


R
ALPINE ELECTRONICS, INC.
Tokyo office: 1-1-8 Nishi Gotanda,
Shinagawa-ku, Tokyo 141, Japan
Tel.: (03) 3494-1101
ALPINE ELECTRONICS OF AMERICA, INC.
19145 Gramercy Place, Torrance,
California 90501, U.S.A.
Tel.: (310) 326-8000
ALPINE ELECTRONICS OF CANADA, INC.
Suite 203, 7300 Warden Ave. Markham,
Ontario L3R 9Z6, Canada
Tel.: (905) 475-7280
ALPINE ELECTRONICS OF AUSTRALIA PTY. LTD.
6-8 Fiveways Boulevarde Keysborough,
Victoria 3173, Australia
Tel.: (03) 769-0000
ALPINE ELECTRONICS GmbH
Brandenburger Strasse 2-6 D-40880 Ratingen,
Germany
Tel.: 02102-45 50
ALPINE ITALIA S.p.A.
Via C. Colombo 8, 20090 Trezzano Sul
Naviglio MI, Italy
Tel.: 02-48 40 16 24
ALPINE ELECTRONICS FRANCE S.A.R.L.
98, Rue De La Belle Etoile, Z.I. Paris Nord Il
B.P. 50016 F-95945, Roissy,
Charles De Gaulle Cedex, France
Tel.: 01-48 63 89 89
ALPINE ELECTRONICS OF U.K., LTD.
13 Tanners Drive, Blakelands,
Milton Keynes MK14 5BU, U.K.
Tel.: 01908-61 15 56
ALPINE ELECTRONICS DE ESPAÑA, S.A.
Portal De Gamarra 36, Pabellón 32
01013 Vitoria (Alava)-Apdo. 133, Spain
Tel.: 34-45-283588
Designed by ALPINE Japan Printed in Japan 68P81384W46-O (Y.)
R
CDA-7832R
FM/MW/LW/RDS Compact Disc
Receiver
∙ OWNER'S MANUAL
Please read this manual to maximize your enjoyment of the outstanding performance and feature capabilities of the equipment, then retain the manual for future reference.
∙ MODE D'EMPLOI
Veuillez lire ce mode d'emploi pour tirer pleinement profit des excellentes performances et fonctions de cet appareil, et conservez-le pour toute référence future.
∙ MANUAL DE OPERACIÓN
Lea este manual, por favor, para disfrutar al máximo de las excepcionales prestaciones y posibilidades funcionales que ofrece el equipo, luego guarde el manual para usarlo como referencia en el futuro.
INTLZ |
MOTE S ENS OR |
EYE |
|
|
|
|
|
|
|
|
|
|
||
PWR |
RE |
SOURCE |
|
|
|
|
|
|
|
|
|
|
||
|
|
|
|
|
|
|
|
|
|
|
|
|||
|
|
|
A.S.U. |
|
|
|
|
|
|
|
|
|
|
|
IN |
D |
|
|
L |
|
|
|
|
|
|
|
|
|
R•D•S EON |
|
|
O |
|
TITLE |
|
T. INFO |
|
|
|
|
||||
|
|
|
U |
|
|
|
|
|
|
|
||||
|
|
|
|
D |
|
|
|
|
|
|
|
|||
|
DN |
|
|
UP |
|
BAND |
|
|
F |
|
|
|
MAX |
RPT ALL M.I.X. |
|
|
|
|
|
|
|
|
DEMO |
DISC |
|
RL |
DX SEEK RDS T.INFO TP PTY MONO ST |
||
|
U |
|
|
|
|
|
|
|
|
TITLE |
|
RF |
|
|
|
A |
|
|
|
1 |
|
2 |
|
3 |
|
MIN |
|
|
|
|
D |
|
|
RDS |
PTY |
P.PTY |
MEMORY |
|
|
|
||||
|
I |
|
|
|
|
|
|
|||||||
|
C |
|
|
|
|
|
|
|
||||||
|
O |
|
|
|
|
|
|
|
|
|
|
|
|
|
|
O |
|
|
DE |
|
|
|
|
|
|
LOUD |
|
|
|
|
NT |
|
|
|
|
|
|
|
|
|
|
|
|
|
|
R |
|
TUNE |
MO |
|
|
|
|
|
|
|
|
|
|
|
O |
L |
M.I.X. |
4 |
RPT |
5 |
SCAN |
6 |
|
|
|
CD RECEIVER 35W x 4 |
CDA-7832R |
|
|
|
A. MEMO |
|
|
|
|||||||||
35W × 4
Precaution English
Warning
DO NOT DISASSEMBLE OR ALTER
Attempts to disassemble or alter may lead to an accident, fire and/or electric shock.
KEEP SMALL ARTICLES OUT OF THE REACH OF CHILDREN
Store small articles (batteries, screws, etc.) in places not accessible to children. If swallowed, consult a physician immediately.
USE THE CORRECT AMPERE RATING WHEN REPLACING FUSES
Replace fuses only with fuses of the same ampere rating. Failure to do so may result in a fire and/or damage to the vehicle.
HALT USE IMMEDIATELY IF A PROBLEM APPEARS
When problems appear, stop using the system immediately and contact the dealer from whom you purchased the equipment. Some problems which may warrant immediate attention include a lack of sound, noxious odors or smoke being emitted from the unit, or foreign objects dropped inside the unit.
DO NOT OPERATE THE REMOTE CONTROL WHILE DRIVING
Do not change settings while driving. If operation requiring a prolonged view of the display is required, stop the vehicle in a safe location before attempting operation.
2

Français |
Español |
|
Précautions |
Precaución |
|
Avertissement |
Advertencia |
|
|
|
|
NE PAS DEMONTER NI MODIFIER |
NO DESMONTE O ALTERE |
|
Toute tentative de démontage ou de |
Si intentase desmontar o alterar el |
|
modification peut provoquer un |
aparato podría ocasionar un |
|
accident, incendie et/ou un choc |
accidente, incendio y/o descarga |
|
électrique. |
eléctrica. |
|
|
|
|
NE PAS LAISSER DE PETITES PIECES |
MANTENGA LOS OBJETOS |
|
A PORTEE DES ENFANTS |
PEQUEÑOS FUERA DEL ALCANCE DE |
|
Rangez les petites pièces (piles, vis, |
LOS NIÑOS |
|
etc.) dans des endroits inaccessibles |
Guarde los objetos pequeños (pilas, |
|
aux enfants. En cas d'ingestion, |
tornillos, etc.) en lugares donde los |
|
niños no puedan acceder a ellos. Si |
||
consultez immédiatement un |
||
tragasen algo, consulte a un médico |
||
médecin. |
||
inmediatamente. |
||
|
||
|
|
|
UTILISEZ DES FUSIBLES DE |
UTILICE EL AMPERAJE CORRECTO |
|
L'AMPERAGE APPROPRIE |
CUANDO CAMBIE FUSIBLES |
Afin d'éviter tout risque d'incendie et/Reemplace los fusibles solamente por
ou de dommage, remplacez les |
otros del mismo amperaje. De no |
|
fusibles par des fusibles de même |
hacerlo así podría ocasionar un |
|
ampérage. |
incendio y/o daños al vehículo. |
|
|
||
|
|
|
ARRETEZ IMMEDIATEMENT |
PARE EL FUNCIONAMIENTO |
|
L'APPAREIL EN CAS DE PROBLEME |
INMEDIATAMENTE SI OCURRIESE |
|
Quand un problème apparaît, ab- |
ALGúN PROBLEMA |
|
sence de son, odeurs nocives ou |
Cuando ocurra algún problema, cese el |
|
uso del sistema inmediatamente y |
||
fumée provenant de l'appareil, |
||
póngase en contacto con el distribuidor |
||
pénétration d'objets dans l'appareil, |
||
al que haya comprado el aparato. Entre |
||
arrêtez immédiatement l'appareil et |
algunos de los problemas que podrían |
|
contactez votre revendeur. |
||
justificar una atención inmediata cabe |
||
|
citar la falta de sonido, olores nocivos |
|
|
o humo que salga de la unidad, u |
|
|
objetos extraños dejados caer dentro |
|
|
de la unidad. |
|
NE PAS UTILISER LA TELECOMMAN- |
NO UTILICE EL CONTROLADOR |
|
DE PENDANT LA CONDUITE |
REMOTO CUANDO CONDUZCA |
|
Ne pas changer de réglage pendant |
No cambie los ajustes mientras |
|
la conduite. Si vous devez regarder |
conduzca. Si va a realizar una |
de manière prolongée l'affichage |
operación que le vaya a llevar tiempo |
||
mirando el visualizador, pare el |
|||
pour effectuer une opération, garez |
|||
vehículo en un lugar seguro antes de |
|||
auparavant le véhicule dans un lieu |
|||
ponerse a realizar la operación. |
|||
sûr. |
|||
|
3 |
||
|
|
||
|
|
||

Precaution English
Caution
DO NOT RAISE THE VOLUME EXCESSIVELY
Keep the volume at a level where you can still hear outside noises while driving. Driving while unable to hear outside sounds could cause an accident.
DO NOT USE THIS EQUIPMENT OUTSIDE THE VEHICLE
Do not use this equipment for purposes other than those listed for a vehicle. Failure to do so may result in an electric shock or an injury.
KEEP FOREIGN OBJECTS OUT OF THE CD COMPARTMENT SLOT
Keep any foreign objects, including fingers, out of the CD compartment slot.
STOP THE VEHICLE BEFORE CARRYING OUT ANY OPERATION THAT COULD INTERFERE WITH YOUR DRIVING
If loading or unloading a CD interferes with your driving, stop the vehicle in a safe location before attempting operation.
DO NOT REPLACE THE BATTERY WITH ONE NOT SPECIFIED. INSERT WITH THE CORRECT BATTERY POLARITY
Do not replace with other than specified battery. When inserting the battery, be sure to observe proper polarity (+ and –) as instructed. Battery rupture or chemical leakage can cause an injury or equipment malfunction.
4

PrecauciónEspañol
¡Prudencia!
NO SUBA EL VOLUMEN EXCESIVAMENTE
Mantenga el volumen a un nivel que no le impida escuchar los sonidos del exterior mientras conduce. Si condujera sin poder oír los sonidos del exterior podría causar un accidente.
NO UTILICE ESTE APARATO FUERA DEL VEHíCULO
No utilice este aparato con otros propósitos diferentes a los que se listan para su uso en un vehículo. De lo contrario podría ocasionar una descarga eléctrica o heridas.
NO INTRODUZCA OBJETOS EXTRAÑOS EN LA RANURA DEL COMPARTIMIENTO DEL DISCO COMPACTO
No introduzca ningún objeto extraño, incluidos los dedos, en la ranura del compartimiento del disco compacto.
PARE EL VEíCULO ANTES DE
REALIZAR CUALQUIER OPERACIóN
QUE PUDIERA INTERFERIR CON LA
CONDUCCIóN
Si l'insertion ou l'éjection d'un disque
Si el cargar o descargar un disco compacto puede interferir con su conducción, pare el vehículo en un lugar seguro antes de intentar realizar cualquier operación.
NO REEMPLACE LA PILA CON OTRA QUE NO SEA LA ESPECIFICADA. INSERTELA CON SUS POLARIDADES CORRECTAMENTE POSICIONADAS
No reemplace la pila con otra que no sea la especificada. Cuando la inserte, asegúrese de hacerlo teniendo en cuenta sus polaridades
(+) y (–), de la forma indicada.
La ruptura de las pilas o las fugas de su líquido químico interior puede causar heridas o un malfuncionamiento del aparato.
5
Contents
English
Page/Page/Página |
|
||||||
8/ |
|
|
|
|
|
|
Precautions |
9 |
|
........................................................................ |
|
|
|||
14/ |
15 |
................................................. |
|
Detachable Front Panel |
|||
|
|
|
|
|
|
|
Basic Operation |
18/ |
19 |
..................................................... |
|
Initial System Start-Up |
|||
18/ |
|
|
|
Automatic Setup |
|||
19 |
.............................................................. |
|
|||||
20/ |
|
|
|
Turning Power On and Off |
|||
21 |
............................................... |
|
|||||
20/ |
|
|
|
|
Subwoofer On and Off |
||
21 |
..................................................... |
|
|||||
22/ |
|
|
|
Turning Loudness On/Off |
|||
23 |
................................................ |
|
|||||
22/ |
|
|
|
Adjusting Source Signal Levels |
|||
23 |
....................................... |
|
|||||
24/ |
|
|
|
|
Adjusting Volume/Bass/Treble/ |
||
25 |
....................................... |
|
|||||
|
|
|
|
|
|
|
Balance/Fader |
26/ |
27 |
..................................................... |
|
Sound Guide Function |
|||
26/ |
27 |
................................................ |
|
Changing Lighting Colour |
|||
28/ |
29 |
.............................................. |
|
Turning Mute Mode On/Off |
|||
30/ |
31 |
................................................................. |
|
Demonstration |
|||
|
|
|
|
|
|
|
Radio Operation |
32/ |
|
|
|
Manual Tuning |
|||
33 |
................................................................. |
|
|||||
34/ |
35 |
................................................... |
|
Automatic Seek Tuning |
|||
36/ |
37 |
................................................................ |
|
Station Presets |
|||
|
|
|
|
|
|
|
RDS Operation |
42/ |
43 |
............................................. |
|
Receiving RDS Stations |
|||
46/ |
47 |
........................................... |
|
Turning AF List On or Off |
|||
48/ |
|
|
|
Recalling Preset RDS Stations |
|||
49 |
.................................. |
|
|||||
50/ |
51 |
............................. |
|
Receiving RDS Regional Stations |
|||
52/ |
53 |
...................................... |
|
Receiving Traffic Information |
|||
54/ |
55 |
............................ |
|
Presetting Volume Level for Traffic |
|||
|
|
|
|
|
|
|
Information |
56/ |
57 |
................................. |
|
PTY (Programme Type) Tuning |
|||
58/ |
59 |
........................... |
|
Receiving Traffic Information While |
|||
|
|
|
|
|
|
|
Playing CD or Radio |
60/ |
61 |
................................. |
|
Priority PTY (Programme Type) |
|||
62/ |
63 |
.......................... |
|
Turning Emergency Alarm On or Off |
|||
|
|
|
|
|
|
|
CD Operation |
64/ |
65 |
..................................................... |
|
Inserting/Ejecting Disc |
|||
|
|
|
|
|
|
|
|
64/ |
65 |
..................................................................... |
|
Normal Play |
|||
|
|
|
|
|
|
|
|
66/ |
67 |
........................................................ |
|
Music Sensor (Skip) |
|||
|
|
|
|
|
|
|
|
66/ |
67 |
............................................ |
|
Fast Forward and Backward |
|||
68/ |
69 |
..................................................................... |
|
Repeat Play |
|||
|
|
|
|
|
|
|
|
70/ |
71 |
...................................................... |
|
M.I.X. (Random Play) |
|||
|
|
|
|
|
|
|
|
72/ |
73 |
......................................................... |
|
Scanning Programs |
|||
|
|
|
|
|
|
|
|
74/ |
75 |
.......................................................................... |
|
CD Titles |
|||
82/ |
|
|
|
|
|
CD Shuttle Operation |
|
83 |
.................................................... |
|
|||||
92/ |
|
|
|
|
|
Audio Processor Operation |
|
93 ........................................... |
|
|
|||||
94/ |
95 |
.............................................................. |
|
Remote Control |
|||
102/ |
103 |
................................................... |
In Case of Difficulty |
||||
110/ |
111 |
............................................................ |
Specifications |
||||
6
Contenu |
Français |
|
|
Indice |
Español |
|
|
|
Précautions |
|
|
Precauciones |
|
|
|||
.................................................. |
|
............................................... |
|
|
|
|||
......................... Panneau avant détachable |
|
...................................... |
|
Panel desmontable |
|
|
||
Fonctionnement de base |
|
|
Operación básica |
|
|
|||
|
|
|
|
|||||
|
|
|
|
|||||
......................... Mise en service de l'appareil |
|
.... |
Puesta en funcionamiento inicial del sistema |
|
|
|||
.................................... |
Réglage automatique |
|
.......................................... |
|
Ajuste automático |
|
|
|
Mise sous et hors tension |
|
.... Conexión y desconexión de la alimentación |
|
|
|
|||
|
|
|
|
|||||
Mise en et hors service du subwoofer |
|
...... |
Activación y desactivación de subgraves |
|
|
|
||
|
.... Activación/desactivación del efecto de sonoridad |
|
|
|||||
.... Activation/annulation de la correction physiologique |
|
|
Ajuste de los niveles de señal de las fuentes |
|
|
|||
Réglage du niveau du signal de source |
|
........ |
|
|
||||
|
..... Ajuste del volumen/los graves/los agudos/el equilibrio |
|
|
|||||
..... Réglage du volume/graves/aigus/balance |
|
|
|
|||||
|
|
entre los altavoces derechos e izquierdos/el equilibrio |
|
|
||||
droite-gauche/balance avant-arrière |
|
|
|
|
||||
|
|
entre los altavoces delanteros y traseros |
|
|
||||
................................................. |
Guide sonore |
|
............................... |
|
Función de guía acústica |
|
|
|
....... Changement de la couleur de l'éclairage |
|
.................... |
Combio del color de iluminatión |
|
|
|||
..... Mise en et hors service de la fonction Mute |
|
.... Activación/desactivación del modo de silenciamiento |
|
|
||||
............................................... |
Démonstration |
|
................................................ |
|
Demostración |
|
|
|
Fonctionnement de la radio |
|
|
Operación de la radio |
|
|
|||
|
|
|
|
|||||
|
|
|
|
|||||
............................................... |
Accord manuel |
|
............................................. |
|
Sintonía manual |
|
|
|
............... Accord par recherche automatique |
|
............... |
Sintonía con búsqueda automática |
|
|
|||
.......................................... |
Stations préréglées |
|
................................... |
|
Preajuste de emisoras |
|
|
|
Fonctionnement RDS |
|
|
Operación RDS |
|
|
|||
|
|
|
|
|||||
|
|
|
|
|||||
.......................... Réception des stations RDS |
|
........................ |
Recepción de emisoras RDS |
|
|
|||
.... Mise en service ou hors service de la liste AF |
|
....... |
Activación o desactivación de la lista AF |
|
|
|||
............ Rappel des stations RDS préréglées |
|
.... Invocación de emisoras de RDS memorizadas |
|
|
||||
........ Réception des stations RDS régionales |
|
...... |
Recepción de emisoras de RDS regionales |
|
|
|||
................ Réception d'informations routières |
|
..... |
Recepción de información sobre el tráfico |
|
|
|||
........... Préréglage du niveau de volume pour |
|
......... |
Preajuste del nivel del volumen para la |
|
|
|||
les informations routières |
|
|
|
información sobre el tráfico |
|
|
||
................ Accord PTY (Type de programme) |
|
............. |
Sintonía por tipo de programa (PTY) |
|
|
|||
.... Réception des informations routières pendant la |
|
............ |
Recepción de información sobre el tráfico durante la |
|
|
|||
lecture CD ou l'écoute de la radio |
|
reproducción de discos compactos o le escucha de la radio |
|
|
||||
................. PTY prioritaire (Programme PTY) |
|
............ |
Prioridad del tipo de programa (PTY) |
|
|
|||
..... Mise en ou hors service de l'alarme d'urgence |
....... |
Activación/desactivación de la alarma de emergencia |
|
|
||||
Fonctionnement du lecteur CD |
|
|
Operación del reproductor de discos compactos |
|
|
|||
|
|
|
|
|||||
|
|
|
|
|||||
.................... Insertion et éjection d'un disque |
|
........................ |
Inserción/expulsión de discos |
|
|
|||
............................................. |
Lecture normale |
|
.................................... |
|
Reproducción normal |
|
|
|
............................. Détecteur de plage (Saut) |
|
.............................. |
|
Sensor de música (Salto) |
|
|
||
...... Recherche rapide vers l'avant ou l'arrière............................. |
|
Avance rápido o retroceso |
|
|
||||
............................................. |
Lecture répétée |
......................... |
Reproducción con repetición |
|
|
|||
............................... M.I.X. (Lecture aléatoire) |
........................ |
M.I.X. (Reproducción al azar) |
|
|
||||
..................................... |
Balayage des plages |
................................. |
|
Escaneo de programas |
|
|
||
.................................................. |
Titre d'un CD |
............................ |
|
Títulos del disco compacto |
|
|
||
.............. Fonctionnement du changeur CD ... Operación del Shuttle de discos compactos |
|
|
||||||
....... Fonctionnement du processeur audio |
.......... |
Operación del procesador de audio |
|
|
||||
............................................ |
Télécommande |
..................................... |
|
Controlador remoto |
|
|
||
..................................... |
En cas de problème |
................................... |
|
En caso de dificultad |
|
|
||
.............................................. |
Spécifications |
......................................... |
|
Especificaciones |
|
|
||
7
English
Precautions
– |
|
F |
|
1 |
2 |
3 |
|
4 |
5 |
6 |
CDA-7930 |
Thermal Protection Circuit
Be sure the temperature inside the vehicle is between +60°C (+140°F) and –10°C (+14°F) before attempting to play a disc. If the temperature is over +60°C (+140°F), the protection circuit functions to stop the CD player, and "HI TEMP" is displayed.
Moisture Condensation
You may notice the CD playback sound wavering due to condensation. If this happens, remove the disc from the player and wait about an hour for the moisture to evaporate.
Damaged Disc
Do not attempt to play cracked, warped, or damaged discs. Playing a bad disc could severely damage the playback mechanism.
Never Attempt the Following
Do not grip or pull out the disc while it is being pulled back into the player by the automatic reloading mechanism.
Do not attempt to insert a disc into the unit when the unit power is off.
Maintenance
If you have problems, do not attempt to repair the unit yourself. Return it to your Alpine dealer or the nearest Alpine Service Station for servicing.
8

Français |
Español |
Précautions Precauciones
Circuit de protection thermique
Vérifier que la température à l'intérieur du véhicule est comprise entre +60°C (+140°F) et
–10°C (+14°F) avant de reproduire un disque. Si la température dépasse +60 °C (+140°F), le circuit de protection se déclenche pour arrêter le lecteur CD et l'indication "HI TEMP" est affichée.
Circuito termoprotector
Cerciórese de que la temperatura del interior del vehículo esté comprendica entre 60 y –
10°C antes de intentar reproducir un disco. Si la temperatura fuese superior a 60°C, se activaría el circuito termoprotector a fin de parar el reproductor de discos compactos, y se visualizaría "HI TEMP."
Condensation d'humidité |
Condensación de humedad |
Si le son est irrégulier pendant la lecture de CD, de l'humidité s'est probablement condensée. Dans ce cas, enlever le disque du lecteur et attendre environ une heure pour que l'humidité s'évapore.
Usted puede oír fluctuaciones en el sonido de reproducción de un disco compacto debido a la condensación de humedad. Cuando suceda esto, extraiga el disco del reproductor y espere aproximadamente una hora hasta que se evapore la humedad.
Disque endommagé |
Disco dañado |
Ne pas reproduire une disque craquelé, déformé ou endommagé sous peine de détériorer sévèrement le mécanisme de lecture.
No intente reproducir discos rayados, alabeados, o dañados. La reproducción de un disco en malas condiciones podría dañar el mecanismo de reproducción.
Ne jamais tenter d'effectuer |
No intente realizar nunca lo |
les opérations suivantes |
siguiente |
Ne pas attraper ni tirer sur le disque pendant qu'il est attiré dans le lecteur par le mécanisme de recharge automatique.
Ne pas essayer d'insérer un disque dans l'appareil quand celui-ci est hors tension.
No tome ni tire del disco mientras esté insertándose en el reproductor mediante el mecanismo de carga automática.
No intente insertar un disco en el reproductor mientras la alimentación del mismo esté desconectada.
Entretien |
Mantenimiento |
En cas de problème, n'essayez pas de réparer la panne vous-même. Rapportez l'appareil à votre revendeur Alpine, ou à défaut, apportezle dans un centre de réparation Alpine.
Si tiene algún problema, no intente reparar la unidad usted mismo. Devuélvala a su proveedor o al centro de servicio técnico Alpine más cercano para que se la reparen.
9
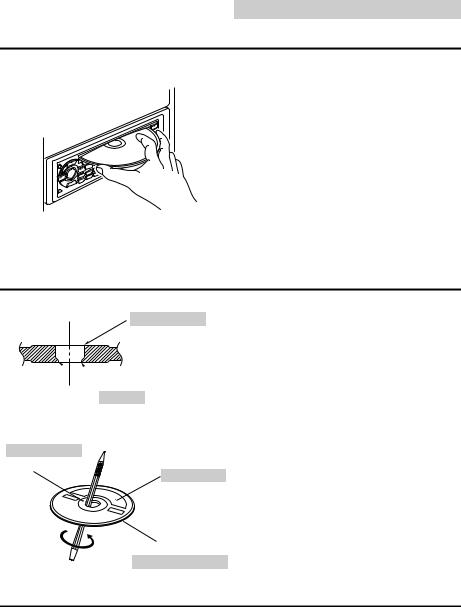
English
Precautions
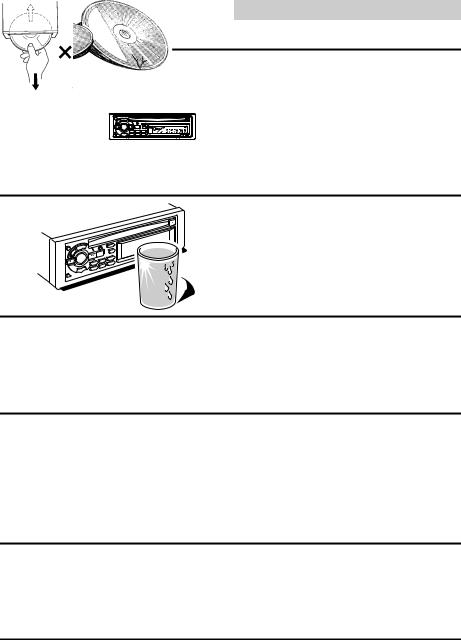
Inserting Discs
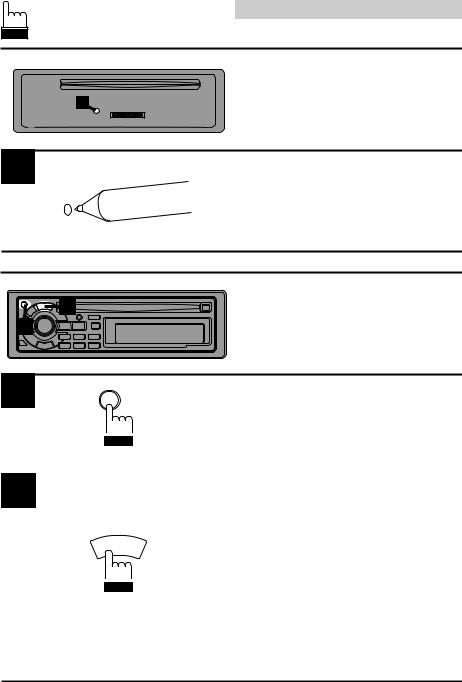
Your player accepts only one disc at a time for playback. Do not attempt to load more than one disc.
Make sure the label side is facing up when you insert the disc. Your player will automatically eject any disc that is inserted incorrectly. If the player continues to eject a correctly inserted disc, push the Reset switch (located behind the detachable front panel) with a pointed object such as a ball-point pen.
Playing a disc while driving on a very bumpy road may result in skips, but this will not scratch the disc or damage the player.
Center Hole
Orifice central
Orificio central
 Bumps
Bumps
Résidus
Abultamientos
Center Hole |
|
Orifice central |
New Disc |
Orificio central |
|
|
Disque neuf |
|
Disco nuevo |
Outside (Bumps) Péniférie (résidus) Borde exterior (abultamientos)
New Discs
As a protective measure to prevent the CD from jamming, the CD player will automatically eject discs with irregular surfaces or inserted incorrectly. When a new disc is inserted into the player and ejected after initial loading, using your finger, feel around the inside of the centre hole and outside edge of the disc. If you feel any small bumps or irregularities, this could inhibit proper loading of the disc. To remove the bumps, rub the inside edge of the hole and outside edge of the disc with a ball-point pen or other such instrument, then insert the disc again.
10
Français |
Español |
Précautions |
Precauciones |
|
|
Insertion des disques |
Inserción de los discos |
Ne pas tenter de charger plusieurs disques car |
Su reproductor solamente aceptará un disco |
le lecteur accepte un seul disque à la fois pour |
cada vez para reproducción. No intente cargar |
la lecture. |
más de un disco. |
Insérer le disque avec la face imprimée vers le |
Cerciórese de que la cara de la etiqueta esté |
haut. Le lecteur éjecte automatiquement tout |
hacia arriba cuando inserte el disco. Su |
disque incorrectement inséré. Si le lecteur |
reproductor expulsará automáticamente |
continue à éjecter un disque inséré correcte- |
cualquier disco incorrectamente insertado. Si el |
ment, appuyer sur l'interrupteur de |
reproductor continúa expulsando un disco |
réinitialisation (situé derrière le panneau avant |
correctamente insertado, presione el interruptor |
détachable) avec un objet pointu comme un |
de reposición (situado detrás del panel frontal |
stylo-bille. |
desmontable) con un objeto puntiagudo, como |
L'écoute d'un disque sur une route très abîméeun bolígrafo. |
|
peut provoquer des sautes de son mais ne |
La reproducción de un disco al conducir por |
risque pas de rayer le disque ni d'endommager una carretera muy accidentada puede resultar
le lecteur. |
en salto del sonido, pero el disco no se rayará |
|
ni se dañará el reproductor. |
|
|
Disques neufs |
Discos nuevos |
Par mesure de protection, le lecteur CD éjecte automatiquement un disque qui n'est pas inséré correctement ou dont la surface est irrégulière. Si le lecteur éjecte un disque neuf chargé pour la première fois, toucher le contour de l'orifice central et de la périphérie du disque avec le doigt. Si le disque contient des résidus ou des irrégularités, il ne pourra pas être chargé. Pour enlever les résidus, passer un stylo-bille ou autre objet similaire sur
le contour de l'orifice central et de la périphérie du disque, puis le réinsérer.
Como medida de protección, el reproductor de discos compactos expulsará automáticamente los discos cuando hayan sido incorrectamente insertados o tengan superficies irregulares.
Cuando inserte un disco nuevo en el reproductor y salga expulsado, utilice un dedo para comprobar los bordes del orificio central y de la periferia. Si nota abultamientos o irregularidades, es posible que el disco no pueda cargarse apropiadamednte. Para eliminar los abultamientos, frote el borde interior del orificio central y de la periferia con un bolígrafo u otro objeto similar, y después inserte de nuevo el disco.
11
English
Precautions
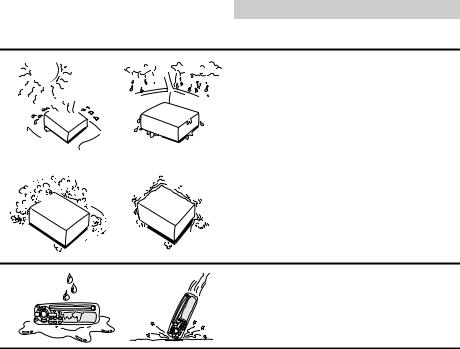
Installation Location
Make sure the CDA-7832R will not be installed in a location subjected to:
∙Direct sun and heat
∙High humidity and water
∙Excessive dust
∙Excessive vibrations
Handling the Detachable
Front Panel
∙Do not expose to rain or water.
∙Do not drop or apply shock.
12

Français |
Español |
Précautions Precauciones
Emplacement de montage
N'installez pas le CDA-7832R dans un endroit exposé:
∙directement au soleil ou à la chaleur,
∙à l'humidité et à l'eau,
∙à la poussière,
∙à des vibrations excessives.
Ubicación de instalación
Cerciórese de no instalar el CDA-7832R en un lugar sometido a:
∙La luz solar directa ni el calor
∙Gran humedad y agua
∙Polvo excesivo
∙Vibraciones excesivas
Manipulation du panneau |
Manejo del panel frontal |
avant détachable |
desmontable |
∙Protégez-le de la pluie et de l'eau.
∙Ne le laissez pas tomber et ne le soumettez pas à des chocs.
∙No lo exponga a la lluvia ni al agua.
∙No lo deje caer ni lo golpee.
13
|
|
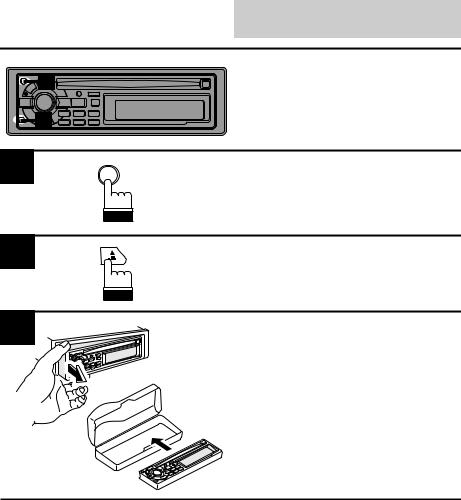
Detachable Front English |
|
|
Panel |
|
1 |
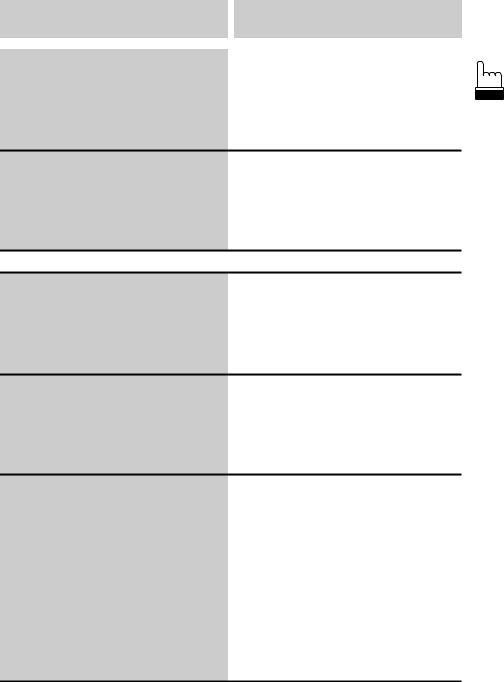
Detaching the Front |
|
2 |
Panel |
|
|
|
1 |
INTLZ |
Press the PWR button to turn off the power. |
|
PWR
2 |
Press the release button until the front panel |
pops out. |
|
3 |
Grasp the left side of the front panel and pull it |
out. |
Note: To protect the front panel, place it in the supplied carrying case.
14

Panneau avant |
Français |
|
Panel |
Español |
|
|
|
||
détachable |
|
|
desmontable |
|
|
|
|
||
Retrait du panneau |
|
Extracción del panel |
||
avant |
|
frontal |
|
|
Appuyez sur la touche PWR pour mettre l'appareil hors tension.
Presione el botón PWR para desconectar la alimentación.
Appuyez sur la touche de libération jusqu'à ce que le panneau avant se désenclenche.
Presione el botón de liberación hasta que el panel frontal salga hacia afuera.
Saisissez le côté gauche du panneau avant et tirez pour l'enlever.
Sujete la parte izquierda del panel frontal y tire de él hacia afuera.
Remarque: Afin de protéger le panneau avant, rangez-le dans l'étui de transport fourni.
Nota: Para proteger el panel frontal, colóquelo en la caja de transporte suministrada.
15
|
Detachable Front English |
|
Panel |
|
Attaching the Front |
|
Panel |
1 |
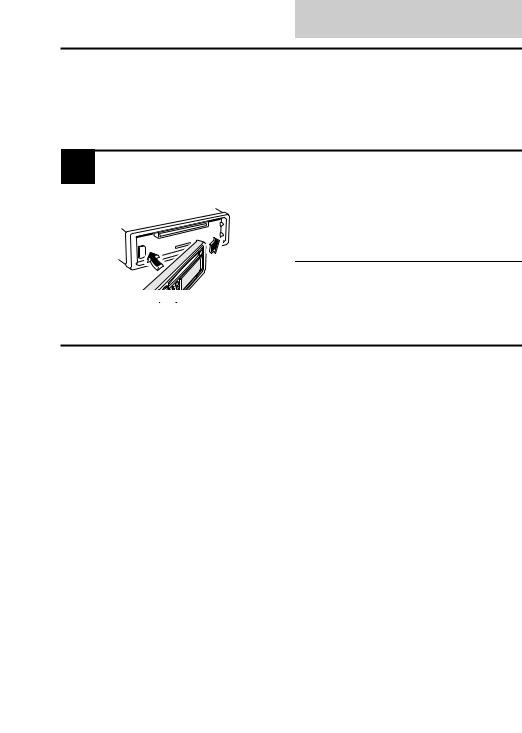
1. First, insert the right side of the front panel |
into the main unit. Align the 2 small holes on |
|
|
the front panel with the 2 projections on the |
|
main unit. |
|
2. Push the left side of the front panel until it |
|
locks firmly into the main unit. |
|
1 |
2 |
Note: Before attaching the front panel, make |
|
sure that there is no dirt or dust on the |
connector terminals and no foreign object between the front panel and the main unit.
16

Panneau avant |
Français |
|
Panel |
Español |
|
|
|
||
détachable |
|
|
desmontable |
|
|
|
|
||
Pose du panneau |
|
Fijación del panel fron- |
||
avant |
|
tal |
|
|
1.Insérez d'abord le côté droit du panneau avant dans l'appareil. Alignez les deux petits orifices du panneau avant sur les 2 saillies de l'appareil.
2.Poussez sur le côté gauche du panneau avant jusqu'à ce qu'il s'enclenche à fond dans l'appareil.
1.En primer lugar, inserte la parte derecha del panel frontal en la unidad principal. Alinee los 2 pequeños orificios del panel frontal con los 2 salientes de la unidad principal.
2.Empuje la parte izquierda del panel frontal hasta que se bloquee firmemente en la unidad principal.
Remarque: Avant de mettre le panneau avant, vérifiez qu'il n'y a pas de poussière ni saleté sur les bornes du connecteur et qu'aucun objet ne se trouve entre le panneau avant et l'appareil.
Nota: Antes de fijar el panel frontal, cerciórese de que no haya suciedad ni polvo en los terminales del conector, y de que no existan objetos extraños entre el panel frontal y la unidad principal.
17
|
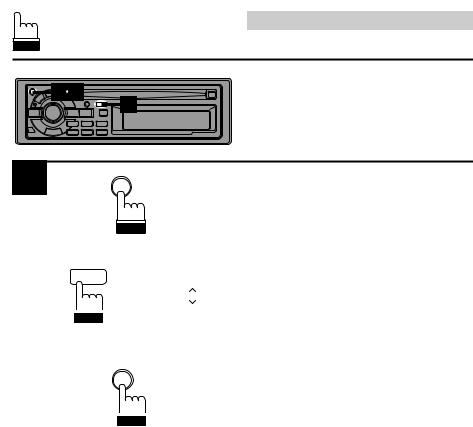
English |
|
Basic Operation |
|
Initial System Start-Up |
|
1 |
1 |
When operating the unit for the first time after |
installation or after the vehicle's battery has |
|
|
been disconnected and reconnected, set the |
|
volume level to its minimum, then remove the |
|
detachable front panel. Press the Reset switch |
|
with a ball-point pen or any other pointed |
|
object. |
2 |
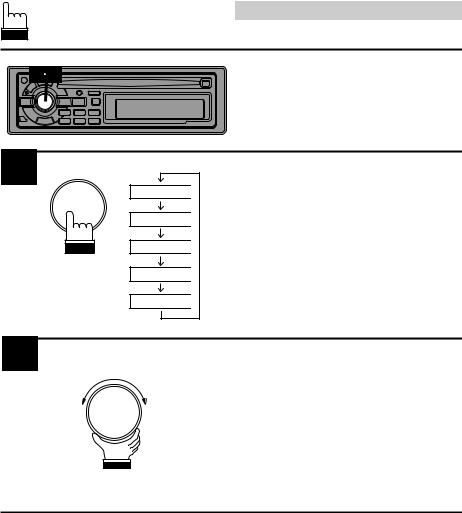
Automatic Setup (A.S.U.) |
1 |
This convenient feature sets up the unit |
automatically after installation.
1
2
INTLZ |
Press the PWR (POWER) button to turn on the |
|||
PWR |
unit. |
|||
|
|
Note: When the ignition key is turned on then |
||
|
|
|
the power is turned on immediately after |
|
|
|
|
installation or resetting, the A.S.U. |
|
|
|
|
function is activated automatically. |
|
|
|
|
||
|
|
Press and hold the A.S.U. (Automatic Setup) |
||
|
|
button for at least 3 seconds to activate the |
||
|
|
A.S.U. mode. |
||
|
|
"ASU" blinks in the display. |
||
SOURCE |
The unit automatically performs the following |
|||
operations. |
||||
|
A.S.U. |
|||
|
|
1. |
Activates Auto Memory mode. |
|
|
|
2. |
Gradually sets the Bass, Treble, Balance |
|
|
|
|
and Fader controls to their center positions. |
|
|
|
3. |
Gradually increases the volume to the |
|
|
|
|
position 12 in the display. |
|
|
|
4. |
Turns the Loudness on. |
|
|
|
5. |
Ends the A.S.U. mode. |
|
18
Fonctionnement deFrançais |
Operación |
Español |
|
|
base |
básica |
|
|
|
|
|
|
|
|
Mise en service de |
Puesta en |
|
funcionamiento inicial |
||
l'appareil |
||
del sistema |
||
|
Lors de la mise en service de l'appareil pour la première fois, ou de la première utilisation après déconnexion et reconnexion de la batterie du véhicule, réglez le niveau de volume au minimum, puis enlevez le panneau avant détachable. Appuyez sur l'interrupteur de réinitialisation avec un stylobille ou autre objet similaire.
Antes de poner en funcionamiento por primera vez la unidad después de su instalación, o después de haber desconectado y vuelto a conectar la batería del automóvil, ajuste el volumen al mínimo, y luego extraiga el panel frontal desmontable.
Presione el interruptor de reposición con un bolígrafo u otro objeto puntiagudo.
Réglage automatique |
Ajuste automático |
(A.S.U.) |
(A.S.U.) |
Grâce à cette fonction pratique, l'appareil est |
Esta útil función ajustará automáticamente la |
automatiquement réglé après l'installation. |
unidad después de su instalación. |
Appuyez sur la touche PWR pour mettre l'appareil sous tension.
Remarque: Lorsque vous tournez la clé de contact et mettez le contact après l'installation ou la réinitialisation, la fonction A.S.U. est automatiquement activée.
Presione el botón PWR (alimentación) para conectar la alimentación de la unidad.
Nota: Cuando conecte la llave del encendido inmediatamente después de haber instalado o reposicionado la unidad, la unidad activará automáticamente el modo A.S.U.
Appuyez sur la touche A.S.U. (Automatic Setup) pendant au moins 3 secondes pour activer le mode A.S.U.
"ASU" clignote sur l'affichage et l'appareil procède automatiquement aux opérations suivantes.
1.Il active le mode de mémorisation automatique.
2.Il règle graduellement les commandes des graves, des aigus, de la balance droitegauche et de la balance avant-arrière sur leur position centrale.
3.Il augmente graduellement le volume jusqu'à la position 12 sur l'affichage.
4.Met la correction physiologique en service.
5.Il sort du mode A.S.U.
Mantenga presionado el botón A.S.U. (Ajuste automático) durante 3 segundos por lo menos para activar el modo A.S.U.
"ASU" parpadeará en el visualizador. La unidad realizará automáticamente las operacións siguiente.
1.Activará el modo de memorización automática.
2.Cambiará gradualmente los controles de graves, agudos, equilibrio entre los altavoces izquierdos y derechos, y equilibrio entre los altavoces delanteros y traseros hasta su posición central.
3.Aumentará gradualmente el volumen hasta la posición 12 en el visualizador.
4.Activará la sonoridad.
5.Finalizará el modo A.S.U.
19
English
|
|
Basic Operation |
|
1 |
Turning Power |
|
|
|
|
|
On and Off |
1 |
|
Press the PWR button to turn on the unit. |
|
Note: The unit can be turned on by pressing |
any other button except the eject c button.
INTLZ
The volume level gradually increases to the PWR previous level you were listening to before the
unit was turned off. Press the PWR button again to turn off the unit.
Subwoofer On and Off
Use the Subwoofer Output when a non-fading 1 signal would be most effective. For example, to
drive an amplifier with a low-pass filter.
1
SUB-W ON
SUBW OFF
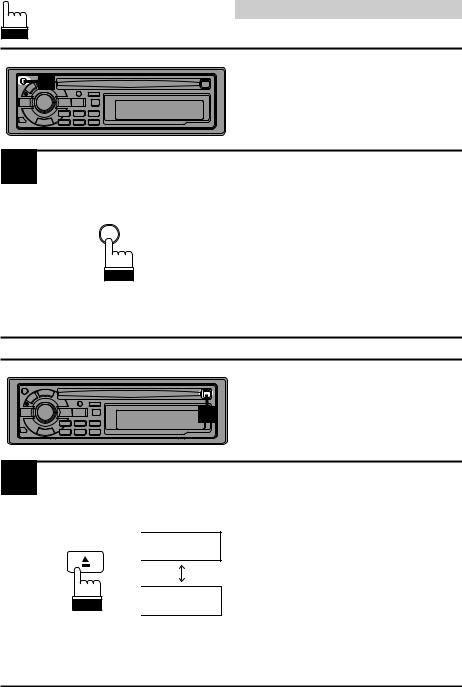
Press and hold the Eject button for at least 3 seconds.
With each press, Subwoofer is toggled On or
Off.
Notes:
∙Initial mode is "SUBW OFF."
∙Leave the "SUBW OFF" as long as the Subwoofer output is not being used.
∙When the subwoofer is turned on, the subwoofer output level can be adjusted. For more details, refer to the Adjusting Volume/ Bass/Treble/Balance/Fader section on page
24.
20
Fonctionnement deFrançais |
Operación |
Español |
|
|
|
|
base |
básica |
|
|
|
|
|
Mise sous et hors |
Conexión y desconexión |
|
|
|
||
|
|
|
||||
|
|
|
||||
tension |
de la alimentación |
|
|
|
|
|
Appuyez sur la touche PWR pour mettre l'appareil sous tension.
Remarque: Vous pouvez également mettre l'appareil sous tension en appuyant sur n'importe quelle touche excepté la touche c (éjection).
Le niveau de volume augmente graduellement jusqu'au niveau réglé avant la mise hors tension de l'appareil.
Appuyez de nouveau sur la touche PWR pour mettre l'appareil hors tension.
Para conectar la alimentación de la unidad, presione el botón PWR.
Nota: La alimentación de la unidad podrá conectarse presionando cualquier botón, excepto el de extracción c.
El nivel del volumen aumentará gradualmente hasta el existente antes de haber desconectado la alimentación de la unidad.
Para desconectar la alimentación de la unidad, vuelva a presionar el botón PWR.
Mise en et hors service |
Activación y desacti- |
|
vación de subgraves |
||
du subwoofer |
||
|
Utilisez la sortie du subwoofer lorsqu'un signal
Utilice la salida para altavoz de subgraves
non fondu est plus efficace, par exemple pour
cuando una señal sin desvanecimiento sea lo
entraîner un amplificateur avec filtre passe-bas. más efectiva. Por ejemplo, para accionar un amplificador con un filtro de pasabajos.
Appuyez sur la touche d'éjection pendant au |
Mantenga presionado el botón de expulsión |
moins 3 secondes. A chaque pression sur la |
durante 3 segundos por lo menos. Cada vez que |
touche, la fonction subwoofer est mise en ou |
lo presione, el subgrave se activará (ON) y |
hors service. |
desactivará (OFF). |
Remarques: |
Notas |
∙ Le réglage initial est "SUBW OFF" (hors |
∙ El modo inicial es "SUBW OFF". |
service). |
∙ Deje SUBW en OFF cuando no esté usando |
∙ Laissez sur "SUBW OFF" tant que vous |
la salida para altavoz de subgraves. |
n'utilisez pas la sortie du subwoofer. |
∙ Cuando ponga subwoofer en ON, el nivel de |
∙ Quand la fonction subwoofer est en service, |
salida del altavoz de subgraves podrá |
le niveau de sortie du subwoofer peut être |
ajustarse. Para más detalles, consulte la |
ajusté. |
sección sobre ajuste del volumen/los graves/ |
Pour des informations détaillées, voir le |
los agudos/el equilibrio entre los altavoces |
paragraphe "Réglage du volume, des graves, |
derechos e izquierdos/el equilibrio entre los |
de la balance gauche-droite et de la balance |
altavoces delanteros y traseros de la página |
avant-arrière" à la page 25. |
25. |
|
|
21
1
1
English
Basic Operation
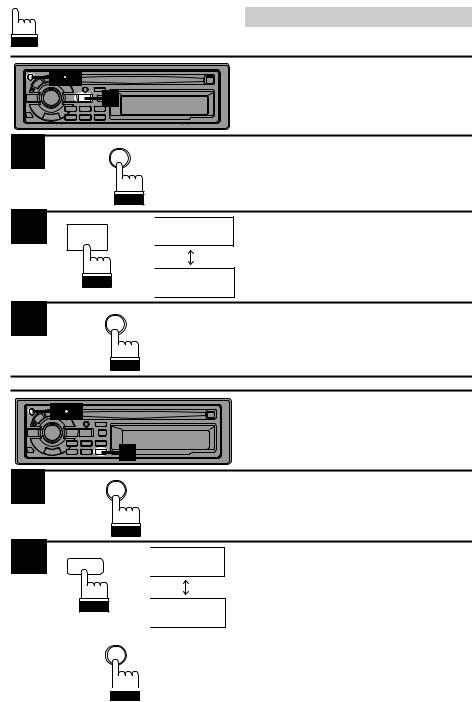
Turning Loudness On/Off
Loudness introduces a special lowand highfrequency emphasis at low listening levels. This compensates for the ear’s decreased sensitivity to bass and treble sound.
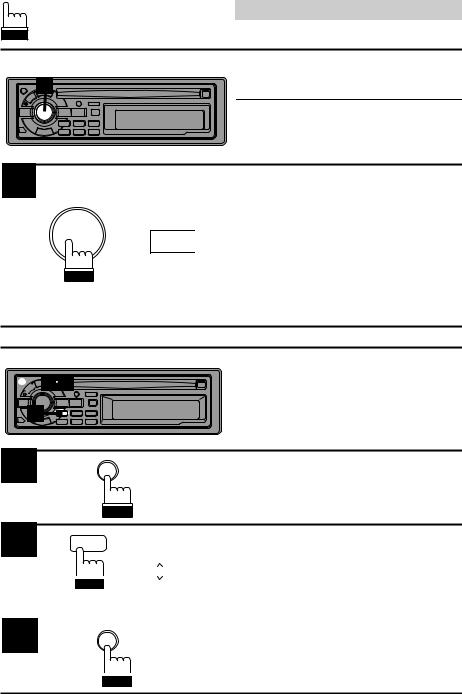
Press and hold the AUDIO CONTROL button for at least 2 seconds to activate or deactivate the loudness mode. The display shows "LOUD" when the loudness mode is activated.
Note: Depending on the device connected to
LOUD
the CDA-7832R, not all functions or display indications will operate as described. For details, consult your
Alpine dealer.
 1 3
1 3
2
Adjusting Source Signal
Levels
If the difference in volume level between the CD player and FM radio is too great, adjust the FM signal level as follows.
1
2
3
INTLZ |
Press and hold the PWR button for at least 3 |
|
PWR |
||
seconds. |
||
|
|
|
|
|
|
|
|
Press the Preset 1 button to select the FM |
RDS 1 |
|
FM-LV HI |
|||||
|
signal level HI (High) or LO (Low) to make the |
||||||
|
|
|
|
|
|
|
signal levels between the FM band and CD |
|
|
|
|
|
|
|
|
|
|
|
|
|
|
|
player closer. |
|
|
|
|
|
|
|
|
|
|
|
|
FM-LV LO |
|
||
|
|
|
|
|
|
|
|
|
|
|
|
|
|
|
|
|
INTLZ |
|
|
|
Press the PWR button to cancel the adjusting |
||
|
PWR |
|
|
|
|||
|
|
|
|
mode. |
|||
|
|
|
|
|
|
|
|
|
|
|
|
|
|
|
|
|
|
|
|
|
|
|
|
22

Fonctionnement deFrançais |
Operación |
Español |
|
|
|
|
base |
básica |
|
|
|
|
|
Activation/annulation de la |
Activación/desactivación |
|
|
|||
|
|
|||||
correction physiologique |
del efecto de sonoridad |
|
|
|
||
|
|
|
|
|
|
|
La correction physiologique accentue les |
La sonoridad introduce una acentuación |
|
|
|||
basses et moyennes fréquences du son |
especial de bajas y altas frecuencias a bajos |
|
|
|||
reproduit à faible niveau pour compenser la |
niveles de escucha para compensar la |
|
|
|
|
|
sensibilidad reducida del oído humano al |
|
|
||||
sensibilité réduite de l'oreille à ces fréquences. |
|
|
||||
|
sonido de graves y agudos. |
|
|
|
|
|
Appuyez pendant au moins 2 secondes sur la |
Para activar o desactivar el modo de sonoridad, |
|
|
|||
touche AUDIO CONTROL pour activer ou |
mantenga presionado el botón AUDIO CON- |
|
|
|||
annuler la correction physiologique. L'affichage TROL durante 2 segundos por lo menos.
indique "LOUD" quand la correction |
Cuando active el modo de sonoridad, el |
physiologique est en service. |
visualizador mostrará "LOUD". |
Remarque: Selon l'appareil raccordé au CDA- Nota: Según el dispositivo conectado al CDA-
7832R, les fonctions ou les |
7832R, puede que no todas las |
indications d'affichage ne |
funciones o indicaciones funcionen de la |
fonctionnent pas toutes de la |
forma descrita. Para más detalles, |
façon décrite. Pour les détails, |
consulte a su distribuidor Alpine. |
consultez votre revendeur Alpine. |
|
|
|
Réglage du niveau du |
Ajuste de los niveles de |
signal de source |
señal de las fuentes |
Si la différence de niveau de volume entre le |
Si la diferencia de volumen entre el reproductor |
lecteur CD et la radio FM est trop importante, |
de discos compactos y el sintonizador de FM |
réglez le niveau du signal FM de la manière |
es demasiado grande, ajuste el nivel de la |
suivante. |
señal de FM de la forma siguiente. |
|
|
Appuyez sur la touche PWR pendant au moins |
Mantenga presionado el botón PWR durante 3 |
3 secondes. |
segundos por lo menos. |
Appuyez sur la touche de préréglage 1 pour sélectionner le niveau du signal FM, Hi (élevé) ou LO (bas), afin de le rapprocher du niveau du signal du lecteur CD.
Presione el botón de memorización 1 para seleccionar el nivel de la señal HI (alto) o LO
(bajo) a fin tratar de igualar los niveles entre la banda de FM y el reproductor de discos compactos.
Appuyez sur la touche PWR pour annuler le mode de réglage.
Para cancelar el modo de ajuste, presione el botón PWR.
23
English
|
Basic Operation |
|
1 2 |
Adjusting |
|
|
Volume/Bass/Treble/ |
|
|
Balance/Fader |
|
1 |
Press the AUDIO CONTROL button repeatedly |
|
to choose the desired mode. |
||
VOL |
Notes: ∙ If the AUDIO CONTROL knob is not |
|
|
||
BASS |
rotated in 5 seconds after selecting |
|
the BASS, TREBLE, BALANCE and |
||
|
||
TREB |
FADER modes, the unit automatically |
|
sets in the VOLUME mode. |
||
BAL |
∙ When the subwoofer is set to ON, the |
|
level of the subwoofer can be |
||
|
adjusted. |
|
FAD |
|
|
2 |
Rotate the AUDIO CONTROL knob until the |
|
desired sound is obtained in each mode. |
Notes: The settings of the Bass and Treble will be individually memorized for each source (FM, MW, LW and CD) until the setting is changed.
Depending on the connected devices, some functions and display indications do not work.
24
Fonctionnement deFrançais |
Operación |
Español |
|
|
|
|
base |
básica |
|
|
|
|
|
Réglage du volume/ |
Ajuste del volumen/los graves/ |
|
|
|||
|
|
|||||
graves/aigus/balance |
los agudos/el equilibrio entre |
|
|
|
||
|
|
|
||||
droite-gauche/balance |
los altavoces derechos e |
|
|
|
|
|
|
|
|
|
|
||
izquierdos/el equilibrio entre los |
|
|
||||
avant-arrière |
altavoces delanteros y traseros |
|
|
|
||
Appuyez de façon répétée sur la touche AUDIO
CONTROL pour choisir le mode souhaité.
Remarques: ∙ Si vous ne tournez pas la molette AUDIO CONTROL dans les 5 secondes qui suivent la sélection des modes
BASS, TREBLE, BALANCE et
FADER, l'appareil se met automatiquement en mode de réglage du volume.
∙Le niveau du subwoofer peut être ajusté quand la fonction subwoofer est en service.
Presione repetidamente el botón AUDIO
CONTROL para elegir el modo deseado.
Notas: ∙ Si no gira el mando AUDIO CON-
TROL antes de 5 segundos de haber seleccionado los modos BASS, TREBLE, BALANCE, y FADER, la unidad pasará automáticamente al modo VOLUME.
∙Cuando ponga subgraves en ON, el nivel del altavoz de subgraves podrá ajustarse.
Tournez la molette AUDIO CONTROL jusqu'à ce que vous obteniez le son souhaité dans chaque mode.
Remarques: Les réglages des graves et des aigus sont mémorisés séparément pour chaque source (FM, PO, GO et CD) et conservés jusqu'à qu'ils soient modifiés. Selon l'appareil raccordé,
certaines fonctions n'agissent pas et les indications n'apparaissent pas sur l'affichage.
Gire el mando AUDIO CONTROL hasta obtener el sonido deseado en cada modo.
Notas: Los ajustes de los graves y los agudos se memorizarán individualmente para cada fuente (FM, MW, LW, y discos compactos) hasta que los cambie. Dependiendo de los dispositivos conectados, algunas funciones e indicaciones del visualizador no trabajarán.
25
|
|
English |
|
|
|
Basic Operation |
|
1 3 |
|
Sound Guide Function |
|
|
2 |
This function will give audible feedback with |
|
|
varying tones depending upon the button |
||
|
|
||
|
|
pressed. |
|
1 |
INTLZ |
Press and hold the PWR button for more than 3 |
|
PWR |
|||
seconds. |
|||
|
2 BAND
BEEP ON
BEEP OFF
Press the BAND button and the display shows
"BEEP ON."
Pressing the button again turns the Sound Guide function off. "BEEP OFF" will be displayed and no tones will be heard.
3 |
INTLZ |
Press the PWR button to activate the normal |
|
||
PWR |
mode. |
|
|
1 |
3 |
|
Changing Lighting Col- |
|
|
|
|
|
|
2 |
our |
|
|
|
1
2
INTLZ
Press the PWR button for at least 3 seconds.
PWR
SCAN 6 |
GREEN |
Press the Preset 6 button to change the lighting |
|
colour between green and amber. |
|||
|
AMBER
3 |
INTLZ |
Press the PWR button to set the lighting colour. |
|
|
|||
|
|
|
|
|
PWR |
|
|
|
|
|
|
|
|
|
|
|
|
|
|
|
|
|
|
26
Français Español
Fonctionnement |
Operación básica |
|
|
de base |
|
|
|
|
|
|
|
|
|
|
|
Guide sonore
Grâce à cette fonction l'opération que vous effectuez est confirmée par des tonalités qui diffèrent selon la touche sur laquelle vous appuyez.
Función de guía acústica
Esta función ofrecerá retroalimentación audible con tonos variables dependiendo del botón presionado.
Appuyez pendant au moins 3 secondes sur la touche PWR.
Mantenga presionado el botón PWR durante más de 3 segundos.
Appuyez sur la touche BAND pour afficher
"BEEP ON".
Une nouvelle pression sur cette touche met la fonction hors service. "BEEP OFF" est affiché et aucune tonalité n'est audible.
Presione el botón BAND y el visualizador mostrará "BEEP ON".
Si vuelve a presionar el botón, se desactivará la función de guía acústica. Se visualizará "BEEP
OFF", y no se oirán tonos.
Appuyez sur la touche PWR pour revenir au |
Para activar el modo normal, presione el botón |
mode normal. |
PWR. |
Changement de la |
Cambio del color de |
couleur de l'éclairage |
iluminación |
Appuyez pendant au moins 3 secondes sur la touche PWR.
Mantenga presionado el botón PWR durante 3 segundos por lo menos.
Appuyez sur la touche de préréglage 6 pour changer la couleur de l'affichage et choisir vert ou orange.
Presione el botón de memorización 6 para cambiar el color de iluminación entre verde y
ámbar.
Appuyez sur la touche PWR pour valider la couleur de l'affichage.
Presione el botón PWR para establecer el color de iluminación.
27
|
|
English |
|
|
Basic Operation |
1 |
3 |
Turning Mute Mode On/Off |
|
2 |
With a cellular phone connected, audio will be |
|
|
interrupted whenever a call is received. This |
|
|
function can be turned ON or OFF from the |
|
|
head unit by following procedure below. |
1 |
INTLZ |
Press and hold the PWR button for at least 3 |
PWR |
seconds. |
2 |
|
|
|
|
|
|
|
Press the T.INFO button to select the MUTE |
|
|
|
|
|
|
|
||
|
T. INFO |
MUTE ON |
ON or OFF mode. |
|||||
|
|
|
|
|
||||
|
|
|
|
|
|
|
|
|
|
|
|
|
|
|
|
|
|
|
|
|
|
|
|
|
|
|
|
|
|
|
|
|
MUTE OFF |
|
|
|
|
|
|
|
|
|
||
|
|
|
|
|
|
|
|
|
|
|
|
|
|
|
|
|
|
3 |
|
|
INTLZ |
|
|
Press the PWR again to return to normal |
||
|
|
PWR |
|
|
operation. |
|||
|
|
|
|
|
|
|
|
|
|
|
|
|
|
|
|
|
|
|
|
|
|
|
|
|
|
|
28
Français Español
Fonctionnement |
Operación básica |
|
de base |
||
|
Mise en et hors service de la fonction Mute
Si un téléphone cellulaire est raccordé, le son est coupé dès qu'un appel est reçu. Cette fonction peut être mise en et hors service à partir de l'appareil principal de la façon suivante.
Activación/desactivación del modo de silenciamiento
Con un teléfono celular conectado, el sonido se interrumpirá cada vez que se reciba una llamada. Esta función podrá activar o activarse desde la unidad principal realizando el procedimiento siguiente.
Appuyez sur la touche PWR pendant au moins |
Mantenga presionado el botón PWR durante 3 |
3 secondes. |
segundos por lo menos. |
|
|
|
|
Appuyez sur la touche T.INFO pour |
Presione el botón T.INFO para seleccionar el |
|
|
sélectionner le mode MUTE ON ou MUTE |
modo MUTE ON u OFF. |
|
|
OFF. |
|
|
|
|
|
|
|
Appuyez une nouvelle fois sur PWR pour |
Para volver a la operación normal, presione de |
revenir au fonctionnement normal. |
nuevo PWR. |
|
|
29
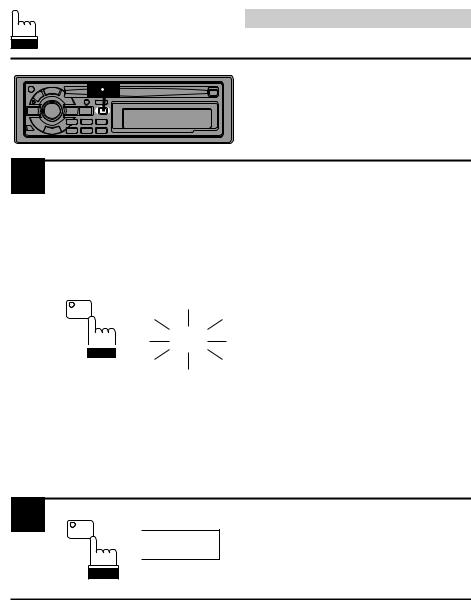
English
Basic Operation
1 2 |
Demonstration |
1
2
In the Demonstration (DEMO) mode, the unit scans each source; CD player and CD Shuttle.
|
|
|
|
|
|
Press and hold the DEMO button for at least 3 |
|
|
|
|
|
|
seconds to activate the DEMO mode. |
|
|
|
|
|
|
"DEMO" blinks in the display. |
|
|
|
|
|
|
The unit automatically performs the following |
|
|
|
|
|
|
scanning operation. |
|
|
|
|
|
|
1. Then the unit goes into the CD mode and |
|
|
|
|
|
|
scans the selections on the loaded CD by |
|
|
|
|
|
|
playing the first 10 seconds of each selection |
|
|
|
|
|
|
starting with the first selection. |
|
|
|
|
|
|
2. If a CD Shuttle is connected, the unit will go |
F |
into the CD mode. It will play the first 10 |
|||||
seconds of each track starting with track one |
||||||
DEMO |
|
|
|
of the first disc. |
||
|
|
|
||||
|
|
|
|
|
|
3. The unit continues scanning of the sources |
|
|
|
|
DEMO |
||
|
|
|
|
|
|
as described in 1 and 2 above. |
|
|
|
|
|
|
Note: Depending on the device connected to |
|
|
|
|
|
|
|
|
|
|
|
|
|
the CDA-7832R, not all functions or |
|
|
|
|
|
|
display indications will operate as |
|
|
|
|
|
|
described. For details, consult your |
|
|
|
|
|
|
Alpine dealer. |
To end the DEMO mode, press the DEMO
F
button.
"DEMO" disappears from the display.
DEMO
30
 Loading...