


user manual
Cooker
EKC60110


Welcome to the world of Electrolux
You've chosen a first class product from Electrolux, which hopefully will provide you with lots of pleasure in the future.
Electrolux ambition is to offer a wide variety of quality products that would make your life even more comfortable. You can look at some examples on the cover in this manual. But now it's time to study this manual and start using and enjoying the benefits from your new machine. We promise that it'll make your life a little easier. Good luck!
2

Contents |
|
Safety ....................................................................... |
4 |
Installation .............................................................. |
6 |
Changing plinth height ............................... |
6 |
Level adjustment ......................................... |
7 |
Tipping protection ....................................... |
8 |
Electrical connections ................................. |
9 |
Safety functions ................................................... |
10 |
The function lock ...................................... |
10 |
The cooling fan ......................................... |
10 |
The door lock ............................................ |
11 |
Description of product ..................................... |
12 |
The cooker ................................................. |
12 |
The oven .................................................... |
12 |
Before using for the first time ......................... |
13 |
Setting and changing the time............... |
13 |
Burning off the oven ................................. |
14 |
Using the ceramic glass plate ........................... |
16 |
The heating zones .................................... |
17 |
Using the oven .................................................... |
20 |
The oven functions .................................... |
20 |
Additional functions .................................. |
21 |
Practical use .............................................. |
25 |
Cleaning and care ............................................... |
27 |
Cleaning the cooker .................................. |
27 |
Cleaning the ceramic glass plate ............ |
28 |
Cleaning the oven ..................................... |
30 |
Technical data ..................................................... |
34 |
Europe Guarantee .................................... |
35 |
Practical advice and tips .................................... |
37 |
Problems and remedies .................................... |
39 |
Disposal ................................................................ |
40 |
3

Safety
These warnings have been provided in the interest of your safety. Ensure that you understand them all before installing or using this appliance. The cooker is intended for normal household use. Do not hesitate to contact us if you have any viewpoints or questions about the cooker and its use. You can find our address and telephone number in the ”Service” chapter.
Text marked with a WARNING TRIANGLE concerns safety. READ THIS INFORMATION VERY CAREFULLY, so that you do not injure yourself and others or damage the cooker.
Unpacking
Check that the cooker is undamaged and in perfect condition. Any damage occurred during transportation should be reported to the retailer immediately.
The packing material can be recycled. Contact your local authority if you are not sure where to leave it.
Do not forget to remove the packing material from inside the oven before using the oven.
Installation
Any work required on the cooker must be carried out by a QUALIFIED EXPERT. Any work carried out by amateurs can mean poorer cooker performance and result in personal injury and/or damage to property.
For cookers fitted with a plug: Make sure that the plug is properly inserted into the wall outlet.
The cooker is heavy. Edges and corners with which you do not normally come into contact can be sharp. Use gloves when moving the cooker.
THE TIPPING PROTECTOR must be fitted
so that you avoid the cooker tipping when subjected to abnormal loading.
NOTE! Do not place the cooker on an extra plinth or other height-increasing
unit since this means more risk that the cooker will tip over!
Children and the cooker
Children are by nature inquisitive and interested in most things, including the cooker. In the interests of safety we should like to mention a few things that you should think about if you have children or are visited by children:
There must be a bench surface at least 40 cm wide on both sides of the cooker.
If you have A HEATING PLATE GUARD
for your cooker, then this must be fitted. THE DOOR LOCK must also be fully operational.
Never allow children to use the blade scraper.
Let children help you at the cooker but teach them that pots and pans, ceramic glass plates and ovens become very hot and retain heat for some time
after use. TOUCHING THEM CAN RESULT IN BURNS.
Use
The appliance becomes hot during use. Do not touch the hob or the heating elements inside the oven when the appliance is in use. Never use a cracked ceramic glass plate. In connection with
4

boiling over and/or cleaning, liquid can penetrate to live electrical components. Switch off the power to the cooker and contact your local Service Force Centre. Never lay aluminium foil, plastic material or similar on the ceramic glass
plate. If one of the heating zones is switched on by mistake, the material on it can burn or melt.
Never leave a deep fat fryer, melting fat, paraffin or other easily ignited material without supervision. In the event of fire, turn off the cooker knobs and switch off the extractor fan. EXTINGUISH
THE FIRE WITH A POT LID, never use water.
Never stand on the ceramic glass plate. Check that the cooker is properly
turned off when it is not in use, with all the knobs set at zero.
Warning! Alcohol and similar substances that can produce explosive gases or other substances that can cause fires or explosions must not be used in the oven.
The ceramic glass plate must be used with the greatest care. For example, flaming with brandy or other forms of alcohol can result in traces of fat in the extractor fan igniting and causing serious fires. In the same way, flames and burning fat can cause injuries.
Do not place chemicals or cleaning agents in the storage compartment.
Cleaning
Keep the ceramic glass plate and the oven clean. Grease and spilled material can cause a great deal of smoke when heated and, in the worse case, imply a risk of fire.
While the oven is still hot, you must use the scraper blade immediately to remove sugar, and boiled-over material with a high sugar content, for example marmelade, as well as melted plastic and foil, to avoid
damaging the ceramic glass plate. Be careful, the blade is extremely sharp.
Maintenance and service
Turn all the knobs to zero before replacing a burned-out oven lamp bulb. Make sure that the cooker is thoroughly switched off before replacing the bulb. Pull out the plug for cookers fitted with one. For other cookers, switch off the power by using the multi-pole switch.
Service and repairs should be carried out by a company that is approved by the supplier. Use only genuine replacement parts.
Disposal and recycling
The symbol  on the product or the packing material indicates that the product may not be treated as household refuse. Instead it must be taken to a disposal station for recycling of the electrical and electronic components.
By ensuring that the product is handled in the right way, you are making a contribution towards preventing possible negative environmental and health effects which can occur if the product is disposed of as normal refuse.
For more detailed information about recycling, contact your local authorities or refuse collectors or the store where you purchased the product.
5
Installation
Work carried out on the cooker must be carried out by an AUTHORISED EXPERT. The cooker is heavy. Edges and corners with which you do not normally come into contact can be sharp. USE GLOVES when moving the cooker.
When delivered, the cooker is adapted to a bench height of 900 mm. The cooker has a telescopic plinth. You can alter the height so that the cooker fits bench height from 848 mm up to 933 mm.
Take care when positioning the cooker so that it does not block the ventilation outlets (behind the cooker and above the hood). The cooker must not be pushed in under a tiled edge or similar.
The cooker must have a bench area on both sides (See ”Safety”).
Make sure that the cooker cable is not crushed when the cooker is moved.
6

Changing plinth height
If you want to change height, first read through all the points below before you start.
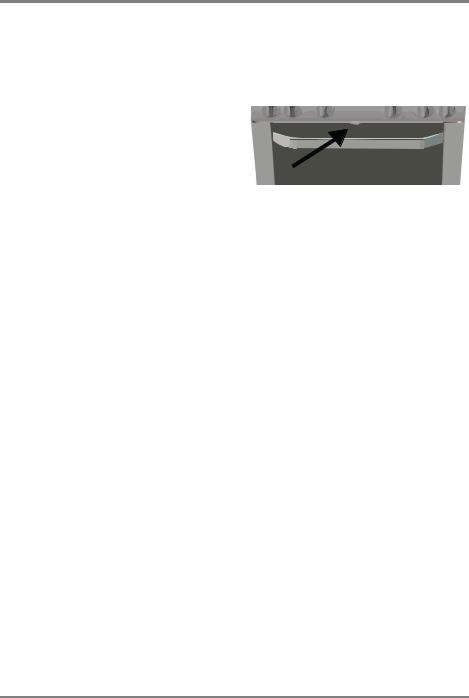
1Lay down the cooker gently (SEE ILLUSTRATION). Use material such as the Frigolite from the packing material as protection between the floor and the cooker. Remember to place a protective layer under the rear lower corners of the cooker sides to protect the floor.
A
A
A 
A
2 Unscrew the screws A (4 SCREWS, SEE |
|
|
|
|
|
|
|
ILLUSTRATION). Pull out the inner |
|
|
|
|
|
|
|
plinth slightly if you only want to |
A |
14 |
|
|
|
14 |
14 |
change its height. Pull the brackets on |
|
7 |
7 |
14 |
|||
|
|
|
|
|
|||
which the wheels and feet are fitted. |
|
|
|
|
|
|
|
NOTE! Be careful, there are sharp |
|
|
|
|
|
|
|
edges under the cooker. |
|
920 |
|
|
|
|
|
3 Screw in the screws again A in one of |
|
|
|
850 |
|
||
|
|
|
|
|
|||
the holes for a bench height of 850 to |
|
|
|
|
|
||
920 mm (33.4” to 36.2”). The distance between the holes varies between 7 and 14 mm (0.3 and 0.5”).
(SEE ILLUSTRATION A).
4Lift the cooker upright and connect it up electrically. Push the cooker into position and adjust the level before fitting the safety equipment.
Adjusting the level
The cooker must stand level, for example to ensure that fat is evenly divided in the frying-pan. Place a spirit level or a fryingpan containing water on the ceramic glass plate when checking that the cooker is level.
If necessary, from the front of the plinth you can adjust the cooker wheels and feet by 15 mm (0.6”). Use a screwdriver to adjust the rear wheels and a polygrip for the front feet.
7

The tipping protector
The tipping protector must be fitted to prevent the cooker from tipping under abnormal loading.
The tipping protector only functions when the cooker has been pushed into position.
THIS IS HOW TO FIT THE TIPPING PROTECTOR TO THE COOKER:
1Before fitting the anti-tip guard, make sure that the cooker has been adjusted to the correct height and is standing level (see page 7).
2The attachment (B) is fitted to the left side when delivered. Measure out where the anti-tip guard (A) is to be located, 60 mm (2.4") down from the edge of the ceramic glass plate and 50 mm (2.0") from the wall(cupboard). Screw it firmly into solid material or use suitable reinforcement. The entire anti-tip guard (A+B) can also be located on the right-hand side (SEE FIG. 1).
Make sure that the surface behind the cooker is smooth. If there are tiles or a moulding behind the edge of the ceramic glass plate then there must be a space with the same dimension between the anti-tip guard and
the wall. This is so that the antitip guard is firmly attached to the cooker and functions correctly.
Check that the anti-tip guard projects at least 20 mm (0.8") into the hole in the back of the cooker (B) when the cooker is pushed in (SEE FIG. 2).
NOTE! If the space between the bench cupboards is greater than the width of the cooker, then you must adjust the side measurement if you want to centre the cooker.
1
2
8

Electrical connections
Any work required on the cooker must be carried out by a QUALIFIED EXPERT. Any work carried out by amateurs can mean poorer cooker performance and result in personal injury and/or damage to property.
The electrical installation is to include a device whereby it is possible to separate all the poles of the equipment from the power supply, with a contact opening of at least
3 mm.
This stipulation must be satisfied because of safety reasons.
The connected rating and voltage are shown on the data plate. There is a wiring diagram on the back of the cooker.
9

Safety functions
Function lock
The function lock is built into one of the knobs on the cooker. NOTE! The main power supply to the cooker is not switched off.
LOCK THE COOKER LIKE THIS
(SEE ILLUSTRATION):
Turn the knob anti-clockwise to  . The knob then jumps out by about 2 mm (0.04”).
In this position neither the heating zones nor the oven function.
UNLOCKING THE COOKER:
Press in the knob towards the panel and turn it clockwise to the required position.
Cooling fan
The cooker is fitted with a cooling fan. Its function is to keep the cooker cool.
The cooling fan starts when the oven is used. When all the knobs are turned to zero, the cooling fan stops automatically.
10
The door lock
The door lock makes it more difficult for children to open the door. The door lock is active when the cooker is delivered but can be disconnected if necessary.
TO OPEN THE DOOR
Move the lock to the right when you want to open the door.
UTO DISENGAGE THE LOCK
Check that the oven is not hot!
Move the lock to the right, press down and continue a little further to the right, then press in the button’s left-hand edge.
ENGAGING THE LOCK
Move the lock to the right and downwards.
11

Description of product
Cooker
1Hob with heatingzones
2Panel
3Oven
4Storage drawer
5Plinth
Oven
1Top heat element
2Heating element
3Ovenlight, 40W
4Meat probe socket
5Bottom heat
6Oven shelf runners, removable
7Shelf positions
1
2
3
4
5
12
7 |
3 |
|
4 |
||
|
5
6
12

Before using for the first time
Setting and changing the time
After the appliance has been connected to the electrical supply or when there has been
a power cut, the function indicator Time  flashes automatically.
1.To change a time that has already been set, press the + button and the - button at the same time, until the function indicator Time  flashes.
2.Using the + or - button, set the current time.
After approx. 5 seconds, the flashing stops and the clock displays the time of day set.
The appliance is now ready to use.
The Time  can only be changed, if no Countdown
  is set.
12.00
12.00
12.00
13
 Loading...