Aeg-electrolux ECN 2148 Manual

ZAMRZIVAČ ŠKRINJA - FRYSBOX - TRUHLICOVÁ MRAZNIČKA
ZAMRAŻARKA - CHEST FREEZER -
ECN 2158
ŠKRINJA ZA SMRZAVANJE |
CR |
|
INSTALLATIONSOCH BRUKSANVISNING |
SE |
5-8 |
NÁVOD K INSTALACI A OBSLUZE |
CZ |
9-12 |
INSTRUKCJA OBSŁUGI |
|
13-18 |
OPERATING AND INSTALLATION MANUAL |
GB |
19-22 |

GB
IWelcome to the world of Electrolux
You've chosen a first class product from Electrolux, which hopefully will provide you with lots of pleasure in the future. Electrolux ambition is to offer a wide variety of quality products that would make your life even more comfortable. You can look at some examples on the cover in this manual. But now it's time to study this manual and start using and enjoying the benefits from your new machine. We promise that it'll make your life a little easier. Good luck!
Make sure that the power plug is not squashed or damaged by the back of the fridge/freezer.
- A damaged power plug may overheat and cause a fire.
Do not place heavy articles or the fridge/freezer itself on the power cord.
- There is a risk of a short circuit and fire.
Do not remove the power cord by pulling on its lead, particularly when the fridge/freezer is being pulled out of its niche.
-Damage to the cord may cause a short-circuit, fire and/or electric shock.
-If the power cord is damaged, it must be replaced by a certified service agent or qualified service personnel.
If the power plug socket is loose, do not insert the power plug.
-There is a risk of electric shock or fire.
The symbol on the product or on its packaging indicates that this product may not be treated as household waste. Instead it shall
 be handed over to the applicable collection point for the recycling of electrical and electronic equipment. By ensuring this product is disposed of correctly, you will help prevent potential negative consequences for the environment and human health, which could otherwise be caused by inappropriate waste handling of this product. For more detailed information about recycling of this product, please contact your local city office, your household waste disposal service or the shop where you purchased the product.
POSITION
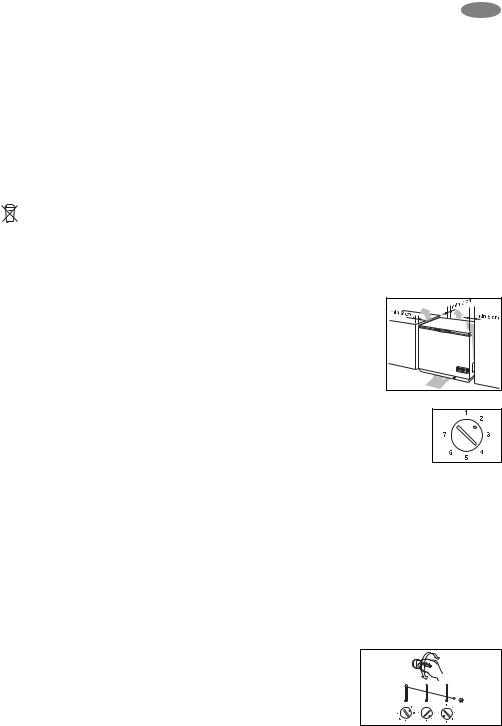
Place the freezer horizontally on a firm surface, resting on all four plastic feet. Use a wooden block or similar object to compensate for any
bumps/holes in the surface. The room should be dry and adequately ventilated. Temperatures of the external environment have an impact |
|
on the energy consumption of the device. Therefore: |
|
- do not put the device to a place exposed to sunshine ore besides a radiator or oven, |
|
- put it to a place where the temperature of the environment corresponds to the climatic classification |
|
for which the device was designed. |
|
Climatic classification |
Ambient temperature limits |
SN |
from +10°C to +32°C |
N |
from +16°C to +32°C |
ST |
from +18°C to +38°C |
T |
from +18°C to +43°C |
If the freezer has been handled standing on end it should be allowed to stand in normal position for about 12 hours before switching it on. Please ensure that when the appliance is installed it is easily accessible for the engineer in the event of a breakdown.
SWITCHING ON
Before switching on, the freezer should be cleaned inside. See under “Maintenance”. Set the thermostat button in middle position. Allow the freezer to run for several hours before placing food inside.
ELECTRICAL REQUIREMENTS
Before switching on, make sure that the voltage of your electricity supply is the same as that indicated on the rating plate, located inside the lid.
Warning: This appliance must be earthed.
 this appliance complies with the following EC Directives:
-73/23/EEC of 19. 02. 1973 - Low-Voltage Directive
-89/336/EEC of 03. 05. 1989 (including Amendment Directive 92/31/EEC - EMC Directive. Some of the models are not available in all countries.
Testing has been carried out in accordance with ISO 5155 regarding the determination of freezer capacity, energy consumption and hold-overtime.
Information for test institute: A plan of the positioning of test packages may be obtained directly from the manufacturer.
OPENING/CLOSING THE LID
The lid is fitted with a tightly closing sealing strip to prevent moisture getting inside the freezer and increasing the amount of frost formed. When the lid is opened the air inside the freezer becomes slightly warmer and expands. As soon as the lid is closed again the air is cooled immediately. This may lead to the creation of a vacuum which makes it hard to open the lid immediately after it has been closed. This is quite normal. Wait a few minutes until the vacuum has disappeared, then open the lid by pulling gently. Never pull the handle violently.
TEMPERATURE CONTROL
The thermostat ensures that the required temperature is maintained in the freezer. Turning the thermostat button towards no. “7” makes the temperature in the freezer colder, and turning the button towards no. “1” makes the temperature warmer. The correct setting can be found by measuring the temperature of the top package in the middle of the freezer. This should not have a temperature higher than –18°C.
19

GB
THE ROLE OF THE PRESSURE EQUALISATION VALVE
The pressure equalisation valve installed in your freezer automatically eliminates the pressure difference which otherwise would make it very difficult or even impossible to open the lid. It may be possible to hear the operation of the valve as the air flows in through the airing outlet in the rear wall of the cabinet. For a safe operation, keep the two openings of the valve clear, do not cover them!
CONTROL PANEL
The green light is illuminated as long as the freezer is connected. The yellow light is illuminated when the “Super” button is depressed. See under “Freezing”. The red light is illuminated when the temperature in the freezer is higher than the thermostat setting (alarm). The red alarm light can be due to: Insertion of a large amount of fresh food. The red alarm light will go out after a while. Opening the lid too long. The red alarm light will go out after a while. A defect in the system. See under “If something does not work”.
CAPACITY
The freezing capacity of the freezer is stated in the data plate (kg/24 hours). Do not exceed the amount stated - if you do, the freezing time will be extended. The data plate is located inside the lid.
IMPORTANT The freezing capacity stated can be utilised to the full occasionally to freeze large amounts of fresh food. However, if the freezer is filled with large amounts of food for freezing every day, the capacity stated is reduced by about one-third.
LOCK
Insert the key in the lock, and turn. The key kan be removed.
Remember to keep the key out of the reach of children.
BASKET
The baskets are designed for the storage of food which has already been frozen. The handles can be placed in two positions, as shown in the drawings.The baskets can either be placed inside the freezer or hung on the edge of the casing.
DEFROSTING
The formation of frost on the inside of freezers cannot be avoided. Frost is formed when moisture contained in the air comes into contact with the cold surfaces of the freezer. Consequently, the lid should only be opened when necessary, and it should never be left open. A thin layer of ice or frost does not affect the function of the freezer adversely, and can be removed carefully using the scraper provided.
IMPORTANT Never use a knife or any other sharp implement to remove frost.
When the frost or ice layer is 10-15 mm thick, the freezer should be defrosted. We suggest that you defrost your freezer when there is little or no food inside. Switch off the current. Remove the contents of the freezer, wrap them in newspapers, and leave them in a cold place. The speed of defrosting can be increased by placing one or more bowls of hot (not boiling) water inside the freezer and closing the lid. Open the lid after a while, and remove the layer of ice carefully. The defrost water can be collected in a bowl as shown in the drawing. Do not try to speed up defrosting by using anything other than hot water, since this may damage the freezer. After defrosting, clean the inside of the freezer.
IMPORTANT Remember to replace the plug in the drip water drain.
HOW TO CLEAN YOUR FREEZER INSIDE
|
|
|
|
|
|
|
|
|
|
Thermostat |
Green |
|
Red |
|
|
|
|||
button |
|
light |
|
light |
Yellow light |
||||
|
|
|
|
|
|
|
|
|
|
|
|
|
|
|
|
|
|
|
|
|
|
|
|
|
|
|
|
|
|
„SUPER”
FREEZING
CAPACITY
Remove the plug from the mains socket, and remove all loose accessories before cleaning the freezer. The best time to clean your freezer is after defrosting and before the electricity supply is connected again. Use a damp cloth to clean your freezer. Use hot water, and a mild, non-aromatic cleaning agent. After cleaning the freezer, clean the basket/baskets before replacing them.
IMPORTANT Never use strong cleaning agents, scouring powder or strongly aromatic cleaning agents to clean your freezer inside, since this will damage the inside and leave a strong smell.
WHEN NOT IN USE
Disconnect the appliance from the electricity supply. Remove all goods from the freezer. Clean the freezer as described above. Leave the lid slightly open. If you are still unable to solve the problem, summon the assistance of authorised service staff. Do not take any other steps. Incorrect procedure may cause personal injury or lead to additional defects. It is quite normal for the freezer to seem warm on the outside occasionally, owing to the heat generated by the freezing process. This heat also helps to prevent the formation of moisture on the outside of the appliance which could cause rust. If the freezer has been switched off briefly, the compressor may not start immediately when the current is re-connected. This is quite normal.
20
 Loading...