


 Loading...
UA
DVD CHANGER
LECTEUR DE DVD CHANGEUR
DVD-C740
OWNER’S MANUAL
MODE D’EMPLOI
NATURAL SOUND DVD PLAYER
STANDBY
ON
|
|
DISC |
|
PLAY CHANGE |
PROGRESSIVE |
|
|
|
|
1 |
2 |
3 |
4 |
5 |
REPEAT
CAUTION |
RISK OF ELECTRIC SHOCK |
DO NOT OPEN |
CAUTION: TO REDUCE THE RISK OF ELECTRIC SHOCK,
DO NOT REMOVE COVER (OR BACK).
NO USER-SERVICEABLE PARTS INSIDE.
REFER SERVICING TO QUALIFIED SERVICE PERSONNEL.
This symbol warns the user that uninsulated voltage within the unit may have sufficient magnitude to cause electric shock. Therefore, it is dangerous to make
any kind of contact with any inside part of this unit.
This symbol alerts the user that important literature concerning the operation and maintenance of this unit has been included. Therefore, it should be read carefully in order to avoid any problems.
WARNING
To reduce the risk of fire or electric shock, do not expose this appliance to rain or moisture.
CAUTION
Use of controls or adjustments or performance of procedures other than herein may result in hazardous radiation exposure.
The set complies with the FCC-Rules, Part 15 and with 21 CFR 1040.10.
IMPORTANT SAFETY INSTRUCTIONS
1.Read these instructions.
2.Keep these instructions.
3.Heed all warnings.
4.Follow all instructions.
5.Do not use this apparatus near water.
6.Clean only with a dry cloth.
7.Do not block any of the ventilation openings. Install in accordance with the manufacturers instructions.
8.Do not install near any heat sources such as radiators, heat registers, stoves, or other apparatus (including amplifiers) that produce heat.
9.Do not defeat the safety
purpose of the polarized or |
|
|
grounding-type plug. A polarized plug |
AC Polarized |
|
has two blades with one wider than |
||
Plug |
the other. A grounding type plug has two blades and a third grounding prong.The wide blade or the third prong are provided for your safety.When the provided plug does not fit into your outlet, consult an electrician for replacement of the obsolete outlet.
10.Protect the power cord from being walked on or pinched, particularly at plugs, convenience receptacles, and the point where they exit from the apparatus.
11.Only use attachments/accessories specified by the manufacturer.
12.Use only with a cart, stand, tripod, bracket,
or table specified by the manufacturer or sold with the apparatus.When a cart is used, use caution when moving the cart/apparatus combination to avoid injury from tip-over.
13.Unplug this apparatus during lightning storms or when unused for long periods of time.
14.Refer all servicing to qualified service personnel. Servicing is required when the apparatus has been damaged in any way, such as if the power-supply cord or plug is damaged, liquid has been spilled or objects have fallen into the apparatus, or when the apparatus has been exposed to rain or moisture, does not operate normally, or has been dropped.
15.Battery usage CAUTION – To prevent battery leakage which may result in bodily injury or damage to the unit:
Install all batteries correctly, + and - as marked on the unit.
Do not mix batteries (old and new or carbon and alkaline, etc.).
Remove batteries when the unit is not used for a long time.
EL 6475-E002: 01/3
FCC INFORMATION (for US customers)
1.IMPORTANT NOTICE: DO NOT MODIFY THIS UNIT!
This product, when installed as indicated in the instructions contained in this manual, meets FCC requirements. Modifications not expressly approved by Yamaha may void your authority, granted by the FCC, to use the product.
2.IMPORTANT: When connecting this product to accessories and/or another product use only high quality shielded cables. Cable/s supplied with this product MUST be used. Follow all installation instructions. Failure to follow instructions could void your FCC authorization to use this product in the USA.
3.NOTE: This product has been tested and found to comply with the requirements listed in FCC Regulations, Part 15 for Class "B" digital devices. Compliance with these requirements provides a reasonable level of assurance that your use of this product in a residential environment will not result in harmful interference with other electronic devices. This equipment generates/uses radio frequencies and, if not installed and used according to the instructions found in the users manual, may cause interference harmful to the operation of other electronic devices. Compliance with FCC regulations does not guarantee that interference will not occur in all installations. If this product is found to be the source of interference, which can be determined by turning the product "OFF" and "ON", please try to eliminate the problem by using one of the following measures: Relocate either this product or the device that is being affected by the interference.
Utilize power outlets that are on different branch (circuit breaker or fuse) circuits or install AC line filter/s.
In the case of radio or TV interference, relocate/reorient the antenna. If the antenna lead-in is 300 ohm ribbon lead, change the lead-in to coaxial type cable.
If these corrective measures do not produce satisfactory results, please contact the local retailer authorized to distribute this type of product. If you can not locate the appropriate retailer, please contact Yamaha Electronics Corp., 6600 Orangethorpe Ave. Buena Park, CA90622.
The above statements apply ONLY to those products distributed by Yamaha Corporation of America or its subsidiaries.
We Want You Listening For A Lifetime
YAMAHA and the Electronic Industries Association's Consumer Electronics Group want you to get the most out of your equipment by playing it at a safe level. One that lets the sound come through loud and clear without annoying blaring or distortion - and, most importantly, without affecting your sensitive hearing.
Since hearing damage from loud sounds is often undetectable until it is too late, YAMAHA and the Electronic Industries Association's Consumer Electronics Group recommend you to avoid prolonged exposure from excessive volume levels.
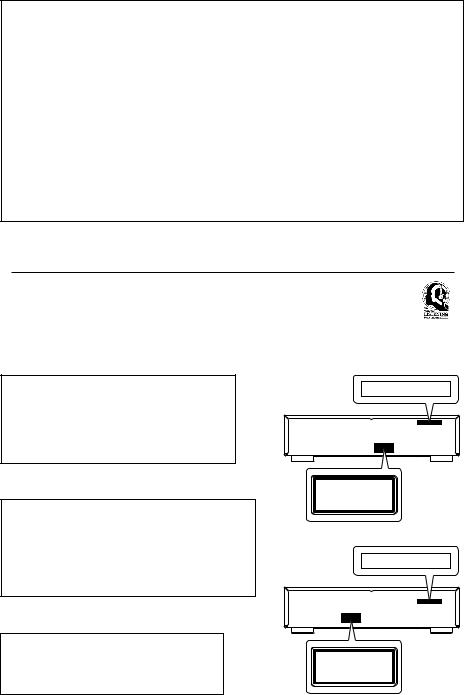
For Customer Use:
Read carefully the information located at the rear panel of the player and enter below the Serial No. Retain this information for future reference.
Model No.
Serial No. __________________________
CAUTION - VISIBLE AND INVISIBLE LASER RADIATION WHEN OPEN. AVOID DIRECT EXPOSURE TO BEAM.
CAUTION
U.S.A. model
FOR CANADIAN CUSTOMERS
To prevent electric shock, match wide blade of plug to wide slot and fully insert.
This Class B digital apparatus complies with Canadian ICES-003.
This digital apparatus does not exceed the Class B limits for radio noise emissions from digital apparatus as set out in the Radio Interference Regulations of the Canadian Department of Communications.
WARNING
TO REDUCE THE RISK OF FIRE OR ELECTRIC SHOCK, DO NOT EXPOSE THIS UNIT TO RAIN OR MOISTURE.
CLASS 1 LASER PRODUCT
LASER KLASSE 1 PRODUKT
LUOKAN 1 LASERLAITE
KLASS 1 LASER APPARAT
PRODUIT LASER DE CLASSE 1
CAUTION - VISIBLE AND INVISIBLE LASER RADIATION
WHEN OPEN. AVOID DIRECT EXPOSURE TO BEAM.
CAUTION
Australia model
CLASS 1 LASER PRODUCT
LASER KLASSE 1 PRODUKT
LUOKAN 1 LASERLAITE
KLASS 1 LASER APPARAT
PRODUIT LASER DE CLASSE 1

CAUTION: READ THIS BEFORE OPERATING YOUR UNIT.
1To assure the finest performance, please read this manual carefully. Keep it in a safe place for future reference.
2Install this unit in a well ventilated, cool, dry, clean place — away from direct sunlight, heat sources, vibration, dust, moisture, or cold. In a cabinet, allow about 2.5cm (1 inch) of free space all around this unit for adequate ventilation.
3Locate this unit away from other electrical appliances, motors, or transformers to avoid humming sounds.
4Do not expose this unit to sudden temperature changes from cold to hot, nor locate this unit in an environment with high humidity (i.e., a room with a humidifier) to prevent condensation inside this unit, which may cause an electrical shock, fire, damage to this unit, and/or personal injury.
5Avoid installing this unit in a location where foreign objects may fall onto this unit or where this unit may be exposed to liquid dripping or splashing. On the top of this unit, do not place:
–Other components, as they may cause damage and/or discoloration on the surface of this unit.
–Burning objects (i.e., candles), as they may cause fire, damage to this unit, and/or personal injury.
–Containers with liquid in them, as they may fall, spilling the liquid and causing an electrical shock to the user and/or damage to this unit.
6Do not cover this unit with a newspaper, tablecloth, curtain, etc. in order not to obstruct heat radiation. If the temperature inside this unit rises, it may cause fire, damage to this unit, and/or personal injury.
7Do not plug in this unit to a wall outlet until all connections are complete.
8Do not operate this unit upside-down. It may overheat, possibly causing damage.
9Do not use excessive force on switches, knobs and/or cords.
10When disconnecting the power cord from the wall outlet, grasp the plug; do not pull the cord.
11Do not clean this unit with chemical solvents; this might damage the finish. Use a clean, dry cloth.
12Use only the voltage specified on this unit. Using this unit with a higher voltage than specified is dangerous and may cause fire, damage to this unit, and/or personal injury.YAMAHA will not be held responsible for any damage resulting from use of this unit with a voltage other than as specified.
13To prevent damage by lightning, disconnect the power cord from the wall outlet during an electrical storm.
14Do not attempt to modify or fix this unit. Contact qualified YAMAHA service personnel when any service is needed.The cabinet should never be opened for any reason.
15When not planning to use this unit for long periods of time (i.e., vacation), disconnect the AC power plug from the wall outlet.
16Be sure to read the “Troubleshooting” section on common operating errors before concluding that this unit is faulty.
17Before moving this unit, press STANDBY/ON to set the unit in standby mode, then disconnect the AC power plug from the wall outlet.
The unit is not disconnected from the AC power source as long as it is connected to the wall outlet,even if this unit itself is turned off.This state is called the standby mode.In this state,this unit is designed to consume a very small quantity of power.
NOTE:
Pictures shown maybe different between countries. Never make or change connections with the power switched on.
LASER SAFETY
This unit employs a laser. Due to possible eye injury, only a qualified service person should remove the cover or attempt to service this device.
CAUTION
VISIBLE AND INVISIBLE LASER RADIATION WHEN OPEN. AVOID EXPOSURE TO BEAM
Use of controls or adjustments or performance of procedures other than those specified herein may result in hazardous radiation exposure.
This unit is designed for home use only. Do not use this unit for business purposes.
Be sure to place this unit on a level surface.
If not so, this unit will fail to work normlly at the PLAYXCHANGE operation and cause damage to the disc(s) and this unit itself.
LASER |
|
Type |
Semiconductor laser GaAlAs |
Wave length |
650 nm (DVD) |
|
780 nm (VCD/CD) |
Output Power |
7 mW (DVD) |
|
10 mW (VCD/CD) |
Beam divergence |
60 degree |
|
|

Contents
Introduction |
|
Supplied accessories .................................................. |
2 |
Notes about discs ...................................................... |
2 |
Cleaning discs.......................................................................... |
2 |
Symbols Used in this Manual ................................... |
2 |
Functional Overview |
|
Front Panel .................................................................. |
3 |
Rear Panel .................................................................... |
4 |
Remote Control......................................................... |
5 |
Preparation |
|
General Notes on connections .............................. |
6 |
Digital Connections ................................................... |
6 |
Analog Connections................................................. |
6 |
Video Connections .................................................... |
6 |
S-Video jacks ........................................................................... |
7 |
Component Video jacks................................................... |
7 |
Composite Video jacks ..................................................... |
7 |
Inserting batteries into the Remote Control ...... |
8 |
Using the Remote Control ............................................. |
8 |
NTSC/PAL Conversion ............................................ |
8 |
Switching On ............................................................... |
8 |
Menu Bars on TV Screen ......................................... |
9 |
Temporary Feedback Field Icons................................. |
9 |
User Preference Settings.......................................... |
9 |
General operation................................................................ |
9 |
Picture ...................................................................................... |
10 |
Sound ....................................................................................... |
11 |
Language................................................................................. |
13 |
Features................................................................................... |
13 |
Other Feature...................................................................... |
13 |
Operation |
|
Basic Playback .......................................................... |
14 |
Playing a DVD-Video.............................................. |
14 |
Playing a title......................................................................... |
14 |
Resume.................................................................................... |
14 |
Video CD and Super Video CD .......................... |
15 |
Playing a disc......................................................................... |
15 |
Playing an Audio CD .............................................. |
15 |
Playing a disc......................................................................... |
15 |
Special DVD Features ............................................ |
16 |
Title/Disc menu .................................................................. |
16 |
Camera Angle...................................................................... |
16 |
Changing the audio language ...................................... |
16 |
Subtitle Language............................................................... |
16 |
Special VCD & SVCD Features............................ |
16 |
Playback Control (PBC)................................................. |
16 |
Special CD & MP3 Features.................................. |
16 |
CD text and MP3 text ................................................... |
16 |
General Features ..................................................... |
17 |
Moving to another title/chapter ................................ |
17 |
Search....................................................................................... |
17 |
Slow Motion ......................................................................... |
17 |
Still Picture and Frame-by-frame playback .......... |
17 |
Scan ........................................................................................... |
17 |
Repeat...................................................................................... |
18 |
Repeat A-B............................................................................ |
18 |
Shuffle Across All Discs.................................................. |
18 |
Time search .......................................................................... |
18 |
Zoom ....................................................................................... |
18 |
Favorite Track Selection Across Disc .................... |
19 |
FTS for a Single disc ......................................................... |
19 |
MP3 Disc Features .................................................. |
20 |
Album/Title Playback....................................................... |
21 |
Repeat track/album/Disc ............................................... |
21 |
Access Control |
|
Child Lock................................................................. |
22 |
Activating/deactivating the Child Lock .................. |
22 |
Authorising discs ................................................................ |
22 |
Deauthorising discs........................................................... |
22 |
Parental Control...................................................... |
22 |
Activating/Deactivating Parental Control............. |
23 |
Country ................................................................................... |
23 |
Changing the 4-digit code ............................................ |
23 |
If you forget your 4 digit code ................................... |
23 |
Parental Control Disclaimer ........................................ |
23 |
Troubleshooting ........................ |
24 |
Specifications ............................. |
25 |
English
1
Introduction
Thank you for purchasing this YAMAHA DVD player. This Owner’s Manual explains the basic operation of this DVD player.
Supplied accessories
–Remote control
–Batteries (two AA size) for remote control
–Audio/Video cable
–Owner’s Manual
Notes about discs
–This unit is designed for use with DVD video, Video CD, Super video CD, Audio CD (CD text supported), CD-R and CD-RW (MP3 Supported), DVD+RW and DVD+R.
–CD-R and CD-RW cannot be played unless finalized.
–Some discs cannot be played depending on the disc characteristics or recording conditions.
–Be sure to use only CD-R and CD-RW discs made by reliable manufacturers.
–Do not use any non standard shaped discs (heart, etc.)
–Do not use disc with tape, scals, or paste on it, damage to the unit may result.
–Do not use a disc printed on its surface by a commercially available label printer.
Cleaning discs
●When a disc becomes dirty, clean it with a cleaning cloth. Wipe the disc from the centre out. Do not wipe in a circular motion.
●Do not use solvents such as benzine, thinner, commercially available cleaners, or antistatic spray intended for analogue records.
Manufactured under license from Dolby Laboratories. “Dolby” and the double-D symbol are trademarks of Dolby Laboratories.
”DTS” and ”DTS Digital Out” are trademarks of Digital Theater Systems, Inc.
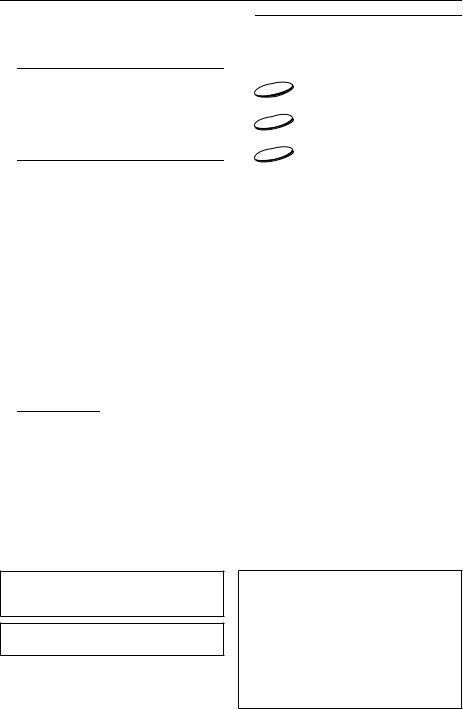
Symbols Used in this Manual
The below symbols appear in some headings and notes with the following meanings:
|
|
|
|
|
|
– Description refers to playback of |
|
DVD |
|
||||
|
|
|
|
|
|
DVD-video discs |
|
|
|
|
|
|
|
|
|
|
|
|
|
– Description refers to playback of |
|
VCD |
|
|
|||
|
|
Video CDs |
||||
|
|
|
|
|
|
|
|
|
|
|
|
||
|
|
|
|
– Description refers to playback of |
||
|
|
CD |
||||
|
|
|
|
|
|
Audio CDs |
|
|
|
|
|
|
|
Helpful Hints!
●Some DVD video discs require specific functions or allow only limited functions during playback.
●“ Ä ” may appears on the TV screen which means that the function is not available on that specific DVD video disc.
This product incorporates copyright protection technology that is protected by method claims of certain U.S. patents and other intellectual property rights owned by Macrovision Corporation and other rights owners. Use of this copyright protection technology must be authorized by Macrovision Corporation, and is intended for home and other limited viewing uses only unless otherwise authorized by Macrovision Corporation. Reverse engineering or disassembly is prohibited.
2

Functional Overview
Front Panel
STANDBY/ON |
|
|
– |
to switch the player to standby mode |
|
|
or ON |
|
Disc Tray |
/ OPEN/CLOSE |
|
– |
load up to 5 discs on the disc tray |
– to open/close the disc tray |
English
NATURAL SOUND DVD PLAYER |
|
|
|
||
STANDBY |
|
|
|
|
|
ON |
|
|
|
|
|
|
|
DISC |
|
PLAY |
CHANGE |
PROGRESSIVE |
|
|
|
|
|
1 |
2 |
3 |
4 |
5 |
|
REPEAT |
|
|
|
|
|
DISPLAY
– shows the current status of the player
DISC (1, 2, 3, 4, 5)/LEDs
–to select and directly playback the preferred disc / each LED flashes green when button is selected
LEDs
–LED lights up when the corresponding feature is set to ON
S/Q
– search backward* / go to a previous chapter or track
R/T
– search forward* / go to the next chapter or track
B; PLAY/PAUSE
– to star t or interrupt playback
9 STOP
– to stop playback
PLAYXCHANGE
– to change another disc(s) during playback
* Press button for about two seconds.
3
Functional Overview
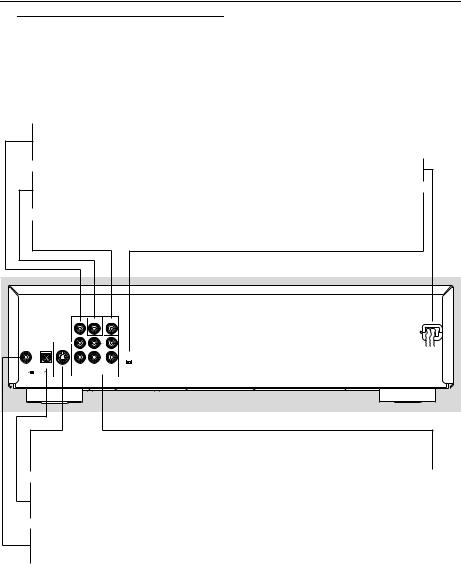
Rear Panel
VIDEO OUT - COMPONENT
–connect to COMPONENT VIDEO input of your AV receiver
VIDEO OUT - VIDEO
–connect to VIDEO (composite) input of your AV receiver
SUBWOOFER
– connect to an active subwoofer
AC Power Cord
– connect to a standard AC outlet
Progressive / Interlace SELECTOR (NTSC only)
– to switch between Progressive or interlace depending on your monitor
|
|
|
|
|
VIDEO |
SUB WOOFER |
|
|
|
|
Y |
|
|
|
|
|
|
PB |
|
|
|
|
|
|
|
|
480p |
|
|
|
|
|
R |
480i |
COAXIAL |
OPTICAL |
|
PR |
|
SCAN MODE |
|
|
|
|
||||
PCM |
DIGITAL |
DTS |
S VIDEO |
COMPONENT |
1 |
2 |
DIGITAL OUT |
|
VIDEO OUT |
AUDIO OUT |
|||
VIDEO OUT - S VIDEO
–connect to S VIDEO input of your AV receiver
DIGITAL OUT - OPTICAL
–connect to OPTICAL input of your AV receiver
DIGITAL OUT - COAXIAL
–connect to COAXIAL input of your AV receiver
AUDIO OUT
– connect to AUDIO inputs of your AV receiver or stereo system
Caution: Do not touch the inner pins of the jacks on the rear panel. Electrostatic discharge may cause permanent damage to the player.
4
Functional Overview
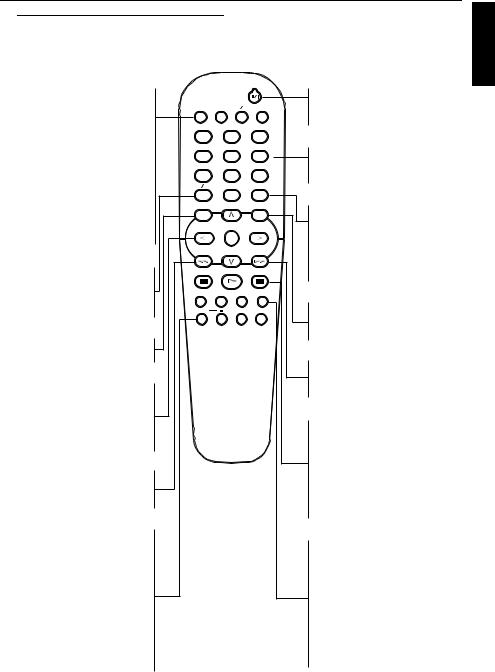
Remote Control
DISC SKIP |
|
|
|
|
|
– to select another disc |
DISC SKIP |
DIMMER |
T C |
SOUND MODE |
|
DIMMER |
|
|
|
|
|
– to select 4 different |
1 |
|
2 |
|
3 |
brightnesses for the display |
4 |
|
5 |
|
6 |
|
|
|
|||
T/C |
7 |
|
8 |
|
9 |
– select title/chapter |
|
|
|||
RETURN RESUME |
|
CD TEXT BIT RATE |
|||
SOUND MODE |
|
|
0 |
|
|
MENU |
|
|
|
ON SCREEN |
|
– selects required sound mode |
|
|
|
||
|
|
|
|
|
|
Stereo, Dolby Surround- |
|
|
ENTER |
|
|
compatible or 3D sound |
|
|
|
|
|
|
|
|
OK |
|
|
RETURN/RESUME |
STOP |
|
PLAY |
|
PAUSE |
– go back to previous menu / |
SUBTITLE |
ANGLE |
ZOOM |
AUDIO |
|
continue playback after play |
|||||
|
|
|
|
||
was stopped |
REPEAT |
A B |
SHUFFLE |
SCAN |
MENU
–access menu of a DVD disc
1, 2, 3, 4
–(left/right/up/down) select an
item in the menu
ENTER/OK
– acknowledge menu selection
S
– search backward* / go to a previous chapter or track
REPEAT
– repeat chapter, track, title, disc, all discs
A-B
– repeat a specific segment
SHUFFLE
– play tracks in random order
SCAN
– play the first 10 seconds of each track/chapter within a disc
B/ I
–switch DVD player ON or go to standby mode
0-9 numerical keys
–select numbered items in a menu
CD TEXT/BIT RATE
–activate/deactivate CD text if available on the disc (audio CDs)
–to display bit rate indicator during playback (DVD, SVCD)
ON SCREEN
–access or remove player’s system menu
T
–search forward* / next chapter or track
STOP ( 9 )
– stop playback
PLAY ( B )
– star t playback
PAUSE ( ; )
–pause playback temporarily / frame-by-frame playback
SUBTITLE
– subtitle language selector
ANGLE
– select DVD camera angle
ZOOM
– enlarge video image
AUDIO
–audio language / format / sampling selector
* Press and hold button for about two seconds.
English
5
Loading...