


LP389 IP Phone
Operation Guide
1
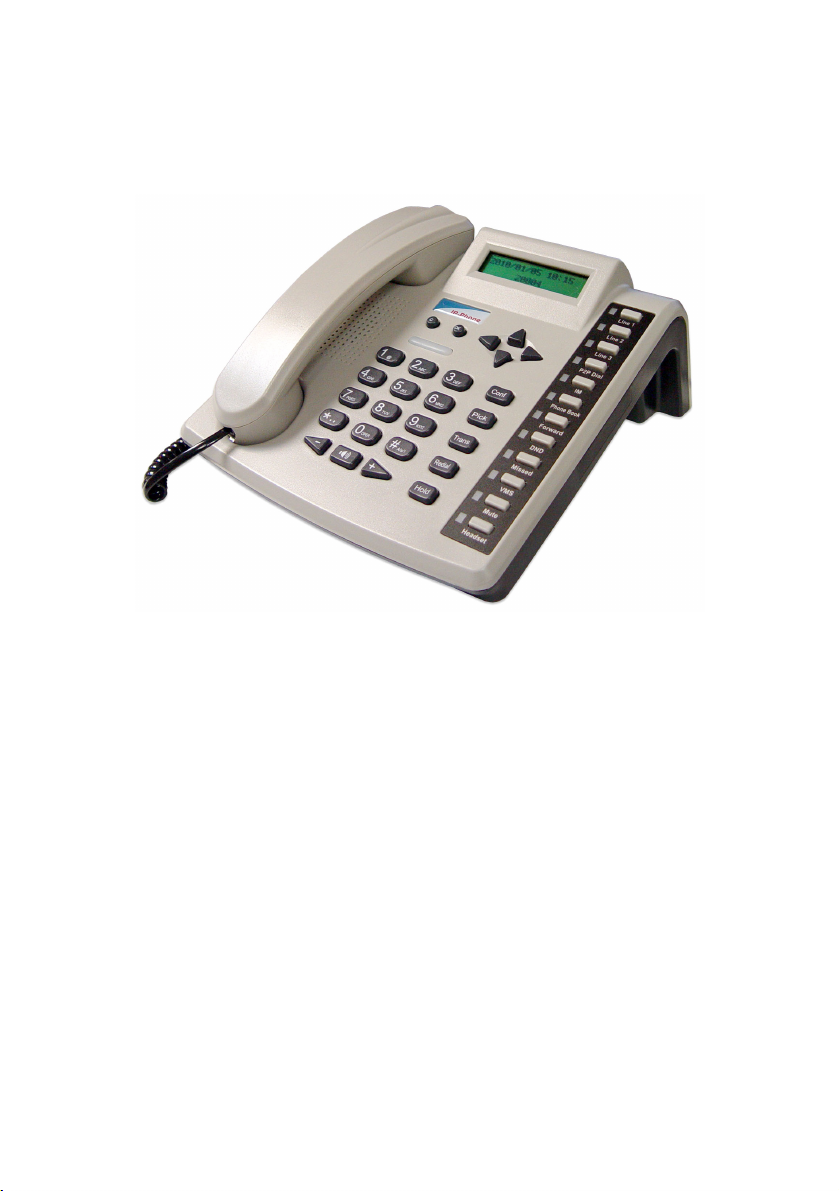
LP389 IP Phone
Welltech Computer Co., Ltd. was founded in 1988 in
Taipei, Taiwan with the aim of linking people and the technologies,
and has been an integral part of the community for over a decade.
Our company is committed to promoting better Communications
and Networking solutions to our customers through our
strong knowledge and expertise in Voice over IP.
2

Contents
LP 389 IP Phone Features....................................................................................7
Connecting the phone .........................................................................................11
Keypad Layout........................................................................................................12
The keys of the Alphanumeric block.......................................................13
The keys of the Navigation block.............................................................14
The keys of the Function block .................................................................14
The keys of the Audio Control, Speaker block ....................................15
The keys of the Feature block...................................................................15
Back Panel ........................................................................................................16
Left Panel ..........................................................................................................16
LCD Menu Tree ................................................................................................17
Device Settings....................................................................................................19
Use fixed IP for network connection.......................................................19
Use DHCP for network connection...........................................................19
Change IP address when use fixed IP address...................................20
Change Network Mask for Fixed IP Network .......................................20
Change Fixed IP default gateway ............................................................21
Change Primary DNS Setting ....................................................................21
Change Secondary DNS Settings.............................................................22
Enable VLAN (0: for disable, 1: reserved): 2-4096 ........................................22
Change User ID...............................................................................................23
Change User Password Login > Login Password........................................23
Change Line Preference (no answer time out) Line Preference >
No Answer Timeout.......................................................................................
24
Change Line Preference (auto answer) Line Preference > Pref Acct1 >
Auto Answer ........................................................................................................
24
Change Line Preference (busy forward) Line Preference > Pref Acct1 >
Busy FW ..............................................................................................................
25
Change Line Preference (no answer forward) Line Preference > Pref
Acct1 > No Answer FW.......................................................................................
25
Change Line Preference (unconditional forward) Line Preference >
Pref Acct1 > UnCond. FW ...................................................................................
26
Change Line Preference (Reject Anonymous Call) Line Preference >
Pref Acct1 > Reject Anonymous ..........................................................................
27
Change Line Preference (Call Waiting) Line Preference > Call Waiting27
SNTP Settings (SNTP Server) Admin Login > Time Setting > NTP Server
..............................................................................................................................
28
SNTP Setting (Refresh Interval) Admin Login > Time Setting > Refresh
3

Int .........................................................................................................................29
SNTP Setting (Time zone) Admin Login > Time Setting > Time Zone...29
Change SIP Account (Active/Inactive) Admin Login > SIP Account 1 >
Active Mode.........................................................................................................
Change SIP Account (SIP Register Tel No) Admin Login > SIP Account
1 > Tel No.............................................................................................................
Change SIP Account (SIP Register User ID) Admin Login > SIP
Account 1 > User ID ............................................................................................
Change SIP Account (SIP Register Password) Admin Login > SIP
Account 1 > Password..........................................................................................
Change SIP Account (SIP Register IP Type) Admin Login > SIP
Account 1 > PX Network Type ............................................................................
Change SIP Account (Enable Backup Proxy) Admin Login > SIP
Account 1 > Backup Enable.................................................................................
Change SIP Account (SIP Register Proxy IP) Admin Login > SIP
Account 1 > Proxy ...............................................................................................
Change SIP Account (Sip Register Proxy Port) Admin Login > SIP
Account 1 > Proxy Port........................................................................................
Change SIP Account (Sip outbound proxy) Admin Login > SIP
Account 1 > Out Proxy ........................................................................................
Change SIP Account (SIP outbound proxy port) Admin Login > SIP
Account 1 > Out Proxy Port.................................................................................
Change SIP Account (SIP display name) Admin Login > SIP Account
1 > Display Name.................................................................................................
Change SIP Account (SIP register domain) Admin Login > SIP
Account 1 > Domain ............................................................................................
Change SIP Account (Enable unregister all) Admin Login > SIP
Account 1 > Unregister All ..................................................................................
Change SIP Account (Idle Display Text Setting) Admin Login > SIP
Account 1 > Idle Display .....................................................................................
Change SIP Account (Enable/Disable voice mail) Admin Login >
SIP Account 1 > VMS Subscribe .........................................................................
Change SIP Account (Voice Mail Access Key) Admin Login > SIP
Account 1 > VMS Access Code ...........................................................................
Change SIP Account (Server Conference Prefix) Admin Login > SIP
Account 1 > XConf Prefix ...................................................................................
Change SIP Account (SIP hold Type) Admin Login > SIP Advance >
Hold Type.............................................................................................................
Change SIP Account (DTMF Relay Type) Admin Login > SIP Advance
> DTMF Relay .....................................................................................................
Change SIP Account (RFC 2833 payload type) Admin Login > SIP
Advance > RFC2833............................................................................................
4
30
31
31
32
33
34
35
36
36
37
38
39
40
41
41
42
43
44
44
45

Change SIP Account (Administrator password) Admin Login > Msic
> Admin Password ...............................................................................................
Change SIP Account (Inter Digit Time Out) Admin Login > Msic >
Inter Digit T/O......................................................................................................
Change SIP Account (End of Digit Key) Admin Login > Msic > End of
Digit .....................................................................................................................
Change SIP Account (Reset to Default) Admin Login > Msic > Reset
to Default..............................................................................................................
Show Firmware Version...............................................................................48
Firmware............................................................................................................48
Restart the IP Phone.....................................................................................48
Warm Reset IP phone (not recommended)..........................................49
Preference Settings............................................................................................49
Add a new entry of phone book ...............................................................49
Modify of an existing entry of phone book...........................................49
Delete an existing entry of phone book ................................................50
Check an existing phone book entry ......................................................50
Make Peer to Peer Call .................................................................................50
Received Instant Message ..........................................................................50
Received Instant Message ..........................................................................51
Received Instant Message ..........................................................................51
Enable call forward ........................................................................................51
Enable Do Not Disturb..................................................................................51
Check Missed Call ..........................................................................................51
Added a missed call to phone book ........................................................52
Mute the IP phone user voice to remote party...................................52
Enable to use headset or not.....................................................................52
View a missed call number.........................................................................52
Check received call........................................................................................52
View the received call number..................................................................53
Add a Received Call Record to Phone Book..........................................53
Delete Call History .........................................................................................54
Call Features.........................................................................................................55
Select a line and dial out.............................................................................55
Dialing a phone book entry by name .....................................................55
Dialing a entry by viewing phone book .................................................55
Dialing a received call number..................................................................56
Redial an existing dialed call from call history....................................56
Dial a missed call number...........................................................................56
Access voice mail system............................................................................56
Setup a conference ............................................................................................57
5
46
46
47
48

Call Transfer..........................................................................................................57
Redial a dialed call records..............................................................................58
Call Hold .................................................................................................................58
6

LP 389 IP Phone Features
The LP-389 is a SIP feature phone which can work on both IPv4 and IPv6
network simultaneously. It support up-to 3 register accounts and each
account can be configured to access IPv4 or IPv6 SIP freely. It makes the
IPv4 to IPv6 migration without any barriers.
Benefits
Support up-to 3 Register Accounts
The LP-389 supports 3 register account to different SIP proxy server and
each account can be configured to access IPv4 or IPv6 SIP network.
Rich Telephony Feature
The LP-389 provides a rich set of telephony feature which including call
transfer, forward, DND, VMS etc.
IPv4/IPv6 Dual Stack
LP-389 supports dual IPv4 and IPv6 IP stack which able to access IPv4
and IPv6 SIP server simultaneously.
Quick Phone Book Name Dialing
By using intelligent filter engine inside, operator/user can easy access
their phone book by using the keypad without using the difficult English
character selection keypad.
Interface:
Ethernet port (RJ-45, 10/100 base-T)
1-LAN port, for connecting to switch
1-PC port for connecting to PC
10/100 based Switch
PoE (IEEE 802.3af ) : optional
Earphone/Microphone Jack (3.5mm) for Headset
Handset Jack (RJ-10)
DC 12V power Jack
LCD Display:
Display Format: 16 Characters (W) x 2 lines(H)
View Size: 64(W) x 17.9 (H) mm
LCD Type: TN
Language: English, French, Chinese (optional)
IP Network connection
IPv4 (RFC 791)/IPV6(RFC 2460)
7

IPv6 Auto Configuration (RFC 4862)
MAC Address (IEEE 802.3)
Static IP
DHCP Client (RFC 2131)
PPPoE
DNS Client
TCP/UDP (RFC 793/768)
RTP/RTCP (RFC 1889/1890)
IPV4 ICMP (RFC 792)/IPV6 ICMP(RFC 4443)
TFTP Client
VOIP VLAN Support (802.1q/802.1p)
HTTP/HTTPS Server
QoS Support
Support IPV4 only, IPV6 only or dual stack mode
SIP Protocol
RFC3261 compliance
Support up-to 3 SIP Register Accounts (IPV4/V6 selectable)
Support Primary and Backup Proxy
SIP UDP Protocol
Support SIP compact Form
SIP Session Timer (RFC 4028)
MD5 Digest Authentication
Reliability of provisional responses PRACK (RFC3262)
Early/Delay media support
Offer/answer (RFC3264)
Message Waiting Indication (RFC3842)
Event Notification (RFC3265)
REFER (RFC3515)
Support DNS SRV to locating SIP Server (RFC 3263)
Support STUN NAT Traversal
Support “rport” parameter (RFC 3581)
Audio
G.711 A-law, μ-law
G.723.1 (6.3K/5.3K)
G.729A
GSM 6.10 (full rate)
Silence Suppression
VAD/CNG
Automatic Gain Control
In-band/out of band DTMF (RFC 4733 (RFC 2833)/SIP INFO)
Adaptive/Configurable Jitter Buffer
Acoustic Echo Cancellation
Volume Adjustment
8

PREFERENCE:
Customized Idle Text
Phone Book
Intelligent Phone Book Name Dialing
Clock, Daylight Saving, Call-timer
Call History of Missed, Received and Dialed
Dialing Plan
Digit Manipulation
Selectable Call Progress Tone
Support Personal Music Ring
Support Silence Ring
Auto Answer Mode
Support Auto Priority (Auto Switch) Calling
Support Specified Line Calling
Call Features
Caller ID display or inhibit
Voice Mail with Indication
Speed Dialing
Call Waiting/Switching between Calls
Call Forward (Busy, Unconditional, No Answer)
Blocking of Anonymous Call
Do not disturb
Call Hold
Call Mute
Call Transfer
Incoming Call Blocking List
Music-on-hold support (via IPPBX or local)
Conferencing (3-way conference over phone)
Multi-parties conference (via IPPBX)
Distinct Ring between on-net and off-net calls*
Call Pickup (via IPPBX)
Call Park/Retrieve (via IPPBX)
Voice Broadcasting (via IPPBX)
Barge-in & Barge-in Allowance List
Redialing/pre-dialing
Hot Line
Support Peer to Peer Dialing
Support Receiving and Display Instant Message (RFC 3428)
MANAGEMENT
SNTP with Daylight Saving
Multilanguage Web User Interface
Administrative Telnet CLI
3 Levels of User Access Right with Password protection
9

LCD Administration Login
Provides System Status
Diagnostics (debug through syslog)
Configuration Backup/Restore
Reset to Default
Dual Firmware Image Backup
Support http provisioning through MAC address
Support Welltech advanced provisioning system (WellEMS 9510)
Environmental
Dimension: 200 × 95 × 223 mm (Desktop)
Weight: 1.17kg (unit)
Operating Temp. & Humidity
- Temp.: 0°C~45°C (32°F~113°F)
- Humidity: 10%~90% relative humidity, non-condensing
Power Adaptor:
- INPUT: AC100V~240V, 50/60Hz
- OUTPUT: DC 12V, 1.5A
Power Consumption of PoE : 4 Watts
Regulatory: FCC (Part 15, Class B) & CE
10

Connecting the phone
Fig. 1
Fig. 2
Next plug the Ethernet (network) cable into the RJ45 connector labeled LAN,
and plug the other end into the network side to establish a data link. The
second RJ45 connector, labeled PC, is for daisy-chaining further Ethernet
devices (switch inside).
If you are using an external power supply, please insert the plug of the
power supply into the connector labeled next to the LAN port.
If you want to use a headset, it can be connected to the audio jack (3.5 mm)
on the left hand side of the LP389.
11
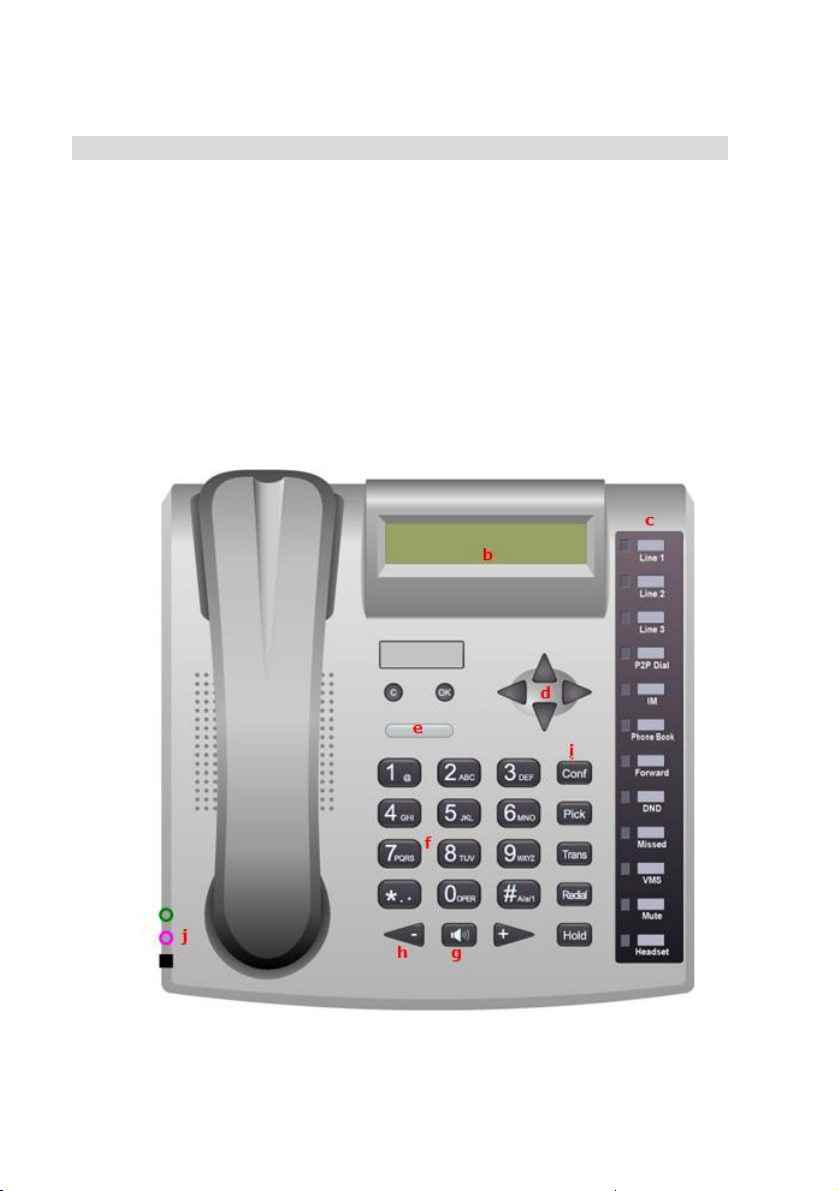
Keypad Layout
The numeric keypad with the keys 0 to 9, *, and # is used to enter digits
and letters. Depending on the operating mode, different actions can be
performed (see the table below):
• Entry of digits only (e.g., when dialing a phone number)
• Typing in letters and digits by pressing the keys repeatedly
(similar to a cellular phone), etc.
Keypad and LEDs:
12

a
○
Handset
f
○
Alphanumeric Keys
b
○
Display
c
○
Function Keys
d
○
Navigation Keys
e
○
Status Indication
Use the MENU key “
input, use the CANCEL key “ ”. The ENTER key “ ” confirms actions,
selections and inputs. For navigation, use the large round navigation key in
the middle.
Depending on the operating mode, the keys can have context-specific
meanings which are described in the manual.
The four soft keys located below the display are context-sensitive function
keys. Their current mapping is depicted with symbols in the bottom line on
the display.
The twelve keys on the right with LEDs next to them are the programmable
function keys onto which different functionalities can be mapped.
By default they are mapped to trunk lines. An incoming call is indicated by
the fast-blinking LED of the trunk line. To pick it up, press the
corresponding key.
To put the call on hold, press the key again. To pick up a call on hold, as
indicated by the slow-blinking LED, press the corresponding key.
” to call up the main menu. To cancel actions or
g
○
Speaker
h
○
Audio Control Keys
i
○
Feature Keys
Headset (3.5mm Audio Jack) &
j
○
Handset Jack
The keys of the Alphanumeric block
Key Digits Lower case Upper case
0
1
(SPC)_0 (SPC)_0
@ @
13

2
3
4
5
6
7
8
9
“*”, . *, .
#, A/a/1 End of digits and input method switch key
The keys of the Navigation block
Key Description
1. Cancel for the menu setting or number typing.
2. Reject the incoming calls
OK for the menu setting
Up arrow key
1. Down arrow key
2. Enter phone book directory
1. Right arrow
2. Enter key for the menu setting
2abc 2ABC
3def 3DEF
4ghi 4GHI
5jkl 5JKL
6mno 6MNO
7pqrs$ 7PQRS$
8tuv 8TUV
9wxyz 9WXYZ
Left arrow and return key for the menu setting
The keys of the Function block
Key Description
Line1 switch key, flashing for the holding and incoming calls
14

Line2 switch key, flashing for the holding and incoming calls
Line3 switch key, flashing for the holding and incoming calls
Peer to Peer call dialing. By press this key, you should able to type the
peering sip address by using keypad. Instead of using the P2P dialing, you
can should phone book for a predefined sip URL. Please refer to
Administrator guide for detail.
Instant Message Indicate and viewing. When an instant
message was received, the LED will light on. Press the key
will start to view the Instant message from the LCD.
Opens the phone book. Use the navigation key to scroll within the phone
book, or use name dialing feature to select to dialed name
Enable or disable unconditional forward
Do not disturb mode on/off
Show the miss called records
LED for “Message Waiting Indication” (MWI)– blinking
When LP389 is in idle state (off hook), press this key to turn on or off the
silent ring. When mute LED is on during the off hook state, it indicates
LP389 is in silent ring mode. During the call, it is the microphone mute
indicator and switch.
Select to use headset or not
The keys of the Audio Control, Speaker block
Key Description
Speaker on/off (headset on/off when headset is turned on)
Adjust volume (higher)
Adjust volume (lower)
The keys of the Feature block
Key Description
15

Back Panel
Slot Description
+12V DC
Conference key
Call pickup
Call transfer
Redial
Call hold/retrieve
+12V DC Power input outlet
PC
LAN
Left Panel
Handset
Sound
and Microphone
RJ-45 connector, connected directory to the PC thought
the straight CAT-5 cable.
RJ-45 connector, connected directory to the Hub
thought the straight CAT-5 cable (Support optional POE
feature).
Slot Description
Handset slot
3.5mm Audio Connector:
Pink: Microphone
Green: Ear
Blue: Non-Used
16

LCD Menu Tree
\
+
Call Records
Network
Setting
Login
Line
Preference
Volume
Missed Calls
Received Calls
Dialed Calls
Deleted Calls
IPv4 Only
IP Support
Network Mode
Address
IPv4/IPv6
IPv6 Only
Fixed
DHCP
NetMask Default GW
Primary DNS
DNS Setting
Secondary
DNS
VLAN Tag
Login ID
Login Password
No Answer
Timeout
Pref Acct1
Prêt Acct2
Pref Acct3
Call Waiting
No Ans Timeout
Speaker Mic
Handset Mic
Speaker Ring
Headset Ring
Auto Answer Time
Auto Answer
Busy FW No Answer FW
UnCond. FW
Reject Anonymou
17

Admin Login
Password
Firmware
Reboot
Soft Reset
Firmware version
Reboot?
Soft Reset?
Time Setting
SIP Account 1
SIP Account 2
SIP Account 3
SIP Advance
Feature Key
Misc
Reset To Default
NTP Server
Refresh Int
Timezone
Active Mode
Tel N o
User ID
Password
Px Network
Backup Enable
Proxy
Display Name
Domain
Register TTL
Unregister All
Idle Display
VMS Subscribe
VMS Access
Code
XConf Prefix
Hold Type
DTMF_Relay
RFC 2833
Pickup
Direct Pickup
Admin
Password
Inter Digit T/O
End of Digit
Admin
Password
18

Device Settings
Use fixed IP for network connection
Network Setting > Network Mode (Fixed)
Action
1
Use DHCP for network connection
Network Setting > Network Mode (DHCP)
Action
1
LCD Output 1 Action 2 LCD Output 2
>Call Records
Network Setting
Login
Reset to Default
Reboot
Soft Reset
>Network Mode
Address
Net Mask
Default Gateway
DNS Setting
VLAN Tag
Saving…… - -
LCD Output 1 Action 2 LCD Output 2
>Call Records
Network Setting
Login
Reset to Default
Reboot
Soft Reset
>Network Mode
Address
Net Mask
Default Gateway
DNS Setting
VLAN Tag
Fixed
>DHCP
19
Call Records
>Network Setting
Login
Reset to Default
Reboot
Soft Reset
>Fixed
DHCP
Call Records
>Network Setting
Login
Reset to Default
Reboot
Soft Reset
>Fixed
DHCP
Saving……

Change IP address when use fixed IP address
Network Setting > Address
Action
1
LCD Output 1 Action 2
>Call Records
Network Setting
Login
Reset to Default
Reboot
Soft Reset
>Network Mode
Address
Net Mask
Default Gateway
DNS Setting
VLAN Tag
IPv4 Only
IPv4/IPv6
IPv6 Only
>Network Mode
Address
Net Mask
Default Gateway
DNS Setting
VLAN Tag
IP Address:
IPv6 Address:
+
Call Records
>Network Setting
Login
Reset to Default
Reboot
Soft Reset
>IP Support
Network Mode
Address
Net Mask
Default Gateway
DNS Setting
VLAN Tag
IPv4/IPv6 *
IP Support
Network Mode
>Address
Net Mask
Default Gateway
DNS Setting
VLAN Tag
IP Address:
192.168.19.22
IPv6 Address:
2001:1440:1:0:2001:a8ff:fe06:66b8
Change Network Mask for Fixed IP Network
Network Setting > Net Mask
Action
1
LCD Output 1 Action 2
>Call Records
Network Setting
Login
Reset to Default
Reboot
Soft Reset
>Network Mode
Address
Net Mask
Default Gateway
DNS Setting
VLAN Tag
Call Records
>Network Setting
Login
Reset to Default
Reboot
Soft Reset
IP Support
Network Mode
Address
IPv6 Address
>Net Mask
Default Gateway
LCD Output 2
LCD Output 2
20

DNS Setting
VLAN Tag
Net Mask:
255.255.255.0
Net Mask:
255.255.248.0
Saving….. - -
~
Net Mask:
Modify?
Net Mask:
255.255.255.240
Change Fixed IP default gateway
Network Setting > Default Gateway
Action
1
LCD Output 1 Action 2
>Call Records
Network Setting
Login
Reset to Default
Reboot
Soft Reset
>Network Mode
Address
Net Mask
Default Gateway
DNS Setting
VLAN Tag
Default GW:
192.168.19.254
Default GW:
192.168.19.254
Saving….. - -
~
Call Records
>Network Setting
Login
Reset to Default
Reboot
Soft Reset
IP Support
Network Mode
Address
IPv6 Address
Net Mask
>Default Gateway
DNS Setting
VLAN Tag
Default GW:
Modify?
Default GW:
211.72.15.49
LCD Output 2
Change Primary DNS Setting
Network Setting > DNS Setting (Primary DNS)
Action 1 LCD Output 1 Action 2 LCD Output 2
>Call Records
Network Setting
Login
Reset to Default
Reboot
Soft Reset
>Network Mode
Address
Net Mask
Default Gateway
DNS Setting
VLAN Tag
21
Call Records
>Network Setting
Login
Reset to Default
Reboot
Soft Reset
Network Mode
Address
Net Mask
Default Gateway
>DNS Setting
VLAN Tag

>Primary DNS
Secondary DNS
Primary DNS:
Modify?
~
Primary DNS:
168.95.1.192
Primary DNS:
168.95.1.1
Primary DNS:
168.95.1.1
Saving….
Change Secondary DNS Settings
Network Setting > DNS Setting (Secondary DNS)
Action 1 LCD Output 1 Action 2 LCD Output 2
Call Records
>Network Setting
Login
Reset to Default
Reboot
Soft Reset
IP Support
Network Mode
Address
IPv6 Address
Net Mask
Default Gateway
>DNS Setting
VLAN Tag
Secondary DNS:
168.95.1.1
Secondary DNS:
168.95.1.1
Saving….
~
>Call Records
Network Setting
Login
Reset to Default
Reboot
Soft Reset
>Network Mode
Address
Net Mask
Default Gateway
DNS Setting
VLAN Tag
Primary DNS
>Secondary DNS
Secondary DNS:
Modify?
Secondary DNS:
168.95.1.192
Enable VLAN
(0: for disable, 1: reserved): 2-4096
Network Setting > VLAN Tag:
Action
1
>Call Records
Network Setting
Login
Line Preference
Volume
Admin Login
Firmware
Reboot
Soft Reset
>Network Mode
LCD Output 1 Action 2
22
LCD Output 2
Call Records
>Network Setting
Login
Line Preference
Volume
Admin Login
Firmware
Reboot
Soft Reset
IP Support

Address
Net Mask
Default Gateway
DNS Setting
VLAN Tag
VLAN Tag:
VLAN Tag:
0
Saving…..
Change User ID
Login > Login ID
Action 1 LCD Output 1
>Call Records
Network Setting
Login
Line Preference
~
or
Volume
Admin Login
Firmware
Reboot
Soft Reset
>Login ID
Login Password
Login ID:
Modify?
Login ID: 1
Irene888
Change User Password
Login > Login Password
Action 1 LCD Output 1 Action 2
>Call Records
Network Setting
Login
Line Preference
Volume
Admin Login
Firmware
Reboot
Soft Reset
Login ID
>Login Password
23
~
-
Action
2
Network Mode
Address
IPv6 Address
Net Mask
Default Gateway
DNS Setting
>VLAN Tag
VLAN Tag:
Modify?
VLAN Tag:
320
-
LCD Output 2
Call Records
Network Setting
>Login
Line Preference
Volume
Admin Login
Firmware
Reboot
Soft Reset
Login ID:
12345
Saving……
LCD Output 2
Call Records
Network Setting
>Login
Line Preference
Volume
Admin Login
Firmware
Reboot
Soft Reset
Login Password:
**********

~
or
Login Password:
Modify?
Login Password: 1
*********
Change Line Preference (no answer time out)
Line Preference > No Answer Timeout
Action 1 LCD Output 1 Action 2
>Call Records
Network Setting
Login
Line Preference
~
or
Volume
Admin Login
Firmware
Reboot
Soft Reset
Line Preference
>No Ans Timeout
Pref Acct1
Pref Acct2
Pref Acct3
Call Waiting
Timeout:
Modify?
Login Password:
30
Change Line Preference (auto answer)
Line Preference > Pref Acct1 > Auto Answer
Action 1 LCD Output 1 Action 2
>Call Records
Network Setting
Login
Line Preference
Volume
Admin Login
Firmware
Reboot
Soft Reset
Line Preference
No Ans Timeout
>Pref Acct1
Pref Acct2
Pref Acct3
Call Waiting
>Auto Answer Time
Auto Answer
Busy FW
Login Password: a
*********
Saving……
LCD Output 2
Call Records
Network Setting
Login
>Line Preference
Volume
Admin Login
Firmware
Reboot
Soft Reset
Timeout:
120
Timeout:
30
Saving……
LCD Output 2
Call Records
Network Setting
Login
>Line Preference
Volume
Admin Login
Firmware
Reboot
Soft Reset
>Auto Answer Time
Auto Answer
Busy FW
No Answer FW
UnCond. FW
Reject Anonymous
Timeout:
3
24

No Answer FW
UnCond. FW
Reject Anonymous
>Auto Answer Time
>Auto Answer
Busy FW
No Answer FW
UnCond. FW
Reject Anonymous
>No *
Yes
Change Line Preference (busy forward)
Line Preference > Pref Acct1 > Busy FW
Action 1 LCD Output 1 Action 2
>Call Records
Network Setting
Login
Line Preference
~
or
Volume
Admin Login
Firmware
Reboot
Soft Reset
Line Preference
No Ans Timeout
>Pref Acct1
Pref Acct2
Pref Acct3
Call Waiting
Auto Answer Time
Auto Answer
>Busy FW
No Answer FW
UnCond. FW
Reject Anonymous
Busy FW:
Modify?
Busy FW:
0702069222
Change Line Preference (no answer forward)
Line Preference > Pref Acct1 > No Answer FW
Action 1 LCD Output 1 Action 2
>Call Records
Network Setting
Login
Line Preference
Volume
25
>No
Yes
Saving……
LCD Output 2
Call Records
Network Setting
Login
>Line Preference
Volume
Admin Login
Firmware
Reboot
Soft Reset
>Auto Answer Time
Auto Answer
Busy FW
No Answer FW
UnCond. FW
Reject Anonymous
Busy FW:
Busy FW:
Saving……
LCD Output 2
Call Records
Network Setting
Login
>Line Preference
Volume

Admin Login
Firmware
Reboot
Soft Reset
Line Preference
No Ans Timeout
~
or
>Pref Acct1
Pref Acct2
Pref Acct3
Call Waiting
Auto Answer Time
Auto Answer
Busy FW
>No Answer FW
UnCond. FW
Reject Anonymous
No Answer FW:
Modify?
No Answer FW:
0702069333
Admin Login
Firmware
Reboot
Soft Reset
>Auto Answer Time
Auto Answer
Busy FW
No Answer FW
UnCond. FW
Reject Anonymous
No Answer FW:
No Answer FW:
Saving……
Change Line Preference (unconditional forward)
Line Preference > Pref Acct1 > UnCond. FW
Action 1 LCD Output 1 Action 2
>Call Records
Network Setting
Login
Line Preference
~
or
Volume
Admin Login
Firmware
Reboot
Soft Reset
Line Preference
No Ans Timeout
>Pref Acct1
Pref Acct2
Pref Acct3
Call Waiting
Auto Answer Time
Auto Answer
Busy FW
No Answer FW
>UnCond. FW
Reject Anonymous
UnCond. FW:
Modify?
UnCond. FW:
0702069555
26
Call Records
Network Setting
Login
>Line Preference
Volume
Admin Login
Firmware
Reboot
Soft Reset
>Auto Answer Time
Auto Answer
Busy FW
No Answer FW
UnCond. FW
Reject Anonymous
UnCond. FW:
UnCond. FW:
Saving……
LCD Output 2

Change Line Preference (Reject Anonymous Call)
Line Preference > Pref Acct1 > Reject Anonymous
Action 1 LCD Output 1 Action 2
>Call Records
Network Setting
Login
Line Preference
Volume
Admin Login
Firmware
Reboot
Soft Reset
Line Preference
No Ans Timeout
>Pref Acct1
Pref Acct2
Pref Acct3
Call Waiting
Auto Answer Time
Auto Answer
Busy FW
No Answer FW
UnCond. FW
>Reject Anonymous
>No *
Yes
Call Records
Network Setting
Login
>Line Preference
Volume
Admin Login
Firmware
Reboot
Soft Reset
>Auto Answer Time
Auto Answer
Busy FW
No Answer FW
UnCond. FW
Reject Anonymous
>No
Yes
Saving……
Change Line Preference (Call Waiting)
Line Preference > Call Waiting
Action 1 LCD Output 1 Action 2
>Call Records
Network Setting
Login
Line Preference
Volume
Admin Login
Firmware
Reboot
Soft Reset
Line Preference
No Ans Timeout
>Pref Acct1
Pref Acct2
Pref Acct3
>Call Waiting
>Disable *
Enable
27
Call Records
Network Setting
Login
>Line Preference
Volume
Admin Login
Firmware
Reboot
Soft Reset
>Disable
Enable
Saving……
LCD Output 2
LCD Output 2

Change Line Preference (microphone volume)
Volume > Speaker Mic
(Handset Mic, Speaker Ring and Headset Ring same as this process)
Action 1 LCD Output 1 Action 2
>Call Records
Network Setting
Login
Line Preference
~
or
Volume
Admin Login
Firmware
Reboot
Soft Reset
>Speaker Mic
Handset Mic
Speaker Ring
Headset Ring
Volume:
Modify?
Volume:
6
SNTP Settings (SNTP Server)
Admin Login > Time Setting > NTP Server
Action 1 LCD Output 1 Action 2
>Call Records
Network Setting
Login
Line Preference
~
Volume
Admin Login
Firmware
Reboot
Soft Reset
Password: a
>Time Setting
SIP Account 1
SIP Account 2
SIP Account 3
SIP Advance
Feature Key
Misc
Reset to Default
NTP Server:
NTP Server:
clock.stdtime.gov.tw
28
~
LCD Output 2
Call Records
Network Setting
Login
Line Preference
>Volume
Admin Login
Firmware
Reboot
Soft Reset
Volume:
5
Volume:
5
Saving……
LCD Output 2
Call Records
Network Setting
Login
Line Preference
Volume
>Admin Login
Firmware
Reboot
Soft Reset
Password:
****
>NTP Server
Refresh Int
Time Zone
NTP Server:
Modify?
Pls Reset….

SNTP Setting (Refresh Interval)
Admin Login > Time Setting > Refresh Int
Action 1 LCD Output 1 Action 2
>Call Records
Network Setting
Login
Line Preference
~
Volume
Admin Login
Firmware
Reboot
Soft Reset
Password: a
>Time Setting
SIP Account 1
SIP Account 2
SIP Account 3
SIP Advance
Feature Key
Misc
Reset to Default
Refresh Int:
7200
Refresh Int:
3600
SNTP Setting (Time zone)
Admin Login > Time Setting > Time Zone
Action 1 LCD Output 1 Action 2
>Call Records
Network Setting
Login
Line Preference
Volume
Admin Login
Firmware
Reboot
Soft Reset
Password: a
>Time Setting
SIP Account 1
SIP Account 2
SIP Account 3
SIP Advance
29
LCD Output 2
Call Records
Network Setting
Login
Line Preference
Volume
>Admin Login
Firmware
Reboot
Soft Reset
~
~
Password:
****
NTP Server
>Refresh Int
Time Zone
Refresh Int:
Modify?
Saving……
Call Records
Network Setting
Login
Line Preference
Volume
>Admin Login
Firmware
Reboot
Soft Reset
Password:
****
NTP Server
Refresh Int
>Time Zone
LCD Output 2

Feature Key
Misc
Reset to Default
>GMT+13:30
GMT+13:00
.
.
.
.
Change SIP Account (Active/Inactive)
Admin Login > SIP Account 1 > Active Mode
Action 1 LCD Output 1 Action 2
>Call Records
Network Setting
Login
Line Preference
Volume
Admin Login
Firmware
Reboot
Soft Reset
Password: a
>Time Setting
SIP Account 1
SIP Account 2
SIP Account 3
SIP Advance
Feature Key
Misc
Reset to Default
>Active Mode
Tel No
User ID
Password
PX Network Type
Backup Enable
Proxy
Display Name
Domain
Register TTL
Unregister All
Idle Display
VMS Subscribe
VMS Access Code
XConf Prefix
>Inactive
Active *
Pls Reset….
LCD Output 2
Call Records
Network Setting
Login
Line Preference
Volume
>Admin Login
Firmware
Reboot
Soft Reset
~
Password:
****
Time Setting
>SIP Account 1
SIP Account 2
SIP Account 3
SIP Advance
Feature Key
Misc
Reset to Default
>Inactive
Active *
Saving….
30

Change SIP Account (SIP Register Tel No)
Admin Login > SIP Account 1 > Tel No
Action 1 LCD Output 1 Action 2
>Call Records
Network Setting
Login
Line Preference
Volume
Admin Login
Firmware
Reboot
Soft Reset
Password: a
>Time Setting
SIP Account 1
SIP Account 2
SIP Account 3
SIP Advance
Feature Key
Misc
Reset to Default
Active Mode
>Tel No
User ID
Password
PX Network Type
Backup Enable
Proxy
Display Name
Domain
Register TTL
Unregister All
Idle Display
VMS Subscribe
VMS Access Code
XConf Prefix
Tel No:
Modify?
Saving…. -
~
Change SIP Account (SIP Register User ID)
Admin Login > SIP Account 1 > User ID
Action 1 LCD Output 1 Action 2
>Call Records
31
LCD Output 2
Call Records
Network Setting
Login
Line Preference
Volume
>Admin Login
Firmware
Reboot
Soft Reset
Password:
****
Time Setting
>SIP Account 1
SIP Account 2
SIP Account 3
SIP Advance
Feature Key
Misc
Reset to Default
Tel No:
101
Tel No:
070202123
LCD Output 2
Call Records

Network Setting
Login
Line Preference
Volume
Admin Login
Firmware
Reboot
Soft Reset
Password: a
>Time Setting
SIP Account 1
SIP Account 2
SIP Account 3
SIP Advance
Feature Key
Misc
Reset to Default
Active Mode
Tel No
>User ID
Password
PX Network Type
Backup Enable
Proxy
Display Name
Domain
Register TTL
Unregister All
Idle Display
VMS Subscribe
VMS Access Code
XConf Prefix
User ID:
Modify?
Saving…. -
~
Change SIP Account (SIP Register Password)
Admin Login > SIP Account 1 > Password
Action 1 LCD Output 1 Action 2
>Call Records
Network Setting
Login
Line Preference
Volume
Admin Login
Firmware
Reboot
Soft Reset
32
Network Setting
Login
Line Preference
Volume
>Admin Login
Firmware
Reboot
Soft Reset
Password:
****
Time Setting
>SIP Account 1
SIP Account 2
SIP Account 3
SIP Advance
Feature Key
Misc
Reset to Default
User ID:
101
User ID:
070202123
LCD Output 2
Call Records
Network Setting
Login
Line Preference
Volume
>Admin Login
Firmware
Reboot
Soft Reset

Password: a
>Time Setting
SIP Account 1
SIP Account 2
SIP Account 3
SIP Advance
Feature Key
Misc
Reset to Default
Active Mode
Tel No
User ID
>Password
PX Network Type
Backup Enable
Proxy
Display Name
Domain
Register TTL
Unregister All
Idle Display
VMS Subscribe
VMS Access Code
XConf Prefix
Password:
Modify?
Saving…. -
~
Change SIP Account (SIP Register IP Type)
Admin Login > SIP Account 1 > PX Network Type
Action 1 LCD Output 1 Action 2
>Call Records
Network Setting
Login
Line Preference
Volume
Admin Login
Firmware
Reboot
Soft Reset
Password: a
>Time Setting
SIP Account 1
SIP Account 2
SIP Account 3
SIP Advance
Feature Key
Misc
33
~
Password:
****
Time Setting
>SIP Account 1
SIP Account 2
SIP Account 3
SIP Advance
Feature Key
Misc
Reset to Default
Password:
101
Password:
070202123
LCD Output 2
Call Records
Network Setting
Login
Line Preference
Volume
>Admin Login
Firmware
Reboot
Soft Reset
Password:
****
Time Setting
>SIP Account 1
SIP Account 2
SIP Account 3
SIP Advance
Feature Key
Misc

Reset to Default Reset to Default
Active Mode
Tel No
User ID
Password
>PX Network Type
Backup Enable
Proxy
Display Name
Domain
Register TTL
Unregister All
Idle Display
VMS Subscribe
VMS Access Code
XConf Prefix
Saving…. -
Change SIP Account (Enable Backup Proxy)
Admin Login > SIP Account 1 > Backup Enable
Action 1 LCD Output 1 Action 2
>Call Records
Network Setting
Login
Line Preference
Volume
Admin Login
Firmware
Reboot
Soft Reset
Password: a
>Time Setting
SIP Account 1
SIP Account 2
SIP Account 3
SIP Advance
Feature Key
Misc
Reset to Default
Active Mode
Tel No
User ID
Password
PX Network Type
>Backup Enable
Proxy
Display Name
Domain
Register TTL
34
~
>IPv4 *
IPv6
LCD Output 2
Call Records
Network Setting
Login
Line Preference
Volume
>Admin Login
Firmware
Reboot
Soft Reset
Password:
****
Time Setting
>SIP Account 1
SIP Account 2
SIP Account 3
SIP Advance
Feature Key
Misc
Reset to Default
>Disable*
Enable

Unregister All
Idle Display
VMS Subscribe
VMS Access Code
XConf Prefix
Saving…. -
Change SIP Account (SIP Register Proxy IP)
Admin Login > SIP Account 1 > Proxy
Action 1 LCD Output 1 Action 2
>Call Records
Network Setting
Login
Line Preference
~
Volume
Admin Login
Firmware
Reboot
Soft Reset
Password: a
>Time Setting
SIP Account 1
SIP Account 2
SIP Account 3
SIP Advance
Feature Key
Misc
Reset to Default
Active Mode
Tel No
User ID
Password
PX Network Type
Backup Enable
>Proxy
Display Name
Domain
Register TTL
Unregister All
Idle Display
VMS Subscribe
VMS Access Code
XConf Prefix
Proxy IP:
Proxy IP: 1
211.72.15.52
35
~
LCD Output 2
Call Records
Network Setting
Login
Line Preference
Volume
>Admin Login
Firmware
Reboot
Soft Reset
Password:
****
Time Setting
>SIP Account 1
SIP Account 2
SIP Account 3
SIP Advance
Feature Key
Misc
Reset to Default
>Proxy IP
Proxy Port
Out PX IP
Out PX Port
Proxy IP:
Modify?
Saving…..

Change SIP Account (Sip Register Proxy Port)
Admin Login > SIP Account 1 > Proxy Port
Action 1 LCD Output 1 Action 2
>Call Records
Network Setting
Login
Line Preference
~
Volume
Admin Login
Firmware
Reboot
Soft Reset
Password: a
>Time Setting
SIP Account 1
SIP Account 2
SIP Account 3
SIP Advance
Feature Key
Misc
Reset to Default
Active Mode
Tel No
User ID
Password
PX Network Type
Backup Enable
>Proxy
Display Name
Domain
Register TTL
Unregister All
Idle Display
VMS Subscribe
VMS Access Code
XConf Prefix
Proxy Port:
Proxy Port:
8080
~
Change SIP Account (Sip outbound proxy)
Admin Login > SIP Account 1 > Out Proxy
Action 1 LCD Output 1 Action 2
>Call Records
Network Setting
Login
Line Preference
36
LCD Output 2
Call Records
Network Setting
Login
Line Preference
Volume
>Admin Login
Firmware
Reboot
Soft Reset
Password:
****
Time Setting
>SIP Account 1
SIP Account 2
SIP Account 3
SIP Advance
Feature Key
Misc
Reset to Default
Proxy IP
>Proxy Port
Out PX IP
Out PX Port
Proxy IP:
Modify?
Saving…..
LCD Output 2
Call Records
Network Setting
Login
Line Preference

Volume
Admin Login
Firmware
Reboot
Soft Reset
~
Password: a
>Time Setting
SIP Account 1
SIP Account 2
SIP Account 3
SIP Advance
Feature Key
Misc
Reset to Default
Active Mode
Tel No
User ID
Password
PX Network Type
Backup Enable
>Proxy
Display Name
Domain
Register TTL
Unregister All
Idle Display
VMS Subscribe
VMS Access Code
XConf Prefix
Out Proxy IP:
Proxy IP: 1
211.72.15.52
~
Volume
>Admin Login
Firmware
Reboot
Soft Reset
Password:
****
Time Setting
>SIP Account 1
SIP Account 2
SIP Account 3
SIP Advance
Feature Key
Misc
Reset to Default
Proxy IP
Proxy Port
>Out PX IP
Out PX Port
Out Proxy IP:
Modify?
Saving…..
Change SIP Account (SIP outbound proxy port)
Admin Login > SIP Account 1 > Out Proxy Port
Action 1 LCD Output 1 Action 2
>Call Records
Network Setting
Login
Line Preference
Volume
Admin Login
Firmware
Reboot
Soft Reset
Password: a
>Time Setting
~
37
Call Records
Network Setting
Login
Line Preference
Volume
>Admin Login
Firmware
Reboot
Soft Reset
Password:
****
Time Setting
LCD Output 2

SIP Account 1
SIP Account 2
SIP Account 3
SIP Advance
Feature Key
Misc
Reset to Default
Active Mode
Tel No
User ID
Password
PX Network Type
Backup Enable
>Proxy
~
Display Name
Domain
Register TTL
Unregister All
Idle Display
VMS Subscribe
VMS Access Code
XConf Prefix
Out Proxy Port:
Out Proxy Port:
8080
Change SIP Account (SIP display name)
Admin Login > SIP Account 1 > Display Name
Action 1 LCD Output 1 Action 2
>Call Records
Network Setting
Login
Line Preference
Volume
Admin Login
Firmware
Reboot
Soft Reset
Password: a
>Time Setting
SIP Account 1
SIP Account 2
SIP Account 3
SIP Advance
Feature Key
Misc
Reset to Default
~
>SIP Account 1
SIP Account 2
SIP Account 3
SIP Advance
Feature Key
Misc
Reset to Default
Proxy IP
Proxy Port
Out PX IP
>Out PX Port
Out Proxy IP:
Modify?
Saving…..
Call Records
Network Setting
Login
Line Preference
Volume
>Admin Login
Firmware
Reboot
Soft Reset
Password:
****
Time Setting
>SIP Account 1
SIP Account 2
SIP Account 3
SIP Advance
Feature Key
Misc
Reset to Default
LCD Output 2
38

Active Mode
Tel No
User ID
Password
PX Network Type
Backup Enable
Proxy
>Display Name
Domain
Register TTL
Unregister All
Idle Display
VMS Subscribe
VMS Access Code
XConf Prefix
Password:
Modify?
Saving…. -
~
Change SIP Account (SIP register domain)
Admin Login > SIP Account 1 > Domain
Action 1 LCD Output 1 Action 2
>Call Records
Network Setting
Login
Line Preference
Volume
Admin Login
Firmware
Reboot
Soft Reset
Password: a
>Time Setting
SIP Account 1
SIP Account 2
SIP Account 3
SIP Advance
Feature Key
Misc
Reset to Default
Active Mode
Tel No
User ID
Password
PX Network Type
Backup Enable
Proxy
Display Name
>Domain
39
~
Display Name:
101
Password: a
Daniel
LCD Output 2
Call Records
Network Setting
Login
Line Preference
Volume
>Admin Login
Firmware
Reboot
Soft Reset
Password:
****
Time Setting
>SIP Account 1
SIP Account 2
SIP Account 3
SIP Advance
Feature Key
Misc
Reset to Default
Domain:

Register TTL
Unregister All
Idle Display
VMS Subscribe
VMS Access Code
XConf Prefix
Domain:
Modify?
Saving…. -
~
Change SIP Account (Enable unregister all)
Admin Login > SIP Account 1 > Unregister All
Action 1 LCD Output 1 Action 2
>Call Records
Network Setting
Login
Line Preference
Volume
Admin Login
Firmware
Reboot
Soft Reset
Password: a
>Time Setting
SIP Account 1
SIP Account 2
SIP Account 3
SIP Advance
Feature Key
Misc
Reset to Default
Active Mode
Tel No
User ID
Password
PX Network Type
Backup Enable
Proxy
Display Name
Domain
Register TTL
>Unregister All
Idle Display
VMS Subscribe
VMS Access Code
XConf Prefix
>No *
Yes
40
~
Domain: a
Welltech.voip23
LCD Output 2
Call Records
Network Setting
Login
Line Preference
Volume
>Admin Login
Firmware
Reboot
Soft Reset
Password:
****
Time Setting
>SIP Account 1
SIP Account 2
SIP Account 3
SIP Advance
Feature Key
Misc
Reset to Default
>No
Yes *
Saving…

Change SIP Account (Idle Display Text Setting)
Admin Login > SIP Account 1 > Idle Display
Action 1 LCD Output 1 Action 2
>Call Records
Network Setting
Login
Line Preference
Volume
Admin Login
Firmware
Reboot
Soft Reset
Password: a
>Time Setting
SIP Account 1
SIP Account 2
SIP Account 3
SIP Advance
Feature Key
Misc
Reset to Default
Active Mode
Tel No
User ID
Password
PX Network Type
Backup Enable
Proxy
Display Name
Domain
Register TTL
Unregister All
>Idle Display
VMS Subscribe
VMS Access Code
XConf Prefix
Idle Display:
Modify?
Saving…. -
~
~
Call Records
Network Setting
Login
Line Preference
Volume
>Admin Login
Firmware
Reboot
Soft Reset
Password:
****
Time Setting
>SIP Account 1
SIP Account 2
SIP Account 3
SIP Advance
Feature Key
Misc
Reset to Default
Idle Display:
Idle Display: a
Daniel
Change SIP Account (Enable/Disable voice mail)
Admin Login > SIP Account 1 > VMS Subscribe
Action 1 LCD Output 1 Action 2
>Call Records
Network Setting
Login
Line Preference
41
Call Records
Network Setting
Login
Line Preference
LCD Output 2
LCD Output 2

Volume
Admin Login
Firmware
Reboot
Soft Reset
Password: a
>Time Setting
SIP Account 1
SIP Account 2
SIP Account 3
SIP Advance
Feature Key
Misc
Reset to Default
Active Mode
Tel No
User ID
Password
PX Network Type
Backup Enable
Proxy
Display Name
Domain
Register TTL
Unregister All
Idle Display
>VMS Subscribe
VMS Access Code
XConf Prefix
>Enable *
Disable
~
Change SIP Account (Voice Mail Access Key)
Admin Login > SIP Account 1 > VMS Access Code
Action 1 LCD Output 1 Action 2
>Call Records
Network Setting
Login
Line Preference
Volume
Admin Login
Firmware
Reboot
Soft Reset
Password: a
>Time Setting
SIP Account 1
SIP Account 2
42
~
Volume
>Admin Login
Firmware
Reboot
Soft Reset
Password:
****
Time Setting
>SIP Account 1
SIP Account 2
SIP Account 3
SIP Advance
Feature Key
Misc
Reset to Default
>Disable *
Enable
Saving….
LCD Output 2
Call Records
Network Setting
Login
Line Preference
Volume
>Admin Login
Firmware
Reboot
Soft Reset
Password:
****
Time Setting
>SIP Account 1
SIP Account 2

SIP Account 3
SIP Advance
Feature Key
Misc
Reset to Default
Active Mode
Tel No
User ID
Password
PX Network Type
Backup Enable
Proxy
Display Name
Domain
Register TTL
Unregister All
Idle Display
VMS Subscribe
>VMS Access Code
XConf Prefix
VMS Access Code:
Modify?
Saving…. -
~
SIP Account 3
SIP Advance
Feature Key
Misc
Reset to Default
VMS Access Code:
VMS Access Code:
*332
Change SIP Account (Server Conference Prefix)
Admin Login > SIP Account 1 > XConf Prefix
Action 1 LCD Output 1 Action 2
>Call Records
Network Setting
Login
Line Preference
Volume
Admin Login
Firmware
Reboot
Soft Reset
Password: a
>Time Setting
SIP Account 1
SIP Account 2
SIP Account 3
SIP Advance
Feature Key
Misc
Reset to Default
Active Mode
Tel No
User ID
Password
~
43
Call Records
Network Setting
Login
Line Preference
Volume
>Admin Login
Firmware
Reboot
Soft Reset
Password:
****
Time Setting
>SIP Account 1
SIP Account 2
SIP Account 3
SIP Advance
Feature Key
Misc
Reset to Default
XConf Prefix:
LCD Output 2

PX Network Type
Backup Enable
Proxy
Display Name
Domain
Register TTL
Unregister All
Idle Display
VMS Subscribe
VMS Access Code
>XConf Prefix
XConf Prefix:
Modify?
Saving…. -
~
Change SIP Account (SIP hold Type)
Admin Login > SIP Advance > Hold Type
Action 1 LCD Output 1 Action 2
>Call Records
Network Setting
Login
Line Preference
Volume
Admin Login
Firmware
Reboot
Soft Reset
Password: a
>Time Setting
SIP Account 1
SIP Account 2
SIP Account 3
SIP Advance
Feature Key
Misc
Reset to Default
>Hold Type
DTMF_Relay
RFC 2833
>0.0.0.0 *
Send Only
Inactvie
~
Change SIP Account (DTMF Relay Type)
Admin Login > SIP Advance > DTMF Relay
Action 1 LCD Output 1 Action 2
44
XConf Prefix:
*875
Call Records
Network Setting
Login
Line Preference
Volume
>Admin Login
Firmware
Reboot
Soft Reset
Password:
****
Time Setting
SIP Account 1
SIP Account 2
SIP Account 3
>SIP Advance
Feature Key
Misc
Reset to Default
>Send Only *
0.0.0.0
Inactvie
Saving….
LCD Output 2
LCD Output 2

>Call Records
Network Setting
Login
Line Preference
Volume
Admin Login
Firmware
Reboot
Soft Reset
Password: a
>Time Setting
SIP Account 1
SIP Account 2
SIP Account 3
SIP Advance
Feature Key
Misc
Reset to Default
Hold Type
>DTMF_Relay
RFC 2833
>2833/SIP INFO *
SIP INFO
2833/Inband
Inband
~
Change SIP Account (RFC 2833 payload type)
Admin Login > SIP Advance > RFC2833
Action 1 LCD Output 1 Action 2
>Call Records
Network Setting
Login
Line Preference
Volume
Admin Login
Firmware
Reboot
Soft Reset
Password: a
>Time Setting
SIP Account 1
SIP Account 2
SIP Account 3
SIP Advance
Feature Key
Misc
Reset to Default
45
~
Call Records
Network Setting
Login
Line Preference
Volume
>Admin Login
Firmware
Reboot
Soft Reset
Password:
****
Time Setting
SIP Account 1
SIP Account 2
SIP Account 3
>SIP Advance
Feature Key
Misc
Reset to Default
>Inband *
2833/SIP INFO
SIP INFO
2833/Inband
Saving….
LCD Output 2
Call Records
Network Setting
Login
Line Preference
Volume
>Admin Login
Firmware
Reboot
Soft Reset
Password:
****
Time Setting
SIP Account 1
SIP Account 2
SIP Account 3
>SIP Advance
Feature Key
Misc
Reset to Default

Hold Type
DTMF_Relay
>RFC 2833
>101 *
96
>96 *
101
>Inband *
2833/SIP INFO
SIP INFO
2833/Inband
>101 *
96
Saving….
Change SIP Account (Administrator password)
Admin Login > Msic > Admin Password
Action 1 LCD Output 1 Action 2
>Call Records
Network Setting
Login
Line Preference
Volume
Admin Login
Firmware
Reboot
Soft Reset
Password: a
>Time Setting
SIP Account 1
SIP Account 2
SIP Account 3
SIP Advance
Feature Key
Misc
Reset to Default
>Admin Password
Inter Digit T/O
End of Digit
Login Password:
Modify?
Saving…. - -
~
~
Call Records
Network Setting
Login
Line Preference
Volume
>Admin Login
Firmware
Reboot
Soft Reset
Password:
****
Time Setting
SIP Account 1
SIP Account 2
SIP Account 3
SIP Advance
Feature Key
>Misc
Reset to Default
Login Password:
****
Login Password: a
1234
Change SIP Account (Inter Digit Time Out)
Admin Login > Msic > Inter Digit T/O
Action 1 LCD Output 1 Action 2
>Call Records
Network Setting
Login
Line Preference
Volume
Admin Login
46
Call Records
Network Setting
Login
Line Preference
Volume
>Admin Login
LCD Output 2
LCD Output 2

Firmware
Reboot
Soft Reset
Password: a
>Time Setting
SIP Account 1
SIP Account 2
SIP Account 3
SIP Advance
Feature Key
Misc
Reset to Default
Admin Password
>Inter Digit T/O
End of Digit
Timeout:
Modify?
Saving…. - -
Change SIP Account (End of Digit Key)
Admin Login > Msic > End of Digit
Action 1 LCD Output 1 Action 2
>Call Records
Network Setting
Login
Line Preference
Volume
Admin Login
Firmware
Reboot
Soft Reset
Password: a
>Time Setting
SIP Account 1
SIP Account 2
SIP Account 3
SIP Advance
Feature Key
Misc
Reset to Default
Admin Password
Inter Digit T/O
>End of Digit
>None *
*
#
Firmware
Reboot
Soft Reset
~
~
~
Password:
****
Time Setting
SIP Account 1
SIP Account 2
SIP Account 3
SIP Advance
Feature Key
>Misc
Reset to Default
Timeout:
3
Timeout:
5
Call Records
Network Setting
Login
Line Preference
Volume
>Admin Login
Firmware
Reboot
Soft Reset
Password:
****
Time Setting
SIP Account 1
SIP Account 2
SIP Account 3
SIP Advance
Feature Key
>Misc
Reset to Default
>None
*
# *
Saving….
LCD Output 2
47

Saving…. - -
Change SIP Account (Reset to Default)
Admin Login > Msic > Reset to Default
Action 1 LCD Output 1 Action 2
>Call Records
Network Setting
Login
Line Preference
Volume
Admin Login
Firmware
Reboot
Soft Reset
Password: a
>Time Setting
SIP Account 1
SIP Account 2
SIP Account 3
SIP Advance
Feature Key
Misc
Reset to Default
>Reset?
Show Firmware Version
Firmware
Action 1 LCD Output 1 Action 2
>Call Records
Network Setting
Login
Line Preference
Volume
Admin Login
Firmware
Reboot
Soft Reset
Firmware
Lp600n.101.bin
Restart the IP Phone
Reboot
Action
1
LCD Output 1 Action 2
>Call Records
Network Setting
48
~
- -
LCD Output 2
Call Records
Network Setting
Login
Line Preference
Volume
>Admin Login
Firmware
Reboot
Soft Reset
Password:
****
Time Setting
SIP Account 1
SIP Account 2
SIP Account 3
SIP Advance
Feature Key
Misc
>Reset to Default
Rebooting…..
LCD Output 2
Call Records
Network Setting
Login
Line Preference
Volume
Admin Login
>Firmware
Reboot
Soft Reset
LCD Output 2
Call Records
Network Setting

Login
Line Preference
Volume
Admin Login
Firmware
Reboot
Soft Reset
>Reboot?
Warm Reset IP phone (not recommended)
Soft Reset
Action
1
LCD Output 1 Action 2
>Call Records
Network Setting
Login
Line Preference
Volume
Admin Login
Firmware
Reboot
Soft Reset
>Soft Reset?
Preference Settings
Login
Line Preference
Volume
Admin Login
Firmware
>Reboot
Soft Reset
Rebooting…..
LCD Output 2
Call Records
Network Setting
Login
Line Preference
Volume
Admin Login
Firmware
Reboot
>Soft Reset
Please Wait…..
Add a new entry of phone book
Phone Book (New)
Action 1 LCD Output 1 Action 2
>New Entry
~
or
~
Modify Entry
Delete Entry
Detail
Entry Name:
Irene Ko
Entry Number
070111
LCD Output 2
Entry Name
Entry Number
Saving….
Modify of an existing entry of phone book
Phone Book (Modify)
Action 1 LCD Output 1 Action 2
>New Entry
49
LCD Output 2
New Entry

~
or
~
Modify Entry
Delete Entry
Detail
>Irene Ko
Daniel888
Entry Name 1
IRENE123
Entry Number
0911222331
>Modify Entry
Delete Entry
Detail
Entry Name A
Irene Ko
Entry Number
070111
Saving….
Delete an existing entry of phone book
Phone Book (Delete)
Action 1 LCD Output 1 Action 2
>New Entry
Modify Entry
Delete Entry
Detail
>Irene Ko
Daniel888
LCD Output 2
New Entry
Modify Entry
>Delete Entry
Detail
Deleting…
Check an existing phone book entry
Phone Book (Detail)
Action 1 LCD Output 1 Action 2
>New Entry
Modify Entry
Delete Entry
Detail
>Daniel888
Samuel236
LCD Output 2
New Entry
Modify Entry
Delete Entry
>Detail
Daniel888
82265699
Make Peer to Peer Call
P2P Dial
Action 1 LCD Output 1 Action 2 LCD Output 2
P2P Dial: 1
Make P2P Call - -
~
or
Received Instant Message
IM > Display
Action 1 LCD Output 1 Action 2 LCD Output 2
>21000 *
>Display *
50
P2P Dial: 1
2003@192.168.19.23
>Display
Detail
Delete Records
Test 1234

Detail
Delete Records
Received Instant Message
IM > Detail
Action 1 LCD Output 1 Action 2 LCD Output 2
>Display
>21000 *
Display
>Detail *
Delete Records
Detail
Delete Records
2009/12/31
13:33:33
Received Instant Message
IM > Delete Records
Action 1 LCD Output 1 Action 2 LCD Output 2
>Display
>21000 *
Display
Detail
>Delete Records *
-- -- --
Detail
Delete Records
Clear All?
Enable call forward
Forward
Action 1 LCD Output 1 Action 2 LCD Output 2
Unconditional
Saving…. - -
~
Enable Do Not Disturb
DND
Action Function Status Description
DND Enable
DND Disable
Check Missed Call
Call Records > Missed Calls
Action
1
LCD Output 1 Action 2 LCD Output 2
>Call Records
Network Setting
Login
Reset to Default
51
>Missed Calls
Received Calls
Dialed Calls
Deleted Record
Unconditional
0936111222
Light up while users enabled
the DND function
Light off while users disable
the DND function

Reboot
Soft Reset
Shows missed calls
(e.g. 080123)
- -
Added a missed call to phone book
Missed Calls (Add to Book)
Action 1 LCD Output 1 Action 2 LCD Output 2
>0936111222
004
Entry Name 1
Saving…. - -
~
or
Dial Out
Detail
>Add to Book
Entry Name 1
IRENE123
Mute the IP phone user voice to remote party
Mute
Action Description
Light up while users enabled the mute
Light off while users cancel the mute
Enable to use headset or not
Headset
Action 1 Description Action 2
Headset
- Light up while users is using headset mode
- Press Speaker button for making a call out
or receive an incoming call.
Description
View a missed call number
Missed Calls (Detail)
Action 1 LCD Output 1 Action 2
>0936111222
004
2008/08/29
09:23:35
Check received call
Call Records > Received Calls
Action 1 LCD Output 1 Action 2
>Call Records
Network Setting
Login
Reset to Default
Reboot
Soft Reset
52
>Missed Calls
Received Calls
Dialed Calls
Deleted Record
- -
LCD Output 2
Dial Out
>Detail
Add to Book
LCD Output 2

Missed Calls
>Received Calls
Dialed Calls
Deleted Record
Shows received history calls
(e.g. 070111)
View the received call number
Call Records > Received Calls > Detail
Action 1 LCD Output 1 Action 2
>Call Records
Network Setting
Login
Reset to Default
Reboot
Soft Reset
Missed Calls
>Received Calls
Dialed Calls
Deleted Record
Dial Out
>Detail
Add to Book
>Missed Calls
Received Calls
Dialed Calls
Deleted Record
Shows received history calls
(e.g. 070111)
LCD Output 2
Add a Received Call Record to Phone Book
Call Records > Received Calls > Add to Book
Action 1 LCD Output 1 Action 2 LCD Output 2
>Call Records
Network Setting
Login
Reset to Default
Reboot
Soft Reset
Missed Calls
>Received Calls
Dialed Calls
Deleted Record
Dial Out
Detail
>Add to Book
53
>Missed Calls
Received Calls
Dialed Calls
Deleted Record
Shows received history calls
(e.g. 070111)

Delete Call History
Call Records > Deleted Calls
Action 1 LCD Output 1 Action 2 LCD Output 2
>Call Records
Network Setting
Login
Reset to Default
Reboot
Soft Reset
Missed Calls
Received Calls
Dialed Calls
>Deleted Record
>Clean All
Clean Received
Clean Dialed
Clean Missed
>Clean All
Clean Received
Clean Dialed
Clean Missed
>Clean All
Clean All
Clean Received
>Clean Dialed
Clean Missed
Clean All
Clean Received
Clean Dialed
>Clean Missed
>Missed Calls
Received Calls
Dialed Calls
Deleted Record
Shows dialed history calls
(e.g. 060222)
Deleting……
Clean All
>Clean Received
Clean Dialed
Clean Missed
Deleting……
Deleting……
Deleting……
54

Call Features
Select a line and dial out
Line1~Line3 Dial out
Action 1 LCD Output 1 Action 2 LCD Output 2
~
Dialing a phone book entry by name
Action 1 LCD Output 1 Action 2 LCD Output 2
(R)+ (K)
Dialing a entry by viewing phone book
Phone Book > dial out:
Phone Book (Detail)
Action 1 LCD Output 1 Action 2
Line1 dial… - >Line1 Dial…
>Daniel888
Mandy
Margaret Lin
Mary-Mobile
Mark
Mark Chen
Michelle
Mick Wang
>Mark
Mark Chen
Line1 dial out to
Mark Chen…..
>New Entry
Modify Entry
Delete Entry
Detail
>Daniel888
Samuel236
Line1 dial out to
82265699…..
(M) + (A)
-
- -
55
> Mandy
Margaret Lin
Mary-Mobile
Mark
Mark Chen
Mark
>Mark Chen
New Entry
Modify Entry
Delete Entry
>Detail
Daniel888
82265699
LCD Output 2

Dialing a received call number
Call Records > Received Calls > Dial Out
Action 1 LCD Output 1 Action 2
>Call Records
Network Setting
Login
Reset to Default
Reboot
Soft Reset
Missed Calls
>Received Calls
Dialed Calls
Deleted Record
>Dial Out
Detail
Add to Book
>Missed Calls
Received Calls
Dialed Calls
Deleted Record
Shows received history calls
(e.g. 070111)
Call out to 070111
LCD Output 2
Redial an existing dialed call from call history
Call Records > Dialed Calls
Action 1 LCD Output 1 Action 2 LCD Output 2
>Call Records
Network Setting
Login
Reset to Default
Reboot
Soft Reset
Missed Calls
Received Calls
>Dialed Calls
Deleted Record
Call Records
>Missed Calls
Received Calls
Dialed Calls
Deleted Record
Shows dialed history calls
(e.g. 060222)
Call out to 060222
Dial a missed call number
Missed Calls (Dial Out)
Action 1 LCD Output 1 Action 2
>0936111222
004
Line 1 Dial….
0936111222
- -
LCD Output 2
>Dial Out
Detail
Add to Book
Access voice mail system
VMS
Action 1 LCD Output 1 Action 2 LCD Output 2
Line 1 Dial…..
>*332
00:00:03
56

Setup a conference
The LP389 can support 3 ways conference by using local conference bridge.
More than 3 ways can be archived by using server conference bridge such
as SIPPBX 6200S/GS. When you setup the corresponding server conference
prefix, the selection to use local or server conference are automatic.
1. A press “
2. A press “
3. A press “
4. A press “
5. If you have server conference bridge (such SIPPBX 6200S/GS) and do
the required settings, you can have more than 4 parties conference as
started by step 6.
6. A press “
7. A press “
8. A press “
9. A press “
” dial out and talk with B.
” to hold B. B hear hold tone music.
” dial out and talk with C.
” to talk with B and C.
” to dial out to D and talk
” to have conference to talk with B, C and D
” to dial out to E and talk
” to have conference to talk with B, C, D and E
Pickup a ringing extension
Pickup:
- Enter extension before press “
- Press “ ” button with any input, group pickup or global pickup
(programmable)
1. B dials out to C, C ringing.
2. A press “
3. A talk with B
” to pickup the call
” button, call pickup
Call Transfer
1. A talk with B, A press “ ”
2. A hear dial tone, B hear hold tone music
3. A dial out to C
4. A can hang-up the call or wait C to answer the call and talk
5. A hang up the call
6. B talk with C
57

Redial a dialed call records
1. A Off-Hook or press “ ” or “ ”
2. A hear dial tone
3. A press “ ” shows and dial out the last records of dialed.
Call Hold
1. A talk with B, A press “ ”
2. A hear dial tone, , B hear hold tone music
3. A press “
4. A talk with B
” to retrieve B
58
 Loading...