


Owner’s Manual
Read this manual for complete instructions
Français (page 15) / Español (página 29)
Power Painter® / Stainer®
Contents
2 Important Safety Information
4Before You Begin
5Features
6Setup
7Practice Spraying
8Spraying Technique
9Spraying Troubleshooting
10Cleanup
11Reassembly / Maintenance
12Troubleshooting
14 Replacement Parts
43Parts List
44Warranty
0613 • Form No. 0518646A
Questions?
Call Wagner Technical Service at:
1-800-328-8251
Register your product online at:
www.wagnerspraytech.com
Important Safety Information
Read all safety information before operating the equipment. Save these instructions.
Indicates a hazardous situation which, if not avoided, could result in death or serious injury.
To reduce the risks of fire or explosion, electrical shock and the injury to persons, read and understand all instructions included in this manual. Be familiar with the controls and proper usage of the equipment.
Grounding Instructions
This product must be grounded. In the event of an electrical short circuit, grounding reduces the risk of electric shock by providing an escape wire for the electric current. This product is equipped with a cord having a grounding wire with an appropriate grounding plug. The plug must be plugged into an outlet that is properly installed and grounded in accordance with all local codes and ordinances.
warning - Improper installation of the grounding plug can result in a risk of electric shock.
If repair or replacement of the cord or plug is necessary, do not connect the green grounding wire to either flat blade terminal. The wire with insulation having a green outer surface with or without yellow stripes is the grounding wire and must be connected to the grounding pin.
Check with a qualified electrician or serviceman if the grounding instructions are not completely
understood, or if you are in doubt as to whether the product is properly grounded. Do not modify the plug provided. If the plug will not fit the outlet, have the proper outlet installed by a qualified electrician.
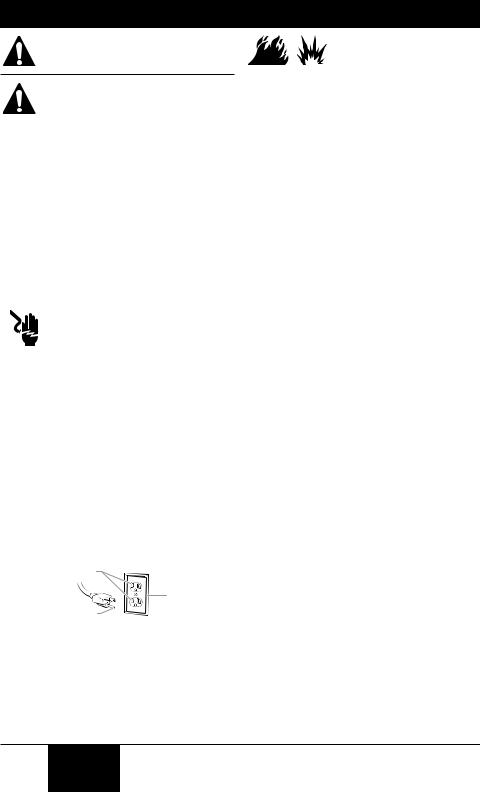
This product is for use on a nominal 120 volt circuit and has a grounding plug that looks like the plug illustrated below. Make sure that the product is connected to an outlet having the same configuration as the plug. No adapter should be used with this product.
Grounded Outlet |
|
|
Cover for |
|
grounded |
Grounding Pin |
outlet box |
|
WARNING - To reduce the risk of fire or explosion:
1.Do not spray flammable or combustible materials near an open flame, pilot lights or sources of ignition such as hot objects, cigarettes, motors, electrical equipment and electrical appliances. Avoid creating sparks from connecting and disconnecting power cords.
2.For use with only water-based or mineral spirit-type materials with a minimum flash point of 21ºC (70º F) — Do not spray or clean with liquids having a flash point of less than 21ºC (70º F). Flash point is the temperature at which a fluid can produce enough vapor to ignite.
3.Verify that all containers and collection systems are grounded to prevent static discharge.
4.Connect to a grounded outlet and use grounded extension cords (electric models only). Do not use a 3 to 2 adapter.
5.Do not use a paint or solvent containing halogenated hydrocarbons. Such as chlorine, bleach mildewcide, methylene chloride and trichloroethane. They are not compatible with aluminum. Contact the coating supplier about compatibility of material with aluminum.
6.Keep spray area well ventilated. Keep a good supply of fresh air moving through the area to keep the air within the spray area free from accumulation of flammable vapors. Keep pump assembly in well ventilated area. Do not spray pump assembly.
7.Do not smoke in the spray area.
8.Do not operate light switches, engines, or similar spark producing products in the spray area.
9.Keep area clean and free of paint or solvent containers, rags, and other flammable materials.
10. Know the contents of the paint and solvents being sprayed. Read all Material Safety Data Sheets (MSDS) and container labels provided with the paints and solvents. Follow the paint and solvent manufacture’s safety instructions.
11. Fire extinguisher equipment shall be present and working.
2 English
© Wagner Spray Tech - All Rights Reserved
Important Safety Information
WARNING - To reduce the risk of skin injection:
1.Do not aim the gun at, or spray any person or animal.
2.Keep hands and other body parts away from the discharge. For example, do not try to stop leaks with any part of the body.
3.Always use the nozzle tip guard. Do not spray without the nozzle tip guard in place.
4.Only use a nozzle tip specified by the manufacturer.
5.Use caution when cleaning and changing nozzle tips.
6.High-pressure spray is able to inject toxins into the body and cause serious bodily injury. In the event that injection occurs, seek medical attention immediately.
7.This system is capable of producing 2800 PSI / 193 Bar. Only use replacement parts or accessories that are specified by the
manufacturer and that are rated a minimum of 2800 PSI. This includes spray tips, nozzle guards and extensions.
8.Verify that all connections are secure before operating the unit.
WARNING - To reduce the risk of injury:
1.Always wear appropriate gloves, eye protection, clothing and a respirator or mask when painting. Hazardous vapors – Paints, solvents, insecticides, and other materials can be harmful if inhaled or come in contact with body. Vapors can cause severe nausea, fainting or poisoning.
2.Do not operate or spray near children. Keep children away from equipment at all times.
3.Do not overreach or stand on an unstable support. Keep effective footing and balance at all times.
4.Stay alert and watch what you are doing.
5.Do not operate the unit when fatigued or under the influence of drugs or alcohol.
Important Electrical Information
Use only a 3-wire extension cord that has a 3-blade grounding plug and a 3-slot receptacle that will accept the plug on the product. Make sure your extension cord is in good condition. When using an extension cord, be sure to use one heavy enough to carry the current your product will draw. An undersized cord will cause a drop in line voltage resulting in loss of power and overheating. A 14 gauge or 12 gauge cord is recommended. If an extension cord is to be used outdoors, it must be marked with the suffix W-A after the cord type designation. For example, a designation of SJTW-A would indicate that the cord would be appropriate for outdoor use.
Wagner Spray Tech accessory extension cords recommended:
P/N 0090241 |
20 foot extension cord |
P/N 0090242 |
35 foot extension cord |
IMPORTANT: Household use only. Intended for indoor/outdoor use ONLY with materials having flashpoint above 70ºF (21ºC).
Capability:
Sprays a variety of materials (oil-based and latex), stains, preservatives and other nonabrasive materials. Do not use materials with flash points below 70° F (21° C).
Do not use!
This pump should not be used with textured materials, block filler, lacquers, industrial enamels, or asphalt sealer or materials containing HHC. See coating supplier if flash point is not listed on the container.
WARNING - To reduce the risk of electric shock:
1.Keep electrical cord plug and spray gun trigger free from paint and other liquids. Never hold cord at plug connections to support cord.
Failure to observe may result in an electrical shock.
2.Never immerse electrical parts in water or any other liquid. Wipe the exterior of the sprayer with a damp cloth for cleaning. Always make sure the sprayer is unplugged before taking it apart for cleaning.
© Wagner Spray Tech - All Rights Reserved |
English |
3 |
|
||
|
|
|

Before you Begin
This page contains information that is necessary in order to operate the sprayer properly.
Material Preparation:
•It is important to mix the material thoroughly before you begin. Do not shake the material to mix it. Always stir the material gently but thoroughly before use.
•Remove any skin that has formed on the top of the material. Do not mix the skin into the material. The skin can break up and clog the sprayer. Older paint may need to be strained.
Thinning the Material:
•Always test spraying without thinning the material as thinning is not typically required.
•If you are spraying with a material that needs to be thinned, make sure to follow the manufacturer’s recommendations.
Selecting the Proper Spray Tip:
It is important that you use the proper spray tip based on your type of spraying job and the type of material you plan to spray. Read below for details.
important: Use only Optimus™-labeled spray tips with this sprayer. Other tips are not compatible with this sprayer.
Important: Make sure to tighten all spray tips firmly by hand. If the spray tip is not tightened firmly enough, the sprayer could leak or the tip could be damaged. Do not use a tool to tighten the spray tip. If the tip is too tight, it may be damaged.
Optimus Spray Tip
An Optimus™ spray tip produces a wide pattern that can be adjusted horizontally or vertically (see page 8).
Material That Can Be Sprayed:
•Make sure the type of paint you use can be cleaned with either mineral spirits (for oil-based paints) or a warm water and soap solution (for latex paints).
Overspray:
Some sprayed materials create a cloud of paint. Some of that cloud will spray past your intended object and also bounce off of it. Wind and air currents may cause this cloud to drift onto surfaces not intended to be sprayed. You can control the amount of overspray and bounce-back by adjusting your spray controls and moving the sprayer closer to the work piece, but always make sure that you have a good spray pattern. Always test your pattern on a scrap piece of wood or cardboard, and make sure that you have drop cloths protecting anything not being sprayed.
Anything you don’t want painted that is in the area of your spraying surface should be covered or removed.
Drop Cloths:
Be sure to protect your floors and furnishings with drop cloths or other coverings during spraying and cleanup.
4 English
© Wagner Spray Tech. - All Rights Reserved

Features
a |
|
e |
|
|
|
|
|
|
|
|
|
|
h |
|
|
|
f |
|
c |
|
|
|
|
|
b |
|
|
|
c1 |
|
|
g |
|
|
|
|
|
|
|
c |
|
|
i |
|
|
|
|
|
|
|
|
g |
|
|
|
|
g1 |
g2 |
g5 |
|
|
g4 |
||
d |
|
|
|
|
|
|
|
|
|
|
|
|
|
g3 |
Features |
Features |
|
||
a |
Sprayer |
g |
Pump assembly |
|
b |
Adjustable spray tip |
|
g1 - Locking nut |
|
c Suction tube with filter |
|
g2 - Atomizer valve |
|
|
|
c1 - Filter |
|
g3 - Pump housing |
|
d |
1 quart container |
|
g4 - Spring |
|
e |
Flow control knob |
|
g5 - Piston |
|
f |
Trigger |
h |
Cleaning brush |
|
|
|
i |
Lubricant |
|
© Wagner Spray Tech. - All Rights Reserved |
English |
5 |
|
||
|
|
|
 Loading...