


 Loading...

Lastchanges: Friday, August11, 2017
This documentation is protected bycopyrightlaw.
Allrights,especiallytherightofduplication,circulation,and translation arereserved.
No partofthis publication maybereproduced in formofcopies,microfilms or other processes,or transmitted into alanguageused for machines,especiallydataprocessingmachines,withouttheexpress written consentofthepublisher.
Allrights ofreproduction arereserved.Errors in and changes to thecontents as wellas programmodifications reserved. Copyright© MAGIXSoftwareGmbH,1994–2017.Allrights reserved.
MAGIX,Vegas and allmentioned MAGIXproductnames areregistered trademarks ofMAGIXSoftwareGmbH PlayStation is aregistered trademarkand PSP is atrademarkofSonyCorporation EntertainmentInc.
HDVand HDVlogo aretrademarks ofSonyCorporation and Victor CompanyofJapan,Limited (JVC).
"ATRAC,""ATRAC3,""ATRAC3plus,""ATRACAdvanced Lossless,"and theATRAClogo aretrademarks ofSonyCorporation. http://www.sony.net/Products/ATRAC3/
Morelicenseinformation can befound onlineattheVegas web sites.
MAGIXlicensingconditions areincluded in theinstallation and also atwww.magix.comunder EULA.
www.vegascreativesoftware.com

Table ofContents |
3 |
Table of Contents
Tableof Contents |
3 |
Introduction |
13 |
Technical Support |
14 |
AboutVegas Pro |
14 |
InteractiveTutorials |
14 |
TheVegas Pro Window |
15 |
Main toolbar |
16 |
Editing Tool |
17 |
TimeDisplay |
20 |
Track List |
21 |
Scrubbing |
22 |
Timeline |
23 |
MarkerBar |
25 |
TheTransportand Editing Toolbar |
26 |
Viewing thestatus bar |
28 |
Window Docking Areaand Floating Window Docks |
29 |
TheExplorerWindow |
29 |
TheTrimmerWindow |
32 |
TheMasterBus Window |
32 |
TheVideo Preview Window |
33 |
TheProjectMediaWindow |
33 |
TheEditDetails Window |
34 |
TheTransitions Window |
34 |
TheVideo FXWindow |
35 |
TheMediaGenerators Window |
36 |
TheCompositors Window |
37 |
ThePlug-In ManagerWindow |
38 |
TheVideo Scopes Window |
39 |
TheSurround PannerWindow |
39 |
TheXDCAMExplorerWindow |
40 |
TheMixing ConsoleWindow |
40 |
TheDeviceExplorerWindow |
41 |

4
Loudness meters |
41 |
Working with projects |
45 |
Creating anew project |
45 |
Setting projectproperties |
45 |
Opening aprojectormediafile |
54 |
Creating rotated projects |
57 |
Nesting projects |
59 |
Opening arecentproject |
60 |
Saving aproject |
60 |
Automaticprojectsaving |
60 |
Saving and renaming aproject(SaveAs) |
60 |
Projectreferences in rendered files |
61 |
Sharing aprojectonline |
63 |
Uploading yourmovieto YouTube |
63 |
Uploading yourmovieto Facebook |
64 |
Uploading yourmovieto Vimeo |
65 |
Uploading yourmovieto YouTube |
65 |
Importing and exporting projects |
66 |
Importing and exporting AAFfiles |
67 |
Archiving projects |
70 |
Working with P2Video |
70 |
EditDecision Lists |
71 |
Closing aProject |
72 |
Exiting theVegas Pro Application |
72 |
Adding, managing, and arranging media |
74 |
Using theProjectMediawindow |
74 |
Previewing mediafiles |
80 |
Adding mediafiles to yourproject |
81 |
Working with high-frame-rate(HFR)clips |
86 |
Adding layered PSDfiles to thetimeline |
87 |
Creating apictureslideshow |
87 |
Importing mediafrom aprojectfile |
89 |
Importing BroadcastWaveFormatfiles |
89 |
www.vegascreativesoftware.com

Table ofContents |
5 |
Importing video from aDVDcamcorder |
90 |
Editing video from an XDCAMStation with StreamChase |
91 |
Using theDeviceExplorer |
94 |
Creating proxyfiles forhigh-definition editing |
96 |
Using HitFilm effects |
96 |
Sorting yourmediawith bins |
97 |
Viewing orchanging mediafileproperties |
99 |
Inserting audio tracks |
104 |
Inserting video tracks |
104 |
Recording audio |
105 |
Metronome |
110 |
Capturing video |
111 |
Capturing from an SDI card |
112 |
Capturepreferences |
115 |
Capturing HDV clips |
119 |
Converting video to 24p |
120 |
Extracting audio from CDs |
120 |
Editing events on thetimeline |
122 |
Adding mediafiles to yourproject |
123 |
Inserting an emptyevent |
127 |
Inserting time |
127 |
Creating selections and positioning thecursor |
128 |
Moving events |
131 |
Automaticcrossfades |
132 |
Enablesnapping |
132 |
Quantizeto frames |
135 |
Cutting, copying, and pasting events |
136 |
Deleting events |
139 |
Trimming events |
141 |
Post-editripple |
141 |
Splitting events |
143 |
Shuffling events |
143 |
Using theTrimmer |
144 |
Adjusting an event's length |
152 |

6
Expanded editmode |
155 |
Slipping and sliding events |
157 |
Repairing audio/video synchronization offsets |
159 |
Eventenvelopes |
160 |
Panning and cropping video events |
164 |
Stabilizing video clips |
174 |
Reversing an event |
175 |
Using takes as alternateversions of events |
175 |
Grouping events |
177 |
Using synclinks |
178 |
Applying switches to events |
179 |
Audio streams |
181 |
Audio channels |
181 |
Opening events in an audio editor |
182 |
Opening acopyof an eventin an audio editor |
183 |
Editing eventproperties |
183 |
Copying and pasting orselectivelypasting eventattributes |
188 |
Using theEditDetails Window |
188 |
Removing red eyefrom still images |
189 |
Undoing and redoing editoperations |
190 |
Rebuild audio peaks |
191 |
Zooming and magnification |
191 |
Multicameraediting |
193 |
Shooting multicameravideo |
193 |
Capturing multicameravideo |
193 |
Synchronizing video in multicameraprojects |
194 |
Creating multicameraevents |
195 |
Editing multicameravideo |
196 |
Stereoscopic3Dediting |
201 |
Setting up yourstereoscopic3Dproject |
201 |
Setting up stereoscopic3Dpreviews |
205 |
Synchronizing stereoscopic3Devents |
205 |
Aligning leftand right-eyeviews and adjusting depth |
208 |
www.vegascreativesoftware.com

|
Table ofContents |
7 |
Rendering astereoscopic3Dproject |
210 |
|
Using markers, regions, and commands |
215 |
|
Inserting markers |
215 |
|
Inserting regions |
216 |
|
Using mediamarkers and regions |
217 |
|
Inserting command markers |
218 |
|
Inserting CDtrack regions |
222 |
|
Inserting CDindexmarkers |
223 |
|
TheMarkerTool |
223 |
|
Track editing |
224 |
|
Inserting audio tracks |
224 |
|
Inserting video tracks |
224 |
|
Selecting tracks |
224 |
|
Arranging tracks |
225 |
|
Grouping tracks |
226 |
|
Duplicating tracks |
227 |
|
Audio track controls |
228 |
|
Video track controls |
236 |
|
Audio bus tracks |
241 |
|
Video bus track |
244 |
|
Setting defaulttrack properties |
248 |
|
Renderto New Track |
249 |
|
Using automation |
250 |
|
Audio track automation |
250 |
|
Video track automation |
254 |
|
Automating audio effectparameters |
257 |
|
Adjusting envelopes |
260 |
|
Recording track envelopeand keyframeautomation |
264 |
|
Animating video events and tracks |
268 |
|
Panning and cropping video events |
268 |
|
Editing track motion |
278 |
|
Keyframeanimation |
285 |
|
Applying effects |
290 |
|
Adding audio track effects |
290 |
|

8
Adding audio eventeffects |
292 |
Using bus effects |
293 |
Applying non-real-timeeventeffects |
295 |
Using assignableeffects |
295 |
Adding an assignableeffects chain |
295 |
Routing tracks to an assignableeffects chain |
297 |
Using assignableeffects envelopes |
298 |
Removing an assignableeffects chain |
298 |
Creating and using effects packages |
298 |
Bypassing all audio effects |
299 |
Editing audio effects |
299 |
Adding video effects |
303 |
Adding transitions |
308 |
Adding generated mediato yourproject |
312 |
Creating textand titles |
314 |
Using theTitles & TextPlug-In |
315 |
Mixing audio |
319 |
Using theMasterBus Window |
319 |
Busses - overview |
321 |
Adding audio busses |
322 |
Assigning tracks to busses |
322 |
Using bus envelopes |
324 |
Routing busses |
324 |
Signal flow diagram |
326 |
Using inputbusses |
326 |
Adding ordeleting inputbusses |
327 |
Recording using an inputbus |
327 |
Using inputbusses with hardware-based effects |
330 |
Real-timerendering |
332 |
TheMixing Console |
335 |
TheMixing ConsoleToolbar |
335 |
TheChannel ListPane |
337 |
TheView Controls Pane |
338 |
www.vegascreativesoftware.com

|
Table ofContents |
9 |
Channel Strips |
339 |
|
Using theMixing Console |
341 |
|
Adding Track, AssignableFX, and Bus Channels |
341 |
|
Audio Track Channel Strips |
341 |
|
Bus Channel Strips |
349 |
|
Inputbus channel strips |
354 |
|
FXsend (assignableeffects)channel strips |
360 |
|
Creating acue(headphone)mixwith theMixing Console |
366 |
|
Compositing video |
369 |
|
Compositing and masks |
369 |
|
3Dcompositing |
374 |
|
Video signal flow diagram |
383 |
|
Proxy-firstworkflow |
385 |
|
Working with HDV |
387 |
|
Capturing HDV clips |
387 |
|
Editing HDV video on thetimeline |
388 |
|
Working with XDCAMvideo |
389 |
|
XDCAMEXworkflow |
389 |
|
XDCAMand XDCAMHDworkflow |
390 |
|
Setting up an XDCAMDevice |
390 |
|
Using theXDCAMExplorerWindow |
391 |
|
Importing XDCAMDiscs |
394 |
|
Editing XDCAMClips on theTimeline |
395 |
|
Exporting Video to XDCAMDiscs |
396 |
|
Working with REDcameraclips |
399 |
|
Working with AVCHDvideo |
401 |
|
S-Log and ACES workflow in Vegas Pro 14.0 |
403 |
|
Enabling colormanagementin yourVegas Pro project |
409 |
|
Specifying thecolorspaceforindividual shots |
410 |
|
Specifying thecolorspacein acustom rendering template |
411 |
|
VEGAS Pro 15ACES 1.0.3 updates |
413 |
|
5.1 surround projects |
415 |
|
Setting up your5.1 surround project |
415 |
|
5.1 surround panning and mixing |
417 |
|

10
Audio panning modes |
425 |
Rendering your5.1 surround project |
429 |
Exporting aVegas Pro projectto DVDArchitect |
430 |
Closed Captioning |
431 |
Adding closed captioning to video files |
431 |
Captioning Windows Mediafiles |
441 |
Previewing yourproject |
445 |
Loop Playback |
445 |
MuteAll Audio |
445 |
MuteAll Video |
445 |
Using theVideo Preview window |
445 |
Split-screen previews |
451 |
Using dynamicRAMpreviews |
453 |
Using an External Video Monitor |
454 |
External monitorviaDVI (Windows Graphics Card) |
454 |
External monitorviaIEEE-1394 (FireWire) |
455 |
External monitorviaSDI |
457 |
Selectivelyprerendervideo |
458 |
Cleaning up prerendered video files |
459 |
Loudness metering and logging |
459 |
Loudness meters |
459 |
Generating aloudness log |
462 |
Monitoring video with scopes |
465 |
TheVectorscopeMonitor |
465 |
TheVideo Waveform Monitor |
466 |
TheHistogram Monitor |
467 |
TheRGBParadeMonitor |
470 |
Video ScopeSettings |
470 |
Timecodesynchronization |
473 |
GenerateMIDI Timecode |
473 |
GenerateMIDI Clock |
473 |
Triggerfrom MIDI Timecode |
474 |
Burning discs |
477 |
www.vegascreativesoftware.com
|
Table ofContents |
11 |
Track-at-once(TAO)CDburning |
477 |
|
Disc-at-once(DAO orRed Book)CDBurning |
478 |
|
Burning aBlu-rayDiscfrom thetimeline |
483 |
|
Burning aDVDfrom thetimeline |
485 |
|
Printing video to tape |
487 |
|
Printing video to tapefrom thetimeline |
487 |
|
Printing video to HDV tape |
494 |
|
Rendering projects (RenderAs) |
497 |
|
Rendering Multichannel Audio Files |
501 |
|
Rendering MPEGFiles |
503 |
|
Rendering Projects forUsein DVDArchitect |
504 |
|
MediaFileSettings forBlu-rayDiscProjects |
506 |
|
Custom rendering templates |
508 |
|
Using Vegas Pro Connect |
511 |
|
Setting up Vegas Pro Connect |
511 |
|
Using Vegas Pro Connectto control playback |
512 |
|
Using Vegas Pro Connectto review projects on yourmobiledevice |
518 |
|
Adjusting Vegas Pro Connectsettings |
521 |
|
Troubleshooting Vegas Pro ConnectConnections |
522 |
|
Using hardwarecontrollers |
523 |
|
Using acontrol surface |
523 |
|
Using aMackieControl |
524 |
|
Using aFrontierTranzPort |
540 |
|
Using aPreSonus FaderPort |
542 |
|
Using aGenericControl Surface |
544 |
|
Configuring aGenericControl Surface |
545 |
|
Using ajoystick forpanning, adjusting controls, and colorcorrection |
547 |
|
Using amultimediacontroller |
549 |
|
Using Scripting |
553 |
|
Customizing theVegas Pro interface |
557 |
|
Customizing thetoolbar |
557 |
|
Customizing keyboard shortcuts |
557 |
|
Customizing ASIO portnaming |
558 |
|
Timeruler |
561 |
|

12
Grid spacing |
563 |
Saving and recalling window layouts |
563 |
Vegas Pro preferences |
567 |
Preferences - General Tab |
567 |
Preferences - Video Tab |
572 |
Preferences - Preview DeviceTab |
574 |
Preferences - Audio Tab |
581 |
Preferences - Audio DeviceTab |
585 |
Advanced Audio Configuration |
587 |
Preferences - MIDI DeviceTab |
589 |
Preferences - VSTEffects |
589 |
Preferences - Editing Tab |
589 |
Preferences - DisplayTab |
593 |
Preferences - CDSettings Tab |
594 |
Preferences - SyncTab |
595 |
Preferences - External Control & Automation Tab |
597 |
Keyboard shortcuts |
601 |
Glossary |
615 |
Index |
633 |
www.vegascreativesoftware.com

13
Introduction
MAGIXproudlyintroduces Vegas Pro , afull-featured nonlineareditor(NLE)forvideo and multitrack digital audio designed forvideo postproduction and multichannel audio recording and mixing.
What's new in this version
nAnew MAGIXAVC/AAC codecsignificantlyaccelerates encoding on machines thatutilizeIntel® Quick SyncVideo (QSV)technology
nAnew MAGIXAVC/AAC codecsignificantlyaccelerates encoding on machines equipped with modern NVIDIAgraphics card GPU technology
nTheusercan now selectfrom thelistof attributes of acopied timelineclip eventto specifywhich attributes will bepasted into atargetevent
nACES 1.0supportenableusers to work with theexpanded colorspaces and dynamicrangeof modern cam eras.
eras.
nMoreefficienthandling of AVC files on thetimelinethrough Intel QSV technology
nPicture-in-pictureOFXplug-in enables theuserto perform sizeand position adjustments of video atanyof thefoureffects levels (including track and event)through parameteradjustmentcontrols and directinter action with theVideo Preview window
nCrop OFXplug-in enables theuserto quicklycrop outportions of avideo atanyof thefoureffects levels (including track and event)through parameteradjustmentcontrols and directinteraction with theVideo Pre view window
nTheusercan specifywhich track headerbuttons and controls appearon tracks and setthese(separatefor audio and video tracks)as projectdefaults forall new tracks in thecurrentand new projects. Controls that havebeen hidden can beaccessed through anew "hamburgerbutton" menu
nLUTFilterOFXplug-in enables theuserto applyLUTs to theirprojectatanyof thefoursupported FXlevels (event, track, media, and video bus)
nRedesigned timelineclip events now contain headers to hold importantinformation and buttons and can be customized through thehamburgerbutton/menu system.
nTheusercan specifywhich controls appearin thetransportareaof both theTrimmerWindow and theVideo Preview window as projectdefaults forthecurrentand new projects. Controls thathavebeen hidden can be accessed through anew "hamburgerbutton" menu
nAsimple"one-click" option creates afreezeframeon all selected events touched bythetimelinecursor
nUsers can specifyoneof fouroptions fortheshading of theVEGAS Pro interfaceranging from verybrightto adark interface
nUsers can definetheamount(strength)of colortheywantshown in theirbuttons
nModern controls enablelogical docking and undocking of windows and maximizing windows within adock
nAuser-friendlyand intuitiveRenderAs dialog boxmakes iteasyto understand and specifyrenderoptions
nTheShareOnlineoption now provides directrender-and-upload operations forYouTube, FaceBook, and Vimeo
nOptimized defaultuserlayoutto reducevisual clutter
nNon-selected timelineclip events arenow thesamecoloras thecorresponding track headerwhileselected events arewhite. This (whiledirectlyoppositeprevious behavior)reduces visual "clutter" and theharsh appearanceof events, particularlyin largeprojects
nNew layoutoption enables userto switch back to theVEGAS Pro 14 defaultlayout, including revealing all but tons in thehamburgermenu system
nUpdated button glyph fortheRecord and Arm forRecord buttons clarifies thefunction of thesebuttons
nThedefaultPan typehas been changed to ConstantPowerwhich is themostlogical and expected type
nAudio notification alerts you when yourrenderis completeforall formattypes
www.vegascreativesoftware.com
Introduction 14
TechnicalSupport
If you experienceproblems orhavequestions whileusing Vegas Pro, ourtechnical supportdepartmentis always readyto help you. Additional supportand information can befound athttp://www.vegascreativesoftware.com.
Foradetailed listof Technical Supportoptions, pleasevisitourweb site.
AboutVegas Pro
From theHelp menu, chooseAboutVegas Pro to displayinformation abouttheapplication, such as thesoftware licenseowner, copyrightand system information, program version and serial number, and theVegas Pro logo.
 Beforecontacting Technical Support, click theComputertab to displayinformation aboutyourcomputer.
Interactive Tutorials
 UsetheInteractiveTutorials Button from theMain Toolbaror, chooseInteractiveTutorials from theHelp menu to startan interactiveguidethatwill show you each partof theVegas Pro interfaceand teach you how to create projects.
Chooseatopicfrom theInteractiveTutorials overview to startatutorial—you'll beup and running in no time!
15
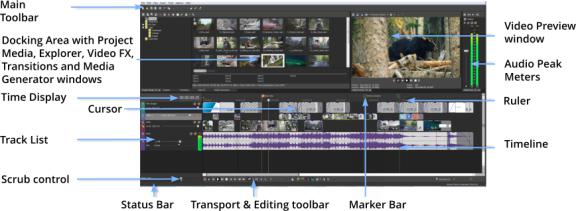
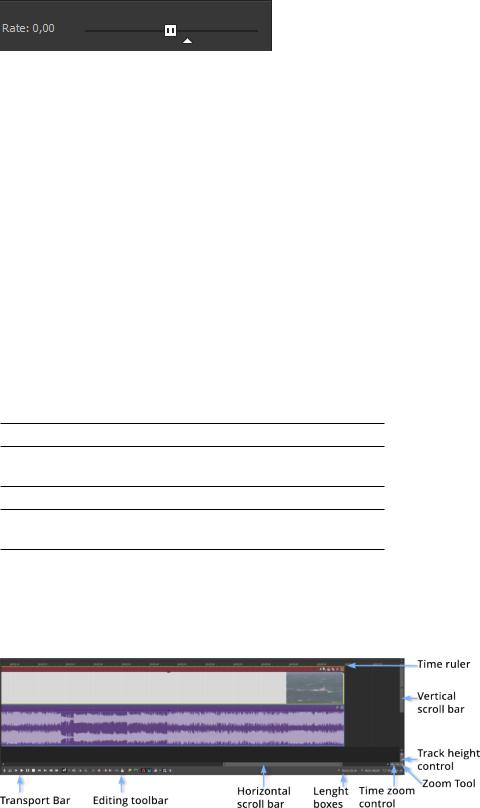
The Vegas Pro Window
TheVegas® Pro window is whereyou edityourproject, and thescreen is divided into several areas.
 Tips:
Tips:
nIf you preferto work with thetimelineatthebottom of thewindow and thedocking areaatthetop of thewindow, selecttheDisplaytimelineatbottom of main window check boxon theDisplaytab of the Preferences dialog. Formoreinformation, see"Preferences - DisplayTab" on page593.
nThetrack list, timeline, and window docking areasections can besized to yourpreferences bydragging thedividers between them orbyusing F11:
o |
F11 minimizes and restores thewindow docking area. |
o |
Shift+F11 minimizes and restores thetrack list. |
oCtrl+F11 maximizes and restores thetimelineverticallyand horizontally(window docking area and track listwill behidden).
Therearetimes when you don’tneed quick access to theall various buttons in theUI. Somebuttons you will useall thetimewhileothers onlyoccasionally. Several areas of theUI havebeen designed so thatyou can customizewhich buttons aredisplayed bydefault. Examples of this arethetool bars found in theVideo Preview window, theTrimmer window, and theaudio and video Track Headers.
Access to thebuttons thatarenotcurrentlydisplayed can beachieved viatheHamburgerbutton  . The Hamburgerbutton also gives you access to theEditVisibleButton Setcommand which enables you to control which buttons aredisplayed bydefault.
 Hint: Throughoutthemanual and help system, featuredescriptions arebased on visiblebuttons. To access a button notcurrentlydisplayed:
nClick theHamburgerbutton 
nClick thecommand in thepop-up menu to perform theaction of thatbutton.
To choosewhich buttons aredisplayed bydefault:
nClick on theHamburgerbutton  and chooseEditVisibleButton Set
nClick thecheck boxforanybutton you wantto bedisplayed bydefault.
www.vegascreativesoftware.com

The VegasProWindow |
16 |
Main toolbar
From theView menu, chooseToolbarto togglethedisplayof themain toolbar.
Thetoolbarcontains buttons thatenableyou to selectfrequentlyused commands quickly. You can customizeitby adding, removing, orreordering buttons.Formoreinformation, see"Customizing thetoolbar" on page557.
Button Name |
Description |
New Empty |
Creates anew blank projectusing thedefaultsettings. Formore |
Project |
information, see"Creating anew project" on page45. |
|
|
Open |
Opens an existing projectormediafile. Formoreinformation, see |
|
"Opening aprojectormediafile" on page54. |
|
|
Save |
Saves thecurrentproject. Formoreinformation, see"Saving a |
|
project" on page60. |
|
|
RenderAs |
Saves yourprojectin anew formatas asinglefile. Formore |
|
information, see"Rendering projects (RenderAs)" on page497. |
|
|
Properties |
Opens theProjectProperties dialog boxallowing you to make |
|
changes to thecurrentproject. Formoreinformation, see"Setting |
|
projectproperties" on page45. |
|
|
Cut |
Deletes and copies thecurrenteventselection to theclipboard. For |
|
moreinformation, see"Cutting, copying, and pasting events" on |
|
page136. |
|
|
Copy |
Copies thecurrenteventselection to theclipboard. Formore |
|
information, see"Cutting, copying, and pasting events" on page136. |
|
|
Paste |
Pastes thecontents of theclipboard atthecurrentcursorposition. |
|
Formoreinformation, see"Cutting, copying, and pasting events" on |
|
page136. |
|
|
Undo |
Reverses thelastaction performed. Formoreinformation, see |
|
"Undoing and redoing editoperations" on page190. |
|
|
Redo |
Reverses theaction of theUndo command. Formoreinformation, |
|
see"Undoing and redoing editoperations" on page190. |
|
|
Interactive |
Starts an interactiveguidethatwill show you each partof theVegas |
Tutorials |
Pro interfaceand teach you how to createprojects. Formore |
|
information, see"InteractiveTutorials" on page14. |
|
|
What's This |
Displays context-sensitivehelp. |
Help |
|
|
|

17
EditingTool
ChooseEdit> Editing Tool and selectatool from thesubmenu to changetheactivetool.
Normal
To usetheNormal tool  , chooseEditing Tool from theEditmenu, and chooseNormal from thesubmenu.
This tool gives you themostflexibilitywhileediting; selection, projectnavigation, mostenvelopeediting, etc. The onlyfunctions you cannotperform whilein normal editing modeareboxselection, boxmagnification, and multiple envelopepointselection.Formoreinformation, see"Adjusting envelopes" on page260.
Selecting events
Click an eventto selectit. Hold Ctrl whileclicking to selectmultipleevents, orhold Shiftto selectall events between thefirstand lasteventyou click.
Moving events
Selectevents and drag them along thetimeline.
Changing an event's length
Drag eitheredgeof an eventto changeits length. Theeventedgewill snap to grid lines if snapping is on. Hold the Shiftkeywhiledragging to temporarilysuspend snapping.Formoreinformation, see"Enablesnapping" on page132.
Click thedown arrow  nextto theNormal tool and chooseatool from themenu to selectthemodethatwill be used forediting events. Formoreinformation, see"TheTransportand Editing Toolbar" on page26.
Tool |
Description |
Normal EditTool |
Useto select, move, and trim theends of events. |
|
|
|
Click an eventto selectit. Hold Ctrl whileclicking to selectmultiple |
|
events, orhold Shiftto selectall events between thefirstand last |
|
eventyou click. |
|
Selectevents and drag them along thetimelineto movethem. |
|
Drag eitheredgeof an eventto changeits length. Theeventedgewill |
|
snap to grid lines if snapping is on. Hold theShiftkeywhiledragging |
|
to temporarilysuspend snapping.Formoreinformation, see"Enable |
|
snapping" on page132. |
|
Formoreinformation, see"Creating selections and positioning the |
|
cursor" on page128,"Moving events" on page131,"Moving events" |
|
on page131, or"Adjusting an event's length" on page152. |
|
|
www.vegascreativesoftware.com
18
Tool |
Description |
|
ShuffleTool |
Useto rearrangeevents on thetimeline. Formoreinformation, see |
|
"Shuffling events" on page143. |
||
|
||
|
Right-click and drag an eventto anew location on thetimeline |
|
|
and chooseShuffleEvents from theshortcutmenu to shuffle |
|
|
events when theShuffleTool is notactive. |
|
|
|
|
Slip Tool |
Useto slip an event's mediawithoutmoving theeventon the |
|
timeline. Formoreinformation, see"Slipping and sliding events" on |
||
|
||
|
page157. |
|
|
Hold Altwhiledragging an eventto slip events when theSlip |
|
|
Tool is notactive. |
|
|
|
|
SlideTool |
Useto movean eventon thetimelinewithoutmoving theunderlying |
|
media. Formoreinformation, see"Slipping and sliding events" on |
||
|
||
|
page157. |
|
|
Hold Ctrl+Altwhiledragging an eventto slideevents when the |
|
|
SlideTool is notactive. |
|
|
|
|
Time |
Useto makeevents longerorshorterwhilechanging thevelocityof |
|
themediato createfast- orslow-motion effects. Formore |
||
Stretch/Compress Tool |
||
|
information, see"Adjusting an event's length" on page152. |
|
|
Hold Ctrl whiledragging theedgeof an eventto time |
|
|
stretch/compress events when theTimeStretch/Compress |
|
|
Tool is notactive. |
|
|
|
|
SplitTrim Tool |
Useto splitan eventatthepointyou click and trim theeventin the |
|
direction you drag (erasermode). Formoreinformation, see"Slipping |
||
|
||
|
and sliding events" on page157. |
|
|
Hold Ctrl+Alt+ Shiftand drag to splittrim events when theSplit |
|
|
Trim Tool is notactive. |
|
|
|
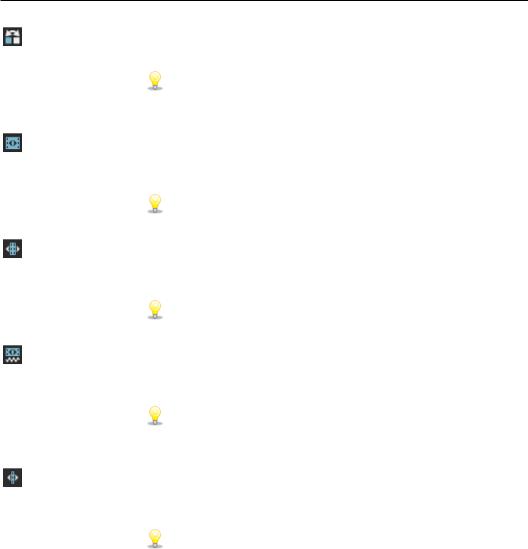
Envelope
To usetheEnvelopetool  , chooseEdit> Editing Tool > Envelope.
TheEnvelopetool is designed to manipulateenvelopes in events. With theEnvelopetool selected, you can add, delete, select, and moveenvelopepoints, butevents cannotbemoved oredited.Formoreinformation, see "Adjusting envelopes" on page260.
Selection
To usetheSelection tool  , chooseEdit> Editing Tool > Selection.
TheSelection tool is designed to selectmultipleevents across tracks bydrawing selection boxes around theevents you wantto include. TheSelection tool can draw threetypes of selection boxes:
19
Type |
Description |
FreeSelection |
Thedefaultbehaviorof thetool: |
|
n Click to selectindividual events (hold ShiftorCtrl to select |
|
multipleevents). |
|
n Drag to draw arectangularregion thatbegins whereyou start |
|
drawing and ends whereyou releasethemousebutton. All of |
|
theevents thatareinsidetheregion will beselected. This |
|
method is good forselecting agroup of events thatareclose |
|
together. |
|
|
Vertical |
Can beused to easilyselectall events thatoccurwithin atimerange. |
|
Thevertical selection boxautomaticallyselects all of thetracks |
|
between yourfirstmouseclick and whereyou draw theselection |
|
box; even tracks thatarenotvisibleatthecurrentmagnification are |
|
selected. |
|
|
Horizontal |
Can beused to easilyselectall events on asingleormultipleadjacent |
|
tracks. Thehorizontal selection boxautomaticallyselects all events |
|
on atrack thatis touched bytheselection box; even events thatare |
|
notvisibleatthecurrentmagnification areselected. |
|
|
To changethetypeof selection boxyou areusing, right-click themousewhileholding down theleftmousebutton. Clicking therightmousebutton will togglethrough thethreetypes of selection boxes.
Zoom
To usetheZoom tool  , chooseEdit> Editing Tool > Zoom. You can usethezoom tool to changethe magnification of theVegas Pro project.
 Click theZoom button in thecornerof thetimelineto temporarilychangethecursorinto theZoom tool. Select
an areaof thetimelinethatyou wantto magnify, and thecursorwill revertto thepreviouslyactivetool.
 Beforezooming, you can maximizethetimelinebyusing thefollowing shortcuts:
nPress F11 to maximizethetimelinevertically(Window Docking areawill behidden).
nPress Ctrl+F11 to maximizethetimelineverticallyand horizontally(Window Docking areaand Track Listwill behidden).
nPress Shift+F11 to maximizethetimelinehorizontally(Track Listwill behidden).
Drag themouseovertheareayou wantto magnify. Adotted rectangleis drawn around thearea, and theareais magnified when themousebutton is released.
Whileholding theleftmousebutton, click therightmousebutton to togglethrough thethreemagnification modes:
www.vegascreativesoftware.com
20
Item |
Description |
FreeZoom |
Thedefaultbehaviorof theZoom tool. Usethis modeto zoom into a |
|
section of yourVegas Pro projecthorizontallyand verticallyatthe |
|
sametime. |
|
|
TimeZoom |
Usethis modeto zoom horizontallywithoutchanging thevertical |
|
magnification. |
|
|
Track HeightZoom |
Usethis modeto zoom verticallywithoutchanging thehorizontal |
|
magnification. |
|
|
 Clicking anywherein theprojectwith theZoom tool will zoom outso thattheentireprojectfits in thetimeline, and as manytracks as possiblewill bedisplayed.
Next Tool
ChooseNextTool (orpress D)to switch to thenexttool in thelist. Forexample, if you'reusing theNormal tool, Next
Tool selects theEnvelopetool.
Previous Tool
ChoosePrevious Tool (orpress Shift+D)to switch to thenexttool in thelist. Forexample, if you'reusing the
Envelopetool, Previous Tool selects theNormal tool.
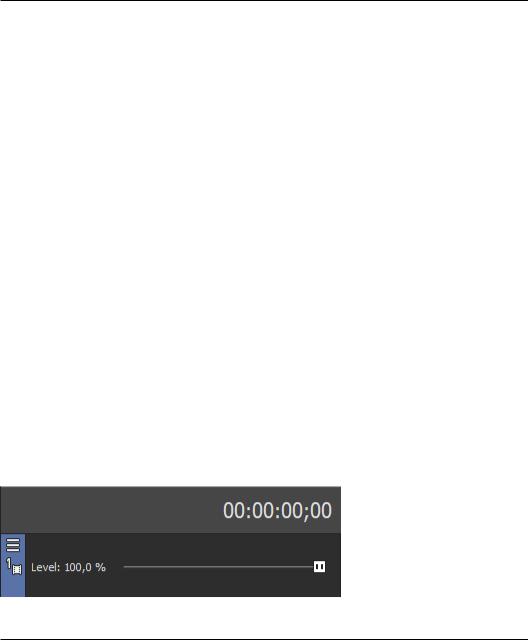
Time Display
TheTimeDisplaywindow shows thecurrentcursorposition, MTC input, MTC output, orMIDI clock outputtime.
Right-click thewindow and chooseacommand from thesubmenu to changethedisplayformat.
Item |
Description |
TimeatCursor |
Displays thecurrentcursorposition using thecurrenttimeformat. |
|
|
MIDI TimecodeIn |
Displays incoming MIDI timecode. Formoreinformation, see |
|
"Triggerfrom MIDI Timecode" on page474. |
|
|
MIDI TimecodeOut |
Displays outgoing MIDI timecode. Formoreinformation, see |
|
"GenerateMIDI Timecode" on page473. |
|
|
MIDI Clock Out |
Displays outgoing MIDI clock. Formoreinformation, see"Generate |
|
MIDI Clock" on page473. |
|
|
TimeFormat |
ChooseTimeFormatand chooseasetting from thesubmenu to set |
|
thetimeunits used in theTimeDisplayand TimeRuler. Formore |
|
information, see"Timeruler" on page561. |
|
|
TextColor |
ChooseCustom to specifythecolorthatwill beused to displaythe |
|
textin thewindow. |
|
|
21
Item |
Description |
Background Color |
ChooseCustom to specifythecolorthatwill beused to displaythe |
|
background of thewindow. |
|
Changing theTimeDisplaywindow colors affects onlythe |
|
currentcolorscheme. You can changethecolorschemeon the |
|
Displaytab of thePreferences dialog. |
|
|
TrackList
Thetrack listdisplays all of theaudio and video tracks in yourprojectand contains themastercontrols foreach track. Ascrub control and playback rateslideris also availablebelow thetrack list.
Formoreinformation, see"Audio track controls" on page228, "Video track controls" on page236, and "Scrubbing" on page22,
Track Headers
TheTrack Headers havebeen designed to beless cluttered and takeup less screen realestate. You can usethe
Hamburgerbutton  , located justabovethetrack numberin thetrack header, to quicklyassess buttons thatare notdisplayed orto selectwhich buttons aredisplayed bydefaulteach timeyou open theprogram.
To access abutton notcurrentlyshown in thetrack header, click theHamburgerbutton  to open themenu. Select thecommand according to thebutton from thedrop down list.
To add abutton to thetrack header, click theHamburger button to open thebutton selection menu. ChooseEdit VisibleButton Setfrom thedrop down list. Click thecheck boxof thebutton(s)you wantto beshown in thetrack headerand click OK.
If you wantall of thebuttons to show on theTrack Header, click theHamburger button to open thebutton selection menu, chooseEditVisibleButton Setfrom thedrop down list, click theShow All button, and click OK.
 Tip:
Tip:
You can quicklyresetthebuttons displayed on theTrack Headerto thefactorydefaultbychoosing View |
Window Layouts | DefaultLayout(Alt+D, D).
 Note:
Note:
This resets theapplication back to all of thefactorydefaultsettings, notjusttheTrack Headerdefaults.
www.vegascreativesoftware.com
22
Therearetimes when you need to freeup as much screen/track real-estateas possible. Thevideo and audio Track Headers havebeen designed to accommodatethat. You can go from full to minimal to veryminimal and back again quicklyand easily.
1.Click theHamburgerbutton  and chooseEditVisibleButton Set
2.Click theHideAll button and click OK
3.Do thesameforboth audio and video tracks. You now seeonlythefaders and pan controls
4.Placethecursoron thevertical borderbetween thetrack headers and thetracks. Themousewill changeits shapeto alinewith adouble-headed arrow . Click and drag to theleftuntil all you seearethetrack numbers and Hamburgerbutton. To return to thedefaultTrack Headersizedrag theborderback to theright, ordouble click theborder.
 Note:
Note:
You don’tneed to hideall thebuttons forthis to work. As you drag theTrack Headerborderto theleftitwill automaticallyhidethebuttons. You can always getto hidden buttons viatheHamburgermenu. Doubleclicking theborderwill takeyou to and from full Track Headerwidth and justthetrack colorbars.
Scrubbing
You can usescrubbing to scroll playback of yourprojectatvarying speeds.
Chooseasetting from theJKL/ shuttlespeed drop-down liston theEditing tab of thePreferences dialog to control thescrub speed and rangewhen you scrub with theJKLkeys orwith amultimediacontroller. Formoreinformation, see"Using amultimediacontroller" on page549.
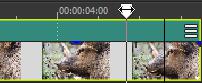
Scrubbing with the playhead
Drag theplayhead  abovethetimelineto shuttleforward orbackward from thecursorposition to find an edit point.
 Tips:
Tips:
nHold Alt, click theruler, and drag to movethecursorto theposition you clicked and scrub in the direction you drag.
nHold Ctrl whiledragging (ordrag whileholding therightmousebutton)to find audio when you're zoomed out. Thecursormoves in largersteps than with aregulardrag.
nHold Ctrl+Altwhiledragging to scrub video only.
nZoom in oroutto adjustthescrub sensitivity. Formoreinformation, see"Zooming and magnification" on page191.
Using the scrub control in the track list
Drag thescrub control to shuttleforward orbackward from thecursorposition to find an editpoint.
23
You can drag theNormal Rateindicatorbelow thescrub control (ordouble-click thelabel to typeaplayback rate)to adjustplayback speed when you click thePlay orPlayfrom Start
 button.
Scrubbing with the cursor
1.Hoveroverthecursorin an areaof thetimelinethatdoes notcontain an eventand press Ctrl. Themouse pointeris displayed as a .
.
 When theAllow Ctrl+drag cursorstylescrub overevents check boxon theGeneral tab of the Preferences dialog is selected, you can scrub with themouseeven when thecursoris overan event.
2.Drag leftorrightto scrub playback.
Scrubbing with the keyboard
Press theJ, K, orLkeys to usethekeyboard as ascrub control.
 Press and hold K whilepressing J orLto emulateashuttleknob mode. Press K+J to turn theknob to theleftor K+Lto turn theknob to theright.
Item Description
JScrub reversemode. Press again to acceleratethe playback rate.
KPause.
LScrub forward mode. Press again to acceleratethe playback rate.
Timeline
Thetimelineis themain partof theVegas Pro window whereyou will bedoing mostof yourwork. Themajorityof thewindow consists of actual track space. This areacontains thedrawn events on each track.
 You can chooseEdit> Navigateand chooseacommand from thesubmenu to navigatethetimelinequickly.
www.vegascreativesoftware.com

24
Time ruler
Displays thetimein theformatyou select. Formoreinformation, see"Timeruler" on page561.
Vertical scroll bar
Drag thescroll boxto pan theview of theprojectup ordown.
 Double-clicking thevertical scroll barwill zoom theprojectoutso thatas manytracks as possiblewill be displayed.
Track height control
Click + to increasetheheightof thetracks, orclick - to decreasetrack height.
 You can also click in thespacebetween the+ and - buttons and drag verticallyforadjusting track height.
Time zoom control
Click + to zoom in horizontally, orclick - to zoom out.
 You can also click in thespacebetween the+ and - buttons and drag horizontallyforadjusting zoom.
Horizontal scroll bar
Drag thescroll boxto pan theview of theprojectleftorright. Theends of thescroll baralso function as zoom controls. You can zoom theprojectin and outbydragging theedges of thescroll box.
 Double-clicking thehorizontal scroll barwill zoom theprojectoutso thattheentirelength of theprojectwill be
displayed.
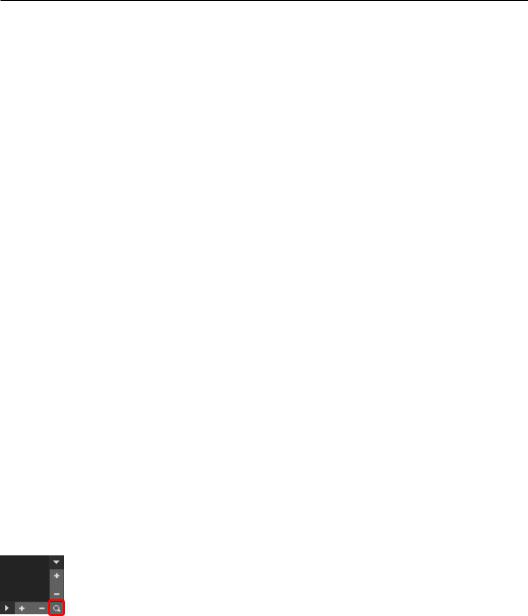
Zoom tool
Click theZoom Tool button  in thecornerof thetimelineto temporarilychangethecursorinto theZoom tool.
Selectan areaof thetimelinethatyou wantto magnify, and thecursorwill revertto thepreviouslyactivetool.
Editing toolbar
Theediting toolbaris displayed below thetimelineand provides access to tools you'll usewhileediting events on the timeline. Formoreinformation, see"TheTransportand Editing Toolbar" on page26.
Length boxes
Thelength boxes displaythestarttime, end timeand length of aselected timerange. If there’s no timeselection, the firstboxshows thecurrentcursorposition.

25
You can double-click theboxes and typeavalueto changethestart, end orlength of thecurrentselection. Formore information, see"Creating selections and positioning thecursor" on page128.
Marker Bar
Themarkerbardisplays markers thatyou add to yourproject. Markers areahandywayto easenavigation in the timeline. Theycan beused to indicatesections of projects, oryou can usemarkers as snap points forediting.
Forinformation aboutinserting markers, see"Inserting markers" on page215.
Ashortcutmenu is displayed when you right-click themarkerbar:
Item |
Description |
Loop Playback |
Sets thetimeselection rangeto repeatthemusicwhen played. |
|
|
SetSelection to View |
Sets theloop region to thevisibleedges of thetimeline. If theentire |
|
projectis displayed, theloop region is setto theends of theproject. |
|
|
SetSelection to Project |
Sets theloop region to theends of theproject. |
|
|
SelectLoop Region |
Creates atimeselection based on thecurrentloop region. |
|
|
Markers/Regions |
Chooseacommand from thesubmenu to add ordeletemarkers or |
|
regions. Formoreinformation, see"Inserting markers" on page215 |
|
and "Inserting regions" on page216. |
|
|
Quantizeto Frames |
Forces edits to occuron frameboundaries. Formoreinformation, see |
|
"Quantizeto frames" on page135. |
|
|
EnableSnapping |
When snapping is enabled, theSnap to Grid and Snap to Markers |
|
commands becomeavailable. Formoreinformation, see"Enable |
|
snapping" on page132. |
|
|
Snap to Grid |
Selectthis command to forceelements in thetimelineto snap to the |
|
grid. Thegrid is defined in units of time. Formoreinformation, see |
|
"Enablesnapping" on page132. |
|
|
Snap to Markers |
Selectthis command to forceelements in thetimelineto snap to |
|
markers. Formoreinformation, see"Enablesnapping" on page132. |
|
|
Snap to All Events |
Selectthis command to forceelements in thetimelineto snap to the |
|
ends of events on othertracks. Formoreinformation, see"Enable |
|
snapping" on page132. |
|
|
Grid Spacing |
Chooseacommand from thesubmenu to setthespacing of vertical |
|
grid lines along thetimeline. |
|
|
SelectivelyPrerender |
Opens thePrerenderVideo dialog, whereyou can createafull-quality |
Video |
preview of yourprojectas itwill appearin its final form. Formore |
|
information, see"Selectivelyprerendervideo" on page458. |
|
|
Clean Up Prerendered |
Removes thetemporaryfiles created as aresultof using the |
Video |
SelectivelyPrerenderVideo command. Formoreinformation, see |
|
"Cleaning up prerendered video files" on page459. |
|
|
www.vegascreativesoftware.com
26
The Transportand EditingToolbar
TheTransportand Editing toolbarprovides controls forplayback, recording, and cursor-positioning buttons and timelineediting.
During projectplayback, audio tracks will bemixed to theMasterbus unless you areusing acustom bus assignment. Video tracks will bemixed to theVideo Preview window.
Formoreinformation, see"Assigning tracks to busses" on page322and "Using theVideo Preview window" on page445.
 You can chooseEdit> Navigateand chooseacommand from thesubmenu to navigatethetimelinequickly.
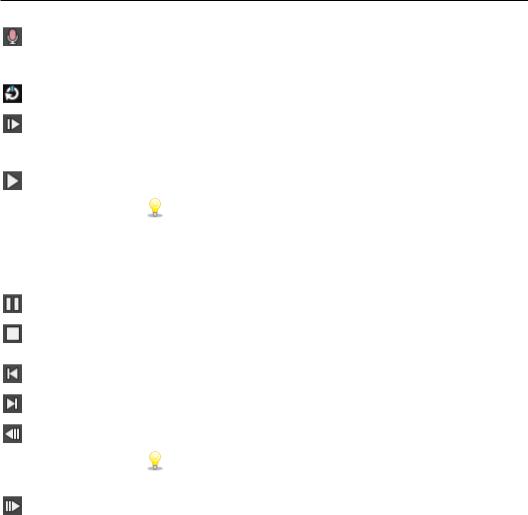
Button Name |
Description |
Record |
Starts recording on all armed tracks. If no tracks arearmed, anew |
|
track will becreated automatically. Formoreinformation, see |
|
"Recording audio" on page105. |
|
|
Loop Playback |
Plays onlytheevents in theloop region in acontinuous mode. |
|
|
Playfrom Start |
Starts playback from thebeginning of theprojectregardless of the |
|
currentcursorposition. When you stop playback, thecursorreturns |
|
to its original position. |
|
|
Play |
Starts playback from thecursorposition. |
|
SelecttheMakespacebarand F12Play/Pauseinstead of |
|
Play/Stop check boxin theGeneral Preferences tab if you want |
|
theF12and spacebarkeyboard shortcuts to togglebetween Play |
|
and Pausemode. In this mode, thecursorwill maintain its |
|
position. |
|
|
Pause |
Pauses playback and leaves thecursoratits currentposition. |
|
|
Stop |
Stops playback orrecording and returns thecursorto its starting |
|
position. |
|
|
Go to Start |
Moves thecursorto thebeginning of theproject. |
|
|
Go to End |
Moves thecursorto theend of theproject. |
|
|
Previous Frame |
Moves thecursorto theprevious frame. |
|
Click and hold thePrevious Frameand NextFramebuttons to |
|
movethecursormultipleframes. |
|
|
NextFrame |
Moves thecursorto thenextframe. |
|
|
27
Button Name |
Description |
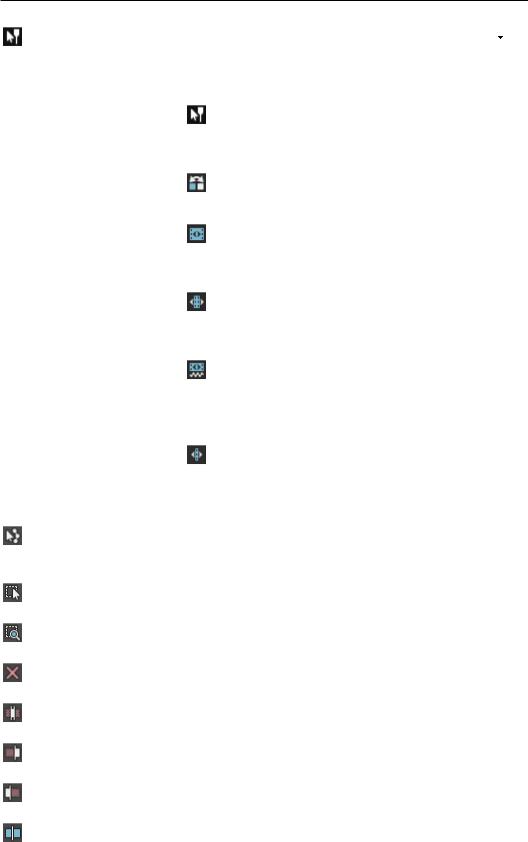
|
Normal Edit |
Selectthis button to perform eventediting. Click thedown arrow |
|
Tool |
and chooseatool from themenu to selectthemodethatwill beused |
|
|
forediting events. Formoreinformation, see"Editing Tool" on page |
|
|
17. |
|
|
n |
Normal EditTool: Useto trim theends of events. For |
|
|
moreinformation, see"Adjusting an event's length" on page |
|
|
152. |
|
n |
ShuffleTool: Useto rearrangeevents on thetimeline. For |
|
|
moreinformation, see"Shuffling events" on page143. |
|
n |
Slip Tool: Useto slip an event's mediawithoutmoving |
|
|
theeventon thetimeline. Formoreinformation, see"Slipping |
|
|
and sliding events" on page157. |
|
n |
SlideTool: Useto movean eventon thetimelinewithout |
|
|
moving theunderlying media. Formoreinformation, see |
|
|
"Slipping and sliding events" on page157. |
|
n |
TimeStretch/Compress Tool: Useto makeevents longer |
|
|
orshorterwhilechanging thevelocityof themediato create |
|
|
fast- orslow-motion effects. Formoreinformation, see |
|
|
"Adjusting an event's length" on page152. |
|
n |
SplitTrim Tool: Useto splitan eventatthepointyou click |
|
|
and trim theeventin thedirection you drag (erasermode). For |
|
|
moreinformation, see"Slipping and sliding events" on page |
|
|
157. |
|
|
|
EnvelopeEdit |
Selectthis button when you wantto editmultipleenvelopes without |
|
Tool |
moving theevents. Formoreinformation, see"Editing Tool" on page |
|
|
17. |
|
|
|
|
Selection Edit |
Selectthis button when you wantto selectmultipleevents. Formore |
|
Tool |
information, see"Editing Tool" on page17. |
|
|
|
|
Zoom EditTool |
Magnifies thecurrentproject. Formoreinformation, see"Editing |
|
|
Tool" on page17. |
|
|
|
|
Delete |
Deletes theselected events ortracks. Formoreinformation, see |
|
|
"Deleting events" on page139. |
|
|
|
|
Trim |
Trims atimeselection. Formoreinformation, see"Trimming events" |
|
|
on page141. |
|
|
|
|
Trim Start |
Trims thestartof theselected eventto thecursor. Formore |
|
|
information, see"Trimming events" on page141. |
|
|
|
|
Trim End |
Trims theend of theselected eventto thecursor. Formore |
|
|
information, see"Trimming events" on page141. |
|
|
|
|
Split |
Click to splitan event. Formoreinformation, see"Splitting events" on |
|
|
page143. |
|
|
|
|
www.vegascreativesoftware.com

28
Button Name |
Description |
Lock |
Locks an eventso thatitcannotbemoved oredited. Formore |
|
information, see"Applying switches to events" on page179. |
|
|
InsertMarker |
Adds amarkeratthecursorposition. Formoreinformation, see |
|
"Inserting markers" on page215. |
|
|
InsertRegion |
Adds region tags ateach end of theselection. Formoreinformation, |
|
see"Inserting regions" on page216. |
|
|
Enable |
Turns on snapping and enables theSnap to Grid and Snap to Markers |
Snapping |
commands. Formoreinformation, see"Enablesnapping" on page |
|
132. |
|
|
Automatic |
Selectthis button to automaticallycreateacrossfadewhen two or |
Crossfades |
moreevents overlap. Formoreinformation, see"Automatic |
|
crossfades" on page132. |
|
|
Auto Ripple |
Selectthis button and chooseamodefrom thedrop-down listto |
|
automaticallyripplethecontents of thetimelinefollowing an edit |
|
afteradjusting an event's length, cutting, copying, pasting, or |
|
deleting events. Formoreinformation, see"Post-editripple" on page |
|
141. |
|
|
Lock Envelopes |
Selectthis button if you wantenvelopepoints to follow an event |
to Events |
when itis moved along thetimeline. Formoreinformation, see |
|
"Video track automation" on page254. |
|
|
IgnoreEvent |
Selectthis button to overrideeventgroups withoutremoving the |
Grouping |
groups. Formoreinformation, see"Grouping events" on page177. |
|
|
Viewingthe status bar
From theView menu, chooseStatus Barto togglethedisplayof thestatus baratthebottom of theVegas Pro window.
Thestatus bardisplays help textwhen yourmouseis overmenu items, shows theavailablerecord timein the selected folder, and will also show progress meters foranyactions thattaketimeto complete.
 To changetherecorded files folder, chooseProperties from theFilemenu and click theAudio tab.Formore information, see"Setting projectproperties" on page45.

29
Window Docking Area and Floating Window Docks
You can usethewindow docking areato keep frequentlyused windows available, butoutof theway, whileyou are working with aproject.
 Tips:
Tips:
nIf you wantto displaythewindow docking areaatthetop of theVegas® Pro window, selecttheDisplay timelineatbottom of main window check boxon theDisplaytab of thePreferences dialog. Clearthe check boxto displaythedocking areaatthebottom of theVegas Pro window.
nIf you wantto displaytabs atthetop of docking windows, selectthePosition tabs attop of docked windows check boxon theDisplaytab of thePreferences dialog.
You can also createmultiplefloating docks to organizeyourVegas Pro windows. Thesedocks can floatoverthe Vegas Pro window or—if you haveadual-monitorvideo card —on asecondarymonitor.
nTo dock awindow, ctrl + drag itbythetitlebarto thedocking areaorafloating dock. Drop nearthetop of the window to createatabbed window oranew docking area. Drop atthetop of thewindow to dock the window atthetop. Drop atthebottom of thewindow to dock thewindow atthebottom.
nTo undock awindow, click theand drag thewindow tab outof thedocking areaorfloating dock.
nTo preventawindow from docking when you drag it, do nothold theCtrl key.
 When theAllow floating windows to dock check boxon theDisplaytab of thePreferences dialog is cleared, windows will notdock unless you hold theCtrl key. When thecheck boxis selected, you can preventawindow from docking byholding theCtrl key.
nTo expand adocked window so itfills thedocking area, click theMaximizebutton  . Click therestorebutton
  to restorethewindow to its previous size.
nTo removeawindow from thedocking areaorafloating dock, click theClosebutton  .
.
You can dock several windows in thesameareaof thescreen, and thewindows will belayered. Click awindow’s tab to bring itto thetop.
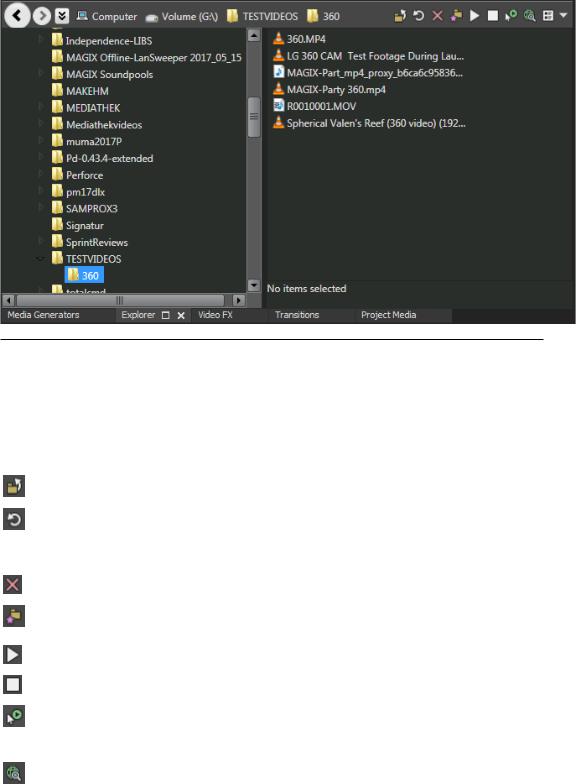
The Explorer Window
ChooseView > Window > Explorerto togglethedisplayof theExplorerwindow.
LiketheProjectMediawindow, you can usetheExplorerwindow to view, preview, and add mediafiles to your project.
www.vegascreativesoftware.com
Window DockingArea andFloatingWindow Docks |
30 |
Learning more about the Explorer window
Item Name |
Description |
Back/Forward |
UsetheBack and Forward buttons to navigatethefolderhistory. |
|
|
Address Bar |
Displays thepath to thecurrentfolder. |
|
|
TreeView |
Displays all of theavailablefiles and folders whereyou can find |
|
mediafiles. |
|
|
Contents Pane |
Displays thefolders and mediafiles contained in theactivefolder. |
|
|
Up |
Opens thefolderonelevel abovetheactivefolder. |
|
|
Refresh |
Refreshes thecontents of theactivefolder. |
|
If you insertanew CD(orotherremovablemedia), click to refresh |
|
theExplorer. |
|
|
Delete |
Deletes theselected folderorfile. |
|
|
Add to Favorites |
Adds theselected folderto theFavorites folderin thetreeview. The |
|
Favorites foldercontains links to folders thatyou usemostoften. |
|
|
StartPreview |
Plays theselected mediafile. |
|
|
Stop Preview |
Stops theplayback of theselected mediafile. |
|
|
Auto Preview |
Automaticallypreview mediafiles when you click them in the |
|
Explorerwindow. Formoreinformation, see"Previewing mediafiles" |
|
on page80. |
|
|
GetMediafrom the |
Opens theGetMediafrom theWeb dialog, whereyou can download |
Web |
files to usein yourproject. |
|
|
Loading...