


IC Recorder
Operating Instructions
4-196-546-12(1)
Getting Started
Basic Operations
Other Recording Operations 
Other Playback Operations
Editing Files
About the Menu Function
Utilizing Your Computer
Additional Information
Troubleshooting
Index
ICD-UX512

Owner’s Record
The model number is located at the rear panel and the serial number is located inside the battery compartment. Record these numbers in the space provided below. Refer to these numbers whenever you call upon your Sony dealer regarding this product.
Model No. __________________________________
Serial No. __________________________________
The following FCC statement applies only to the version of this model manufactured for sale in the USA. Other versions may not comply with FCC technical regulations.
INFORMATION
This equipment has been tested and found to comply with the limits for a Class B digital device, pursuant to Part 15 of the FCC Rules. These limits are designed to provide reasonable protection against harmful interference in a residential installation. This equipment generates, uses and can radiate radio frequency energy and, if not installed and used in accordance with the instructions, may cause harmful interference to radio communications.
However, there is no guarantee that interference will not occur in a particular installation. If this equipment does cause harmful interference to radio or television reception, which can be determined by turning the equipment off and on, the user is encouraged to try to correct the interference by one or more of the following measures:
Reorient or relocate the receiving antenna. Increase the separation between the equipment and receiver.
Connect the equipment into an outlet on a circuit different from that to which the receiver is connected. Consult the dealer or an experienced radio/TV technician for help.
You are cautioned that any changes or modifications not expressly approved in this manual could void your authority to operate this equipment.
If you have any questions about this product, you may call: Sony Customer Information Service Center 1-800-222-7669 or http://www.sony.com/
Declaration of Conformity
Trade Name |
: SONY |
Model |
: ICD-UX512 |
Responsible Party |
: Sony Electronics Inc. |
Address |
: 16530 Via Esprillo, |
|
San Diego, CA 92127 USA |
Telephone Number : 858-942-2230
This device complies with part 15 of the FCC Rules. Operation is subject to the following two conditions: (1) This device may not cause harmful interference, and (2) this device must accept any interference received, including interference that may cause undesired operation.
RECYCLING NICKEL METAL HYDRIDE BATTERIES
Nickel metal hydride batteries are recyclable.
You can help preserve our
environment by returning your used rechargeable batteries to the
collection and recycling location nearest you.
For more information regarding recycling of rechargeable batteries, call toll free 1-800-822-8837, or visit http://www.rbrc.org/.
Caution: Do not handle damaged or leaking nickel metal hydride batteries.
2GB

•The recorded music is limited to private use only. Use of the music beyond this limit requires permission of the copyright holders.
•Sony is not responsible for incomplete recording/ downloading or damaged data due to problems of the IC recorder or computer.
•Depending on the types of the text and characters, the text shown on the IC recorder may not be displayed properly on device. This is due to:
–The capacity of the connected IC recorder.
–The IC recorder is not functioning normally.
–Content information is written in the language or the character that is not supported by the IC recorder.
Notice for users
All rights reserved. This manual or the software described herein, in whole or in part, may not be reproduced, translated or reduced to any machine readable form without prior written approval from Sony Corporation.
IN NO EVENT SHALL SONY CORPORATION BE LIABLE FOR ANY INCIDENTAL, CONSEQUENTIAL OR SPECIAL DAMAGES, WHETHER BASED ON TORT, CONTRACT, OR OTHERWISE, ARISING OUT OF OR IN CONNECTION WITH THIS MANUAL, THE SOFTWARE OR OTHER INFORMATION CONTAINED HEREIN OR THE USE THEREOF.
Sony Corporation reserves the right to make any modification to this manual or the information contained herein at any time without notice.
The software described herein may also be governed by the terms of a separate user license agreement.
•This software is for Windows and cannot be used for Macintosh.
•The supplied connection support cable is for the IC recorder ICD-UX512. You cannot connect other IC recorders.
What you record is for personal enjoyment and use only. Copyright laws prohibit other forms of use without the permission of the copyright holders. The use of Memory Stick™ media for
recording copyright-protected graphics or other data is limited to the restrictions specified under applicable copyright laws. Any use beyond those restriction is prohibited.
This product supports “Memory Stick Micro™ (M2™) ” media. “M2™” is an abbreviated form of “Memory Stick Micro™.” Hereinafter, “M2™” is used in this document.
3GB

Trademarks
•Microsoft, Windows, Windows Vista and Windows Media are registered trademarks or trademarks of Microsoft Corporation in the United States and/or other countries.
•Macintosh and Mac OS are trademarks of Apple Inc., registered in the USA and other countries.
•Pentium is a registered trademark of Intel Corporation.
•MPEG Layer-3 audio coding technology and patents licensed from Fraunhofer IIS and Thomson.
•microSD and microSDHC logos are trademarks of SD-3C, LLC.
• “Memory Stick Micro,” “M2” and 
 are trademarks or registered trademarks of Sony Corporation.
•“MagicGate” is a trademark of Sony Corporation.
•Nuance, the Nuance logo, Dragon, Dragon NaturallySpeaking, and RealSpeak are trademarks and/or registered trademarks of Nuance Communications Inc., and/or its affiliates in the United States and/or other countries.
•US and foreign patents licensed from Dolby Laboratories.
All other trademarks and registered trademarks are trademarks or registered trademarks of their respective holders. Furthermore, “ ™ ” and “®” are not mentioned in each case in this manual.
The “Sound Organizer” uses software modules as shown below:
Windows Media Format Runtime
This product contains technology subject to certain intellectual property rights of Microsoft.
Use or distribution of this technology outside of this product is prohibited without the appropriate license(s) from Microsoft.
4GB

Table of Contents |
|
Getting Started |
|
Step 1: Checking the Contents of the |
|
Package ..................................................... |
8 |
Index to parts and controls ................... |
9 |
Preventing unintentional operations |
|
(HOLD) .............................................. |
10 |
Step 2: Recharging the Battery ............... |
11 |
Recharging the battery using a |
|
computer ............................................. |
11 |
Recharging the battery using a |
|
USB AC adaptor ................................. |
13 |
When to charge/replace the battery ...... |
13 |
Step 3: Turning the IC Recorder On ....... |
14 |
Turning the power on ......................... |
14 |
Turning the power off ......................... |
14 |
Step 4: Setting the Clock ........................ |
15 |
Setting the clock after recharging the |
|
battery ................................................. |
15 |
Setting the clock using the menu ........ |
15 |
Step 5: Setting the Language to Be |
|
Used in the Display Window .................. |
18 |
Basic Operations |
|
Recording ....................................... |
19 |
Listening ......................................... |
23 |
Erasing ............................................ |
28 |
Other Recording Operations
Changing the Recording Settings ............ |
30 |
Selecting a recording scene for each |
|
situation ............................................... |
30 |
Starting to record automatically in |
|
response to sound |
|
– the VOR function ............................. |
35 |
Recording on a Memory Card ................. |
36 |
Recording via Other Devices .................. |
40 |
Recording with an external |
|
microphone ......................................... |
40 |
Recording from other equipment ........ |
41 |
Operation during Recording .................... |
44 |
Monitoring the recording .................... |
44 |
Other Playback Operations |
|
Changing the Playback Settings .............. |
45 |
Convenient playback methods ............ |
45 |
Reducing noise in the playback |
|
sound and making the human voice |
|
clearer – the noise cut function ........... |
46 |
Adjusting the playback speed |
|
– the DPC (Digital Pitch Control) |
|
function ............................................... |
47 |
Selecting the sound effect ................... |
48 |
Selecting the playback mode .............. |
50 |
Playing Back a File at a Desired Time |
|
with an Alarm .......................................... |
52 |
5GB
Playback via Other Devices .................... |
54 |
Recording with other equipment ........ |
54 |
Editing Files |
|
Arranging Files in a Folder ..................... |
55 |
Moving a file to a different folder ...... |
55 |
Copying a file to the other |
|
memory ............................................... |
56 |
Erasing all files in a folder .................. |
57 |
Using a Track Mark ................................ |
59 |
Adding a track mark ........................... |
59 |
Erasing a track mark ........................... |
60 |
Erasing all the track marks in the |
|
selected file at one time ...................... |
61 |
Dividing a File ........................................ |
62 |
Dividing a file at the current |
|
position ............................................... |
62 |
Dividing a file at all the track mark |
|
positions .............................................. |
63 |
Protecting a File ...................................... |
65 |
About the Menu Function |
|
Making Settings for the Menu ................ |
66 |
Menu Settings ......................................... |
67 |
Utilizing Your Computer |
|
Using the IC Recorder with Your |
|
Computer ................................................. |
80 |
Connecting the IC recorder to your |
|
computer ............................................. |
80 |
Structure of folders and files ............... |
81 |
Disconnecting the IC recorder |
|
from your computer ............................ |
85 |
Copying Files from the IC Recorder to |
|
Your Computer ....................................... |
86 |
Copying Music Files from Your |
|
Computer to the IC Recorder and |
|
Playing Them Back ................................. |
87 |
Copying a music file from your |
|
computer to the IC recorder |
|
(drag and drop) ................................... |
87 |
Playing back music files copied |
|
from your computer using |
|
the IC recorder .................................... |
87 |
Using the IC Recorder as |
|
USB Memory .......................................... |
89 |
Using the Supplied Sound Organizer |
|
Software .................................................. |
90 |
What you can do using Sound |
|
Organizer ............................................ |
90 |
System requirements for your |
|
computer ............................................. |
91 |
Installing Sound Organizer ................. |
92 |
The Sound Organizer window ............ |
94 |
6GB
Additional Information |
|
Using a USB AC Adaptor ....................... |
95 |
Disconnecting the IC recorder |
|
from the AC outlet .............................. |
96 |
Precautions .............................................. |
97 |
Specifications ........................................ |
100 |
System requirements ........................ |
100 |
Design and specifications ................. |
101 |
Battery life ........................................ |
104 |
Troubleshooting |
|
Troubleshooting .................................... |
105 |
Message List ......................................... |
114 |
System Limitations ............................... |
118 |
Display Window Guide ........................ |
119 |
Index ..................................................... |
124 |
7GB
Getting Started
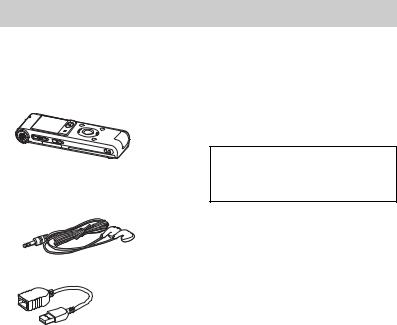
Step 1: Checking the Contents of the
Package
IC Recorder (1)
Remove the film on the display window before you use the IC recorder.
Stereo headphones (1)
USB connection support cable (1)
Application software, Sound Organizer (CD-ROM) (1)
Operating Instructions
You are cautioned that any changes or modifications not expressly approved in this manual could void your authority to operate this equipment.
If the IC recorder cannot be connected to a computer directly, use the supplied USB connection support cable.
NH-AAA (size AAA) rechargeable battery (1)
Battery case (1)
8GB

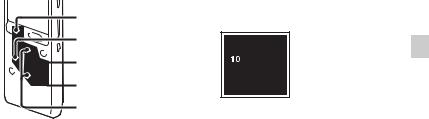
Index to parts and controls
Front
A Operation indicator
B Built-in microphones (stereo)
C Display window
D x STOP button
E z REC (record)/PAUSE button
FControl button (v, V / . (review/fast backward), > (cue/fast forward))
G N (play)/ENT (enter) button*
H  (folder) button
I MENU/NOISE CUT button
J m (microphone) jack*
K i (headphone) jack
L ERASE button
M VOL (volume) –/+* button
N  (repeat) A-B button
O T-MARK (Track mark) button
Rear
Started Getting
P Strap hole (A strap is not supplied.)
Q Speaker
R USB slide lever
S HOLD/POWER switch
T DPC(SPEED CTRL) switch
U M2™/microSD memory card slot
V Battery compartment
*These buttons and the jack have a tactile dot. Use it as a reference point for operations, or to identify each terminal.
9GB
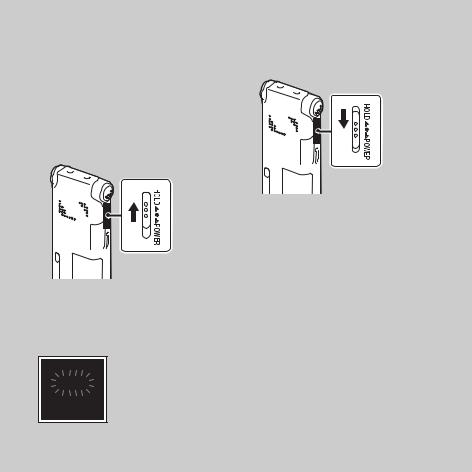
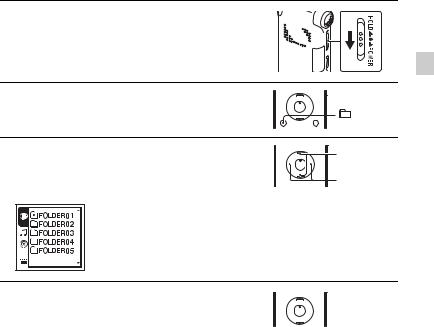
Preventing unintentional operations (HOLD)
You can disable all the buttons (HOLD) in order to prevent unintentional operations when you carry the IC recorder, etc.
To put the IC recorder in the HOLD status
Slide the HOLD/POWER switch in the direction of “HOLD.”
“HOLD” will appear for approximately 3 seconds, indicating that all the button operations are disabled.
To release the IC recorder from the HOLD status
Slide the HOLD/POWER switch towards the center.
P Note
When the HOLD function is activated during recording, all the button operations are disabled. To stop recording, cancel the HOLD function first.
z Tip
Even if the HOLD function is activated, you can stop the alarm playback by pressing any button. (You cannot stop normal playback.)
10GB
Step 2: Recharging the Battery
Recharging the battery |
arrow, and insert the USB DIRECT |
using a computer |
connector into the USB port of a running |
|
computer.*2 |
Remove the film on the display window before you use the IC recorder. Connect the IC recorder to a running
computer, and charge the battery until the battery indicator indicates “ .”
.”
It takes about 3 hours and 30 minutes to fully charge an exhausted battery.*1
1 Insert a rechargeable battery.
Slide and lift the battery compartment lid, insert an NH-AAA rechargeable battery with correct polarity, and close the lid.
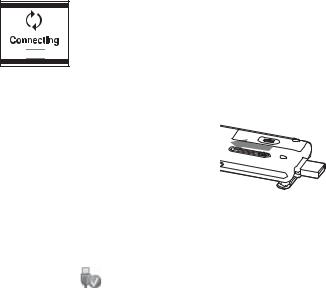
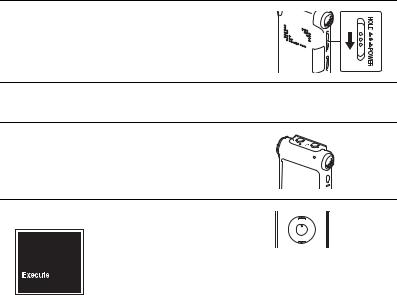
2 Connect the IC recorder to your computer.
Slide the USB slide lever on the back of the IC recorder in the direction of the
Computer
IC recorder
To USB port of your computer
While the battery is charging, “Connecting” and the battery indicator are displayed in an animation.


 Battery indicator
Started Getting
11GB
When the battery is fully charged, the battery indicator will indicate “  .”
.”

 Fully charged indicator
3 Disconnect the IC recorder from your computer.
Follow the procedures below; otherwise, when the IC recorder contains data files, the files may be damaged or become unplayable.
1Make sure that the operation indicator does not light.
2Perform the following operation on your computer.
On a Windows screen, left-click the icon at the bottom of the desktop of the computer.
t Left-click “Eject IC RECORDER.”
The icon and menu displayed can be different on different operating systems.
On a Macintosh screen, drag “IC RECORDER” on the desktop to “Trash” and drop it there.
For details on disconnecting the IC recorder from your computer, refer to the operating instructions supplied with your computer.
3Disconnect the IC recorder from the USB port of the computer, and slide the USB slide lever in the direction of the arrow to retract the USB DIRECT connector.
*1 This is an approximation for the time it takes to charge from no remaining battery power to full battery power at room temperature. It varies depending on the remaining power and the condition of the battery. It also takes more time if the temperature of the battery is low, or if the battery is charged while you are transferring data to the IC recorder.
*2 If the IC recorder cannot be connected to a computer directly, use the supplied USB connection support cable.
12GB

P Note
If the battery indicator is not displayed in an animation, charging has not been done properly. See “Troubleshooting” on page 105.
When using a fully charged battery or an LR03 (size AAA) alkaline battery
Follow the step 1.
P Note
You cannot charge an LR03 (size AAA) alkaline battery (not supplied).
z Tips
•Do not use a manganese battery for this IC recorder.
•When replacing the battery, files recorded or alarm settings are not erased even when you remove the battery.
•When replacing the battery, the clock continues moving for about 1 minute after you remove the battery.
Recharging the battery using a USB AC adaptor
You can also charge the battery by using an AC-U501AD USB AC adaptor, etc. (not supplied) (page 95).
When to charge/replace the battery
The battery indicator on the display shows the battery condition in an animation.
Battery remain indication


 : “Low Battery Level” appears. Charge the rechargeable battery or replace the old battery with a new one.
m


 : “Low Battery” appears and the IC recorder will stop operation.
Started Getting
13GB

Step 3: Turning the IC Recorder On
Turning the power on |
z Tips |
Slide the HOLD/POWER switch in the direction of “POWER” for more than 1 second. The IC recorder is turned on, and the “Accessing...” animation is displayed.
•When you are not going to use the IC recorder for a long time, we recommend to turn off the IC recorder.
•When the IC recorder is in the stop mode, and you leave the IC recorder without attempting an operation for a certain length of time, the auto power off function will take effect. (The length of time before auto power off is set to “10min” when you purchase the IC recorder.) You can select the length of time before auto power off takes effect in the menu (page 78).
Turning the power off
Slide the HOLD/POWER switch in the direction of the “POWER” for more than 2 seconds, and “Power Off” animation is displayed.
14GB
Step 4: Setting the Clock
 x STOP
.
 N/ENT
N/ENT
 MENU/NOISE CUT
v, V
Select the last two digits of the year when you set the year.
2 Press x STOP to return to the stop mode display.
You need to set the clock to use the alarm function or record the date and time. When you insert a battery for the first time, or when you insert a battery after the IC recorder has been without a battery for more than 1 minute, the “Set Date&Time” animation appears, and then the year section begins to flash in the clock setting display window.
Setting the clock using the menu
While the IC recorder is in the stop mode, you can set the clock using the menu.
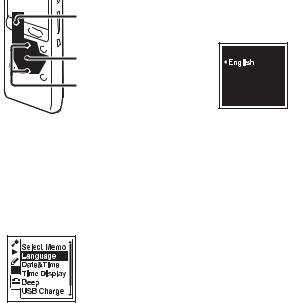
1 Select “Date&Time” in the menu.
1Press MENU/NOISE CUT to enter the menu mode.
Started Getting
Setting the clock after recharging the battery
1 Press v or V on the control button to set the year, month, day, hour, and minute in sequence, and then press N/ENT.
15GB
The menu mode window will be displayed.
2Press . on the control button, press
v or V on the control button to select
the  (IC recorder setting) tab, and then press N/ENT.
3Press v or V on the control button to select “Date&Time,” and then press N/ENT.
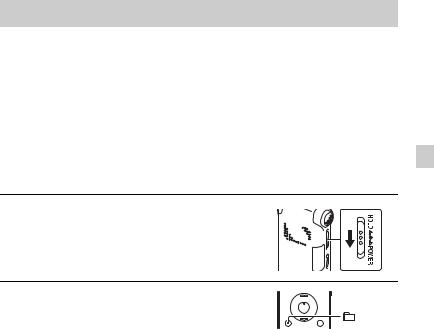
2 Press v or V on the control button to select “Auto” or “Manual,” and then press N/ENT.
16GB
When you selected “Auto,” the clock is automatically adjusted using the clock in the computer connected to the IC recorder and on which the supplied Sound Organizer software is started. When you select “Manual,” proceed to the next steps.
3 Press v or V on the control button to select “10y1m1d,” and then press N/ ENT.
4 Press v or V on the control button to set the year, month, day, hour, and minute in sequence, and then press N/ENT.
Select the last two digits of the year when you set the year.
5 Press x STOP to exit the menu mode.

P Note
If you do not press N/ENT within 1 minute of entering the clock setting data, the clock setting mode is canceled and the window will return to the display of the stop mode.
To display the current date and time
While the IC recorder is in the stop mode, press x STOP to display the current date and time for about 3 seconds.
Started Getting
17GB
Step 5: Setting the Language to Be Used in the Display Window
|
2 Press v or V on the control button to |
x STOP |
select the language that you want to use, |
|
and then press N/ENT. |
N/ENT |
|
v, V |
|
You can select the language to be used for messages, menus, folder names, file names, etc. from 3 languages.
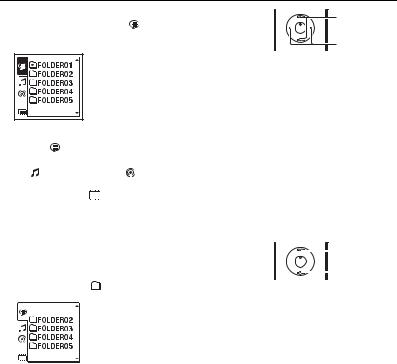
1 Select the (IC recorder setting) tab t “Language” in the menu, and then press N/ENT.
You can select the following languages. English, Español (Spanish), Français (French)
3 Press x STOP to exit the menu mode.
18GB
Basic Operations
Recording
P Notes
•Before making a recording, be sure to check the battery indicator (page 13).
•Noise may be recorded if an object, such as your finger, etc., accidentally rubs or scratches the IC recorder during recording.
z Tip
Before you start recording, we recommend you make a trial recording first, or monitor the recording (page 44).
Selecting a folder
1 Slide the HOLD/POWER switch towards the center to release the IC recorder from the HOLD status
(page 10).
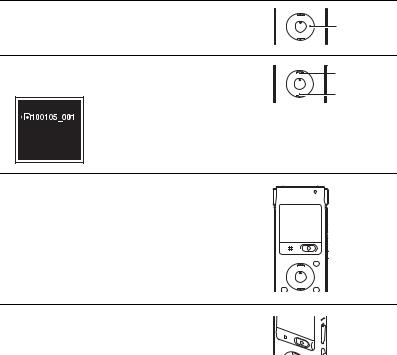
2 Press  to display the folder selection window.
Operations Basic
19GB
3 Press . on the control button, press v or V on the |
v, V |
||
control button to select the |
(Voice) tab, and then |
||
|
|||
press > on the control button. |
., > |
|
P Note
Only the |
|
(Voice) tab will be displayed when you |
|
|
|||||||||
|
|
|
|||||||||||
purchase the IC recorder. |
|
|
|
||||||||||
The |
(Music) tab and the |
(Podcast) tab will be |
|
|
|||||||||
displayed when you transfer files from your computer |
|
|
|||||||||||
(page 87, 91). The |
|
(Built-in memory) tab will be |
|
|
|||||||||
|
|
|
|||||||||||
displayed when you insert a memory card into the IC |
|
|
|||||||||||
recorder (page 37). |
|
|
|
|
|
||||||||
|
|
|
|
|
|
|
|
|
|
|
|||
4 Press v or V on the control button to select the folder in |
|
v |
|||||||||||
which you want to record files. |
|
|
|||||||||||
When you purchase the IC recorder, there are 5 folders |
|
V |
|||||||||||
|
|||||||||||||
already available ( |
|
FOLDER01-05). |
|
|
|||||||||
|
|
|
|
|
|
|
|
|
|
|
|
|
|
|
|
|
|
|
|
|
|
|
|
|
|
|
|
|
|
|
|
|
|
|
|
|
|
|
|
|
|
|
|
|
|
|
|
|
|
|
|
|
|
|
|
|
|
|
|
|
|
|
|
|
|
|
|
|
|
|
|
|
|
|
|
|
|
|
|
|
|
|
|
20GB
5 Press N/ENT.
 N/ENT
N/ENT
Starting to record (Auto (AGC) recording)
1 Place the IC recorder so that the built-in microphones face the direction of the source to be recorded.
2 Press z REC/PAUSE in the stop mode. The operation indicator lights in red.
You do not need to press and hold z REC/PAUSE while recording.
The new file will be automatically recorded after the last recorded file.
 Operation
indicator
 z REC/ PAUSE
Operations Basic
21GB

To stop recording
1 Press x STOP. |
|
The “Accessing...” animation appears and the IC recorder |
x STOP |
stops at the beginning of the current recording file. |
|
Note while accessing
The IC recorder is recording data and storing it on the memory media when the “Accessing...” animation appears on the display. While the IC recorder is accessing data, do not remove the battery or connect or disconnect the USB AC adaptor (not supplied). Doing so may damage the data.
Other operations
pause recording* |
Press z REC/PAUSE. During recording pause, the operation indicator |
|
|
flashes in red and “ |
” begins to flash in the display window. |
|
|
|
release pause and |
Press z REC/PAUSE again. Recording resumes from that point. (To stop |
|
resume recording |
recording after pausing recording, press x STOP.) |
|
|
|
|
review the current |
Press N/ENT. Recording stops and playback starts from the beginning of |
|
recording instantly |
the file just recorded. |
|
|
|
|
review during |
Press and hold . on the control button during recording or recording |
|
recording |
pause. Recording stops and you can search backwards while listening to fast |
|
|
playback sound. After you release . on the control button, playback |
|
|
starts from that point. |
|
*1 hour after you pause recording, recording pause is automatically released and the IC recorder enters the stop mode.
z Tips
•You can record up to 199 files in each folder.
•You can make new folders or erase unwanted folders using the supplied Sound Organizer software (page 90).
22GB
Listening
Starting playback
1 Slide the HOLD/POWER switch towards the center to release the IC recorder from the HOLD status
(page 10).
2 Press  .
.
3 Press . on the control button, press v or V on the control button to select the  (Voice) tab, the
 (Music) tab, or the
  (Podcast) tab, and then press > on the control button.
v, V
 ., >
., >
Operations Basic
4 Press v or V on the control button to select the folder.
 v
v
 V
V
23GB
5 Press > on the control button.
|
> |
6 Press v or V on the control button to select the file you |
v |
want to play. |
|
|
V |
7 Press N/ENT.
Playback will start soon, and the operation indicator will light in green. (When “LED” is set to “OFF” in the menu (page 76), the operation indicator does not light.)
 Operation
indicator
 N/ENT
N/ENT
8 Press VOL –/+ to adjust the volume.
 VOL –/+
24GB
To stop playback
1 Press x STOP.
 x STOP
Other operations
stop at the current position Press N/ENT. To resume playback from that point, press N/ENT (Playback Pause function) again.
go back to the beginning of Press . on the control button once.*1*2 the current file
go back to previous files |
Press . on the control button repeatedly. (During the stop mode, |
|
keep the button pressed to go back the files continuously.*3) |
skip to the next file |
Press > on the control button once.*1*2 |
skip to the succeeding files Press > on the control button repeatedly. (During the stop mode, keep the button pressed to skip the files continuously.*3)
*1 When a track mark is set, the IC recorder goes backward or forward to the track mark before or after the current point (page 59).
*2 These operations are for when “Easy Search” is set to “OFF” (page 45).
*3 In the continuous searching mode, the IC recorder does not locate track marks.
Operations Basic
25GB
About the tab view
The recordable area and the playback-only area of folders stored on the IC recorder are managed separately, and are displayed with tabs. When you choose a folder, you can move to one of those the areas by switching a tab.
Tabs
 (Voice): Recordable area. This is the area used to manage files recorded with the IC recorder.
 (Music): Playback-only area. This is the area used to manage music files transferred from your computer.
 (Podcast): Playback-only area. This is the area used to manage podcast files transferred from your computer.
 (Built-in memory) or
  (External memory): You can switch between the built-in memory and external memory (memory card) of the IC recorder (page 38).
Only the |
|
(Voice) tab will be displayed when you purchase the IC recorder. |
||||
|
||||||
The |
(Music) tab and the |
(Podcast) tab will be displayed when you transfer files from |
||||
your computer (page 87, 91). The |
|
(Built-in memory) tab will be displayed when you |
||||
|
||||||
insert a memory card into the IC recorder (page 37).
Display when playing back a file
26GB
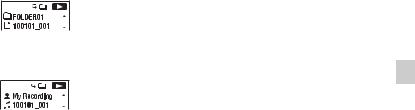
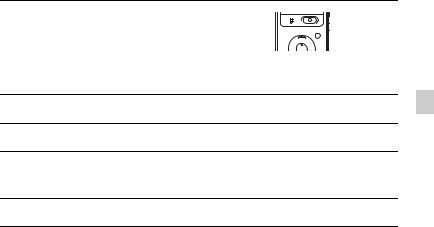
AFile information
Press v or V on the control button to check the file information during playback. A file recorded using the IC recorder is displayed as follows.
 : Folder name: FOLDER01-FOLDER05
 : File name: Date_file number (e.g. 100101_001)
 : Artist name (e.g. My Recording)
 : Title: Date_file number (e.g. 100101_001)
BCounter information
You can select the display mode in the menu (page 75). Elapsed time: The elapsed playback time of one file Remaining time: The remaining playback time of one file Recording date: Date recorded
Recording time: Time recorded
CRemaining recording time
Displays the remaining recording time in hours, minutes, and seconds.
If there is more than 10 hours time remaining, the time is displayed in hours.
If there is more than 10 minutes and less than 10 hours time remaining, the time is displayed in hours and minutes.
If there is less than 10 minutes time remaining, the time is displayed in minutes and seconds.
Operations Basic
27GB
Erasing
P Note
Once a recording has been erased, you cannot retrieve it.
Selecting a file and erasing it
1 Slide the HOLD/POWER switch towards the center to release the IC recorder from the HOLD status
(page 10).
2 Select the file you want to erase when the IC recorder is in the stop or playback mode.
3 Press ERASE.
“Erase?” is displayed and the specified file is played back for confirmation.
 ERASE
ERASE
4 Press v or V on the control button to select “Execute.”
 v
v
 V
V
28GB

5 Press N/ENT.
The “Erasing...” animation appears in the display  N/ENT window and the selected file will be erased.
When a file is erased, the remaining files will advance so that there will be no space between files.
To cancel erasing
1 Select “Cancel” in step 4 of “Selecting a file and
erasing it,” and then press N/ENT. |
N/ENT |
|
To erase another file
Proceed with steps 2 through 5 in “Selecting a file and erasing it.”
To erase a part of a file
Divide the file into two files first (page 62), and then proceed with steps 2 through 5 in “Selecting a file and erasing it.”
Operations Basic
29GB

Other Recording Operations
Changing the Recording Settings
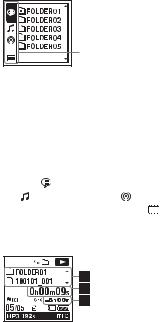
Selecting a recording scene for each situation
 x STOP
 N/ENT
N/ENT
v, V
According to various recording scene, you can change the items for recording, such as REC Mode (page 70), Mic Sensitivity (page 70), etc., to the recommended settings in bulk. You can change the settings for each item.
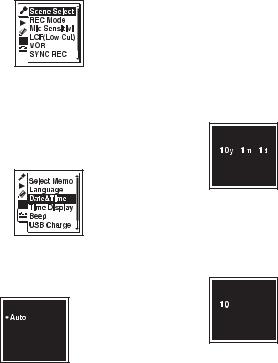
1 Select the (Recording) tab t “Scene Select” in the menu, and then press N/ ENT.
The Scene Select window will be displayed.
2 Press v or V on the control button to select a scene you want, and then press N/ENT.
3 Press v or V on the control button to select “Save Scene Setting,” and then press N/ENT.
4 Press x STOP to exit the menu mode.
30GB
 Loading...