How it Works
Log In / Sign Up
Buy Points
How it Works
FAQ
Contact Us
Questions and Suggestions
Users
Sony
Loading...
H
HXC‐D70
4
HXCE-FB70
HXC-FB80
2
HXC-FB80HN
HXC-P70
2
HXCU-100
4
HXCU-D70
HXCU-FB70
HXCU-FB80L
2
HXD1090
HXD1095
HXD790
HXD795
HXD890
HXD895
HXD990
HXD995
HXR-FMU128
HXR-IFR5
HXR-MC1
6
HXR-MC1500C
2
HXR-MC1500P
3
HXR-MC1P
5
HXR-MC2000
2
HXR-MC2000E
2
HXR-MC2000J
HXR-MC2000N
HXR-MC2000U
2
HXR-MC2500
3
HXR-MC50
2
HXR-MC50E
3
HXR-MC50P
HXR-MC50U
2
HXR-MC88
HXR-NX100
HXR NX200
4
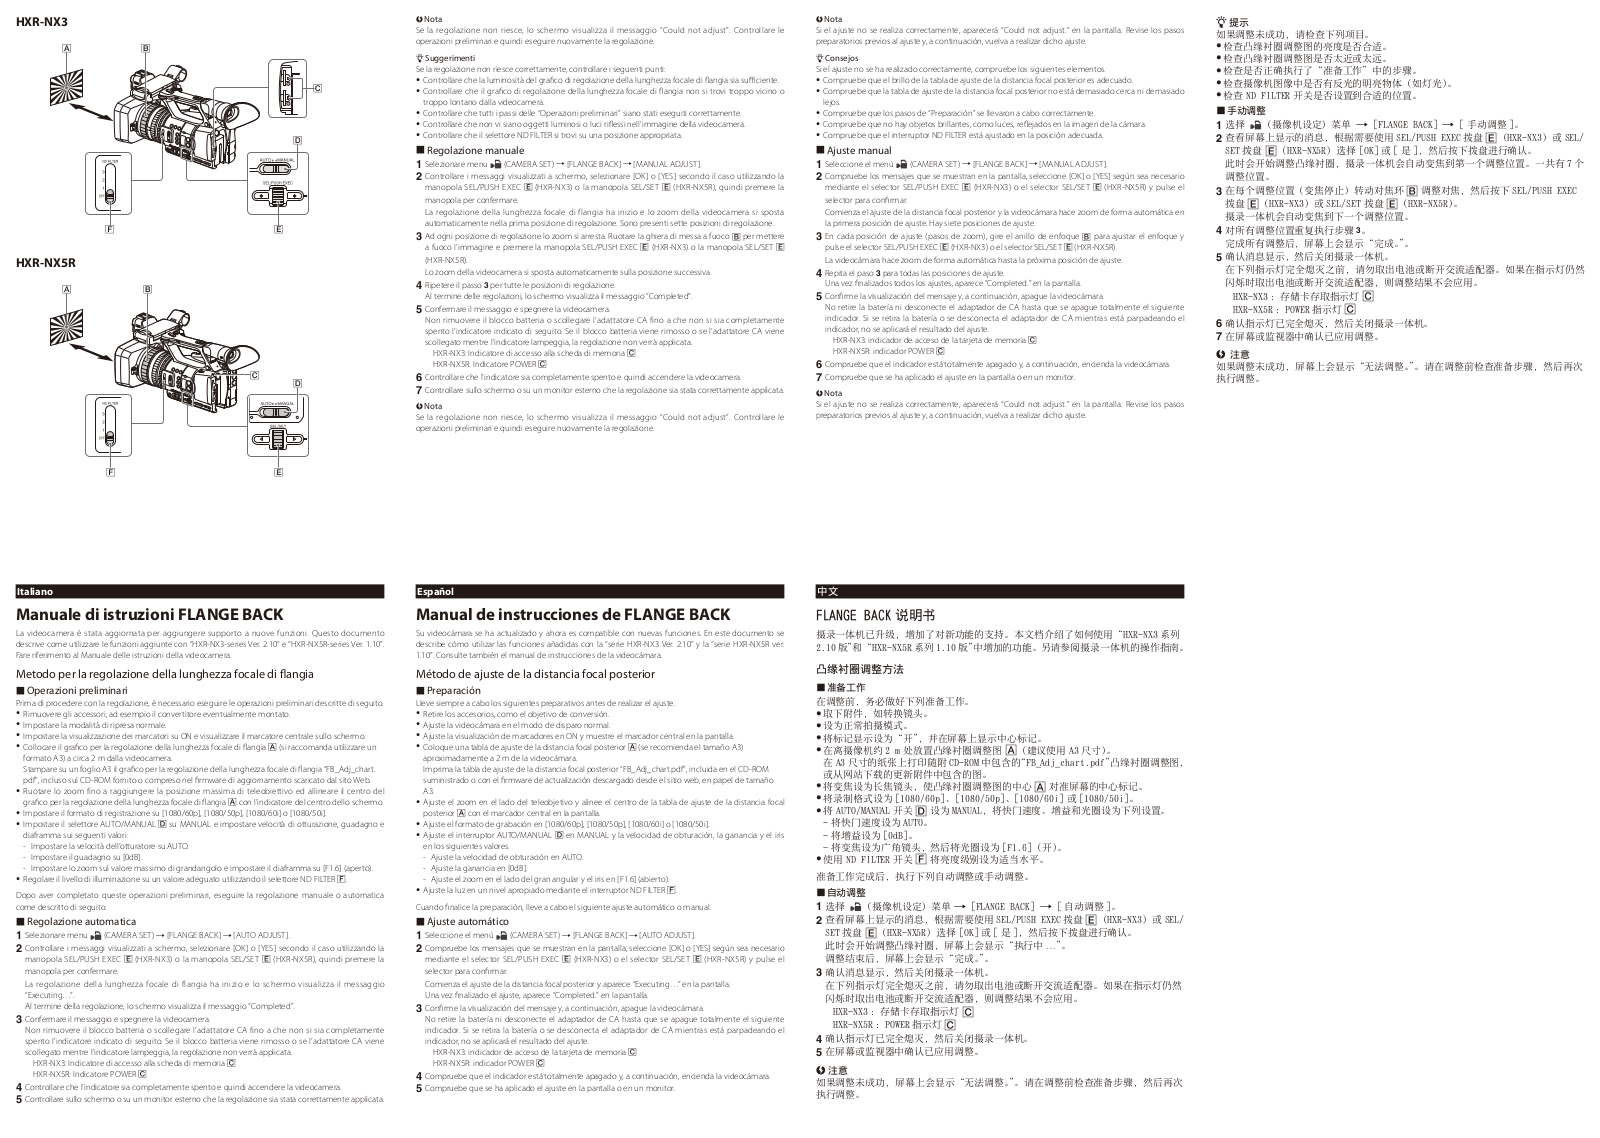
HXR-NX3
2
HXR-NX30E
2
HXR-NX30U
2
HXR-NX3D1
HXR-NX3D1C
HXR-NX3D1E
HXR-NX3D1U
HXR-NX5
HXR-NX5C
3
HXR-NX5E
3
HXR-NX5J
2
HXR-NX5M
3
HXR-NX5N
4
HXR-NX5P
3
HXR-NX5R
5
HXR-NX5U
5
HXR-NX70
HXR-NX70C
HXR-NX70E
HXR-NX70U
2
HXR-NX80
3
Hyper HAD SPT-M124,Hyper HAD SPT-M122CE,Hyper HAD SPT-M124CE,Hyper HAD SPT-M128CE
Hyper HAD SSC-CX34
Hyper HAD SSC-CX34P
HyperHAD SSC-MX34
HZC-DFR20
HZC-DFR20M
HZC-DFR20W
HZC-PRV20
HZC-PRV20M
HZC-PRV20W
HZC-PSF20
HZC-PSF20M
HZC-PSF20W
HZ-DS2000
HZ-WS2000
I
i130
i260
I3113
4
I3123
3
I3213
5
I3223
4
I3312
5
i390
I4113
4
I4193
3
I4213
5
I4293
4
I4312
5
I4332
4
i90
IAD-IF70
4
IBAR12
IBAR12-20ULTRA
IBAR12ULTRA
ICBU-100
ICB-U655
3
ICD 47
7
ICD 70
9
ICD B300
17
ICD B500
23
ICD BX800
20
IC Recorder
IC voice recorder
Loading...
Loading...
Nothing found
HXR-NX5R
Operating Instructions
2 pgs
347.91 Kb
0
User Manual
8 pgs
6.67 Mb
0
User Manual
148 pgs
7.46 Mb
0
User Manual [de]
149 pgs
7.54 Mb
0
User Manual [fr]
153 pgs
7.57 Mb
0
Table of contents
Loading...
Sony HXR-NX5R Operating Instructions
...
Sony Operating Instructions
Download
Specifications and Main Features
Frequently Asked Questions
User Manual
Download
Loading...
+
hidden pages
Unhide
You need points to download manuals.
1 point = 1 manual.
You can buy points or you can get point for every manual you upload.
Buy points
Upload your manuals