


ICF-C120
Table of contents
 Loading...
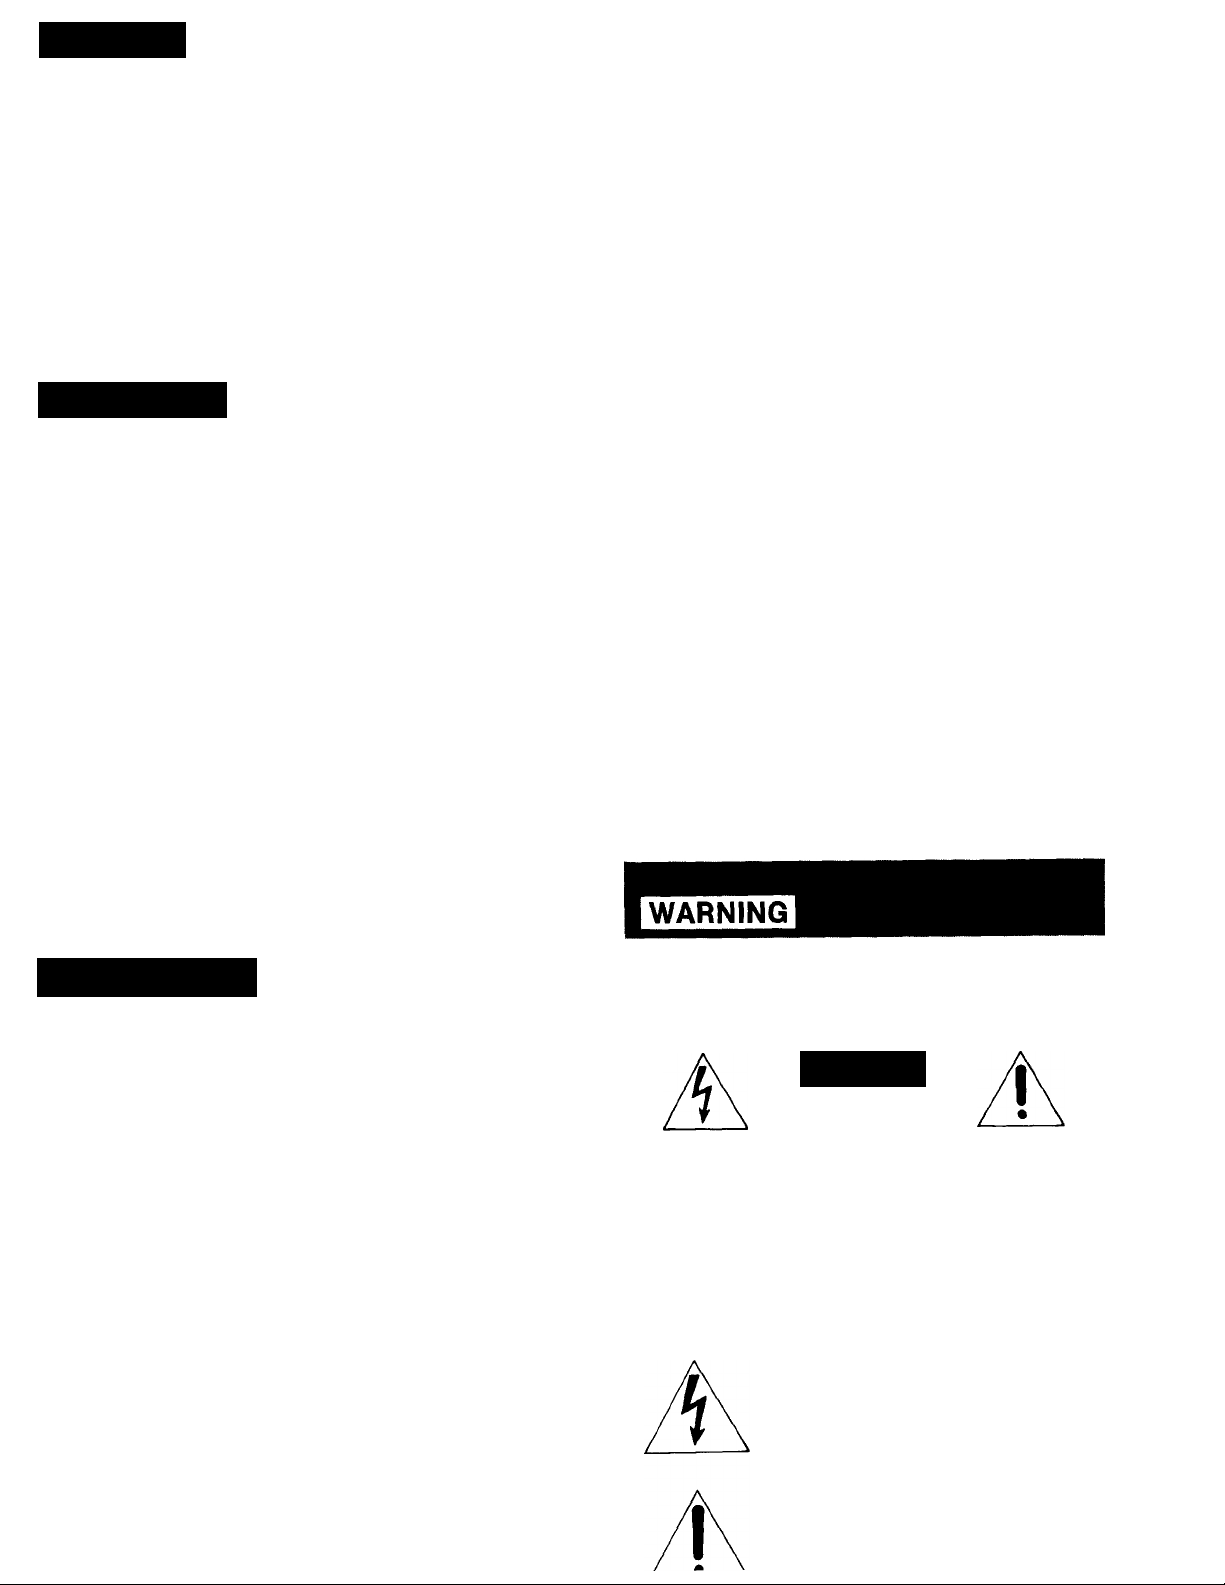
Features
3-75(KI73-22 (1)
• High quality FM/AM 2 band radio combined with an electric
digital alarm clock and timer.
• Choice of awakening to radio or buzzer alarm.
• Easy-to-read green LED di^lay.
• Power backup function to feep the clock operating during a
power interruption, using an optional 6F22 battery.
• DREAM BAR SNOOZE/SLEEP OFF; feather-light touch to
operate, and having functions: snooze alarm, sleep timer off,
and instant readout of the alarm.
Precautions
• Operate the unit only on 120 V AC, 60 Hz.
• To disconnect the cord, pull it out by grasping the plug.
Never pull it by the cord.
• Do not leave the unit in a location near heat sources, or in a
place subject to direct sunlight, excessive dust, or
mechanical shock.
• Allow adequate air circulation to prevent internal heat build
up. Do not place the unit on surfaces (rugs, blankets, etc.) or
near materials (curtains, draperies) that may block the
ventilation holes.
• Should any solid object or liquid fall into the unit, unplug the
unit and have it checked by qualified personnel before
operating it any further.
• When the casing becomes soiled, clean it with a soft cloth
dampened with a mild detergent solution. Never use abrasive
cleansers or chemical solvents, as they may mar the casing.
FM/AM Digital Clock Radio
ICF-C120
Operating Instructions
Before operating the unit, please read this manual
thoroughly and retain it for future reference.
If you have any question or problem concerning your unit that
is not covered in this manual, please consult the nearest Sony
dealer.
Specifications
Frequency range
Antenna
Speaker
Power output
Power requirement
Battery life
Dimensions
Weight
Design and specifications subject to change without notice.
FM: 87.6-108 MHz
AM: 530-1,710 kHz ‘
FM: FM wire antenna
AM: Built-in ferrite bar antenna
Approx. 6.6 cm (25^ Inches) dia.
200 mW (at 10% harrhonic distortion)
120 V AC, 60 Hz
For the power backup function;
9 V DC, one 6F22 battery
Approx. 10 hours, using Sony battery
S-006P (U)
Approx. 114 X115 X116 mm (w/h/d)
(4I/S X 45/6 X 45/6 inches)
incl. projecting parts and controls
Approx. 680 g (1 lb 5 oz)
not incl. battery
Sony Corporation ©1989 Printed in Malaysia
To prevent fire or shock hazard, do not
expose the unit to rain or moisture.
CAUTION
RISK OF ELECTRIC SHOCK
DO NOT OPEN
CAUTION : TO REDUCE THE RISK OF ELECTRIC SHOCK,
DO NOT REMOVE COVER (OR BACK).
NO USER-SERVICEABLE PARTS INSIDE.
REFER SERVICING TO QUALIFIED SERVICE PERSONNEL.
This symbol is intended to alert the user to
the presence of uninsulated “dangerous
voltage” within the product’s enclosure that
may be of sufficient magnitude to
constitute a risk of electric shock to
persons.
This symbol is intended to alert the user to
the presence of important operating and
maintenance (servicing) instructions in the
Radio Operation
How to Set the Clock
1 Set the function selector switch to RADIO ON.
2 Select the desired band.
3 Tune in the desired station.
4 Adjust the volume.
To turn off the radio, set the function selector switch to OFF.
For Improved Reception
FM: Extend the FM wire antenna fully to increase the FM
sensitivity.
AM: Since the reception is affected by the direction of the
radio, rotate the unit horizontally for optimum reception.
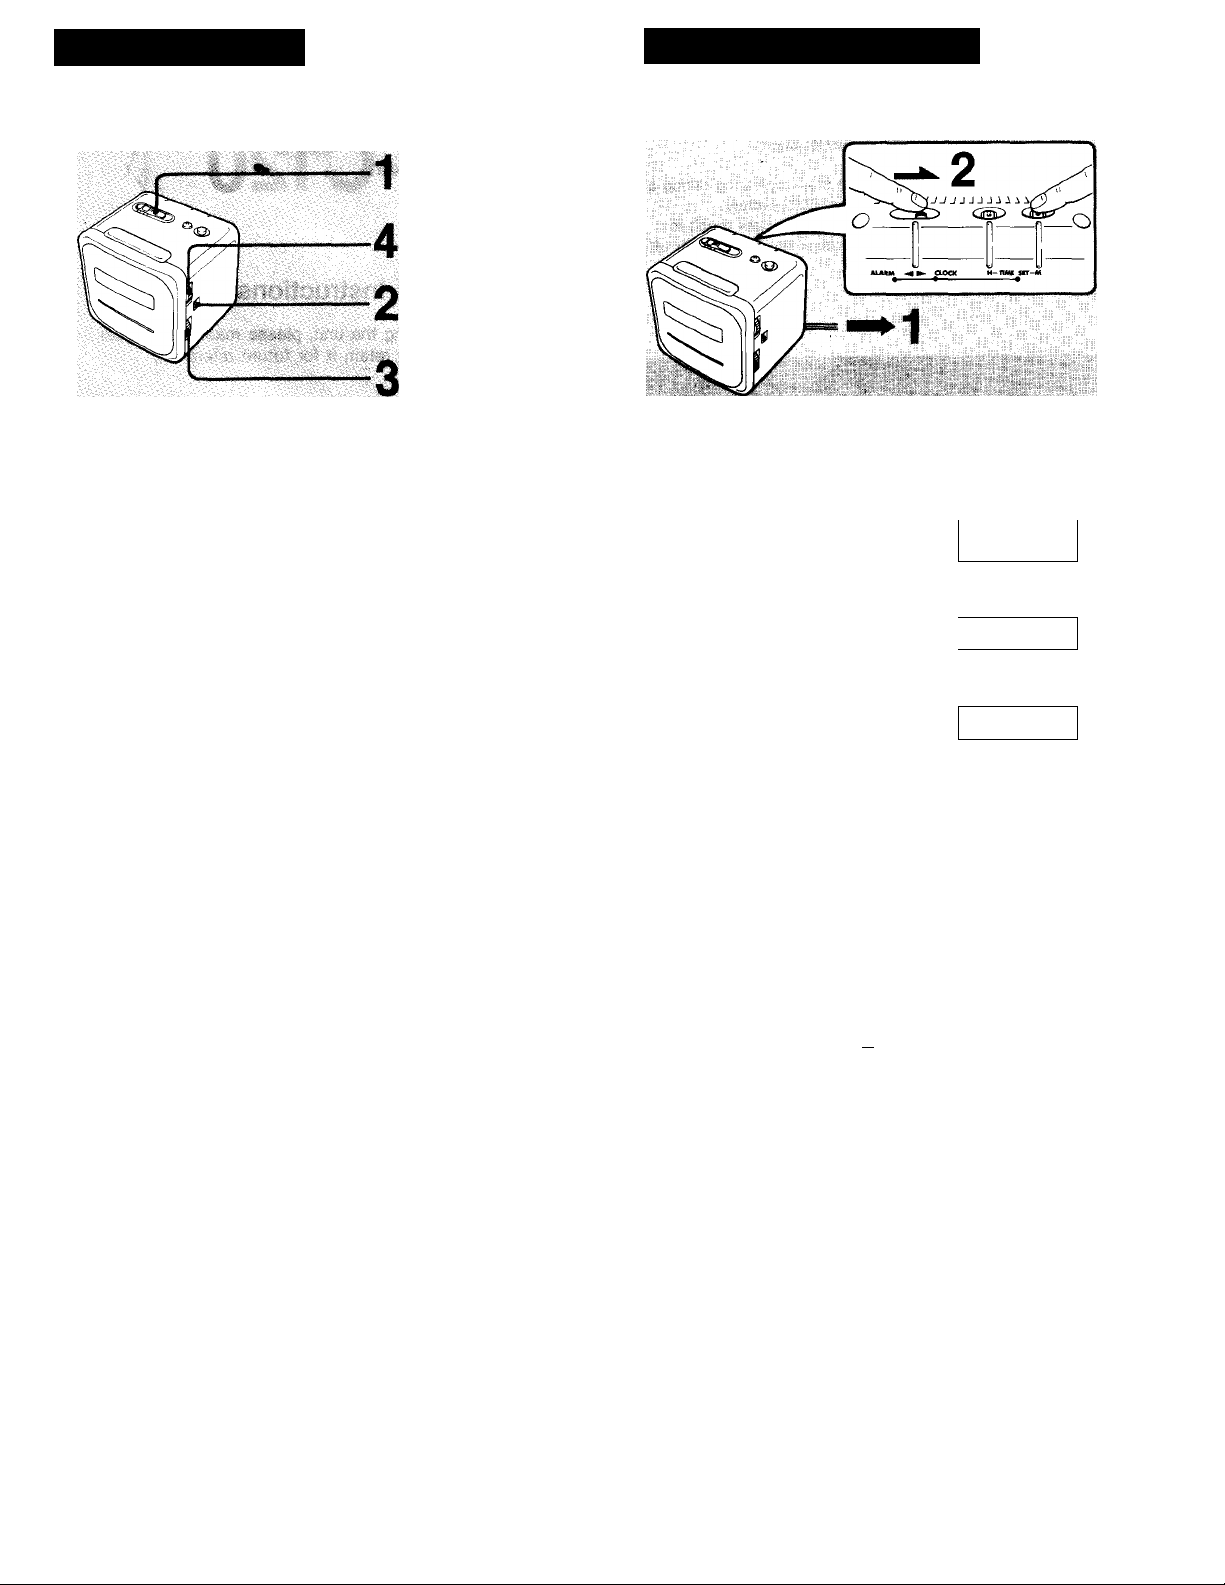
1 Connect the AC power cord
to a wall outlet.
Figures will appear and begin to
flicker.
Example: To set to 8:15 AM
-----
v-tL
»“JL •
n
2 Adjust the clock to the
current time with the TIME
SET buttons, H (hour) and M
(minute), while holding the
ALARM/CLOCK set switch to
the CLOCK side.
AM12:00 = midnight
PM12:00 = noon
Note: The minutes digits advance to “00” after “59”. The hour
digits advance none.
Zero Second Adjustment
If you want to adjust the time exactly to the second with a
radio or a telephone time signal, proceed as in the following
Example.
Example: To set to 7:15 AM
T 8:
™ u •
1 Adjust the time indication to 1: 'W| as described before.
2 While holding the ALARM/CLOCK set switch to ALARM,
press the SLEEP button. (The time display indicates the
minute one’s digit and the seconds.) Then, continuing to
hold the ALARM/CLOCK switch to ALARM, press the H
button simultaneously with a radio or telephone time signal.
The clock will begin to operate, showing the precise time of
day.
If the time display still indicates |”! ~l: ‘S'| when the
ALARM/CLOCK set switch is released, advance the minute
digit to 15 by pressing the M button once while holding the
ALARM/CLOCK switch to CLOCK.
nn
LI LI
i
III-
U
1 _l
Example: When the current time is 7:15:10 a m. the display
will become:
"i- (C-
/• I _l
II I
lU
TT
Minute Second dioits
Loading...