

ESCÁNER DE MANO SHM 600 A1
ESCÁNER DE MANO
Instrucciones de uso
HANDSCANNER
Bedienungsanleitung
IAN 73767
HANDHELD SCANNER
Operating instructions
Antes de empezar a leer abra la página que contiene las imágenes y, en
seguida, familiarícese con todas las funciones del dispositivo.
Before reading, unfold the page containing the illustrations and familiarise
yourself with all functions of the device.
Klappen Sie vor dem Lesen die Seite mit den Abbildungen aus und machen
Sie sich anschließend mit allen Funktionen des Gerätes vertraut.
ES Instrucciones de uso Página 1
GB / MT Operating instructions Page 31
DE / AT / CH Bedienungsanleitung Seite 61
A
B

Indice
Introducción . . . . . . . . .2
Información sobre estas
instrucciones de uso . . . . . . 2
Derechos de autor . . . . . . . 2
Aviso legal . . . . . . . . . . . . . 2
Advertencias . . . . . . . . . . . . 3
Finalidad de uso . . . . . . . . . 3
Seguridad . . . . . . . . . .4
Manejo de las baterías . . . 4
Advertencias de seguridad
básicas . . . . . . . . . . . . . . . . 5
Puesta en
funcionamiento . . . . . .6
Indicaciones de seguridad . 6
Volumen de suministro e
inspección de transporte . . 6
Evacuación del embalaje . . 7
Insertar/ cambiar pilas . . . . 7
Elementos de operación 8
Manejo y
funcionamiento . . . . . .9
Insertar/cambiar tarjeta de
memoria micro-SD . . . . . . . 9
Formatear la tarjeta de
memoria micro-SD . . . . . . . 9
Ajustar la fecha y la hora . 10
Ajuste de la resolución de
escaneado . . . . . . . . . . . . 11
Ajuste del modo escaneado .11
SHM 600 A1
Escanear . . . . . . . . . . . . . . 11
ES
Realizar calibración . . . . . 12
Indicación LED . . . . . . . . . 13
Observar documentos/
imágenes escaneadas . . . 13
Conexión a un ordenador 13
Instalación del programa
NimoDoc Lite . . . . . . . . . . 14
Iniciar el programa
NimoDoc Lite . . . . . . . . . . 15
Limpieza . . . . . . . . . . .23
Indicaciones de seguridad 23
Limpieza . . . . . . . . . . . . . . 23
Eliminación de fallos .24
Causas y solución de fallos 24
Almacenaje/
Evacuación . . . . . . . . .26
Almacenaje . . . . . . . . . . . 26
Evacuación del aparato . . 26
¡Evacuar las pilas! . . . . . . 26
Anexo . . . . . . . . . . . . .27
Características técnicas . . 27
Requisitos mínimos al
ordenador . . . . . . . . . . . . 28
Indicaciones acerca de la
declaración de
conformidad . . . . . . . . . . . 28
Garantía . . . . . . . . . . . . . . 29
Asistencia técnica . . . . . . . 30
Importador . . . . . . . . . . . . 30
1

Introducción
Introducción
ES
Información sobre estas instrucciones de uso
Felicidades por la compra de su aparato nuevo.
Ha optado por adquirir un producto de alta calidad.
Estas instrucciones de uso forman parte del escáner manual portátil
SHM 600 A1 (denominado en adelante "el aparato") y proporcionan
información importante para el uso conforme a lo previsto, la seguridad, la conexión y manejo del aparato. Estas instrucciones de uso
deben estar disponibles siempre cerca del aparato. Deberán leerlas
y aplicarlas todas las personas que manejen y solucionen fallos en
el aparato. Conserve estas instrucciones de uso y entréguelas junto
con el aparato a cualquier posible propietario futuro.
Derechos de autor
Esta documentación está protegida por derechos de autor.
La reproducción o impresión, incluso de secciones, así como la
reproducción de las imágenes, incluso en estado modifi cado, únicamente se permite previo consentimiento por escrito del fabricante.
Aviso legal
Todas las informaciones técnicas, datos e indicaciones contenidos
en estas instrucciones de uso, para la conexión y manejo, refl ejan
la situación más avanzada en el momento de la impresión y se proporcionan teniendo en cuenta nuestras experiencias y conocimientos
hasta ese momento. Los datos, ilustraciones y descripciones de estas
instrucciones no pueden servir como base para posibles reclamaciones. El fabricante no asume ninguna responsabilidad por los daños
debidos a la inobservancia de las instrucciones, el uso contrario a lo
previsto, las reparaciones inadecuadas, las modifi caciones realizadas
sin autorización o el empleo de recambios no homologados.
2
SHM 600 A1

Introducción
Advertencias
En estas instrucciones de uso se utilizan las advertencias siguientes:
ADVERTENCIA
Una advertencia de este nivel de peligro indica
una posible situación de peligro.
Si no puede evitarse la situación de peligro, pueden producirse
lesiones.
► Deben seguirse las instrucciones de esta advertencia para
e
vitar lesiones a personas.
ATENCIÓN
Una advertencia de este nivel de peligro indica un
posible daño mat
Si no puede evitarse la situación, pueden producirse daños
materiales.
► Deben seguirse las instrucciones de esta advertencia para
vitar daños materiales.
e
ADVERTENCIA
► Una indicación advierte de informaciones adicionales que
facilitan el manejo del apar
Finalidad de uso
Este aparato se ha diseñado exclusivamente para el uso no comercial destinado a escanear y digitalizar documentos e ilustraciones.
Cualquier uso diferente o que supere lo indicado se considera
contrario a lo dispuesto. Se excluyen reclamaciones de cualquier
tipo debido a daños por el uso contrario a lo dispuesto. El riesgo
será responsabilidad exclusiva del usuario.
erial.
ato.
ES
SHM 600 A1
3
Seguridad
ES
En este capítulo obtendrá indicaciones de seguridad importantes para
manejar el aparato. Este aparato cumple las normas de seguridad
prescritas. Sin embargo, el uso inadecuado puede causar daños
personales y materiales.
Manejo de las baterías
ADVERTENCIA
¡Peligro debido al uso incorrecto! ¡Existe riesgo
de explosión y de derrame!
Para manejar con seguridad las baterías, debe tener en
cuenta las indicaciones de seguridad siguientes:
► No tire nunca las pilas al fuego.
► No cortocircuite nunca las pilas.
► No intente recargar las pilas.
► Compruebe las pilas de forma regular. El ácido de las pilas
puede causar daños permanentes en el apar
precaución especial en el manejo de una pila dañada o
reventada. ¡Peligro de abrasión! Usar guantes protectores.
► Guardar las pilas fuera del alcance de los niños.
En caso de ingestión, solicitar asistencia médica inmediata.
► Cuando no vaya a utilizar el aparato durante un periodo
olongado, extraiga las pilas.
pr
ato. Debe tenerse
Seguridad
4
SHM 600 A1

Seguridad
Advertencias de seguridad básicas
Para manejar con seguridad el aparato deben tenerse en cuenta las
indicaciones de seguridad siguientes:
■ Antes de usar el aparato, compruebe si hay signos de datos
xternos visibles. No ponga en servicio un aparato dañado o
e
que haya caído.
■ No permita utilizar el aparato a personas (incluidos los niños)
cuy
as facultades físicas, sensoriales o mentales, así como su
falta de conocimientos o de experiencia, les impida hacer un uso
seguro del mismo si no están bajo vigilancia o han sido instruidos
correctamente acerca del uso del aparato.
■ Vigile a los niños para asegurarse de que no juegan con el
apar
ato.
■ Las reparaciones en el aparato deben ser realizadas sólo por
taller
es autorizados o por el servicio al cliente. En caso de reparaciones indebidas se pueden producir riesgos considerables
para los usuarios. Además expirará la garantía.
■ La reparación del aparato durante el periodo de garantía debe
ser r
ealizada exclusivamente por un servicio al cliente autorizado
por el fabricante, de lo contrario, los posibles daños posteriores
no estarán cubiertos por la garantía.
■ Los componentes defectuosos deben cambiarse sólo por recambios
o
riginales. Sólo estos recambios garantizan que se cumplen los
requisitos de seguridad.
■ No realice ningún cambio o transformación en el aparato.
■ Proteja el aparato de la humedad y contra la entrada de
líquidos. P
líquido (p. ej. jarrón) encima del aparato.
■ No utilice el aparato en la proximidad de llamas abiertas.
ara ello, no coloque ningún recipiente que contenga
ES
SHM 600 A1
5

Puesta en funcionamiento
Puesta en funcionamiento
ES
Indicaciones de seguridad
ADVERTENCIA
¡Durante la puesta en servicio del aparato se
pueden producir lesiones personales y daños
materiales!
► Los materiales de embalaje no deben usarse para jugar.
P
odrían asfi xiarse.
Volumen de suministro e inspección de transporte
El aparato se suministra de serie con los componentes siguientes:
▯ Escáner manual
▯ 2 GB de tarjeta de memoria micro-SD
incl. adaptador par
▯ 2 x 1,5 V pilas tipo AA / LR6 / Mignon
▯ CD de programa
▯ Funda protectora
▯ Cable USB
▯ Paño de limpieza
▯ Papel para la calibración - ajuste de blanco
▯ Manual de instrucciones
ADVERTENCIA
► Compruebe la integridad de suministro y si hay daños visibles.
► Si el suministro es incompleto o hay daños debido a un em-
balaje defi
línea directa de asistencia (véase capítulo Asistencia técnica).
ciente o al transporte, póngase en contacto con la
a tarjeta SD
6
SHM 600 A1
Puesta en funcionamiento
Evacuación del embalaje
El embalaje protege el aparato durante el transporte. El material
de embalaje se ha seleccionado teniendo en cuenta criterios
ecológicos y de técnica de eliminación y por ello es reciclable.
La reintroducción del embalaje en el ciclo de materiales
ahorra materias primas y reduce el volumen de residuos.
Evacue los materiales de embalaje que no sean
necesarios según las normativas locales aplicables.
ADVERTENCIA
► Si es posible, conserve el embalaje original durante el
periodo de gar
correctamente en caso de aplicación de la garantía.
Insertar/ cambiar pilas
♦ Abra la tapa del compartimiento de pilas en el lado superior del
aparato, deslizando la tapa hacia la derecha y levantándola.
♦ Inserte las pilas del tipo AA/LR6/Mignon (contenidas en el
v
olumen de suministro) en el compartimiento de pilas .
♦ Cierre el compartimiento de pilas
deslizándola hacia la izquierda.
antía del aparato para poder empaquetarlo
, colocando la tapa y
ES
SHM 600 A1
7

Elementos de operación
ES
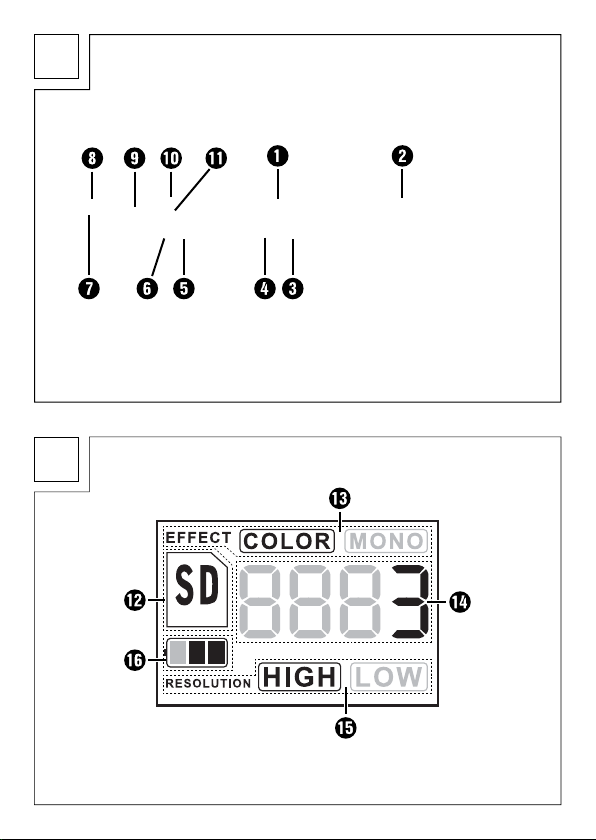
(véase página desplegable fi gura A)
Tecla /SCAN: Interruptor de encender/apagar;
Compartimiento de pilas
Tecla FORMAT: Formatear la tarjeta de memoria
micro-SD
Alojamiento para la tarjeta de memoria micro-SD
Conexión USB
Tecla TIME SET: Ajustar la fecha y la hora
LED ERR: Velocidad de escaneado demasiado alta
LED SCAN: Escaneando
Display
Tecla C/BW: Ajuste del modo escaneado
Tecla DPI: Ajuste de la resolución de escaneado
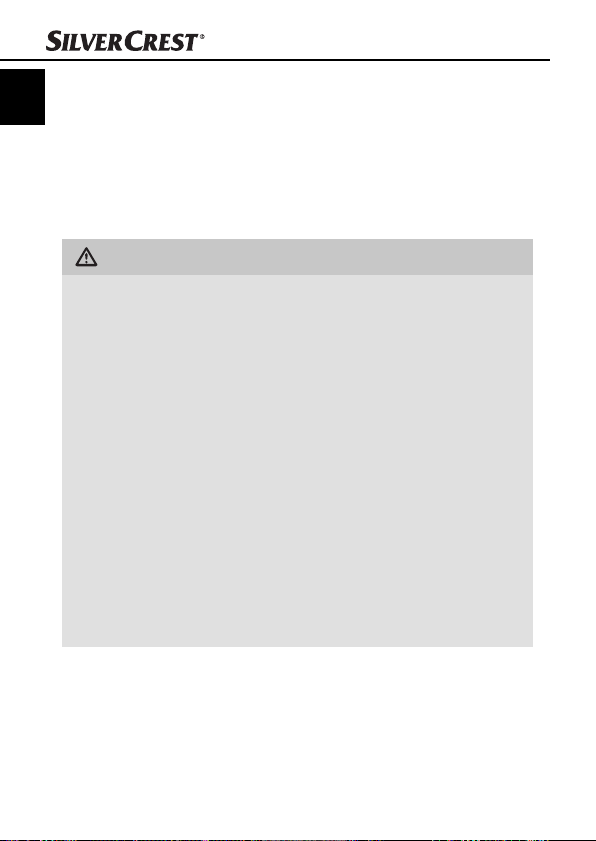
Representaciones de pantalla
(véase página desplegable fi gura B)
Tarjeta SD de visualización: Las fotos son guardadas
Efecto de visualización: Los documentos son escaneados
Contador: Muestra la cantidad de archivos escaneados
en la tarjeta de memoria micro-SD
Resolución elegida: HIGH: 600 dpi; LOW: 300 dpi
Indicación batería: Batería llena ; Batería vacía
Elementos de operación
Iniciar/fi nalizar proceso de escaneado
en la tarjeta de memoria
micro-SD
en color o blanco/negro
8
SHM 600 A1
Manejo y funcionamiento
Manejo y funcionamiento
En este capítulo se proporcionan indicaciones importantes sobre el
manejo y funcionamiento del aparato.
Insertar/cambiar tarjeta de memoria micro-SD
El aparato necesita una tarjeta de memoria micro-SD (contenida en
el suministro), para escanear y guardar documentos o imágenes.
♦ Apague el aparato con la tecla
♦ Inserte la tarjeta de memoria micro-SD con los contactos de
metal mir
con precaución sobre la tarjeta hasta que encastre.
ATENCIÓN
► No presione la tarjeta de memoria micro-SD con fuerza
dentr
y la tarjeta de memoria.
ando hacia arriba en el alojamiento y presione
o del alojamiento. Con ello se podría dañar el aparato
Formatear la tarjeta de memoria micro-SD
Al usar una tarjeta de memoria micro-SD nueva se ha de formatear
antes de proceder al escaneado.
ADVERTENCIA
► Al formatear se borrarán todos los datos en la tarjeta de
memoria micr
♦ Apague el aparato con la tecla
♦ Inserte una tarjeta de memoria micro-SD con los contactos de
metal mirando hacia arriba en el alojamiento
precaución sobre la tarjeta hasta que encastre.
♦ Encienda el aparato con la tecla
♦ Presione con un objeto delgado sin punta, p. ej. la punta de un
sujetapapeles sobre la tecla FORMAT . En la pantalla
aparece un .
o-SD.
/SCAN .
/SCAN .
y presione con
/SCAN .
ES
SHM 600 A1
9
ES
♦ Pulse la tecla /SCAN , para iniciar el formateado de la
tarjeta de memoria micro-SD. En la pantalla parpadea la
indicación de la tarjeta SD , hasta fi nalizar el formateado.
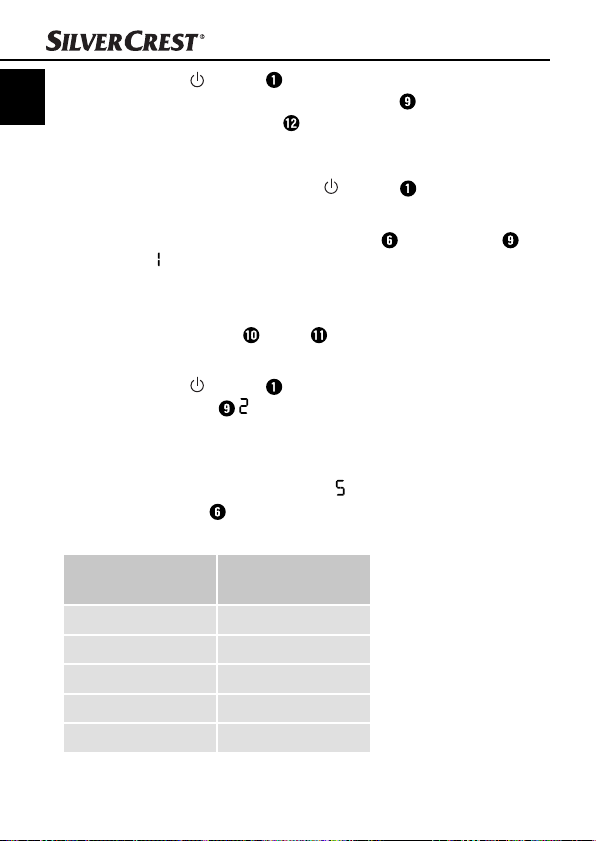
Ajustar la fecha y la hora
♦ Encienda el aparato con la tecla /SCAN .
♦ Presione con un objeto delgado sin punta, p. ej. la punta de
un sujetapapeles sobr
aparece ## para el año, teniendo en cuenta que ## repre-
senta una serie de cifras que deberán concordar con la hora o
bien fecha real o la que se ha de modifi car.
♦ Pulse la tecla C/B
actual.
♦ Pulse la tecla
pantalla aparece ##.
♦ Repita los dos últimos pasos con el fi n de ajustar el mes, día, la
hor
a y los minutos.
♦ Después del ajuste de los minutos (
tecla TIME SET , para fi nalizar el modo de ajuste de la
fecha y la hora.
Manejo y funcionamiento
e la tecla TIME SET . En la pantalla
W o DPI , para seleccionar el año
/SCAN , para confi rmar el ajuste. En la
##), vuelva a pulsar la
10
Visualiza-
ción
1 ## Año
2 ## Mes
3 ## Día
4 ## Hora
5 ## Minuto
Ajuste
SHM 600 A1
Manejo y funcionamiento
Ajuste de la resolución de escaneado
♦ Pulse la tecla DPI , para elegir entre la resolución alta
(HIGH = 600 dpi) y la resolución baja (LOW = 300 dpi).
En la pantalla se muestra HIGH o LOW.
Ajuste del modo escaneado
♦ Pulse la tecla C/BW , para elegir entre el modo de color
(COLOR) y el modo de blanco/negro (MONO).
En la pantalla se muestra COLOR o MONO.
Escanear
ADVERTENCIA
► Para escanear asegúrese que el aparato no está conectado
denador y que la tarjeta de memoria micro-SD se
al or
encuentra insertada.
♦ Encienda el aparato con la tecla
♦ Coloque el documento sobre una superfi cie plana y mantengalo
sujeto con una mano.
♦ Coloque el aparato sobre el borde del papel. Preste atención
ea de escaneado quede comprendido entre las marcas
que el ár
de la anchura de escaneado ( ), y que se mantenga dicha
anchura que marca el lado del aparato.
♦ Mantenga el aparato presionado de modo plano sobre el
documento y vuelv
SCAN se ilumina.
♦ Desplace lentamente el aparato sobre el documento y mantenga
las manos sin temblar con el fi
del documento escaneado.
♦ Vuelva a pulsar la tecla
a accionar la tecla /SCAN . El LED
/SCAN , para fi nalizar el escaneado.
/SCAN .
n de lograr la máxima calidad
ES
SHM 600 A1
11
ADVERTENCIA
ES
► Si el aparato no es utilizado y con el fi n de no gastar la
batería innecesariamente, el apar
modo automático transcurrido unos 3 minutos.
Realizar calibración
ADVERTENCIA
► Realice la calibración sólo si ha de ajustar el ajuste de
blanco. Se r
imágenes escaneadas el punto más claro que en realidad
debería ser blanco, aparece como un tono de grises.
♦ Coloque el aparato sobre el papel suministrado para la
calibr
ación de ajuste de blancos y encienda el aparato con
la tecla
♦ Pulse y mantenga accionada la tecla C/B
la tecla /SCAN , para cambiar al modo de calibración.
En la pantalla parpadea la indicación de la tarjeta SD ,
hasta que quede borrada la memoria interna. A continuación
brilla el LED SCAN y el LED ERR .
ADVERTENCIA
► Los documentos / imágenes existentes en la tarjeta de memoria
o-SD se conservan durante el borrado de la memoria interna.
micr
♦ No mueva el aparato hasta que no se apague el LED ERR
El LED SCAN se ilumina de nuevo.
♦ Comience ahora con el escaneado del papel, desplazando
el apar
SCAN (en caso necesario desplace el aparato hacia atrás).
♦ El proceso de calibración ha fi nalizado. Apague el aparato
con la tecla
Manejo y funcionamiento
ato se desconecta de
ecomienda realizar un ajuste de blanco si en las
/SCAN .
W y pulse ahora
.
ato sobre el papel blanco hasta que se apague el LED
/SCAN .
12
SHM 600 A1
Manejo y funcionamiento
Indicación LED
El LED SCAN se ilumina verde: Escaneando
El LED SCAN
LED ERR
El LED ERR
Observar documentos/imágenes escaneadas
Utilice el adaptador de tarjetas SD suministrado o bien conecte el
aparato con el cable USB directamente al ordenador con el fi n de
transferir los datos de la tarjeta de memoria micro-SD.
Conexión a un ordenador
Requisitos al sistema
Necesita un ordenador con un puerto USB libre y un sistema
operativo Windows
empresa Microsoft
♦ Conecte el aparato mediante el cable USB con su ordenador
y enciendalo con la tecla /SCAN . Su ordenador deberá
detectar el aparato como un "medio extraible de datos".
♦ Haga clic en "Abrir carpeta" para visualizar los archivos" con
n de observar e importar las imágenes escaneadas.
el fi
esta apagado: Modo de funcionamiento standby/
escaneado completado.
se ilumina en naranja: Velocidad de escaneado dema-
siado alta/ escaneado torcido.
esta apagado: Velocidad de escaneado sin error.
®
XPSP2, Windows®Vista, Windows®7 de la
®
o bien MacOS
®
10.4 o superior.
ES
ADVERTENCIA
► Si ha desactivado la función de autoarranque y la unidad
de sopor
te de datos no se visualiza automáticamente,
busque en mi PC bajo "medio extraible".
SHM 600 A1
13

Manejo y funcionamiento
Instalación del programa NimoDoc Lite
ES
ADVERTENCIA
► Tenga en cuenta que el programa NimoDoc Lite sólo funciona
denadores con sistema operativo Windows. Los usuarios
con or
MAC necesitan un Software alternativo o tienen que emular el
entorno Windows.
► Las ilustraciones y las descripciones hacen referencia al sistema
ativo Microsoft®Windows®7. La representación en pantalla
oper
puede diferir dependiendo de los ajustes de visualización de
los sistemas operativos.
♦ Inserte el CD del programa suministrado en la unidad de disco
de CD de su or
automática".
♦ Haga clic en el botón "NimoDoc.exe".
Se inicia la instalación y se muestr
ADVERTENCIA
► Si se encuentra desactivada la función de autoarranque
y no se inicia automáticamente el pr
inicie el proceso de instalación haciendo doble clic sobre el
archivo "NimoDocLite.exe" en el directorio principal del CD.
♦ Haga clic en el botón "Install NimoDoc Lite", para instalar el
pr
ograma "NimoDoc Lite".
El asistente de instalación le conduce paso a paso a través del
proceso de instalación. Después de la instalación con éxito se
mostrará que la instalación se ha completado.
♦ Haga clic en el botón "Finalizar". Se muestra la ventana de inicio.
♦ Haga clic en el botón "Exit", para salirse del programa de
instalación.
denador. Se muestra la ventana "Reproducción
a la ventana de inicio.
oceso de instalación,
14
SHM 600 A1
Manejo y funcionamiento
Iniciar el programa NimoDoc Lite
♦ Arranque el programa haciendo doble clic sobre el icono del
programa en el escritorio o bien seleccione el símbolo correspondiente en el menú de inicio.
♦ Se abre la ventana principal.
1
2
3
ES
5
1. Barra de menú
2. Barra de inicio rápido
3. Campo de búsqueda
4. Área de previsualización
5. Zona de trabajo
SHM 600 A1
4
15
Confi gurar la zona de trabajo
ES
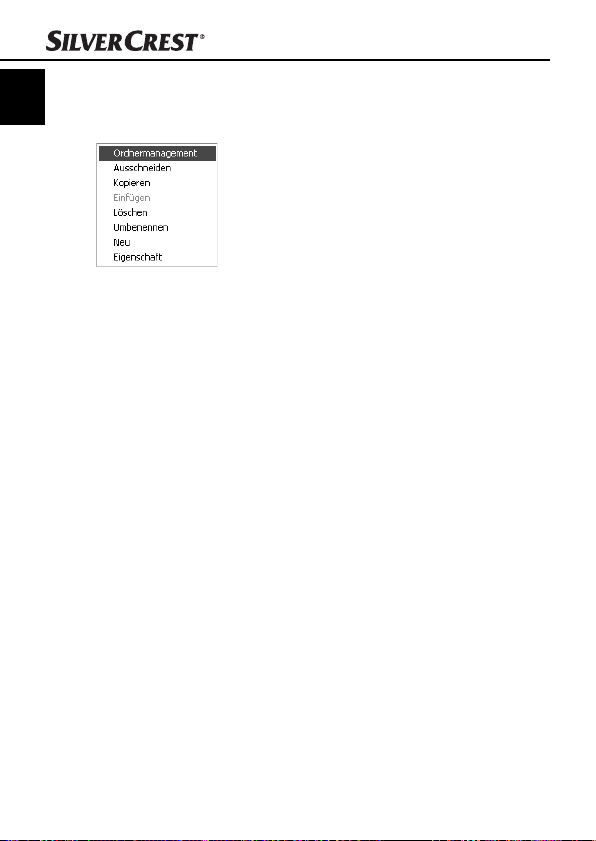
♦ Haga clic con el botón derecho del ratón sobre "MyNimoDoc"
en la z
ona de trabajo. Se abre el menú contextual.
♦ Haga clic con el botón izquierdo del ratón sobre "Administrador
de carpetas". Se abre una ventana nueva con el administrador
de carpetas.
♦ Haga clic en "Agregar" para seleccionar una carpeta del disco
duro o bien para seleccionar el aparato.
Manejo y funcionamiento
16
SHM 600 A1

Manejo y funcionamiento
♦ Seleccionada la carpeta haga clic en "Guardar". La carpeta
seleccionada se visualizar
todos los documentos o imágenes a editar, pueden guardarse
en dicha carpeta.
Importar imágenes desde el aparato
♦ Haga clic en la barra de tareas en "Abrir", para aceptar las
imágenes del apar
visualiza la ventana "Abrir".
♦ Seleccione si desea importar toda la carpeta (Folder) o un
chivo (Image) en una carpeta de documentos. Además
unico ar
tiene la opciones de fi ltro para la búsqueda de formatos de
archivo.
♦ Haga clic en "OK" y seleccione a continuación la carpeta o
bien el archivo individual que desea importar. Se crea una
carpeta de documentos nuevos con las imágenes importadas.
♦ Haga clic con el botón derecho del ratón sobre la carpeta de
documentos y asigna bajo "R
para la carpeta de documentos.
á ahora en la zona de trabajo y
ato en una carpeta de documentos. Se
enombrar" un nombre signifi cativo
ES
ADVERTENCIA
► Las imágenes de su aparato las encontrará en el medio
xtraible en el directorio DCIM/100Media.
e
SHM 600 A1
17

Manejo y funcionamiento
Exportar las imágenes de una carpeta de documentos
ES
Puede exportar todas las imágenes y documentos coleccionados en
una carpeta de documentos en diferentes formatos de archivos.
♦ Seleccione primero la carpeta de documentos correspondientes
y haga clic en la pantalla principal en "Guar
♦ A continuación se abre otra ventana en la cual puede indicar
en que formato de ar
Reconocimiento de texto
♦ Haga clic en la barra de tareas en "Abrir", para aceptar la
imagen del apar
♦ Seleccione como modo de entrada "Image" y haga clic en
"OK".
♦ Introduzca la ruta de acceso a su imagen, marque la imagen y
haga clic en "A
previsualización.
♦ Haciendo doble clic obre la imagen se abre el entorno de
edición.
chivo desea la carpeta de documentos.
ato. Se visualiza la ventana "Abrir".
brir". Ahora aparece la imagen en un área de
dar".
18
SHM 600 A1

Manejo y funcionamiento
♦ Haga clic en "Reconocimiento". Se abre una ventana adicional
en la cual puede indicar que idioma se va a utilizar en la
imagen.
ES
♦ Seleccione el idioma correspondiente y haga clic en "OK".
El editor comienza con el reconocimiento del texto.
♦ Haga clic en la barra de tareas del entorno de edición en
"Guar
dar" y seleccione el formato de texto a exportar, p. ej.
"Guardar el texto como documento Word".
SHM 600 A1
19
Manejo y funcionamiento
♦ Introduzca la ruta de acceso y un nombre de archivo, haga a
ES
continuación clic en "Guardar".
ADVERTENCIA
► Preste atención que la imagen escaneada del texto transcurra
ontalmente ya que de lo contrario no funcionará el re-
horiz
conocimiento del texto. Si no es el caso gire la imagen con
el botón izquierdo/derecho del área inferior de la pantalla
y vuelva a darle a guardar.
Barra de herramientas
En el borde de la pantalla derecho está situada la barra de herramientas, esta le pone a disposición diferentes herramientas de edición:
1324
8567
1. Marcar áreas de la imagen
2. Ajuste del brillo, contraste, saturación y color
3. Herramientas de cortar
4. Cambiar de colores
5. Función de simetría
6. Función de rotación de las imágenes
7. Saturación blanco-negro
8. Crear imagen en blanco-negro
20
SHM 600 A1

Manejo y funcionamiento
91110
12 13 14
9. Reconocimiento de texto
10. Función para recorte de bordes
11. Eliminación de ojos rojos
12. Insertar notas en la imagen
13. Insertar texto en la imagen
14. Función de bolígrafo
15
15. Función de lápiz
16. Función de borrador
17. Colorear áreas
18. Trazar líneas
19. Trazar rectángulos
20. Trazar circunferencias
1716
1918
20
ES
SHM 600 A1
21

Manejo y funcionamiento
Barra de comandos
ES
98714652 3 10 1112 13 14 151617
1. Imagen anterior
2. Imagen siguiente
3. Mostrar tamaño de imagen óptimo
4. Mostrar tamaño de imagen real
5. Reducir imagen
6. Aumentar imagen
7. Cambiar al modo de imagen completa
8. Rotar imagen hacia la izquierda
9. Rotar imagen hacia la derecha
10. Cambiar tamaño de imagen (indicaciones en puntos por pantalla)
11. Deshacer
12. Rehacer
13. Imprimir imagen
14. Abrir vista preliminar
15. Guardar como
16. Guardar
17. Borrar
22
SHM 600 A1

Limpieza
Limpieza
Indicaciones de seguridad
ATENCIÓN
Posibles daños del aparato
La penetr
aparato.
► Asegúrese que durante la limpieza no entre humedad en el
Limpieza
■ Limpie la carcasa exclusivamente con un paño ligeramente húmedo
y un detergente suave.
■ Limpie la superfi cie de la lente del escáner con el paño de limpieza
suministrado.
ación de humedad puede conllevar daños en el
ato, para evitar daños irreparables en el mismo.
apar
ES
SHM 600 A1
23
Eliminación de fallos
Eliminación de fallos
ES
En este capítulo se proporcionan indicaciones importantes para la
localización y solución de averías. Tenga en cuenta las indicaciones
para evitar peligros y daños.
Causas y solución de fallos
La tabla siguiente ayuda a la localización y solución de averías
menores:
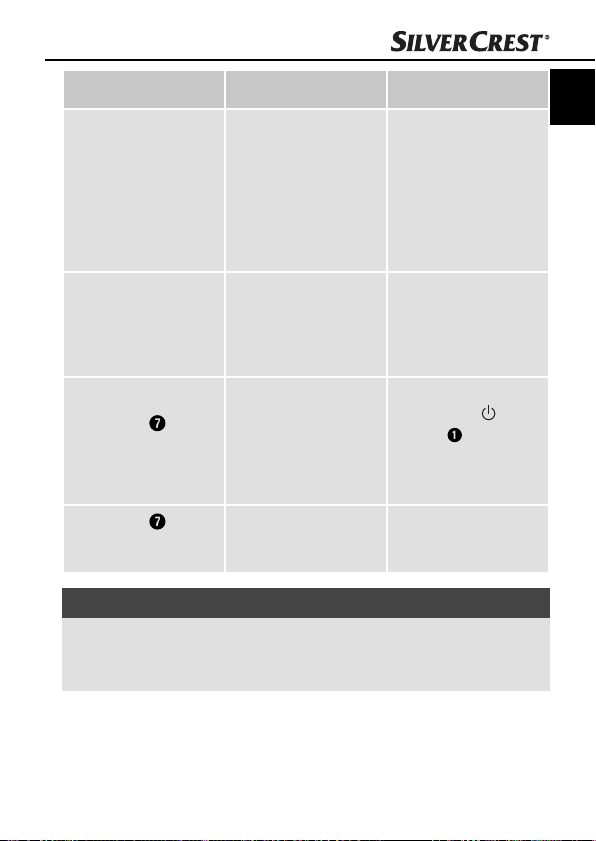
Error Posible causa Reparación
El aparato no se
enciende.
Las imágenes no se
pueden guardar durante
el escaneado.
- Las pilas están
descargadas.
- Las pilas no están
insertadas correctamente.
- No se ha insertado
ninguna tarjeta de
memoria micro-SD.
- La tarjeta de memoria
micro-SD está llena.
- La tarjeta de memoria
micro-SD no ha sido
formateada correctamente
- Sustituya las pilas.
- Inserte las pilas
correctamente en el
compartimento de las
pilas.
- Introduzca la tarjeta
de memoria con los
contactos metálicos
mirando hacia arriba.
- Guarde los datos de
la tarjeta de memoria
en el ordenador.
- Proceda a formatear
la tarjeta de memoria
(véase capítulo
formatear la tarjeta de
memoria micro-SD)
24
SHM 600 A1
Eliminación de fallos
Error Posible causa Reparación
- Asegúrese que todos
El ordenador no
detecta el aparato
después de conectarlo
(no detecta un medio
extraible de datos).
Las imágenes están
borrosas.
Los LED ERR
iluminan durante el escaneado de un documento.
Los LED ERR
iluminan al encender el
aparato.
se
se
Error de conexión.
La lente del escáner
está sucia.
Velocidad de escaneado
demasiado alta.
Se han restablecido los
datos de calibración.
los cables estén conectados correctamente.
Rearranque en su
caso el ordenador de
nuevo.
- Pruebe un puerto USB
distinto.
- Limpie la lente del
escáner con un paño
de limpieza.
- Calibre el aparato de
nuevo.
Pulse para cancelar
sobre la tecla
SCAN y pruebe
a escanear de nuevo
el documento a una
velocidad más baja.
Calibre el aparato de
nuevo.
ADVERTENCIA
► Si no puede solucionar el problema con los pasos indicados
anteriormente,le r
ogamos se ponga en contacto con el servicio
al cliente.
ES
/
SHM 600 A1
25
Almacenaje/Evacuación
Almacenaje/Evacuación
ES
Almacenaje
Si no va a utilizar el aparato durante un tiempo prolongado, extraiga
las pilas y guardelo con la funda de conservación suministrada en
un entorno seco y libre de polvo.
Evacuación del aparato
No tire en ningún caso en la basura doméstica.
Este producto está sujeto a la directiva
europea 2002/96/EC-WEEE (Waste Electrical
and Electronic Equipment).
Entregue el aparato a un centro de eliminación autori-
zado o al centro de eliminación de residuos comunitario. Tenga en cuenta las normativas actuales en
vigor. En caso de duda póngase en contacto con las
instalaciones municipales de eliminación de residuos.
¡Evacuar las pilas!
Las pilas no deben eliminarse con la basura doméstica. Cada
consumidor está obligado legalmente a entregar las pilas/baterías
en un punto de recogida de residuos de su municipio, barrio o en
un establecimiento. Esta obligatoriedad tiene el objetivo de que se
evacuen las pilas favorables al medio ambiente. Devuelva las pilas
sólo en estado descargado
26
SHM 600 A1

Anexo
Anexo
Características técnicas
Alimentación de corriente 2 x 1,5 V tipo AA/Mignon/LR6/R6
Fotosensor Fotosensor - color -contraste
Cantidad de sensores 5138 puntos
Resolución
Formato de archivo JPEG
Desconexión automática 3 minutos
Memoria externa
Puerto USB 2.0
Temperatura de servicio +5 - +40°C
Humedad (sin condensación) 5 - 90 %
Medidas (L x Al x A) aprox. 25,9 x 3 x 2,8 cm
Peso (sin accesorio) 146 g aprox.
LOW: 300 x 300 dpi
HIGH: 600 x 600 dpi
tarjeta de memoria micro-SD
de hasta 32 GB
ES
SHM 600 A1
27

Requisitos mínimos al ordenador
ES
Sistema operativo
CPU Pentium III o superior
Memoria de
trabajo
Puerto USB-Port 2.0
Windows
Windows®7 y MacOS® 10.4 o superior
(enchufar el aparato directamente, no
se precisa instalar ningún controlador)
256 MB mínimo
®
XPSP2, Windows®Vista™,
Indicaciones acerca de la declaración de
conformidad
Este aparato cumple respecto a concordancia con los
requisitos básicos y demás prescripciones relevantes
de las directivas sobre compatibilidad electromagnética 2004/108/EC.
La declaración de conformidad original completa
la puede solicitar a la empresa de importación.
Anexo
28
SHM 600 A1

Anexo
Garantía
Este aparato tiene 3 años de garantía desde la fecha de compra.
El aparato ha sido fabricado cuidadosamente y ha sido probado
antes de su entrega.
Guarde el comprobante de caja como justifi cante de compra. Si
necesitara hacer uso de la garantía, póngase en contacto por
teléfono con su punto de servicio habitual. Éste es el único modo
de garantizar un envío gratuito.
ADVERTENCIA
► La garantía cubre los defectos de fabricación o del material,
o no los daños de transporte, las piezas sujetas a des-
per
gaste y los daños sufridos por las piezas frágiles (p. ej. el
interruptor o las pilas).
Este producto ha sido diseñado exclusivamente para el uso particular
y no para el uso industrial. En caso de manipulación indebida e
incorrecta, uso de la fuerza y en caso de abrir el aparato personas
extrañas a nuestros centros de asistencia técnica autorizados, la
garantía pierde su validez.
Esta garantía no reduce en forma alguna sus derechos legales. La
garantía no alarga el periodo de garantía. Esto se aplica también
a las piezas sustituidas y reparadas.
Los daños y desperfectos presentes en el momento de realizar la
compra deben notifi carse inmediatamente después de desembalar
el producto, como muy tarde dos días después de la fecha de
compra.
Fuera del periodo de garantía, las reparaciones tienen un coste
económico.
ES
SHM 600 A1
29

Asistencia técnica
ES
Servicio España
Tel.: 902 59 99 22
(0,08 EUR/Min. + 0,11 EUR/llamada (tarifa normal))
(0,05 EUR/Min. + 0,11 EUR/llamada (tarifa reducida))
E-Mail: kompernass@lidl.es
IAN 73767
Importador
KOMPERNASS GMBH
BURGSTRASSE 21
44867 BOCHUM, GERMANY
www.kompernass.com
Anexo
30
SHM 600 A1

Index
Introduction . . . . . . . .32
Information for these
operating instructions . . . . 32
Copyright . . . . . . . . . . . . . 32
Limited liability . . . . . . . . . 32
Warnings . . . . . . . . . . . . . 33
Intended use . . . . . . . . . . . 33
Safety . . . . . . . . . . . . .34
Interaction with batteries . 34
Basic Safety Instructions . . 35
Commissioning . . . . .36
Safety instructions . . . . . . . 36
Items delivered and
transport inspection . . . . . 36
Disposal of the packaging 37
Inserting/replacing the
batteries . . . . . . . . . . . . . . 37
Operating Elements . 38
Handling and
operation . . . . . . . . . .39
Insertion/exchange of the
Micro-SD memory card . . 39
Formatting the Micro SD
memory card . . . . . . . . . . 39
Setting Time and Date . . . 40
Setting the Scan Resolution 41
Setting the Scan Mode . . . 41
Scanning . . . . . . . . . . . . . 41
Perform calibration . . . . . . 42
LED Indicators . . . . . . . . . . 43
Viewing the scanned
documents/images . . . . . . 43
Connection to a computer 43
Installation of the program-
mme NimoDoc Lite . . . . . . 44
Launching the programme
NimoDoc Lite . . . . . . . . . . 45
Cleaning . . . . . . . . . . .53
Safety instructions . . . . . . . 53
Cleaning . . . . . . . . . . . . . . 53
Troubleshooting . . . .54
Malfunction causes and
remedies . . . . . . . . . . . . . . 54
Storage/Disposal . . .56
Storage . . . . . . . . . . . . . . . 56
Disposal of the appliance . 56
Disposing of the batteries . 56
Appendix . . . . . . . . . .57
Technical data . . . . . . . . . 57
Minimum PC requirements 58
Notes on the Declaration
of Conformity . . . . . . . . . . 58
Warranty . . . . . . . . . . . . . 59
Service . . . . . . . . . . . . . . . 60
Importer . . . . . . . . . . . . . . 60
GB
SHM 600 A1
31

Introduction
Information for these operating instructions
Congratulations on the purchase of your new appliance.
GB
You have clearly decided in favour of a quality product.
These operating instructions are a component of the mobile Hand
Scanner SHM 600 A1 (henceforth designated as the appliance)
and they supply you with important information for intended use,
safety and connection as well as operation of the appliance. The
operating instructions must be constantly kept available close to the
appliance. They are to be read and applied by everyone occupied
with operating and troubleshooting the appliance. Retain these
operating instructions and pass them on, with the appliance, to any
future owners.
Copyright
This documentation is copyright protected.
All reproductions or duplications, also as extracts, as well as representations of the illustrations, even in an altered state, are only permitted
with the written approval of the manufacturer.
Limited liability
All technical information, data and instructions for connection and
operation contained in this operating manual correspond to the latest
available at the time of printing and, to the best of our knowledge,
take into account our previous experience and know-how. No claims
can be derived from the details, illustrations and descriptions in
these instructions. The manufacturer assumes no responsibility for
damage caused by failure to observe the instructions, improper use,
incompetent repairs, making unauthorised modifi cations or for using
unapproved replacement parts.
Introduction
32
SHM 600 A1

Introduction
Warnings
In these operating instructions the following warnings are used:
WARNING
A warning at this risk level indicates a possible
dangerous situation.
If the dangerous situation is not avoided it could lead to injuries.
► The directives in this warning are there to avoid personal injuries.
IMPORTANT
A warning at this risk level indicates possible
pr
operty damage.
If the situation is not avoided it could lead to property damage.
► Follow the instructions in this warning to avoid property damage.
NOTICE
► A notice indicates additional information that assists in the
handling of the appliance.
Intended use
This appliance is intended solely for non-commercial use in the
scanning and digitising of documents and images. This appliance is
not intended for any other use or for uses beyond those mentioned.
Claims of any kind for damage resulting from unintended use will not
be accepted. The user alone bears liability.
GB
SHM 600 A1
33

Safety
In this chapter you receive important safety information regarding
the handling of the appliance. This appliance complies with the
GB
statutory safety regulations. Incorrect usage can lead to personal
injury and property damage.
Interaction with batteries
WARNING
Danger from improper use! The risk of explosions
and leakages exists!
For safe handling of batteries observe the following safety
instructions:
► Do not throw batteries into a fi re.
► Do not short circuit batteries.
► Do not attempt to recharge batteries.
► Regularly check the condition of the batteries. Leaking batter
acid can cause permanent damage to the appliance. Special
caution should be shown when handling damaged or leaking
batteries. Risk of acid burns! Wear protective gloves.
► Store batteries in a place inaccessible to children.
allowed, seek IMMEDIATE medical attention.
If sw
► If you do not intend to use the appliance for an extended
emove the batteries.
period, r
Safety
y
34
SHM 600 A1

Safety
Basic Safety Instructions
For safe handling of the appliance observe the following safety
information:
■ Before use, check the appliance for visible external damage. Do
not put into oper
dropped.
■ This appliance is not intended for use by individuals (including
childr
en) with restricted physical, physiological or intellectual
abilities or defi ciences in experience and/or knowledge unless
they are supervised by a person responsible for their safety or
receive from this person instruction in how the appliance is to be
used.
■ Children should be supervised to ensure that they do not play
with the appliance.
■ Repairs should only be carried out by authorised specialist compa-
nies or b
can result in signifi cant risks for the user. In addition, warranty claims
become void.
■ A repair to the appliance during the warranty period may only
be carried out b
the manufacturer, otherwise no additional warranty claims can
be considered for subsequent defects.
■ Defective components may only be replaced with original replace-
ment par
guaranteed that the safety requirements are being complied with.
■ Do not make any unauthorised modifi cations or alterations to the
appliance.
■ Protect the appliance from moisture and liquid penetration. Do
not place container
the appliance.
■ Do not use the appliance adjacent to open fl ames.
ation an appliance that is damaged or has been
y the Customer Services department. Incompetent repairs
y a Customer Service department authorised by
ts. Only by using original replacement parts can it be
s fi lled with fl uids, such as vases, adjacent to
GB
SHM 600 A1
35

Commissioning
Commissioning
Safety instructions
GB
WARNING
Personal injury and property damage may be
caused during the commissioning of the appliance!
► Packaging material should not be used as a play thing.
Ther
e is a risk of suff ocation!
Items delivered and transport inspection
The appliance is delivered with the following components as standard:
▯ Hand Scanner
▯ 2GB Micro SD memory card including adapter for
SD memor
▯ 2 x 1.5 V Batteries Type AA / LR6 / Mignon
▯ Programme CD
▯ Storage case
▯ USB Cable
▯ Cleaning cloth
▯ Paper for white balance calibration
▯ Operating Manual
NOTICE
► Check the contents to make sure everything is there and for
visible damage.
► If the contents are not complete or are damaged due to
defectiv
service hotline (see chapter Service).
y card
e packaging or through transportation, contact the
36
SHM 600 A1

Commissioning
Disposal of the packaging
The packaging protects the appliance from transport damage.
The packaging materials are selected from the point of view of
their environmental friendliness and disposal technology and are
therefore recyclable.
The recirculation of packaging into the material circuit
saves on raw material and reduces the amount of waste
generated. Dispose of packaging material that is no longer
needed as per the regionally established regulations.
NOTICE
► If possible, preserve the appliance's original packaging during
arranty period so that, in the event of a warranty claim,
the w
you can package the appliance ideally for its return.
Inserting/replacing the batteries
♦ Open the battery compartment cover on the upperside of the
appliance by sliding the cover to the right and then lifting it off .
♦ Insert two batteries of type AAA (supplied) into the battery
compar
tment .
♦ Close the battery compartment
sliding it to the left.
by replacing the cover and
GB
SHM 600 A1
37

Operating Elements
(see fold-out side Figure A)
Button /SCAN: On/Off switch;
GB
Battery compartment
Button FORMAT: Format the Micro-SD memory card
Insertion slot for Micro SD memory card
USB port
Button TIME SET: Setting Time and Date
LED ERR: Scanning speed is too high
LED SCAN: Scan is being performed
Display
Button C/BW: Setting the Scan Mode
Taste DPI: Setting the Scan Resolution
Display representations
(see fold-out side Figure B)
Display SD Card: Photos are being stored on the
Display eff ect: Documents are being scanned in colour
Counter: Indicates the number of scanned fi les on the
Selected resolution: HIGH: 600 dpi; LOW: 300 dpi
Battery indicator: Battery is full ; Battery is empty
Operating Elements
Start/end scan process
Micro-SD memory card
or black/white
Micro-SD memory card
38
SHM 600 A1

Handling and operation
Handling and operation
In this chapter you receive important information in regard to the
handling and operation of the appliance.
Insertion/exchange of the Micro-SD memory card
The appliance requires a Micro SD memory card (supplied) to be
able to scan and save documents or pictures.
♦ Switch the appliance off with the button
♦ Insert the Micro SD memory card with the metal contacts facing
ards into the slot and carefully press the card until it
upw
clicks into place.
IMPORTANT
► Do not press the Micro-SD memory card into the slot with force.
The appliance and the memor
y card could be damaged.
Formatting the Micro SD memory card
When using a new Micro SD memory card, this must be formatted
prior to scanning.
NOTICE
► Formatting erases all data saved on the Micro-SD memory card.
♦ Switch the appliance off with the button
♦ Insert the Micro SD memory card with the metal contacts facing
upwards into the slot and carefully press the card until it
clicks into place.
♦ Switch the appliance on with the button /SCAN .
♦ Using a blunt and thin object, such as the end of a paper clip,
press the button FORMAT . In the display appears a .
♦ Press the button
memory card. In the display the indicator for the SD card
will blink until formatting is complete.
/SCAN to start formatting the Micro-SD
/SCAN .
/SCAN .
GB
SHM 600 A1
39

Setting Time and Date
♦ Switch the appliance on with the button /SCAN .
GB
♦ Using a blunt and thin object, such as the end of a paper clip,
pr
ess the button TIME SET . In the display appears ##
for the year, whereby # # stands for a series of digits that will
be changed to match the actual time and date.
♦ Press the button C/B
♦ Press the button
display appears ##.
♦ Repeat the last two action steps to set the month, day, hour and
minute.
♦ After setting the minute (
once again to exit the setting of date and time.
Display Setting
1 ## Year
2 ## Month
3 ## Day
4 ## Hour
5 ## Minute
Handling and operation
W or DPI to select the current year.
/SCAN to confi rm the setting. In the
##), press the button TIME SET
40
SHM 600 A1

Handling and operation
Setting the Scan Resolution
♦ Press the button DPI to choose between either the high
resolution (HIGH = 600 dpi) or the low resolution (300 dpi =
LOW). In the display either HIGH or LOW is indicated.
Setting the Scan Mode
♦ Press the button C/BW to choose between either the colour
mode (COLOR) or the black / white mode (MONO). In the
display either COLOR or MONO is indicated.
Scanning
NOTICE
► To scan, please ensure that the appliance is not connected
to a computer and the Micr
♦ Switch the appliance on with the button
♦ Place the document on a fl at surface and hold it down fi rmly
with one hand.
♦ Place the appliance on the edge of the paper. Ensure that the
ea between the markings for the scan width ( ),
scan ar
which are marked on the side of the appliance, is maintained.
♦ Hold the appliance pressed fl at against the document and press
the button
♦ Proceed slowly with the appliance over the document whilst
k
eeping your hand steady, so as to achieve the best quality for
the scanned document.
♦ Press the button
/SCAN once. The LED SCAN glows.
o-SD memory card is inserted.
/SCAN .
/SCAN once again to stop scanning.
GB
NOTICE
► To conserve the batteries, the appliance switches off auto-
matically af
SHM 600 A1
ter 3 minutes of not being in use.
41

Perform calibration
NOTICE
GB
► Perform a calibration only if the white balance needs to be
eset. A white balance is recommended if it should be that
r
the lightest point in scanned images, which in reality should
be white, in fact appears in a shade of grey.
♦ Place the appliance on the paper supplied for white balance cali-
br
ation then switch the appliance on with the button /SCAN .
♦ Press and hold the button C/B
/SCAN to switch into calibration mode. In the display
the indicator for the SD card will blink until the internal
memory is deleted. Subsequently, the LED SCAN
LED ERR glow.
NOTICE
► The documents/pictures extant on the Micro-SD memory card
will be r
♦ Do not move the appliance until the LED ERR
The LED SCAN continues to glow.
♦ Now begin to scan the paper by moving the appliance over
the white paper until the LED SC
appliance backwards if necessary).
♦ The calibration process is fi nished. Switch the appliance off with
the button
Handling and operation
W and then press the button
and the
etained even after the deletion of the internal memory.
extinguishes.
AN extinguishes (push the
/SCAN .
42
SHM 600 A1

Handling and operation
LED Indicators
LED SCAN lights up green: Scan is being performed.
LED SCAN
LED ERR
LED ERR
Viewing the scanned documents/images
To transfer your data from the Micro-SD memory card, use either
the supplied SD card adapter or connect the appliance directly to
a computer with the USB cable.
Connection to a computer
System Requirements
You require a computer with a free USB port and, as the operating system, either Microsoft
Windows
♦ Connect the appliance to your computer via the USB cable and
switch it on with the /SCAN button. Your computer should
recognise the appliance as a "Removable Medium".
♦ Click on "Open folder to display fi les" to view and import the
scanned images.
NOTICE
► If you have switched the auto start function off and the re-
mo
My Computer (PC) and search for the appliance under
"Removable Medium".
does not light up: Standby mode/Scan complete.
lights up orange: Scanning speed too high/Scan blurred.
does not light up: Faultless scanning speed.
®
®
7 or Mac OS® 10.4 or higher.
Windows® XP SP2, Windows® Vista,
vable medium does not appear automatically, go to
GB
SHM 600 A1
43

Handling and operation
Installation of the programmme NimoDoc Lite
NOTICE
GB
► Please note that the programme NimoDoc Lite only functions
with Windo
ws PCs. Mac users will need an alternative soft-
ware or need to emulate a Windows environment.
► The illustrations and descriptions refer to the operating system
Micr
®
Windows®7. The screen display may, depending
osoft
on the display settings, vary with other operating systems.
♦ Place the supplied software CD into the CD-ROM drive of your
computer
. The window "Automatic Playback" is displayed.
♦ Click on the "Run NimoDoc.exe" button.
The installation star
ts and the start window is displayed.
NOTICE
► If you have switched the auto start function off and the instal-
ocess does not start automatically, start the installation
lation pr
process by double-clicking the fi le "NimoDocLite.exe" in the
root directory of the CD.
♦ Click on the button "Install NimoDoc Lite" to install the pro-
gr
amme "NimoDoc Lite".
The installation wizard will now guide you through the installation process. After successful installation, a display appears
indicating that the installation has been completed.
♦ Click on the button "Finish". The launch window is displayed
once again.
♦ Click on the button "Exit" to end the installation programme.
44
SHM 600 A1

Handling and operation
Launching the programme NimoDoc Lite
♦ Start the programme by double clicking on the programme icon
on the desktop or select the corresponding entry in the Start Menu.
♦ The main window is opened.
1
2
3
GB
5
1. Menu bar
2. Quick Launch toolbar
3. Search fi eld
4. Preview area
5. Workspace
SHM 600 A1
4
45

Confi guring the work space
♦ Click on "MyNimoDoc" in the work space with the right mouse
button. A conte
GB
♦ Click on "File Management" with the left mouse button. A new
window with the fi le management will open.
♦ Click on "Add" to select a fi le from your hard disc or appliance.
Handling and operation
xt menu opens.
46
SHM 600 A1

Handling and operation
♦ After you have selected a fi le, click on "Save". The selected fi le
w be displayed in the work space and all documents or
will no
images to be processed can be stored in this fi le.
Importing images from the appliance
♦ Click in the Quick Launch bar on "Open" to take over images
om the appliance into a document fi le. The window "Open"
fr
appears.
♦ Here, select whether you want to import an entire fi le (folder)
or a single fi
you can also fi lter as to which fi le formats are to searched for.
♦ Click on "OK" and then select the folder or individual fi le that
you wish to import. A new document folder with the imported
images is created.
♦ Click on the document folder with the right mouse button and,
under "r
folder.
NOTICE
► The images from your appliance can be found on the
wly recognised removable medium in the directory
ne
DCIM/100Media.
le (image) into a document folder. In addition,
ename", assign a descriptive name for the document
GB
SHM 600 A1
47

Handling and operation
Export images of a document folder
You can export the collected images and documents in a documents
folder in various fi le formats.
GB
♦ First, select the appropriate document fi le and then click on
"Sav
e" in the main screen.
♦ Another window then opens in which you can specify in which
fi
le format the document folder is to be issued.
Text Recognition
♦ Click in the Quick Launch bar on "Open" to take over an image
fr
om the appliance. The window "Open" appears.
♦ Select the Input Mode "Image" and click on "OK".
♦ Specify the path to your image, mark the image and then click
on "Open". The image will no
♦ By double clicking on the image the editing interface opens.
w appear in the preview area.
48
SHM 600 A1

Handling and operation
♦ Click on "Recognition". Another window will open in which you
can specify which language is to be used in the image.
GB
♦ Select the appropriate language and click on "OK". The editor
starts with the recognition of the text.
♦ In the Quick Launch toolbar click on "Save" in the editing inter-
face and select the fi
as a Word document".
SHM 600 A1
le format to be exported, e.g. " Save text
49

Handling and operation
♦ Specify a path and fi le name and click on "Save".
NOTICE
GB
► Ensure that on the scanned image the text runs horizontally,
wise the text recognition does not work. If this is not the
other
case, rotate the image with the left/right buttons in the lower
area of the screen and save it again.
Toolbar
On the right side of the display there is the tool bar, which provides
you with various editing tools:
1324
8567
1. Marking of image areas
2. Adjustment of brightness, contrast, saturation and colour
3. Cutting tool
4. Convert colours
5. Mirror function
6. Function for rotating the images
7. Black and white saturation
8. Create black and white image
50
SHM 600 A1

Handling and operation
91110
12 13 14
9. Text Recognition
10. Function for trimming the edges
11. Red eye removal
12. Insert notes into the image
13. Insert text into the image
14. Ballpoint pen function
GB
15
15. Pencil function
16. Eraser
17. Colourise areas
18. Draw lines
19. Draw rectangles
20. Draw circles
SHM 600 A1
1716
1918
20
51

Control bar
GB
1. Previous image
2. Next image
3. Display optimal image size
4. Display actual image size
5. Zoom out
6. Zoom in
7. Switch to full screen mode
8. Rotate image to the left
9. Rotate image to the right
10. Resize image (pixel data)
11. Undo
12. Restore
13. Print image
14. Open print preview
15. Save as
16. Save
17. Delete
Handling and operation
98714652 3 10 1112 13 14 151617
52
SHM 600 A1

Cleaning
Cleaning
Safety instructions
IMPORTANT
Possible damage to the appliance.
Moistur
e penetration can cause damage to the appliance.
► In order to avoid irreparable damage, when you are cleaning
he appliance ensure that moisture cannot penetrate inside it.
t
Cleaning
■ Clean the housing exclusively with a soft damp cloth and a mild
dishwashing liquid.
■ Clean the surface of the lens scanner with the supplied cleaning
cloth.
GB
SHM 600 A1
53

Troubleshooting
Troubleshooting
In this chapter you will receive important information for malfunction
localization and remedies. Observe the instructions in order to avoid
GB
danger and damage.
Malfunction causes and remedies
The following table will help with localizing and remedying minor
malfunctions:
Defect Possible cause Solution
The appliance will not
switch on.
The images cannot be
saved when scanning.
The computer does not
recognise the appliance
after the connection
is made (it has not
detected removable
medium).
- Batteries are
discharged.
- Batteries are not
inserted correctly.
- The Micro SD memory
card is not fi tted.
- The Micro-SD memory
card is full.
- The Micro-SD memory
card has not been
formatted correctly
Connection error.
- Replace the batteries.
- Insert the batteries into
the battery compartment correctly.
- Insert the memory
card with the metal
contacts facing upwards.
- Save the data from
the memory card onto
a computer.
- Format the memory
card (see section "Formatting the Micro-SD
memory card)
- Ensure that all cables
are connected properly. If necessary,
restart the computer.
- Try a diff erent USB
port.
54
SHM 600 A1

Troubleshooting
Defect Possible cause Solution
- Clean the scanner
The images are blurry.
The LED ERR
up when scanning a
document.
The LED ERR
up after switching the
appliance on.
lights
lights
The scanner lens is
dirty.
The scanning speed is
too high.
The calibration data
has been reset.
NOTICE
► If you cannot solve the problem with the aforementioned methods
please contact Customer Ser
vice.
lens with the cleaning
cloth.
- Recalibrate the
appliance.
To cancel, press the
button
and try to scan the
document again at a
slower speed.
Recalibrate the
appliance.
GB
/SCAN
SHM 600 A1
55

Storage/Disposal
Storage/Disposal
Storage
GB
If you intend to not use the appliance for an extended period, remove the batteries and store it in the supplied storage bag in a dry
and dust-free environment.
Disposal of the appliance
Do not dispose of the appliance into normal
household waste. This product is subject
to the provisions of European Directive
2002/96/EC-WEEE (Waste Electrical and
Electronic Equipment).
Dispose of the appliance through an approved disposal
centre or at your community waste facility. Observe
the currently applicable regulations. In case of doubt,
please contact your waste disposal centre.
Disposing of the batteries
Do not dispose of the batteries with household waste. Every consumer
is statutorily obliged to dispose of batteries at a collection centre in
his/her community/district or a dealer. This obligation is intended
to ensure that batteries are disposed of in an environmentally safe
fashion. Dispose of batteries only when they are fully discharged.
56
SHM 600 A1

Appendix
Appendix
Technical data
Power supply
Image Sensor Colour contrast image sensor
Number of sensors 5138 Points
Resolution
Data format JPEG
Automatic switch-off 3 Minutes
External memory
Interface USB 2.0
Operating temperature +5 - +40°C
Humidity (no condensation) 5 - 90 %
Measurements (W x H x D) approx. 25.9 x 3 x 2.8 cm
Weight (without accessories) 146 g approx.
2 x 1.5 V Type AA/Mignon/
LR6/R6
LOW: 300 x 300 dpi
HIGH: 600 x 600 dpi
Micro-SD memory card
up to 32GB
GB
SHM 600 A1
57

Minimum PC requirements
®
XPSP2, Windows®Vista™,
Operating system
GB
CPU Pentium III or higher
Main memory Minimum 256 MB
Interface USB-Port 2.0
Windows
Windows®7 and MacOS® 10.4 or higher
(Insert the appliance directly, driver installation not required)
Notes on the Declaration of Conformity
This appliance satisfi es the fundamental requirements
and other relevant regulations of the EMC Directive
2004/108/EC.
The complete original declaration of conformity can
be obtained from the importer.
Appendix
58
SHM 600 A1

Appendix
Warranty
You receive a 3-year warranty for this appliance as of the purchase
date. This appliance has been manufactured with care and meticulously examined before delivery.
Please retain your receipt as proof of purchase. In the case of a
warranty claim, please make contact by telephone with our service
department. Only in this way can a post-free despatch for your
goods be assured.
NOTICE
► The warranty covers only claims for material and manufac-
turing defects, not for tr
for damage to fragile components, e.g. buttons or batteries.
This appliance is intended for domestic use only, NOT for commercial purposes. If this product has been subjected to improper or
inappropriate handling, abuse, or modifi cations not carried out by
one of our authorised sales and service outlets, the warranty will be
considered void.
Your statutory rights are not restricted in any way by this warranty.
The warranty period will not be extended as a result of repairs made
under warranty. This applies also to replaced and repaired parts.
Damages and defects discovered on purchase are to be reported
directly after unpacking, at the latest two days after the date of
purchase.
On the lapse of the warranty period, all repairs carried out are
liable to charges.
ansport damage, wearing parts or
GB
SHM 600 A1
59

Service
Service Great Britain
Tel.: 0871 5000 720 (£ 0.10/Min.)
GB
E-Mail: kompernass@lidl.co.uk
IAN 73767
Importer
KOMPERNASS GMBH
BURGSTRASSE 21
44867 BOCHUM, GERMANY
www.kompernass.com
Appendix
60
SHM 600 A1

Inhaltsverzeichnis
Einführung . . . . . . . . .62
Informationen zu dieser
Bedienungsanleitung . . . . 62
Urheberrecht . . . . . . . . . . 62
Haftungsbeschränkung . . . 62
Warnhinweise . . . . . . . . . . 63
Bestimmungsgemäße
Verwendung . . . . . . . . . . . 63
Sicherheit . . . . . . . . . .64
Umgang mit Batterien . . . . 64
Grundlegende
Sicherheitshinweise . . . . . . 65
Inbetriebnahme . . . . .66
Sicherheitshinweise . . . . . . 66
Lieferumfang und
Transportinspektion . . . . . . 66
Entsorgung der Verpackung 67
Batterien einlegen/wechseln 67
Bedienelemente. . . . .68
Bedienung und Betrieb 69
Micro-SD-Speicherkarte
einsetzen/wechseln . . . . . 69
Formatieren der Micro-SD-
Speicherkarte . . . . . . . . . . 69
Datum und Uhrzeit einstellen . 70
Scanaufl ösung einstellen . 71
Scanmodus einstellen . . . . 71
Scannen . . . . . . . . . . . . . . 71
Kalibrierung durchführen . 72
LED-Anzeigen . . . . . . . . . . 73
Betrachten der gescannten
Dokumente/Bilder . . . . . . 73
Anschluss an einem
Computer . . . . . . . . . . . . . 73
Installation des Programms
NimoDoc Lite . . . . . . . . . . 74
Das Programm NimoDoc
Lite starten . . . . . . . . . . . . 75
Reinigung . . . . . . . . . .83
Sicherheitshinweise . . . . . . 83
Reinigung . . . . . . . . . . . . . 83
Fehlerbehebung . . . .84
Fehlerursachen und
-behebung . . . . . . . . . . . . 84
Lagerung/Entsorgung 86
Lagerung . . . . . . . . . . . . . 86
Gerät entsorgen . . . . . . . . 86
Batterien entsorgen . . . . . . 86
Anhang . . . . . . . . . . . .87
Technische Daten . . . . . . . 87
Mindestanforderungen
an den Computer . . . . . . . 88
Hinweise zur
Konformitätserklärung . . . 88
Garantie . . . . . . . . . . . . . . 89
Service . . . . . . . . . . . . . . . 90
Importeur . . . . . . . . . . . . . 90
DE
AT
CH
SHM 600 A1
61

Einführung
Informationen zu dieser Bedienungsanleitung
Herzlichen Glückwunsch zum Kauf Ihres neuen Gerätes.
Sie haben sich damit für ein hochwertiges Produkt entschieden.
Diese Bedienungsanleitung ist Bestandteil des mobilen Handscanners
DE
SHM 600 A1 (nachfolgend als Gerät bezeichnet) und gibt Ihnen
AT
wichtige Hinweise für den bestimmungsgemäßen Gebrauch, die
CH
Sicherheit, den Anschluss sowie die Bedienung des Gerätes. Die
Bedienungsanleitung muss ständig in der Nähe des Gerätes verfügbar
sein. Sie ist von jeder Person zu lesen und anzuwenden, die mit der
Bedienung und Störungsbehebung des Gerätes beschäftigt ist.
Bewahren Sie diese Bedienungsanleitung auf und geben Sie diese
mit dem Gerät an den Nachbesitzer weiter.
Urheberrecht
Diese Dokumentation ist urheberrechtlich geschützt.
Jede Vervielfältigung, bzw. jeder Nachdruck, auch auszugsweise,
sowie die Wiedergabe der Abbildungen, auch im veränderten Zustand
ist nur mit schriftlicher Zustimmung des Herstellers gestattet.
Haftungsbeschränkung
Alle in dieser Bedienungsanleitung enthaltenen technischen Informationen, Daten und Hinweise für den Anschluss und die Bedienung, entsprechen dem letzten Stand bei Drucklegung und erfolgen unter Berücksichtigung unserer bisherigen Erfahrungen und Erkenntnisse nach
bestem Wissen. Aus den Angaben, Abbildungen und Beschreibungen in dieser Anleitung können keine Ansprüche hergeleitet werden.
Der Hersteller übernimmt keine Haftung für Schäden aufgrund von
Nichtbeachtung der Anleitung, nicht bestimmungsgemäßer Verwendung, unsachgemäßen Reparaturen, unerlaubt vorgenommenen
Veränderungen oder Verwendung nicht zugelassener Ersatzteile.
Einführung
62
SHM 600 A1

Einführung
Warnhinweise
In der vorliegenden Bedienungsanleitung werden folgende Warnhinweise verwendet:
WARNUNG
Ein Warnhinweis dieser Gefahrenstufe kennzeichnet
eine mögliche gefährliche Situation.
Falls die gefährliche Situation nicht vermieden wird, kann dies
zu Verletzungen führen.
► Die Anweisungen in diesem Warnhinweis befolgen, um
V
erletzungen von Personen zu vermeiden.
ACHTUNG
Ein Warnhinweis dieser Gefahrenstufe kennzeichnet
einen mög
Falls die Situation nicht vermieden wird, kann dies zu Sachschäden führen.
► Die Anweisungen in diesem Warnhinweis befolgen, um
Sachschäden zu v
HINWEIS
► Ein Hinweis kennzeichnet zusätzliche Informationen, die den
Umgang mit dem Ger
Bestimmungsgemäße Verwendung
Dieses Gerät ist ausschließlich für den nicht gewerblichen Gebrauch
zum Scannen und Digitalisieren von Dokumenten und Bildern bestimmt.
Eine andere oder darüber hinausgehende Benutzung gilt als nicht
bestimmungsgemäß. Ansprüche jeglicher Art wegen Schäden aus
nicht bestimmungsgemäßer Verwendung sind ausgeschlossen. Das
Risiko trägt allein der Benutzer.
lichen Sachschaden.
ermeiden.
ät erleichtern.
DE
AT
CH
SHM 600 A1
63

Sicherheit
In diesem Kapitel erhalten Sie wichtige Sicherheitshinweise im Umgang
mit dem Gerät. Dieses Gerät entspricht den vorgeschriebenen Sicherheitsbestimmungen. Ein unsachgemäßer Gebrauch kann zu Personenund Sachschäden führen.
DE
AT
Umgang mit Batterien
CH
WARNUNG
Gefahr durch nicht ordnungsgemäße Verwendung!
Es besteht Explosions- und Auslaufgefahr!
Für den sicheren Umgang mit Batterien beachten Sie folgende
Sicherheitshinweise:
► Werfen Sie Batterien nicht ins Feuer.
► Schließen Sie Batterien nicht kurz.
► Versuchen Sie nicht, Batterien wieder aufzuladen.
► Überprüfen Sie regelmäßig die Batterien. Ausgetretene
Batteriesäur
Im Umgang mit beschädigten oder ausgelaufenen Batterien
besondere Vorsicht walten lassen. Verätzungsgefahr! Schutzhandschuhe tragen.
► Batterien für Kinder unzugänglich aufbewahren.
Bei V
► Entnehmen Sie die Batterien, wenn Sie das Gerät längere Zeit
nicht benutz
e kann dauerhafte Schäden am Gerät verursachen.
erschlucken umgehend einen Arzt aufsuchen.
en.
Sicherheit
64
SHM 600 A1

Sicherheit
Grundlegende Sicherheitshinweise
Beachten Sie für einen sicheren Umgang mit dem Gerät die folgenden
Sicherheitshinweise:
■ Kontrollieren Sie das Gerät vor der Verwendung auf äußere
e Schäden. Nehmen Sie ein beschädigtes oder herunter-
sichtbar
gefallenes Gerät nicht in Betrieb.
■ Dieses Gerät ist nicht dafür bestimmt, durch Personen (einschließ-
lich Kinder) mit eingeschr
geistigen Fähigkeiten oder mangels Erfahrung und/oder mangels
Wissen benutzt zu werden, es sei denn, sie werden durch eine für
ihre Sicherheit zuständige Person beaufsichtigt oder erhielten von
ihr Anweisungen, wie das Gerät zu benutzen ist.
■ Kinder sollten beaufsichtigt werden, um sicherzustellen, dass sie
nicht mit dem Ger
■ Lassen Sie Reparaturen am Gerät nur von autorisierten Fachbetrieben
oder dem K
Reparaturen können erhebliche Gefahren für den Benutzer
entstehen. Zudem erlischt der Garantieanspruch.
■ Eine Reparatur des Gerätes während der Garantiezeit darf nur
v
on einem vom Hersteller autorisierten Kundendienst vorgenommen
werden, sonst besteht bei nachfolgenden Schäden kein Garantieanspruch mehr.
■ Defekte Bauteile dürfen nur gegen Original-Ersatzteile ausgetauscht
w
erden. Nur bei diesen Teilen ist gewährleistet, dass sie die
Sicherheitsanforderungen erfüllen werden.
■ Nehmen Sie keine eigenmächtigen Umbauten oder Veränderungen
an dem Ger
■ Schützen Sie das Gerät vor Feuchtigkeit und dem Eindringen von
Flüssigk
de (z.B. Vasen) neben das Gerät.
■ Das Gerät nicht in der Nähe von off enen Flammen betreiben.
undenservice durchführen. Durch unsachgemäße
ät vor.
eiten. Stellen Sie keine mit Flüssigkeit gefüllten Gegenstän-
änkten physischen, sensorischen oder
ät spielen.
DE
AT
CH
SHM 600 A1
65

Inbetriebnahme
Inbetriebnahme
Sicherheitshinweise
WARNUNG
DE
AT
CH
Bei der Inbetriebnahme des Gerätes können
Personen- und Sachschäden auftreten!
► Verpackungsmaterialien dürfen nicht zum Spielen verwendet
w
erden. Es besteht Erstickungsgefahr.
Lieferumfang und Transportinspektion
Das Gerät wird standardmäßig mit folgenden Komponenten geliefert:
▯ Handscanner
▯ 2 GB Micro-SD-Speicherkarte inkl. Adapter auf SD-Speicherkarte
▯ 2 x 1,5 V Batterien Typ AA / LR6 / Mignon
▯ Programm-CD
▯ Aufbewahrungstasche
▯ USB-Kabel
▯ Reinigungstuch
▯ Papier für die Weißabgleich-Kalibrierung
▯ Bedienungsanleitung
HINWEIS
► Prüfen Sie die Lieferung auf Vollständigkeit und auf sichtbare
Schäden.
► Bei einer unvollständigen Lieferung oder Schäden infolge
mangelhaf
sich an die Service-Hotline (siehe Kapitel Service).
ter Verpackung oder durch Transport wenden Sie
66
SHM 600 A1

Inbetriebnahme
Entsorgung der Verpackung
Die Verpackung schützt das Gerät vor Transportschäden.
Die Verpackungsmaterialien sind nach umweltverträglichen und
entsorgungstechnischen Gesichtspunkten ausgewählt und deshalb
recyclebar.
Die Rückführung der Verpackung in den Materialkreislauf
spart Rohstoff e und verringert das Abfallaufkommen.
Entsorgen Sie nicht mehr benötigte Verpackungsmaterialien
gemäß den örtlich geltenden Vorschriften.
HINWEIS
► Heben Sie, wenn möglich, die Originalverpackung während
antiezeit des Gerätes auf, um das Gerät im
der Gar
Garantiefall ordnungsgemäß verpacken zu können.
Batterien einlegen/wechseln
♦ Öff nen Sie die Abdeckung des Batteriefachs auf der Gerä-
teoberseite, indem Sie die Abdeckung nach rechts schieben und
abheben.
♦ Legen Sie die Batterien vom Typ AA/LR6/Mignon (im Lieferum-
fang enthalten) in das Batteriefach
♦ Schließen Sie das Batteriefach
aufsetzen und sie nach links schieben.
ein.
, indem Sie die Abdeckung
DE
AT
CH
SHM 600 A1
67

Bedienelemente
(siehe Ausklappseite Abbildung A)
Taste /SCAN: Ein-/Ausschalter; Scanvorgang
DE
AT
CH
Displaydarstellungen
(siehe Ausklappseite Abbildung B)
Batteriefach
Taste FORMAT: Micro-SD-Speicherkarte formatieren
Steckplatz für Micro-SD-Speicherkarte
USB-Anschluss
Taste TIME SET: Datum und Uhrzeit einstellen
LED ERR: Scangeschwindigkeit zu hoch
LED SCAN: Scannen wird durchgeführt
Display
Taste C/BW: Scanmodus einstellen
Taste DPI: Scanaufl ösung einstellen
Anzeige SD-Karte: Fotos werden auf der Micro-SD-
Anzeige Eff ekt: Dokumente werden in Farbe oder
Zähler: Zeigt die Anzahl der gescannten Dateien auf
der Micro-SD-Speicherkarte an
Gewählte Aufl ösung: HIGH: 600 dpi; LOW: 300 dpi
Anzeige Batterie: Batterie ist voll ; Batterie ist leer
Bedienelemente
starten/beenden
Speicherkarte gespeichert
schwarz/weiß gescannt
68
SHM 600 A1

Bedienung und Betrieb
Bedienung und Betrieb
In diesem Kapitel erhalten Sie wichtige Hinweise zur Bedienung und
Betrieb des Gerätes.
Micro-SD-Speicherkarte einsetzen/wechseln
Das Gerät benötigt eine Micro-SD-Speicherkarte (im Lieferumfang
enthalten), um Dokumente oder Bilder zu scannen und zu speichern.
♦ Schalten Sie das Gerät mit der Taste
♦ Stecken Sie die Micro-SD-Speicherkarte mit den Metallkontak-
ten nach oben in den Steckplatz
auf die Karte, bis sie einrastet.
ACHTUNG
► Drücken Sie die Micro-SD-Speicherkarte nicht mit Gewalt in
den Steckplatz. Das Ger
dadurch beschädigt werden.
ät und die Speicherkarte können
Formatieren der Micro-SD-Speicherkarte
Bei Verwendung einer neuen Micro-SD-Speicherkarte muss diese vor
dem Scannen formatiert werden.
HINWEIS
► Beim Formatieren werden alle Daten auf der Micro-SD-
Speicherk
♦ Schalten Sie das Gerät mit der Taste
♦ Stecken Sie eine Micro-SD-Speicherkarte mit den Metallkontak-
ten nach oben in den Steckplatz
auf die Karte, bis sie einrastet.
♦ Schalten Sie das Gerät mit der Taste
♦ Drücken Sie mit einem dünnen und stumpfen Gegenstand, z.B.
das Ende einer Bür
Display erscheint ein .
SHM 600 A1
arte gelöscht.
oklammer, auf die Taste FORMAT . Im
/SCAN aus.
und drücken Sie vorsichtig
/SCAN aus.
und drücken Sie vorsichtig
/SCAN ein.
DE
AT
CH
69

♦ Drücken Sie die Taste /SCAN , um mit dem Formatieren
der Micro-SD-Speicherkarte zu beginnen. Im Display blinkt
solange die Anzeige der SD-Karte , bis die Formatierung
abgeschlossen ist.
Datum und Uhrzeit einstellen
DE
AT
CH
♦ Schalten Sie das Gerät mit der Taste /SCAN ein.
♦ Drücken Sie mit einem dünnen und stumpfen Gegenstand, z.B.
das Ende einer Bür
Display erscheint ## für das Jahr, wobei ## für eine Reihe
von Ziff ern steht, die zum Übereinstimmen mit der tatsächlichen
Zeit bzw. dem Datum abgeändert wird.
♦ Drücken Sie die Taste C/B
Jahr auszuwählen.
♦ Drücken Sie die Taste
bestätigen. Im Display erscheint ##.
♦ Wiederholen Sie die letzten zwei Handlungsschritte, um den
Monat, den T
♦ Nach dem Einstellen der Minute (
die Taste TIME SET , um den Einstellmodus von Datum und
Uhrzeit zu beenden.
Anzeige Einstellung
1 ## Jahr
2 ## Monat
3 ## Tag
4 ## Stunde
5 ## Minute
ag, die Stunde und die Minute einzustellen.
Bedienung und Betrieb
oklammer, auf die Taste TIME SET . Im
W oder DPI , um das aktuelle
/SCAN , um die Einstellung zu
##), drücken Sie erneut
70
SHM 600 A1

Bedienung und Betrieb
Scanaufl ösung einstellen
♦ Drücken Sie die Taste DPI , um zwischen der hohen
Aufl ösung (HIGH = 600 dpi) und der niedrigen Aufl ösung
(LOW = 300 dpi) auszuwählen. Im Display wird HIGH oder
LOW angezeigt.
Scanmodus einstellen
♦ Drücken Sie die Taste C/BW , um zwischen dem Farb-Modus
(COLOR) und dem Schwarz/Weiß-Modus (MONO) auszu-
wählen. Im Display wird COLOR oder MONO angezeigt.
Scannen
HINWEIS
► Zum Scannen stellen Sie bitte sicher, dass das Gerät nicht an
einem Computer angeschlossen und die Micr
karte eingelegt ist.
♦ Schalten Sie das Gerät mit der Taste
♦ Legen Sie das Dokument auf eine ebene Oberfl äche und
halten es mit einer Hand dar
♦ Legen Sie das Gerät auf den Papierrand. Achten Sie dar-
auf, dass der Scanber
Scanbreite ( ), die auf der Seite des Gerätes markiert ist,
beibehalten wird.
♦ Halten Sie das Gerät fl ach gegen das Dokument gedrückt und
en Sie einmal auf die Taste /SCAN . Die LED SCAN
drück
leuchtet auf.
♦ Fahren Sie langsam mit dem Gerät über das Dokument und
halten Sie dabei Ihr
gescannten Dokuments zu erzielen.
♦ Drücken Sie erneut die Taste
beenden.
SHM 600 A1
e Hand ruhig, um die beste Qualität des
auf fest.
eich zwischen den Markierungen der
/SCAN , um das Scannen zu
o-SD-Speicher-
/SCAN ein.
DE
AT
CH
71

HINWEIS
► Um die Batterien zu schonen, schaltet das Gerät bei
Nichtbenutzung automatisch nach 3 Minuten ab.
Kalibrierung durchführen
DE
HINWEIS
AT
CH
► Führen Sie die Kalibrierung nur durch, wenn der Weißab-
gleich eingestellt w
sich, wenn bei gescannten Bildern der hellste Punkt, der in
Wirklichkeit weiß sein sollte, in einem Grauton erscheint.
♦ Platzieren Sie das Gerät auf das mitgelieferte Papier für die
W
eißabgleich-Kalibrierung und schalten Sie das Gerät mit der
Taste /SCAN ein.
♦ Drücken und halten Sie die Taste C/B
dann die Taste /SCAN , um in den Kalibrierungsmodus
zu wechseln. Im Display blinkt die Anzeige der SD-Karte
solange, bis der interne Speicher gelöscht ist. Anschließend
leuchten die LED SCAN und LED ERR auf.
HINWEIS
► Die auf der Micro-SD-Speicherkarte vorhandenen
umente/Bilder bleiben bei Löschung des internen
Dok
Speichers erhalten.
♦ Bewegen Sie das Gerät solange nicht, bis die LED ERR
erlischt. Die LED SCAN leuchtet weiter.
♦ Beginnen Sie nun mit dem Scannen des Papiers, indem Sie das
Ger
ät über das weiße Papier fahren, bis die LED SCAN
erlischt (schieben Sie das Gerät rückwärts, falls notwendig).
♦ Der Kalibriervorgang ist beendet. Schalten Sie das Gerät mit
der T
aste /SCAN aus.
Bedienung und Betrieb
erden muss. Ein Weißabgleich empfi ehlt
W und drücken Sie
72
SHM 600 A1

Bedienung und Betrieb
LED-Anzeigen
LED SCAN leuchtet grün: Scannen wird durchgeführt.
LED SCAN
LED ERR
LED ERR
Betrachten der gescannten Dokumente/Bilder
Verwenden Sie entweder den mitgelieferten SD-Karten-Adapter
oder schließen Sie das Gerät mit dem USB-Kabel direkt an einen
Computer an, um Ihre Daten von der Micro-SD-Speicherkarte zu
übertragen.
Anschluss an einem Computer
Systemvoraussetzungen
Sie benötigen einen Computer mit einem freien USB-Anschluss und
als Betriebssystem Windows
der Firma Microsoft
♦ Verbinden Sie das Gerät mittels USB-Kabel mit Ihrem Computer
und schalten Sie es mit der T
ter sollte das Gerät als einen „Wechseldatenträger“ erkennen.
♦ Klicken Sie auf „Ordner öff nen, um Dateien anzuzeigen“, um
die gescannten Bilder zu betr
leuchtet nicht: Standby-Betrieb/Scannen vollständig.
leuchtet orange: Scangeschwindigkeit zu hoch/Scan
verwackelt.
leuchtet nicht: Fehlerfreie Scangeschwindigkeit.
®
®
XP SP2, Windows® Vista, Windows® 7
oder Mac OS
®
10.4 oder höher.
aste /SCAN ein. Ihr Compu-
achten und zu importieren.
DE
AT
CH
HINWEIS
► Wenn Sie die Autostartfunktion ausgeschaltet haben und der
echseldatenträger nicht automatisch angezeigt wird, rufen
W
Sie den Arbeitsplatz (PC) auf und suchen Sie nach dem
Gerät unter „Wechseldatenträger“.
SHM 600 A1
73

Bedienung und Betrieb
Installation des Programms NimoDoc Lite
HINWEIS
► Bitte beachten Sie, dass das Programm NimoDoc Lite nur mit
ws-PCs zusammenarbeitet. MAC-User benötigen eine
Windo
DE
AT
CH
alternative Software oder müssen eine Windows-Umgebung
emulieren.
► Die Abbildungen und die Beschreibungen beziehen sich auf
das Betriebssy
darstellung kann in Abhängigkeit der Anzeigeeinstellungen
bei anderen Betriebssystemen abweichen.
♦ Legen Sie die mitgelieferte Programm-CD in das CD-Laufwerk
Ihr
es Computers ein. Das Fenster „Automatische Wiedergabe“
wird angezeigt.
♦ Klicken Sie auf die Schaltfl äche „NimoDoc.exe ausführen“.
Die Installation star
HINWEIS
► Wenn Sie die Autostartfunktion ausgeschaltet haben und der
Installationsv
den Installationsvorgang durch einen Doppelklick auf die
Datei „NimoDocLite.exe“ im Hauptverzeichnis der CD.
♦ Klicken Sie auf die Schaltfl äche „Install NimoDoc Lite“, um das
Pr
ogramm „NimoDoc Lite“ zu installieren.
Der Installationsassistent führt Sie nun schrittweise durch den
Installationsprozess. Nach erfolgreicher Installation wird angezeigt, dass die Installation vollständig erfolgt ist.
♦ Klicken Sie auf die Schaltfl äche „Fertigstellen“. Das Startfenster
d wieder angezeigt.
wir
♦ Klicken Sie auf die Schaltfl äche „Exit“, um das Installationspro-
gr
amm zu beenden.
74
stem Microsoft® Windows® 7. Die Bildschirm-
tet und das Startfenster wird angezeigt.
organg nicht automatisch beginnt, starten Sie
SHM 600 A1

Bedienung und Betrieb
Das Programm NimoDoc Lite starten
♦ Starten Sie das Programm durch einen Doppelklick auf das
Programmsymbol auf dem Desktop oder wählen Sie den entsprechenden Eintrag im Startmenü aus.
♦ Das Hauptfenster wird geöff net.
1
2
3
DE
AT
CH
5
1. Menüleiste
2. Schnellstartleiste
3. Suchfeld
4. Vorschaubereich
5. Arbeitsbereich
SHM 600 A1
4
75

Arbeitsbereich konfi gurieren
♦ Klicken Sie mit der rechten Maustaste auf „MyNimoDoc“ im
Arbeitsber
DE
AT
CH
♦ Klicken Sie mit der linken Maustaste auf „Ordnermanagement“.
Ein neues Fenster mit der Ordnerverwaltung öff net sich.
♦ Klicken Sie auf „Hinzufügen“, um einen Ordner von Ihrer Fest-
platte oder dem Gerät auszuwählen.
eich. Ein Kontextmenü öff net sich.
Bedienung und Betrieb
76
SHM 600 A1

Bedienung und Betrieb
♦ Nachdem Sie einen Ordner ausgewählt haben, klicken Sie auf
„Speichern“. Der ge
angezeigt und alle zu bearbeitenden Dokumente oder Bilder
können in diesem Ordner abgelegt werden.
wählte Ordner wird nun im Arbeitsbereich
Bilder vom Gerät importieren
♦ Klicken Sie in der Schnellstartleiste auf „Öff nen“, um Bilder vom
ät in eine Dokumentenmappe zu übernehmen. Das Fenster
Ger
„Öff nen“ wird angezeigt.
♦ Wählen Sie hier, ob Sie einen ganzen Ordner (Folder) oder
eine einz
tieren wollen. Zusätzlich können Sie auch fi ltern, nach welchen
Dateiformaten gesucht werden soll.
♦ Klicken Sie auf „OK“ und wählen Sie anschließend den Ordner
bzw. die einzelne Datei aus, die Sie importieren möchten. Eine
neue Dokumentenmappe mit den importierten Bildern wird
erstellt.
♦ Klicken Sie mit der rechten Maustaste auf die
Dok
einen aussagekräftigen Namen für die Dokumentenmappe.
HINWEIS
► Die Bilder Ihres Gerätes fi nden Sie auf dem neu erkannten
W
elne Datei (Image) in eine Dokumentenmappe impor-
umentenmappe und vergeben Sie unter „Umbenennen“
echseldatenträger im Verzeichnis DCIM/100Media.
DE
AT
CH
SHM 600 A1
77

Bedienung und Betrieb
Bilder einer Dokumentenmappe exportieren
Sie können die gesammelten Bilder und Dokumente einer Dokumentenmappe in verschiedene Dateiformate exportieren.
♦ Wählen Sie zuerst die entsprechende Dokumentenmappe aus
und klick
DE
AT
CH
Texterkennung
♦ Ein weiteres Fenster wird geöff net, in dem Sie angeben können
♦ Klicken Sie in der Schnellstartleiste auf „Öff nen“, um ein Bild
♦ Wählen Sie als Input Mode „Image“ und klicken Sie auf „OK“.
♦ Geben Sie den Pfad zu Ihrem Bild an, markieren Sie das
♦ Durch einen Doppelklick auf das Bild öff net sich die Editierober-
en dann im Hauptbildschirm auf „Speichern“.
in w
elches Dateiformat die Dokumentenmappe ausgegeben
werden soll.
v
om Gerät zu übernehmen. Das Fenster „Öff nen“ wird ange-
zeigt.
Bild und klick
Vorschaubereich.
fl
äche.
en Sie auf „Öff nen“. Das Bild erscheint jetzt im
78
SHM 600 A1

Bedienung und Betrieb
♦ Klicken Sie auf „Erkennung“. Ein weiteres Fenster wird geöff net,
in dem Sie angeben können, welche Sprache im Bild verwendet
wird.
DE
AT
CH
♦ Wählen Sie die entsprechende Sprache aus und klicken Sie auf
„OK“. Der Editor beginnt mit der Erkennung des Textes.
♦ Klicken Sie in der Schnellstartleiste der Editieroberfl äche auf
„Speichern“ und w
z.B. „Text als Worddokument speichern“, aus.
SHM 600 A1
ählen Sie das zu exportierende Dateiformat,
79

Bedienung und Betrieb
♦ Geben Sie einen Pfad und einen Dateinamen an und klicken
Sie auf „Speichern“.
HINWEIS
► Achten Sie darauf, dass auf dem eingescannten Bild der
DE
AT
CH
ext waagerecht verläuft, da sonst die Texterkennung nicht
T
funktioniert. Wenn dies nicht der Fall ist, drehen Sie das Bild
mit den Links- / Rechts-Schaltfl ächen im unteren Bereich des
Bildschirms und speichern Sie es erneut ab.
Werkzeugleiste
Am rechten Bildrand befi ndet sich die Werkzeugleiste, die Ihnen
verschiedene Bearbeitungswerkzeuge zur Verfügung stellt:
1324
8567
1. Markieren von Bildbereichen
2. Einstellung von Helligkeit, Kontrast, Sättigung und Farbe
3. Schneidewerkzeug
4. Farben umwandeln
5. Spiegelfunktion
6. Funktion zum Drehen der Bilder
7. Schwarz-Weiß-Sättigung
8. Schwarz-Weiß-Bild erstellen
80
SHM 600 A1

Bedienung und Betrieb
91110
12 13 14
9. Texterkennung
10. Funktion zum Beschneiden der Ränder
11. Rote Augen entfernen
12. Notizen in das Bild einfügen
13. Text in das Bild einfügen
14. Kugelschreiberfunktion
DE
AT
CH
15
1918
15. Bleistiftfunktion
16. Radiergummi
17. Bereiche einfärben
18. Linien zeichnen
19. Rechtecke zeichnen
20. Kreise zeichnen
SHM 600 A1
1716
20
81

Steuerungsleiste
DE
AT
1. Vorheriges Bild
CH
2. Nächstes Bild
3. Optimale Bildgröße anzeigen
4. Tatsächliche Bildgröße anzeigen
5. Bild verkleinern
6. Bild vergrößern
7. In den Vollbildmodus wechseln
8. Bild nach links drehen
9. Bild nach rechts drehen
10. Bildgröße ändern (Pixelangaben)
11. Rückgängig machen
12. Wiederherstellen
13. Bild drucken
14. Druckansicht öff nen
15. Speichern unter
16. Speichern
17. Löschen
Bedienung und Betrieb
98714652 3 10 1112 13 14 151617
82
SHM 600 A1

Reinigung
Reinigung
Sicherheitshinweise
ACHTUNG
Mögliche Beschädigung des Gerätes.
Eindringende F
Gerätes führen.
► Stellen Sie sicher, dass bei der Reinigung keine Feuchtigkeit
in das Ger
des Gerätes zu vermeiden.
Reinigung
■ Reinigen Sie das Gehäuse ausschließlich mit einem leicht
feuchten Tuch und einem milden Spülmittel.
■ Reinigen Sie die Oberfl äche der Scannerlinse mit dem
mitgelieferten Reinigungstuch.
euchtigkeit kann zu einer Beschädigung des
ät eindringt, um eine irreparable Beschädigung
DE
AT
CH
SHM 600 A1
83

Fehlerbehebung
Fehlerbehebung
In diesem Kapitel erhalten Sie wichtige Hinweise zur Störungslokalisierung und Störungsbehebung. Beachten Sie die Hinweise um
Gefahren und Beschädigungen zu vermeiden.
DE
Fehlerursachen und -behebung
AT
Die nachfolgende Tabelle hilft bei der Lokalisierung und Behebung
CH
kleinerer Störungen:
Fehler Mögliche Ursache Behebung
- Ersetzen Sie die
Batterien.
- Legen Sie die Bat-
- Setzen Sie die Speicherkarte mit den Metallkontakten nach oben ein.
- Speichern Sie die Daten
von der Speicherkarte
auf einem Computer.
- Formatieren Sie die
Speicherkarte (siehe
Kapitel Formatieren der
Micro-SD-Speicherkarte)
- Vergewissern Sie sich,
dass alle Kabel richtig
angeschlossen sind.
Starten Sie ggf. den
Computer neu.
- Probieren Sie einen
anderen USB-Port.
Das Gerät lässt sich
nicht einschalten.
Die Bilder können beim
Scannen nicht
gespeichert werden.
Der Computer erkennt
das Gerät nach dem
Anschließen nicht (Es
wird kein Wechseldatenträger erkannt).
- Batterien sind entladen.
- Batterien sind nicht
richtig eingelegt.
- Es wurde keine MicroSD-Speicherkarte
eingesetzt.
- Die Micro-SDSpeicherkarte ist voll.
- Die Micro-SDSpeicherkarte wurde
nicht richtig formatiert
Anschlussfehler.
terien richtig in das
Batteriefach ein.
84
SHM 600 A1

Fehlerbehebung
Fehler Mögliche Ursache Behebung
- Reinigen Sie die
Die Bilder sind
verschwommen.
Die LED ERR
beim Scannen eines
Dokuments auf.
Die LED ERR
nach dem Einschalten
des Gerätes auf.
leuchtet
leuchtet
Die Scannerlinse ist
verschmutzt.
Die Scangeschwindigkeit ist zu hoch.
Die Kalibrierungsdaten
wurden zurückgesetzt.
HINWEIS
► Wenn Sie mit den vorstehend genannten Schritten das Problem
nicht lösen k
önnen, wenden Sie sich bitte an den Kundendienst.
Scannerlinse mit dem
Reinigungstuch.
- Kalibrieren Sie das
Gerät neu.
Drücken Sie zum Abbrechen auf die Taste
/SCAN und
probieren Sie das
Dokument mit einer
langsameren Geschwindigkeit neu zu scannen.
Kalibrieren Sie das
Gerät neu.
DE
AT
CH
SHM 600 A1
85

Lagerung/Entsorgung
Lagerung/Entsorgung
Lagerung
Sollten Sie das Gerät längere Zeit nicht benutzen, entnehmen Sie
die Batterien und lagern Sie es in der mitgelieferten Aufbewahrungs-
DE
tasche in einer trockenen und staubfreien Umgebung.
AT
CH
Gerät entsorgen
Werfen Sie das Gerät keinesfalls in den
normalen Hausmüll. Dieses Produkt unterliegt der europäischen Richtlinie 2002/96/EC
WEEE (Waste Electrical and Electronic
Equipment).
Entsorgen Sie das Gerät über einen zugelassenen
Entsorgungsbetrieb oder über Ihre kommunale Entsorgungseinrichtung. Beachten Sie die aktuell geltenden
Vorschriften. Setzen Sie sich im Zweifelsfall mit Ihrer
Entsorgungseinrichtung in Verbindung.
Batterien entsorgen
Batterien dürfen nicht im Hausmüll entsorgt werden. Jeder Verbraucher
ist gesetzlich verpfl ichtet, Batterien bei einer Sammelstelle seiner
Gemeinde / seines Stadtteils oder im Handel abzugeben. Diese
Verpfl ichtung dient dazu, dass Batterien einer umweltschonenden
Entsorgung zugeführt werden können. Geben Sie Batterien nur im
entladenen Zustand zurück.
86
SHM 600 A1

Anhang
Anhang
Technische Daten
Spannungsversorgung 2 x 1,5 V Typ AA/Mignon/LR6/R6
Bildsensor Farb-Kontrast-Bildsensor
Anzahl Sensoren 5138 Punkte
Aufl ösung
Dateiformat JPEG
Automatische Abschaltung 3 Minuten
Externer Speicher
Schnittstelle USB 2.0
Betriebstemperatur +5 - +40°C
Feuchtigkeit (keine Kondensation) 5 - 90 %
Abmessungen (B x H x T) ca. 25,9 x 3 x 2,8 cm
Gewicht (ohne Zubehör) ca. 146 g
LOW: 300 x 300 dpi
HIGH: 600 x 600 dpi
Micro-SD-Speicherkarte bis zu
32 GB
DE
AT
CH
SHM 600 A1
87

Mindestanforderungen an den Computer
®
Windows
Betriebssystem
DE
AT
CH
CPU Pentium III oder höher
Arbeitsspeicher Mindestens 256 MB
Schnittstelle USB-Port 2.0
Windows® 7 und Mac OS® 10.4 oder
höher (Gerät direkt einstecken, Treiberinstallation nicht erforderlich)
XP SP2, Windows® Vista™,
Hinweise zur Konformitätserklärung
Dieses Gerät entspricht hinsichtlich Übereinstimmung
mit den grundlegenden Anforderungen und den
anderen relevanten Vorschriften der Richtlinie zur
elektromagnetischen Verträglichkeit 2004/108/EC.
Die vollständige Original-Konformitätserklärung ist
beim Importeur erhältlich.
Anhang
88
SHM 600 A1

Anhang
Garantie
Sie erhalten auf dieses Gerät 3 Jahre Garantie ab Kaufdatum. Das
Gerät wurde sorgfältig produziert und vor Anlieferung gewissenhaft
geprüft.
Bitte bewahren Sie den Kassenbon als Nachweis für den Kauf auf.
Bitte setzen Sie sich im Garantiefall mit Ihrer Servicestelle telefonisch
in Verbindung. Nur so kann eine kostenlose Einsendung Ihrer Ware
gewährleistet werden.
HINWEIS
► Die Garantieleistung gilt nur für Material- oder Fabrikations-
, nicht aber für Transportschäden, Verschleißteile oder
fehler
für Beschädigungen an zerbrechlichen Teilen, z.B. Schalter
oder Akkus.
Das Produkt ist lediglich für den privaten und nicht für den gewerblichen Gebrauch bestimmt. Bei missbräuchlicher und unsachgemäßer
Behandlung, Gewaltanwendung und bei Eingriff en, die nicht von
unserer autorisierten Service-Niederlassung vorgenommen wurden,
erlischt die Garantie.
Ihre gesetzlichen Rechte werden durch diese Garantie nicht eingeschränkt. Die Garantiezeit wird durch die Gewährleistung nicht
verlängert. Dies gilt auch für ersetzte und reparierte Teile.
Eventuell schon beim Kauf vorhandene Schäden und Mängel müssen sofort nach dem Auspacken gemeldet werden, spätestens aber
zwei Tage nach Kaufdatum.
Nach Ablauf der Garantiezeit anfallende Reparaturen sind kostenpfl ichtig.
DE
AT
CH
SHM 600 A1
89

Service
Service Deutschland
Tel.: 0180 5772033 (0,14 EUR/Min. aus dem dt. Festnetz,
Mobilfunk max. 0,42 EUR/Min.)
E-Mail: kompernass@lidl.de
DE
AT
CH
IAN 73767
Service Österreich
Tel.: 0820 201 222 (0,15 EUR/Min.)
E-Mail: kompernass@lidl.at
IAN 73767
Service Schweiz
Tel.: 0842 665566 (0,08 CHF/Min.,
Mobilfunk max. 0,40 CHF/Min.)
E-Mail: kompernass@lidl.ch
IAN 73767
Importeur
KOMPERNASS GMBH
BURGSTRASSE 21
44867 BOCHUM, GERMANY
www.kompernass.com
Anhang
90
SHM 600 A1

KOMPERNASS GMBH
Burgstraße 21
D-44867 Bochum
www.kompernass.com
Estado de las informaciones · Last Information Update
Stand der Informationen: 03 / 2012
Ident.-No.: SHM600A1012012-4
IAN 73767
5
 Loading...