


 Loading...
Samsung XE500T1C, XE700T1CA04US, ATIV Smart PC Pro 5, XE500T1CA01US, XE700T1CA03US User Manual
...User Guide

 Contents
 Chapter 1. Getting Started
3 |
Before You Start |
6 |
Safety Precautions |
21 |
Proper Posture During Computer Use |
24 |
Overview |
30 |
Turning the Computer On and Off |
 Chapter 2. Using Windows 8
33What is Microsoft Windows 8?
34Screen At a Glance
36 Using the Charms
38 Using Apps
42 Windows Hot Key Function
 Chapter 3. Using the computer
44 Using the Touch Screen
52 Micro SD Card Slot (Optional)
54 Connecting an External Display Device
57 Adjusting the Volume
59LCD Brightness Control
60Wireless Network (Optional)
62Mobile broadband (Wireless WAN, Optional)
63NFC (Near Field Communication) (Optional)
Chapter 1 |
1 |
|
Getting Started |
||
|
||
|
|
65 Using the Keyboard Dock (Optional)
71 Using the S Note app (S Note, Optional)
75Samsung Software Update
76Diagnosing the Computer Status and Troubleshooting
77Battery
80 BIOS Setup
 Chapter 4. Troubleshooting
83 Recovering the Computer (Optional)
86 Q&A
 Chapter 5. Appendix
91 Important Safety Information
93 Replacement Parts and Accessories
95 Regulatory Compliance Statements
110WEEE Symbol Information
111Samsung Packaging Take-Back Program
112TCO Certified (for corresponding models only)
113Product Specifications
115 Glossary
119 Index

Chapter 1.
Getting Started
Before You Start |
3 |
Safety Precautions |
6 |
Proper Posture During Computer Use |
21 |
Overview |
24 |
Turning the Computer On and Off |
30 |

 Before You Start
Before reading the User Guide, first check the following information.
•• Optional items, some devices and software referred to in the User Guide may not be provided and/or changed by upgrade.
Note that the computer environment referred in the User Guide may not be the same as your own environment.
•• The pictures used for the cover and the main body in the User Manual are those of the representative model of each series and may differ from the actual appearance of the product.
•• This guide decribes procedures for using both the mouse and the S Pen.
In this manual ‘click’ means ‘one press with the S Pen’.
•• The User Guide describes information on the basis of the touch screen.
•• This manual has been written for the Windows 8 operating system. The descriptions and figures may differ depending on the installed operating system.
•• The User guide supplied with this computer may vary depending on your model.
Chapter 1 |
3 |
|
Getting Started |
||
|
Software Usage Instructions
•• In the Start screen, slightly drag the top edge of the screen toward the center.
Click the corresponding program in the All Apps menu item.
Alternatively, start the program from Quick Starter.
•• You can install Quick Starter through the SW Update.
 Before You Start
Safety Precaution Notations
Icon |
Notation |
Description |
|
|
|
|
|
Failure to follow instructions marked with |
|
Warning |
this symbol, may cause personal injury |
|
|
and or fatality. |
|
|
|
|
|
Failure to follow instructions marked with |
|
Caution |
this symbol, may cause slight injury to |
|
|
yourself or damage your property. |
|
|
|
Text Notations
Icon |
Notation |
Description |
|
|
|
|
Caution |
Content included in this section includes |
|
information required about the function. |
|
|
|
|
|
|
|
|
Note |
Content included in this section includes |
|
helpful information to use the function. |
|
|
|
|
|
|
|
Chapter 1 |
4 |
|
Getting Started |
||
|
Copyright
© 2013 Samsung Electronics Co., Ltd.
Samsung Electronics Co., Ltd. owns the copyright of this manual.
No part of this manual may be reproduced or transmitted in any form or by any means, electronic or mechanical, without the consent of Samsung Electronics Co., Ltd.
The information in this document is subject to change without notice due to improving the performance of the product.
Samsung Electronics shall not be liable for any data loss. Please take care to avoid losing any important data and backup your data to prevent any such data loss.
OS and Software Support
If you change the product’s factory OS (Operating System) to another OS or if you install software which is not supported by the product’s original factory OS, you will not receive any technical support, product exchange or refund. And a fee will be charged when requesting a service.
Please use your computer with the original factory OS. If you install an OS other than the factory OS, data may be deleted or the computer may not start.

 Before You Start
Performance Information and Restriction
•• Online games and some games(3D,2D) may not be supported and Full HD video and some high bit rate HD video playback may be slow and stutter on this computer.
•• If the main board goes out of order, the data saved on the storage device cannot be used due to the characteristics of this product.
Make sure that you always back up all your important data.
Chapter 1 |
5 |
|
Getting Started |
||
|
About the Product Capacity Representation
Standard
About the capacity representation of the storage
The capacity of the storage device (HDD, SSD) of the manufacturer is calculated assuming that 1KB=1,000 Bytes.
The operating system (Windows) calculates the capacity of the storage device assuming that 1KB=1,024 Bytes, and therefore the representation of the storage device capacity in Windows is smaller than the actual capacity due to the difference in the capacity calculation.
(E.g. For an 80GB storage device, the capacity is represented as 74.5GB by the operating system. 80x1,000x1,000x1,000 byte/ (1,024x1,024x1,024)byte=74.505GB)
Windows may also display a smaller hard disk capacity due to some hidden functions or software programs such as the Recovery program.
About Memory Capacity Representation
The memory capacity reported in Windows is less than the actual capacity of memory.
This is because BIOS or a video adapter uses a portion of memory or claims it for further use.
(E.g. For 1GB(=1,024MB) memory installed, Windows may report the capacity as 1,022MB or less)
 Safety Precautions
For your security and to prevent damage, please read the following safety instructions carefully.
Since this is commonly applied to Samsung computers, some pictures may differ from actual products.
 Warning
Failure to follow instructions marked with this symbol may cause personal injury and even fatality.
Installation Related
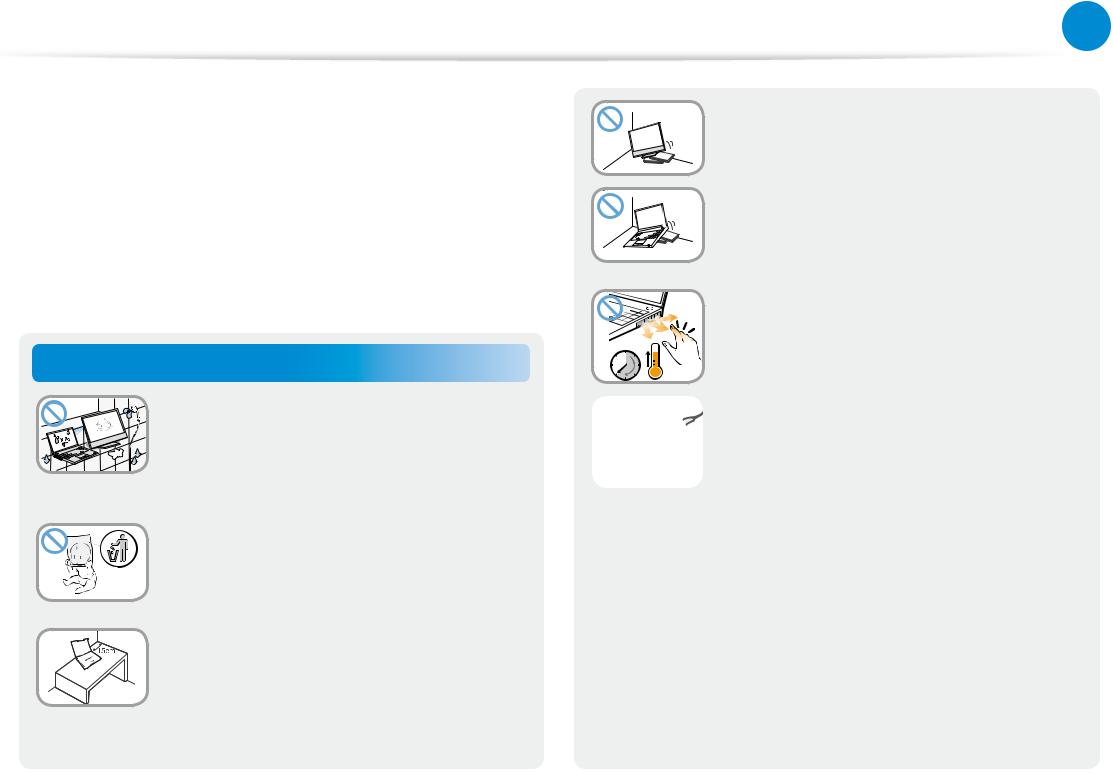
Do not install the product in places exposed to humidity such as bathrooms.
There is a danger of electric shock. Use the product within the operating conditions specified in the Manufacturers User Guide.
Keep the plastic bags out of the reach of children.
There is a danger of suffocation.
Keep a distance of 15cm or more between the computer and the wall and do not place any objects between them.
This may increase the internal temperature of the computer and may cause an injury.
Chapter 1 |
6 |
|
Getting Started |
||
|
Do not install the computer on a slant or a place prone to vibrations, or avoid using the computer in that location for a long time.
This increases the risk that a malfunction or damage to the product will occur.
Be careful that people are not exposed to the computer’s ventilator, adapter, etc., as they generate heat over a long period of time when your PC is powered on.
Exposing a part of your body close to the heat from the vent or AC adapter for long periods of time may cause a burn.
Avoid blocking the vent at the bottom or side of the computer when using it on a bed or cushion.
If the vent is blocked, there is a danger of damaging the computer or overheating the inside of the computer.
Ver 3.3
 Safety Precautions
 Warning
Failure to follow instructions marked with this symbol may cause personal injury and even fatality.
Power Related
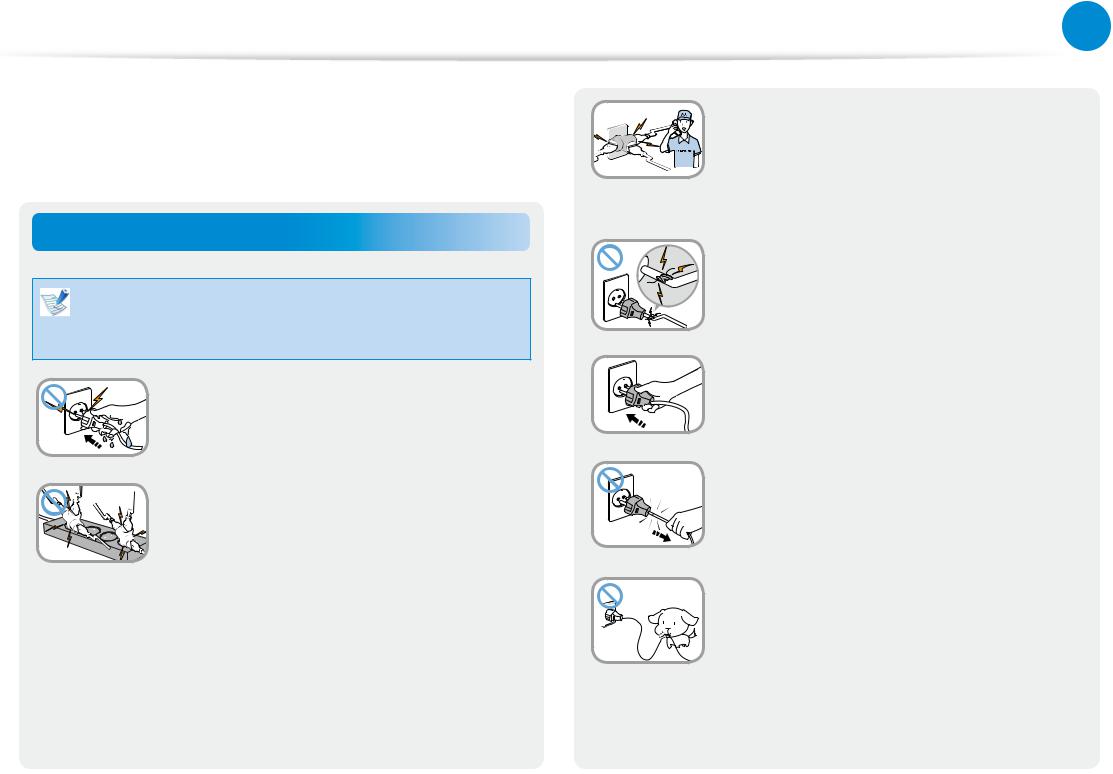
The power plug and wall outlet figures may differ depending on the country specifications and the product model.
Do not touch the main plug or power cord with wet hands.
There is a danger of electric shock.
Do not exceed the standard capacity (voltage/current) of a multiplug or power outlet extension when using it for the product.
There is a danger of electric shock or fire hazard.
Chapter 1 |
7 |
|
Getting Started |
||
|
|
If the power cord or power outlet makes a |
G |
noise, disconnect the power cord from the |
|
wall outlet and contact a service center. |
|
There is a danger of electric shock or fire |
|
hazard. |
Do not use a damaged or loose main plug or power cord or power outlet.
There is a danger of electric shock or fire hazard.
Plug the power cord firmly into the power outlet and AC adapter.
Failure to do so may cause fire hazard.
Do not unplug the power cord by pulling the cable only.
If the cord is damaged, it may cause electric shock.
Do not bend the power cord excessively or do not place a heavy object over the power cord. It is especially important to keep the power cord out of reach of infants and pets.
If the cord is damaged, it may cause electric shock or fire.
 Safety Precautions
 Warning
Failure to follow instructions marked with this symbol may cause personal injury and even fatality.
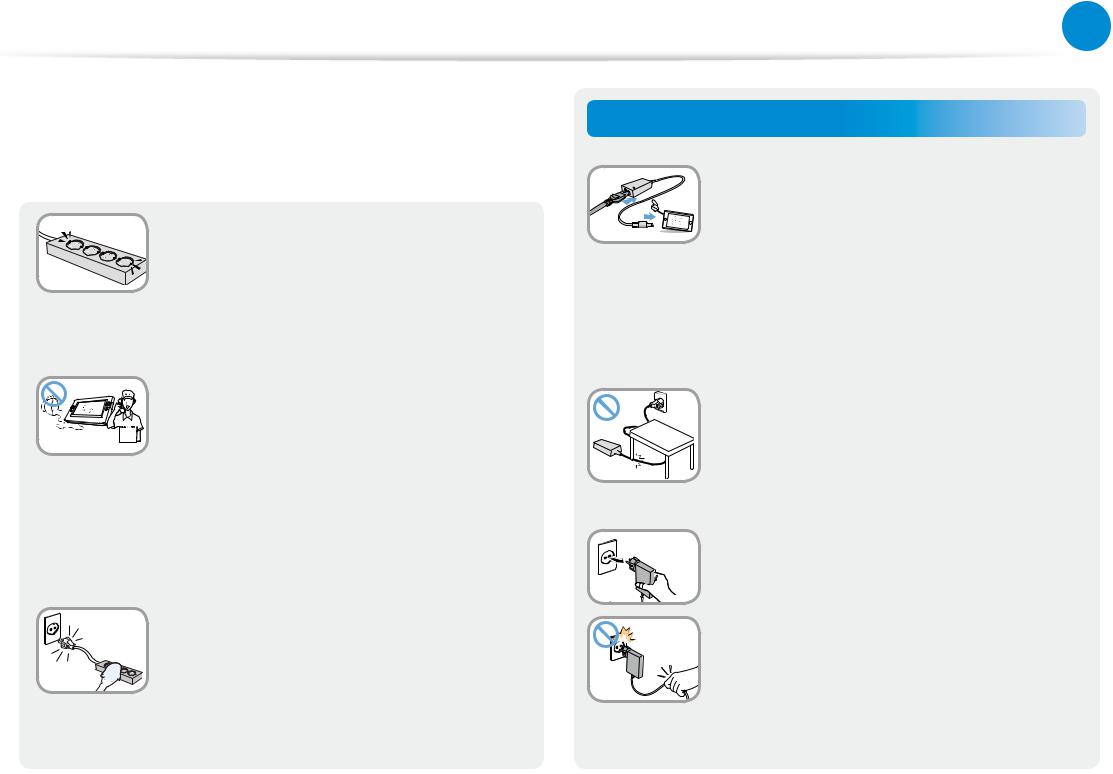
Connect the power cord to an outlet or multiple power plug (extended cable) with a ground terminal.
Failure to do so may result in electric shock.
When the power supply is ungrounded, the current may leak resulting in electric shock.
If water or another substance enters the power input jack, AC adapter or the
computer, disconnect the power cord and contact the service center.
If the notebook computer has an external type (removable) battery, separate the battery also.
Damage to the device within the computer may cause electric shock or fire hazard.
Keep the power cord or outlet clean so that they are not covered with dust.
Failure to do so may result in fire.
Chapter 1 |
8 |
|
Getting Started |
||
|
AC Adapter Usage Precautions
Connect the power cord to the AC adapter firmly.
Otherwise, there is a danger of fire due to an incomplete contact.
Use only the AC adapter supplied with the product.
Using another adapter may cause the screen to flicker.
Do not place heavy objects on top of or step onto the power cord or AC adapter to avoid damaging the power cord or AC adapter.
If the cord is damaged, there is a danger of electric shock or fire.
Unplug the wall-mount AC adapter (adapter and plug intergrated type) from the wall outlet while holding the body and pulling it in the direction of the arrow.
If you unplug the adapter by holding and pulling the cable, the adapter may be damaged and an electric shock, explosive sound or spark may occur as a result.
 Safety Precautions
 Warning
Failure to follow instructions marked with this symbol may cause personal injury and even fatality.
Battery Usage Related
Please charge the battery fully before using the computer for the first time.
Keep the battery out of the reach of infants and pets, as they could put the battery into their mouths.
There is a danger of electric shock or choking.
Use an authorized battery and AC adapter only.
Please use an authorized battery and adapter approved by Samsung Electronics.
Unauthorized batteries and adapters may not meet the proper safety requirements and may cause problems or malfunctions and result in an explosion or fire.
Chapter 1 |
9 |
|
Getting Started |
||
|
Do not use the computer in a badly ventilated location such as on bedding, on a pillow or cushion, etc, and do not use it in a location such as a room with floor heating as it may cause the computer to overheat.
Take care that the computer vents (on the side or the bottom) are not blocked especially in these environments. If the vents are blocked, the computer may overheat and it may cause a computer problem, or even an explosion.
Do not use the computer in a humid location such as a bathroom or sauna.
Please use the computer within the recommended temperature and humidity ranges (10 - 32ºC (50 - 90ºF), 20 - 80% RH)
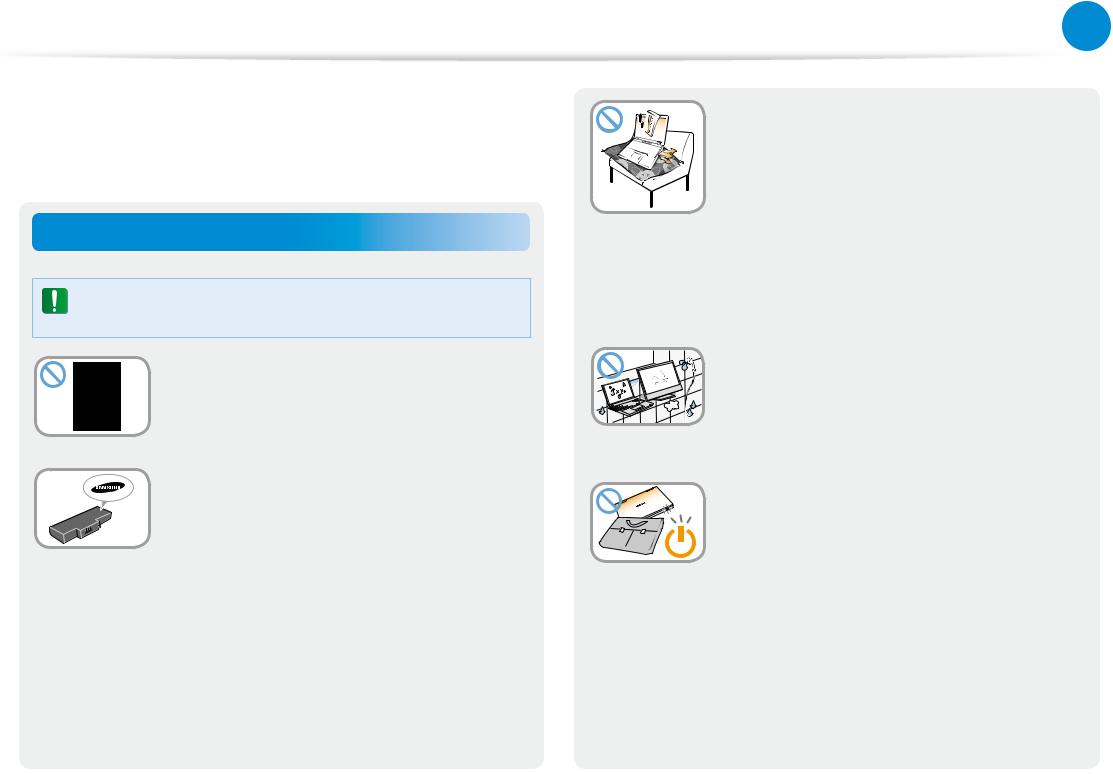
Do not close the LCD panel and put the computer into your bag to move it when it is still turned on.
If you put the computer into your bag without turning it off, the computer may overheat and there is a danger of fire. Shut the computer down properly before moving it.
 Safety Precautions
 Warning
Failure to follow instructions marked with this symbol may cause personal injury and even fatality.
Never heat the product (or battery) or put the product (or battery) into a fire. Do not put or use the product (or battery) in a hot location such as a sauna, inside a vehicle exposed to the heat, and so on.
There is a danger of an explosion or fire.
Take care not to allow metal objects such as a key or clip to touch the battery terminal (metal parts).
If a metal object touches the battery terminals, it may cause excessive current flow and it may damage the battery, or result in a fire.
If liquid leaks out of the product (or battery) or there is a funny smell coming from the product (or battery), remove the the product (or battery) the computer and contact a service center.
There is a danger of an explosion or fire.
To use the computer safely, replace a dead battery with a new, authorized battery.
Chapter 1 |
10 |
|
Getting Started |
||
|
Cutting the Power to the Internal Battery (for corresponding models only)
•• For products with built-in batteries, customers cannot remove the battery.
•• In the case of flooding, lightning or explosions, you can cut the battery power by inserting an object such as a paper clip into the [Emergency Hole] at the bottom of the computer.
•• Disconnect the AC adapter and insert an object such as a paper clip into the hole at the bottom of the computer to cut the battery power.
In the case of flooding, lightning or explosions, cut the battery power, do not reconnect the AC adapter, and immediately contact Samsung Electronics so that the appropriate countermeasures can be taken.
 Safety Precautions
 Warning
Failure to follow instructions marked with this symbol may cause personal injury and even fatality.
•• Thereafter, if you connect the AC adapter, the battery power will be supplied again.
•• Do not cut the battery power under normal conditions.
•• This may result in data loss or a product malfunction.
The location of the Emergency Hole may differ depending on the model.
Chapter 1 |
11 |
|
Getting Started |
||
|
Usage Related
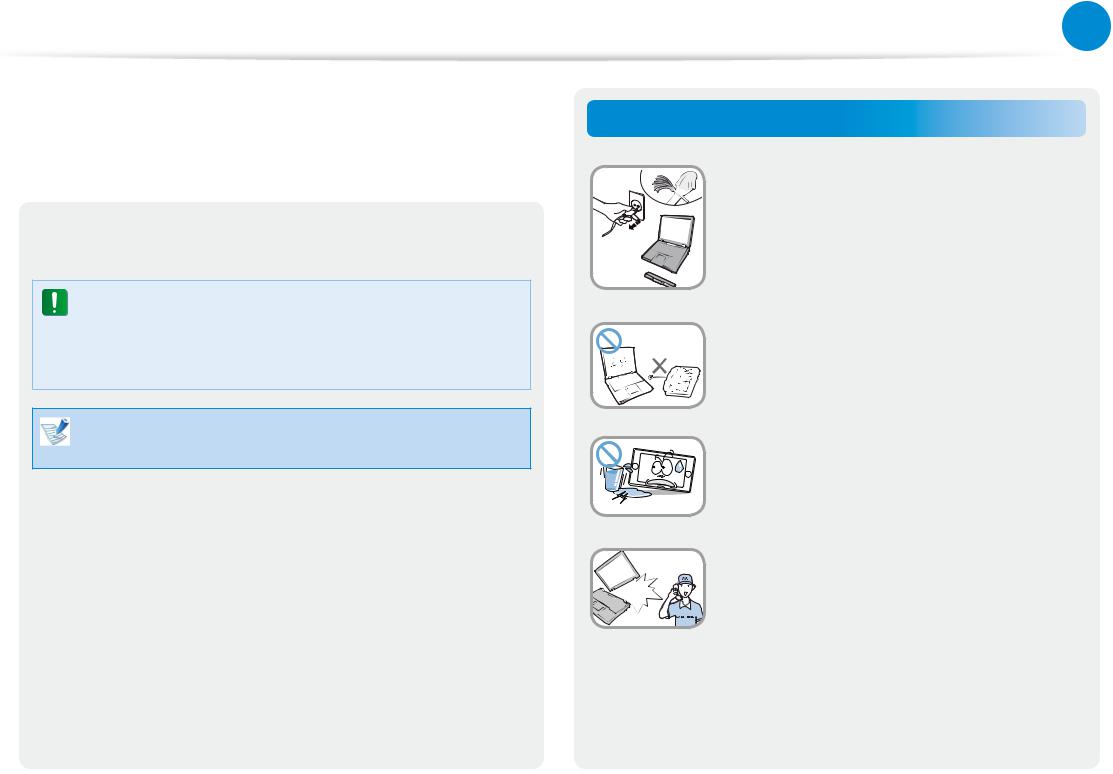
Disconnect all cables connected to the computer before cleaning it. If your notebook is an external & removable battery type, remove the external battery.
There is a danger of electric shock or damage to the product.
Do not connect a phone line connected to a digital phone to the modem.
There is a danger of a electric shock, fire or damage to the product.
Do not place any container filled with water or chemicals over or near the computer.
If water or chemicals enter the computer, this may cause fire or electric shock.
If the computer is broken or dropped, disconnect the power cord and contact a service center for a safety check.
If the notebook computer has an external type (removable) battery, separate the battery also.
Using a broken computer may cause electric shock or fire hazard.
 Safety Precautions
 Warning
Failure to follow instructions marked with this symbol may cause personal injury and even fatality.
Avoid direct sunlight when the computer is in an air-tight location such as inside a vehicle.
There is a danger of a fire hazard. The computer may overheat and also present opportunity to thieves.
Do not use your computer for long periods of time while any part of your body is making direct contact with it. The temperature of the product may increase during normal operation.
This may result in harming or burning your skin.
Chapter 1 |
12 |
|
Getting Started |
||
|
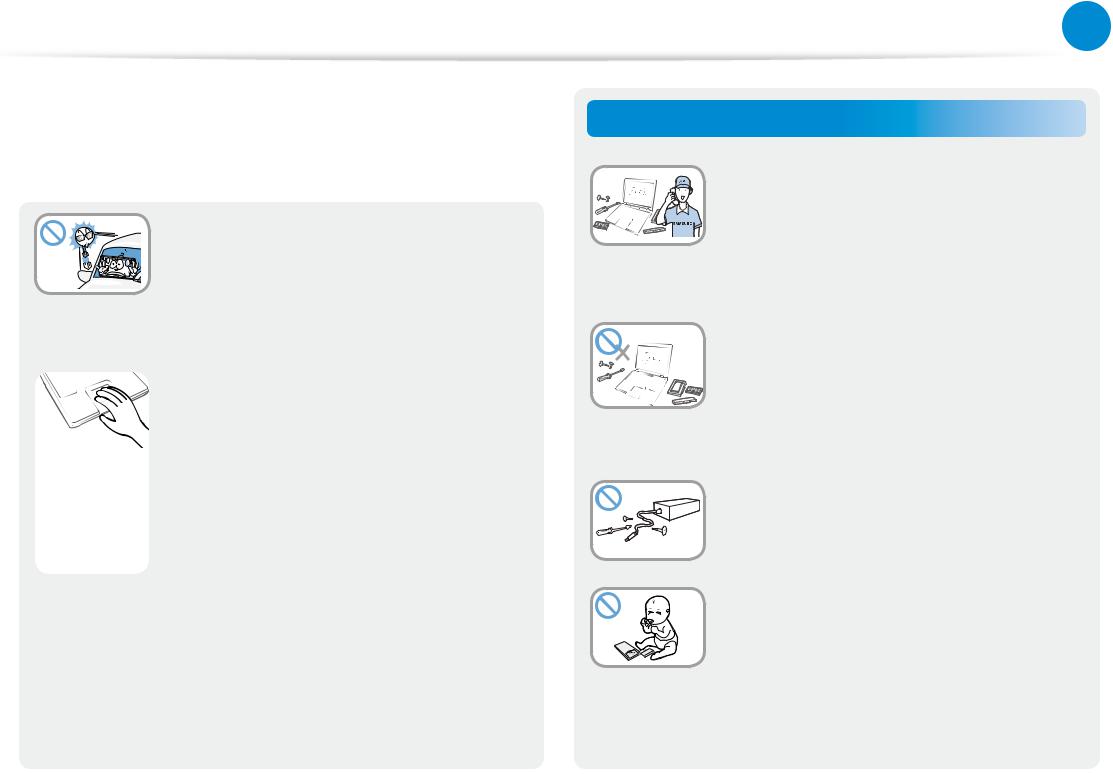
Upgrade Related
Be sure to upgrade the computer by yourself only if you have sufficient knowledge and ability.
If this is not the case, ask for assistance from the service center or an authorized engineer for the upgrade.
Be sure to upgrade only the parts specified in the user manual according to the procedures described in the user manual.
Do not disassemble any other parts or devices by yourself. There is a danger of a electric shock, fire or damage to the product.
Never disassemble the power supply or AC adapter.
There is a danger of electric shock.
When removing the RTC (Real Time Clock) battery, keep it out of the reach of children as they could touch and/or swallow it.
There is a danger of choking. If a child has swallowed it, contact a doctor immediately.

 Safety Precautions
 Warning
Failure to follow instructions marked with this symbol may cause personal injury and even fatality.
Before upgrading the computer, be sure to shutdown the computer first and then separate all connected cables. If the notebook computer has an external type (removable) battery, separate the battery, too.
Failure to do so may cause electric shock.
Chapter 1 |
13 |
|
Getting Started |
||
|
Security and Movement Related
Follow the instructions for the relevant location (e.g., airplane, hospital, etc.) when using a wireless communication device (wireless LAN, Bluetooth, etc.).
Avoid exposing a drive to magnetic fields. Security devices with magnetic fields include airport walk-through devices and security wands.
The airport security devices that check car- ry-on luggage, such as conveyor belts, use x-rays instead of magnetism and will not damage a drive.
When carrying the notebook computer with other items, such as the adapter, mouse, books, etc, take care not to press anything against the notebook computer.
If a heavy object is pressed against the notebook computer, a white spot or stain may appear on the LCD. Therefore, take care not to apply any pressure to the notebook.
In this case, place the notebook computer in a separate compartment away from other objects.

 Safety Precautions
 Caution
Failure to follow instructions marked with this symbol may cause slight injury or damage to the product.
Installation Related
Do not block the ports (holes), vents, etc. of the product and do not insert objects.
Damage to a component within the computer may cause electric shock or fire.
When using the computer with it lying on its side, place it so that the vents face upwards.
Failure to do so may cause the internal temperature of the computer to rise and the computer to malfunction or halt.
Do not place a heavy object over the product.
This may cause a problem with the computer. In addition, the object may fall and cause injury, or damage the computer.
Chapter 1 |
14 |
|
Getting Started |
||
|
Battery Usage Related
Dispose of worn-out batteries properly.
•• There is a danger of fire or explosion.
•• The battery disposal method may differ depending on your country and region. Dispose of the used battery in an appropriate way.
Do not throw or disassemble the battery and do not put it into water.
This may cause an injury, fire or explosion.
Use only a battery authorized by Samsung Electronics.
Failure to do so may cause an explosion.
Avoid contact with metal objects such as car keys or clips when keeping or carrying a battery.
Contact with a metal may cause excessive current and a high temperature and may damage the battery or cause a fire.
Charge the battery according to the instructions in the manual.
Failure to do so may cause an explosion or fire from damage to the product.
Do not heat the product (or battery) or expose it to heat (e.g., inside a vehicle during the summer).
There is a danger of explosion or fire.

 Safety Precautions
 Caution
Failure to follow instructions marked with this symbol may cause slight injury or damage to the product.
Usage Related
Do not place a candle, light a cigar, etc. over or on the product.
There is a danger of fire.
Use a wall outlet or multi-plug with a grounding part.
Failure to do so may cause electric shock hazard.
Make sure to have the product tested by a safety service engineer after repairing the product.
Authorized Samsung Repair Centers will carry out safety checks after a repair. Using a repaired product without testing it for safety may cause an electric shock or fire.
In case of lightning, immediately turn the system off, disconnect the power cord from the wall outlet and phone line from the modem. Do not use a modem or phone.
There is a danger of electric shock or fire.
Chapter 1 |
15 |
|
Getting Started |
||
|
Do not use your computer and AC-Adapter on your lap or soft surfaces.
If the computer temperature increases, there is a danger of burning yourself.
Connect only permitted devices to the connectors or ports of the computer.
Failure to do so may cause electric shock and fire.
Close the LCD panel only after checking if the notebook computer is turned off.
The temperature may rise and cause overheating and deformation of the product.
Do not press the Eject Button while the CD-ROM drive is in operation.
You might lose data and the disk might be suddenly ejected and could cause an injury.
Do not drop or knock the product.
This may result in injury or damage to the data.
Do not touch the antenna with an electricity facility such as the power outlet.
There is a danger of electric shock.
When handling computer parts, follow the instructions on the manual supplied with the parts.
Failure to do so may cause damage to the product.

 Safety Precautions
 Caution
Failure to follow instructions marked with this symbol may cause slight injury or damage to the product.
If the computer emits smoke, or there is a burning smell, disconnect the power plug from the wall outlet and contact a service center immediately. If your notebook is an external & removable battery type, remove the external battery.
There is a danger of fire.
Do not use a damaged or modified CD.
There is a danger of damaging the product or personal injury.
Do not insert your fingers into the PC Card Slot.
There is a danger of injury or electric shock.
Use recommended computer cleansing solution when cleaning the product and only use the computer when it is completely dried.
Failure to do so may cause electric shock or fire.
Emergency disk eject method using paperclip should not be used while the disk is in motion. Make sure to use the emergency disk eject method only when the Optical Disk Drive has stopped.
There is a danger of injury.
Chapter 1 |
16 |
|
Getting Started |
||
|
Do not place your face close to the Optical Disk Drive tray when it is operating.
There is a danger of injury due to an abrupt ejection.
Check CDs for cracks and damage prior to use.
It may damage the disc and cause problems with the device and injury to the user.
Do not leave the product in a location exposed to magnetic fields.
•• A magnetic field may cause the product to work abnormally or the battery to discharge.
•• The information saved on the magnetic tape of a credit card, phone card, bankbook, transportation tickets and so on can be damaged by a computer’s electromagnetic field.
Use the pen only for the original purpose. Do not poke in the eye or ear with the pen, and do not put the pen in the mouth.
There is a danger of injury.

 Safety Precautions
 Caution
Failure to follow instructions marked with this symbol may cause slight injury or damage to the product.
Upgrade Related
Carefully touch a part or device of the product.
Failing to do so may result in damage to the product or injury.
Take care not to throw or drop a computer part or device.
Failing to do so may result in damage to the product or injury.
After the disassembly, be sure to close the cover and then connect the power.
Failing to do so may result in an electric shock from the exposed circuit.
Use parts authorized by Samsung Electronics only.
It may damage the product or result in fire.
Never disassemble or repair the product by yourself.
If the product is modified, disassembled or repaired by the user, the warranty is expired, a service fee will be charged and there is a danger of an accident.
Be sure to use an authorized Samsung Electronics service center.
Chapter 1 |
17 |
|
Getting Started |
||
|
To connect a device that is not manufactured or authorized by Samsung Electronics, inquire at your service center before connecting the device.
There is a danger of damaging the product.
Security and Movement Related
When moving the product, turn the power off and separate all connected cables first.
The product might be damaged or users may trip over the cables.
For long periods of not using the notebook computer, discharge the battery and separate the battery from the computer (for external & removable battery type).
The battery will be preserved at its best condition.
Do not operate or watch the computer while driving a vehicle.
There is a danger of a traffic accident. Please concentrate on driving.

 Safety Precautions
 Caution
Failure to follow instructions marked with this symbol may cause slight injury or damage to the product.
Cautions on Preventing Data Loss (Hard Disk Management)
Take care not to damage the data on a hard disk drive.
•• A hard disk drive is so sensitive to external impact that an external impact may cause loss of data on the surface of the disk.
•• Take extra care, because moving the computer or an impact on the computer when it is turned on may damage the data of the hard disk drive.
•• The company is not liable for any loss of data on the hard disk drive.
Chapter 1 |
18 |
|
Getting Started |
||
|
Causes that may damage the data of a hard disk drive and the hard disk drive itself.
•• The data may be lost when an external impact is applied to the disk while disassembling or assembling the computer.
•• The data may be lost when the computer is turned off or reset by a power failure while the hard disk drive is operating.
•• The data may be lost and irrecoverable due to a computer virus infection.
•• The data may be lost if the power is turned off while running a program.
•• Sudden impact or movement to the computer while the hard disk drive is operating may cause files to be corrupted or bad sectors on the hard disk.
To prevent data loss due to damage to the hard disk drive, please backup your data frequently.
 Safety Precautions
Using the Power Supply in an Airplane
Since the power outlet type differs depending on the type of airplane, connect the power appropriately.
Since the representative figures of the power plug and the auto adapter are used, they may differ from the actual parts.
Chapter 1 |
19 |
|
Getting Started |
||
|
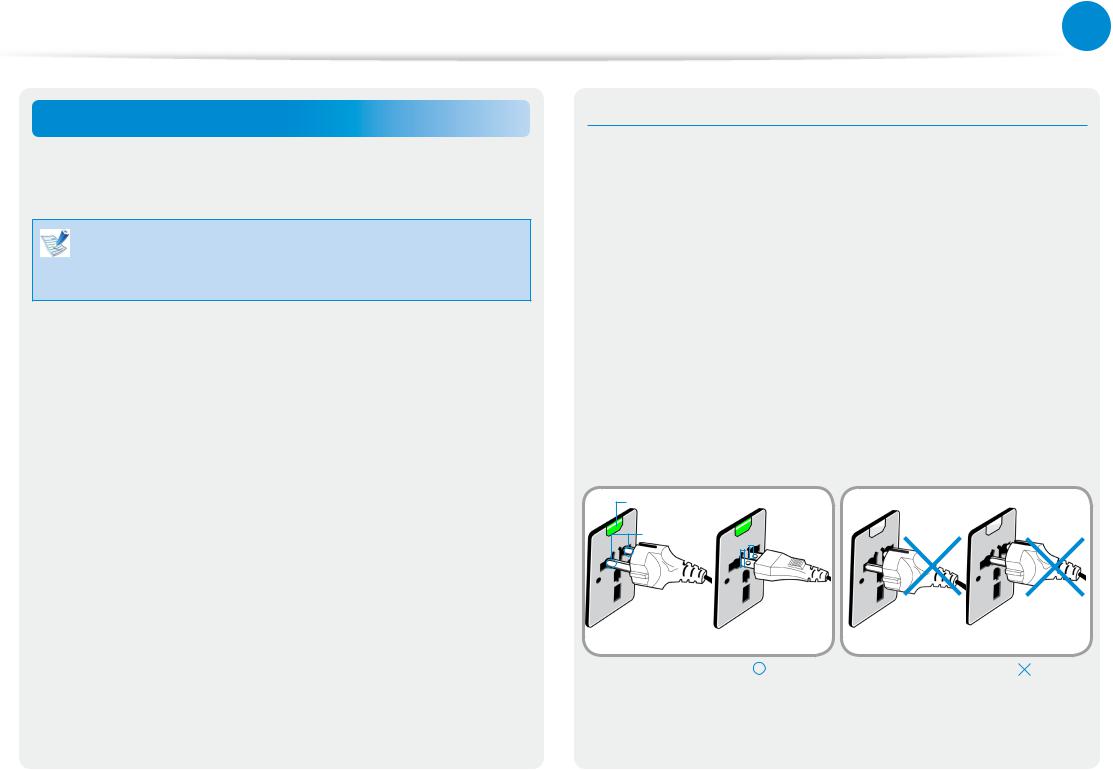
When Using the AC Power Plug
Connect the power plug pins perpendicular into the center of the power outlet.
•• If the plug pins are not inserted into the center of the holes, the plug pins are only inserted up to half their length. In this case, reconnect the power plug.
•• You have to insert the power plug into the outlet when the power indicator (LED) of the power outlet is lit green. If the power is connected properly, the power indicator (LED) remains green.
Otherwise, the power indicator (LED) is turned off. In this case, unplug the power, check if the power indicator (LED) is green, and then reconnect the power plug.
Power Indicator (LED)
Center
Holes
220V Power Plug |
110V Power Plug |
Good Example |
Wrong Example |
 Safety Precautions
When Using the Auto Adapter
When a cigar socket is provided, you have to use the auto adapter (optional). Insert the cigar plug of the auto adapter into the cigar socket and connect the DC plug of the auto adapter to the power input port of the computer.
Auto Adapter
|
|
|
|
|
|
|
|
|
|
|
|
|
|
|
|
DC Plug |
Cigar Plug |
In-flight Cigar Socket |
|||||
When Using the Airplane Charging Coverter
Depending on the airplane, you have to use the auto adapter and charging converter. Connect the airplane charging converter (optional) to the auto adapter (optional) and then insert the airplane power input jack into the power outlet.
Charging
Converter
Connect the airplane power 2 input jack to the power
outlet of the airplane.
1 Connect this end to the auto adapter.
Chapter 1 |
20 |
|
Getting Started |
||
|
 Proper Posture During Computer Use
Maintaining a proper posture during computer use is very important to prevent physical harm.
The following instructions are about maintaining a proper posture during computer use developed through human engineering. Please read and follow them carefully when using the computer.
Otherwise, the probability of (RSI: Repetitive Strain Injury) from repeated operations may increase and serious physical harm may be caused.
•• The instructions in this manual have been prepared so that they can be applied within the coverage of general users.
•• If the user is not included in the coverage, the recommendation is to be applied according to the user’s needs.
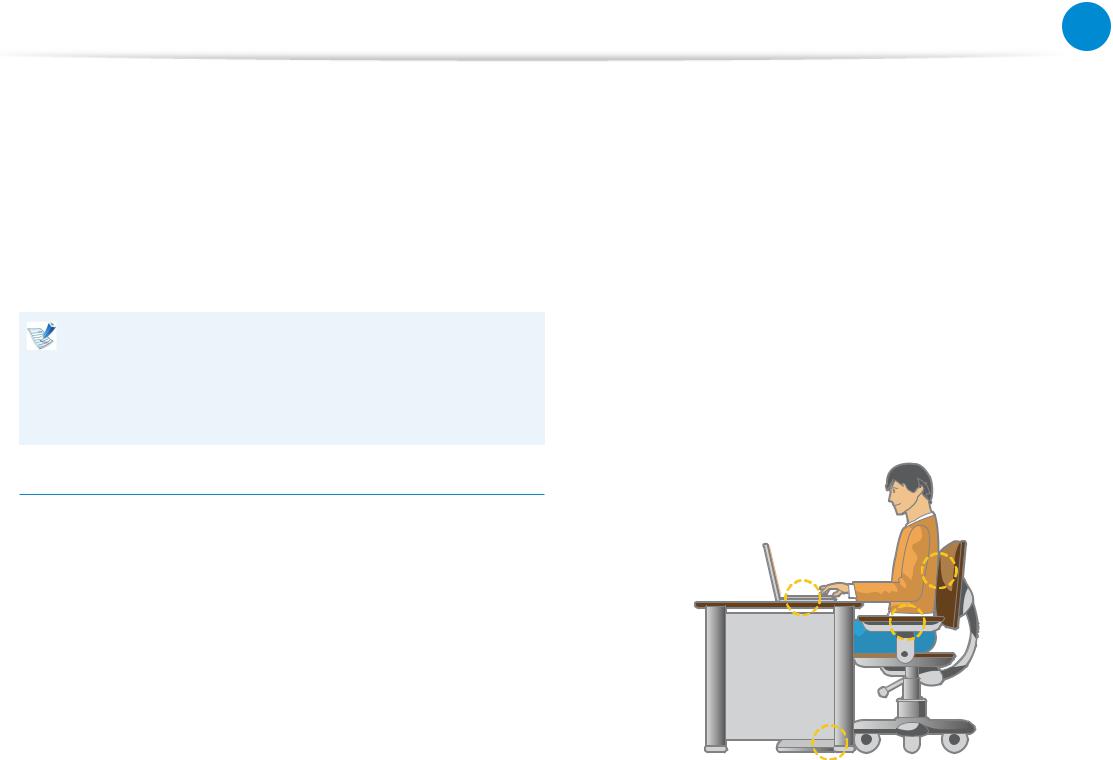
Proper Posture
Adjust the heights of desks and chairs appropriate to your height.
The heights are to be adjusted so that your arm forms a right angle when you place your hand over the keyboard while sitting down on a chair.
Adjust the height of chair so that your heel is comfortably placed on the floor.
Chapter 1 |
21 |
|
Getting Started |
||
|
•• Do not use the computer while you are lying down, but only while you are sitting down.
•• Do not use the computer on your lap. If the computer temperature increases, there is a danger of burning yourself.
•• Work while keeping your waist straight.
•• Use a chair with a comfortable back.
•• Keep the center of your leg weight not on the chair but on your feet when you are sitting on a chair.
•• To use the computer while talking over the telephone, use a headset. Using the computer with the phone on your shoulder is bad for posture.
•• Keep frequently used items within a comfortable work range (where you can reach them with your hands).
 Proper Posture During Computer Use
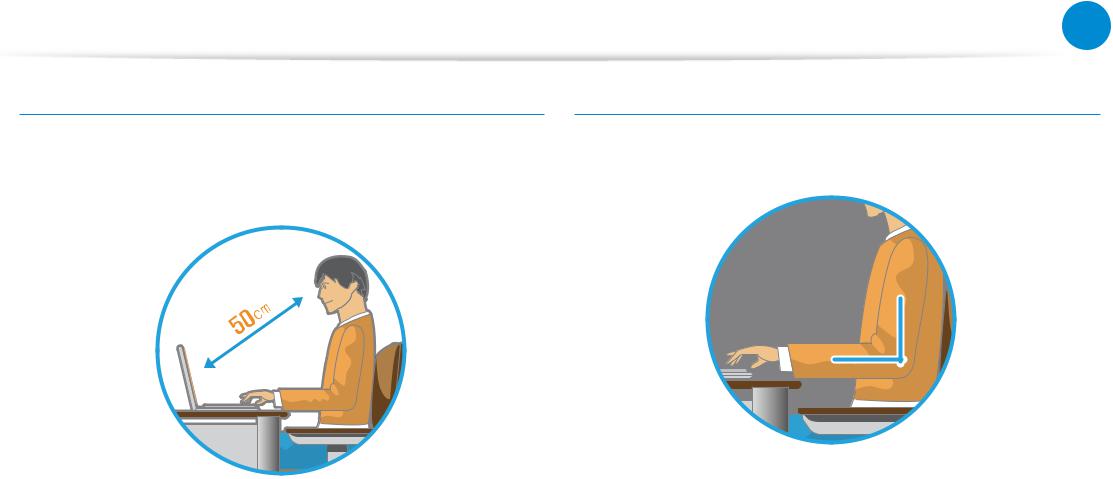
Eye Position
Keep the monitor or LCD away from your eyes by at least 50cm.
•• Adjust the height of the monitor and the LCD screen so that its top height is equal to or lower than your eyes.
•• Avoid setting the monitor and LCD excessively bright.
•• Keep the monitor and LCD screen clean.
•• If you wear glasses, clean them before using the computer.
•• When entering contents printed on a paper into the computer, use a static paper holder so that the height of the paper is almost equal to that of the monitor.
Chapter 1 |
22 |
|
Getting Started |
||
|
Hand Position
Keep your arm at a right angle as shown by the figure.
•• Keep the line from your elbow to your hand straight.
•• Do not place your palm over the keyboard while typing.
•• Do not hold the mouse with excessive force.
•• Do not press the touch screen with excessive force.
•• It is recommended connecting an external keyboard and mouse when using the computer for long periods of time.
 Proper Posture During Computer Use
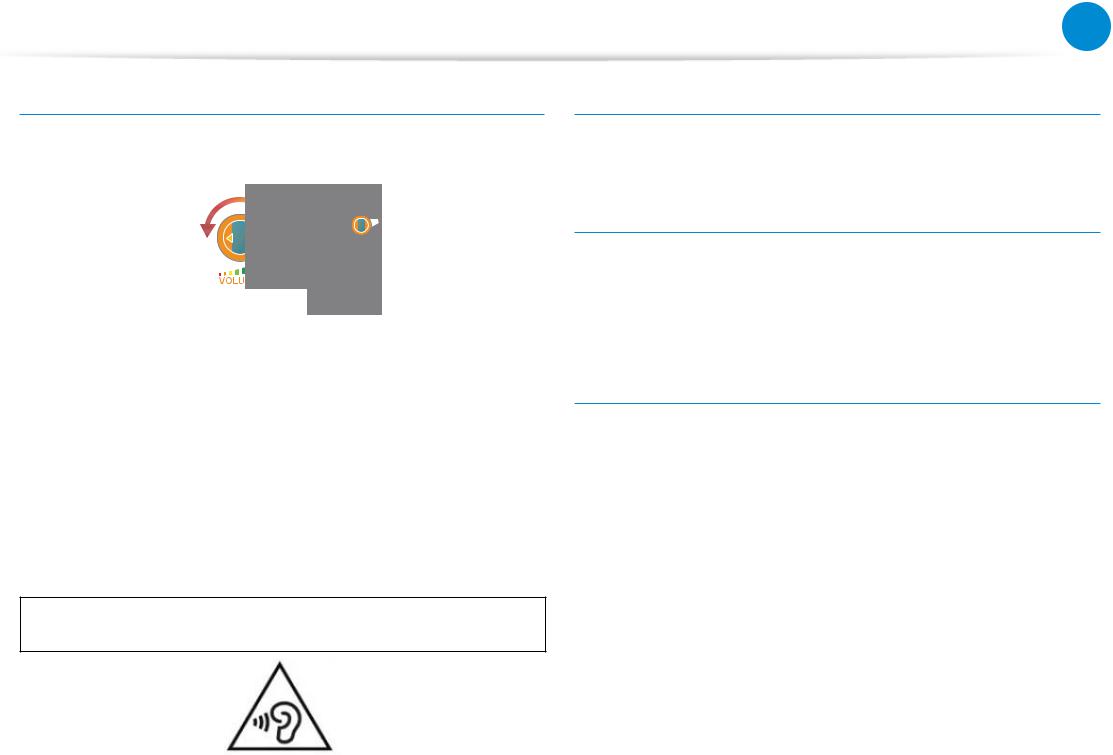
Volume Control (Headphones and Speakers)
Check your volume first to listen to music.
Chapter 1 |
23 |
|
Getting Started |
||
|
Use Time (Break Time)
•• Take a break for 10 minutes or more after a 50-minute period when working for more than one hour.
Check your volume!
•• Check if the volume is too loud before using headphones.
•• It is not recommended using headphones for long periods of time.
•• Any deviation from the equalizer default setting could cause hearing impairment.
•• The default setting can be changed through software and driver updates without your intervention. Please check the equalizer default setting before first usage.
Illumination
•• Do not use the computer in dark locations. The illumination level for computer use must be as bright so for reading a book.
•• Indirect illumination is recommended. Use a curtain to prevent reflection on the LCD screen.
Operation Condition
•• Do not use the computer in hot and humid locations.
•• Use the computer within the allowed temperature and humidity range specified in the User Guide.
To prevent possible hearing damage, do not listen at high volume levels for long periods.
 Overview
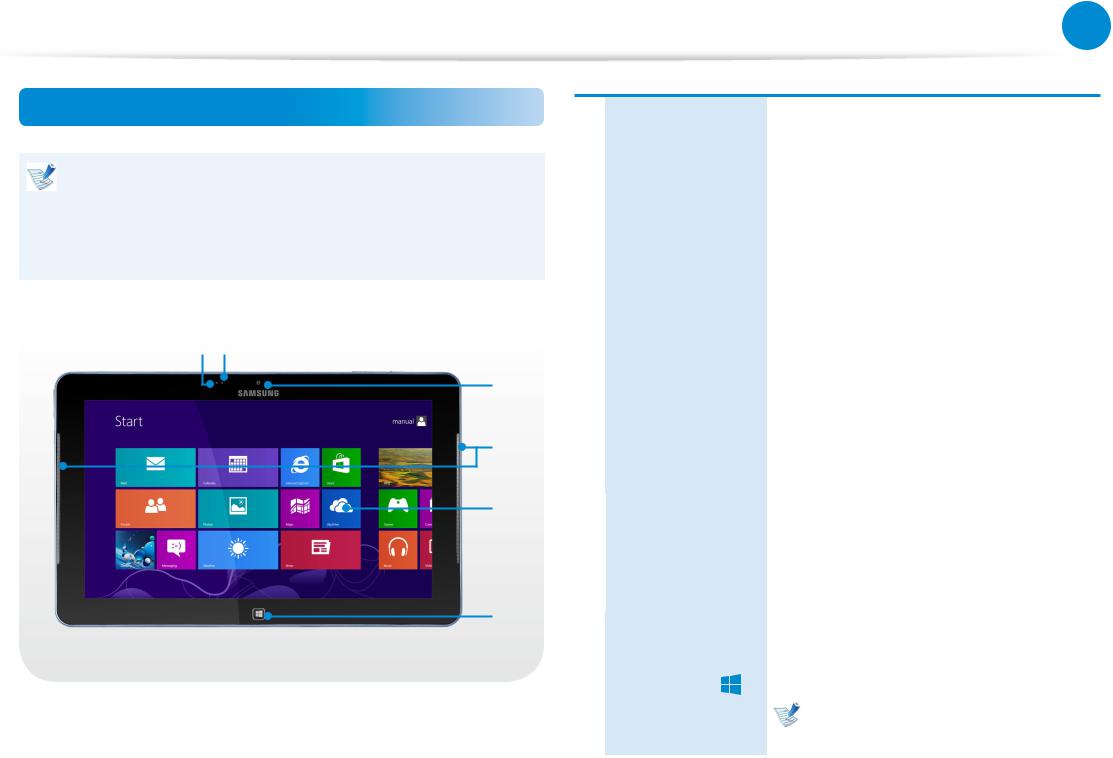
Front View
The pictures used for the cover and the main body in the User Manual are those of the representative model of each series. Therefore the colors and appearance of the pictures may differ from the actual appearance of the product depending on the model.
1 2
3
4
5
6
Chapter 1 |
24 |
|
Getting Started |
||
|
|
|
Using the illumination sensor, the LCD |
|
|
|
screen brightness is automatically adjusted |
|
|
|
depending on the ambient illumination. |
|
1 |
Illumination Sensor |
If you cover the illumination sensor with |
|
|
|
your hand, the LCD screen will become |
|
|
|
dimmer. Therefore, please take care that |
|
|
|
you do not cover the sensor when you use |
|
|
|
the computer. |
|
|
|
|
|
2 |
Camera operating |
This indicates the camera operating status. |
|
|
indicator (Optional) |
|
|
|
|
|
|
|
|
Using this camera, you can take still |
|
3 |
Camera (Optional) |
pictures and record video. |
|
|
|
You can take a picture or make a movie |
|
|
|
using the Charms > Start > Camera. |
|
|
|
|
|
4 |
Speaker |
A device used to generate sound. |
|
|
|
|
|
5 |
Touch Screen |
This is a touch screen that shows the |
|
output from the computer. |
|||
|
|
||
|
|
|
|
|
|
Switches the screen between the Start |
|
|
|
screen and the currently running app/ |
|
6 |
Home button |
program. |
|
|
|
If no app/software is currently running, |
|
|
|
the Desktop is displayed. |
|
|
|
|
 Overview
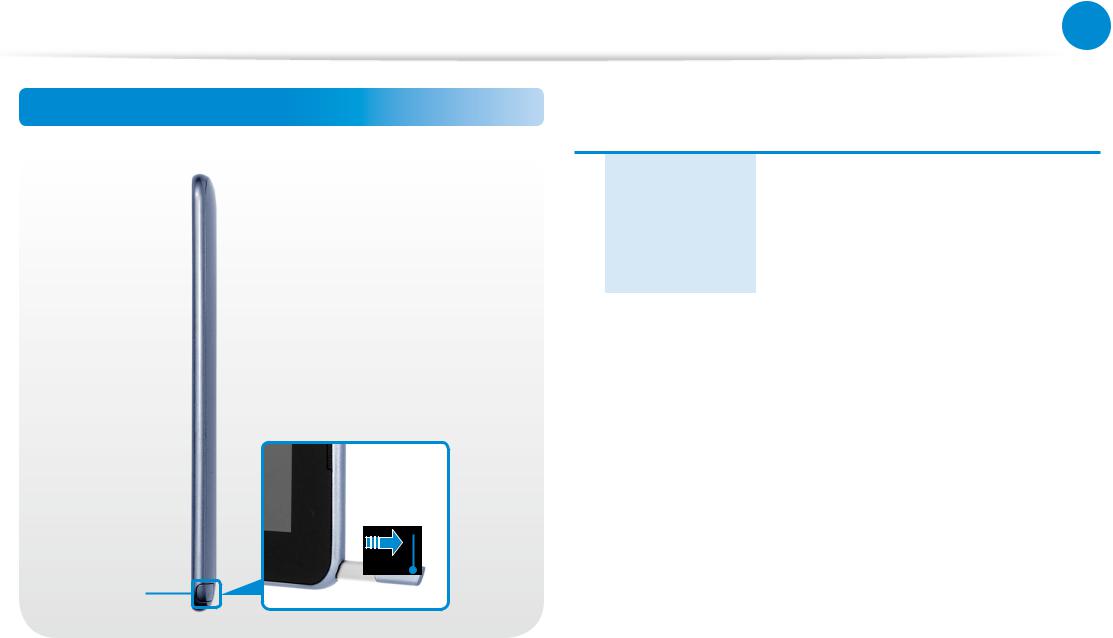
Right View
1
2
Chapter 1 |
25 |
|
Getting Started |
||
|
1 |
S Pen (Optional) |
A pen used to enter information on the |
|
touch screen. |
|||
|
|
||
|
|
|
|
2 |
S Pen Slot |
You can keep the S Pen in the S Pen slot. |
|
(Optional) |
|||
|
|
|
 Overview
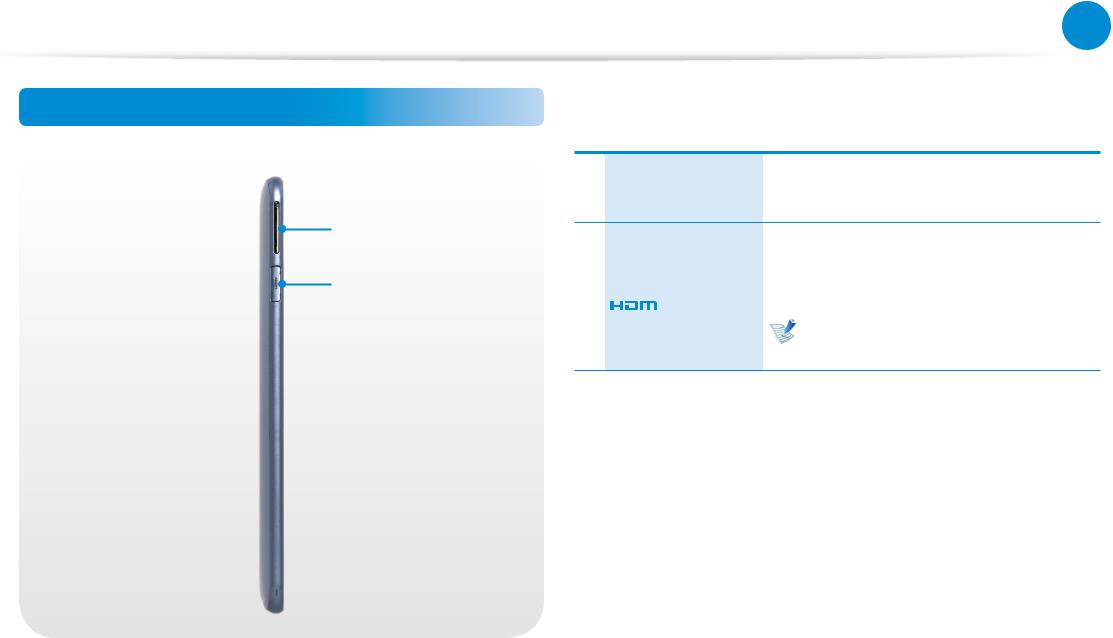
Left View
1
2
Chapter 1 |
26 |
|
Getting Started |
||
|
1 |
Volume Control |
Controls the volume. |
|
Button |
|
2 |
Micro HDMI Port |
|
|
|
(Optional) |
|
|
|
This is the port for a micro HDMI.
You can enjoy digital video and audio by connecting the computer to a TV.
You can connect a VGA adapter (optional).
 Overview
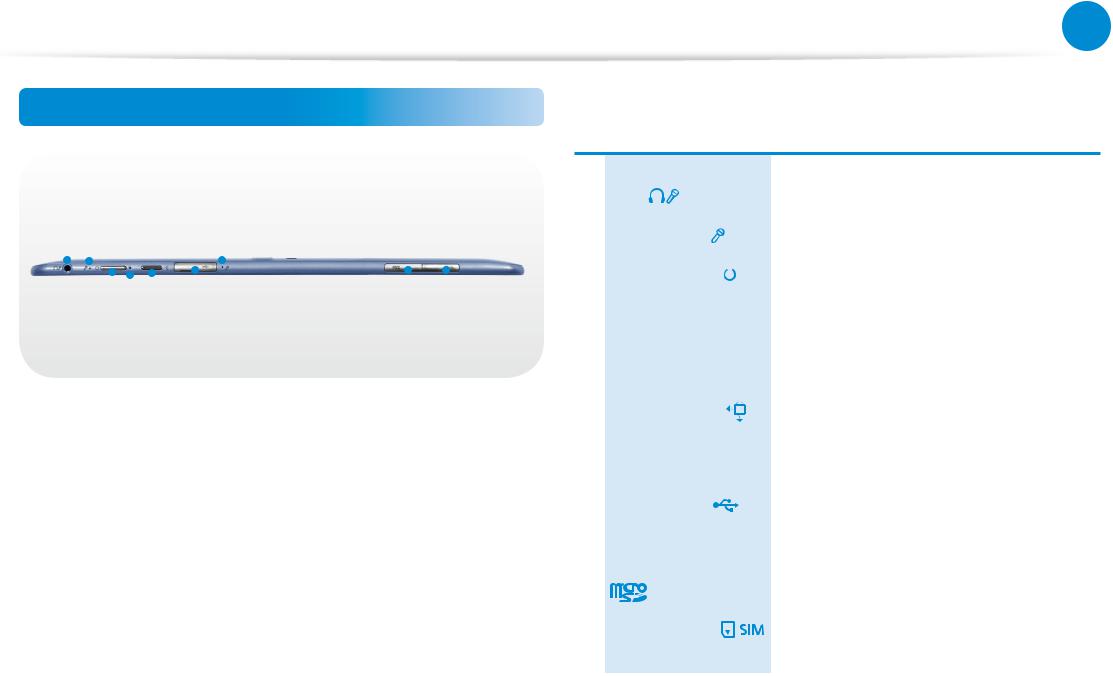
Top View
Chapter 1 |
27 |
|
Getting Started |
||
|
|
|
|
|
|
|
|
|
|
|
|
|
|
1 |
Ear-set / headset |
This is the jack for connecting an ear-set |
|||||
1 |
|
|
|
2 |
|
|
|
|
|
|
Jack |
or headset. |
||||||||
|
|
|
|
|
|
|
|
|
|
|
|
|
|
|
|
|||||
|
|
|
|
|
|
|
|
|
|
|
|
|
2 |
Microphone |
You can use the built-in microphone. |
|||||
|
|
|
|
|
|
|
|
|
|
|
|
|
||||||||
|
|
|
|
|
|
|
|
|
|
|
|
|
||||||||
|
|
|
|
|
|
|
|
|
|
|
|
|
|
|
|
|
|
|
|
|
|
|
|
|
|
|
|
|
|
|
|
|
|
3 |
Power Button |
|
|
|
|
Turns the computer on and off. |
|
|
|
|
|
|
|
|
|
|
|
|
|
|
|
|
|
|
||||
|
|
|
|
|
|
|
|
|
|
|
|
|
|
|||||||
|
|
|
|
|
|
|
|
|
|
|
|
|
|
|||||||
|
|
|
|
|
|
|
|
|
|
|
|
|
|
|
|
|
|
|||
3 4 |
5 |
6 |
7 8 |
4 |
Power Button LED |
When the computer is on, the power |
||||||||||||||
|
|
|
|
|
|
|
|
|
|
|
|
|
button LED is lit. |
|||||||
|
|
|
|
|
|
|
|
|
|
|
|
|
|
|
|
|
|
|
|
|
|
|
|
|
|
|
|
|
|
|
|
|
|
|
|
|
|
|
|
|
|
|
|
|
|
|
|
|
|
|
|
|
|
|
|
|
|
|
|
|
|
Locks the screen rotation so that the |
|
|
|
|
|
|
|
|
|
|
|
|
|
5 |
Rotation Lock |
screen does not automatically rotate |
|||||
|
|
|
|
|
|
|
|
|
|
|
|
|
according to the orientation function of |
|||||||
|
|
|
|
|
|
|
|
|
|
|
|
|
|
|
|
|
|
|
|
|
|
|
|
|
|
|
|
|
|
|
|
|
|
|
|
|
|
|
|
|
the product. |
|
|
|
|
|
|
|
|
|
|
|
|
|
|
|
|
|
|
|
|
|
|
|
|
|
|
|
|
|
|
|
|
|
|
6 |
USB 2.0 Port |
You can connect USB devices to the USB |
|||||
|
|
|
|
|
|
|
|
|
|
|
|
|
port such as a keyboard/mouse, digital |
|||||||
|
|
|
|
|
|
|
|
|
|
|
|
|
|
|
|
|
|
|
|
camera, etc. |
|
|
|
|
|
|
|
|
|
|
|
|
|
|
|
|
|
|
|
|
|
|
|
|
|
|
|
|
|
|
|
|
|
|
7 |
Micro SD Card Slot |
This slot is for micro SD cards. |
|||||
|
|
|
|
|
|
|
|
|
|
|
|
|
|
|
|
|
|
|
|
|
|
|
|
|
|
|
|
|
|
|
|
|
|
|
|
|
|
|
|
|
|
|
|
|
|
|
|
|
|
|
|
|
|
|
8 |
SIM Card Slot |
|
|
This slot is for SIM cards. |
|||
|
|
|
|
|
|
|
|
|
|
|
|
|
|
|||||||
|
|
|
|
|
|
|
|
|
|
|
|
|
|
|||||||
|
|
|
|
|
|
|
|
|
|
|
|
|
|
(Optional) |
|
|||||
|
|
|
|
|
|
|
|
|
|
|
|
|
|
|
|
|
|
|
|
|
 Overview
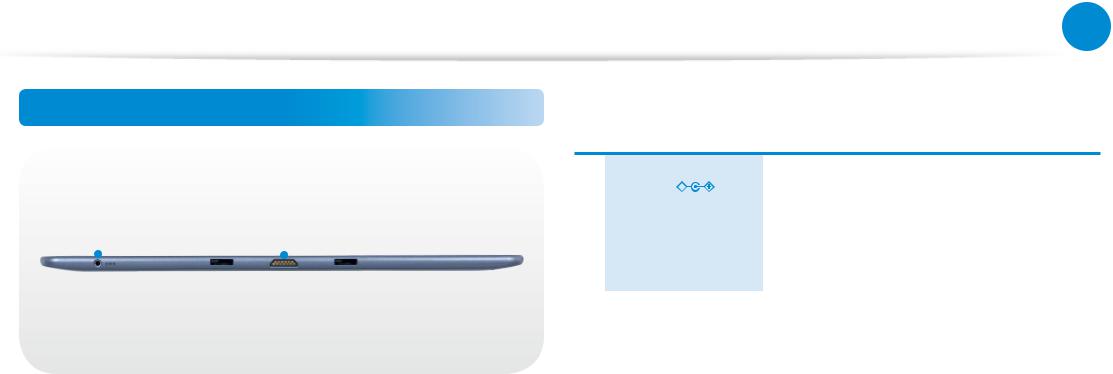
Bottom View
Chapter 1 |
28 |
|
Getting Started |
||
|
|
|
1 |
DC Jack |
|
|
A jack to connect the AC adapter that |
||
|
|
|
|
supplies power to the computer. |
||||
1 |
2 |
|
|
|
|
|||
|
|
|
|
|
||||
|
|
|
|
|
|
|
|
|
|
|
|
2 |
Dock Connector |
A connector to the keyboard dock |
|||
|
|
|
|
|
(Optional) |
(optional). |
||
|
|
|
|
|
|
|
|
|

 Overview
Rear View
Chapter 1 |
29 |
|
Getting Started |
||
|
1 2 |
1 |
Camera Flash |
Used when taking photos. |
||||
|
|
|
|
|
(Optional) |
||
|
|
|
|
|
|
|
|
|
|
|
|
|
|
|
|
|
|
|
|
|
|
|
|
|
|
|
|
|
|
|
Using this camera, you can take still pictures |
3 |
|
|
|
|
2 |
Camera |
and record video. |
|
|
|
|
(Optional) |
You can take a picture or make a movie |
||
|
|
|
|
||||
|
|
|
|
|
|
|
using the Charms > Start > Camera. |
|
|
|
|
|
|
|
|
|
|
|
|
|
3 |
NFC Antenna |
Provides NFC features for near field |
|
|
|
|
|
communication for various application |
||
|
|
|
|
|
|
(Optional) |
services. |
|
|
|
|
|
|
|
|
|
|
|
|
|
|
|
|
If you replace the bottom of the product, the model name, serial number and some logos etched into the bottom of the product will no longer be there.
For more information, please ask for assistance from the service center.
Loading...