


CQ-DF602U
Table of contents
 Loading...
Panasonic
Removable Full From CD Player/Receiver with Full Dot Matrix
Display and CD Changer Control
Lecteur CD/récepteur avec panneau avant amovible, affichage ma
triciel et contrôle de changeur CD
Reproductor de CD/Receptor con Pantalla de Matriz de Puntos.
Controlador de Cambiador de Discos y Frente Complete
Desmontable
CQ-DF602U
Operating Instructions
Manuel d’instructions
Manual de instrucciones
псомавст
йоз®
DieiTAl AUDIO
• Please reùiî iriç$6 ir»siu»0iiO4S o^^uHy rj^iOfS uçiiiij iins pfO^uC! 4п<1 P'iônyvil lyr luHire us«
• Prière de ine uv^tiuctions aUentivement av^nt dutlliser le (iroduit et yardei cè manuel pcm> ruiili'^niion iilièneurè
• Lea can aipjiddn estas instrucoDnes antas utilirar si ptmliictp v ynmds ests manual nara (miierin cnnsiiltar an я) tiiiurn-
Safety Information
Radio Frequency Interference Statement (Part 15 of the FCC Rules):
Applies only in U.S.A.
This equipment has been tested and found to comply with the limits for a Class В digital, pursuant to Part
15 of the FCC Rules.
• These limits are designed to provide reasonable protection against harmful interference in an automobile
installation. This equipment generates, uses, and can radiate radio frequency energy and, if not installed
and used in accordance with the instructions, may cause harmful inteiierence to radio communications.
However, there is no guarantee that interference will not occur in a particular installation. If this equip
ment does cause harmful interference to radio reception, which can be determined by turning the equip
ment off and on, the user is encouraged to consult the dealer or an experience radio technician for help.
FCC Warning;
Any unauthorized changes or modifications to this equipment would void the user’s authority to operate
this device._____________________________________________________________________________________
This device complies with Part 15 of the FCC Rules:
Operation is subject to the following two conditions:
(1) This device may not cause harmful interference, and
(2) This device must accept any interference received, including interference that may cause undesired op
eration.
^For Canada:
This Class В digital apparatus complies with Canadian ICES-003.
CAUTION:
THIS PRODUCT IS A
UCT.
USE OF CONTROLS
PERFORMANCE OF
THAN THOSE SPECIFIED HEREIN MAY RESULT
IN HAZARDOUS RADIATION EXPOSURE.
DO NOT OPEN COVERS AND DO NOT REPAIR
YOURSELF. REFER SERVICING TO QUALIFIED
PERSONNEL.
CLASS I LASER PROD-
OR ADJUSTMENTS OR
PROCEDURES OTHER
Laser products:
Wave length: 780 nm
Laser power: No hazardous radiation is emitted
with safety protection.
WARNING:
TO REDUCE THE RISK OF FIRE OR ELECTRIC
SHOCK, DO NOT EXPOSE THIS PRODUCT TO
RAIN OR MOISTURE.
TO REDUCE THE RISK OF FIRE OR ELECTRIC
SHOCK, AND ANNOYING INTERFERENCE, USE
ONLY THE INCLUDED COMPONENTS.
Label indication and location
Panasonic
Model No. ^ n npftn^lj
N* Do Modèle CQ-DF602U
Manutacturad by Deian Uatsusbita
Communication Industiial Co., Ltd.
Dalian China Made in China
Serial No.
N’ De Sèrie
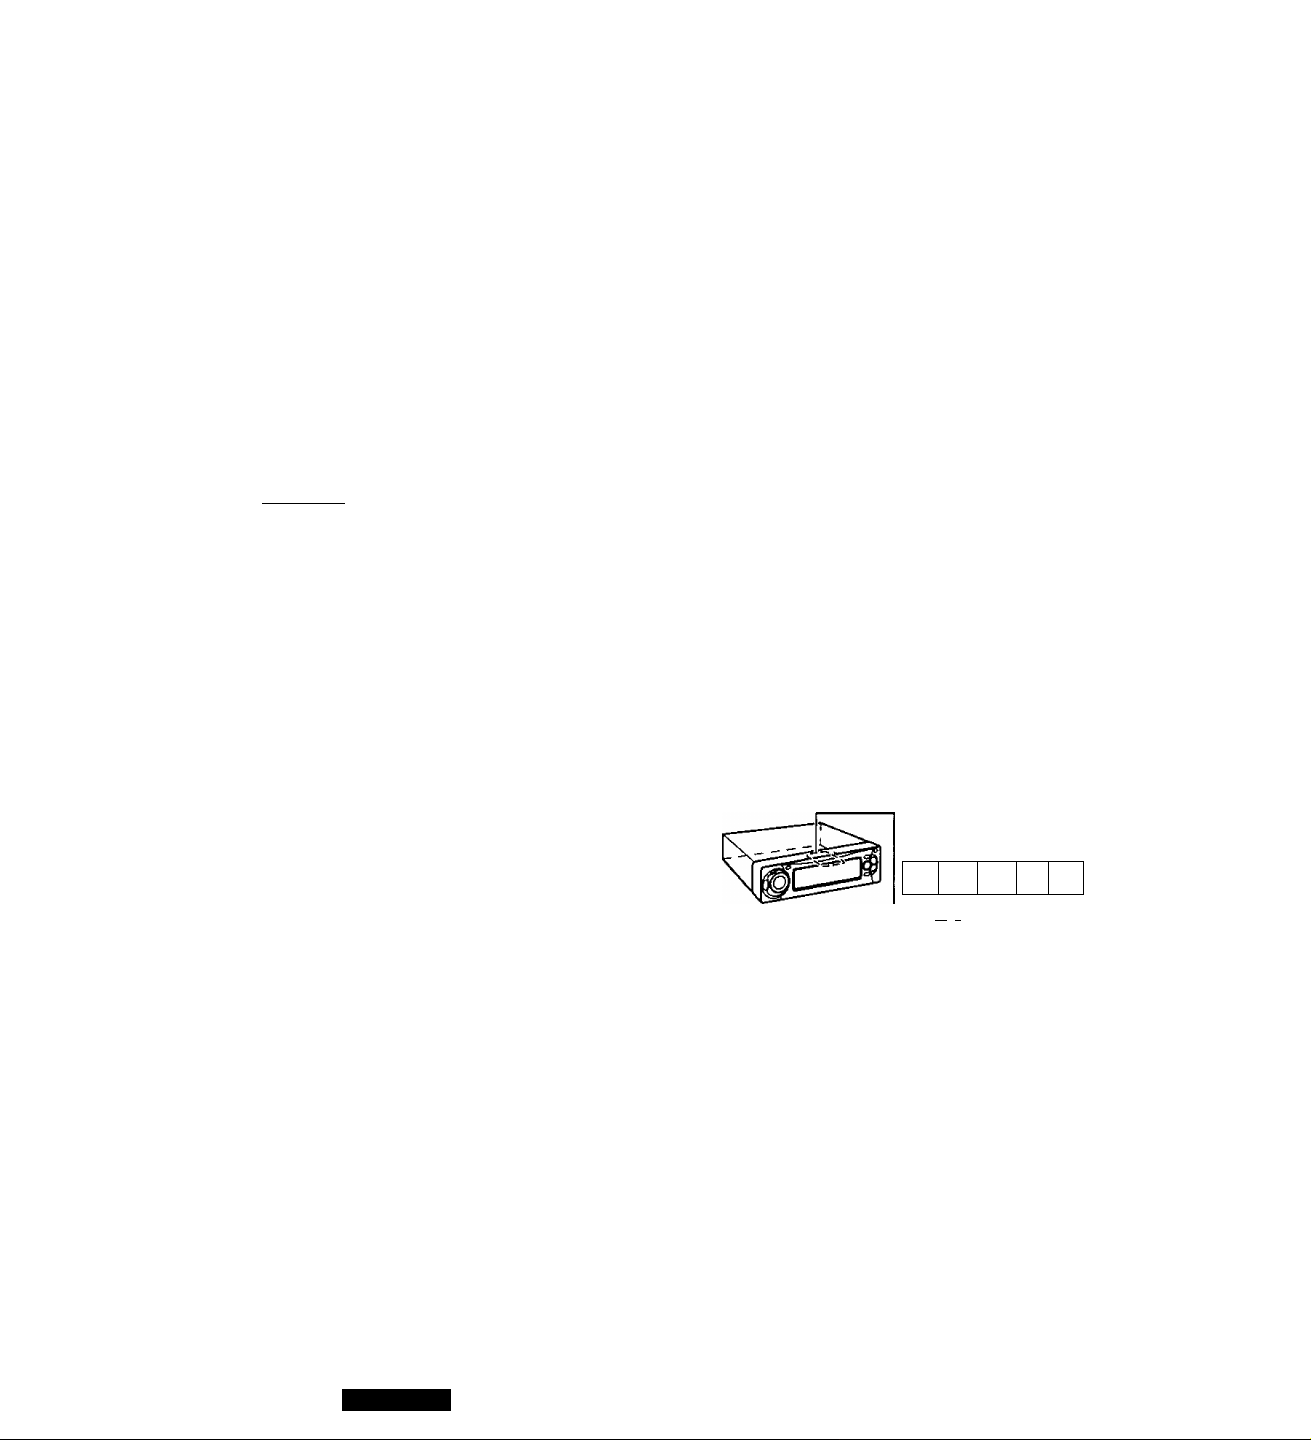
Find the model number and serial number on either
the back or bottom of the unit. Please record them
in the space below and retain this booklet as a per
manent record of your purchase to help with identi
fication in case of theft.
MODEL NUMBER
SERIAL NUMBER
DATE PURCHASED
I
-----------
H-
12V 4-en 15A
Thts dwkfl complies with Pert 15 of ths
FCC RiiM. Operatiort is subject to the
condtt^ that this device itoee not cause
harmAJ interference.
S
cCI
CQ-DF602U
[“■ZI
"J
Y
FM75Û
CQ-DF602U
FROM

Consignes de sécurité
Información para su seguridad
AHENTION :
CET APPAREIL EST UN PRODUIT USER DE U
CUSSE I.
L’UTILISATION DE COMMANDES OU RÉGUGES OU
L’EXÉCUTION D’OPÉRATIONS AUTRES QUE CELLES
QUI SONT INDIQUÉES DANS CE DOCUMENT PEUVENT
RÉSULTER EN UNE EXPOSITION À UN RAYONNEMENT
DANGEREUX.
N’OUVREZ PAS LES COUVERCLES ET N’ESSAYEZ PAS
D’EFFECTUER VOUS-MÊME DES RÉPARATIONS.
ADRESSEZ-VOUS À UN PERSONNEL QUALIFIÉ POUR
TOUTE RÉPARAЛON.
Produits laser:
Longueur d’onde: 780 nm
Puissance du laser: Aucune radiation dangereuse
n’est émise avec la protection de
sécurité.
MISE EN GARDE:
POUR RÉDUIRE LES RISQUES D’INCENDIE OU D’ÉLECTROCUTION, N’EXPOSEZ PAS CET APPAREIL À U
PLUIE OU À L’HUMIDITÉ.
AFIN DE PRÉVENIR TOUT RISQUE D’INCENDIE OU
D’INTERFÉRENCES, UTILISER UNIQUEMENT LES
COMPOSANTS FOURNIS.
PRECAUCION:
ÉSTE ES UN PRODUCTO LÁSER DE U CUSE I.
U UTILIZACIÓN DE CONTROLES, EL HACER AJUSTES
0 EL SEGUIR PROCEDIMIENTOS DISTINTOS DE LOS
ESPECIFICADOS EN ESTE MANUAL PODRÍA CAUSAR
UNA EXPOSICIÓN PELIGROSA A U RADIACIÓN.
NO ABRA US CUBIERTAS NI HAGA REPARACIONES
USTED MISMO. SOLICITE LOS TRABAJOS DE SERVICIO
AL PERSONAL CALIFICADO.
Productos láser:
Longitud de onda: 780 nm
Potencia láser: Con protección de seguridad no se
emite radiación peligrosa.
ADVERTENCIA:
PARA REDUCIR EL RIESGO DE INCENDIOS O SACU
DIDAS ELÉCTRICAS, NO EXPONGA ESTE PRODUCTO
A U LLUVIA NI A U HUMEDAD.
PARA REDUCIR EL RIESGO DE INCENDIOS O SACUDI
DAS ELÉCTRICAS, Y PARA EVITAR US
INTERFERENCIAS MOLESTAS, UTILICE
SOUMENTE LOS COMPONENTES INCLUIDOS.
^Déclaration d’interférence de fréquences radio
(Partie 15 des Règlements FCC):
Cet appareil numérique de Classe B est conforme au
règlement ICES-003 canadien.
II est recommandé de noter, dans (’espace prévu cidessous, les numéros de modèle et de série inscrits soit
à l’arrière soit sous le fond de i’appareil, et de conserver
ce manuel comme mémorandum de l’achat afin de per
mettre l’identification de l’appareil en cas de vol.
NUMÉRO DE MODELE
NUMÉRO DE SÉRIE
DATE DE L’ACHAT
VENDEUR
CQ-DF602U NUMERO DEL MODELO
Busque el número del modelo y el número de serie ya
sea en ia parte trasera o en ei fondo de la unidad. Sírvase
anotar dichos números en ei espacio siguiente, y man
tenga este librete como una anotación permanente de su
compra para ayudar en la identificación en el caso de
robo.
CQ-DF602U
NÙMERO DE SERIE
FECHA DE COMPRA
NOMBRE DE LA TIENDA

Panasonic welcomes you to our ever growing family of electronic product owners. We know that this
product will bring you many hours of enjoyment Our reputation is built on precise electronic and me
chanical engineering, manufactured with carefully selected components and assembled by people who
take pride in their work. Once you discover the quality, reliability, and value we have built into this prod
uct, you too will be proud to be a member of our family.
□ Use this Product Safely
When Driving
Keep the volume level low enough to be aware of
road and traffic conditions.
When Washing Your Car
Do not expose the product, including the speakers
and CDs, to water or excessive moisture. This
could cause electrical shorts, fire, or other damage.
When Parked
Parking in direct sunlight can produce very high
temperatures inside your car. Give the interior a
chance to cool down before switching the unit on.
Use the Proper Power Supply
This product is designed to operate with a 12 V DC,
negative ground battery system (the normal system
in a North American car).
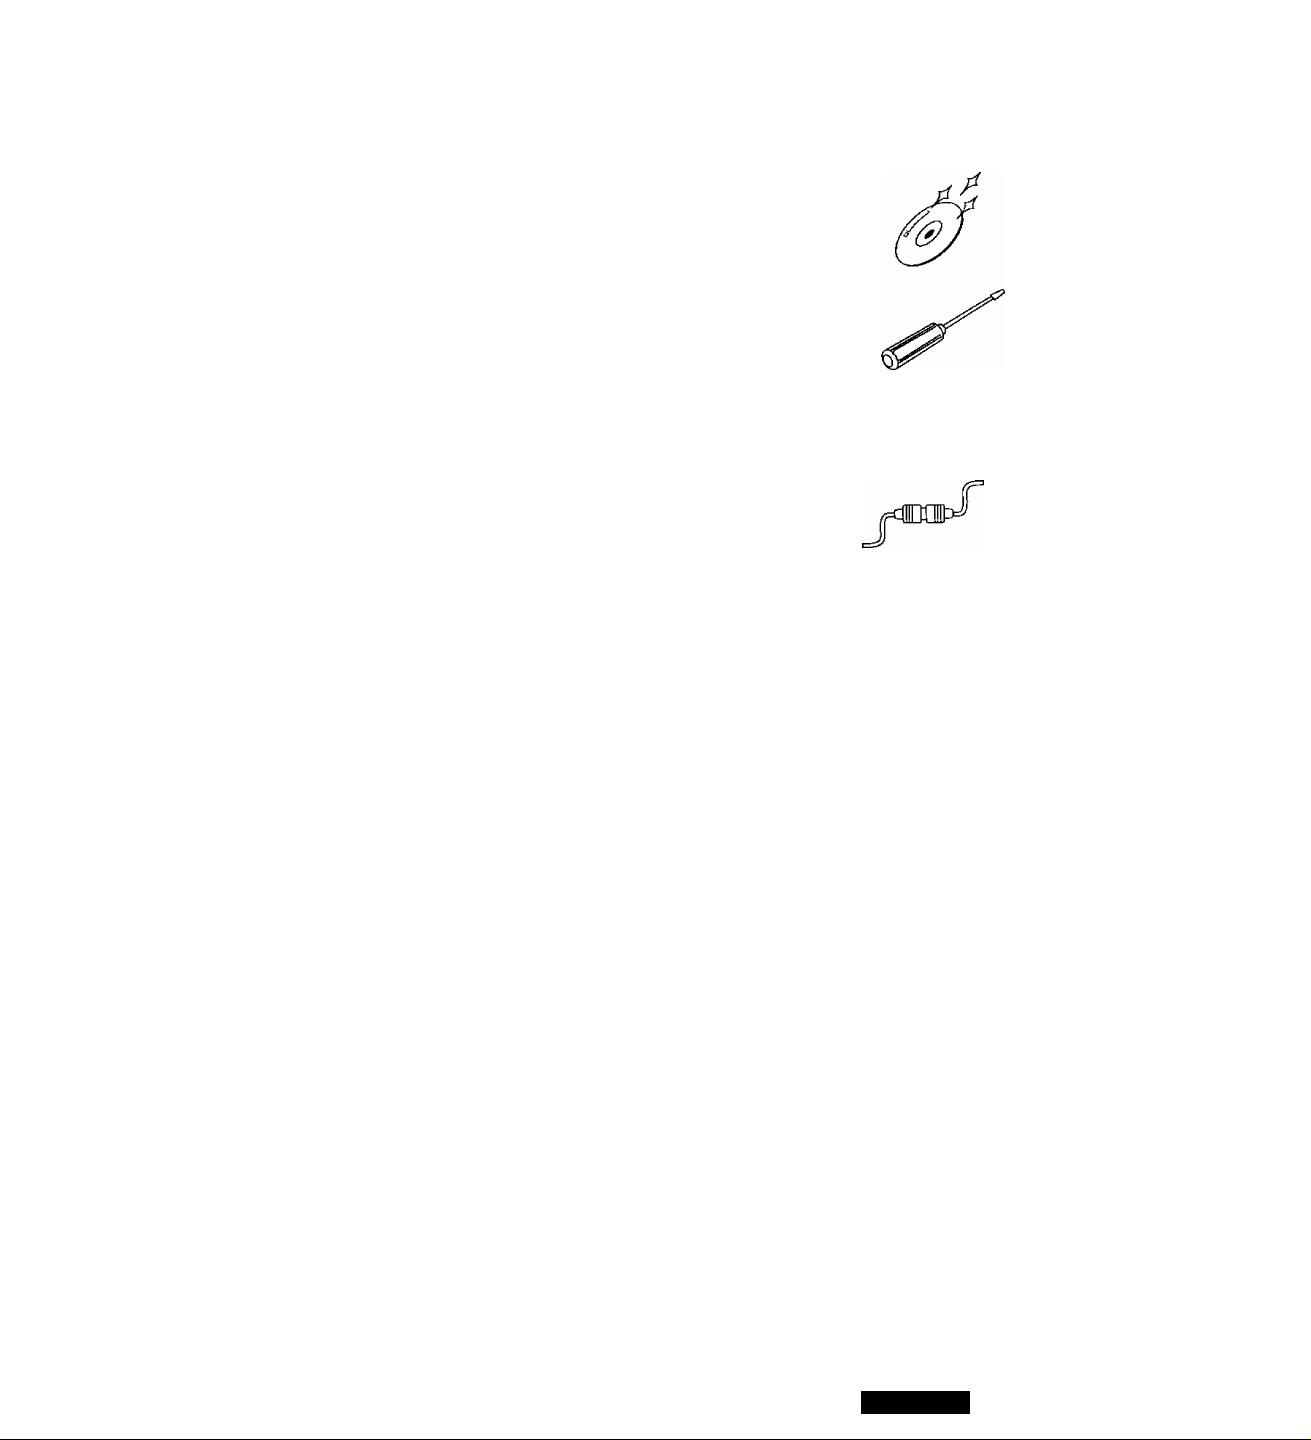
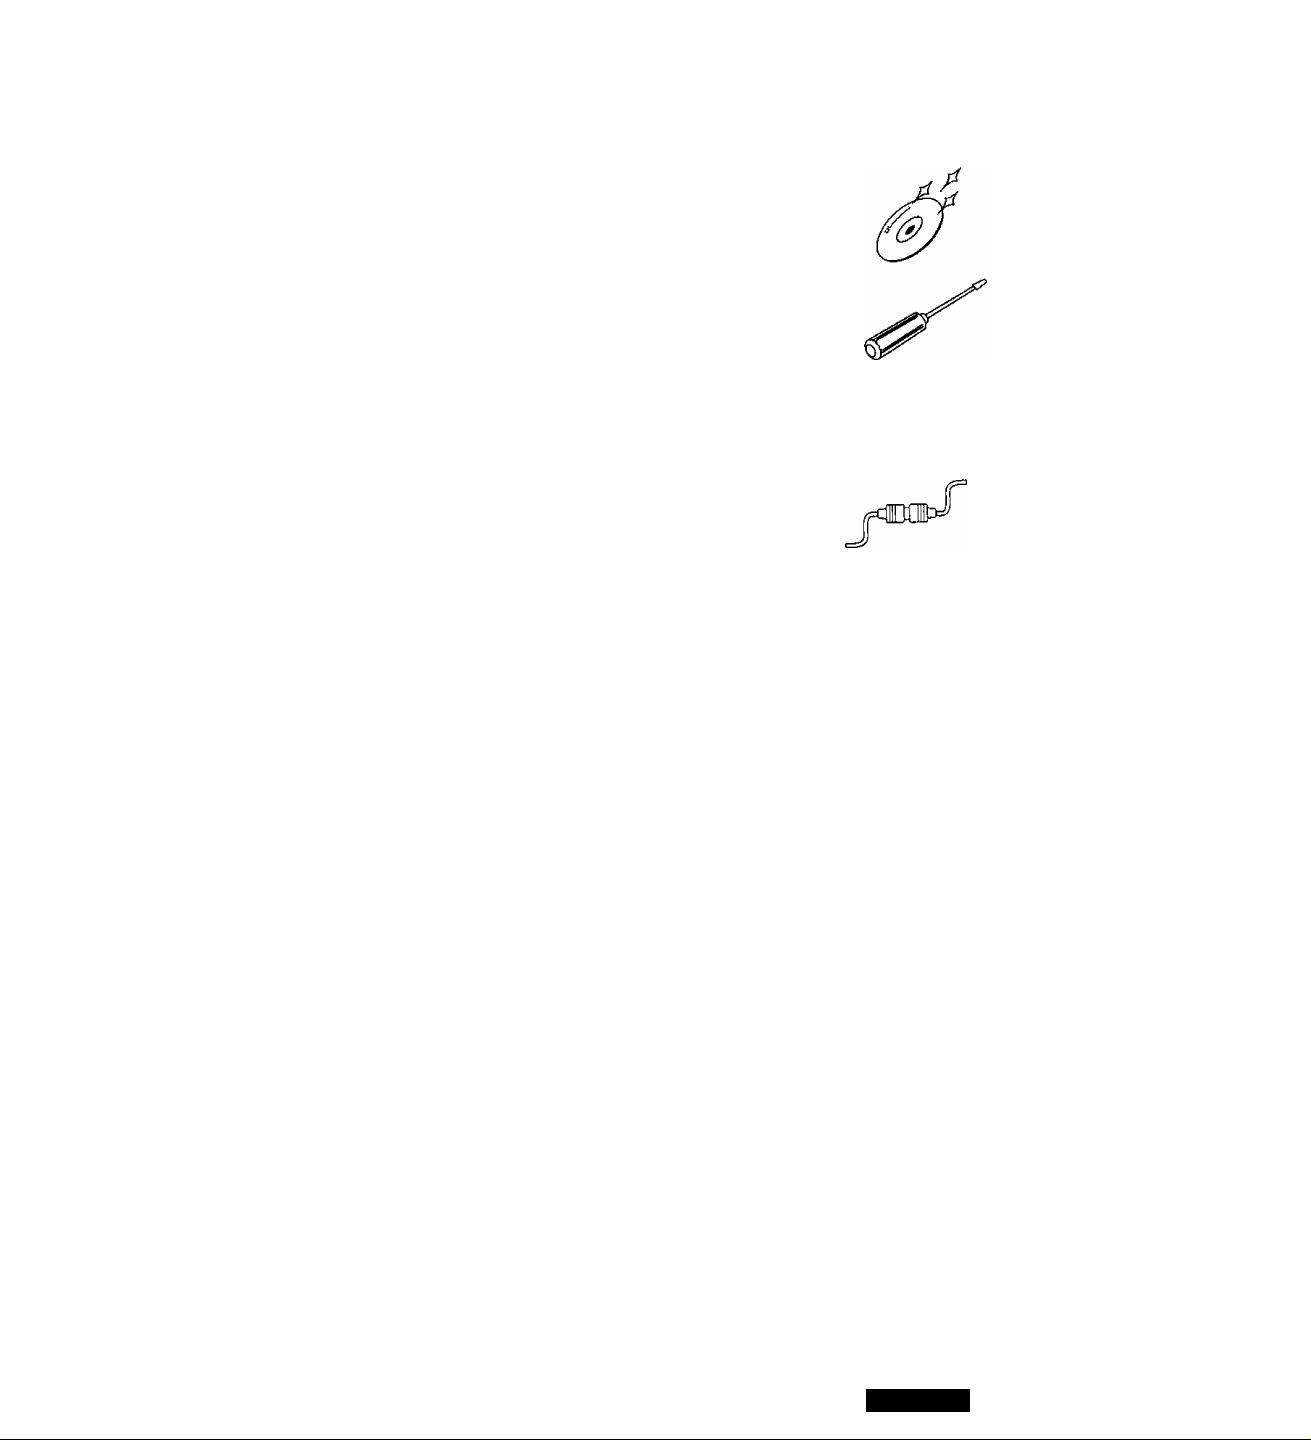
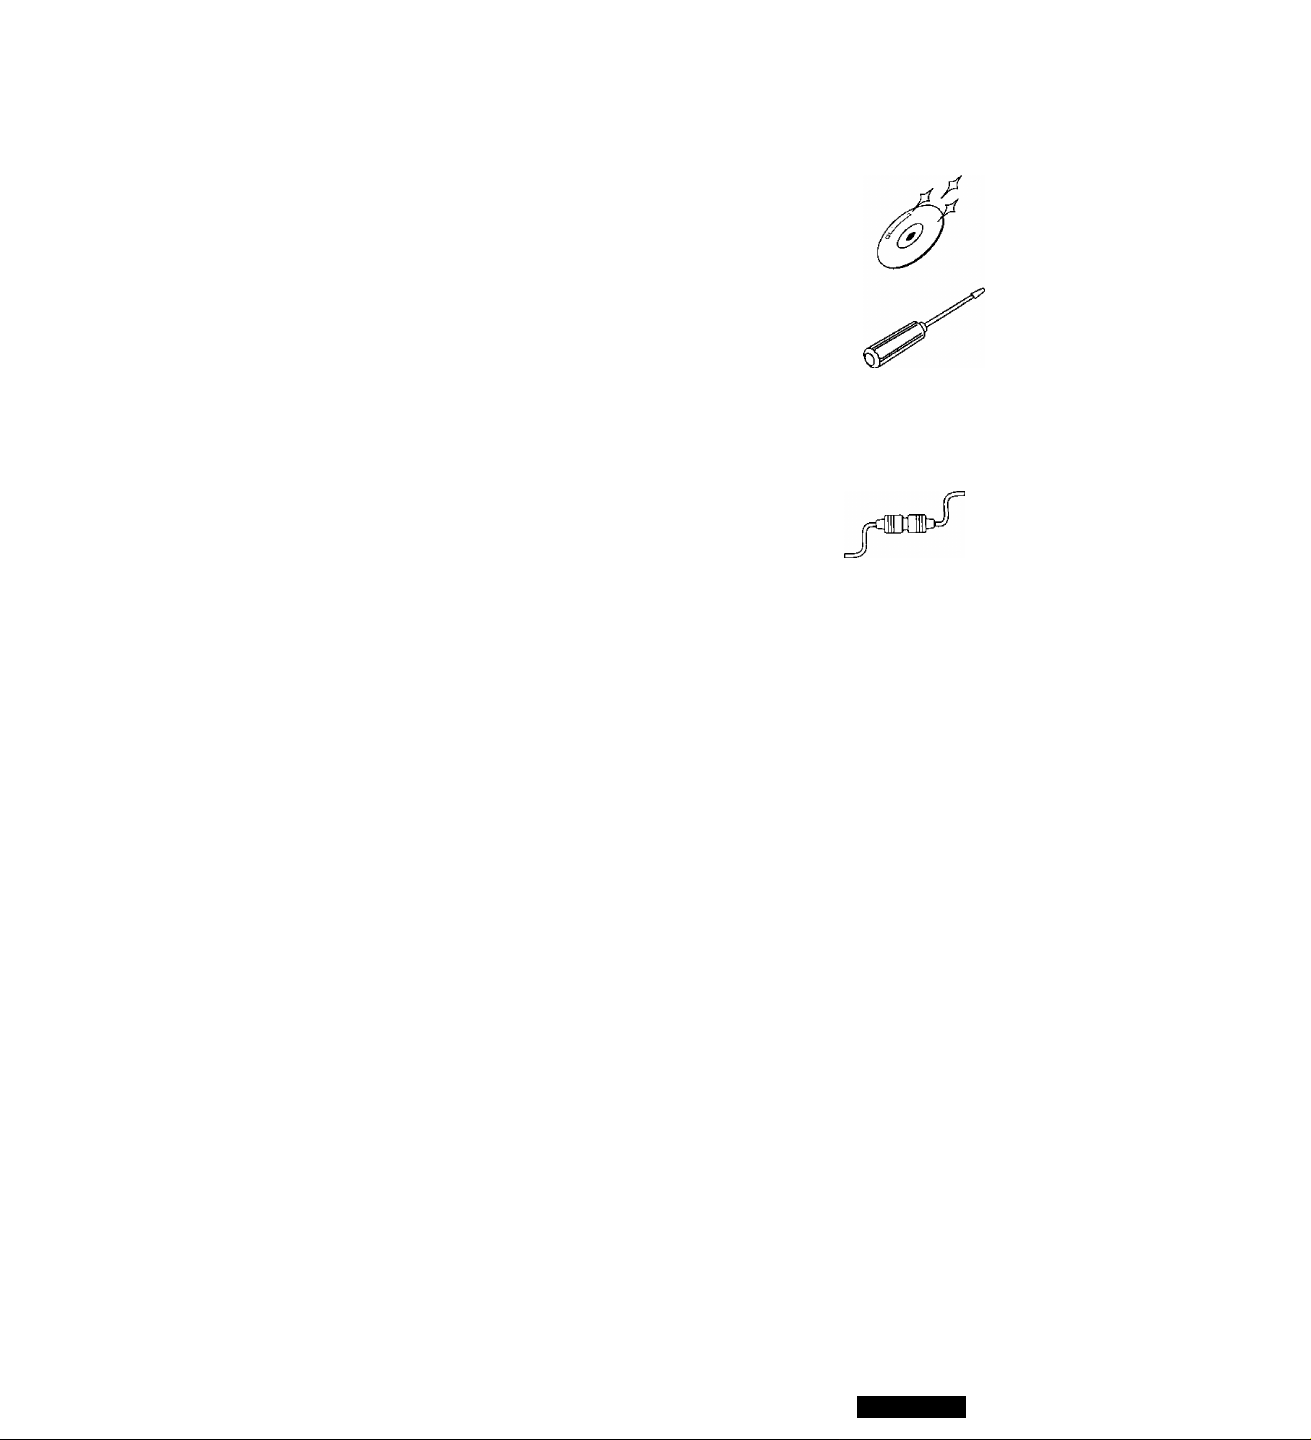
Disc Mechanism
Do not insert coins or any small objects. Keep
screwdrivers and other metallic objects away from
the disc mechanism and disc.
Use Authorized Servicenters
Do not attempt to disassemble or adjust this preci
sion product. Please refer to the Servicenter list in
cluding with this product for service assistance.
For Installation
This product should be installed in a horizontal po
sition with the front end up at a convenient angle,
but not more than 30**.
NOTICE:
□ Language for Manuals of Products Using LCD
This product has a fluorescent lamp that contains a small amount of mercury. It also contains lead in some
components. Disposal of these materials may be regulated in your community due to environmental con
siderations.
For disposal or recycling Information please contact your local authorities, or the Electronics Industries
Alliance: <
http://www.eiae.org.>
CQ-DF602U
□ Features
• A CD-R and a CD-RW that hold CD-DA data can be reproduced.
• Full-dot expressiveness <3D dot matrix dlsplay>
• Actions that previously could be performed by pressing a single button are now performed through menu
selections. See the menu operation explanations for each mode for details.
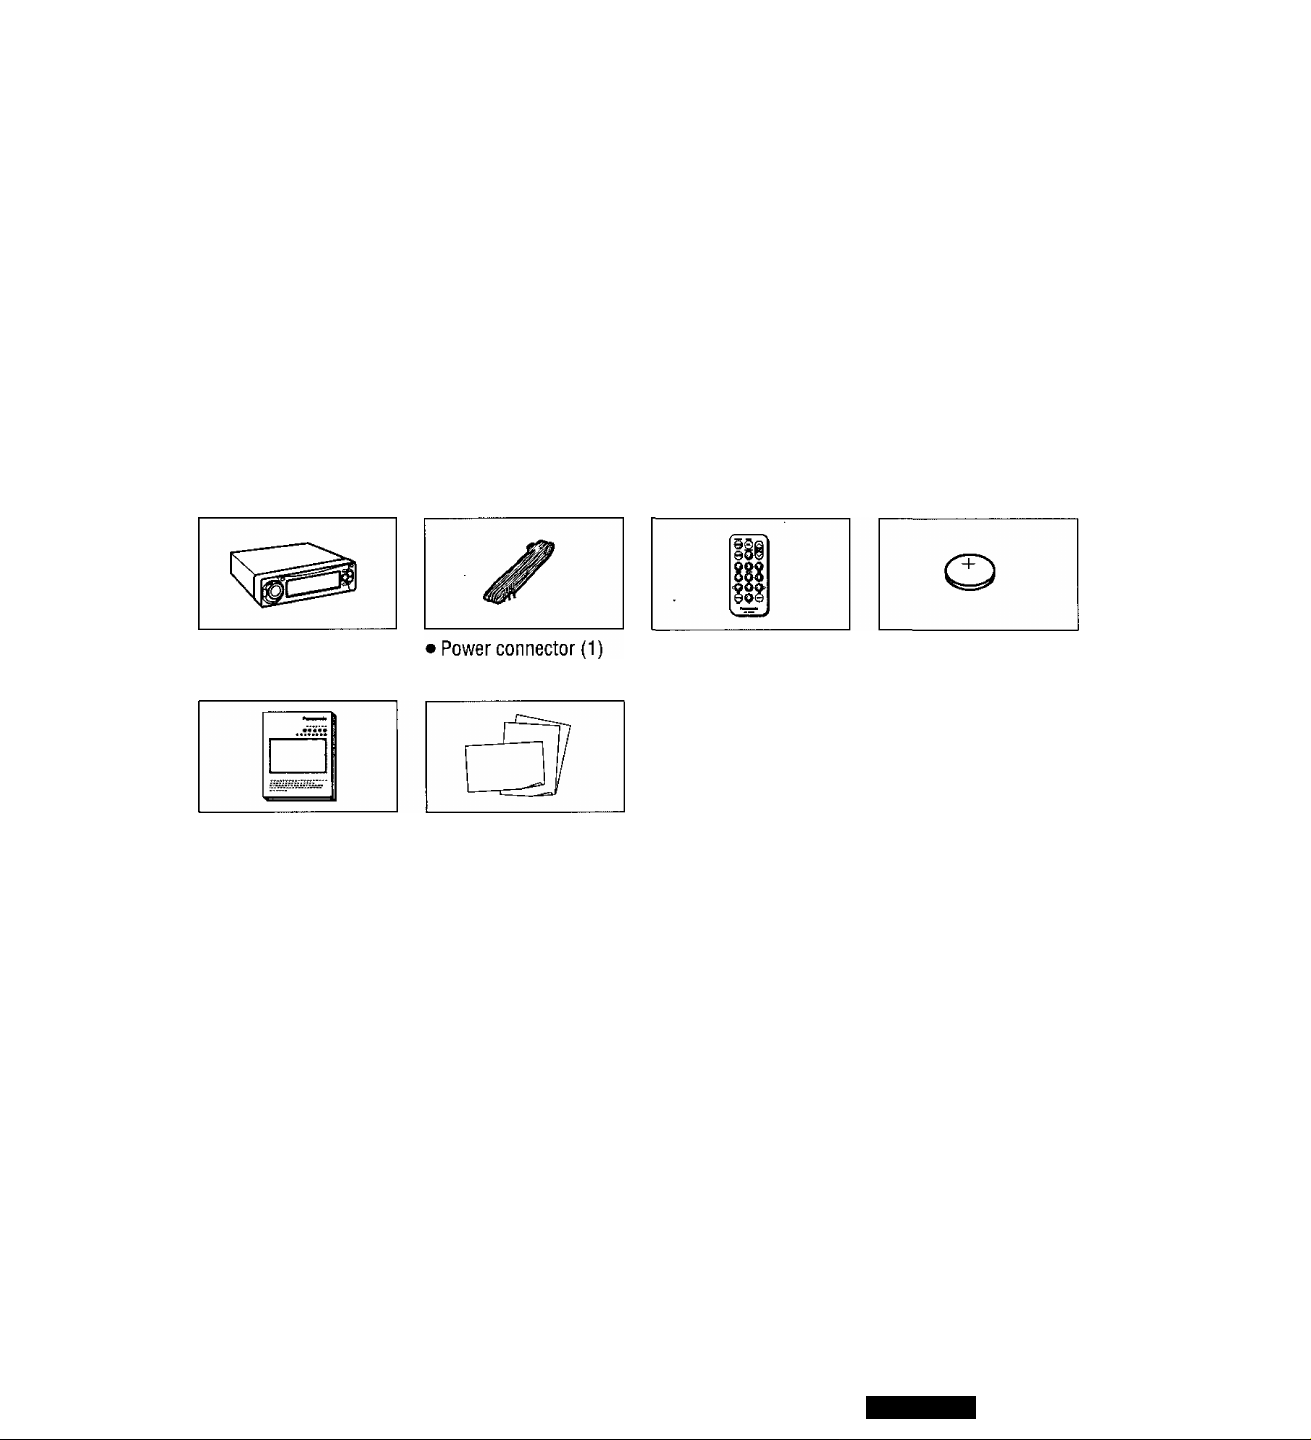
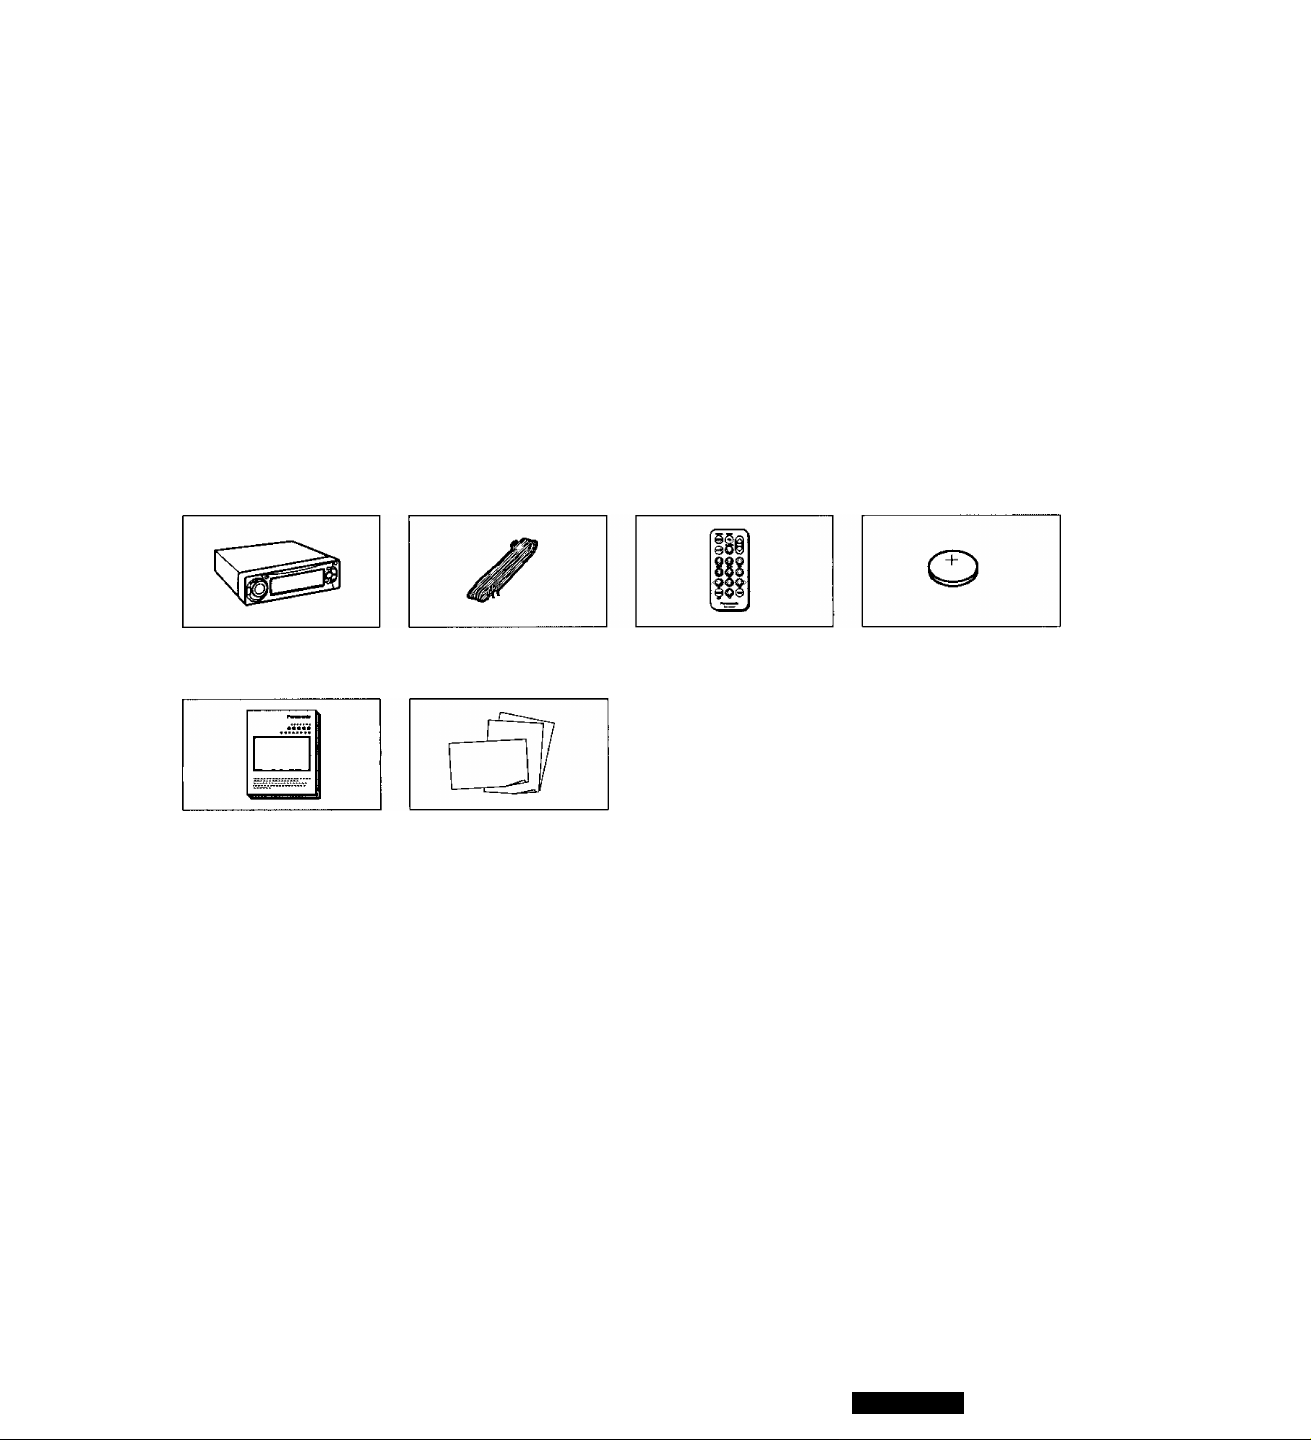
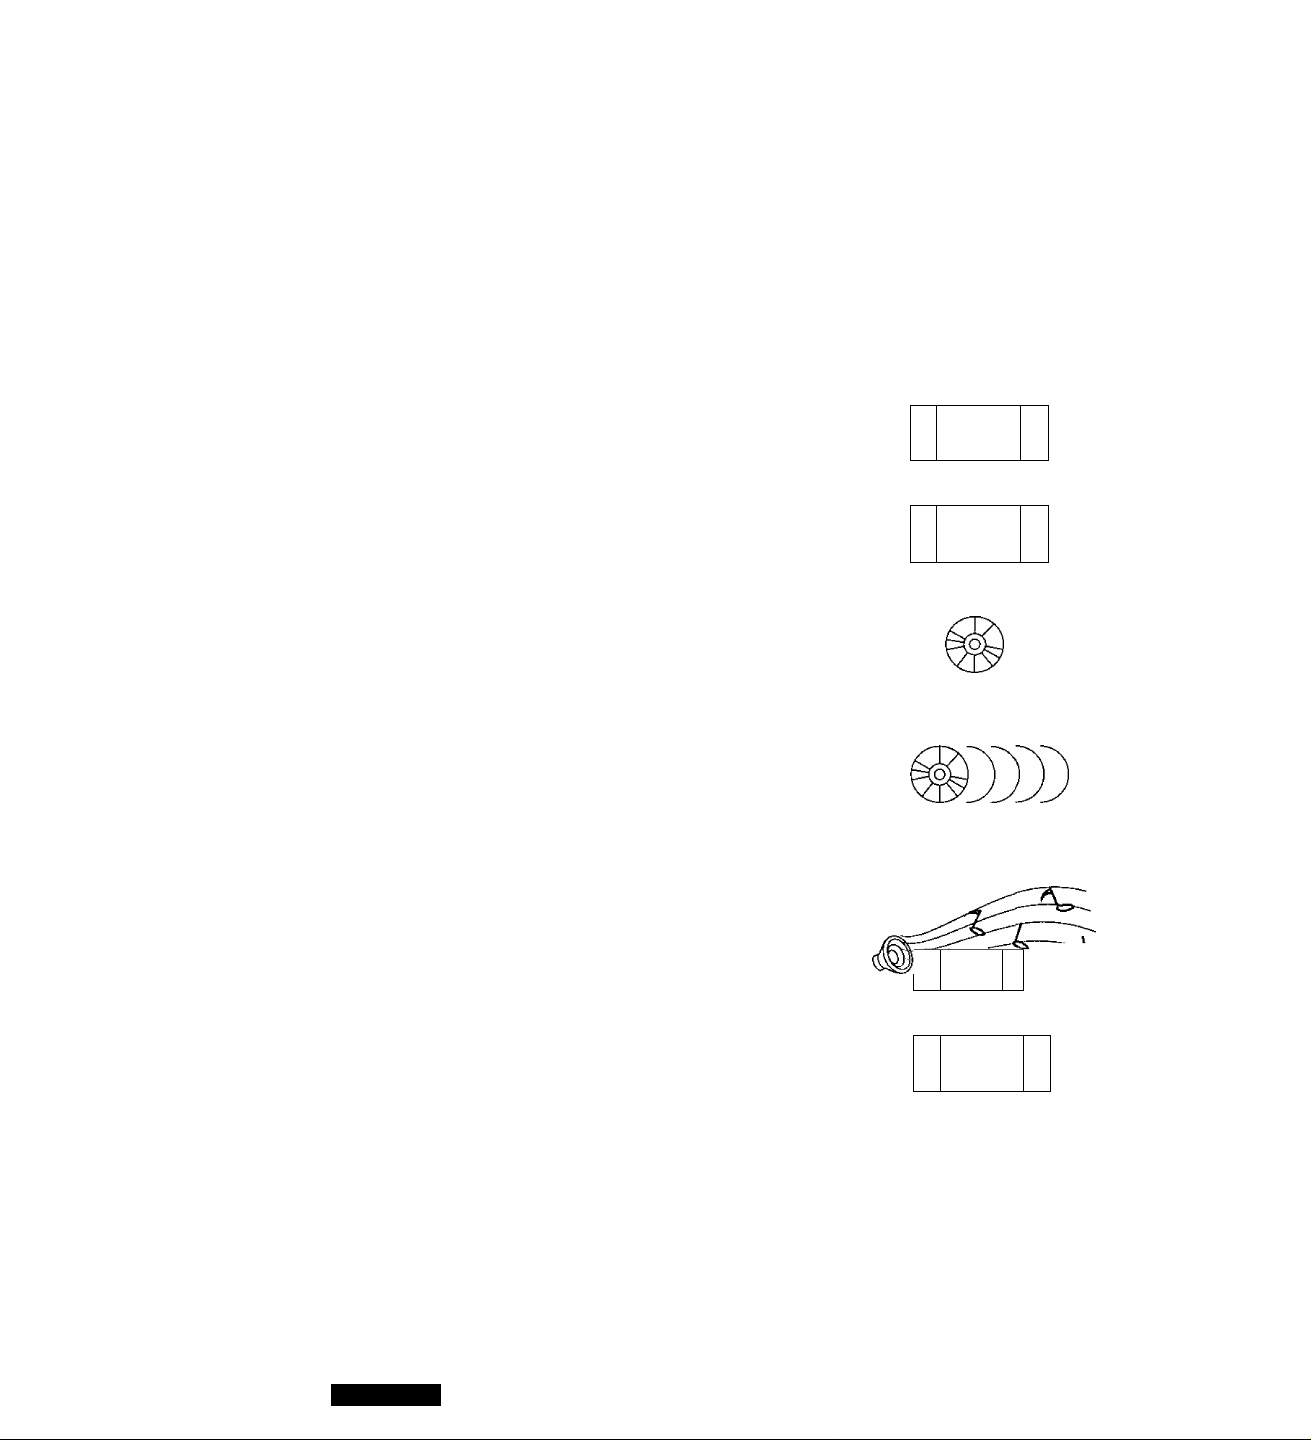
□ Components • The numbers in parentheses indicate the accessory quantities.
• CD player/receiver (1)
Operating instructions • Warranty card, etc.
(1)
• Remote control unit
(1)
• Installation hardware
(screws, cords, etc.)
(*=» page 42)
• Lithium battery
(CR2025){1)
CQ-DF602U

Contents
Safety Information
Radio Frequency Interference Statement {Part 15 of the FCC Rules)
Use this Product Safely...................................................................................... 4
Language for Manuals of Products Using LCD
Features................................................................................................................. 5
Components.......................................................................................................... 5
□ Before Reading these Instructions
□ Remote Control Unit Preparation
Battery installation, battery notes
П General...............................................................................................................17
Power, source, volume, mute/attcnuation, open/close the front panel,
display change
□ Radio................................................................................................................20
Radio mode, band, tuning, one-touch selection of a preset station, manual
preset memory, auto preset memory (АРМ), preset station calling
□ CD Player.........................................................................................................22
Disc insert and playback, stop and disc eject, listening to a CD, CD player
mode, track selection, track search, pause, direct track selection, menu
setting on CD player mode, random play, repeat play, scan play
□ CD Changer Control.........................................................................................26
CD changer mode, disc selection, track selection, track search, direct disc
selection, menu setting on CD changer mode, random play, disc random
play, repeat play, disc repeat play, scan play, disc scan play
........................................................................................
..................
.......................................................
............................................................
.............................................................
Page 2
2
4
16
16
О
о
о
о о
о о
о о
WELCOME
FM
О
О
□ Audio Settings [AUDIO]...................................................................................30
S HDB (Super Fligh Definition Bass), bass and treble, balance and fader,
subwoofer level
□ Picture (Display) Settings [PICTURE]...............................................................32
Dimmer (display brightness setting range). Spectrum Analyzer (S-A)
display pattern, contrast, clock on the mode display
□ Clock Basics.....................................................................................................34
Clock adjustment
□ Function Settings [FUNCTION]........................................................................34
Mute/attenuation, security function
О Troubleshooting................................................................................................36
Preliminary steps, if you suspect something wrong, troubleshooting tips,
error display messages, maintenance, product servicing, replacing the
fuse
CQ-DF602U
'о
О
о о о о о
***
8 : 00
о
О
O Maintenance................................................................................................41
Care of the unit, notes on CD/CD media {CD-R, CD-RW), notes on CDRs/RWs)
□ Installation Guide...........................................................................................42
Remove the unit
O Anti-Theft System........................................................................................ 47
Place the removable face plate into case, install removable face plate,
security indicator, panel removal alarm
O Electrical Connections
.....................................................................................
Caution, wiring diagram, upgrading the system
□ Specifications............................................................................................... 51
48
CQ-DF602U

Panasonic est heureuse de vous compter parmi les utilisateurs de ses appareils électroniques. Nous pouvons vous as
surer que cet appareil vous procurera de longues heures d’agrément. Notre réputation est fondée sur une ingénierie
électronique et mécanique.de haute précision, laquelle préside à la fabrication d'appareils ne comportant que des com
posants de choix assemblés par un personnel soucieux de la bonne réputation acquise par la qualité de son travail.
Après avoir découvert la qualité, ta valeur et la fiabilité de cet appareil, vous aussi serez fier d’être un client Panasonic.
□ Précautions à prendre
Au volant
Réglez le volume à un niveau qui ne risque pas de mas
quer les bruits ambiants.
Lavage de la voiture
Afin de prévenir tout risque de court-circuit ou d’in
cendie, n’exposez pas l’équipement, y compris les hautparleurs et les disques, à l’eau ou à une humidité
excessive.
Voiture stationnée
L’habitacle d’une voiture immobile exposée au soleil
toutes vitres fermées devient rapidement très chaud.
Laisser rafraîchir l’intérieur du véhicule avant d’utiliser
l’appareil.
Source d’alimentation
Cet appareil est conçu pour fonctionner sur un système
d’alimentation avec batterie de 12 V à masse négative
(système standard sur les voitures de construction nord-
américaine).
Mécanisme de disque
N’insérez pas de pièces de monnaie ou de petits objets.
Gardez les tournevis et autres objets métalliques à l’écart
du mécanisme de disque et du disque.
Réparation
Ne tentez pas de démonter ou d’ajuster l’appareil vousmême. Veuillez vous référer à la liste des centres de ser
vice fournie avec cet appareil pour contacter le service
d’assistance.
Installation
L’appareil doit être installé en position horizontale avec
son extrémité avant inclinée vers le haut à un angle com
mode, mais ne dépassant pas 30°.
CQ-DF602U
□ Charactéristiques
• La reproduction des CD-R et CD-RW qui contiennent des données de format CD-DA est possible.
• «Affichage à matrice de points 3D» pour une expression de l’image à points entiers
• Les commandes qui s’effectuaient jusqu’ici en appuyant sur une touche s’effectuent maintenant au moyen de
menus. Pour plus de détails, veuillez consulter les explications relatives aux commandes pour chacun des modes.
□ Eléments constitutifs • Les chiffres entre parenthèses indiquent ia quantité d’accessoires.
• Lecteur CD/récepteur (1 ) • Connecteur d’aiimenta- • Téiécommande (1 ) • Pile au lithium (CR2025)
tion(1) (1)
• Quincaillerie pour l’instal
lation (vis, cordons, etc.)
(“» page 78)
• Manuel d’instructions (1 ) • Carte de garantie, etc.
CQ^DF602U

Tables des matières
Consignes de sécurité......................................................................................................Page 3
Précautions à prendre.............................................................................................................. 8
Charactéristiques..................................................................................................................... 9
Éléments constitutifs............................................................................................................... 9
G Avant de lire ce manuel d’utilisation.................................................................................52
□ Préparation de la télécommande...............................................................................52
Installation de la pile, remarques sur la pile
□ Généralités....................................................................................................................... 53
Alimentation, source, volume, silencieux/atténuation, ouvrir/fermer le panneau
avant, changement d’affichage
G Radio ...............................................................................................................................56
Mode radio, bande, syntonisation, sélection à une touche d'une station,
présyntonisation manueile, présyntonisation automatique (АРМ), appel de station
présyntonisée
□ Lecteur CD........................................................................................................................ 58
Insertion et lecture de disque, arrêt et éjection de disque, écoute d’un CD, mode
de lecteur CD, sélection de plage, recherche de plage, pause, sélection directe de
plage, réglage de menu en mode de lecteur CD, lecture aléatoire, lecture répétée,
lecture des débuts de plage
□ Commande de changeur CD.......................................................................................62
Mode de chargeur CD, sélection de disque, sélection de plage, recherche de
plage, sélection directe de disque, réglage de menu en mode de changeur CD,
lecture aléatoire, lecture aléatoire de disque, lecture répétée, lecture répétée de
disque, lecture des débuts de plage, lecture des débuts de plage des disques
□ Réglages audio [AUDIO]....................................................................................................66
S HDB (graves à définition supérieure), graves et aigus, balance et équilibrage,
niveau du haut-parleur d’extrêmes-graves
□ Réglages d’image (affichage) [PICTURE]............................................................................68
Gradateur (plage de réglage de la luminosité d'affichage), type d'affichage
d'anaiyseur de spectre (S A), contraste, horloge sur l'affichage du mode
□ Fonctions de base de l'horloge..........................................................................................70
Réglage de l’horloge
O
O
г O
o|
O
O O
O O
O O
WELCOME
FM
8 : 00
O
O
O
G Réglages de fonctions [FUNCTION].......................................................................................70
Silencieux/atténuation,-fonction de sécurité
O En cas de difficulté........................................................................................................... 72
Étapes préliminaires, lorsqu’on soupçonne que quelque chose est défectueux,
guide de dépannage, messages d’erreur, entretien, service après-vente de
l’appareil, remplacement d’un fusible
10
CQ-DF602U
77?? I
O O O O O
□ Entretien.............................................................................................. 77
Entretien de l’appareü, remarques relatives aux CD et supports de type CD (CD-R,
CD-RW), remarques relatives aux CD-R/RW
O Guide d’installation..............................................................................78
Pour retirer l’appareil
□ Système antivol................................................................................. 83
Mettre la plaque de façade amovible dans l’étui, installer la plaque de façade
amovible, voyant du système de sécurité, alarme de retrait du panneau
G Branchements électriques....................................................................84
Précaution, schéma de câblage, système évolutif
□ Données techniques.............................................................................87
CQ-DF6Q2U
11
Panasonic le da la bienvenida a la familia constantemente en aumento de poseedores de productos electrónicos. Nos
esforzamos en proporcionarle las ventajas de la ingeniería mecánica y electrónica de precisión, de una fabricación con
componentes cuidadosamente seleccionados, y de un montaje realizado por personas orgullosas de la reputación que
su trabajo ha cimentado para nuestra empresa. Estamos seguros de que este producto te proporcionará muchas horas
de distracción y, una vez comprobada la calidad, el valor y la fiabilidad Incorporados, usted también se sentirá orgul
loso de pertenecerá nuestra familia.
□ Uso de este equipo con seguridad
»1
Cuando conduzca
Mantenga el nivel del volumen suficientemente bajo para
estar atento a la carretera y a las condiciones del tráfico.
Cuando lave el automóvil
No exponga el equipo, incluyendo los altavoces y los
CDs, al agua o a una humedad excesiva. Esto puede
causar cortocircuitos eléctricos, incendios u otros daños.
Cuando esté estacionado
El estacionamiento a la luz solar directa puede producir
temperaturas muy altas en el interior de su vehículo.
Procure enfriar el interior antes de encender la unidad.
Uso de la alimentación apropiada
Este equipo ha sido diseñado para funcionar con un sis
tema de batería de 12 V CC con negativo a masa (el sis
tema normal en un vehículo norteamericano).
Mecanismo de disco
No inserte monedas ni ningún objeto pequeño. Mantenga
los destornilladores u otros objetos metálicos apartados
del mecanismo de disco y del disco.
Uso de los centros de servicio autoriza
dos
No intente desmontar ni ajustar este equipo de precisión.
Consulte la lista de centros de servicio incluidos con este
producto para acudir a ellos cuando sea necesario.
Instalación
La unidad deberá instalarse en posición horizontal, con el
extremo delantero hacia arriba formando un ángulo con
veniente, pero con no más de 30“.
12
□ Characterísticas
• Pueden reproducirse discos CD-R y CD-RW con datos CD-DA.
• Expresividad total de puntos <Visuatización de presentación de matriz de puntos tridimensíonales>
• Los comandos que se efectuaban con solo hacer clic sobre un botón, se realiza abora a través de selecciones de
menús. Para más detalles, consulte las explicaciones sobre los comandos de cada uno de los modos.
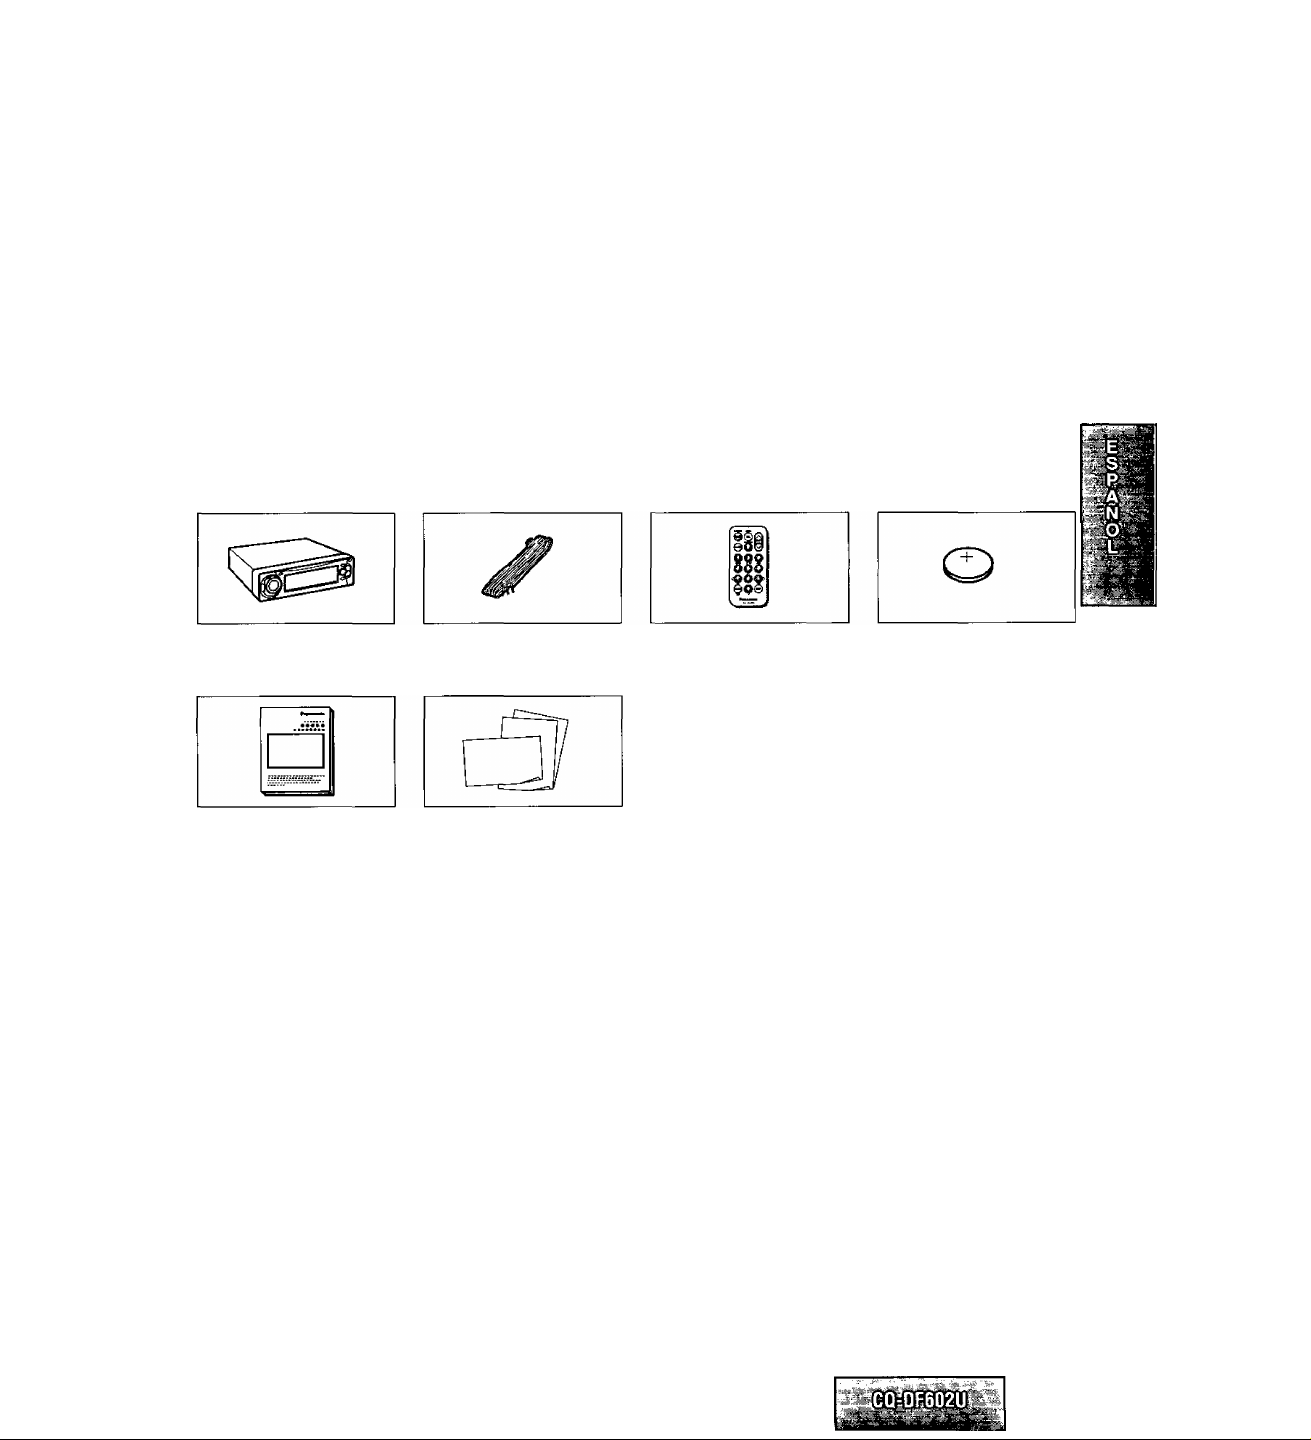
□ Componentes
Reproductor de CD/receptor(1)
• Manual de instrucciones • Tarjeta de garantía, etc.
(1)
Los números entre paréntesis indican las cantidades de accesorios.
Conector de alimentación o Unidad del controlador ® Pila de litio (CR2025) (1)
(1) remoto (1)
« Accesorios suministrados
{tornillos, cables, etc.)
(=♦ página 114)
13
Indice
Información para su seguridad.....................................................................................Página 3
Uso de este equipo con seguridad..........................................................................................12
Characterísticas...................................................................................................................... 13
Componentes......................................................................................................................... 13
□ Antes de leer estas instrucciones
G Preparación del controlador remoto
Sustitución de la pila, notas sobre la pila
□ Generalidades......................................................................................89
Alimentación, fuente, volume, enmudecimiento/atenuación, abertura/cierre del
panel delantero, cambio de visualización
G Radio .................................................................................................92
Modo de la radio, banda, sintonización, selección con un solo toque de una
emisora, memoria de presintonización manual, memoria de presintonización
automática (APM), llamada a emisoras presintonizadas
G Reproductor CD ................................................................................94
Inserción y reproducción de discos, parada y expulsión de disco, para escuchar
un CD, modo de reproductor de CD, selección de pista, búsqueda de pista, pausa,
selección directa de pista, ajuste de menú en el modo de reproductor de CD,
reproducción aleatoria, repetición de reproducción, reproducción con exploración
G Control del cambiador do CD................................................................98
Modo de cambiador de CD, selección de disco, selección de pista, búsqueda de
pista, selección directa de disco, ajuste de menú en el modo de cambiador CD,
reproducción aleatoria, reproducción aleatoria de disco, repetición de
reproducción, repetición de reproducción de disco, reproducción con exploración,
reproducción con exploración de disco
G Ajustes de sonido [AUDIO].................................................................102
S-HDB (Graves de definición super alta), graves y agudos, equilibrio y
desvanecimiento, nivel de altavoz de subgraves
G Ajustes de imagen (Visualización) [PICTURE]..........................................104
Regulador de intensidad de luz (gama de ajuste de brillo de visualización), patrón
de visualización del analizador de espectro (S'A), contraste, reloj en la
visualización de modo
G Reloj: Conceptos generales.................................................................106
Ajuste del reloj
...........................................................
........................................................
88
88
o
□ o
o o
o o
WELCOME
O
FM
o
’o o
o
8 ; 00
O
O
'
O
G Ajustes de funciones [FUNCTION].......................................................106
Enmudecimiento/atenuación, función de seguridad
O Solución de problemas ......................................................................108
Pasos preliminares, si cree que hay algo que no funciona bien, consejos para
localizar y solucionar averías, mensajes de visualización de error, mantenimiento,
mantenimiento del producto, cómo sustituir el fusible
14
CQ-DF602U
o o o o o
□ Mantenimiento....................................................................................113
Cuidado de la unidad, notas sobre soportes CD/CD (CD-R, CD-RW), notas sobre
discos CD-R/RW
□ Guía de instalación.............................................................................114
Para extraer el aparato
a Sistema antirrobo..............................................................................119
Coloque !a placa frontal removible en la caja, Instale la placa frontal removible,
indicador de seguridad, alarma de extracción del panel
□ Conexiones eléctricas.........................................................................120
Precaución, diagrama del cableado, mejora del sistema
□ Especificaciones.................................................................................123
CQ-DF602U
15

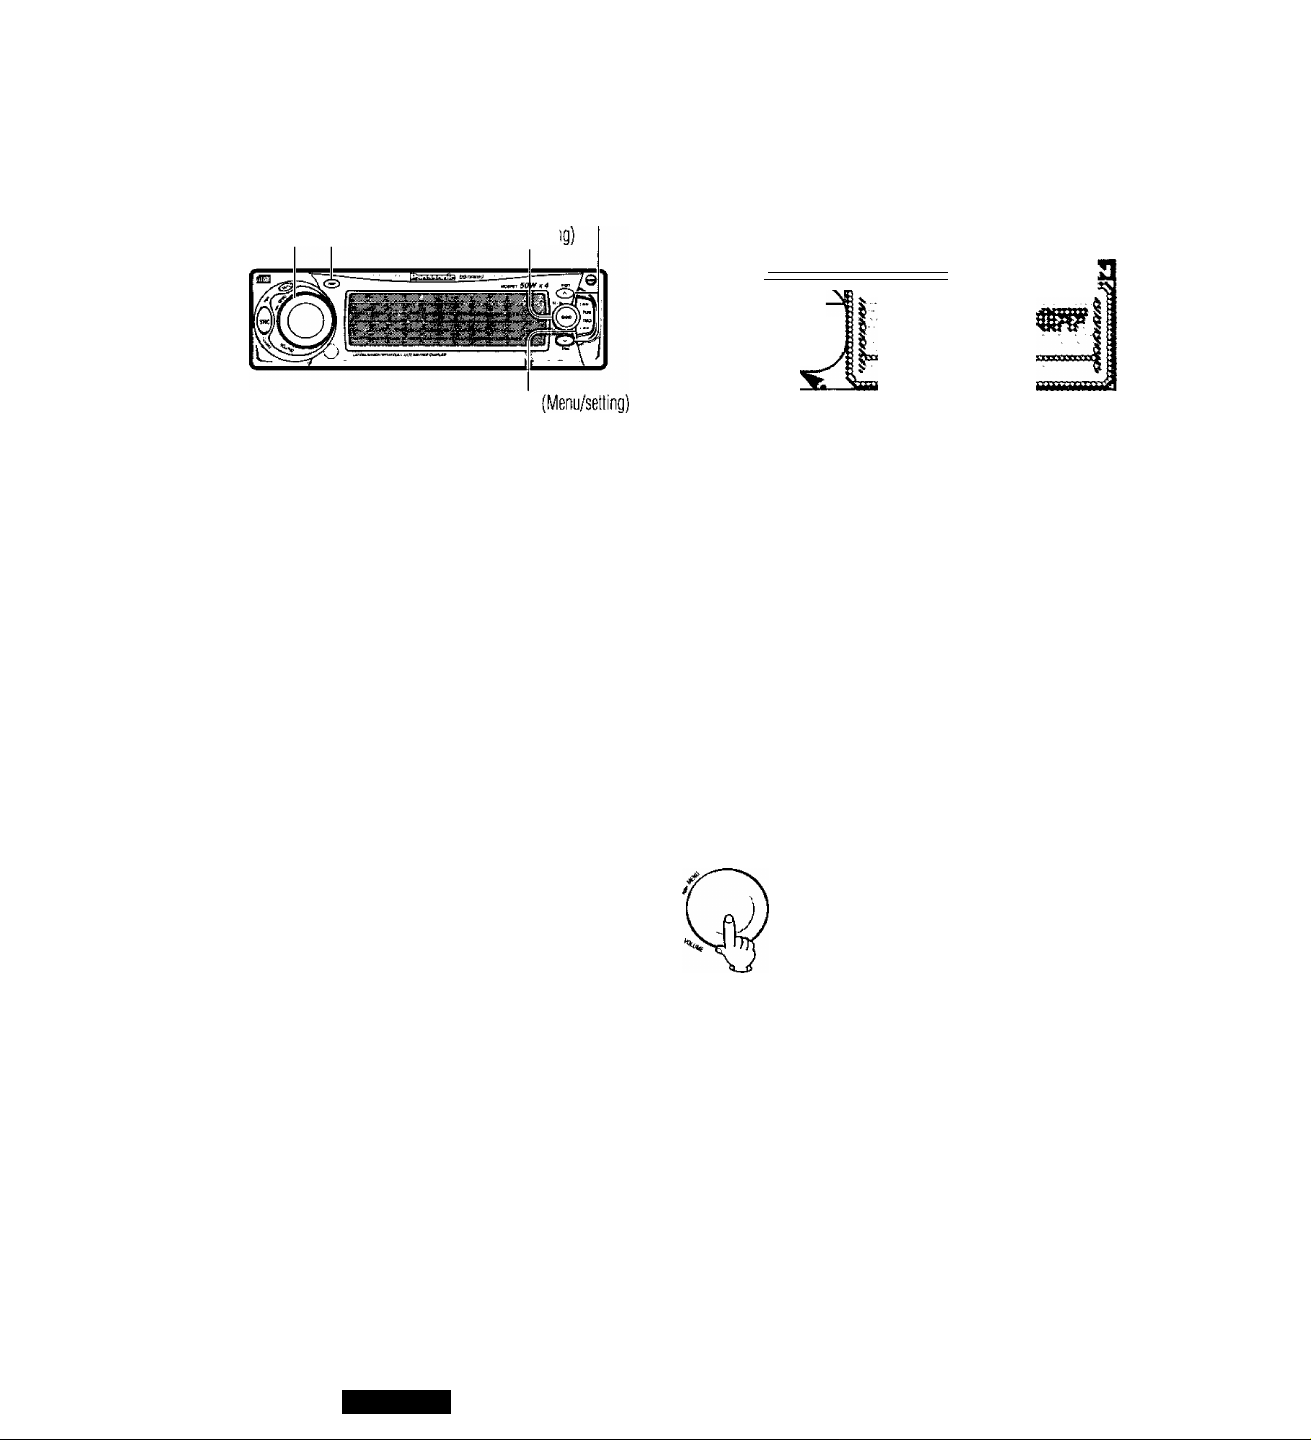
Before Reading these Instructions
You can operate this unit by pressing buttons on the main unit and the remote control unit.
■ These instructions describe buttons that are concerned with operations as follows.
Example: Press [P-SET or [P-SET v]/[^l or [ v].
[buttons on the main unit]/[remate control unit]
Some operations can be activated by pressing buttons only on main unit or remote control unit.
Those cases are described in the instructions.
Example: Press [OPEN] on the main unit.
Remote Control Unit Preparation
Battery Installation
© Remove the battery holder.
Pull the battery holder by the position B while pushing
position A in the direction indicated by the arrow.
© Install the battery on the battery holder.
Set a new battery properly with its “+” side facing up
as shown in the figure.
@ Insert the battery holder.
Push the battery holder back into its original position.
Lithium battery
(included)
Battery Notes
Remove and dispose of an old battery immediately.
Battery Information:
• Battery type: Panasonic lithium battery (CR2025) (included)
• Battery life: Approximately 6 months with normal use (at room temperature)
Caution:
• Improper use of batteries may cause overheating, an explosion or ignition, resulting in injury or a fire.
Battery leakage may damage the unit.
• Do not disassemble or short the battery. Do not throw a battery into a fire.
• Keep batteries away from children to avoid the risk of accidents.
• Be careful to observe proper local disposal rules when you dispose of batteries.
Point the remote control unit at the main unit’s sensor.
16
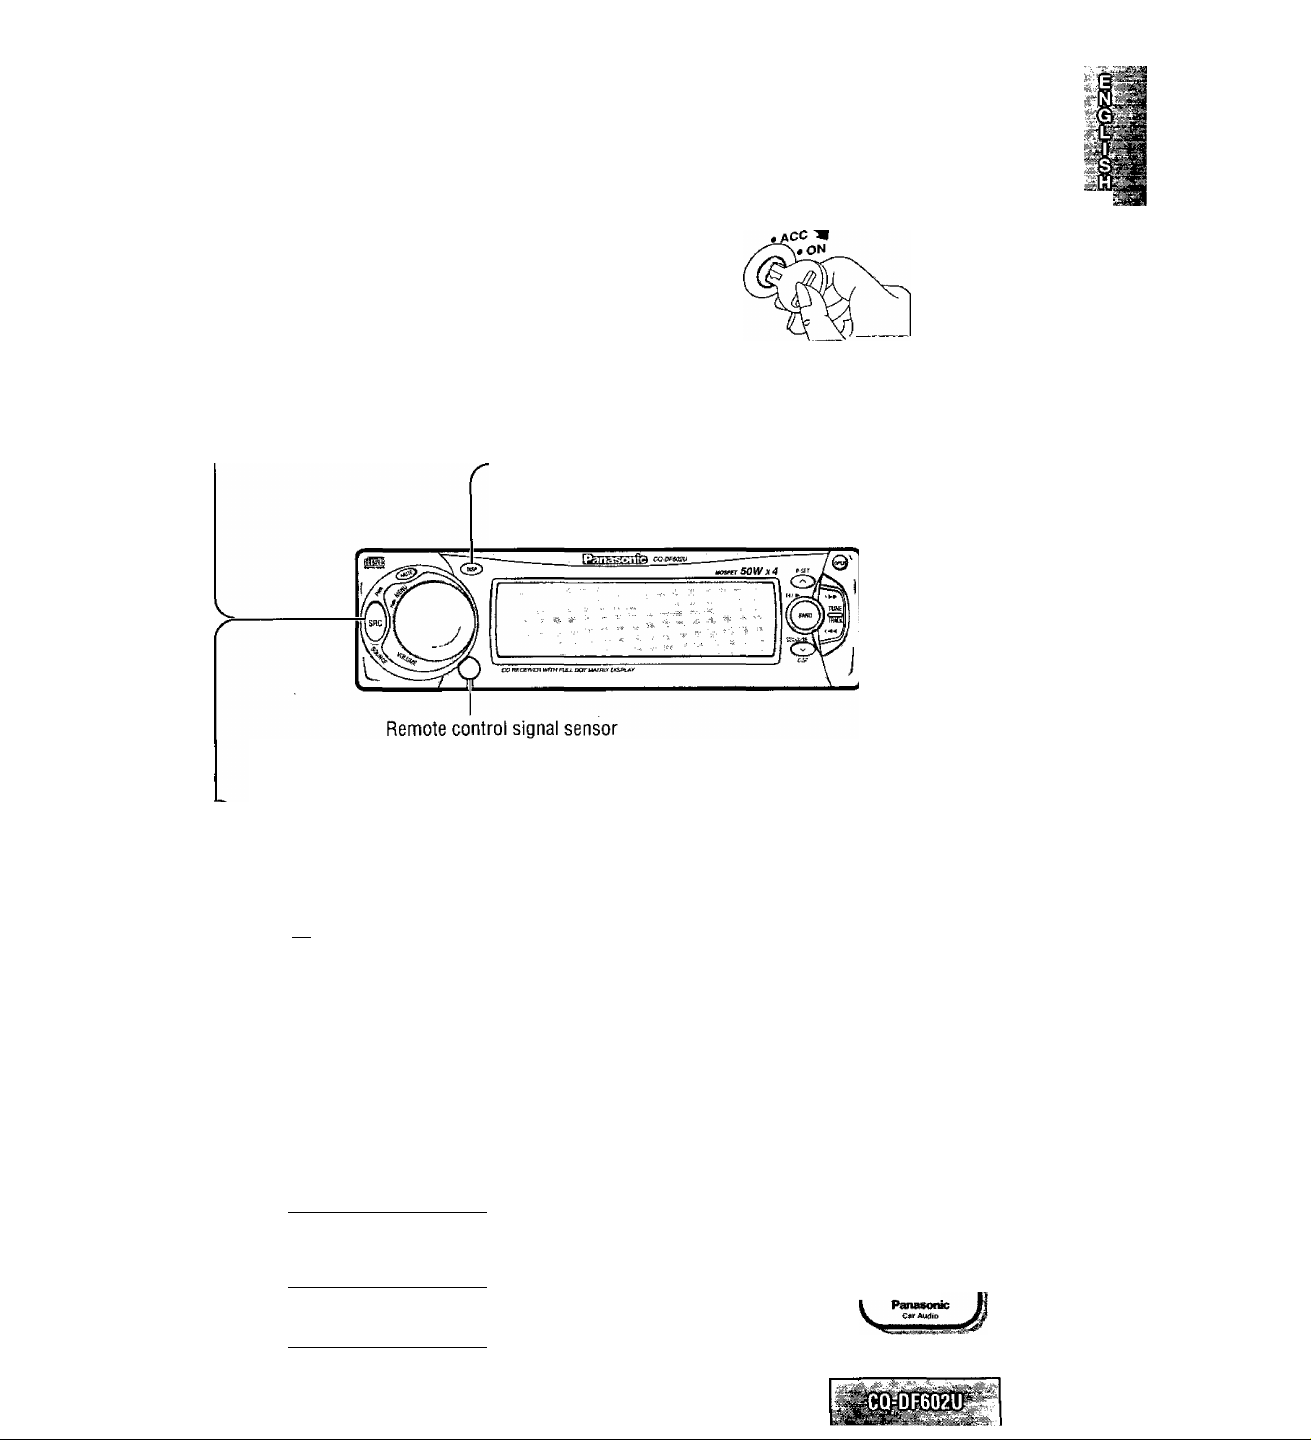
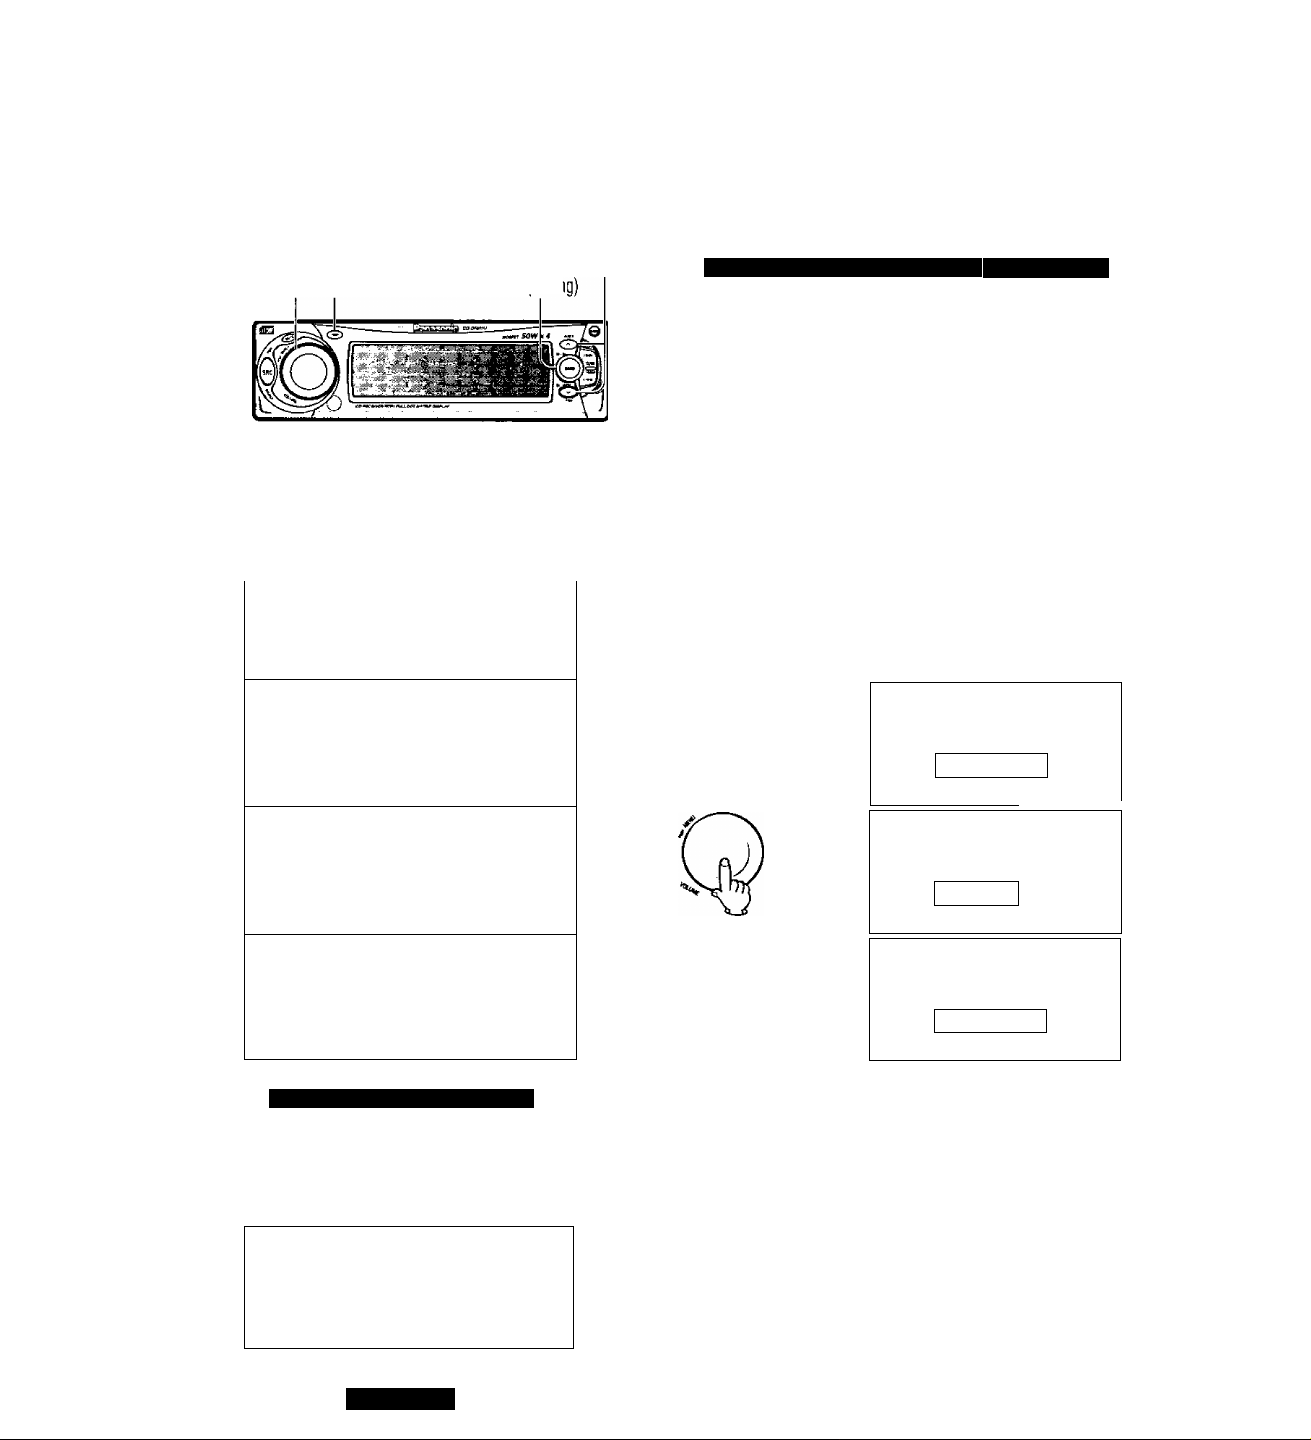
General
Power
Turn the key in the ignition until the accessory in
dicator lights.
ON: Press [SRC] (PWR)/[SOURCEJ (POWER).
OFFiPress and hold [SRC] (PWR)/[SOURCE]
(POWER) again for more than 1 second.
• After turning off the ignition key, a security
message is displayed, and the panel removable
alarm that reminds you to take the panel is acti
vated.
(When security function is set to on page 34)
Note:
When the power is switched on for the
first time, a demonstration message ap
pears on the display.
To cancel this display, press [DISP] (dis
play).
Source
Press [SRC] (SOURCE)/[SOURCE] to change the source.
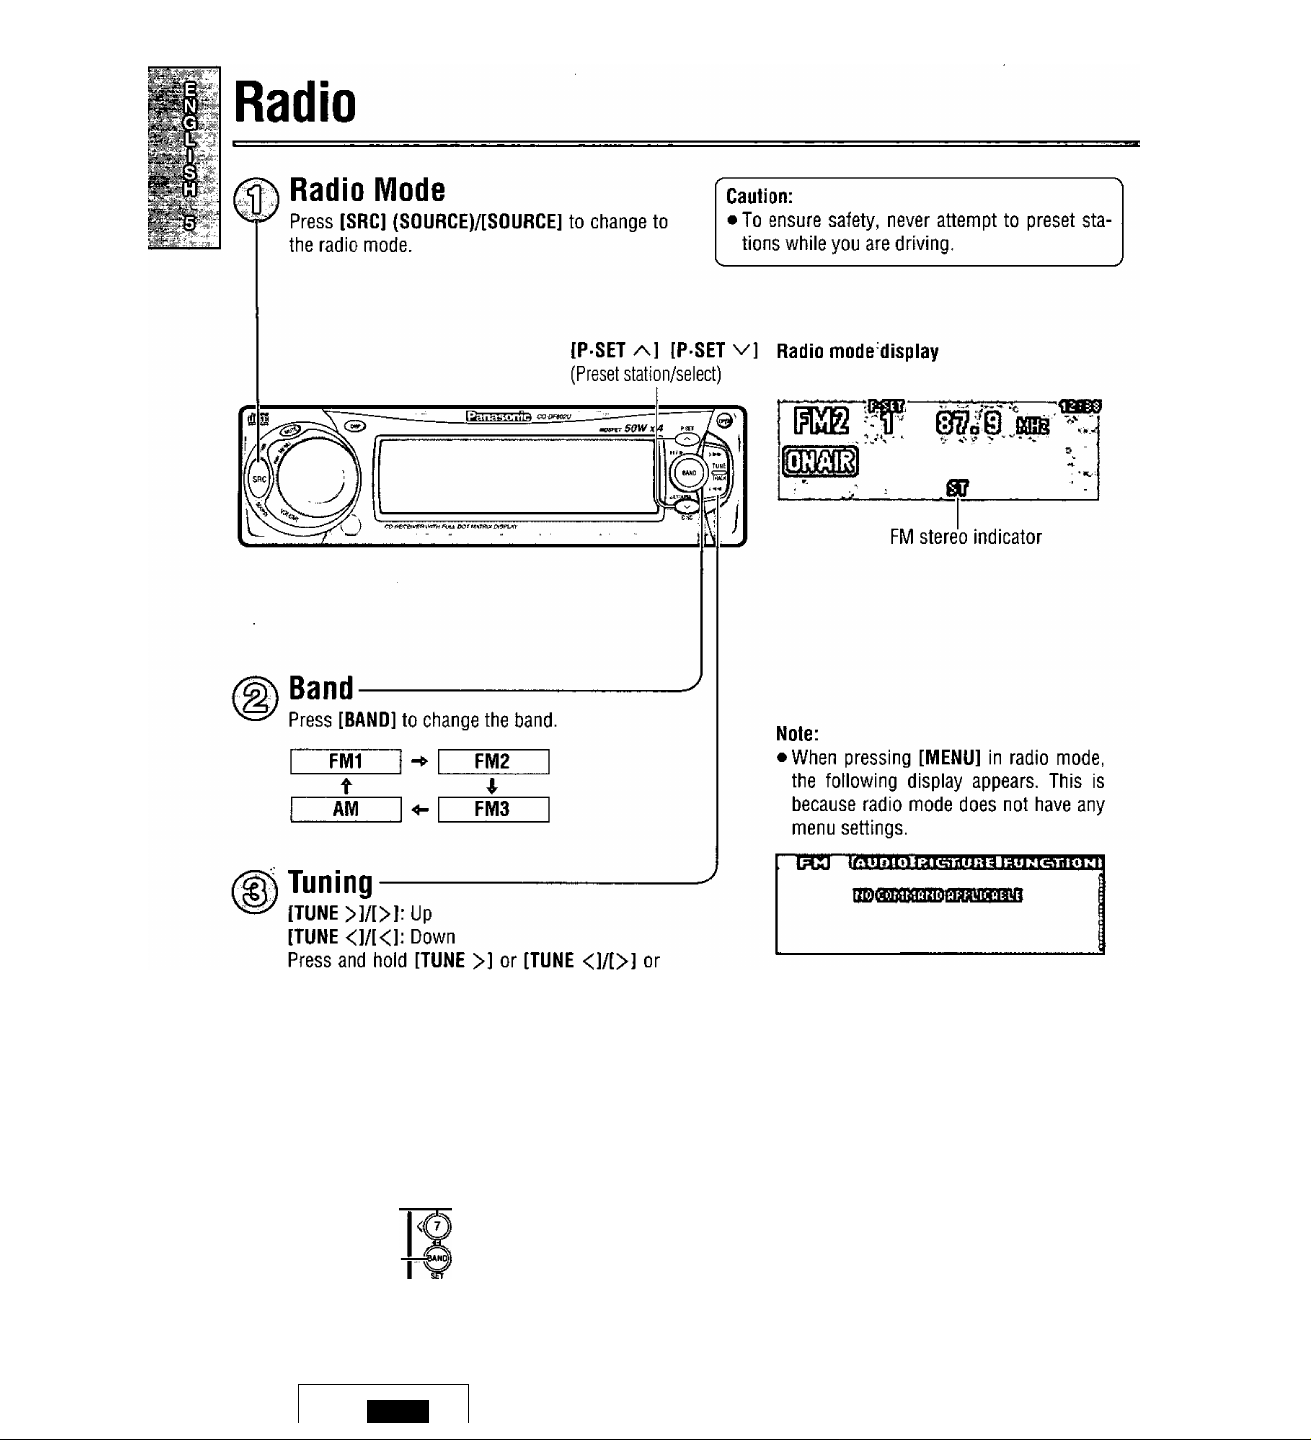
Radio
IWT OB.0bb'
rm
CD player
^ § (When a CD is in the player.)
CD changer control
S
AUX-IN setting
!«
jc«»
_____
(When a CD changer is con
nected and magazine is in the
changer.) (^ page 26)
1
1
[SOURCE]
(POWER)
(E)iS
~«aa
SCAN
®0|-[DISP]
^ ^ (Display)
17
General
(Continued)
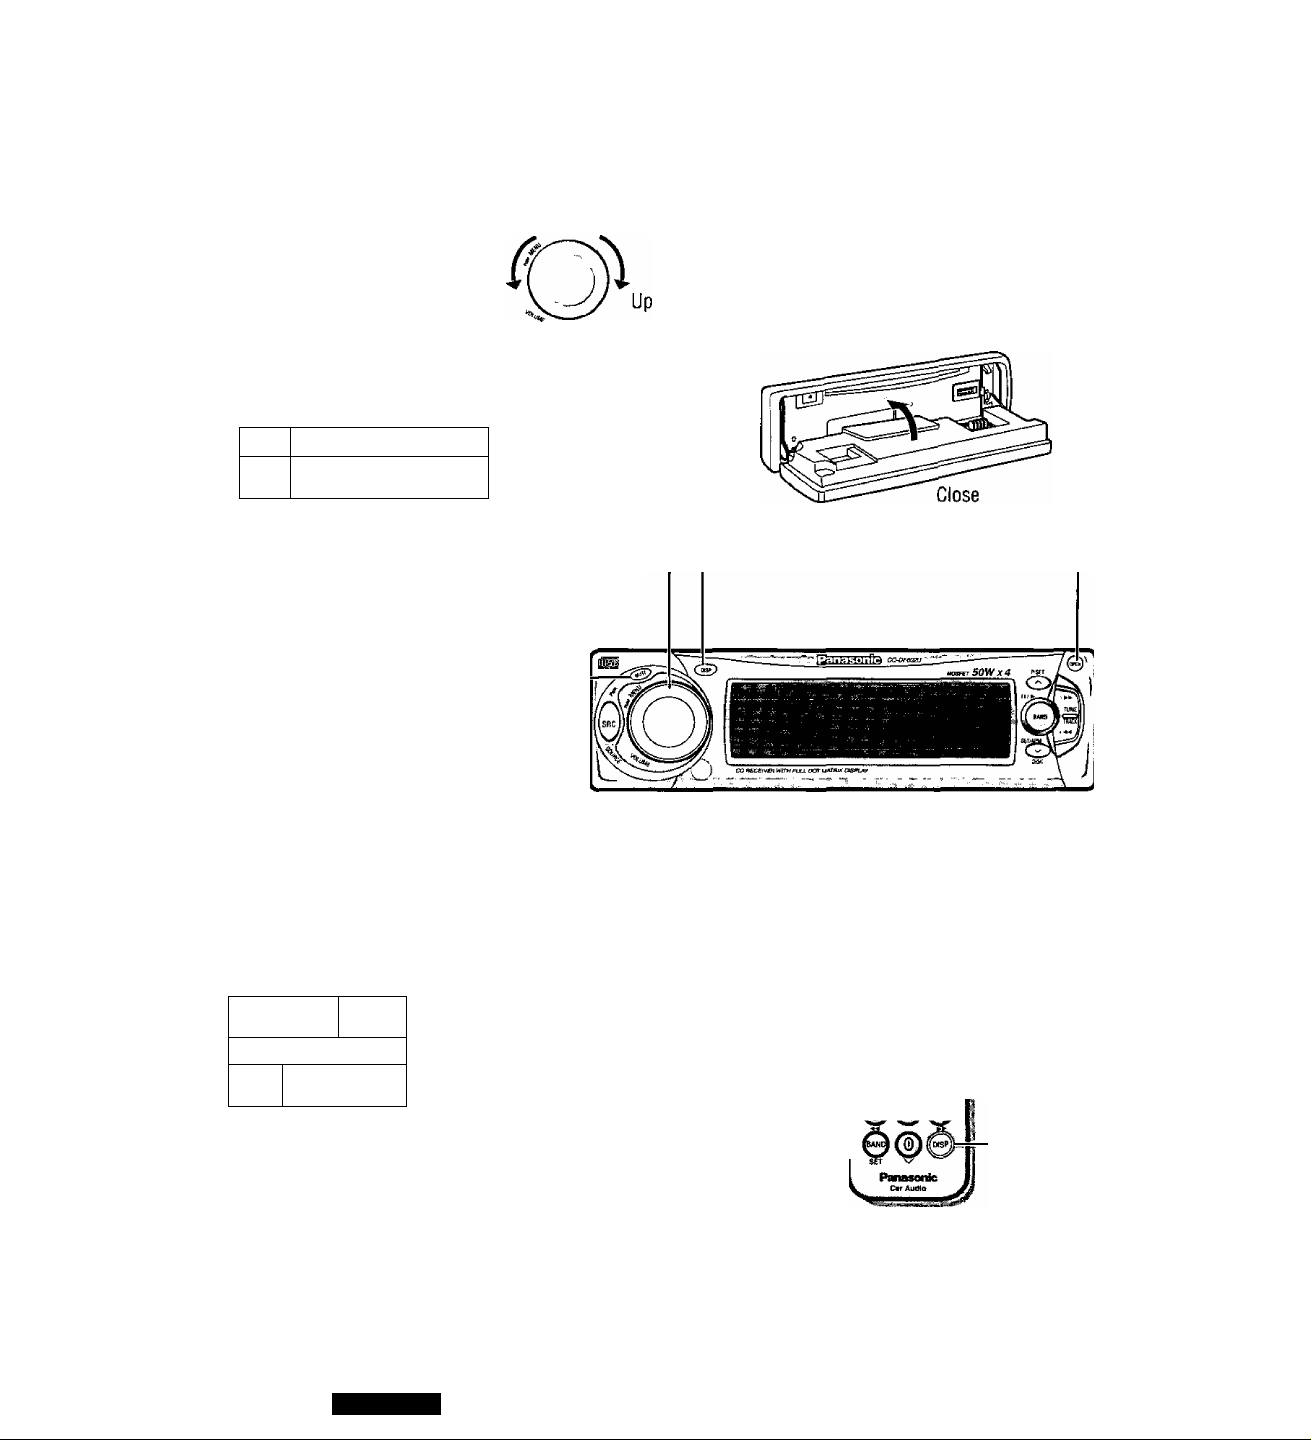
Volume
On the main unit:
Turn [VOLUME] dial
Ciockwise: Up
Counterclockwise: Down
On the remote control unit:
IVOL AJ: Up
[VOL V]: Down
(W
Note:
• The sound level for each source is stored in
memory.
(There is one voiume setting for AM radio band
and one voiume setting for FM radio band.)
--------------
i 1
IIIHMHÉM ■n»
lit. Jr
-----------------
Down
Setting range:
Oto 40
—J
Open/Close the Front Panel
OPEN: Press [OPEN] on the front panel.
CLOSE: Raise the panei by hand.
Mute/Attenuation
ON: Press [MUTE].
OFF: Press again.
: l\lo sound.
■ -
: Decrease the volume to Vio.
Decreasing volume range depends on setting.
(^ page 34)
Caution:
• To avoid damaging the front panel, do not push it down or place objects on it while it is open.
• Do not pitch your finger or hand in the front panel.
• Do not insert foreign matter into the disc siot.
18
CQ-DF602U
[MUTE]—0
[sel)î/v^=|-[VQL
[VOL V]
{Voiume)
HA№ rIp
[DISP]
(Dispiay)

— Display Change
Press [DISP] (display).
m itï/Àt
When Power is ON
Mode display
Mode and spectrum analyzer display
Spectrum Analyzer (S A) display
If you press a button, the mode and spectrum analyzer display
appear for 5 seconds.
Mode and clock display
iO
$yi-lD]j[spj|g5F^
Display and light otf (when it is turned on.)
^ If you press a button, the light is turned on, the mode display appears
for 5 seconds, and the light is turned off again.
Press and hold [DISP] (display) for more than 2 seconds.
• The audio indicator is displayed and returns to the previous display.
I'SlHse VooM
• When the Indicator lights, the audio function (S-HDB/SUB W) is now
activated.
Press [DISP] (display) again to cancel.
When Power is OFF
Press [DISP] (display).
Note:
• Set the Spectrum Analyzer (S-A) display pattern In a separate procedure. («► page 32)
: Displays before adjusting the clock, (■ * page 34)
Clock display
Display and light off
AUDlO^'lMDIGATORt’««*.
............
..
CQ-DF602U
19
[<] for more than 0.5 seconds, then release.
Seeking will start.
PC^Ft
[SOURCE]
[<][>] —
(Tune)
[BANDl(SET)
{Auto preset
memory)
--------
-0
■m to [6]
(Preset station)
r
[^][v]
I
(Preset station/
^
select)
20
.%>s •
DF.602U
1
One-Touch Selection of a Preset Station
Up to 6 stations each can be saved in the FIV11, FM2, FM3 and AM preset station memories.
© Seiect a band and frequency (steps (JD, ® and ® on the previous
page).
@ Press and hoid [P-SET /\] or [P-SET v]/[/\] or [v] for more than
2 seconds untii the preset number blinks.
@ Press [P-SET /\] or (P-SET v]/[/\] or [v] to seiect a preset num
Manual Preset Memory
Manuaiiy save a station in
the preset memory.
ber (1-6).
@ Press and hold [P-SET /\] or [P-SET v]/[/\) or [v] for more than
2 seconds to memorize. ,
oThe display blinks once, and a re- SSolhaffiS >
ceiving station is saved in the
Note:
® Frequency setting can be performed even after selecting a preset number.
Entering numbers directly on the remote control unit
© Select a band and frequency (step (SD, ® and ® on the previous
page).
@ Press and hold [1] to [6] for more than 2 seconds to memorize.
--------------------------
__ \ I X
Preset number
:y\
----
1——
© Select a band (steps ф and ® on Scanning:
the previous page). ^
Auto Preset
Memory (АРМ)
Automatically save rela
tively strong stations in
the preset memory.
Note:
New stations are overwritten on existing saved stations after following this procedure.
Preset Station Calling
@ Press and hold [BAND] (АРМ) for
more than 2 seconds.
• The 6 strongest available stations \wi!l be automatically saved in the mem
ory under preset number 1 to 6.
©Once set, the preset stations are sequentially scanned for 5 seconds
each. (Scanning)
• Press [P-SET or [P-SET v]/[^] or [ v] for the broadcast you mn\
to listen to.
(Press [11 to [6] on the remote control unit.)
© Select a band (steps (3) and 0 on the previous page).
Press [P-SET ^1 or [P-SET v]/[/\] or [v] to select the preset
number for tuning in the preset station.
(Press [1] to [6] on the remote control unit.)
GQIDE602U
21
CD Player
I
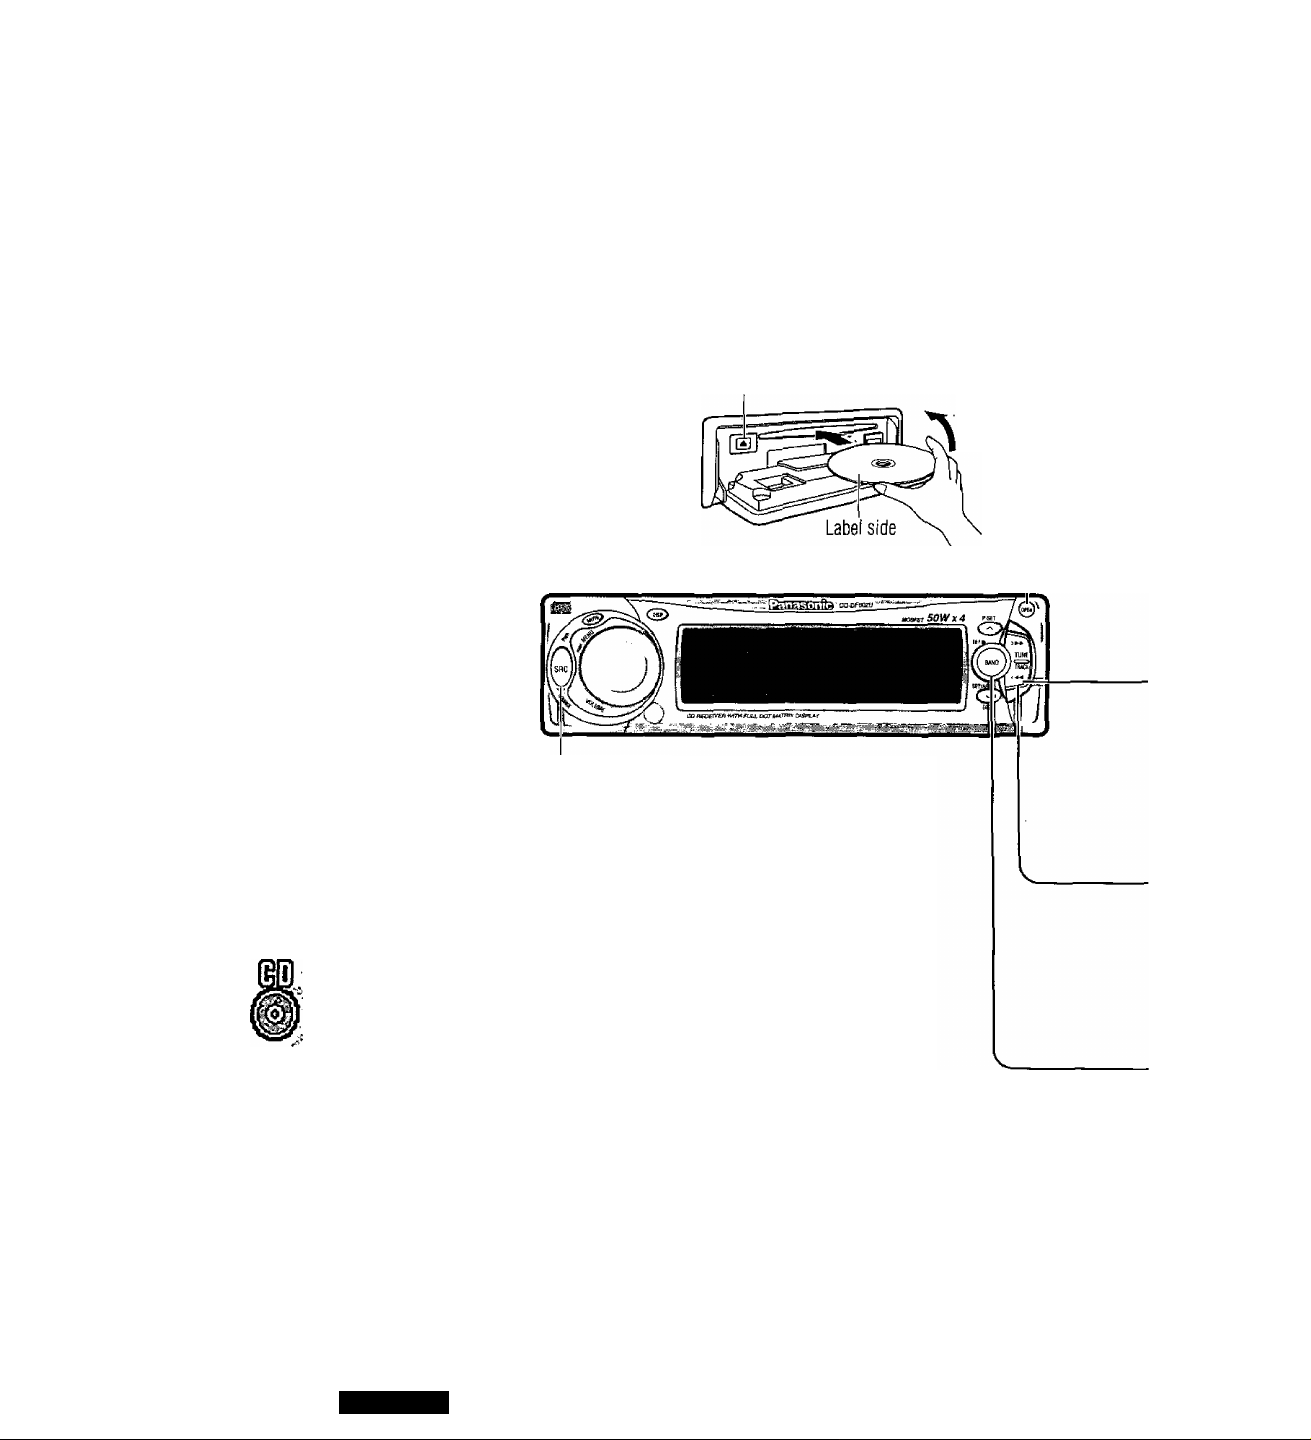
Disc Insert and Playback
Open the front panel.
O
Press [OPEN] on the front panel.
Insert the disc.
Playback will start automatically after the unit
recognized the loaded disc as an ordinary
music CD. (When a CD-R or CD-RW which has
CD-DA formatted data as the same as an ordi
nary music CD is loaded, this unit recognizes it
as an ordinary music CD.)
Close the front panel manually.
A (Eject)
Close
[SRC] (SOURCE)
Note;
• Loading a disc when the power is off allows the
power to be turned on.
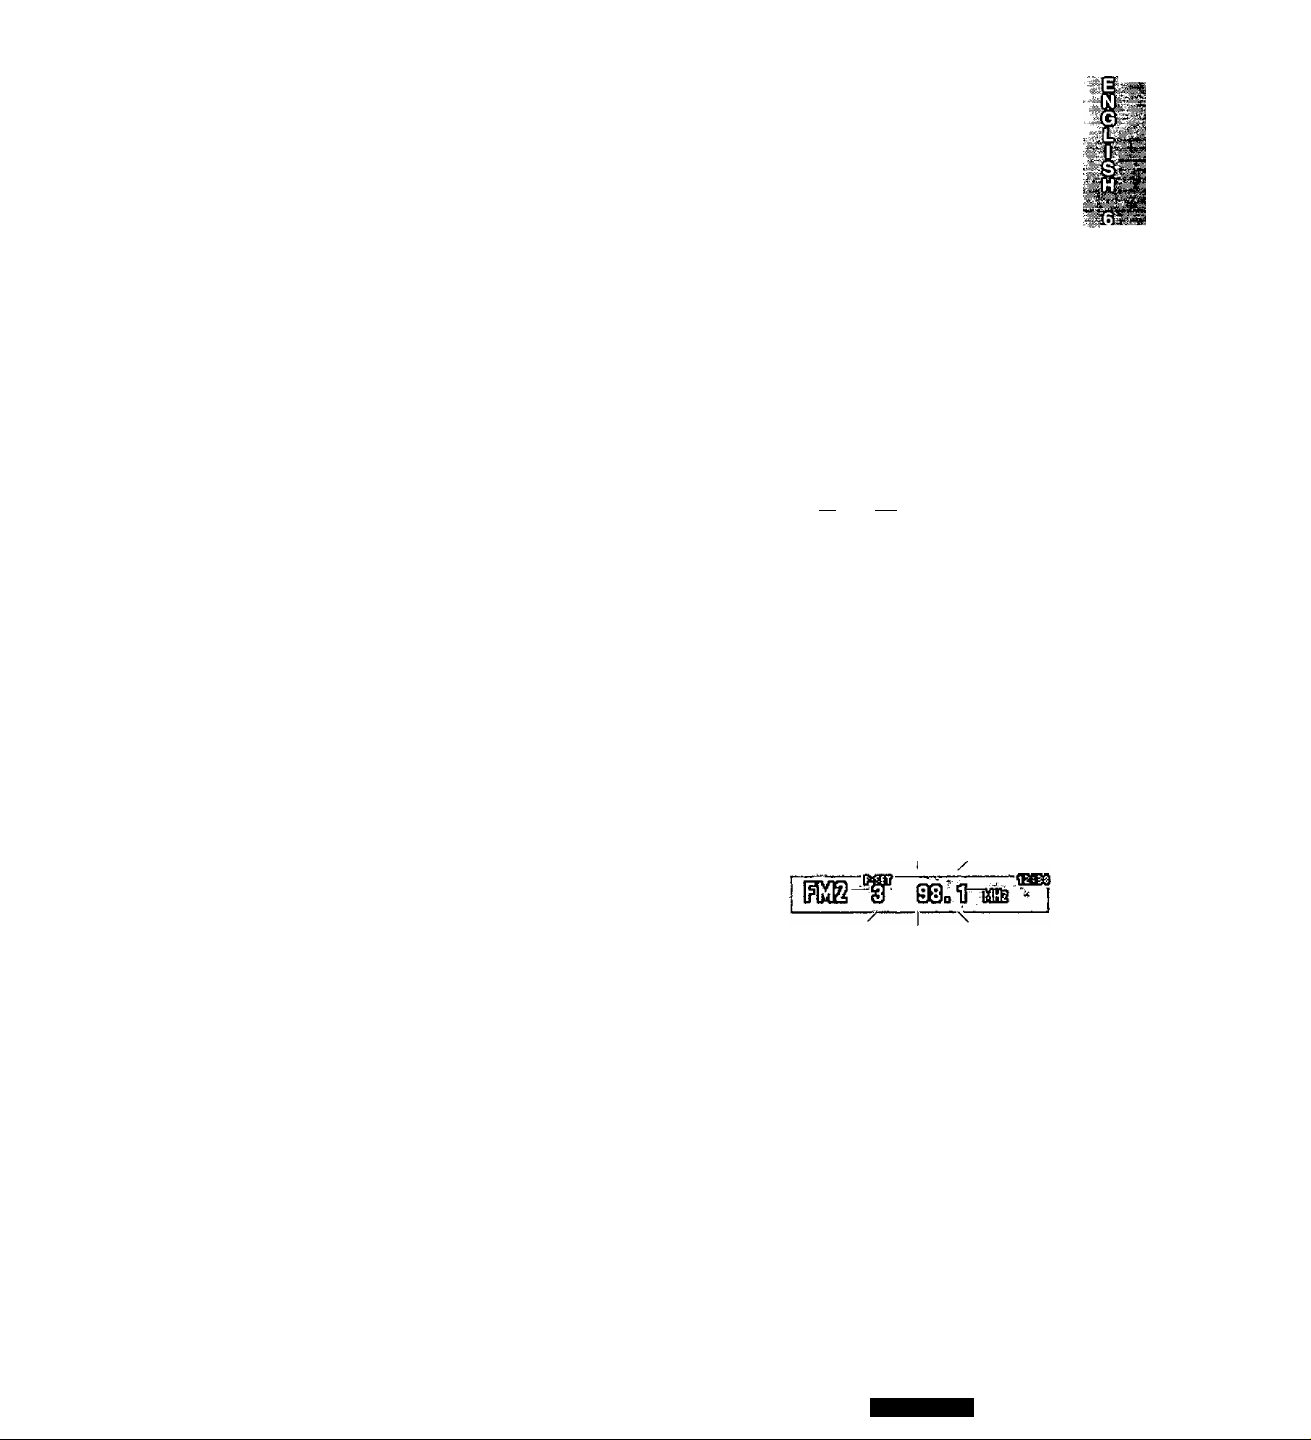
CD player mode display
Track number Track playing time
• Do not insert a disc when this indicator
• Lights when the disc is loaded/played.
Scan, random and repeat indicator
Slop and Disc Eject
(T) Press [OPEN] on the front panel.
@ Press [A] (eject) to stop CD play and eject the
disc.
Note:
• Ejecting the disc when the unit is in the CD player
mode allows the power to be turned off.
lights.
22
CQ-DF602U
Caution:
• Only 5" (12 cm) CD, CO-DA data recorded CD-R and CD-RW dises are available for this unit.
• This unît does not support CD text display.
• This unit does not support MP3 disc playback.
• Refer to page 41 about notes on CD-Rs/RWs.
• To avoid damaging the front panel, do not push it down or place objects on it while it is open.
• Do not use irregular shaped discs.
• Do not use discs that have a seal or label attached.
• Do not insert foreign matter into the disc slot.
Listening to a CD
CD Piayer Mode
(When CD is in the player)
Press [SRC] (S0URCE)/[S0URCE1 to change to CD
player mode.
Playback will start automatically.
Track Selection
[TRACK ► ► ]/[► ► ]: Advance to the next track.
[TRACK ◄ ◄ ]/[◄ ◄ ]: Back to beginning of the cur
rent track.
Back to previous track
(Press twice.)
Track Search
Press and hold.
[TRACK ► ► ]/[► ► ]: Fast forward
[TRACK ◄ ◄ ]/[◄ ◄ ]; Fast backward
Release to resume the regular play.
Pause
Press [BAND] (ll/^).
Press [BAND] (!!/► ) again to cancel.
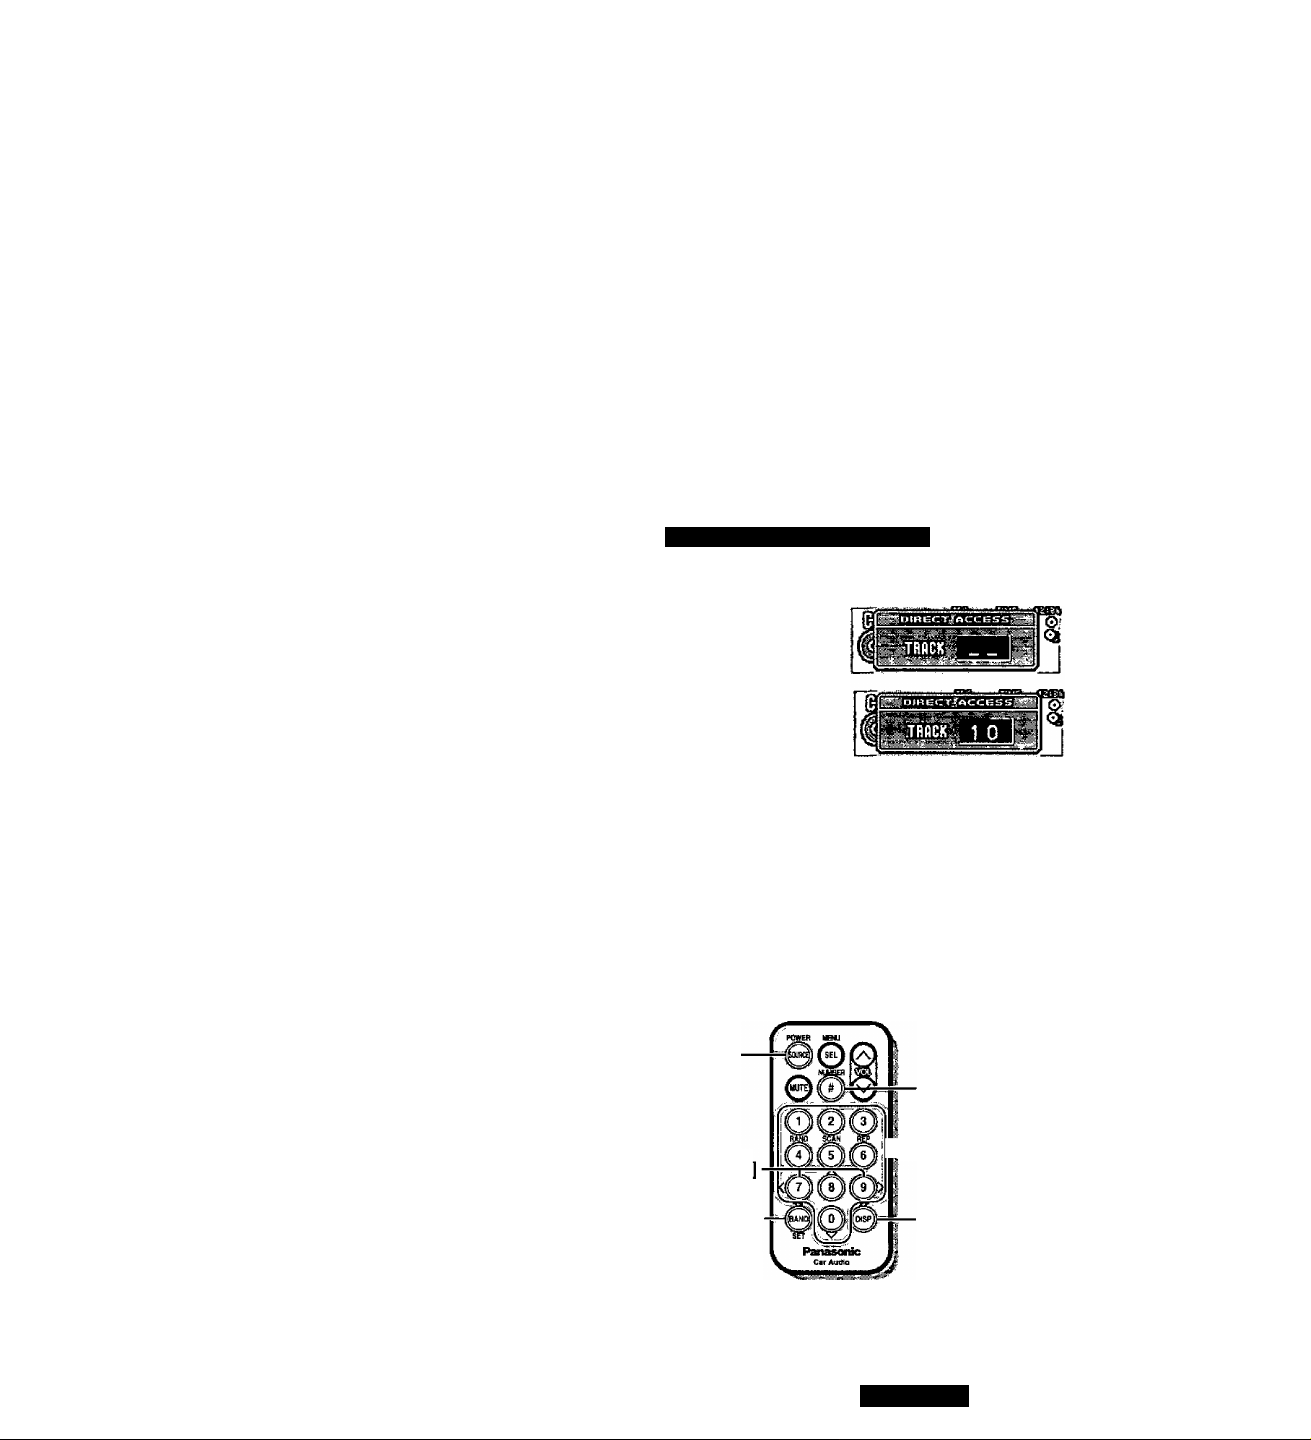
Direct Track Seiection
Only for the remote control unit
Example: track number 10
© Press [#] (NUMBER).
©Press [1][0].
@ Press [BAND] (SET) to set.
The corresponding track starts playing.
0 ms ^
Note:
• Press [DISP] (display) or [#] (NUMBER) to re
turn to the regular mode.
[SOURCE]
[#] (NUMBER)
^[01 to [9]
[◄◄] [►►
(Track)
[BAND] (SET)
(Pause)
(Track number)
[DISP]
(Display)
CQ-DF602U
23
CD PISySr (Continued)
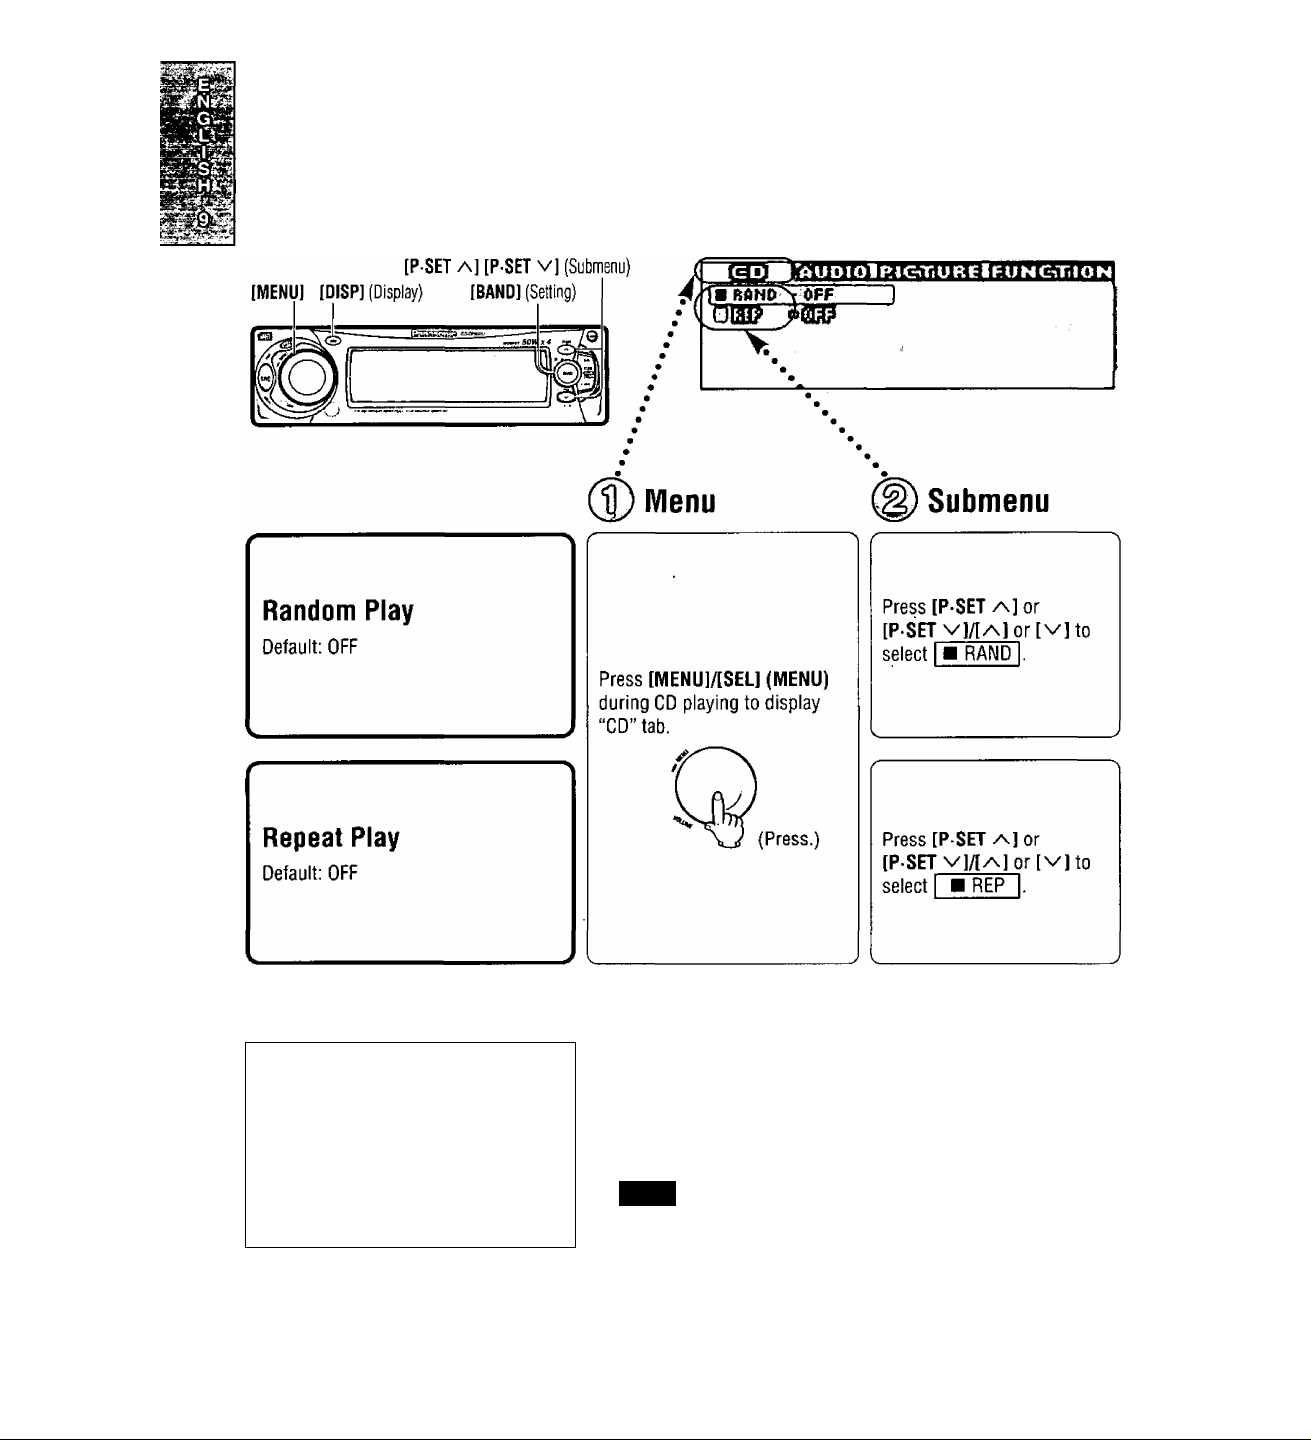
Menu Setting on CD Player Mode
Scan Play
Default: SCAN OFF
24
When Ihe menu is not displayed
Press [5J (SCAN) to change setting.
;The first 10 seconds of each track
plays in sequence.
siBm
: Cancel
rÀUDiotfïi&TiUiisli'UHémtOH
[Wmnd^IöffIX
ütdtf
Note:
o Operations except setting should be performed after
returning to the mode display,
o Press [MENU], IDISPl (display) to return to the reg
ular mode.
Direct setting on the remote con
trol unit when the menu is not
displayed
Press 14] (RAND) to change setting.
RÀNDQHlIÜN
BMDQMlOÇfa
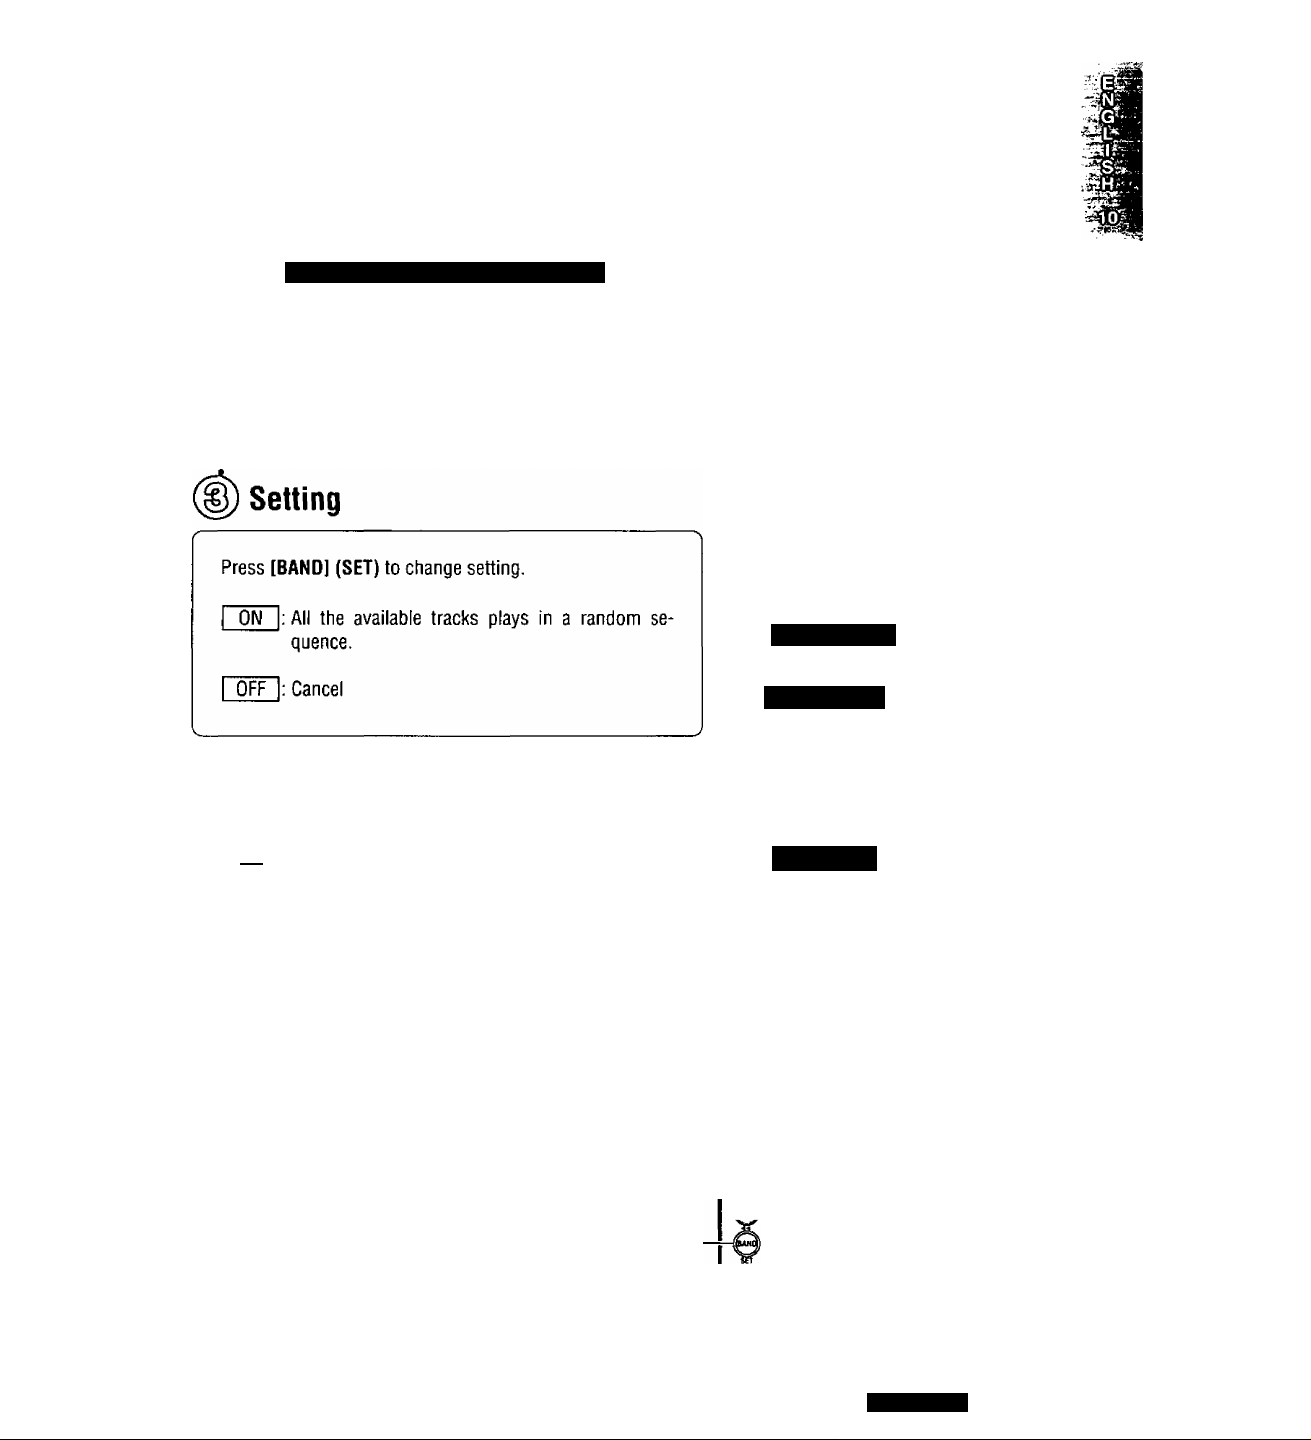
Press [BAND] (SET) to change setting.
ON : Repeat the current track.
OFF : Cancel
[SEL] (MENU)-
[5] (SCAN)
[4](RAND)
[BAND] (SET)
Press [6] (REP) to change setting.
refïeMïün
■'(Qr'
[6] (REP)
<mÌ8
I
OS'K
[/\] [V]
[DISP]
(Display)
(Submenu)
CQmR602U
25
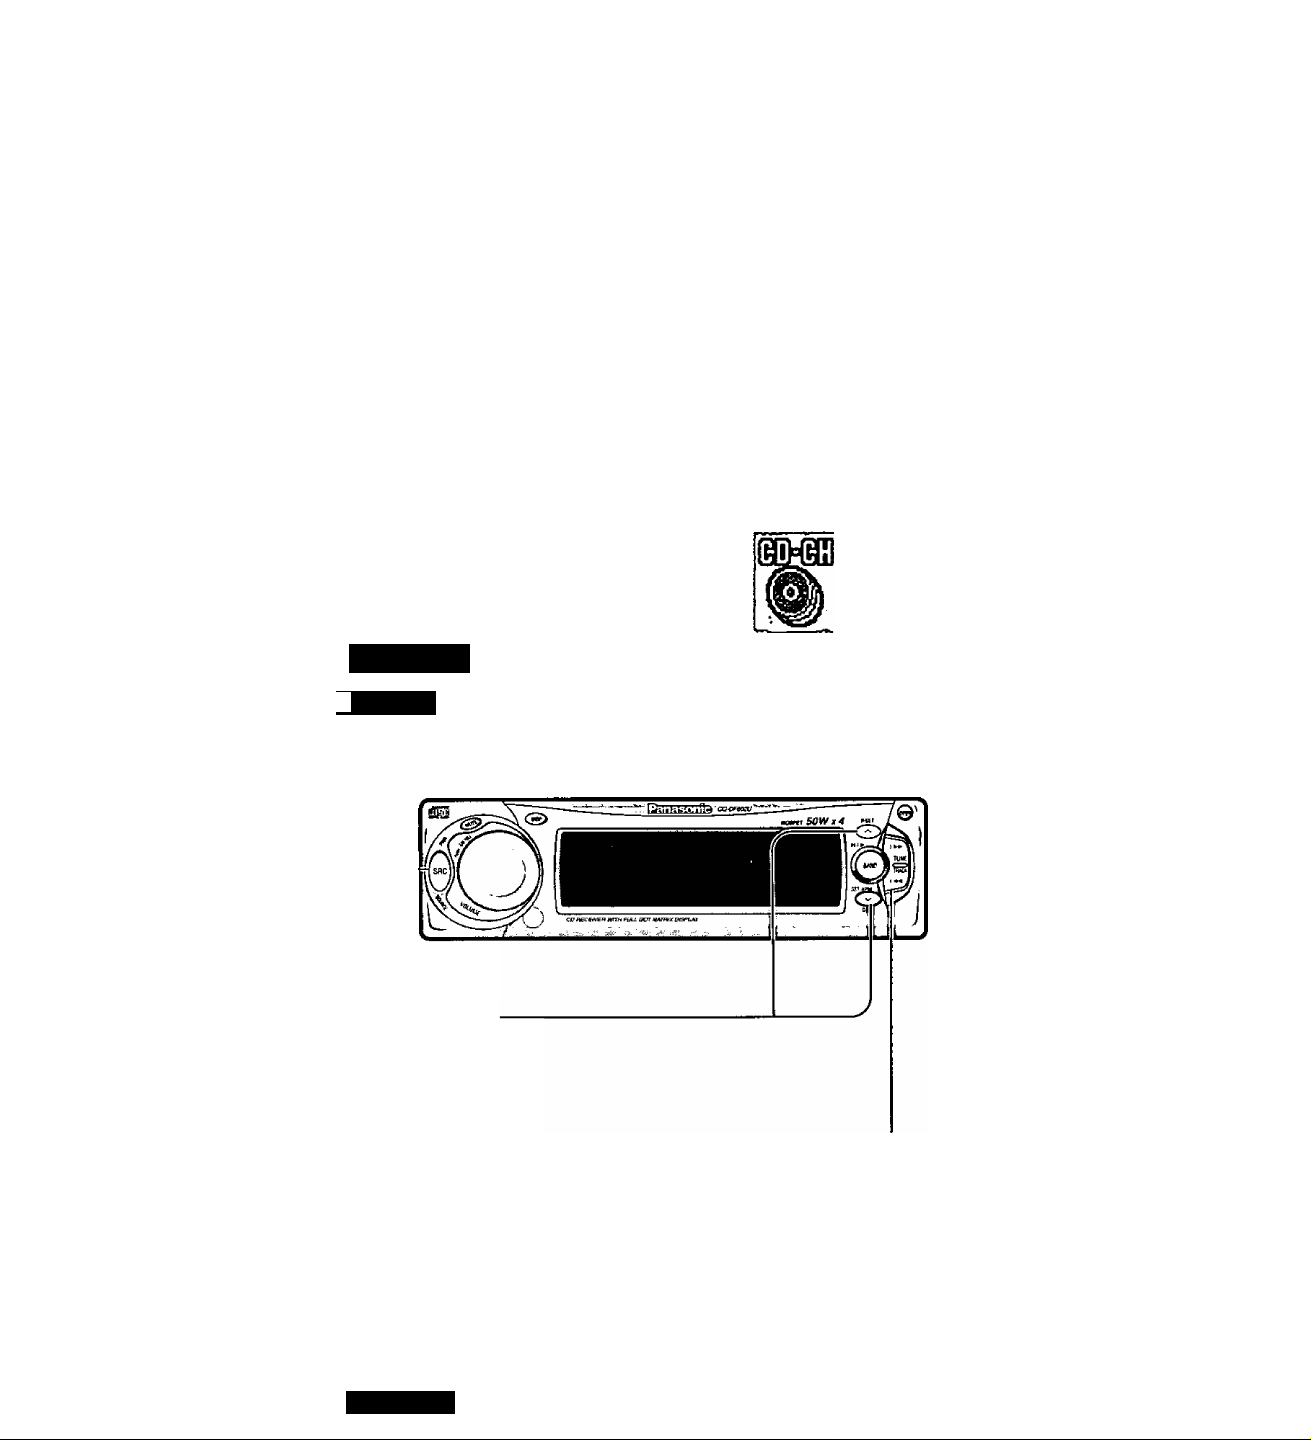
CD Changer Control
CD changer functions are designed for optional Panasonic CD changer unit.
Preparation:
• Connect the CD changer, and load a magazine (disc).
Note:
• Loading a magazine when the power is off allows the power to be turned on.
• Ejecting the magazine when the unit is in the CD changer mode ailows the power to be turned off.
• This unit does not support CD-ROM, CD-R or CD-RW playback through the CD changer. Use the CD changer
to listen to normal music CD’s exclusively.
• Pausing does not function in the CD changer mode.
CD Changer Mode
(When a CD changer is connected and a maga
zine is in the changer.)
Press [SRC] (SOURCE)/[SOURCE] to change to
CD changer mode.
Playback starts automatically.
Note:
ijVQlDISjg
MAGAZINEMED’
Load a magazine
with CDs.
Magazine is ejected
in the CD changer
mode.
CD changer mode display
Disc number Track number
Track playing time
Scan, random and repeat indicator
• Lights when the changer (magazine) is
connected.
• Lights when the disc is played.
26
Disc Selection
e
[DISC ^]/i^]; Next disc.
[DISC v]/[vj; Previous disc.
Track Selection
o
[TRACK ► ► ]/[► ► ]: Advance to the next track.
[TRACK ◄ ◄ ]/[◄ ◄ ]: Back to the beginning of the
current track.
Back to the previous track.
(Press twice.)
CQ-DF602U
Track Search
Press and hold.
[TRACK ► ► ]/[► ► ]: Fast forward
[TRACK ◄ ◄ ]/[◄ ◄ ]; Fast backward
Release to resume the regular play.
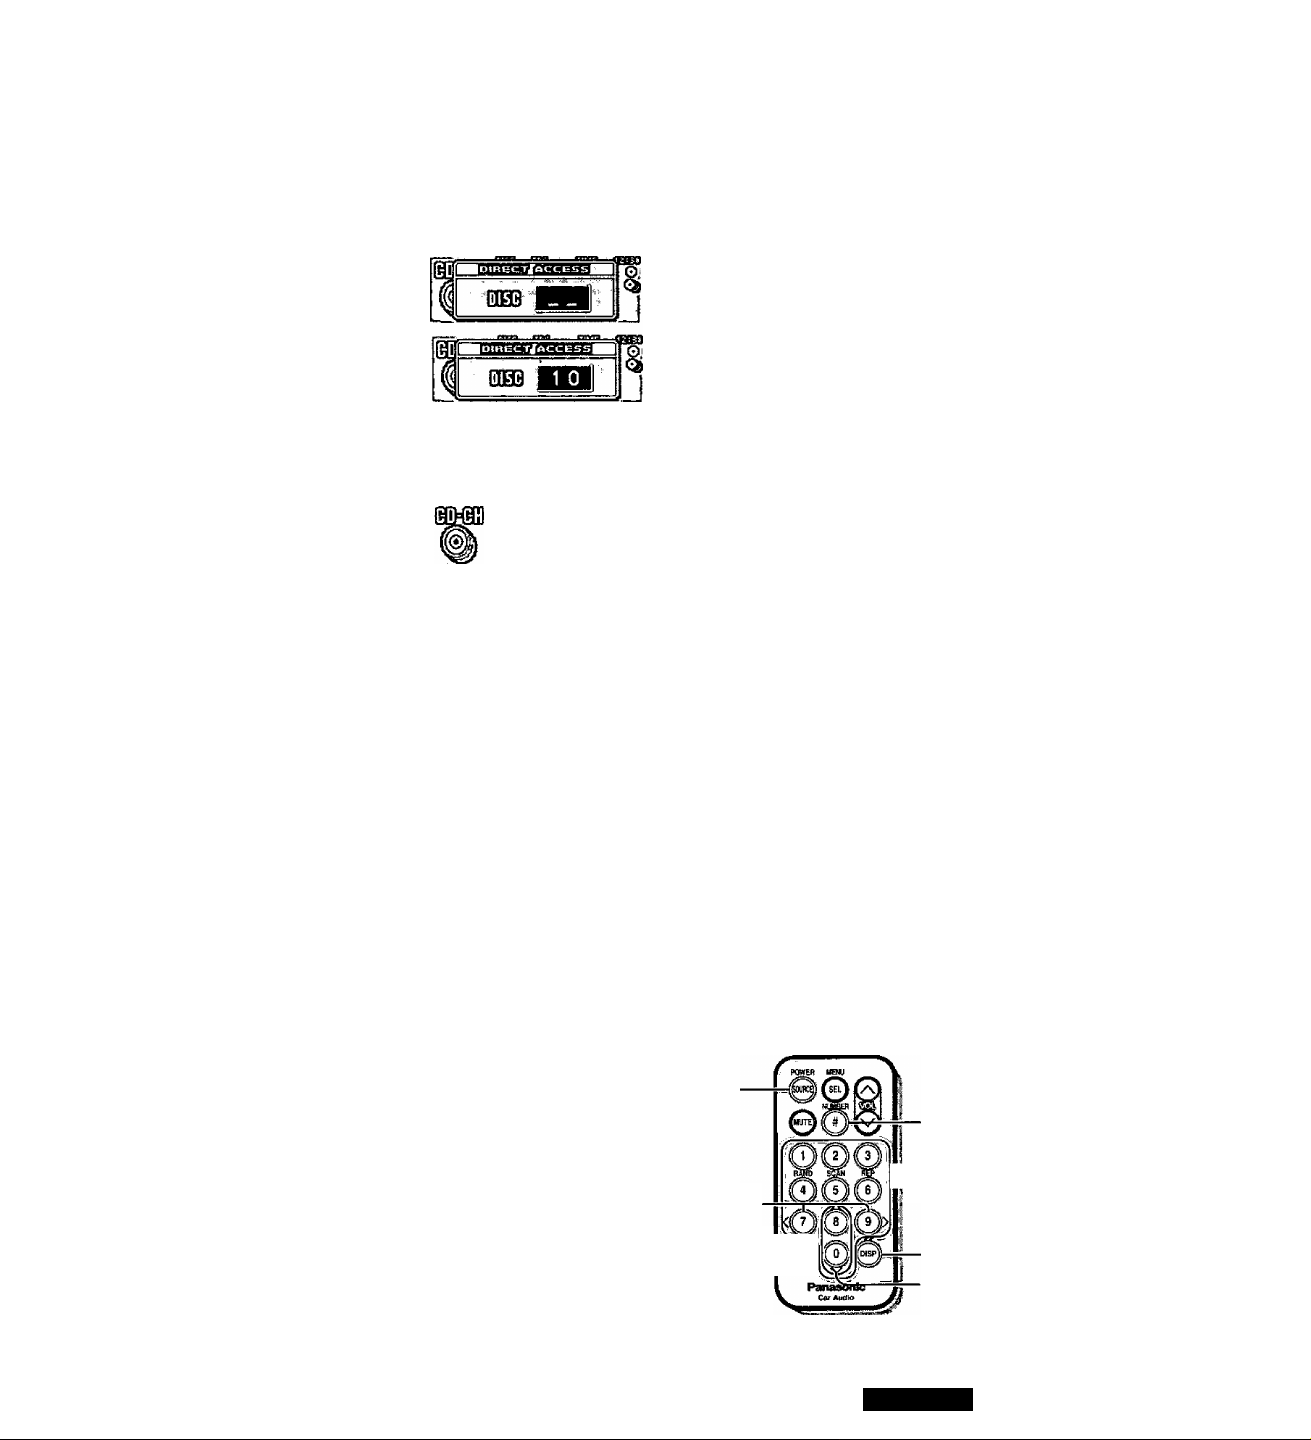
Direct Disc Selection
Example: disc number 10
© Press [#] (NUMBER).
Press [1][0],
©Press [BAND] (SET) to set.
The first track of the corresponding disc starts
playing.
Note:
• Press [DISP] (display) or [#] (NUMBER) to re
turn to the regular mode.
[SOURCE]
[◄◄][►►]
(Track)
[BAND] (SET)—Q
!— [0]
to
(Disc number)
[DISP] (Display)
[^][v]{Disc)
CQ-DF602U
[#] (NUMBER)
[9]
27
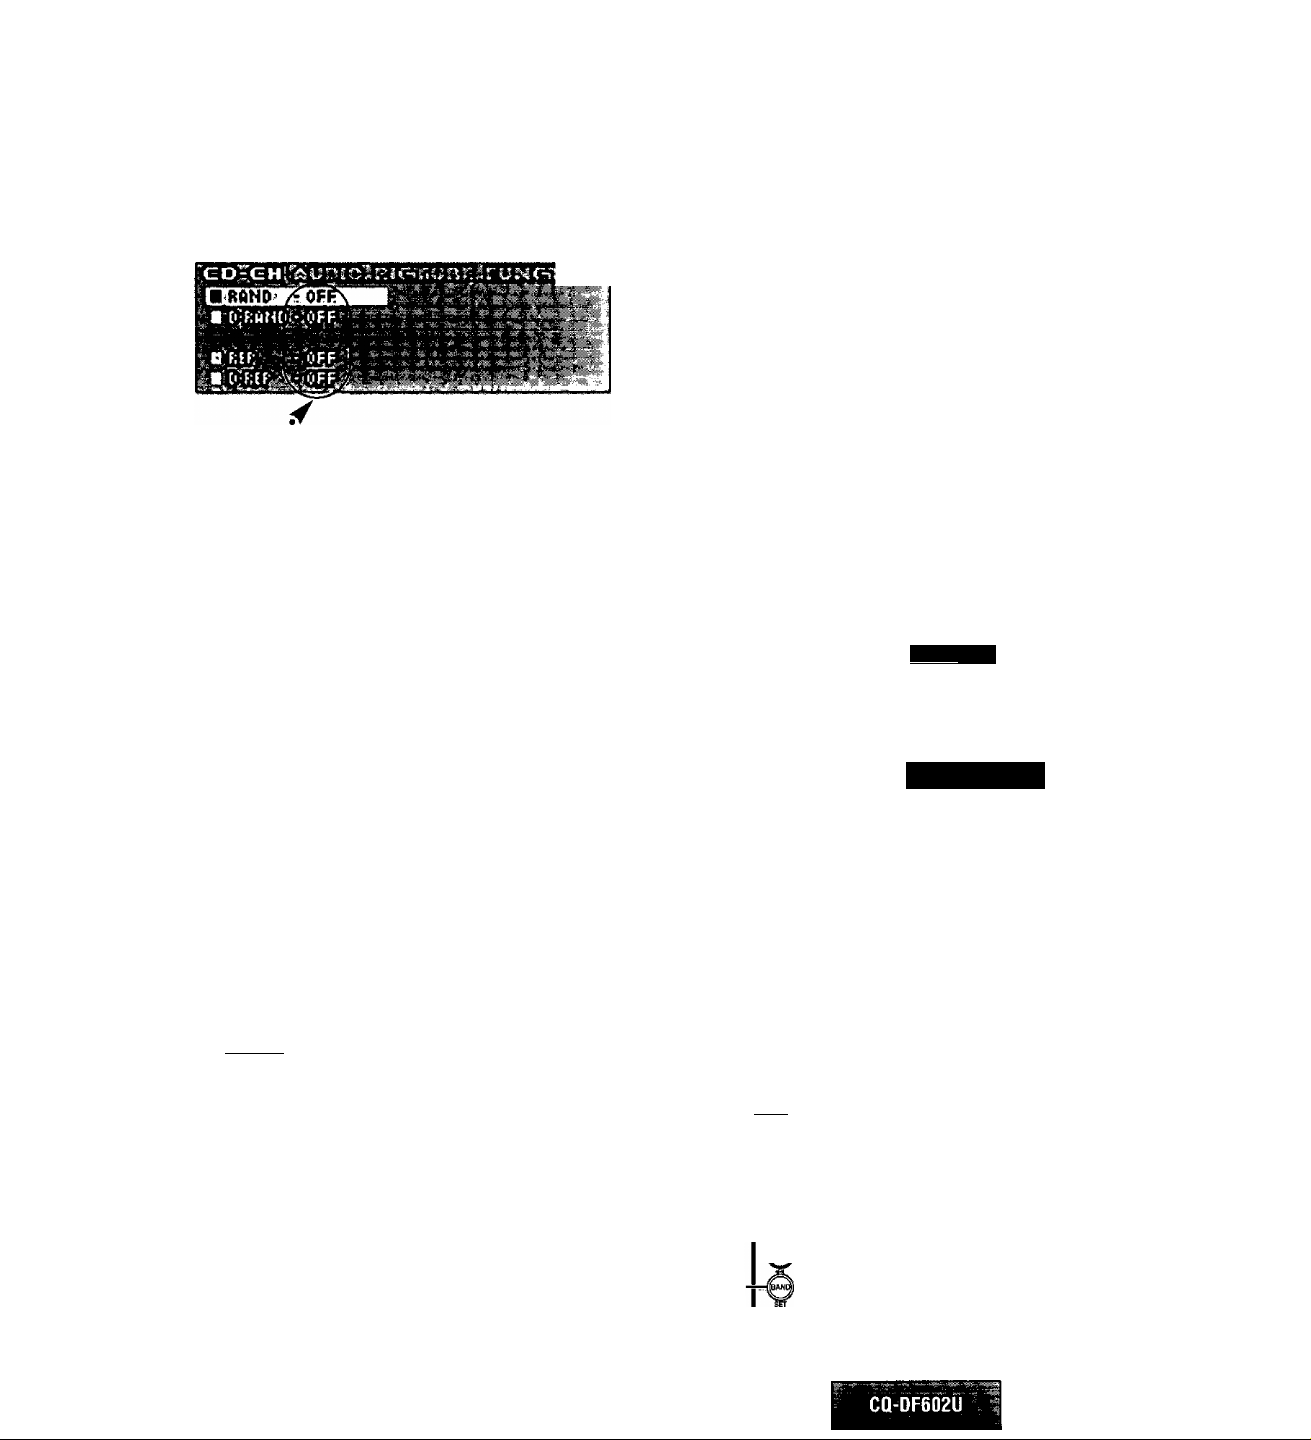
CD Changer Control
Menu Setting on CD Changer Mode
(Continued)
[P-SET A] [P-SETv]
[MENU] [DISP]
(Display]
[BAND]
(Settir
Random Play
Default: OFF
Disc Random Play
Default: OFF
r
----------------------------------------------
Repeat Play
Default: OFF
k____________________________
(Submenu)
---------
^
Â
m
^ Menu
Press [MENUl/ISEL] (MENU)
during CD changer playing to
display “CD-CH” tab.
(Press.)
U S n 0 C^' fi P. T:
e Submenu
Press [P-SET A] or
[P-SET v]/[A]or[v]to
select ■ RAND
/
---------Press [P-SET A] or
[P-SET v]/[A]or[v]to
select ■ D-RAND
V
_____
r
Press [P-SET A] or
[P-SET v]/[A]or[v]to
select
■ REP
------------s
_____J
-----------------
__________
\
>
Disc Repeat Play
Default; OFF
Only for the remote control unit
Scan Play
Default: SCAN OFF
Disc Scan Play
Default: DISC SCAN OFF
28
CQ-DF602U
Press [P-SET A] or
[P-SET v]/[A] or [V] to
select ■ DREP
'
----------
_______
When the menu is not displayed
Press [5] (SCAN) to change setting.
:The first 10 seconds of each track on all
discs plays in sequence.
Press and hold [5] (SCAN) for nnore than 2 seconds to change
setting.
: The first 10 seconds of the first track of all
the discs plays in sequence.
;
^ Setting
Note:
• Operations except setting should be performed after
returning to the mode display.
• Press IMENU], [DISP] (display) to return to the reg-
m ularmode.
Direct setting on the remote con
trol unit when the menu is not dis
played
Press IBAND] (SET) to change setting.
ON
: All the available tracks on all discs in the maga
zine plays in a random sequence.
OFF : Cancel
Press [BAND] (SET) to change setting.
: All the available tracks on the current disc plays
ON
in a random sequence.
OFF : Cancel
Press [BAND] (SET) to change setting.
ON |: Repeat the current track.
OFF : Cancel
Press [BAND] (SET) to change setting.
ON j: Repeat the current disc.
I OFF j: Cancel
: Cancel
Press [4] (RAND) to change setting.
BANDDM
Press and hold [4] (RAND) for more
than 2 seconds to change setting.
DISC^RANDMOLF.
Press [6] (REP) to change setting.
Press and hold [6] (REP) for more
than 2 seconds to change setting.
IteUMjji'mIl rBEEUMVLLIj!
f PCWEP ¡¡¡gÿ
[SEL] (MENU)
: Cancel
[5] (SCAN)
[4] (RAND)
[BAND] (SET)
<mfe
[61 (REP)
[ ^ ]
[V] (Submenu)
[DISP]
(Display)
29
Audio Settings [AUDIO]
[MENU] [DISP]
[P-SET Л] [P-SET V]
(Display)
[BAND]
[TUNE >] [TUNE <]
(Submenu/setting)
(Settir
Audio menu display
!1и»гата}шядп;ша»тпята
Í
о
gBBtSSSGGBEí\рв
...-.........
• ^
S HDB (Super High
Definition Bass)
Especially for rock music, the bass-sound
will be more powerful.
Default: OFF
Setting range: OFF, BOOM, TIGHT
Bass and Treble
You can adjust the bass and treble sound.
Default: BAS (Bass) 0
TRE (Treble) 0
Setting range: -12 to +12 (by 2 steps)
Balance and Fader
You can adjust the sound balance among
the front, rear, right and left speakers.
Default: BAL (Balance) Center
FAD (Fader) Center
Setting range: 15 levels each
^ Menu
© Press [MENUj/iSEL]
(MENU).
@ Press [TUNE >] or
[TUNE <]/[>] or [<] to
select “AUDIO" tab.
^ Submenu
© Press [P-SET Л] or
[P-SET v]/[A] or
[V] to select
S'HDB
©Press [BAND] (SET)
to set.
© Press [P-SET A] or
[P-SET v]/[^] or
[V] to select
ВАОЯПЕ
© Press [BAND] (SET)
to set.
(Press.)
© Press [P-SET A] or
[P-SET v]/[A] or
[V] to select
BAL7FAD
©Press [BAND] (SET)
to set.
Subwoofer Level
You can change the subwoofer volume
level.
Default: 0
Setting range: (Subwoofer mute),
-6 to +6 (by 2 steps)
30
CQ-DF602U
© Press [P-SET A] or
[P-SET v]/[^] or
[V] to select
SUB WOOFER
© Press [BAND] (SET)
to set.
Loading...