


VX-6020
VX6020
Operating Instructions
Owner’s Manual
watts peak
40W x 4
128-9243a VX6020 Owner's Manual 08 14 2013.indd 1 8/14/2013 12:06:53 PM

VX6020
2
128-9243a VX6020 Owner's Manual 08 14 2013.indd 2 8/14/2013 12:06:54 PM

VX6020
NAVIGATION QUICK START GUIDE 64
iPod® Control “iPod” is a trademark of Apple Computer, Inc., registered
in the U.S. and other countries. Bluetooth® is a trade mark of Bluetooth
Special Interest Group (SIG) Inc.
CONTENTS
FEATURES 5
CONTROLS AND INDICATORS 8
REMOTE CONTROL 10
EXTERNAL DEVICES 14
QUICK START 16
EQUALIZER CONTROLS MENU 20
SYSTEM SETTINGS 22
DISC OPERATION 30
RADIO TUNER OPERATION 40
iPod®/iPhone® OPERATION 46
USB AND SD CARD CONTROLS 50
AV-In1/AV-In2 CONTROLS 55
BLUETOOTH OPERATION 56
STEERING WHEEL CONTROL (SWC) OPERATION 68
REAR CAMERA OPERATION 69
TROUBLESHOOTING 70
DISC ERROR MESSAGES 73
CARE AND MAINTENANCE 74
SPECIFICATIONS 76
3
128-9243a VX6020 Owner's Manual 08 14 2013.indd 3 8/14/2013 12:06:54 PM

VX6020
FCC Statement
1. This device complies with Part 15 of the FCC Rules.
Operation is subject to the following two conditions:
(1) This device may not cause harmful interference.
(2) This device must accept any interference received, including interference that may
cause undesired operation.
2. Changes or modi cations not expressly approved by the party responsible for
compliance could void the user's authority to operate the equipment.
NOTE: This equipment has been tested and found to comply with the limits for a Class B
digital device, pursuant to Part 15 of the FCC Rules. These limits are designed to provide
reasonable protection against harmful interference in a residential installation.
This equipment generates uses and can radiate radio frequency energy and, if not
installed and used in accordance with the instructions, may cause harmful interference
to radio communications. However, there is no guarantee that interference will not
occur in a particular installation. If this equipment does cause harmful interference
to radio or television reception, which can be determined by turning the equipment
o and on, the user is encouraged to try to correct the interference by one or more of
the following measures:
• Reorient or relocate the receiving antenna.
• Increase the separation between the equipment and receiver.
• Connect the equipment into an outlet on a circuit different from that to which the
receiver is connected.
• Consult the dealer or an experienced radio/TV technician for help.
FCC Radiation Exposure Statement
This equipment complies with FCC radiation exposure limits set forth for an uncontrolled environment. This equipment should be installed and operated with minimum
distance of 20 centimeters between the radiator and your body.
4
128-9243a VX6020 Owner's Manual 08 14 2013.indd 4 8/14/2013 12:06:54 PM

VX6020
FEATURES
Congratulations on the purchase of the In-Dash Navigation Radio. Please read
the instruction manual for this product before using. The documentation
provided will allow the user to fully enjoy all the features of your new Jensen
VX6020 Mobile Multimedia Receiver. Please read all of the instructions
before beginning the installation and save this manual for future reference.
We recommend having your Jensen VX6020 installed by a reputable installation shop.
DVD
• Audio Equalizer
• Next Chapter and Previous Chapter
• Play/Pause
• Track Direct Entry
• Disc Menu
• Selection Repeat / Track Repeat
• Disc Audio
• Disc Language
• Pic Control
CD / MP3 / WMA
• CD-Text Compatible
• ID3 Tag Compatible
• Directory Search (MP3 / WMA Only)
• Burn up to 1500 MP3 and WMA Files onto a DVD+R / RW
• Audible Forward / Reverse Track Search (CD-DA Only)
• Random, Repeat and Intro
• Play, Pause, Stop, Next Track and Previous Track
AM-FM
• USA, China, Japan, Europe, Europe (LW) and Orient (OIRT)
• 30 Station Presets (18 FM / 12 AM)
• Auto Stereo / Mono
• Local / Distance
• Auto Store / Preview Scan
iPod®/iPhone®
• iPod®/ iPhone® via USB
• High Speed Direct Connect Interface to Access iPod® Playlists, Artists, Albums
and Songs. Play music and view video/photo* les from your iPod®. *Video/photo
playback requires jLink-USB iPod® interface cable (sold separately).
• Power Management Charges iPod® while Connected
5
128-9243a VX6020 Owner's Manual 08 14 2013.indd 5 8/14/2013 12:06:55 PM

VX6020
Chassis
• 2.0 DIN (Import / ISO-DIN Mountable)
• Fixed Front Panel
• 6.2” High Denition TFT LCD
• 1,152,000 Sub Pixels (800 x 3 X 480)
• Beep Tone Conrmation (ON-OFF Option)
General
• Navigation is built in - iGo primo
• Built-In Bluetooth® providing Hands-Free operation for safety and convenience
and A2DP for streaming music from your smartphone or other Bluetooth®
device.
• One Composite Video Output for Additional Screens
• Front Panel Audio/Video Input
• Ten-Band Tone Equalizer
• Rear Panel Audio/Video RCA Input
• Rear Subwoofer Line Output
• Rear Camera Input
• Touch Screen Calibration Mode
• Rotary Encoder Audio Control
REAR CAMERA
The VX6020 is “camera ready.” Before accessing any camera features, you must
purchase and install a rear video camera.
6
128-9243a VX6020 Owner's Manual 08 14 2013.indd 6 8/14/2013 12:06:55 PM

VX6020
WARNING! Never install this unit where operation and viewing could interfere
with safe driving conditions.
WARNING! To reduce the risk of a trac accident (except when using for rear
view video camera) never use the video display function while driving the vehicle.
This is a violation of federal law.
WARNING! Never disassemble or adjust the unit.
WARNING! To prevent injury from shock or re, never expose this unit to moisture
or water.
WARNING! Never use irregular discs.
WARNING! To prevent damage to the mechanism inside this unit, avoid impact to
the unit’s monitor.
WARNING! Using an improper fuse may cause damage to the unit and result in
re.
7
128-9243a VX6020 Owner's Manual 08 14 2013.indd 7 8/14/2013 12:06:55 PM
CONTROLS AND INDICATORS
VX6020
13
12
11
10
9
8
7
6
5
OPEN
AV-
IN
EJECT
MENU
VX6020
AV INPUT
SD CARD
Bluetooth
4
1
NAVIGATION
3
2
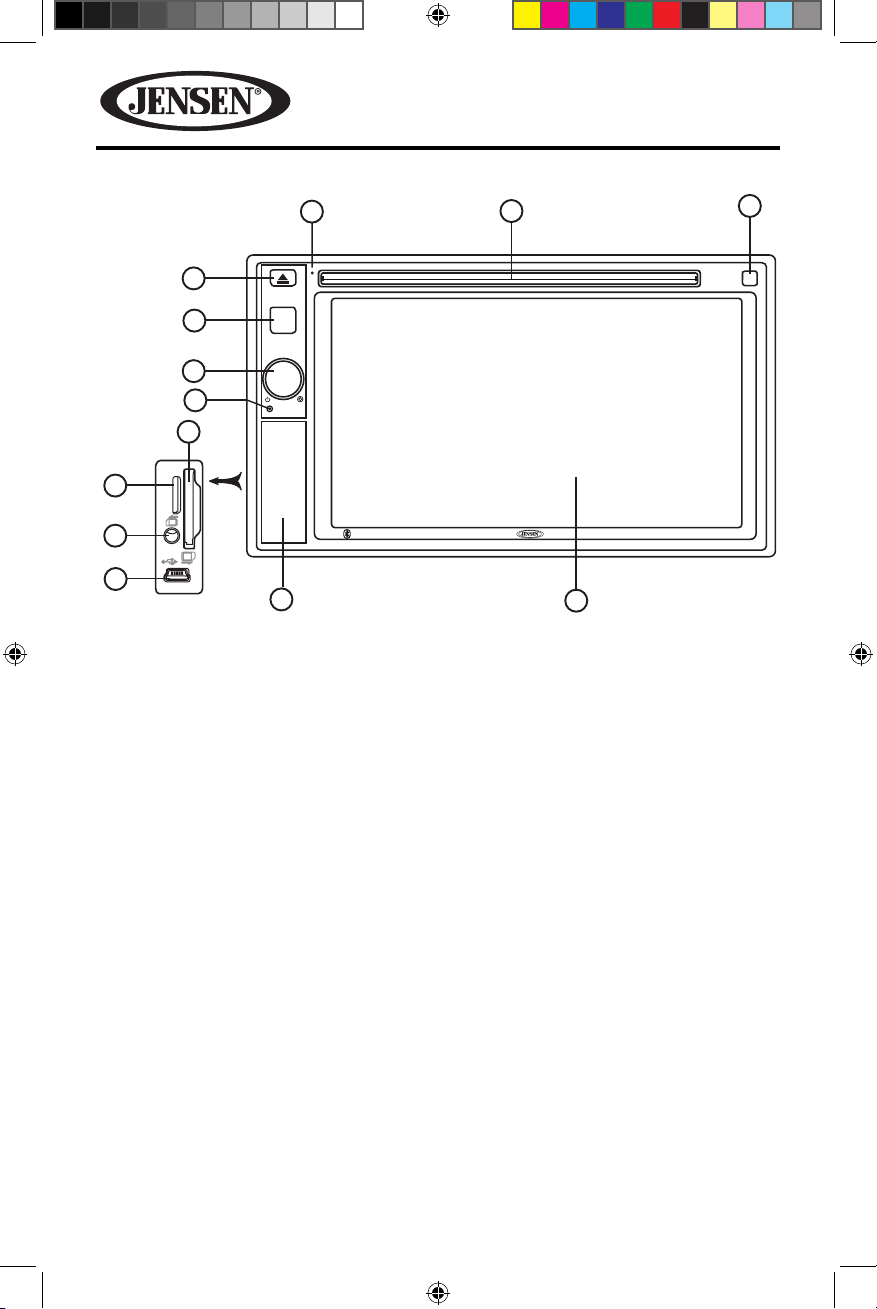
Figure 2. VX6020 Controls and Indicators
1. DISC Slot: Accepts DVD/CD/MP3 discs. If the unit is turned on, playback
begins when a disc is inserted.
2. REMOTE SENSOR: Used to receive command signals from the remote
control.
3. LCD Screen and Touch Screen: Touch icons on this screen to access
menus or control functions.
4. INTERFACE COVER: Covers the Micro SD/ SD/ Mini USB slots and AV Input
Connector.
5. MINI USB SLOT: Used to connect iPod / MP3 player connection adapter.
6. AV INPUT CONNECTOR: This connector accepts a 3.5 mm jack through
which signals from various audio/video devices can be applied to the unit.
7. MICRO SD CARD SLOT: Used to insert the Micro SD Card for the Navigation
Map (or rmware updates if required) only, not for music or other les.
8. SD CARD SLOT: Used for inserting SD Cards containing photos, audio and
video for playback.
8
128-9243a VX6020 Owner's Manual 08 14 2013.indd 8 8/14/2013 12:06:55 PM

VX6020
9. RESET Button: Press this button to reset the system settings (except
password and parental lock settings) and to correct a system halt or
other illegal operation. Use the tip of a pen to press the Reset button.
10. ROTARY KNOB ( ) Power ON/OFF, Volume, and Mute Control: Press
the knob to turn the unit ON. Press and hold the knob for 2 seconds to turn the
unit OFF. Rotate the knob to adjust the volume from 0 to 50. Press the knob
momentarily to mute the audio. Press the knob again to restore the audio.
11. MENU Button: Press this button to access the Main touch screen menu.
Press and hold to switch to Navigation screen.
12. Eject ( ) Button: Press this button to eject a DVD/CD/MP3 disc. Disc play is
stopped, the disc is ejected and the unit will change to radio operation. If the
disc is not removed from the unit and the button is pressed again, the disc will
be re-loaded. If the disc is not removed from the disc slot within 10 seconds
of being ejected, it will be automatically reloaded to prevent it from being
accidentally damaged.
13. MICROPHONE: Used for Bluetooth® communication.
9
128-9243a VX6020 Owner's Manual 08 14 2013.indd 9 8/14/2013 12:06:56 PM
REMOTE CONTROL
VX6020
32
31
30
29
28
27
26
25
20
24
23
22
21
20
19
1
2
3
4
5
6
7
8
9
10
11
12
13
14
15
18
16
17
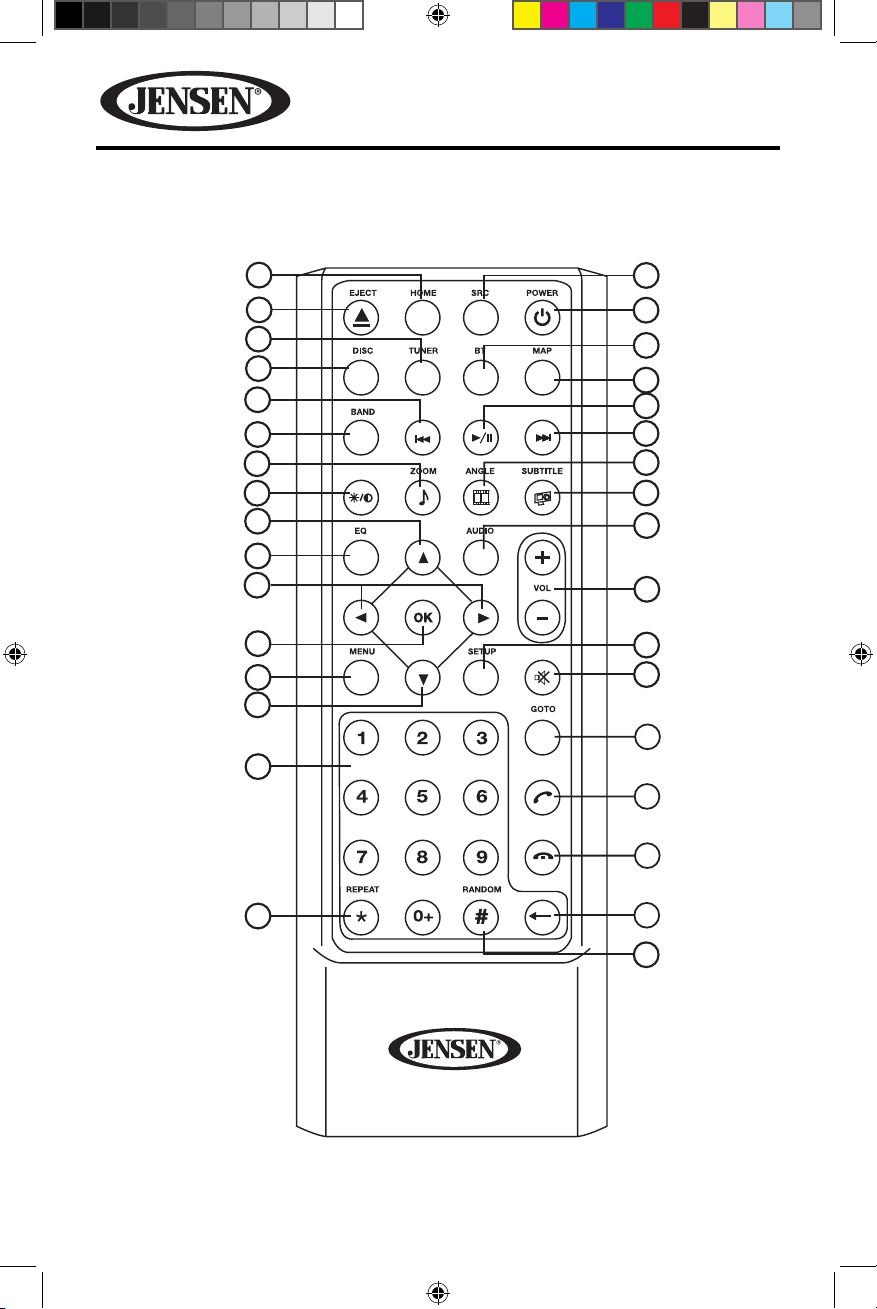
Figure 2. VX6020 Remote Control
10
128-9243a VX6020 Owner's Manual 08 14 2013.indd 10 8/14/2013 12:06:56 PM

VX6020
Remote Control Functional Description
1. SOURCE SRC Button: Press this button to switch between and select available
sources. (Radio/Disc/SDHC/USB/Bluetooth/AV-IN1/AV-IN2/Navigation/iPod)
2. POWER Button ( ): Press this button to turn the unit ON and OFF.
3. BLUETOOTH BT Button: Press this button to enter the Bluetooth
feature.
4. MAP Button: Press this button to enter the Navigation feature. Press again to
return to previous source.
5. PLAY / PAUSE Button: Press this button to pause the playback of a disc.
Press this button again to resume normal playback.
6. NEXT FORWARD uul) Button – Press this button to skip to the next chapter,
track or song during playback of a disc. Press this button while in Radio mode
to search available radio station by increasing tuning frequency. Press this
button while in iPod mode to pause playback/starts playback of a music le.
7. ANGLE Button ( ): Press to display and select dierent camera angles
in DVD mode. Each time the button is pressed, the angle changes.
NOTE: The numbers of angles vary from disc to disc. Not all discs contain this
option.
8. SUBTITLE Button ( ): Press to display and select the subtitle language in
DVD mode. Each time the button is pressed, the subtitle language changes.
NOTE: The type and number of languages for subtitles vary from disc to disc.
9. AUDIO Button: Press to display and select the audio language in
DVD mode. Each time the button is pressed, the language changes.
NOTE: The languages for audio vary from disc to disc.
10. VOLUME Button VOL + and : Press these buttons to increase or decrease
the playback volume.
11. SETUP Button: Press to this button to enter the system settings menu.
12. MUTE Button ( ): Press this button to turn the audio output ON and OFF.
13. GOTO Button: Press this button to open direct entry search screen during the
playback of a disc.
14. ANSWER INCOMING PHONE CALL Button ( ): Press this button to answer
an incoming Bluetooth phone call.
11
128-9243a VX6020 Owner's Manual 08 14 2013.indd 11 8/14/2013 12:06:57 PM
VX6020
15. DISCONNECT ACTIVE PHONE CALL Button ( ): Press this button to
disconnect an active Bluetooth phone call.
16. BACKSPACE Button ( ): Press this button to correct invalid number entries
when entering passwords, track/chapter selections or phone numbers using
the remote control.
17. RANDOM Button ( ): Press this button to play tracks or chapters in random
order while playing a disc.
18. REPEAT Button : Press this button to repeat the playback of a current track.
Allows the user to repeat a selected Title, Chapter or Track of a DVD, CD or MP3.
19. NUMBER Buttons (0-9): Press these buttons to directly access chapters and
tracks, dialing phone numbers, or entering passwords.
20. UP (p) / DOWN q) Buttons – Press these buttons to scroll upward and
downward, respectively, in menu options.
21. MENU Button: – Press this button to access the root menu of a DVD or CD
during playback. The disc will return to normal playback and the root menu
will disappear if no selection is made within 10 seconds. This button is also
used to select photo mode of an MP3 player.
22. ENTER Button (OK): Press this button to implement a selected setting or
accept an option.
23. LEFT t / RIGHT u Buttons: – Press these buttons to shift left and right,
respectively, in the menu options
24. EQUALIZER Button (EQ): Press this button to accesses the equalizer menu in
all audio playback modes.
25. SCREEN BACKLIGHT ADJUST BUTTON : Press this button to adjust the
screen backlighting level between low, medium and bright.
26. ZOOM Button ( ): (FOR VIEWING IMAGE FILES)
DISC images -
Press ZOOM button CD Player Performs
Once Enlarge the picture 125% of the original size
2 times Enlarge the picture 150% of the original size
3 times Enlarge the picture 200% of the original size
4 times Picture is returned to original size
12
128-9243a VX6020 Owner's Manual 08 14 2013.indd 12 8/14/2013 12:06:57 PM

VX6020
SD Card images -
Press ZOOM button SD Card Player Performs
Once Enlarge the picture 100% of the original size
2 times Enlarge the picture 200% of the original size
3 times Enlarge the picture 300% of the original size
4 times Picture is returned to original size
27. BAND Button: Press this button to scroll though preset stations.
28. PREVIOUS ltt) Button – Press this button to go back to the previous
chapter, track or song during playback of a disc. Press this button while in
Radio mode to search available radio station by increasing tuning frequency.
Press this button while in iPod mode to pause playback/starts playback of a
music le.
29. DISC Button: Press this button to enter Disc mode radio mode and scroll
though prset stations.
30. TUNER: Press this button to enter Radio mode.
31. EJECT Button ( ): Press this button to eject a DVD/CD/MP3 disc. Disc play is
stopped, the disc is ejected and the unit will change to radio operation. If the
disc is not removed from the unit and the button is pressed again, the disc will
be re-loaded. If the disc is not removed from the disc slot within 10 seconds
of being ejected, it will be automatically reloaded to prevent it from being
accidentally damaged.
32. HOME Button: Press this button to return to the source menu.
13
128-9243a VX6020 Owner's Manual 08 14 2013.indd 13 8/14/2013 12:06:57 PM
VX6020
EXTERNAL DEVICES
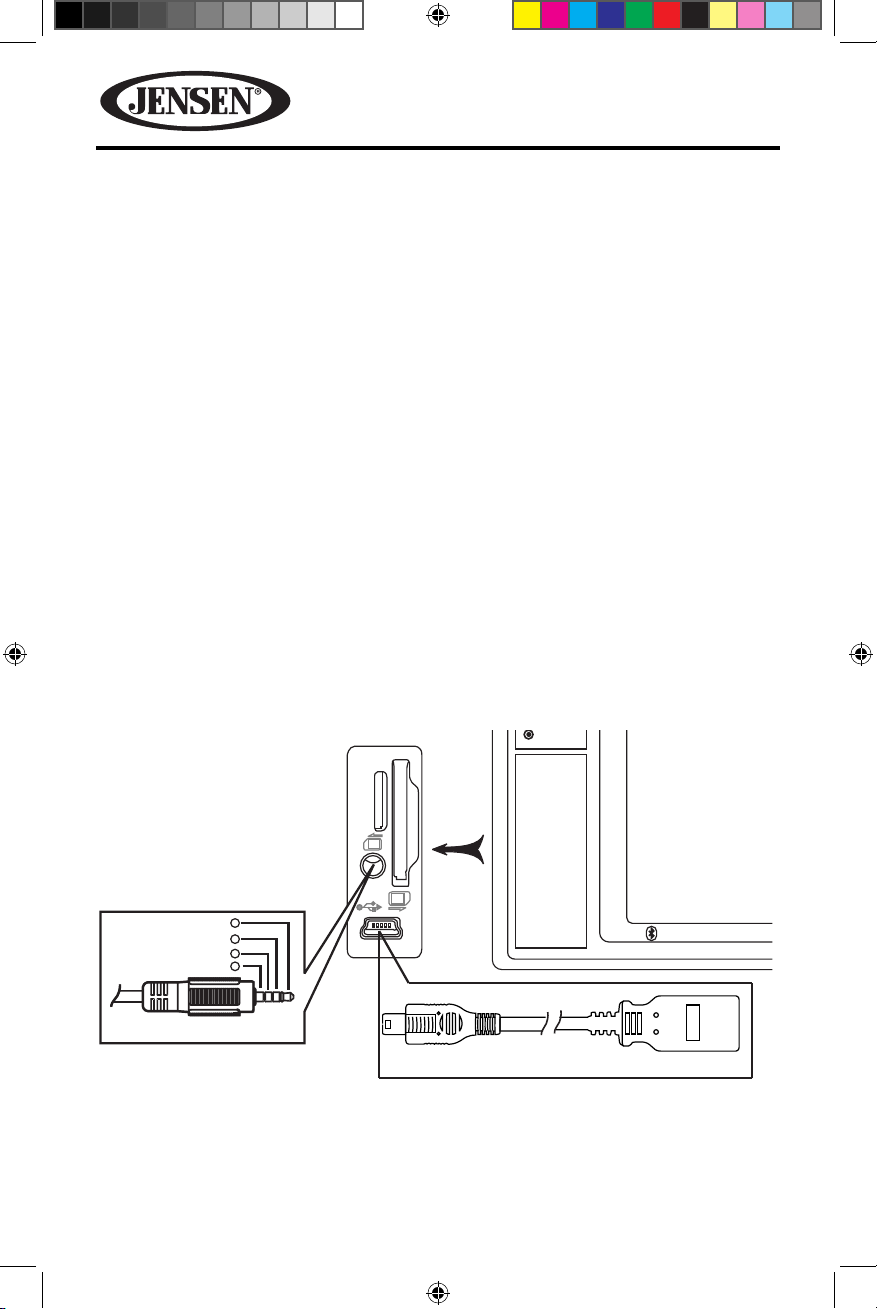
Connecting External Devices
External devices, including a game console, camcorder, navigation unit, iPod®,
Zune®, etc. can be connected to this unit using its front A/V input 3.5mm jack (AVIn1), the rear RCA inputs (AV-In2), or the Mini USB input using the supplied USB-A
to Mini USB Adapter.
You cannot directly control external devices connected to the A/V INPUTs using the
front panel controls or this unit’s remote control.
AV-In1
AV-In1 is used for playback of audio/video from an external device connected
to the unit through a 3.5mm jack. The unit can increase or decrease the volume
of the connected device all other controls are done on the connected device.
Select “AV-In 1” mode to access auxiliary devices.
AV-In2
AV-In2 is used for playback of audio/video from an external device connected
through RCA connectors located on the back of the unit (see VX6020 Installation
Guide). The unit can increase or decrease the volume of the connected device all
other controls are done on the connected device. Select “AV-In2” mode to access
auxiliary devices. .
VX6020
AV INPUT
SD CARD
Bluetooth
Ground
V ideo
1
2
3
4
Right Audio
Left Audio
3.5mm A/V Cable (not included)
AV-
IN
OPEN
Mini USB to USB Adapter Cable (included)
Figure 3. VX6020 Connecting External Devices
14
128-9243a VX6020 Owner's Manual 08 14 2013.indd 14 8/14/2013 12:06:57 PM
VX6020
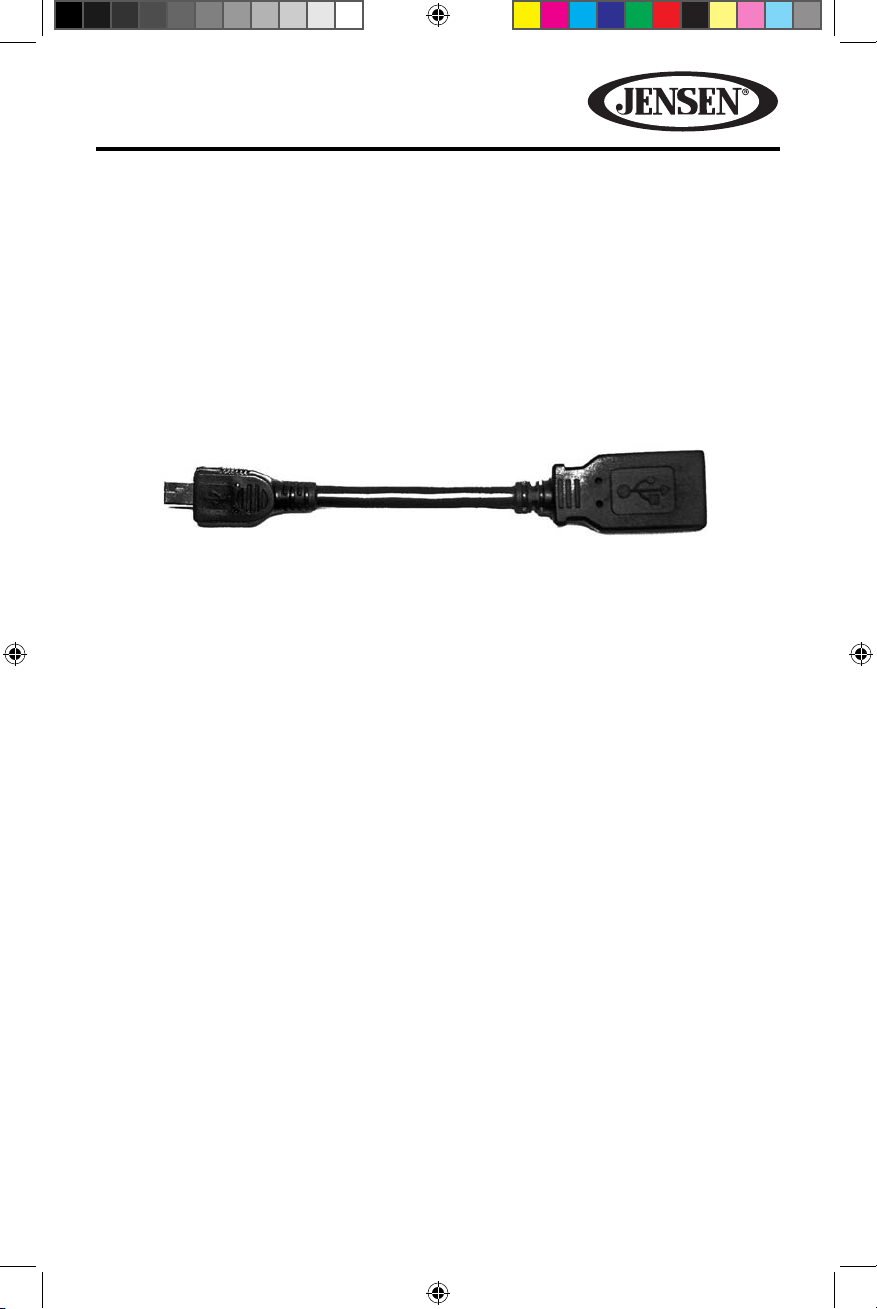
Mini USB to USB Adapter Cable
The unit is supplied with a Mini USB to USB Adapter Cable which can accept
signals from various audio/video devices through a USB connection. The Mini
USB to USB Adapter Cable is installed directly into the front panel of the unit.
NOTE: When connecting an iPod®/iPhone® the user must using the iPod/iPhone
adapter cable that comes with the iPod®/iPhone® or is available separately.
NOTE: When connecting an iPod®/iPhone® to the Mini USB to USB Adapter Cable,
the user must also insert the devices 3.5 mm jack into the A/V input connector for
video playback.
Figure 4. Mini USB to USB Adapter Cable
NOTE: If the vehicle is equipped with steering wheel controls for the audio system,
the controls may function dierently than described in the vehicle owners manual.
The Jensen In-Dash Navigation Radio system may function dierently than the
OEM radio due to added features and functions that the OEM radio did not support.
This is normal operation.
15
128-9243a VX6020 Owner's Manual 08 14 2013.indd 15 8/14/2013 12:06:58 PM
VX6020
QUICK START GUIDE
Turning the Unit ON or OFF
Press the front panel Power/Volume/Mute control knob to turn the unit ON.
To turn the unit OFF, press and hold the front panel Power/Volume/Mute control
knob for 2 seconds.
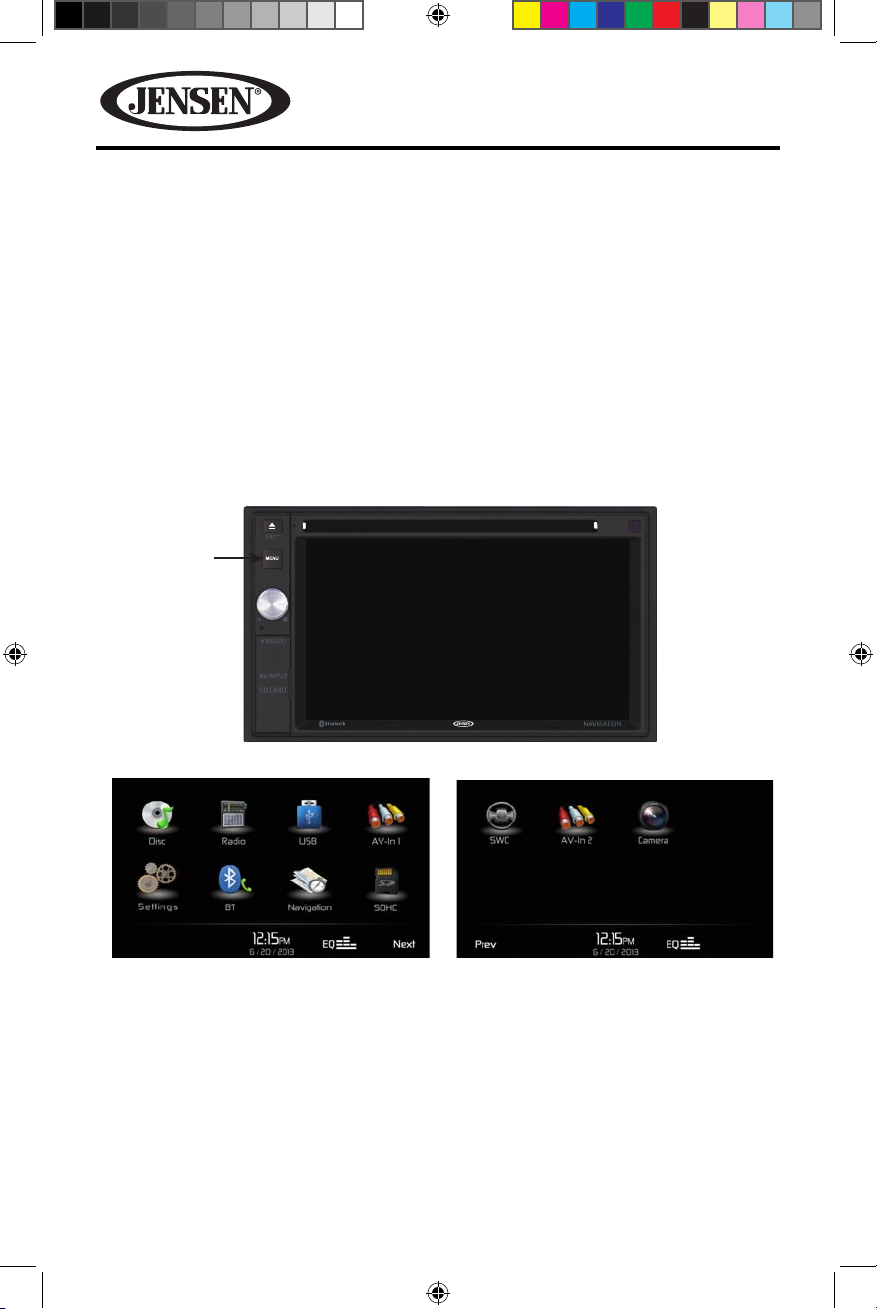
Selecting an Audio/Video Source, Bluetooth, Navigation
Steering Wheel Controls or Backup Camera
To access an Audio/Video source:
1. Press the front panel MENU button or touch the SRC icon to view the Main
Menu Screen.
MENU
Button
Screen 1 Screen 2
Figure 5. VX6020 Main Menu Screen
2. Touch the desired source icon on one of the two main menu screens.
Screen 1 of 2: Disc, Radio, USB, AV-IN1, Bluetooth (BT), Navigation, or SDHC.
Touch Next at the bottom of the screen to access Screen 2 of 2: Steering Wheel
Control (SWC), AV-IN2, or Camera.
16
128-9243a VX6020 Owner's Manual 08 14 2013.indd 16 8/14/2013 12:06:59 PM

VX6020
System Settings
To access and adjust system settings:
1. Press the MENU button on the front panel to view the Main Menu Screen.
2. Touch the Settings ( ) icon on the Main Menu screen to enter the SETTINGS
MENU. Sub-menus where adjustments can be made will appear highlighted in
green. (See System Settings Menu)
Volume Adjustment
To increase or decrease the volume level, rotate the front panel Power/Volume/
Mute control knob. The unit’s front panel screen will display the volume level for
3 seconds. The volume level ranges from 0 to 50 (a beep sounds, indicating that the
adjustment limit has been reached).
Navigation and Bluetooth volume can be adjusted independently of the radio
volume by rotating the Power/Volume/Mute control knob. The navigation must be
talking, Bluetooth must be in a call when making the volume adjustment. When
exiting Navigation or Bluetooth the volume will return to the previous source
volume level.
Audible Beep Conrmation
An audible beep tone conrms each function selection. The beep tone can be
disabled through the Setup menu.
Muting the Audio
Press the front panel Power/Volume/Mute control knob to mute the audio from
the unit. Mute icon is displayed on the LCD screen. Press the Power/Volume/Mute
control knob again to restore the audio volume to its previous level. Adjusting the
volume or using any of the audio setup features cancels the mute function.
Equalizer Controls
Equalizer (EQ): Adjustment can be made after entering one of the
audio/video sources (Disc, Radio, USB, AV-IN1, SDHC or AV-IN2)
Touch the Equalizer (EQ) icon to view the Equalizer Control Screen to select a
desired audio preset level ( Optimal / Classic / Rock / Jazz / Techno / Pop or Flat),
make adjustments to the audio Balance and Fade levels or to turn the Loudness
option ON or OFF. Touch SRC icon to return to the current source.
(See Equalizer Control Menu)
Playing a Disc
To begin playback of an Audio/Video Disc:
1. Press the front panel Power/Volume/Mute control knob to turn the unit ON.
2. Insert a disc with the label side facing UP and playback will begin
automatically. (See Disc Operation Menu)
17
128-9243a VX6020 Owner's Manual 08 14 2013.indd 17 8/14/2013 12:07:00 PM
VX6020
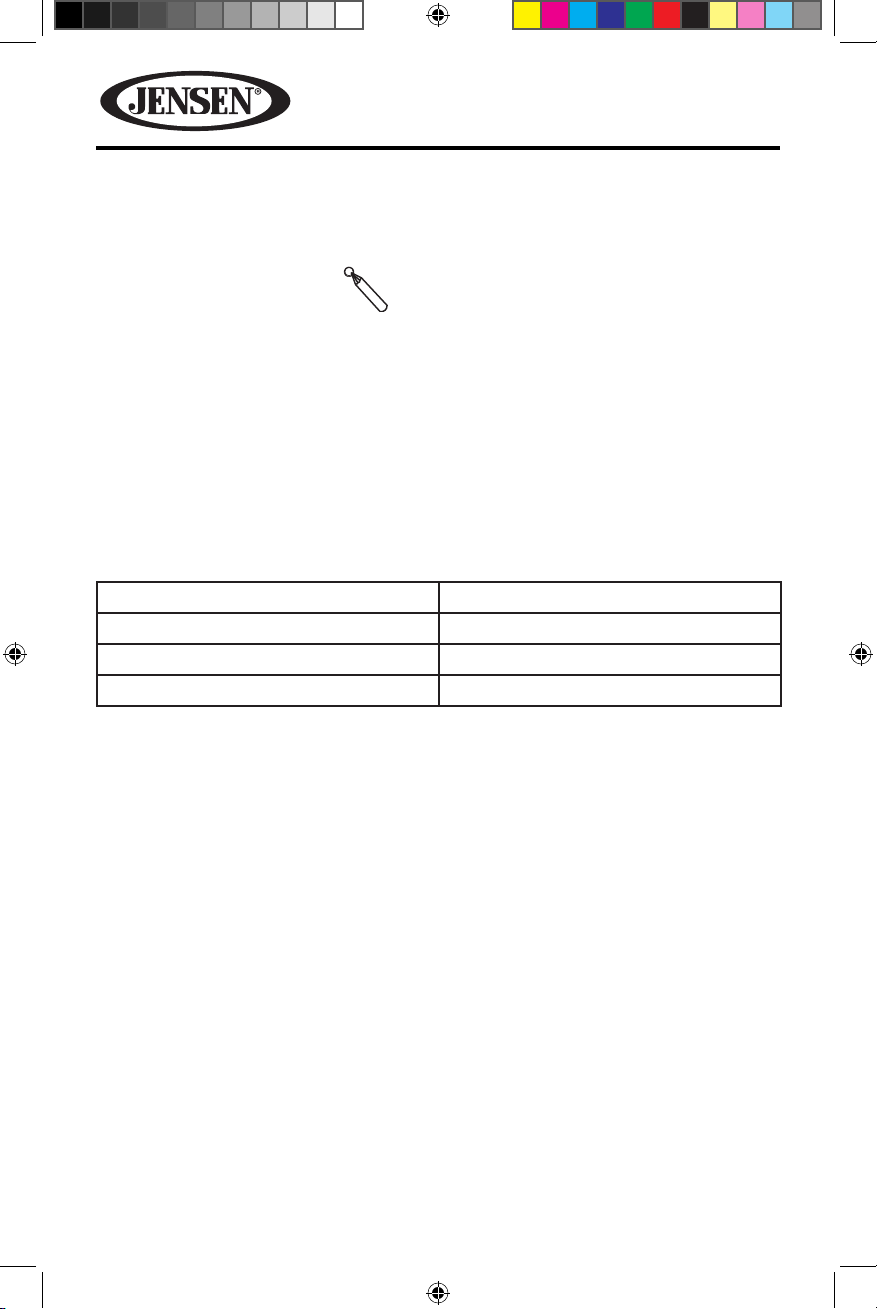
Resetting the System
Soft Reset - To correct a system halt or other illegal operation, use the tip of a pen to
press and release the reset button located just below the front panel control knob.
[RESET] Button
Figure 6. System Reset Button
For a Hard Reset- Touch the System Reset Icon on the Third Settings Screen.
After a system reset,the unit restores all factory default settings.
NOTE: If the unit is reset while a DVD is playing, the unit will return to Main Menu
once the reset is complete.
Image/Display Settings
Video Output Modes
The table below shows the video output mode for each playing source.
Playing Source Video Output Modes
AM/FM TUNER YCbCr Mode
DVD YCbCr Mode
AUX IN CVBS* Mode
*CVBS – Composite Video Baseband Signal
Parking Brake Inhibit
When the green wire with the white stripe “Parking” wire is connected to the vehicle
Parking Brake circuit, the front TFT monitor will display video when the Parking
Brake is engaged. (When the pink wire is grounded via the Parking Brake circuit,
video will be displayed.)
18
128-9243a VX6020 Owner's Manual 08 14 2013.indd 18 8/14/2013 12:07:00 PM

VX6020
This page intentionally left blank
19
128-9243a VX6020 Owner's Manual 08 14 2013.indd 19 8/14/2013 12:07:00 PM
VX6020
EQUALIZER CONTROL MENU
Adjusting Equalizer Controls
The Equalizer adjustment screen allows the user to easily adjust the audio
system to meet the acoustical characteristics of the vehicle. The acoustical
characteristics vary depending on the type of vehicle and measurements.
For example: proper setting of the audio controls can improve the speakers
frequency response to compensate for cabin.
The Balance/Fade levels and Loudness ON/OFF option of a selected audio/video
source (Disc, Radio, USB, AV-IN1, SDHC or AV-IN2) is also adjusted through the
Equalizer adjustment screen.
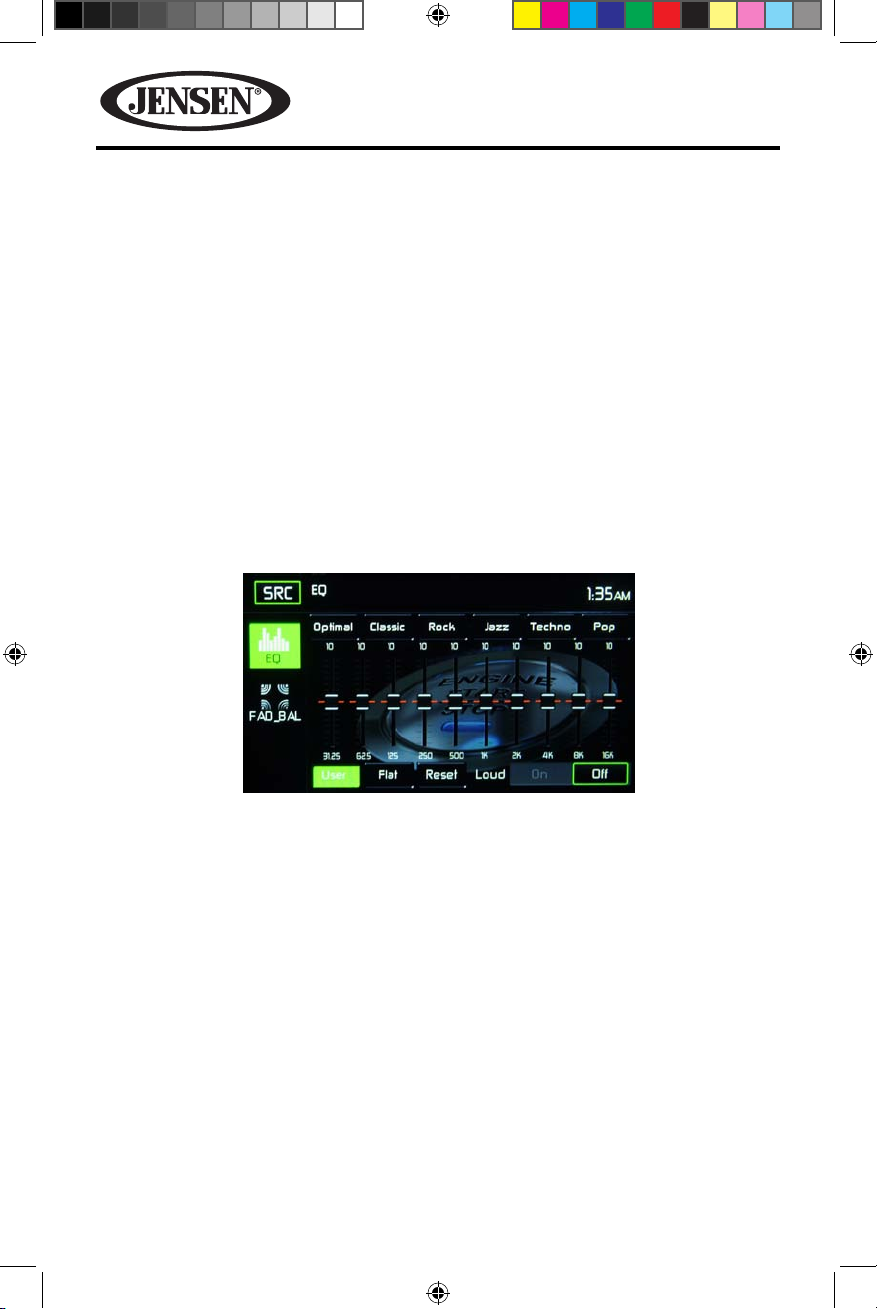
Equalizer (EQ) (10 Band)
1. Touch the Equalizer (EQ) icon to view and select a desired acoustical preset level
( Optimal / Classic / Rock / Jazz / Techno / Pop or Flat)
automatically change to “USER” when individual audio functions are adjusted.
NOTE: The equalizer will
Figure 7. Equalizer Adjustment Screen
2. Select a desired frequency range slide bar to be adjusted (31.5, 62, 125, 250,
500, 1K, 2K, 4K, 8K or 16K).
3. Touch and move the slide bar UP or Down to adjust the frequency sound level
settings from -10 to +10.
User Setting
Touch the EQ slider icon to customize each of the equalizers 10 frequency bands.
Flat Setting
Touch the Flat icon to set the equalizers 10 band frequencies to the midpoint.
20
128-9243a VX6020 Owner's Manual 08 14 2013.indd 20 8/14/2013 12:07:01 PM
VX6020
Loud Setting
Touch the Loud icon to turn the loud option ON or OFF. The loud option automatically
alters the frequency response curve of audio to make it sound more natural when
played at a lower volume level.
To exit the Equalizer menu touch SRC icon to return to the current source.
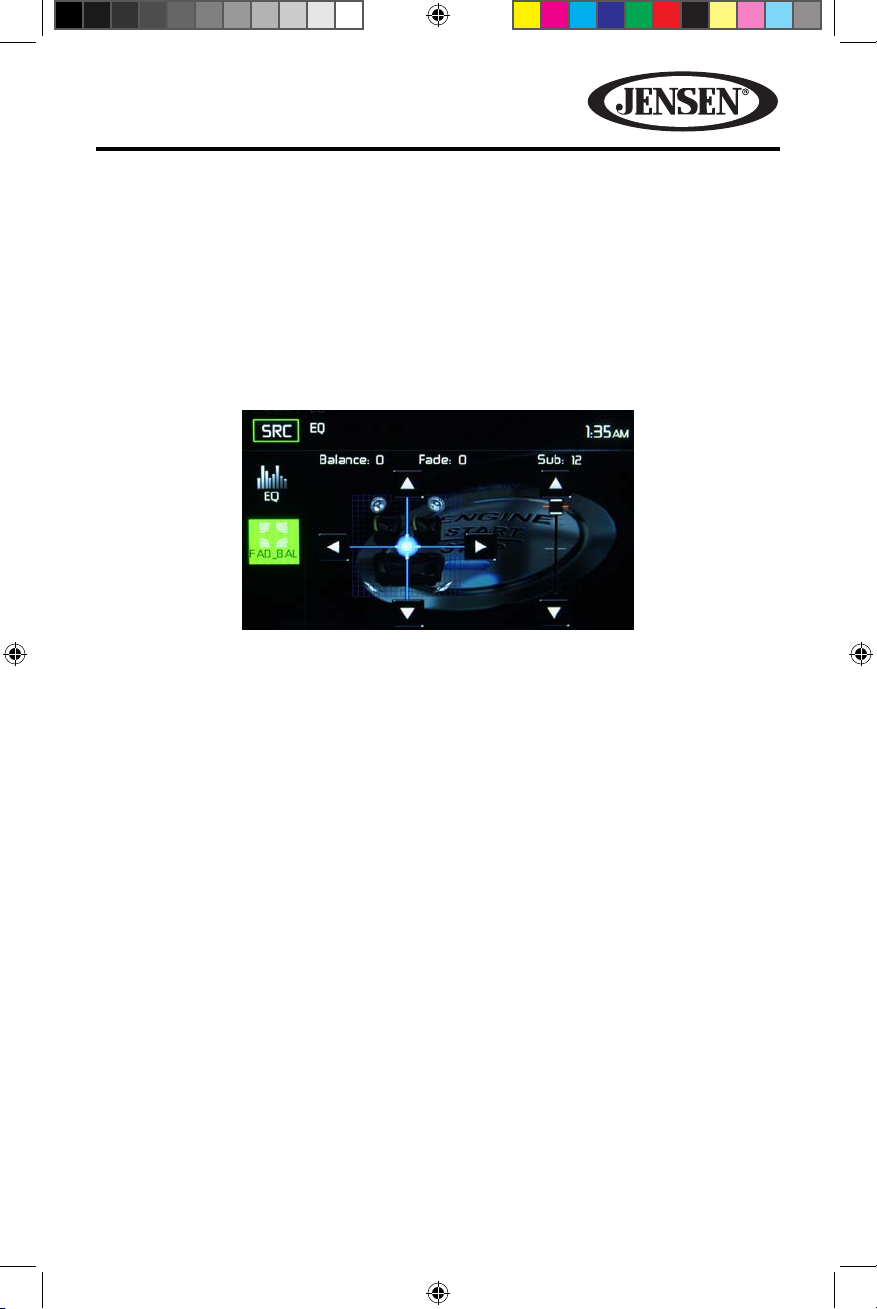
Fade-Balance
Balance-Touch the FAD-BAL icon on the left side of the equalizer screen to display
the balance/fader screen.
Figure 8. Fade-Balance Adjustment Screen
Balance- This feature is used to balance the audio output levels between the left
and right side of the vehicle. Touch the t or u icons to change the balance control
settings -18 (Left) to +18 (Right). The setting can also be changed by touching
screen within the grid to move the green sphere.
Fade- This feature is used to fade the audio output levels between the front
and rear of the vehicle. Touch the p or q icons to change the fade control
settings -20 (Rear) to +20 (Front). The setting can also be changed by touching
screen within the grid to move the green sphere.
Sub (Subwoofer)- This feature is used to reduces or increases the subwoofer
sound level. Touch the slide bar p or q icons to adjust the settings.
To exit the balance-fader touch the SRC icon on the top left corner of the screen.
21
128-9243a VX6020 Owner's Manual 08 14 2013.indd 21 8/14/2013 12:07:02 PM

VX6020
SYSTEM SETTINGS
To access System Settings, touch the icon on the Main Menu screen. There are
eight System Settings Sub-menus that are used to adjust the performance of each
option of the VX6020. Touch a desired Sub-Menu (General, Video, Sound, Time,
Language, Bluetooth, DVD or Volume) and the Sub-menu will appear highlighted
in green. The features available for adjustment will appear on the screen.
Figure 9. System Settings Screens
Adjusting a Sub-Menu Feature
1. Touch the Sub-Menu feature to be adjusted.
2. Touch the p or q icon to view the previous or next feature page, if applicable.
An options list appears on the right.
3. Touch the desired feature option once to make selection then touch again to
conrm selection.
General Sub-menu Features
Radio Region- USA, China, Japan, Europe, Europe (LW) and Orient (OIRT)
USA frequencies:
• AM Frequency Spacing - 9kHz / 10 kHz
• AM Frequency Band - 522 kHz ~ 1710 kHz
• FM Frequency Spacing - 50kHz / 200 kHz
• FM Frequency Band - 87.5 MHz ~ 107.9 MHz
Radio Range- Touch the Distance or Local to increases or decreases radio tuning
sensitivity to receive local or distant stations.
TFT Standby- Touch OFF, 10s or 20s to set the unit’s front panel TFT LCD screen to
stay ON continuously or to blackout the screen after 10 or 20 seconds.
Dimmer Mode- Touch Night, Day, Normal or Brightness to set the unit’s front panel
TFT LCD screen to be adjusted for day and night conditions.
Beep- Touch OFF or ON to turn the selection conrmation beep ON or OFF.
22
128-9243a VX6020 Owner's Manual 08 14 2013.indd 22 8/14/2013 12:07:03 PM
VX6020
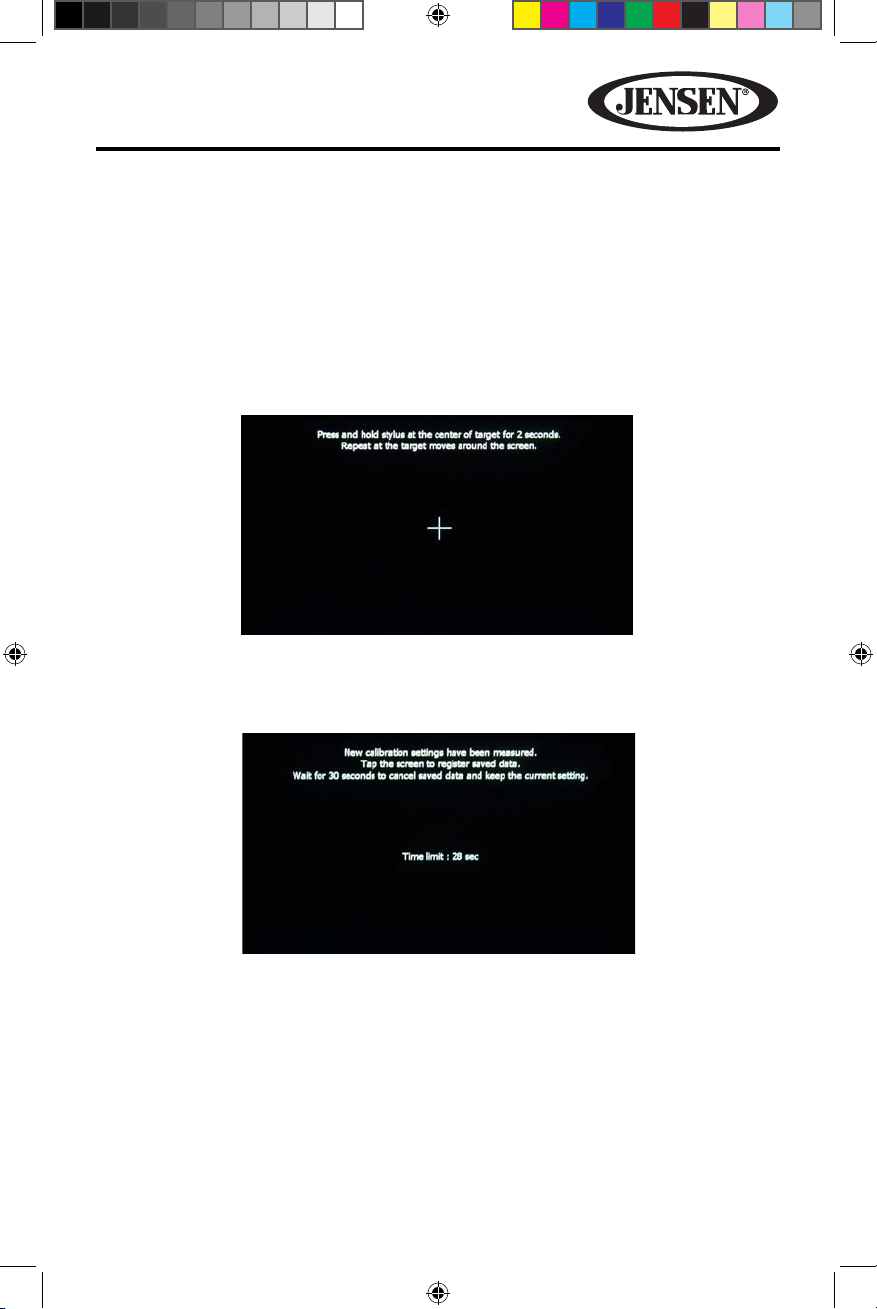
Calibration- The Touch Screen Calibration adjustment is used to set the
parameters of the touch screen to ensure that when the screen is touched, it
corresponds to the feature desired.
NOTE: Never use a pen or sharp object to calibrate the touch screen as this will
damage the panel.
1. Touch the Calibrate icon and the rst screen will appear with instructions.
2. Follow the instructions on the screen touching and momentarily holding nger
or a stylus to the center of the target for 2 seconds. Repeat as the target moves
to each corner of the screen and nally to the center.
Figure 10. Calibration Screen
3. The second screen will appear:
Figure 11. Audio Sub-Menu Screen
4. If the screen is touched, the new calibration parameters will be accepted. If
the screen is not touched within thirty seconds, the new parameters will be
disregarded.
23
128-9243a VX6020 Owner's Manual 08 14 2013.indd 23 8/14/2013 12:07:05 PM
VX6020
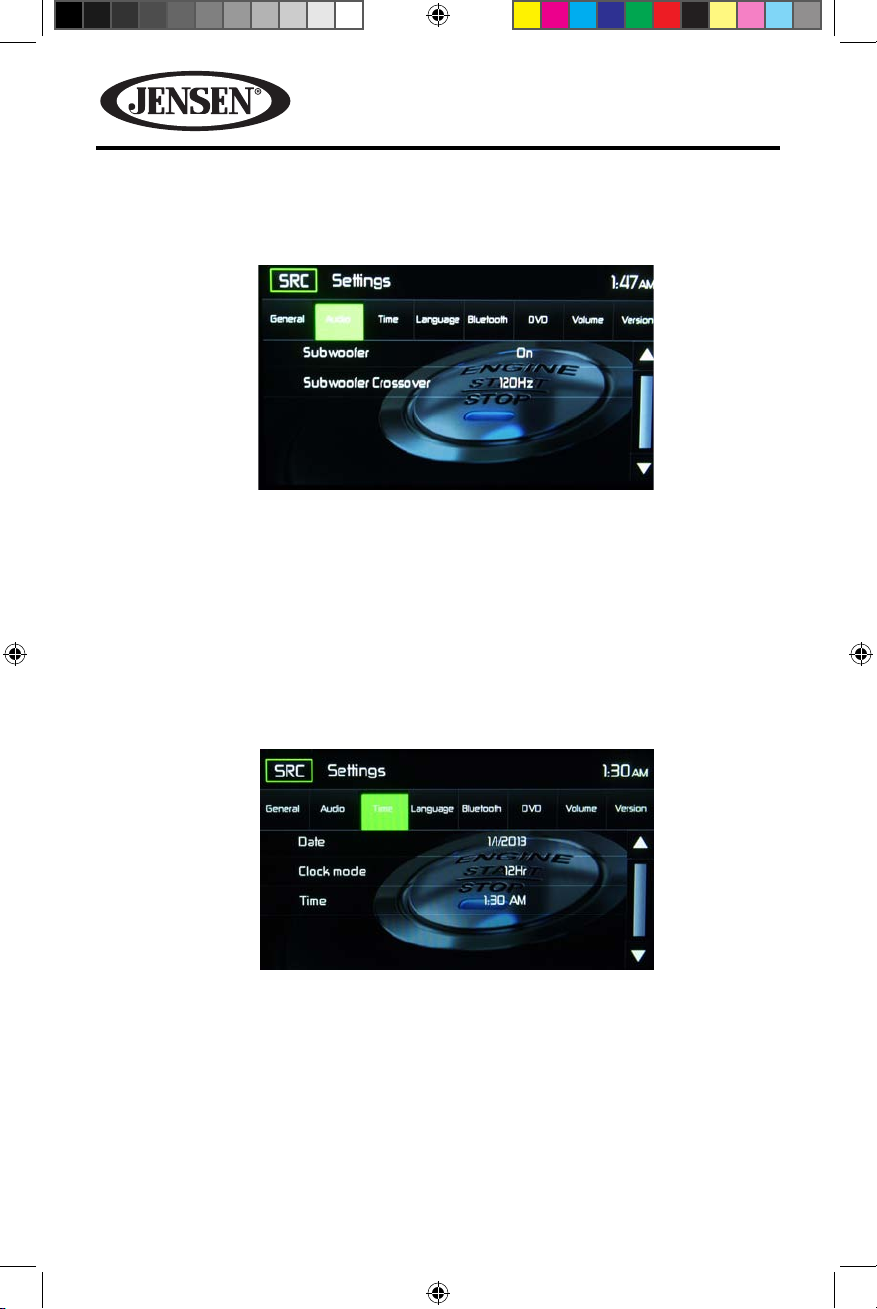
Audio Sub-menu Features
The Audio Sub-menu is used to turn the Subwoofer output ON or OFF and to select
a Subwoofer crossover frequency.
Figure 12. Audio Sub-Menu Screen
Subwoofer- Touch ON or OFF to turn the subwoofer output ON or OFF.
Subwoofer Crossover- Touch a crossover frequency (80Hz, 120Hz or 160Hz) to
set a cut-o frequency for the subwoofer’s LPF (low-pass lter).
Time Sub-menu Features
Clock appears in the top right corner of the screen during certain operations.
NOTE: The AM/PM indication will change as you continue to adjust the hour past 12.
Figure 13. Time Sub-Menu Screen
Date- Touch the Date icon and use the p or q icons to set the day, month, and
year (see gure 13). After setting the date, touch Save. The date will appear to the
right of the Date option.
Clock Mode- Touch 12Hr to set the clock display to 12 hour time intervals using AM
and PM. Touch 24Hr to set the clock display to a 24 hour time interval (or military
time).
24
128-9243a VX6020 Owner's Manual 08 14 2013.indd 24 8/14/2013 12:07:07 PM
 Loading...