


Installation Guide
VM9216BT
|
What’s in the Box |
VM9216BT Head Unit |
Single DIN Sleeve |
External Microphone |
Trim Ring |
Power / Speaker Harness |
Owner’s Manual |
NAV104 / Microphone Harness |
Installation Guide |
Hardware Bag |
|
Tools and Supplies
You will need these tools and supplies to install your VM9216BT:
•Torx type, flat-head and Philips screwdrivers
•Wire cutters and strippers
•Tools to remove existing radio (screwdriver, socket wrench set or other tools)
•Electrical tape
•Crimping tool
•Volt meter/test light
•Crimp connections
•18 gauge wire for power connections
•16 – 18 gauge speaker wire
WARNING! Never install this unit where operation and viewing could interfere with safe driving conditions.
VM9216BT
Disconnecting the Battery
To prevent a short circuit, be sure to turn off the ignition and remove the negative (-) battery cable prior to installation.
NOTE: If the VM9216BT is to be installed in a car equipped with an on-board drive or navigation computer, do not disconnect the battery cable. If the cable is disconnected, the computer memory may be lost. Under these conditions, use extra caution during installation to avoid causing a short circuit.
Pre-installation
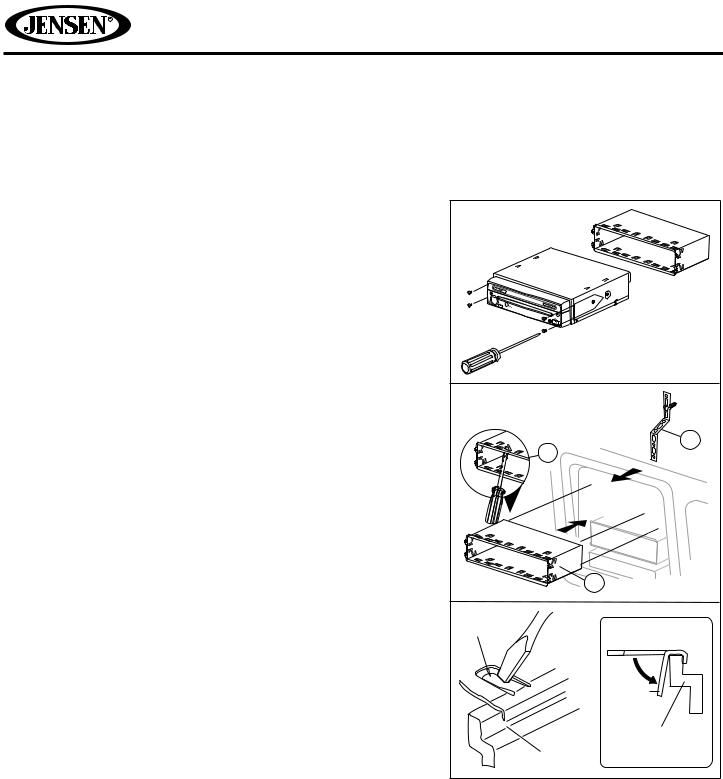
1.Remove the four screws that attach the mounting sleeve to the radio and remove the sleeve.
2.Install the mounting sleeve:
a.Install mounting sleeve into the dashboard or optional adapter. Do not force the sleeve into the opening or cause it to bend
or bow.
b.Locate the series of bend-tabs along the top, bottom and sides of the mounting sleeve. With the sleeve fully inserted into the dashboard opening, bend as many of the tabs outward as necessary so that the sleeve is firmly secured to the dashboard.
c.Install the support strap to make the unit more stable.
3.Place the radio in front of the dashboard opening so the wiring can be brought through the mounting sleeve.
CAUTION! Be careful not to damage the car wiring.
EJECT |
2c |
2b |
2a |
TAB |
TAB |
DASHBOARD |
DASHBOARD |
2
 Loading...