


TITLE Cleaning the Jaguar XK8/XKR Throttle Body, MAFS, and Part-Load Breather
Project Time Required: Approx. 1 Hour |
Last Update: April 11, 2008 – Version 2.5 |
||
|
|
|
|
Author |
Parts Store Items Needed |
Tools Needed |
Skill Level |
|
|
|
|
Dan Pechonis |
• |
Throttle Body Cleaner – *NOT* |
dpechonis@austin.rr.com |
|
carburetor cleaner. (Recommend CRC |
|
|
|
Forum name: MrTexasDan |
|
brand) |
|
• |
Electrical contact cleaner – Must dry |
|
|
residue-free. (Recommend CRC brand) |
|
• |
Lint-free cloth |
•Flat blade screwdriver
•8mm and 10mm nut drivers or sockets and ratchet
•3/32” (2.5mm) drill bit
•Vise Grips
•Pliers
•Phillips-head screwdriver
•10mm wrench (for battery terminal)
Basic
Intermediate
Professional
Author Comments
I own a 2000 XKR. At 82k miles, I was experiencing hard starting and hesitation/rough running when the engine was cold. Also, at any engine temperature when I stepped on the gas from a standing stop, the response was quite “jerky” and the car lurched.
After some online research, I set out to do a little maintenance that probably has never been done on my car (I bought it at 67k miles). Namely, I cleaned the Throttle Body, Mass-Air Flow Sensor (MAFS), and Part-Load Breather Tube orifice.
After performing these steps (in less than an hour!), the hard starting and hesitation were gone, the throttle response was smooth, and I got noticeably more power. I have added this procedure to my maintenance schedule for every 10k miles.
Many thanks go to Jeff Cline, SidVaga, and Bloodworm for their help and posts on this subject. If I ripped off any of your words, it is only because I couldn’t have said it better. Any inaccuracies or omissions are my responsibility alone and not that of these fine people.
Corrections or suggestions for improvement would be sincerely appreciated.
This document may be freely distributed in its complete and unaltered state, with the author’s name and email addresses included.
Procedures
•Clean connectors, hoses, and other parts as you go. This is good practice in general. Clean parts are happy parts.
•Under-hood plastic is notorious for being brittle and breaks quite easily. Handle with care.
•Care should always be taken to protect the paint while you lean over the fender. Wash dirt off the bodywork *first*, put covers on both fenders, remove belt buckles, and watch for rivets in jeans or metal zippers, or other potential hazardous bits.
Instructions
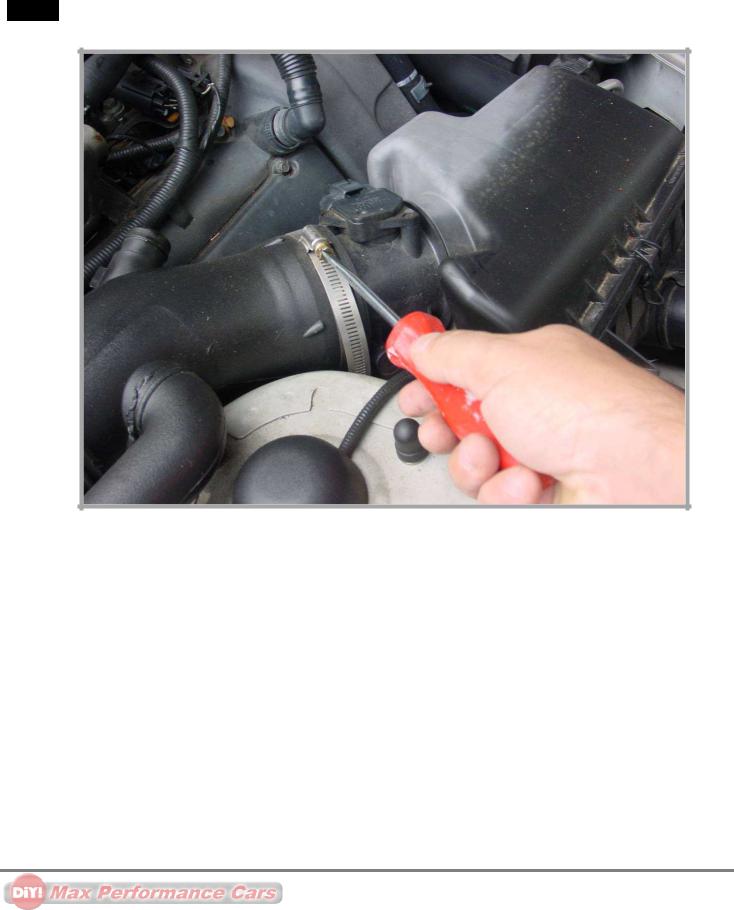
STEP 1 Disconnect the full-load breather tube from the big air intake duct by squeezing as shown. This releases the tangs securing the tube so that it then can be pulled out from the duct. Rotate the breather tube out of the way.
Page 1 of 18
These DiY! Articles are provided as a service of Max Performance Cars and are the sole property of the author.
MPC is not liable for the content.

Note: Do this very carefully, as it is quite easy to break old brittle plastic here … a new one cost me $17 at Jaguar. Also
check that the full-load breather tube has no cracks or leaks. Even small air leaks here will throw off the air-fuel mixture.
Page 2 of 18
These DiY! Articles are provided as a service of Max Performance Cars and are the sole property of the author.
MPC is not liable for the content.
STEP 2 Loosen the hose clamp securing the large air intake duct to the air cleaner box.
Page 3 of 18
These DiY! Articles are provided as a service of Max Performance Cars and are the sole property of the author.
MPC is not liable for the content.
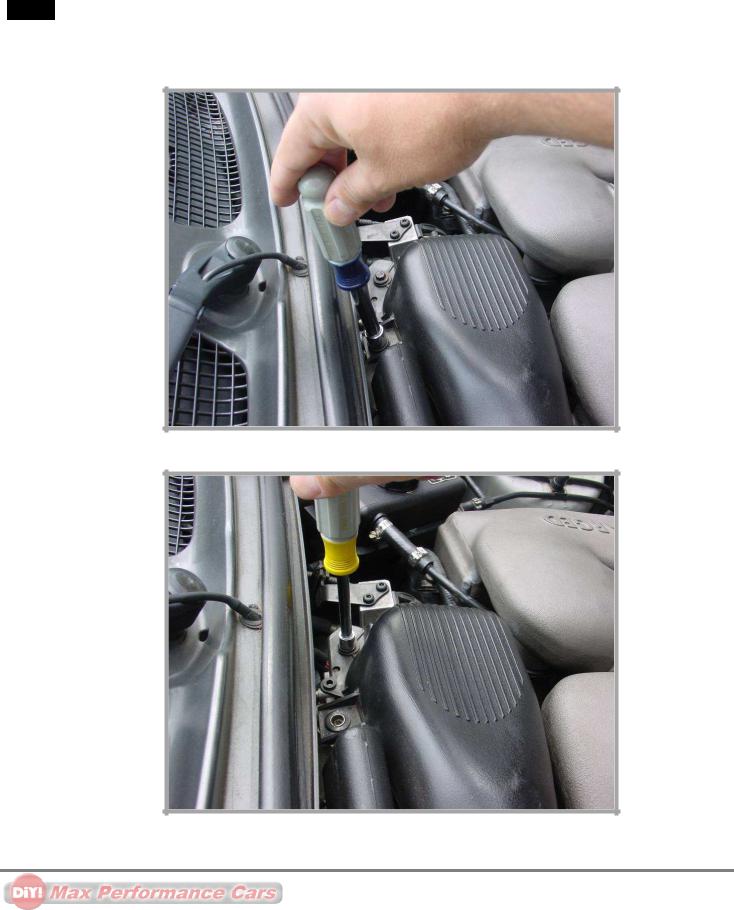
STEP 3 Remove the 2 bolts securing the air intake duct to the throttle body. The upper bolt is 10mm and the lower bolt is 8mm (why – I don’t know. And for that matter, why they are both on the same side while there is no bolt on the other side is a big automotive engineering mystery).
Page 4 of 18
These DiY! Articles are provided as a service of Max Performance Cars and are the sole property of the author.
MPC is not liable for the content.

STEP 4 Remove the intake air duct …
… To reveal this very dirty throttle body.
Page 5 of 18
These DiY! Articles are provided as a service of Max Performance Cars and are the sole property of the author.
MPC is not liable for the content.
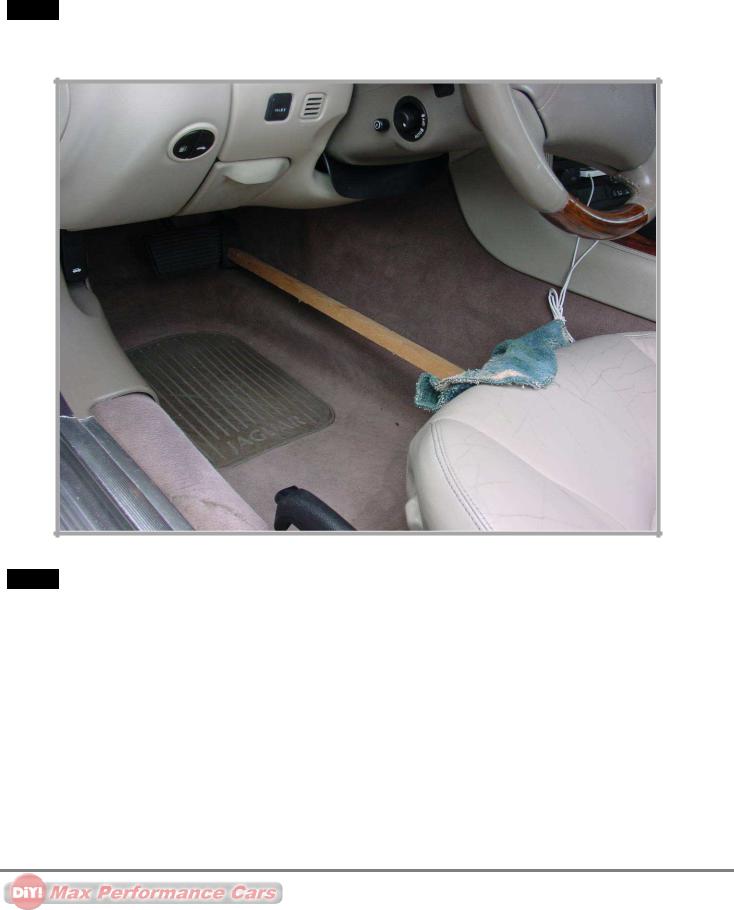
STEP 5 Have someone hold down the throttle pedal to make it easier to open and clean the throttle body valve. If you have no friends to do this, use something like what I rigged up in the picture. Notice the bunched-up rag to protect the leather.
STEP 6 Here’s where we get to cleaning. Spray throttle body cleaner on a lint-free rag. Reach in and open the throttle valve, and wipe down the throttle bore as far in as you can get with your fingers. On my car, the gunk was so thick that it took many wipes to get clean. Also clean the throttle valve itself, especially on the edges.
Note: Use only your fingers and the rag, and not any hard sharp implements. It is easy to damage the coatings on the throttle bore and valve.
Warning: DO NOT spray cleaner directly into the throttle bore. This would cause flammable cleaner to pool up at the bottom of the throttle body (and supercharger on XKR). I’m guessing an explosion in here would be bad.
Page 6 of 18
These DiY! Articles are provided as a service of Max Performance Cars and are the sole property of the author.
MPC is not liable for the content.
 Loading...