


TruVision Navigator 5.0

TruVision Navigator 5.0
Service Pack 3 User
Manual
P/N 1064107 • REV G • ISS 09DEC14

Copyright © 2014 United Technologies Corporation
Interlogix is part of UTC Building & Industrial Systems, a unit of
United Technologies Corporation. All rights reserved.
Trademarks and
patents
The TruVision Navigator 5.0 Service Pack 3 name and logo are
trademarks of United Technologies.
Other trade names used in this document may be trademarks or
registered trademarks of the manufacturers or vendors of the
respective products.
Manufacture
r
Interlogix
3211 Progress Drive, Lincolnton, NC 28092 USA
Authorized EU manufacturing representative:
UTC Climate Controls & Security B.V.,
Kelvinstraat 7, 6003 DH Weert, Netherlands
Contact Information For contact information, see www.interlogix.com
or
www.utcfssecurityproducts.eu
.
Version This document applies to TruVision Navigator 5.0 Service Pack 3.
Certification
N0000
Software license
agreement
Important: This end-user license agreement (“Agreement”) is a legal
agreement between UTC and You. By downloading, installing,
copying or otherwise using this software, you agree to be bound by
the terms of this Agreement. If you do not agree to the terms of this
Agreement, you may not download, install, copy or use the software,
and you may return the software within thirty days (30) days and
request a refund of the license fee.
1. Definitions. The following definitions apply to this document:
“UTC”, means UTC Fire & Security Inc., a Delaware corporation.
“You” means the natural person or the entity that is agreeing to be
bound by this Agreement, their employees and third party
contractors that provide services to you.
“Software” means the software products that are licensed to You
under this Agreement and any upgrades, modified versions, updates,
additions, and copies of the Software furnished to You during the
term of the license granted herein.
“Customer” means the person or organization, or parent or
subsidiary thereof, who uses the Software for its intended purposes,
and excludes distributors, authorized resellers, value added resellers
and original equipment manufacturers. Customer may be referred to
as You or Your, whether an individual or a business entity of any
kind.

“Machine” means the computer, workstation, terminal, or other
hardware product on which the Software is installed.
2. License. The Software is licensed, not sold. UTC shall retain all
rights to and in the Licensed Product, including, but not limited to, all
copyrights, patents, trademarks, and trade secrets incorporated in
the Licensed Products.
UTC hereby grants You a non-exclusive, non-transferable license,
without right to sublicense, to install and use the object code version
of the Software to the extent permitted by your payment of the
license fee (if applicable) and only in the country in which the
Software was acquired. Unless multiple copies are licensed, you
may not install more than one copy of the Software onto more than
one Machine.
UTC hereby grants You a non-exclusive, non-transferable license, to
make a single machine-readable copy of the Software solely for
backup or achival purposes.
You agree not to:
a. transfer or distribute the Software, in electronic format or
otherwise;
b. store the Software on a server for use by more than one terminal;
c. sell, rent, lease, or sublicense the Software;
d. copy or modify the Software for any purpose.
3. Term. This Agreement is effective until terminated. You may
terminate this Agreement by uninstalling all components of the
Software from all Machines and returning the Software to UTC. UTC
may terminate this Agreement if You breach any of these terms and
conditions. Upon termination of this Agreement for any reason, You
agree to immediately uninstall all components of the Software and
return the Software to UTC. All provisions of this Agreement relating
to (i) disclaimer of warranties; (ii) limitations on liability, remedies,
and damages; and (iii) UTC’s proprietary rights, shall survive
termination of this Agreement.

4. Reverse Engineer. The Software is delivered in object code only.
You may not alter, merge, modify, adapt, translate, decompile,
disassemble, reverse-engineer, or otherwise reduce the Software to
a human-perceivable form.
5. Limited warranty. UTC warrants that for one (1) year from the
date of delivery of the Licensed Product (Software Warranty Period),
the functions contained in the Software will be fit for their intended
purpose as described in the accompanying documentation, and will
conform in all material respects to the specifications stated in such
documentation. UTC does not warrant that the operation of the
Software will be uninterrupted or error-free. Your exclusive remedy
under this limited warranty for nonconforming Software shall be
repair or replacement of the Software, at the sole discretion of UTC.
To obtain a repair or replacement of nonconforming Software,
contact your Interlogix reseller directly or contact us online at
www.interlogix.com/customer-support during the Software Warranty.
EXCEPT FOR THE PRECEDING EXPRESS LIMITED WARRANTY,
TO THE MAXIMUM EXTENT PERMITTED BY APPLICABLE LAW,
UTC PROVIDES THE SOFTWARE WITHOUT ANY WARRANTIES
OF ANY KIN, EXPRESS, IMPLIED, OR STATUTORY. UTC
SPECIFICALLY DISCLAIMS ANY IMPLIED WARRANTIES OF
MERCHANTABILITY, FITNESS FOR A PARTICULAR PURPOSE,
AND NON-INFRINGEMENT.
6. Limitation of liability. UTC’s sole obligation or liability under this
agreement is the repair or replacement of nonconforming software
and/or defective media according to the limited warranty above. TO
THE MAXIMUM EXTENT PERMITTED BY APPLICABLE LAW, IN
NO EVENT WILL UTC BE LIABLE FOR ANY LOST PROFITS OR
BUSINESS OPPORTUNITIES, LOSS OF USE, BUSINESS
INTERRUPTION, LOSS OF DATA, OR ANY OTHER INDIRECT,
SPECIAL, INCIDENTAL, OR CONSEQUENTIAL DAMAGES
UNDER ANY THEORY OF LIABILITY, WHETHER BASED IN
CONTRACT, TORT, NEGLIGENCE, PRODUCT LIABILITY, OR
OTHERWISE. BECAUSE SOME JURISDICTIONS DO NOT
ALLOW THE EXCLUSION OR LIMITATION OF LIABILITY FOR
CONSEQUENTIAL OR INCIDENTAL DAMAGES THE PRECEDING
LIMITAITON MAY NOT APPLY TO YOU. IN ANY EVENT, UTC’S
LIABILITY WILL NOT EXCEED THE LICENSE FEE, IF ANY, PAID
BY YOU FOR THE SOFTWARE LICENSED HEREUNDER. THE
FORGOING LIMITATION WILL APPLY TO THE MAXIMUM
EXTENT PERMITTED BY APPLICABLE LAW, REGARDLESS OF
WHETHER UTC HAS BEEN ADVISED OF THE POSSIBILITY OF

SUCH DAMAGES AND REGARDLESS OF WHETHER ANY
REMEDY FAILS OF ITS ESSENTIAL PURPOSE.
7. General. The material provided to You, including the Software,
shall not be exported or reexported in violation of any export
provisions of the USA or any other applicable jurisdiction. Any
attempt to sublicense, assign, or transfer any of the rights, duties, or
obligations hereunder shall be void. This Agreement shall be
governed by and interpreted under the laws of the State of California,
United States of America, without regard to conflicts of law
provisions. You hereby consent to the exclusive jurisdiction of the
state and federal courts covering Costa Mesa, California to resolve
any disputes arising under or in connection with this Agreement.
8. Restricted rights legend. The Licensed Product is provided with
RESTRICTED RIGHTS. In the event the United States Government
or an agency thereof is granted a license, the following additional
terms apply: Restricted Computer Software, as defined in the
Commercial Computer Software– Restricted Rights clause at
Federal Acquisition Regulations 52.227-19, and the restrictions as
provided in subparagraphs (c)(1) and (c)(2) thereof; and as
applicable, the Government’s rights to use, modify, reproduce,
release, perform, display, or disclose the Software also are restricted
as provided by paragraphs (b)(2) and (b)(3) of the Rights in
Noncommercial Technical Data and Computer Software– Small
Business Innovative Research (SBIR) Program clause at DFARS
252.227-7018.
9. Acknowledgment. You acknowledge that You have read and
understand this agreement and agree to be bound by its terms. You
further agree that this agreement is the complete and exclusive
statement of the agreement between You and UTC, and supersedes
any proposal or prior agreement, oral or written, and any other
communication relating to the subject matter of this agreement.
Intended use Use this product only for the purpose it was designed
for; refer to the data sheet and user documentation. For the latest
product information, contact your local supplier or visit us online at
www.interlogix.com/customer-support .


TruVision Navigator 5.0 Service Pack 3 User Manual i
Content
Chapter 1 Overview 1
Client Software Requirements 6
Client Hardware Guidelines 6
Server Software Requirements 8
Server Hardware Guidelines 9
Chapter 2 Installation 12
Architecture 12
Installation Options 12
Languages 13
Installation – Standalone Model 13
Installation – Multi-Client Model 16
Upgrade 21
Initial Login 27
Uninstall 29
Network Time Protocol (NTP) Service 32
Windows 7 and Vista – Local Scheduling Service 33
Installing Navigator on Windows 8 platforms 35
Chapter 3 Operation 37
Adding a Single Device 37
Device Management Tool 40
Adding Cameras via Discovery Tool 42
Adding Cameras 44
Import an address book 44
Organize the Navigator 47
Find and export video 48
TruVision Navigator Player 52
Views
54
PTZ control 56
Digital Zoom 58
Tampering Monitor 58
Configure a device 59
Configure a camera 62
Device properties 64
Device disk
analysis 65
Firmware upload 66
Camera search 67

ii TruVision Navigator 5.0 Service Pack 3 User Manual
Chapter 4 TruVision Navigator Settings 69
User Management & Client Software Delivery Overview 78
Fully Automated Client Software Delivery 79
Partially Automated Client Software Delivery 83
Inactivate a user 84
Restore an inactive user 85
Reset a user after lockout 88
Group management 88
Connection priority 89
Services 91
Notifications and Notifier 93
Health Diagnostics 96
Device Report 98
Database backup and restore 99
Help 100
Licensing 101
Appendix A Device Details 102
DVMRe / StoreSafe (DVR) 103
SymDec / SymSafe (DVR) 107
DVSRxU (DVR) 112
TruVision TVR10 (DVR) 116
TruVision TVR11 / TVR12 (DVR) 120
TruVision TVR20 (DVR) 124
TruVision TVR30 (DVR) 127
TruVision TVR31 (DVR) 130
TruVision TVR40 (DVR) 134
TruVision TVR41 / TVR42 (DVR) 138
TruVision Generic TVR / TVN 142
TruVision TVR60 (Hybrid DVR)
145
TruVision TVN10/20/21/50 (NVR) 150
TruVision TVN40 (NVR) 155
TruVision Software Video Recor
der (SVR) 171
Platform Out of Box Experience (OOBE) 172
Appendix B Microsoft IIS Setup 178
Microsoft IIS Setup 178

TruVision Navigator 5.0 Service Pack 3 User Manual 1
Chapter 1
Overview
TruVision Navigator is video management software that enables security-related
personnel to easily and remotely gather video evidence, monitor live situations, and
configure and maintain a video surveillance system that consists of UTC digital video
recorders (devices), analog video cameras, network video recorders, and IP cameras.
TruVision Navigator provides a more intuitive way to find and provide relevant video
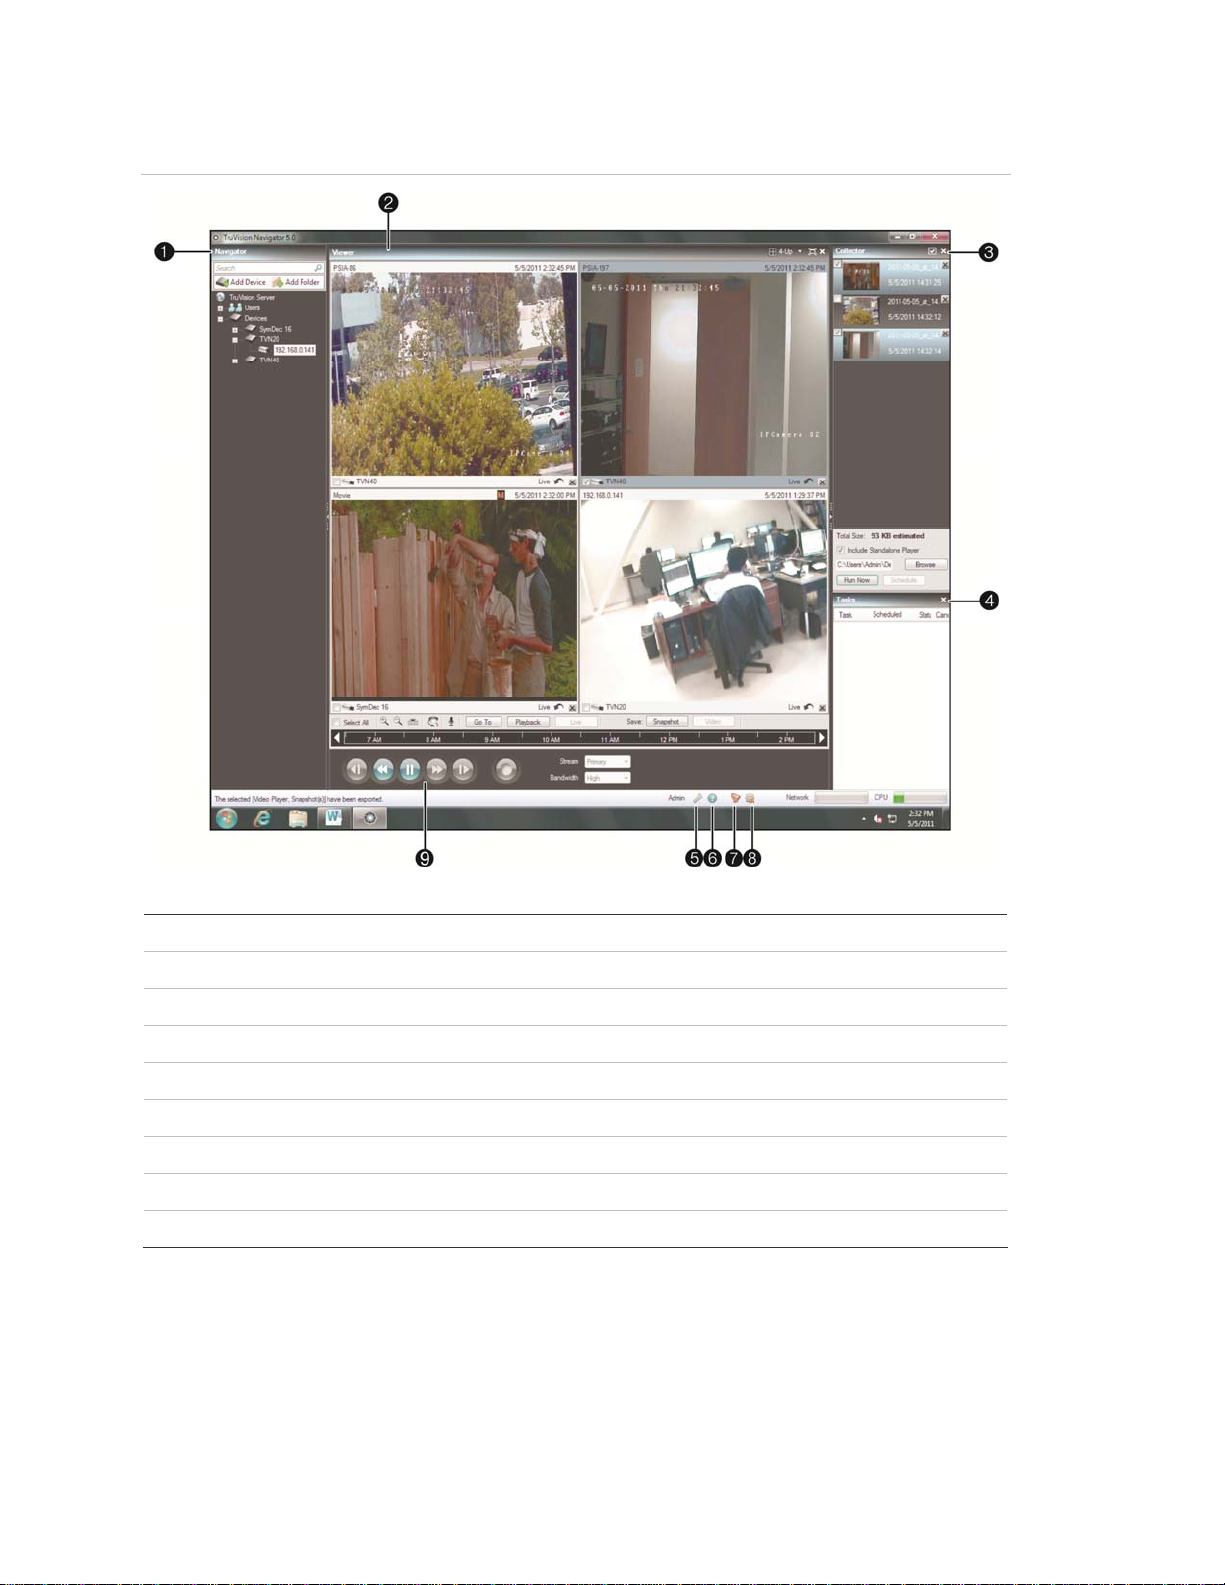
content. Figure 1 shows the TruVision Navigator main screen.
Chapter 1: Overview
2 TruVision Navigator 5.0 Service Pack 3 User Manual
Figure 1: TruVision Navigator Main Window
1 Navigator Panel
2 Viewer Panel
3 Collector Panel
4 Tasks Panel
5 Settings Dialog
6 Help Dialog
7 Notifier Dialog
8 Services Dialog
9 Controller Panel and Toolbar
TruVision Navigator consists of 5 panels and several major dialogs as listed above.
Panels are resizable by dragging the vertical left or right splitter bars. Arrow icons next
to panel names signify the ability to hide/unhide the panel. This provides custom
application layout styles depending on the activities that you want to perform. TruVision

Chapter 1: Overview
TruVision Navigator 5.0 Service Pack 3 User Manual 3
Navigator will remember your custom panel layout upon logout and restore you to that
same point when you log back in.
The Navigator panel is the central administration area in the software and allows you to
quickly search and access any device or camera in your system.
The Navigator features double-click or drag n’ drop capability to view cameras or
devices as a whole. By right-clicking on any object in the Navigator, you will be exposed
to a number of operations that can be performed on the object. These include health
diagnostics, device configuration, disk analysis, properties, search, firmware uploads,
and more.
This panel is permission-based, so if you do not have rights to perform certain actions,
you will not see the options.
The Viewer panel allows you to view both live and recorded video from any video source
in the system to verify and act on the content. It contains live or previous recorded
videos that can be launched from the Notifier, Navigator, or Collector.
Users have several tile layouts to choose from when arranging the video sources.
Standard tile layouts include 1×1, 2×2, 3×3, 4×4, and 5×5. We also support a Custom
Tile Layout with 1 large tile and 7 smaller surrounding tiles for additional flexibility.
Double-clicking in any single tile will bring that video to full screen. Double-clicking the
video again will restore the video to the previous tile layout. As well, Instant Replay is
available from the video tile itself by clicking on the Instant Replay icon.
If your system contains PTZ (pan/tilt/zoom) cameras, the Viewer panel has mouse
support for PTZ features from within the video tile. Left-click and move the mouse
left\right\up and down to adjust the pan and tilt of the camera. Right-click and move the
mouse up and down to allow the camera lens to zoom in and out.
The Controller panel allows you to manage video once it is loaded in the Viewer. The
Controller features a toolbar, a timeline, playback controls, and stream switching
capabilities. When a specific video tile is selected (blue outline around the video tile),
the Controller features will affect that video tile.
The Controller toolbar allows you to select all video tiles in the viewer, zoom in and out
on the timeline, center the timeline, open the PTZ control palette, perform a Go To
search, and put video in live or playback. The Snapshot button allows you to take a
snapshot of the current play time of a selected video tile and send it to the Collector for
export. The Video button allows you to send a desired video segment (of the time range
you specified with the green and red indicators) to the Collector for export.
The Controller timeline allows users to seek for video at specific points in time. Double-
clicking anywhere on the timeline will automatically playback the selected video at that
specific date and time. Use the current live/playback cursor (appears as a blue seek
triangle icon) to seek and play the video anywhere along the timeline. Use the green and

Chapter 1: Overview
4 TruVision Navigator 5.0 Service Pack 3 User Manual
red triangle icons to mark the beginning and end of a desired video segment. Use the
playback controls beneath the timeline to further manipulate playback video.
The Collector panel contains all relevant video segments, snapshots, and local
recordings ready for export. From here, you can select the desired content to export to
your hard drive on demand or via a schedule.
To re-open a video clip for further analysis, double-click the thumbnail and the video will
launch in the Viewer. You can then manipulate the timeline to refine the clip and send it
back to the Collector. To delete video clips from the Collector, click the delete icon next
to the thumbnail. Rename, print, or E-mail snapshots with a right-click of the mouse on
the thumbnail.
The Tasks panel affords the user one central place to monitor the tasks that have been
created and scheduled in the system. These tasks include video exports, firmware
upgrades, bulk configurations, database backups, and database restores. The Tasks
panel provides a real-time status of the tasks in the queue, and the reason if a task was
unsuccessful.
The Settings dialog allows the user to configure several options within the application.
These include settings for client, server, notifications, and health diagnostics.
Client settings apply to each client station. These settings include CPU threshold control,
POS activation, aspect ratio and bandwidth controls for video monitoring, and audio
activation. Enable the maximum CPU threshold here to prevent your CPU from reaching
100% during video rendering. As with all applications, you will experience lockups as
you reach 100% CPU.
Enable your alert sound when new device notifications are received in TruVision
Navigator's Notifier.
Enable the aspect ratio for live and playback video in the Viewer.
Server settings include the SMTP server settings, permission settings, custom help link
settings, and server/client URL information.
Notifications settings include the network settings necessary to receive events from each
device. Also, this menu includes the e-mail notification settings as well as a filter of
specific notification types.
Health diagnostics settings include a filter of diagnostics to be received, as well as e-mail
settings to receive notifications of diagnostics information. Also, automatic diagnostic
polling can be scheduled from this menu.
The Help dialog offers an easy to use Help function for more detailed system
instructions. You can also obtain TruVision Navigator version information, copyright, and
end user license agreement information here. Organizations have the ability to add their
own custom Help or training link here to facilitate the adoption of the product. This menu

Chapter 1: Overview
TruVision Navigator 5.0 Service Pack 3 User Manual 5
also includes the licensing screen for TruVision SVR recorder. Please see TruVision
SVR User Manual for more information on licensing.
The Notifier dialog allows you to collect and manage any notifications sent to you from
the devices. You can select an alert in the Notifier panel and view the video results in the
Viewer panel. You must configure your devices to send these notifications over the
network via TCP or SMTP to the IP address of the TruVision Navigator Server machine.
In addition, the firewall must be configured on the TruVision Navigator Server machine to
accept these network notifications.
These notifications may include Alarm, Video Loss, Motion, Fan Failed, Disk Failed,
User Locked at Device, Video Erased, Disk Full, Device Powered Up, and more
depending on the device model.
The Services dialog shows general information on all of the TruVision Navigator
services including Network Time Protocol, Diagnostic Polling, and Notification Service.
This includes the service name, location, status, and the ability to start, stop, or disable
the service. Standalone installations will only show the Network Time Protocol service in
this dialog since the other services are embedded in Settings menu.

Chapter 1: Overview
6 TruVision Navigator 5.0 Service Pack 3 User Manual
Client Software Requirements
TruVision Navigator supports all of the following Operating Systems and other software
components.
Table 1: Client Software Requirements
Component Version Notes
Operating
System
Microsoft Windows XP Pro SP3 Prerequisite to loading
TruVision Navigator
Microsoft Windows Vista SP1 32-bit / 64-bit Prerequisite to loading
TruVision Navigator
Microsoft Windows 7 32-bit / 64-bit Prerequisite to loading
TruVision Navigator
Microsoft Windows 8 32-bit/ 64-bit Prerequisite to loading
TruVision Navigator
(WinPCAP needs to be
installed separately and ran
in compatibility mode for
operation on Windows 8
systems)
Microsoft Windows Server® 2003 R2 32-bit Prerequisite to loading
TruVision Navigator
Microsoft Windows Server® 2008 R2 32-bit /
64-bit
Prerequisite to loading
TruVision Navigator
Other Microsoft .NET Framework 4.0 Packaged with the
installation
Client Hardware Guidelines
The PC industry is constantly improving on product performance / configurations while
reducing cost to the customer.
As a result, we have listed some Client PC specifications for TruVision Navigator as to
what is commercially available in August 2013.
These specifications are meant to serve as a GUIDELINE for the customer. TruVision
Navigator will perform to varying degrees on lesser or more robust machines.
Please review the Expected Performance metrics at the bottom of the table to determine
what will meet your needs. You can make your PC decision based upon that need.

Chapter 1: Overview
TruVision Navigator 5.0 Service Pack 3 User Manual 7
Table 2: Client PC Hardware Specifications
Component Minimum Recommended High Notes
Processor 3rd Gen Intel
Core i3-3220
Processor (Dual
Core, 3.30GHz,
3MB, w/
HD2500
Graphics)
3rd Gen Intel
Core i5-3470
Processor
(6MB, 3.2GHz)
w/HD2500
Graphics
3rd Gen Intel
Core i7-3770
Processor
(8MB, 3.4GHz)
w/HD4000
Graphics
CPU power is directly
related to the
performance of the
application when running
and rendering video. The
better the CPU, the more
responsive your
application will be.
Memory 4GB, NON-
ECC, 1600MHZ
DDR3,2DIMM
6GB, NON-
ECC, 1600MHZ
DDR3,2DIMM
8GB, NON-
ECC, 1600MHZ
DDR3,2DIMM
RAM is related to the
number of different
applications that can run
simultaneously as well as
the number of different
operations that TruVision
Navigator can perform at
once. The higher the
RAM, the better
performance you can
expect.
Hard Drive 500GB -
7200RPM,
SATA 3.0Gb/s,
16MB Cache
500GB5 -
7200RPM,
SATA 3.0Gb/s,
16MB Cache
500GB5 -
7200RPM,
SATA 3.0Gb/s,
16MB Cache
Optional - TruVision
Navigator requires
approximately 880 MB to
install. If you wish to
store exported video from
the devices on the
machine, you may want
to increase storage.
Graphics Card Intel Integrated
Graphic
w/Single
HDMI/VGA
Dual 1GB AMD
Radeon™HD
7470
Dual 1GB AMD
Radeon™HD
7470
Video Card capability is
directly related to the
video rendering
performance within
TruVision Navigator. The
better the video card, the
better video rendering
performance you can
expect.
Resolution 1024 x 768 1024 x 768 1024 x 768
Network Integrated PCIE
10/100/1000
Integrated PCIE
10/100/1000
Integrated PCIE
10/100/1000
The network interface card
can be a performance bottle
neck depending upon the
throughput of the card. If the
card’s throughput is less
than the amount of data
streaming to the machine,
you will experience
performance issues.

Chapter 1: Overview
8 TruVision Navigator 5.0 Service Pack 3 User Manual
Server Software Requirements
TruVision Navigator supports all of the following Operating Systems and other software
components.
Table 3: Server software requirements
Component Version Notes
Operating
System
Microsoft Windows XP Pro SP3 Prerequisite to loading
TruVision Navigator
Microsoft Windows Vista SP1 32-bit / 64-bit Prerequisite to loading
TruVision Navigator
Microsoft Windows 7 32-bit / 64-bit Prerequisite to loading
TruVision Navigator
Microsoft Windows 8 32-bit/ 64-bit Prerequisite to loading
TruVision Navigator (WinPCAP
needs to be installed
separately and ran in
compatibility mode for
operation on Windows 8
systems)
(SQL drivers need to be
installed for Windows 8 before
Navigator installation)
Microsoft Windows Server® 2003 R2 32-bit Prerequisite to loading
TruVision Navigator
Microsoft Windows Server® 2008 R2 32-bit / 64-
bit
Prerequisite to loading
TruVision Navigator
Web Service Microsoft Internet Information Services (IIS) 6.0
or higher
Prerequisite to loading
TruVision Navigator
Cassini Packaged with the installation
Database Microsoft’s SQL 2008
Microsoft’s SQL Express 2008 R2
Microsoft’s SQL Express 2008
R2 is packaged with the
installation.
Microsoft SQL is not required
for Standalone installation

Chapter 1: Overview
TruVision Navigator 5.0 Service Pack 3 User Manual 9
Other Microsoft .NET Framework 4.0 Packaged with the installation
Other WinPCAP 4.1.2 Packaged with the installation
Server Hardware Guidelines
This specification is meant to serve as a GUIDELINE for the customer. TruVision
Navigator will perform to varying degree on a lesser or more robust machine. Table 5
lists the recommended server hardware specification.
Table 4: Server Hardware Specifications
Component Recommended Notes
Processor 3rd Gen Intel Core i5-3470
Processor (6MB, 3.2GHz)
w/HD2500 Graphics
Memory 6GB, NON-ECC, 1600MHZ
DDR3,2DIMM
Hard Drive 500GB5 - 7200RPM, SATA
3.0Gb/s, 16MB Cache
Optional - this storage requirement will
vary widely depending on many factors
including whether or not the database is
being hosted on the server, the size of the
actual database, and whether or not you
want to store video on the server.
Graphics Card Dual 1GB AMD Radeon™HD
7470
Optional - depending on whether or not
you want to view video from a Client on
this machine.
Network 1024 x 768
Intergrated PCIE 10/100/1000
Supported Video Units
Table 6 shows the supported devices and related firmware versions.
Table 5: Supported Recording Devices
UTC Devices Supported Firmware
TruVision NVR20* 2.0h
TruVision NVR50* 1.0m
TruVision TVN10 1.1
TruVision TVR20* 1.0.36

Chapter 1: Overview
10 TruVision Navigator 5.0 Service Pack 3 User Manual
TruVision TVN21(P) 2.0
TruVision DVR12 1.0
TruVision DVR41* 1.0
TruVision DVR42 1.0
TruVision NVR40 (TVN40)* 4.2.1 Changelist 53820
TruVision DVR60 (TVR60) 4.0
TruVision DVR40 (TVR40)* V3.0 build 100416
TruVision DVR31* 8000
TruVision DVR30 (TVR30)* 0453-0329-0552-4723
TruVision DVR10 (TVR10)* 2.0 Build 090722 and 2.2 Build 091210
TruVision DVR11 (TVR11c)* 1.0m
TruVision DVR11 (TVR11)* 1.0k
TruVision SVR* 7.0.825
SymDec 16 plus 4* 1.46r, 1.47k, 1.51e, 1.52b, and 1.53
SymDec 4* 1.47e and 1.48a
SymDec 1* 1.47e and 1.48a
SymSafe Pro Series* 1.27b, 1.28i, 1.30b, 1.31.b, and 1.32
SymSafe Basic Series* 1.27b, 1.28i, 1.30b, 1.31.b, and 1.32
DVSRxU* V2.3 build 091110 (V2.31S)
DVMRE CT (Triplex) Series* 5.68a, 5.69, 5.71, and 5.72
DVMRE CT II Series* 6.28a, 6.29, 6.31, and 6.32
DVMRE PRO Series* 5.68a, 5.69, and 5.71
DVMRE ezT Series* 5.68a, 5.69, and 5.71
DVMRE CS Series* 5.21
DVMRE CD Series* 3.24
StoreSafe Series* 5.68a, 5.69, 5.71, and 5.72
StoreSafe Pro II Series* 6.28a, 6.29, 6.31, and 6.32
StoreSafe Advanced Series* 6.28a, 6.29, 6.31, and 6.32

Chapter 1: Overview
TruVision Navigator 5.0 Service Pack 3 User Manual 11
DSR* 2.23d and 2.24a
DVSE Series* 1.20g, 1.41w, and 3.04
* These models are in End of Life status and are not actively supported.

TruVision Navigator 5.0 Service Pack 3 User Manual 12
Chapter 2
Installation
Architecture
TruVision Navigator is made up of 3 components:
• Client
• Services
• Database
The TruVision Navigator architecture is flexible enough to allow all 3 of these
components to co-exist on the same PC (i.e. a single Windows 7 machine) in small-
scale environments.
As well, TruVision Navigator allows each of these 3 components to operate on separate
machines (i.e. a virtual server for Services, a dedicated database machine for Database,
and multiple PCs distributed on the network hosting Clients) for large- scale, distributed
environments.
Installation Options
There are 2 installation options for TruVision Navigator:
Standalone Model (or Direct Database Connection) - this installation option allows
the Client, the Database, and the Services to be located on the same machine. The one
limitation is that no other Clients on the network can connect to the database on this
machine. This installation option is ideal for small, standalone systems.
Multi-Client Model (or Traditional Client/Server) - This installation option allows the
Client, the Database, and the Services to be located on the same or separate machines.
This option requires a Web Service (either Microsoft’s Internet Information Services (IIS)
or Cassini) for communication between the multiple Clients and the shared Database.
This installation option is ideal for larger systems with many geographically dispersed
users, PCs, and recording devices.

Chapter 2: Installation
TruVision Navigator 5.0 Service Pack 3 User Manual 13
Whatever installation option you choose, the core features and functions of TruVision
Navigator remain the same.
You will need Administrator’s rights on the machine to install the application, but the
software will be available to all users who successfully log on to a Windows account on
that machine.
Languages
The following languages are supported in TruVision Navigator: Arabic, Chinese
(Simplified and Traditional), Czech, Danish, Dutch, English, Finnish, French, German,
Hungarian, Lithuanian, Italian, Polish, Portuguese, Russian, Slovak, Spanish, Swedish,
and Turkish.
After launching the TruVision Navigator Installation Setup.exe, the InstallShield Wizard
will auto-detect the language setting on the PC, and if it is supported, will translate to
that language. If the language detected is not supported, the InstallShield Wizard will
default to English.
Upon launching the Client, TruVision Navigator will always auto-detect the language
setting on the PC, and if it is supported, will translate to that language. If the language
detected is not supported, the Client will default to English.
Installation – Standalone Model
To install a new standalone instance of TruVision Navigator on your computer do the
following:
Place the TruVision Navigator setup.exe program on the desktop of the PC.
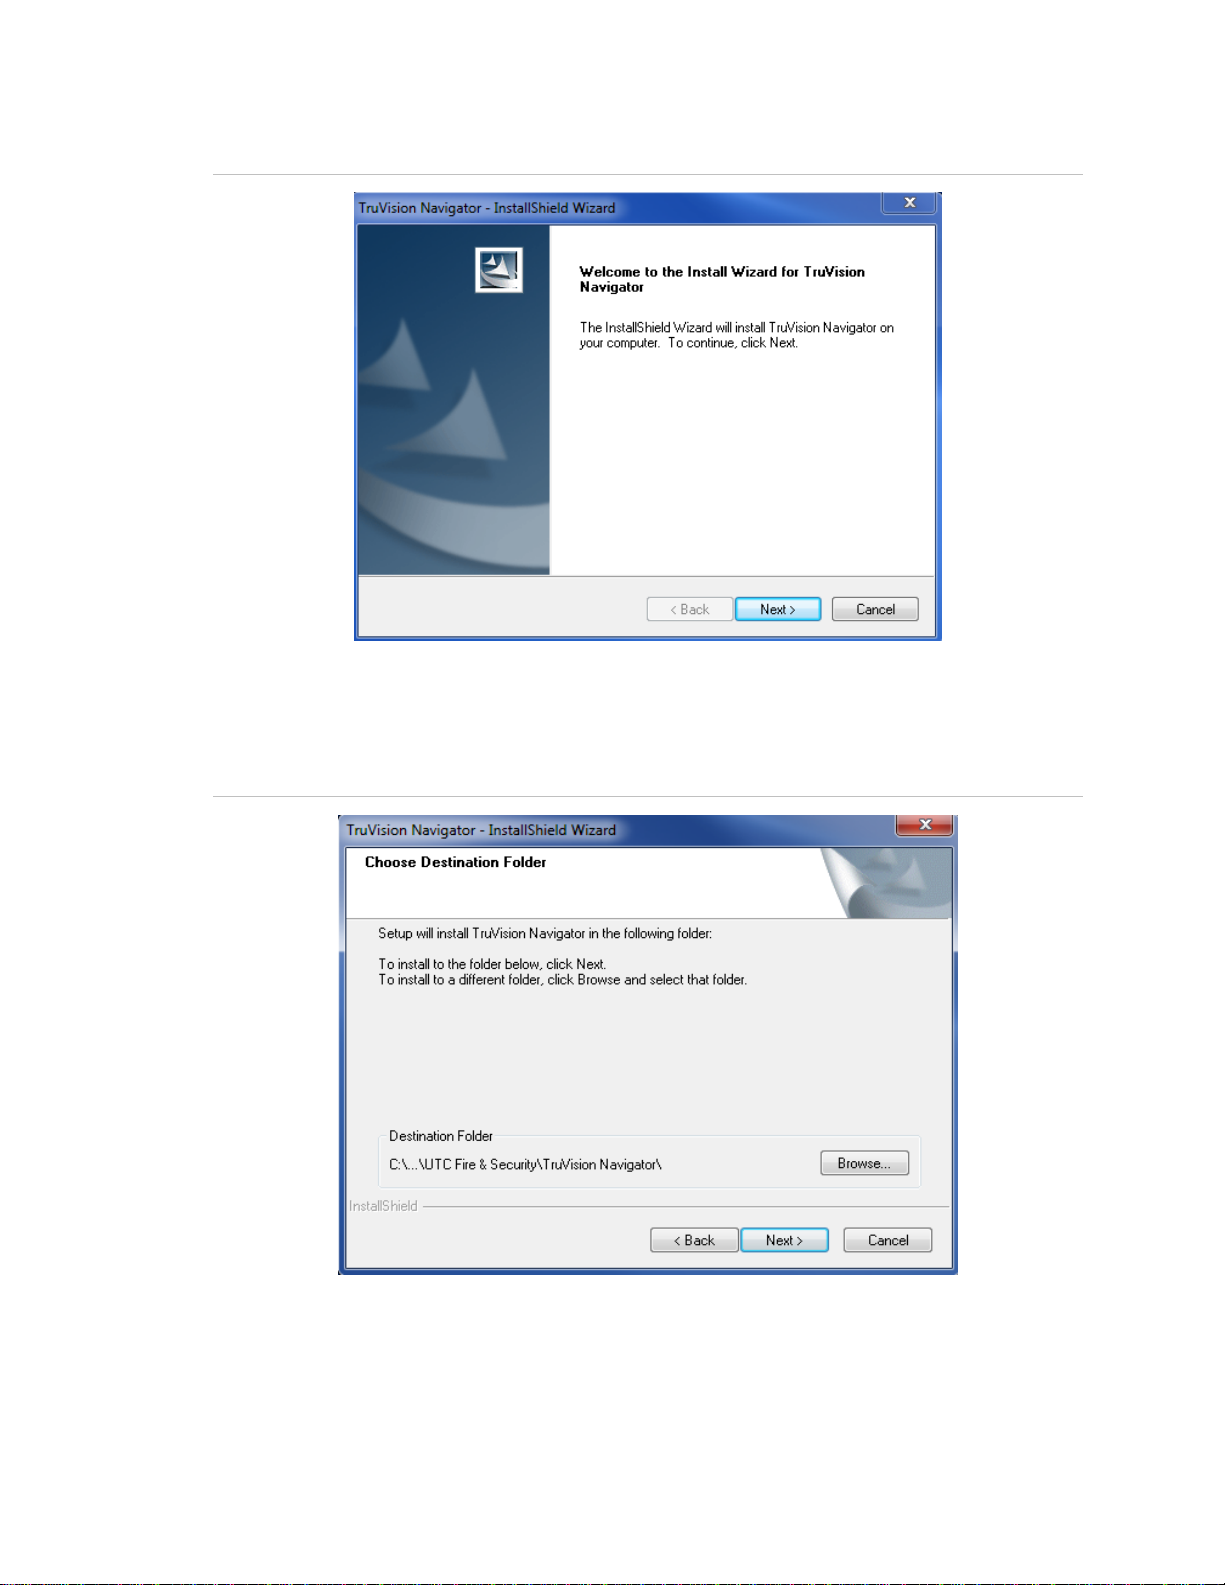
Launch the InstallShield Wizard from the auto-run page or double-click the TruVision
Navigator setup.exe to begin the installation.
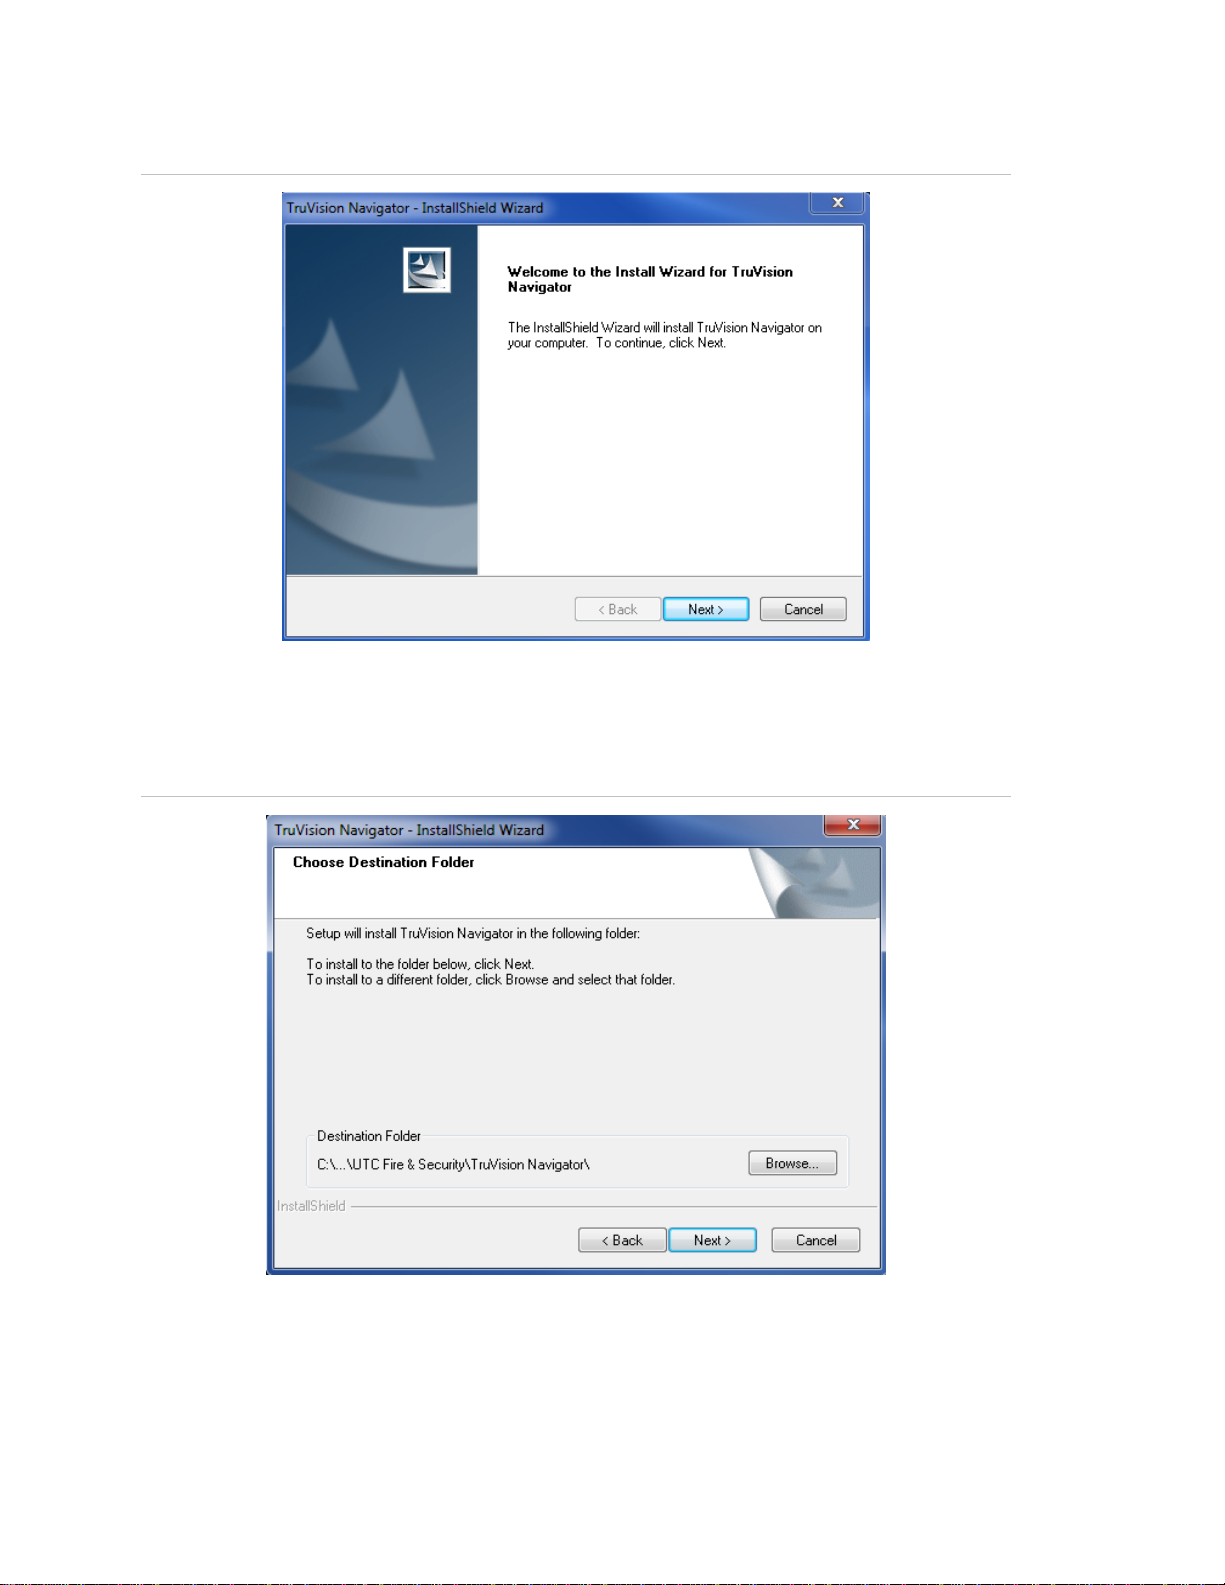
The Welcome window displays.
Chapter 2: Installation
14 TruVision Navigator 5.0 Service Pack 3 User Manual
Figure 2: InstallationShield Wizard
Click Next.
The Choose Destination Folder window displays.
Figure 3: Choose Destination window
Browse for a destination folder for the TruVision Navigator payload or accept the default
location and click Next.
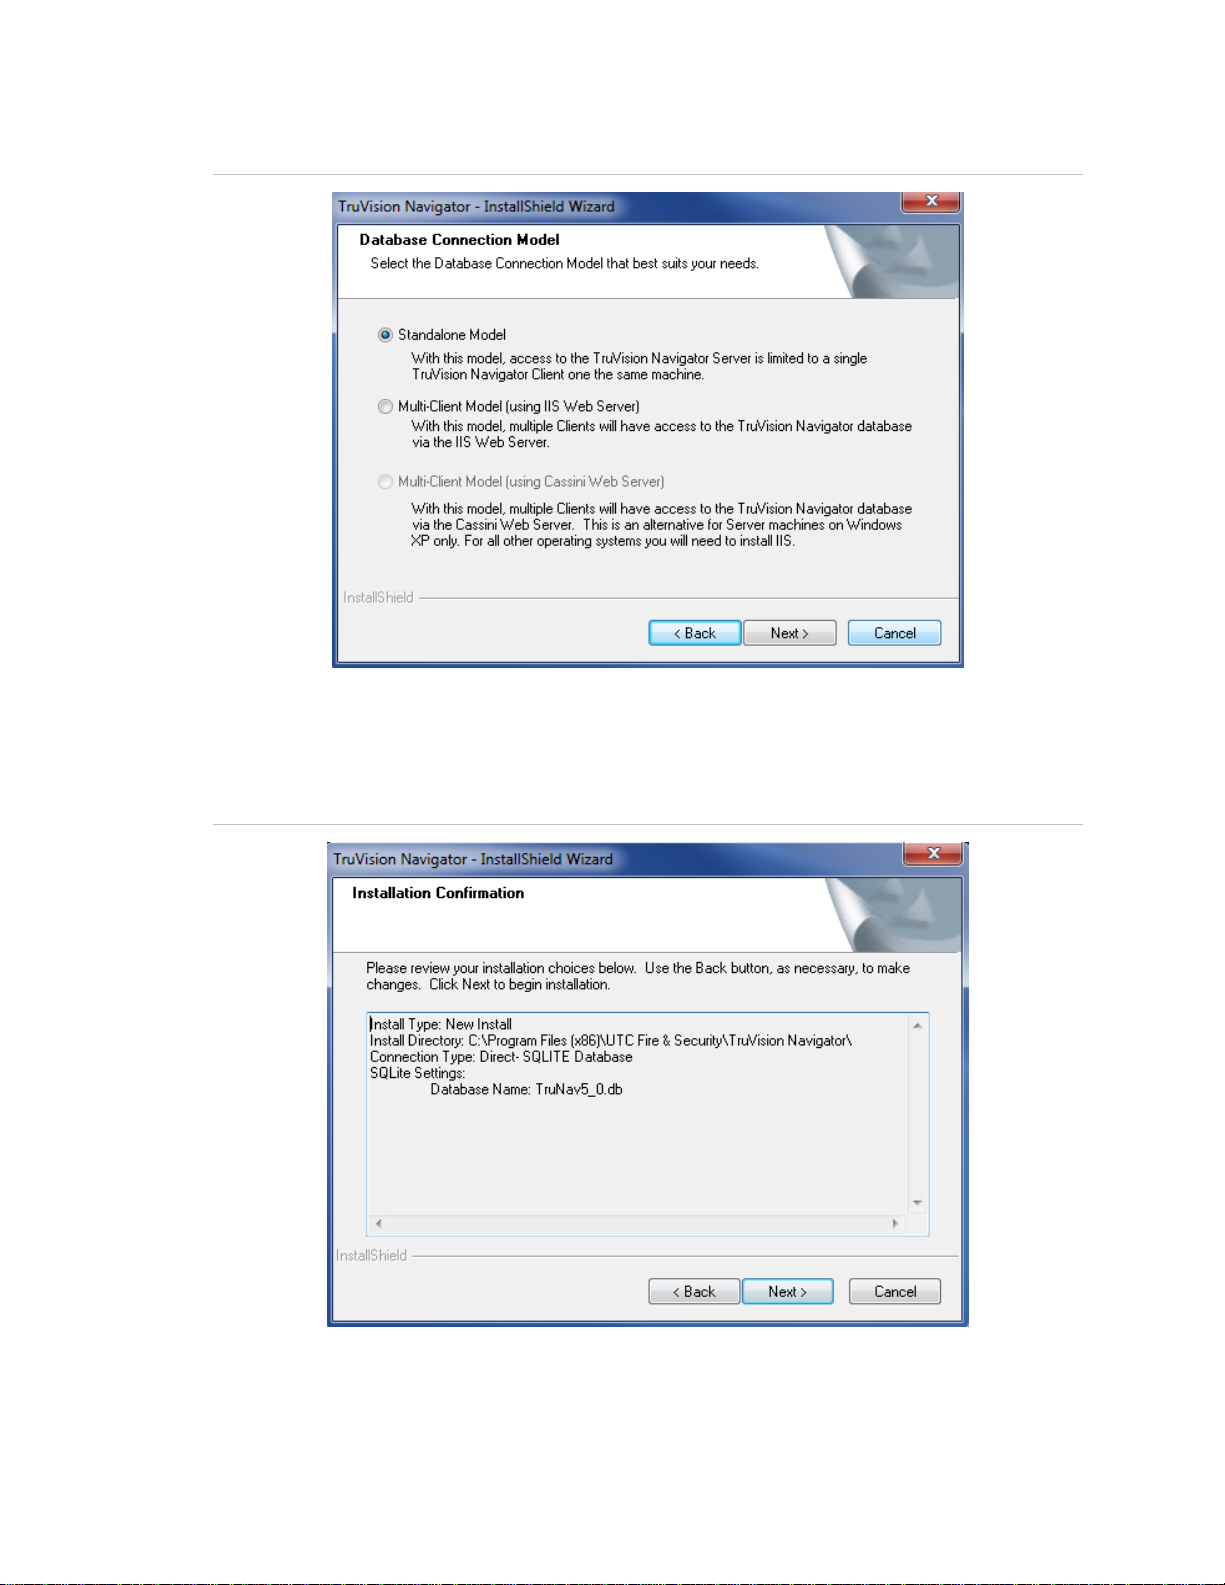
The Database Connection Model window displays.
Chapter 2: Installation
TruVision Navigator 5.0 Service Pack 3 User Manual 15
Figure 4: The Database Connection Model window
Select the Standalone Model (Direct Database Connection) option and click Next.
The Installation Confirmation window displays.
Figure 5: The Installation Confirmation window
Review the installation confirmation page and click Next to proceed with the installation.
If you want to make changes, use the Back button to go back and adjust your
selections.
Chapter 2: Installation
16 TruVision Navigator 5.0 Service Pack 3 User Manual
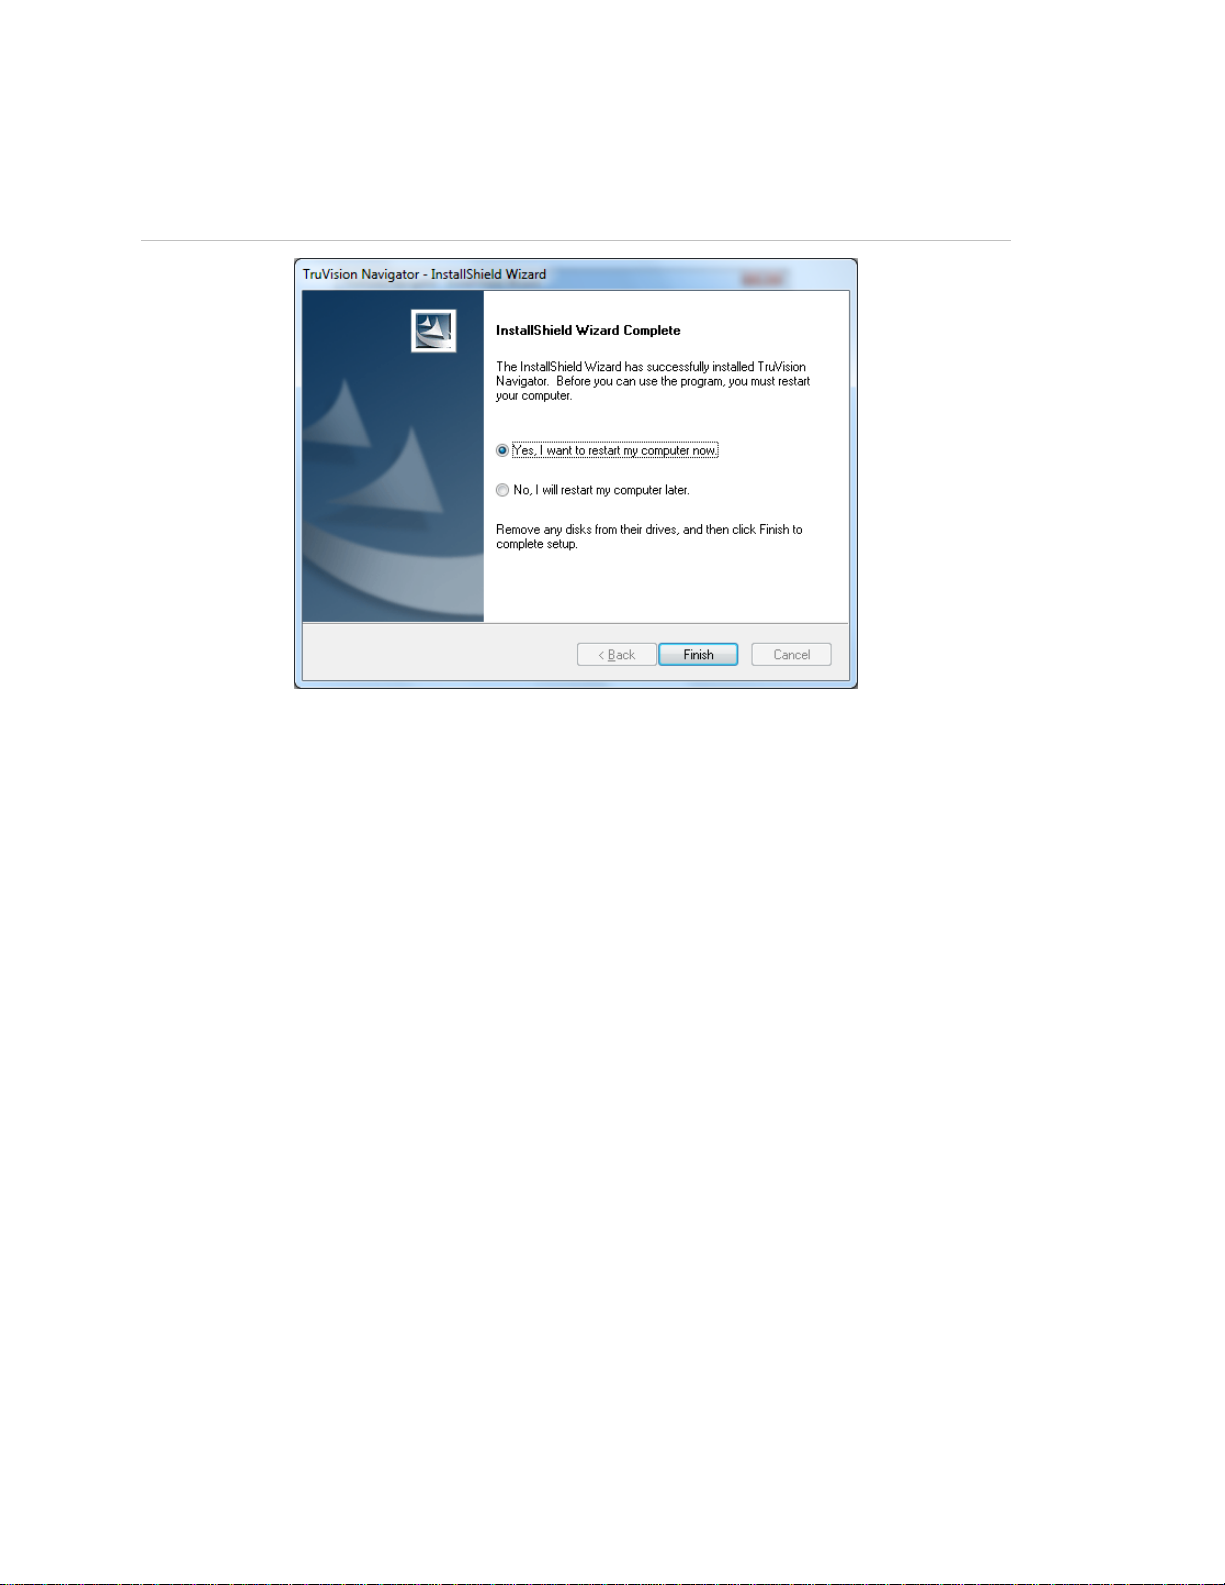
Once the installation is finished, The Installation Complete screen displays.
Figure 6: The Installation Complete window
Select the Yes, I want to restart my computer now option and click the Finish button.
A TruVision Navigator icon will be placed on your desktop and in your Start Menu to
access the application.
Installation is complete.
Installation – Multi-Client Model
To install a new traditional Client/Server instance of TruVision Navigator on your
computer do the following:
Place the TruVision Navigator setup.exe program on the desktop of the PC.
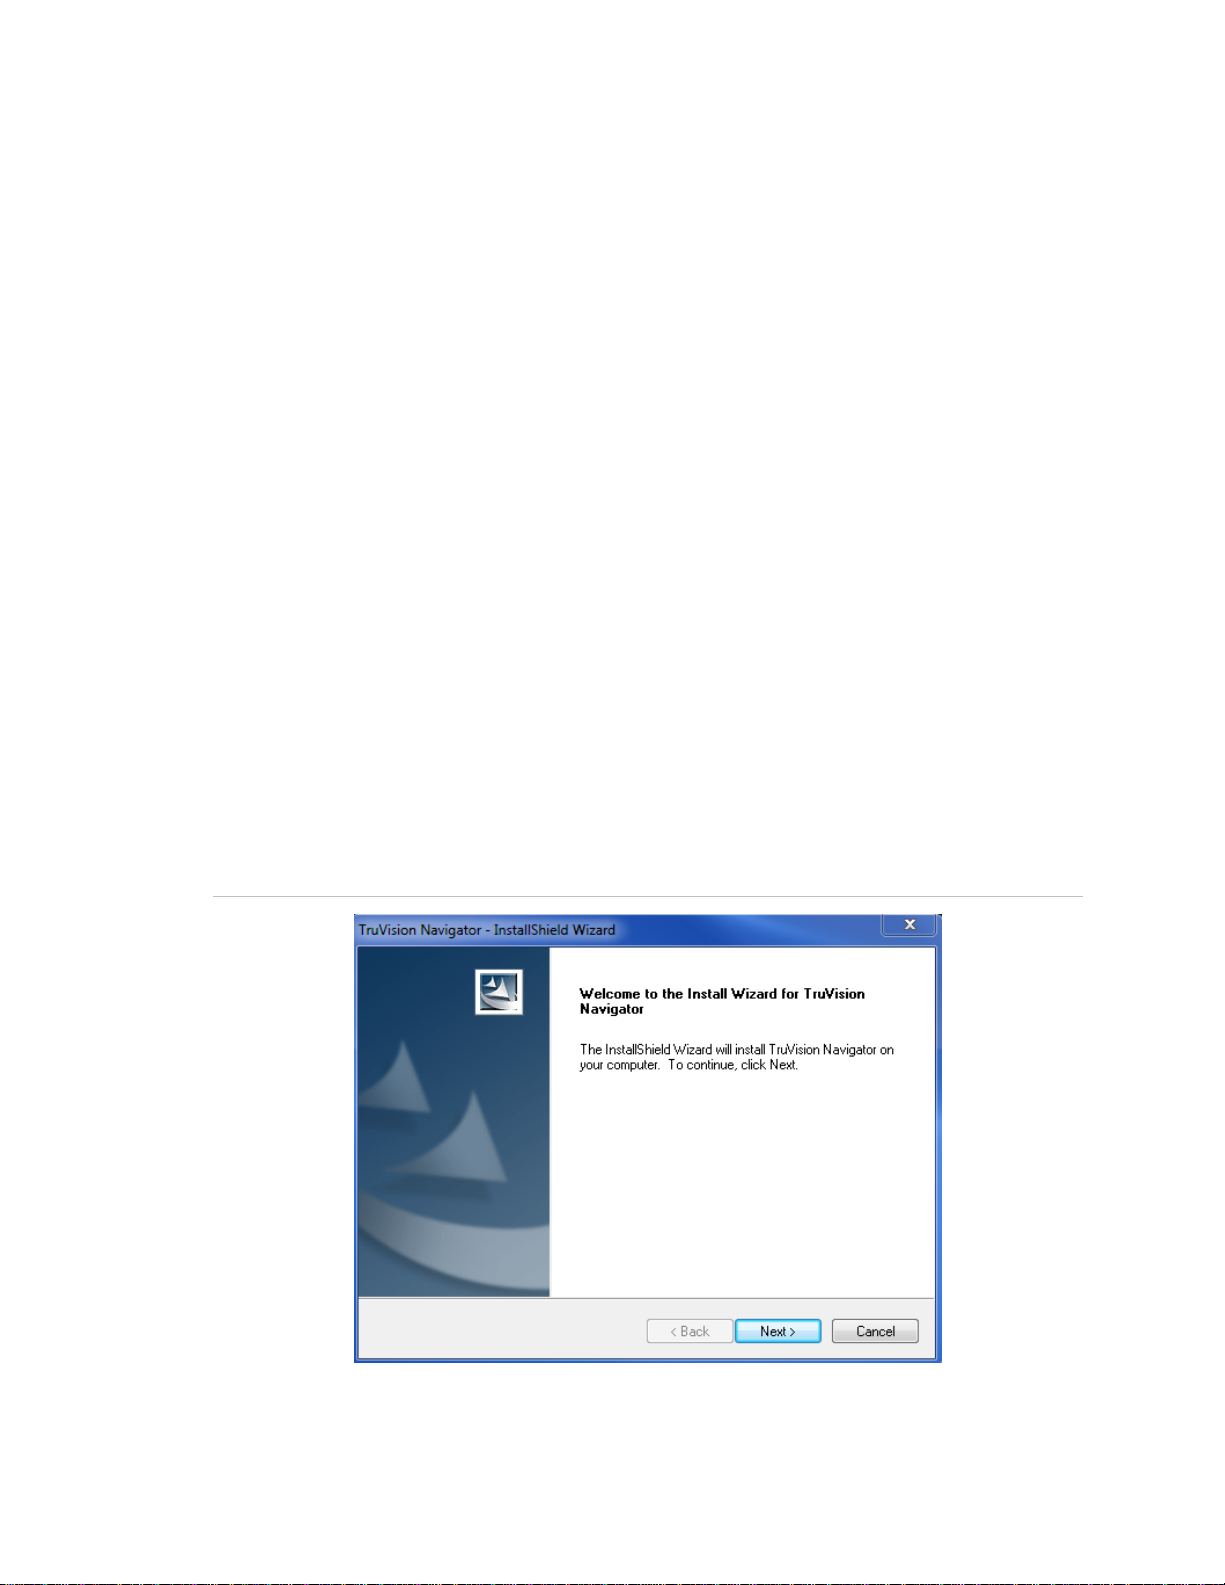
Launch the InstallShield Wizard from the auto-run page or double-click the TruVision
Navigator setup.exe to begin the installation.
The Welcome window displays.
Chapter 2: Installation
TruVision Navigator 5.0 Service Pack 3 User Manual 17
Figure 7: Installation Shield Wizard
Click Next.
The Choose Destination Folder window displays.
Figure 8: Choose Destination window
Browse for a destination folder for the TruVision Navigator payload or accept the default
location and click Next.
The Database Connection Model window displays.

Chapter 2: Installation
18 TruVision Navigator 5.0 Service Pack 3 User Manual
Figure 9: The Database Connection Model window
Select the Multi-client Model (using IIS or Cassini Web Server) option and click Next.
Note: Microsoft’s IIS is the preferred model for Multi-Client Model (i.e. Traditional
Client/Server) systems, assuming it is pre-loaded on your system. However, if you do
not have IIS pre-loaded, the installer will offer you the Cassini Web Server option as an
alternative. See Appendix B “Microsoft IIS Setup” on page 178 for setup instructions.
The Web Server Configuration window displays.
Figure 10: The Web Server Configuration Window
Select the Default Configuration option and click Next.
Chapter 2: Installation
TruVision Navigator 5.0 Service Pack 3 User Manual 19
Note: We do offer Advanced Web Server settings. To explore those settings, select the
Advanced option and proceed with the on- screen instructions.
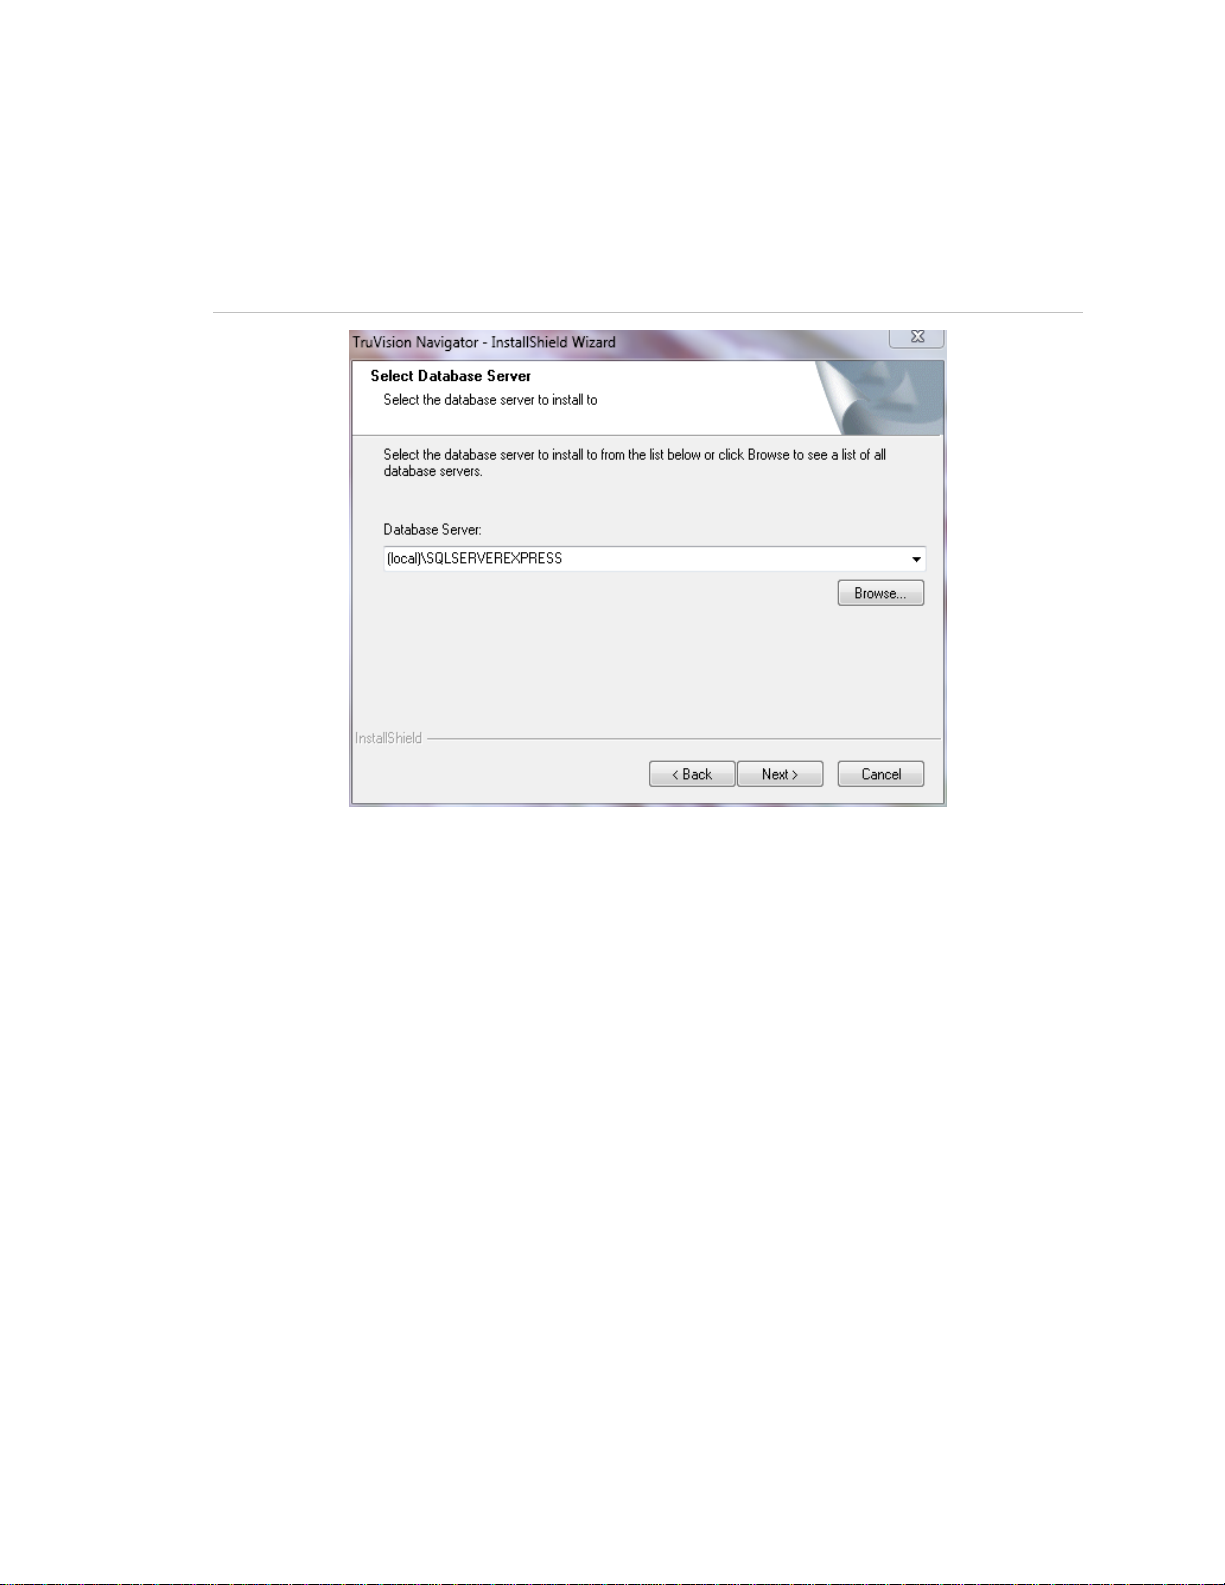
The Database Server window displays.
Figure 11: The Database Server window
Select the Database Server from the drop-down list and click Next.
Note: We do offer Advanced Database Installation settings. To explore those settings,
select the Advanced option and proceed with the on-screen instructions.
The Installation Confirmation window displays.

Chapter 2: Installation
20 TruVision Navigator 5.0 Service Pack 3 User Manual
Figure 12: Installation Confirmation Dialog
Review the installation confirmation page and click Next to proceed with the installation.
If you want to make changes, use the Back button to go back and adjust your
selections.
The Installation Complete screen displays.
Figure 13: The Installation Complete window
Chapter 2: Installation
TruVision Navigator 5.0 Service Pack 3 User Manual 21
Select the Yes, I want to restart my computer now option and click the Finish button.
A TruVision Navigator icon will be placed on your desktop and in your Start Menu to
access the application.
Installation is complete.
Upgrade
TruVision Navigator offers upgrade paths from TruVision Navigator v4.0, TruVision
Navigator v4.0 SP1, SP2, SP3, SP4, SP5 and SP6 releases.
Note: You cannot use this upgrade procedure for earlier TruVision Navigator v4.0
releases.
Upgrade for Client Server Installations
To upgrade from a previous version of TruVision Navigator, do the following:
Place the TruVision Navigator setup.exe program on the desktop of the PC.
Launch the InstallShield Wizard from the auto-run page or double-click the TruVision
Navigator setup.exe to begin the installation.
The Welcome window displays.
Figure 14: Installation Shield Wizard
Click Next.

Chapter 2: Installation
22 TruVision Navigator 5.0 Service Pack 3 User Manual
The Choose Destination Folder for Upgrade window displays.
Figure 15: Setup Type window
Installer will proceed with a prerequisite component install. WinPcap is one of the
required components for upgrades from previous versions to v5.0. (except 4.0 SP6).
Figure 16: The Setup Status window
Proceed to the next steps and accept the license agreement of WinPcap and click next
to finish the WinPcap installation. Once the installation finishes, installer will continue to
install TruVision Navigator.
 Loading...