

Page 1
Game Manual
Game Manual
™
Page 2

Giants™:
Citizen Kabuto
GAME MANUAL
1
Page 3

Table of Contents
Background Story 4
Menus 6
Player ID 6
Main Menu 6
Cast of Characters 10
Meccaryns 10
Sea Reapers 11
Kabuto 12
Other Characters 13
Structures 19
Game Interface 21
Mecc Interface 21
Delphi Interface 23
Kabuto Interface 26
Controls 28
Movement 28
Attacking 30
Views 32
The Meccaryns 34
Mecc Weapons, Packs, and Items 34
Mecc Base 39
The Sea Reapers 44
Sea Reaper Weapons and Spells 44
Sea Reaper Base 49
Kabuto 54
2
Page 4

Base Building 58
The Base Building Screen 60
Building a Mecc Base – Walkthrough 62
Multiplayer 66
Host a New Multiplayer Game 66
Join an Existing Multiplayer Game 69
Multiplayer Game Types 69
Hints & Tips 71
Appendix: The History of Planet Moon 73
Credits 75
3
Page 5

Background Story
Before man climbed down from the trees to shop in megastores and
drink cappuccino, before Earth wadded itself into a cool blue ball,
before PLANET MOON even existed, there was the Island. The
Island, a massive fragment of a long-lost planet, hurtling blindly
through space. The description evokes the term, “asteroid”, but the
Island is no dead piece of scorched rock. Even from a distance of light
years, the Island’ s radiant colors distinguish it as an anomaly within the
void of the cosmos. True asteroids, decaying and splintered pieces of
rock floating quietly around the Island like watchful ghosts, radiate
jealousy from their black pores, desperate for the beauty they will
never have.
The surface of the Island is mostly water … if it can be called water.
So rich and bright, so vast. Various land formations can be found
within the Island’s great sea – small continents composed of stone or
ice. These landmasses boast curious shapes, some curving gently, some
jagged. Seen from the sky, the scattered islands resemble the alphabet
of a lost deity, perhaps writing his name upon the surface of a world.
Or making a shopping list with whatever materials were at hand. Or
doing his taxes.
Anyway, the Island … whether these small continents are made of rock
or ice, they boast some curious life forms. Plants ranging from a few
inches in height to thousands of feet. Small humanoid creatures occupying quaint stone huts. A variety of monstrosities, all created by the
Island’s natural forces … all but one.
Upon the surface of this paradise wanders the giant, Kabuto. He
knows that this is his home, but he does not feel that he belongs. From
whence he came, he does not know, only the serial number “001”
imprinted on his stomach offers any clue. The only one of his kind,
Kabuto sits alone and longs for company. Every creature he has
encountered was … different. Whether they came from the skies or
from the seas, they tried to destroy him. Now, Kabuto trusts no one,
and guards the one thing that he loves – the Island, his home.
4
Page 6

Little does Kabuto know that the Island was home to others before
him. In the oceans, there dwells a race of females called the Sea
Reapers. These women, along with their many minions, once ruled the
Island with strong will and harsh law. In their pride, they created
Kabuto, as a defense against intruders. But Kabuto became conscious
of himself, his loneliness, his pain – and he went berserk. The Sea
Reapers’ creation turned on them, decimating their numbers and driving them into the seas. In time, a wicked new leader arose to lead the
survivors: Sappho, the Sea Reaper Queen. Sappho intends to return
the Reapers to their rightful position on the Island, as the dominant
species, by whatever means necessary. Her daughter, Delphi, isn’t so
sure of her mother’s evil practices. By far the youngest and most innocent of the Reapers, Delphi is just learning the mystical powers known
to the others. If only she knew of some alternative to evil … if only she
could speak with someone from the universe outside the Island …
Perhaps five cockney space aliens on holiday aren’t the outsiders
Delphi had in mind, but what can you do, eh? Baz, Tel, Reg, Gordon,
and Bennett – otherwise known as the Meccaryns (Meccs for short).
After leaving their home planet for an annual lads’ holiday at the one
and only Planet Majorca, their ship is almost immediately attacked and
swallowed by the notorious Giant “Gibbon” Fish. Hurtling through
space within the belly of the great ship, all the boys could do was get
drunk and wait. After two months, the Meccs’ ship was ignominiously “discharged” from the bowels of the great beast. Sobering quickly,
the Meccs piloted their battered ship towards the nearest chunk of
rock for repairs. If you haven’t guessed already, they ended up at the
Island.
Faced with yet another unscheduled layover while restoring their ship,
the Meccs decide to make the best of their temporary home. They’re
used to harsh conditions, so they explore with the aid of suits and
weapons developed through superior technology, scouting the strange
world of the Island for signs of life. Just their luck – the natives are
already embroiled in their own little war, and the Mecc visitors are
most unwelcome!
Meccaryns … Sea Reapers … Kabuto … One island isn’t big enough
for the three of them.
5
Page 7

Menus
PLAYER ID
When starting Giants you will need to create a new Player ID (or select
a previously created one). The Player ID will store all your key configurations, statistics, and level load status. Feel free to create multiple Player ID’s – one for each of the voices in your head, if you like.
You can also delete old or unused Player IDs.
MAIN MENU
Having created (or selected) a Player ID, you’ll come to the main menu
screen, offering a number of options: Start New Single Player Game,
Join Multiplayer Game, Host Multiplayer Game, Options, Load Single
Player Game, Change Player ID, and Exit Game. Use the mouse or
arrow keys to move the selection/highlight cursor – use the Enter key
or left-mouse button to select an option. While navigating through
game menus, you can press the Escape key to return to the previous
menu screen.
Start New Single Player Game
Selecting this option will start a new single player game. The single
player game takes place over a number of glorious islands, with multiple missions upon each. You will control each of the three races –
Meccs, Sea Reapers, and Kabuto – for different portions of the single
player game. Your progress through the islands is automatically saved
out when you complete each mission. If you die during the completion
of a mission, you’ll be given the option to replay the mission. All
previously completed missions can be accessed through the “Load
Game” menu.
We recommend that you play the single player game first before tackling multiplayer. The progression of missions in the single player game
gives you excellent training on the abilities and strategies of all three
races – helpful stuff for an intense multiplayer session.
6
Page 8

Load Single Player Game
The load game screen lists all of the missions you have completed with
the selected Player ID, along with a score rating beside them. You can
access this screen to start the last mission you played or return to a previous mission in order to improve your score.
Host or Join Multiplayer Game
Selecting these game options will allow you to host a new multiplayer
session or join an existing multiplayer session. For more information
about setting up and playing multiplayer Giants games, see the section
starting on page 66.
OPTIONS
Controls
This menu selection will let you access the controls options screen.
You can separately change the key configurations for Meccs, Delphi,
and Kabuto (you can find the default control configurations on the
card included in the Giants game box). When you’re in any of these
screens, you can change button/keyboard assignments by placing the
mouse cursor over the function that you want to re-assign, then hitting
the key/button that you wish to perform that function in the game.
Graphics Options
Graphics options will often affect the performance of your game.
Turning off special options, lowering the model detail, and decreasing
the view distance can all yield better game performance – at the cost of
some of the prettier stuff in the game. If you are experiencing poor
game performance, you should try changing the graphics settings
below until you find the balance of speed and visual quality that suits
you best. Depending on your video card, some of these options may
not be available.
Model Detail (high/medium/low): Three levels affect the detail of all
game models.
7
Page 9

Lighting (on/off): This option turns lighting on and off – note that
when lighting is off, the game does not become dark, but
becomes uniformly bright.
Object Bumpmapping (on/off): With this option, you can apply or
remove object bump maps in the game – bump maps give
surfaces the appearance of roughness or depth.
Landscape Bumpmapping (on/off): With this option, you can
determine whether or not to display landscape bump maps in
the game.
Environmental Mapping (on/off): This option turns environmental
mapping on or off – environmental maps are used to create
shiny or reflective surfaces.
Enhanced Water Effects (on/off): With this option, you can choose to
turn super-special water effects on or off.
Player Shadow (on/off): This option turns the player character’s
shadow on and off.
General Shadows (on/off): Through this option, you can turn all game
shadows on or off.
Sun Flare Effect (on/off): This option will apply or remove the sun
flare effect in the game.
View Distance (slider bar): Using the slider bar in this option will
increase or reduce the viewing distance. A certain amount of
“fog” will always obscure distant objects in the game – adjusting the view distance slider will bring the “fog” closer or push
it further away.
Sound Options
Depending on your sound card, some of these options may not be
available.
Sound Effects Volume (slider bar): Lets you change the volume at
which game sound effects are played.
Music V olume (slider bar): Lets you change the volume at which game
music is played.
Reverb (on/off): Adds or removes reverberation effects to game
sounds.
Occlusion (on/off): When occlusion is turned on, objects and terrain
will affect how sound travels.
8
Page 10

CHANGE PLAYER ID
This option lets you change your player ID. Different player ID’s
progress separately through the single player game, and save out
different control, audio, and video settings.
EXIT GAME
Selecting this option allows you to exit the game. Go ahead, you quitter.
9
Page 11
Cast of Characters
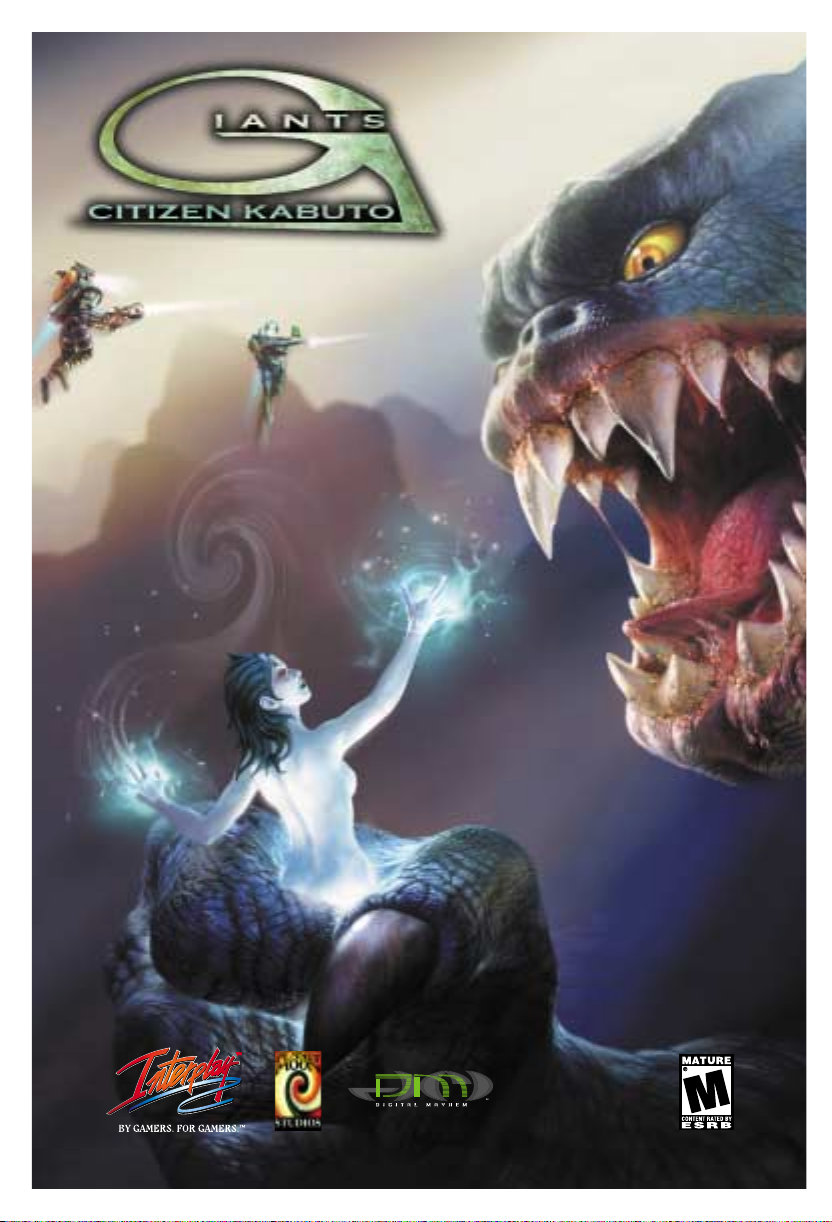
MECCARYNS
Five cockney space aliens: Baz, Tel, Reg,
Gordon, and Bennett – otherwise known as
the Meccaryns (Meccs for short). On their
way to a holiday at the infamous Planet
Majorca, the Meccs are swallowed by a giant
space fish and defecated into the vicinity of
the Island. Nursing a broken ship and massive hangovers, the Meccs limp towards the
strangely beautiful world, where they find a
most violent welcoming party. Forced to
remain on the island while repairing their
ship, the Meccs have the advantage of teamwork and superior technology when dealing with unfriendlies. Their goal: to get their ship up
to top speed and take a well-deserved vacation at Planet Majorca. If
they have to kill everything on the Island in order to accomplish that
goal, well then …
Baz
Baz (short for “Basil”) is the leader of the group, the most intelligent
of the lot and, consequently always frustrated by the ineptitude of his
mates. That said, he loves his mates like brothers and will do anything
to protect them. Like the rest of the group, Baz loves a pint. Unlike
the others, however, he insists on finishing the job at hand before
thinking about the fun he’s missing.
Reg
Reg is the technical maestro of the group. He’s polite, even to the
point of being timid. But when he gets pissed off, you’ll know it. Reg
is also the womanizer of the bunch – more than anything, he wants to
get to Planet Majorca as soon as possible for a few libidinous delights
with the beautiful Majorcan ladies.
10
Page 12
Tel
In his grating cockney voice, Tel often complains that he’s unjustly
branded as the complainer of the group. Of course, the irony of this
situation escapes him.
Gordon and Bennett
Gordon and Bennett love their beer, love their women, and love their
holiday destination: Planet Majorca. They rarely think beyond those
three things. These two fellows are rather dense, but in a lovable way
(even when they engage in psuedo-intellectual conversations and argue
the night away). Gordon and Bennett always seem to be together,
inevitably causing trouble.
SEA REAPERS
Exotic female creatures complete with crimson
eyes and skin of a soft bluish tint, the Sea Reapers
were the dominant life form of the island for long
ages. They lorded over all other Island life with
absolute power bordering on the tyrannical. In an
effort to discourage any unwanted visitors from
approaching their bucolic home, the Sea Reapers
created Kabuto, a massive giant creature with
brutish tendencies. Unfortunately for the
Reapers, Kabuto was too well-suited to his purpose. He not only defended the Island against any
intruders, he chased the Sea Reapers into the surrounding oceans. Adapting to their new home,
the Sea Reapers developed mystical powers –
from lightning-fast attacks with sword and bow to elemental spells on
a grand scale.
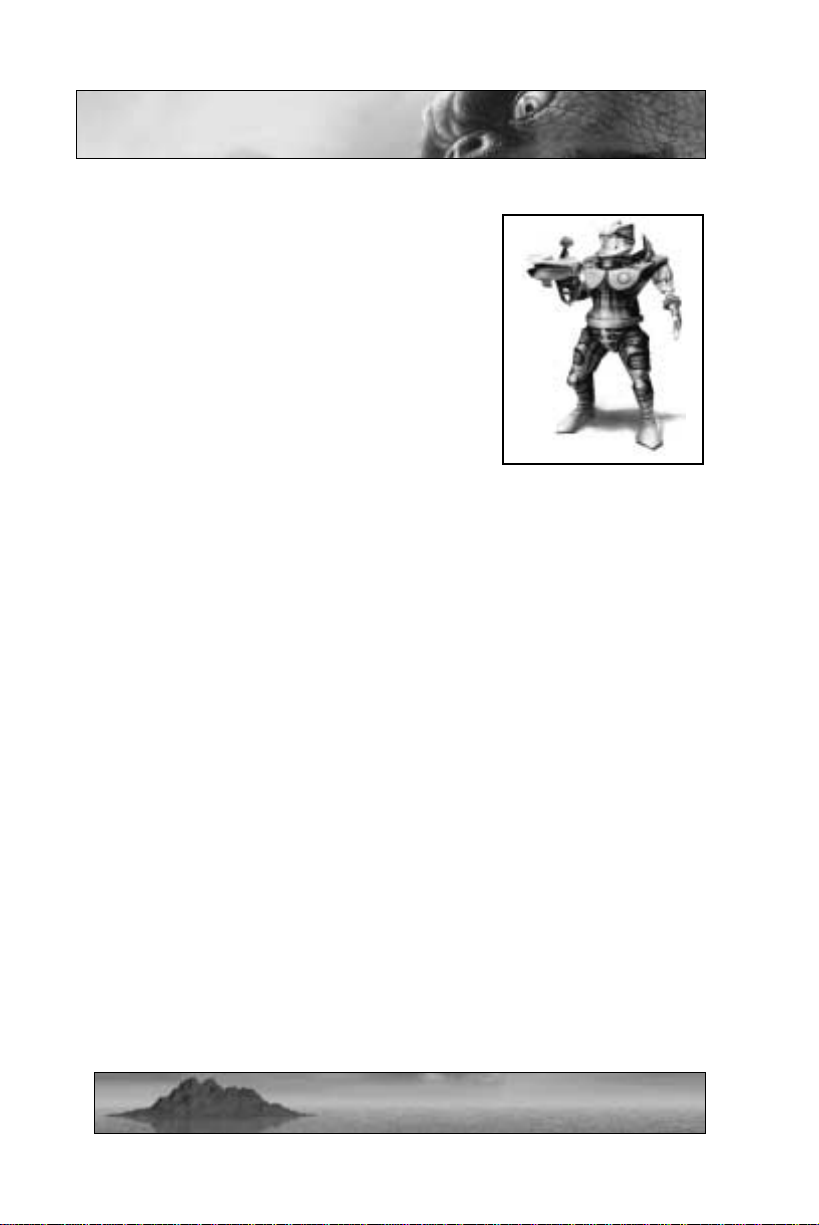
Delphi
Delphi is the youngest and most innocent of the Sea Reapers, as well
as the daughter of Queen Sappho. Delphi doesn’t always agree with
the other Reapers’ severe methods, but she doesn’t know of any
alternative. She is certain, however, that she must put an end to her
mother’s evil reign. When the single player game introduces Delphi,
11
Page 13
she is just growing into her powers, hoping to refine and increase her
abilities with the help of her famed tutor, Yan, the Samurai Smartie!
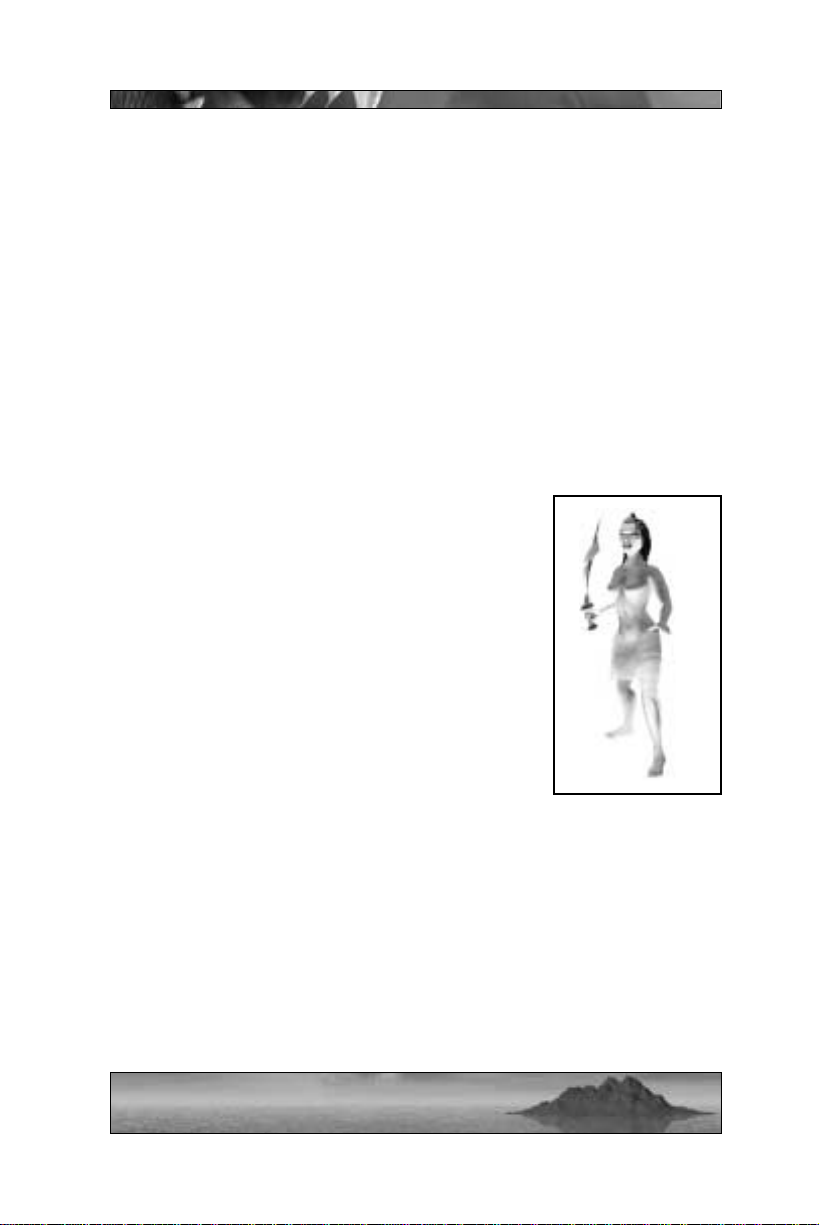
KABUTO
You don’t know how you came to exist
upon this beautiful Island, nor do you
know of any other creatures like yourself. Stomping around in existential
frustration, you only know two things
for sure: you are very big and you’re
mad as hell.
Created by the Sea Reapers to defend
the Island, Kabuto went a little berserk
and chased all the Reapers into the
ocean. Standing over ten times the
height of a normal person, Kabuto is a
truly massive brute, capable of swallowing opponents whole or
destroying entire villages with his prodigious posterior. As Yan the
Samurai Smartie says, “When big Kabuto ass drop from sky, run like
your nuts are on fire.”
While playing a 900-ton monstrosity of bone and muscle may seem
appealing, there is one problem. When the Sea Reapers made Kabuto,
they gave him a single fatal flaw – a weak spot in his tough skin, located directly in the center of his gut.
Offspring
Kabuto offspring are much smaller versions of the big cheese. When
Kabuto eats enough Smarties, he can lay an egg that hatches into one
of his offspring. Kabuto can then give his offspring simple commands,
such as attack/eat, fetch, and return. Offspring start fairly small, but
can grow to almost half of Kabuto’ s height if they are fed enough Vimp
meat.
12
Page 14

OTHER CHARACTERS
Smarties
Smarties are the hardy, indigenous little people who
inhabit the island. For the most part timid creatures,
Smarties can be extremely helpful when joined to
your cause. In the single-player game, Smarties will
guide you through the details of game play, give you
your mission objectives, and help you build a base
(when applicable). In the multiplayer game,
Smarties are used mainly for base building.
For Sea Reapers and Meccs, Smarties are one of the primary resources
needed to build a base. Smarties will not only raise structures, they
will also develop new weapons for the Reapers and Meccs (available in
the Gift Shop). But in order for your Smarties to be productive, you
first need to keep them happy. Protect them, feed them, and offer them
a pub where they can get plastered.
Kabuto uses Smarties in a slightly different manner. Rather than nurture and care for these mischievous scamps, Kabuto simply eats them.
When Kabuto devours a few Smarties, the creatures are transformed
into a viable mutant egg within Kabuto’s belly. At this point, Kabuto
can get in touch with his feminine side, straining momentarily before
giving birth to the egg. Shortly thereafter, the egg will hatch and yield
a mini-Kabuto (for more about Kabuto Offspring, see page 12).
Each of the three main characters can grab and carry Smarties. When
a Mecc finds a Smartie, the Smartie will climb on his back. When a
Sea Reaper finds a Smartie, the Smartie will be encased in a protective
bubble, which will trail behind the Reaper. Kabuto, being Kabuto,
doesn’t encourage volunteers. Instead, he can pick up Smarties (who
usually flee as he draws near) and skewer them on his horns – this
won’t kill the Smartie, but it will hurt when the Smartie laughs.
There are a limited number of Smarties on any given level, single play-
13
Page 15
er or multiplayer . Smarties are spawned one at a time from their underground hatches. If a Smartie is killed, then another will spawn from
one of the available hatches. Smartie hatches are spread fairly evenly
around the world – though in some cases they may be hard to reach.
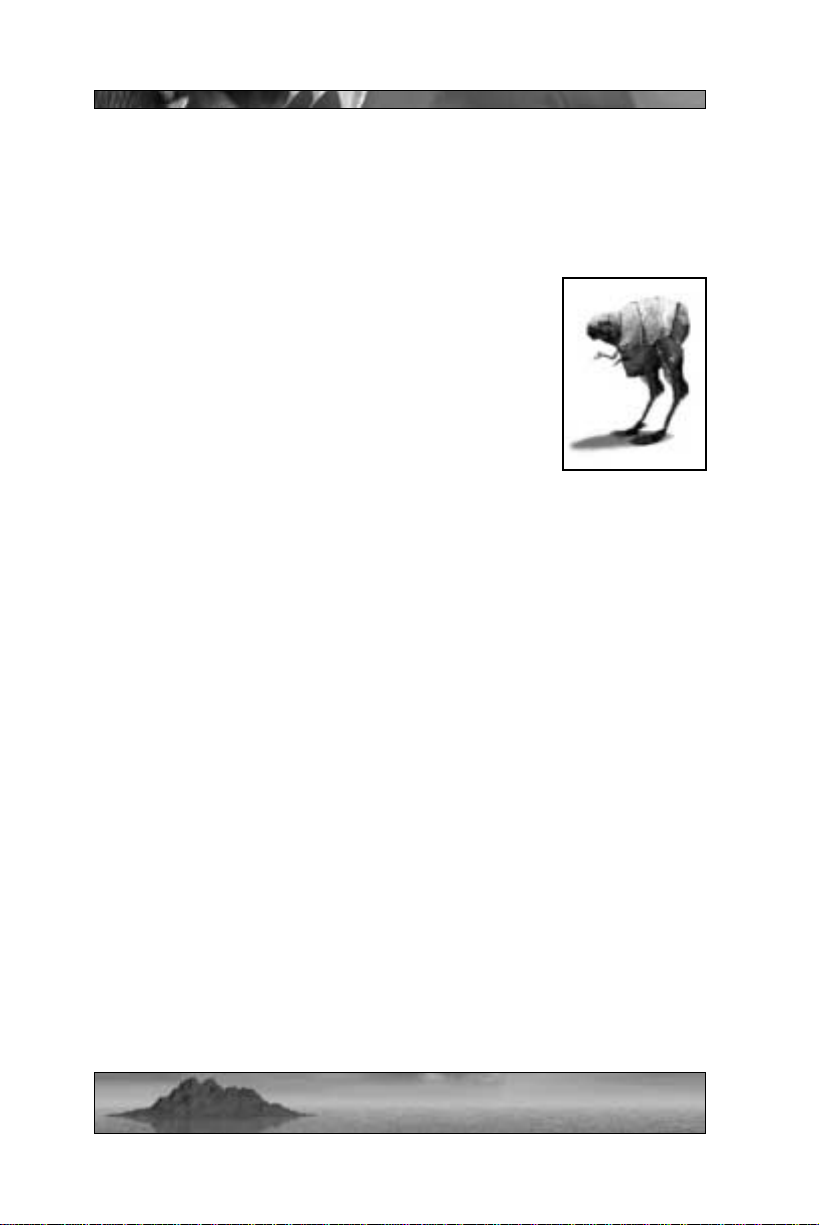
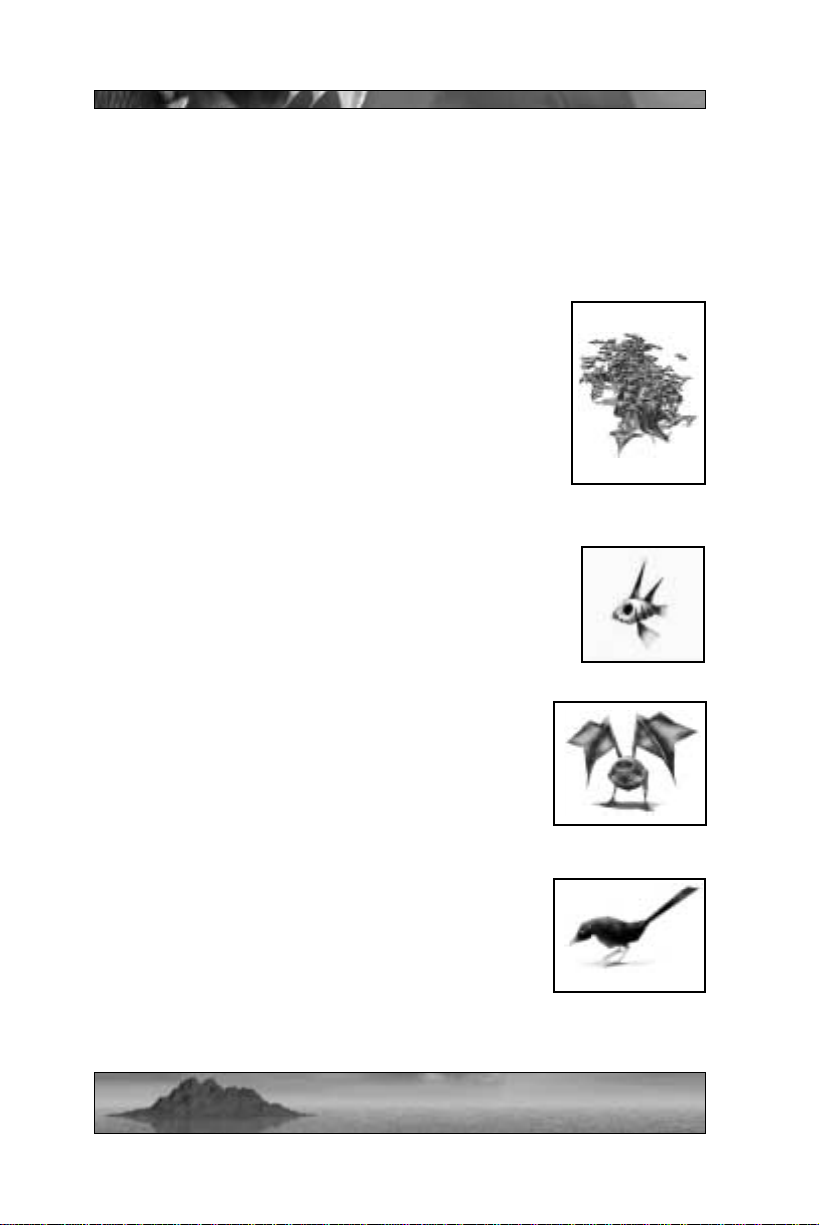
Vimps
Extremely docile and not very bright, Vimps are the
cattle of the island. Vimps can usually be found
strolling across the idyllic plains in herds, gently
grazing as they await a grisly demise. Cooked Vimp
is a staple of the Smartie diet, while Kabuto prefers
to gobble Vimps raw. Either way, Vimp meat
restores lost energy just like a high-priced sports
drink … but with bones.
Kabuto can down Vimps like fleshy nachos in order to regain health –
or he can skewer them on his horns and save them for later. Meccs
refrain from Vimp consumption (perhaps they’re squeamish, though
reports from the Smarties insist that the meat tastes just like chicken).
Instead, they need Vimp meat in order to keep Smarties happy at their
base. Killing Vimps will turn them into small heaps of quivering steak,
which Meccs can gather and return to base. Remember: a bellyful of
Vimpy goodness equals more productive Smarties. Sea Reapers need
Vimps as well, but instead of collecting their meat to feed Smarties,
Delphi must kill Vimps and gather their souls. She uses these souls to
power the mystical mechanisms that keep her base going.
Some by-product of the island’s natural energy continually replenishes
the Vimp population. If you wipe out an entire herd of Vimps, more
Vimp young will spring up nearby within a few minutes. These creatures grow over time – the larger they are, the more meat they yield
when smashed, shot, or blown up. Thus, when encountering a herd of
young Vimps, you often have to consider the value of waiting for the
creatures to fatten up against the risk that an enemy will swoop in and
snatch up your meat. Wait, that didn’t sound right. You know what I
mean.
14
Page 16
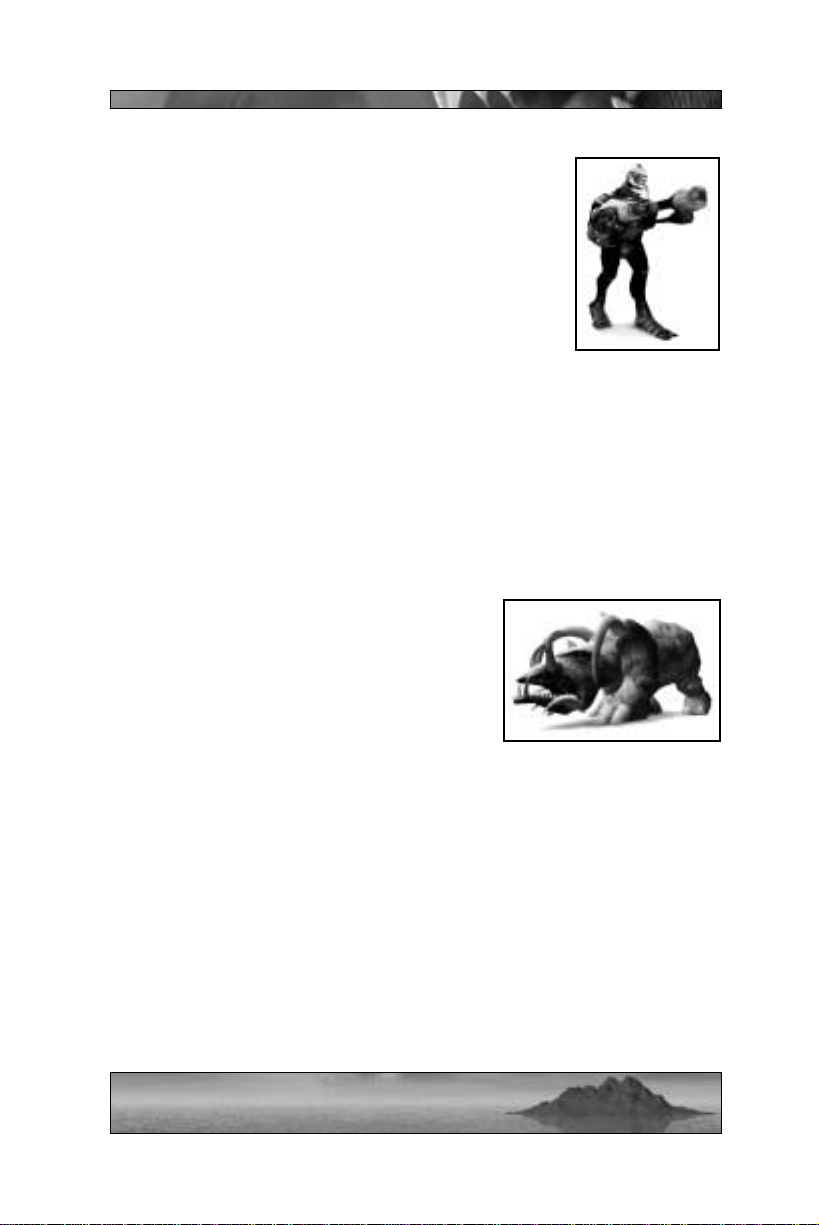
Reaper Guards
The Guards comprise the bulk of the Reapers’
assault forces. They are the bodyguards, the soldiers, the grunts. While Reaper Guards lack any
magical abilities, they do possess the requisite number of limbs and coordination skills to fire a weapon.
Beyond that … well, they aren’t the brightest of
bulbs. You’ll often find groups of Reaper Guards
patrolling the valleys of the Island or guarding a
Reaper settlement, clutching heavy armament in
their scaly fists. Reaper Guards are also likely to show up when you’re
building a base, making it hard for you and your Smarties to get any
work done. There are many kinds of Reaper Guards, carrying different weapons and using different modes of transportation … you’ll just
have to stay on your toes and be ready for anything when encountering these guys, especially with the Kamikaze Reaper who sometimes
makes a rare appearance!
Sonak
This great lumbering beast is the favored
method of transportation for the Reaper
Guards. While ponderous and none too
bright, the Sonak’s rigid hide makes it
extremely difficult to kill. In addition to the
gun turrets that the Reaper Guards often
mount on the back of a Sonak, these creatures have their own natural defense mechanisms. Sonaks possess the
ability to cause the ground around them to ripple and heave simply by
stomping their enormous feet. A Sonak can also harm opponents with
its destructive scream, projecting disorienting sound waves out of its
vast maw. If these waves hit you, you’ll lose your jetpack/turbo ability for a short period of time.
15
Page 17
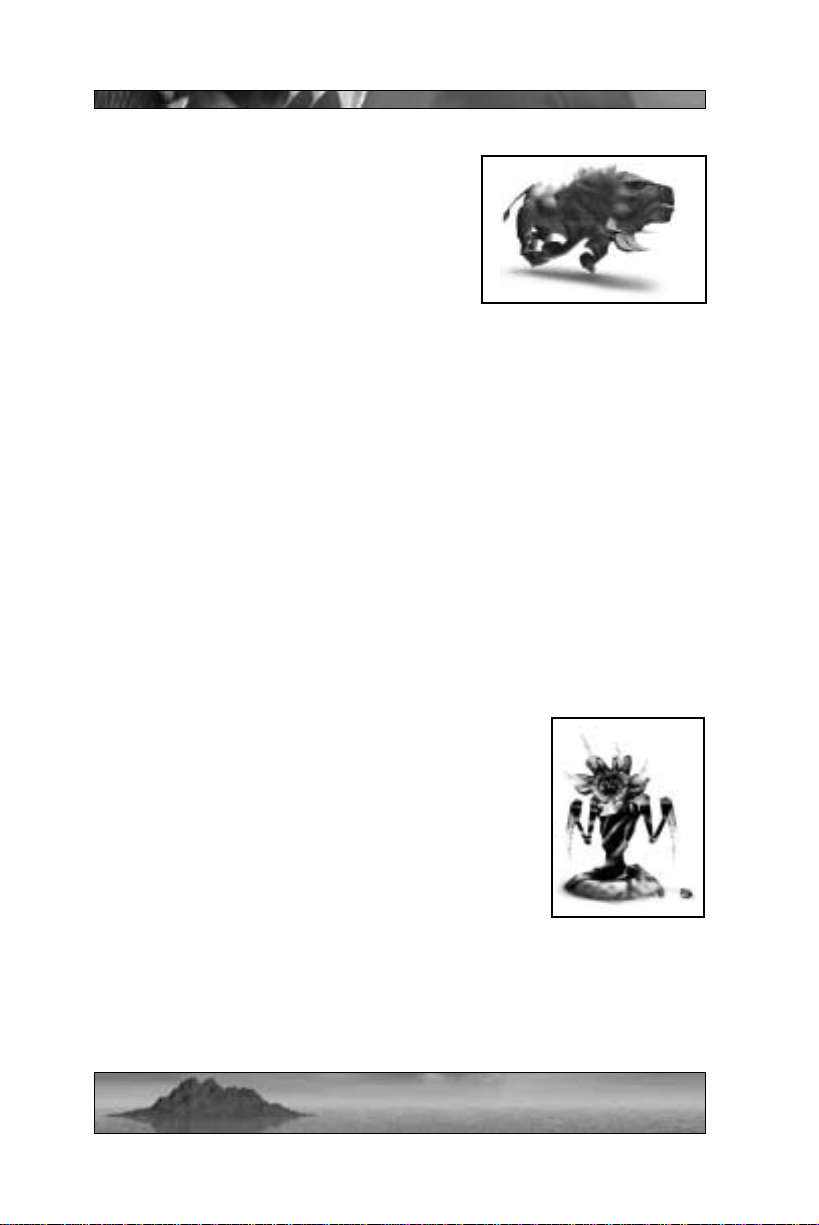
Charger
The Charger is an incredibly fierce territorial creature. Once it settles on a spot, it will
rarely attempt to leave that spot, even if
fired upon from a distance. Not that a
Charger would even feel anything short of a
planet colliding with its skull, the creature’ s
skin is that tough. A Charger will attack
any creature to come near its nest, roaring as it barrels down on the
unsuspecting intruder. If you happen to be the unfortunate individual
placed in the path of this monster’s charge, you have two choices. One
– you can flee like a frightened child (not that there’s any dignity lost
in running away from a Charger). Two – you can try to shoot the creature in its mouth as it charges, which is the only possible way to damage it, much less kill it. Of course, as you take aim, you’ll have to
remember that several tons of horn and muscle are approaching at a
very high velocity on a collision course with your comparatively frail
form. At the point of contact, if you don’t simply break apart like a
water balloon, you’ll probably wish that you did as you fly through the
air, spurting precious life fluids in all directions. And even if you do
manage to fire a shot into the beast’ s gullet, you’ll have to get out of its
way quickly or get mashed to a pulp before its irresistible charge.
Rippers
With ninety percent of their body mass composed of
claws and teeth, these insect-like creatures can be
ferocious enemies. Rippers are often found in
packs, barely visible with the majority of their bodies burrowed underground. Like many of the other
creatures of the Island, Rippers serve the Sea
Reapers, their sheer numbers ensuring that no
unwanted visitor will set foot on the Island without
some resistance. Rippers come in three sizes:
Small: Small Rippers move slowly, always remain above ground, and
possess a savage biting attack. The husks that spawn small Rippers
can be destroyed, cutting off their limitless supply of these immature
enemies.
16
Page 18
Medium: Medium-size Rippers are much tougher than their fetal
counterparts. In this stage, the Ripper can move at medium speed
above ground or underground. Additionally, medium Rippers can spit
flaming orb projectiles at you while they are above ground. When a
medium-size Ripper is killed, it leaves behind a glowing sphere that
will restore a moderate amount of health when picked up.
Large: These are the Rippers you have to watch out for . Large Rippers
are bulky, but can move fast above or below ground. They can spit a
massive blue fireball over long range, hitting with the concussive force
of a grenade. When a large Ripper is killed, it leaves behind a glowing
sphere that will restore a significant amount of health when picked up.
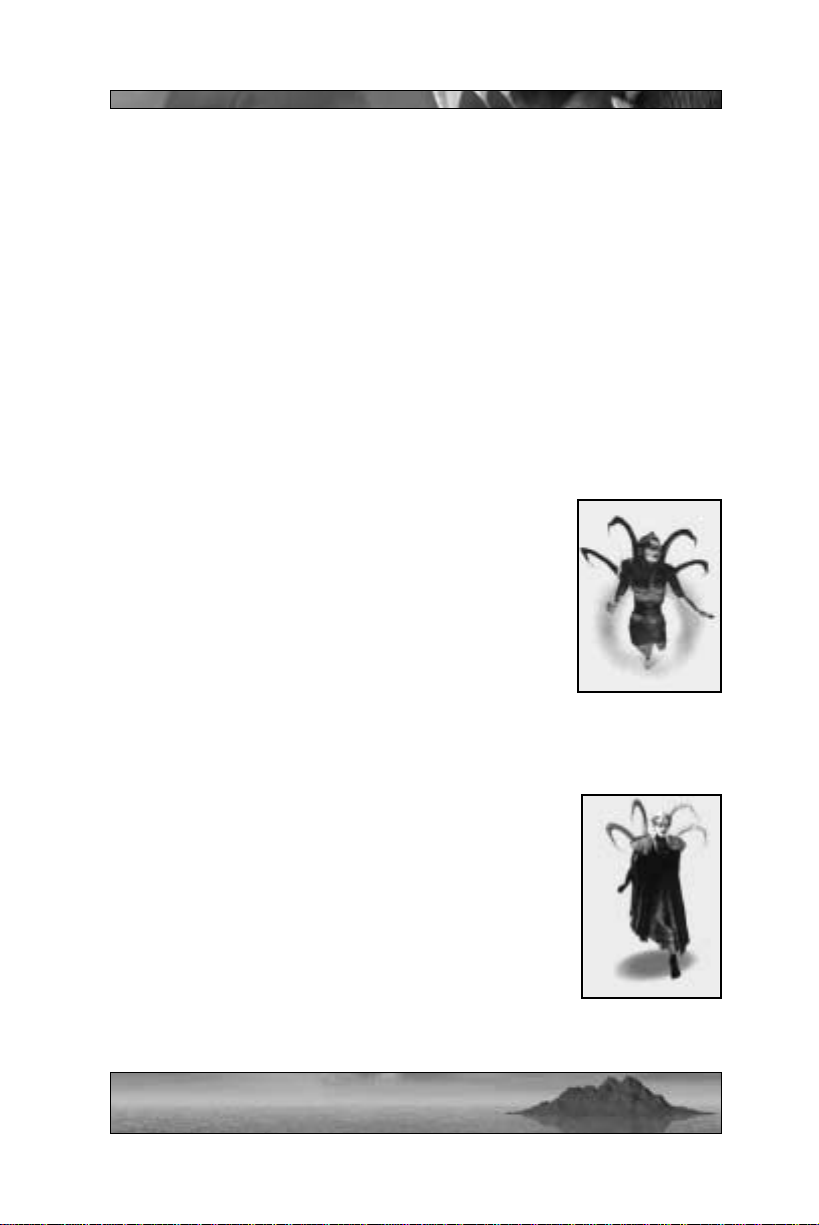
Raiks
Malignant subordinates to Queen Sappho, these
creatures possess the torso of a blue-skinned woman,
and the lower body of a wasp. Raiks have many of
the same magical abilities that Delphi does – turbo,
teleport, and cloak to name a few (see the section
below starting on page 44 for more information on
Sea Reaper powers). Like Delphi, Raiks wield a
sword and bow with great proficiency. Often found
commanding a contingent of Reaper Guards, Raiks
are not to be trifled with. And they have absolutely no sense of humor.
Queen Sappho
When Kabuto turned on the Sea Reapers, many were
destroyed; the scattered survivors that fled to the
oceans were demoralized. While the water-bound
Reapers increased their mystical powers dwelling in
the sea, they became increasingly embittered and
angry. Sappho was easily the most powerful and
most cruel of the Reapers to survive Kabuto’s
onslaught – it was only right that she should be the
Reaper Queen. Her primary goal is to return the Sea
Reapers to the dominant position on the Island. She
always intended for her daughter, Delphi, to become a powerful ally in
17
Page 19
this cause. However , Delphi has proven willful and rebellious – actions
that Sappho sees as necessary to the Sea Reaper cause, Delphi brands
as cruel and tyrannical. Now with the accidental entrance of these
accursed “Meccaryns”, Sappho finds herself forced to show them all
just how cruel and tyrannical she can be.
Cleaners
Weak but incredibly voracious, these parasites dwell
in vast numbers just beneath the surface of the soil.
Whenever a creature dies and falls, dozens, sometimes
hundreds of Cleaners will swarm upwards to devour
the corpse. Meat, clothing, bone … nothing will
remain of any carcass once the Cleaners have
finished gorging themselves and retreated to their
waiting places below.
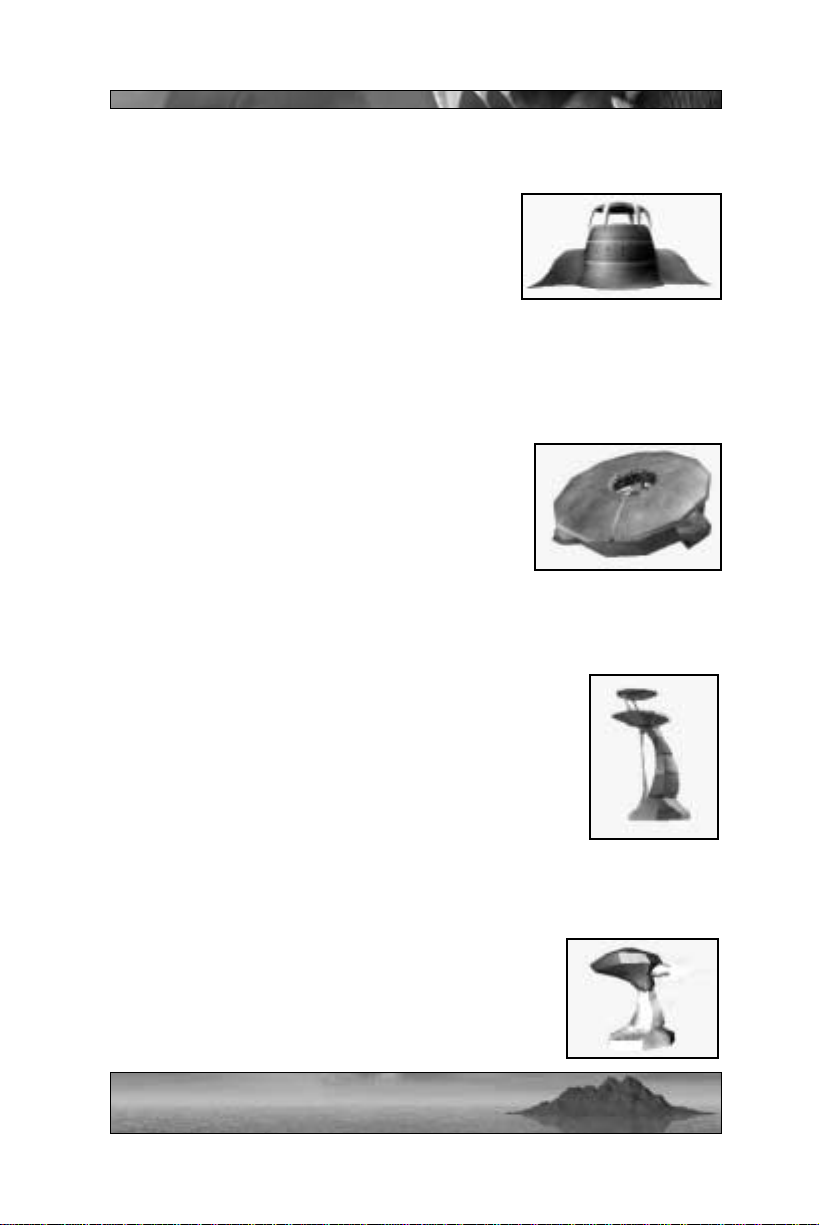
Piranha
These aquatic creatures are a very basic mixture of
teeth and fins… but mostly teeth. Piranha won’t attack
a Sea Reaper or Kabuto, but Smarties and Meccs are
fair game once they enter the water.
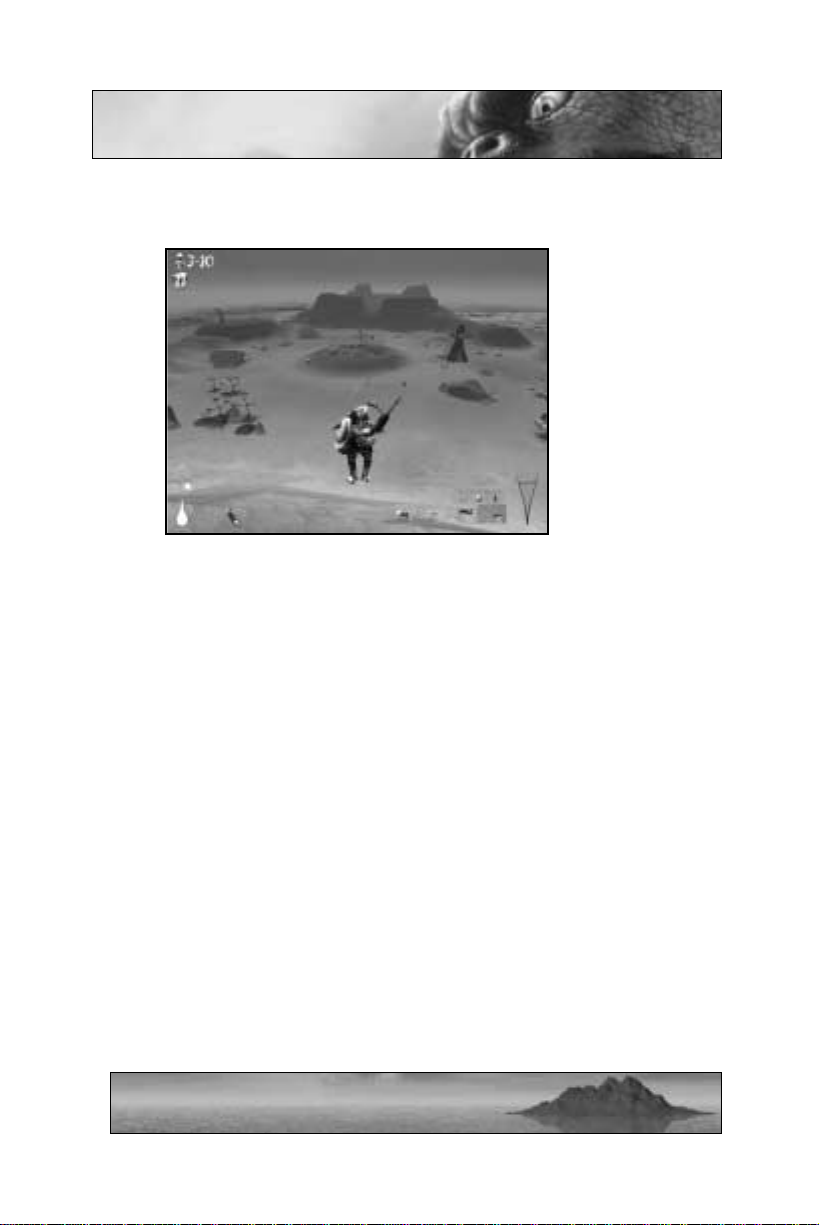
Verms
Verms are ill-tempered flying creatures that will
attack on sight and launch fire at you – this sort of
antisocial behavior usually leads to a solitary and
bitter life for the Verm, punctuated by occasional
egg-laying (eggs will hatch additional Verms).
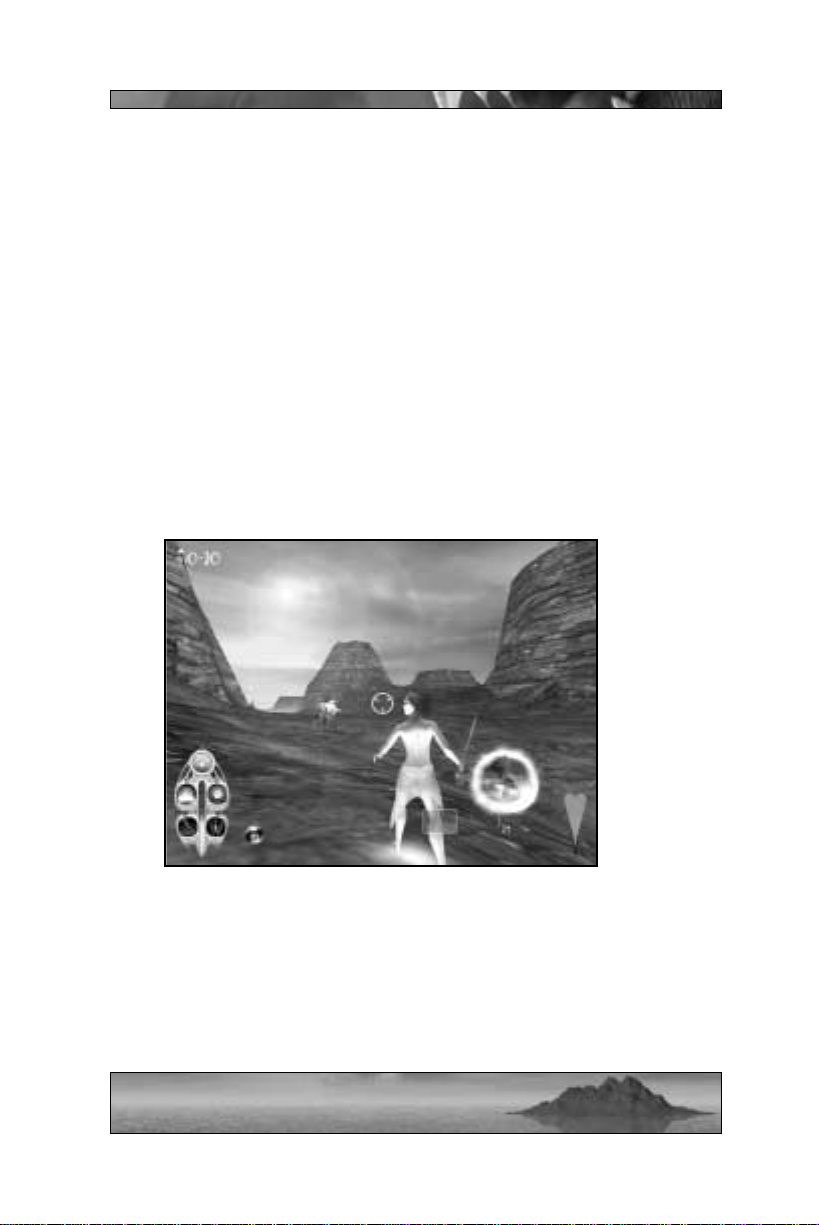
Dactyl, Lobird, and Flaks
These harmless birds can often be found circling
lazily above the islands. Don’t bother trying to
shoot them down, unless you really have too much
ammunition on your hands.
18
Page 20
STRUCTURES
Barracks
The Barracks are the living quarters for the
Reaper Guards, and they come in different
sizes. Often, several Guards will guard a
Barracks at once. When battle occurs near a
Barracks, more Reaper Guards will pour out
of the doors, armed and ready to deal with whatever threat approaches. Barracks can only replenish a certain amount of guards, but you
can stop this process by destroying the structure altogether.
Bunker
A Bunker is a hollow bowl-like structure with
portals on all sides. The bowl can raise off the
ground and lower again – this way Reaper
Guards can enter and leave the Bunker. Once
inside, Guards are fairly well protected by the
Bunker’s shell, while still being able to fire at
enemies through the portals.
Guard Tower
Guard towers can often be found looming over small
villages, placed within strategic valleys to monitor any
who would pass through, or perched atop high hills to
give whoever stands within a view of the surrounding
countryside. Reaper Guards often stand watch atop
these towers, ready to rain fire down on anything that
moves. Of course, if you can eliminate any guards
occupying the tower, you can take advantage of its
strategic positioning for your own purposes.
Turrets
Turrets often guard larger Reaper settlements, laying down heavy caliber cannon fire at any ground
enemies who come within range of their sensors.
19
Page 21

SAM Turrets
SAM (surface-to-air missile) turrets are designed to
repel airborne invaders, and do not threaten intruders on the ground. These devices sweep the skies
with mid-range scanners. Any flying enemy who
approaches a SAM T urret will quickly receive a missile lock-on warning – from there, it gets downright
ugly. Missiles fired by this turret will track you with fair accuracy,
moving fast and with eerie purpose. Unless you’re capable of some
very fancy maneuvering, the blast from one of these missiles will
almost certainly tear you in half as soon as it strikes.
Husks
Similar to barracks, husks are organic pods that house and spawn
Rippers. When you’re faced with a whole heap of hostile Rippers
bearing down on you, husks are more than likely the root of the problem. What’s more, you can probably throw all of your ammunition at
the Rippers without thinning their numbers … until you get the bright
idea to blast away at the husk that’ s spitting them out. Husks come in
two sizes, small (only spawns small Rippers) and large (spawns medium and large Rippers).
Huts and Other Buildings
You’ll encounter many other types of structures as you explore the
Island – many designed and inhabited by the Smarties, some belonging
to the Sea Reapers. For the most part, these buildings can be reduced
to rubble if you apply some heavy firepower to their walls over a period of time. Of course, you might not want to destroy every building
you see as a regular practice. Sometimes the cover they afford can be
a great blessing when you’re outnumbered.
20
Page 22
Game Interface
Many of the interface elements in Giants are common between the
races, but some portions of the interface are specific to each character.
MECC INTERFACE
Game Text
Any messages the game might have for you (such as, “I know where
you live”) will be displayed in the upper portion of the screen.
Jetpack Fuel Indicator
The jetpack fuel meter, displayed in the lower left-hand corner of the
screen, represents the energy level of your jetpack. Most of the missions start you off with a full jetpack. Activating the jetpack thrusters
will propel you skyward, but will also consume fuel rapidly. Don’t
worry, though, your fuel level will regenerate over a short period of
time – just try not to fall from a mile above ground before it does. Next
to the jetpack fuel meter, a small light indicates when your nitro boost
is active. The nitro boost gives a little extra kick to the jetpack
thrusters – when it’s used, the light will go off as you shoot upwards at
greater speed. The nitro boost will immediately regenerate as soon as
you touch the ground (signaled to you when the small nitro boost light
becomes active again).
21
Page 23

Backpack Indicator
Next to the jetpack fuel meter, an icon for the current backpack that
you’re wearing will be displayed. Many backpacks, such as the Bush
camouflage or Shield, drain your jetpack fuel so long as they are active.
Other backpacks, like the Turret and Pop-up Bomb, are dropped and
activated one time only. Also, if you are carrying a Smartie on your
back, a Smartie picture icon will be shown here.
Weapon Icons
At the bottom center of your screen, you’ll see the weapons currently
held in your inventory. Blue brackets surrounding the weapon icon
indicate the weapon in use, while the numbers beneath each icon
indicate ammunition for the weapons you possess. Mecc weapons are
primarily guns of one sort or another – all except the handgun hold a
limited amount of ammunition.
Health Indicator
The heart in the lower right hand corner of the screen is your health
indicator. Look at the heart as a life container. When the level of red
stuff inside the heart goes down, your health is getting low. When
there’ s no more red stuff in the heart, you are dead. Just like in real life.
Vimp and Smartie Indicator
The upper left hand corner of the screen holds two sets of numbers –
one corresponds to Vimps, the other to Smarties. The Vimp number
is the amount of Vimp steaks you currently have in your possession.
You’ll need Vimp meat to feed any Smarties you have working back in
your base – but you can only carry a limited amount of Vimp meat.
The Smartie numbers indicate the number of Smarties you have working for you in your base compared against the total number of Smarties
on the current island (in multiplayer games, a third number is displayed – the number of Smarties the enemy has). Note that the total
number of Smarties on the island never changes. If a Smartie is killed,
another is spawned elsewhere. The only number that you can affect is
the number of Smarties that you have working for you – the more the
better, so start setting up that attractive benefits package and 401k
plan as soon as possible.
22
Page 24
Targeting Cursor
The Mecc interface uses a basic targeting cursor in the center of the
screen. For the majority of game play, this is displayed as a small white
crosshair. The cursor can change under certain circumstances. The
targeting cursor has two states, depending upon what it’s placed over.
The neutral state is represented by the basic crosshairs – this means
that there’s really nothing to shoot at directly in front of you. When
there is an enemy or structure in your crosshairs, a red highlighting
cursor will appear.
If you’re using a homing missile, you can keep your cursor aimed at the
desired target to lock the missile on – a highlighting bracket will
appear to let you know when you’re locked on. Once you are, fire
at will.
DELPHI INTERFACE
Game Text
Same as for the Meccs, all messages for either single player or multiplayer games are displayed in the upper portion of the screen.
23
Page 25

Spell Indicator
In the lower left-hand corner of the screen, you’ll see a device with five
circular slots – this represents the five spells that Delphi currently possesses. You can toggle between available spells and activate them
whenever you see fit. Spells may be obtained through regular game
play, or acquired at a spell shop. Beneath each spell, three “lights” are
displayed, indicating the number of times a spell may be cast. When a
spell is acquired, all three lights are on. When that spell is cast, one of
the lights goes out. If you cast the spell three times, you can return to
the spell shop in order to replenish the energy for that spell.
Delphi can also use acquired Vimp souls to recharge her spells. This
collected energy is represented by the vertical bar in the center of the
spell icon device. By killing Vimps and collecting their blue, ghost-like
souls, Delphi increases her magical energy. You can use this energy to
recharge any of your spells – just press Shift and use the cursor to click
on one of the 5 slots. This will take some of the Vimp soul-energy
you’ve collected and fill up one of the three “lights” so that you can
cast another spell. Vimp soul energy can also be used to restore the
mystical forces that power your base.
Smartie Bubble Indicator
When you “acquire” a Smartie, he’ll become encased in a bubble of
magical energy that will follow you around until you return the Smartie
to your base. If you have a Smartie bubble floating along behind you,
an icon next to your spells will show it.
Weapons Icons
Just like the Mecc interface, your weapons are displayed at the bottom
center of your screen. Blue brackets surrounding the weapon icon
indicate the weapon in use, while the numbers beneath each icon
indicate ammunition for the weapons you possess. Delphi always
possesses a sword and bow, but can acquire other, more powerful bows
in her spell shop.
24
Page 26

Health Indicator
As with the Mecc interface, the heart in the lower right hand corner of
the screen is your health indicator. The level of red contained in the
heart represents your health. When the heart is completely red, you
are at full health. When the heart has no red in it whatsoever, you are
at zero health. Hint: Zero health is bad. Delphi will gradually regenerate health so long as she’s immersed in water.
Smartie Indicator
The upper left hand corner of the screen holds a number representing
Smartie allocation. This works the same way as the Mecc interface,
indicating the number of Smarties you have working for you in your
base compared against the total number of Smarties on the current
island (again, in multiplayer, your enemy’s number of Smarties is also
displayed).
Targeting Cursor
While you’re controlling Delphi, the targeting cursor has the same
highlight function as it does when you’re controlling the Meccs. In
short, if you place the cursor over a viable creature or building target,
a red highlight will appear. Also, if you have a certain spell selected,
new crosshairs will appear if you target something that the spell can
affect.
On Delphi’s interface, the crosshairs are encircled by another cursor,
which represents your turbo ability. When you place the cursor over a
viable landmass, the turbo circle will turn green. When the crosshairs
are aimed at water, sky, or land that’s out of turbo range, the turbo circle is neutral gray. When you activate your turbo ability, the turbo circle will drain as you fly through the air – the distance you travel determines the amount of turbo energy you drain. Once drained, your turbo
energy will gradually recharge within a few seconds. You cannot activate your turbo ability unless the turbo circle is full, though you can
change direction and turbo again while in the air, provided the new
destination you pick is within range. You can activate your turbo ability at any time as long as you have enough energy for the jump.
25
Page 27

If you’re using a Power-Up Bow or Lightning Bow, you can lock onto
your target(s) by holding down the fire button. When you’re locked
on, a highlight aura will appear around the target(s), letting you know
that your missiles will hit their mark once you release the fire button.
KABUTO INTERFACE
Game Text
Same as above – game text is displayed in the upper portion of the
screen. Not that Kabuto is much for words anyway.
Adrenaline Indicator
Displayed in the lower left-hand corner of the screen, Kabuto’s adrenaline indicator is a measure of his overall energy. Kabuto can perform
special attacks that drain his adrenaline to varying degrees. Kabuto’s
adrenaline will regenerate, but at a rate proportional to his health. In
other words, if Kabuto has low health, his adrenaline will regenerate
slowly. At full health, his adrenaline will regenerate quickly.
When you hold down the adrenaline button to charge Kabuto’ s attacks,
a second bar will appear over the adrenaline indicator, indicating how
much adrenaline will be used in the upcoming attack. As you hold
down the adrenaline button, this second bar will grow to take up more
and more adrenaline. There are three levels of adrenaline attacks that
Kabuto can perform, using either his hands or his feet. Note that if you
release the adrenaline button before attacking, you won’t use up any of
Kabuto’s adrenaline. For more information on Kabuto’s adrenaline
attacks, see page 54.
Next to the adrenaline indicator, there’s a small light, similar to the
Mecc nitro light. When this light is on, Kabuto can run in a short
burst. After a light sprint, the light will go off. Kabuto will need a
while to recover his wind before the light comes on again, and he’ s able
to run once more.
Growth/Egg Indicator
In both single player and multiplayer levels, Kabuto begins play at a
moderate size (roughly twice the height of your average Reaper
26
Page 28

Guard). This is a temporary condition, easily remedied by eating
Smarties. Kabuto has four growth stages, and needs to consume a
number of Smarties to expand to each level. A white outline at the
bottom of the screen shows you how close you are to the next stage of
growth. As you eat more Smarties, this outline will begin to fill up –
once it’s full, Kabuto will grow larger, his attacks will be more powerful, and all will seem right with the world.
When you reach the largest level of development, the growth indicator
is replaced by two egg indicators – or as Kabuto likes to call it,
“planned parenthood indicators”. Once Kabuto is at full size, he can
eat a Smartie in order to lay an egg. This egg will hatch into an offspring – a creature much like Kabuto only smaller. When the egg
hatches, the egg indicator becomes a growth indicator for the offspring. Offspring eat creatures in order to grow, much like Kabuto.
Each time an offspring eats a creature, his growth indicator will fill up
a little – when it’s full, the offspring will grow to the next stage of
development. Offspring can only grow to about half of a full-size
Kabuto’s height, and Kabuto can only have two offspring at any given
time. When an offspring dies, the Smartie that was consumed in
order to create it will reappear.
Health Indicator
As with the other races, Kabuto’s health indicator is displayed in the
lower right-hand corner of the screen. The level of red inside the heart
corresponds directly to Kabuto’s health. Kabuto’s health level affects
the rate at which his strength regenerates, so staying in shape is important. Kabuto can regain lost health by eating creatures.
Targeting Cursor
When you’re controlling Kabuto, the cursor changes as you place it
over different objects, to represent how you can interact with that
object.
27
Page 29

Controls
Giants has default control settings for each of the three main characters, but you can change these settings through the main menu. The
default controls are listed on a separate card in the Giants game box –
quite handy to refer to during game play.
Movement
The slope of the terrain affects basic movement. When moving uphill,
you’ll find that your character moves slower in proportion to the angle
of the slope. The same goes for moving downhill, except in reverse
(i.e. you’ll move faster down a steep slope, sometimes even sliding
faster than you may wish to go). These features of general movement
are common to all three races, but each also has special movement
modes that help them get around.
Mecc Movement
Meccs use jetpacks to propel themselves through the air. A jetpack’s
energy cell will only allow you to use one for a limited duration, but
once drained, they replenish their energy quickly. An extra nitro boost
attachment adds power to the jetpack when activated. Once used, the
nitro boost replenishes as soon as you touch the ground.
When your Mecc base has a party house, your Smarties can develop a
gyrocopter. This is a fairly basic flying vehicle with its own machine
gun (unlimited ammo) and unlimited fuel for flying – it can be
destroyed, though. When piloting a gyrocopter in a multiplayer game,
your Mecc teammates can grab on to your ‘copter and hitch a ride.
Meccs cannot enter the water – at all. Doing so will summon groups
of Piranhas that chew through Mecc armor to the soft parts inside.
Sea Reaper Movement
Delphi can use her “turbo” ability to blur from one point to another.
When her targeting cursor is placed over a landmass within a limited
range, you can activate her turbo ability to leap to the selected point.
28
Page 30

You can also use creatures as turbo destinations. Place your targeting
cursor over a nearby creature – a blue highlight sphere will appear
around the creature. Use your turbo ability to leap directly at the
highlighted creature. When a landmass is within range, the cursor is
green; when it’s out of range, the cursor is gray. Notice that when you
activate Delphi’s turbo for long-distance jumps, the cursor will drain.
This energy meter will recuperate in a short amount of time, but until
it does you can’t activate Delphi’s turbo ability again. While Delphi is
airborne during a turbo jump, she can look around and fire her bow at
enemies. The turbo ability is also great for getting close to a foe for
some hit-and-run sword work.
Delphi can also acquire the ability to teleport. This is a spell like many
others, with a limited number of uses (for more information on Sea
Reaper spells, see page 45). Delphi can move easily through the water,
in normal swimming mode or fast swim mode. So long as she’s in
water, Delphi will regenerate health at a moderate rate. When her base
is sufficiently developed, Delphi can also gain access to a one-person
Reaper Ski. This vehicle has very basic controls, and can magically
skim over land almost as well as it can race over water. During Reaper
Ski races, you’ll find pickups such as missiles and turbo boosts that you
can activate during the race.
Kabuto Movement
Kabuto is the only creature who can choose to walk at a slow pace or
run at a much faster pace. While running, Kabuto can initiate more
devastating attacks. He can run for short distances before growing
tired – it takes him a short while to recuperate enough energy in order
to go for another sprint. He’s been meaning to exercise more, but you
know how it is … too many Vimps to slaughter, buildings to destroy.
Kabuto can also perform great bounding leaps from one place to
another. Similar to Delphi’s turbo ability, you can have Kabuto jump
from one point to another simply by placing the targeting cursor on a
nearby landmass and activating Kabuto’s jumping ability. Because he
has few ranged attacks, Kabuto will automatically move towards
distant targets when given the command to either “attack” or “grab”
those targets. Finally, Kabuto doesn’t like the water. He won’t go in
29
Page 31

deep water if he can avoid it, and if he lands in deep water (through an
over-eager leap, for instance), he’ll tread water miserably until you
direct him to leap out.
Attacking
Mecc Attacks
Mecc attacks are fairly simple – as simple as pulling the virtual trigger.
Some Mecc weaponry is more indirect, requiring a different approach
to attacking. For instance, the mine is an object that you place on the
ground. Once dropped, you no longer control it – if an enemy goes
near it, the mine will handle the rest. For more information on Mecc
weapons and items, see page 34.
The Meccs excel at working as a team. While playing as a Mecc in the
single player game, you’ll often have one or two of your buddies at your
side, referred to as “disciples”. These fellows can do plenty of maneuvering and fighting on their own, but you can give them orders as well,
commanding them to go to a certain location, attack a target, or simply flock to your position.
Sea Reaper Attacks
Sea Reapers have two primary methods of attack – using their sword,
or using one of their bows. The sword works just as you’d expect;
press the attack button to swing the sword, striking out at close-range
enemies. Sea Reapers can use many different bows, available through
the gift shop. Similar to Mecc guns, every bow functions differently,
requiring you to take a different approach to using them. For more
information on Sea Reaper bows, see page 44.
Sea Reapers also have the ability to attack on a grander scale, using
their spells. Sea Reaper spells aren’t all oriented towards attacking,
but the ones that are can be truly devastating. For more information
on Sea Reaper spells, see page 45.
30
Page 32

Kabuto Attacks
Adhering to the traditions firmly established in classic monster movies,
Kabuto’s attacks fall into two basic categories: grab and destroy. Both
actions are performed at close range. Note that Kabuto can go after
both ground and airborne targets. He can also perform a running grab
or running kick – both of which will carry him to the target much more
quickly.
Once Kabuto grabs someone or something, he can do a few things with
it. If it’s an inanimate object, he can throw it. By breaking up existing
rock formations, Kabuto will have access to a pile of handy missiles –
the term “projectile weapon” takes on a whole new meaning when
you’re a giant beast pitching boulders at your opponents. If Kabuto
grabs a creature, he can throw that creature, he can eat it (Vimps give
Kabuto health; Smarties give Kabuto an offspring egg; other creatures
just taste yummy), or he can “store” it on his horns by skewering the
creature on the sharpened end. Skewering creatures can be extremely
useful during game play. For instance, your Kabuto may be at full
health when he comes upon a herd of full-grown Vimps – just Vimpkebab them on your horns and you’ll have access to quick healing if
you get into combat later.
When you direct Kabuto to destroy a target, the outcome is fairly predictable. You can also charge your attacks using Kabuto’s adrenaline
stores – the more you charge your attacks, the more powerful they are.
Whether he uses the body slam, the elbow drop, or the flying butt
slam, Kabuto is truly an irresistible force on the battlefield. Note that
Kabuto’ s attacks are not only effective in squashing creatures, he’s also
very good at knocking down buildings.
Once Kabuto is at full size and can create offspring, he can direct his
offspring to attack or fetch a target. This not only keeps the big guy
safely out of harm’s way, it gives the little ones a chance to play adult
for a while.
31
Page 33

Views
Zoom
The zoom function makes it easy to discern far-off objects on the
sprawling landscape. All races can use the zoom function, but it’s
especially useful to the Meccs and Sea Reapers, as it aids you in firing
projectile weapons at far-off targets. You can adjust the power of
zoom magnification, giving you different levels of zooming in and out.
Y ou can also move freely while in zoom mode – just be careful that you
don’t strafe off a cliff.
Change Camera View
At any time during game play, you can change from a third-person
camera view (default) to first-person view. If you’re used to playing a
lot of first-person shooters, you may be more comfortable in first-person camera mode. Additionally, you have the option to switch to a
head-on camera to highlight your actions. This camera view isn’t terribly practical for game play – if you walk forward, for instance, you
can’t see where you’re going. However, this camera gives you a great
view of your character’s actions (especially fun to watch Kabuto crush,
stomp, and gobble his foes from this perspective).
Additionally, while playing Kabuto, you can change to a foot cam
(ground-level perspective just beneath him) or a mouth cam (a view of
the action from within the big guy’s toothy maw). When playing
Kabuto in mouth cam mode, you can easily target objects and devour
them messily. If you ever wondered what it would be like to look
through a small camera inside your mouth while gobbling jelly-filled
candies … you’re pretty sick. Rather than taking the time to grab creatures and pop them in his mouth, while in this mode, Kabuto will lunge
downward at the targeted creature teeth-first. Note that you can’t perform any actions other than movement and eating (using the left
mouse button) while in mouth cam viewing mode.
32
Page 34

Map Mode
Toggling the map mode will give you an overhead view of the island,
with your position in the center of the screen and a text window at the
bottom with your mission briefing (single player only). A cute little
face indicates your character, with an arrow representing the direction
that you’re facing. Y ou can use the mouse and movement keys to move
your character around the landscape while on the map screen – but be
careful! If you encounter any hostile critters, they won’t hesitate to
pummel your character while you blissfully examine the terrain from a
bird’s eye view.
You can change your view of the landscape using simple controls.
Hold the Ctrl key in and a mouse cursor will appear. You can move
this cursor to any spot on the map and right-click to zoom in. Perhaps
the most important feature of the map screen is the icon indicating the
location of your mission objective. In the map screen mode, look for
the small circular highlight icon. This icon marks the spot where you
want to go. This is very handy if you’re uncertain whether or not you’re
going in the right direction or you get turned around during some
heavy combat.
33
Page 35

The Meccaryns
MECC WEAPONS,
PACKS, AND ITEMS
Being more technologically oriented than
the other races, the Meccs rely primarily on
guns, bombs, and other nifty little devices
in order to get the job done. Much of the
deadly equipment they use is stowed aboard
their vacation ship, which might make one
wonder exactly what sort of holiday they’re
headed for. At any given time, Meccs
can carry 3 weapons (in addition to their
handgun), 3 items, and 1 backpack.
Mecc Weapons
Handgun (default)
The generic Mecc pistol, affectionately referred to as
the “Pea Shooter”, has a decent rate of fire, but little
power behind it. The only real benefit to this gun is its
unlimited ammunition. In short, great for hunting
Vimps and better than your bare hands when messing
with anything else.
RPG
This weapon fires a rocket-propelled grenade
in a straight line very fast. Any questions?
Machine Gun
The machine gun’s key selling feature lies in its ability to
deliver lots of bullets in a short period of time. The
weapon’s incredible rate of fire, however, reduces the
accuracy of projectiles over a long range. Taking into
account the muzzle velocity and… Look, just get as close
to your enemy as you can, pull the trigger, and enjoy!
34
Page 36

Proximity Missile
Based on the design of the RPG, this weapon uses a similar
mechanism to fire a projectile that’ s roughly the same as the
RPG rocket. The big difference being that the proximity
missile will explode when it comes within 50 feet of its
target. The proximity missile is a great choice when you’re
trying to take down any hard-to-hit enemy – especially if the
enemy is airborne.
Sniper Gun
A favorite weapon for long-range combat, the sniper
gun fires a bullet at extremely high velocity directly at
the target. Even when fired at very long range, the
sniper bullet will achieve a near-instantaneous hit,
doing a lot of damage. A steady Mecc can take out all
kinds of opponents with a sniper gun and plenty of
ammo – but long reload times for this weapon can leave you with your
pants down once too often.
Missile Launcher
Very similar to the RPG, this weapon fires an explosive projectile in a straight line towards the target.
The explosive missile, however, will do more damage
over a wider area than the RPG projectile.
Homing Missile
Yet another modification of the RPG, this weapon fires a
missile that will actually change course to track your target.
To fire a homing missile, just keep the crosshairs on your
target for 3 seconds with the fire button pressed – this gives
the missile enough time to lock on. Release the button when
ready, and let technology work for you.
Millennium Mortar
If you have some … other shortcomings, then the
millennium mortar is the perfect way to overcompensate
for them. It is the big gun. Fire the millennium mortar
by aiming at a spot on the ground, at a structure, or at a
35
Page 37

living target – the gun won’t fire if your crosshairs are lined up with the
sky. Pull the trigger and the weapon will lob a large projectile at the point
you indicated. This projectile will detonate on impact when it strikes a
building or creature, but will sit momentarily if it hits bare ground,
exploding after a few seconds. And oh, the explosion. Amidst the chaos
of battle, enjoy a moment of contentment as you observe the mighty fireworks display. Just make sure you’re far away before you do so.
Mecc Packs
Note that different backpacks have different weights – added weight
will make your jetpack work harder to get you up off the ground,
which means that you won’t be able to go as high. Most of the backpacks are relatively light – the jetpack upgrade doesn’t add any weight
at all. However, the Deployable Turrets are somewhat heavy – you’ll
notice the difference – and the Pop-Up Bomb is downright massive.
Carrying a Smartie on your back will add to the weight that your jetpack has to work against.
Jetpack (default)
Aside from one of the single player missions, your Meccs
will always carry a jetpack. This device makes moving
around the rough terrain of the island much easier than
going on foot – it’s basically a small propulsion system
that will thrust you skyward with each burst. The jetpack has a limited amount of energy, but its energy will
recharge over time. Thus, you can remain airborne with a jetpack so
long as it has energy. Once it’s gone, you’ll start falling while the jetpack slowly replenishes its energy stores. Most jetpacks have a nitro
boost add-on. When activated, the nitro will give your jetpack thruster
an extra kick, launching you farther and faster. The nitro boost regenerates when you touch the ground.
Jetpack Upgrade
The upgraded jetpack is exactly what you’d expect – an improved
version of the original. It’s better, faster, stronger, more powerful …
order now and we’ll include a special set of vibrating attachments that
massage tired muscles as you fly. Wait … the attachments are shaped
like what? Oh … never mind.
36
Page 38

Repair Pack
This pack uses your jetpack energy to repair buildings,
your teammates, even yourself. Pretty much useful
all-around.
Shield Pack
The shield pack uses your jetpack energy to create an
invisible shield around you. When your jetpack energy
reaches zero, the shield deactivates.
Bush Pack
This pack uses jetpack energy to create a camouflage bush
around you. When surrounded by this bush, you can walk
(though more slowly than normal), but you can’t fly or
attack. A stationary bush is completely invisible to the
enemy – moving around will increase your chance of
detection. Note: Enemy Meccs hiding in bush camouflage can be seen
clearly through the green viewing window of the sniper gun.
Deployable Turret
When this pack is activated, you can drop a machine-gun
turret at your feet. This turret will fire on any enemy who
comes near, though it can be destroyed.
Pop-Up Bomb
The pop-up bomb is the most powerful bomb in the Mecc
arsenal. Larger than a grenade but smaller than a nuclear
weapon, the pop-up bomb is capable of doing massive
damage to a collection of structures or group of creatures.
While carrying this device around on your back, you’ll
have some difficulty getting airborne due to the thing’s
immense weight – it’s darn heavy.
37
Page 39

MECC ITEMS
Mine
Once you drop this mine it’ll burrow into the ground
leaving only its top showing. If any enemy comes within
range it will pursue them, blowing up upon impact or
within 5 seconds of activation (whichever comes first).
Health Syringe
You can use a health syringe at any time to replenish
some of your health.
Grenade
Activating a grenade, you’ll promptly lob the explosive at the
point indicated by your targeting cursor (within a limited distance). After a few seconds, the grenade will explode. Whee!
Grenades work well while flying – you can drop them on enemies below while cackling maniacally.
Flare
If alerted that a homing missile is locked on to you, you can jettison a flare to confuse the approaching missile while you make
your getaway.
Mecc Disciples
You and your Meccaryn buddies travel together, drink together, woo
women together – it’s only natural that you fight together too. During
the single-player game, you’ll find that your Mecc buddies – referred to
as disciples – are only too ready to take your orders when it comes to
adventure and battle. Your disciples can use their jetpacks to fly to
locations, carry guns just like you, and have a true love for kicking ass.
Your disciples will follow your orders to attack, go to positions that
you point out, or return to you.
38
Page 40

Mecc Gyrocopter
Meccs can gain access to a gyrocopter once
they haul a Smartie out of their party house to
build a gyrocopter pad. One Mecc can pilot
the gyrocopter, while teammates (in multiplayer games) can latch on to the sides and hitch a
ride. Gyrocopters not only have greater airborne range than jetpacks (due to their unlimited fuel capacity), they
also have a nose-mounted machine gun with unlimited ammunition, as
well as 3 millennium bombs. Millennium bombs are similar in effect
to the Millennium Mortar (described on page ##). You can aim these
bombs by targeting a spot on the ground within a limited range. When
you land on your gyropad, you’ll load up on millennium bombs
again. Millennium bomb icons are displayed at the bottom of the game
interface.
With all of this firepower, gyrocopters are unfortunately weak on the
structural side. While you’re piloting a gyrocopter, the heart-shaped
health indicator on your interface refers to the gyrocopter’s health, not
yours. If the ‘copter takes damage, you can return to your gyrocopter
pad to repair the vehicle. Don’t wait too long, though – it doesn’t take
much to blow up a gyrocopter, damaging the pilot and any unlucky
teammates who happen to be hitching a ride.
MECC BASE
When building a Mecc base from scratch, you’ll start with a “pit” (with
a “meat drop-off” circle in front) and a “Smartie drop-off” circle. The
pit is where you bring Vimp meat that you’ve collected – Smarties that
work for you will go to the pit immediately after a task is done for some
good old Vimp-burgers. The Smartie drop-off circle is where you need
to bring any Smarties you gather. You can only carry one Smartie on
your back at a time, and when you do, you’ll want to bring him here.
Once you’ve returned a Smartie to your base, you’ll get the following:
39
Page 41

Pub
When you get a Smartie back to your
base, the first thing he’ll build is a pub
– hey, priorities, right? Built on top of
the pit, the pub is a place for your subordinate Smarties to eat and drink in
between tasks you give them. So long
as you keep your Smarties well-fed,
they’ll sit in the pub and wait for you to assign them additional work.
Build Base Platform
After the pub, your number one Smartie will go and
create a build base platform. When you stand on this
platform, the camera will zoom out to an overhead
view of your base – this is the base building screen.
For a complete rundown of options on the base building screen, see page 58. Whenever you need to access
this screen, hop on the build base platform.
Now, as you acquire more Smarties and enough Vimp meat to keep
them happy, you can use the base building screen to construct the following:
Workshop/Generator
After you’ve gathered a few Smarties to your
base, the workshop the first structure that
you can create in the base building screen.
The workshop allows your Smarties to develop materials needed to create walls around
your base as well as cool devices for your
inventory and other buildings. Once the
workshop is built, you can build walls around your base as well as a
gift shop.
The generator is an upgraded version of the workshop. Once you have
a generator, all of your base’s structures will have an additional shield
added on to their health (represented by the gray bar next to each
40
Page 42

structure in the base building view). You need to have a generator in
order to upgrade your pub to a party house.
Wood Wall/Stone Wall
You can only start building walls once you have
a workshop. Once you do, you can access the
base building screen to place walls on four sides
of your base to defend against land-bound foes.
The first level of wall is made of wood; the
upgrade is made of stone, giving you much
tougher defenses. You need all four walls to be
made of stone before you can upgrade your pub to a party house.
Gift Shop 1/Gift Shop 2
Once you have a workshop, you can direct
your Smarties to build a gift shop 1. The
gift shop is where you can acquire nifty
guns, packs, and other items. Also, visiting the gift shop will fully restore your
health and ammunition for all the guns
you’re carrying. The gift shop 1 has a limited
supply of things to get, but you can upgrade it
through the base building screen to a gift shop
2 – that’s where the truly cool weapons of
mass destruction fall into the wrong hands …
your hands. You need a gift shop 2 in order to
upgrade your pub to a party house.
Command Center
The command center requires more Smarties
to build than most other projects, and is available once you have a workshop. This structure
is essentially a shell that your Smarties will
build around your base building platform.
Protection provided by the command center
building can be extremely useful, especially in
multiplayer games where the structure houses not only your base build-
41
Page 43

ing platform, but your flag-holding Smartie as well. The command
center is one of the many structures that you need to have in your base
in order to get a party house.
Once you have a Party House, you can control the turrets that
you place via the command center . Just enter the command center and
step on the pad labeled “Turret Control” – an overhead view of
the island will appear. Left-click on any of your turrets to assume
control of it; hit the Escape key to return to normal control of your
Mecc character.
Party House
Once you’ve acquired a generator, a command center, and a level 2 gift
shop, and surrounded your base with stone walls on all four sides,
you’ll have the option to upgrade your pub to a party house. The party
house is a little sliver of Smartie heaven – it keeps the little buggers
happy enough to be downright inspired. Inspiration, of course, leads
to more cool stuff for you. You can enter the party house and put a
Smartie to work on special projects, simply by clicking on the icons at
the top of the screen and dragging it over an idle Smartie. This will
return you to the outside of the party house, carrying the selected
Smartie on your back. All you need to do now is go to the desired destination and give your lil’ buddy the order to build (using the X key).
Once your Smartie is done building, you’ll probably want to take him
back to your party house. If you get killed, your Smartie will wander
around the landscape, available to any team.
Features available through the Mecc party house are:
Tower
This is a simple tower – giving you a high vantage point
for better range of sight and defensive capability.
Towers can even be built while flying, placing the
structure high in the air. You can build up to 3 towers.
42
Page 44
Mini-Shop
The mini-shop is similar to the normal gift shop in
your base, but you can place it anywhere in the field.
Unfortunately, the mini-shop only holds a limited
selection of weapons and items, and has a limited
supply of health. You can build numerous mini-shops
.
Gyrocopter Pad
The gyrocopter pad is a hovering structure with bay
doors on the roof along with a circular yellow
“button”. When you stand on the button, the bay
doors will open and a brand new gyrocopter will be
delivered up to you. You can only build one gyrocopter pad. For more information on the gyrocopter
itself, see page 39.
Mine Shaft
Place the mine shaft anywhere in the field, and
your Smartie will construct a small tree-like hut
at that location. Place another mine shaft, and
you’ll have an underground link between any
two points in the game world. Whenever you enter either of the huts,
you’ll immediately be transported to the other – very useful if you want
to make a quick path from your base to the thick of the action. Of
course, if you’re on the opposing team, you can’t enter another team’s
mine shaft, but you can destroy it.
Bulldog Turret
This turret is similar to the deployable machine-gun
turret pack, only bigger and more powerful. It will fire
a heavy caliber machine gun at ground enemies when
they come within range.
SAM Turret
Everybody’s favorite personal home defense system,
the SAM turret scans a limited area for airborne
enemies, firing guided missiles to run ‘em down and
blow ‘em up.
43
Page 45

The Sea Reapers
SEA REAPER WEAPONS
AND SPELLS
Where the Meccs rely upon science and
technology to lend them superior firepower,
the Sea Reapers’ strength lies in their mystical
energy. While you’re playing Delphi, you’ll
use this energy to form her weapons, cast
devastating elemental spells, even create a
well-fortified base. Delphi can carry 3 special
bows in addition to her default sword and
regular bow. She can also “store” up to 5
spells, with 3 uses each.
DELPHI WEAPONS
Sword (default)
Graceful and deadly at the same time, Delphi can perform
simple slashing moves with her sword. Striking a single
enemy with a sequence of cuts, Delphi will perform combination moves that are truly deadly. Many opponents have
ranged armaments, making it dangerous for Delphi to close
the distance to sword-swinging range. In conjunction with her turbo
ability, however, Delphi can zoom in right next to an opponent, cut him
from groin to throat, and be away before the poor sap knows how he
died.
Bow (default)
This bow is Delphi’s equivalent of the Mecc handgun.
Shots with this bow are fast, but not powerful. Fortunately,
due to the bow’s mystical nature, it has unlimited ammo.
44
Page 46

Lightning Bow
The lightning bow is a more powerful version of the regular
bow, with a faster shot speed – this makes it an ideal sniper
weapon.
Hellfire Bow
This bow fires explosive arrows – very nasty.
Screamer Bow
The screamer bow fires a screaming skull that will home in on
a target once you’ve locked on. Simply hold down the fire
button and a lock-on bracket will appear around the target.
When you release the button, the skull will seek out the target and explode on impact. Very convenient for fast or flying
opponents.
Power-Up Bow
The ideal weapon for facing numerous enemies simultaneously. While wielding the power-up bow in combat, hold
down the fire button, similar to the lightning bow. As you
hold the button down, glowing halos will appear around targets in an ever-increasing area in front of you. When you
release the fire button, the power-up bow will fire multiple projectiles,
one at each of the selected targets. As if all of that wasn’t enough,
these projectiles will explode on impact.
DELPHI SPELLS
Smartie Grab/Bubble Spell
This spell allows you to magically ensnare a Smartie
from a distance. When cast on a targeted Smartie
(within a certain range), a bubble will form around the
creature, carrying him back to you. This spell can be
very helpful in multiplayer, allowing you to steal
Smarties off of the backs of Mecc opponents or off the
horns of Kabuto.
45
Page 47

Cluster
When Delphi casts this spell, she will hurl a fist-sized
object at the targeted spot. Upon impact, the object will
burst, throwing small explosives out in a circle, doing
damage to anything in its radius.
Cloak
Casting this spell turns Delphi into a fast-moving trail of
green mist for a short amount of time. While in this mist
form, Delphi is not only invincible, she will poison any
creature she touches.
Teleport
This spell teleports Delphi to a random location within a
certain distance. At the same time, casting this spell will
create a few stationary Delphi clones to confuse the
enemy. These clones will disappear over time, or as soon
as they are hit.
Summon Firewall
Casting this spell creates a wall of fire at the targeted
point. This wall will immediately sweep forward, away
from Delphi, a short distance, setting fire to any creature
in its path. Note that, if you are on fire, you can quickly
put yourself out by jumping in the water.
Summon Hail
When you cast this spell, you’ll get a top-down view of
the targeted spot. When this view appears, you have a
certain amount of time to target spots on the ground with
the left mouse button. When regular game play resumes,
giant pieces of hail will stream down from the sky to
strike each of the points you targeted, doing massive damage to any
creature in the area of impact.
46
Page 48

Slow Time
When Delphi casts this spell, she will create a dome of
slow time with a fixed radius, centered on the targeting
cursor. Creatures caught within this dome can still
move and attack, but at a much slower rate – it’s very
easy to avoid their attacks and pick them off one by one.
Note that Delphi can enter the dome without being
affected by the time distortion magic. The slow time dome has a limited duration. After it disappears, any creature who was caught within will return to its normal movement speed.
Shrink
This spell will damage any target creature while shrinking it to half of its original size – simply target the creature and cast away. The psychological effect on male
opponents alone is quite devastating.
Follow
When Delphi casts this spell, two projectiles will home
in on the targeted creature. Upon impact, these projectiles will lift the creature in the air and hold him there.
A third projectile will then appear, homing in and
exploding when it hits the struggling victim.
Summon Fire Circle
When you cast this spell, a cone of fire will appear at the
point you’re targeting. This cone is essentially a trigger
point. You must walk to the cone in order to trigger
the fire circle – at this point, a circular wall of flame will
expand outward from the cone. The flames won’t hurt
you, but they’ll burn anything they touch. Creating a
fire circle isn’t all that simple, though. Your enemies can shoot the
cone to trigger the fire circle prematurely – if the flames hit you in this
case, you will take damage. Furthermore, the fire cone won’t last forever. After a short amount of time, it will disappear, and the power of
the fire circle will disperse.
47
Page 49

Repair
Delphi can use this spell to repair damaged structures in her
base. Simply target the structure that’s battered or broken and
activate the spell to perform repairs.
Cluster Mine
This spell is similar to the Cluster spell above, but instead of launching
a projectile outward, Delphi will leave a mystical object on the ground
where the spell is cast. This object, when an enemy comes near it, will
explode, hurling smaller explosives a short distance around, damaging
any creature in the area.
Summon Tornado
Powerful and incredibly fun, this spell creates a
monstrous tornado at the targeted point. Any small
creature who goes near this tornado (with the exception of yourself) will immediately get yanked up into
the air, whirling frantically around the tornado’s circumference. Large creatures will remain grounded,
but will take damage so long as they remain near the tornado – high
speed winds plus tiny particles of debris equals innumerable bullet-like
projectiles whirling through the air. Now, the unfortunates that have
achieved lift-off will also take some damage as they continue to rise.
But wait … there’ s more! After a short period of time, the tornado will
disperse, dropping any airborne creatures from a phenomenal height,
to collide messily with the ground below.
DELPHI REAPER SKI
Some special game levels will give Delphi access to a one-person jet
ski vehicle, while in base building levels, she can acquire a Reaper Ski
once she has a party house. The Reaper Ski is the preferred mode
of travel over the water. Due to its magical nature, the Reaper Ski
can even run on land, though moving much more slowly than in water.
The Reaper Ski can be augmented with power-ups like turbo boosts
and missiles (which are conveniently found floating on the water
surface). Acquired power-ups will be shown on the bottom of the
interface. Like the Mecc gyrocopter, so long as Delphi is on a Reaper
48
Page 50

Ski, the health indicator refers to the vehicle.
SEA REAPER BASE
The Sea Reaper base is very similar to the Meccaryn base, with the main
exception that many of the structures and devices are magical in origin
rather than technological. As with the Meccs, you want to return
Smarties to your base in order to begin construction. When you
encounter an unaligned Smartie, you’ll encase him or her in a mystical
bubble, which will float along behind you until you get back to your base.
When building a Sea Reaper base, you begin with a “pit” – this little
device will bend the Smarties you return here to your will, allowing
them to work for you. Near the pit, you’ll see a “soul drop-off” point
as well as a “Smartie drop-off” point nearby. Bring the collected souls
of slain Vimps to the pit to provide it with energy. Without energy,
your pit won’t work its mystical mojo on your Smarties, and your
Smarties won’t work for you. Once you’ve returned your first Smartie
to your base, you’ll get the following:
Persuader
The first structure that you’ll get is a persuader, built directly over your
pit. This gives you a focal point for your magical energies, and it gives
your Smarties a place to gather while waiting for more work. The
Vimp soul energy that you collect will be harnessed here, to rejuvenate
tired Smarties and keep them in your service.
Build Base Platform
As with the Mecc base, Delphi uses a build base platform in order to
direct her Smarties to work. Your first Smartie will build this platform
immediately after building a persuader. Stand on this platform and the
camera will zoom out to an overhead view of your base – this is the
base building screen. For a complete rundown of options on the base
building screen, see page 58. Whenever you need to access this screen,
hop on the build base platform.
From this point on, you’ll need to use the base building platform to
acquire additional structures.
49
Page 51

Spell School/Shield Generator
Once you have a few Smarties drawing energy from your command
center, you’ll be able to build a spell school. This structure allows you
to advance your research into magical energies, which will eventually
be used to give you more powers as well as make it possible to build
greater structures. Once the spell school is built, you can create a force
field around your base as well as a spell shop.
The shield generator is an upgraded version of the spell school. The
shield generator creates an extra layer of magical defense over all of
your base’s structures (represented by the gray bar next to each structure in the base building view). You need to have a shield generator in
order to upgrade your persuader to a party house.
Spell shop 1/Spell Shop 2
If you’ve built a spell school, you’re all set to put in a spell shop. The
spell shop is an extremely useful structure, where you can acquire new
spells as well as more powerful bows. Also, whenever you visit the
spell shop, you’ll be healed, completely supplied with ammunition, and
all of your existing spells will be fully charged. The first level spell
shop has a limited stock – the upgraded spell shop has just about anything you could possibly want. You’ll need to upgrade your spell shop
before you can upgrade your persuader to a party house.
Force Field
Once you have a spell school, you can start surrounding your base with
a force field. Using the base building screen, you’ll need to place a separate force field on all four sides of your base. A force field is a very
effective defense against ground enemies, though the force field can be
damaged. Upgrading your force field will make it tougher. You’ll need
an upgraded force field on all four sides of your base before you can
upgrade your persuader to a party house.
Command Center
Once you have a spell school and a sufficient number of available
Smarties, you can build a command center. Like the Mecc command
center, Delphi’s command center is essentially a shell-like structure
50
Page 52

surrounding her base building platform and flag-carrying Smartie (in
multiplayer). You need a command center in order to get a party
house.
Once you have a Party House, you can control the turrets that you place
via the command center. Just enter the command center and step on
the pad labeled “Turret Control” – an overhead view of the island will
appear. Left-click on any of your turrets to assume control of it; hit the
Escape key to return to normal control of your Mecc character.
Party House
Once you’ve acquired a shield generator, a level 2 spell shop, and a
command center, and surrounded your base with upgraded force fields
on all four sides, you’ll have the option to upgrade your persuader to a
party house. The Sea Reaper party house is basically the same as the
Mecc party house – it’s a place for Smarties to gather and chill while
awaiting new tasks. You can enter the party house and put a Smartie
to work on special projects by clicking on the icons at the top of the
screen and dragging it over an idle Smartie. This will return you to the
outside of the party house, carrying the selected Smartie in a magical
bubble. Go to the location where you want the special structure and
activate your Smartie using the X key. Once your Smartie is done
building, you’ll probably want to take him back to your party house. If
you get killed, your Smartie will wander around the landscape, available to any team.
The structures available within Delphi’s party house are:
Hellfire Turret
This is a basic gun turret for base defense, but Delphi can position it
just about anywhere she wants. The hellfire turret will fire at any
ground opponents that come within range of its sensors – the explosive
projectiles that it fires usually discourage all but the most determined
invaders.
Screamer SAM
This device is a stationary turret that works similar to Delphi’ s screamer bow – only more powerful. When an airborne target comes within
range of a screamer SAM, it will activate and fire a magical projectile
51
Page 53

at the target, tracking it through the air. When this projectile hits …
ouch.
Cloaked Tower
When you give the command to build one of these
towers, your harnessed Smartie will create a levitating tower. These
towers are only visible to Delphi or her teammates (in a multiplayer
game). Enemies must come within a certain distance in order for the
tower to appear visible to them. The tower’s invisibility
field extends to anyone or thing on it – this includes players and turrets placed on top of the tower.
Pier
When you use your party house Smartie to create a pier, you’ll have
access to a Reaper Ski. Simply go to the pier and mount the Reaper
Ski in order to ride it. Reaper Skis have great maneuverability on the
water – not so great on land. For more information on the Reaper Ski,
see page 48.
Portal
Activating this will create a magical portal, similar to the mine shafts
that the Meccs use. You must create two portals in order for them to
work – entering one will bring you directly to the location of the other.
Like the Mecc mine shaft, other team members cannot enter your portals, and portals can be destroyed.
Mini-Spell Shop
This is a smaller version of the spell shop that you can create within
your base. The main difference with a mini spell shop is that it can be
placed anywhere on the map, and it only contains a limited inventory
of weapons and spells.
Sea Monster
When you activate this power, you’ll summon a massive sea monster
from the waters surrounding the island – a small cinematic sequence
will show the creature rearing its head above the waves. Once this
52
Page 54

short cut scene is finished, a timer will begin to count down to zero.
Your goal: to get to the spot you want your sea monster to target when
the timer reaches zero; you want this spot to be somewhere near your
enemies. When the timer hits zero, the sea monster will spew a massive fireball, arcing it across the sky to land on the spot where you’re
standing (anywhere on the island – distance is no matter). You should
probably get away from that point as quickly as possible, as the incoming globe of burning, screaming death will most likely devastate anything near the point of impact. Once the sea monster has spent himself (ahem), he’ll return to the watery depths, perhaps for a cigarette
and some television.
53
Page 55

Kabuto
One giant, angry can of whoop-ass. The
big bruiser. Kabuto. His weapons are
primitive, but effective, using his hands,
his feet, his entire body weight.
Kabuto’s size and strength gives him
superiority over any single creature that
he might meet – hell, over any group of
a dozen creatures that he might meet.
On top of this, he can hatch smaller
offspring to help the cause. Language
skills are lacking, but who’s going to
tell him?
Kabuto Attacks
Kabuto normally has fairly devastating attacks. But when devastating
just isn’t enough, hold down the adrenaline button to charge Kabuto’s
attack. The longer you hold it down, the more powerful the attack is,
draining more adrenaline. Of course, the amount that you can charge
an attack depends upon the amount of adrenaline Kabuto has. Once
you’ve charged the attack to your liking, you can launch either a hand
or foot attack. Kabuto has three levels of adrenaline attacks for both
hands and feet. More powerful attacks tend to be slower – small, fast
opponents can sometimes get out of the way while you’re winding up
a big fat killer blow.
Adrenaline Punch
This is the first level of adrenaline hand attack. Being that Kabuto’s
fist is bigger than most things it’ll connect with, it’s hardly fair to call
this a punch. The extra bit of adrenaline makes all the difference, say,
when you’re brawling with a house.
Two-Handed Slam
This is the second level adrenaline hand attack. Kabuto brings his
hands together to form an immense mallet of knuckles and fury. When
he swings his fists down on a target, any target, the chunks will fly.
54
Page 56

Elbow Drop
This is a third level adrenaline hand attack. Ah, the pro-wrestling classic. As timeless as it is punishing, the elbow drop can crush creatures
and buildings alike.
Belly Flop
This is a third level adrenaline hand attack. Kabuto leaps into the air,
stretching his massive form to poise spread-eagled in the air above his
target, blotting out the sun itself. Then, like your overweight uncle
Carl at last year’s family reunion, leaping gut-first into the pool, the
bulky behemoth descends. The difference here is that Kabuto isn’t hitting water – and whatever comes between him and the ground is going
to quickly become a small smear.
Foot Stomp
This is the first level of adrenaline foot attack. Foot go up. Little
person scream in horror. Foot go down. No more scream. Kabuto
like quiet.
Jumping Stomp
This is the second level of adrenaline foot attack. See foot stomp above
– multiply by two.
Butt Flop
This is a third level adrenaline foot attack. Like the body slam, but
with less dignity. Kabuto goes airborne, crashing into the ground gluteus maximus first as if to say to his opponents, “Kiss my hairy monster ass!”
Cannonball
This is a third level adrenaline foot attack. Kabuto’ s playful side comes
to the fore as he folds into a great muscular sphere and hurls himself
at his foes. Oh Kabuto, you’re just a big hateful kid, aren’t you?
55
Page 57

Running Kick
While running, press the left mouse button to initiate a running kick.
This will direct Kabuto to give the target a World Cup style boot.
Running Grab
While running, press the right mouse button to initiate a running grab.
Kabuto will slide along the ground, creating an immense plume of dust
behind him, to scoop up the target.
Throwing Stuff
Kabuto can make a pretty darn nasty missile weapon out of anything
that he can get his big scaly fist around. Reaper Guards especially
hate it when Kabuto grabs one of them and hurls him at his best buddy
– both will take serious damage (usually weighted more heavily toward
the projectile) and their friendship will suffer irreparable harm. Of
course, Kabuto can pitch any creature he likes at cliff walls, buildings,
or far out to sea … all with fatal consequences.
Kabuto can also throw large boulders. These can often be found
scattered near cliff walls, and are extremely deadly. When Kabuto
throws one of these ten-ton rocks, even at the ground near a cluster of
enemies, the pulverizing rock and flying stone shards equal a large
explosion. In a word: Ouch. Some parts of the landscape have
volcanic columns where Kabuto can find boulders that continually
replenish – knock the top off of one of these columns and seismic
forces will soon push another out of the soil.
Magnifying Glass
When Kabuto picks up a special gemstone, he can hold it aloft to fire
a wide laser at the ground, which then narrows and grows in intensity.
At this point, Kabuto can control the laser in 1st person mode (use
mouse to move around targeting cursor and left mouse button to fire).
All creatures unfortunate enough to have this beam fall upon them will
slowly burn, taking damage as smoke curls out of their pores.
56
Page 58

Kabuto’s Offspring
When a full-size Kabuto eats a Smartie, he can lay
an egg that will hatch into an offspring. Offspring
are much smaller versions of Kabuto, but they can
grow when they’re fed plenty of meat. Offspring
can be used to protect areas, fetch creatures for
Kabuto, or simply attack and eat targeted enemies.
Kabuto can only have 2 offspring under his control
at any given time.
Kabuto’s Weak Spot
Kabuto is a pretty tough character overall, but he can be killed if he
takes a lot of punishment over a long period of time. Considering
Kabuto’s size and power, not many opponents will be given the opportunity or time to chip away at him. However , the Sea Reapers designed
their ultimate weapon with a kill switch – literally. In the center of
Kabuto’s torso is a small shield. This shield will open when an
opponent comes within a certain range, revealing Kabuto’s weak spot.
This weak spot is a very small target which, when it takes a direct hit,
will put an end to Kabuto. This can be very convenient for Kabuto’s
enemies (provided they can get close enough to open the shield
without being crushed in Kabuto’s ham-fist), but very inconvenient
for Kabuto.
57
Page 59

Base Building
Certain levels in the single player game require you to build a base in
order to advance, while you can choose in a multiplayer game whether
or not to play in base building mode or simply start with a fullyoperational base that you utilize during play. If you’re used to very
complex base building procedures from other real-time strategy games,
forget what you know. Base building in Giants is very simple and
action-oriented.
Only the Meccs and Sea Reapers can really build and maintain a base.
Kabuto is more or less a walking base, consuming and using any
resources he comes across. Complete descriptions of Mecc structures
are given on page 39, while Sea Reaper buildings are described on page
49. The following sections apply to more of the basic strategy of base
building, applicable to both Meccs and Sea Reapers.
Building Your Base
Building a base is a matter of development, literally from the ground
up. You start with nothing and gradually use Smarties and Vimps as
resources in order to build some rudimentary structures. Gathering
more and more resources, then using the base building screen to allocate these resources (see page 60), you can add structures to your base
and improve upon them. Ultimately, the better your base is, the more
powerful items and abilities you’ll have access to.
Gathering Resources
For all three characters, the basic resources to gather are Smarties (the
little dudes in the orange robes) and Vimps (the not-so-bright pinkish
herd animals). For a complete description of Vimps and Smarties, see
the character section on page 13. Each of the three characters acquire
and use these resources differently …
Meccs and Resources
The Meccaryn base is more conventional, requiring you to gather
workers (Smarties) and feed them in order to create better buildings
and weapons. To grab a Smartie, all you need to do is walk up to one
58
Page 60

(who isn’t already working for another player) and he’ll climb on your
back. When you return the Smartie to your base, he’ll get off and go
to work for you. You can only carry one Smartie at a time.
When you’re playing the Meccs, you need to kill Vimps and collect
their meat in order to feed the Smarties working at their base. Dead
Vimps will yield a number of meat chunks depending upon the Vimp’s
maturity and size. These meat chunks will melt into the ground after
a few seconds, so gather them quickly, then return the meat to your
food pit within your base.
Sea Reapers and Resources
The Sea Reaper base is founded on mystical power. Like the Meccs,
Sea Reapers also use Smarties to establish and construct their base.
Sea Reapers can capture Smarties simply by walking up to them – this
will surround the Smartie in a magical bubble which will follow the
Reaper around until she returns to her base. The “Smartie Grab” spell
will also perform this function, except it allows you to enclose distant
Smarties in the same magical bubble. You can only “carry” one
Smartie at a time.
Sea Reapers must kill Vimps and gather their souls in order to acquire
more energy for base building. Dead Vimps leave behind a ghostly
soul, which will disperse after a short period of time. Gather up these
souls and return them to your base for additional spiritual energy.
Kabuto and Resources
Kabuto doesn’t really have a structural base – if anything, the entire
island is his base. Resources such as Smarties and Vimps are applied
directly to Kabuto’s health and abilities, as well as those of his offspring. By eating Smarties, Kabuto can increase in size … and with
an increase in size comes more raw physical power. In addition, once
Kabuto is full size, he can eat Smarties in order to lay offspring eggs.
When he does so, he’ll have control of a miniature version of himself,
which can attack and eat other creatures as well as fetch fresh meat to
lay at Kabuto’s feet.
Kabuto must eat creatures in order to regain lost health. He can also
59
Page 61

store live creatures by skewering them on his horns, saving the juicy
morsels for later. Kabuto can also direct his offspring to eat Vimps
(making the offspring grow) or fetch Vimps for him (the offspring will
grab the targeted Vimp and return it to Kabuto).
Protecting Your Base
Building walls can protect your buildings from Reaper Guards in the
single player game, as well as from direct Kabuto/Reaper/Mecc
attacks. The walls do take damage but your Smarties can repair the
wall so long as they’re well-fed. Upgraded walls are obviously tougher,
and can take more punishment. However, because Reapers, Meccs,
and Kabuto can pretty much traverse any sort of landscape, walls alone
won’t keep these folks out of your base. Mecc and Reaper turrets can
provide additional discouragement for the pesky airborne visitor.
THE BASE BUILDING SCREEN
Once you have acquired your first Smartie, you’ll have access to a
“Base Build” platform within your base. Step on this platform to bring
up the base building screen.
The base building screen shows you an overhead view of your base.
The image above shows a Mecc base, but the same basic mechanics
apply to the Sea Reaper base (Kabuto does not require a base building
screen). You can change the camera view by zooming in or out (arrow
60
Page 62

up, arrow down), or rotating to the left or right (arrow left, arrow
right). You can exit the base building screen by hitting the ESC key.
The mouse controls a pointer – you can move this around and select
different options on the base building screen.
Each building displayed on the base building screen has a meter for its
“health” – this is the vertical green bar next to the structure. Note: you
can fix damaged buildings using the repair tool available in the Gift
Shop.
The pub has a horizontal bar over it as well as a health bar; this horizontal bar represents the amount of meat that the pub holds. Smarties
eat meat after work, so you need to keep your pub stocked with meat
if you want your Smarties to be happy. When a Smartie has eaten
enough Vimp meat, he’ll go to the bar tables behind the pub for a quick
pint, awaiting any orders you might have for him. If your Smarties
don’t have enough meat, they may wander off.
Smarties have a small horizontal green bar next to them – this represents their health. Damaged Smarties can regain lost health by hanging out at the pub eating more or just partying away in the Party
House.
The interface panel along the right side of the screen holds the structures available for construction in your base. There are several open
slots on this panel – a few main slots and four smaller ones. The main
slots are for your major structures and their upgrades. The smaller
slots are for wall sections and their upgrades. Once a structure is built,
the slot it once occupied will either be replaced with an icon for
upgrading the building, or the slot will be greyed out (if no upgrade is
available).
The window at the bottom of the base building screen is the currently
selected building. The name of the building is at the top of the window,
along with its construction status (ready to build, complete, etc.).
Below the name, a numeric value tells you how many Smarties you
need in order to build the structure. A graphic of the structure to be
built is shown in the center of the window. Below the graphic, you’ll
61
Page 63

see a progress bar for the construction of the structure.
At the bottom of the window, the number of Smarties currently work-
ing on the selected structure will be displayed.
In the lower right hand corner of the base building screen, you’ll see
large plus (+) and minus (–) buttons. Above these buttons, there is an
indicator telling you how many of your Smarties are working out of
your base’s total Smartie population (the rest, of course, are boozing
away in your Pub or Party House). You can use the plus and minus
buttons to add or remove Smarties to the construction of your currently selected structure. Once you’ve added enough Smarties to a
building’s construction, the green “Go!” will flash, and you can watch
your Smarties go to work.
Building a Mecc Base
Walkthrough
In order to get a better handle on building a base, here’ s a simple walkthrough for Mecc base building (the Sea Reaper base is very similar).
You can perform this walkthrough quite easily by starting a new multiplayer game with the setting “start with no base” – you’ll also need to
set the Meccs as your player type.
1. Getting Started
Start with a food pit, a “Return Smartie” platform, and a “Meat
Dropoff” platform (in front of the food pit). Go find a Smartie – as
soon as you stand near him, he’ll climb on your back. Don’t worry,
Smarties are relatively clean. Bring the Smartie back to your base and
touch or fly over the “Return Smartie” platform. The Smartie will then
drop from your back. The first thing he’ll do is automatically upgrade
your food pit into a pub, then he’ll build a “Base Build” platform for
you to work with. Go get another Smartie and return him to your base.
Fly up to the Base Build platform and stand on the “Base Build” circle
– the camera will zoom out to base building mode.
62
Page 64

2. The Base Building Screen
Now you’re in the base building screen (see page 60 for a complete
rundown on the base building screen options). Select the “W orkshop”
icon in the upper right hand corner of your base building screen. Once
selected, you’ll see the workshop displayed in the bottom window of
the interface as well as on the field within your base, flashing translucent. Note that all buildings are placed in predetermined locales – you
don’t have to maneuver or position your structures.
Click on the plus sign in the bottom right hand corner of the interface
– do it twice to put the required number of Smarties (2) onto the construction of the workshop. When the word “Go!” starts flashing, production has begun. Watch those freaky little bastards work (the building’s construction progress will be displayed in the window at the bottom of the screen).
When the building is complete, the window at the bottom of the screen
will tell you. Notice that your tired Smarties will then return to the
pub and eat some meat, bringing your pub’s meat level down a bit.
Notice also that you now have a few new icons on the right hand side
of the screen. Where there was once a workshop icon, there is now a
“Generator” icon (this is the upgrade for the workshop). Also, the slot
beneath it now shows the icon “Gift Shop 1.”
3. Retrieving Vimp Meat
Before you get your Smarties seriously working, you should go find
some Vimp meat to make sure that they stay happy. So what are you
waiting for? Get out there and massacre some defenseless Vimps!
When you kill a Vimp, it will break apart into large chunks of meat.
More mature Vimps are larger and will yield more meat, while young
Vimps yield less meat. Pick up all the meat you can – you can only hold
20 slabs of meat at a time. Vimp meat will disappear if left too long.
Oh, and don’t worry about killing too many Vimps – the natural forces
of the Island ensure that there are always plenty of Vimps for you to
slaughter.
Bring the meat you’ve gathered back to the food pit – stand on the
“Meat Dropoff” platform to drop the meat into the pit. You can only
63
Page 65

put in as much meat as your food pit can hold – the remainder stays in
your possession.
4. Protecting Your Base
Select the “Generator” icon and assign 2 or more Smarties to go
upgrade your workshop. Note that if you want the building to go
faster, you can assign more Smarties to the job (assuming you have
acquired them inside your base).
Once your generator is built, you’ll notice that your buildings have gray
vertical bars next to them in addition to their health bar. These bars
represent shield energy, provided by the generator. Building shields are
additional health for every building, which will slowly regenerate if
damaged. Once a building’ s shield has been completely destroyed, any
additional damage will drain its health.
Through the base building screen, assign Smarties to build a command
center. This will basically place a shell-like structure around your base
building platform for protection. And like they tell you in school,
always use protection.
Notice that your base is surrounded by a natural rock wall, with 4 large
gaps. The 4 gaps correspond to the 4 slots on the right-hand side of
the base building interface meant for wall building. Start assigning
Smarties to build walls in each of these slots. You’ll start with wood
walls, but you can upgrade to stone walls, which are far stronger.
5. Getting Cool Stuff
Head into your gift shop to get new weapons and items. You can only
carry 1 backpack at a time, 3 items, and 3 weapons (not including your
pistol). If you run out of ammunition for any of your weapons, you’re
ammo stock will be replenished just by entering the gift shop.
You can upgrade your gift shop from “Gift Shop 1” to “Gift Shop 2”
at any time, so long as you have 2 available Smartie workers who are
happy and well fed. Go to the base building screen to upgrade your
gift shop.
64
Page 66

Now when you enter your gift shop, you’ll see a lot of new stuff.
6. Advancing Your Base
Once you have a generator , a level 2 gift shop, and stone walls on all four
sides of your base, go to the base building screen to upgrade your pub
to a party house.
When you enter your party house, you’ll see a number of Smarties
lounging about and drinking beer. There are 6 icons across the top of
the screen, corresponding to different objects you can order the
Smarties to make for you, including gun turrets, towers, and best of all,
the gyrocopter pad – for more information on these devices, see page 42.
Now it’ s up to you to develop your base as you see fit – you can surround
it with gun turrets, or add a gyrocopter pad, or place towers inside it …
or you can do all of these things. The remainder of base building is
strategic deployment – something you can only learn when playing
against an opponent. Time to get into a multiplayer skirmish with your
friends (or complete strangers) and kick some ass!
65
Page 67

Multiplayer
Multiplayer games allow you to play against friends (or enemies) via
modem or internet connection. Different game types require different
setups, but the basic idea is that you can play any of the 3 characters
from the single player game – Meccs, Sea Reapers, Kabuto. Note that
the abilities of these characters are somewhat imbalanced. The ideal
3-way multiplayer game would pit 5 Meccs against 3 Sea Reapers
against 1 Kabuto – but this dynamic isn’t enforced, so feel free to make
your own rules.
Host a New Multiplayer Game
When you choose to host a new multiplayer game, the following menu
allows you to arrange game options and teams.
Game Statistics
Teams: Teams currently active in the game
Count: Number of players on each team
Score: Score for each team
Deaths: Number of deaths for each team
Current Players
Name: Name of player
Status: Current status of game
Ping: Gives the ping of each player (lower ping = faster connection)
Score: Gives the score of each player
Race/Team Color: Race of player or team color (if playing Mecc vs.
Mecc or Reaper vs. Reaper)
Chat Window
Left-click on the chat window to type a message to other players. Hit
return at the end of the message to send.
66
Page 68

Game Settings
Game Name: Name of selected game
Game Type: Deathmatch, Deathmatch with full base, Capture the
Smartie, Capture the Smartie with full base, Base Building,
Capture the Smartie base building (see explanations below)
Teams: Mecc vs. Mecc, Mecc vs. Reaper, Reaper vs. Reaper, or Mecc
vs. Reaper vs. Kabuto
World: Selected game map (note that game maps are specific to the
types of teams playing – the map you select must work for the
teams you’ve chosen)
Game Options
Max Players: Select the number of players in the game – up to 10
players are supported to play in a single game simultaneously
(although the maximum number of players will ultimately be
determined by the speed of your computer as well as your
internet connection)
Join Any Time: Set this option (y/n) to allow or restrict new players
from a game once it has started (note that base building games
will not allow new players to enter once the game has started,
and join any time games will not let you destroy buildings)
Allow Team Changes: Set this option (y/n) to allow players to change
teams after the game has started
Damage T eammates: Set this option (y/n) to determine whether or not
teammates are damaged by friendly fire
Points per Kill: Set the amount of points a player gets by killing an
opponent (up to 20)
Points per Capture: Set the amount of points a player gets by
capturing the opposing team’s flag-waving Smartie (up to
1000)
67
Page 69

Prevent Capture Time: Enables unimpeded base building by rendering
flag-waving Smarties immune to capture for a set amount of
time (up to 30 minutes)
Number of Smarties: Determines the constant number of Smarties
that will be present on the game island.
Vimp Meat/Souls: This setting (easy/medium/hard) affects the
amount of meat you need to fill your pit. For instance, on the
easy setting, you’ll need less meat, and it will be easier to feed
your Smartie workers. On the hard setting, you’ll need more
meat in order to keep your workers happy. The same modifiers apply to Vimp souls that Sea Reapers gather.
Winning Conditions
Time Limit: Set a time limit for the game (up to 2 hours)
Add Time to Clock: This option allows you to adjust the game’s time
limit while the game is running
Player Score Limit: Set a score limit for individual players (up to 500)
Team Score Limit: Set a team score limit (up to 5000)
First Base Complete: Set this option (y/n) to end the game when one
team completely builds their base
End Game Now: Select this option to immediately end a currently
running game
Load Map/Start Game
Click on the “Load Map” button to load the map into memory. Once
the map is loaded, you can click on the “Start Game” button to begin
playing.
Restore Defaults
Click on this button to restore the default settings for all multiplayer
options.
Quit
Click on this button to quit the menu and game.
68
Page 70

Join an Existing Multiplayer Game
You can choose to join an existing multiplayer game that another
player has already set up. Doing this will take you to a screen where
you can enter the IP address of the game you’re planning to join, or
browse the internet for an existing game – if you’re hooked up to a
game service like Mplayer or GameSpy, you’ll get linked to their system.
Once you’re linked to an existing game, you’ll come to the same screen
described above in the host section. Players joining a multiplayer game
only have access to certain functions – they can’t modify the game
options or win conditions, but they can choose teams, chat with other
players (pre-game trash talking is strongly encouraged), and view the
options selected by the host before the game begins.
Multiplayer Game Types
Deathmatch
Players can join any of the teams set by the host, and then … well the
name “deathmatch” is pretty self-explanatory, isn’t it? Deathmatch
games can be played with no base to start or with a full base at starting time.
Capture the Smartie
Similar to capture the flag games, each team starts with a pre-built
base and a Smartie, blissfully waving a flag in the center of the base as
if to say, “Please capture me!” The idea is to get inside the other team’s
base and do just that – steal the opposing Smartie and return it to your
base. Of course, while you’re doing that, the opposing team will not
only be attempting to stop you, but also to steal your Smartie from
your base. Like deathmatch, you can determine whether you want to
start with no base or with a full base. You can also opt to play capture
the Smartie with base building as well – double the objectives, ten
times the challenge.
69
Page 71

Base Building
For a base building game, each team starts with no base and a dream
– to build a powerful tactical position that overwhelms all others. The
main challenge in base building (aside from the obvious – combat) is
getting resources. The island has a fixed amount of Smarties and
Vimps, and all teams will need them to build a base.
70
Page 72

Hints & Tips
Single Player
Giants is an action game, so never be afraid to go in blasting. Even if
the result isn’t favorable, you’ll always have the opportunity to replay
the mission.
The in-game music will signal when danger is near – listen closely and
you’ll receive a fair amount of warning before things get too ugly.
When you go up against Reaper armies during base building missions,
start setting up defenses early. And keep an eye on your immediate
surroundings just in case they’re planning on attacking the rear of
your base!
Meccs
Careful when using your jetpack for long-distance flying. You don’t
want to overshoot a cliff and land in the water (fatal for a Mecc), nor
do you want to end up high above the ground with no fuel to ensure
a safe landing – if you take a hard fall from a great height, you’ll feel
the burn.
Sea Reapers
Once you acquire the turbo ability, you can zip across the landscape
rather quickly and easily.
Kabuto
Remember: The biggest creature has the right of way.
Multiplayer
Because there is a fixed amount of Smarties and Vimps on the island
at any given time, the more resources (Smarties, Vimps) you gather,
the less there will be for your opponents.
Killing your opponents’ Smarties will not only deprive them of
71
Page 73

resources, it will also spawn more unaligned Smarties, which you can
capture and return to your own base.
Killing Vimps when you have no need for them can also be a good
strategy – the dead Vimps can’t feed your enemies.
72
Page 74

Appendix:
The History of Planet Moon
The year was 1898, exactly 102 years ago, that the young designer,
Earlydoors Graham, invented what was to become known as the
W orld’s First Videogame. Blood, sweat, and tears went into this grand
invention. But the story of which I speak is a tragic one, for young
Earlydoors would be left destitute, despondent, and imprisoned before
his dream of a great Gaming Empire would truly be realized.
In the late 1800s Earlydoors created a glass bulb which emitted light,
and could be turned on and off at will. Indeed, here was the very game
itself: on and off, on and off, who’ s going to be the winner? ON!!! Yes,
yes, you win!!! Such a revelation in the gaming field occupied
Earlydoors’ six sons with many hours of frenzied fun and enjoyment!
But, alas, the days in these Elysian Fields would be short lived, for the
invention would soon be stolen and eclipsed by another inventor,
Thomas Edison, who used the “lightbulb” for the much more practical
purpose of lighting areas which were dark. Of course, it all seems so
obvious in retrospect, but the times were different then, and for many
people, Earlydoors was ahead of his time.
It was shortly after this that the six sons decided to form the company,
Planet Moon, in a tribute to their Dad, the forefather of the videogame.
The Fall
Sad and dejected from the “lightbulb” fiasco, Earlydoors turned his
attention to a new quest: The T otal Elimination of Many of the World’s
Most Tiresome Questions. Unfortunately, this endeavor also met with
failure. The root of the problem existed in the first two questions he
planned on eliminating. They were both to do with a newly created
treasure, the now famous Golden Gate Bridge of San Francisco. The
first question …
Why do they call it the Golden Gate Bridge when in reality it’s red?
73
Page 75

… was the first to be tackled. To combat this much-asked inquiry he
would, indeed, paint the entire bridge gold.
One less question!
For the following question …
Is this the world’s longest bridge?
… he planned to blow it up, eliminating the question along with the
bridge itself – hence the nickname, Earlydoors “Paint It Gold And
Blow It Up” Graham, as he spent his remaining years in jail.
74
Page 76

Credits
Giants was created and developed by Planet Moon Studios
PLANET MOON STUDIOS IS:
Nick Bruty Co-Art Director, President
Bob Stevenson Co-Art Director, Vice President
Andy Astor Programming Director, CFO
Tim Williams Creative Director
Shawn Nelson The Animator
Scott Guest Principal Software Engineer
Jim Mazrimas Senior Programmer
Dave Aufderheide Senior Programmer
Ken Capelli Senior Artist
Conceived and designed by:
Nick Bruty, Bob Stevenson, and Tim Williams
Programming by:
Andy Astor
Scott Guest
Jim Mazrimas
Dave Aufderheide
Art by:
Bob Stevenson & Nick Bruty
Ken Capelli
Animation by:
Shawn Nelson
Script written and directed by:
Tim Williams
75
Page 77

INTERPLAY CREDITS
Division Director/Executive Producer:
Jim Molitor
Producer:
Shawn Jacoby
Associate Producer:
Jeremy Ray
Assistant Producer:
Brandon Lang
Game Manual:
Chris Pasetto
Additional Production:
Jim Molitor
Travis Williams
SFX and Music Supervision:
Adam Levenson
SFX Design:
Paul Menichini
Tim Gedemer (Audio Group)
Charles Deenen
Roland Thai
Rebecca Hanck
Mike Reagan (Scorpio Sound)
Harry Cohen (Soundelux)
Adam Levenson
Tim Walston (Soundstorm)
Music:
Jeremy Soule www.jeremysoule.com
Mark Morgan
76
Page 78

Music Editing:
Howard Drossin (Yo Eleven Prod.)
Ron Valdez
Mastering:
Craig Duman
Foley Recording:
One Step Up
Foley Artist:
Dan O'Connell
Foley Mixer:
John Cucci
Foley Editing:
Lisa Varetakis (Soundstorm)
VO Talent:
Rob Paulsens
Jeff Bennett
Correy Burton
Michael Bell
Susan Silo
Grey Delisle
Rodger Bumpass
VO Casting/Supervision:
Chris Borders
VO Direction:
Ginny McSwain
VO Editing:
Stephen Miller
JP Walton
Jeremy Simpson
77
Page 79

Audio Operations Manager:
Gloria Soto
Mixed in Dolby Surround
at Interplay Entertainment Corp.
Video Services:
Dan Williams
Dave Cravens
Chris Folino
Senior PR Manager:
Lisa Bucek
Public Relations Coordinator:
Maclean Marshall
Marketing
Bob Picunko
Natalie Batiste
Creative Services
Kathy Helgason, Creative Services Manager
Jeff Blanco, Traffic Manager
Brian Casteel, Package Design
Lee Fleshman, Manual Design
Director of Quality Assurance
Michael Motoda
QA Division Operations Manager
Monica Vallejo
QA Manager
Greg Baumeister
78
Page 80

Project Supervisors
Erick Lujan
Eric Fong
Kevin Osburn
Erik Guenther
Senior Testers
Bradley Dutton
Thomas Edmonds
Savina Greene
Lisa Hawker
Sean Johnson
Harold Kim
Rodney Smith
Gary Tesdall
Testers
Vince Carino
Christopher Cruz
John Hoover
Jon Goudrault
Brendan Johnson
Joseph Isip
Jeff Mitchell
Matt Philips
Eric Pribish
Nicole Rund
Charles Salzman
Daniel Sato
Tex Yang
External QA:
Beta Breakers – San Rafael, California
Additional Programming
Darren Monahan
79
Page 81

International Product Manager
Tom Decker
Language Specialists
Olaf Becker (German)
Carole Huguet (French)
Rafael Lopez (Spanish)
Above the call of duty to:
Stacy Herring Astor
Shawn Jacoby
Chris Pasetto
Special thanks to:
Brian Fargo
Jeff Rose (Legal Jedi!)
Ed Schofield for lending a helping hand
Andy “nVIDIA” Hess
Doug Kennedy, nVIDIA
Stephanie Quilao, nVIDIA
Personal thanks to:
All the patient wives of Planet Moon, Allyn Bruty, Natashia & Milo
Stevenson, Stacy Herring Astor , Katie & Blake Nelson, Angelika & Lily
Williams, Claire Guest, Andrea Aufderheide, Heather & Eva Capelli
Greg James, Keith Charley, Kellie McGee
Stanford Medical Center
Sushi Ran & Asahi beer
Hannah and her home baked cookies
Jeff Wagoner
Liam Byrne
80
Page 82

INTERPLAY LIMITED 90-DAY WARRANTY
Interplay warrants to the original purchaser of this Interplay Entertainment Corp.
product that the compact disc or floppy disk(s) on which the software programs are
recorded will be free from defects in material and workmanship for 90 days from the
date of purchase. IF the compact disc or floppy disk(s) is found defective within 90 days
of original purchase, Interplay agrees to replace, free of charge, any product discovered
to be defective within such period upon receipt at its factory service center of the
product, postage paid, with proof of the date of purchase. This warranty is limited to the
compact disc or floppy disk(s) containing the software program originally provided by
Interplay and is not applicable to normal wear and tear. This shall be void if the defect
has arisen through abuse, mistreatment, or neglect. Any implied warranties applicable to
this product, including warranties of merchantability and fitness for a particular purpose
are disclaimed. Interplay disclaims all responsibility for incidental or consequential
damages.
Some states do not allow limitations as to how long an implied warranty lasts and/or
exclusions or limitations of incidental or consequential damages so the above limitations
and/or exclusions or liability may not apply to you. This warranty gives you specific
rights, and you may also have other rights which vary from state to state.
LIMITED WARRANTY
If the compact disc or floppy disk(s) should fail after the original 90-day warranty
period has expired, you may return the software program to Interplay at the address
noted below with a check or money order for $5.00 (U.S. currency), which includes
postage and handling, and Interplay will mail a replacement to you. To receive a
replacement, you need to enclose the original defective compact disc or floppy disk(s) in
protective packaging accompanied by: (1) a $5.00 check or money order, (2) a brief
statement describing the defect, and (3) your return address. If you have a problem with
your software, you may wish to call us first at (949) 553-6678. If your compact disc is
defective and a replacement is necessary, U.P.S. or registered mail is recommended for
returns. Please send the defective disc(s) only (not the box) with a description of the
problem and $5.00 to:
Warranty Replacements
Interplay Entertainment Corp.
16815 Von Karman Avenue
Irvine, CA 92606
81
Page 83

COPYING PROHIBITED
This software product and the manual are copyrighted and all rights are reserved by
Interplay Entertainment Corp. and are protected by the copyright laws that pertain to
computer software. You may not copy the software. You may not loan, sell, rent, lease,
give, sub license, or otherwise transfer the software (or any copy). You may not modify,
adapt, translate, create derivative works, decompile, disassemble, or otherwise reverse
engineer or derive source code from all or any portion of the software or anything
incorporated therein or permit or encourage any third party to do so.
Notice: Interplay reserves the right to make modifications or improvements to the
product described in the manual at any time and without notice.
HINT LINE
Stumped?!?! Frustrated?? Stuck?? Or do you just want to know the latest codes and
tricks for this and many other Interplay titles?? Well, look no further because the
solution for all these problems is just a phone call away. Pick up the phone and call the
Interplay Hintline at 1.900.370.PLAY<7529> (or 1.900.370.6869 for all our Canadian
friends).
You can call this line 24 hours a day, 7 days a week. And best of all, it only costs 95¢ a
minute (again, for our Canadian friends this charge will be in Canadian dollars), with all
long distance charges included in that price…. you can’t beat that for a great deal.
Remember, you must be over 18 or have your parent’s permission to call the hintline.
You must have a touch-tone phone. This service is only available in the U.S. and
Canada. Charges and information are subject to change without notice.
82
Page 84

Interplay Website
Welcome to the Interplay Web! As a company
dedicated to providing innovative, high-quality
interactive entertainment software, we are
always striving to stay as close as possible to the
leading edge of technology. This Web site is the
latest example of our ongoing effort to provide a
wealth of information and opportunities to you.
As a company of fanatic gamers, we love the idea
of gamers all over the world tapping into cyberspace to see, touch and feel our latest games. No
hype, no marketing campaign; just great games.
To make it work, our goal is to keep this site
fresh and new, to make it a place where you can
tell US what you like about our games... and
what you don’t like about them. So use the feedback options on these pages and sound off.
Enjoy your visit in our Web site, explore all the different areas we have to offer, and come
back soon. Check us out in the weeks and months ahead; we will be introducing new and
exciting areas for you to experience.
Once again, welcome.
Brian Fargo, C.E.O.
Interplay’s World Wide Web site is an
Internet service designed to give you the
latest information about Interplay and our
products. This site features our demos,
upgrades, product information and ordering information. This website is not intended for technical support, but to offer new
machines and the latest product information. For technical support, please contact
Interplay as described in the Technical Support section.
Interplay Web Store
Looking for a quick, easy way to get your
favorite Interplay games? Well, look no
further...you can now order directly from
Interplay. Just turn on your computer and
go to... www.interplay-store.com. This is
your one-stop shop for everything
Interplay. Buy the hottest new releases or
maybe get a copy of that hard-to-find
game that you’ve been looking for.
Purchase some ultra-cool merchandise; or
make a bid on a unique collectible in the
Online Auction. All this, seasonal specials
and much more. So don’t delay... go to www.interplay-store.com and get shopping!
83
HOW TO GET THERE:
From your Internet account, point your favorite browser to:
www.interplay.com
Page 85

Notes:
84
Page 86

16815 Von Karman Ave.
Irvine, CA 92606
www.interplay.com
MN-C95-749-0
 Loading...