


PLAYER’S GUIDE
IBM-PC 386SX+ & 100% compatibles
© 1992 ORIGIN Systems, Inc.
STARTING THE GAME
1.First, install ULTIMA Underworld on your hard disk. If you haven’t already done this, refer to the Install Guide included in this package for instructions.
2.Select the drive on which the game is installed. (For example, if you installed the game on your C-drive, type “C:” and ENTER.
3.Select the ULTIMA Underworld directory. (If you selected our default directory, type “CD \UW” and ENTER).
4.Start the game (by typing “UW” followed by ENTER).
The “ORIGIN Presents” screen appears, followed by another reading “A Blue Sky Productions Game.” As the game finishes loading, this screen is replaced by a title screen (“ULTIMA Underworld: The Stygian Abyss”). If you have not played the game before (or have never “saved” your previous adventures), the game proceeds to the Introduction. This provides background information you need to complete your subterranean adventure.
If you are in a hurry, or you have already seen the Introduction, press ESC to cancel any preliminary screen and bring on the following screen. If you have “saved games” on your hard disk, the game automatically skips the Introduction and goes directly to the main menu. (If you do not know what “saved games” are, see “Save Game,” page 17.)
Afterward, you are presented with several choices:
Introduction. Repeats the introductory sequence you just saw. Create Character. Allows you to set up a brand-new player-character.
Acknowledgments. Lists the names of the people who created the game. Journey Onward. When you have a character, select this option to begin
playing. You will not see this option unless you have a saved game.
Select an option by clicking on the option you want or by using the cursor keys to change the highlighted selection and pressing ENTER. If this is your first game, you must select “Create Character” before you can begin play.
1
CREATING YOUR CHARACTER
Through the choices which you make at this time, you fashion the type of hero you wish to guide through this adventure. Each option is represented by a button. To make a choice, use the mouse to move the cursor onto the option button you want to select and click either mouse-button. (You may also use the cursor keys to highlight the option you want — a highlighted option appears raised — and then press ENTER to select the option.)
In order, the choices you must make are:
Choose Player Sex. Male or female. Controls whether your Avatar is a man or a woman, and which portraits you may select later. Gender has no effect on your character’s strength or abilities.
Select Handedness. Right or left. Determines which hand you use to hold your primary weapon, and which is your shield-hand.
Class
Fighter. A warrior, trained in the military arts since youth. Mage. One born with the ability to cast spells.
Bard. A traveling entertainer, perhaps a storyteller or a musician. Tinker. A skilled craftsman, particularly with weapons and armor. Druid. A guardian of the woodlands, able in both combat and magic. Paladin. A warrior who also has some grasp of the art of spellcasting. Ranger. A woodsman, skilled at tracking, hunting and fighting. Shepherd. A resourceful sheep-tender, often a jack-of-all-trades.
Pick Skills. Your character description includes several skills — abilities you have honed and tasks you have practiced. Many of these skills come automatically, as a result of the character class you choose. (For instance, all Mages can use magic so they all begin with casting and mana skills.)
In addition to innate skills, you are asked to select some skills unique to your character. For instance, you may give your Fighter sword skill, or you might choose axe, mace, missile weapon or the unarmed combat skill. When the skill selection list appears on the right-hand side of the screen, simply click on the skill you want for your character.
For now, pick skills that sound useful and interesting. Later, you can consult the skill list on page 30 and create carefully honed characters.
Portrait. Select the appearance of your character by clicking on one of the five pictures that appear on the right-hand side of the screen.
Choose Difficulty. Standard o r Easy. In easy mode, monsters and hostile characters are less dangerous and are easier to defeat than in standard mode. (Note that you can’t change this after you begin playing — to change the difficulty level, you must begin a new game.)
Name. The last step in creating your character is to give him or her a name. Type in the name of your choice, then press the ENTER key when done.
Keep This Character. Finally, the game asks you whether or not you want to play the game with the character you have just designed. If this character is acceptable, answer “yes.” Otherwise, select “no” and you can design another character.
2

IN THE UNDERWORLD
(NOTE: This tutorial walks you through the beginning of your adventure in the Abyss. It assumes you have a mouse. To play without a mouse, consult your Reference Card for keyboard equivalents of the commands described.)
Once you finish designing your character, you automatically begin the game.
The Main Game Screen. This is the screen you will see most of the time. In the center is the View Window — the Stygian Abyss as your character sees it. To the right of this is a Character Panel which usually displays a picture of your character and any items he or she is carrying. At the bottom of the screen is a Message Scroll where text is displayed. On the left side of the screen are six Command Icons which allow you to look at and interact with creatures and objects you encounter in the underworld. Other elements of the game screen — the Compass, the Rune Shelf, the Power Gem, the Vitality Flaskand the Mana Flask — will be explained later.
Command |
|
View Window |
Icons |
Gargoyle |
Character |
|
|
Panel |
Options 
Talk
Get
Look
Fight
Use
Power
Gem 
Message |
Current |
Compass |
Rune |
Vitality |
Mana |
|
Scroll |
Shelf |
|||||
Spells |
Your |
Flask |
Flask |
|||
|
|
|||||
|
|
Weapon |
|
|
|
Try moving your mouse around the screen — but don’t press any of the buttons yet. As you move the mouse in the view window, an arrow-shaped cursor mimics your mouse movements. Outside the view window, the cursor takes the form of a yellow cross.
3
SAVING YOUR CHARACTER
Before you do anything else, save the game. If you die before saving, you will have to go through the character creation process again.
1.First, click on the “O” icon (for “Options”) on the left side of the screen.
2.When the option list appears, click on “Save Game.”
3.Click on the roman numeral “I” icon.
4.When the words “<not used yet>” appear in the message scroll, type in a name for your saved game (something like “Start”) and press ENTER or either mouse-button.
5.You return to the game automatically and can now begin exploring.
LOOKING AROUND
First, examine your surroundings. Move the cursor into the view window, and notice how the shape of the arrow changes depending on where it is. Near the middle of the screen, the arrow changes into cross-hairs. Moving to the right makes the arrow point to the right; moving to the left makes the arrow point left.
In the view window, the shape of the arrow controls which direction your character moves. To move, press and hold the left mouse-button. Your character moves as long as you hold the button down.
For instance, move the arrow to the right side of the screen, then move it up or down until the arrow bends and nearly forms a circle — this allows you to turn in place, without moving forward or backward. With your cursor in this position, press the left mouse-button and hold it down.
The view in the window shows what you see as you turn around. If you’re just starting a game, you see a dark corridor ahead of you and a bag to your right. Behind you are the closed (and locked) doors through which you entered the Abyss. To your left is a skull and, on the wall, a carved message.
As you spin around, note that the compass below the view window spins too. The compass shows which direction you are facing — the red-tipped point of the compass indicates north.
Occasionally, looking at or using objects calls up a scene that temporarily replaces the view window. When you’re finished looking at one of these scenes, click either mousebutton or ENTER to return to the view window.
MANEUVERING
Now you’re ready to try moving around. Two rules govern movement:
Rule 1. While your cursor is inside the view window, its shape determines the direction in which you move if you press and hold down the left mousebutton. If it points right, you’ll move to the right; if it points upward, you’ll move forward, and so forth.
Rule 2. The speed at which you move depends on how far your cursor is from the center of the view window. When the cursor is exactly centered, it changes into a cross and you don’t move at all. As you move the cursor closer to any edge of the view window, you move faster.
4
To practice setting speeds, turn until you are again facing down the long corridor leading deeper into the Abyss (the corridor opposite the huge double doors at the entrance). Remember, you turn by using the nearly-circular cursor arrows, as you did before — this pivots you in place, without moving you forward. Then release the mouse-button to stop your turning motion. Now, move the mouse until the cursor turns into an upward-pointing arrow, and then press and hold the left mouse-button. This moves you forward. Shift the mouse so that the cursor moves toward the top of the screen and you will move faster and faster until you release the mouse-button. When the arrow points downward (toward the bottom of the view window), you will move backward.
Try clicking the right mouse-button while you’re moving forward — this causes you to jump. The faster you’re moving, the farther you jump.
Don’t worry if you slam into a wall — you can’t hurt yourself by walking into walls. Flying (or jumping) into a wall will cause injury.
When you feel comfortable walking, running, turning and jumping, turn around and walk back to the double doors.
Easy Move Mode. If you have difficulty maneuvering in 3-D space, try using the arrow keys on the base of the compass below the view window. The curving left and right arrows turn you 45 degrees in the direction of the arrow you click. The up arrow in the center of the compass moves you forward four feet. Press X to move back (two feet with each keypress). There is no mouse equivalent for the  command. Though less realistic than “normal” movement through the dungeon, using the arrows might make it easier to maneuver through the dungeons.
INTERACTING WITH THE WORLD
The first thing to do when beginning the game is to find some equipment — a weapon, armor, food and so forth. Fortunately the bag close at hand holds several useful items. To find out what’s in the bag, use the command icons on the left side of the screen. In order from the top of the screen, these icons are:
the “O” symbol |
Options |
the lips |
Talk |
the hand grasping an object |
Get |
the eye |
Look |
the sword |
Fight |
the hand holding a key |
Use |
Selecting these various icons (only one of which can be active at a time) allows your right mouse-button to perform different tasks. We’ll address each of these as the need arises. (For an explanation of the “Options” icon, see page 16.)
Advanced tip: The icons are easy to use and give you a good understanding of the way ULTIMA Underworld works, but if you are an experienced game-player and mouse-user, you can access many commands without using the icons! If none of the icons are highlighted, you enter a very useful shortcut mode called “Default Mode.”
If you’re just learning to play ULTIMA Underworld, we recommend using the icons for a while (and this tutorial assumes you will do so). Eventually, however, perhaps even before you complete this tutorial, you will want to try the icon-less default interface. For an explanation of Default Mode, see page 16.
5
LOOKING AT THINGS
Click on the Look icon with either button, then move the cursor over the bag, and click the right mouse-button. (Don’t press the left mouse-button — that will cause your character to move.) Pressing the right button in Look Mode causes your character to Look at an object — what you see is printed on the message scroll. Turn until you are facing the bag and Look at it. The words on your message scroll read, “You see a bag.”
Looking Up and Down. You might have trouble seeing the bag on the floor, unless you tilt your character’s head and look down. To do this, press 1 at the top of your keyboard — each time you press this key, your character’s head tilts a little further downward, until it finally reaches its maximum. To look up again, you can either press 3 (which lets you look up a little more, every time it is pressed) or 2 (which returns your head to its normal viewing angle).
Note that 1, 2 and 3 on the numeric keypad control cursor movement and can’t be used to look up or down.
GETTING THINGS
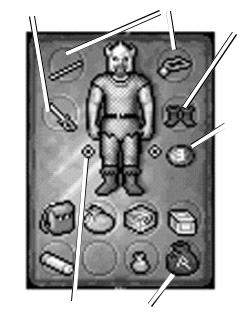
Now, pick up the bag and examine its contents. First, make sure that the inventory side of your character panel is displayed. This is the side with your character’s picture on it. (If this picture isn’t visible, click either button on the chain below the right-hand panel.)
The circles at the bottom of the character panel are for inventory — objects your character is carrying but which aren’t necessarily ready for immediate use. The circles surrounding the picture of your character are for objects your character is wearing or holding — armor, weapons, rings, lit torches and so on.
To pick up the bag, change to Get Mode by clicking on the Get icon (the third one from the top) and move your cursor until it is on the bag. (Look down, using 1, if you have trouble seeing the bag.) Now, press and hold the right mousebutton and move the mouse. You now have the bag “in-hand.” The cursor assumes the shape of the bag and, as long as you keep the right mouse-button pressed, moves around the screen as you move the mouse.
Move the bag over to one of the empty circles at the bottom of your character panel. Release the right mouse-button and the bag settles into place in your inventory.
Manipulating Your Inventory. To open the bag, click on it with the left mouse-button. The contents are now displayed on the inventory panel. If you don’t recognize any of the items, you can find out what they are by Looking at them. For instance, click on the Look icon, then move the cursor over the object that looks like a stick and press the right mouse-button — the message scroll now reads, “You see a somewhat used torch.”
Looking at an object may tell you the nature and condition of the item you are looking at. Right-clicking the sword-like object, for instance, reveals that it is a dagger, and that it is in “badly worn” condition. However, it is the only weapon you have, so place it in your weapon hand. If your character is right-handed, your weapon hand is your right hand — otherwise, it is your left hand. (Note that your character’s “right” hand is not the hand to the right on the screen, but the figure’s right hand.) To move the dagger from the bag in your inventory to your weapon hand, place the cursor on the dagger, press and hold down either
6
mouse-button, and drag the dagger to the inventory circle nearest your weapon hand. When you release the button, the object will settle into place.
The torch will make the Abyss a much brighter place. You already know how to move items within your inventory, so move the torch to the circle above your character’s right shoulder. Now you want to light it. Click on the Use icon and then on the torch. Notice the difference this makes in the view window. (If you Use a lit torch, you snuff it out.)
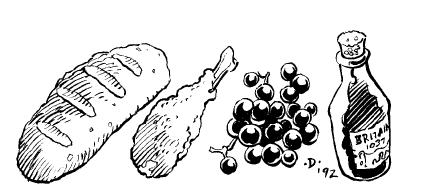
The food in this bag — an apple, a fish and a loaf of bread — can be ignored
for now, but your character will |
Weapon Hand Slot (for |
|
Shoulder |
|
|
|
eventually become hungry. Al- |
|
Slots |
|
|
||
right-handed character) |
Shield Hand Slot |
|||||
|
||||||
ways make sure you have food |
|
|
|
(if shield readied) |
||
available. |
|
|
|
|
|
|
Perhaps the most important |
|
|
|
|
|
|
item in the bag is the square parch- |
|
|
|
|
|
|
ment, which a Look will tell you is |
|
|
|
|
|
|
a map. The game automatically |
|
|
|
|
|
|
updates this map as you move |
|
|
|
Additiona |
||
about the Abyss. Place the cursor |
|
|
|
Weight |
||
on the parchment and click the left |
|
|
|
Limit |
||
|
|
|
|
|
||
mouse-button — a full-screen map |
|
|
|
|
|
|
appears. |
|
|
|
|
|
|
The Auto-Map. There isn’t |
|
|
|
|
|
|
much on your map at this point, |
|
|
|
|
|
|
since you haven’t gone anywhere |
|
|
|
|
|
|
yet — the walls of your current |
|
|
|
Inventor |
||
room and the bit of corridor you |
|
|
|
} |
Slots |
|
explored are sketched in brown |
|
|
|
|
||
ink, your position is noted by the |
|
|
|
|
||
yellow pushpin, and the cursor is |
|
|
|
|
|
|
a quill pen. If you want, you can |
Finger |
Rune Bag |
|
|
||
write notes to yourself directly on |
|
|
||||
Slot |
|
|
|
|
||
the map.
For instance, mark your starting location for future reference: Move the quillpen cursor to your current location on the map and press either mouse-button. The quill pen shifts into writing position — whatever you type will now be added to the map. (Try typing, “START.”) When you are done with the comment, click either mouse-button (or press either ENTER or ESC) to return the quill pen to its non-writing position.
To erase a remark, click on the eraser symbol in the lower right corner of the map. This turns your cursor into an eraser. Move the eraser to the comment and click either mouse-button. The comment goes away.
To call up maps of levels other than the first, click on the dog-eared corners on the right-hand side of the map. The upper corner allows you to examine higher levels while the lower corner allows you to examine deeper levels. Since you haven’t explored any levels other than the first yet, you will have to wait to experiment with this feature.
To return from the map to the game, press ESC or move your cursor to the “Close” symbol at the lower right, and click either mouse-button.
7
You’ll want to use the map often, so you shouldn’t keep it inside a bag. Right- click-and-hold on the map symbol on your character panel, drag it over the bag symbol above the lower inventory circles, and release the button. (This takes the map out of the bag, but keeps it on your person.) Now left-click the bag symbol to close the bag and return to the main inventory screen. The closed bag and the map should be side-by-side.
(Note that if you had all of your inventory slots full, dragging the map to the bag symbol would have had no effect — to move the map out of the bag, you would have had to empty an inventory slot to make room for it.)
You can click on the map any time you want to get a fix on your location.
Dropping Objects. Now, you know how to pick things up and manipulate your inventory, but what if you want to get rid of something? At this point, you want to keep everything you’ve found, so we’ll have to fudge a little — there’s a skull around here somewhere. It’ll do.
Turn until you are facing the wall to the west — the wall with the carved message on it. (When the red “North-point” on the compass below the view window points to the three o’clock position, you are facing west.) Now, move forward. You may accelerate right into the wall, but don’t worry — running into walls doesn’t hurt you in ULTIMA Underworld. Back up a bit so you can see the message carved into the wall. (Read the message by clicking on the Look icon and right-clicking on the carving.)
The skull is just below the graffiti on the wall. Click on the Get icon, then use the right mouse-button to click and drag the object into your inventory. (If you are too far away to get the skull, move closer.)
You certainly don’t need to carry this skull around, so drag it out of your inventory and put it back on the ground. (Remember, when you drag an item, the cursor assumes the shape of that item.) To rid yourself of the skull, you can either drop it or throw it.
To drop the skull on the ground, drag the skull-shaped cursor to anywhere in the bottom third of the view window, and then release the button.
To throw the skull, release the button while the skull is in the top two-thirds of the view window. (The skull is pretty tough, but some objects break or bounce upon impact.) If there is an obstacle in front of you, a thrown object falls to the ground in front of you.
If you’re too close to an obstacle (the wall, for example), you may not be able to drop the skull at all. Any time you find you are unable to drop or throw an object because you are too close to a wall or door, try backing up a bit.
8
OPENING DOORS
Turn until you are facing north (i.e., until the red point on the compass is in the 12 o’clock position) and walk down the corridor again. This time, stop and look at all the objects you see. As you walk, you come across an axe (a Look will reveal that it is broken), ashes, bones and other rubbish. Mid-way down the corridor, in a recess in the right-hand wall, you’ll find a door. Right-click to look at it and read the description on the screen’s message scroll.
Click the Use icon and then the door to try to open it. You’ll discover that it is locked, and you don’t have a key. But there’s another way to open this door— turn to face the door and back up a bit. There, on your right, is a pull-chain. Right click on the chain to Use the chain to pull it and open the door.
Walk through the doorway and bear a little to the left — there’s another bag! Using the bag spills the contents onto the ground so you can examine the items without adding them all to your inventory.
In this bag, you find a cudgel, a mushroom and a candle. First, pick up the now empty bag. Leave the candle, for the moment, and pick up the mushroom and the cudgel. (Click the Get icon, right-click and drag each object into your inventory and release the button over an inventory circle.)
SELECTING WEAPONS
Now you have a decision to make — should you leave the dagger in your hand or move that out of the ready position and replace it with the cudgel? To make this decision, you need to know more about your skills. Click on the chain below the character panel and the panel flips around to your statistics panel.
This panel contains a great deal of information about your character, but right now we’re concerned with the skill list at the bottom of the panel. To scroll through the list, click on the upor down-arrows below the skill list.
If your character has the mace skill, you probably want to use the cudgel rather than the dagger. If your character’s mace score is zero, check the sword skill. If you have that skill, stick with the dagger (and go looking for a better dagger or sword!). If you have neither skill, ready whichever weapon you prefer
— the dagger does less damage than the cudgel, but you will be able to attack more frequently with it.
Now click the chain below the stat panel to flip back to the character panel. Move whichever weapon you want into your character’s weapon hand.
9
DEALING WITH GROUPED ITEMS
There is still a candle on the ground. Since your torch won’t last forever, you should pick it up. (Candles don’t provide as much light as torches, but they burn longer and some light is better than none at all…)
When you try to pick up the candle you find there’s something different about it — it’s actually several candles! When you click the Get icon and then the candle, the message “Move how many? 1” appears in the message scroll. To take just one of the candles, click with the left button. The right button would take all of them if clicked, or you could type in a number from the keyboard, then press ENTER. Now you can move the candle(s) just as you would any other object.
Items of the same type can usually be stacked within a single circle on your inventory panel — for instance, five torches are generally shown as one torch symbol, with the numeral “5” above it. The only time you can’t stack identical objects is if their “quality” is different. For instance, you can’t stack a “somewhat used” candle in the same circle with “halfway used” candles.
FURTHER EXPLORATION
Turning left and right, you see two doors in this room. Trying to open them (by clicking the Use icon and then right-clicking the door), you find that they’re both locked — and this time, there are no pull-chains. Without a key, there’s nothing more you can do here short of “attacking” the door repeatedly to batter it down. This is possible, but it takes time and could damage or destroy your weapon. For now, go back out into the main corridor and head west.
Keep going until the east-west corridor ends, then turn to the right (north). Here, in an alcove, you find a torch, a bowl and an axe. Look at each of these items, note their condition, and get them. (If you have the axe skill, put the axe in your weapon hand.)
Now check the compass and head south. Beyond the east-west corridor that brought you here, you’ll pass the remains of an adventurer and come upon some strange blue and gold objects. These are rune stones — the stuff of magic. Pick these up and put them in your inventory. There isn’t much you can do with them right now, but they’ll come in handy later.
Continue on until the corridor turns to the right (west again) and you enter a room with a large stone block in the center. Go around the block — it doesn’t matter whether you go to the north or the south.
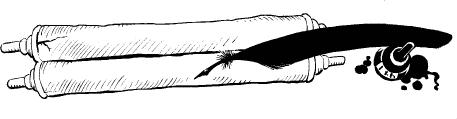
Past the block, you find a pack. Put it in your inventory and click on it to examine its contents. Inside, you find a scroll, a red key, a rune bag and some runes.
Read the scroll (by right-clicking it in Look mode) and then leave it behind or carry it, at your discretion (it doesn’t weigh much).
The red key should open some of the locked doors you’ve encountered. The magic items are very important. The rune bag allows you to cast magic,
but only if you have the proper rune stones inside. Pick up each rune stone and drag it on top of the rune bag — this actually puts the stone inside the bag. (You can use this method to place anything inside of any bag or pack.) Be sure to put in the stones you found earlier, too.
You want your rune bag to be accessible, especially if you’re a mage, so drag the rune bag onto the pack symbol above the lower inventory circles, moving it to a more convenient inventory location.
10
 Loading...