


1707FP
D0LL
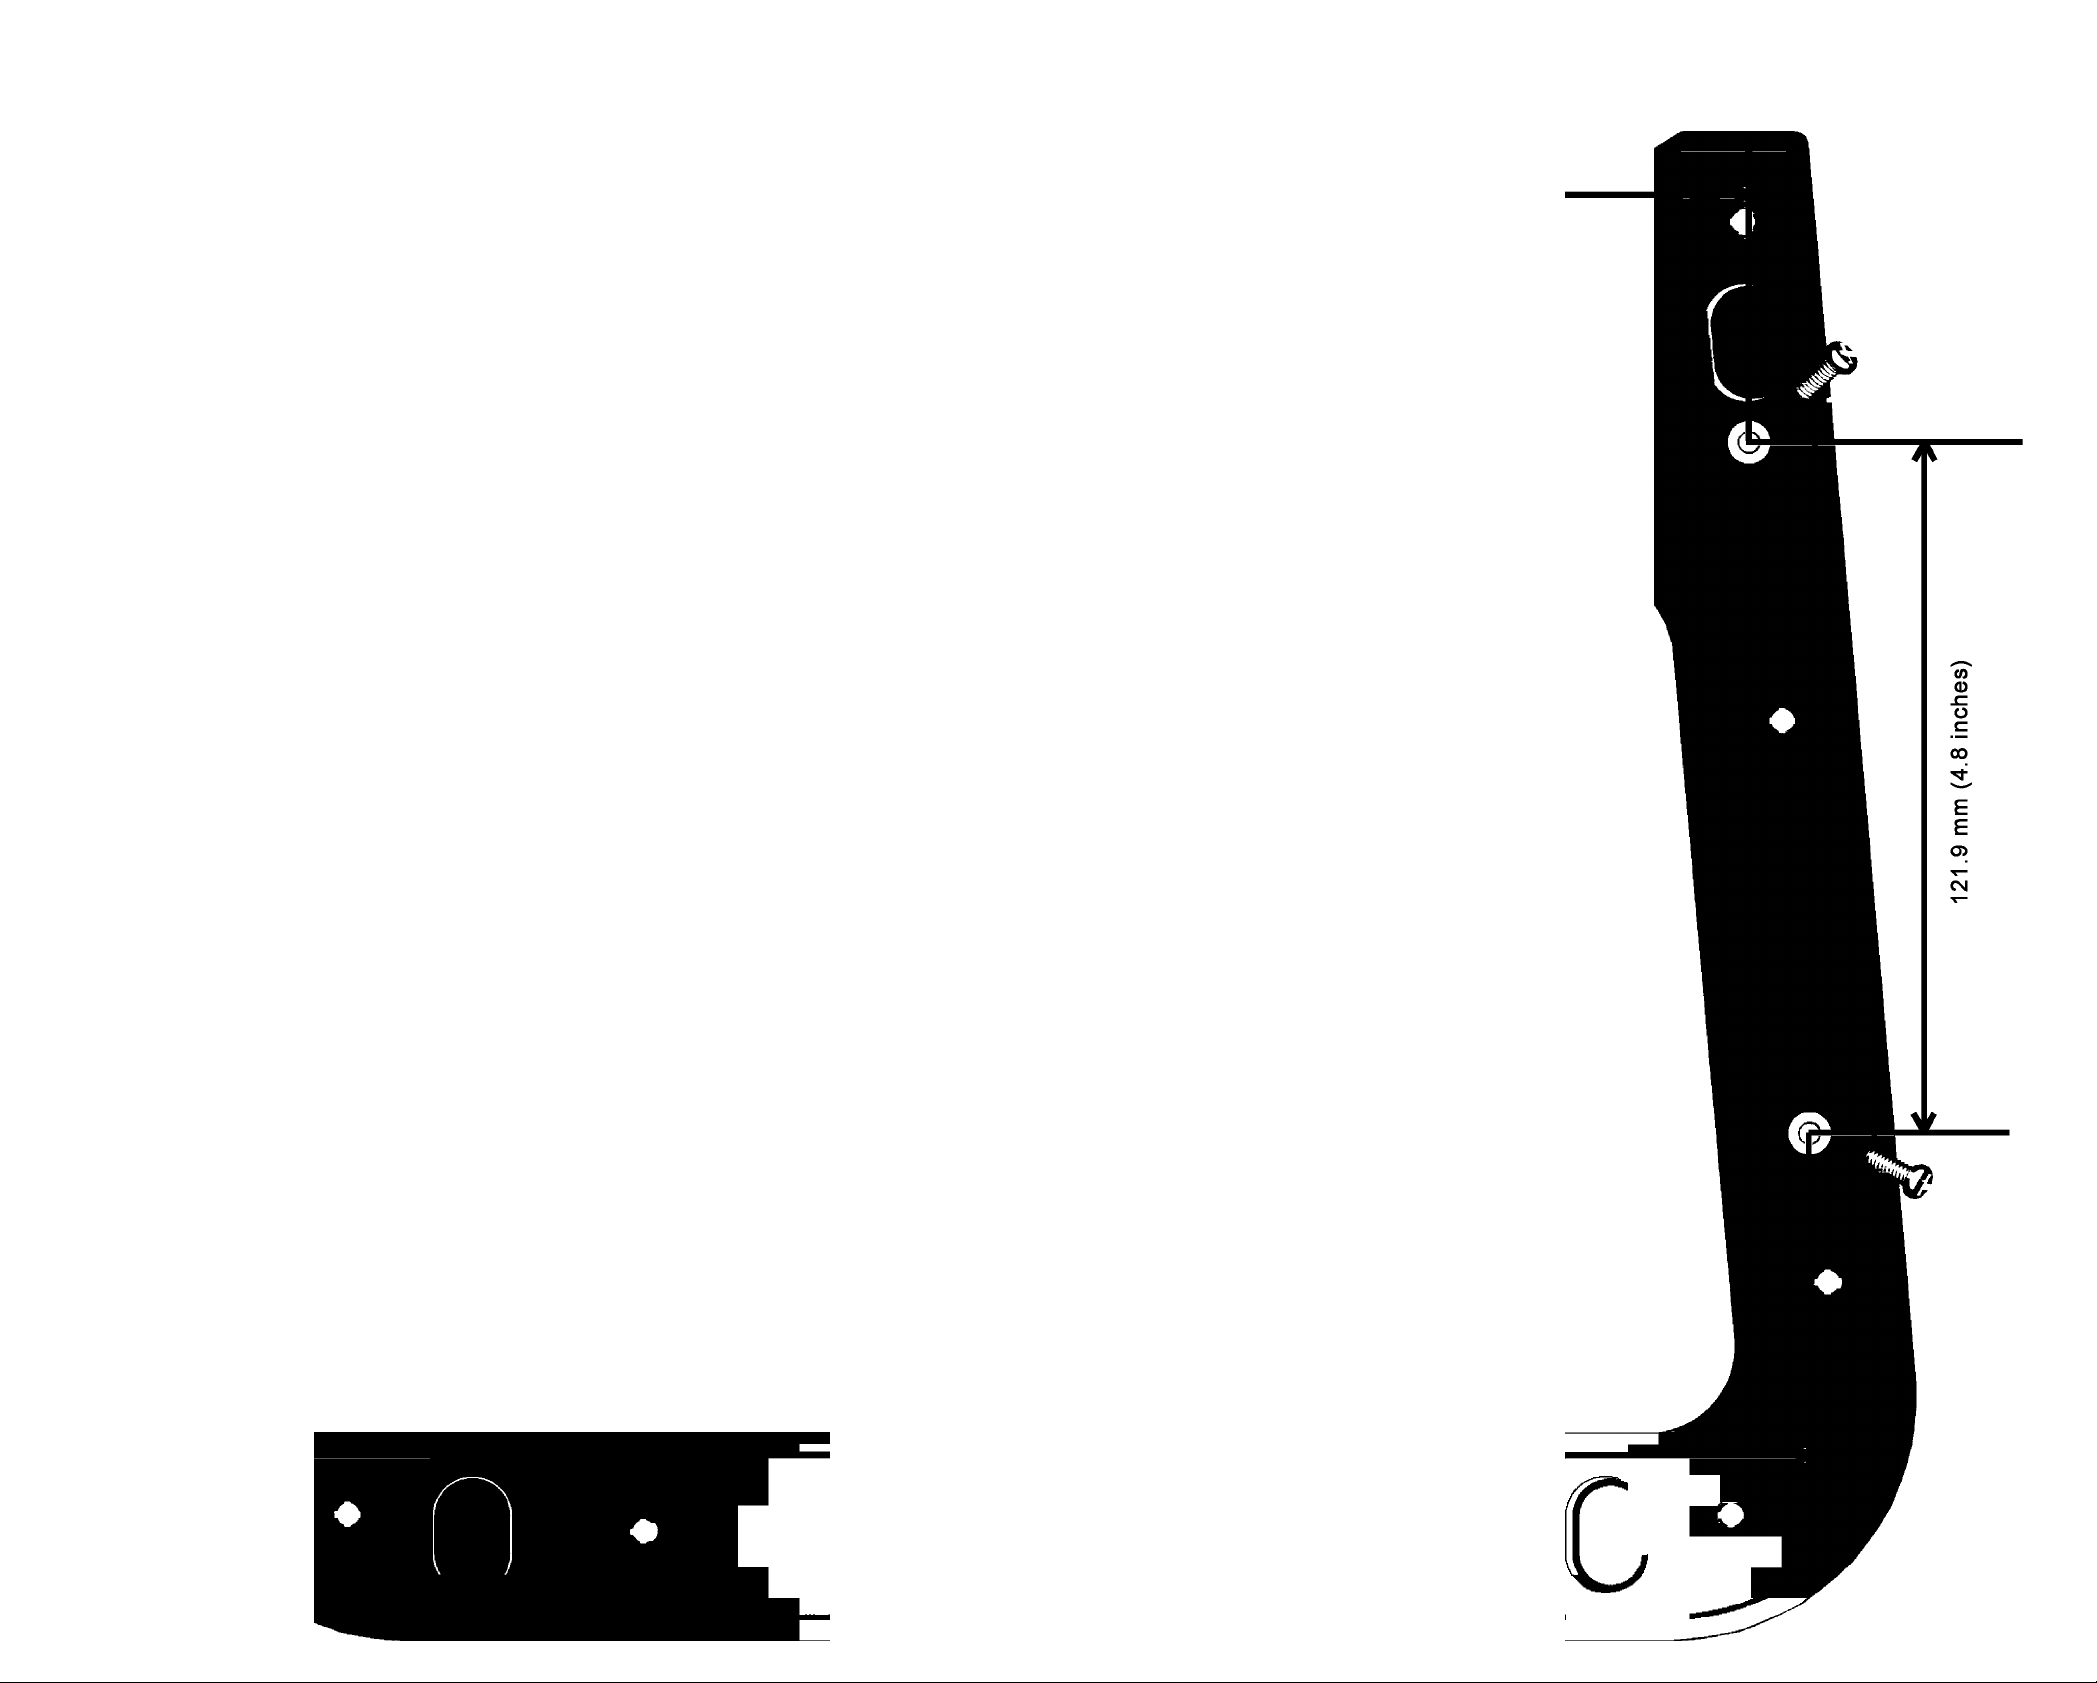
AlO Stand Template
Gabarit Support AlO
AlO Ständer Schablone
250.4 mm (9.86 inches)
Eè NOTE: You must use a 5-mm drill bit to drill the holes In the desk top.
^ NOTE : Vous devez utiliser un forêt de 5 mm pour percer les trous dans le bureau.
^ Hinweis: Venvenden Sie zum Bohren In die Tischplatte einen Smm-Bohrer.
^ NOTA: debe utilizar una broca de 5 mm para realizar los agujeros taladrando el escritorio.
EÎÈ: 5mm(0 KUJUtf'V
Eí NOTE: The length of the screw must be 5-7 mm longer than the thickness of the desk top.
1. Lay the template on the desk top In the desired position for the AlO stand, and mark the locations of the holes.
2. Drill holes at the marked locations using a 5-mm drill bit.
3. Place the stand on the desk top as marked In the template.
4. Insert M4-thread screws through the holes In the desk top and the stand and then tighten the screws Into the threaded holes.
O NOTICE: Do not overtighten the screws.
EÍ NOTE : La longueur de la vis doit être supérieure de 5 à 7 mm à l'épaisseur du bureau.
1. Placez le gabarit sur le bureau dans la position désirée pour le support AlO, puis marquez les emplacements des trous.
2. Percez les trous aux emplacements marqués en utilisant un forêt de 5 mm.
3. Posez le support sur le bureau tel qu'indiqué sur le gabarit.
4. Insérez des vis M4 dans les trous du bureau et du support puis vissez-les bien dans les trous filetés.
Plantilla de base AlO
Aiox^> h
O ATTENTION : Ne serrez pas les vis trop fort.
^ Hinweis: Die Länge der venvendeten Schrauben muss 5-7 mm langer als die Stärke der Tischplatte sein.
1. Legen Sie die Schablone an die gewünschte Position des AlO Ständers auf die Tischplatte und markieren Sie die Positionen für die Löcher.
2. Bohren Sie Löcher an den markierten Stellen mithilfe eines 5mm-Bohrers.
3. Stellen Sie den Ständer auf die Tischplatte.
4. Stecken Sie die M4-Schrauben In die Löcher und ziehen Sie die Schrauben fest.
O Hinweis: Schrauben nicht zu fest ziehen.
CN
^ NOTA: la longitud del tornillo debe ser de 5 a 7 mm superior al grosor del escritorio.
1. Coloque la plantilla sobre el escritorio en la posición que desee para la base AlO y marque las ubicaciones de los agujeros
2. Taladre los agujeros en las ubicaciones marcadas utilizando para ello una broca de 5 mm.
3. Coloque la base sobre el escritorio conforme a la plantilla.
4. Inserte tornillos de rosca M4 en los agujeros del escritorio y la base y, a continuación, apriete dichos tornillos en los agujeros roscados.
O AVISO: no apriete los tornillos en exceso.
ü a: h'y:2’CDJÍéd:y5~7 mm
1. AlO h-y:7’ro#м■r§f±Slca^,^■c, ?v:a>f±sa>En^#it*-ro
2. 5mmCOK'j7Le-y híffior. Eni#ltfc®RlTtÿl:Î
3. hroEpotfcyiz, x^vh'íxx^ h'2:T'®±iza#^-r„
o aM: ^í?liiís*40®^)0:i-'-e<7£¿L'o
Front
© 2005 Dell Inc. All Rights reserved.
Reproduction In any manner whatsoever without the written permission of Dell Inc. Is strictly forbidden.
Dell and the DELL logo are trademarks of Dell Inc.
Other trademarks and trade names may be used in this document to refer to either the entities claiming the marks and names or their products.
Dell Inc. disclaims any proprietary interest In trademarks and trade names other than its own.
271.7 mm (10.7 inches)
o
DELL Part No.:WD770
7730203198-OB
 Loading...