


 Loading...
Dell Projector 1550/1650
User’s Guide

Notes, Cautions, and Warnings
NOTE: A NOTE indicates important information that helps you make better use of your projector
CAUTION: A CAUTION indicates potential damage to hardware or loss of data if instructions are not followed.
WARNING: A WARNING indicates a potential for property damage, personal injury, or death.
____________________
Information in this document is subject to change without notice. © 2016 Dell Inc. All rights reserved.
Reproduction of these materials in any manner whatsoever without the written permission of Dell Inc. is strictly forbidden.
Trademarks used in this text: Dell and the DELL logo are trademarks of Dell Inc.; DLP and DLP logo are trademarks of TEXAS INSTRUMENTS INCORPORATED; Microsoft and Windows are either trademarks or registered trademarks of Microsoft Corporation in the United States and/or other countries.
Other trademarks and trade names may be used in this document to refer to either the entities claiming the marks and names or their products. Dell Inc. disclaims any proprietary interest in trademarks and trade names other than its own.
Model: Dell Projector 1550/1650
June 2016 Rev. A00
Contents
1About Your Dell Projector . . . . . . . . . . . . . . . . . 4
Projector Box Contents . . . . . . . . . . . . . . . . . . . . |
4 |
Projector Top and Bottom View . . . . . . . . . . . . . . . |
5 |
Projector Connections . . . . . . . . . . . . . . . . . . . . . |
6 |
Using Remote Control . . . . . . . . . . . . . . . . . . . . . |
8 |
2Adjusting Projector Image. . . . . . . . . . . . . . . . 12
Adjusting Projected Zoom. . . . . . . . . . . . . . . . . . |
12 |
Adjusting Projector Focus . . . . . . . . . . . . . . . . . . |
13 |
Adjusting Image Size . . . . . . . . . . . . . . . . . . . . . |
14 |
3Troubleshooting. . . . . . . . . . . . . . . . . . . . . . . . 19
. . . . . . . . . . . . . . . . . . . . .
Guiding Signals . . . . . . . . . . . . . . . . . . . . . . . . .
19
23
4Maintenance . . . . . . . . . . . . . . . . . . . . . . . . . . . 24
Changing the Lamp . . . . . . . . . . . . . . . . . . . . . . 24
Replacing Remote Control Batteries . . . . . . . . . . . 26
5 Specifications . . . . . . . . . . . . . . . . . . . . . . . . . . 27
6 Additional Information . . . . . . . . . . . . . . . . . . 31
7Contacting Dell . . . . . . . . . . . . . . . . . . . . . . . . 32
Contents | 3

1About Your Dell Projector
Your projector comes with all the items shown below. Ensure that you have all the items, and contact Dell if anything is missing.
Projector Box Contents
Package Contents
Power cable |
VGA cable (VGA to VGA) |
Remote control
|
POWER |
|
MENU |
|
ASPECT |
SOURCE |
VOL |
|
|
VIDEO MODE |
|
|
MUTE |
|
KEYSTONE |
VOL |
PAGE |
|
|
|
AUTO ADJ. |
FREEZE |
BLANK |
ZOOM |
ZOOM |
INFO |
VGA |
VIDEO |
HDMI |
AAABatteries (2)
AAA
CD, User’s Guide, and Documentation
Informacion Importante
Documentation
Dell Projector 1550/1650
4About Your Dell Projector

Projector Top and Bottom View
Top View |
Bottom View |
1 |
9 |
10 |
8 |
|
|
7 |
2 |
82.30 |
|
3 |
|
|
|
|
|
4 |
|
|
5 |
|
|
6 |
|
|
|
55.00 |
|
|
110.00 |
1 IR receivers
2Power button
3 Status indicators
4 Zoom tab
5Focus ring
6Lens
7 Lamp cover
810W speaker
9 Mounting holes for ceiling mount
10 Tilt adjustment wheel
NOTE: Ceiling mount screw hole M3 x 6.5 mm depth. Recommended torque < 15 kgf-cm.
About Your Dell Projector |
5 |

Projector Connections
1 |
2 |
3 |
4 |
5 |
6 |
7 |
8 |
9 |
10 |
|
13 |
|
|
|
|
|
|
|
|
12 |
11 |
1 |
Mini USB (mini type B) |
8 |
+ 5V/1.8A DC out connector |
|
connector for firmware upgrade |
|
|
|
|
|
|
2 |
RJ-45 connector |
9 |
RS232 connector |
|
|
|
|
3 |
VGA input connector |
10 Audio input connector |
|
|
|
|
|
4 |
VGA output (monitor loop |
11 |
Audio output connector |
|
through) connector |
|
|
|
|
|
|
5 |
Composite Video connector |
12 |
Security cable slot |
|
|
|
|
6 |
HDMI-1 connector |
13 |
Power cord connector |
|
|
|
|
7 |
HDMI-2 connector |
|
|
|
|
|
|
CAUTION: Before you begin any of the procedures in this section, follow the Safety Instructions as described on page 7.
6About Your Dell Projector
CAUTION: Safety Instructions
1 Do not use the projector near appliances that generate a lot of heat.
2 Do not use the projector in areas where there is an excessive amount of dust. The dust may cause the system to fail and the projector will automatically shutdown.
3 Ensure that the projector is mounted in a well-ventilated area.
4 Do not block the ventilation slots and openings on the projector.
5 Ensure the projector operates between ambient temperatures (5 °C to 40 °C).
6 Do not try to touch the ventilation outlet as it can become very hot after the projector has been turned on or immediately after it is turned off.
7 Do not look into the lens while the projector is on as it may cause injury to your eyes.
8 Do not place any objects near or in front of the projector or cover its lens while the projector is on as the heat may cause the object to melt or burn.
9 Do not use alcohol to wipe the lens.
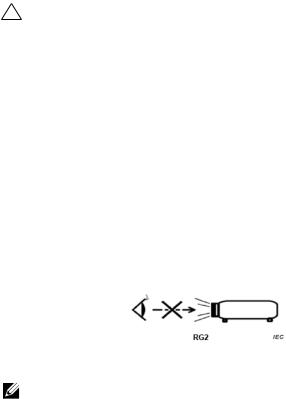
10 Do not stare into the beam, RG2.
11 As with any bright source, do not stare into the direct beam, RG2 IEC 62471-5:2015.
NOTE:
•Do not attempt to ceiling mount the projector by yourself. It should be installed by a qualified technician.
•Recommended Projector Ceiling Mount Kit (P/N: C3505). For more information, see the Dell Support website at dell.com/support.
•For more information, see the Safety Information that shipped with your projector.
•The 1550/1650 projector can only be used indoors.
About Your Dell Projector |
7 |

Using Remote Control
14
15
16
17
18
19
20
21
22
23 24
25
26
POWER
MENU |
|
ASPECT |
SOURCE |
VOL |
VIDEO MODE |
|
||
|
MUTE |
|
KEYSTONE |
VOL |
PAGE |
|
|
|
AUTO ADJ. |
FREEZE |
BLANK |
ZOOM |
ZOOM |
INFO |
VGA |
VIDEO |
HDMI |
1
2
3
4
5
6
7
8
9
10
11
12
13
1 |
Power |
Turns the projector on or off. |
|
|
|
2 |
Enter |
Press to confirm the selection. |
|
|
|
3 |
Right |
Press to navigate through the On-Screen |
|
|
Display (OSD) Menu items. |
|
|
|
4 |
Down |
Press to navigate through the On-Screen |
|
|
Display (OSD) Menu items. |
|
|
|
5 |
Aspect Ratio |
Press to change the aspect ratio of a |
|
|
displayed image. |
|
|
|
8About Your Dell Projector

6 |
Mute MUTE |
Press to mute or un-mute the projector |
|
|
speaker. |
|
|
|
7 |
Video mode |
The projector has preset configurations that |
|
|
are optimized for displaying data |
|
|
(presentation slides) or video (movies, games, |
|
|
etc.). |
|
|
Press the Video Mode button to toggle |
|
|
between Presentation mode, Bright mode, |
|
|
Movie mode, sRGB, or Custom mode. |
|
|
Pressing the Video Mode button once will |
|
|
show the current display mode. Pressing the |
|
|
Video Mode button again will switch |
|
|
between modes. |
|
|
|
8 |
Page up |
Press to move to the previous page. |
|
|
NOTE: The Mini USB cable must be |
|
|
connected if you want to use the Page |
|
|
Up feature. |
|
|
|
9 |
Page down |
Press to move to the next page. |
|
|
NOTE: The Mini USB cable must be |
|
|
connected if you want to use the Page |
|
|
Down feature. |
|
|
|
10 |
Freeze |
Press to pause the screen image, then press |
|
|
"Freeze" again to unfreeze the image. |
|
|
|
11 |
Blank screen |
Press to hide/unhide the image. |
|
|
|
12 |
Information |
Press to provide projector native resolution |
|
|
information. |
|
|
|
13 |
HDMI |
Press to choose HDMI source. |
|
|
|
14 |
Up |
Press to navigate through the On-Screen |
|
|
Display (OSD) Menu items. |
|
|
|
15 |
Left |
Press to navigate through the On-Screen |
|
|
Display (OSD) Menu items. |
|
|
|
16 |
Menu |
Press to activate the OSD. |
|
|
|
17 |
Volume up VOL |
Press to increase the volume. |
18 |
Source |
Press to switch between Analog RGB, |
|
|
Composite, Component (YPbPr, via VGA), |
|
|
HDMI 1, and HDMI 2 source. |
|
|
|
About Your Dell Projector |
9 |

19 Volume down VOL
Press to decrease the volume.
20 |
Keystone adjustment |
Press to adjust image distortion caused by |
|
+ |
tilting the projector (+/-40 degrees). |
|
|
|
21 |
Keystone adjustment |
Press to adjust image distortion caused by |
|
- |
tilting the projector (+/-40 degrees). |
|
|
|
22 |
Auto Adjust |
Press to synchronize the projector with the |
|
|
input source. Auto adjust does not operate if |
|
|
the OSD is displayed. |
|
|
|
23 |
Zoom + |
Press to increase the image. |
|
|
|
24 |
Zoom - |
Press to decrease the image. |
|
|
|
25 |
VGA |
Press to choose VGA source. |
|
|
|
26 |
Video |
Press to choose Composite Video source. |
|
|
|
10 About Your Dell Projector
Remote Control Operating Range
Operating range
Angle ±30°
Distance 7 m/22.97 feet
Angle
HDMI |
VIDEO |
VGA |
INFO |
ZOOM |
ZOOM |
BLANK |
FREEZE |
AUTO.ADJ |
PAGE |
VOL |
KEYSTONE |
|
MUTE |
|
VIDEOMODE |
VOL |
SOURCE |
|
|
|
ASPECT |
|
MENU |
|
POWER |
|
Distance
POWER
|
|
|
MENU |
|
|
SOURCE |
|
|
|
KEYSTONE |
VOL |
AUTO |
|
|
MUTE |
|
|
|
ASPECT |
ADJ |
VOL |
VIDEO |
|
ZOOM |
. |
|
|
|
|
|
MODE |
VGA |
FREEZE |
PAGE |
|
ZOOM |
|
|
|
VIDEO |
|
BLANK |
|
|
INFO |
|
|
HDMI |
|
|
|
Distance
Angle
NOTE: Actual operating range may slightly differ from the diagram. Weak batteries will also prevent the remote control from properly operating the projector.
About Your Dell Projector |
11 |
Loading...