


MIC440TX
MICROWAVE OVENS |
|
||||
GB |
|||||
USER INSTRUCTIONS |
|
|
|
||
|
|
|
|
||
FORNI A MICROONDE |
|
||||
IT |
|||||
MANUALE DI ISTRUZIONI |
|
|
|||
|
|
|
|||
HORNOS MICROONDAS |
|
||||
ES |
|||||
MANUAL DE INSTRUCCIONES |
|
||||
|
|
||||
МИКРОВОЛНОВАЯ ПЕЧЬ |
|
||
RU |
|||
ИНСТРУКЦИЯ ПО ЭКСПЛУАТАЦИИ |
|
||
|
|
||

GB
Microwave Oven
INSTRUCTION MANUAL
MODEL:MIC440TX
Read these instructions carefully before using your microwave oven, and keep it carefully.
If you follow the instructions, your oven will provide you with many years of good service.
SAVE THESE INSTRUCTIONS CAREFULLY
1

GB
PRECAUTIONS TO AVOID POSSIBLE EXPOSURE TO EXCESSIVE MICROWAVE ENERGY
(a)Do not attempt to operate this oven with the door open since this can result in harmful exposure to microwave energy. It is important not to break or tamper with the safety interlocks.
(b)Do not place any object between the oven front face and the door or allow soil or cleaner residue to accumulate on sealing surfaces.
(c)WARNING: If the door or door seals are damaged, the oven must not be operated until it has been repaired by a competent person.
ADDENDUM
If the apparatus is not maintained in a good state of cleanliness, its surface could be degraded and affect the lifespan of the apparatus and lead to a dangerous situation.
Specifications
Model: |
MIC440TX |
Rated Voltage: |
230V~50Hz |
Rated Input Power(Microwave): |
1650W |
Rated Output Power(Microwave): |
900W |
Rated Input Power(Grill): |
1750W(top)+600W(bottom) |
Rated Input Power(Convection): |
1750W |
Oven Capacity: |
44L |
Turntable Diameter: |
360mm |
External Dimensions: |
594 455 568 mm |
Net Weight: |
Approx. 41 kg |
2

GB
IMPORTANT SAFETY INSTRUCTIONS
WARNING
To reduce the risk of fire, electric shock, injury to persons or exposure to excessive microwave oven energy when using your appliance, follow basic precautions, including the following:
1.Warning: Liquids and other foods must not be heated in sealed containers since they are liable to explode.
2.Warning:it is hazardous for anyone other than a competent person to carry out any
service or repair operation that involves the removal of a cover which gives protection against exposure to microwave energy.
3.Warning: Only allow children to use the oven without supervision when adequate instructions have been given so that the child is able to use the oven in a safe way and understand the hazards of improper use.
4.Warning: When the appliance is operated in the combination mode, children should only use the oven under adult supervision due to the temperatures generated.
(only for grill series)
5.Only use utensils suitable for use in microwave ovens.
6.The oven should be cleaned regularly and any food deposits should be removed.
7.Read and follow the specific:"PRECAUTIONS TO AVOID POSSIBLE EXPOSURE TO EXCESSIVE MICROWAVE ENERGY".
8.When heating food in plastic or paper containers, keep an eye on the oven due to the possibility of ignition.
9.If smoke is observed, switch off or unplug the appliance and keep the door closed in order to stifle any flames.
10.Do not overcook food.
11.Do not use the oven cavity for storage purposes. Do not store items,
such as bread, cookies, etc. inside the oven.
12.Remove wire twist-ties and metal handles from paper or plastic containers/bags before placing them in the oven.
13.Install or locate this oven only in accordance with the installation instructions provided.
14.Eggs in the shell and whole hard-boiled eggs should not be heated in microwave ovens since they may explode, even after microwave heating has ended.
15.Use this appliance only for its intended uses as described in manual. Do not use corrosive chemicals or vapors
in this appliance. This oven is especially designed to heat. It is not designed for industrial or laboratory use.
16.If the supply cord is damaged, it must be replaced by the manufacturer, its service agent or similarly qualified persons in order to avoid a hazard.
17.Do not store or use this appliance outdoors.
18.Do not use this oven near water, in a wet basement or near a swimming pool.
19.The temperature of accessible surfaces may be high when the appliance is operating. The surfaces are liable to get hot during use.Keep cord away from heated surface, and do not cover any vents on the oven.
20.Do not let cord hang over edge of table or counter.
21.Failure to maintain the oven in a clean condition could lead to deterioration of the surface that could adversely affect the life of the appliance and possibly result in a hazardous situation.
22.The contents of feeding bottles and baby food jars shall be stirred or shaken and the temperature checked before consumption, in order to avoid burns.
3

GB
23.Microwave heating of beverages can result in delayed eruptive boiling, therefore care must be taken when handling the container.
24.The appliance is not intended for use by persons (including children) with reduced physical , sensory or mental capabilities, or lack of experience and knowledge,
unless they have been given supervision or instruction concerning use of the appliance by a person responsible for their safety.
25.Children should be supervised to ensure that they do not play with the appliance. 26.The appliances are not intended to be operated by means of an external timer or
separate remote-control system.
27.WARNING: Ensure that the appliance is switched off before replacing the lamp to avoid the possibility of electric shock.
28.Accessible parts may become hot during use. Young children should be kept away
steam cleaner is not to be used.
29.Do not use harsh abrasive cleaners or sharp metal scrapers to clean the oven door glass since they can scratch the surface, which may result in shattering of the glass.
30.During use the appliance becomes hot. Care should be taken to avoid touching heating elements inside the oven.
31.Only use the temperature probe recommended for this oven.(for ovens provided with a
facility to use a temperature-sensing probe.)
32.The rear surface of appliance shall be placed against a wall.
4

GB
To Reduce the Risk of Injury to Persons
Grounding Installation
DANGER
Electric Shock Hazard
Touching some of the internal components can cause serious personal injury or death. Do not
disassemble this appliance.
WARNING
Electric Shock Hazard Improper use of the grounding can result in electric shock. Do not plug into an outlet until appliance is properly installed and grounded.
CLEANING
Be sure to unplug the
appliance from the power supply.
1.Clean the inside of the oven after using with a slightly damp cloth.
2.Clean the accessories in the usual way in soapy water.
3.The door frame and seal and neighbouring parts must be cleaned carefully with a damp cloth when they are dirty.
This appliance must be grounded. In the event of an electrical short circuit, grounding reduces the risk of electric shock by providing an escape wire for the electric current. This appliance is equipped with a cord having a grounding wire with a grounding plug. The plug must be plugged into an outlet that is properly installed and grounded. Consult a qualified electrician or serviceman if the grounding instructions are not completely understood or if doubt exists as to whether the appliance is properly grounded. If it is necessary to use an extension cord , use only a 3-wire extension cord.
1.A short power-supply cord is provided to reduce the risks resulting from becoming entangled in or tripping over a longer cord.
2.If a long cord set or extension cord is used: 1)The marked electrical rating of the cord set or extension cord should be at least as great as the electrical rating of the appliance. 2)The extension cord must be a groundingtype 3-wire cord.
3)The long cord should be arranged so that it will not drape over the counter top or tabletop
where it can be pulled on by children or tripped over unintentionally.
5

UTENSILS
CAUTION
Personal Injury Hazard
It is hazardous for anyone other than a compentent person
to carry out any service or repair operation that involves the removal of a cover which gives protection against exposure to microwave energy.
GB
See the instructions on "Materials you can use in microwave oven or to be avoided in microwave oven." There may be certain non-metallic utensils that are not safe to use for microwaving. If in doubt, you can test the utensil in question following the procedure below.
Utensil Test:
1.Fill a microwave-safe container with 1 cup of cold water (250ml) along with the utensil in question.
2.Cook on maximum power for 1 minute.
3.Carefully feel the utensil. If the empty utensil is warm, do not use it for microwave cooking.
4.Do not exceed 1 minute cooking time.
Materials you can use in microwave oven
Utensils |
Remarks |
||
|
|
|
|
Aluminum foil |
Shielding only. Small smooth pieces can be used to cover thin parts of |
||
|
meat or poultry to prevent overcooking. Arcing can occur if foil is too |
||
|
close to oven walls. The foil should be at least 1 inch (2.5cm) away from |
||
|
oven walls. |
|
|
Browning dish |
Follow manufacturer’s instructions. The bottom of browning dish must be |
||
|
at least 3/16 inch (5mm) above the turntable. Incorrect usage may cause |
||
|
the turntable to break. |
|
|
Dinnerware |
Microwave-safe only. Follow manufacturer's instructions. Do not use |
||
|
cracked or chipped dishes. |
|
|
Glass jars |
Always remove lid. Use only to heat food until just warm. Most glass jars |
||
|
are not heat resistant and may break. |
|
|
Glassware |
Heat-resistant oven glassware only. Make sure there is no metallic trim. |
||
|
Do not use cracked or chipped dishes. |
|
|
Oven cooking |
Follow manufacturer’s instructions. Do not close with metal tie. Make |
||
bags |
slits to allow steam to escape. |
|
|
Paper plates |
Use for short–term cooking/warming only. Do not leave oven unattended |
||
and cups |
while cooking. |
|
|
Paper towels |
Use to cover food for reheating and absorbing fat. Use with supervision |
||
|
for a short-term cooking only. |
||
Parchment |
Use as a cover to prevent splattering or a wrap for steaming. |
|
|
paper |
|
|
|
Plastic |
Microwave-safe only. Follow the manufacturer’s instructions. Should be |
||
|
labeled "Microwave Safe". Some plastic containers soften, as the food |
||
|
inside gets hot. "Boiling bags" and tightly closed plastic bags should be |
||
|
slit, pierced or vented as directed by package. |
|
|
Plastic wrap |
Microwave-safe only. Use to cover food during cooking to retain |
||
|
moisture. Do not allow plastic wrap to touch food. |
|
|
Thermometers |
Microwave-safe only (meat and candy thermometers). |
|
|
Wax paper |
Use as a cover to prevent splattering and retain moisture. |
|
|
6
|
GB |
|
Materials to be avoided in microwave oven |
||
Utensils |
Remarks |
|
Aluminum tray |
May cause arcing. Transfer food into microwave-safe dish. |
|
Food carton with |
May cause arcing. Transfer food into microwave-safe dish. |
|
metal handle |
|
|
Metal or metal- |
Metal shields the food from microwave energy. Metal trim may |
|
trimmed utensils |
cause arcing. |
|
Metal twist ties |
May cause arcing and could cause a fire in the oven. |
|
Paper bags |
May cause a fire in the oven. |
|
Plastic foam |
Plastic foam may melt or contaminate the liquid inside when exposed |
|
|
to high temperature. |
|
Wood |
Wood will dry out when used in the microwave oven and may split |
|
|
or crack. |
|
SETTING UP YOUR OVEN
Names of Oven Parts and Accessories
Remove the oven and all materials from the carton and oven cavity
Your oven comes with the following accessories: |
|
||
Enamel Tray |
1 |
. |
|
Turntable ring assembly |
1 |
||
|
|||
Instruction Manual |
1 |
|
|
1 |
|
8 |
|
2 |
|
9 |
|
3 |
|
|
|
4 |
|
|
|
9
5
6 
10
7
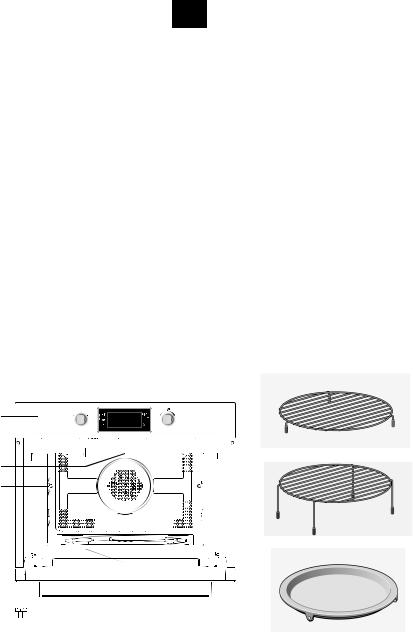
1.Control panel
2. |
Grill element |
8. |
Short Grill Rack |
3. |
Light |
9. |
Long Grill Rack |
4. |
Level |
10.Grill Pan |
|
|
|
||
5.Door glass
6.Hinge
7.Turntable shaft
7
GB
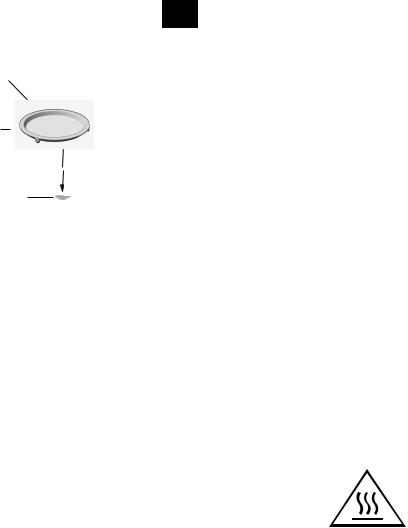
Turntable Installation
Hub (underside)
Enamel tray
Turntable shaft
a.Never place the enamel tray upside down. The enamal tray should never be restricted.
b.The enamal tray must always be used during cooking.
c.All food and containers of food are always placed on the enamel tray for cooking.
d. If enamel tray cracks or breaks, contact your nearest authorized service center.
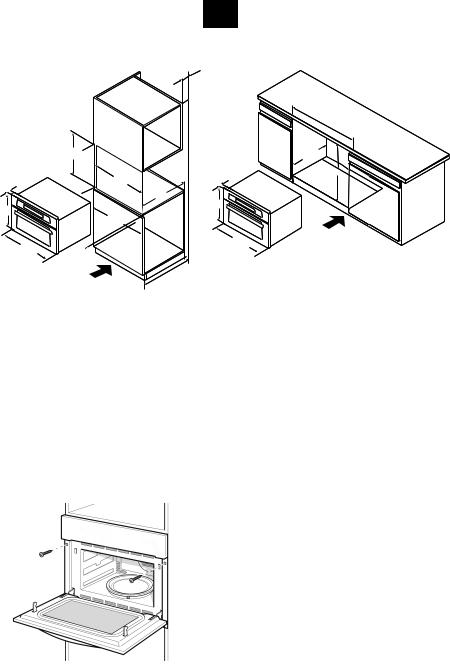
Important information about installing
•This appliance is NOT intended for use in a commercial environment.
•Please observe the installation instructions provided and note that this appliance should only be installed by a qualied technician.
•The appliance is tted with a plug and must only be connected to a properly installed earthed socket.
•In case a new socket is needed, installation and cable connection must only be done by a quali ed electrician. If the plug is no longer accessible following installation, a pole disconnecting device must be present on the installation site with a contact gap of at least 3 mm.
•Adapters, multiway strips and extension cords must not be used. Overloading can result in fire.
The accessible surface may be hot during operation.
Placement
•Danger! Do not disassemble this appliance. Touching internal components of this appliance can cause serious personal injury or death.
•Place the microwave oven on a firm,flat surface.
•Make sure that there is surficient ventilation around the microwave oven. At the rear and sides keep at least 10 cm free.
•Do not cover the air vents.
•The adjustable feet should not be r emoved.
•Do not place the micr owave oven near a heat source.
•Transmitting and receiving equipment such as radios and televisions can affect the operation of the micr owave oven.
8
GB
Installation dimensions
|
|
100 |
|
|
|
|
|
|
|
|
560 |
|
|
|
|
|
558-568 |
|
450 |
|
|
|
min. |
|
|
|
|
550 |
|
|
560-568 |
20 |
|
min 458+2 |
|
20 |
|
min 460 |
|||
542 |
min |
|
|
542 |
|
|
550 |
455 |
|
540 |
|
455 |
|
|
|
||
600 |
|
|
|
|
|
|
|
|
|
|
|
|
|
|
|
5945 |
min. baerationluchtingsoppsurface. |
|
5945 |
|
|
250 cm2 |
|
|
|
|
|
||
|
|
|
|
|
|
|
min. aeration surface 250 cm2 |
min 580 |
|
|
|
Note: There should be gap above the oven.
Building in
•Do not hold or carry the appliance by the door handle. The door handle cannot hold the weight of the appliance and may br eak off.
1. Carefully push the microwave into the box, making sure that it is in the centre. 2. Open the door and fasten the micr owave with the screws that were supplied.
9
GB
INSTALL THE TRAY
1. Check the position of the shaft.
5:1
2. Adjust the angle of the tray, the tray roller should point to one of the shaft arm.
3. Put the tray on the shaft and adjust slightly .
10
GB
OPERATION
Control Panel and Features
|
|
|
|
|
|
|
|
|
|
|
|
|
|
|
|
|
|
|
|
|
|
|
|
|
|
|
|
|
|
|
|
|
|
|
|
|
|
|
|
|
|
|
|
|
|
|
|
|
|
|
|
|
|
|
|
|
|
|
|
|
|
|
|
|
|
|
|
|
|
|
|
|
|
|
|
|
|
|
|
|
|
|
|
1 |
|
4 |
|
|
6 5 |
8 |
|||||
2 3 |
7 |
||||||||||
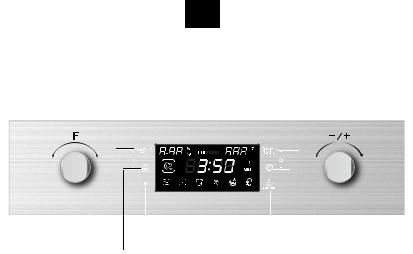
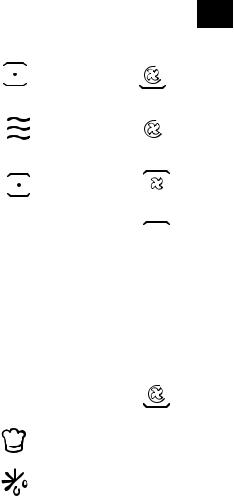
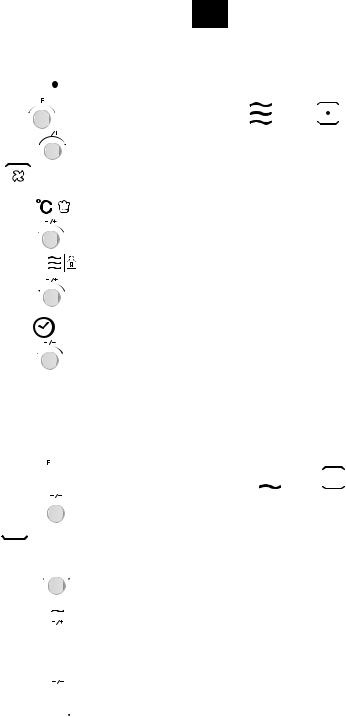
1)Function knob
2)Power/Weight button
3)Quickly preheating button
4)On/Off Button
5)Temperature/automenu button
6)Clock button
7)Start/Pause button
8)Selection knob
11

GB
OPERATION INSTRUCTION
This microwave oven uses modern electronic control to adjust cooking parameters to meet your needs better for cooking.
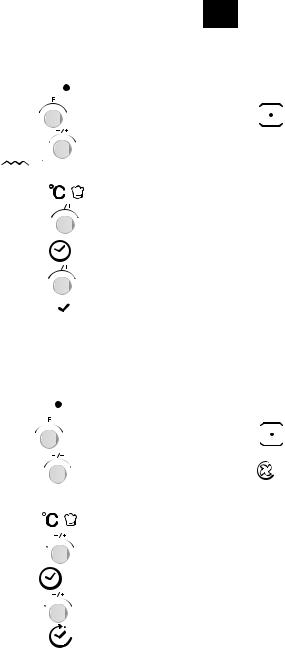
1.Clock Setting
When the microwave oven is electrified, "00:00" will blink, buzzer will ring once. |
|
||||
1) Turn |
knob to set the right time(between 00:00 and 23:59.) |
|
|
||
2) After you have set the right time, press " |
". The clock has been set. |
|
|||
Note: 1) If you want to change the time, you have to press and hold the " |
" |
||||
button for 3 seconds. The actual time disappears and then the time will |
|||||
blink in the display. |
|
|
|
|
|
Turn |
knob to set the new time and press the " |
" |
button |
|
|
to confirm the setting. |
|
|
|
|
|
2) If you do not want to see the clock in the display, press " |
|
" button |
|||
briefly. The time disappears. Press " |
" again, and the clock appears |
||||
in the display again. |
|
|
|
|
|
2. Microwave Cooking
1) Press the "  " button to activate the microwave function. "01:00" is blinking in the display and the microwave icon appears. If no operation in 10 seconds, the current power will be confirmed automatically.
2) Turn 
 knob to set the cooking time.
The max. cooking time depends on the power that has been set. When the power is 900W, the MAX. time is 30 minutes and other powers are 90 minutes.
3) Press " |
" button to adjust the power microwave power. |
4) Turn |
knob to set the microwave power (between 100W to 900W) |
5) Press " |
" button to start cooking. |
NOTE: the step quantities for the adjustment time of the coding switch are as follow:
0---1 |
min |
: |
1 second |
|
|
|
|
||
1---5 |
min |
: |
10 seconds |
|
|
|
|
||
5---15 |
min |
: |
30 seconds |
|
|
|
|
||
15---60 |
min |
: |
1 minute |
|
|
|
|
||
|
60 min |
|
: |
5 minutes |
|
|
|
|
|
Microwave Power Chart |
|
|
|
|
|
|
|||
|
|
|
|
|
|
|
|
|
|
|
Microwave Power |
|
100% |
|
80% |
50% |
30% |
10% |
|
|
Display |
|
|
900W |
|
700W |
450W |
300W |
100W |
|
|
|
|
|
|
|
|
|
|
12

GB
You can see from the table below from which power levels you can choose and for which foods the power levels are suitable.
Power level |
Food |
900 W |
- Boiling water, reheating |
|
- Cooking chicken, fish, vegetables |
|
|
700 W |
- Reheating |
|
- Cooking mushrooms, shell fish |
|
- Cooking dishes containing eggs and cheese |
|
|
450 W |
- Cooking rice, soup |
|
|
300 W |
- Defrosting |
|
- Melting chocolate and butter |
|
|
100 W |
- Defrosting sensitive/delicate foods |
|
- Defrosting irregularly-shaped foods |
|
- Softening ice cream |
|
- Allowing dough to rise |
Functions |
|
Function |
|
Mode |
||
|
Microwave |
|
Microwave |
Microwave |
|
|
|
|
Use the microwave |
|
|
|
|
function to cook and |
|
|
|
|
reheat vegetables, |
|
|
|
|
potatoes, rice, fish and |
|
|
|
|
meat. |
|
|
|
Hot air |
Hot air |
|
|
|
|
With hot air you can |
|
|
|
|
prepare meals in the |
|
Heating |
|
|
same way as you do |
|
|
|
with a conventinal oven. |
|
|
|
|
|
|
|
|
|
|
The microwave is not |
|
|
|
|
activated. You are advised |
|
|
|
|
to preheat the oven |
|
|
|
|
before putting the meal in |
|
|
|
|
the oven. |
|
|
|
Grill with fan |
Grill with fan |
|
|
|
|
Use this function to roast |
|
|
|
|
meals evenly and at the |
|
|
|
|
same time give the meal a |
|
|
|
|
brown crust. |
|
|
|
|
|
|
|
|
Grill |
Grill |
|
|
|
|
The grill is very suitable |
|
|
|
|
to prepare thin pieces of |
|
|
|
|
meat and sh. |
13
GB
Function |
|
Mode |
|||
|
|
|
Hot air+ |
Use this function to roast |
|
|
Heating |
|
Bottom heat |
big pieces of meat, pizza, |
|
|
|
|
|
etc. |
|
|
Combination |
|
Hot air |
Microwave + Hot air |
|
|
|
|
|
Use this function to roast |
|
+ |
|
|
|
meals quickly. |
|
|
|
|
|
|
|
|
|
|
Grill with fan |
Microwave + Grill with |
|
|
|
|
|
fan |
|
|
|
|
|
|
|
|
|
|
Grill |
Microwave + Grill |
|
|
|
|
|||
|
|
|
|
Use this function to cook |
|
|
|
|
|
meals quickly and at the |
|
|
|
|
|
same time give the meal |
|
|
|
|
|
a brown crust (also au |
|
|
|
|
|
gratin). The microwave |
|
|
|
|
|
and the grill are activated |
|
|
|
|
|
at the same time. The |
|
|
|
|
|
microwave is cooking and |
|
|
|
|
|
the grill is roasting. |
|
|
|
|
|
|
|
|
|
|
Hot air+ |
Use this function to roast |
|
|
|
|
big pieces of meat, pizza, |
||
|
|
|
Bottom heat |
||
|
|
|
etc. |
||
|
|
|
|
|
|
|
Auto- |
|
P01 - P13 |
Automatic cooking |
|
|
programs |
|
|
programs |
|
|
|
|
|
|
|
|
Defrost |
|
d01 + d02 |
Defrost |
|
|
|
|
|
|
|
14
GB
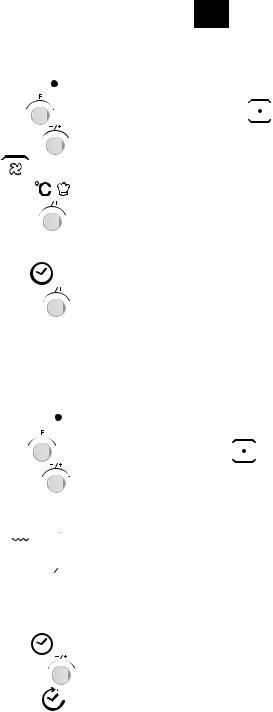
3. Grill |
Cooking |
|
|||
1) Press " |
|
" button to activate the microwave function. |
|||
2) |
Turn " |
|
|
" to select the cooking mode. " |
" indicator lights. |
3) |
Turn |
" |
|
" to select grill mode. The default grill power is the third level. |
|
" |
" indicator will light when grill function is selected. |
|
|||
4) |
Press " |
|
" to enter to the grill level. |
|
|
|
|
||||
5) |
Turn |
" |
|
" to select the level 3(the MAX.), level 2 or level 1(the MIN.). |
|
Press " |
|
" to select the time setting mode. The default time is 10 minutes. |
|||
6) Turn |
" |
|
" to select the cooking time of grill. The MAX.time is 90 minutes. |
||
7)Press "  " button to start cooking.
4.Convection Cooking
1) Press " |
|
" button to activate the microwave function. |
|||
2) Turn " |
|
|
" to select the cooking mode. " |
" indicator lights. |
|
3) Turn |
" |
|
" to select convection mode. " |
" lights. |
|
|
The default temperature is 180 degrees.. |
|
|||
4) Press " |
|
" to enter the temerpature mode. |
|
||
|
|
||||
5) Turn |
" |
|
" to select temerpature. The temperature is from 50 to 230 degrees. |
||
|
Press " |
|
" to select the time setting mode. The default time is 10 minutes. |
||
6) |
Turn |
" |
|
" to select the cooking time. The MAX.time is 5 hours. |
|
7) |
Press " |
|
" button to start cooking. |
|
|
15
GB
5. Grill Fan Cooking
1) Press " |
|
" button to activate the microwave function. |
|||
2) |
Turn " |
|
|
" to select the cooking mode. " |
" indicator lights. |
3) |
Turn |
" |
|
" to select grill fan mode. The default temperature is 180 degrees. |
|
|
" |
|
" indicator will light when grill fan function is selected. |
||
4) |
Press " |
|
|
" to enter to the temperature selection. |
|
|
|
||||
5) |
Turn |
" |
|
" to select the temperature between 100 to 230 degrees. |
|
The temperature are 100,105,110,115,120,125,130,135,140,145,150,155,160, 165,170,175,180,185,190,195,200,205,210,215,220,225,230.
Press" |
" to select the time setting mode. The default time is 10 minutes. |
6) Turn " |
" to select the cooking time. The MAX.time is 5 hours. |
7)Press "  " button to start cooking.
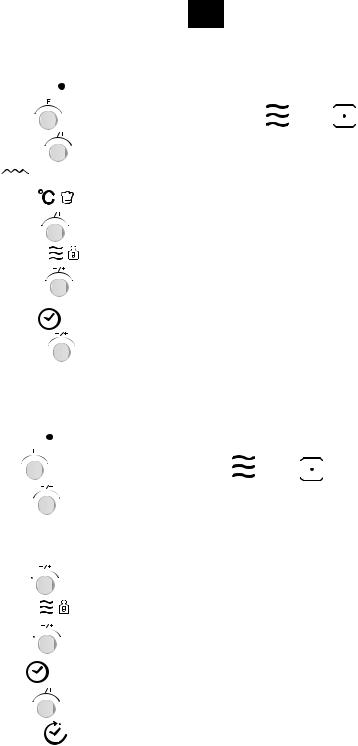
6.Convection+ Bottom heat Cooking
1) Press " |
" button to activate the microwave function. |
||
2) |
Turn " |
" to select cooking mode. " |
" indicator lights. |
3) |
Turn " |
" to select bottom+ convection |
mode. |
The default temperature is 180 degrees.
" " indicator will light when convection + bottom function is selected.
4)Press " 

 " to enter the temperature selection.
5) Turn " 

 " to select the temperature between 100 to 230 degrees.
The temperature are 100,105,110,115,120,125,130,135,140,145,150,155,160, 165,170,175,180,185,190,195,200,205,210,215,220,225,230.
|
press" |
" to select the time setting mode. The default time is 10 minutes. |
6) |
Turn " |
" to select the cooking time. The MAX.time is 5 hours. |
7) |
Press " |
" button to start cooking. |
16
GB
7. Microwave + Grill Cooking
1) Press " |
|
" button to activate the microwave function. |
|
|||
2) |
Turn " |
" to select the combination mode." |
" and " |
" will light. |
||
3) |
Turn |
" |
|
" to select mode. The default power is level 3. |
|
|
|
" |
" indicator will light when grill function is selected. |
|
|
||
4) |
Press " |
|
" to enter to the temperature selection. |
|
||
|
|
|||||
5) |
Turn |
" |
|
" to select the power. |
|
|
6) |
Press |
" |
|
" to select the power. The default power is 300W |
||
|
||||||
7) |
Turn |
" |
|
" to select 700W,450W,300W and 100W. |
|
|
8) Press" |
" to select the time setting mode. The default time is 10 minutes. |
|||||
9) |
Turn |
" |
|
" to select the cooking time. The MAX.time is 90 minutes. |
||
10)Press "  " button to start cooking.
8.Microwave + Convection Cooking
1) Press " |
" button to activate the microwave function. |
|
||
2) |
Turn " |
" to select the cooking mode. " |
" and " |
" will light. |
3) |
Turn " |
" to select convection mode. The default temperature is 180 degrees. |
||
" " lights.
4)Press " 

 " to enter to the temperature selection.
5) |
Turn |
" |
|
" to select the temerpatre between 50 to 230 degrees. |
6) |
Press |
" |
|
" to select the power. The default power is 300W |
|
||||
7) |
Turn |
" |
|
" to select 700W,450W,300W and 100W. |
8) Press" |
|
" to select the time setting mode. The default time is 10 minutes. |
||
9) |
Turn |
" |
|
" to select the cooking time of grill. The MAX.time is 90 minutes. |
10) Press " |
|
" button to start cooking. |
||
17
GB
9. Microwave + Grill Fan Cooking
1) Press " |
" button to activate the microwave function. |
|
|||
2) |
Turn " |
|
" to select the combination mode." |
" and " |
" will light. |
3) |
Turn |
" |
" to select cooking mode. The default temperature is 180 degrees. |
||
|
" |
|
" indicator will light when this function is selected. |
|
|
4) |
Press " |
" to enter to the temperature selection. |
|
||
5) |
Turn |
" |
" to select the temerpatre between 100 to 230 degrees. |
||
6) |
Press |
" |
" to select the power. The default power is 300W |
||
7) |
Turn |
" |
" to select 700W,450W,300W and 100W. |
|
|
8) Press" |
|
" to select the time setting mode. The default time is 10 minutes. |
|||
9) |
Turn |
" |
" to select the cooking time of grill. The MAX.time is 90 minutes. |
||
10)Press "  " button to start cooking.
10.Microwave + Bottom + Convection Cooking
1) Press "  " button to activate the microwave function.
2)Turn " 

 " to select the combination mode."
  " and "
  " will light.
3)Press "
 " to select convection mode. The default temperature is 180 degrees.
" " indicator will light when this function is selected.
4)Press " 
 " to enter to the temperature selection.
5)Press " " to select the temerpatre between 100 to 230 degrees.
6)Press " 

 " to select the power. The default power is 300W
7)Press " 

 " to select 700W,450W,300W and 100W.
8)Turn "  " to select the time setting mode. The default time is 10 minutes.
9)Press " 

 " to select the cooking time of grill. The MAX.time is 90 minutes.
10)Press "  " button to start cooking.
18
GB
11. Auto Cook
There are 15 automatic cooking programs. You only have to choose the program and set the weight. The power, the time and the temperature are already set.
1) Press "  " button to activate the microwave function.
2) Turn " 

 " to select the cooking mode. "
 " or "
 " will light when defrost or auto menu selected.
Time, weight, the first number of the automatic programs are shown in the display.
3) Turn " |
to select auto menu. " d01","d02" or "P01","P02"...."P13" will display. |
4) Press " 

 " button.
5) Turn " |
" to select weight of the menu. |
6) Press "  " button to start cooking.
Program |
Category |
Item |
|
d01 (defrost)** |
Meat, poultry and fish |
If you hear a beep, the combi microwave |
|
d02 (defrost)** |
Bread, cake and fruit |
oven stops. Turn the food and pr ess |
|
the start/pause button to continue the |
|||
|
|
||
|
|
defrosting program. |
|
|
|
|
|
P01** |
Vegetables |
Fresh vegetables |
|
P02** |
Side dishes |
Potatoes - peeled/cooked |
|
P03* |
Side dishes |
Potatoes - roasted |
|
|
|
If you hear a beep, turn the food. The combi micr owave |
|
|
|
oven starts the next fase automatically. |
|
|
|
|
|
P04 |
Poultry/ Fish |
Chicken pieces/ Fish pieces |
|
|
|
If you hear a beep, turn the food. The combi micr owave |
|
|
|
oven starts the next fase automatically. |
|
|
|
|
|
P05* |
Bakery |
Cake |
|
P06* |
Bakery |
Apple pie |
|
|
|
|
|
P07* |
Bakery |
Quiche |
|
|
|
|
|
P08** |
Reheat |
Drink/soup |
|
|
|
|
|
P09** |
Reheat |
Plated meal |
|
P10** |
Reheat |
Sauce/stew/dish |
|
P11* |
Convenience |
Frozen - pizza |
|
|
|
|
|
P12* |
Convenience |
Oven chips |
|
|
|
If you hear a beep, turn the food. The combi microwave |
|
|
|
oven starts the next fase automatically. |
|
|
|
|
|
P13* |
Convenience |
Frozen - lasagne |
•The programmes with a * are preheated. During pr eheating, the cooking time pauses and the preheating symbol is on. After preheating, you wil hear an alarm and the preheating symbol will blink.
•The programmes with ** only use the microwave function.
19
GB
12. Preheating Function
The prehating function can be activated after you have chosen the functions: Convection, Grill fan, bottom -convection,MW-convection,MW-Grill fan and Microwave -Bottom-convection.
1)Press "  " button. The preheating icon appears in the display.
2)Press "  " button to start preheating. You can stop the preheating by opening
the oven door or by pressing the " |
" button. |
3)When the set temerpature is reached, you will hear three beeps and reheat icon will flash.
4)Open the oven door, put the food into the oven and close the door.
Press the "  " button to start cooking, preheating icon go off.
If you don't press "  ", the oven will go back to clock states.
Note: The preheating function only works if you have already chosen one of the modes above. During preheating, the microwave function is switched off.
13. Lock-out Function for Children
Lock: In waiting state, press " |
" and " |
|
|
" at the same time, there will be a long "beep" |
denoting entering into the children-lock state and " |
|
" indicator will light. |
||
Unlock : In locked state, press " |
" and " |
|
" for 3 seconds, there will be a long |
|
|
||||
"beep" denoting that the lock is released, and " |
|
" indicator will disapear. |
||
14. Control oven lamp and turntable tray
During the microwave, grill and combination cooking, you can switch the oven lamp and
turntable tray working condition by press “ |
|
” and “ |
” at the same time. |
|||
|
|
|
|
|
|
|
|
Cooking mode |
Default mode |
Switch mode |
|
||
|
|
|
|
|
|
|
|
Microwave |
Turntable tray rotating, |
Turntable tray not rotating, |
|
||
|
|
oven lamp on |
oven lamp off |
|
||
|
grill |
Turntable tray rotating, |
Turntable tray not rotating, |
|
||
|
|
oven lamp on |
oven lamp off |
|
||
|
combination |
Turntable tray rotating, |
Turntable tray not rotating, |
|
||
|
|
oven lamp on |
oven lamp off |
|
||
20
GB
15. Display Specification
(1)When setting, if no other operation,it will confirm automatically after 10 seconds. Except clock setting for the first time.
(2)During setting program, after adjusted for 3 seconds, it will confirm after 3 seconds.
(3)The oven lamp will light all the time if the door is open.
(4)When the oven is in setting state or pause state, including auto menu and defrost program, if no operation in 15 minutes, it will enter into the off state.
(5) "  " button must be pressed to continue cooking if the oven door is open during cooking process.
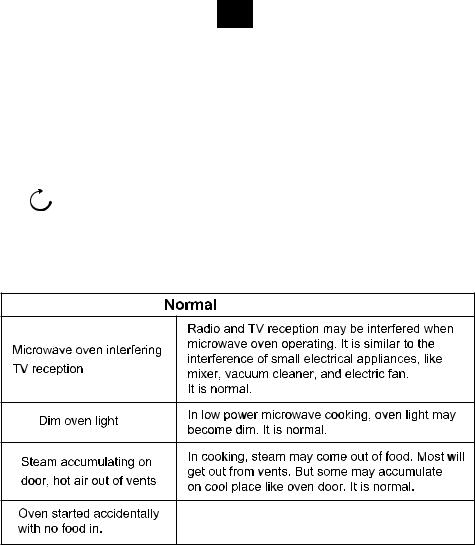
Trouble shooting
It is forbidden to run the unit without any food inside.
It is very dangerous.
21

GB |
CUSTOMER ASSISTANCE SERVICE
If you cannot identify the cause of the operating anomaly: switch off the appliance (do not subject it to rought treatment) and contact the Assistance Service.
PRODUCT SERIAL NUMBER. Where can I find it?
It is important that you to inform the Assistance Service of your product code and its serial number (a 16 character code which begins with the number 3); this can be found on the guarantee certificate or on the data plate located on the appliance.
It will help to avoid wasted journerys to technicians, thereby (and most significantly) saving the corresponding callout charges.
According to Waste of Electrical and Electronic Equipment (WEEE) directive, WEEE should be separately collected and treated. If at any time in future you need to dispose of this product please do NOT dispose of this product with household waste. Please send this product to WEEE collecting points where available.
22

I T
Forno a microonde
MANUALE D'USO
MODELLO: MIC440TX
Leggere attentamente queste istruzioni prima di utilizzare il forno a microonde e conservarle con cura.
Per ottenere prestazioni ottimali nel lungo termine, è indispensabile seguire le istruzioni contenute in questo documento.
CONSERVARE CON CURA QUESTE ISTRUZIONI
23

I T
PRECAUZIONI PER EVITARE LA POSSIBILE ESPOSIZIONE A UN'ENERGIA ECCESSIVA DEL MICROONDE
(a)Non utilizzare il forno a microonde quando lo sportello è aperto perché ciò potrebbe comportare il rischio di esposizione all'energia prodotta dal forno stesso, con il conseguente rischio di danni per la salute. Non rompere o manomettere gli interblocchi di sicurezza.
(b)Non collocare alcun oggetto tra il lato anteriore del forno e lo sportello e rimuovere sempre tutto lo sporco e i residui di soluzioni detergenti dalle superfici di tenuta.
(c)AVVERTENZA: se lo sportello è aperto o le tenute sono danneggiate, non utilizzare il forno a microonde e farlo riparare da una persona competente.
AGGIUNTA
La mancata pulizia del forno a microonde potrebbe deteriorare le sue superfici, ridurre la vita utile del forno stesso e dar luogo a situazioni pericolose.
Specifiche
Modello |
MIC440TX |
Tensione nominale |
230V~50Hz |
Potenza nominale in ingresso (microonde) |
1650 W |
Potenza nominale emessa (microonde) |
900 W |
Potenza nominale in ingresso (grill) |
1750 W (superiore)+600 W |
|
(inferiore) |
Potenza nominale emessa (cottura a |
1750 W |
convezione) |
|
Capacità del forno |
44 L |
Diametro del ripiano girevole |
360 mm |
Dimensioni esterne |
594 x 455 x 568 mm |
Peso netto |
Circa 41 kg |
24

I T
ISTRUZIONI IMPORTANTI PER LA SICUREZZA
AVVERTENZA |
Per limitare il rischio di scosse elettriche, lesioni |
|
personali o di un'esposizione a un'energia |
|
eccessiva del microonde, attenersi alle seguenti |
|
precauzioni di base durante l'uso del forno: |
1.Avvertenza: non riscaldare liquidi e altri alimenti in contenitori chiusi poiché potrebbero esplodere.
2.Avvertenza: la copertura che protegge dall'esposizione all'energia prodotta dal forno a microonde deve essere rimossa solo da persone competenti.
3.Avvertenza: non permettere ai bambini di usare il forno senza la supervisione di un adulto se non sono state fornite loro istruzioni adeguate in modo che sappiano come usarlo in modo sicuro e siano consapevoli dei possibili rischi risultanti da un uso improprio.
4.Avvertenza: in modalità Combi, l'uso del forno è consentito ai bambini solo sotto la supervisione di un adulto a causa delle temperature alte prodotte in questa modalità (solo per i modelli muniti di grill).
5.Utilizzare solo utensili compatibili con i forni a microonde.
6.Pulire regolarmente il forno e rimuovere tutti i depositi di cibo.
7.Leggere e attenersi a quanto indicato nella sezione "PRECAUZIONI PER EVITARE LA POSSIBILE ESPOSIZIONE A UN'ECCESSIVA ENERGIA DEL MICROONDE".
8.Durante il riscaldamento di alimenti contenuti in vaschette in plastica o carta, controllare il forno perché è possibile che i contenitori si incendino.
9.Se si nota la presenza di fumo, spegnere il forno o scollegarlo dall'alimentazione elettrica e chiudere lo sportello per impedire alle fiamme di propagarsi.
10.Non riscaldare eccessivamente gli alimenti.
11.Non utilizzare la cavità per conservare gli alimenti. Non conservare alimenti come pane, biscotti, ecc., all'interno del forno.
12.Rimuovere sempre i laccetti di chiusura e le impugnature in metallo dai sacchetti in carta o plastica prima di inserirli nel forno.
13.Installare e posizionare il forno solo in conformità a quanto indicato nelle istruzioni di installazione.
14.Non riscaldare uova racchiuse nel guscio o bollite per lunghi periodi di tempo nel microonde poiché potrebbero esplodere anche dopo il termine della cottura.
15.Utilizzare il forno solo per l'uso previsto e in conformità a quanto indicato in questo manuale. Non usare sostanze chimiche o vapori che potrebbero corrodere il forno.
Questo forno è espressamente progettato per il riscaldamento di alimenti. Non è indicato per essere usato per applicazioni industriali o di laboratorio.
16.Se il cavo di alimentazione è danneggiato, deve essere sostituito dal costruttore, da un rappresentante o da una persona con analoga qualifica per evitare danni.
17.Non conservare o utilizzare il forno in ambienti aperti.
18.Non utilizzare il forno in presenza di acqua, in cantine umide o vicino a piscine.
19.La temperatura delle superfici esterne potrebbe raggiungere valori molti alti quando il forno è in uso. Le superfici si riscaldano durante l'uso. Tenere il cavo di alimentazione lontano dalle superfici calde e non coprire nessuna delle aperture di ventilazione.
20.Non lasciare pendere il cavo di alimentazione dal bordo di un tavolo o banco.
21.La mancata pulizia regolare del forno potrebbe deteriorare le superfici, ridurre la vita utile del forno e causare situazioni pericolose.
22.Per evitare possibili ustioni, mescolare e agitare il contenuto di biberon e barattoli contenenti alimenti per neonati.
25

IT
23.Il riscaldamento di bibite con il forno a microonde potrebbe provocare un'ebollizione ritardata. Manipolare il contenitore con estrema cautela.
24.Questo apparecchio non deve essere utilizzata da persone (bambini inclusi) con ridotte capacità fisiche, sensoriali o mentali o senza esperienza e sufficiente conoscenza del suo utilizzo, a meno che ciò avvenga sotto la supervisione di una persona responsabile
della loro sicurezza o siano state date istruzioni relative al suo utilizzo.
25.Verificare sempre che i bambini non giochino con la piastra.
26.Le unità non sono progettate per essere comandate mediante l'utilizzo di un timer esterno o un telecomando dedicato.
27.AVVERTENZA: per evitare possibili scosse elettriche, verificare che l'unità sia spenta prima di sostituire la lampadina.
28.Le parti accessibili potrebbe riscaldarsi durante l'uso. Evitare che i bambini possano avvicinarsi. Non utilizzare sistemi di pulizia a vapore.
29.Non utilizzare detergenti aggressivi o raschietti in metallo appuntiti per pulire il vetro dello sportello perché potrebbero graffiare le superfici e scheggiare il vetro.
30.Il forno si riscalda durante l'uso. Fare attenzione a non toccare le resistenze all'interno del forno.
31.Utilizzare solo la sonda di temperatura consigliata per questo forno (per i modelli muniti di sonda di rilevamento della temperatura).
32.Posizionare la superficie posteriore contro il muro.
26
 Loading...