


TEMPORIS 12 / TEMPORIS 22
1. SETUP
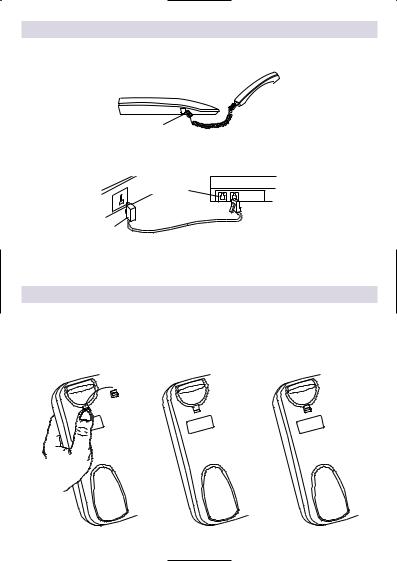
lPlug one end of the spiral cord into the handset plug (A), and the other end into the socket located on the left-hand side of the phone (B).
B  A
A
lPlug the telephone cord into the socket (C) situated on the back of the set and plug the other end (D) into the telephone wall socket.
E
 C
C
D
NOTE: The spare socket (E) enables a modem to be connected.
l Stick the emergency number label in the appropriate place.
2. WALL MOUNTING
To mount your telephone set on the wall, remove the wall mounting peg and put it back in reverse position as described below. Bore two 6mm-large holes, spaced 70 mm apart. Put two plugs in place, then, place in two screws (3.5 mm Ø and 25 mm long) without tightening them.
Place the cord in the slot situated underneath the set.
Wall mounted position |
Horizontal position |

FUNCTION KEYS
|
Stick the phone number |
Peg for wall mounting |
label there |
|
10 memories
Message waiting lamp
Memories and set
Loudspeaker
programming key
 Redial/Pause

 Mute key
Additional services access key
Loudspeaker
key *
Loudspeaker and ringer * sound level adjustment
* on TEMPORIS 22 only
 Loading...