


Wine cellar
Cave à vin de vieillissement
Cava para envejecimiento del vino
E24 WC 160 ES1
Use & Care Guide ................. |
GB |
Notice d´instructions ................. |
FR |
Manual de instrucciones ................. |
ES |
C...
825 12 52-00/5995421665
Thank you for choosing an Electrolux Wine Cellar !
Operating and Installation Instructions for your Electrolux Wine Cellar
Introduction
Thank you for choosing the Electrolux Wine Cellar. Please read the following instructions carefully before installing your new wine cellar. We trust you will be completely satisfied with your purchase.
The wine cellar must be installed and used according to these instructions in order for it to operate correctly and economically.
Electrical connections
Your winecellar operates on a single phase alternating current.(AC) Please check that the voltage shown on the serial plate corresponds to your power supply.
All wine cellars require a connection to an electrical power source. Improper hook-up can result in a safety hazard and potential damage to the product of contents! Proper installation, in accordance with the manufacturer´s specifications and all local codes, is the sole responsibility of the consumer. The manufacturer is not responsible for any installation expenses or damages incurred due to improper installation. If you are insure of your ability to safely connect electric power to the unit, consult a licensed and insured professional to perform all electrical work.
WARNING – THE WINE CELLAR
MUST BE GROUNDED.
Electrical leads must be routed and secured so that they cannot come into contact with hot or sharp parts of the wine cellar.
Accessories
Please check that the following accessories are attached to the wine Cellar or in the separate cardboard box for accessories which is placed inside the wine cellar.
At the back:
1. Distance bar (to ensure distance to wall behind)
Accessories box:
1.Instruction manual
2.Handle + Socket head screwdriver ( 2 mm )
3.Drip tray
4.Shelf support
5.Storage shelf
6.Wooden bar (Installation see page 19)
Necessary additional tools not incuded
1.Screwdriver (star quad )
2.Adjustable wrench
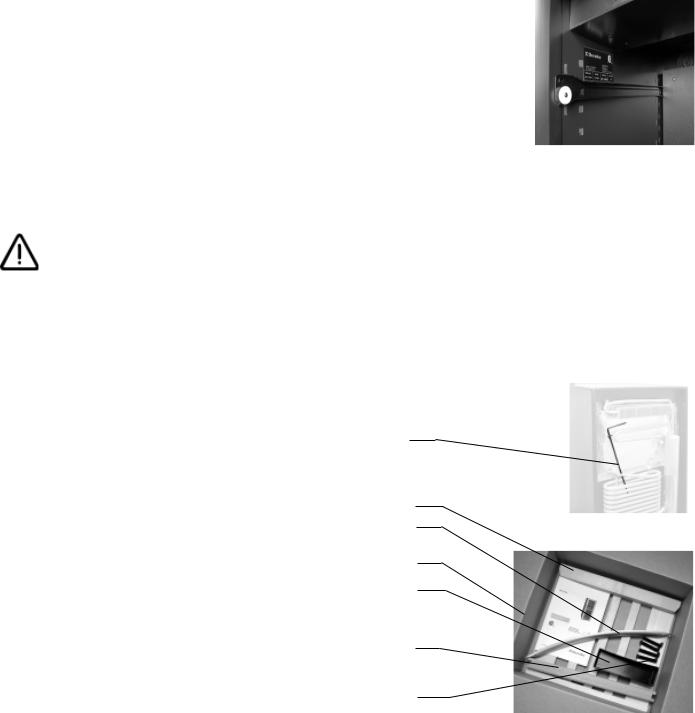
Data plate
Check the data plate, inside the wine cellar at the top left, to ensure you have received the right model. The data plate shows details that you will need to quote if you have to contact service personnel. It is a good idea to make a note of them here.
Model Number |
……………............................ |
Serial number |
………………......................... |
Purchase date |
.............................................. |
Shipping damage
Inspect the wine cellar for shipping damage. You must report any damage to the company responsible for the delivery within the legal or stated time for this type of product. If there is no such established report time, the damage must be reported within seven days of delivery.
Questions ?
For toll-free telephone support in the U.S. and Canada: 1-877-4ELECTROLUX ( 1-877-435-3287 )
For online support and internet product information: www.electroluxusa.com
1
5
2
1
3
6
4
3

Installation
WARNING This product is intended for indoor use only. Installation or use of this product outdoors, or in any area exposed to the elements , may cause serious injury, product damage, or property damage.
Please read all instructions completely before attempting to install or operate the unit..
For best performance, air needs to circulate freely over the cooling unit behind the wine cellar. The freestanding design of the cellar means that it should stand at least 1” (25 mm) from the rear and side walls. Allow a clearance of at least 4” (100 mm) above the wine cellar.
Adjust the feet of the wine cellar so that it is level from back-to-front and side-to side. Use a leveling tool if necessary. FIG.1
1.Remove the shipping pallet on which your wine cellar rests.
2.IMPORTANT ! Adjust the feet to allow a 1 3/16” (30mm) clearance under the wine cellar
3.Attach the distance bar using the two screws at the top back on each side of the cellar. The rod ensures the correct distance to the wall behind. FIG 2.
FIG. 1 |
Distance bar |
1 3/16” |
(30 mm) |
Wall |
Distance bar |
1” |
(25mm) |
Rear |
1” |
(25mm) |
Wall |
4.For optimum performance, please place your wine cellar far away from any source of heat (radiator,range or intence sunlight) .
Please note that it must be possible to open the wine cellar door at least 90° to allow the sliding shelves to be pulled out.
5. Attach the driptray on the back as shown in
FIG 3a , 3b , 3c. . The screws are already attached at the back.
FIG 3a |
FIG 3b |
FIG 2
FIG 3c
4
 Loading...