


Color Television
OWNER'S MANUAL
MODEL : CP-29Q12P
Please read this manual carefully before operating your set. Retain it for future reference.
Record model number and serial number of the set.
See the label attached on the back cover and quote this information to your dealer when you require service.
Internet Home Page : http://www.lge.co.kr
P/N : 3828VA0187B (MC996A)

Safety Precautions
WARNING : TO REDUCE THE RISK OF FIRE OR ELECTRIC SHOCK, DO NOT EXPOSE THIS PRODUCT TO RAIN OR MOISTURE.
CAUTION : TO REDUCE THE RISK OF ELECTRIC SHOCK, DO NOT REMOVE COVER(OR BACK). NO USER-SERVICEABLE PARTS IN SIDE. REFER SERVICING TO QUALIFIED SERVICE PERSONNEL.
Cleaning
Unplug this television receiver from the wall outlet before cleaning. Do not use liquid cleaners or aerosol cleaners. Use a damp cloth for cleaning.
Do not use attachments not recommended by the television receiver manufacturer as they may cause hazards.
Power Supply
This television receiver should be operated only from the type of power source indicated on the marking label. If you are not sure of the type of power supplied to your home, consult your television dealer or local power company.
Installation
Do not use this television receiver near water, for example, near a bathtub, washbowl, kitchen sink, or laundry tub, in a wet basement, or near a swimming pool, etc.
Do not place this television receiver on an unstable cart, stand, or table. The television receiver may fall, causing serious injury to a child or an adult, and serious damage to the appliance. Use only with a cart or stand recommended by the manufacturer, or sold with the television receiver. Wall or shelf mounting should follow the manufacturer's instructions and should use a mounting kit approved by the manufacturer.
Slots and openings in the cabinet and the back or bottom are provided for ventilation, and to insure reliable operation of the television receiver, and to
protect it from overheating. These openings must not be blocked or covered. The openings should never be blocked by placing the television receiver on a bed, sofa, rug, or other similar surface. This television receiver should not be placed in a builtin installation such as a bookcase unless proper ventilation is provided.
It is recommended not to operate this unit near speakers or big metallic furnitures in order to keep their magnetism from disturbing colors purity (uniformity) on the screen.
Use
Do not allow anything to rest on the power cord. Do not locate this television receiver where the cord will be abused by persons walking on it.
Do not overload wall outlets and extension cords as this can result in fire or electric shock.
Never push objects of any kind into this television receiver through cabinet slots as they may touch dangerous voltage points or short out parts that could result in a fire or electric shock.
Never spill liquid of any kind on the television receiver.
Service
Do not attempt to service this television yourself as opening or removing covers may expose you to dangerous voltage or other hazards. Refer all servicing to qualified personnel.
Writing Model And Serial Numbers
The serial number and model number are found on the back of this unit. The serial number is unique to this unit. You should record requested information here and retain this guide as a permanent record of your purchase. Please retain your purchase receipt as your proof of purchase.
Date of Purchase
Dealer Purchased from
Dealer Address
Dealer Phone No.
Model No.
Serial No.
2

CONTENTS
Description of controls ................................................................................................. |
4 ~6 |
Basic TV operation ............................................................................................................. |
7 |
Turning on/off the TV ..................................................................................................... |
7 |
Selecting the on screen language ................................................................................. |
7 |
Memorizing Channels .................................................................................................... |
8 |
Memorizing the Channels by AUTO PROGRAM .......................................................... |
8 |
Memorizing the Channels by MANUAL PROGRAM ..................................................... |
9 |
Selecting the Channel ................................................................................................... |
9 |
Adjusting the Volume ..................................................................................................... |
9 |
Various function ............................................................................................................... |
10 |
Setting the Clock ......................................................................................................... |
10 |
Setting the OFF TIMER ............................................................................................... |
10 |
Setting the ON TIMER ................................................................................................. |
10 |
Setting the Sleep Time ................................................................................................ |
11 |
Auto Off ....................................................................................................................... |
11 |
Key Lock ...................................................................................................................... |
11 |
Auto Demonstration ..................................................................................................... |
12 |
Operating the degauss ................................................................................................ |
12 |
Adjusting the Fine Tuning ............................................................................................ |
12 |
Favorite channel memory ............................................................................................. |
13 |
Zoom Picture ................................................................................................................ |
13 |
Picture control .................................................................................................................. |
14 |
Enjoying the Eye Function ........................................................................................... |
14 |
Auto Picture Control .................................................................................................... |
14 |
YNR (Luminance Noise Reduction) ............................................................................. |
14 |
Adjusting the Picture .................................................................................................... |
14 |
Sound control ................................................................................................................... |
15 |
Enjoying the Stereo/SAP Broadcast ............................................................................ |
15 |
AVL (Auto Volume Leveler) ......................................................................................... |
15 |
Auto Sound Control ..................................................................................................... |
16 |
Adjusting the equalizer (USER mode in ASC) ............................................................. |
16 |
Adjusting the balance .................................................................................................. |
16 |
Closed caption function ................................................................................................... |
17 |
Using Closed Captions ................................................................................................ |
17 |
Operating the Caption and Text ................................................................................... |
18 |
PIP function ....................................................................................................................... |
19 |
Watching the PIP (Picture in Picture) .......................................................................... |
19 |
Selecting the input signal (in PIP and Double window mode) ...................................... |
19 |
Moving the Sub Picture (in PIP mode) ........................................................................ |
20 |
Swapping Screens........................................................................................................ |
20 |
Still Picture.................................................................................................................... |
20 |
Channel Search............................................................................................................ |
20 |
Adjusting the Volume (in PIP and Double window mode) ........................................... |
21 |
Antenna Connections ....................................................................................................... |
22 |
Connecting an Outdoor Antenna ................................................................................. |
22 |
Connecting a CATV Cable .......................................................................................... |
22 |
Connection of external equipment .................................................................................. |
23 |
Connecting AUDIO/VIDEO IN Jacks ........................................................................... |
23 |
Connecting the S-VHS VCR ........................................................................................ |
24 |
Recording Onto VCR ................................................................................................... |
24 |
Recording a program from connected other equipment .............................................. |
25 |
Connecting the COMPONENT INPUT jacks ............................................................... |
25 |
Troubleshooting check list ............................................................................................... |
26 |
3
Description of controls
1
4
5
6
7
8
9
10
11
12
|
|
POWER |
|
|
EYE |
|
|
|
|
|
|
|
TV/VIDEO |
|
MUTE |
|
|
|
|
MENU |
|
|
|
|
|
|
|
CH |
|
ENTER |
|
|
|
|
|
VOL |
|
VOL |
|
|
|
|
CH |
|
APC |
DASP |
AVL |
CAPTION |
SLEEP |
MTS |
REVIEW |
FCR |
AUTO |
MEMORY |
|
|
|
PROGRAM |
/ERASE |
1 |
2 |
3 |
4 |
5 |
6 |
7 |
8 |
9 |
0 |
ZOOM IN |
PIP/DW |
SWAP |
POSITION |
CH+ |
ZOOM OUT |
PIP MENU |
STILL |
CH.SEARCH |
CH- |
|
POWER |
REW |
PLAY |
FF |
|
|
STILL |
STOP |
REC |
This is a simplified representation of front panel.
STAND BY  TV/VIDEO MENU VOL VOL
 CH CH
CH CH  ON/OFF


1 |
|
2 |
|
13 |
|
6 |
|
7 |
3 |
22 |
|
|
|
|
|
|
|
|
|
|
|
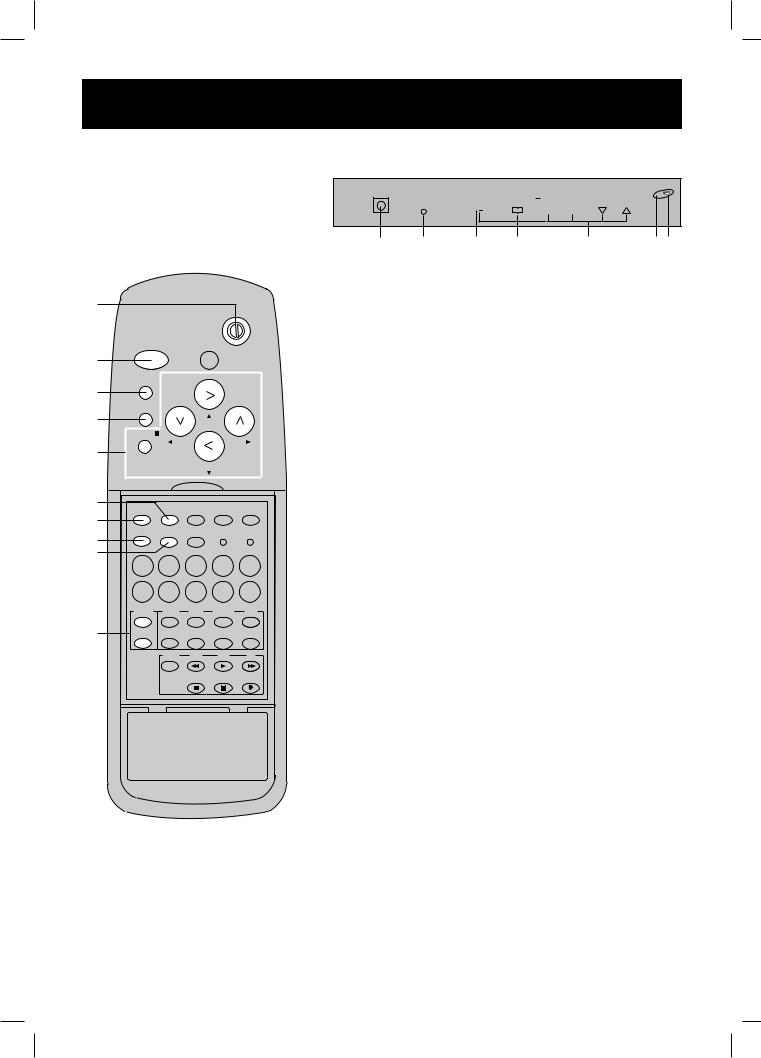
1.POWER BUTTON
Refer to "Turning on/off the TV".
2.STAND BY INDICATOR
Illuminates green when the TV is in standby mode.
3.REMOTE CONTROL SENSOR
4.EYE BUTTON
To switch on or off eye picture.
5.MUTE BUTTON
To mute the sound. Again to restore the muted sound.
6.MENU BUTTON
To display on screen menus one by one.
7.CHANNEL UP/DOWN (D/E) BUTTONS
•To select the desired channel.
•To select the desired menu item when menu is displayed on the screen.
VOLUME UP/DOWN ( G/F) BUTTONS
•To increase or decrease volume level.
•To enter or adjust the selected menu when menu is displayed on the screen.
ENTER (n) BUTTON
•To exit from the displayed menu.
•To memorize the adjusted menu.
•To recall the current TV mode (by remote control only).
8.DASP BUTTON
To select the sound appropriate to your viewing program character ; NEWS, CINEMA, MUSIC or USER.
9.APC (Auto Picture Control) BUTTON
To adjust the factory preset pictures corresponding to the lighting around.
10.MTS BUTTON
To listen to the MTS sound ; MONO, STEREO or SAP.
11.REVIEW BUTTON
To return to the previous channel.
12.ZOOM IN/OUT BUTTON
To select the desired picture format (NORMAL, ZOOM IN or ZOOM OUT).
4
Description of controls
|
|
POWER |
|
|
EYE |
|
|
|
|
|
|
|
TV/VIDEO |
|
MUTE |
|
|
|
|
MENU |
|
|
|
|
|
|
|
CH |
|
ENTER |
|
|
|
|
|
VOL |
|
VOL |
|
|
|
|
CH |
|
APC |
DASP |
AVL |
CAPTION |
SLEEP |
MTS |
REVIEW |
FCR |
AUTO |
MEMORY |
|
|
|
PROGRAM |
/ERASE |
1 |
2 |
3 |
4 |
5 |
6 |
7 |
8 |
9 |
0 |
ZOOM IN |
PIP/DW |
SWAP |
POSITION |
CH+ |
ZOOM OUT |
PIP MENU |
STILL |
CH.SEARCH |
CH- |
|
POWER |
REW |
PLAY |
FF |
|
|
STILL |
STOP |
REC |
13. TV/VIDEO BUTTON
|
To select TV or VIDEO mode. |
|
|
14. AVL (Auto Volume Leveler) BUTTON |
|
|
To keep on equal volume level of each channels. |
|
|
15. CAPTION BUTTON |
|
|
To select the CAPTION mode. |
|
|
Refer to "Closed caption function". |
|
|
16. SLEEP BUTTON |
|
|
To set the desired sleep time. |
|
|
17. MEMORY/ERASE BUTTON |
|
13 |
To memorize or erase the desired channel. |
|
|
||
|
18. AUTO PROGRAM BUTTON |
|
|
To memorize channels by AUTO PROGRAM. |
|
|
19. FCR ( Favorite Channel Review ) BUTTON |
|
|
To select the favorite channel. |
|
14 |
Refer to "Favorite channel memory". |
|
20. NUMBER BUTTONS |
||
15 |
||
To select the desired channel directly. |
||
16 |
||
|
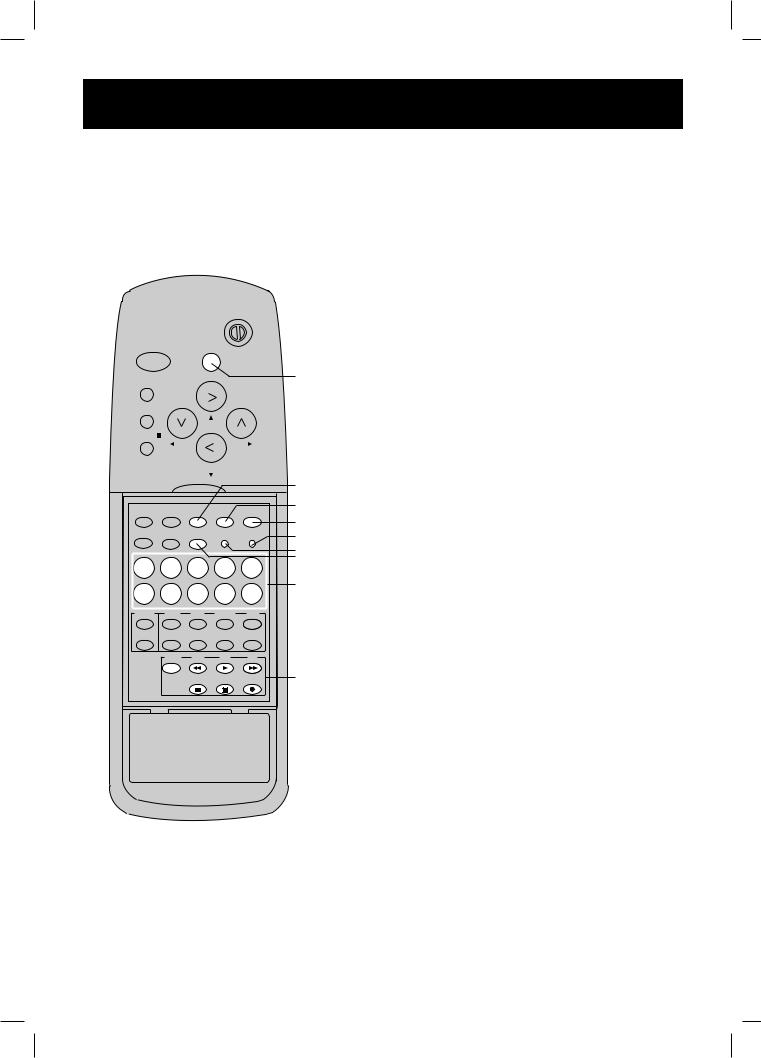
1721. VCR BUTTONS
18To control LG video cassette recorder.
22. EYE SENSOR
20
21
5

Description of controls
|
|
|
|
|
23. PIP (Picture in Picture) BUTTONS |
|
|
|
|
|
|
PIP/DW BUTTON |
|
|
|
|
|
|
To select the PIP mode or double window mode. |
|
|
|
|
|
|
SWAP BUTTON |
|
|
|
|
|
|
To exchange the main picture and sub picture. |
|
|
|
|
|
|
POSITION BUTTON |
|
|
|
|
|
|
To move the sub picture to another corner of the main |
|
|
|
|
|
|
picture. |
|
|
|
POWER |
|
PIP MENU BUTTON |
||
EYE |
|
|
|
|
||
|
|
|
TV/VIDEO |
To display various menu in the PIP mode or double |
||
MUTE |
|
|
|
|
window mode. |
|
|
|
|
|
|
||
MENU |
|
|
|
|
STILL BUTTON |
|
|
|
|
CH |
|
To stand still the picture in sub picture. |
|
ENTER |
|
|
|
|
CH. SEARCH BUTTON |
|
|
VOL |
|
VOL |
|||
|
|
|
CH |
|
To search one by one the pictures of all the programmed |
|
|
|
|
|
channels through the sub picture while the main picture |
||
|
|
|
|
|
||
|
|
|
|
|
remains as a current channel. |
|
APC |
DASP |
AVL |
CAPTION SLEEP |
CH +/- BUTTONS |
||
|
|
|
|
|
||
MTS |
REVIEW |
FCR |
PROGRAM |
/ERASE |
To select the desired channel of the sub picture. |
|
AUTO |
MEMORY |
|
||||
1 |
2 |
3 |
4 |
5 |
Fitting Batteries in the Remote Control Unit |
|
6 |
7 |
8 |
9 |
0 |
The remote control is powered by batteries. This requires AA |
|
ZOOM IN |
PIP/DW |
SWAP |
POSITION |
CH+ |
type batteries for operation. To ensure consistent operation, |
|
change the batteries about once a year. |
||||||
|
|
|
|
|
||
ZOOM OUT |
PIP MENU |
STILL |
CH.SEARCH |
CH- |
23 |
|
|
POWER |
REW |
PLAY |
FF |
1. Remove the battery compart- |
|
|
|
|
|
|
||
|
|
STILL |
STOP |
REC |
ment cover by sliding it after |
|
|
|
|
|
|
pushing down slightly in the |
|
|
|
|
|
|
arrowhead direction. |
|
|
|
|
2. Insert new |
batteries as |
|
3 |
9 |
indicated by |
the polarity |
|
|
4 |
|
|
|
2 |
8 |
markings (+ and -) inside the |
|
|
5 |
7 |
||
|
1 |
|
|
|
0 |
6 |
|
|
|
|
|
|
compartment. |
|
|
|
|
3. Replace the battery compart- |
|
|
2 |
8 |
ment cover. |
|
|
|
4 |
|
|
|
3 |
9 |
|
|
|
1 |
7 |
|
|
0 |
6 |
|
|
|
|
5 |
|
|
|
6
Basic TV operation
Before operating your TV, make sure the following instructions have been completed.
•Your TV has been connected to an antenna or a cable system.
•Your TV has been plugged in a power outlet.
Turning on/off the TV
To turn on the TV, press any button on the set or remote control.
A channel number will be displayed on the screen. The on-screen display will disappear after a few seconds.
To turn the TV off, press the POWER button.
Selecting the on screen language
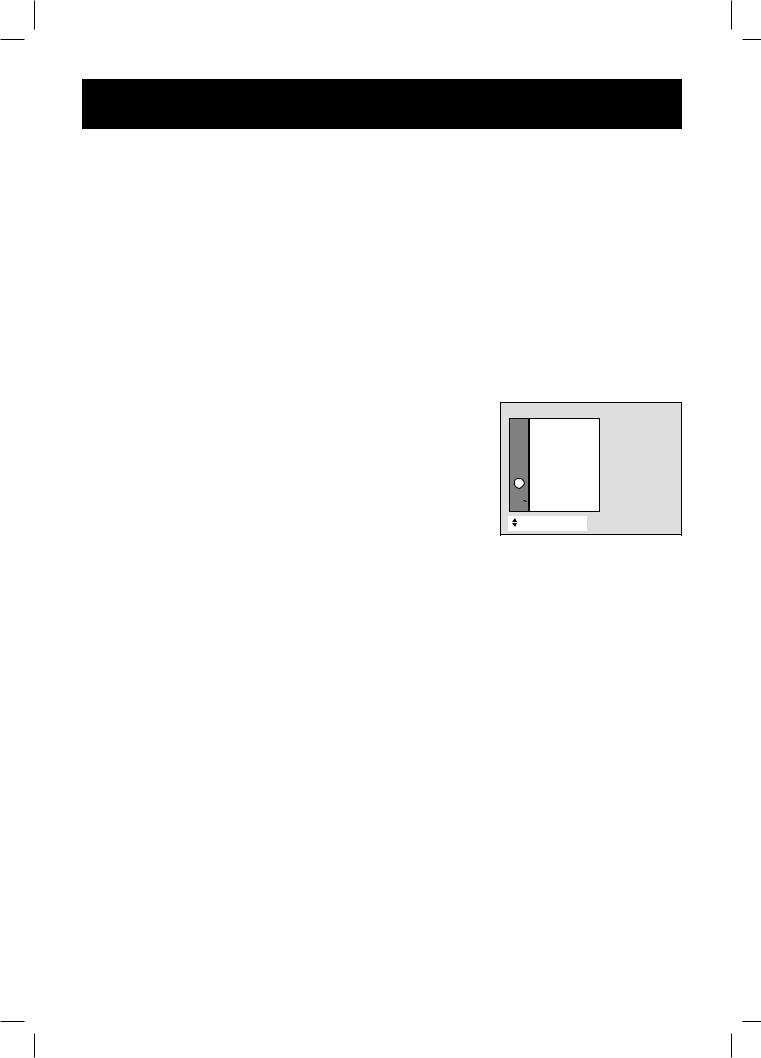
1.Press the MENU button until the menu is displayed as shown right.
2.Press the G and then D/E button to select LANGUAGE.
3.Press the G button to enter the language menu.
4.Press the D/E button to select the desired language.
5.Press the ENTER (n) button to exit.
From this point on, the on-screen display will be presented in the language of your choice.
SPECIAL
CH. LANGUAGE++++{
 CAPTION+++++{ KEY+LOCK++++{
 AUTO+OFF++++{ DEGAUSS+++++{
 PIP®DW++++++{
  AUTODEMO++++{
+MOVE+{NEXT
7

Basic TV operation
Memorizing Channels
This is the function to memorize all the active channels in your area before you can use the TV. There are two ways of memorizing channels. You can use either.
One is called AUTO PROGRAM and the other is called MANUAL PROGRAM.
In AUTO PROGRAM the TV will memorize the channels in ascending order. If there are additional channels you want to add or delete, you can manually add or delete those channels.
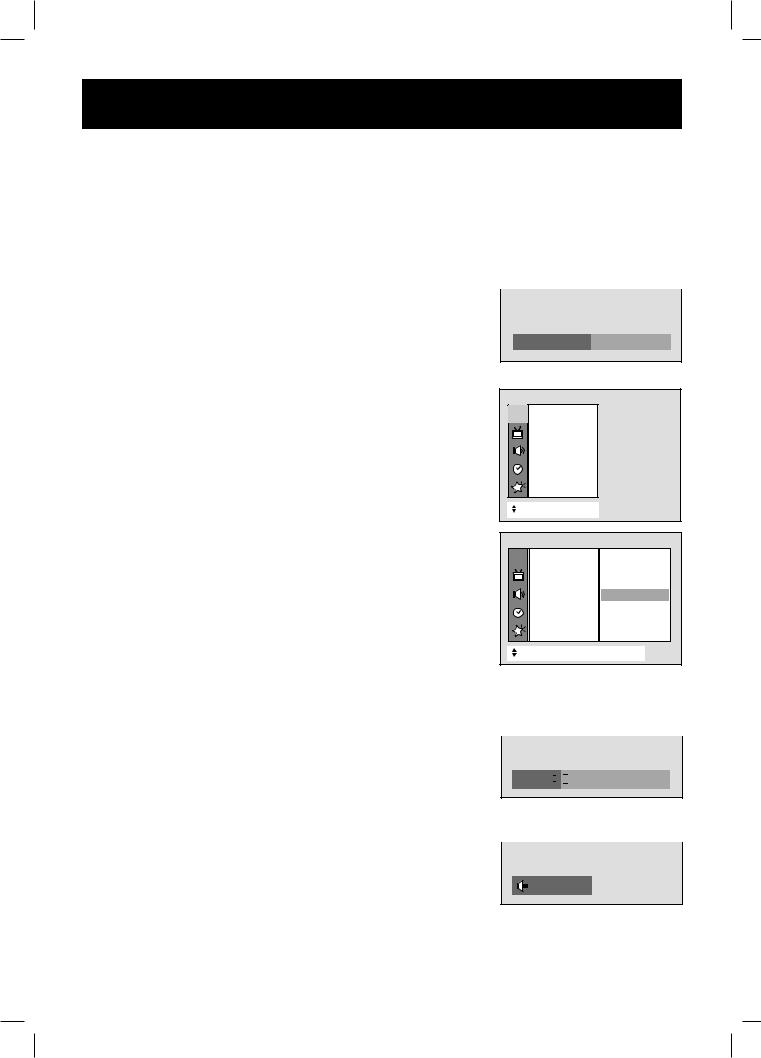
Memorizing the Channels by AUTO PROGRAM
AUTO PROGRAM searches and memorizes all the active channels in your area then you can select the desired channel with the D / E buttons.
Using the AUTO PROGRAM button
You can conveniently perform AUTO PROGRAM using the AUTO PROGRAM button on the remote control.
1.Press the AUTO PROGRAM button.
2.Press the D/E button to select TURBO or NORMAL.
3.Press the G or AUTO PROGRAM button. The AUTO PROGRAM starts now.
If you want to stop auto programming, press the ENTER (n) button. Only the channels searched up to that time are memorized.
TURBO AUTO PROGRAM is further faster than NORMAL AUTO PROGRAM.
Note : If the programmed signal has poor quality or the certain CH is not memorized, memorize again in the NORMAL AUTO PROGRAM.
Using the MENU button
1.Press the MENU button until the menu is displayed as shown right.
2.Press the D/ E button to select AUTO PROGRAM.
3.Press the G button to enter the AUTO PROGRAM mode.
4.Press the D/ E button to select TURBO or NORMAL.
5.Press the G button. The AUTO PROGRAM starts now.
AUTO
++CH AUTO+PROGRAM OTURBO 
AUTO
++CH AUTO+PROGRAM OOOOTVO19


 O5%
O5%
ÅSTOP
CHANNEL
CH.
INPUT+++++++{
AUTO+PROGRAM{


 MANUAL+PROG.{
FINE++++++++{
FAVORITE+CH.{
+MOVE+{+NEXT |
CHANNEL |
CH. |
INPUT+++++++{ |
AUTO+PROGRAM{ TURBO++++++{ |
MANUAL+PROG.{ NORMAL+++++{ |
FINE++++++++{ |
FAVORITE+CH.{ |
+MOVE+{+NEXT+}BACK |
8
Basic TV operation
Memorizing the Channels by MANUAL PROGRAM
Using the MEMORY/ERASE button
You can conveniently perform MANUAL PROGRAM using the MEMORY / ERASE button on the remote control.
1.Press the D/ Eor NUMBER buttons to select the channel number you want to memorize or erase.
2.Press the MEMORY/ERASE button.
The on screen display appears as shown right.
3.Press the VOL F / G or MEMORY/ERASE button to select
MEMORY or ERASE.
4.Press the ENTER (n) button to exit.
Using the MENU button
1.Press the MENU button until the menu is displayed as shown right.
2.Press the G and then D / E button to select the MANUAL PROG..
3.Press the G button to enter the MANUAL PROG. mode.
4.Press the D/ Eor NUMBER buttons to select the channel number you want to memorize or erase.
5.Press the D/ Ebutton to select MEMORY or ERASE.
6.Repeat process 3 to 4 to memorize or erase another channels.
7.Press the ENTER (n) button to exit.
Selecting the Channel
Press the D/ E button to conveniently select the upper or lower channel then the channel being viewed, or NUMBER buttons to directly select the desired channel.
MANU |
MANUAL |
TV2122ERASE2}{ |
++CH |
||
|
CHANNEL |
|
CH. |
|
|
|
INPUT+++++++{ |
|
|
AUTO+PROGRAM{ |
|
|
MANUAL+PROG.{ |
|
|
FINE++++++++{ |
|
|
FAVORITE+CH.{ |
|
+MOVE+{+NEXT |
|
CHANNEL |
|
CH. |
|
INPUT+++++++{ |
|
AUTO+PROGRAM{ |
|
MANUAL+PROG.{ 222TV213+ |
|
FINE++++++++{ |
MEMORY |
FAVORITE+CH.{ |
|
+MOVE+}{+ADJUST+ÅBACK |
|
Adjusting the Volume
Press the G button to increase the volume level or F button to decrease the volume level.
To mute the sound, press the MUTE button.
The word MUTE is displayed (It's not displayed in the Caption mode). It's convenient when you get the telephone calls.
To restore the muted sound, press the MUTE button again or VOL F/ G button.
VOLUME 


 5
5
EEEMUTE
9
 Loading...