

Page 1

YA MAH A
PORTHTOnE
Owner’s Guide
Spielanleitung
Mode d’emplof
Manual del Propietario
YAMAHA
Page 2

Congratulations'
Herzlichen Glück
wunsch, Sie haben gut
gewählt!
Félicitations!
¡FELICIDADES!
You are the proud owner of a Yannaha
PortaTone. Your PortaTone is a highquality musical instrument that incor
porates advanced Yamaha digital
technology and many versatile
features. In order to obtain maximum
performance and enjoyment from your
PortaTone, we urge you to read this
Owner’s Guide thoroughly while trying
out the various features described.
Keep the Owner’s Guide in a safe
place for later reference.
Contents
Before You Begin..................................1
1. Nomenclature ..................................2
2. Playing Back the Demonstration
Music
.............................................
3
3. Using the Voice Bank & Rhythm
Controls (Selecting Voices and
Applying Effects/Using the Rhythm
Section) ..........................................4
4. Adding Accompaniment
(Single-finger Accompaniment/
Fingered Accompaniment/Auto
Chord Accompaniment/Auto Bass
Accompaniment)
...........................
8
5. Using the Real-time Melody
Memory .......................................12
6. The Rear-panel Jacks
7. Optional Accessories
8. Taking Care of Your PortaTone
...................
....................
....
14
15
16
9. Specifications ...............................16
Sie sind nun der stolze Besitzer eines
Yamaha-PortaTone. Das PortaTone ist
ein hochwertiges Musikinstrument, das
auf der Yamaha-Digitaltechnik basiert
und eine vielseitige Funktionspalette
bietet. Für optimales Leistungsverhalten
des Geräts und damit größtmögliches
Spielvergnügen empfiehlt sich eine
gründliche Lektüre dieser Bedienungsan
leitung bei gleichzeitigem Ausprobieren
der verschiedenen Gerätefunktionen.
Bewahren Sie die Bedienungsanleitung
bitte gut auf, damit Sie sie jederzeit
zum Nachschlagen parat haben.
INHALTSVERZEICHNIS
Vor Inbetriebnahme des Geräts
1. Bezeichnung der Bedienteile/
Geräteaufschriften
2. Wiedergabe des Demostücks
3. Verwendung von Stimmenbank und
Rhythmuswahltasten (Wahl von Stimmen
und Auslösen von Effekten/Verwendung
des Rhythmusteils)
4. Hinzufügen von Begleitung
(Einfinger-Begleitung/Gespielte
Begleitung/Auto-Akkordbegleitung/
Auto-Baßbegleitung)
5. Verwendung des EchtzeitMelodiespeichers
6. Anschlußbuchsen an der Geräterück
seite
7. Sonderzubehör
8. Vorsichtsmaßnahmen
9. Technische Daten
......................
............
............
..............
...............
..........
............
......
... .
...........
3
10
12
15
23
Vous voici à présent le fier proprié
taire d’un PortaTone de Yamaha.
Votre PortaTone est un instrument
de musique de haute qualité qui
incorpore la technologie numérique
de pointe de Yamaha, ainsi que de
nombreuses fonctions pratiques. Afin
de tirer le meilleur parti de votre
PortaTone, nous vous recommandons
de lire attentivement oe mode
d’emploi tout en essayant ses diver
ses fonctions décrites. En outre,
rangez ce mode d’emploi dans un
endroit sûr, afin de vous y référer
plus tard.
Table des matières
1
Préparatifs ...........................................l
1. Nomenclature
2
2. Musique de démonstration
...............................
3. Utilisation de la banque de voix et des
réglages du rythme (Sélection des voix
et application des effets/Utilisation
de la section du rythme) ................4
4
4. Addition d’un accompagnement
(Accompagnement à un seul doigt/
Accompagnement à plusieurs doigts/
6
Accompagnement d’accords automatique/Accompagnement de basses
automatique) .................................8
7
5. Utilisation de la mémoire musicale
en temps réel ...............................12
6. Prises du panneau arrière
7. Accessoires en option
8. Entretien du PortaTone
............
..................
...............
9. Spécifications ...............................16
...........
Puede estar orgulloso de ser el propietario
de un PortaTone Yamaha. Su PortaTone
es un instrumento musical de alta calidad
que incorpora la avanzada tecnología
digital de Yamaha y muchas y versátiles
características. Con el fin de obtener
un máximo rendimiento y disfrute de
su PortaTone, le sugerimos que lea esta
Guía del propietario al mismo tiempo
que prueba las diferentes características
descritas. Mantenga esta Guía del pro
pietario en un lugar seguro para su utili
zación posterior.
Indice
Antes de empezar............................................ 1
1. Nomenclatura
2
2. Interpretación de la música de
3
14
15
16
demostración ............................................ 3
3. Utilización del banco de voces y de los
controles de ritmo (Selección de voces
y aplicación de efectos/Utilización de
la sección de ritmos)
4. Añadiendo acompañamiento
(Acompañamiento con un dedo/Acompañamiento con varios dedos/Acompañamiento automáticos de acordes/
Acompañamiento automático de
bajo) ..........................................................8
5. Utilización de la memoria de melodías
en tiempo real ......................................... 12
6. Tomas del panel posterior ...................... 14
7. Accesorios opcionales
8. Cuidados de su PortaTone
9. Especificaciones
............................................
.................................
...........................
....................................
.....................
2
4
15
16
16
Page 3

Before You Begin
Vor Inbetriebnahme des Geräts
Préparatifs
Antes de empezar
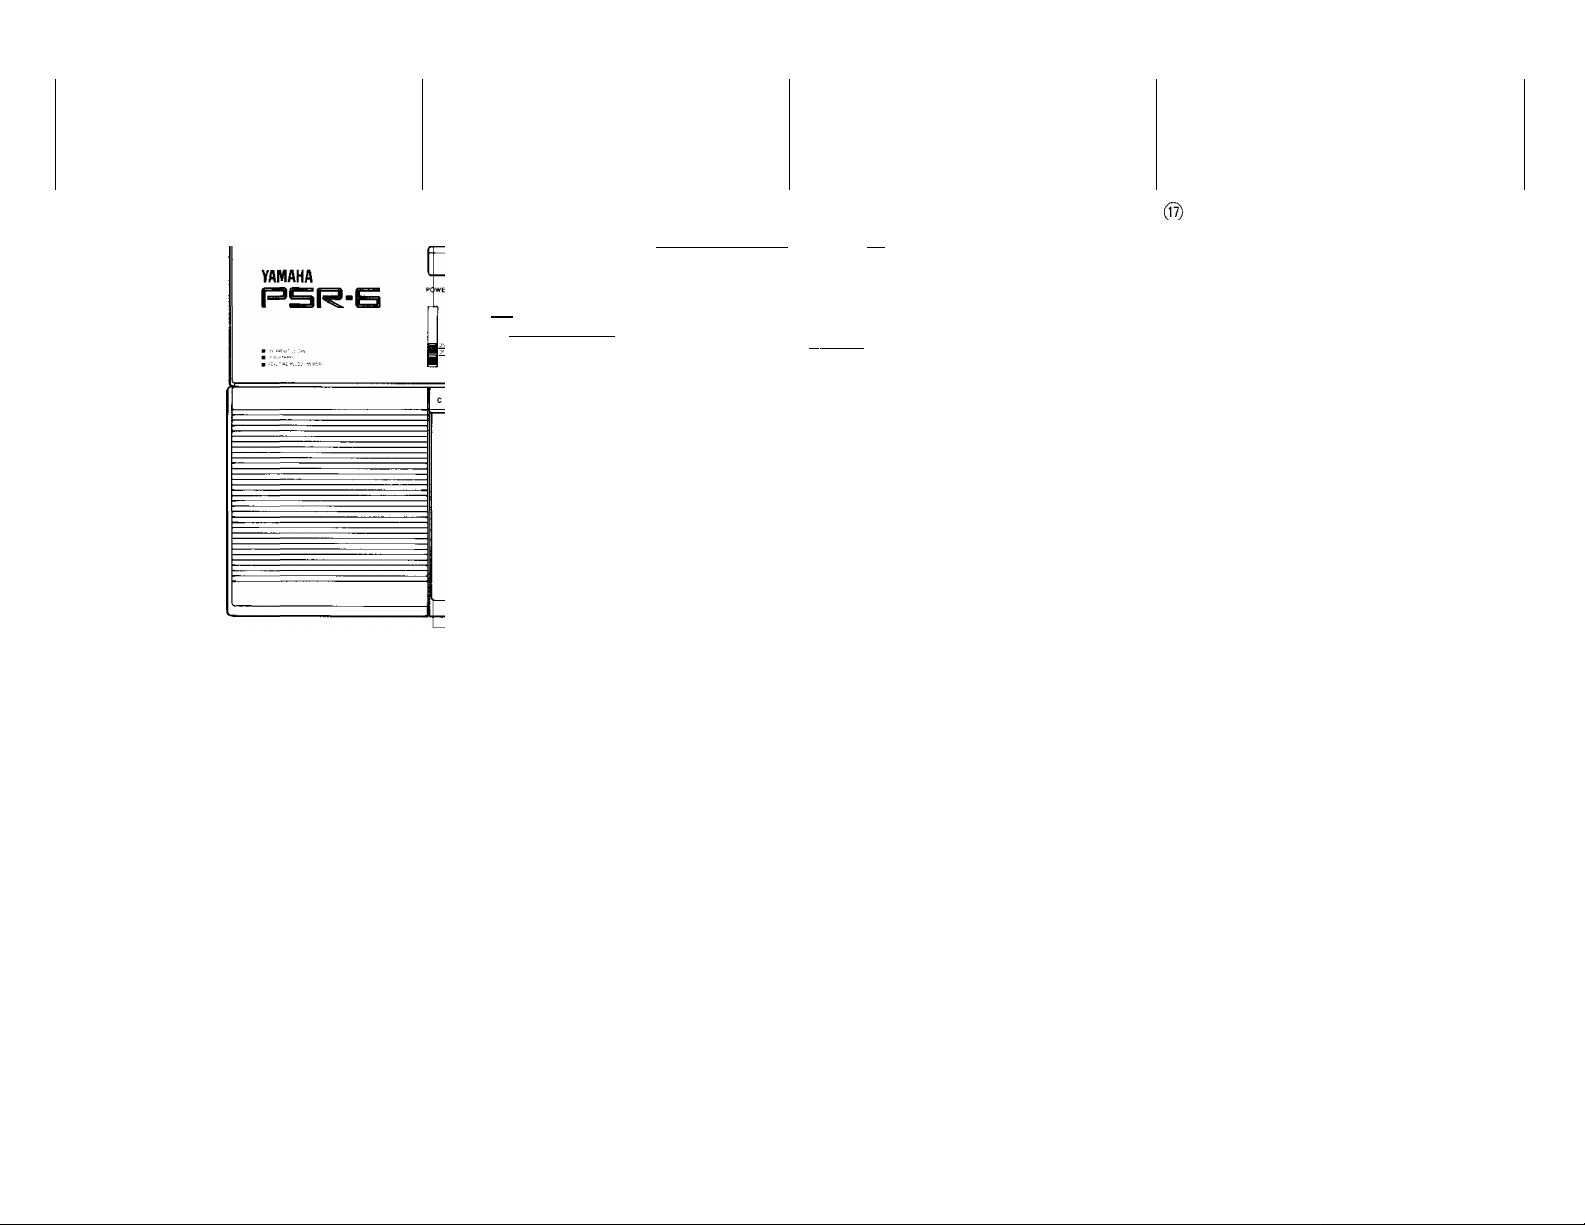
Your PSR-6 will run either from batteries
or an optional power adapter. Follow the
instructions below according to the power
source you intend to use.
Using Batteries
Six 1.5V SUM-1, “D” size, R-20 or equivalent
alkaline batteries {sold separately) must
first be installed in the PSR-6 battery
compartment.
1. Open the battery compartment cover
located in the center of the instrument’s
bottom panel.
2. Insert the six batteries, being careful
to follow the polarity markings on the
inside of the compartment.
3. Replace the compartment cover,
making sure that it locks firmly in place.
Caution:
1. When the batteries run down, replace them
with a complete set of six new batteries.
NEVER mix old and new batteries.
2. To prevent possible damage due to battery
leakage, remove the batteries from the
instrument if it is not to be used for an
extended period of time.
Using an Optional Power Adaptor
For AC Mains Power
Use ONLY a Yamaha PA-1, PA-4 or PA-40 AC
Adaptor to power your instrument from the AC
mains. Refer to “Rear-panel Jacks” on page
14 for more details.
For Car Battery Power
The Yamaha CA-1 Car Battery Adaptor plugs
into your car cigarette lighter socket, providing
power to your instrument from the car battery.
Refer to “Rear-panel Jacks” on page 14 for
more details.
fiemoife the Protective Film
Before using your instrument, please remove the protective
film covering the VOICE NO.H'EMPO LED display.
Das PSR-6 läßt sich mit Batterien oder einem
als Zubehör erhältlichen Adapter betreiben.
Beachten Sie die folgenden Anweisungen je
nach der verwendeten Stromquelle.
Batteriebetrieb
Zunächst sind sechs 1,5-V-Monozellen oder
entsprechende Alkali-Batterien (nicht mitgelie
fert) in das Batteriefach des PSR-6 einzulegen.
1. Batteriefachdeckel in der Mitte der unteren
Abdeckung des Instruments abnehmen.
2. Die sechs Batterien richtig gepolt einsetzen
(Batteriefachmarkierungen beachten).
3. Batteriefachdeckel wieder aufsetzen und
darauf achten, daß er fest einrastet.
И H tf H tf
Vorsicht:
1. Erschöpfte Batterien stets als Satz gegen
neue austauschen und KEINESFALLS ver
brauchte und frische Batterien gleichzeitig
verwenden.
2. Bei längerem Nichtgebrauch des Instru
ments die Batterien herausnehmen, damit
nicht durch eventuell auslaufenden Elektro
lyt Schäden entstehen.
Adapterbetrieb
Stromversorgung über Netzadapter
Zur Stromversorgung über das öffentliche Netz
dürfen nur die Yamaha-Netzadapter PA-1 oder
PA-4 verwendet werden. Weitere Einzelheiten hierzu
siehe Seite 14 in Abschnitt “Anschlußbuchsen an
der Geräterückseite”.
Stromversorgung über Autobatterieadapter
Der Autobatterieadapter CA-l von Yamaha läßt
sich mit dem Zigarettenanzünder im Wagen verbin
den, so daß Sie das PSR-6 über die Fahrzeugbatterie
betreiben können. Weitere Einzelheiten hierzu siehe
Seite 14 in Abschnitt “Anschlußbuchsen an der
Geräterückseite”.
Entfernen des Schutifiims
Vor dem Spielen des Instrumems sollten Sie den Schutzfilm vom
LED-Display für Stimmen und Tempoanzeige (VOiCE NO./TEMPO)
entfernen.
Le PSR-6 fonotionne soit sur piles, soit
avec un adaptateur d’alimentation dispo
nible en option. Suivre les instructions
ci-dessous, en fonction de la source
d’alimentation que l’on va utiliser.
Fonctionnement sur piles
Avant tout, installer six piles SUM-1 de 1,5
V, format D, R-20, ou des piles alcalines
équivalentes (vendues séparément), dans
le logement des piles du PSR-6.
1. Ouvrir le couvercle du logement des
piles, situé au centre du fond du PSR-6.
2. Insérer les six piles en veillant à
respecter l’agencement des polarités,
indiqué à l’intérieur du logement.
3. Remettre le ouvercle en place en veil
lant à ce qu’il s’emboîte parfaitement.
—
Attention:
1. Lorsque les piles s’épuisent, les remplacer
toutes les six à la fois. Ne JAMAIS mélan
ger des piles neuves avec des piles usagées.
2. Pour éviter tout dommage éventuel dû à une
fuite des piles, les retirer de l’instrument s’il
ne doit pas être utilisé pendant une période
prolongée.
Fonctionnement avec un adaptateur d’alimentation en option
Pour alimentation sectear
Utiliser EXCLUSIVEMENT un adaptateur
d’alimentation secteur Yamaha PA-1 ou PA-4
pour faire fonctionner le PSR-6 sur le courant
secteur. Pour plus de détails, se reporter au
chapitre “Prises du panneau arrière”, page 14.
Fonctionnement sur batterie de voiture
L’adaptateur de batterie de voiture Yamaha
CA-1 se branche sur la douille de l’allumecigare et alimente l’instrument par la batterie
de voiture. Pour plus de détails, se reporter au
chapitre “Prises du panneau arrière”, page 14.
Enlever le film protecteur
Avant d’utiliser l’instrument, prière d'enlever le film plastique
qui protège l’affichage à DEL VOICE NO./TEMPO.
Su PSR-6 funcionará bien con pilas o bien
con un adaptador opcional de alimentación.
Siga las instrucciones que se dan abajo de
acuerdo con la fuente de alimentación que
desee utilizar.
Utilización de las pilas
Primero se deben instalar seis pilas alcalinas
R-20 ó su equivalente de 1,5V SUM-1, tamaño
“D” (vendidas separadamente) en el compar
timiento de las pilas del PSR-6.
1. Abra la cubierta del compartimiento de
las pilas que se encuentra localizado en el
centro del panel inferior del instrumento.
2. Inserte las seis pilas, teniendo en cuenta
las marcas de polaridad que se encuentran
en el interior del compartimiento.
3. Vuelva a colocar la cubierta del compar
timiento, asegurándose de que se adapte
firmemente en su lugar.
Precaución:
1. Cuando las pilas se gasten, reemplácelas con
un juego completo de seis pilas nuevas.
NUNCA mezcle las pilas viejas y las nuevas.
2. Para evitar que se produzcan posibles daños
debido a una fuga de las pilas, extráigalas del
instrumento cuando no lo .yaya a utilizar
durante un período de tiempo prolongado.
Utilización de un adaptador opcional de
alimentación
Para la red de alimentación de CA
Utilice SOLO los adaptadores de CA Yamaha
PA-1 ó PA-4 para conectar su instrumento a la
red de alimentación de CA. Para más detalles
consulte la sección de las “Tomas del panel
posterior” que se encuentra en la página 14.
Para la batería de un automóvil
El adaptador para la batería de un automóvil CA-1
Yamaha se puede enchufar en el receptáculo del
encededor de cigarrillos del automóvil, suministran
do de esta manera la energía suficiente para el
funcionamiento de su instrumento desde la batería
del automóvil. Para más detalles consulte la sección
de las “Tomas del panel posterior” que se encuentra
en la página 14.
Extraiga la película protectora
Antes de utilizar su instrumento, extraiga por favor la película
protectora que cubre la visualización VOICE SO./TEMPO LED.
Page 4
1
Nomenclature
POWER Switch
MASTER VOLUME Control
ACCOMP. VOLUME Control
AUTO BASS CHORD Selector
RHYTHM SELECTOR Buttons
FILL IN Button
SYNC. START Button
START/STOP Button
TEMPO Controls
MELODY MEMORY RECORD Button
MELODY MEMORY PLAY Button
DEMONSTRATION Button
VOICE NO.n’EMPO & BEAT Display
VOICE BANK SELECTOR
SUSTAIN Button
VIBRATO Button
Voice Chart
Auto Bass Chord Keys
Bezeichnung der
Nomenclature
Nomenclatura
Bedienteile/Geräteaufschríften
® (2)(|)(4)
t—^ ,
" Til Ï BJSSrHOBn HHYTHMSELECTOR MELOOYHEMOHY VOICEBAUKSELECOR ■ c : : Y1 ^
(D
__
_______ @_________________________________________
A., A.n“.T° c£=i & & & S3 ÈS3 r-J:7n|i=. fc=i I==|| 'éâf SP'
i d pt !=&&&£=. I i=, - g"
_ g— DEMONSTRATIO N iQ 0-1 Í' I [ 1 \ 1 I =
^ ^ L:r J É=b|bz^|
@ ®
M|ili|iM
Ein/Aus-Schalter (POWER)
Gesamtlautstärkeregler (MASTER VOLUME)
Begleitungslautstärkeregler (ACCOMP.
VOLUME)
Wahlschalter für Auto-Baßakkord (AUTO
BASS CHORD)
Rhythmuswahltasten (RHYTHM SELECTOR)
Fill-In-Taste (FILL IN)
SYNC. START-Taste (SYNC. START)
START/STOP-Taste (START/STOP)
Tempo-Einstelltasten (TEMPO)
Melodie-Aufzeichnungstaste (MELODY
MEMORY RECORD)
Melodie-Wiedergabetaste (MELODY MEMORY
PLAY)
Demo-Taste (DEMONSTRATION)
Display für Stimmennummer/Tempo und Takt
(VOICE NO./TEMPO & BEAT)
Stimmenbank-Wahltasten (VOICE BANK
SELECTOR)
Sustain-Taste (SUSTAIN)
Vibrato-Taste (VIBRATO)
Stimmentabelle
Tastenfeld für Auto-Begleitung (AUTO-BASSCHORD)
' Interrupteur d’alimentation (POWER)
' Réglage d’intensité sonore principal
(MASTER VOLUME)
' Réglage d’intensité sonore de l’accompa
gnement (ACCOMP. VOLUME)
' Sélecteur d’accord de basses automatiques
(AUTO BASS CHORD)
Sélecteurs du rythme (RHYTHM
SELECTOR)
Touche de remplisage (FILL IN)
Touche de mise en marche synchronisée
(SYNC. START)
Touche de marche/arrêt (START/STOP)
Réglages du tempo (TEMPO)
Touche de mémorisation de mélodie
(MELODY MEMORY RECORD)
Touche de lecture de la mélodie mémorisée
(MELODY MEMORY PLAY)
Touche de démonstration
(DEMONSTRATION)
Affichage du numéro de voix/tempo et
mesure (VOICE NO.fTEMPO & BEAT)
Sélecteur de la banque de voix (VOICE
BANK SELECTOR)
Touche de soutien (SUSTAIN)
Touche de vibrato (VIBRATO)
Tableau des voix
Touche d’accompagnement automatique
(AUTO-BASS-CHORD)
Interruptor de alimentación (POWER)
Control de volumen principal (MASTER
VOLUME)
Control de volumen del acompañamiento
(ACCOMP. VOLUME)
Selector de acordes y bajo automático (AUTO
BASS CHORD)
Botones selectores de ritmos (RHYTHM
SELECTOR)
Botón de relleno (FILL IN)
Botón de inicio de sincronización (SYNC.
START)
Botón de inicio/parada (START/STOP)
Controles de tempo (TEMPO)
Botón de grabación en la memoria de melodías
(MELODY MEMORY RECORD)
Botón de interpretación de la memoria de
melodías (MELODY MEMORY PLAY)
Botón de desmostración (DEMONSTRATION)
Visualización de n.° de voz/tempo y tiempo
(VOICE NO./TEMPO & BEAT)
Selector del banco de voces (VOICE BANK
SELECTOR)
Botón de sostenido (SUSTAIN)
Botón de vibrato (VIBRATO)
Gráfico de voces
Teclas de acompañamiento automático
(AUTO-BASS-CHORD)
Page 5

2
Playing Back the
Demonstration Music
To give you an idea of the PSR-6’s
sophisticated capabilities, it is pro
grammed with a demonstration tune
—“Spring Song” (Fruhlingslied)— which
plays automatically while demonstrating
a number of the instrument’s voices.
1. Switch ON
Slide the POWER switch © to the ON
position. The VOICE NO./TEMPO display
® will light when the power is ON.
2. Set an Initial Volume Level
Slide the MASTER VOLUME control @
to a position about half way between the
“MIN” and “MAX” settings. You can set
this control for the most comfortable
volume level after playback begins.
Wiedergabe des Demostücks
Damit Sie eine Vorstellung von den raffinier
ten Funktionen und Eigenschaften des PSR-6
bekommen, ist schon ein Musikstück (“Früh
lingslied”) einprogrammiert, das automatisch
abgespielt wird und dabei eine Reihe von
Instrumentenstimmen vorführt.
1. Stromversorgung einschalten.
Den POWER-Schalter © auf ON stellen.
Hierauf leuchtet das LED-Display für Stim
mennummer/Tempo und Takt ® auf.
t
2. Anfangslautstärke einstellen.
Den MASTER VOLUME-Regler (g) auf eine
Position ungefähr in der Mitte zwischen
“MIN” und “MAX” stellen. Nach dem
Beginn der Wiedergabe läßt sich dann mit
diesem Regler die Lautstärke nach Wunsch
einstellen.
Musique de
démonstration
Pour avoir une idée des possibilités raf
finées du PSR-6, celui-ci a été programmé
avec un air de démonstration “Le chant
du Printemps” (Frühlingslied) qui s’exé
cute automatiquement tout en démonstrant quelques voix instrumentales.
1. Mettre l’appareil sous tension
Glisser l’interrupteur POWER © sur la
positon ON. Lors de la mise sous tension,
l’affichage VOICE NO.fTEMPO ® s’allume.
ve CE N0 ^EVPO
88.
2. Régler le niveau de l’intensité
sonore initial.
Glisser le réglage MASTER VOLUME @
à mi-chemin entre les positions “MIN” et
“MAX”. Il est possible d’ajuster ce réglage
à un niveau d’écoute confortable après
que la lecture a commencé.
Interpretación de la música de demostración
Para darle una idea de las sofisticadas caracte
rísticas del PSR-6, se ha programado con
una canción de demostración “Canción de
primaverd” (“Frühlingslied”) que se interpre
ta automáticamente cuando se presiona uno
de los números de las voces de instrumentos.
1. Conexión
Deslice el interruptor POWER © hacia la
posición ON. La visualización de VOICE NO./
TEMPO ® se activará cuando se conecte
la alimentación.
2. Ajuste de un nivel de volumen inicial
Deslice el control MASTER VOLUME @
hacia una posición situada a la mitad entrs
los ajustes “MIN” y “MAX”. Este control
se puede ajustar en un nivvel de volumen
más agradable una vez haya comenzado la
interpretación.
3. Press the DEMONSTRATION
Button
The demonstration music will begin play
ing as soon as you press the DEMON
STRATION button ®.
The demonstration will play continuously,
providing samples of different voices until
the DEMONSTRATION button ® is
pressed a second time.
3. DEMONSTRATION-Taste drücken
Sobald die DEMONSTRATION-Taste ®
gedrückt wird, setzt die Wiedergabe des
Demostücks ein.
Das Musikstück wird kontinuierlich abgespielt
und bringt dabei Beispiele für verschiedene
Instrumentenstimmen zu Gehör, bis die
DEMONSTRATION-Taste ® erneut gedrückt
wird.
t
3. Appuyer sur la touche
DEMONSTRATION
La musique de démonstration s’exécute
aussitôt que la touche DEMONSTRATION
® est enfoncée.
Cette musique s’exécute sans s’inter
rompre, offrant des échantillons de
plusieurs voix, jusqu’à ce que la touche
DEMONSTRATION ® soit de nouveau
enfoncée.
3. Presione el Botón DEMONSTRATION.
La música de demostración empezará a sonar
inmediatamente después de que presione el
botón DEMONSTRATION ®. La demostra
ción se interpretará continuamente, dando
ejemplos de diferentes voces, hasta que el
botón DEMONSTRATION ® se presione
por segunda vez.
Page 6

DEMONSTRATION
O
• The demonstration music can also be
stopped by pressing the SYNC. START
@ or START/STOP button ®.
• The rhythm pattern can be changed
at any time simply by pressing the 8
BEAT, 16 BEAT, COUNTRY, SAMBA.
BOSSANOVA, DISCO or MARCH
rhythm selectors (SWING, 12 BEAT
and WALTZ cannot be used because
their 3-beat rhythms do not match the
demonstration piece).
• The playback tempo of the demon
stration piece can be varied using the
TEMPO controls @.
• The PSR-6 randomly selects a new
voice for each phrase of the demon
stration piece.
Wofe;
1. The demonstration cannot be started while the
PSR-6 MELODY MEMORY feature is in operation.
2. No sound will be produced by playing the key
board during demonstration playback.
Using the Voice Bank
& Rhythm Controis
Selecting Voices and Applying
Effects
1. Select a Voice
Choose a voice shown on the Voice Chart
® then enter its number using the
numbered VOICE BANK SELECTOR @
buttons. To select PIPE ORGAN 2 (number
12), for example, first press “1” and then
“2.” The number “12” should then be
displayed on the VOICE NO-fTEMPO
display C§).
• Das Demostück läßt sich auch durch
Drücken der SYNY. START-Taste @ oder
der START/STOP-Taste ® anhalten.
• Der Rhythmus läßt sich jederzeit einfach
durch Drücken einer der Rhythmuswahlta
sten 8 BEAT, 16 BEAT, COUNTRY,
SAMBA, BOSSANOVA, DISCO oder
MARCH verändern (SWING, 12 BEAT
und WALTZ können nicht gewählt werden,
weil ihre dreitaktigen Rhythmen nicht zum
Demostück passen.)
• Das Wiedergabetempo des Demostücks
kann mit den TEMPO-Einstelltasten @
variiert werden.
• Das PSR-6 wählt für jede Phrase des
Demostücks eine neue Stimme in zufälliger
Reihenfolge.
Hinweise:
1. Bei aktivierter Melodiespeicher-Funktion kann das
Demostück nicht gestartet werden.
2. Während der Wiedergabe des Demostücks ist das
Manual funktionslos.
Verwendung von
Stimmenbank und
Rhythmuswahltasten
Wahl von Stimmen und Auslösen
von Effekten
1. Wahl einer Stimme
Eine der auf der Stimmentabelle ® angege
benen Stimmen wählen und die zugehörige
Nummer mit Hilfe der VOICE BANK-Tasten
(u) eingeben. Zur Wahl von PIPE ORGAN 2
(Nummer 12) z.B. ist zunächst “1” und dann
“2” zu drücken, worauf auf dem VOICE
NO./TEMPO-Display ® die Nummer “12”
erscheinen muß.
• La musique de démonstration peut
aussi être arrêtée par poussée sur la
touche SYNC. START @ ou START/
STOP ®.
• Le motif rythmique peut être modifié à
tout moment, simplement en appuyant
sur les sélecteurs du rythme 8 BEAT,
16 BEAT, COUNTRY, SAMBA, BOSSANOVA, DISCO ou MARCH (SWING,
12 BEAT et WALTZ ne peuvent être
utilisés, car leur rythme à trois temps
ne correspond pas à celui de la
musique de démonstration).
• Le tempo de la musique de démons
tration peut être modifié par les régla
ges TEMPO
• Le PSR-6 choisit au hasard une
nouvelle voix pour chaque phrase de
la musique de démonstration.
Remarques;
1. La démonstration ne peut commencer tant que
la fonction MELODY MEMORY du PSR-6 est en
service.
2. Pendant la lecture de la musique de démons
tration, aucun son ne peut retentir du davier.
3
Utilisation de la banque de voix et des réglages du rythme
Sélection des voix et application des effets
1. Choisir une voix
Choisir une voix indiquée dans le tableau
des voix ®, puis entrer son numéro à
l’aide des touches numériques de VOICE
BANK SELECTOR (u). Par exemple, pour
sélectionner PIPE ORGAN 2 (n° 12),
appuyer tout d’abord sur la touche “1”
puis sur la touche “2”. Le numéro “12”
apparaît alors sur l’affichage VOICE NO./
TEMPO (13).
• La música de demostración también se
puede detener presionando los botones
SYNC. START @ o START/STOP ®.
• El patrón de ritmo se puede cambiar en
cualquier momento, presionando simple
mente los selectores de ritmos 8 BEAT,
16 BEAT, COUNTRY, SAMBA, BOSSA
NOVA, DISCO o MARCH (SWING, 12
BEAT y WALTZ no se pueden utilizar
debido a que sus ritmos de 3 tiempos no
se adaptan a la pieza de demostración.)
• El tempo de reproduccón de la pieza de
demostración se puede cambiar utilizando
los controles de TEMPO ®.
• El PSR-6 selecciona aleatoriamente una
nueva voz para cada una de las frases de
la pieza de demostración.
Nota:
La demostración no podrá ser iniciada mientras la
característica de MELODY MEMORY del PSR-6 esté
en operación.
No se producirá sonido alguno cuando se toque el
teclado durante la reproducción de la demostración.
Utilización del banco de
voces y de los controles
de ritmo
Selección de voces y aplicación de efectos
1. Selección de una voz
Escoja una voz de entre las que se muestran
en el gráfico de voces ® luego introduzca su
número utilizando los botones numerados de
VOICE BANK SELECTOR ®. Por ejemplo,
para seleccionar el órgano de tubos 2 (PIPE
ORGAN 2) (número 12), primero presione
“1” y luego “2”. El número “12” debe
visualizarse en la visualización de VOICE
NO./TEMPO
Page 7

VOICE BANK SELECTOR
VOICE NO TEVtPO
/г
50 P AMC ■
5' PANO 2
52 hONHV-'ONK =iANO
53 E.tCTfliC PIANO t
54 E.ECiSiC PIANO 2
55 HAPPS'CHOSD 1
5E happs^chgpo :
hAPPSiChOsD 5
58 hONKV "ONK C.i(
59 GLASS CE.EETa
10 REEO organ
r Pi=£ ORGAN 1
12 PIPE ORGAN 2
IOELECI'RONCOPGAN
‘4 elec^pon-c organ :
15 .AZZ ORGAN
15 accordion
r VIBES
16 MARIMBA •
19 MARIMBA 2
2; [flUMRET
21 MO'E ТЯОМРЕГ
22 -TROMBONE
2- SORT -BOMBONE
2s HORN
25 A ^ PEN HORN
2E ^иЗА
21
BRASS ensemble •
25 BRAES ENSEMBLE 2
29 BRASS ensemble 3
i: RlU-E
2- PANF,„CE
•2 R'CCO.O
33 C,_AP NE3
34 BASS C.ARINE'
35 OBOE
36 SASSOON
37 SAXOPHONE
36 BAGP PE
39.VOODV.LNOS
40 VIOLIN t
41 VIOLIN 2
42 CELLO
43 STRINGS
44 ELECTRIC BASS
45 SLAP BASS
46 UPRIGHT BASS
47 SYNTH BASS
46 BANJO
49 mandolin
50 CLASSIC GUITAR
51 JAZZ GUITAR
52 FOLK guitar
53 STEEL GUITAR
54 UKULELE
55 KOTO
56 SHAMISEN
57 HARP
5« HARMONICA
59 MUSIC BOX
60 BRASS 6 MARIMBA
61 FLUTE i HARPSICHORD
62 OBOE i VIBRAPHONE
63 clarinet S HARP
64 VIOLIN 4 STEEL DRUM
65 HANDSAW
66 SYNTH BRASS
67 METALLIC SYNTH
66 SINE WAVE
69 REVERSE
70 SYNTH VOX 1
71 SYNTH vox 2
72 SYNTH vox 3
73 WHISPER
74 WHISTLE
75 GURGLE
76 BUBBLE
77 RAINDROP
76 POPCORN
79 DRIP
63 jCG r-angt
61 DUCK
62 BABY OOU
83 "E.tPHONE BE..
34 emergency ALiRI
65.EAF SPR NG
86 COMEY
37 FIREWORKS
36 C=ySya_
39 GhOST
9C HAND 3EI.L
91 C- MES
92 BEL.
93 S'EE. DRUM
94 CCWBEL.
95 Electronic tom ’
96 ELECTRONIC TOM 2
97 SNARE DRUM
38 maCh'ne gun
99 V.'AVE
When the power is initially turned ON,
the PIANO 1 voice is automatically
selected and its number (“00”) is shown
on the VOICE NO.rTEMPO display
2. Play the Voice & Adjust the Volume
The selected voice can now be played
on the instrument’s keyboard. Adjust the
MASTER VOLUME control (2) while
playing to set the desired volume level.
With most voices up to 9 notes can be
played simultaneously. Some voices—
HONKY-TONK PIANO, for example—
actually produce 2 notes for every
single key played, and therefore only
4 notes can be played simultaneously
on the keyboard.
The Rhythm and Auto Bass Chord
features of this instrument use 3 and
4 of the available notes, respectively.
Thus, when Rhythm and Auto Bass
Chord are used at the same time
(3 notes -I- 4 notes = 7 notes), 2 notes
or 1 note, depending on the selected
voice, will be available for playing
melody on the keyboard.
• Beim Einschalten des Instruments wird
automatisch die Stimme PIANO 1 abge
rufen, worauf die zugehörige Nummer
(„(X)“) auf dem VOICE No./TEMPODisplay @ auftaucht.
2. Wiedergabe der Instnimentenstimme
und Einstellen der Lautstärke
Die gewählte Stimme kann nun über das
Manual gespielt werden.Während des Spie
lens mit dem MASTER VOLUME-Regler (?
die gewünschte Lautstärke einstellen.
Bei den meisten Stimmen können bis zu
9 Töne gleichzeitig gespielt werden. Einige
Stimmen—beispielsweise HONKY-TONK
PIANO—erzeugen tatsächlich zwei Töne
bei jedem Tastenanschlag, weshalb diese
Stimmen nur 4 simultane Noten erzeugen
können.
Bei den Rhythmus- und Auto-Begleitungs
funktionen des PSR-6 werden 3 bzw. 4 der
verfügbaren Töne verwendet. Wenn daher
Rhythmus- und Auto-Begleitungsfunktion
gleichzeitig aktiviert sind (3 Töne-I-4 Töne
= 7 Töne) stehen je nach gewählter Stinune
nur eine oder zwei simultane Noten zum
Spielen auf dem Manual zur Verfügung.
• A la première mise sous tension, la
voix PIANO 1 est automatiquement
choisie et son numéro (“00”) apparaît
sur l’affichage VOICE NO./TEMPO ®.
2. Reproduire la voix et ajuster
l’intensité sonore
La voix sélectionnée peut à présent être
reproduite sur le clavier de l’instrument.
Ajuster le réglage MASTER VOLUME (g)
tout en jouant, afin de régler l’intensité
sonore souhaitée.
t
La plupart des voix permettent de
jouer jusqu’à 9 notes à la fois. Certai
nes voix, comme HONKY-TONK PIANO,
par exemple, produisent en réalité 2
notes pour toute note individuelle jouée
et par conséquent, 4 notes seulement
peuvent être jouées simultanément sur
le clavier.
Le rythme et l’accompagnement
automatique de cet instrument utilisent
respectivement 3 et 4 des notes dispo
nibles. De cette façon, lorsque le rythme
et l’accompagnement automatique sont
utilisés en même temps (3 notes-t-4
notes = 7 notes), 2 notes, ou 1 note, en
fonction de la voix choisie, reste dispo
nible pour jouer la mélodie sur le clavier.
Cuando la alimentación se conecte inicial
mente, se seleccionará autométicamente la
voz PIANO 1 y su número (“00”) se
mostrará en la visualización VOICE NO./
TEMPO (Í3).
2. Interpretación de una voz y ajuste del volumen
Ahora se podrá interpretar la voz seleccionada
en el teclado del instrumento. Ajuste el control
MASTER VOLUME @ mientras está efec
tuando la interpretación para conseguir el
nivel de volumen deseado.
Con la mayoría de las voces se pueden
interpretar 9 notas simultáneamente.
Algunas voces (por ejemplo, HONKYTONK PIANO) producen 2 notas por
cada una de las teclas presionadas, por
lo que sólo se podrán interpretar 4 notas
simutáneamente en el teclado.
Las características de ritmo y de acompa
ñamiento automático de este instrumento
utilizan respectivamente 3 de las 4 notas
disponibles. De este modo, cuando el ritmo
y el acompañamiento automático se utilizan
al mismo tiempo (3 notas -I- 4 notas = 7
notas), habrá 2 notas ó 1 nota disponibles,
dependiendo de la voz seleccionada, para
interpretar una melodía con el teclado.
Page 8

3. Adding Effects
Sustain: Press the SUSTAIN button ®
once and notes played on the keyboard
will decay gradually after you lift your
fingers from the keys. Press the SUSTAIN
button @ a second time to turn the
sustain effect off.
3. Auslösen von Effekten
Sustain: Durch einmaliges Drücken der
SUSTAIN-Taste @ hallen die angeschlagenen
Noten allmählich aus, nachdem die Tasten
freigegeben worden sind. Der SUSTAINEffekt läßt sich durch erneutes Drücken der
SUSTAIN-Taste (Vb) ausschalten.
3. Ajout d’effets
Soutien: Appuyer sur la touche SUSTAIN
® et les notes jouées sur le clavier
s’atténuent graduellement après que les
doigts ont quitté les touches. Appuyer
de nouveau sur la touche SUSTAIN
pour couper l’effet de soutien.
O
@
3. Adición de efectos
Sostenido: Presione el botón SUSTAIN ®
una vez y las notas interpretadas en el teclado
disminuirán gradualmente una vez eleve sus
dedos de las teclas. Presione el botón SUSTAIN @ por una segunda vez para desactivar
el efecto de sostenido.
Vibrato: Press the VIBRATO button @
once and a gentle “wavering” effect will
be applied to notes played on the
keyboard. Press the VIBRATO button ®
a second time to turn the vibrato effect
off.
Using the Rhythm Section
1. Select a Rhythm
Press the RHYTHM SELECTOR button ®
for the type of rhythm you intend to use.
• When the power is initially turned ON,
the 8 BEAT rhythm is automatically
selected.
2. Start the Rhythm
Press the START/STOP button @ to start
the selected rhythm immediately, or press
the SYNC. START button @ if you want
the rhythm to start when you play the
first note on the keyboard. If you use the
SYNC. START button, the rhythm will start
as soon as you play any of the 19 lowest
keys on the keyboard (up to F*2)-
Vibrato: Durch einmaliges Drücken der
VIBRATO-Taste ® erklingen die auf dem
Manual gespielten Noten mit einem sanften
“Zittereffekt”. Der Vibratoeffekt läßt sich
durch erneutes Drücken der VIBRATO-Taste
® ausschalten.
Verwendung des Rhythmusteils
1. Rhythmuswahl
Mit der entsprechenden RHYTHM
SELECTOR-Taste ® die gewünschte
Rhythmusart aufrufen.
16 BEAT COUNTRY SAMBA
e
BEAT
DISCO
• Beim Einschalten des Instruments wird
automatisch der Rhythmus 8 BEAT
aktiviert.
2. Starten des Rhythmus
Zum unmittelbaren Starten des gewählten
Rhythmus die START/STOP-Taste ®
drücken. Soll der Rhythmus jedoch gleichzei
tig mit Anschlägen der ersten Note einsetzen,
muß man nur die SYNC. START-Taste @
antippen. In diesem Fall setzt der Rhythmus
ein, wenn eine der 19 tiefsten Tasten (bis zu
F*2) angeschlagen wird.
Vibrato: Appuyer sur la touche VIBRATO
® et un effet de légère ondulation affecte
les notes jouées sur le clavier. Appuyer
de nouveau sur la touche VIBRATO
pour couper l’effet de vibrato.
utilisation de la section du rythme
1. Choisir un rythme
Appuyer sur le RHYTHM SELECTOR
pour sélectionner le type de rythme
souhaité.
RHYTHM SELECTOR
BOSSA NOVA
SWING 12 BEAT WALTZ
• Lors de la première mise sous tensinon,
le rythme 8 BEAT est choisi auto
matiquement.
2. Lancer le rythme
Appuyer sur la touche START/STOP ®
pour lancer immédiatement le rythme
sélectionné, ou appuyer sur la touche
SYNC. START @ si l’on veut lancer le
rythme dès que l’on joue une note sur le
clavier. Si l’on utilise la touche SYNC.
START, le rythme va commencer aussitôt
que l’on joue une des 19 touches infé
rieures du clavier (jusqu’à F*2)-
Vibrato: Presione el botón VIBRATO ® una
vez para que se aplique un amable efecto de
“ondulación” a las notas interpretadas en el
teclado. Presione el botón VIBRATO @ por
una segunda vez para desactivar el efecto de
vibrato.
Utilización de la sección de ritmos
1. Seleccione un ritmo
Presione el botón RHYTHM SELECTOR ®
para obtener el tipo de ritmo que desea utilizar.
• Cuando la alimentación se conecta inicial
mente, se seleccionará automáticamente el
ritmo 8 BEAT.
2. Inicio de un ritmo
Presione el botón START/STOP ® para
iniciar el ritmo seleccionado inmediatamente,
o presione el botón SYNC. START @ si
desea que el ritmo empiece en el momento en
que interpreta la primera nota en el teclado.
Si utiliza el botón SYNC. START, el ritmo
se iniciará tan pronto como interprete cual
quiera de las 19 teclas inferiores del teclado
(hasta F*2)-
Page 9

SVNC. STARI
ö
3. Adjust the Rhythm Volume
Use the ACCOMP. VOLUME control @ to
adjust the volume of the rhythm sound in
relation to the melody (notes played on
the keyboard).
4. Adjust the Tempo
Use the TEMPO controls @ to adjust the
speed (tempo) of the rhythm. Pressing the
(t) button decreases the tempo, and
pressing the (a) button increases the
tempo.
The tempo setting range is from 01
to 31 (“01” is the slowest, and “31” the
fastest tempo), and the selected setting
is shown on the V01CE./TEMP0 display
® while you operate the TEMPO
controls ®.
A “standard tempo” (120 beats per
minute) is produced by a tempo setting
of “16.” This tempo setting is auto
matically selected when the power is
initially turned ON. The standard tempo
setting of “16” can be immediately
recalled at any time by pressing both
TEMPO controls @ at the same time.
The two LED dots at the bottom of
the VOICE NO./TEMPO display ®
provide a visual indication of tempo.
The leftmost dot flashes on the first
beat of every measure, and the right
most dot flashes on the remaining
beats.
3. Einstellen der Rhythmuslautstärke
Die Lautstärke des gewählten Rhythmus mit
dem ACCOMP. VOLUME-Regler (3) an die
Lautstärke der gespielten Melodie (auf dem
Manual gespielte Noten) anpassen.
4. Einstellen des Tempos
Die Geschwindigkeit (das Tempo) des gewähl
ten Rhythmus mit den TEMPO-Einstelltasten
@ festlegen. Durch Drücken der Taste (t)
verringert sich das Tempo, während die Taste
(A) es dagegen steigert.
• Das Tempo läßt sich in einem Bereich
von 01 bis 31 einstellen (,,01“ ist dem lang
samsten und ,,31“ dem schnellsten Tempo
zugeordnet). Der gewählte Tempowert wird
bei Betätigen der TEMPO-Einstelltasten @
auf dem VOICE NO./TEMPO-Display
(® dargestellt.
• Ein ,,Standardtempo“ von 120 Takten
pro Minute ist dem Einstellwert ,,16“
zugeordnet. Diese Tempoeinstellung wird
automatisch beim Einschalten des Instru
ments geladen. Das Tempo läßt sich jeder
zeit durch gleichzeitiges Drücken beider
TEMPO-Einstelltasten @ auf diesen
Standardwert rückstellen.
• Die beiden Leuchtdioden im unteren Teil
des VOICE NO./TEMPO-Displays ®
geben die gewählte Tempoeinstellung
optisch wieder. Die linke Leuchtdiode blinkt
am ersten Taktschlag jedes Takts auf,
während die rechte die übrigen Taktschläge
anzeigt.
3. Ajuster rintensité sonore du rythme
Utiliser le réglage ACCOMP. VOLUME @
pour ajuster l’intensité sonore du rythme,
en relation avec la mélodie, c’est-à-dire,
les notes jouées sur le clavier.
t
4. Ajuster le tempo
Utiliser les réglages TEMPO ® pour
ajuster la vitesse (le tempo) du rythme.
Une poussée sur la touche (t) ralentit
le tempo, tandis qu’une poussée sur la
touche (a) l’accélère.
• La plage de réglage du tempo s’étale
de 01 à 31, “01” étant le tempo le plus
lent et “31”, le plus rapide. Le réglage
choisi apparaît sur l’affichage VOICE
МО.ЯЕМРО ® pendant que l’on
manipule les réglages TEMPO @.
• Un “tempo standard” (120 battements
par minute) est produit par le réglage
de tempo “16”. Ce réglage est choisi
automatiquement lors de la première
mise sous tension. Ce tempo standard
peut être rappelé à tout moment, en
appuyant simultanément sur les deux
réglages TEMPO
• Les deux DEL, au bas de l’affichage
VOICE NO./TEMPO ® donnent une
indication visueile du tempo. Le point
gauche clignote sur le premier batte
ment de chaque mesure, tandis que le
point droit clignote sur les battements
restants.
VCCÍ N0
3. Ajuste de! volume del ritmo
Utilice el control ACCOMP. VOLUME @
para ajustar el volumen del sonido del ritmo
en relación con la melodía (notas interpretdas
en el teclado).
4. Ajuste del tempo
Utilice los controles de TEMPO (9) para ajustar
la velocidad (tempo) del ritmo. Al presionar
el botón (T) el tempo disminuye, y al
presionar el botón (A) el tempo aumenta.
• El margen de ajuste de! tempo es de 01
a 31 (“01“ es el más lento, y “31” es el
más rápido), el ajuste seleccionado se
mostrará en la visuahzación de VOICE
NO./TEMPO (í|i mientras esté operando
los controles de TEMPO
• El “tempo estándar” (120 tiempos por
minuto) se obtiene ajustando el tempo en
“16”. Este ajuste de tempo se selecciona
automáticamente cuando se conecta inicial
mente la alimentación. El ajuste estándar
del tempo “16” puede obtenerse inmediata
mente en cualquier momento presionando
al mismo tiempo ambos controles de
TEMPO (9).
• Los dos indicadores LED que se encuentran
en la parte inferior de la visuahzación de
VOICE NO./TEMPO ® proveen una
indicación visual del tem^o. El indicador
situado más hacia la izquierda parpadea en
el primer tiempo de cada compás, y el
indicador situado más hacia la derecha
parpadea en los tiempos restantes.
Ш
Page 10

5. Stop the Rhythm
Press the START/STOP button (8
second time to stop the rhythm.
5. Stoppen des Rhythmus
Durch erneutes Drücken der START/STOP-
Taste (8) den Rhythmus stoppen.
5. Arrêter le rythme
Appuyer une deuxième fois sur la touche
START/STOP ® pour arrêter le rythme.
О
5. Detención del ritmo
Para detener el ritmo presione por segunda
vez el botón START/STOP ®.
6. Adding Fill-ins
To add a one-measure fill-in (rhythm varia
tion) at any time while the rhythm is play
ing, press the FILL IN button ®.
• A one-measure rhythm introduction
can be produced by pressing the FILL
IN button ® before pressing the
SYNC, START button and then
starting the rhythm by playing any of
the 19 lowest keys on the keyboard.
Adding
Accompaniment
Auto Bass Chord section
The PSR-6 includes a sophisticated auto
accompaniment system that can provide
automated rhythm and chordal backing
in a number of ways.
Single-finger Accompaniment
SINGLE FINGER accompaniment makes
it simple to produce accompaniment
using major, seventh, minor and minorseventh chords by pressing a minimum
number of keys in the Auto Bass Chord
Key ® section of the keyboard.
6. Einfügen von Fill-Ins
Durch Drücken der FILL IN-Taste ® läßt
sich jederzeit ein Fill-In (Rhythmusvariation)
über einen Takt während der Rhythmuswie
dergabe einfügen.
• Zum Voransetzen eines eintaktigen Auf
takts die FILL IN-Taste ® ygr der SYNC.
START-Taste @ drücken und dann den
Rhythmus durch Anschlägen einer der 19
tiefsten Tasten auslösen.
Hínzufügen von Begleitung
Baß-Akkord-Automatik
Das PSR-6 verfügt über ein ausgefeiltes Auto-
Begleitungssystem, das in vielfältiger Weise
eine automatische Rhythmus- und Akkordbe
gleitung ermöglicht.
Einfinger-Begieitung
Mit der Einfinger-Begieitung lassen sich auf
einfache Weise durch Drücken von maximal
drei Tasten des Tastenfelds Auto-Bass-Chord
@ komplette Dur-, Septimen-, Moll- und
Moll-Septimenakkorde erzeugen.
6. Ajout de motifs de remplissage
Pour ajouter, à tout moment, un remplis
sage d’une mesure (variation du rythme)
pendant que le rythme retentit, appuyer
sur la touche FILL IN ®.
• Une introduction rythmique d’une
mesure peut être reproduite en
appuyant sur la touche FILL IN ®
avant d’appuyer sur la touche SYNC.
START @, puis en lançant le rythme
par une des 19 touches inferiéures du
clavier.
4
Addition d’un
accompagnement
Section des accords de basses automatiques
Le PSR-6 inclut un système d’accompa
gnement automatique raffiné qui offre
un rythme automatisé et un soutien en
accords aux nombreuses variantes.
Accompagnement à un seul doigt
L’accompagnement “SINGLE FINGER”
facilite la création d’un accompagnement
qui utilise des accords majeur, de
septième, mineur et mineur-septième en
appuyant sur un minimum de touches,
dans la section des touches Auto-BassChord ®) du clavier.
6. Adición de relleno
Para añadir el relleno de un compás (variación
de ritmo) en cualquier momento durante la
interpretación del ritmo, presione el botón
FILL IN ®.
• La introducción de un ritmo de un
compás se puede producir presionando el
botón FILL IN d) antes de presionar el
botón SYNC. START @ y luego iniciando
el ritmo mediante una cualquiera de las
19 teclas inferiores del teclado.
Añadiendo
acompañamiento
Sección de Acorde y Bajo Automático
El PSR-6 incluye un sofisticado sistema de
acompañamiento automático que puede
proveer ritmos automatizados y fondos de
acordes de maneras diferentes.
Acompañamiento coñ un dedo
El acompañamiento con un dedo (SINGEL
FINGER) puede producir de una manera
simple un acompañamiento utilizando acordes
mayores, de séptima, menores y menores de
séptima presionando un número mínimo de
teclas de la sección Auto-Bass-Chord ® del
teclado.
Page 11

1. Select the SINGLE FINGER Mode
Slide the AUTO BASS CHORD selector
0 to the SINGLE FINGER position.
2. Select a Rhythm
Press the RHYTHM SELECTOR button
® for the rhythm you intend to use, then
press either the START/STOP button ®
or the SYNC. START button If you
press the START/STOP button ®, the
rhythm will begin playing immediately
without chordal accompaniment.
1. Wahl der Einfinger-Betriebsart
Den AUTO BASS CHORD-Schalter ® auf
Stellung SINGLE FINGER schieben.
t
2. Rhythmuswahl
Mit den RHYTHM SELECTOR-Tasten ®
den gewünschten Rhythmus abrufen und dann
entweder die START/STOP-Taste ® oder
die SYNC. START-Taste @ drücken. Wird
die START/STOP-Taste® angetippt, setzt der
Rhythmus sofort ohne Akkordbegleitung ein.
1. Chosir le mode SINGLE FINGER
Glisser le sélecteur AUTO BASS CHORD
0 sur la position SINGLE FINGER.
AUTO
BASS CHORD
SINGLE F'NGE^
2. Choisir le rythme
Appuyer sur le RHYTHM SELECTOR ®
pour le rythme que l’on souhaite utiliser,
puis appuyer sur la touche START/STOP
® ou sur la touche SYNC. START @. Si
l’on appuie sur la touche START/STOP
®, le rythme démarre immédiatement,
sans accompagnement d’accords.
COUNTRY SAMBA
1. Selección del modo SINGLE FINGER
Deslice el selector AUTO BASS CHORD 0
hacia la posición SINGLE FINGER.
2. Selección de un ritmo
Presione el botón RHYTHM SELECTOR ®
para obtener el ritmo que desee utilizar, luego
presione el botón START/STOP ® o el
botón SYNC. START @. Si presiona el
botón START/STOP ®, el ritmo se inicará
inmediatatmente sin acompañamiento de
acordes.
3. Press a Key in the Auto Bass
Chord Key @ Section
Pressing any of the 19 lowest keys on
the keyboard will cause the automatic
chord and bass accompaniment to begin.
If you press a “C” key, for example, a
C-major accompaniment will be played.
Press another key in the Auto Bass
Chord Key @ section to select a new
chord. The key you press will always
determine the “root” of the chord played
(i.e. “C” for a C chord).
Auto Bass Chord key section
Baß-Akkord-Bereich
Section des touches d’accords de basses automatiques
Sección de teclas de Acorde Bajo Automático
3. Eine der Tasten im Tastenfeld AutoBass-Chord @ drücken.
Durch Anschlägen einer der 19 tiefsten Tasten
des Manuals wird die automatische Akkordund Baßbegleitung aktiviert. Wird beispiels
weise die Taste ,,C“ gedrückt, so spielt das
Instrument einen C-Dur-Begleitakkord. Durch
Anschlägen von anderen Tasten in diesem
Manualbereich lassen sich neue Akkorde erzeu
gen. Die gewählte Taste bestimmt stets den
,,Grundton“ des wiederzugebenden Akkords
(also bei ,,C“ ein C-Akkord).
3. Appuyer sur une touche de la
section des touches Auto-BassChord @
Le fait d’enfoncer une des 19 touches
inférieures du clavier lance l’accompa
gnement des basses et des accords auto
matique. Si, par exemple, on appuie sur
la touche “do”, un accompagnement en
do majeur est produit. Pour sélectionner
un nouvel accord, appuyer sur une autre
touche de la section Auto-Bass-Chord ®.
La touche enfoncée détermine toujours le
radical de l’accord joué (par ex., “do”
pour un accord en do).
3. Presione una tecla de la sección
Auto-Bass-Chord @
Al presionar una cualquiera de las 19 teclas
inferiores del teclado se iniciará el acompaña
miento automático de acordes y de bajo. Si
presiona una tecla “C”, por ejemplo, se
interpretará un acompañamiento de C mayor.
Presione otra de la teclas Auto-Bass-Chord ®
para seleccionar un nuevo acorde. La tecla
que presione siempre deter minará la nota
principal del acorde interpretado (es decir
“C” para un acorde de C).
Page 12

Playing Minor, Seventh, and Minorseventh Chords in the Singie-finger Mode
For a minor chord, press the root key
and the first black key to its left.
For a seventh chord, press the root
key and the next \white key to its left.
For a minor-seventh chord, press the
root key and both the next white and
black keys to its left.
Spielen von Moll, Septimen- und MollSeptimenakkorden in der Einfinger-Betriebsart
• Zum Erzeugen eines Mollakkords die
Grundton-Taste und die erste schwarze
Taste links davon anschlagen.
• Zum Spielen eines Septimenakkords die
Grundton-Taste und die weiße Taste links
davon anschlagen.
• Zum Spielen eines Moll-Septimenakkords
die Grundton-Taste und die weiße und die
schwarze Taste links davon anschlagen.
Cm
mp
Jouer des accords mineur, de septième
et mineur-septième en mode SiNGLE
FiNGER
• Dans le cas d’un accord mineur,
appuyer sur la touche de radical et sur
la première noire à sa gauche.
• Dans le cas d’un accord de septième,
appuyer sur la touche du radical et sur
la première blanche à sa droite.
• Dans le cas d’un accord mineur-
septième, appuyer sur la touche du
radical et sur les premières touches
blanche et noire à sa gauche.
Interpretación de los acordes menores, de
séptima y menores de séptima del modo de un
dedo
• Para un acorde menor, presione la tecla
principal y la primera tecla negra que se
encuentre a su izquierda.
• Para un acorde de séptima presione la
tecla principal y la siguiente tecla blanca
que se encuentre a su izquierda.
• Para un acorde menor de séptima, presione
la tecla principal y las siguientes teclas blan
ca y negra que se encuentren a su izquierda.
4. Set the Accompaniment Volume
Set the volume of the Auto Bass Chord
sound using the ACCOMP. VOLUME
control (3).
5, Set the Tempo
Use the TEMPO controls @ to set the
desired accompaniment tempo (see “4.
Adjust the Tempo” on page 7 for more
details).
6. Stop the Auto Bass Chord
Accompaniment
Press the START/STOP button ® to stop
the Auto Bass Chord Accompaniment.
4. Einstellen der Begleitungslautstärke
Die Lautstärke der Auto-Begleitung mit dem
ACCOMP. VOLUME-Regler (3) einstellen.
5. Einstellen des Tempos
Das gewünschte Tempo der Begleitung mit den
TEMPO-Einstelltasten @ einstellen. (Siehe
“4. Eimstellen des Tempos auf Seite 7).
6. Stoppen der Auto-Begleitung
Zum Stoppen der Auto-Begleitung die
START/STOP-Taste ® drücken.
4. Régler l’intensité sonore de
l’accompagnement
Régler l’intensité sonore de l’accompa
gnement automatique à l’aide du réglage
ACCOMP. VOLUME (3).
t
5. Régler le tempo
utiliser les réglages TEMPO ® pour poser
le tempo souhaité de l’accompagnement.
Pour plus de détails, se reporter à “4.
Régler le tempo”, page 7).
6. Arêter raccompagnement auto
matique
Appuyer sur la touche START/STOP ®
pour arrêter l’accompagnement
automatique.
4. Adjuste del volumen de acompañamiento
Ajuste el volumen del sonido del acompaña
miento automático utilizando el control
ACCOMP. VOLUME
5. Ajuste del tempo
Utilice los controles del TEMPO @ para
ajustar el tempo deseado del acompañamiento
(para más detalles vea “4. Ajuste del tempo”
que se encuentra en la página 7).
6. Detención del acompañamiento automático
Presione el botón START/STOP ® para
detener el acompañamiento automático.
10
Page 13

Fingered Accompaniment
The FINGERED mode is ideal if you
already know how to play chords on a
keyboard, since it allows you to supply
your own chords for the Auto Bass
Chord feature.
Gespielte Begleitung (FINGERED)
Diese Betriebsart ist ideal für Fortgeschittene,
die bereits Akkorde auf einem Keyboard
spielen können, weil dann eigene Akkorde
für die Auto-Begleitungsfunktion eingesetzt
werden können.
Accompagnement à plusieurs doigts
L’accompagnement “FINGERED” est idéal
si l’on sait déjà jouer des accords sur un
clavier, car il permet d’introduire ses
propres accords pour l’accompagnement
automatique.
Acompañamiento de vanos dedos
El modo FINGERED resulta ideal si usted
sabe cómo interpretar los acordes de un
teclado, puesto que le permite incorporar sus
propios acordes en la característica de acom
pañamiento automático.
1. Select the FINGERED Mode
Slide the AUTO BASS CHORD selector
@ to the FINGERED position.
2. Select a Rhythm
Select te desired rhythm then press either
the START/STOP button ® or the SYNC.
START button @.
3. Play a Chord on the Auto Bass
Chord Keys @
As soon as you play any chord (up to 4
notes) in the Auto Bass Chord Key
(g) section, the PSR-6 will automatically
begin to play the chord along with the
selected rhythm and an appropriate bass
line.
Auto Chord Accompaniment
Set the AUTO BASS CHORD selector ©
to the AUTO CHORD position, select a
rhythm, and press either the START/STOP
® or SYNC. START button Then,
when you pl^ a chord on the Auto Bass
Chord Keys (is), the PSR-6 will auto
matically play only the chords and rhythm
and will continue playing even after you
release the keys. You can then play your
own bass line. A new chord will be played
ONLY if you play a 3- or 4-note chord
on the Auto Bass Chord Keys (i|).
1. Wahl der FINGERED-Betriebsart
Den AUTO BASS CHORD-Schalter @ in
Stellung FINGERED schieben.
2. Wahl eines Rhythmus
Den gewählten Rhythmus durch Drücken der
START/STOP-Taste ® oder der SYNC.
START-Taste @ auslösen.
3. Einen Akkord auf dem Tastenfeld
Auto-Bass-Chord (Js) spielen
Sobald ein Akkord (bis zu vier Töne) auf dem
Tastenfeld für Auto-Begleitung gespielt wird,
beginnt das PSR-6 automatisch diesen Akkord
zusammen mit dem eingestellten Rhythmus und
einer passenden Baßstimme wiederzugeben.
Auto-Akkordbegleitung
Den AUTO BASS CHORD-Schalter © in
Stellung AUTO CHORD bringen, einen
Rhythmus wählen und entweder die START/
STOP-Taste ® oder die SYNC. START-
Taste @ drücken. Wenn nun ein Akkord auf
dem Tastenfeld Auto-Bass-Chord @ ange
schlagen wird, spielt das PSR-6 automatisch
die jeweiligen Akkorde und den Rhythmus
und setzt das Begleitspiel auch dann fort,
wenn die Tasten freigegeben worden sind.
Man kann dann eine eigene Baßstimme dazu
spielen. Ein Akkordwechsel erfolgt NUR
dann, wenn ein neuer Akkord mit drei oder
vier Noten im Tastenfeld Auto-Bass-Chord
© angeschlagen wird.
1. Choisir le mode FINGERÒ
Glisser le sélecteur AUTO BASS CHORD
© sur la position FINGERED.
AUTO
BASS CHORD
2. Choisir le rythme
Choisir le rythme souhaité en appuyant
sur la touche START/STOP ® ou sur la
touche SYNC. START @.
3. Jouer un accord avec les touches
Auto-Bass-Chord @
Dès que l’on joue un accord (4 notes
maximum) dans la section des touches
de l’accompagnement automatique @,
le PSR-6 commence à jouer automatique
ment l’accord avec le rythme sélectionné
et une ligne de basse appropriée.
Accompagnement d’accords
automatique
Placer le sélecteur AUTO BASS CHORD
@ sur la position AUTO CHORD, puis
appuyer sur la touche START/STOP ® ou
sur la touche SYNC. START Ensuite,
lorsqu’on joue un accord avec les touches
Auto-Bass-Chord ®, le PSR-6 joue, de
manière automatique, uniquement tes
accords et le rythme et continue à jouer
après que l’on a relâché les touches. Il
est alors possible de jouer la ligne des
basses. Un nouvel accord est joué
UNIQUEMENT si l’on joue un accord de
3 ou 4 notes avec les touches Auto-BassChord (©.
1. Selección del modo FINGERED
Deslice el selector AUTO BASS CHORD ©
hacia la posición FINGERED.
2. Selección de un ritmo
Seleccione el ritmo deseado y luego presione
el botón START/STOP ® o el botón SYNC.
START @.
3. Interprete un acorde con las teclas
Auto-Bass-Chord (§)
Tan pronto como interprete un acorde (hasta
4 notas) en la sección de teclas de acompaña
miento automático ©, el PSR-6 empezará
automáticamente a interpretar el acorde junto
con el ritmo deseado y una línea de bajo
apropiada.
Acompañamiento automático de
acordes
Ajuste el selector AUTO BASS CHORD ©
en la posición AUTO CHORD, seleccione un
ritmo, y presione el botón START/STOP ®
o el botón SYNC. START @. Luego, cuando
interprete un acorde con las teclas Auto-BassChord ©, el PSR-6 sólo interpretará automá
ticamente los acordes y el TÍtmo y seguirá
interpretando incluso después de que usted
libere las teclas. Luego usted podrá interpre
tar su propia línea de bajo. Un nuevo acorde
será interpretado SOLO en el caso de que us
ted interprete un acorde de 3 ó 4 notas con las
teclas Auto-Bass-Chord automático (ÍI).
11
Page 14

AUTO
BASS CHORD
Auto Bass Accompaniment
Set the AUTO BASS CHORD selector @
to the AUTO BASS position, select a
rhythm, and press either the START/STOP
® or SYNC. START button Then, when
you play a chord on the Auto Bass
Chord Keys ®, the PSR-6 will auto
matically play only the bass line and
rhythm and will continue playing even
after you release the keys. You can then
play your own chords, arpeggios or
accompaniment lines with your own
timing. The automatic bass accom
paniment will follow you precisely as you
play chords on the Auto Bass Chord
Keys ®.
Auto-Baßbegleitung
Den AUTO BASS CHORD-Schalter ® in die
Stellung AUTO BASS bringen, einen Rhyth
mus wählen und dann entweder die START/
STOP-Taste ® oder die SYNC. STARTTaste @ drücken. Wenn nun ein Akkord
auf dem Tastenfeld Auto-Bass-Chord (i|)
gespielt wird, spielt das PSR-6 automatisch
die entsprechende Baßlinie sowie den Rhythmus
dazu und setzt die Wiedergabe auch dann
fort, wenn die Tasten freigegeben worden
sind. Man kann dann seine eigenen Akkorde,
Arpeggios oder Begleitstimmen nüt eigenem
Timing (Takt) spielen. Die Auto-Baßbegleitung
folgt genau dem Spiel der Akkorde auf dem
Tastenfeld Auto-Bass-Chord ®.
Accoma^nement de basses automatique
Placer le sélecteur AUTO BASS CHORD
® sur la position AUTO BASS, puis
appuyer sur la touche START/STOP ® ou
sur la touche SYNC. START @. Ensuite,
lorsqu’on joue un accord avec les touches
Auto-Bass-Chord ®, le PSR-6 joue, de
manière automatique, uniquement la ligne
de basse et le rythme et continue à jouer
après que l’on a relâché les touches. Il
est alors possible de jouer ses propres
accords, arpèges ou lignes d’accompagne
ment avec son propre minutage.
L’accompagnement de basses automati
que suit exactement le musicien au fur
et à mesure qu’il joue les accords avec
les touches Auto-Bass-Chord
AUTO
BASS CHORD
Acompañamiento automático de
bajo
Ajuste el selector AUTO BASS CHORD ®
en la posición AUTO BASS, seleccione un
ritmo, y presione el botón START/STOP ®
o el botón SYNC. START Luego, cuando
interprete un acorde con las teclas Auto-BassChord ®, el PSR-6 sólo interpretará
automáticamente la línea de bajo y el ritmo y
continuará interpretando incluso después de
que haya liberado las teclas. A continuación
usted podrá interpretar sus propios acordes,
arpegios o las líneas de acompañamiento
siguiendo la temporización que desee. El
acompañamiento automático de bajo le seguirá
con precisión a medida que interpreta acordes
con las teclas Auto-Bass-Chord ®.
Using the Real-time Melody Memory
The MELODY MEMORY makes it possible
to record and playback a single-line
melody you play on the keyboard.
12
Verwendung des
EchtzeitMelodiespeichers
Der Melodiespeicher ermöglicht Aufzeichnung
und Wiedergabe einer auf dem Manual
gespielten einstimmigen Melodie.
MELODY MEMORY
Utilisation de la
mémoire musicale en
temps réel
La mémoire musicale permet d’enregistrer
et de reproduire une mélodie d’une seule
ligne que l’on joue sur le clavier.
Utilización de la
memoria de melodías
en tiempo real
La MELODY MEMORY hace posible la
grabación y la reproducción de una melodía de
línea sencilla que se interpreta en el teclado.
Page 15

1. Set the Record-ready Mode
Press the RECORD button and the
tempo LED will begin flashing at the
currently set tempo while a metronome
sounds.
1. Schalten auf Aufzeichnungsbereitschaft
Die RECORD-Taste @ drücken. Hierauf
beginnt die Tempo-Leuchtdiode gemäß der
aktuellen Tempoeinstellung zu blinken,
während gleichzeitig ein Metronomton zu
hören ist.
1. Régler le mode de préparation
d’enregistrement
Appuyer sur la touche RECORD @ et la
DEL du tempo se met à clignoter sur le
tempo actuel, tandis qu’un métronome
retentit.
1. Ajuste del modo de listo para la grabación
Presione el botón RECORD y el LED del
tempo empezará a parpadear siguiendo el
tempo establecido actualmente mientras que
un metrónomo suena.
2. Adjust the Tempo
Use the TEMPO controls
C |)
to set the
tempo you wish to record at.
3. Select a Rhythm
Press the RHYTHM SELECTOR button ®
for the rhythm you wish to use while
recording. The selected rhythm will NOT
begin playing at this point.
4. Start Recording
As soon as you press a key on the key
board, recording will begin automatically.
The selected rhythm wil begin playing
at the same time. Remember, you can
ONLY record single notes.
• Recording can also be started by press
ing the START/STOP button ®. The
selected rhythm will begin playing when
you press the START/STOP button ®.
This method is useful if you want to
have one or two blank measures before
your melody begins.
2. Einstellen des Tempos
Mit den TEMPO-Einstelltasten @ das Tempo
festlegen, bei dem die Aufzeichnung erfolgen
soll.
3. Wahl eines Rhythmus
Mit den RHYTHM SELECTOR-Tasten ®
den Rhythmus festlegen, mit dem die Aufzeich
nung durchgeführt werden soll. Der gewählte
Rhythmus beginnt jedoch NOCH NICHT.
RHYTHM SELECTOR
¿-BEAT 16 BEAT COUNTRY SAMBA BOSSA NOVA
DISCO MARCH SWING
4. Starten der Aufzeichnung
Beim Anschlag einer beliebigen Taste auf dem
Manual startet automatisch die Aufzeichnung
der Melodie und gleichzeitig setzt auch der
gewählte Rhythmus ein. Es ist stets zu beach
ten, daß AUSSCHLIESSLICH einzelne Noten
aufgezeichnet werden können.
• Die Melodieaufzeichnung kann auch durch
Drücken der START/STOP-Taste ®
ausgelöst werden. In diesem Fall setzt der
gewählte Rhythmus beim Drücken dieser
Taste ein. Dieses Vorgehen ist dann zweck
mäßig, wenn dem Beginn der eigentlichen
Melodie eine Leerstelle von zwei Takten
vorangestellt werden soll.
2. Ajuster le tempo
Utiliser les réglages TEMPO @ pour utili
ser le tempo avec lequel on souhaite
enregistrer.
3. Choisir un rythme
Appuyer sur le RHYTHM SELECTOR ®
pour le rythme que Гоп souhaite utiliser
pour l’enregistrement. Le rythme sélec
tionné NE démarre PAS à cette étape.
12 BEAT WALTZ
4. Lancer l’enregistrement
Dès que Гоп frappe une touche du
clavier, l’enregistrement commence
immédiatement. Le rythme choisi démarre
simultanément. Remarquer que Гоп ne
peut enregistrer QUE des notes
indivuduelles.
• L’enregistrement peut aussi être lancé
par enclenchement de la touche
START/STOP®. Le rythme sélectionné
démarre lorsqu’on appuie sur la touche
START/STOP ®. Cette méthode est
pratique si l’on veut placer une ou deux
mesures vides avant que la mélodie ne
commence.
2. Ajuste del tempo
Utilice los controles del TEMPO @ para
establecer el tempo de la grabación.
3. Selección de un ritmo
Presione el botón RHYTHM SELECTOR ®
para obtener el ritmo que desea utilizar durante
la grabación. El ritmo seleccionado no se
empezará a interpretar en este momento.
4. Inicio de la grabación
Tan pronto como presione una teda del
teclado, la grabación se inicará automáti
camente. El ritmo seleccionado empezará a
interpretarse al mismo tiempo. Recuerde que
TAN SOLO se pueden grabar notas sencillas.
• La grabación también se puede iniciar
presionando el botón START/STOP ®. El
ritmo seleccionado empezará a interpretarse
cuando presione el botón START/STOP
®. Este método es de utilidad cuando
desee que queden uno o dos compases en
blanco antes de que empiece su melodía.
• Staccato notes can not be recorded.
Each note you play will be recorded
until the next note is played.
• You can record a maximum of 57 notes
in the MELODY MEMORY. Recording
will stop automatically after you play
the 57th note.
• Stakkatonoten lassen sich nicht aufzeichnen.
Jeder angeschlagene Ton wird für sich
aufgezeichnet, bis die nächste Note ange
schlagen, wird.
• Der Melodiespeicher faßt maximal 57
Noten. Daher wird die Aufzeichnung nach
dem Spielen der 57. Note automatisch
beendet.
• Les notes en staccato ne peuvent être
enregistrées. Chaque note jouée est
enregistrée jusqu’à ce que la suivante
soit jouée.
• Il est possible d’enregistrer un maxi
mum de 57 notes dans la mémoire
musicale. L’enregistrement s’arrête
automatiquement après que l’on a joué
la 57ème note.
• Las notas de staccato no pueden ser
grabadas. Cada nota que interprete será
grabada hasta que se interprete la nota
siguiente.
• En la memoria de melodías MEMORY
se pueden grabar un máximo de 57 notas.
La grabación se detendrá automáticamente
después de que se interprete la nota
número 57.
13
Page 16

5. Stop Recording
Stop recording bv pressing either the
MELODY MEMORY PLAY button (ii) or the
rhythm section START/STOP button ®.
5. Stoppen der Aufzeichnung
Zum Stopped der Aufzeichnung entweder die
MELODY MEMORY PLAY-Taste ® oder
die START/STOP-Taste ® im Rhythmu
steil drücken.
5. Arrêter Tenregistrement
Arrêter l’enregistrement en appuyant soit
sur la touche MELODY MEMORY PLAY
soit sur la touche START/STOP @
de la section du rythme.
5. Detención de la grabación
Para detener la grabación presione el botón
MELODY MEMORY PLAY ® o el botón
START/STOP de la sección de ritmo ®.
6. Play Back the Recorded Melody
Press the PLAY button (n) to play back
your melody along with the selected
rhythm. You can change the rhythm or
voice at an time.
• Melody playback can be stopped at
any time by pressing the PLAY button
• The MELODY MEMORY is erased when
the power is turned OFF.
The Rear-panel Jacks
1. External Power Jack (DC 9-12V IN)
• AC Power
Connect the output cable from the
optional PA-1, PA-4 or PA-40 AC Adaptor
to the instrument’s DC 9-12V IN jack,
and connect to the adaptor’s AC power
plug to a convenient wall outlet.
• Car Battery
The optional CA-1 Car Battery Adaptor
connects to the instrument’s DC 9-12V
IN jack, and to the car cigarette lighter
socket.
6. Wiedergabe der aufgezeichneten
Melodie
Um die aufgezeichnete Melodie zusammen mit
dem gewählten Rhythmus wiederzugeben, die
PLAY-Taste ® drücken. Rhythmus oder
Instrumentenstimme lassen sich jederzeit
verändern.
• Die Melodiewiedergabe kann jederzeit durch
erneutes Drücken der PLAY/STOP-Taste
® abgebrochen werden.
• Beim Ausschalten des Keyboards wird der
Inhalt des Melodiespeichers gelöscht.
Anschlußbuchsen auf der Geräterückseite
1. Adapterbuchse (DC 9-12V IN)
• Netzspannung
Das Ausgangskabel des als Sonderzubehör
erhältlichen Netzadapters PA-1 oder PA-4
mit der Buchse DC 9-12V IN und das Netz
kabel des Adapters mit einer geeigneten
Netzsteckdose verbinden.
• Autobatteriespannung
Den als Sonderzubehör erhältlichen Auto
batterieadapter auf der einen Seite mit der
Gerätebuchse DC 9-12V IN und auf der
anderen Seite mit dem Zigarettenanzünder
verbinden.
6. Reproduire la mélodie enregistrée
Appuyer sur ta touche MELODY MEMORY
PLAY ® pour reproduire la mélodie
avec la rythme choisi. Il est possible de
changer le rythme ou la voix à tout
moment.
• La lecture de la mélodie peut être Inter
rompue à tout moment, par pression
sur la touche MELODY MEMORY PLAY/
STOP ®.
• La mélodie mémorisés est effacée
lorsque l’appareil est mis hors tension.
6
Prises du panneau
arrière
зс -N
1. Prise d’alimentation externe
(DC 9-12V IN)
• Alimentation secteur
Raccorder le câble de sortie de l’adap
tateur d’alimentation secteur PA-1 ou
PA-4 disponible en option, à la prise
DC IN 9-12V de l’instrument et brancher
la fiche secteur de l’adaptateur sur une
prise murale.
• Batterie de voiture
L’adaptateur de batterie de voiture,
disponible en option, se branche sur la
prise DC IN 9-12V de l’instrument et
sur la douille de l’allume-cigare du
véhicule.
6. Reproducción de la melodía grabada
Presione el botón PLAY @ para reproducir
su melodía junto con el ritmo seleccionado.
El ritmo y la voz se podrán cambiar en
cualquier momento.
• La reproducción de la melodía se puede
detener en cualquier momento presionando
el botón PLAY ®.
• La memoria de melodías se borrará
cuando se desconecte la alimentación.
Tomas del panel
posterior
1. Toma de alimentación externa
(DC 9-12V IN)
• Alimentación de CA
Conecte el cable de salida del adaptador de
CA opcional PA-1 ó PA-4 a la toma DC
9-12V IN del instrumento, y conecte el
enchufe de alimentación de CA del adap
tador a una toma de la red que resulte
conveniente.
• Batería de un automóvil
El daptador para una batería de automóvil
CA-1 opcional se debe conectar a la toma
DC 9-12V IN y al receptáculo del encen
dedor para cigarrillos del automóvil.
14
Page 17

2. HEADPHONES/AUX OUT Jack
• A pair of standard headphones with
a 1/4” phone plug can be plugged into
this jack for private listening. The sound
from the instrument’s internal speaker
is automatically shut off when head
phones are plugged in.
• This jack can also be used to feed
the output of the PRS-6 to a stereo
system.
• The output level at this jack \s +^
dBm, ±3 dBm (four simultaneous
notes at maximum volume).
2. Ausgangsbuchse HEADPHONES/
AUX
• Zum Hören ohne den Nachbarn zu stören,
läßt sich ein normgerechter Kopfhörer mit
einem 1/4-Zoll-KIinkenstecker an diese
Buchse anschließen. Bei angeschlossenem
Kopfhörer ist der eingebaute Lautsprecher
des Portatone stummgeschaltet.
• Über diese Buchse kann auch das
Ausgangssignal des PRS-6 einer Stereoan
lage zugeführt werden.
• Der Ausgangspegel an dieser Buchse
beträgt -I-1 dBm, ± 3 dBm (vier simultane
Noten bei Höchstlautstärke).
2. Prise de casque d’écoute/de sortie
auxiliaire (HEADPHONES/AUX
OUT)
• Pour une écoute en privé, brancher,
à cette prise, un casque d’écoute ordi
naire muni d’une fiche téléphonique
de 1/4 pouce. Aussitôt que le casque
est branché, le son, en provenance du
haut-parleur interne de l’instrument,
est coupé automatiquement.
• Cette prise peut également être
utilisée pour raccorder le PSR-6 à une
chaîne stéréo.
• Le niveau de sortie de cette prise est
de -1-1 dBm, ±3 dBm (quatre notes
simultanées au volume maximum).
7
2. Toma para auriculares/salida auxiliar
(HEADPHONES/AUX OUT)
• En esta toma se pueden enchufar un par
de auriculares estándar con una clavija
de 1/4 de pulgada, para una audición
privada. Cuando se enchufen los auricula
res el sonido del altavoz interno del instru
mento se desconectará automáticamente.
• Esta toma también se puede utilizar para
suministrar la salida PSR-6 a un sistema
estéreo.
• El nivel de salida en esta toma es de -l-1
dBm, ±3 dBm (cuatro notas simultáneas
a un volumen máximo).
Optional Accessories
• AC Power Adaptor (PA-1/PA-4/
PA-40)
The optional AC power adaptors convert
the AC mains voltage to the DC voltage
required by the instrument.
• Car Battery Adaptor (CA-1)
The Car Battery Adaptor provides power
to your instrument from a car battery
via the car cigarette lighter socket.
• Soft Carrying Case (SCC-31)
This lightweight case provides protec
tion and convenient transportation.
• Headphones (HPE-3/HPE-5)
These specially designed lightweight
headphones feature extra-comfortable
ear pads.
• Stand (L-2/L-4)
• Bench (BC-6)
*Some optional accessories may not be
available in all areas.
Sonderzubehör
• Netzadapter (PA-l/PA-4)
Die als Sonderzubehör erhältlichen Netz
adapter setzen die Netzspannung in die zum
Betrieb des PSR-6 erforderliche Gleich
spannung um.
• Autobatterieadapter (CA-1)
Der Autobatterieadapter ermöglicht die
Spannungsversorgung des Instruments
durch die Fahrzeugbatterie über den
Zigarettenanzünder.
• Tragetasche (SCC-31)
Diese leichte Tragetasche ist zum Schutz
und zum bequemen Transport des Instru
ments bestimmt.
• Kopfhörer (HPE-3/HPE-5)
Diese speziell konstruierten Kopfhörer mit
geringem Gewicht zeichnen sich durch
besonders bequeme Ohrschalen aus.
• Gestell (L-2/L-4)
• Sitzbank (BC-6)
*Einige Sonderzubehörteile sind u.U. nicht
überall lieferbar.
Accessoires en option
• Adaptateur d’alimentation secteur
(PA-1, PA-4)
Les adaptateurs d’alimentation secteur
convertissent la tension du courant
secteur en tension du courant continu
requise par cet instrument.
• Adaptateur de batterie de voiture
(CA-1)
L’adaptateur de batterie de voiture
alimente l’instrument à partir de la
batterie du véhicule, via la douille de
l’allume-cigare.
• Etui souple de transport (SCC-31)
Cet étui léger offre une protection
idéale et un transport pratique de
l’instrument.
• Casque d’écoute (HPE-3, HPE-5)
Ce casque d’écoute léger, spécialement
conçu, est équipé de coussinets pour
les oreilles extrêmement confortables.
• Pied (L-2, L-4)
• Banc (BC-6)
*Certains accessoires ne sont pas
disponibles partout.
Accesorios opcionales
• Adaptador de alimentación de CA
(PA-l/PA-4)
Los adaptadores de alimentación de CA
opcionales convierten la tensión de alimen
tación de la red de CA en la tensión de
CC requerida por el instrumento.
• Adaptador para la batería de un
automóvil (CA-1)
El adaptador para la batería de un
automóvil provee a su instrumento con la
energía sufciente procedente de la batería
de un automóvil a través del receptáculo
del encendedor de cigarrillos del automóvil.
• Funda blanda para el transporte
(SCC-31)
Esta funda de peso ligero provee la protec
ción necesaria para un transporte
conveniente.
• Auriculares (HPE-3/HPE-5)
Estos auticulares son ligeros de peso y
están diseñados especialmente, se caracte
rizan por sus almohadillas muy cómodas
para los oídos.
• Soporte (L-2/L-4)
• Banco (BC-6)
• Puede que algunos de los accesorios opciona
les no estén disponibles en todas partes.
15
Page 18

8
Taking Care of Your
PorlaTone
Your PortaTone will give you years of play
ing pleasure if you follow the simple rules
given below:
1. Use ONLY the specified optional
Yamaha AC adaptors with your PortaTone. Read the adaptor instructions
carefully before use.
2. The optional CA-1 Car Battery Adaptor
can ONLY be used with 12-volt negativeground car battery systems. Make sure
that your car has this system before
attempting to power your PortaTone
using the CA-1.
3. Connections between the PortaTone
and any other device must be made
with both pieces of equipment turned
OFF.
4. Use a relatively low MASTER VOLUME
control setting when connecting the
PortaTone to a stereo sound system.
Use the stereo system’s volume control
to adjust volume.
5. Avoid placing the PortaTone in areas
that are subject to excessive humidity
or heat. Do not leave the instrument
near heaters or in a car exposed to
direct sunlight, for example.
6. Do not subject the instrument to strong
physical shocks, and avoid placing
heavy objects on it,
7. Use a soft cloth, dry or slightly damp,
for cleaning. Never use chemicals such
as benzine or thinner.
8. For protection, keep the PortaTone in
its case when you’re not using it.
V orsichtsmaßnahmen
Wenn Sie die folgenden einfachen Verhaltens
maßregeln beachten, werden Sie sicher viele
Jahre lang Freude an Ihrem PortaTone haven:
1. AUSSCHLIESSLICH die als Sonder
zubehör erhältlichen Yamaha-Netzadapter
für das PortaTone verwenden und bei
Gebrauch die einschlägigen Bedienungsan
leitungen beachten.
2. Der als Sonderzubehör erhältliche Autobat
terieadapter CA-1 darf NUR an 12-VBatterieanlagen mit negativer Karosserie
masse angeschlossen werden. Daher ist vor
Gebrauch des Adapters sicherzustellen, daß
die Batterieanlage den Erfordernissen
entspricht.
3. Beim Anschluß anderer Geräte an das
PortaTone müssen beide Systeme AUSGE
SCHALTET sein.
4. Beim Anschluß des PortaTone an eine
Stereoanlage die Lautstärke mit dem
MASTER VOLUME-Regler (2) möglichst
niedrig einstellen. Zur Lautstärkeeinstellung
den entsprechenden Regler an der Stereo
anlage verwenden.
5. Aufstellorte meiden, die extrem hoher
Feuchtigkeit oder Wärme ausgesetzt sind.
Das Instrument daher z.B. keinesfalls in
der Nähe von Öfen aufstellen oder in einem
Fahrzeug zurücklassen, das direkter Sonnen
einstrahlung ausgesetzt ist.
6. Das Instrument keinesfalls starken Stößen
aussetzen oder durch schwere Gegenstände
belasten.
7. Zum Reinigen keinesfalls scharfe Mittel
wie Waschbenzin oder Verdünner, sondern
stets ein weiches trockenes oder leicht
angefeuchtetes Tuch verwenden.
8. Bei Nichtgebrauch das PortaTone stets
in der Schutzhülle aufbewahren.
Entretien du PortaTone
Si les simples précautions suivantes sont
observées, le PortaTone doit fonctionner
parfaitement pendant des années.
1. Utiliser UNIQUEMENT les adaptateurs
d’alimentation secteur, en option, spécifés par Yamaha, avec le PortaTone.
Avant d’utiliser ces appareils, lire
attentivement leur mode d’emploi.
2. L’adaptateur de batterie de voiture
CA-1, en option, peut être utilisé
UNIQUEMENT avec des batteries de
voiture de 12V avec masse négtive.
Avant d’alimenter le PortaTone par le
CA-1, s’assurer que le véhicule
possède une telle batterie.
3. N’effectuer de raccordement entre
le PortaTone et tout autre appareil
uniquement lorsque ceux-ci sont hors
tension.
4. Lorsqu’on raccorde le PortaTone à
une chaîne stéréo, laisser le réglage
MASTER VOLUME sur un niveau rela
tivement bas. Utiliser le réglage
d’intensité sonore de la chaîne stéréo
pour ajuster le volume.
5. Eviter d’installer le PortaTone dans
des endroits soumis à une humidité ou
une chaleur excessive. Ne pas laisser
l’instrument à proximité d’un appareil
de chauffage, ou dans un véhicule
garé en plein soleil.
6. Ne pas infliger de choc violent à
l’instrument et éviter d’y poser des
objets lourds.
7. Pour nettoyer l’instrument, utiliser un
chiffon doux et sec, ou légèrement
humide. Ne jamais utiliser de produit
chimique, comme l’essence ou un
dissolvant.
8. Par mesure de protection, laisser le
PortaTone dans son étui de transport
lorsqu’il n’est pas utilisé.
Cuidados de su
PortaTone
Su PortaTone le proporcionará años de ser
vicio si se tienen en cuenta las simples normas
que se dan a continuación:
1. Utilice SOLAMENTE los adaptadores
Yamaha de CA opcionales especificados
con su PortaTone. Antes de su utilización
lea cuidadosamente las instrucciones del
adaptador.
2. El adaptador para la batería de un auto
móvil CA-1 opcional sólo se puede utilizar
con sistemas de baterías de automóviles
de tierra negativa de 12 voltios. Asegúrese
de que su automóvil disponga de este sis
tema antes de conectar su PortaTone
utilizando el CA-1.
3. Las conexiones entre el PortaTone y otro
dispositivo cualquiera deben efectuarse
estando ambos equipos desconectados.
4. Cuando conecte el PortaTone a un
sistema de sonido estéreo utilice un ajuste
de control del MASTER VOLUME
relativamente bajo.
5. Evite el emplazar el PortaTone en áreas
que estén sujetas a una humedad excesiva
o expuestas al calor. No deje el instrumento
cerca de calentadores o en un automóvil
que esté directamente expuesto a la luz
solar, por ejemplo.
6. Procure que el instrumento no reciba
impactos físicos fuertes, y evite el colocar
objetos pesados sobre el PortaTone.
7. Utilice una tela blanda, seca o ligeramente
humedecida, para limpiarlo. Nunca utilice
agentes químicos como bencina o
disolventes.
8. Cuando no lo utilice mantenga el
PortaTone en su funda, para su protección.
Specifications
Keyboard
49 keys (Cl—Cs)
Orchestra Voices {“00-99” in the Voice Bank)
Piano 1, 2, Honky-Tonk Piano*, Electric Piano
1, 2, Harpsichord 1, 2, 3, Honky-Tonk Clavi*,
16
Technische Daten
Tastatur
49 Tasten (C, bis C,)
Orchesterstim men (,,00-99“ in der Stimmenbank)
Piano 1 und 2, Honky-Tonk Piano*, Elektrisches
Piano l und 2, Cembalo 1, 2 und 3, Honky-Tonk
9
Spécifications
Clavier
49 touches (fa, à dog)
Voix orchestrales (“00 à 99” dans la banque de
voix)
Piano 1, 2, Honky-Tonk Piano*, Piano élec-
Especificaciones
Teclado
49 teclas (C,—C5)
Voces de Orquesta (“00-99” en el Banco de Voces)
Piano 1, 2, Honky Tonk Piano*, Piano Eléctrico
I, 2, Clavicordio 1, 2, 3, Honky Tonk Clavi*,
Page 19

Glass Celesta, Reed Organ, Pipe Organ 1*, 2,
Electronic Organ 1,2*, Jazz Organ, Accordion*,
Vibes, Marimba 1, 2, Trumpet, Mute Trumpet,
Trombone, Soft Trombone, Horn, Alpenhorn,
Tuba, Brass Ensemble 1*, 2*, 3*, Flute,
Panflute, Piccolo, Clarinet, Bass Clarinet, Oboe,
Bassoon, Saxophone, Bagpipe, Woodwinds*,
Violin 1, 2 Cello, Strings*, Electric Bass, Slap
Bass, Upright Bass, Synth Bass, Banjo,
Mandolin*, Classic Guitar, Jazz Guitar, Folk
Guitar, Steel Guitar, Ukulele, Koto, Shamisen,
Harp, Harmonica, Music Box, Brass &
Marimba, Flute & Harpsichord*, Oboe &
Vibraphone*, Clarinet & Harp*, Violin & Steel
Drum*, Handsaw, Synth Brass, Metallic Synth,
Sine Wave, Reverse, Synth Vox 1, 2, 3,
Whisper, Whistle, Gurgle, Bubble, Raindrop,
Popcorn, Drip, Dog Pianist*, Duck, Baby Doll,
Telephone Bell*, Emergency Alarm*, Leaf
Spring, Comet, Fireworks, Crystal, Ghost,
Hand Bell, Chimes, Bell, Steel Drum, Cowbell,
Electronic Tom 1, 2, Snare Drum, Machine
Gun, Wave
(*Double sounding voices)
Rhythm Section
8 Beat, 16 Beat, Country, Samba, Bossa Nova,
Disco, March, Swing, 12 Beat, Waltz
Controls: Tempo, Synchro Start, Start/Stop,
Fill In
Auto Bass Chord Section
Single Finger, Fingered, Auto Chord, Auto
Bass, Off
Effects
Vibrato, Sustain
Other Controls And indicators
Power Switch, Master Volume, Accom
paniment Volume, Voice No.rTempo LED In
dicator, Demonstration
Auxiliary Jacks
Headphones/Aux Out, DC 9V—12V In
Main Amplifiers
2.5W, 4 ohms
Speakers
12cm (4-3/4”)
Rated Voltage
DC 9V (Six SUM-1, ”D” size, R-20 or equivalent
batteries), AC Power Adaptor (PA-1/PA-4/PA-40)
or Car Battery Adaptor (CA-1)
Dimensions (W x D x H)
858mm x 286mm x 94mm
(33-7/9” X 11-1/4” X 3-5/7”)
Weight
3.8 kg (8.4 lbs.) excluding batteries
Clavi*, Glass-Celesta, Harmonium, Pfeifenorgel
1* und 2, Elektronische Orgel 1 und 2*, Jazzorgel,
Akkordeon*, Vibraphon, Marimba 1 und 2,
Trompete, Gedämpfte Trompete, Posaune, SoftPosaune, Horn, Alpenhorn, Tuba, Blechbläser 1*,
2* und 3*, Flöte, Panflöte, Pikkoloflöte, Klarinette,
Baßklarinette, Oboe, Fagott, Saxophon, Dudelsack,
Holzbläser*, Violine 1 und 2, Cello, Streicher*,
Elektrobaß, Slap-Baß, Kontrabaß, Synthesizer-Baß,
Banjo, Mandoline*, Klassische Gitarre, Jazz
gitarre, Folkgitarre, Steel-Gitarre, Ukulele, Koto,
Shamisen, Harfe, Harmonika, Music-Box, Blech
bläser und Marimba, Flöte und Cembalo*, Oboe
und Vibraphon*, Klarinette und Harfe*, Violine
und Steel-Drum*, Handsäge, SynthesizerBlechbläser, Metallic-Synthesizer, Sinuswelle,
Reverse, synth. Stimme 1, 2 und 3, Geflüster,
Pfeifen, Kluckern, Brodeln, Regentropfen,
Popcorn, Tröpfeln, Dog-Pianist*, Entenquaken,
Baby-Doll-Geräusch, Telefonklingel*, Alarm
signal*, Blattfeder, Komet, Feuerwerk*, Kristall,
Geist, Handglocke, Glockenspiel, Glocke, Blech
trommel, Kuhglocke, Electronic-Tom 1 und 2,
Kleine Trommel, Maschinengewehr und Wellenge
räusch (* Doppelstimmen)
Rhythmusteil
8 Beat, 16 Beat, Country, Samba, Bossa Nova,
Disco, Marsch, Swing, 12 Beat, Walzer
Bedienelemente: Tempo-Einstelltasten, SYNC.
START-Taste, Start/Stop-Taste und Fill-ln-Taste
Auto-Baßakkord-T eil
Einfinger-Betriebsart, Gespielte Auto-Begleitung,
Auto-Akkord, Auto-Baß, Aus
Effekte
Sustain und Vibrato
Weitere Bedienteile und Anzeigen
Ein/Aus-Schalter, Hauptlautstärkeregler, Beglei
tungslautstärkeregler, Demotaste, Anzeige für
Stimmennummer/Tempo und Takt
Anschlußbuchsen an der Geräterückseite
Kopfhörer/Aux.-Ausgang (HEADPHONES/
AUX)
Adapterbuchse (DC 9V—12V IN)
Endverstärker
2,5W, 4 Ohms
Lautsprecher
12cm
Betriebsspannung
9V (6 Monozellen oder entsprechende AlkaliBatterien), Netzadapter (PA-1 oder PA-4) oder
Autobatterieadapter (CA-1)
Abmessungen (B x T x H)
858mm x 286mm x 94mm
Gewicht
3,8 kg (ohne Batterien)
trique 1,2, Clavecin 1,2,3, Honky-Tonk Clavi*,
Glass Celesta, Reed Organ, Grandes orgues
1 *, 2, Orgue électronique 1, 2*, Orgue de jazz.
Accordéon*, Vibes, Marimba 1, 2, Trompette,
Trompette sourdine. Trombone, Trombone
doux. Cor, Alpenhorn, Tuba, Ensemble cuivres
1*, 2*, 3*, Flûte, Flûte de Pan, Piccolo,
Clarinette, Clarinette basse. Hautbois, Basson,
Saxophone, Cornemuse, Bois*, Violon 1, 2
Violoncelle, Cordes*, Basse électrique. Slap
Bass, Basse verticale, Synth Bass, Banjo,
Mandoline*, Guitare classique, Guitare jazz.
Guitare Folk, Guitare métallique, Yukulélé,
Koto, Shamisen, Harpe, Harmonica, Boîte à
musique, Cuivres et Marimba, Flûte et
Clavecin*, Hautbois et Vibraphone*, Clarinette
et Harpe*, Violon et Caisse claire*. Scie,
Cuivres synthétiques. Metallic Synth, Sine
Wave, Reverse, Voix synthétique 1, 2, 3,
Soupir, Sifflet, Gargouillis, Bouillonnement,
Goutte de pluie. Popcorn, Egouttement, Chien
pianiste*. Canard, Bébé, Sonnerie de télé
phone*, Alarme*, Leaf Spring, Comète, Feu
d’artifice. Clochette en cristal de fantôme.
Carillon, Tambour métalique. Cloche de vache.
Torn électronique 1,2, Snare Drum, Mitraillette,
Vague (*Voix à double son)
Section du rythme
8 temps, 16 temps, Country, Samba, Bossa
Nova, Disco, Marche, Swing, 12 temps, Valse
Réglages: Tempo, Départ synchronisé, Marche/
Arrêt, Remplisage
Section des accords de basses automatiques
Accord à un seul doigt, accord à plusieurs
doigts. Accord automatique. Basse auto
matique, Hors service
Effets
Vibrato, Soutien
Autres réglages et témoins
Interrupteur d’alimentation, intensité sonore
principale, intensité sonore de l’accompagne
ment, Témoin à DEL du n® de voix/tempo.
Musique de démonstration
Prises auxiliaires
Casque d’écoute/sortie auxiliaire, DC IN
9V—12V
Amplificateurs principaux
2,5W, 4 ohms
Haut-parleurs
12cm
Tension nominale
Courant continu de 9V (Six piles SUM-1, R-20,
de format D, ou piles équivalentes), Adaptateuer d’alimentation secteur (PA-1, PA-4), ou
Adaptateur de batterie de voiture (CA-1)
Dimensions (Lx Px H)
858mm x 286mm x 94mm
Poids
3,8 kg (8,2 livres) piles non comprises
Celesta de Cristal, Armonio, Organo de Tubos
1*, 2, Organo Electrónico 1,2*, Organo de Jazz,
Acordeón*, Vibràfono, Marimba 1, 2, Trompeta,
Trompeta con Sordina, Trombón, Trombón
Suave, Cuerno, Alpenhorn, Tuba, Conjunto de
Metales 1*, 2*, 3*, Flauta, Flauta Dulce, Pícolo,
Clarinete, Clarinete Bajo, Oboe, Fagot, Saxofón,
Gaita, Woodwinds* Violín 1, 2, Violoncello,
Cuerdas*, Bajo Eléctrico, Slap Bass, Contrabajo,
Bajo Sintetizado, Banjo, Mandolina*, Guitarra
Clásica, Guitarra de Jazz, Guitarra de Folk,
Guitarra con Cuerdas de Acero, Ukelele, Koto,
Shamisen, Arpa, Armónica, Caja de Música,
Metales y Marimba, Flauta y Clavicordio*, Oboe
y Vibràfono*, Clarinete y Arpa*, Violín y Tambor
metálico*, Handsaw, Metales Sintetizados,
Sintetizador Metálico, Sine Wave, Reverse, Voz
Sintetizada 1, 2, 3, Susurro, Silbido, Borboteo,
Gotas de LLuvia, Maíz Tostado, Goteo, Perro
Pianista*, Pato, Muñeca, Timbre de Teléfono*,
Alarma de Emergencia*, Leaf Spring, Cometa,
Fuegos Artificiales, Cristal, Fantasma, Campa
nilla, Repique, Campana, Tambor Metálico,
Cencerro, Tom Electrónico 1, 2, Tambor de
Cuerda, Ametralladora, Ola.
(*Voces con sonido doble)
Sección de Ritmos
8 Beat, 16 Beat, Country, Samba, Bossanova,
Disco, Marcha, Swing, 12 Beat, Vals.
Controles: Tempo, Arranque Sincronizado,
Inicio/Parada, Relleno.
Sección de Acordes de Bajo Automático
Un Dedo, Varios Dedos, Acorde Automático,
Bajo Automático, Off
Efectos
Corte, Vibrato, Sostenido
Otros controles e indicadores
Interruptor de Conexión, Volumen Principal,
Volumen del Acompañamiento, Indicador LÉD
N.° de VOZ/Tempo, Música de Demostración.
Contactos auxiliares
Auriculares/Aux. Out, CC 9V—12V IN
Amplificadores principales
2,5W, 4 ohmios
Altavoces
12cm
Tensión nominal
CC 9V (seis pilas SUM-1, tamaño “D”, R-20 o
equivalentes). Adaptador de alimentación de CA
(PA-l/PA-41) o Adaptador para Baterías de
Automóvil (CA-1)
Dimensiones (An. x PF. x Al.)
858mm x 286mm x 94mm
Peso
3,8 kg (8,21 Ib) excluyendo las pilas
"Specifications are subject to change without notice. ^Änderungen bleiben Vorbehalten
"Les spécifications son sujettes à modifications
sans préavis.
*Especificaciones sujetas a cambios sin previo aviso.
Page 20

FCC INFORMATION
Attention users in the U.S.A.
PortaTone PSR-6 prepared in accordance
with FCC rules.
The PortaTone PSR-6 uses frequencies that appear in the
radio frequency range, and if installed in the immediate
proximity (within three meters) of some types of audio or
video devices interference may occur.
The PortaTone PSR-6 has been type tested and found
to comply with the specifications set for a Class B
computing device in accordance with those specifications
listed in Subpart J of Part 15 of the FCC rules. These rules
are designed to provide a reasonable measure of protection
against such interference. However, this does not guarantee
that interference will not occur. If your PortaTone PSR-6
should be suspected of causing interference with other
electronic devices, verification can be made by turning your
PortaTone PSR-6 off and on. If the interference continues
when your PortaTone PSR-6 is off, PortaTone PSR-6 is not
the source of the interference. If your PortaTone PSR-6
does appear to be the source of the interference, you should
try to correct the situation by usin" one or more of the
following measures:
Relocate either the PortaTone PSR-6 or the electronic
device that is being affected by the interference.
Utilize power outlets for the PortaTone PSR-6 and the
device being affected that are on different branch (circuit
breaker of fuse) circuits, or install A/C line filters.
In the case of radio-TV interference, relocate the
antenna or, if the antenna lead-in is a 300 ohm ribbon lead,
change the lead-in to a co-axiat type cable.
If these corrective measures do not produce satisfactory
results, please contact your Authorized Yamaha dealer for
suggestions and/or corrective measures. If you cannot
locate an Authorized Yamaha dealer in your general area,
contact the Service Division, Yamaha Music Corporation
U.S.A., 6600 Orangethorpe Ave, Buena Park, CA 90620.
If for any reason you should need additional information
relating to radio or TV interference, you may find a booklet
prepared by the Federal Communications Commission
helpful: "How to Identify and Resolve Radio-TV Interference
Problems". This booklet is available from the U.S.
Government Printing Office, Washington D.C. 20402—Stock
*004-000-345-4.
This applies only to products distributed by YAMAHA
Music Corp. U.S.A,
Wichtiger Hinweis ftirdie Benutzung in der Bundesrepublik Deutschland.
Bescheinigung des Importeurs
Hiermit wird bescheinigt, daß der/die/das
Musikinstrument Typ: PSR-6
(Gerat, TVp, Bezeichnung)
in Übereinstiniinung mit den Etestinunungen der
VERFÜGUNG 1046/84
(Amt sblat t verfUgung)
funk-entstört ist.
Der Deutschen Bundespost wurde das Iny^kehrbringen dieses Gerätes
angezeigt und die Elerechtigung zur Überprüfung der Serie auf
Einhaltung der Bestimmungen eingeräumt.
Väma/18 Europa GmbH
Name des Importeurs
Dies bezieht sich nur auf die von der YAMAHA EUROPA GmbH
vertriebenen Produkte.
YAMAHA
YAMAHA CORPORATION
PO. Box 1, Hamamatsu, Japan
The serial number of this product may be found on
the bottom of the unit. You should note this serial
number in the space provided below and retain this
manual as a permanent record of your purchase to
aid identification in the event of theft.
Model No. PSR-6
Die Seriennummer befindet sich an der Unterseite des In
struments. Wir empfehlen, diese Nummer sicherheitshalber
an der unten vorgesehenen Stelle einzutragen, um sie auch
im Falle eines Diebstahls jederzeit zur Hand zu haben.
Model-Nr. PSR-6
Le numéro de série de ce produit figure sur le socle
de l’appareil. Il conviendra de noter ce numéro de
série dans l’espace réservé ci-dessous et de
conserver ce manuel: celui-ci constitue le document
permanent de votre achat et permet l’identification
en cas de vol.
Modèle No. PSR-6 № de modelo PSR-6
E1 número de serie de este producto se encuentra en la
parte inferior de la unidad. Sírvase anotar este número de
serie en el espacio proporcionado debajo y guarde este
manual como comprobante de compra para ayudar a la
identificación en caso de robo.
Serial No. Serien-Nr. No. de série: № de serie
Remarque relative à la garantie
Concerning Warranty
This product was made for international distribution,
and since the warranty for this type of product varies
from marketing area to marketing area, please contact
the selling agency for information concerning the
applicable warranty and/or service policies.
Hinweis zur Garantie
Dieses Produkt wird international vertrieben, und die
Garantiebedingungen sind von Vertriebsland zu Vetriebsland
verschieden. Ihr Händler gibt Ihnen gerne ganauere Infor
mationen zu den in Ihrem Land gültigen Garantie und/oder
Servicebedingungen.
Ce modèle est destiné à être distribué à l’échelle
internationale. Etant donné que les conditions de
garantie pour ce type de produit varient en fonction
des zones de commercialisation, prière de prendre
contact avec l’agence chargée des ventes pour tous
renseignements relatifs aux conditions de garantie
et de service après-vente.
Concerniente a la garantía
Este producto ha sido fabricado para ser distribuido inter
nacionalmente y, como la garantia para este tipo de
producto varia en relación a su área de comercialización,
sírvase consultar con el agente de ventas sobre la información
en torno a la garantia aplicable y/o políticas de servicio.
i
CD ^802 Printed in Japan
 Loading...