

Page 1

OWNER’S MANUAL
Advanced Features
BEDIENUNGSANLEITUNG
Programmieranleitung
MODE D’EMPLOI
Fonctions avancées
MANUAL DE INSTRUCCIONES
Características avanzadas
Page 2

The PSR-5700 Advanced Features manual contains operating instructions for the instrument’s
more complex and advanced features. If you are yet familiar with PSR-5700’s basic features and the
way it works in general, we recommend that you go through the PSR-5700 Getting Started manual
prior to attempting to use the features described in this manual.
Contents
The Sequencer .................................................................... 3
■ Recording ....................................................................... 3
■ Deleting Tracks ............................................................... 5
■ Playback ......................................................................... 6
■ Sequence Editing ........................................................... 7
E1 CONDITION/REC TYPE ............................................. 7
E2 VOLUME................................................................... 8
E3 TRACK COPY/MIX ..................................................... 9
E4 QUANTIZE .............................................................. 10
E5 DELETE ALL TRACKS ............................................. 11
E6 INSERT ALL TRACKS .............................................. 12
E7 ERASE ................................................................... 12
E8 REMOVE EVENT ..................................................... 13
E9 NOTE SHIFT ........................................................... 14
E10 SONG CLEAR ....................................................... 14
The Custom Accompaniment Programmer............... 15
■ Basic Programming Procedure ..................................... 15
■ Using a Custom Accompaniment ................................. 18
■ Custom Accompaniment Editing .................................. 19
1 CUSTOM ACCOMP. (Measure/Beat)............................ 19
2 VOLUME ................................................................... 19
3 FADER SELECT ........................................................ 20
4 NAME ....................................................................... 20
5 SAVE TO ACCOMP.................................................... 20
6 QUANTIZE ................................................................ 21
7 COPY ....................................................................... 22
8 REMOVE EVENT ....................................................... 23
9 CHANGE PATTERN ................................................... 23
• CREATING INTRO, FILL-IN, & ENDING PATTERNS ...... 24
• EXITING FROM THE CUSTOM ACCOMPANIMENT
MODE ....................................................................... 25
Other Functions ................................................................ 26
■ General Function Selection & Editing Procedure ......... 26
[F1] Custom Voice Edit ................................................... 27
■ Standard Voice Edit Functions
1 NAME ....................................................................... 27
2 COMMON ................................................................. 28
3 MODULATION ........................................................... 28
4 EG RATE .................................................................. 29
5 TONE ....................................................................... 30
■ Dual Voice Edit Functions (Voices 90 through 97) ........... 30
1 DUAL NAME.............................................................. 30
2 DUAL VOICE ............................................................. 31
3 DUAL OCTAVE .......................................................... 31
4 DUAL VOLUME ......................................................... 31
5 DUAL PAN ................................................................ 32
6 DUAL DETUNE .......................................................... 32
■ Drum Voice Edit Functions (Voices 98 and 99) ............... 33
1 PERC. NAME ............................................................ 33
2 PERC. PITCH ............................................................ 33
3 PERC. PAN ............................................................... 34
4 PERC. TONE ............................................................. 34
(Voices 00 through 89) .... 27
[F2] Reverb, Effect............................................................ 35
1 REVERB TYPE .......................................................... 35
2 REVERB DEPTH ....................................................... 35
3 EFFECT TYPE........................................................... 36
4 EFFECT DEPTH ........................................................ 36
[F3] Controller & Key Velocity....................................... 37
1 KEY VELOCITY ......................................................... 37
2 FOOT SWITCH SELECT ............................................ 37
3 EXP. PEDAL SELECT ................................................ 38
4 SUSTAIN PART SELECT ............................................ 38
5 PITCH BEND SELECT ............................................... 39
6 WHEEL SELECT ....................................................... 39
[F4] Split Point, Interactive Accompaniment, &
Super Style Play Mode ........................................... 40
1 SPLIT POINT ............................................................. 40
2 INTERACTIVE ACCOMP. ........................................... 40
3 SUPER STYLE PLAY MODE ....................................... 41
[F5] Disk .............................................................................. 42
■ The [TO DISK] Button ................................................... 42
■ The [FROM DISK] Button ............................................. 44
■ The [F5] DISK Functions .............................................. 45
1 FROM DISK .............................................................. 45
2 TO DISK ................................................................... 46
3 RENAME FILE ........................................................... 46
4 DELETE FILE ............................................................ 47
5 FORMAT DISK .......................................................... 47
6 DISK FREE AREA ...................................................... 47
• Disk Error Messages .................................................. 48
[F6] Utility & MIDI .............................................................. 49
1 MEMORY BACKUP .................................................... 49
2 RECALL INITIAL DATA ............................................... 50
■ The [DISK ORCHESTRA/GENERAL MIDI] Button ...... 50
3 MIDI CHANNEL SETTING ........................................... 54
4 MULTI PART SETTING .............................................. 56
5 MIDI SWITCH ............................................................ 56
6 MIDI SYSTEM ........................................................... 57
7 DATA TRANSMIT ...................................................... 58
Index..................................................................................... 59
MIDI Function Tree ......................................................... 242
MIDI Messages .............................................................. 246
DISK ORCHESTRA (DOC) Mode Voice List ................. 253
GENERAL MIDI (GM) Mode Voice List .......................... 254
PSR-5700 Percussion Map ............................................ 255
GM/DOC Mode Percussion Map .................................... 256
MIDI Implementation Chart ............................................ 257
Specificationes ............................................................... 258
2
Page 3
G
The Sequencer
The PSR-5700 features an 8-track sequencer that allows you to record and play back original musical creations — along with auto accompaniment if required. You can record the accompaniment and
orchestra parts separately or at the same time. If, for example, you record the accompaniment first
and then record your own performance while listening to playback of the accompaniment, you’re free
to use the entire keyboard for your performance rather than being limited to only the upper keyboard
area. You can also play back each part independently or in any combination. For even further versatility, the PSR-5700 sequencer allows different songs to be saved to or re-loaded from floppy disk.
Recording
As you become more familiar with the PSR-5700 sequencer you’ll probably develop a recording procedure
that best suits your particular musical requirements. Here, to get you started, is the most simple, straightforward way to approach sequencer recording.
ZEngage the Sequencer
SEQUENCER
CUSTOM ACCOMPANIMENT PRO
SONG
SELECT
XSelect a Song Number
SEQUENCER
CUSTOM ACCOMPANIMENT PROGRAMMER
SONG
SELECT
123456
CSet Up All Record Parameters
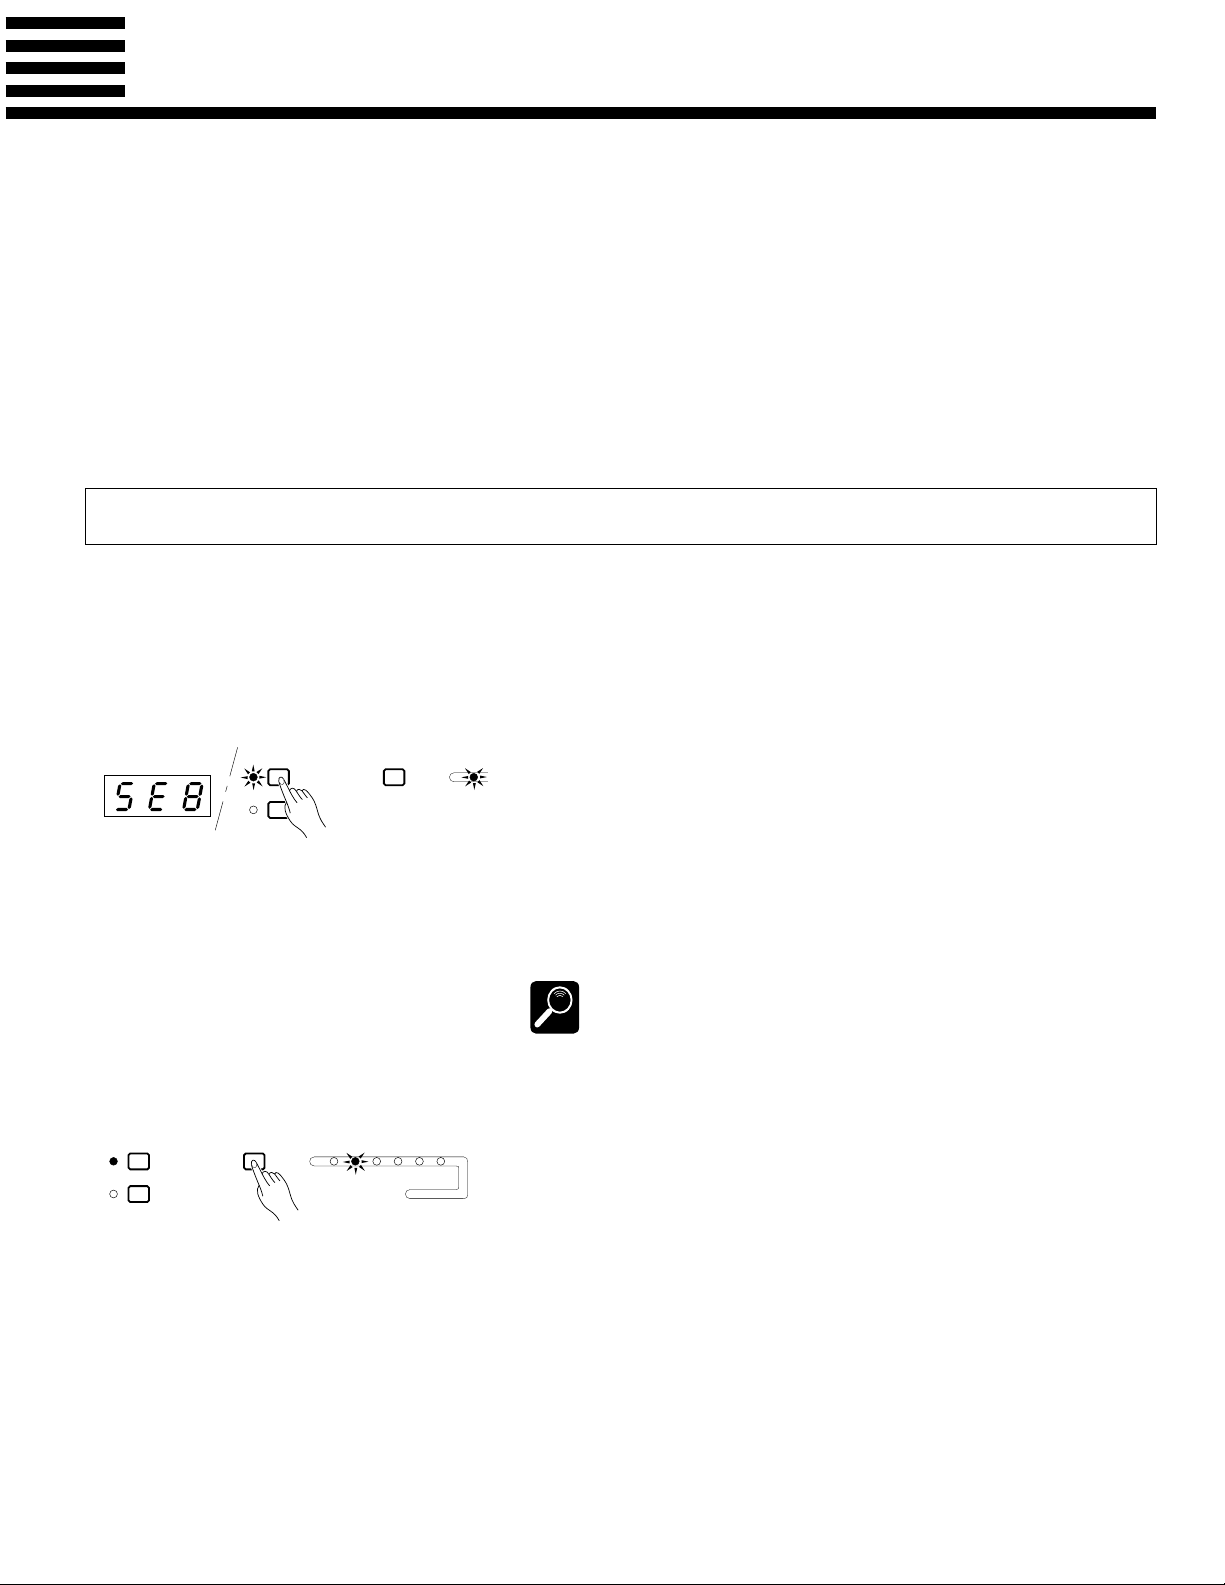
Press the [SEQUENCER] button to engage the sequencer. “SEQ” will
appear on the TEMPO display if the currently selected song contains no
data, or the measure number will appear if the song does contain data. The
1
number-1 indicator to the right of the [SONG SELECT] button will also
light.
If the sequencer contains previously recorded data, the green PLAY indicators of tracks containing data will light when the sequencer is engaged.
Any of these tracks can be muted prior to engaging the record-ready mode
(below) by pressing the corresponding track button so that the green PLAY
indicator flashes.
The sequencer can also be engaged by pressing one of the track buttons, or by
pressing the [SONG SELECT] button.
DETAIL
The PSR-5700 sequencer can record up to 6 separate songs. Use the
[SONG SELECT] button to select the song number you want to record. The
selected song number is shown by the indicators, 1 through 6, to the right of
the [SONG SELECT] button.
Select the accompaniment style you want to record with, voices, orchestration, harmony, and other parameters before actually beginning recording.
A list of the parameters that can be recorded by the PSR-5700 sequencer is
given below.
You may also need to select a specific record mode and other conditions
accessible via the sequencer’s CONDITION/RECORD TYPE functions,
described on page 7.
3
Page 4
The Sequencer
Recordable Parameters
Tracks 1 — 7
• Note on/off
• Pitch bend
• Modulation
• Sustain on/off
• Orchestra 1 & 2 volume
• Voice change (including custom voice on/off)
• Tempo (if ACCOMP. track contains no data)
• Glide on/off
• Percussion pad on/off*
• Tempo pad tempo value*
• Multi pad on/off (phrase only)*
* The pad mode selected when the sequence
is played back will be used.
Accompaniment Track
• Chord & root (note on/off in Manual Bass
mode)
• Style change (styles with the same time
signature only)
• Rhythm volume
• Bass volume
• Chord 1 volume
• Chord 2 volume
• Tempo
• Reverb on/off & depth
• Reverb type
• Effect on/off & depth
• Effect type
When the sequencer mode is engaged all previous panel settings are ignored.
IMPORTANT
If the record and playback pad modes are different, pad on/off events will not be
reproduced.
DETAIL
If parameter changes are memorized using the Voice Registration, Panel Registration, or Super Styleplay features during recording, only those parameters that
can be recorded on the current track will be memorized.
DETAIL
• Effect control
• Harmony on/off and type
• Interactive Accompaniment on/off
• Interactive Accompaniment variation
• Interactive Accompaniment mode & sensitivity
• Auto Bass Chord mode
• Percussion Pad on/off
• Pad function (Multi/Tempo/Perc)
• Repeat/Synchro/Break on/off
• Manual bass on/off, voice
• Intro, fill in & ending
• Chord pad chord sequence
• Tempo pad tempo value
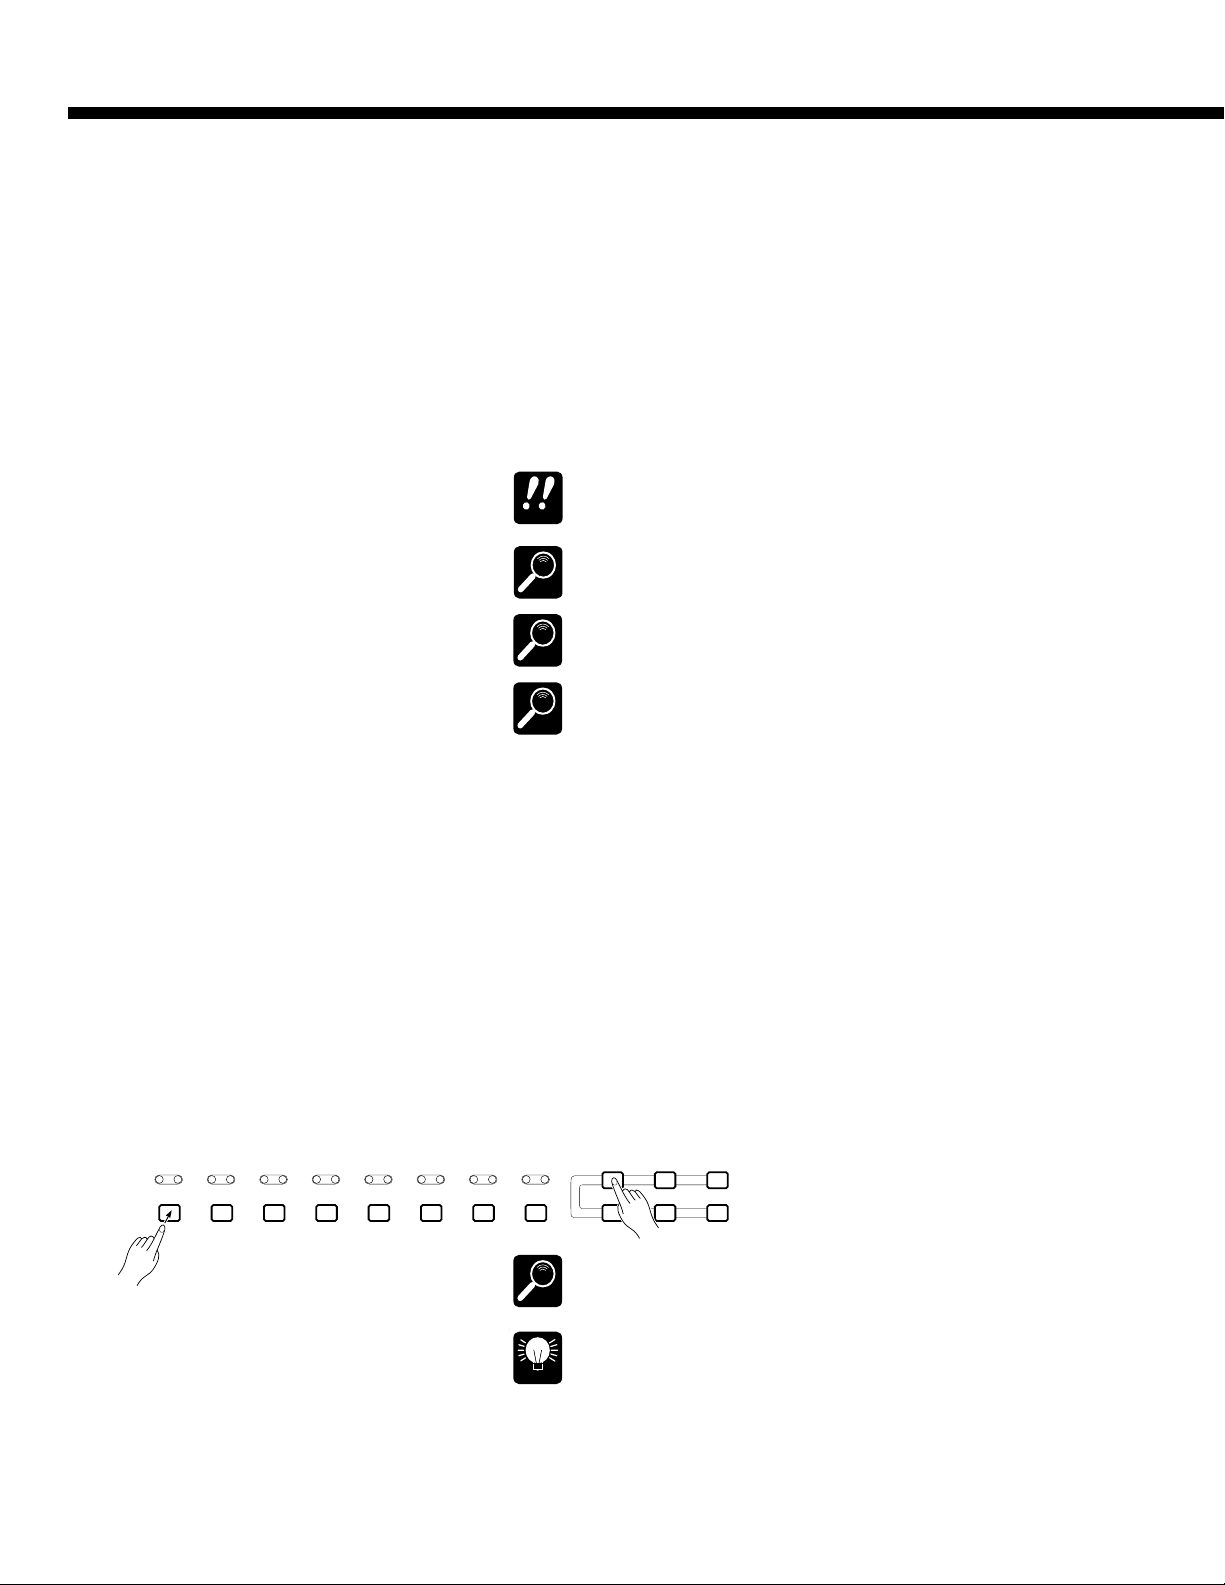
VSelect the Record Track(s)
PLAY REC PLAY REC PLAY REC PLAY REC PLAY REC PLAY REC PLAY REC PLAY REC
1 2 3 4 5 6 7 ACCOMP.
CHORD 1 CHORD 2 CHORD 3 CHORD 4 CHORD 5 CHORD 6 BASS RHYTHM
The time signature cannot be changed once a song has been recorded.
DETAIL
AUTO BASS CHORD accompaniment can only be recorded on the
ACCOMP. track. The ORCH.1 and ORCH.2 voices can be recorded on any
of the remaining 7 tracks, but only one of these tracks can be recorded at a
time if the normal ORCH.1 orchestration is selected. If the ORCH.2+1 or
ORCH.2v1 orchestration is selected, two record tracks must be selected
— the ORCH.1 voice will be recorded on the lower-numbered track while
the ORCH.2 voice will be recorded on the higher-numbered track. This
means that a maximum of three record tracks can be specified when the
ORCH.2+1 or ORCH.2v1 orchestration is selected: ACCOMP. and any
two numbered tracks.
To select the record track(s) and engage the record-ready mode, hold the
[RECORD] button and press the appropriate track button(s). The red REC
indicator for the tracks will flash. Also note that the AUTO BASS CHORD
indicator will light automatically when the ACCOMP. track is selected.
RECORD DELETE EDIT
prf
The upper markings on the track buttons apply when the SEQUENCER mode is
engaged (1 through 7, and ACCOMP.). The lower markings when the CUSTOM
ACCOMPANIMENT PROGRAMMER described on page 15 is operating.
DETAIL
If you are adding new material to tracks that have already been recorded, the
[r] and [f] buttons can be used at this point to move to any measure number
HINT
from which you want to begin recording. The [r] and [f] buttons will not
function once recording has been started.
4
Page 5
The Sequencer
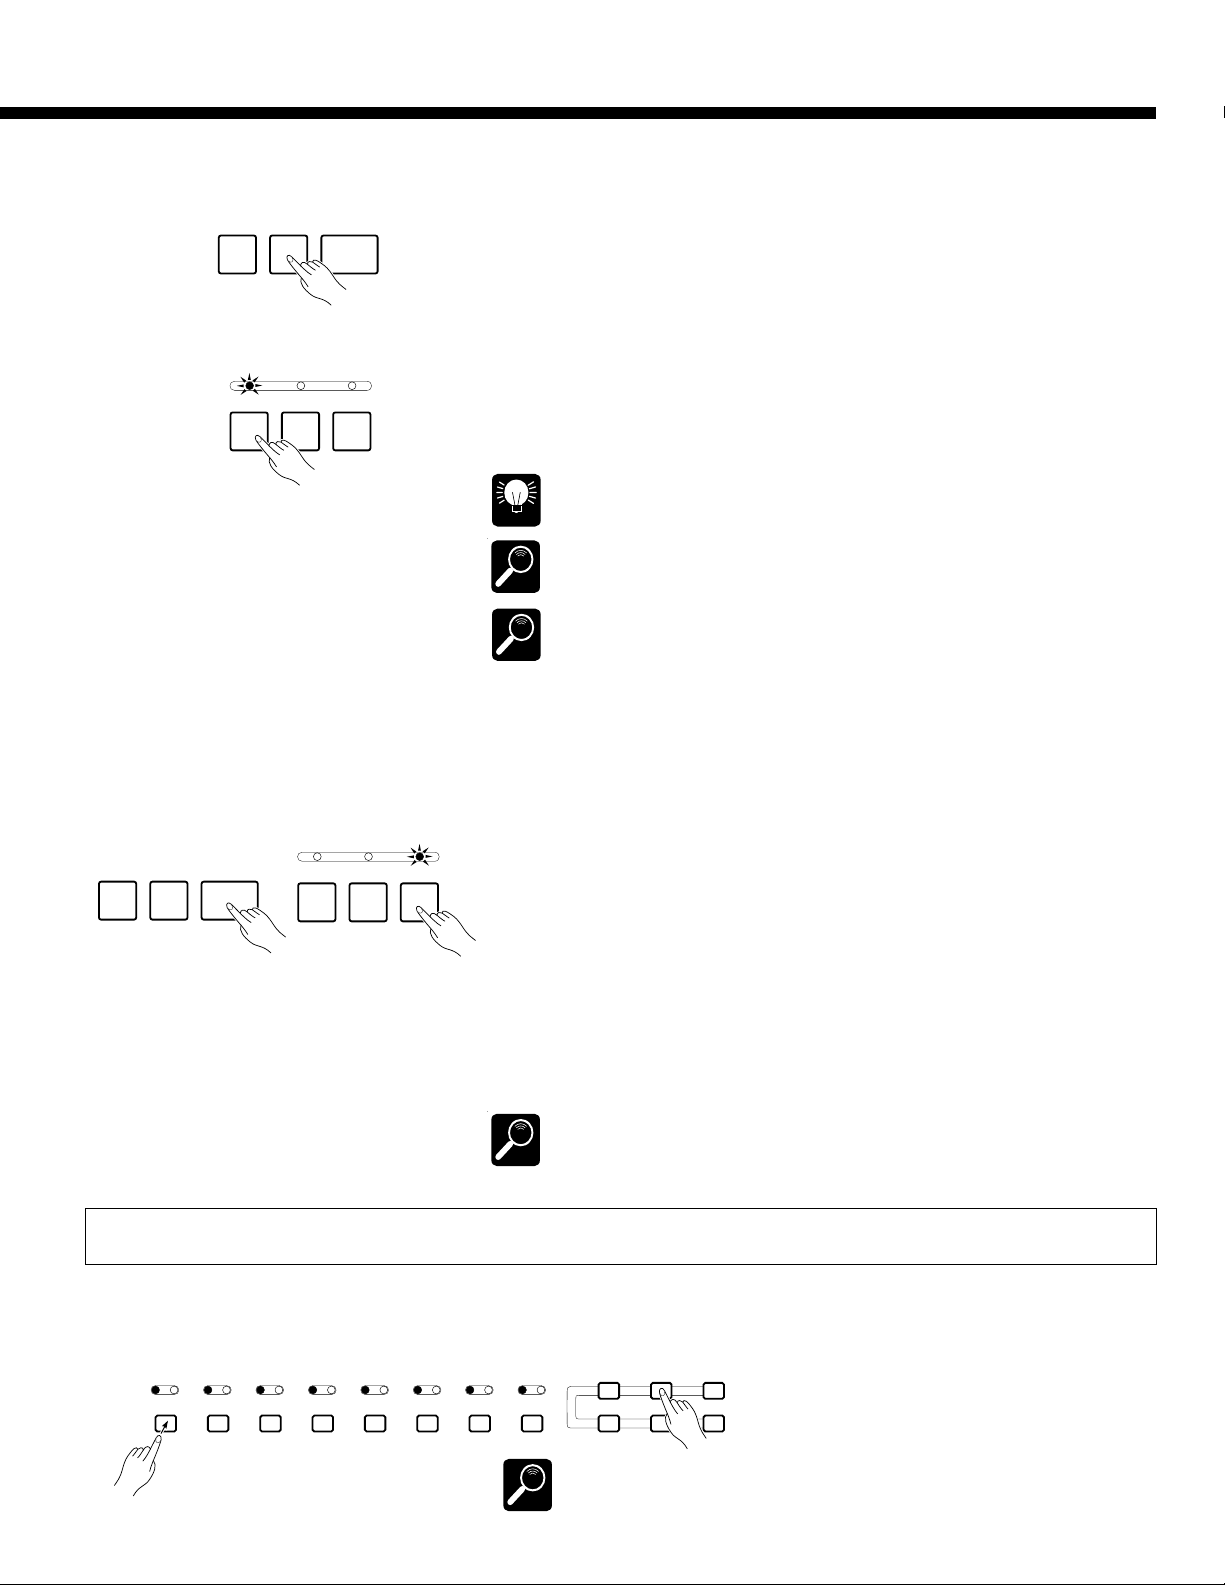
CO
BStart Recording
SYNCHRO
START/
START
RE-START
FILL IN
FILL IN
j
NPlay
Recording will start as soon as the [START/RE-START] button is pressed or,
STOP
if you also press the [SYNCHRO START] button, as soon as any key on the keyboard is pressed.
If the ACCOMP. track is selected and you start recording by pressing the
[START/RE-START] button, only the rhythm will play until the first chord
(FINGERED or SINGLE FINGER) is played on the left-hand section of the keyboard.
If you start recording in the SYNCHRO START mode by playing on the right-
ENDING/
rit.
n
hand section of the keyboard, a metronome will sound in place of the rhythm and
AUTO BASS CHORD accompaniment until a key is played on the left-hand
INTRO.3INTRO.2INTRO.1
section of the keyboard.
Before starting recording you can also choose an introduction by pressing any of the
[INTRO.] buttons.
HINT
The restart function can not be used while the sequencer mode is engaged.
DETAIL
Previously recorded fill-ins may not always be erased if that section is re-recorded or
deleted.
DETAIL
Play the accompaniment and/or orchestra parts. The current measure number is
shown on the TEMPO display as you record.
MStop Recording
SYNCHRO
START
START/
RE-START
STOP
FILL IN
j
<Record a New Track
PLAY REC PLAY REC PLAY REC PLAY REC PLAY REC PLAY REC PLAY REC PLAY REC
1 2 3 4 5 6 7 ACCOMP.
CHORD 1 CHORD 2 CHORD 3 CHORD 4 CHORD 5 CHORD 6 BASS RHYTHM
FILL IN
n
ENDING/
rit.
INTRO.3INTRO.2INTRO.1
Press the [STOP] button to stop recording immediately, or the [ENDING/rit.]
button to finish off the recording with an appropriate ending. The first measure of
the sequence is automatically selected when recording is stopped.
To record a new track, simply select a new voice and other parameters as required, select a new track as described in step 4, then record. All previously recorded tracks will automatically be set to the PLAY mode so you can record the
new material while listening to the material you’ve already recorded. Repeat this
procedure until your sequence is complete.
Up to approximately 7,000 notes can be recorded for all six sequencer songs. The
exact number of notes that can be recorded, however, will depend on the type of data
DETAIL
you record.
Deleting Tracks
If you make a mistake while recording or simply want to delete a track from
your sequence, press the track button corresponding to the track you want to
delete while holding the [DELETE] button.
RE
RD DELETE EDIT
prf
Tracks cannot be deleted during recording or playback.
DETAIL
5
Page 6
The Sequencer
S
Playback
ZStart Playback
SYNCHRO
START/
START
RE-START
PLAY REC PLAY REC PLAY REC PLAY REC PLAY REC PLAY REC PLAY
12345 67
CHORD 1 CHORD 2 CHORD 3 CHORD 4 CHORD 5 CHORD 6 BA
RECORD DELETE EDIT
prf
STOP
XPlay along If You Like
Since tracks are automatically set to the PLAY mode once they have been
recorded, and tracks containing data are automatically set to the PLAY mode
when the sequencer is initially engaged by pressing the [SEQUENCER] button,
all you have to do to play back a sequence is to press the [START/RE-START]
button. If you first press the [SYNCHRO START] button, sequencer playback
can be started by playing any key on the keyboard.
Any of the PLAY tracks can be muted before or during playback by pressing
the corresponding track button. The PLAY indicator will flash when a track is
muted. Normal playback can be restored by pressing the track buttons of muted
tracks a second time (the PLAY indicator will light continuously).
Before starting playback you can use the [r] and [f] buttons to move to any
measure number from which you want to begin playback. The [p] button goes
directly to measure number 1.
HINT
If the Super Styleplay section change parameter (page 41) is turned ON during
ACCOMP. track playback, the Super Styleplay section will change in accordance
with accompaniment variation transitions and the result may be different from the
DETAIL
recorded data.
You can play along with the sequence using the entire PSR-5700 keyboard,
selecting different voices and changing the tempo as required (subsequently
recorded tempo changes will still take effect).
Parameters That Can Be Changed During Playback
• Style select (styles with different time signatures cannot be selected)
• Volume (rhythm, bass, chord 1 & chord 2)
• Tempo
• Reverb & effect on/off
• Pad repeat and break on/off
• Interactive Accompaniment on/off & accompaniment variation
(VERSE 1, VERSE 2, CHORUS 1, CHORUS 2, SOLO)
• Pad
• Some FUNCTION parameters (pages 26 through 58)
CStop Playback
SYNCHRO
START
START/
RE-START
STOP
VPress [EXIT] When Done
FUNCTION
EXIT
6
If changes to any of the above parameters are recorded in the sequence, the recorded changes will still take effect even if you manually change the parameters
DETAIL
while playing.
Playback will stop automatically when the end of the sequence is reached. At
this point the parameters recorded on the ACCOMP. track will revert to their
initial values. You can also stop playback at any time by pressing the [STOP]
button.
Press the [EXIT] key to exit the sequencer mode and return to the normal
play mode. The sequencer mode can also be exited by pressing the [SEQUENCER] button.
Page 7
Sequence Editing
The Sequencer
RECORD DELETE EDIT
The PSR-5700 sequencer edit mode offers a range of functions that let you modify the re-
corded data and the way in which it is recorded in a number of ways.
Press the [EDIT] button while the sequencer is engaged to enter the sequencer edit mode.
prf
When you’re finished editing press the [EDIT] button again or press the [EXIT] button to return
to the sequencer.
The various functions in the sequencer edit mode are accessed by using the [s] and [t] buttons (these are the same as the [ABC MODE] and [HARMONY TYPE] buttons, respectively),
while the various display screens provided by each function are accessed by using the [<] and
[>] buttons (the [TRANSPOSE/TUNE] and [OCTAVE CHANGE] buttons, respectively).
`CONDITION/REC TYPE ‡
Metro=On Harmony=Key
+– +–
DETAIL
DETAIL
A. B. C. MODE
s
<>
TRANSPOSE/
TUNE
The sequencer record and playback modes can not be engaged while in the edit mode.
The edit functions may not work if a large amount of sequence data has been recorded.
t
HARMONY
TYPE
OCTAVE
CHANGE
E1 CONDITION/REC TYPE
Edit function 1 (“E1”) actually includes two separate functions: CONDITION and RECORD TYPE.
● Condition
`CONDITION/REC TYPE ‡
Metro=On Harmony=Key
+– +–
Purpose:
This display page allows the recording metronome sound
to be turned on or off, and determines whether harmony will
be applied to the keyboard or a track part.
Procedure:
Use the left [-] and [+] buttons to turn the metronome on
or off, and the right [-] and [+] buttons to select the harmony
part — “Key” or “Tr1” through “Tr7”.
Notes:
The metronome sound only appears during recording
when no rhythm is playing.
When the “Key” harmony setting is selected (this is the
default setting when the sequencer mode is engaged), harmony will be applied to notes played on the keyboard. If the
“Tr1” harmony setting is selected, harmony will be applied
to the track-1 part. If “Tr2” is selected harmony is applied to
track 2, and so on.
If Harmony is not turned on during recording, it will automatically be turned off each time playback is stopped if it is
turned on before or during playback.
Harmony can only be applied to tracks that contain data.
7
Page 8
The Sequencer
● Recording Type
† `REC TYPE
Mode=Replace
+–
Purpose:
Selects the Replace, Overdub, or Punch record mode.
Procedure:
Press the [>] button to access the REC TYPE display. Use
the left [-] and [+] buttons to select the Replace, Overdub, or
Punch record mode:
• Replace
If replace recording is selected, any previous data on the
track being recorded will be erased and replaced by the
new material.
• Overdub
If overdub recording is selected, previous material on
that track will be retained and the new material will be
added to it.
• Punch
Punch-in recording allows a specified measure or range
of measures to be re-recorded (replaced) without affecting
previously recorded material before and after the punch-in
range.
When the Punch mode is selected you must also specify
the measure from which playback is to begin prior to the
“punch-in” point at which recording will actually begin
(Play St), the punch-in measure from which recording is
to begin (In), and the punch-out measure at which recording is to end (Out). Use the [<] and [>] buttons to switch
between these two display screens, and the associated [-]
and [+] buttons to specify the required measure numbers.
† `REC TYPE ‡
Mode=Punch Play St= 1
+– +–
† `Punch IN/OUT MEAS.
In= 1 Out= 1
+– +–
Notes:
It’s generally convenient to set the “Play St” measure in
the Punch mode to just a few measures before the punch-in
point. This allows you to get the feel of the music and prepare to start playing at the punch-in point. You can even play
along with the material prior to the actual punch-in point so
you’ll flow naturally into the punch-in recording range.
A footswitch (the supplied FC5 footswitch can be used)
plugged into the rear-panel FOOT SW jack can also be used
to punch-in and punch-out when the footswitch “Punch In”
function is selected via the “FOOT SWITCH SELECT”
function described on page 37. With the sequencer running
in the Punch Record mode, press the footswitch at the point
you want to begin recording (i.e. to “punch in”), and again to
stop recording (punch out).
Please note that the punch-in record function can only be
used on tracks that already contain recorded material.
E2 VOLUME
“VOL. 1~2'3~4'5~6'7~
_
99/81/99/81/99/81/99
+– +–
Purpose:
This page lets you independently set the playback volume
of each of the sequencer’s seven orchestra tracks.
Procedure:
Use the [<] and [>] buttons to position the cursor at the
volume parameter of the track you want to adjust (1 through
8
7, from left to right), then use either the left or right [-] and
[+] buttons to set the volume to a value between “00” (minimum volume — no sound) and “99” (maximum volume).
Vertical bar-graphs to the right of each track number on the
top line of the display provide a graphic representation of the
track volume levels.
Notes:
Only tracks that contain data are available for volume
control.
Any recorded volume changes will override these settings.
Page 9
E3 TRACK COPY/MIX
The Sequencer
£TRACK COPY/MIX ‡
Source1=Tr1 Source2=Tr2
+– +–
† £COPY/MIX Tr1+Tr2
Dest.=Tr1 Execute
+– +–
Purpose:
Copies the data from one recorded track to another, or
mixes the data from two recorded tracks (except the
ACCOMP. track).
● Copy
Source track 1
Data
Copy to Destination track
Data
● Mix
Source track 1
Data
Source track 2
Data
Destination track (mix result)
Procedure:
Use the [<] and [>] buttons to switch between the two
display screens, and the left or right [-] and [+] buttons to set
the first source track (Source1), the second source track
(Source2), and the destination track (Dest.). If
“CopyToDest.” is selected for the Source2 parameter, only
the Source1 track is copied to the destination track.
Once the source and destination tracks have been selected,
press the [+] button below “Execute” on the right side of the
display to actually execute the mixdown operation. “Sequencer Executing!” will appear on the lower line of the
display while the operation is in progress, and “Completed!”
will appear briefly when the operation has finished.
Immediately after execution “Undo” will appear above the
right [-] button, and that button can be used to undo the
mixdown if it was executed by mistake. The undo function is
only available until the next operation is performed.
Notes:
The mix function is most useful when you want to record
more than 7 individual parts on the seven orchestra-part
tracks. Successfully recorded parts can be combined using
this function, thus opening up more tracks for further recording. The data in the source tracks is not erased during a mix
operation.
If the tracks that are mixed use different voices, the voice
of the lower-numbered track will be used. Subsequent recorded voice changes will operate normally.
Please note that only tracks containing data can be specified as the source tracks.
Any data in the destination track will be overwritten by
data copied from the source 1 and 2 tracks.
9
Page 10
The Sequencer
E4 QUANTIZE
¢QUANTIZE 1/32 ‡
Track=Tr1 Execute
+– +–
† ¢QUANTIZE Tr1
Size=1/32 Execute
+– +–
Purpose:
Aligns notes in the specified track to the nearest specified
beat.
One measure of 8th notes before quantization
eeee eee
After quantization
e
eeeeeeee
Procedure:
Use the [<] and [>] buttons to switch between the two
display screens, and the left [-] and [+] buttons to set the
track number (Track) and the quantize size (Size).
Once the track number and quantize size have been selected, press the [+] button below “Execute” on the right side
of the display to actually execute the quantize operation.
“Sequencer Executing!” will appear on the lower line of the
display while the operation is in progress, and “Completed!”
will appear briefly when the operation has finished.
Immediately after execution “Undo” will appear above the
right [-] button, and that button can be used to undo the
quantize operation if it was executed by mistake. The undo
function is only available until the next operation is performed.
The Quantize Sizes are:
1/4 = 1/4 note
1/6 = 1/4 note triplet
1/8 = 1/8 note
1/12 = 1/8 note triplet
1/16 = 1/16 note
1/24 = 1/16 note triplet
1/32 = 1/32 note
1/96 = maximum resolution
(default)
3
3
3
Notes:
Quantization is generally used to tighten up sloppy timing.
Use it judiciously, however, because timing that is too perfect can sound cold and mechanical — unless, of course,
you’re specifically aiming for a cold, mechanical feel. Always use a quantize value that is at least as “short” as the
shortest notes in the track to be quantized. If you quantize a
track containing 16th notes to 1/8 (8th notes), for example,
some of the 16th notes will be aligned with 8th note beats,
thus ruining the track.
10
Page 11
E5 DELETE ALL TRACKS
The Sequencer
DELETE ALL TRACKS ‡
TopMeas= 4 LastMeas= 6
+– +–
† DELETE from 4 to 6
Execute
+
Purpose:
Deletes the specified measure or range of measures from
all tracks (including the accompaniment track).
Delete Measures 4 through 6.
123456789
Measure 4 through 6 deleted.
123 789
Subsequent measures moved back.
123456
Procedure:
Use the [<] and [>] buttons to switch between the two
display screens, and the left or right [-] and [+] buttons in the
first display screen to specify the number of the first measure
in the range to be deleted (TopMeas) and the number of the
last measure in the range to be deleted (LastMeas).
Once the top and last measure numbers have been selected, press the [+] button below “Execute” on the right side
of the second display screen to actually execute the delete
operation. “Sequencer Executing!” will appear on the lower
line of the display while the operation is in progress, and
“Completed!” will appear briefly when the operation has
finished.
Notes:
It’s important to remember that a delete operation affects
all tracks simultaneously, and that measures following the
deleted range are moved back to take the place of the deleted
measures. This differentiates the delete job from the erase
job (described later), which replaces data in the specified
range with rests.
Be careful when deleting measures that contain effect on/
off events — e.g. pitch bend, modulation, sustain, harmony,
etc. If, for example, you delete a measure that contains a
pitch bend off event, the pitch bend applied in a previous
measure will remain in effect until the next pitch bend event
is encountered.
The delete operation has no “undo” function, so be absolutely sure you want to delete the selected material before
actually executing the delete operation.
11
Page 12
The Sequencer
E6 INSERT ALL TRA CKS
⁄INSERT ALL TRACKS ‡
TopMeas= 6 Size= 3
+– +–
†⁄INSERT from 6size 3
Execute
+
Purpose:
Inserts a specified number of blank measures in all tracks
(including the accompaniment track) at the specified measure number.
Insert measure, size 3, at measure 6.
123456
Measure 6 moved up; 3 blank measures inserted.
12345 6
Result with new measure numbers.
123456789
Procedure:
Use the [<] and [>] buttons to switch between the two
display screens, and the left or right [-] and [+] buttons in the
first display screen to specify the number of the measure at
which the blank measures are to be inserted (TopMeas) and
the number of blank measures to be inserted (Size).
Once the top measure number and size have been selected,
press the [+] button below “Execute” on the right side of the
second display screen to actually execute the insert operation. “Sequencer Executing!” will appear on the lower line of
the display while the operation is in progress, and “Completed!” will appear briefly when the operation has finished.
Notes:
Insert affects all tracks simultaneously. The specified
number of blank measures is inserted before the existing data
beginning at the specified insert measure number.
The insert operation has no “undo” function.
E7 ERASE
ƒERASE ‡
Track=Tr1 TopMeas= 4
+– +–
†ƒERASE Tr1 from 4
LastMeas= 6 Execute
+– +–
Purpose:
Erases all note and event (pitch bend, volume changes,
etc.) data from the specified measure or range of measures in
the specified track (accompaniment track not available),
leaving blank measures.
Erase measures 4 through 6.
TRACK 1
TRACK 1
123456789
123456789
Measures 4 — 6 “blank, ”
containing only rests.
Procedure:
Use the [<] and [>] buttons to switch between the two
display screens, and the left or right [-] and [+] buttons to set
the track number (Track), the number of the first measure in
the range to be erased (TopMeas), and the number of the last
measure in the range to be erased (LastMeas).
Once the track and measure numbers have been selected,
press the [+] button below “Execute” on the right side of the
display to actually execute the erase operation. “Sequencer
Executing!” will appear on the lower line of the display
while the operation is in progress, and “Completed!” will
appear briefly when the operation has finished.
Immediately after execution “Undo” will appear above the
right [-] button, and that button can be used to undo the erase
operation if it was executed by mistake. The undo function is
only available until the next operation is performed.
Notes:
An erase operation leaves the specified measures intact but
blank.
12
Page 13

E8 REMOVE EVENT
The Sequencer
¥REMOVE EVENT ‡
Track=Tr1 Event=PB
+– +–
†¥REMOV Tr1 PB ‡
TopMeas= 3 LastMeas= 4
+– +–
†¥REMOV Tr1 PB 3> 4
Execute
+–
Purpose:
Removes all occurrences of the specified event type (pitch
bend, modulation wheel, volume, or sustain operations) from
the specified measure or range of measures in the specified
track (accompaniment track not available).
Procedure:
Use the [<] and [>] buttons to switch between the three
display screens, and the left or right [-] and [+] buttons to set
the track number (Track), the type of event to be removed
(Event), the number of the first measure in the range from
which the events are to be removed (TopMeas), and the
number of the last measure in the range from which the
events are to be removed (LastMeas).
Once the track, event, and measure numbers have been
specified, press the [+] button below “Execute” on the right
side of the display to actually execute the remove event operation. “Sequencer Executing!” will appear on the lower
line of the display while the operation is in progress, and
“Completed!” will appear briefly when the operation has
finished.
Immediately after execution “Undo” will appear above the
right [-] button, and that button can be used to undo the remove event operation if it was executed by mistake. The
undo function is only available until the next operation is
performed.
The Event Abbreviations are:
PB = Pitch Bend
MOD = Modulation Wheel
VOL = Volume
SUS = Sustain
VC = Voice Change
Notes:
This function is handy if, for example, you’ve played
some wild pitch bends that don’t sound right. You can remove only the offending pitch bends without erasing the
entire track.
Be careful when removing effect on/off events. If, for
example, you remove a pitch bend off event in a specified
measure, the pitch bend applied in a previous measure will
remain in effect until the next pitch bend event is encountered. Similarly, if you remove all program change events
from the beginning of a track, the voice that was initially
selected when the track was recorded will be used.
13
Page 14

The Sequencer
E9 NOTE SHIFT
»NOTE SHIFT ‡
Track=Tr1 Shift=+12
+– +–
†»NOTE Tr1 +12 ‡
TopMeas= 1 LastMeas= 16
+– +–
†»NOTE Tr1 1> 16 +12
Execute
+–
Purpose:
Shifts the pitch of notes in the specified measures of the
specified track (accompaniment track not available) up or
down by a maximum of two octaves, in semitone increments.
Procedure:
Use the [<] and [>] buttons to switch between the three
display screens, and the left or right [-] and [+] buttons to set
the track number (Track), the amount of note shift (Shift —
see “Notes” below), the number of the first measure in the
range in which the notes are to be shifted (TopMeas), and the
number of the last measure in the range in which the notes
are to be shifted (LastMeas).
Once the track, shift, and measure numbers have been
specified, press the [+] button below “Execute” on the right
side of the display to actually execute the note shift operation. “Sequencer Executing!” will appear on the lower line of
the display while the operation is in progress, and “Completed!” will appear briefly when the operation has finished.
Immediately after execution “Undo” will appear above the
right [-] button, and that button can be used to undo the note
shift operation if it was executed by mistake. The undo function is only available until the next operation is performed.
Notes:
The range of “Shift” values is from -24 to +24. A setting
of “0” produces no note shift. Each increment represents a
semitone, so a setting of +4, for example, would shift the
pitch of notes in the specified range up by an interval of a
third. A setting of -12 would shift the notes down by one
octave.
The ability to selectively shift the pitch of specified measures and tracks makes it simple to create “modulations” (key
changes) without having to reprogram entire passages, and to
create simple harmonies.
E10 SONG CLEAR
`…SONG 1 CLEAR
FREE:31k Execute
+
Purpose:
Deletes the entire song — i.e. deletes all data from all
sequencer tracks.
Procedure:
Press the [+] button below “Execute” on the display to
execute the song clear operation. “Completed!” will appear
briefly when the operation has finished.
14
Notes:
Remember that this function deletes all data in the sequencer in one operation. If you think you might want to
keep the data for later use or editing, be sure to save it to
floppy disk (page 42, 46) before executing the song clear
operation. Be careful with SONG CLEAR — it has no
“undo” function!
The remaining amount of sequencer memory is shown on
the bottom line of the display in kilobytes.
Page 15

The Custom Accompaniment Programmer
The PSR-5700 CUSTOM ACCOMPANIMENT feature allows you to create and store up to six original accompaniments — including rhythm, bass, and chords — in addition to 36 internal preset accompaniment styles. You can
even create intro, fill-in, and ending patterns that can be saved with your accompaniments. More custom accompaniments can be created and saved to floppy disk (page 42, 46). Your original accompaniments can be selected
and played at any time, just like the presets.
Basic Programming Procedure
Although many of the steps outlined below do not have to be carried out in the order given, the basic pro-
gramming procedure presented below will serve as useful guide to get you started.
Select a Suitable Accompani-
Z
ment Style
STYLE SELECT
BANK
NUMBER
012345
012345
Engage the Custom Accom-
X
paniment Programmer
SEQUENCER
CUSTOM ACCOMPANIMENT PROGRAMMER
SONG
SELECT
Select an Accompaniment
C
Variation
VERSE
1
VERSE
2
CHORUS2SOLOCHORUS
1
12345
Begin by selecting one of the preset accompaniment styles that is close to
the type of accompaniment you want to create. For example, select a
WALTZ accompaniment style if you want to program a rhythm pattern in
3/4 time.
Press the [CUSTOM ACCOMPANIMENT PROGRAMMER] button.
The selected accompaniment style will begin playing, with accompaniment
based on a C major chord. Also, the rhythm track will be set to the record
mode (red REC indicator lit) and the 98 DRUM KIT voice will be selected.
All other tracks containing data will be set to the PLAY mode (green PLAY
indicator lit). PLAY tracks can be muted by pressing the corresponding
track button (the green PLAY indicator will flash when the track is muted).
Use the [VERSE1], [VERSE2], [CHORUS1], [CHORUS2], and [SOLO]
buttons to select the accompaniment variation you want to program (variations cannot be selected when a custom style is selected).
Intro, fill-in, and ending patterns will be based on the selected variation.
If you delete all existing data to program an accompaniment from scratch,
and change the time signature (beat), the intro, fill-in, and ending patterns
cannot be used.
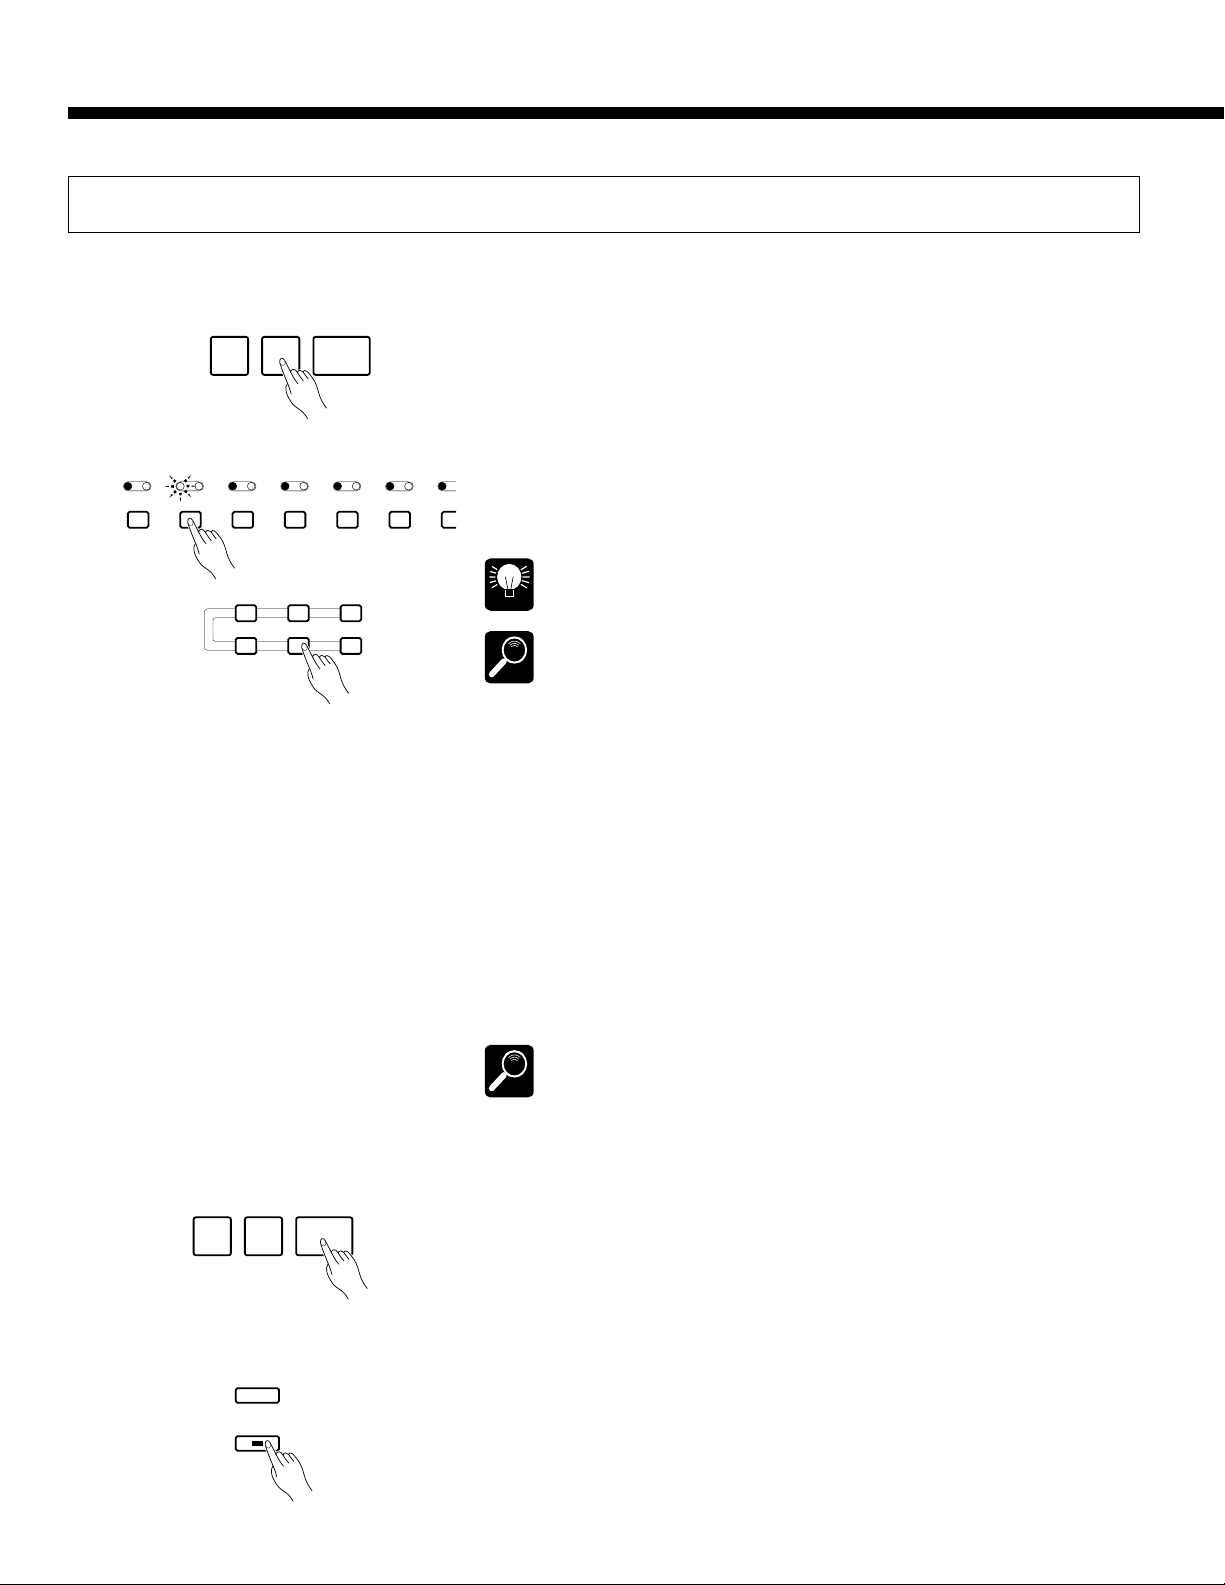
VProgram the Rhythm Part
Since the RHYTHM track is initially set to the REC mode and the 98
DRUM KIT voice is selected, you can start programming the RHYTHM
track immediately.
You can add new notes to the rhythm by playing the keys corresponding
to the PSR-5700 drums and percussion instruments. The drums and percussion instruments produced are indicated by the symbols immediately above
the keys (see the “KEYBOARD PERCUSSION KEYS” chart on page 14 of
the “Getting Started” manual). Please note that pitch bend can not be applied to the rhythm instruments.
15
Page 16

The Custom Accompaniment Programmer
If you want to create a totally new rhythm track, press the RHYTHM
track button while holding the [DELETE] button. This cancels all the instruments in the original rhythm track, leaving only a metronome sound
(the metronome sound will not be heard while the rhythm is playing). The
rhythm pattern can be up to 8 measures long (see “1. CUSTOM ACCOMP.
Measure/Beat” on page 19), and the pattern will continue to repeat so you
can add new instruments during each repeat, if necessary.
PLAY REC PLAY REC PLAY REC PLAY REC PLAY REC PLAY REC PLAY REC PLAY REC
1 2 3 4 5 6 7 ACCOMP.
CHORD 1 CHORD 2 CHORD 3 CHORD 4 CHORD 5 CHORD 6 BASS RHYTHM
To Cancel A Single Percussion Instrument
Although you can cancel all instruments in the RHYTHM track by pressing
the RHYTHM track button while holding the [DELETE] button, it is also
possible to cancel a single instrument to eradicate a mistake or simply
eliminate an unwanted instrument. While holding the CANCEL key (the
highest key on the PSR-5700 keyboard), press the percussion key corresponding to the instrument you want to cancel. The selected instrument
should now be cleared from the pattern.
>
CANCEL
To Add Accents
To accent specific beats after recording the rhythm, press the accent key
(the second to highest key on the keyboard, with the “>” symbol) at the
timing of beats you want to accent.
RECORD DELETE EDIT
prf
If you can’t cancel an instrument even after following the above procedure,
switch to VOICE SELECT number 8 or 9 and try again.
HINT
B
16
Program the Bass and Chord
Parts
PLAY REC PLAY REC PLAY REC PLAY REC PLAY REC PLAY REC PLAY REC PLAY REC
1 2 3 4 5 6 7 ACCOMP.
CHORD 1 CHORD 2 CHORD 3 CHORD 4 CHORD 5 CHORD 6 BASS RHYTHM
if no changes are required), you can select a bass or chord track for programming by pressing the BASS or a CHORD track button while holding
the [RECORD] button (tracks containing preset data cannot be selected for
recording). The RHYTHM track will automatically switch to the PLAY
mode when a new REC track is specified. Please remember that only one
track can be programmed at a time.
After the RHYTHM track has been programmed (or it can be left as it is
RECORD DELETE EDIT
prf
Page 17

The Custom Accompaniment Programmer
Play notes or chords to be added to the existing data, or delete all data on
the track (press the track button while holding the [DELETE] button) and
start from scratch. The bass and chord tracks must be programmed in the
key of C major!
PLAY REC PLAY REC PLAY REC PLAY REC PLAY REC PLAY REC PLAY REC PLAY REC
1 2 3 4 5 6 7 ACCOMP.
CHORD 1 CHORD 2 CHORD 3 CHORD 4 CHORD 5 CHORD 6 BASS RHYTHM
your custom accompaniment is complete.
RECORD DELETE EDIT
prf
Continue selecting new record tracks and variations, and program until
Unwanted tracks can be deleted from the accompaniment by holding the [DELETE] button and pressing the appropriate track button.
HINT
Although the bass and chord tracks must be programmed in C major, they are
automatically re-harmonized when the custom accompaniment is used in the
HINT
play mode, and can be used in any key, major or minor.
When programming an accompaniment from scratch, you can select a new
voice that will take effect from the beginning of the accompaniment after deleting all tracks. Other voice changes added while programming will take effect
HINT
from the point at which they are made.
The synchro start, start, and stop functions can be used when recording a
custom accompaniment. The re-start function, however, cannot be used.
HINT
Pitch bend, modulation, and sustain changes are not recorded if the accompaniment is stopped — the accompaniment must be running for parameter
HINT
changes to be recorded.
Work Area Full !!
Memory Area Full!!
Can not Save
NSet a New Default Tempo
The Custom Accompaniment Programmer memory capacity is limited. When
the available memory for the track you are recording is exhausted, the “Work
DETAIL
Area Full !!” display will appear and further recording on that track will be impossible unless existing data is deleted. Further, if the data size is too big when you
perform a save operation, “Memory Area Full!!/ Can not Save” will appear on
the display.
Only preset voices 00 through 89 can be used to record bass and chord parts
(custom voices cannot be used).
DETAIL
If necessary, set a new default tempo for the custom accompaniment by
using the TEMPO [-] and [+] buttons.
17
Page 18

The Custom Accompaniment Programmer
Give the Finished Accompa-
M
niment a Name and Assign it
to a CUSTOM Number
¢NAME
_
Big Band
+– +–
SAVE TO ACCOMP.
Set to=Cus0 -Execute-
+– +–
SAVE ßCancel´
Set to=Cus0 No Yes
+– +–
Use the “4. NAME” function described on page 20 to give your custom
accompaniment an original name, then use the “5. SAVE TO ACCOMP.”
function described on page 20 to assign the accompaniment to a CUSTOM
number and exit from the Custom Accompaniment Programmer mode.
Please note that if you attempt to exit from the Custom Accompaniment Programmer by pressing the [EXIT], [SEQUENCER], or [CUSTOM ACCOMP PRO-
IMPORTANT
GRAMMER] button, the confirmation display shown to the left will appear:
Use the left [-] and [+] buttons to select the custom accompaniment
number to which the accompaniment is to be stored (C0 through C5), then
press the [+] button under “YES” on the display to store the accompaniment. Press the [-] button under “NO” on the display to exit from the Custom Accompaniment Programmer without storing the data. You can also
press both the [-] and [+] buttons simultaneously to cancel the store operation and return to the Custom Accompaniment Programmer if you want to
make a few more changes or additions to the accompaniment before storing.
NUMBER
18
0 CUSTOM12345
BANK
0 DISK12345
STYLE SELECT
Using a Custom Accompaniment
Once created and stored, your original accompaniment can be selected
and used in the same way as the preset accompaniment styles.
Press the [CUSTOM] button and then the appropriate STYLE SELECT
NUMBER button (0 through 5) to select a custom accompaniment — C0,
C1, C2, C3, C4, or C5. The selected custom accompaniment can then be
operated just like any of the preset accompaniment styles — it can be
started and stopped as usual, and can be used in the FINGERED or SINGLE FINGER AUTO BASS CHORD modes.
To select a preset accompaniment style after selecting a custom accompaniment, use the STYLE SELECT buttons in the normal way.
HINT
Interactive Accompaniment cannot be used with custom accompaniments.
IMPORTANT
Page 19

The Custom Accompaniment Programmer
Custom Accompaniment Editing
The PSR-5700 Custom Accompaniment Programmer offers a range of functions that let
you modify the recorded data in a number of ways. The various Custom Accompaniment
Programmer functions are accessed by using the [s] and [t] buttons, while the various
display screens provided by each function are accessed by using the [<] and [>] buttons.
1 CUSTOM ACCOMP. (Measure/Beat)
Procedure:
`CUSTOM ACCOMP. Normal
Measure:4 Beat:4
+– +–
Use the left [-] and [+] buttons to specify the numbers of
measures the accompaniment is to have (from 1 to 8), and
the right [-] and [+] buttons to specify the number of beats
per measure — from “3” to “5”.
Purpose:
This display page allows the length (in measures) and time
signature of the accompaniment to be defined when the Custom Accompaniment mode is initially engaged.
2 VOLUME
“VOL. 1~2~3~4~5~6~B~R~
15/15/15/15/15/15/15/15
+– +–
Purpose:
This page lets you independently set the volume of each of
the Custom Accompaniment Programmer’s tracks.
_
Notes:
These parameters can only be changed when you’re creating an entirely new pattern from scratch — i.e. you have
deleted all tracks from the original accompaniment by holding the [DELETE] button and pressing the buttons of all
tracks containing data so that no PLAY indicators remain lit.
The INTRO, FILL, and ENDING variations must also be
empty.
FILL patterns can have a maximum length of 1 measure.
Procedure:
Use the [<] and [>] buttons to position the cursor at the
volume parameter of the track you want to adjust (1 through
6, “B” for BASS, and “R” for RHYTHM, from left to right),
then use either the left or right [-] and [+] buttons to set the
volume to a value between “0” (minimum volume — no
sound) and “15” (maximum volume). Vertical bar-graphs to
the right of each track number on the top line of the display
provide a graphic representation of the track volume levels.
Notes:
Only tracks that contain data are available for volume
control.
19
Page 20

The Custom Accompaniment Programmer
3 FADER SELECT
£FADER SELECT
—
C1` C2` C3` C4“ C5“ C6“
+– +–
Purpose:
Assigns the CHORD 1 and CHORD 2 volume controls to
Custom Accompaniment Programmer CHORD tracks 1
through 6, determining which control affects which chord
tracks when the accompaniment is played back.
Procedure:
Use the [<] and [>] buttons to position the cursor at the
chord track you want to assign (C1 through C6), then use the
left or right [-] and [+] buttons to assign either “1” (the
CHORD 1 volume control) or “2” (the CHORD 2 volume
control) to the selected chord track.
Notes:
It is a good idea to group the chord tracks according to
their musical function. For example, tracks containing basic
block chords could be assigned to the CHORD 1 control
while tracks containing more “decorative” chord work could
be assigned to the CHORD 2 control.
4 NAME
¢NAME
_
Big Band
+– +–
Purpose:
Allows a name of up to 8 characters to be assigned to the
current custom accompaniment before it is stored via the
following “5. SAVE TO ACCOMP.” function.
5 SAVE TO ACCOMP.
SAVE TO ACCOMP.
Set to=Cus0 -Execute-
+– +–
Purpose:
This function stores the current custom accompaniment to
a specified custom accompaniment number.
Procedure:
Use the [<] and [>] buttons to move the underline cursor
to the various character positions, then use the left [-] and [+]
buttons to select the required character for each position.
Notes:
Independent names can not be assigned to INTRO, FILL,
and ENDING patterns. Here’s a list of the characters that can
be selected via the left [-] and [+] buttons.
Character list
[Space]!"#$%&'()*+,-./0123456789:;<=>?@
ABCDEFGHIJKLMNOPQRSTUVWXYZ[\]^_`
abcdefghijklmnopqrstuvwxyz{|}≤≥
Procedure:
The “Set to” parameter in the first display screen determines to which custom accompaniment number the accompaniment will be stored — Cus0, Cus1, Cus2, Cus3, Cus4, or
Cus5. When the “Set to” parameter has been set as required
by using the left [-] and [+] buttons, press the right [-] and
[+] buttons under “-Execute-” on the display to actually store
the current custom accompaniment in the specified custom
accompaniment number. “Completed” will appear when the
operation is complete.
20
Page 21

6 QUANTIZE
⁄QUANTIZE 1/32 ‡
Track=Rhythm Execute
†⁄QUANTIZE Rhythm
Size=1/32 Execute
+– +–
+– +–
The Custom Accompaniment Programmer
The Quantize Sizes are:
1/4 = 1/4 note
1/6 = 1/4 note triplet
1/8 = 1/8 note
1/12 = 1/8 note triplet
1/16 = 1/16 note
1/24 = 1/16 note triplet
1/32 = 1/32 note
3
3
3
Purpose:
Aligns notes in the specified track to the nearest specified
beat.
One measure of 8th notes before quantization
eeee eee
After quantization
e
eeeeeeee
Procedure:
Use the [<] and [>] buttons to switch between the two
display screens, and the left [-] and [+] buttons to set the
track number (Track) and the quantize size (Size).
Once the track number and quantize size have been selected, press the [+] button below “Execute” on the right side
of the display to actually execute the quantize operation.
Immediately after execution “Undo” will appear above the
right [-] button, and that button can be used to undo the
quantize operation if it was executed by mistake. The undo
function is only available until the next operation is performed.
Notes:
Quantization is generally used to tighten up sloppy timing.
Use it judiciously, however, because timing that is too perfect can sound cold and mechanical — unless, of course,
you’re specifically aiming for a cold, mechanical feel. Always use a quantize value that is at least as “short” as the
shortest notes in the track to be quantized. If you quantize a
track containing 16th notes to 1/8 (8th notes), for example,
some of the 16th notes will be aligned with 8th note beats,
thus ruining the track.
Quantization can not be applied to tracks containing preset
data. If you attempt to quantize a track containing preset
(including disk style) data, “!” will appear on the display in
place of “=”.
21
Page 22

The Custom Accompaniment Programmer
7 COPY
ƒCOPY ‡
Track=Rhythm TopMeas=1
+– +–
†ƒCOPY Rhythm 1- ‡
LastMeas=2 Meas=5
+– +–
†ƒCOPY Rhythm 1-2>5
Execute
+–
Purpose:
Copies a specified measure or range of measures to a dif-
ferent location within the same track.
Procedure:
Use the [<] and [>] buttons to switch between the three
display screens, and the left or right [-] and [+] buttons in the
various screens to specify the track number (Track), the
number of the first measure of the range to be copied
(TopMeas), the number of last measure of the range to be
copied (LastMeas), and the number of the measure (Meas) to
which the data is to be copied.
Once the track numbers and measure numbers have been
selected, press the [+] button below “Execute” on the right
side of the third display screen to actually execute the copy
operation.
Immediately after execution “Undo” will appear above the
right [-] button, and that button can be used to undo the copy
operation if it was executed by mistake. The undo function is
only available until the next operation is performed.
Copy measures 1 through 2 to measure 5 in
the same track.
12345678
12341278
Notes:
A copy operation overwrites the data from the beginning
of the specified destination measure with the data from the
source measure(s). Previous data in the overwritten measures
is therefore lost.
The COPY function cannot be used with tracks containing
preset data.
22
Page 23

8 REMOVE EVENT
The Custom Accompaniment Programmer
¥REMOVE EVENT ‡
Track=Rhythm Event:VOL
+– +–
†¥REMOVE Rhythm VOL
Execute
+–
Purpose:
Removes all occurrences of the specified event type (volume, sustain, pitch bend, or modulation wheel operations)
from the specified track.
Procedure:
Use the [<] and [>] buttons to switch between the two
display screens, and the left or right [-] and [+] buttons to set
the track number (Track) and the type of event to be removed (Event).
Once the track and event have been specified, press the [+]
button below “Execute” on the right side of the display to
actually execute the remove event operation.
Immediately after execution “UndoExecute” will appear
above the right [-] button, and that button can be used to
undo the remove event operation if it was executed by mistake. The undo function is only available until the next operation is performed.
The Event Abbreviations are:
PB = Pitch Bend
MOD = Modulation Wheel
VOL = Volume
SUS = Sustain
Notes:
This function is handy if, for example, you’ve played
some wild pitch bends that don’t sound right. You can remove only the offending pitch bends without erasing the
entire track.
Only the VOL event type can be selected when the
RHYTHM tracks is selected.
Be careful when removing effect on/off events. If, for
example, you remove a pitch bend off event in a specified
measure, the pitch bend applied in a previous measure will
remain in effect until the next pitch bend event is encountered.
The REMOVE EVENT function cannot be used with
tracks containing preset data.
9 CHANGE PATTERN
»CHANGE PATTERN
Pattern=I/F/E: Intro
+– +–
Purpose:
Selects the Normal or Intro/Fill/Ending accompaniment
pattern for editing.
Procedure:
Use the left [-] and [+] buttons to select either “Normal”
if you want to edit the normal accompaniment pattern, or
“I/F/E” if you want to edit the INTRO, FILL or ENDING
pattern. If you select “I/F/E”, the next step is to use the
right [-] and [+] buttons to select “Intro”, “Fill” or “Ending”.
Once the desired pattern has been selected, go back to
the preceding screens and create your custom accompaniment.
23
Page 24

The Custom Accompaniment Programmer
● CREATING INTRO, FILL-IN, & ENDING PA TTERNS
The custom accompaniment programmer allows you to create one set of intro, fill-in, and ending patterns that can be saved and
later used with custom accompaniments Cus0 … 5 (see “SET INTRO/FILL/ENDING” in step 7 for more details).
■ EDITING A PRESET INTRO, FILL-IN, OR
ENDING PATTERN
1. Select the preset style that your custom accompaniment
is to be based on.
2. Go to the “5 SAVE TO ACCOMP” screen and save the
accompaniment to a custom accompaniment number
(Cus0 … 5).
When this is done any custom accompaniment data
previously saved in the same location will be overwritten!
IMPORTANT
3. Use the [CUSTOM] and [NUMBER] buttons to select
the custom accompaniment you saved in the preceding
step.
4. Go to the “9 CHANGE PATTERN” screen and use the
left [-] and [+] buttons to select “I/F/E”, then use the
right [-] and [+] buttons to select “Intro,” “FillIn,” or
“Ending.”
»CHANGE PATTERN
Pattern=I/F/E: Intro
+– +–
5. After selecting the type of pattern to be programmed, go
to any other custom edit screen and program the pattern
using the standard custom accompaniment programming
procedure.
6. When the pattern is complete, go to the “5 SAVE TO
ACCOMP” screen and save the pattern.
7. At this point the “SET INTRO/FILL/ENDING” screen
will appear. Shift to the second screen and use the left
and right [-] and [+] buttons to select “User” for the custom accompaniment numbers with which you want to
use your original intro/fill/ending patterns.
Shift back to the first screen and press the [+] button
under “RETURN” on the display to return to the “5
SAVE TO ACCOMP” screen.
SET INTRO/FILL/ENDING‡
Return
+
† SET INTRO/FILL/ENDING
Style=Cus0 = User
+– +–
8. Repeat steps 4 through 7 to create other patterns.
If you select “Preset” in the “SET INTRO/FILL/ENDING”
screen, then the un-edited intro, fill-in and ending patterns
of the original preset style will be used with the selected
DETAIL
custom style. If you select “NoAssign”, then no intro, fill-in,
or ending patterns will be used. In this case the [INTRO]
button functions in the same way as the [START] button,
the [ENDING] button functions in the same way as the
[STOP] button, and the [FILL IN] button has no effect.
If the user patterns have a different time signature than
the custom accompaniment patterns, then “User” cannot
be selected in the “SET INTRO/FILL/ENDING” screen.
DETAIL
The “SET INTRO/FILL/ENDING” screen appears automatically when an intro, fill-in, or ending pattern is saved,
or when “I/F/E” is reset to “Normal” in the “9 CHANGE
DETAIL
PATTERN” screen.
24
If you go to the “9 CHANGE PATTERN” screen and
select a different “Pattern,” the screen you need to save
DETAIL
the pattern you created in step 5 will appear
automatically. Press the [+] button under “YES” on the
display and the pattern will be saved.
SAVE TO ACCOMP.
Set to:I/F/E No Yes
+– +–
To prevent differences between the time signatures of the
intro, fill-in, and ending patterns, all the patterns for the
selected styles are saved simultaneously when any one
HINT
pattern is saved. For example, if you edit an intro pattern
while a preset style is selected and then save the intro
pattern, the fill-in and ending patterns for the selected
style will also be saved. If you then edit and save the fill-in
pattern, the intro and ending patterns will also be saved,
meaning the intro pattern you just saved will be
overwritten. To prevent this, first copy the preset style to a
custom style number, as described in steps 1 through 3,
above, and then use this as a basis for your new patterns.
Of course, you must be careful that you don’t overwrite a
previously saved custom accompaniment style when
doing this.
Page 25

The Custom Accompaniment Programmer
■ EDITING A PREVIOUSLY SAVED USER
INTRO, FILL-IN, OR ENDING PATTERN
To edit intro, fill-in, and ending patterns that you have
previously created and saved, simply select the custom accompaniment to which the user patterns are assigned (Cus0
… 5) and follow steps 4 through 8, above.
■ CREATING A NEW INTRO, FILL-IN, OR
ENDING PATTERN
After selecting an intro, fill-in, or ending pattern as described in step 4, above, use the [DELETE] button to delete
all data from all tracks. Then follow steps 5 through 8 to
create your original pattern.
To create an intro, fill-in, or ending pattern with a different time signature, go to the “1 CUSTOM ACCOMP” screen
and set the “BEAT” parameter as required. If you delete and
save the intro pattern, the fill-in pattern, and the ending pattern, the “1 CUSTOM ACCOMP” screen will appear automatically no matter what pattern edit mode you’re in, and
you can set the “BEAT” parameter as required.
Use the synchro start function when you want to enter data
precisely on the first beat of the first measure.
HINT
● EXITING FROM THE CUSTOM A CCOMPANIMENT MODE
To exit from the custom accompaniment mode, press either the [CUSTOM ACCOMPANIMENT PROGRAMMER]
or [EXIT] button. This will return you to the normal play
mode.
If you have not performed a save operation via the “5
SAVE TO ACCOMP” screen after performing any other
operation in the custom accompaniment mode, however, the
following display will appear automatically when you exit
from the custom accompaniment mode:
SAVE ßCancel´
Set to=Cus0 No Yes
+– +–
To save the edited data before exiting, use the left [-] and
[+] buttons to select the destination custom accompaniment
number, and then press the [+] button below “YES” on the
display. If you want to exit without saving, simply press the
[-] button below “NO” on the display.
If you attempt to exit after programming an intro, fill-in,
or ending pattern, the following display will appear:
SAVE ßCancel´
Set to:I/F/E No Yes
From this display you will exit to the “SET INTRO/FILL/
ENDING” display, from which you can exit as described
above.
+–
You can return to the custom accompaniment mode by pressing both the right [-] and [+] buttons simultaneously.
DETAIL
25
Page 26

Other Functions
The PSR-5700 [FUNCTION] button selects 6 groups of functions that access single or
multiple display “pages” of parameters. Here’s a list of the functions and the manual page
numbers on which they are described in detail.
[F1] Custom Voice Edit .......................... 27
[F2] Reverb Type ................................... 35
Effect Type ...................................... 36
[F3] Controller ........................................ 37
Key Velocity ....................................37
General Function Selection & Editing Procedure
FUNCTION
F1: CUSTOM VOICE EDIT
F2: REVERB / EFFECT
F3: CONTROLLER / KEY VELOCITY
F4: SPLIT POINT / I.A. / S.S.P. MODE
F5: DISK
F6: UTILITY / MIDI
EXIT
Each of the function groups selected by the [FUNCTION] button includes several display
“pages.” These are accessed by using the [s] and [t] buttons. Furthermore, in some cases a
display page have more parameters than fit in a single screen. The different screens are
accessed by using the [<] and [>] buttons.
Each display screen will have a maximum of two parameters, and these can be adjusted by
using the [-] and [+] buttons immediately below each parameter. Pressing both the [-] and [+]
buttons simultaneously will generally set the “normal” value for the selected parameter.
[F4] Split Point ........................................40
Interactive Accompaniment.............40
Super Style Play Mode ................... 41
[F5] Disk .................................................42
[F6] Utility ............................................... 49
MIDI ................................................ 50
“COMMON ……Piano 1 ‡
PitBend=0 TouchSens=0
+– +–
These buttons set the
left parameter.
■ The [EXIT] Button
FUNCTION
EXIT
26
The left and right arrows select
A. B. C. MODE
s
<>
TRANSPOSE/
TUNE
These buttons set the
right parameter*.
* Some functions have only one parameter which will be shown to the left of the display. In such
cases the right [-] and [+] buttons will have no effect.
t
HARMONY
TYPE
OCTAVE
CHANGE
other parameters within the same
page (if available).
The up and down arrows select
different display “pages.”
The [EXIT] button can be used at any time to exit from a function and return to the normal
play mode.
“Not Available in SEQ!” may appear on the lower display line when a function button is pressed in the
sequencer, custom accompaniment programmer, DOC, or GM mode (depending on the mode, “SEQ”
DETAIL
in the display may be replaced by “CUS”, “DOC”, or “GM”). If this message appears, the selected function cannot be accessed or edited.
Page 27

[F1] Custom V oice Edit
The Custom Voice Edit mode allows you to edit any of the PSR-5700 voices to create new sounds
that ideally match your own music style. 100 custom voices — 00 through 99 — can be programmed,
each based on the correspondingly-numbered preset voice.
After selecting the voice you want to edit*, engage the Custom Voice Edit mode by pressing the
[FUNCTION] button so that “F1” appears on the TEMPO display. Use the various editing functions
described below to modify the sound to suit your needs. Then press the [EXIT] button when you’re
finished editing to return to the normal play mode.
Your custom voices can be selected and played by pressing the [CUSTOM VOICE] button and
using the VOICE SELECT buttons in the normal way (the custom voice numbers are displayed in
reversed letters).
* You can also select a different voice while the Custom Voice Edit mode is engaged via the VOICE SELECT buttons. In this
case the normal voice selection display will appear while the VOICE SELECT buttons are being used, and for a few seconds
afterwards. The display will then revert to the previous Custom Voice Edit display page.
Please note that some voices may suddenly shift to a different octave or change in level when played on the highest or
lowest keys. There may also be slight tonal changes at one or more points on the keyboard.
DETAIL
The preset value can be instantly recalled by pressing both the [-] and [+] buttons simultaneously.
HINT
Some settings may produce noise or no sound.
DETAIL
Standard Voice Edit Functions (Voices 00 through 89)
The following functions are available when editing voices 00 through 89. Different groups of
edit functions are provided for the PSR-5700 dual voices (90 through 97 — page 30) and drum
voices (98 and 99 — page 33).
For all parameters described here the preset value can be instantly recalled by pressing both the [-] and
[+] buttons simultaneously.
DETAIL
1 NAME
Character list
`NAME
……:Piano 1
_
+–
Purpose:
Allows an 8-character name to be assigned to the voice.
Procedure:
Use the [<] and [>] buttons to position the cursor at the
desired character location, then use the left [-] and [+] buttons to select the desired character. A chart of the available
characters is given below.
[Space]!"#$%&'()*+,-./0123456789:;<=>?@
ABCDEFGHIJKLMNOPQRSTUVWXYZ[\]^_`
abcdefghijklmnopqrstuvwxyz{|}≤≥
Notes:
It’s a good idea to give your voices names that make them
easily identifiable. If you’ve created a new voice that is a
variation on the standard piano voice, for example, you could
call it something like “PianVar”.
27
Page 28

[F1] Custom Voice Edit
2 COMMON
COMMON includes two display screens covering a range of parameters that affect the entire voice.
Use the [<] and [>] buttons to switch between the two display screens, and the [-] and [+] buttons
below each parameter to set the required values.
“COMMON ……Piano 1 ‡
PitBend=2 TouchSens=2
+– +–
†“COMMON ……Piano 1
Oct=Normal Pan=L R
+– +–
● Pitch Bend Range (PitBend)
Sets the range of the pitch bend wheel to “0” (OFF), “1”
(±1 semitone), “2” (±2 semitones), “3” (±3 semitones), or
“Glis” (maximum 1-octave glissando in semitone steps).
● Touch Sensitivity (TouchSens)
Allows the touch sensitivity of the keyboard to be set to
three different levels, or turned off: “0” (OFF), “1”, “2” ,
or “3”.
● Octave (Oct)
Shifts the pitch of the voice up one octave (1up) or
down one octave (1down). A setting of “normal” produces
the normal pitch for that voice.
Some voices may exhibit sudden pitch changes in the highest
and lowest ranges of the keyboard when shifted up or down by
DETAIL
an octave. The pitch bend wheel may also cause sudden pitch
changes.
● Pan
Sets the apparent position of the voice in the stereo
sound field. The graphic display indicates the approximate
location of the sound between the left and right speakers.
When Pan is set to the center position, the preset pan position
of the selected voice is used. The center pan position can be
DETAIL
recalled immediately by pressing both the [-] and [+] buttons
simultaneously.
3 MODULATION
The two parameters provided in this screen are used to adjust the depth and speed of
modulation produced by the PSR-5700 MODULATION/EFFECT wheel.
Use the [-] and [+] buttons below each parameter to set the required values.
£MODULATION ……Piano 1
Depth= 0 Speed= 0
+– +–
● Modulation Depth
Decreases (-) or increases (+) the depth of modulation
produced by the PSR-5700 MODULATION/EFFECT
wheel relative to the original modulation depth of the
selected voice.
● Modulation Speed
Decreases (-) or increases (+) the speed of modulation
produced by the MODULATION/EFFECT wheel relative
to the original modulation speed of the selected voice.
Notes:
The maximum range of the depth and speed is from -7
through 0 to +7, although this range is more limited with
some voices. An exclamation mark (!) will appear next to the
parameter when the maximum or minimum allowable setting
for the selected voice has been reached.
The default modulation depth and speed values for the
selected voice are produced by settings of “0”. Minus settings produce gentler or slower modulation, while plus settings produce deeper or faster modulation, respectively.
Pressing both the [-] and [+] buttons below a parameter immediately recalls the default value (“0”).
Modulation is applied automatically to some voices, and
in some cases operating the wheel causes modulation to be
applied automatically.
28
Page 29

4 EG RATE
[F1] Custom Voice Edit
Decay
shape the volume envelope of the voice.
Attack
Level
Key
Pressed
Time
Key
Released
Sustain
Release
and the [-] and [+] buttons below each parameter to set the required values.
¢EG RATE ……Piano 1 ‡
Attack= 0! Decay= 0
+– +–
†¢EG RATE ……Piano 1
Release= 0 Sustain= 0
+– +–
● Attack
Sets the speed of attack — i.e. how fast the sound
reaches maximum level after a key is pressed.
“0” sets the normal attack for the selected voice, minus
settings produce a slower attack, and plus settings produce
a faster attack.
● Decay
Sets the speed of decay portion of the envelope — i.e.
how fast the sound decays from the maximum attack level
to its normal level.
“0” sets the normal decay for the selected voice, minus
settings produce a slower decay, and plus settings produce
a faster decay.
The attack, decay, sustain, and release parameters provided here let you
Use the [<] and [>] buttons to switch between the two display screens,
● Sustain
Sets the speed of sustain decay — i.e. how fast the
sound decays after a key is released when the panel [SUSTAIN] button is on or the sustain pedal is pressed.
“0” sets the normal sustain for the selected voice, minus
settings produce a longer sustain decay, and plus settings
produce a faster sustain decay.
Notes:
The maximum range for all parameters is from -50
through 0 to +50, although this range is more limited with
some voices. An exclamation mark (!) will appear next to the
parameter when the maximum or minimum allowable setting
for the selected voice has been reached.
The default values for the selected voice are produced by
settings of “0”. Pressing both the [-] and [+] buttons below a
parameter immediately recalls the default value (“0”).
With voices like 21 STRINGS, in which key velocity (keyboard
dynamics) controls the speed of attack, attack speed changes
DETAIL
in the same way even if the attack parameter is set to a minus
value.
Since PIANO 1 (00) and some other voices already have
the fastest possible attack, no sound will be produced if the
Decay parameter for such voices is set to “+50.”
The Decay parameter will have no effect on some sustaintype voices which have no inherent decay.
● Release
Sets the speed of release — i.e. how fast the sound decays after a key is released when the panel [SUSTAIN]
button is off and the sustain pedal is not pressed.
“0” sets the normal release for the selected voice, minus
settings produce a slower release decay, and plus settings
produce a faster release decay.
Changing the EG rate parameter may have no effect on the
sound with some voices.
DETAIL
29
Page 30

[F1] Custom Voice Edit
5 TONE
The brilliance and resonance parameters provided here make it possible to vary the tone of the voice over a wide range.
Use the [-] and [+] buttons below each parameter to set the required values.
TONE ……Piano 1
Brilli= 0 Resonanc= 0!
+– +–
● Brilliance (Brilli)
This parameter alters the cutoff frequency of the filter
applied to the voice, thereby making the sound more or
less brilliant. Minus settings reduce brilliance for a
rounder, more mellow tone, while plus setting increase
brilliance for a sharper tone.
● Resonance (Resonanc)
Plus settings increase the height of a resonant peak at
the filter cutoff frequency, giving the voice greater presence and sometimes a more “nasal” tone. Minus settings
reduce resonance for a “flatter” sound.
Dual Voice Edit Functions (Voices 90 through 97)
Notes:
The maximum range of both parameters is from -50
through 0 to +50, although this range is more limited with
some voices. An exclamation mark (!) will appear next to the
parameter when the maximum or minimum allowable setting
for the selected voice has been reached.
The default values for the selected voice are produced by
settings of “0”. Pressing both the [-] and [+] buttons below a
parameter immediately recalls the default value (“0”).
The following functions are available when editing voices 90 through 97. Different groups of
edit functions are provided for the PSR-5700 normal voices (00 through 89 — page 27) and drum
voices (98 and 99 — page 33).
For all parameters described here the preset value can be instantly recalled by pressing both the [-] and
[+] buttons simultaneously.
DETAIL
1 DUAL NAME
`DUAL NAME
»…:SpacePno
_
+–
Purpose:
Allows an 8-character name to be assigned to the custom
dual voice.
Procedure:
Use the [<] and [>] buttons to position the cursor at the
desired character location, then use the left [-] and [+] buttons to select the desired character. A chart of the available
characters is given below.
Character list
[Space]!"#$%&'()*+,-./0123456789:;<=>?@
ABCDEFGHIJKLMNOPQRSTUVWXYZ[\]^_`
abcdefghijklmnopqrstuvwxyz{|}≤≥
Notes:
Give your dual voice names that identify both the voices
used, if possible. If you’ve created a new dual voice that
combines piano and organ, for example, you could call it
something like “PianOrg”.
30
Page 31

2 DUAL VOICE
[F1] Custom Voice Edit
“DUAL VOICE »…SpacePno
00:Piano 1 19:Voyager
+– +–
Purpose:
This function allows any two of the PSR-5700’s standard
voices (numbers 00 through 89) to be assigned to the dual
voice.
3 DUAL OCTA VE
£DUAL OCTAVE »…SpacePno
A=1down B=Normal
+– +–
Purpose:
Allows the two voices used in the dual voice to be independently shifted up or down one octave.
Procedure:
Use the left and right [-] and [+] buttons to set the desired
octaves for voices A and B. A setting of “normal” produces
the normal pitch for that voice. “1up” shifts the pitch up one
octave, and “1down” shifts the pitch down one octave.
Procedure:
Use the left and right [-] and [+] buttons to select the de-
sired voices.
Notes:
Remember that you can only use voices 00 through 89 in a
custom dual voice. If you increment past voice number 89,
the next voice selected will be 00, and vice versa.
The pitch bend range for DUAL VOICE is limited to ±1
whole tone.
Notes:
Some voices may exhibit sudden pitch changes in the
highest and lowest ranges of the keyboard when shifted up or
down by an octave. The pitch bend wheel may also cause
sudden pitch changes.
Previous OCTAVE settings for the normal voice will be
ignored.
4 DUAL VOLUME
¢DUAL VOLUME »…SpacePno
A=50! B=45
+– +–
Purpose:
Independently adjusts the volumes of the two voices used
in the dual voice.
Procedure:
Use the left and right [-] and [+] buttons to set the desired
volume levels for voices A and B.
Notes:
The volume range is from “00” (no sound) to “50” (maximum volume). Use this function to set the optimum balance
between the two voices.
When the parameter is set to “00” or “50” an exclamation
mark (!) will appear next to the parameter indicating that the
limit has been reached.
31
Page 32

[F1] Custom Voice Edit
5 DUAL PAN
DUAL PAN »…SpacePno
A=L R B=L R
+– +–
Purpose:
Independently sets the pan positions of the two voices
used in the dual voice.
6 DUAL DETUNE
⁄DUAL DETUNE »…SpacePno
A= 0 B=+ 2
+– +–
Purpose:
Allows the two voices used in the dual voice to be detuned
slightly to create a thicker sound.
Procedure:
Use the left and right [-] and [+] buttons to set the desired
detune for voices A and B.
Procedure:
Use the left and right [-] and [+] buttons to set the desired
pan positions for voices A and B. The graphic display indicates the approximate location of the sound between the left
and right speakers.
Notes:
When Pan is set to the center position, the preset pan position of the selected voice is used. The center pan position can
be instantly recalled by pressing both the [-] and [+] buttons
simultaneously.
Notes:
The normal tune value is “0”. This can be tuned down to a
maximum setting of -50 or up to a maximum setting of +50.
Each increment equals approximately 0.78 cents (a cent is
one hundredth of a semitone). The maximum amount of
detune that can be set in either direction is therefore 39 cents
— not quite a quarter tone.
This function can be used by leaving one of the voices set
at “0” and detuning the other until the desired effect is
achieved. Another approach is to tune one voice down and
the other up.
The pitch bend range is always ±200 cents, regardless of
the setting of this function.
When the parameter is set to “-50” or “50” an exclamation
mark (!) will appear next to the parameter indicating that the
limit has been reached.
32
Page 33

[F1] Custom Voice Edit
Drum Voice Edit Functions (Voices 98 and 99)
The following functions are available when editing voices 98 and 99. Different groups of edit functions are pro-
vided for the PSR-5700 normal voices (00 through 89 — page 27) and dual voices (90 and 97 — page 30).
1 PERC. NAME
Character list
`PERC. NAME
ȴ:Drum Kit
+–
_
[Space]!"#$%&'()*+,-./0123456789:;<=>?@
ABCDEFGHIJKLMNOPQRSTUVWXYZ[\]^_`
abcdefghijklmnopqrstuvwxyz{|}≤≥
Purpose:
Allows an 8-character name to be assigned to the custom
drum voice.
Procedure:
Use the [<] and [>] buttons to position the cursor at the
desired character location, then use the left [-] and [+] buttons to select the desired character. A chart of the available
characters is given below.
2 PERC. PITCH
“PERC. PITCH »¥Drum Kit
Prc=Kick1 Pitch= 0
+– +–
Purpose:
Allows the pitch of each instrument in the drum voice to
be individually tuned.
Notes:
Give your drum voice names that identify their character.
If you’ve created a new drum voice intended for rock music,
for example, you could call it something like “RockDrum”.
Procedure:
Use left [-] and [+] buttons to select the instrument to be
tuned, and then the right [-] and [+] buttons to set the desired
degree of tuning.
Notes:
The maximum tuning range is from -50 through 0 to +50,
with “0” being the normal pitch for the instrument. Each
increment equals approximately 6.25 cents (a cent is one
hundredth of a semitone), for a total tuning range of about
±312 cents.
33
Page 34

[F1] Custom Voice Edit
PERC. PAN
3
£PERC. PAN »¥Drum Kit
Prc=Kick1 Pan=L R
+– +–
Purpose:
Allows the pan position of each instrument in the drum
voice to be individually adjusted.
Procedure:
Use left [-] and [+] buttons to select the instrument to be
panned, and then the right [-] and [+] buttons to set the desired pan position. The graphic display indicates the approximate location of the sound between the left and right speakers.
4 PERC. TONE
¢PERC. TONE »¥Drum Kit
Prc=Kick1 Softnes= 0
+– +–
Purpose:
Allows the tone (softness) of each instrument in the drum
voice to be individually adjusted.
Procedure:
Use left [-] and [+] buttons to select the instrument to be
adjusted, and then the right [-] and [+] buttons to set the desired degree of softness.
Notes:
Use this function to create the required “stereo image” for
your drum voice. View in the drum kit from the audience
side, for example, the bass drum is normally in the center,
the snare to its right, the tom-toms to the left, and so on.
The center pan position can be instantly selected by pressing both the [-] and [+] buttons simultaneously.
When the parameter is set to “-50” or “50” an exclamation mark (!) will appear next to the parameter indicating
that the limit has been reached.
Notes:
The “softness” setting range is from 0 through -9, with “0”
being the normal setting for the selected instrument. Lowering the softness setting lowers the cutoff frequency of the
filter applied to the selected drum instrument, thereby creating a softer tone.
Some voices may produce no sound if this parameter is set
too low.
When the parameter is set to “0” or “-9” an exclamation
mark (!) will appear next to the parameter indicating that the
limit has been reached.
34
Page 35

[F2] Reverb, Effect
The PSR-5700 has 23 reverb-based effects and 9 other effects that can be selected via the four
pages accessed by this function. The selected reverb and effect types are applied to the sound
when the [EFFECT] and [REVERB] buttons are used (see page 37 in the Getting Started manual).
1 REVERB TYPE
`REVERB TYPE No. 1
Type=Reverb : Hall
+– +–
Purpose:
Selects the reverb effect to be applied when the
[REVERB] button is turned on (see page 37 of the “Getting
Started” manual).
Procedure:
The right [-] and [+] buttons step through the reverb list
effect by effect. For faster selection you can use the left [-]
and [+] buttons to directly select the reverb categories —
Reverb, Delay, etc. — and then use the right [-] and [+] buttons to select the desired reverb effect within that category.
2 REVERB DEPTH
The Reverb Effects are:
1. Reverb : Hall
2. Reverb : Room
3. Reverb : Plate
4. Reverb : Church
5. Reverb : Club
6. Reverb : Stage
7. Reverb : Bathroom
8. Reverb : Metal
9. Delay : Short
10. Delay : Medium
11. Delay : Long
12. Delay : OneShot
13. TempoSync : Short
14. TempoSync : Long
15. Echo : Stereo
16. Echo : PingPong
17. Refl&Gate : Panned
18. Refl&Gate : Early
19. Refl&Gate : Gate
20. Delay&Rev : Single
21. Delay&Rev : DelayL/R
22. Variation : Distort.
23. Variation : Tunnel
Notes:
The “TempoSync” effects produce a delay that is synchronized to the currently selected tempo. “Variation : Distort”
produces a distortion effect.
Try out all of the effects to get a feel for what they can do
to your sound.
“REVERB DEPTH
R' B˜ C2' C1' O2¶ O1~
+– +–
_
Purpose:
Independently sets the depth of the selected reverb effect
for the rhythm, bass, chord 1, chord 2, orchestra 1, and orchestra 2 sound.
Procedure:
Use the [<] and [>] buttons to select the parameter for
which reverb depth is to be adjusted (R = rhythm; B = bass;
C1 = chord 1; C2 = chord 2; O1 = orchestra 1; O2 = orchestra 2), and use the [-] and [+] buttons to set the reverb depth
for each parameter. Pressing the [-] and [+] buttons simultaneously instantly recalls the default depth value.
Notes:
Reverb depth can be adjusted in 7 steps, represented by a
vertical bar to the right of each parameter. The longer the
bar, the greater the reverb depth.
35
Page 36

[F2] Reverb, Effect
EFFECT TYPE
3
£EFFECT TYPE No. 4
Type=Chorus : 1
+– +–
Purpose:
Selects the effect to be applied when the [EFFECT] button
is turned on (see page 37 of the “Getting Started” manual).
Procedure:
The right [-] and [+] buttons step through the effect list
effect by effect. For faster selection you can use the left [-]
and [+] buttons to directly select the effect categories —
Tremolo, Chorus, etc. — and then use the right [-] and [+]
buttons to select the desired effect within that category.
4 EFFECT DEPTH
¢EFFECT DEPTH
B˜ C2' C1' O2¶ O1~
+– +–
Purpose:
Independently sets the depth of the selected effect for the
bass, chord 1, chord 2, orchestra 1, and orchestra 2 sound.
_
The Effects are:
1. Tremolo :1
2. Tremolo : 2
3. Tremolo : 3
4. Chorus :1
5. Chorus : 2
6. Flange :1
7. Flange : 2
8. Symphony :1
9. Symphony : 2
Notes:
Try out all of the effects to get a feel for what they can do
to your sound.
Procedure:
Use the [<] and [>] buttons to select the parameter for
which effect depth is to be adjusted (B = bass; C1 = chord 1;
C2 = chord 2; O1 = orchestra 1; O2 = orchestra 2), and use
the [-] and [+] buttons to set the effect depth for each parameter. Pressing the [-] and [+] buttons simultaneously instantly
recalls the default depth value.
Notes:
Effect depth can be adjusted in 7 steps, represented by a
vertical bar to the right of each parameter. The longer the
bar, the greater the effect depth.
36
Page 37

[F3] Controller & Key V elocity
The [F3] function group includes six functions that affect how the PSR-5700 responds to control
via the keyboard, a footswitch plugged into the rear-panel FOOT SW jack, an expression pedal
plugged into the rear-panel EXP. PEDAL jack, the [SUSTAIN] button and SUSTAIN footswitch, the
PITCH BEND/GLISSANDO wheel, and the MODULATION/EFFECT wheel.
1 KEY VELOCITY
`KEY VELOCITY
ON
+– +–
Purpose:
Turns keyboard velocity response on or off.
Procedure:
Use the left or right [-] and [+] keys to turn keyboard ve-
locity response ON or OFF.
2 FOOT SWITCH SELECT
“FOOT SWITCH SELECT 1
Type=Glide
+–
Purpose:
Determines the function of a footswitch plugged into the
rear-panel FOOT SW jack.
Procedure:
Use the left [-] and [+] buttons to select one of the follow-
ing footswitch functions:
• Glide ............ Lower orchestra 1 sound by a semitone while
• Harmony ..... Harmony occurs only while footswitch pressed.
• Effect ........... Same as panel [EFFECT] button.
•
Punch In/Out .
• Tension ....... Modifies dominant 7th chords in the accompani-
• Perc. 1 ......... Footswitch plays a percussion instrument from
• Perc. 2 ......... Footswitch plays a percussion instrument from
footswitch pressed.
Sets punch-in and punch-out points when sequencer record mode set to “Punch.”
ment to produce a more consistent sound when
playing in a minor key. Also automatically reharmonizes non-scale tones on chords other
than the tonic and 7th.
the 98 DRUM KIT voice (see “Notes”).
the 99 POP DRUM KIT voice (see “Notes”).
Notes:
This function should normally be turned ON so that you
can create expressive dynamics by varying the velocity with
which you play the keys (i.e. how hard you play the keys).
Key velocity can be turned OFF when playing voices that
normally don’t have velocity response (organ, for example),
or to assist young children learning to play the keyboard who
have not yet developed the finger strength and touch for
playing dynamics.
• Start/Stop............. Same as panel [START] and [STOP]
buttons.
• Start/Re-Start....... Same as panel [START/RE-START] but-
ton.
• Intro1/Fill.............. Same as panel [INTRO.1/FILL IN] button.
• Intro2/Fill.............. Same as panel [INTRO. 2/FILL IN] button.
• Intro3/Ending/rit .. Same as panel [INTRO. 3/ENDING/rit.]
button.
• V.Regist. + ........... Recall next (increment) voice registration.
• P.Regist. + ........... Recall next (increment) panel registration.
• Tap Start .............. Same as PAD Tap Start function.
Notes:
When the “Perc. 1” or “Perc. 2” setting is selected a new
parameter appears to the right of the screen. This allows you
to select the drum or percussion instrument that will be
played when the footswitch is pressed. To select an instrument either use the right [-] and [+] buttons, or press the
corresponding key on the keyboard. The preset velocity
value will be assigned if the [-] and [+] buttons are used,
while the velocity at which the key is played will be assigned
if the keyboard is used to select the drum/percussion instrument.
“FOOT SWITCH SELECT 6
Type=Perc.1 Prc=Kick1
+–
37
Page 38

[F3] Controller & Key Velocity
3 EXP. PEDAL SELECT
£EXP. PEDAL SELECT ‡
Effect=OFF MastVol=ON
+– +–
†£EXP. PEDAL SELECT ‡
Orc1Vol=OFF Orc2Vol=OFF
+– +–
†£EXP. PEDAL SELECT
ABCVol=OFF RhmVol=OFF
+– +–
Purpose:
Determines which of the PSR-5700’s parts (orchestra,
rhythm, etc.) an expression pedal plugged into the rear-panel
EXP. PEDAL jack will control.
Procedure:
Use the [<] and [>] buttons to switch between the three
display screens. Use the [-] and [+] buttons below each parameter to turn expression control on or off:
• Effect ......... Effect control (Same as MODULATION/EFFECT
wheel. All other parameters automatically OFF).
• MastVol .....Master volume control.
• Orch1Vol ... Orchestra 1 volume control.
• Orch2Vol ... Orchestra 2 volume control.
• ABCVol .....ABC accompaniment volume control.
• RhmVol ..... Rhythm volume control.
Notes:
Normally you’ll want to be able to apply expression control to the orchestra voices without affecting the accompaniment and rhythm sound, so “Orch1Vol” should be turned on
while the remaining parameters are turned off.
When “MastVol”, “Orc1Vol”, “Orc2Vol”, “ABCVol” , or “RhmVol”
is turned ON, “Effect” is automatically turned OFF.
DETAIL
When “Orc1Vol”, “Orc2Vol”, “ABCVol” , or “RhmVol” is turned
ON, “MastVol” and “Effect” are automatically turned OFF.
DETAIL
The “Effect” setting only applies when the panel [EFFECT]
button is turned ON.
DETAIL
4 SUSTAIN PAR T SELECT
¢SUSTAIN PART SELECT
Orch1=ON Orch2=ON
+– +–
Purpose:
Determines whether the PSR-5700 sustain effect is to be
applied to the orchestra 1 voice, the orchestra 2 voice, or
both orchestra voices.
38
Procedure:
Use the left [-] and [+] buttons to turn sustain on or off for
the orchestra 1 voice, and the right [-] and [+] buttons to turn
sustain on or off for the orchestra 2 voice.
Notes:
The sustain effect is applied to the specified orchestra
part(s) only when the panel [SUSTAIN] button is turned on
or when the sustain pedal is pressed.
Page 39

5 PITCH BEND SELECT
PITCH BEND SELECT
Orch1=ON Orch2=ON
+– +–
[F3] Controller & Key Velocity
Procedure:
Use the left [-] and [+] buttons to turn pitch wheel control
on or off for the orchestra 1 voice, and the right [-] and [+]
buttons to turn pitch wheel on or off for the orchestra 2
voice.
Purpose:
Determines whether the PITCH BEND/GLISSANDO
wheel will affect the orchestra 1 voice, the orchestra 2 voice,
or both orchestra voices.
6 WHEEL SELECT
⁄WHEEL SELECT ‡
Type=Modulation
+–
†⁄WHEEL SELECT
Orch1=ON Orch2=OFF
+– +–
Notes:
If, for example, you’re using the split mode (ORCH.
2v1) with a bass voice on the left and a sax voice on the
right, you’ll want pitch bend to apply only to the right-hand
sax voice. In this case simply turn orchestra 1 pitch bend on
and orchestra 2 pitch bend off.
If AUTO BASS CHORD is on and the ORCH. 2v1 or-
chestration mode is selected, no pitch bend is applied to the
ORCH. 2 voice.
Procedure:
Use the left [-] and [+] buttons to select either “Modula-
tion” or “Effect” operation, then press the [>] button to
move to the second display screen and use the left [-] and [+]
buttons to turn wheel control on or off for the orchestra 1
voice, and the right [-] and [+] buttons to turn wheel control
on or off for the orchestra 2 voice.
Purpose:
Determines whether the MODULATION/EFFECT wheel
will control modulation or the selected effect (page 36), and
whether it will affect the orchestra 1 voice, the orchestra 2
voice, or both orchestra voices.
Notes:
This function can be used to apply modulation or the se-
lected effect to just one of the voices being played in the split
mode (ORCH. 2v1) to emphasize that voice and provide
greater contrast with the other voice.
When “Effect” operation is selected, the wheel will func-
tion only when the panel [EFFECT] button is turned on.
If AUTO BASS CHORD is on and the ORCH. 2v1 or-
chestration mode is selected, no modulation is applied to the
ORCH. 2 voice.
39
 Loading...