

Page 1
Model
H-2191
H-2192
Data / Voice Modem
Owner's Manual
Version 2.0.1
75 West 10 0 S outh , L ogan , U tah 843 21 P hon e: (4 35) 75 3-2 212 F ax: (4 35) 753 -76 69 W eb : htt p:/ /w ww .wa terlog. com E- mail: wat erlog@ wa terlo g.c om
D E S I G N A N A L Y S I S A S S O C I A T E S , I N C .
Page 2

Page 3

Table of Contents
User Agreement/WATERLOG Warranty. . . . . . . . . . . . . . . . . . . . . . . . . . . . . . . . . . . . . . . . . W-1
®
Chapter 1 Introduction
1.1 Introduction to the H-2191 and H-2192. . . . . . . . . . . . . . . . . . . . . . . . . . . . . . . . . . . . . . . . 1-1
1.2 Unpacking Your H-219X. . . . . . . . . . . . . . . . . . . . . . . . . . . . . . . . . . . . . . . . . . . . . . . . . . . 1-2
1.3 About This Manual. . . . . . . . . . . . . . . . . . . . . . . . . . . . . . . . . . . . . . . . . . . . . . . . . . . . . . . . 1-2
1.4 Definitions and Acronyms. . . . . . . . . . . . . . . . . . . . . . . . . . . . . . . . . . . . . . . . . . . . . . . . . . 1-3
1.5 H-2192 SIM Card Installation.. . . . . . . . . . . . . . . . . . . . . . . . . . . . . . . . . . . . . . . . . . . . . . . 1-4
1.6 FCC Approval.. . . . . . . . . . . . . . . . . . . . . . . . . . . . . . . . . . . . . . . . . . . . . . . . . . . . . . . . . . . 1-4
Chapter 2 Installation
2.1 Pre Installation. . . . . . . . . . . . . . . . . . . . . . . . . . . . . . . . . . . . . . . . . . . . . . . . . . . . . . . . . . . . 2-1
2.2 Front Panel Connections. . . . . . . . . . . . . . . . . . . . . . . . . . . . . . . . . . . . . . . . . . . . . . . . . . . . 2-1
2.2.1 Phone Connection. . . . . . . . . . . . . . . . . . . . . . . . . . . . . . . . . . . . . . . . . . . . . . . . . . . . . . . . 2-1
2.2.2 Cell Phone Antenna Connection.. . . . . . . . . . . . . . . . . . . . . . . . . . . . . . . . . . . . . . . . . . . . 2-1
2.2.3 RF Radio Connection. . . . . . . . . . . . . . . . . . . . . . . . . . . . . . . . . . . . . . . . . . . . . . . . . . . . . 2-1
2.2.4 Earth Ground Connection. . . . . . . . . . . . . . . . . . . . . . . . . . . . . . . . . . . . . . . . . . . . . . . . . . 2-1
2.3 Back Panel Connection. . . . . . . . . . . . . . . . . . . . . . . . . . . . . . . . . . . . . . . . . . . . . . . . . . . . . 2-2
2.3.1 Power Connection.. . . . . . . . . . . . . . . . . . . . . . . . . . . . . . . . . . . . . . . . . . . . . . . . . . . . . . . 2-2
2.3.2 Alarm Connection.. . . . . . . . . . . . . . . . . . . . . . . . . . . . . . . . . . . . . . . . . . . . . . . . . . . . . . . 2-2
2.3.3 RS-232 Connection.. . . . . . . . . . . . . . . . . . . . . . . . . . . . . . . . . . . . . . . . . . . . . . . . . . . . . . 2-3
2.3.4 USB Connection. . . . . . . . . . . . . . . . . . . . . . . . . . . . . . . . . . . . . . . . . . . . . . . . . . . . . . . . . 2-3
2.3.5 Ethernet RJ45. . . . . . . . . . . . . . . . . . . . . . . . . . . . . . . . . . . . . . . . . . . . . . . . . . . . . . . . . . . 2-3
2.4 LED Descriptions. . . . . . . . . . . . . . . . . . . . . . . . . . . . . . . . . . . . . . . . . . . . . . . . . . . . . . . . . 2-4
2.5 Installing the H-219X. . . . . . . . . . . . . . . . . . . . . . . . . . . . . . . . . . . . . . . . . . . . . . . . . . . . . . 2-5
2.6 Testing the Installation. . . . . . . . . . . . . . . . . . . . . . . . . . . . . . . . . . . . . . . . . . . . . . . . . . . . . 2-6
Chapter 3 Operation
3.1 Overview.. . . . . . . . . . . . . . . . . . . . . . . . . . . . . . . . . . . . . . . . . . . . . . . . . . . . . . . . . . . . . . . 3-1
3.2 Data Mode Operation Over Standard Phone System. . . . . . . . . . . . . . . . . . . . . . . . . . . . . . 3-1
3.3 Voice Call In Over Standard Phone System. . . . . . . . . . . . . . . . . . . . . . . . . . . . . . . . . . . . . 3-1
3.3.1 Voice Call In Overview. . . . . . . . . . . . . . . . . . . . . . . . . . . . . . . . . . . . . . . . . . . . . . . . . . . 3-1
3.3.2 Voice Call In Options. . . . . . . . . . . . . . . . . . . . . . . . . . . . . . . . . . . . . . . . . . . . . . . . . . . . . 3-3
3.3.2.1 Embedded Control Codes and Special Characters.. . . . . . . . . . . . . . . . . . . . . . . . . . . . . 3-5
3.3.3 Phone Call In Menu. . . . . . . . . . . . . . . . . . . . . . . . . . . . . . . . . . . . . . . . . . . . . . . . . . . . . . 3-6
3.4 Voice Call In Over Cell Phone System.. . . . . . . . . . . . . . . . . . . . . . . . . . . . . . . . . . . . . . . . 3-7
3.5 Voice Call Out (Alarm) Over Standard Phone System.. . . . . . . . . . . . . . . . . . . . . . . . . . . 3-10
3.5.1 Voice Call Out Menu.. . . . . . . . . . . . . . . . . . . . . . . . . . . . . . . . . . . . . . . . . . . . . . . . . . . 3-10
3.6 Voice Call Out (Alarm) Over Cell Phone System. . . . . . . . . . . . . . . . . . . . . . . . . . . . . . . 3-11
3.7 Data Call In Using Cell Modem Module. . . . . . . . . . . . . . . . . . . . . . . . . . . . . . . . . . . . . . 3-11
3.8 Text Message Call In. . . . . . . . . . . . . . . . . . . . . . . . . . . . . . . . . . . . . . . . . . . . . . . . . . . . . 3-12
75 West 10 0 S outh , L ogan , U tah 843 21 P hon e: (4 35) 75 3-2 212 F ax: (4 35) 753 -76 69 W eb : htt p:/ /w ww .wa terlog. com E- mail: wat erlog@ wa terlo g.c om
D E S I G N A N A L Y S I S A S S O C I A T E S , I N C .
Page 4

3.9 Text Message Call Out. . . . . . . . . . . . . . . . . . . . . . . . . . . . . . . . . . . . . . . . . . . . . . . . . . . . 3-12
3.10 Voice Call In Over UHF / VHF Radio. . . . . . . . . . . . . . . . . . . . . . . . . . . . . . . . . . . . . . . 3-12
Chapter 4 Remote Communications
4.1 Introduction.. . . . . . . . . . . . . . . . . . . . . . . . . . . . . . . . . . . . . . . . . . . . . . . . . . . . . . . . . . . . . 4-1
4.2 General System Commands. . . . . . . . . . . . . . . . . . . . . . . . . . . . . . . . . . . . . . . . . . . . . . . . . 4-3
4.3 Data Entry Commands. . . . . . . . . . . . . . . . . . . . . . . . . . . . . . . . . . . . . . . . . . . . . . . . . . . . . 4-4
4.4 General Voice Commands. . . . . . . . . . . . . . . . . . . . . . . . . . . . . . . . . . . . . . . . . . . . . . . . . . 4-6
4.5 Alarm Call Out Commands. . . . . . . . . . . . . . . . . . . . . . . . . . . . . . . . . . . . . . . . . . . . . . . . . 4-7
4.6 Modem Commands.. . . . . . . . . . . . . . . . . . . . . . . . . . . . . . . . . . . . . . . . . . . . . . . . . . . . . . . 4-8
4.7 VHF / UHF Radio Commands. . . . . . . . . . . . . . . . . . . . . . . . . . . . . . . . . . . . . . . . . . . . . . . 4-9
Chapter 5 Menu Mode Reference
5.1 Menu Mode Reference. . . . . . . . . . . . . . . . . . . . . . . . . . . . . . . . . . . . . . . . . . . . . . . . . . . . . 5-1
5.2 Remote Access. . . . . . . . . . . . . . . . . . . . . . . . . . . . . . . . . . . . . . . . . . . . . . . . . . . . . . . . . . . 5-1
5.3 Main Menu. . . . . . . . . . . . . . . . . . . . . . . . . . . . . . . . . . . . . . . . . . . . . . . . . . . . . . . . . . . . . . 5-2
5.4 Voice Menu.. . . . . . . . . . . . . . . . . . . . . . . . . . . . . . . . . . . . . . . . . . . . . . . . . . . . . . . . . . . . . 5-3
5.5 Alarm Message Menu.. . . . . . . . . . . . . . . . . . . . . . . . . . . . . . . . . . . . . . . . . . . . . . . . . . . . . 5-5
5.6 Alarm Menu. . . . . . . . . . . . . . . . . . . . . . . . . . . . . . . . . . . . . . . . . . . . . . . . . . . . . . . . . . . . . 5-7
5.7 RF Radio Mneu.. . . . . . . . . . . . . . . . . . . . . . . . . . . . . . . . . . . . . . . . . . . . . . . . . . . . . . . . . . 5-8
5.8 Cell Modem Menu. . . . . . . . . . . . . . . . . . . . . . . . . . . . . . . . . . . . . . . . . . . . . . . . . . . . . . . 5-10
5.9 Diagnostics Menu. . . . . . . . . . . . . . . . . . . . . . . . . . . . . . . . . . . . . . . . . . . . . . . . . . . . . . . . 5-12
5.9.1 Voice Quality Menu. . . . . . . . . . . . . . . . . . . . . . . . . . . . . . . . . . . . . . . . . . . . . . . . . . . . . 5-14
Chapter 6 Maintenance and Trouble Shooting
6.1 Maintenance. . . . . . . . . . . . . . . . . . . . . . . . . . . . . . . . . . . . . . . . . . . . . . . . . . . . . . . . . . . . . 6-1
6.2 Trouble Shooting. . . . . . . . . . . . . . . . . . . . . . . . . . . . . . . . . . . . . . . . . . . . . . . . . . . . . . . . . 6-1
Appendix A - Specifications.. . . . . . . . . . . . . . . . . . . . . . . . . . . . . . . . . . . . . . . . . . . . . . . . . . A-1
Page 5

Chapter 1
Introduction
1.1 Introduction to the H-2191 and H-2192
Both the H-2191 and H-2192 are modem based communication devices. The main difference is
the H-2191 is based on a standard land line connection while the H-2192 uses a cell phone based
modem for communications.
NOTE: Items discussed in this manual that apply to both the H-2191 and to the H-2192 will be
listed as H-219X. Subjects that pertain only to one unit or the other will use the appropriate
model number.
The H-219X data/voice modems operate in a fashion similar to many other modems, but they
also have been designed with special features that make them ideal for remote applications in the
data logging industry. While in a sleep mode, the H-219X draws very little power making them
ideal for battery operation. The advanced setup options are easily programmed through the serial
port or remotely via a data connection. The H-219X operate in several different modes.
Voice Call In Over Land Line or Cell Phone:
When called, the H-2191 will answer in a voice mode and later switch to a data mode if
necessary. The H-2192 acts the same as the H-2191 except it will not enter a data mode. The
voice mode allows the user to retrieve data by simply calling the H-219X from any touch tone
phone. Data for the voice mode normally comes form a WATE RLOG series data logger.
®
Voice Call Out (ALARM) Over Land Line or Cell Phone:
The H-219X can also call out in a voice mode when an alarm condition exists.
Voice Over RF Radio Link:
This is the same as the land line or cell phone operation except the alarm call out option is not
supported. To call a site, instead of a phone number, a 2 to 4 digit code pressed on a keypad of
the calling radio is used.
Data Over Land Line Connection:
In the data mode, the H-2191 may be used to program or retrieve data from any WATERLOG
series data logger through the serial port. The connection is made using a terminal emulation
program such as Hyper Term running on a PC with a standard modem.
Data Over Cell Phone:
In the data mode, the H-2192 may be used to program or retrieve data from any WATERLOG
To access the data logger using the cell phone modem a TCP/IP connection must be used. This
can also be done using the Hyper Term program.
®
®
H-219X Introduction 1-1
Page 6

Text Message Call In Using The Cell Phone:
The H-2192 can also send data in a text message. To receive a text message with the data simply
send a text message to the H-2192. The H-2192 will reply to the calling number with the current
data.
Text Message Call Out (Alarm) Using The Cell Phone:
The H-2192 can also send data in a text message based on some alarm condition. When an alarm
condition occurs, the H-2192 will send a text message to selected recipients unsolicited.
1.2 Unpacking Your H-219X
You should have received the following items
1. The H-219X Instrument.
2. Mounting Hardware.
3. Owner’s Manual or (CD).
4. Data Cable.
5. Power and External Alarm Connectors.
6. Male to Male 9 pin D adaptor.
7. CD with Firmware Update Program and Update Instructions
8. Accessories such as antennas and cables may also be included.
1.3 About This Manual
This manual will show you how to install and operate your H-219X. You will find the
installation procedures and operational functions simple and easy to use. The chapters are
compiled in a logical order to help in the installation and operation of the H-219X.
Chapter 1: Introduction
Chapter 2: Installation
Chapter 3: Operation
Chapter 4: Modem Command Reference
Chapter 5: Menu Mode Reference
Chapter 6: Maintenance and Troubleshooting
Appendix A: Specifications
1-2 Introduction H-219X
Page 7

1.4 Definitions and Acronyms
General Terms:
H-2191 Model number of the unit with the standard land line modem module installed.
H-2192 Model number of the unit with the cell modem module installed.
H-219X Model number used in this manual when a topic applies to both the H-2191 and
the H-2192.
Phone System Terms:
APN Access Point Name. Used by the provider to determine how to connect the
mobile device to the IP network.
CSD Circuit Switched Data.
Older technology for data transfer.
GPRS General Packet Radio Service.
This is a “packet oriented, mobile data service” available to users of the 2G
(GSM) cellular communication systems, as well as the newer 3G systems. In 2G
systems, GPRS provides data rates of 56-114 kbit/s
GSM Global System for Mobile Communication.
POTS Plain Old Telephone System. This is the same as the PSTN.
PSD Packet Switched Data.
Newer technology for data transfer.
PSTN Public Switched Telephone Network.
Radio Terms:
DL3400 this is the model number of the radio from ‘Data Radio’ that interfaces directly to
the H-219X.
PPT Push To Talk.
Normally a button on a radio manually pressed when the user desires to talk.
H-219X Introduction 1-3
Page 8

1.5 H-2192 SIM Card Installation
Before the H-2192 GSM cell phone modem can be used a SIM card must be obtained and
activated by a local provider, then installed in the modem.
Use the following steps to install the SIM card.
1 - Remove the two screws on the end of the case with the LED’s and ground lug.
2 - Disconnect the ground lug from the end plate by pulling gently on the connector on the
ground wire. Be careful not to bend the end plate. Also be careful not to pull the end plate away
from the case to the point the antenna wire disconnects or is stressed.
3 - Holding the other end plate in one hand, gently pull the top half of the case away from the end
plate exposing the PC board inside. With the top of the case slid back about half way the modem
module will be exposed.
4 - At one end of the modem module will be a socket for the SIM card. Properly orient the SIM
card to the socket and insert it into the socket.
5 - Push the top of the case back into its normal position.
6 - Reconnect the ground lug wire to the end plate.
7 - align the end plate and replace the two screws.
Note: If the antenna cable did become disconnected from the modem module, then simply
reconnect it. Be careful as this is a small connector and does not take a lot of pressure to
reconnect it.
1.6 FCC Approval
Type of Service: The H-2191 is designed to be used on a standard device telephone line. It
connects to the telephone line by means of a standard jack called the USOC RJ-11C. Connection
to telephone company provided coin service (central office implemented systems) is prohibited.
Connection to party line service is subject to state tariffs.
Telephone Company Procedures: The goal of the telephone company is to provide the best
service possible. In order to do this, it may occasionally be necessary for them to make changes
in their equipment, operations, or procedures. If these changes affect your service or the
operation of your equipment, the telephone company will give you a written notice in order to
allow you to make any changes necessary to maintain uninterrupted service.
In certain circumstances, it may be necessary for the telephone company to request information
1-4 Introduction H-219X
Page 9

from you concerning the equipment which you have connected to your telephone line. Upon
request of the telephone company, provide the FCC registration number and the ringer
equivalence number (REN); both of these items are listed on the equipment label. The sum of all
the REN’s on your telephone line should be less than five in order to assure proper service from
the telephone company. In some cases, a sum of five may not be useable on a given line.
If Problems Arise: If any of your telephone equipment is not operating properly, and you expect
it may be affecting the telephone line, immediately remove it from the telephone line to prevent
harm to the telephone network. If the telephone company notes a problem, they may temporarily
discontinue service. When practical, they will notify you in advance of this disconnection. If
advanced notice is not feasible, you will be notified as soon as possible. When you are notified,
you will be given the opportunity to correct the problem and be informed of your right to file a
complaint with the FCC. Contact your telephone company if you have any questions about your
telephone line. In the event any repairs are required on the H-2191, they should be performed
only by Design Analysis Associates. In this event call Design Analysis Associates for assistance.
H-219X Introduction 1-5
Page 10

1-6 Introduction H-219X
Page 11
Chapter 2
Installation
2.1 Pre Installation
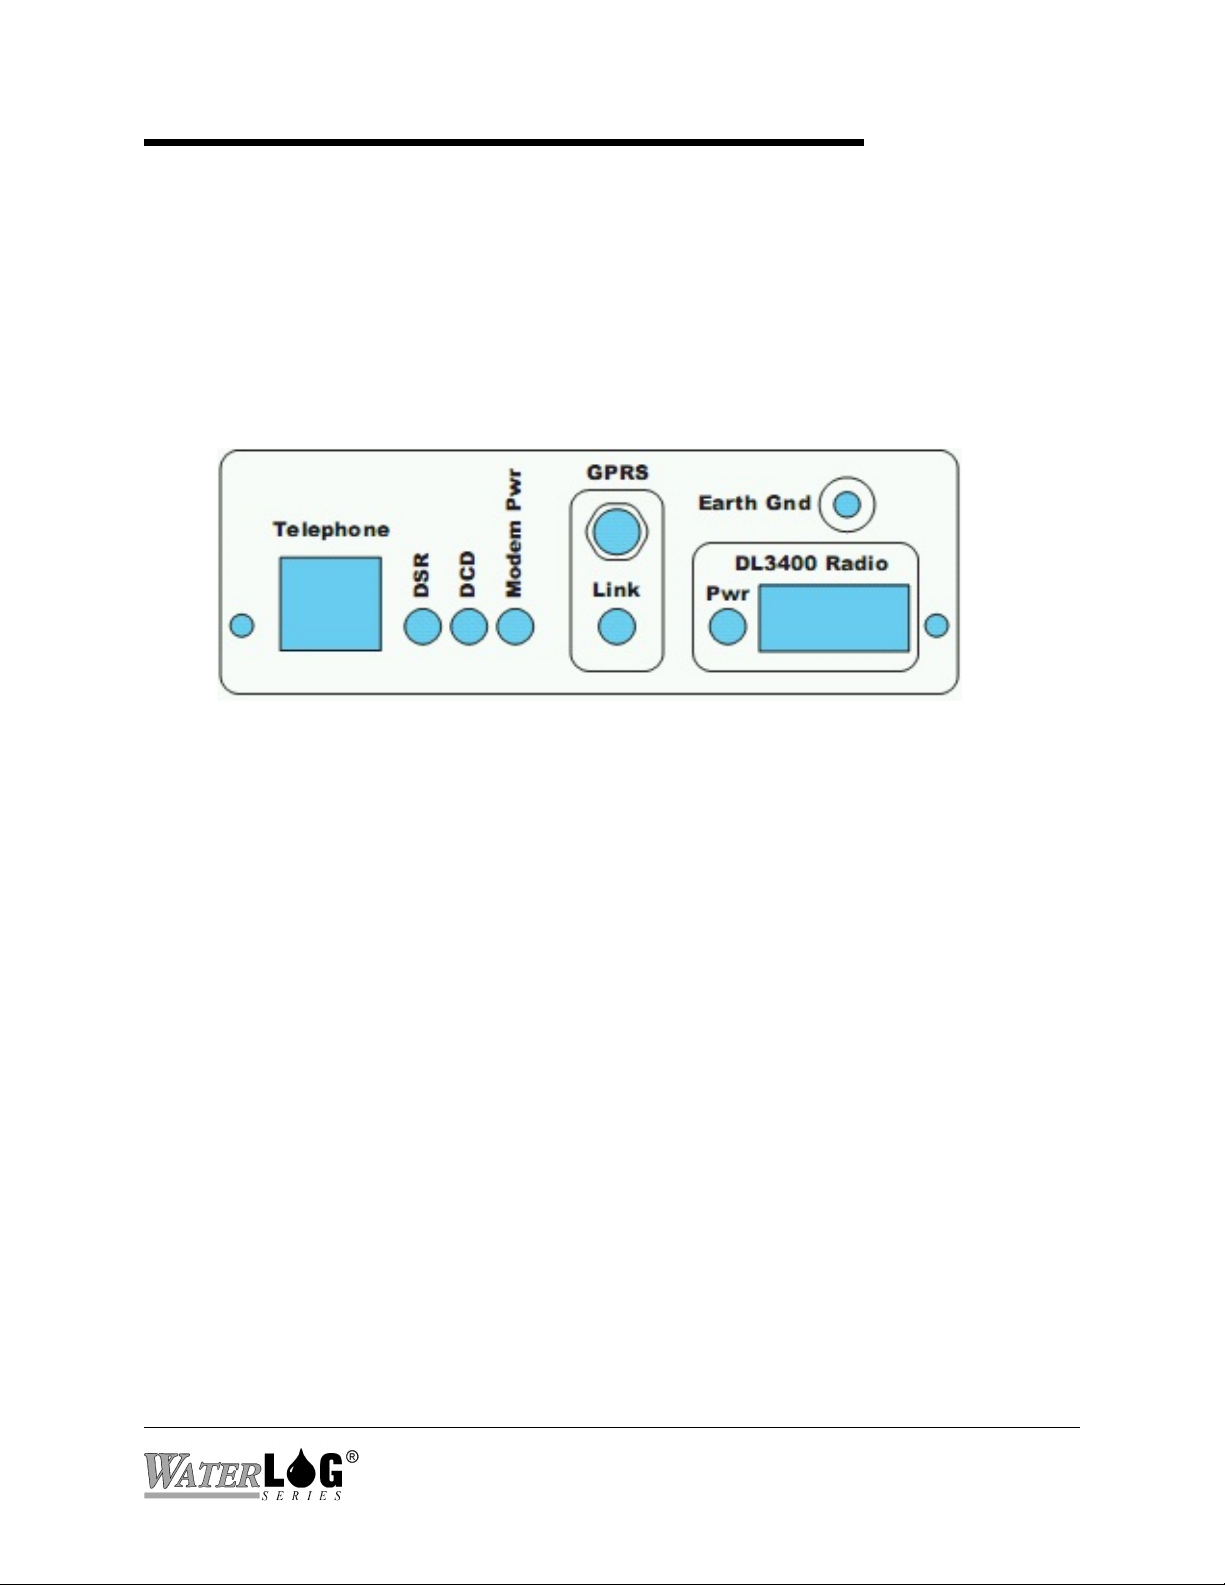
Before discussing the installation options, a review of the connections and LED operation will be
helpful. There are several connections on both ends of the unit.
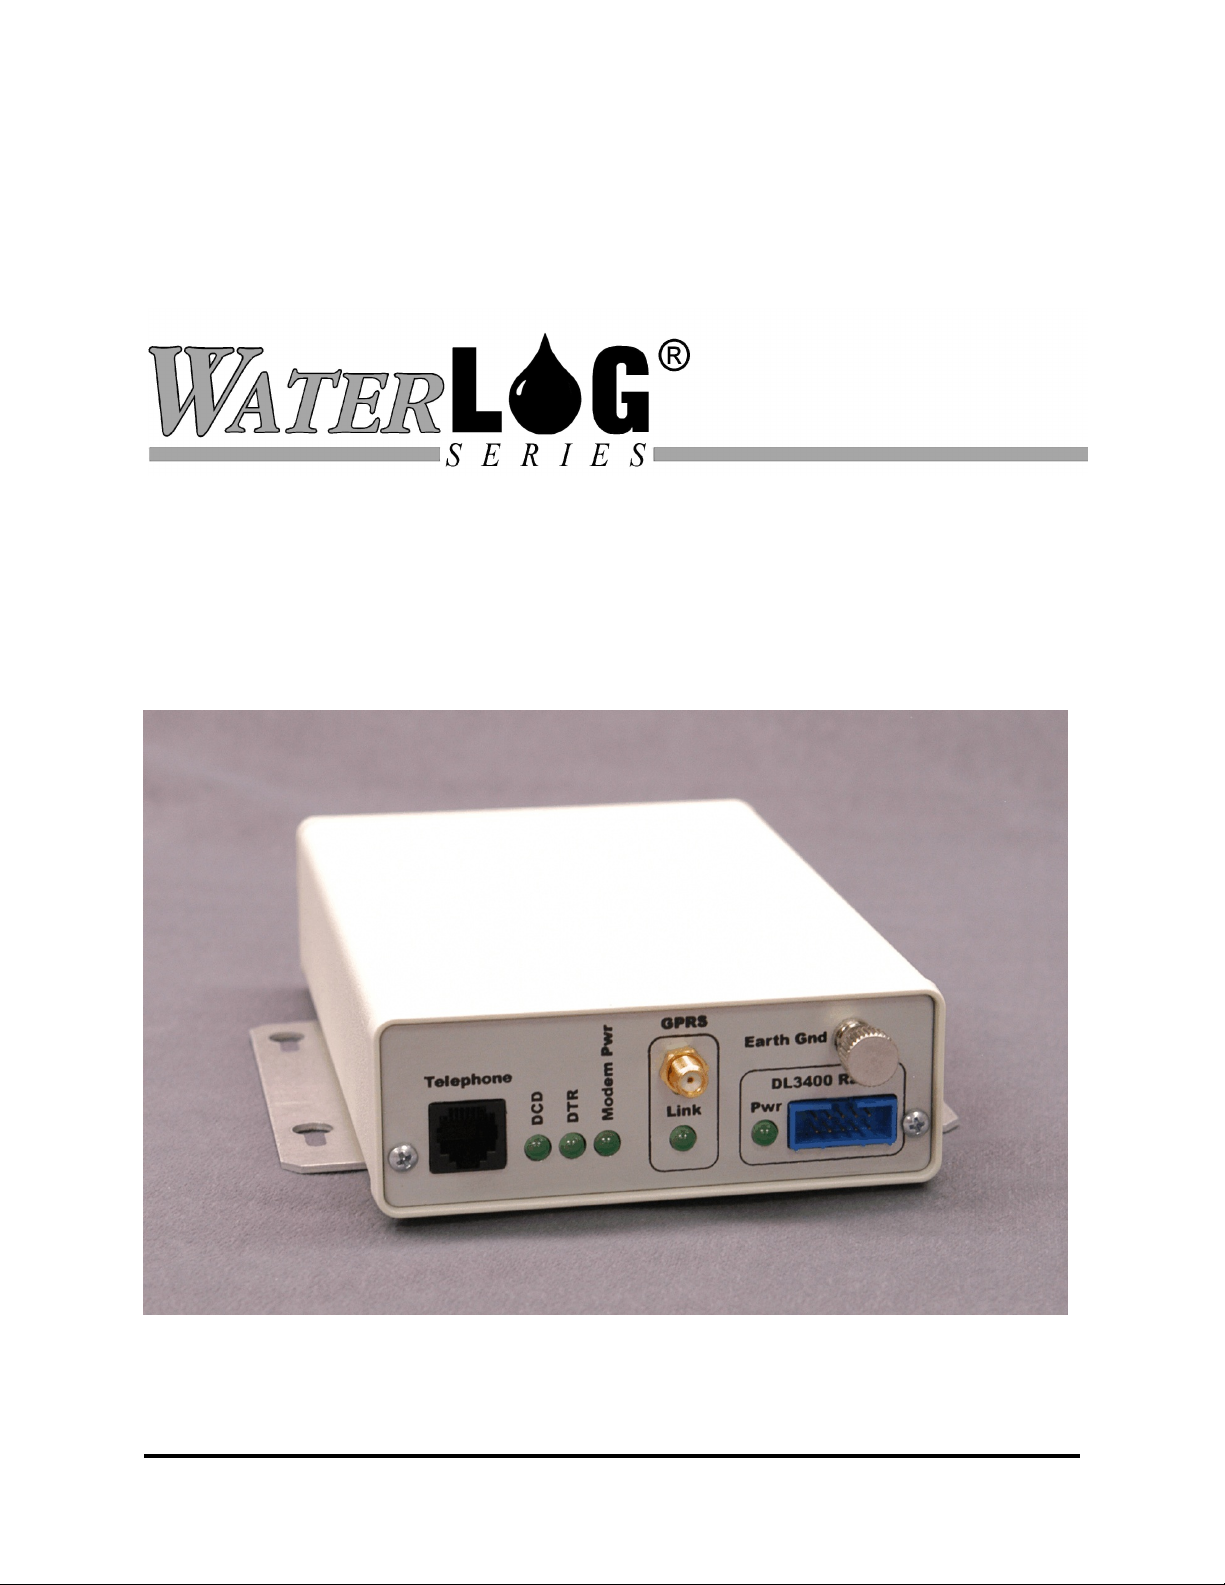
2.2 Front Panel Connections
Figure 2.2 Front Panel Connections
2.2.1 Phone Connection
The phone connection is a standard RJ11 connector allowing a simple connection to a phone
system.
2.2.2 Cell Phone Antenna Connection
The H-2192 uses a built in cell phone that uses this connection for its antenna.
2.2.3 RF Radio Connection
This connection was designed to plug directly into a Data Radio DL-3400 RF radio using a
straight through cable. This connection handles the audio in and out, the push to talk (PPT)
function, and other control signals. The H-219X also controls the power to the radio so it can be
turned off to save power.
2.2.4 Earth Ground Connection
There is a connection for an earth ground. It is very important that an earth ground be provided
and connected to this grounding post on the H-219X. Other equipment in the system should also
be connected to an earth ground.
H-219X Installation 2-1
Page 12

2.3 Back Panel Connections
Figure 2.1 H-219X Back Panel Connections
2.3.1 Power Connection
The two pins on the right side of the green terminal strip allows for an easy power connection. It
is important to use a heavy gauge wire (18 gauge or heavier) for power connections. If the RF
radio is also used with this modem then the heavier gauge wire may be required. The power
connections are clearly labeled on the instrument housing.
2.3.2 Alarm Connection
The two pins on the left side of the green terminal strip allows for an easy connection to some
external device that may signal an alarm condition. The alarm connections are clearly labeled on
the instrument housing.
2-2 Installation H-219X
Page 13

2.3.3 RS-232 Connection
The RS-232 port is a standard 9 pin D connector. It is configured as a standard type DCE (Data
Communication Equipment) device. This will connect directly to the data logger or any other
DTE (Data Terminal Equipment) type of device. The pin out is as follows:
SE R IA L P OR T P IN OU T
PI N DI R EC TIO N CO M ME NTS
1 Da ta Carri er
De tect (DC D)
2 Tr ansmit D ata
(T D)
3 Re ceive Da ta
(R D)
4 Da ta Termi nal
Re ady (DTR )
5 Gr ound (GN D) Sy stem Gro und.
6 Da ta Set R eady
(D SR)
7 Re quest to Send
(R TS)
8 Cl ear to S end
(C TS)
Al ways fol lows the stat e of the mode m c arrie r signal .
Tr ansmit f rom t he modem to the conne cte d dev ice.
Re ceive da ta fr om the c onnected devi ce.
Si gnal fro m the co nnect ed devic e tha t i t is ready fo r
co mmunicat ions. Wh en ac tive, th is si gna l wil l take
th e modem out o f t he lo w power mode and read y to
re ceive co mmand s. This will pre vent the mode m from
an swering incom ing call s. If an inco min g cal l was
al ready in proc ess , the n the H- 2191 wil l con tinue on
wi th that call bef ore a ccepting comm and s fro m the
co nnected devic e.
A signal f rom t he modem to the conne cte d dev ice that
it is read y for co mmuni cations.
Ti ed to th e rem ote devi ces Clea r to Sen d. Th is signa l
is used fo r har dwa re ha ndshakin g.
Ti ed to th e rem ote devi ces Requ est t o S end. This
si gnal is used for hard ware han dshak ing .
9 Ri ng Indic ator
(R I)
Go es activ e dur ing the actual c all i n r ing p rocess.
2.3.4 USB Connection
The USB connection is used for firmware updates. As new versions of the firmware come
available they will be placed on the manufactures web page or available by some other means to
the end user. Directions for updating the firmware will be available with the update.
2.3.5 Ethernet RJ45
At this time the Ethernet port is not used but may be used for future options.
H-219X Installation 2-3
Page 14

2.4 LED Descriptions
DTR LED:
The DTR LED indicates the data logger connected to RS-232 port is active. This LED will be on
any time the data logger is sending data to the modem, any time the modem requests data from
the data logger, and when a data connection is active.
Modem Pwr:
On the H-2191, the modem is normally turned off and the unit is in a low power mode.
Incoming calls will be detected and wake up the modem. Once the modem is awake the call can
be answered.
On the H-2192 the modem power must be on to receive a call. For the H-2192 the power can be
programmed to turn on and off and set times or based on a battery voltage, or on always.
DCD LED
This is the Data Carrier Detect signal form the modem used in the H-2191. When a data
connection is valid this LED turns on.
Link LED:
When using the H-2192 this LED indicates the status of the cell phone connection. This LED is
off if the internal modem module is powered off. This LED is on solid if the modem power is on
and the cell modem is not registered on the network. This normally only happens for a few
seconds when the modem module is first powered up. This LED will blink at a rate of once
every 2 to 3 seconds when it is registered on the network and ready for operation. If a call is
active then this LED blinks at a faster rate of about 1 a second.
DL3400 Radio Pwr LED:
The VHF or UHF radio must be powered for operation. This LED indicated the status of the
power supplied to the radio.
NOTE: The Ethernet connector has a couple of LED’s on it also, but it is not activated at this
time.
2-4 Installation H-219X
Page 15

2.5 Installing the H-219X
This chapter will help you to install and connect your H-219X. For proper installation, you will
need:
! The H-219X with mounting hardware
! The H-219X Owner’s Manual
! Communication cables
! For the H-2191, phone line cable with RJ-11 jack connectors for the land line connection
! For the H-2192, Antenna for cell phone. Make sure phone is activated before field trip!
! Cables for radio connection including any accessories needed by the radio
! Screw driver to make the power connections
! 18 gauge or larger wire for power and ground connections
! Power source (Battery, Solar panels, AC adaptor, etc.)
! Grounding rod and heavy copper wire for connecting the system to the grounding rod
The following paragraphs give a basic outline of the installation process. Your installation may
vary according to your intended application and site conditions.
! Choose the best place to mount the equipment. Wiring should be kept as short as
possible. Equipment with displays and keyboards should be easily accessible. Equipment
with exposed wiring terminals should be mounted with the terminals toward the bottom
of the case. Antenna cables should be kept short. Also consider any future expansion,
function of the equipment, vandalism, etc.
! Physically mount all the equipment in the desired locations.
! Connect a power source to the H-219X. This power source should be a 12 Volt power
source, but not to exceed 16 Volts. Use 18 gauge wires or heavier for a standard modem
application, if the RF radio is used then use 16 gauge or larger wires for the power .
! Connect the phone line to the phone line connection of the H-2191 using a standard RJ11
connector. For the H-2192, cell phone sites, install and connect the antenna.
! For sites using the RF radio, install the radio and make appropriate connections as
H-219X Installation 2-5
Page 16

needed. This includes the data / power cable, and antennas.
! On sites using the H-2192 cell phone and an RF radio, install the antennas and cables to
prevent the two from interfering with each other.
! Connect the RS-232 cable to the XL series data logger or other equipment. When
connected to the XL series data logger a straight through cable should be used, a NULL
modem adaptor is not required.
! Evaluate the earth grounding of all the equipment at the site and make sure the modem is
included in this grounding scheme. An earth ground connector has been provided for this
purpose.
2.6 Testing the Installation
The H-219X is designed to be a plug and play device. Once connected, it should function without
any additional setup in the data mode and only a few settings for the voice mode. Normally the
voice mode settings of the H-219X will be setup in the office, but they may also be done in the
field. This includes adding the voice messages and any settings for the stand alone mode. See the
next chapter for details on the voice mode setups.
Before leaving a site, make sure the equipment is functioning properly. The best way to confirm
that the H-219X is connected properly and operating properly is to call it. The voice mode is the
easiest to test. If a cell phone is available, call the H-219X and the voice sign on message should
be heard. Run through the different options to verify that they are all working correctly. A
common problem is that the messages do not match the data, for example the first message may
refer to stage when the data reported is temperature. Either change the messages to correspond to
the data or rearrange the order of the data being sent to the H-219X.
To test the data mode, it is again best to call the site and verify the connection and operation.
When used with an XL series data logger, pressing the enter key a few times should produce the
arrow prompt used by the command mode of the data logger or a menu will be displayed. If the
command prompt is displayed then standard commands for the XL series logger may be used. If
the menu is displayed then the menu may be accessed as usual.
It may also be helpful to hook a current meter to the H-2191 and monitor the power consumption
of the H-2191 in its sleep mode, voice mode, and data mode. See the specifications for the actual
levels.
2-6 Installation H-219X
Page 17

Chapter 3
Operation
3.1 Overview
The H-219X is easy to set up and operate, and can be used as a regular data modem as well as a
voice modem. The modem uses the standard AT and S register commands, however in most
cases they are handled automatically so the user does not need to know anything about them.
Options related to the voice mode of the H-219X are programmed using a built in menu or from
an extended set of commands.
3.2 Data Mode Operation Over Standard Phone System
The main purpose of the H-2191 in the data mode is to allow data communications between a PC
and a remote WATERLOG series data logger. This allows for remote data transfers, and for
changes to the data logger setups remotely. If the H-219-1 is operated with a WATERLOG series
data logger, all that needs to be done is to connect the power, the RS-232 cable, and the phone
line to the H-2191.
Although this may seem too simple, the system is designed to be a plug and play system,
meaning that only a few steps are necessary for operation. If you are going to use the modem
with something other than a WATERLOG series data logger, standard AT commands and S
registers may be changed for special modes if needed. In most cases no changes are needed.
When used in the data mode only, no setup changes are required on the data logger. This is the
simplest mode of operation.
Note: The H-2191 is configured to always answer in the voice mode. When the H-2191 is
called it first looks for a keyed response from a touch-tone phone in order to continue
with the menu for voice capability. If it does not receive a keyed response within five
seconds, the H-2191 will automatically switch to the data mode and expect to
communicate with another modem in a data mode.
3.3 Voice Call In Over Standard Phone System
®
®
®
Before proceeding, an explanation of how and what data will be sent from the data logger to the
H-2191 modem may be helpful.
3.3.1 Voice Call In Overview
When a incoming call is made to get data from a site in a voice mode, the data spoken is data that
resides in the modem, not the logger. On the XL series of loggers, there is a special menu option
to define what data will be sent to the modem and the order in which it will be sent. This data is
H-219X Operation 3-1
Page 18

normally sent to the modem each time the logger scans the different sensors. For example if the
logger is set to scan the sensors every 15 minutes, then data is normally sent to the modem every
15 minutes. For more instructions on this feature, please see the corresponding section in the XL
Series data logger owner’s manual.
The data coming from the data logger will be stored in memory locations referred to as data value
boxes within the H-219X. There are ten data value boxes labeled BOX01 to BOX10. As data is
sent from the data logger to the modem it is placed in data box01 and continues until no more
data is sent or all the data boxes are full. A time stamp is also sent to the modem so the time the
data value was measured is known. The following table gives a simple visual representation of
how data is stored in the modem.
Time Stamp Box 01 Box 02 Box 03 - - - Box 10
Each data box has a user programable message that will be spoken to identify the data when a
voice call is made. A typical message would look like the following:
“The battery voltage is $v01 volts”
Notice the ‘$’ character in the message. The ‘$’ is used by the system to perform some task at
that point. The character just after the ‘$’ indicates the action to take. In this case the next
character is a ‘v’ which stands for ‘data value’. So in the above message the $v01 means insert
the value from data box 01 into the message when it is spoken.
For example, if the value in box01 is 34.25 and the user programmed the message for box01 to
“The stage is $v01 feet” then the unit would speak “The stage is 34.25 feet", and then move on to
the next data value if it is valid.
Now besides there being 10 different data boxes like a columns a table, there are also multiple
rows to hold older data.
Currently, this is a 10 by 13 table used to hold the data values. This is basically 10 values wide
for the different types of data and 12 values deep for historical data. One extra row of data for
non scheduled updates.
Time Stamp Box 01 Box 02 Box 03 - - - Box 10
Last / Non Scheduled Update
Last Update
3-2 Operation H-219X
Page 19

Historical Data 01
Historical Data 01
| | | | | |
Historical Data 12
The normal sequence for a data logger to load data into the modem at a normal scheduled update
time is as follows:
AV Send the AV command just to get its attention
AVTIME=HH:MM:SS Send the time to the modem, time is stored in top box in the table.
AVBOX01=12.34 Send data for data box 01, data stored in top box of the table.
AVBOX02=56.78 Send data for data box 02, data stored in top box of the table.
AVSHIFTVALUES Shift values so data in row 12 is lost, row 11 moved to row 12, row
10 moved to row 11, continued on until row 0 is stored in row 1.
If the user requests data on demand, then the same sequence is followed except the shift
command is not issued. The new data is in row 0 and all the historical data in the other rows
remains the same. Again the data logger automatically issues these command to load the data
into the modem.
3.3.2 Voice Call In Options
On the XL Series data logger use the ‘Voice Modem’ options menu to select what data will be
sent to the modem, how often and in what order. Refer to the XL Series manual for full details
on setting up the voice modem options.
On the H-2191 modem, the main setups required are to enter the voice messages that will be
spoken when the modem answers the call. This will be a site identification message and any
messages needed to identify the data values. To use the menu to make these changes, connect a
PC to the RS-232 port and using Hyper Term enter the following commands to get he menu.
AVMENU
After entering the above command the following menu will be displayed.
H-219X Operation 3-3
Page 20

H-2192 Main Menu (ESC to Exit)
Modem Type = CELL
Battery = 13.22 Volts
Hardware Version = 0
Firmware Version = V1.0
V - Voice Messages Menu
A - Alarm Call Out Menu
R - Radio Menu
M - Cell Modem Menu
D - Diagnostic Menu
Enter Option ->_
This screen gives some general information about the unit and then the options to enter into some
sub menus. Use the ‘V’ option to enter the submenu that is used to change the voice messages.
H-2191 Voice Menu (ESC to Exit)
I - ID Message: This Is The Site ID Message
W - Welcome Message: Press 0 for the menu
P - System Password: 0
1 - Data Message 1: Data value 1 = $v01
2 - Data Message 2: Data value 2 = $v02
3 - Data Message 3: Data value 3 = $v03
4 - Data Message 4: Data value 4 = $v04
5 - Data Message 5: Data value 5 = $v05
6 - Data Message 6: Data value 6 = $v06
7 - Data Message 7: Data value 7 = $v07
8 - Data Message 8: Data value 8 = $v08
9 - Data Message 9: Data value 9 = $v09
0 - Data Message 10: Data value 10 = $v10
A - Alarm Message Menu
Enter Option ->
Use the ‘I’ option to enter in a message that will identify the site.
Use the ‘W’ option to change the welcome message played when calling into the modem over
voice.
Use the ‘P’ option to set or change the password when calling the modem in either a voice or
3-4 Operation H-219X
Page 21

data mode. Use a password of ‘0' to disable the password in data mode.
Use the options 0 to 9 to change the messages that will be used to identify the data values.
Use the ‘A’ option to enter the Alarm Message Menu to customize messages sent during an
alarm event. Alarm messages are used only for outgoing calls and text messages and do not need
any changes if only incoming calls will be used.
All messages can be up to 128 characters.
3.3.2.1 Embedded Control Codes and Special Characters
The H-2191 has a text to speech converter so the messages typed will be spoken when called.
The unique exception is the ability to embed control codes in the text. This allows the messages
to actually speak the data values or perform other actions. The embedded control codes all start
with the ‘$’ character. As the unit is speaking the message and it sees the ‘$’ it knows a special
case exists and looks at the next character to see what action to perform. This is not case
sensitive. The following table shows all the special cases.
Code Action
$Vxx The ‘V’ character stands for value. This control code is used to
insert a value into the data message. The value comes from the
data box indicated by the xx. The xx has a range of 01 to 10.
The leading zero is needed.
$Q This code is used to ‘Q’uit speaking the current message and
move on to the next message if one is needed.
$I This code inserts the current IP address assigned to the modem.
$P This code inserts the current TCP port set in the modem
Some characters cause the ‘text to voice’ converter to speak a work or perform some other
function. These are listed in the following table.
Character Spoken Text
= Speaks the word ‘equals’
, Causes a pause of 0.5 seconds
H-219X Operation 3-5
Page 22

. Speaks the work ‘point if in a
number such as 12.34.
Causes a pause of about 1 second
if at the end of a word.
< Speaks ‘Less Than’
> Speaks ‘Greater Than’
# Speaks ‘Number’
% Speaks ‘Percent’
& Speaks ‘and’
Other unique characters may speak a word or phrase but are normally unusable for this
application and can be spoken by spelling out the word if needed.
3.3.3 Phone Call In Menu
When calling the H-2191 it will respond with the message: “Press Zero For The Menu”.
Pressing the '0' key on the phone will cause the H-2191 to ‘speak’ its ‘Call In’ menu. This menu
with its options is listed below:
Press: 1 for a new measurement.
2 for the last measurement.
7 to move forward in time
8 to move to current time
9 to move back in time
0 to repeat the menu.
Pressing '1': This instructs the H-2191 to request a new measurement from the XL Series
data logger. This may take several seconds and is based on the type of sensors
connected to the logger.
Pressing '2': This causes the H-2191 to ‘voice’ or speak the last measured data from the
logger.
Pressing '7': When moving through the historical data, this key causes the H-2191 to move
forward in time. This is used in conjunction with the ‘9' key which moves
back in time, and the ‘8' key which moves to the current time. These options
allow historical data to be reviewed to look for trends in the data. The modem
will hold 12 historical data values for each data box. When these options are
3-6 Operation H-219X
Page 23

used the modem will ‘voice’ or say the time the measurement was made, after
which it will voice the data in each data box for that measurement time.
Pressing '8': This causes the H-2191 to move to the last measurement and ‘voice’ or speak
the data measured by the logger at that time.
Pressing '9': This causes the H-2191 to move back in time so historical data can be
reviewed to look for trends in the data. This is used in conjunction with the ‘7'
key. See the description above for the ‘7' key for more information.
Pressing '0': This causes the H-2191 to repeat the menu.
NOTE: The following are valid options that are not part of the spoken menu. Press the ‘*’
key to access these options
Pressing '*1': This is a hidden option to instruct the modem to answer in a data only mode on
the next dial in attempt.
Pressing '*2': This is a hidden option to change the modem to modem baud rate on the H-2191.
Pressing '*4': This is a hidden option in the call in menu and is used to enable the alarms.
Pressing '*5': This is a hidden option in the call in menu and is used to disable the alarms.
Pressing '*6': This is a hidden option to acknowledge any pending or suspended alarms.
Pressing '*8': This is a hidden option in the call in menu and is used to enter a menu used to
adjust the voice quality options while the user is on the phone listening to the
adjustments as they are made.
Pressing '#': This is a hidden option that causes the call to terminate immediately. The ‘Good
Bye’ message will be spoken and then the phone call is terminated. The normal
inactivity timer of about 7 seconds is ignored.
The modem will ‘voice’ a good-bye message and hang-up if there is no key press for about 7
seconds.
3.4 Voice Call In Over Cell Phone System
Calling into a H-2192 functions the same as calling into the H-2191. The only difference is the
modem module power must be enabled, keeping the Cell phone module active.
H-219X Operation 3-7
Page 24

The Cell phone modem module can be powered up all the time or off all the time. It can be
programmed to turn on and off at set times, or based on the level of the battery voltage. The
following menu is used to select how the power for the cell module is handled.
H-2192 Cell Phone Menu
P - Power On/Off: Off (Manual Off)
Last Time Update: 00:00:00
N - Cell Turn On Time: 06:00:00
F - Cell Turn Off Time: 18:00:00
V - Cell Turn Off Voltage: 12.25
A - Cell Carrier APN: i2gold
U - Cell Carrier Username:
W - Cell Carrier Password:
Current IP Address: 10.11.12.13
I - TCP Listen Port Number: 2192
Enter Option -> _
P - Power On/Off:
This option selects if the cell module is powered on, off or auto. In the auto mode the modem
will power up and down automatically based on the turn on time and turn off time settings.
N - Cell Turn On Time:
This option sets the time the cell phone module will turn on if the power mode is set to ‘Auto’.
F - Cell Turn Off Time:
This option sets the time the cell phone module will turn off if the power mode is set to ‘Auto’.
V - Cell Turn Off Voltage:
This option sets the minimum battery voltage level before the modem module will turn off
automatically. This will turn the modem module on and off no matter what the power mode is
set to. This may be set to 10 to 14 volts. The default is 12.25 volts. This will help prevent the
modem from draining the battery.
A - Cell Carrier APN:
This is a GSM only option and sets the APN used with GSM provider.
U - Cell Carrier Username:
This is a GSM only option and sets the username if required for the GSM provider.
3-8 Operation H-219X
Page 25

V - Cell Carrier Password:
This is a GSM only option and sets the password if required for the GSM provider.
Current IP Address:
This field shows the current IP address assigned to the modem. If the address listed is 0.0.0.0
then the cell modem isn’t powered or the cell provider hasn’t assigned it an IP address.
I - TCP Listen Port Number:
This option sets specifies the TCP port number which the modem is going to listen for incoming
connections. Note: If you specify port 0 it will disable incoming data connections.
Last Time Update:
This is a status message that shows the last time data was loaded to the unit. This time stamp is
used by the modem to see if it should turn on or off the modem based on the turn on time and the
turn off time settings and the power mode setting.
Keep in mind there is no time clock in the H-219X so all calculations and decisions using a time
value are based on the time received from the data logger. Remember that if the data logger is
using international standard time and not local time, then that is what is sent to the modem.
H-219X Operation 3-9
Page 26

3.5 Voice Call Out (ALARM) Over Standard Phone System
The H-219X provides the option to alert a user of an alarm condition at the site installation.
There are two methods of alarming with the H-219X.
The first method of alarming the H-219X is provided with a External Alarm Input located next to
the +12V power connection on the modem. This input is pulled high internally to 5 Volts by a
47K resistor and is triggered by pulling the line to 0 Volts (GND).
The second method of alarming is provided by XL series data logger attached to the RS-232 port
of the H-219X. Please refer to the data loggers documentation on triggering H-219X alarms.
Alarms persist until acknowledged or the system loses power. If an alarm fails to get
acknowledged it is suspended until the next report issued by an attached data logger.
3.5.1 Voice Call Out Menu
When an alarm is activated the H-2191 will call out to the programmed phone numbers and if
answered will respond with the message: “Press Zero For The Menu.” Pressing the ‘0' key on the
phone will cause the H-2191 to ‘speak’ the alarm message and then the ‘Call out’ menu. The
options for the call out menu are listed below: If no key is pressed for about 7 seconds the
modem will speak a ‘Good bye’ message.
Press: 1 for a new measurement.
2 for the last measurement.
3 to repeat alarm messages.
4 to enable alarms.
5 to disable alarms.
6 to acknowledge alarms.
7 to move forward in time
8 to move to current time
9 to move back in time
0 to repeat the menu.
Pressing '1': Instructs the H-2191 to request a new measurement from the data logger. This will
take at least 15 seconds and may be longer based on the setup options of the data
logger.
Pressing '2': This causes the H-2191 to ‘voice’ the last measured data received from the data
logger.
Pressing '3': This causes the H-2191 to repeat any alarm messages for alarms that have gone
active.
3-10 Operation H-219X
Page 27

Pressing '4': This causes the H-2191 globally enable the alarms.
Pressing '5': This causes the H-2191 globally disable the alarms.
Pressing '6': This causes the H-2191 acknowledge the alarm call out action.
Pressing '7': When moving through the historical data, this key causes the H-2191 to move
forward in time. This is used in conjunction with the ‘9' key which moves back in
time, and the ‘8' key which moves to the current time. These options allow
historical data to be reviewed to look for trends in the data. The modem will hold
12 historical data values for each data box. When these options are used the
modem will ‘voice’ or say “Scan XX” where XX is a number 0 to 12 indicating
scan number 0, the newest scan, to scan number 12, the oldest scan, after which it
will voice the data in each data box for that scan.
Pressing '8': This causes the H-2191 to move to the last measurement and ‘voice’ or speak the
data measured by the logger at that time.
Pressing '9': This causes the H-2191 to move back in time so historical data can be reviewed to
look for trends in the data. This is used in conjunction with the ‘7' key. See the
description above for the ‘7' key for more information.
Pressing '0': This causes the H-2191 to repeat the menu.
Pressing '#': This is a hidden option that causes the call to terminate immediately. The ‘Good
Bye’ message will be spoken and then the phone call is terminated. The normal
inactivity timer of about 7 seconds is ignored.
3.6 Voice Call Out (ALARM) Over Cell Phone System
Out going calls over the Cell Module based on an alarm condition will act much the same as for
the standard phone system.
3.7 Data Call In Using Cell Modem Module
Note: a data plan setup for mobile terminated connections is required for this feature to be
available. The modem will listen for incoming telnet sessions on the TCP port specified by the
user (the default is port: 2192). Simply open a connection with a program like HyperTerminal
using the port and IP address assigned to the modem (refer to the cell providers documentation
on obtaining the IP address which they assigned to the modem).
H-219X Operation 3-11
Page 28

3.8 Text Message Call In
The H-2192 can text the last measurement over the cell network. To us this feature simply send
a text containing any content to the phone number of the H-2192 and it will respond with the last
measurement reported to the modem.
3.9 Text Message Call Out
The H-2192 can text an alarm rather than make an outgoing voice call. This feature can ben
enabled by prefixing the provided phone number with the character ‘T’
For example: if I wanted to text to the phone number 555-555-1234 I would enter the phone
number as T555-555-1234 under the H-2192 alarm menu.
If both voice and text alarms are enabled the alarm will continue to be active until acknowledged
from a voice alarm. If only text alarms are used alarms continue to be active until the alarm has
been successfully sent to all configured recipients.
3.10 Voice Call In Over UHF / VHF Radio
The H-2191 can connect directly to a Data Radio DL 3400 radio. Using this radio, data
messages can be ‘spoken’ as requested from remote sites using similar radios with the ability to
produce a DTMF tones. Basically a radio with a phone like keypad will be able to produce the
DTMF tones.
Calling into a H-2191 that uses a UHF /VHF radio will act much the same as calling in from a
standard phone system. The main difference is only the last measured data will be spoken and
the user must use a keypad on their radio to select the site they want data from.
The Radio can be powered up all the time or off all the time. It can be programmed to turn on
and off at set times, or based on the level of the battery voltage. The following menu is used to
select how the power for the radio is handled.
H-2191 RF Radio Menu
P - Power On/Off: Off (Manual Off)
I - Radio ID Code: 0
Last Time Update: 00:00:00
N - Radio Turn On Time: 06:00:00
F - Radio Turn Off Time: 18:00:00
V - Radio Turn Off Voltage: 12.25
Enter Option -> _
3-12 Operation H-219X
Page 29

P - Power On/Off:
This option selects if the cell module is powered on, off or auto. In the auto mode the modem
will power up and down automatically based on the turn on time and turn off time settings.
I - Radio ID Code:
This option is used to select a 1 to 4 digit ID code to use to call the site. Each site must have a
unique ID. The default ID code is ‘0'. The H-2191 considers the default ID of ‘0' as invalid
forcing the user to set this to a unique ID.
N - Radio Turn On Time:
This option sets the time the modem will turn on the attached radio if the power mode is set to
‘Auto’.
F - Radio Turn Off Time:
This option sets the time the modem will turn off the attached radio if the power mode is set to
‘Auto’.
V - Radio Turn Off Voltage:
This option sets the minimum battery voltage level before the modem will turn off the radio
automatically. This will turn the radio on and off no matter what the power mode is set to. This
may be set to 10 to 14 volts. The default is 12..25 volts. This will help prevent the radio from
draining the battery.
Last Time Update:
This is a status message that shows the last time data was loaded to the unit. This time stamp is
used by the modem to see if it should turn on or off the radio based on the turn on time and the
turn off time settings and the power mode setting.
To call a site using the RF radio the user presses the PTT (Push To Talk) button on there radio
and then keys in the ID code using the keypad on their radio. Once the ID code is entered,
depress the PTT button. At that point if the receiving site recognizes the ID it will speak the data
from the last measurement.
H-219X Operation 3-13
Page 30

3-14 Operation H-219X
Page 31

Chapter 4
Modem Command Reference
4.1 Introduction
The H-219X uses a modem module that incorporates the standard Hayes AT command set. However
the modem module is just one subsection of the H-219X. In most cases the user will never have to
change the configuration of this module. The H-219X has much more capability than just a standard
data modem. The H-219X also supports voice options over the phone system, Cell phone options,
alarm call out options, text messaging, and voice over a VHF / UHF radio network. To support these
options a set of commands have been added that use an ‘AV’ prefix. This chapter is used to describe
these ‘AV’ commands.
The commands are not case sensitive, upper or lower case may be used. All voice commands must
be terminated with a Carriage Return or a Carriage Return and Line Feed pair. This will not be
shown in the descriptions below.
In most cases the response to a command is the ‘OK’ message or the data or information requested
is returned. All responses will be terminated with a Carriage Return and Line Feed pair. Below the
commands are listed in upper case to help them stand out.
H-219X Modem Command Reference 4-1
Page 32

AV Command Summary
General System Commands General Modem Commands
MENU MODEMON
PCBVERSION MODEMOFF
RESET MODEMAUTO
BATTERY MODEMLOWBATT
Data Entry Commands
TIME MODEMTURNONTIME
BOXxx xx = 01 to 10 PORT
SHIFTVALUES IPADDRESS
VALUES APN
General Voice Commands
IDMESSAGE
DATAMESSAGExx xx = 01 to 10 RADIOON
ALARMMESSAGEx x = 0 to 9 RADIOOFF
ALARMMESSAGET RADIOAUTO
Alarm Commands
PHONE1 - PHONE8 RADIOTURNONTIME
MODEMTURNOFFTIME
USERNAME
PASSWORD
VHF / UHF Radio Commands
RADIOLOWBATT
ALARMSENABLED RADIOTURNOFFTIME
ALARMSDISABLED RADIOIDCODE
ALARMx x = 0 to 9 SPEAKRADIO
TESTRADIO
4-2 Modem Command Reference H-219X
Page 33

4.2 General System Commands
Command: MENU
Description: This command is used to start a simple menu interface to aid the user in configuring
the modem. All setup and most diagnostic options are available using the menu
interface. In most cases this built in menu will be used to setup and configure the
modem. The menu makes it easy to make the changes to the different options and
organizes the options in logical menu groups.
Example: avmenu
This will cause the main menu to be displayed.
Command: RESET
Description: This is used to reset the modem to factory defaults.
Command: PCBVERSION
Description: This is used to return the current version of the PCB (printed circuit board) in use.
This will be a number from 0 to 7 with 0 being the first release. As changes to the
hardware (PCB) the number will increase. This is mainly used by the manufacture
when the user calls in for technical assistance.
Example: avpcbversion
PCB Version=0
Command: BATTERY
Description: This command is used to return the battery voltage as measured by the modem.
Example: avbattery
Battery=13.52 Volts
H-219X Modem Command Reference 4-3
Page 34

4.3 Data Entry Commands
Before describing the commands used to load data into the modem for voice options, it is best to
understand how the data is stored and moved around in the modem.
Currently, there is a 10 by 13 table used to hold the data values. This is basically 10 values wide for
the different types of data and 12 values deep for historical data. One extra row of data for non
scheduled updates.
Time Stamp Box 01 Box 02 Box 03 - - - Box 10
Last / Non Scheduled Update
Last Update
Historical Data 01
Historical Data 01
| | | | | |
Historical Data 12
The normal sequence for a data logger to load data into the modem at a normal scheduled update
time is as follows:
AV Send the AV command just to get its attention
AVTIME=HH:MM:SS Send the time to the modem, time is stored in top box in the table.
AVBOX01=12.34 Send data for data box 01, data stored in top box of the table.
AVBOX02=56.78 Send data for data box 02, data stored in top box of the table.
AVSHIFTVALUES Shift values so data in row 12 is lost, row 11 moved to row 12, row
10 moved to row 11, continued on until row 0 is stored in row 1.
If the user requests data on demand, then the same sequence is followed except the shift command
is not issued. The new data is in row 0 and all the historical data in the other rows remains the same.
Again the data logger automatically issues these command to load the data into the modem.
Command: TIME
Description: This command is used to time tag the data sent to the modem, or to see the last time
value entered.
In a normal sequence the command AVTIME =HH:MM:SS is sent to the modem from
the logger, followed by data commands. If the command was successful then the “OK”
message will be returned.
4-4 Modem Command Reference H-219X
Page 35

Example: avtime=12:15:00
OK
If the command is entered without the time portion, then the last time value entered will
be returned.
Example: avtime
Time=12:45:00
Command: BOX01 - BOX10
Description: These commands are used to send data to the modem, or to see the last value entered
for the selected data box.
In a normal sequence the command AVBOXxx =xx.xx is sent to the modem from the
logger. A separate AVBOXxx command is used for each value sent tot he modem. If
the command was successful then the “OK” message will be returned.
If the command is entered without the data value portion, then the last value entered for
the selected box will be returned.
Command: SHIFTVALUES
Description: This command is used by the data logger to shift the data in the table at scheduled
timed updates.
If the command was successful then the “OK” message will be returned.
Command: VALUES
Description: This command can be used to see all the data that is currently stored in the modem.
This includes the time stamp of when the data was received. The data will be
formatted much like the above table.
H-219X Modem Command Reference 4-5
Page 36

4.4 General Voice Commands
Command: IDMESSAGE
Description: This command is used to enter the site id message that will be spoken when the unit
is called or when it calls out in a voice mode. The message can be up to 128
characters but keep in mind the longer the message, then the longer it will take to
make the call.
Example: avidmessage=This is the logan river near first dam
OK
The command can also be used to see the current message.
Example: avidmessage
ID Message = This is the logan river near first dam
Command: DATAMESSAGE01 to DATAMESSAGE10
Description: This command is used to enter the message that will be spoken to identify the data
for boxXX when the unit is called or when it calls out in a voice mode.
Command: ALARMMESSAGE0 to ALARMMESSAGE9
Description: This command is used to enter the message that will be spoken to identify an alarm
condition. This is only used when the unit calls out in a voice mode after an alarm
is detected.
Command: ALARMMESSAGET
Description: This command is used to enter the message that will be spoken to identify an alarm
caused by the external input.
4-6 Modem Command Reference H-219X
Page 37

4.5 Alarm Call Out Commands
Command: ALARMSENABLED
Description: This command is a global enable of all alarms. All alarms will be inactive unless the
global alarm enable is activated using this command or done through the menu.
Command: ALARMSDISABLED
Description: This command is used to disable all alarms. All alarms will be ignored until
reactivated using the ‘alarmsenabled’ command.
Command: PHONE1 - PHONE8
Description: These commands are used to enter in the phone numbers that will be used to call out
when an alarm is activated.
Command: ALARM0 - ALARM9
Description: These commands are used to set an alarm so the unit will make outgoing calls. The
data logger will evaluate some condition to see if a call should be made. If the logger
determines an alarm condition exists, then it will set the desired alarm using this
command. The alarm is activated by setting it to a 1 and clearing the alarm by setting
it to 0.
Example: AVALARM9=1 Triggers alarm 10 and out going calls will be made.
The modem will also clear the alarm to 0 after acknowledgment. A suspended alarm will
be greater than 1.
H-219X Modem Command Reference 4-7
Page 38

4.6 Modem Commands
Command: MODEMON
Description: This command is used to turn on power to the modem module. Note that if the
measured battery voltage is less than the ‘Modem Low Battery’ setting the modem
module will automatically turn off.
Command: MODEMOFF
Description: This command is used to turn off the modem module power supply.
Command: MODEMAUTO
Description: This command is used to turn the modem power supply on and off automatically
based on the current time.
Command: MODEMTURNONTIME
Description: This command is used to set the modem turn on time. The default is 06:00:00 so the
modem would turn on at 6 AM if the modem power mode is set to “Auto”.
Example: AVMODEMTURNONTIME=08:00:00
If the command is issued without the time option, then the current radio turn on time is
returned.
Command: MODEMTURNOFFTIME
Description: This command is used to set the modem turn off time. The default is 18:00:00 so the
modem would turn off at 6 PM if the modem power mode is set to “Auto”.
Example: AVMODEMTURNOFFTIME=16:00:00
If the command is issued without the time option, then the current modem turn off time
is returned.
Command: MODEMLOWBATT
Description: This command is used to set the minimum measured battery voltage level to prevent
the modem from automatically turning off. If the modem is turned off because the
voltage dropped below this limit, then it will not turn back on until it is above this
limit plus 0.5 volts. This helps to keep from having the modem power cycling fast
due to the voltage just sitting on the limit.
Command: APN
Description: This is a GSM only command and sets the APN used with GSM provider.
Command: USER
4-8 Modem Command Reference H-219X
Page 39

Description: This is a GSM only command and sets the username if required for the GSM
provider.
Command: PASSWORD
Description: This is a GSM only command and sets the password if required for the GSM
provider.
Command: PORT
Description: This command sets specifies the TCP port number which the modem is going to
listen for incoming connections. Note: If you specify port 0 it will disable incoming
data connections.
Command: IPADDRESS
Description: This command returns the current IP address assigned to the modem. If the address
listed is 0.0.0.0 then the cell modem isn't powered or the cell provider hasn't assigned
it an IP address.
4.7 VHF / UHF Radio Commands
Command: RADIOON
Description: This command is used to turn on the radio power supply. Note that if the measured
battery voltage is less than the ‘Radio Low Battery’ setting the radio will
automatically turn off.
Command: RADIOOFF
Description: This command is used to turn off the radio power supply.
Command: RADIOAUTO
Description: This command is used to turn the radio power supply on and off automatically based
on the current time.
Command: RADIOTURNONTIME
Description: This command is used to set the radio turn on time. The default is 06:00:00 so the
radio would turn on at 6 AM if the radio power mode is set to “Auto”.
Example: AVRADIOTURNONTIME=08:00:00
If the command is issued without the time option, then the current radio turn on time is
returned.
H-219X Modem Command Reference 4-9
Page 40

Command: RADIOTURNOFFTIME
Description: This command is used to set the radio turn off time. The default is 18:00:00 so the
radio would turn off at 6 PM if the radio power mode is set to “Auto”.
Example: AVRADIOTURNOFFTIME=16:00:00
If the command is issued without the time option, then the current radio turn off time is
returned.
Command: RADIOLOWBATT
Description: This command is used to set the minimum measured battery voltage level to prevent
the radio from automatically turning off. If the radio is turned off because the voltage
dropped below this limit, then it will not turn back on until it is above this limit plus
0.5 volts. This helps to keep from having the radio power cycling fast due to the
voltage just sitting on the limit.
Command: RADIOIDCODE
Description: The radio will only answer if the incoming request matches the ID for this site. This
command is used to change or view the current ID for this site. The radio ID code
must be a 1 to 4 digit number in the range of 0 to 9999.
Command: SPEAKRADIO
Description: This command is used to send a voice message out the radio. This allows a data
logger to generate messages on its own.
Example: avspeakradio=this is a test.
Command: TESTRADIO
Description: This command is used to send the ID message out the radio port. The message will
be sent repeatedly with about a 1 second delay. This command will automatically
time out after sending the message 20 times or will end when the user presses any
key. This command is used mainly for diagnostics.
4-10 Modem Command Reference H-219X
Page 41

Chapter 5
Menu Mode Reference
5.1 Menu Mode Reverence
The easiest way to setup and test the modem is to use the built in menu mode. To enter the menu
connect a PC to the serial port and using a terminal emulation program like Hyper Term running at
9600 baud, enter the command AVMENU. The main menu should be displayed as shown below.
The example below is for the H-2192, the Cell phone option.
5.2 Remote Access
The modem menus and commands can also be accessed remotely. Normally when calling a site that
has an H-219X, the intent is to communicate with a device connected to the serial port of the H219X. However if the device connected to the H-219X is in a sleep state, then the H-219X is
accessed by typing in commands for the H-219X. Normally the AVMENU command is used to
access the menus of the modem. As long as ‘AV’ commands are sent to the remote H-219X the
characters will not be passed on to the connected device.
If the connected is an XL series data logger and it is asleep, pressing any key other than ‘AVxxx’
will cause the characters to be sent out the serial port and wake up the XL data logger.
H-219X Menu Mode Reference 5-1
Page 42

5.3 Main Menu
The main menu has a few status lines but is mainly used to move into sub menus that are organized
bases on function.
H-2192 Main Menu (ESC to Exit)
Modem Type = CELL
Battery = 13.22 Volts
Hardware Version = 0
Firmware Version = V1.0
V - Voice Messages Menu
A - Alarm Call Out Menu
R - Radio Menu
M - Cell Modem Menu
D - Diagnostic Menu
Enter Option ->
Modem Type:
The modem type is either a POTS or a Cell type of device. POTS stands for Plain Old Telephone
System and is connected using the standard RJ 11 phone connection. The other type is the Cell
connection. The modem comes from the factory set as a POTS or Cell type and cannot be changed
in the field. This is why there are two different model numbers for the modem. The H-2191 is for
the POTS unit and the H-2192 is the Cell unit.
Battery = XX.XX Volts
This is the battery voltage as measured by the modem. The battery voltage may also be used to see
if the cell phone modem or the radio power should be turned off.
Hardware Version = 0
In time it may be required to update hardware design. The system has the ability to see what version
of hardware is in use and make adjustments based on available options etc.
Firmware Version = 1.00
This option shows the version of the current firmware running in the unit.
V - Voice Messages Menu
This menu is used to enter in all the voice messages.
A - Alarm Call Out Menu
This menu is used to enter the phone numbers to call in case of an alarm. Alarms are also enabled
or disabled in this menu.
5-2 Menu Mode Reference H-219X
Page 43

R - Radio Menu
This menu is used to set the options to control the RF radio if it is used. This includes the power
mode and settings used to automatically turn it on and off. The site ID code is also set in this menu.
M - Cell Modem Menu
This menu is used to set the options to control the Cell modem if it is used. This includes the power
mode and settings used to automatically turn it on and off. If this is a POTS modem, then this option
is not listed. The POTS modem is normally always off and turns on automatically as needed
D - Diagnostic Menu
This menu lists more status information on the usage of the modem and allows for some diagnostic
options.
5.4 Voice Menu
The options entered here set the messages that will be spoken in the voice modes.
H-2191 Voice Menu (ESC to Exit)
I - ID Message: This Is The Site ID Message
W - Welcome Message: Press 0 for the menu
P - System Password: 0
1 - Data Message 1: Data value 1 = $v01
2 - Data Message 2: Data value 2 = $v02
3 - Data Message 3: Data value 3 = $v03
4 - Data Message 4: Data value 4 = $v04
5 - Data Message 5: Data value 5 = $v05
6 - Data Message 6: Data value 6 = $v06
7 - Data Message 7: Data value 7 = $v07
8 - Data Message 8: Data value 8 = $v08
9 - Data Message 9: Data value 9 = $v09
0 - Data Message 10: Data value 10 = $v10
A - Alarm Message Menu
Enter Option ->
I - ID Message:
This option is used to enter the text that will be spoken to identify the site when the unit is called in
a voice mode. It is best to keep all the messages short so the phone call is not too long. All
messages can be up to 128 characters.
W - Welcome Message: This is the message that will be played when calling into the modem over
voice. For example if a password has been set it could be changed to “Enter Password” or left blank
H-219X Menu Mode Reference 5-3
Page 44

to instruct the modem to speak nothing and waiting for a correct password before responding.
P - System Password: This option is used to set or change the password when calling the modem
in either a voice or data mode. Use a password of ‘0' to disable the password in data mode. Note:
due to the restrictions of a touch tone handset password
1 - Data Message 1:
This is the message that will be played if the data value 01 is valid. This is used to identify the data.
This is the same for all data messages, 01 to 10.
There are some special options used to enter actual data in a text message. To enter a data value that
changes from one measurement to another use the $vxx option, where the ‘$’ character indicates a
embedded code is coming. The ‘v’ character indicates the embedded code is a value, and the xx is
a number 01 to 10 for value 01 to value 10. For example if value 01 was a temperature and was
23.75, then a typical message would be: “The temperature is $v01 degrees”. Now when spoken the
unit would speak the “23.75" in place of the $v01. Other special options for the messages are listed
below.
Code Action
$Vxx The ‘V’ character stands for value. This control code is used to
insert a value into the data message. The value comes from the
data box indicated by the xx. The xx has a range of 01 to 10.
The leading zero is needed.
$Q This code is used to ‘Q’uit speaking the current message and
move on to the next message if one is needed.
$I This code inserts the current IP address assigned to the modem.
$P This code inserts the current TCP port set in the modem
Some characters cause the ‘text to voice’ converter to speak a work or perform some other function.
These are listed in the following table.
Character Spoken Text
= Speaks the word ‘equals’
, Causes a pause of 0.5 seconds
. Speaks the work ‘point if in a
number such as 12.34.
Causes a pause of about 1 second
if at the end of a word.
< Speaks ‘Less Than’
5-4 Menu Mode Reference H-219X
Page 45

> Speaks ‘Greater Than’
# Speaks ‘Number’
% Speaks ‘Percent’
& Speaks ‘and’
Other unique characters may speak a word or phrase but are normally unusable for this application
and can be spoken by spelling out the word if needed.
A - Alarm Message Menu:
Use option ‘A’ to enter the Alarm Message Menu to customize messages send during an alarm event.
Alarm messages are used only for outgoing calls and text messages and do not need any changes if
only incoming calls will be used.
5.5 Alarm Message Menu
This menu is used to setup the messages reported during an alarm event.
H-2191 Alarm Message Menu (ESC to Exit)
A - Alarm Message 1: Alarm 1
B - Alarm Message 2: Alarm 2
C - Alarm Message 3: Alarm 3
D - Alarm Message 4: Alarm 4
E - Alarm Message 5: Alarm 5
F - Alarm Message 6: Alarm 6
G - Alarm Message 7: Alarm 7
H - Alarm Message 8: Alarm 8
I - Alarm Message 9: Alarm 9
J - Alarm Message 10: Alarm 10
T - Ext Alarm Message: External Alarm
Enter Option ->
A - Alarm Message 1:
This is the message that will be used if an alarm 1 is triggered from the attached data logger.
The options B-J correspond to the remaining alarms 2 through 10.
T - Ext Alarm Message:
This is the message that will be used if an external alarm is triggered from the external alarm input
located next to the power connector.
Note: the alarm message also use the special control codes listed in the 5.4 Voice Menu section of
this manual.
H-219X Menu Mode Reference 5-5
Page 46

5.6 Alarm Menu
This menu is used to setup the call out options.
H-2191 Alarm Menu (ESC to Exit)
1 - Phone Number 1: #1
2 - Phone Number 2: #2
3 - Phone Number 3: #3
4 - Phone Number 4: #4
5 - Phone Number 5: #5
6 - Phone Number 6: #6
7 - Phone Number 7: #7
8 - Phone Number 8: #8
A - Alarms Disabled
Enter Option ->
1 - Phone Number 1:
This option is used to enter in a phone number to call if an alarm is active. Up to eight different
numbers can be used. There are a few rules regarding entering numbers and answering a call.
- If the entered phone number starts with the ‘#’ character, then number will be ignored.
- When a call out is made and the user picks up the phone, a prompt to “Press 0 to accept call” is
spoken. To accept the call press the ‘0' key on the touch tone phone.
- When a call out is not answered the unit will call the next number in the list.
- If th call is answered but the alarms are not acknowledged then the unit will call the next number
in the list.
- If the call is answered and the alarms are acknowledged, then the unit will not make any more calls
until the next time the alarm is activated.
- If the call is answered and the alarms are disabled, then the unit will not make any more calls for
this or any new alarms in the future.
A - Alarms Disabled
This option is used to enable or disable alarms. This can also be done over voice call in or call out
over the phone.
5-6 Menu Mode Reference H-219X
Page 47

5.7 RF Radio Menu
The RF radio interface was designed for the ‘Data Radio, DL3400'. Other radios may be used but
a special cable will be required.
H-2191 RF Radio Menu (ESC to Exit)
P - Radio Power On/Off: Off (Manual Off)
I - Radio ID Code: 1234
Last Time Update: 00:00:00
N - Radio Turn On Time: 06:00:00
O - Radio Turn Off Time: 18:00:00
V - Radio Turn Off Voltage: 12.25
Enter Option ->
P - Radio Power On/Off:
This option is used to set the current power mode and to see the current status of the power for the
radio. The modes are Off, On, and Auto.
Power Modes:
Off
In this mode the radio power is forced off. No matter of other settings the radio will be
powered down.
On
In this mode the radio power will turn on as long as the battery voltage is greater than the
value of the ‘Radio Turn On Voltage’ listed below. If the battery voltage drops lower than
the ‘Radio Turn On Voltage’ then the radio power will turn off.
Auto
In this mode the power will turn on and off based on the programmed turn on time and turn
off time. This option helps manage the modem power to conserve battery power. The radio
could be powered up during normal office hours when the unit would need to be called, and
off at other times to save power.
I - Radio ID Code:
This option is used to enter the 2 to 4 digit ID code for the site. When calling the site the push to talk
is pressed and held and then the ID code is entered. After entering the ID code, release the push to
talk button. If the called site was in range and able to decode the ID then it will speak the ID
message and the data for the last measurement.
H-219X Menu Mode Reference 5-7
Page 48

Last Time Update:
This is just a status message that shows the last time data was sent to the unit. This time may be
local time or universal standard time or some other format based on what is sending the time
information to the unit.
N - Radio Turn On Time: 06:00:00
This option is used to enter the turn on time if the power mode is set to ‘Auto”, See the power mode
discussion above.
O - Radio Turn Off Time: 18:00:00
This option is used to enter the turn off time if the power mode is set to ‘Auto”, See the power mode
discussion above.
V - Radio Turn Off Voltage:
This option is used to set the low voltage level. If the voltage falls below this value the radio power
will turn off. To turn back on the voltage must raise up 0.5 volts above this value.
5-8 Menu Mode Reference H-219X
Page 49

5.8 Cell Modem Menu
This menu is only used for the H-2192, the cell phone option. This menu option is not available on
the H-2191, the POTS modem.
H-2192 Cell Phone Menu
P - Power On/Off: Off (Manual Off)
Last Time Update: 00:00:00
N - Cell Turn On Time: 06:00:00
F - Cell Turn Off Time: 18:00:00
V - Cell Turn Off Voltage: 12.25
A - Cell Carrier APN: i2gold
U - Cell Carrier Username:
W - Cell Carrier Password:
Current IP Address: 10.11.12.13
I - TCP Listen Port Number: 2192
Enter Option -> _
P - Modem Power On/Off:
This option is used to set the current power mode and to see the current status of the power for the
modem. The modes are Off, On, and Auto.
Power Modes:
Off
In this mode the modem power is forced off. No matter of other settings the modem will be
powered down.
On
In this mode the modem power will turn on as long as the battery voltage is greater than the
value of the ‘Modem Turn On Voltage’ listed below. If the battery voltage drops lower than
the ‘Modem Turn On Voltage’ then the modem power will turn off.
Auto
In this mode the power will turn on and off based on the programmed turn on time and turn
off time. This option helps manage the modem power to conserve battery power. The
modem could be powered up during normal office hours when the unit would need to be
called, and off at other times to save power.
H-219X Menu Mode Reference 5-9
Page 50

Signal Strength: XX
This is a status screen that shows the cell phone radio signal strength. The range is xx t xx. Levels
at xx and above indicate acceptable levels while levels below xx are questionable and calls may be
dropped.
Last Time Update:
This is just a status message that shows the last time data was sent to the unit. This time may be
local time or universal standard time or some other format based on what is sending the time
information to the unit.
N - Modem Turn On Time: 06:00:00
This option is used to enter the turn on time if the power mode is set to ‘Auto”, See the power mode
discussion above.
O - Modem Turn Off Time: 18:00:00
This option is used to enter the turn off time if the power mode is set to ‘Auto”, See the power mode
discussion above.
V - Modem Turn Off Voltage:
This option is used to set the low voltage level. If the voltage falls below this value the modem
power will turn off. To turn back on the voltage must raise up 0.5 volts above this value.
A - Cell Carrier APN:
This is a GSM only option and sets the APN used with GSM provider.
U - Cell Carrier Username:
This is a GSM only option and sets the username if required for the GSM provider.
V - Cell Carrier Password:
This is a GSM only option and sets the password if required for the GSM provider.
Current IP Address:
This field shows the current IP address assigned to the modem. If the address listed is 0.0.0.0 then
the cell modem isn’t powered or the cell provider hasn’t assigned it an IP address.
I - TCP Listen Port Number:
This option sets specifies the TCP port number which the modem is going to listen for incoming
connections. Note: If you specify port 0 it will disable incoming data connections.
5-10 Menu Mode Reference H-219X
Page 51

5.9 Diagnostic Menu
This menu is used to see the status of the modem including call counters and other messages.
This status screen shows how many incoming POTS calls have came in. This counts all calls, data
and voice.
H-2191 Diagnostics Menu (ESC to Exit)
Modem Type = POTS 5692
Battery=13.47 Volts
hardware Version = 0
Firmware Version = V2.0a
Number Of Incoming Phone Calls = 0
Number Of Incoming Cell Calls = 0
Number Of Incoming Radio Calls = 0
Number Of External Alarms = 0
B - Modem to Modem Baud Rate: 9600
C - Clear Call Counters
V - View Data Values
D - Wait For Data TimeOut = 20 seconds
S - Main System TimeOut = 120 minutes
Q - Voice Quality Options
R - Reset Defaults
Enter Option ->
Modem Type:
The modem type is either a POTS or a Cell type of device. POTS stands for Plain Old Telephone
System and is connected using the standard RJ 11 phone connection. The other type is the Cell
connection. The modem comes from the factory set as a POTS or Cell type and cannot be changed
in the field. This is why there are two different model numbers for the modem. The H-2191 is for
the POTS unit and the H-2192 is the Cell unit.
Battery = XX.XX Volts
This is the battery voltage as measured by the modem. The battery voltage may also be used to see
if the cell phone modem or the radio power should be turned off.
Hardware Version = 0
In time it may be required to update hardware design. The system has the ability to see what version
of hardware is in use and make adjustments based on available options etc.
Firmware Version = 1.00
H-219X Menu Mode Reference 5-11
Page 52

This option shows the version of the current firmware running in the unit.
Number Of Incoming Phone Calls
This status screen shows how many incoming POTS calls have came in. This counts all calls, data
and voice. In some cases it may be handy to see how many calls are coming in.
Number Of Incoming Cell Calls
This status screen shows how many incoming Cell calls have came in.
Number Of Incoming Radio Calls
This status screen shows how many incoming Radio calls have came in. This filters out unwanted
calls and only counts calls that successfully match the site ID code.
Number Of External Alarms
This status screen shows how many external alarms have happened.
B - Modem to Modem Baud Rate:
This option instructs the modem in a H-2191 to negociate a modem to modem connection at the
selected baud rate. Rate limiting is helpful at installations that have trouble connecting due to noisy
or filtered phone lines.
C - Clear Call Counters:
This option is used to set all the call and alarm counters back to zero.
V - View Data Values
This option is used to display all the values currently loaded into the modem by the data logger. This
will be up to ten different data values and each value having a current value and 12 old values. Also
each set of values will be time tagged. Below is a sample of a typical screen.
Time Box01 Box02 Box03 Box04
------------------------------------12:00:00 23.21 9.23 279.32 13.48
11:45:00 23.71 9.12 274.21 13.46
11:30:00 24.02 8.83 269.37 13.45
11:15:00 24.59 8.52 263.88 13.51
11:00:00 24.89 8.02 259.81 13.44
D - Wait For Data TimeOut = 20 Seconds
This option is used to set the time out to use to wait for data. If the data logger is using sensors that
take some time to measure or using long averaging times, then this needs to be adjusted.
S - Main System TimeOut = 120 Minutes
This is a system time out that will cause the system to reset if it is active for longer than a set time.
Normally no call will last longer than a few minutes but could be longer. This time must be set long
5-12 Menu Mode Reference H-219X
Page 53

enough so it does not reset a normal call.
Q - Voice Quality Options:
This option is used to bring up a menu that allows the user to adjust the voice volume, speed, delays
between words, and other voice quality options. See section 5.7.1.
R - Reset Defaults:
This option resets all user programmable options back to the factory defaults.
5.9.1 Voice Quality Menu
This menu allows the user to adjust the voice quality options for their personal preference. Even
though this uses an advanced ‘Text To Speech’ converter, keep in mind there are still limitations on
range and true voice dynamics. Again, all these are changed based on user preference.
H-2191 Advanced Voice Menu (ESC to Exit)
V - Volume (0 to 9 Default = 6):
S - Speed (0 to 9 Default = 1):
D - Delay (0 to 5 Default = 2):
P - Pitch (0 to 9 Default = 5):
F - Freq (0 to 9 Default = 5):
E - Expression (0 to 9 Dflt = 3):
Enter Option ->
V - Volume
This Option sets the voice volume. Going to loud may cause distortion.
S - Speed
This Option sets the voice speed. Some messages are easier to understand at higher speeds while
others are easier at the slower speeds.
D - Delay
This Option sets the delay between words.
P - Pitch
This Option sets the voice pitch.
F - Freq
This Option sets the voice frequency.
E - Expression
This Option sets the voice Expression.
H-219X Menu Mode Reference 5-13
Page 54

5-14 Menu Mode Reference H-219X
Page 55

Chapter 6
Maintenance and Trouble Shooting
6.1 Maintenance
Sustained operation of the H-2191 is almost maintenance-free. There is no desiccant or serviceable
parts to maintain. It is always best to keep the unit as dry as possible and out of direct sun light.
6.2 Trouble Shooting
It is unlikely that this manual will ever contain trouble shooting tips to cover every problem that may
be encountered. Feedback from customers is very valuable and greatly aids in the quest for constant
product enhancement. Please feel free to call the factory for technical assistance, and also to share
solutions you have found to past problems. The following paragraph present some possible solutions
to a few problems that may be encountered.
Will not answer when called:
1. The H-2191 may be busy communicating with the connected device. If so, it may not answer
the call. If connected to a WATERLOG series data logger, the H-2191 will be activated
when the data logger turns on to make a measurement, the H-2191 will be active until the
measurement is complete and data has been sent to the H-2191 data value boxes. This
normally takes 15 seconds but can be longer based on the settings and the sensors that are
connected. Wait for a minute or so and try again.
2. If the line is busy, someone else may be talking to the H-2191 or it is trying to make an out
going calls based on some alarm condition.
The “Press 1 For New Measurement” option responds with “No Data Available”:
1. The connected data logger may not be responding to commands from the H-2191 to take a
new reading. Check the cable between the H-2191 and the connected device. Make sure the
connected device is functioning properly.
2. Check the voice modem setup menu options to ensure the data to be sent to the H-2191 is
defined correctly.
3. The H-2191 may timeout before the data is ready to be sent from the data logger. Increase
the timeout associated to waiting for data. The default is 30 seconds but can be increased to
250 seconds.
®
H-219X Maintenance and Trouble Shooting 6-1
Page 56

Voice data does not seem to be as expected:
1. The data being sent to the H-2191 is in a different order than what is expected. Check the
voice modem setup menu option to ensure the data to be sent to the H-2191 is defined
correctly and as expected.
2. The connected device is malfunctioning. The H-2191 just reports what it is given. If errors
exist in the data sent to the H-2191, the H-2191 will pass on this data including the errors as
it is not able to qualify the data. Test the device sending data to the H-2191.
Miscellaneous Problems:
1. The lack of a proper earth ground can result is several unexplained problems. Please make
sure the complete system is properly grounded.
! Double check that all the power cables are connected well.
! Low power can cause the modem to function abnormally or not at all.
! If the modem will not return to the low power mode make sure the device connected to the
serial port is turning off properly. When connected to a PC that is running a terminal
emulation program, the modem will stay on continuously.
Normally, a very high percentage of the problems can be related to power supply problems, bad or
incorrect wiring, or system options are not set up correctly. In most cases these problems can easily
be resolved. If a problem cannot be found easily call Design Analysis for technical assistance.
6-2 Maintenance and Trouble Shooting H-219X
Page 57

Appendix A
Specifications
Telephone Option
Features: V.34 / 33.6Kbps + Voice
Approval: FCC part 68
Safety: UL 60950
GPRS Option
Type: GPRS, quad band
Frequency: 850/900/1800/1900 MHz
Safety: UL 60950-1
Network: PTCRB
Voice Synthesizer
Type: Text-to-speech, voice concatenation using
human voice samples. Pitch, volume, tone,
speed, expression, articulation, delay and
format frequency are programmable. A user
programmable dictionary allows the
pronunciation of any character to be redefined.
RF Radio Interface
Radio: DataRadio® DL-3400 (not supplied)
Type: Analog, synthesized telemetry link
Frequency: 132-174 MHz VHF or 380-512 MHz UHF
Power: 5-watts at 13.3V
Switched +12Vout Internal 4.0A solid state circuit breaker
powers external radio
RS-232 Port
Type: RS-232, DCE pinout
Baud Rate: 9600/8/N (programable)
Connector: DB-9, female
Alarm Input Port
Type: Switch closure
Voltage Input: 0 to 3.3V, internal 47K-ohm pullup to 3.3V
Connector: 2-pin plug-in terminal
USB Port
Type: Type-B, device, self powered
Operation: Supports field firmware upgrade
Ethernet Port
Type: 10/100 Base-T
LED Indicators: speed & activity
Operation: Send data (push) to a remote server
Power Requirements
Voltage Input: 9.0 to 16.0 Volts DC
Current: 900 uA (sleep, all sub systems off)
900 uA typ (standby, telephone)
25 mA typ (standby, GPRS active)
120 mA max (transmitting, GPRS)
95 mA typ (standby, radio)
Environmental
Operating Temperature: -40E to 60E C
Operating Temperature: -30E to 60E C (GPRS)
Storage Temperature: -40E to 60E C
Humidity: 0 to 95% non-condensing
Mechanical
Enclosure: Aluminum, vinyl clad
Size: 4.0" x 6.5" x 1.5" h
Mounting: Mount bracket included
Connectors
RS -232 D B-9, female
Telephone: R J-11 modular jack
Po wer: Ph oe nix Contact P/N 1757019
Alarm: Ph oe nix Contact P/N 1757019
Radio 2 x5 box header for ribbo n cable
Antenna: SMA, 50-ohm
USB: USB Type B (device)
Ethernet: 10/100 Base-T
Order Information
Telephone M o dem: H-21 91
GPRS Modem: H-21 92
Warranty
The WATERLOG H-2191 & H-2192 are warranted against
defects in materials and workmanship for one year from date of
shipment.
Note
Specifications subject to change without prior notice due to on
going commitment to product testing and improvement.
LR April 6, 2010
®
LED Indicators
Modem Power : Green
Radio Power: Green
DSR: Green
DCD: Green
GPRS LINK: Green
WATE RLOG is a registered trademark of Design Analysis Associates, Inc.
®
H-219X Appendix A Specifications A-1
 Loading...