


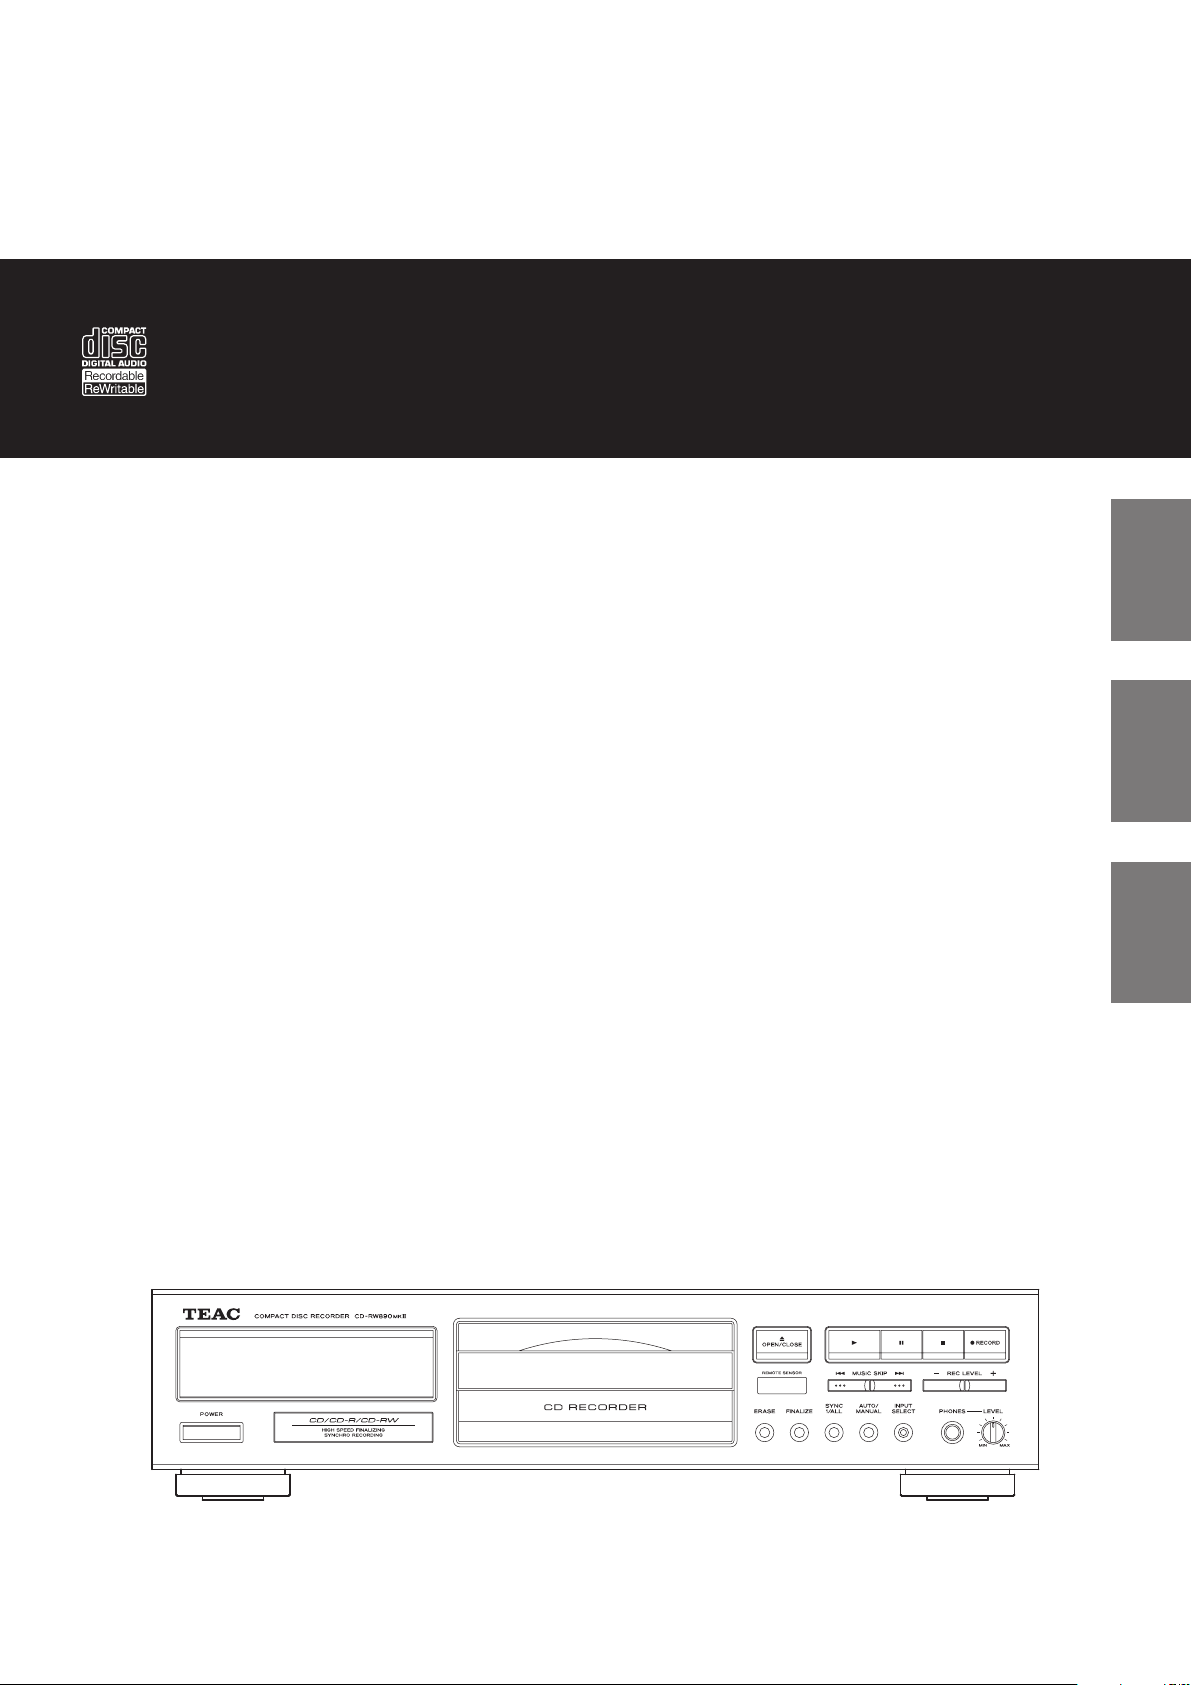
TEAC CD-RW890MKII Owner's Manual
Z
CD-RW890MK"
77-20RW89000007
CD Recorder
OWNER’S MANUAL
MODE D’EMPLOI
MANUAL DEL USUARIO
ENGLISH FRANÇAIS ESPAÑOL
IMPORTANT SAFETY PRECAUTIONS
CAUTION: TO REDUCE THE RISK OF ELECTRIC SHOCK,
DO NOT REMOVE COVER (OR BACK). NO USERSERVICEABLE PARTS INSIDE. REFER SERVICING TO
QUALIFIED SERVICE PERSONNEL.
The lightning flash with arrowhead symbol, within an
<
B
WARNING: TO PREVENT FIRE OR SHOCK HAZARD,
DO NOT EXPOSE THIS APPLIANCE TO RAIN OR
MOISTURE.
CAUTION
o DO NOT REMOVE THE EXTERNAL CASES OR CABINETS TO EXPOSE
THE ELECTRONICS. NO USER SERVICEABLE PARTS ARE INSIDE.
o IF YOU ARE EXPERIENCING PROBLEMS WITH THIS PRODUCT,
CONTACT THE STORE WHERE YOU PURCHASED THE UNIT FOR A
SERVICE REFERRAL. DO NOT USE THE PRODUCT UNTIL IT HAS BEEN
REPAIRED.
equilateral triangle, is intended to alert the user to the
presence of uninsulated “dangerous voltage” within the
product’s enclosure that may be of sufficient magnitude
to constitute a risk of electric shock to persons.
The exclamation point within an equilateral triangle is
intended to alert the user to the presence of important
operating and maintenance (servicing) instructions in
the literature accompanying the appliance.
Model for USA
This equipment has been tested and found to comply with the
limits for a Class B digital device, pursuant to Part 15 of the FCC
Rules. These limits are designed to provide reasonable protection against harmful interference in a residential installation. This
equipment generates, uses, and can radiate radio frequency
energy and, if not installed and used in accordance with the
instructions, may cause harmful interference to radio communications. However, there is no guarantee that interference will
not occur in a particular installation. If this equipment does cause
harmful interference to radio or television reception, which can
be determined by turning the equipment off and on, the user is
encouraged to try to correct the interference by one or more of
the following measures:
• Reorient or relocate the equipment and/or the receiving
antenna.
• Increase the separation between the equipment and receiver.
• Connect the equipment into an outlet on a circuit different from
that to which the receiver is connected.
• Consult the dealer or an experienced radio/TV technician for
help.
Declaration of Conformity
Responsible party:
TEAC AMERICA, INC.
Address: 1834 Gage Road, Montebello, California, U.S.A.
Telephone number : 1-323-726-0303
This device complies with Part.15 of FCC Rules.
Operation is subject to the following two conditions:
1) This device may not cause interference
2) This device must accept any interference, including interference
that may cause undesired operation of the device.
o USE OF CONTROLS OR ADJUSTMENTS OR PERFORMANCE OF
PROCEDURES OTHER THAN THOSE SPECIFIED HEREIN MAY RESULT
IN HAZARDOUS RADIATION EXPOSURE.
IN USA/CANADA, USE ONLY ON 120 V SUPPLY.
Model for Canada
Industry Canada’s Compliance Statement:
This Class B digital apparatus complies with Canadian ICES-003.
Model for Europe
DECLARATION OF CONFORMITY
We, TEAC AUDIO EUROPE, Liegnitzer Straße 6, 82194
Gröbenzell, Germany declare in own responsibility,
the TEAC product described in this manual is in
compliance with the corresponding technical standards.
CAUTION
Changes or modifications not expressly approved by the party
responsible for compliance could void the user’s authority to
operate the equipment.
2
Laser information
Pb, Hg, Cd
This product contains a semiconductor laser system inside the cabinet
and is classified as a “CLASS 1 LASER PRODUCT”.
To prevent being exposed to the laser beam, do not try to open the
enclosure.
Laser:
Type: LO-DWH02/LO-DWH02B
Manufacturer: Lite-space Technology Co., Ltd.
Laser output: Less than 131.9 mW (CD) and 147.8 mW (DVD)
on the objective lens
Wavelength: 785 nm (CD) typical
661 nm (DVD) typical
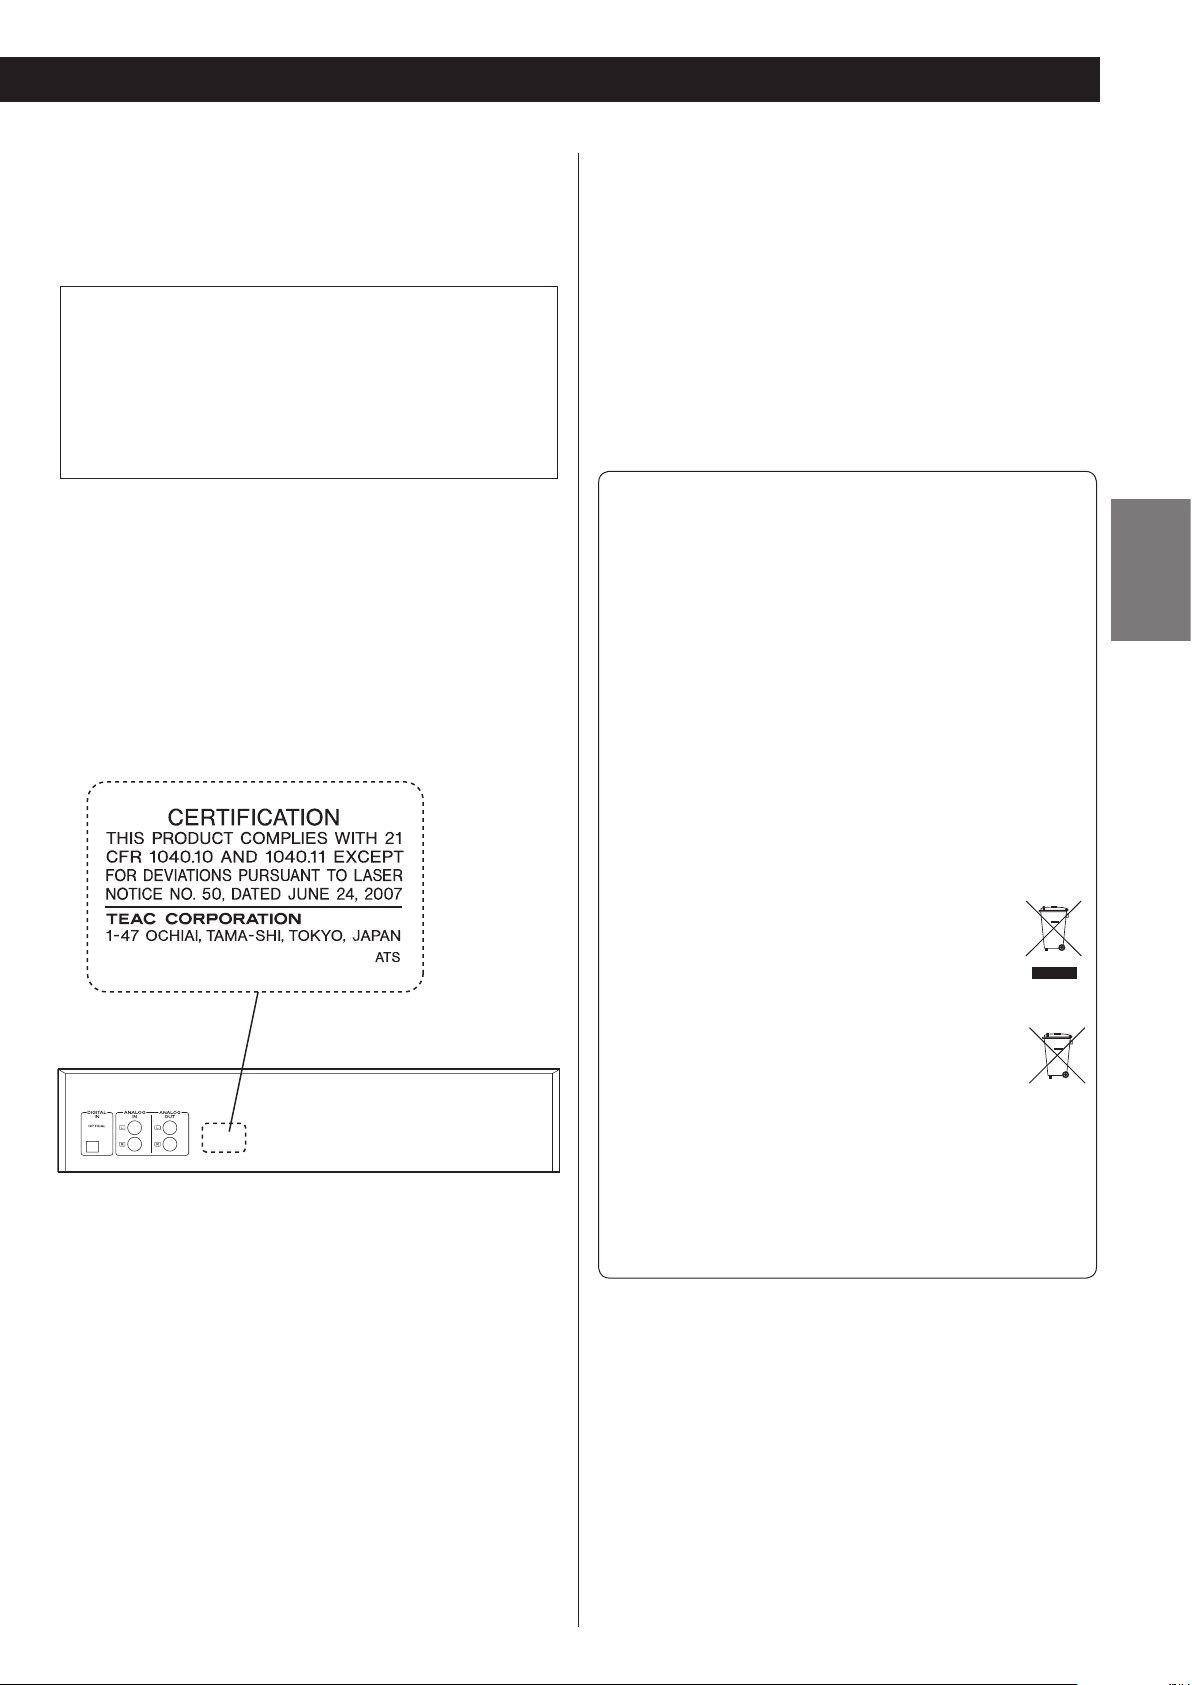
Model for USA
This product has been designed and manufactured according to
FDA regulations “title 21, CFR, chapter 1, subchapter J, based on the
Radiation Control for Health and Safety Act of 1968”, and is classified
as class ! laser product. There is not hazardous invisible laser radiation
during operation because invisible laser radiation emitted inside of
this product is completely confined in the protective housings.
The label required in this regulation is as follows:
V Precautions concerning batteries
Misuse of batteries could cause them to rupture or leak leading to fire,
injury or the staining of nearby things. Please read and observe the
following precautions carefully.
o Do not use batteries of types other than those specified. Do not
mix new batteries with old ones or use different types of batteries
together.
o Do not heat or disassemble batteries. Never throw batteries into
fire or water.
o Do not carry or store batteries with other metallic objects. The bat-
teries could short circuit, leak or explode.
o Never recharge a battery unless it is confirmed to be a recharge-
able type.
For European Customers
Disposal of electrical and electronic equipment and
batteries and/or accumulators
(a) All electrical/electronic equipment and waste batteries/accu-
mulators should be disposed of separately from the municipal
waste stream via collection facilities designated by the government or local authorities.
(b) By disposing of electrical/electronic equipment and waste
batteries/accumulators correctly, you will help save valuable
resources and prevent any potential negative effects on human
health and the environment.
(c) Improper disposal of waste electrical/electronic equipment
and batteries/accumulators can have serious effects on the
environment and human health because of the presence of
hazardous substances in the equipment.
(d) The Waste Electrical and Electronic Equipment (WEEE)
symbols, which show wheeled bins that have been
crossed out, indicate that electrical/electronic equipment and batteries/accumulators must be collected
and disposed of separately from household waste.
If a battery or accumulator contains more than the
specified values of lead (Pb), mercury (Hg), and/or
cadmium (Cd) as defined in the Battery Directive
(2006/66/EC), then the chemical symbols for those
elements will be indicated beneath the WEEE symbol.
(e) Return and collection systems are available to end users. For
more detailed information about the disposal of old electrical/electronic equipment and waste batteries/accumulators,
please contact your city office, waste disposal service or the
shop where you purchased the equipment.
ENGLISH
o Be sure to insert the batteries with correct positive (¥) and nega-
tive (^) orientations.
o Use batteries of the same type. Never use different types of batter-
ies together.
o If the remote control is not used for a long time (more than a
month), remove the batteries to prevent them from leaking.
o If the batteries leak, wipe away the leakage inside the battery com-
partment and replace the batteries with new ones.
3
IMPORTANT SAFETY INSTRUCTIONS
1) Read these instructions.
2) Keep these instructions.
3) Heed all warnings.
4) Follow all instructions.
5) Do not use this apparatus near water.
6) Clean only with dry cloth.
7) Do not block any ventilation openings. Install in accordance with
the manufacturer's instructions.
8) Do not install near any heat sources such as radiators, heat registers, stoves, or other apparatus (including amplifiers) that produce
heat.
9) Do not defeat the safety purpose of the polarized or grounding-type plug. A polarized plug has two blades with one wider
than the other. A grounding type plug has two blades and a third
grounding prong. The wide blade or the third prong are provided
for your safety. If the provided plug does not fit into your outlet,
consult an electrician for replacement of the obsolete outlet.
10) Protect the power cord from being walked on or pinched particu-
larly at plugs, convenience receptacles, and the point where they
exit from the apparatus.
11) Only use attachments/accessories specified by the manufacturer.
12) Use only with the cart, stand, tripod, bracket,
or table specified by the manufacturer, or
sold with the apparatus. When a cart is
used, use caution when moving the cart/
apparatus combination to avoid injury from
tip-over.
13) Unplug this apparatus during lightning storms or when unused
for long periods of time.
14) Refer all servicing to qualified service personnel. Servicing is
required when the apparatus has been damaged in any way, such
as power-supply cord or plug is damaged, liquid has been spilled
or objects have fallen into the apparatus, the apparatus has been
exposed to rain or moisture, does not operate normally, or has
been dropped.
o The apparatus draws nominal non-operating power from the
AC outlet with its POWER or STANDBY/ON switch not in the ON
position.
o The power plugs are used as disconnect devices; the disconnect
devices shall remain readily operable.
o Caution should be taken when using earphones or headphones
with the product because excessive sound pressure (volume) from
earphones or headphones can cause hearing loss.
CAUTION
o Do not expose this apparatus to drips or splashes.
o Do not place any objects filled with liquids, such as vases, on
the apparatus.
o Do not install this apparatus in a confined space such as a
book case or similar unit.
o The apparatus should be located close enough to the AC
outlet so that you can easily reach the power cord plug at any
time.
o If the product uses batteries (including a battery pack or
installed batteries), they should not be exposed to sunshine,
fire or excessive heat.
o CAUTION for products that use replaceable lithium batteries:
there is danger of explosion if a battery is replaced with an
incorrect type of battery. Replace only with the same or equivalent type.
Company names, product names and logos in this document are the trademarks or registered trademarks of their respective owners.
4

Before Using the UnitContents
Thank you for choosing TEAC. Read this manual carefully
to get the best performance from this unit.
IMPORTANT SAFETY PRECAUTIONS ...............................2
IMPORTANT SAFETY INSTRUCTIONS .............................. 4
Before Using the Unit ............................................5
Using the TEAC Global Site .......................................5
Product registration .............................................. 5
Discs ............................................................6
Connections .....................................................7
Unit Functions and Remote Control ..............................8
Remote Control Unit .............................................9
Playback
Basic Operation .................................................10
Basics of Playback ............................................... 10
Direct Playback .................................................12
Shuffle Playback ................................................12
Time Display ....................................................13
Repeat Playback ................................................13
A-B Repeat ......................................................14
Programmed Playback ..........................................14
Recording
About Recording ................................................16
Before Recording ...............................................17
Recording ......................................................17
Synchronous Recording .........................................20
Read this before attempting any operations.
< The nominal temperature should be between 5°C and 35°C (41°F
and 95°F). The CD-RW recorder is more sensitive to extremes of
temperature than ordinary CD players.
< Relative humidity should be 30 to 85 percent non condensing.
< As the unit may become warm during operation, always leave
sufficient space around the unit for ventilation.
< The voltage supplied to the unit should match the voltage as
printed on the rear panel. If you are in any doubt regarding this
matter, consult an electrician.
< Choose the installation location of your unit carefully. Avoid
placing it in direct sunlight or close to a source of heat. Also avoid
locations subject to vibrations and excessive dust, heat, cold or
moisture.
< Do not place the unit on an amplifier/receiver.
< Do not open the cabinet as this might result in damage to the
circuitry or electrical shock. If a foreign object should get into the
unit, contact your dealer or service company.
< When removing the power plug from the wall outlet, always pull
directly on the plug, never yank the cord.
< To keep the laser pickup clean, do not touch it and always close
the disc tray.
< Do not attempt to clean the unit with chemical solvents as this
might damage the finish. Use a clean, dry cloth.
< Keep this manual in a safe place for future reference.
< Do not tilt the main unit while a disc is inserted. Doing so may
cause a malfunction.
DO NOT MOVE THE UNIT DURING PLAYBACK/RECORDING
During playback or recording, the disc rotates at high speed.
Do NOT lift or move the unit during playback or recording.
Doing so may damage the disc or the unit.
ENGLISH
Finalize .........................................................21
Unfinalize .......................................................21
Erasing the Last Track (CD-RW) ..................................22
Erasing All Tracks (CD-RW) .......................................23
Erasing All Tracks In Refresh Mode (CD-RW) ......................24
Troubleshooting ................................................25
Messages .......................................................26
Specifications ...................................................27
WHEN MOVING THIS UNIT
When changing the unit’s location or packing the unit for moving,
be sure to remove the disc. Moving this unit with the disc loaded
may result in damage to this unit.
Using the TEAC Global Site
You can download updates for this unit from the TEAC Global Site:
http://teac-global.com/
1) Open the TEAC Global Site.
2) In the TEAC Downloads section, click the desired language to open
the Downloads website page for that language.
NOTE
If the desired language does not appear, click Other Languages.
3) Click the “Search by Model Name” section to open the Downloads
page for that product. (Users in Europe should click the product
name in the “Products” section instead.)
4) Select and download the updates that are needed.
Product registration
Customers in the USA, please visit the following TEAC website to
register your TEAC product online.
http://audio.teac.com/support/registration/
5
Discs
Playable discs
Please use CD discs bearing the “COMPACT disc DIGITAL
AUDIO” logo.
CD-R and CD-RW discs properly recorded and finalized in
audio CD format.
The main unit can play the above discs without an adapter. Other
discs are not available.
If you attempt to play discs other than the above, a loud
noise may occur to damage the speakers or your hearing.
Do not play such discs.
< Copy-protected discs, DualDiscs and other discs which do not
conform to the CD standard may not play back correctly in this
player. If you use such discs in this unit, TEAC Corporation and
its subsidiaries cannot be responsible for any consequences or
guarantee the quality of reproduction. If you experience problems
with such non-standard discs, you should contact the producers of
the disc.
About CD-R and CD-RW discs
The main unit can play CD-R and CD-RW discs recorded in audio CD
format (CD-DA).
Cautions for use
< Do not use cracked discs as doing so may cause a malfunction.
< Printable CD-R and CD-RW discs are not recommended, as the
label side might be sticky and damage the unit.
< Do not stick papers or protective sheets on the discs and do not
use any protective coating spray.
< Use a soft oil-based felt-tipped pen to write the information on the
label side. Never use a ball-point or hard-tipped pen, as this may
cause damage to the recorded side.
< Never use a stabilizer. Using commercially available CD stabilizers
with this unit will damage the mechanism and cause them to
malfunction.
< Do not use CDs with an irregular shape (octagonal, heart shaped,
business card size, etc.). CDs of this sort can damage the unit:
Handling disc
< Always place the disc on the disc tray with the label side
uppermost. (Compact discs can be played or recorded only on
one side.)
< Scratches, fingerprints, dirt, etc. on the signal recording surface
(without labels) may cause a playback error. Be careful when
handling.
< To remove a disc from its storage case, press down on the center
of the case and lift the disc out, holding it carefully by the edges.
< Remember to finalize a disc recorded with the CD recorder.
< Depending on the quality of the disc and/or the condition of the
recording, some CD-R/CD-RW discs may not be playable.
< If you are in any doubt as to the care and handling of a CD-R/
CD-RW disc, read the precautions supplied with the disc, or
contact the disc manufacturer directly.
Recordable discs
CD-R and CD-RW discs bearing the "DIGITAL AUDIO" logo
How to remove the disc How to hold the disc
Storing disc
< Discs should be returned to their cases after use to avoid dust and
scratches that could cause the laser pickup to “skip”.
< Do not expose discs to direct sunlight or high humidity and
temperature for extended periods. Long exposure to high
temperatures will warp the disc.
< CD-R and CD-RW discs are more sensitive to the effects of heat
and ultraviolet rays than ordinary CDs. It is important that they are
not stored in a location where direct sunlight will fall on them, and
away from sources of heat such as radiators or heat-generating
electrical devices.
< Dirt on the disc may cause the sound to skip or lower the sound
quality. Always keep it clean when storing.
Maintenance
< Should the disc become dirty, wipe the surface radially (from the
center hole outward towards the outer edge) with a soft, dry cloth.
< Never use such chemicals as record sprays, antistatic sprays or
fluid, benzine or thinner to clean the discs. Such chemicals will do
irreparable damage to the disc’s plastic surface.
6
CD-RW890MK
"
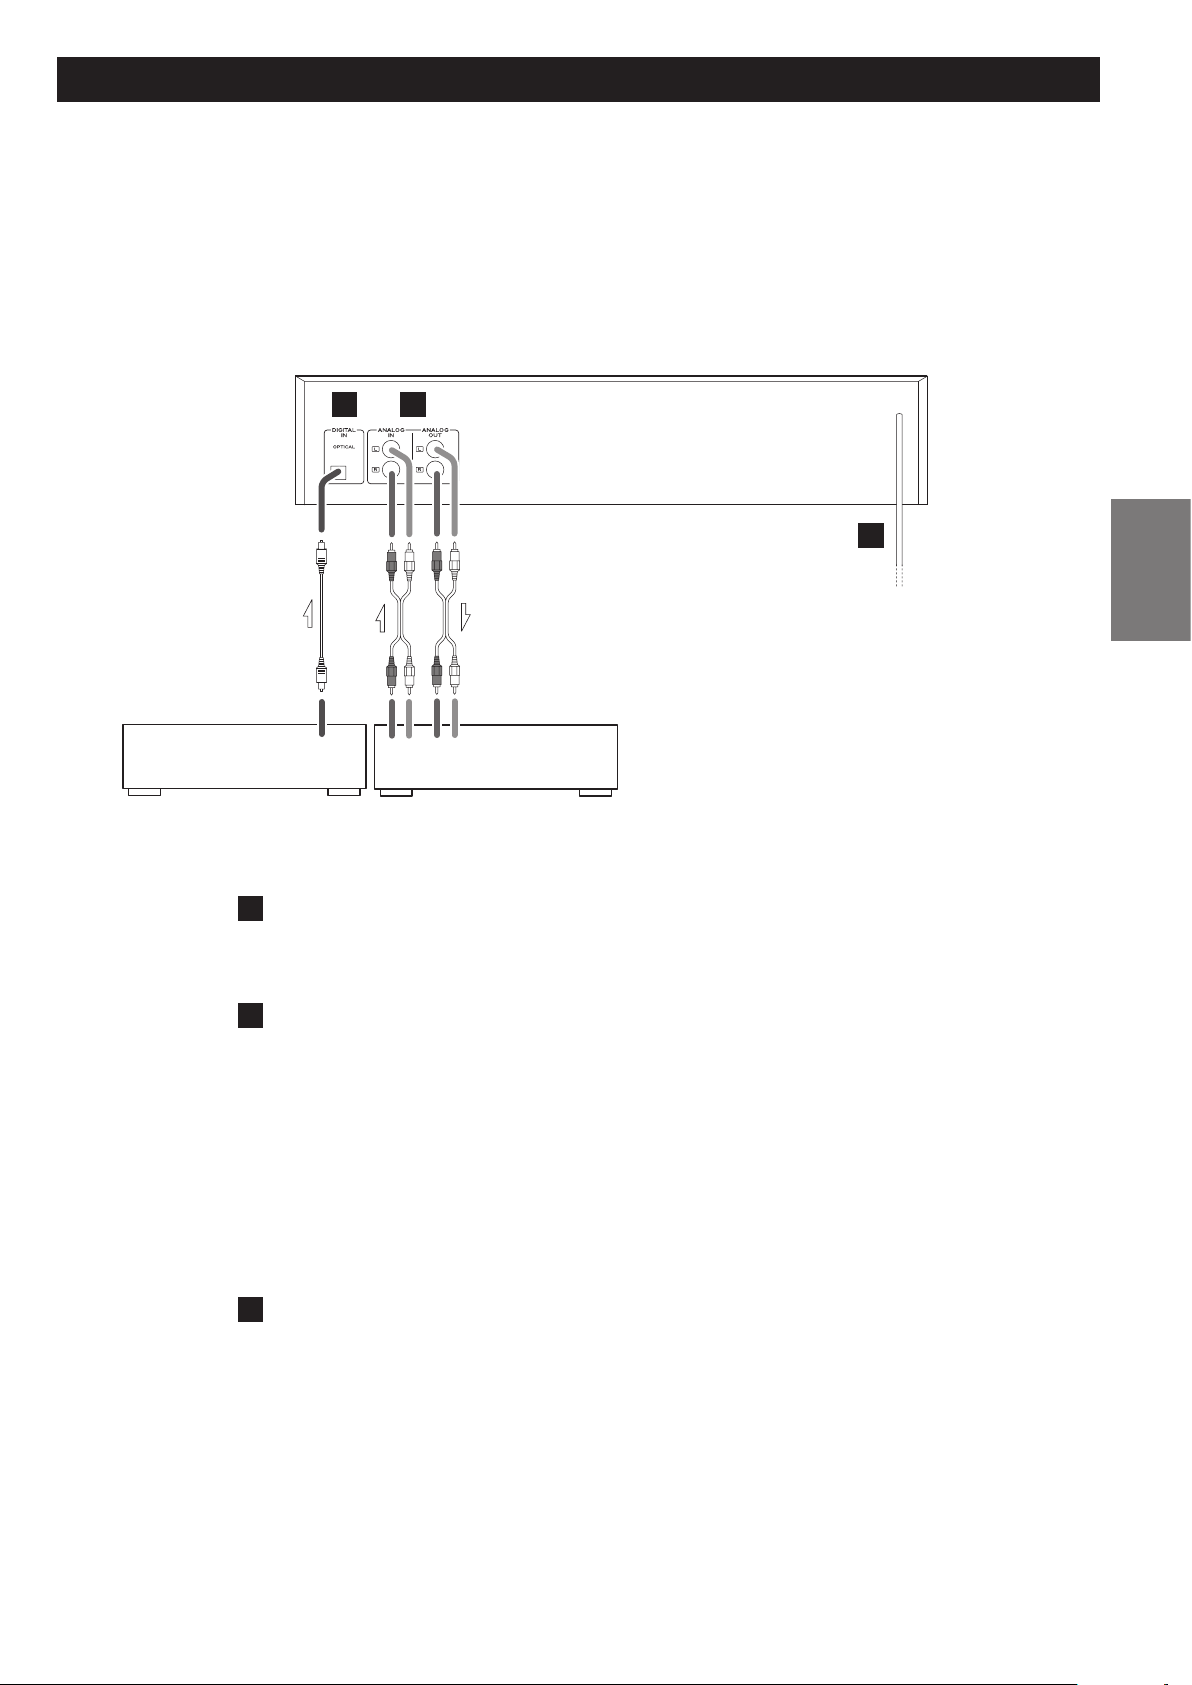
Connections
CAUTION:
< Switch off the power to all equipment before making connections.
< Read the instructions of each component you intend to use with this unit.
< Be sure to insert each plug securely. To prevent hum and noise, avoid bundling
the signal interconnection cables together with the AC power cord.
A B
RL
DIGITAL OUT
CD Player, MD Deck, etc. Amplifier
A
DIGITAL IN terminal
To record digital audio signals, connect this terminal to the digital output terminal of a
digital device such as a CD player with a commercially available optical digital cable.
B
ANALOG IN/OUT jacks
Analog 2-channel audio signal is input or output from these jacks. Connect these jacks to
the amplifier with RCA cables.
RL
RE C PLAY
C
AC Outlet
ENGLISH
CD-RW890MK@
ANALOG OUT q
ANALOG IN q
Make sure to connect:
white plug q white jack (L: left channel)
red plug q red jack (R: right channel)
C
AC Power Cord
After all other connections are complete, connect the plug to the AC wall socket.
Be sure to connect the power cord to an AC outlet which supplies the correct voltage.
Hold the power plug when plugging or unplugging the power cord. Never pull or yank
on the power cord.
< If the unit will not be used for a long period of time, unplug the power cord.
Amplifier
CD-R (TAPE) PLAY
CD-R (TAPE) REC
7
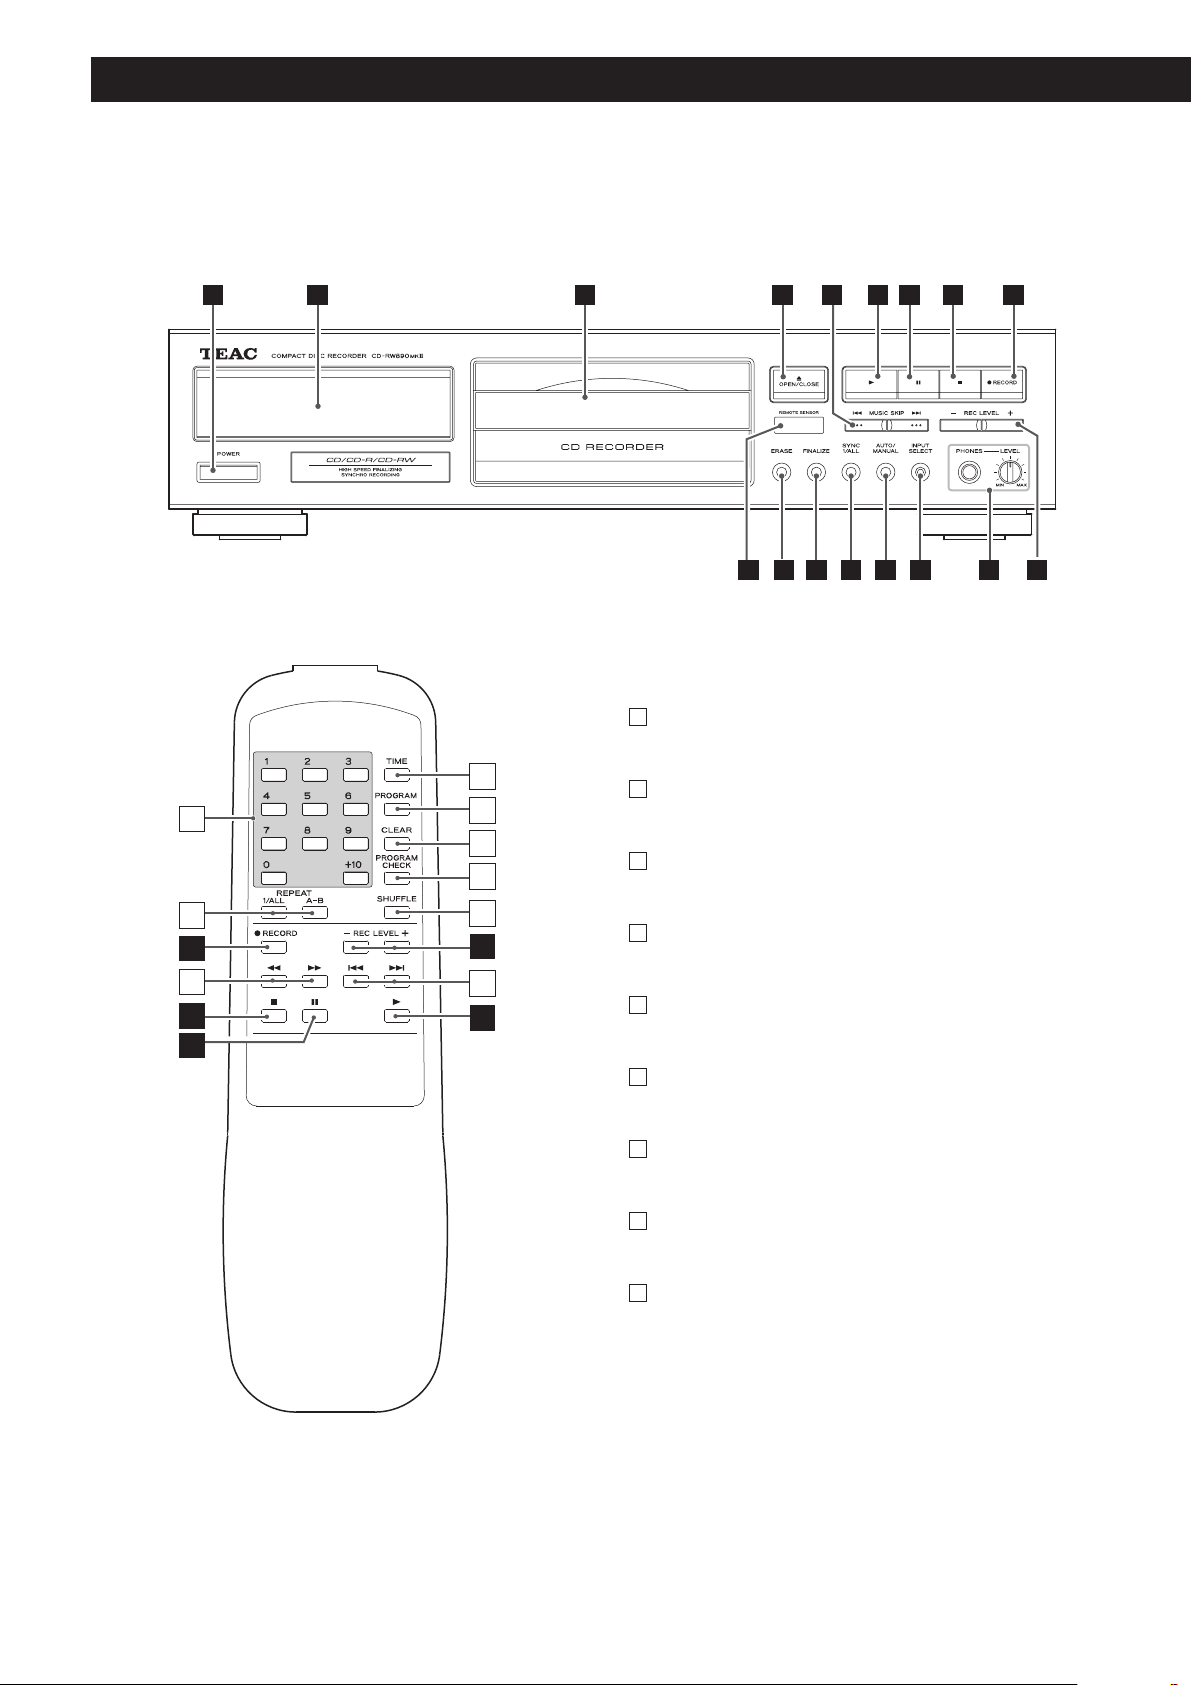
Unit Functions and Remote Control
H
G
A
a
b
I
c
B
d
e
f
g
C
Only on Remote control unit
a
Numeric buttons
Use these buttons to select track numbers.
b
REPEAT (1/ALL, A-B)
Use these buttons to select a repeat mode.
c
Search (m/,)
Use these buttons to search for a part of a track.
h
d
TIME
J
J
i
F
Use this button to change the display mode.
e
PROGRAM
Use this button to program tracks.
f
CLEAR
Use this button to clear programmed tracks.
Q
D
E
P
O
G
F
N
M
L
H I
K J
g
PROGRAM CHECK
Use this button to check the programmed contents.
h
SHUFFLE
Use this button for shuffle playback.
i
Skip (.//)
Use these buttons to skip tracks.
Note:
To simplify explanations, instructions in this manual refer
to the names of the buttons and controls on the front panel
only. Associated controls on the remote control will also operate
similarly.
8
Remote Control Unit
Main unit and Remote control unit
POWER
A
Press this button to turn the unit on or off.
Display
B
The total number of the tracks, the total play time of the disc, etc.
are displayed.
Disc Tray
C
OPEN/CLOSE (L)
D
Use this button to open and close the disc tray.
MUSIC SKIP (.//)
E
Use these buttons to skip tracks.
Hold down these buttons to search for a part of a track.
Play (y)
F
Use this button to start playback, recording, finalizing, unfinalizing
and erasing.
Pause (J)
G
Use this button to pause playback or recording.
Stop (H)
H
Use this button to stop playback or recording.
The provided remote control unit allows the unit to be operated
from a distance. When operating the remote control unit, point it
towards the REMOTE SENSOR on the front panel of the unit.
< Even if the remote control unit is operated within the effective
range, remote control operation may be impossible if there are any
obstacles between the unit and the remote control.
< The remote control may not work if the remote sensor is exposed
to direct sunlight or electric lighting. In this case, move the main
unit.
< If the remote control unit is operated near other appliances which
generate infrared rays, or if other remote control devices using
infrared rays are used near the unit, it may operate incorrectly.
Conversely, the other appliances may operate incorrectly.
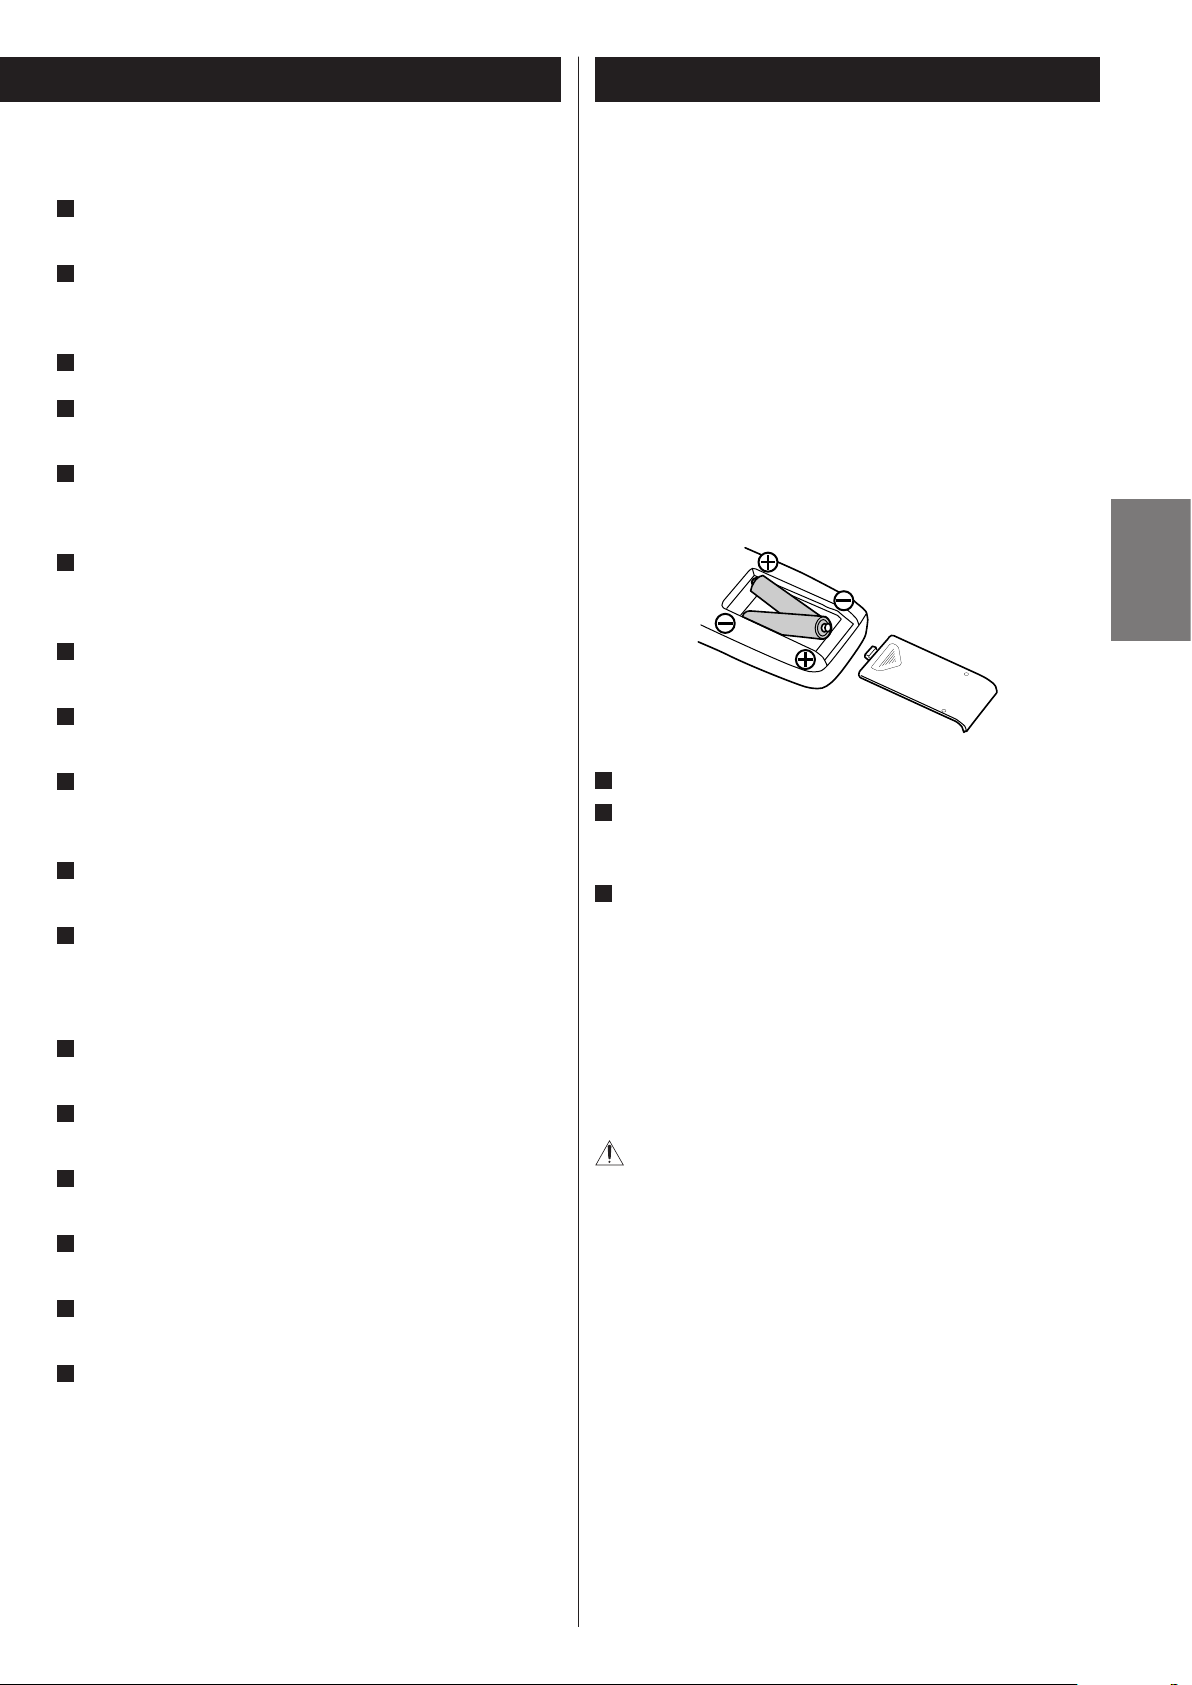
Battery Installation
ENGLISH
RECORD
I
Use this button to enter record pause mode. During recording, use
this button to divide tracks.
REC LEVEL
J
Use these buttons to adjust the analog recording level.
PHONES
K
For private listening, first reduce the volume level to minimum.
Then insert the plug from your headphones into the PHONES jack,
and adjust the volume by turning the LEVEL knob.
INPUT SELECT
L
Use this button to select a source to be recorded.
AUTO/MANUAL
M
Use this button to select the mode of track number assignment.
SYNC 1/ALL
N
Use this button for digital synchronized recording.
FINALIZE
O
Use this button to finalize a CD-R/CD-RW disc.
ERASE
P
Use this button to erase or unfinalize a CD-RW disc.
REMOTE SENSOR
Q
When operating the remote control unit, point it towards the
REMOTE SENSOR.
1
Remove the battery compartment cover.
2
Insert two “AA” (R6, SUM-3) dry batteries. Make sure that the
batteries are inserted with their positive “+” and negative“_” poles
positioned correctly.
3
Close the cover.
Battery Replacement
If the distance required between the remote control unit and main
unit decreases, the batteries are exhausted. In this case replace the
batteries with new ones.
For more information about collection of batteries, please contact
your local municipality, your waste disposal service or the point of
sale where you purchased the items.
Precautions concerning batteries
Misuse of batteries could cause them to rupture or leak leading to
fire, injury or the staining of nearby things. Please read and observe
the following precautions carefully.
< Be sure to insert the batteries with correct positive “+” and
negative “_” polarities.
< Use batteries of the same type. Never use different types of
batteries together.
< Rechargeable and non-rechargeable batteries can be used.
Refer to the precautions on their labels.
< When the remote control unit is not to be used for a long time
(more than a month), remove the batteries from the remote
control unit to prevent them from leaking. If they leak, wipe
away the liquid inside the battery compartment and replace the
batteries with new ones.
< Do not heat or disassemble batteries and never dispose of old
batteries by throwing them in a fire.
< Do not carry or store batteries with metal accessories. Doing so
may cause short-circuiting, leakage, breakage, etc.
9
Basic Operation Basics of Playback
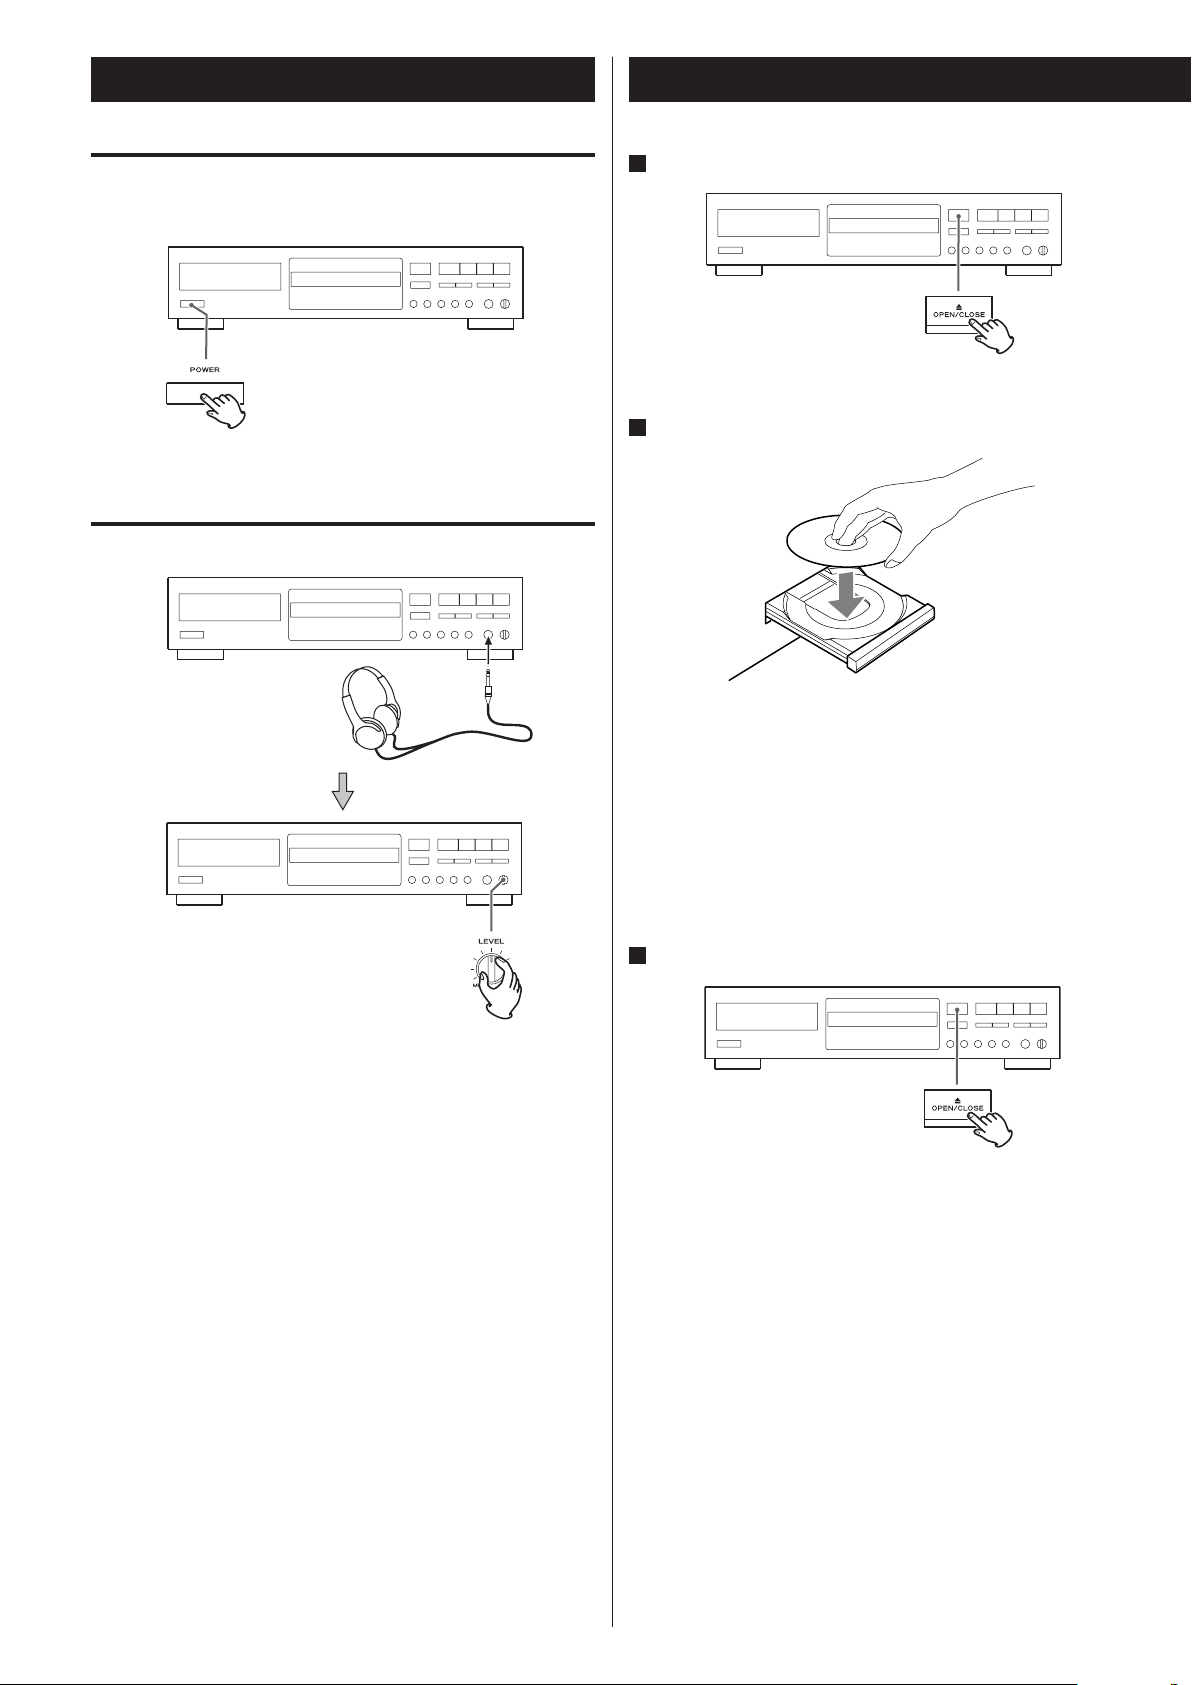
Turning on the power
Press the POWER button to turn on the unit.
Using Headphones
1
Press the OPEN/CLOSE (L) button.
The disc tray is opened.
2
Place a disc on the tray with the disc label side up.
For private listening, first reduce the volume level to minimum.
Then insert the plug from your headphones into the PHONES jack,
and adjust the volume by turning the LEVEL knob.
When turning the power on/off, unplug the headphones. Failure
to observe this precaution may cause a noise to be produced.
< Never place more than one disc on the tray.
< The disc must be placed in the center of the disc tray. If the disc
is not correctly loaded, it may not be possible to open the tray
again once it has closed, so you should ensure the disc is always
centered on the tray.
< Do not force the tray by hand during opening and closing
operations.
Press the OPEN/CLOSE (L) button to close the tray.
3
The tray is closed. Take care that you do not catch your fingers in
the tray.
< It takes a few seconds for the unit to load the disc. No buttons will
work during loading. Wait until the total number of the tracks and
the total play time of the disc are displayed.
10
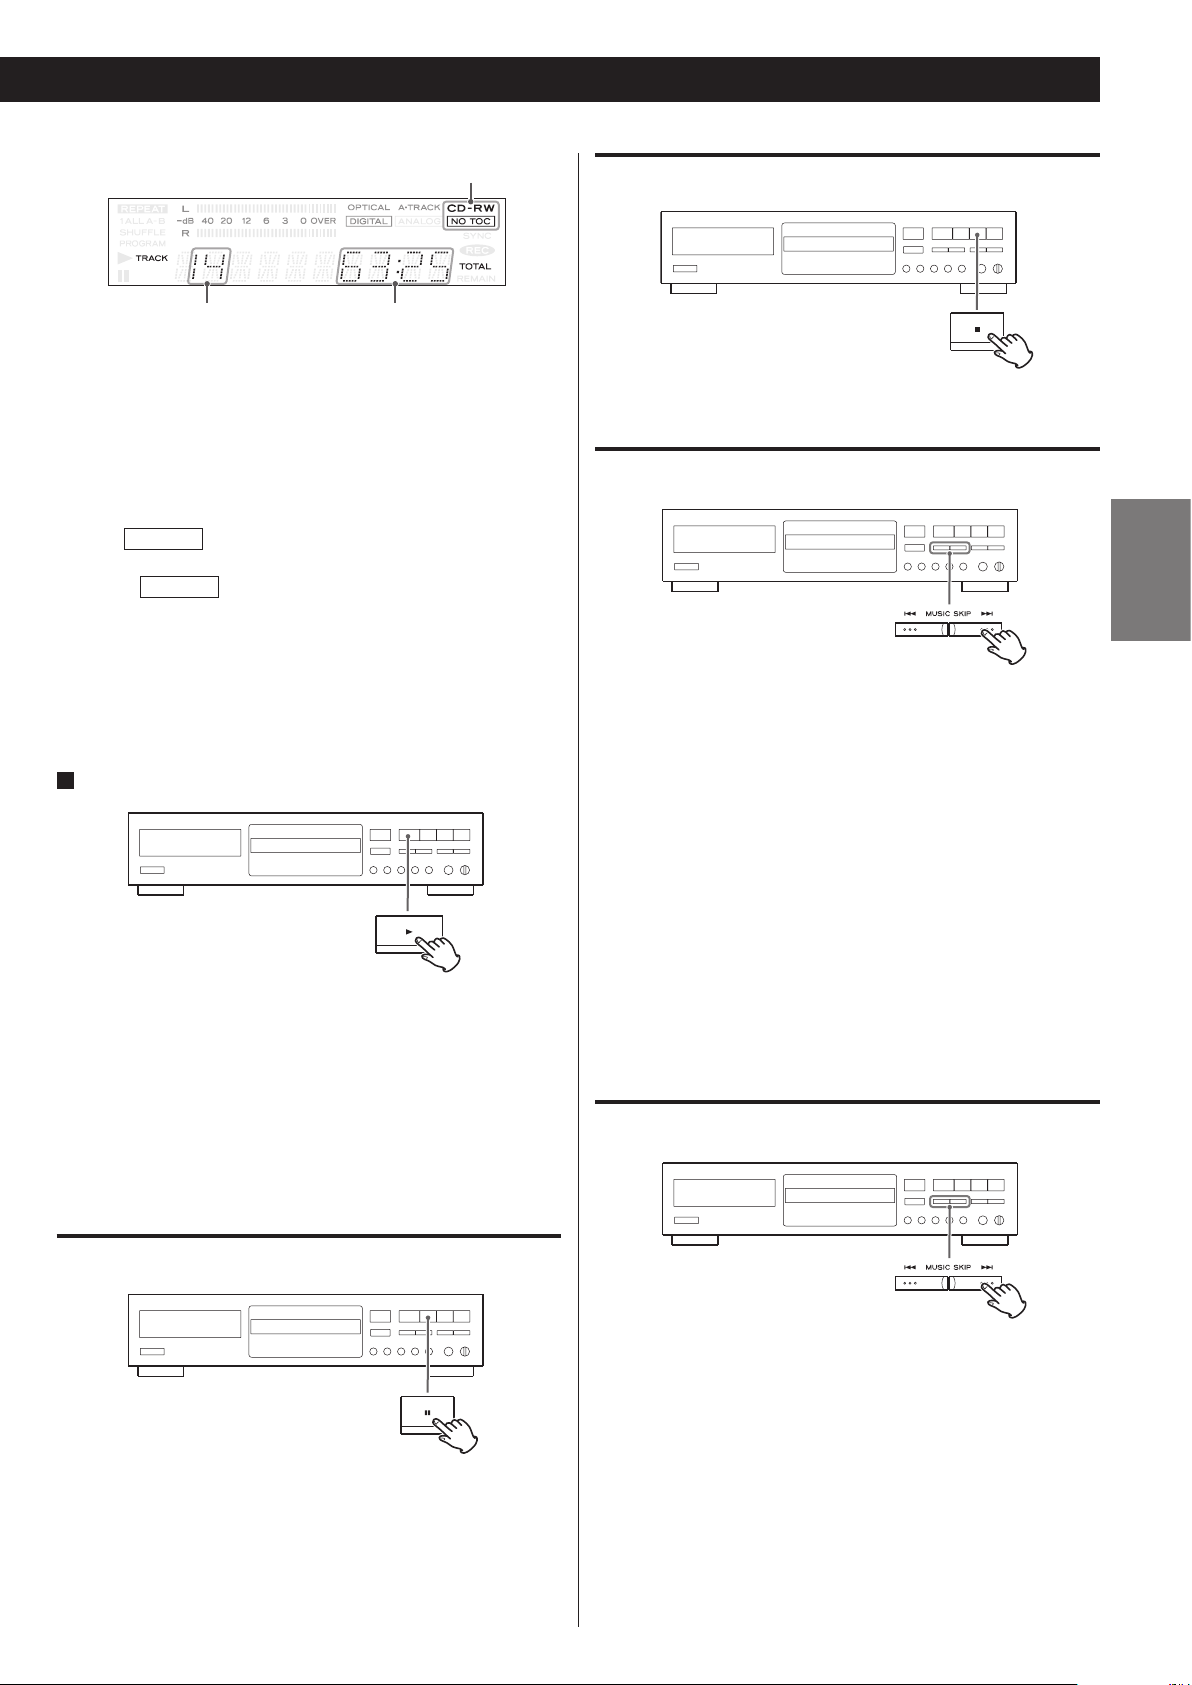
disc type indicator
total number of the tracks total play time of the disc
The disc type indicator shows the type of disc currently loaded.
To stop playback
CD:
A commercial pre-recorded CD
CD-R:
A finalized CD-R
CD-RW:
A finalized CD-RW
CD-R
CD-RW
< As for non-audio discs, the content may be detected but will not
be played.
< When no disc is inserted, “NO DISC” appears.
4
Press the PLAY (y) button to start playback.
Disc playback starts from the first track.
< If you load the disc, and then press the Play (y) button without
closing the disc tray, the disc tray closes automatically and
playback starts.
< When the track number changes during playback of continuous
music such as live performances, the sound may be cut then
played.
NO TOC
A CD-R which has yet to be finalized
A CD-RW which has yet to be finalized
NO TOC
:
:
Press the Stop (H) button to stop playback.
To skip to the next or previous track
ENGLISH
During playback, repeatedly press the Skip (.or/) button
until the desired track is found. You can also skip to next or
previous tracks rapidly by holding down the Skip (.or/)
button of the remote control unit. The selected track will be
played from the beginning.
In the stop mode, press the Skip (.or/) button repeatedly
until the track you want to listen to is found, and press the Play (y)
button to start playback from the selected track.
< When the . button is pressed during playback, the track
being played will be played from the beginning. To return to the
beginning of the previous track, press the . button twice.
< During programmed playback, the playback skips to the previous
or next track in the program.
Search for a part of a track
To pause playback
Press the Pause (J) button during playback. Playback stops at the
current position. To resume playback, press the Play (y) button or
the Pause (J) button.
During playback, hold down the Skip (. or /) button of
the main unit and release it when the part you want to listen to is
found.
Use the Search (m or ,) button when operating with the
remote control unit.
11
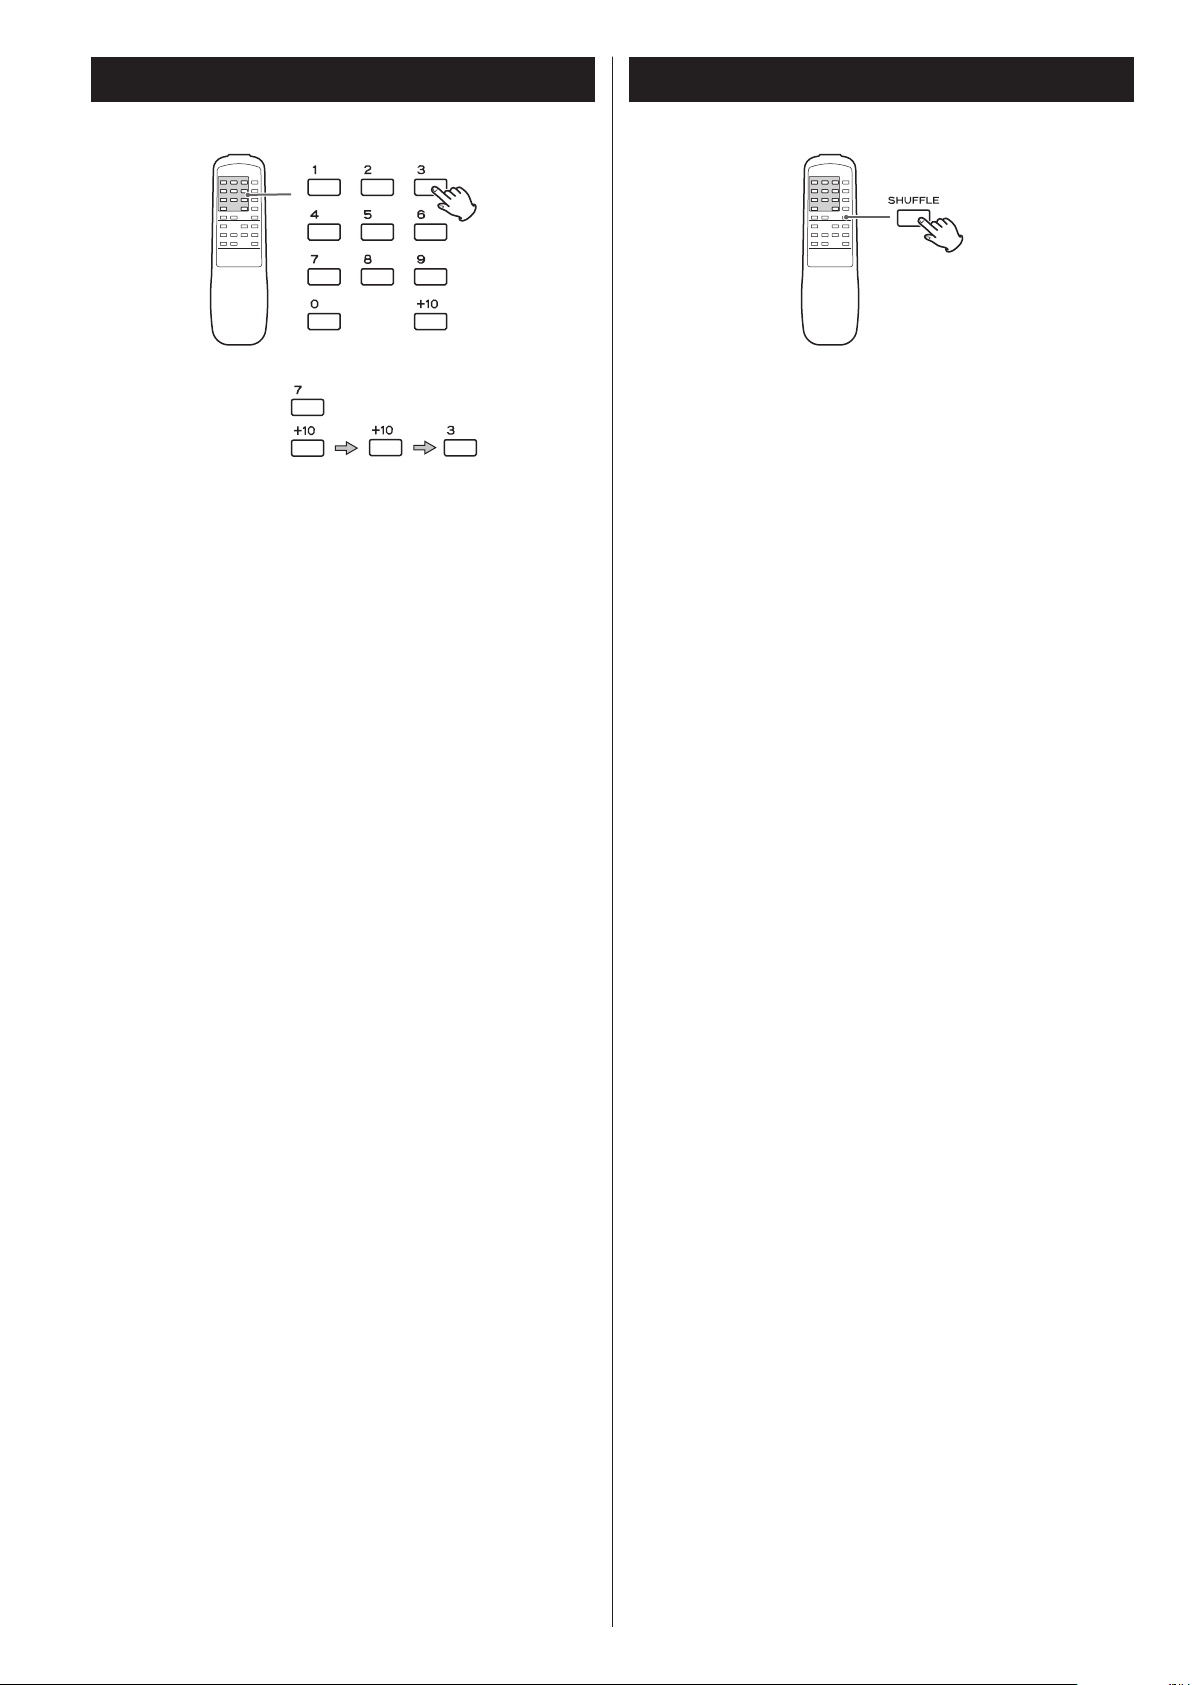
Direct Playback Shuffle Playback
track 7:
track 10:
While in stop or playback mode, you can use the numeric buttons of
the remote control unit to select a track.
Playback starts from the selected track.
< If the above operation is performed while paused, playback will be
paused at the beginning of the selected track.
< Direct playback is not possible during shuffle playback and
programmed playback.
During playback, press the SHUFFLE button so that the tracks can be
played randomly.
In the stop mode, press the SHUFFLE button, then the Play (y)
button.
When the shuffle playback of all the tracks has been finished, the
unit stops and the shuffle playback mode is cancelled.
< If you press the / button during shuffle playback, next track
will be randomly selected and played. If you press the .
button, the currently played track will be played from the
beginning. A track cannot be replayed during shuffle playback.
< Shuffle playback does not work during programmed playback and
A-B repeat.
< A-B repeat does not work during shuffle playback.
< Shuffle playback works with finalized discs only.
< If one of the following buttons is pressed, shuffle mode will be
cancelled:
SHUFFLE (while in the stop mode), OPEN/CLOSE (L), POWER
< When the SHUFFLE button is pressed during REPEAT 1 playback, all
tracks are played in a random order.
12
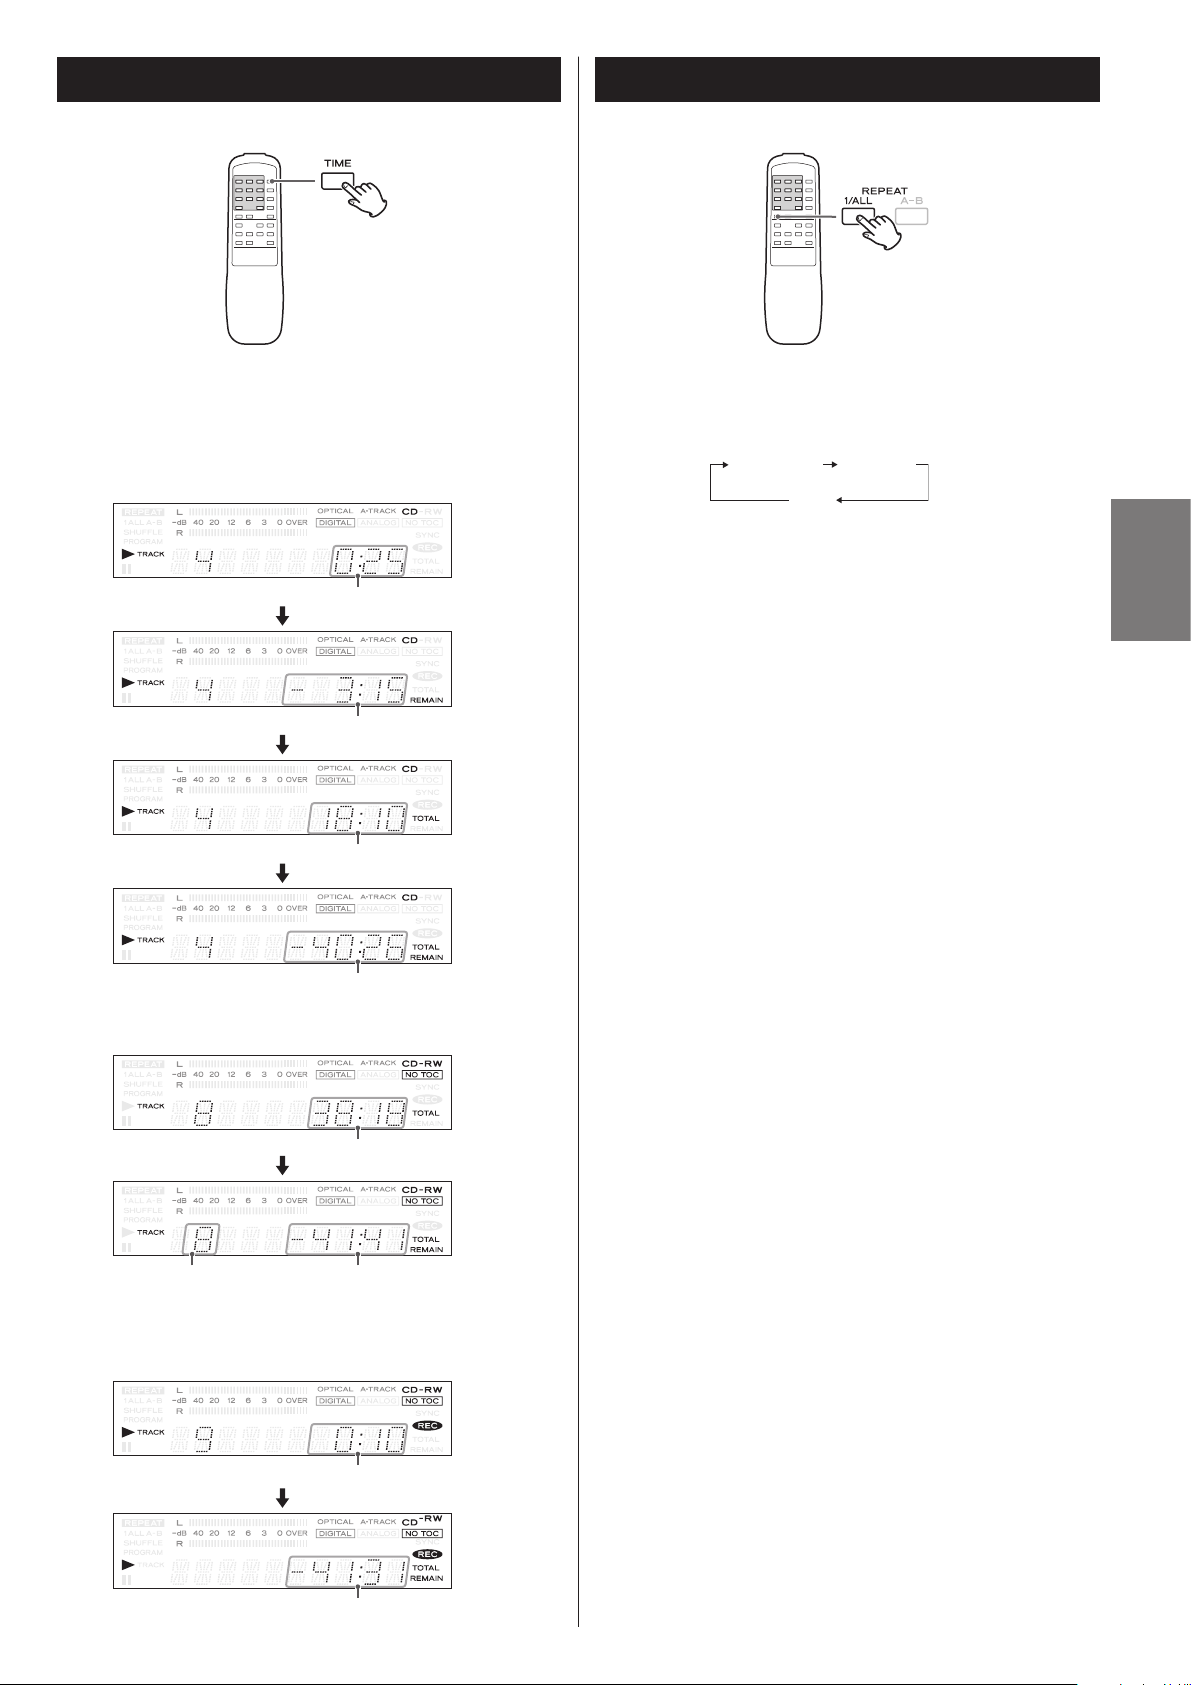
Time Display
REPEAT ALL REPEAT 1
Repeat Playback
Each time the TIME button is pressed, the display changes as
follows:
CD/CD-R/CD-RW playback
(Ex.)
elapsed time of the current track
time remaining for the current track
total elapsed time of the disc
time remaining for the disc
Unfinalized CD-R/CD-RW, stopped
Each time the REPEAT button is pressed, the repeat mode changes
as follows:
(off)
ENGLISH
REPEAT ALL (Repeat all the tracks)
All the tracks of the disc will be played repeatedly.
REPEAT 1 (Repeat one track)
The track being played will be played repeatedly. If you press the
Skip (.//) button and select another track, the track you
selected will be played repeatedly.
It is also possible to select a track to be repeated in the stop mode.
Press the REPEAT button twice and then select the track number
by pressing the Skip (.//) button. Press the Play (y) button
to start playback.
< REPEAT ALL or REPEAT 1 playback works with finalized discs only.
< If one of the following buttons is pressed, repeat mode will be
cancelled:
OPEN/CLOSE (L), POWER
< During shuffle playback, REPEAT 1 cannot be selected.
(Ex.)
total play time of the disc
total number of the tracks remaining recording time of the disc
During recording / While recording is paused
(Ex.)
elapsed recording time of the disc
remaining recording time of the disc
13
A-B Repeat
You can play back the designate point of track repeatedly.
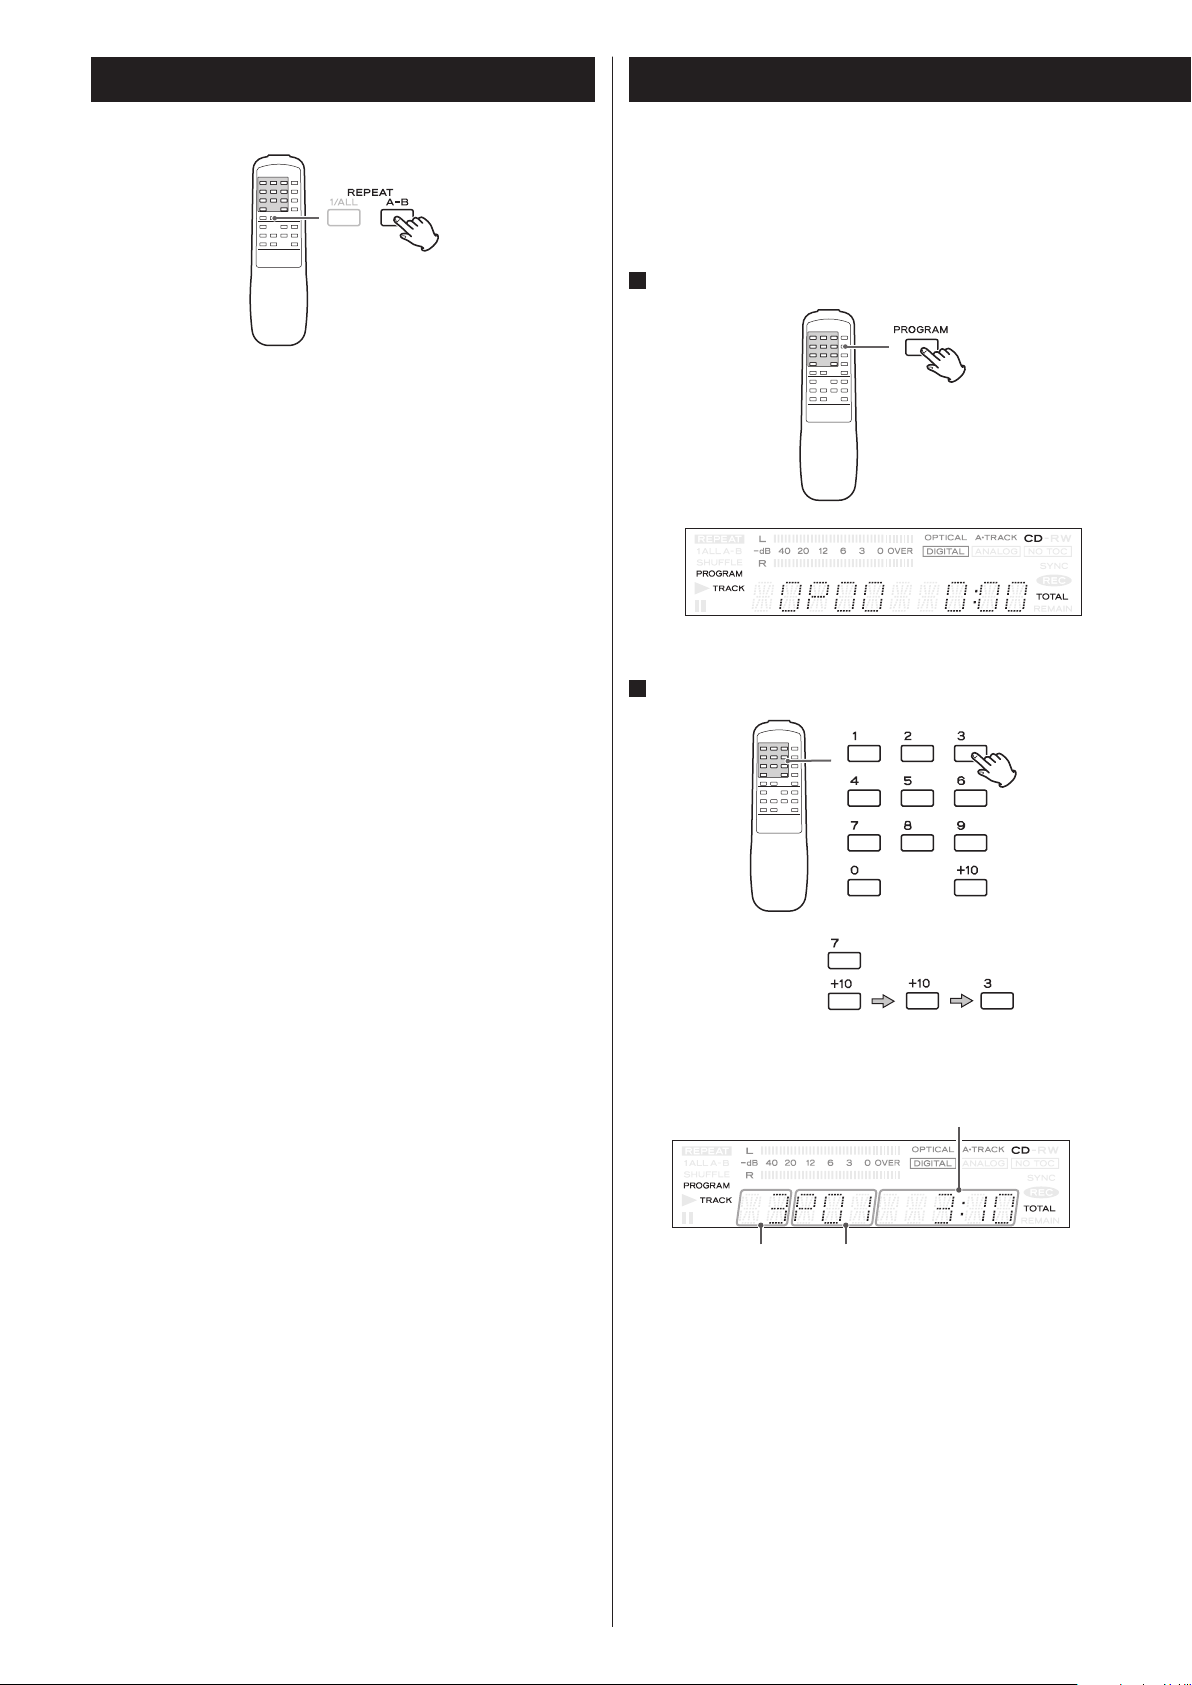
Start playback and designate the point at which the A-B repeat
should start (point A) by pressing the A-B button.
“REPEAT A-” blinks on the display.
When the point at which repeat playback should end (point B) is
reached, press the A-B button again.
The designated section will be played repeatedly.
Programmed Playback (1)
Up to 32 tracks can be programmed in the desired order.
< Insert a disc before beginning programming.
< Programmed playback works with finalized discs only.
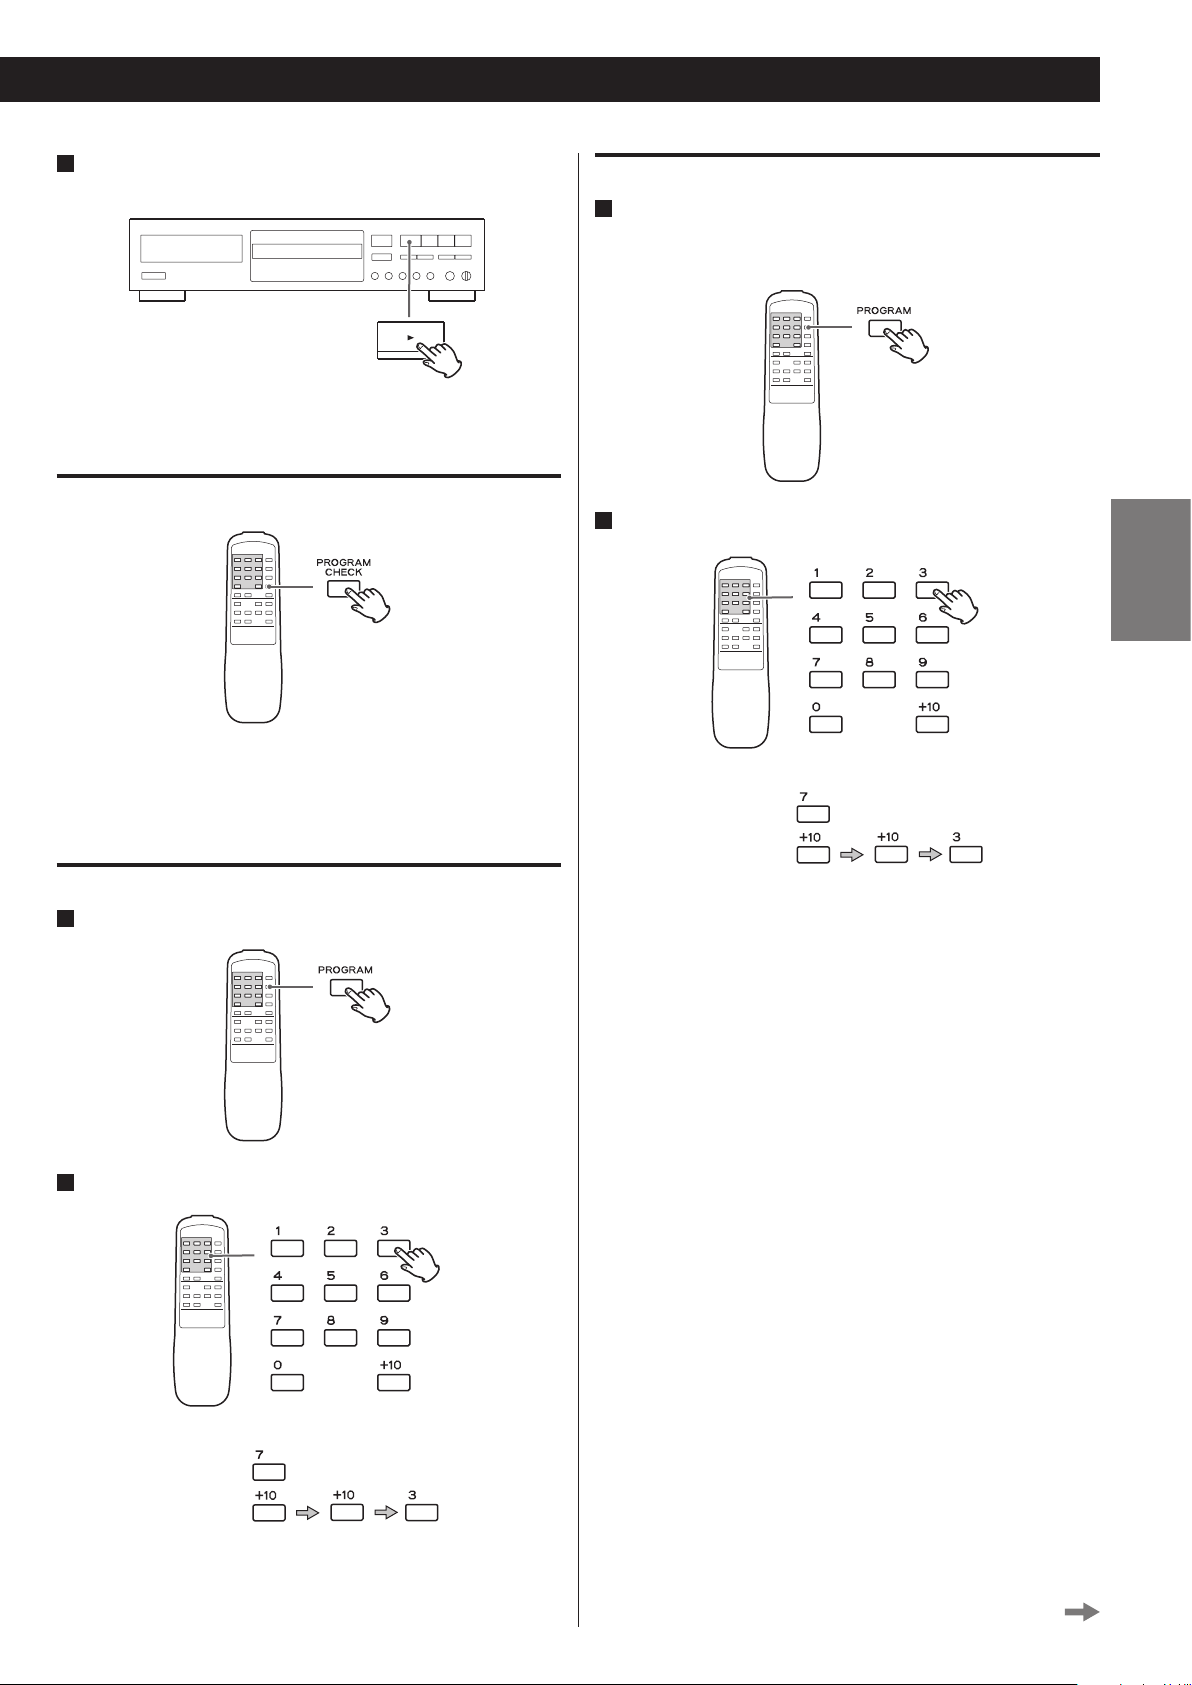
1
Press the PROGRAM button in the stop mode.
< The interval between points A and B must be 10 seconds or longer.
< CD-R/CD-RW discs that have not been finalized cannot be used for
A-B repeat.
< After designating point A, the Search (m/,) button can be
used to fast-forward or fast-backward to point B.
Note that the point B should be forward the point A. Do not go
back beyond the point A.
< The Skip (.//) buttons do not work during A-B repeat.
< A-B repeat does not work during programmed playback and
shuffle playback.
< Shuffle playback does not work during A-B repeat.
< If one of the following buttons is pressed, A-B repeat will be
canceled:
A-B, Stop (H), OPEN/CLOSE (L), POWER
“PROGRAM” indicator blinks, and “0P00” appears on the display.
2
Press the numeric button to select a track.
track 7:
track 10:
The selected track is programmed. To program more than one
track, press the numbers subsequently.
total time of the programmed tracks
14
track number program number
You can also use the Skip (.//) button and the PROGRAM
button to program tracks. Select a track using the Skip (.//)
button, and press the PROGRAM button. Repeat this step to
program other tracks.
< If you made a mistake, press the CLEAR button. The last
programmed number will be deleted.
< To stop programming, press the Stop (H) button. The program
indicator (PROGRAM) stops blinking and lights up. When the
PROGRAM button is pressed again, the “PROGRAM” indicator starts
blinking again, and you can continue programming.
3
When the selection of track numbers has been finished,
press the Play (y) button to start program playback.
The “PROGRAM” indicator stops blinking and lights up. Playback of
the program starts.
To overwrite the program
1
In the stop mode, press the PROGRAM button repeatedly
until the program number to be changed appears on the
display.
To check the programmed order
In the stop mode, press the PROGRAM CHECK button repeatedly to
show the track numbers that have been stored in memory.
< This cannot be used while the “PROGRAM” indicator blinks.
To add a track to the end of the program
1
Press the PROGRAM button in the stop mode.
2
Press the numeric button to select a track.
track 7:
track 10:
The track is overwritten to the selected track.
ENGLISH
2
Press the numeric button to select a track.
track 7:
track 10:
The track is added to the end of the program.
Continue to the next page
15
Programmed Playback (2)
About Recording
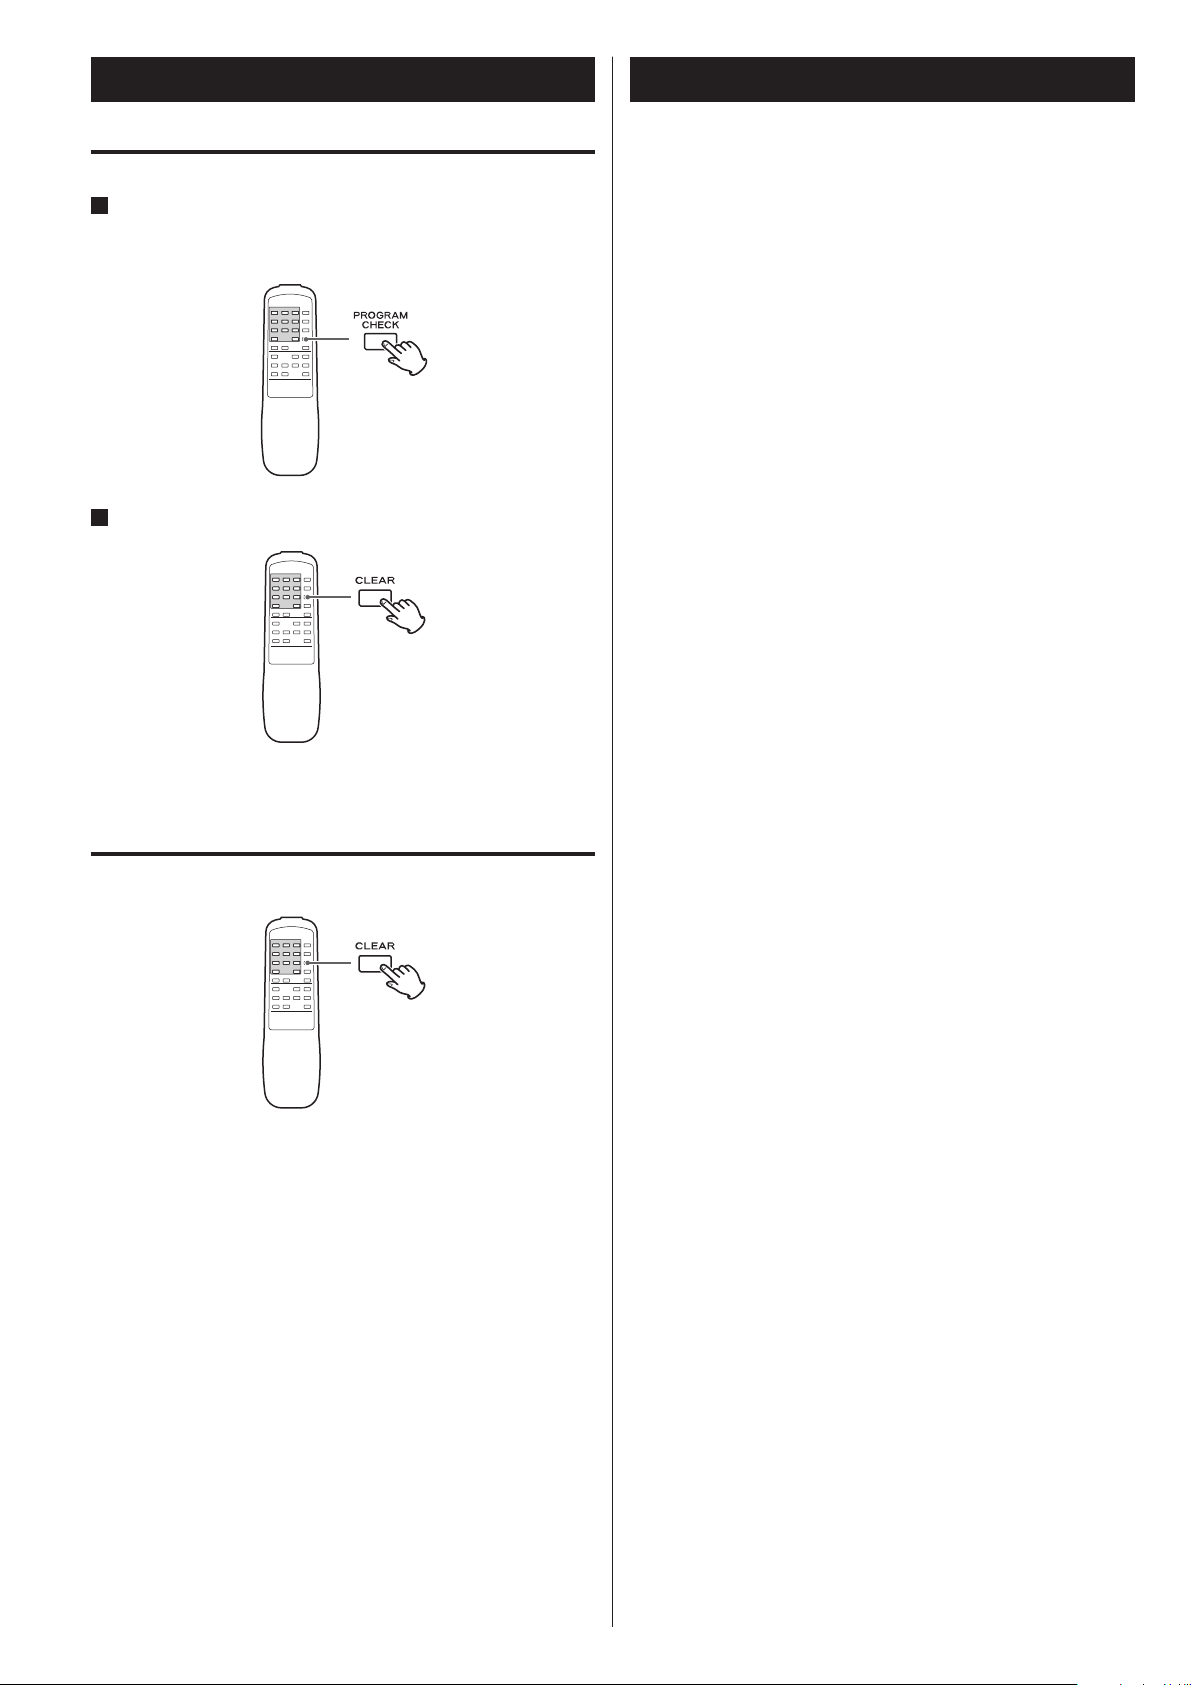
To delete a track from the program
1
In the stop mode, press the PROGRAM CHECK button
repeatedly until the program number to be deleted
appears on the display.
2
Press the CLEAR button.
The track is removed from the program, and the program numbers
of the following tracks are moved up.
To clear the program
CD-R and CD-RW
A CD-R disc can be recorded only once. Recorded tracks cannot be
erased. However, if some recording time is still available, additional
recording is possible. If you finish recording and finalize the CD-R
disc, it can be played with a normal CD player. (Some CD players
may not be compatible.)
On a CD-RW disc, even if no recording time is available, you can
erase tracks already recorded and record tracks repeatedly. You can
erase all tracks at once or the last track only. However, you cannot
erase only tracks in the middle of the disc.
CD-RW discs can only be played with compatible CD players.
Serial Copy Management System
This unit is in compliance with the Serial Copy Management
System standard. This standard has been established to restrict
digital-to-digital copying to only the first generation. The basic
rules governing this system are as follows:
Rule 1
A digital recording is possible from a digital source such as a CD,
DAT or MD onto a recordable CD-R, CD-RW, MD or DAT through
a digital input connection. However, further digital to- digital
recording is prohibited for the second and later generations.
Rule 2
When an analog source such as an analog disc or FM broadcast
is digitally recorded by using a CD-R, CD-RW, MD or DAT, this
recorded source can be digitally recorded on another CD-R,
CD-RW, MD or DAT. However, further digital copying is prohibited.
In the stop mode, hold down the CLEAR button for more than 2
seconds.
If one of the following buttons is pressed, the programmed contents
will also be cleared.
OPEN/CLOSE (L), POWER
16

Before Recording
MANUAL
S-LVL -60 S-LVL -50
S-LVL -40 S-LVL -30
A-TIME xx*
Recording (1)
Before you start recording, make sure that you understand
the following points:
<
Up to 99 tracks can be recorded according to the CD standards.
When a 100th track is about to be recorded, recording will stop
automatically.
<
A track less than 10 seconds in length on an audio CD cannot be
recorded .
<
If the Stop
seconds from the beginning of a track, the unit continues to
record no signal and stops when the track’s length reaches 10
seconds.
<
When recording is finished, “PMA WRITE” blinks for a few seconds,
and then the unit goes into the stop mode. Do not apply shock or
vibration to the unit while recording or “PMA WRITE” blinks.
<
When the available recording time reaches 0, recording will stop
automatically.
<
If a half-way recorded disc is inserted, recording continues next to
the last recorded track.
(H )
button or Pause
(J)
button is pressed within 10
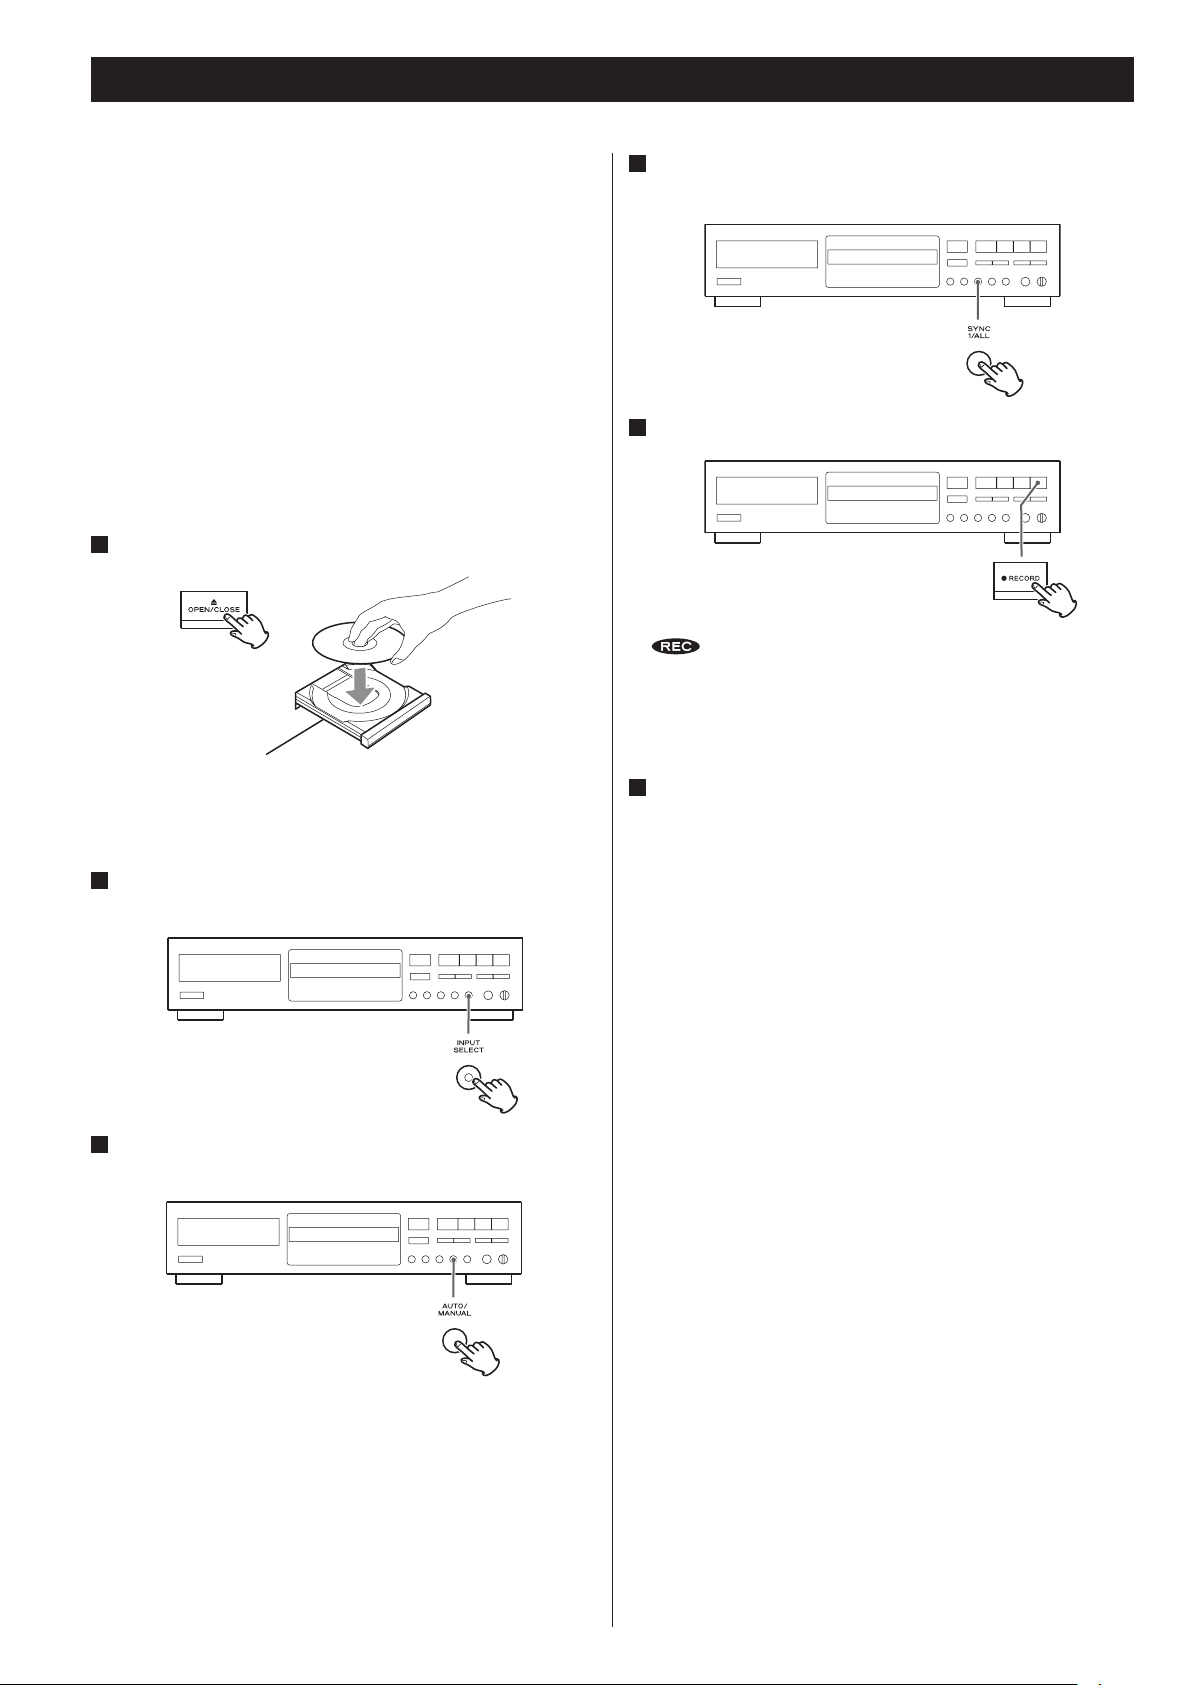
1
Load a recordable CD-R or CD-RW disc into the unit.
Press the OPEN/CLOSE (L) button, place a disc on the disc tray
with the disc label side up, and then press the OPEN/CLOSE (L)
button to close the disc tray.
Make sure “NO TOC” and “CD-R” (or “CD-RW”) indicator lights on
the display.
2
Select the source to be recorded using the INPUT SELECT
button.
ENGLISH
<
You can add tracks to an unfinalized recordable disc. Once
finalized, a CD-R disc is “fixed” and behaves in the same way as a
CD. Finalized CD-RW discs, however, can be unfinalized, erased and
re-recorded.
<
When the auto track function is used, the tracks are separated
based on the specified level. Therefore, if a silent part is contained
at the beginning or in the middle of a track, the playback time may
not be the same as the actual length of the track.
<
When track numbers are added to continuous music such as live
performances, the sound is cut a moment.
<
If a disc recorded with this unit is played with another player,
noises may occur when the track changes.
Each time the INPUT SELECT button is pressed, the display changes
as follows:
DIGITAL (OPTICAL IN)
Select this to record a source connected to the DIGITAL IN terminal.
ANALOG (ANALOG IN)
Select this to record a source connected to the ANALOG IN
terminal.
< The input source cannot be changed during recording.
3
Select the mode of track number assignment using the
AUTO/MANUAL button.
When the AUTO/MANUAL button is pressed once, the current
increment level is displayed. Press the AUTO/MANUAL button
repeatedly to select another setting.
* Appears only when using ANALOG input
< After 2 seconds have passed, the display returns to the track/time
display.
Continue to the next page
17
Recording (2)
S-LVL-60/50/40/30
Track numbers are added automatically when silence is detected.
The auto track function activates and “A-TRACK” appears. The
displayed number indicates the increment level.
The track numbers are automatically added during recording. If
a track change is detected via DIGITAL or if silence (lower than
the increment level**) continues for three seconds or longer
then the next track starts (when sound becomes louder than
the increment level) via ANALOG, and the track numbers are
automatically updated.
** Increment level
Sound level to detect “silence” to add track numbers using auto
track when recording from external devices via ANALOG or to
perform synchronous recording for digital sources such as CD, MD,
and DAT.
This instruction manual describes “silence” as the situation where
the recording source level is lower than the specified increment
level.
−60, −50, −40, and −30 dB can be selected.
A-TIME
Track numbers are added at the set time intervals. This is only
enabled when using ANALOG input.
“A-TRACK” appears on the display when the auto track function is
on. The number shows the time increment used. Track numbers
will be added automatically during recording. Use the skip
(.//) buttons to set the time interval for adding track
numbers. The interval can be set to 1–10 minutes in one-minute
increments.
The track number will not change if the next track started after
analog audio input was silent (less than the set increment level) for
3 or more seconds.
If track numbers are not properly added
When you record sources with interference via ANALOG, track
numbers may not be added if the increment level is lower than the
interference level. In this case, set the increment level higher than
the interference level.
If there is little interference and the track starts with a small sound
resulting in the beginning of the recorded track being truncated,
set the increment level lower.
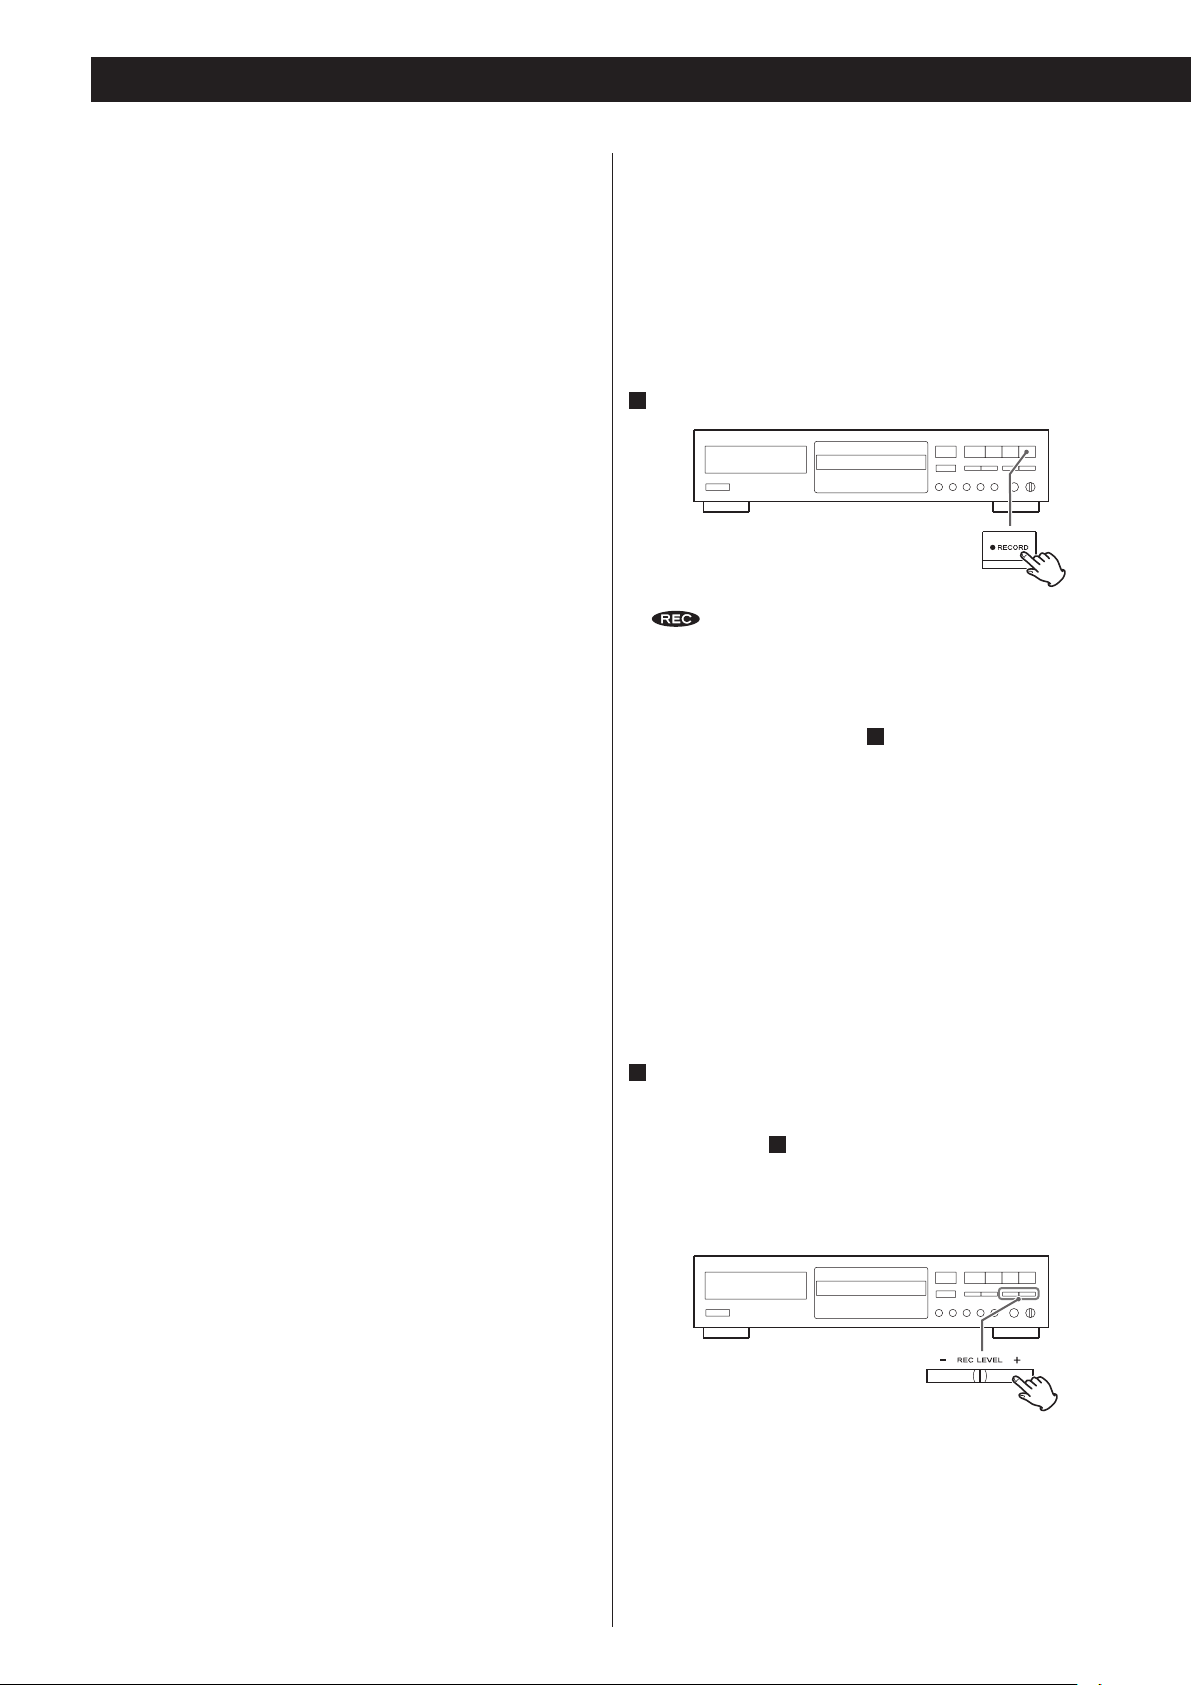
4
Press the RECORD button.
and J indicators on the display will light, and the unit
enters the record pause mode.
< No button will work while “WAITING” is displayed. Wait a few
seconds until “WAITING” disappears from the display. When
DIGITAL is selected in step 2, the sampling frequency of the
digital source (“FS 44_1K”, “FS 48K” or “ FS 32K”) briefly appears
after “WAITING”.
< “DIN UNLOCK” appears when the unit cannot perceive the digital
signal. In that case, connect a digital device to the DIGITAL IN
terminal, switch it on, and wait a few seconds until the unit enters
the record pause mode.
MANUAL
Track numbers will not be added automatically.
To add track numbers manually, press the RECORD button.
< The setting can be configured for DIGITAL and ANALOG
respectively. When the power is turned on, the setting is –60dB for
DIGITAL, and –50dB for ANALOG.
< The setting is stored until the power is turned off.
< If a CD is recorded via DIGITAL, the track numbers are added based
on the CD's digital signals. There is usually no need to change the
increment level.
< In digital recording, even if the auto track function is activated, track
numbers may not be added depending on the digital source player.
In such a case, add track numbers manually (see page 19).
< When you record digital broadcasts or other sources without
track numbers, track numbers are not added even if the auto track
function is activated. To add a track number, press the RECORD
button while recording a track.
< When you record classical music or other sources containing silent
parts via ANALOG, track numbers may not be properly added even
if the auto track function is activated. To add a track number in this
case, deactivate the auto track function, and press the RECORD
button while recording a track.
< When you record a record or other sources with much
interference, more track numbers than expected may be added
unintentionally.
< The AUTO/MANUAL button cannot be used during recording.
< You cannot record if “MONITOR” appears on the display. In that
case, reload a recordable disc, wait a few seconds until “NO TOC”
and “CD-R” (or “CD-RW”) indicators light on the display, then press
the RECORD button again.
5
If necessary, adjust the recording level using the REC LEVEL
buttons.
The recording level can be adjusted only when “ANALOG” is
selected in step 2.
The recording level is 0 dB when the power is turned on. Usually,
recording is possible even if the recording level has not been
adjusted.
18
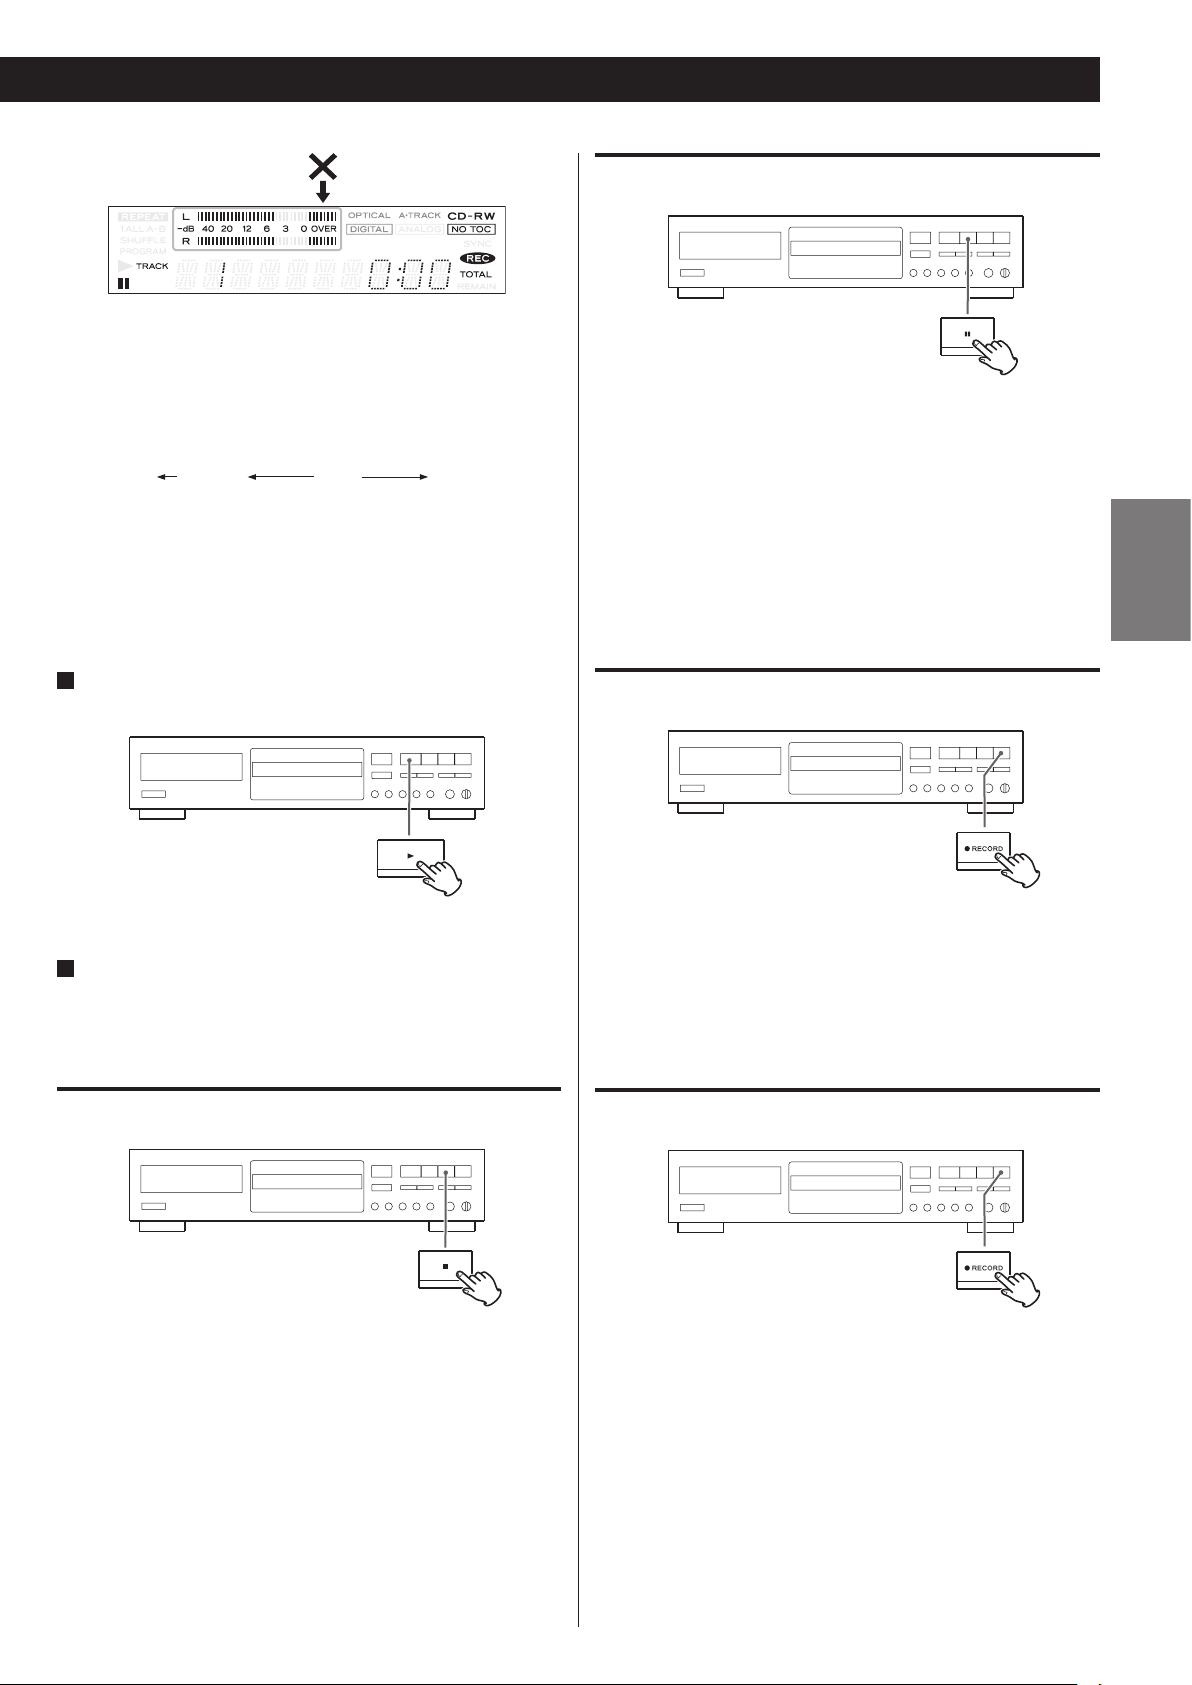
Play the source to be recorded and adjust the recording level so
0 dB–
∞
+12 dB−60 dB
that the loudest sound does not exceed the “OVER” indicator on
the peak level meter.
To pause recording
The level can be adjusted as follows:
MIN. DOWN UP MAX.
< When the POWER button or the Stop (H) button is pressed, the
recording level is reset to 0 dB.
< The volume level differs depending on the source (record, cassette
tape, CD, etc.). To record various sources at the appropriate volume,
the recording level should be adjusted for each source.
Press the Play (y) or the Pause (J ) button to start
6
recording.
Recording starts.
7
Play the source to be recorded.
When the playback of the source has been finished, press the Stop
(H) button to stop recording.
Press the Pause (J) button. “WAITING” briefly appears on the
display, then recording is paused.
To restart recording, press the Play (y) button or the Pause (J)
button.
< You cannot restart recording while “WAITING” is displayed.
< Remember that every time recording is paused or stopped, a new
track number will always be assigned. It is not possible to record in
two “stages” within one track.
To monitor the input signal
When no recordable disc is loaded in the unit, press the RECORD
button.
“MONITOR” appears on the display, and you can monitor the input
source via the PHONES jack and the output terminals. The meters
show the current input level.
Exit the monitor mode by pressing the Stop (H) button.
ENGLISH
To stop recording
Press the Stop (H) button to stop recording.
< If the CD-R is finalized, it can be played with another CD player.
Manual track division
It is possible to divide a track into multiple tracks by pressing the
RECORD button while recording.
< Manual track division is possible regardless of the AUTO/MANUAL
setting.
< A track cannot be less than 10 seconds in length. The RECORD
button will not work if it is pressed within 10 seconds from the
beginning of a track.
19
Synchronous Recording
The convenient synchronous recording function automatically starts
recording when receiving analog or digital signals from an externally
connected device such as a CD player and MD deck, and stops
recording when signal reception is complete.
For CD, MD, or DAT, synchronous recording starts when a digital
signal is detected, which is the beginning of a track. Synchronous
recording stops if there is a period where the sound is quieter than
the specified increment level lasting five seconds.
For digital sources other than the above or analog sources,
synchronous recording starts when a sound louder than the
specified increment level is detected. Synchronous recording stops
if there is a period where the sound is quieter than the specified
increment level lasting 8 seconds.
1
Load a recordable CD-R or CD-RW disc into the unit.
4
Press the SYNC 1/ALL button and select “SYNC 1” or “SYNC
ALL”.
5
Press the RECORD button.
and J indicators on the display will light, and the unit
enters the record pause mode.
< The Play (y) button and Pause (J) button cannot be used during
synchronous recording.
Press the OPEN/CLOSE (L) button, place a disc on the disc tray
with the disc label side up, and then press the OPEN/CLOSE (L)
button to close the disc tray.
2
Select the source to be recorded using the INPUT SELECT
button.
3
Select the mode of track number assignment using the
AUTO/MANUAL button.
6
Start playing the source.
< If no sound is heard for 5 seconds or longer during synchronous
recording, recording stops. To record the music with such periods
of silence, turn off synchronous recording. After turning off
synchronous recording, start recording manually, then play the
source to be recorded.
< Press the Stop (H) button to stop the recording manually.
< If you press the Stop (H) button or the Pause (J) button during
recording, the synchronous recording function will be cancelled.
< The synchronous recording function automatically turns off after
recording.
< The SYNC 1/ALL button cannot be used during recording or in the
record pause mode.
< When “SYNC ALL” is selected, the auto track function is always on.
Select –60, 50, 40 or 30 dB using the AUTO/MANUAL button.
< Even if the AUTO/MANUAL button is set to MANUAL, the auto track
function will be on during synchronous recording. The increment
level is set to –60 dB (–50 dB when recording via ANALOG). The
setting automatically returns to MANUAL after the recording.
20
< In digital recording, synchronous recording may not start
depending on the digital source player. In such a case, start and
stop recording manually.
< To prevent the beginning of a track from being cut off, manually
start recording by pressing the Play (y) button before you play
the source to be recorded.
Finalize
Unfinalize
Finalizing is a process of writing the TOC data (recorded data) to a
disc.
Finalized CD-Rs can be played with other CD players. No more tracks
can be recorded on a finalized CD-R.
Finalized CD-RWs can be played with other compatible CD players.
To record additional tracks on a finalized CD-RW, first unfinalize it.
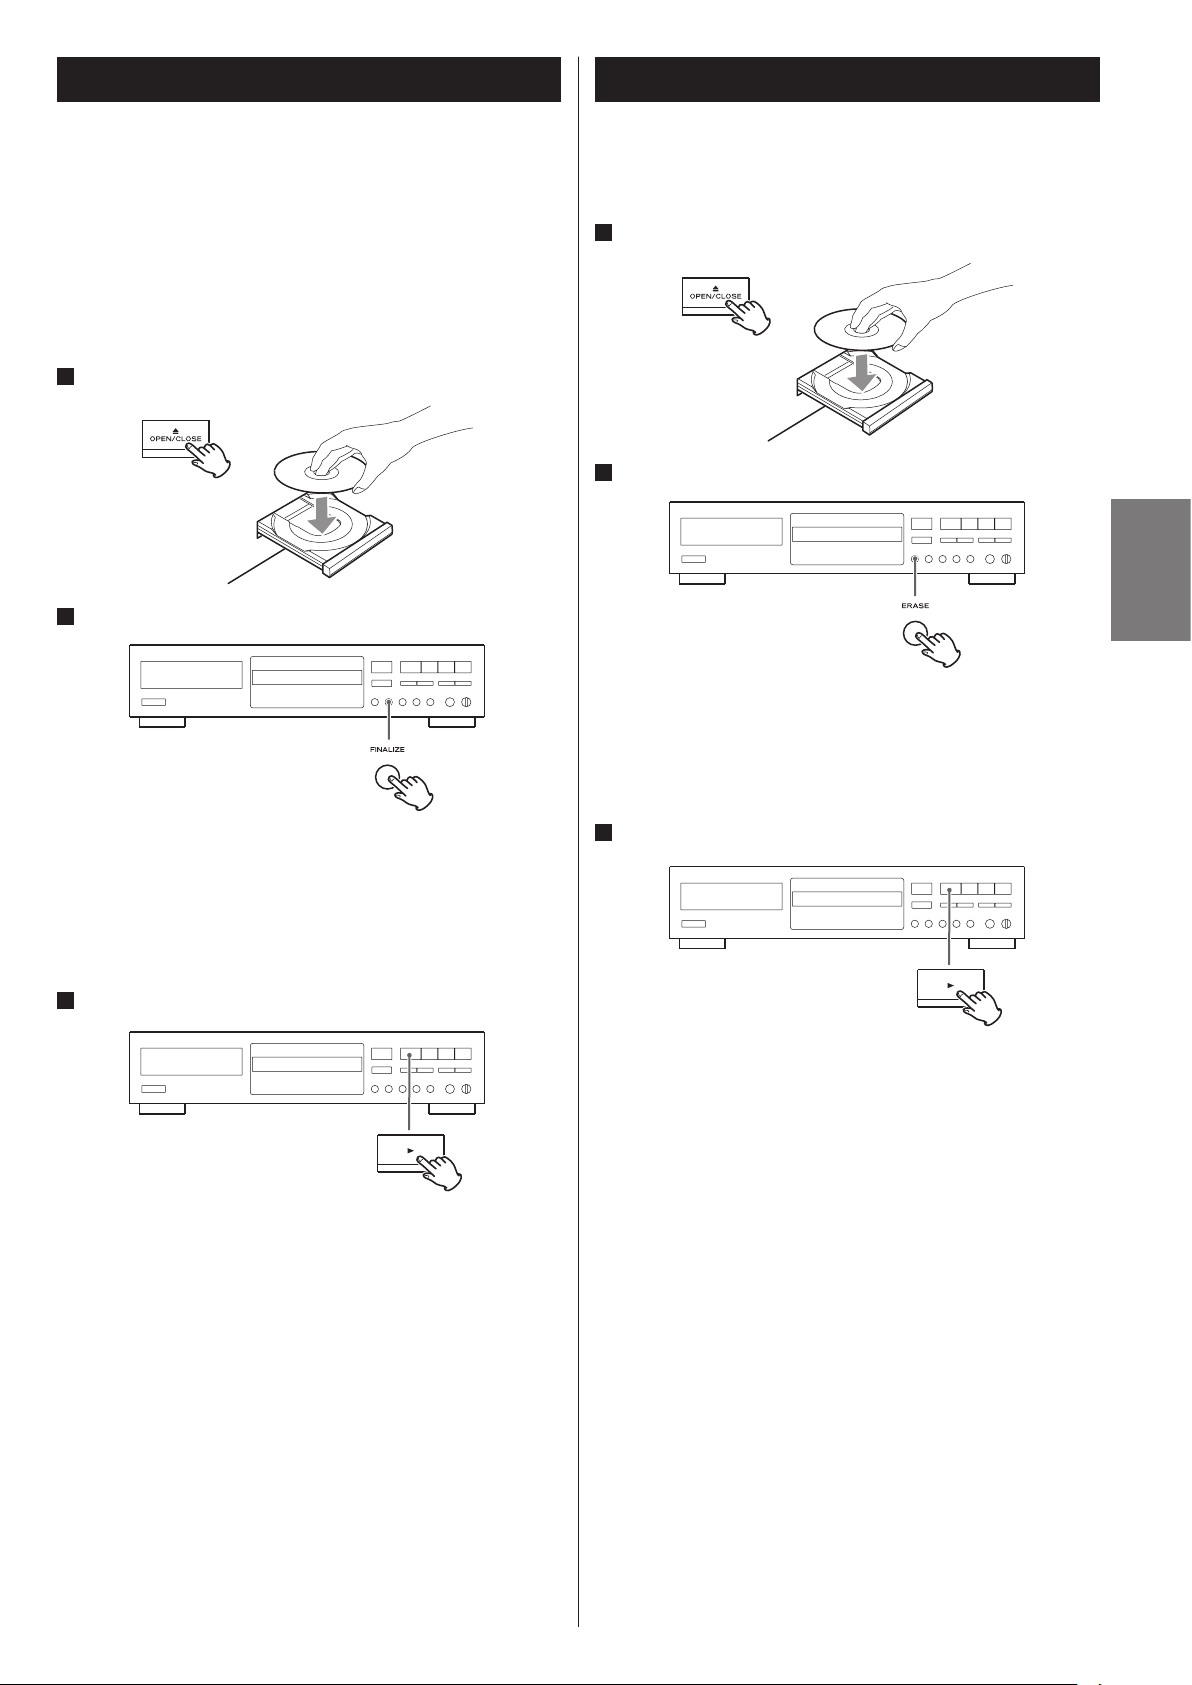
1
Load an unfinalized (recordable) disc.
2
Press the FINALIZE button in the stop mode.
If a finalized CD-RW is unfinalized, recording and erasing will be
possible on the CD-RW.
1
Load a finalized (not recordable) disc.
2
Press the ERASE button in the stop mode.
“UNFINALIZE” appears on the display.
< If “ERASE” and the last track number or “ERASE DISC” is displayed
on the display, it indicates that the disc has not been finalized and
so does not need to be unfinalized.
ENGLISH
“FINALIZE” appears on the display.
< If a finalized disc has been loaded, the FINALIZE button cannot be
used.
< To cancel the finalizing process, press the Stop (H) button.
3
Press the Play (y) button to start finalizing.
Finalizing starts.
When the operation has been finished, the display returns to the
track/time display.
< Never turn the power off nor unplug the power cord during
finalizing.
< During finalizing, no button works.
3
Press the Play (y) button to start unfinalizing.
Unfinalizing starts.
When the operation has been finished, the display returns to the
track/time display.
< Never turn the power off nor unplug the power cord during
unfinalizing.
< During unfinalizing, no button works.
21
Erasing the Last Track (CD-RW)
ERASE#
ERASEDISC
ERASEDISC
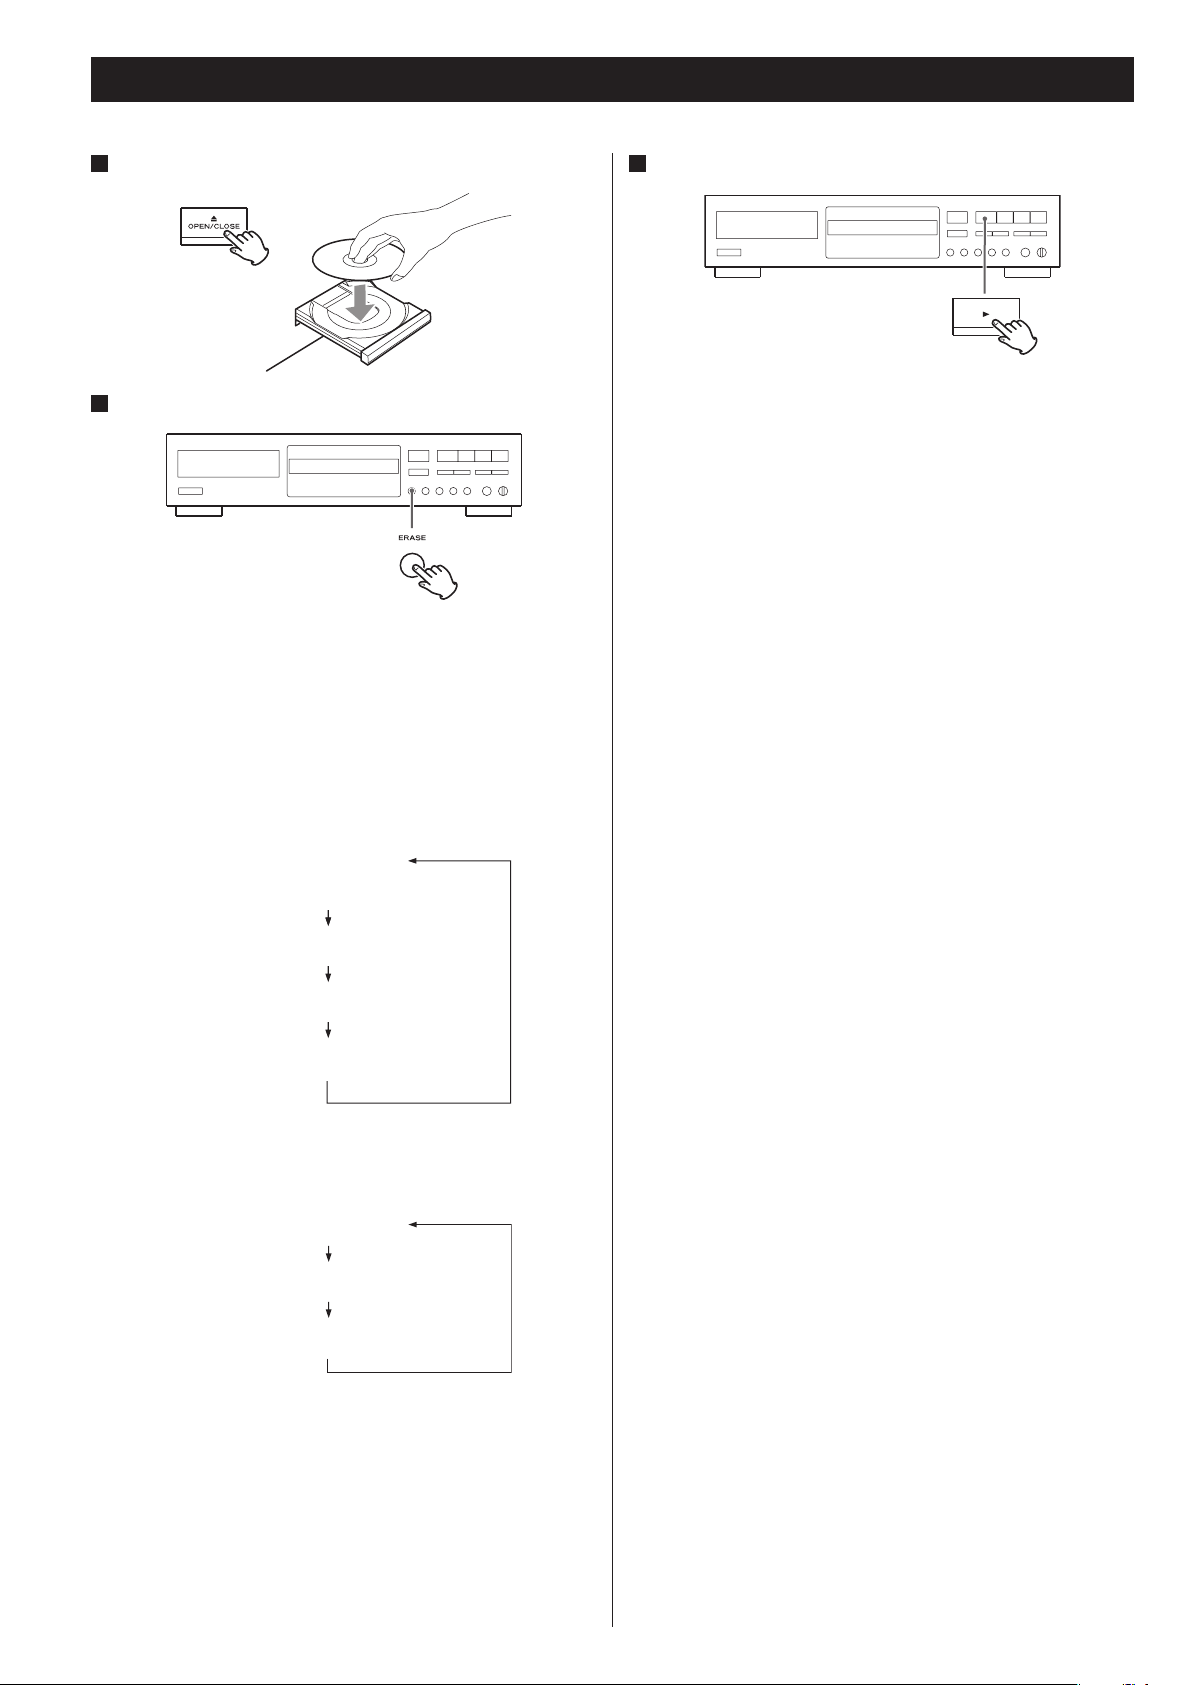
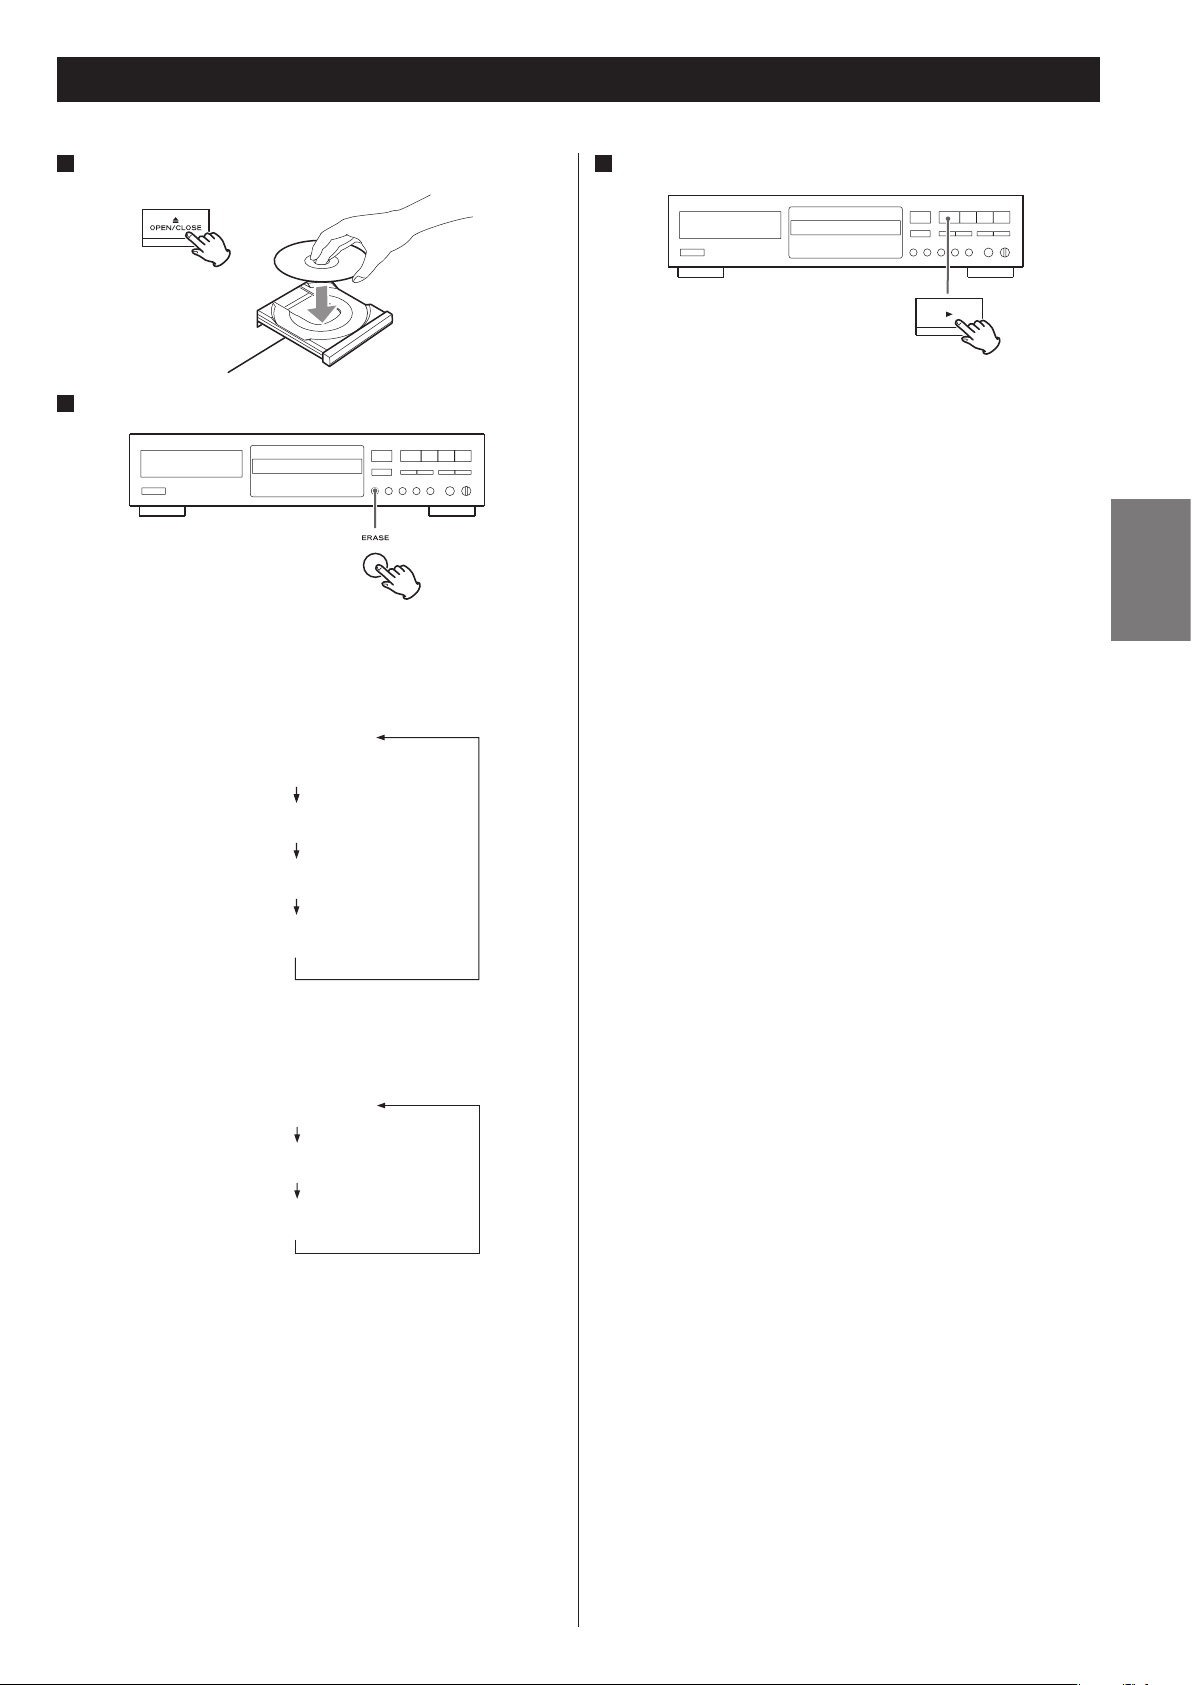
1
Load a recorded CD-RW.
2
Press the ERASE button in the stop mode.
“ERASE” and the last track number appear on the display.
You can simultaneously erase multiple tracks, from the selected
one to the last one. Press the Skip (.//) buttons to select
the number of the first track to erase. (You cannot erase only tracks
in the middle of the CD.)
3
Press the Play (y) button to start erasing.
Only the last track, or tracks from the selected one to the last one,
will be erased.
When the operation has been finished, the display returns to the
track/time display.
< Never turn the power off nor unplug the power cord during
erasing.
< During erasing, no buttons will work.
< This operation cannot be cancelled. Before erasing the track or
tracks, make sure that you really want to erase them.
< Each time the ERASE button is pressed, the display changes as
follows:
(#: The last track number)
REFRESH
Total number of tracks and total playback time
< If only one track is recorded, “ERASE” and the last track number do
not appear. The display changes in the following order:
REFRESH
Total number of tracks and total playback time
< If a finalized disc is inserted, “UNFINALIZE” appears. To erase the
track(s), unfinalize the disc first.
22
ERASE#
ERASEDISC
ERASEDISC
Erasing All Tracks (CD-RW)
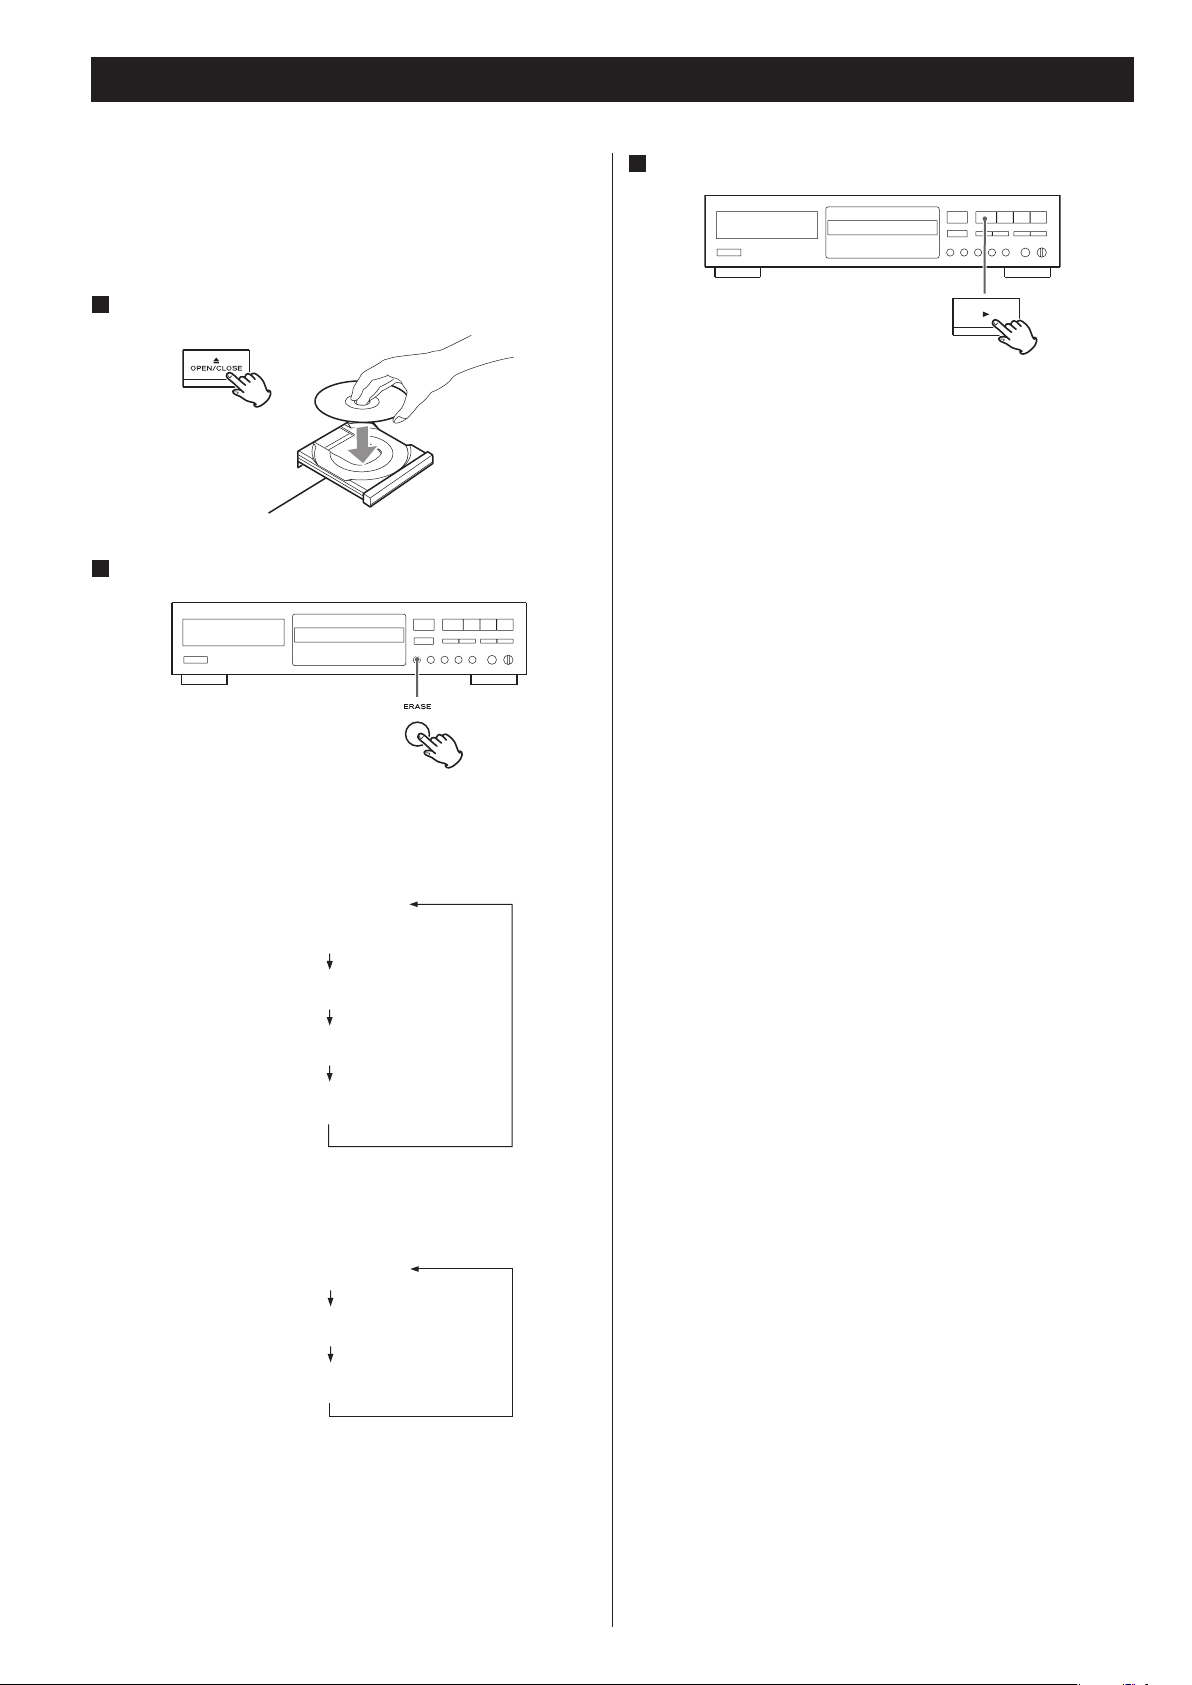
1
Load a recorded CD-RW.
2
Press the ERASE button twice.
“ERASE DISC” appears.
< Each time the ERASE button is pressed, the display changes as
follows:
3
Press the Play (y) button to start erasing.
All tracks will be erased.
The time required appears on the display.
When the operation has been finished, the display returns to the
track/time display.
< Never turn the power off nor unplug the power cord during
erasing.
< During erasing, no buttons will work.
< This operation cannot be undone. Before erasing the tracks, make
sure that you really want to erase them.
ENGLISH
(#: The last track number)
REFRESH
Total number of tracks and total playback time
< If only one track is recorded, “ERASE” and the last track number do
not appear. The display changes in the following order:
REFRESH
Total number of tracks and total playback time
< Press the Stop (H) button to stop erasing.
< If a finalized disc is inserted, “UNFINALIZE” appears. To erase the
track(s), unfinalize the disc first.
23
Erasing All Tracks In Refresh Mode (CD-RW)
ERASE#
ERASEDISC
ERASEDISC
Erasing in the refresh mode takes time. It is recommended to use
“ERASE DISC” when erasing all tracks.
A disc that causes an error during recording may be recovered by
erasing all tracks on the disc in the refresh mode.
1
Load a recorded CD-RW.
2
Press the ERASE button three times.
3
Press the Play (y) button to start erasing.
All tracks will be erased.
The time required appears on the display.
When the operation has been finished, the display returns to the
track/time display.
< Never turn the power off nor unplug the power cord during
erasing.
< During erasing, no buttons will work.
< This operation cannot be undone. Before erasing the tracks, make
sure that you really want to erase them.
“REFRESH” appears on the display.
< Each time the ERASE button is pressed, the display changes as
follows:
(#: The last track number)
REFRESH
Total number of tracks and total playback time
< If only one track is recorded, “ERASE” and the last track number do
not appear. The display changes in the following order:
REFRESH
Total number of tracks and total playback time
< Press the Stop (H) button to stop erasing if you need.
< If a finalized disc is inserted, “UNFINALIZE” appears. To erase the
track(s), unfinalize the disc first.
24
 Loading...