

Z
ENGLISH
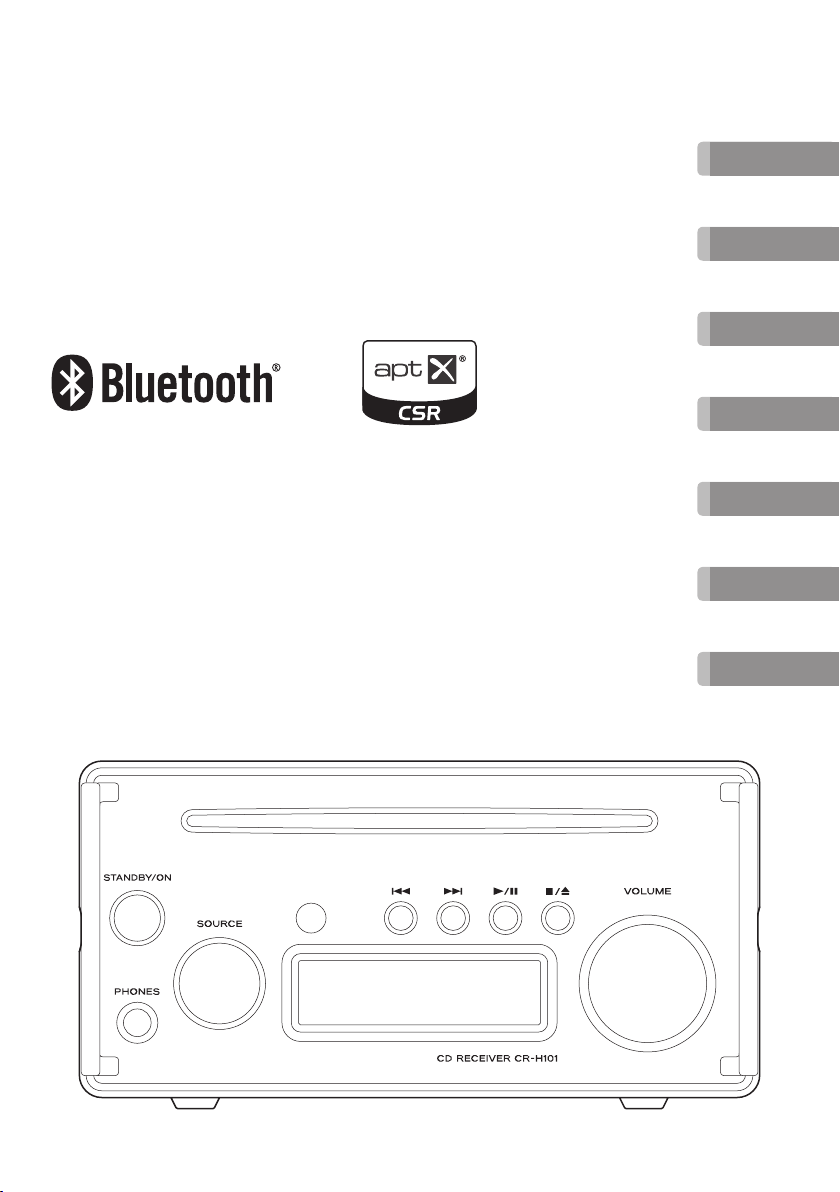
CR-H101
CD Receiver
OWNER’S MANUAL
MODE D’EMPLOI
MANUAL DEL USUARIO
BEDIENUNGSANLEITUNG
MANUALE DI ISTRUZIONI
GEBRUIKERSHANDLEIDING
BRUKSANVISNING
This Owner’s Manual explains the main
functions of this unit.
Please see the Reference Manual for
information about all the unit’s functions.
The Owner's Manual and Reference Manual
can be downloaded from the TEAC Global
Site (http://www.teac-global.com/).
FRANÇAIS
ESPAÑOL
DEUTSCH
ITALIANO
NEDERLANDS
SVENSKA
VQX1A1969Y
IMPORTANT SAFETY INSTRUCTIONS
CAUTION: TO REDUCE THE RISK OF ELECTRIC SHOCK, DO
NOT REMOVE COVER (OR BACK). NO USER-SERVICEABLE
PARTS INSIDE. REFER SERVICING TO QUALIFIED SERVICE
PERSONNEL.
The lightning flash with arrowhead symbol,
<
B
WARNING: TO PREVENT FIRE OR
SHOCK HAZARD, DO NOT EXPOSE THIS
APPLIANCE TO RAIN OR MOISTURE.
within an equilateral triangle, is intended
to alert the user to the presence of uninsulated “dangerous voltage” within the
product’s enclosure that may be of sufficient magnitude to constitute a risk of
electric shock to persons.
The exclamation point within an equilateral triangle is intended to alert the user to
the presence of important operating and
maintenance (servicing) instructions in the
literature accompanying the appliance.
CAUTION
o DO NOT REMOVE THE EXTERNAL CASES OR CABINETS TO
EXPOSE THE ELECTRONICS. NO USER SERVICEABLE PARTS
ARE INSIDE.
o IF YOU ARE EXPERIENCING PROBLEMS WITH THIS
PRODUCT, CONTACT THE STORE WHERE YOU PURCHASED
THE UNIT FOR A SERVICE REFERRAL. DO NOT USE THE
PRODUCT UNTIL IT HAS BEEN REPAIRED.
o USE OF CONTROLS OR ADJUSTMENTS OR PERFORMANCE
OF PROCEDURES OTHER THAN THOSE SPECIFIED HEREIN
MAY RESULT IN HAZARDOUS RADIATION EXPOSURE.
The nameplate is located on the bottom of the unit as
shown below.
Front side
Nameplate
The Bluetooth® word mark and logos are registered trademarks owned by Bluetooth SIG, Inc. and any use of such marks by TEAC
CORPORATION is under license.
© 2013 CSR plc and its group companies. The aptX® mark and the aptX logo are trade marks of CSR plc or one of its group companies and may be registered in one or more jurisdictions.
This product is protected by certain intellectual property rights of Microsoft. Use or distribution of such technology outside of
this product is prohibited without a license from Microsoft.
Windows is a registered trademark of Microsoft Corporation in the United States and/or other countries.
Mac, Mac OS and OS X are trademarks of Apple Inc., registered in the U.S. and other countries.
Other company names, product names and logos in this document are the trademarks or registered trademarks of their respective owners.
2
1) Read these instructions.
2) Keep these instructions.
3) Heed all warnings.
4) Follow all instructions.
5) Do not use this apparatus near water.
6) Clean only with dry cloth.
7) Do not block any ventilation openings. Install in accordance with the manufacturer's instructions.
8) Do not install near any heat sources such as radiators,
heat registers, stoves, or other apparatus (including
amplifiers) that produce heat.
9) Do not defeat the safety purpose of the polarized or
grounding-type plug. A polarized plug has two blades
with one wider than the other. A grounding type plug
has two blades and a third grounding prong. The wide
blade or the third prong are provided for your safety. If
the provided plug does not fit into your outlet, consult
an electrician for replacement of the obsolete outlet.
10) Protect the power cord from being walked on or
pinched particularly at plugs, convenience receptacles,
and the point where they exit from the apparatus.
11) Only use attachments/accessories specified by the
manufacturer.
12) Use only with the cart, stand,
tripod, bracket, or table specified by the manufacturer,
or sold with the apparatus.
When a cart is used, use caution when moving the cart/
apparatus combination to
avoid injury from tip-over.
13) Unplug this apparatus during lightning storms or when
unused for long periods of time.
14) Refer all servicing to qualified service personnel.
Servicing is required when the apparatus has been
damaged in any way, such as power-supply cord or plug
is damaged, liquid has been spilled or objects have fallen
into the apparatus, the apparatus has been exposed to
rain or moisture, does not operate normally, or has been
dropped.
o The apparatus draws nominal non-operating power
from the AC outlet with its POWER or STANDBY/ON
switch not in the ON position.
o The mains plug is used as the disconnect device, the dis-
connect device shall remain readily operable.
o Caution should be taken when using earphones or
headphones with the product because excessive sound
pressure (volume) from earphones or headphones can
cause hearing loss.
CAUTION
o Do not expose this apparatus to drips or splashes.
o Do not place any objects filled with liquids, such as
vases, on the apparatus.
o Do not install this apparatus in a confined space
such as a book case or similar unit.
o The apparatus should be located close enough to
the AC outlet so that you can easily reach the power
cord plug at any time.
o If the product uses batteries (including a battery
pack or installed batteries), they should not be
exposed to sunshine, fire or excessive heat.
o CAUTION for products that use replaceable lithium
batteries: there is danger of explosion if a battery is
replaced with an incorrect type of battery. Replace
only with the same or equivalent type.
V
Precautions concerning batteries
Misuse of batteries could cause them to rupture or leak leading to fire, injury or the staining of nearby things. Please read
and observe the following precautions carefully.
o Be sure to insert the batteries with correct positive (¥)
and negative (^) orientations.
o Use batteries of the same type. Never use different types
of batteries together.
o If the remote control is not used for a long time (more
than a month), remove the batteries to prevent them
from leaking.
o If the batteries leak, wipe away the leakage inside the
battery compartment and replace the batteries with
new ones.
o Do not use batteries of types other than those specified.
Do not mix new batteries with old ones or use different
types of batteries together.
o Do not heat or disassemble batteries. Never throw bat-
teries into fire or water.
o Do not carry or store batteries with other metallic
objects. The batteries could short circuit, leak or explode.
o Never recharge a battery unless it is confirmed to be a
rechargeable type.
3
IMPORTANT SAFETY INSTRUCTIONS (continued)
Pb, Hg, Cd
Laser information
This product contains a semiconductor laser system inside
the cabinet and is classified as a “CLASS 1 LASER PRODUCT”.
To prevent being exposed to the laser beam, do not try to
open the enclosure.
Laser:
Type: EP-HD870PB
Manufacturer: GUANGDONG EVER BRIGHT GROUP CO.,LTD
Laser output: Less than 1 mW on the objective lens
Wavelength: 792±25 nm
DECLARATION OF CONFORMITY
We, TEAC AUDIO EUROPE, Gutenbergstr. 3,
82178 Puchheim, Germany declare in own
responsibility, the TEAC product described
in this manual is in compliance with the
corresponding technical standards.
For European Customers
Disposal of electrical and electronic equipment and batteries and/or accumulators
(a) All electrical/electronic equipment and waste
batteries/accumulators should be disposed of
separately from the municipal waste stream via
collection facilities designated by the government
or local authorities.
(b) By disposing of electrical/electronic equipment
and waste batteries/accumulators correctly, you
will help save valuable resources and prevent any
potential negative effects on human health and the
environment.
(c) Improper disposal of waste electrical/electronic
equipment and batteries/accumulators can have
serious effects on the environment and human
health because of the presence of hazardous substances in the equipment.
(d) The Waste Electrical and Electronic
Equipment (WEEE) symbols, which show
wheeled bins that have been crossed
out, indicate that electrical/electronic
equipment and batteries/accumulators
must be collected and disposed of separately from household waste.
If a battery or accumulator contains more
than the specified values of lead (Pb),
mercury (Hg), and/or cadmium (Cd) as
defined in the Battery Directive (2006/66/
EC), then the chemical symbols for those
elements will be indicated beneath the WEEE
symbol.
(e) Return and collection systems are available to end
users. For more detailed information about the
disposal of old electrical/electronic equipment and
waste batteries/accumulators, please contact your
city office, waste disposal service or the shop where
you purchased the equipment.
4

Wireless equipment precautions
Compliance of radio transmitter and
interference
Model for EEA (European Economic Area)
This equipment complies with the harmonised standards of
DIRECTIVE 1999/5/EC (R&TTE).
Labeling of conformity
CE marking:
CAUTION
Changes or modifications not expressly approved by the
party responsible for compliance could void the user’s
authority to operate the equipment.
CAUTION
Authorization of wireless devices are different in countries or
regions. Please use only in the country where you purchased
the product.
o Depending on the country, restrictions on the use of
Bluetooth wireless technology might exist.
Radiation Exposure requirements
This equipment meets the regulation, which is recognized
internationally, for the case of human exposure to radio
waves generated by the transmitter.
Statement of compliance
EEA (European Economic Area) model
This equipment complies with EN.62311; Assessment of
electronic and electrical equipment related to human exposure restrictions for electromagnetic fields; the harmonised
standard of DIRECTIVE 1999/5/EC.
5

Included accessoriesTable of contents
Thank you for choosing TEAC product.
Read this manual carefully to get the best performance from
this unit.
After reading it, keep it in a safe place for future reference.
This Owner’s Manual explains the main functions of this unit.
Please see the Reference Manual for information about all
the unit’s functions.
The Owner's Manual and Reference Manual can be downloaded from the TEAC Global Site (http://www.teac-global.
com/).
IMPORTANT SAFETY INSTRUCTIONS ........................2
Wireless equipment precautions ............................5
Included accessories ........................................6
Using the TEAC Global Site ..................................6
Before use ..................................................7
Setting the clock. . . . . . . . . . . . . . . . . . . . . . . . . . . . . . . . . . . . . . . . . . . .7
Notes about discs ..........................................8
Connections .............................................. 10
Connecting speakers ..................................... 12
Using the remote control ................................. 13
Names and functions of parts (remote control) ............ 14
Names and functions of parts (main unit) ................. 16
Basic operation ........................................... 17
Listening to CDs .......................................... 18
Listening to FM radio ..................................... 19
RDS (European model only) ............................... 20
Bluetooth® function ...................................... 22
Settings .................................................. 23
Playing back music on a computer ........................ 25
Troubleshooting ..........................................26
Specifications .............................................27
Check to be sure the box includes all the supplied accessories shown below.
Please contact the store where you purchased this unit if
any of these accessories are missing or have been damaged
during transportation.
Power cord × 1
Remote control (RC-1324) × 1
Batteries for remote control (AAA) × 2
Basic FM antenna × 1
Owner’s manual (this document) × 1
o Keep this manual in a safe place for future reference.
o See page 184 for information about the warranty.
Using the TEAC Global Site
You can download updates for this unit from the TEAC
Global Site: http://teac-global.com/
1) Open the TEAC Global Site.
2) In the TEAC Downloads section, click the desired language to open the Downloads website page for that
language.
NOTE
If the desired language does not appear, click Other
Languages.
3) Click the product name in the “Products” section.
4) Select and download the updates that are needed.
6
Setting the clockBefore use
V
Placement of the unit
o Avoid placing it in high temperature environments
such as in direct sunlight or close to a source of heat.
Moreover, do not place the unit on an amplifier or any
other device that generates heat. Doing so could cause
discoloration, deformation or malfunction.
o Do not place anything on top of the unit. Do not put
cloth on top of the unit or place it on top of bedding or
thick carpet.
Maintenance
Wipe dirt from the top cover and other panel surfaces using
a soft cloth that has been slightly dampened with a diluted
neutral cleanser.
Do not use chemically-treated wipes, thinner or similar substances because they could damage the surface of the unit.
V
For safety, disconnect the power cord from
the outlet before cleaning.
This unit has a clock built-in.
After completing connections, set the current time.
The time appears on the display when, for example, the unit
is in standby mode.
o See “Set clock (time settings)” on page 24 for how to
set the clock.
Example of display when in standby
T AM 09:18
Current time
Appears when the on/off timer is on
o The clock will be reset if the unit's power cord is discon-
nected from an outlet. Reset the current time when you
use the unit.
o The clock is not perfectly precise, so we recommend
resetting the time occasionally.
7
Notes about discs
Types of discs that can be played by
this unit
CDs (12cm) with the Compact Disc Digital Audio
logo
o This logo appears on disc labels and packaging.
o This unit cannot play 8cm CDs.
CD-R and CD-RW discs that have been properly
recorded and finalized using the audio CD format.
CD-R and CD-RW discs that have been written with
MP3 or WMA files and finalized.
o Multi-session discs are not supported.
This unit cannot play discs of types other than those above.
If you try to play any other type of disc with this
V
unit, loud noises that damage speakers or harm
hearing could occur. Never try to play any type of
disc other than those shown above.
o WMA files
Windows Media Audio Professional (WMA Pro) and
Windows Media Audio Lossless (WMA Lossless) formats
are not supported.
o Depending on the quality of the disc and the condition
of the recording, playback might not be possible.
o This unit cannot read or play the following types of discs.
CD-ROM discs
Video CDs
Super Audio CDs
DVD video discs
DVD audio discs
DVD-ROM discs
CD-R/CD-RW discs
This unit can play CD-R/CD-RW discs that are in audio CD
format (CD-DA) or that contain MP3 or WMA format files.
o In order to play a disc created by a CD recorder, be sure
to finalize it.
o Depending on the quality of the disc and the condition
of the recording, playback might not be possible. For
details, see the operation manual for the device you are
using.
o If you have any questions about how to handle a CD-R
or CD-RW disc, contact the seller of the disc directly.
Precautions for use
o Do not use cracked discs because they could damage
the unit.
o Do not apply labels or other materials to discs. Do not
use discs that have had tape, stickers or similar materials
removed from them as they may have left a sticky residue on the disc’s surface. Other discs to avoid are ones
that have exposed glue around the edges of stickers, for
example. Using such a disc in this unit could cause the
disc to become stuck or could damage the unit.
o When writing something on the label side of a disc, use
a felt tip permanent marker. The use of a ballpoint pen or
other pen with a hard tip could damage the disc, making
it unplayable.
o Never use commercially-available CD stabilizers. Doing
so could make the disc unplayable or damage the unit.
o Never use discs with irregular shapes, including heart-
shaped and octagonal discs, because they could
damage the unit.
If you load a DVD video, DVD audio, DVD-ROM or
V
similar disc into this unit, the unit will try to play
it and spin at high speed. If you accidentally load
such a disc, the disc could be damaged, so do not
try to remove it until it stops spinning.
o This unit might not be able to properly play Copy
Control CDs, Dual Discs or other special CDs that do not
conform to the Red Book CD standard. Operation and
sound quality cannot be guaranteed when special discs
are used in this unit. If playback of a special disc should
cause trouble, contact the seller of the disc.
8
o To remove a disc from its case, while pressing down on
the center of the case, hold the disc by its edges. Do not
touch the side of the disc that has the data encoded on
it (unlabeled side).

If a disc will not load properly
If a disc becomes caught or is otherwise difficult to insert,
do not push it in forcefully. Press the eject (-) button and
remove the disc once before reinserting it. (Pushing a disc
forcefully could damage the unit.)
Storing discs
o Discs should be stored in their cases when not being
used. Failure to do so could result in warping and
scratches.
o Do not leave discs in places that are exposed to direct
sunlight or that are very humid or hot. Doing so could
cause discs to become deformed or degraded, making
them unplayable.
o CD-R and CD-RW discs are more susceptible to the
impacts of heat and ultraviolet rays than ordinary
CDs. For this reason, do not leave them for long times
in places that are exposed to direct sunlight or near
devices that generate heat, for example.
o Always clean discs before storing them. Leaving a disc
in an unclean state might result in skipping or degraded
sound quality.
Maintenance
o If the side of the disc that has the data encoded on it
(unlabeled side) becomes dirty with fingerprints or dust,
use a soft cloth to wipe the surface from the center
directly toward the edge.
o Never use record cleaners, antistatic treatments, thinners
or similar chemicals to clean discs. Such chemicals could
harm the surface of the disc.
9
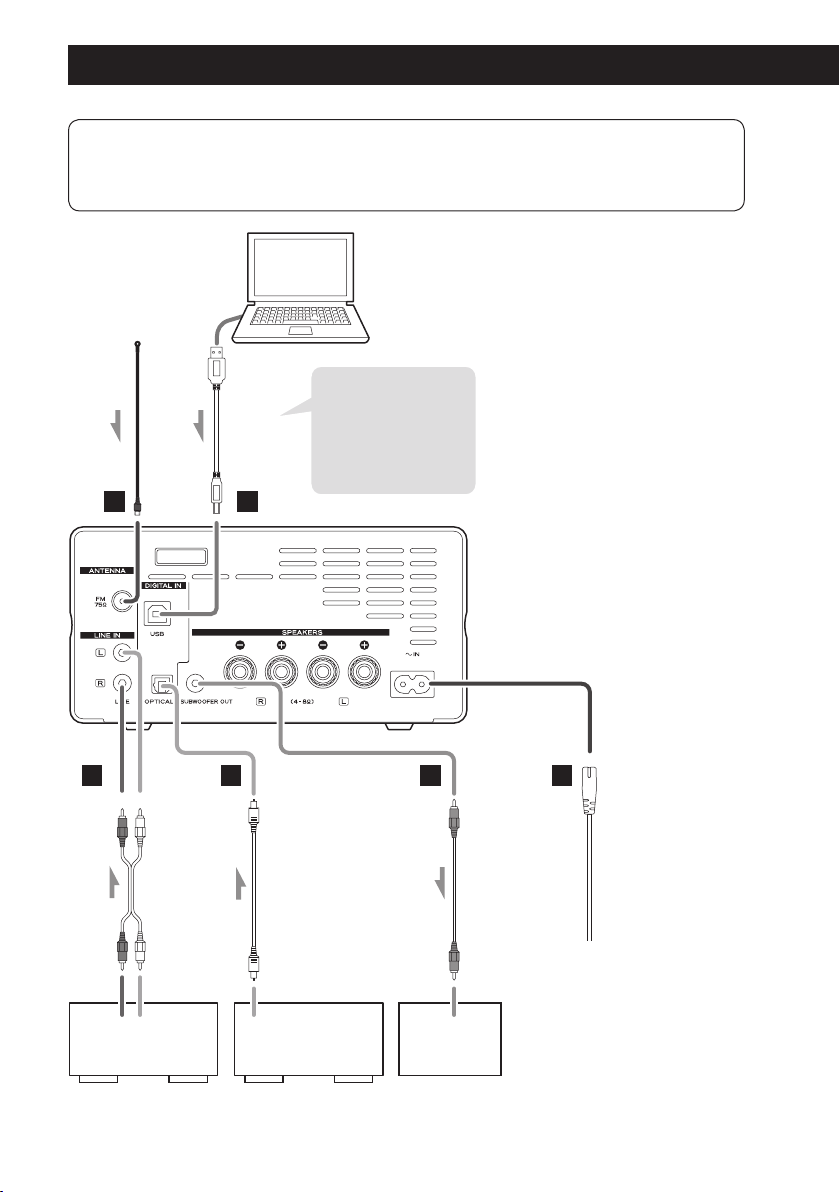
Connections
V
After all connections are complete, connect the power cord’s plug to the AC wall outlet.
o Read the instructions of each device that you intend to use with this unit.
o Do not bundle connecting cables with power cords. Doing so could cause noise.
o Be sure to connect each plug securely.
Basic FM antenna
A
RCA cable
USB cable
B
DC
Install the dedicated
driver on the computer
before connecting this
unit to it (page 25).
Optical digital cable
E F
RCA cable
Included power cord
Audio output
(LINE OUT, etc.)
Cassette deck,
MD player, etc.
10
DIGITAL OUT
(OPTICAL)
device
Line input
jack
SubwooferDigital audio output
c
Wall outlet

A
FM antenna
When receiving an FM broadcast, extend this antenna
and position it for the best reception.
After moving this unit, readjust the position again.
B
USB port
Use to input digital audio from a computer. Connect
to the USB port of a computer to input digital audio
from it.
Use a commercially-available USB cable.
ATTENTION
Install the dedicated TEAC driver software on the computer before connecting the unit (page 25).
C
Analog audio input connectors (LINE IN)
Use these to input analog audio.
Connect an audio output device such as a cassette deck
or MD player to these jacks using commercially-available
RCA cables.
Use commercially-available cables for connections.
Connect the R connector of this unit to the right (R)
connector of the audio output device and the L connector of this unit to the left (L) connector of the audio
output device.
D
Digital audio input connector (OPTICAL)
Input digital audio. Connect the digital audio output
connector of a digital audio device to it.
Use a commercially-available optical digital (TOS)
cable to make the connection.
o Sampling frequencies up to 192 kHz are supported.
V
Do not use any power cord other than the
one included with this unit. Use of other
power cords could result in fire or electric
shock. Unplug the cord from the outlet
when not using the unit for a long time.
E
SUBWOOFER OUT connector
If you want to use a subwoofer, connect it to this
connector.
o The output level is linked to the VOLUME controls
on the front of the unit and on the remote control.
F
Power inlet (~IN)
Insert the included power cord here.
After all other connections are complete, connect the
power cord's plug to a wall outlet.
11
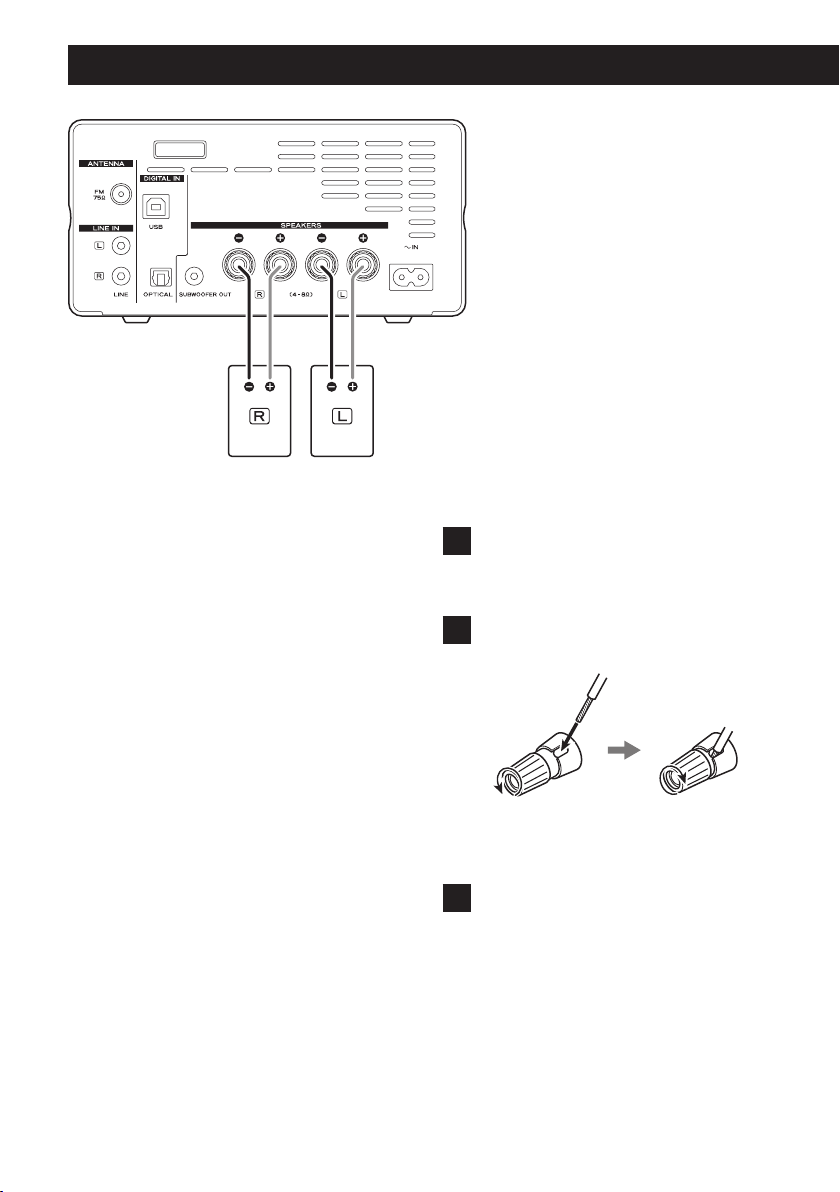
Connecting speakers
V
Precautions when making connections
o After all connections are complete, connect the power
cord’s plug to the AC wall outlet.
o Read the instructions of each device that you intend to
use with this unit.
CAUTION
o When not connecting LS-101HR speakers, use speakers
with 4–8Ω nominal impedance. If speakers with different
impedance ratings are used, the protection circuit could
operate, causing sound output to stop.
o The red speaker terminals are positive (+) and the black
speaker terminals are negative (−). Generally, the + wire
of the speaker cable is marked to distinguish it from
the − wire of the cable. Connect the marked wire to
the red + terminal and the unmarked wire to the black
− terminal.
o The metal portions of the two separate wires should
not touch. If they touch an electrical short might occur.
Shorted wires can create a fire hazard or cause equipment failure.
Never allow speaker cables to cause a short.
o Be sure to insert each plug securely. To prevent hum and
noise, avoid bundling the cables together with the AC
power cord or other cables.
LS-101HR speakers or speakers with
4–8Ω nominal impedance
How to connect speakers
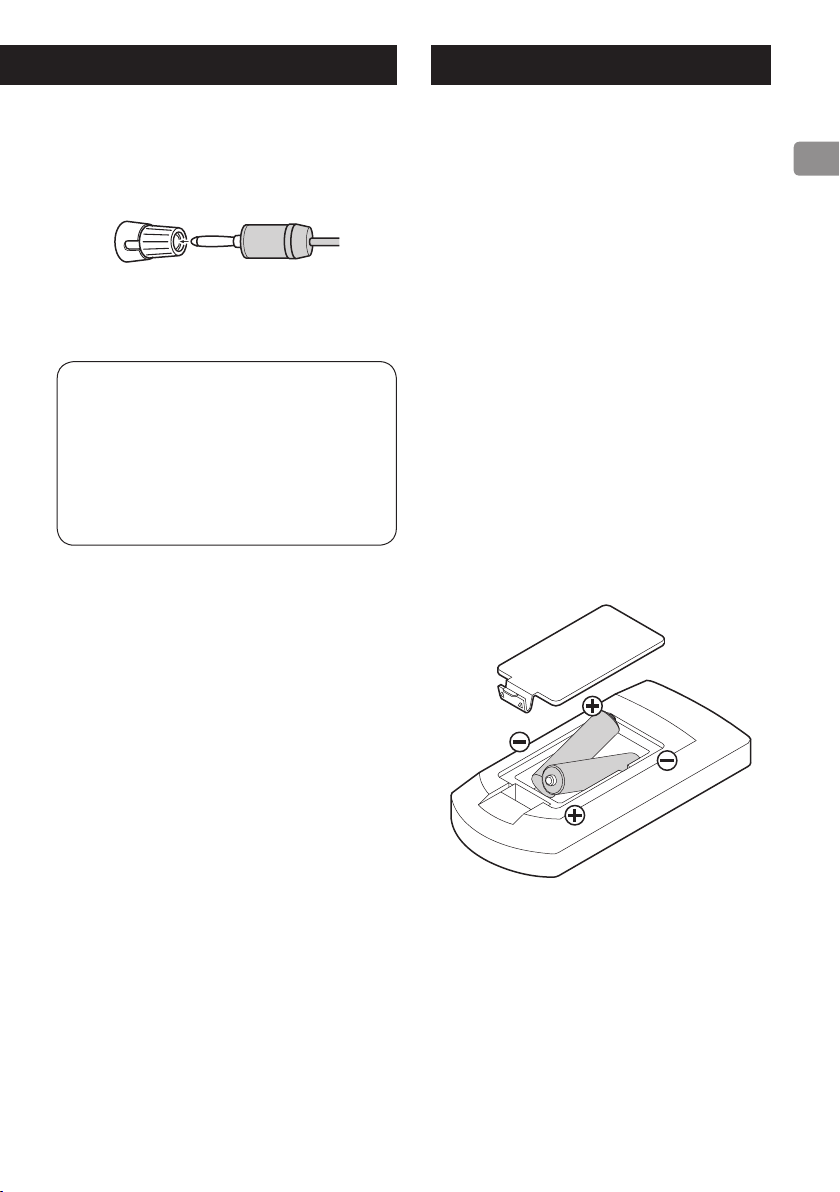
1 Turn the terminal cap counterclockwise to
loosen it. The speaker terminal caps cannot
be fully removed from the unit.
2 Insert the wire into the terminal and turn the
terminal cap clockwise to securely connect it.
o Make sure none of the wire insulation is under the
terminal and only the bare, stripped wire is touching
the terminal.
3 Conrm that the cable is fastened securely
by gently pulling the cable.
12
Using the remote control
Connecting with banana plugs
You can also make connections using commercially-available banana plugs. First, connect the banana plugs to the
speaker cables and then connect the plugs to the terminals.
o Keep the caps tightened when in use.
o Carefully read the instructions for the banana plugs that
you are using.
Notice about the European model
In accordance with European safety regulations, connecting banana plugs to speaker terminals is not
allowed on European models. The holes into which
banana plugs could be inserted have been covered
with black caps. Connect speakers using bare wires or
spade lugs. If a black cap should become separated
from its terminal, return it to its original position.
Precautions for use
V
Misuse of batteries could cause them to
rupture or leak leading to fire, injury or
the staining of items nearby. Please read
and observe the precautions on page 3
carefully.
o When using the remote control, point it toward the
remote control signal receiver on the main unit from a
distance of 5 m (16 ft) or less. Do not place obstructions
between the main unit and the remote control.
o The remote control might not work if the remote control
signal receiver on the main unit is exposed to sunlight or
bright lights. In this case, try moving the main unit.
o Beware that use of this remote control could cause the
unintentional operation of other devices that can be
controlled by infrared rays.
Installing batteries
Remove the cover on the back of the remote control, and
insert 2 AAA batteries into the case, aligning them with the
¥ and ^ indications. Replace the cover.
Battery Replacement
If the operation range of the remote control decreases, the
batteries have become exhausted. In this case, replace the
batteries with new ones.
Dispose of the used batteries according to the instructions
on them or requirements set by your local municipality.
13
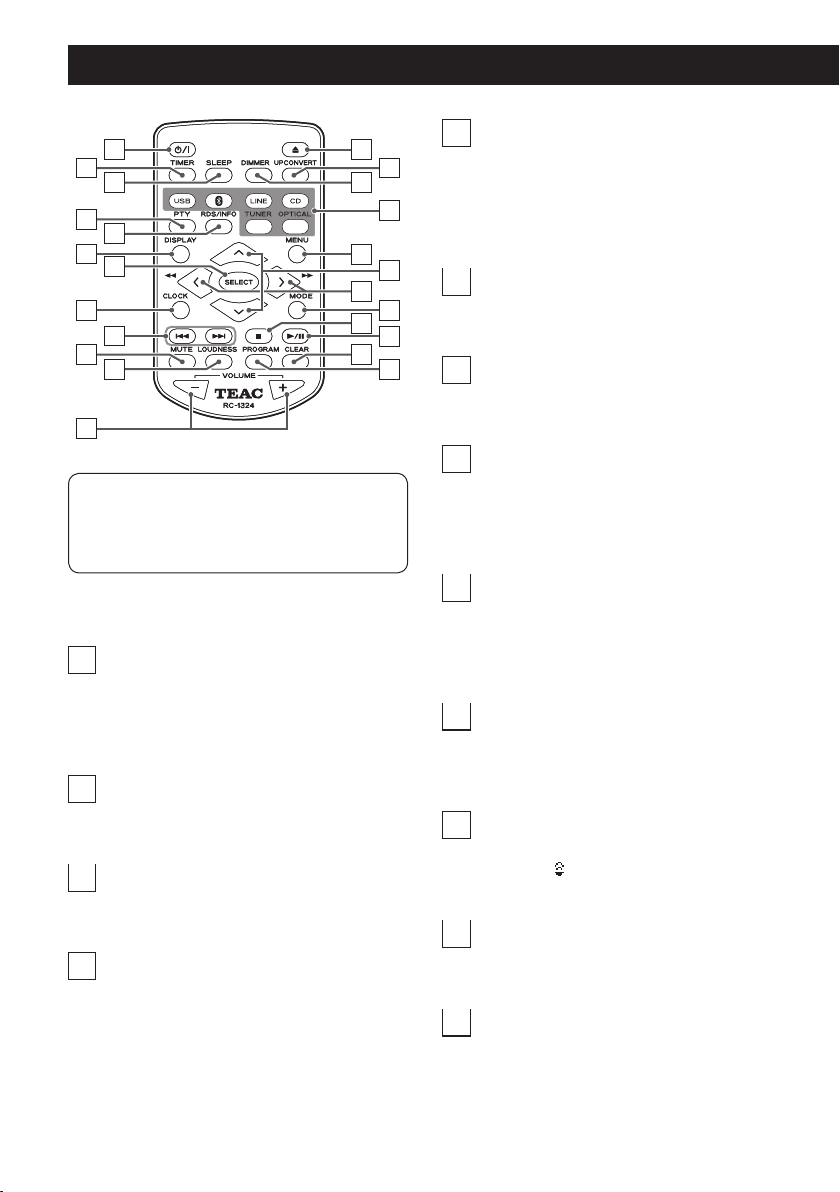
Names and functions of parts (remote control)
l
a
b
c
d
e
f
g
h
i
j
k
When both the main unit and the remote control have
buttons with the same functions, the instructions in this
manual refer only to one, but the other can be used in
the same way.
a
Standby/on (¤) button
Press this button to turn the unit on and put it in
standby. When the unit is ON, the ring around the
main unit STANDBY/ON (¤) button lights blue.
b
TIMER button
Use to set the on/off timer.
c
SLEEP button
Use to set the sleep timer.
d
PTY button
Use to search for stations by program type (PTY).
m
o
q
s
u
w
e
RDS/INFO button
n
p
r
t
When the playback source is FM, use this button
to select an RDS mode. Please ignore “INFO” on the
remote control unit. (INFO function does not work on
this unit.)
f
DISPLAY button
Press to change what is shown on the display.
v
x
g
SELECT button
Use to change settings.
h
CLOCK button
Press repeatedly to show the time and the on/off timer
setting, and then return to showing the previous information on the display.
i
Skip (.//) buttons
When the playback source is CD, use to skip to the
previous or next track.
When the playback source is FM, use to change presets.
j
MUTE button
Press this button to mute the sound temporarily. To
restore the sound, press it again.
k
LOUDNESS button
Press to turn low-frequency emphasis on and off.
When on, the icon appears on the display.
l
VOLUME (−/+) buttons
Use these to adjust the volume.
m
Eject (-) button
Press to partially eject the disc. Hold the disc by its
edges and pull it out.
14

n
UPCONVERT button
Press this button to turn upconversion on and off.
o
DIMMER button
Press to change the display brightness.
p
Source buttons
Use these buttons to select the playback source.
q
MENU button
Press to enter setting mode.
r
Direction (k/j) buttons
When the playback source is CD, use to select folders.
(MP3/WMA only)
When the playback source is FM, use to change presets.
s
Direction (l/;) buttons
Search (m/,) buttons
When the playback source is CD, press during playback
to search backward/forward.
When the playback source is FM, use to lower/raise the
frequency received. Press and hold for at least two seconds to begin automatically selecting stations.
v
Play/pause (7/9) button
When the playback source is CD and the unit is
stopped or paused, press to start disc playback.
Use this button to pause playback during playback.
When the playback source is FM, use to select presets
and frequencies.
w
CLEAR button
Use to clear programmed tracks.
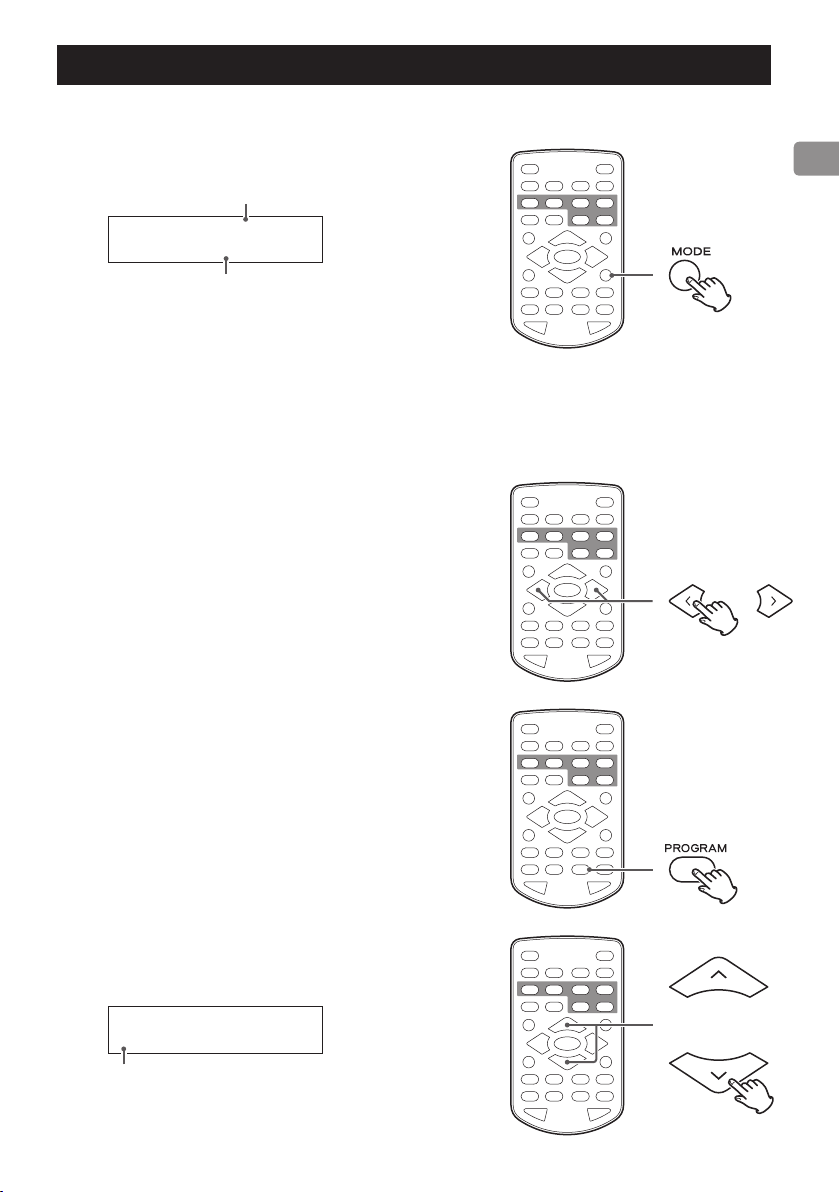
x
PROGRAM button
When the playback source is CD, use with program
playback.
When the playback source is FM, use with radio station
presets.
t
MODE button
When the playback source is CD, use to switch
between repeat playback and shuffle playback.
When the playback source is FM, use to switch
between stereo and mono.
u
Stop (8) button
Press during playback to stop playback.
15

Names and functions of parts (main unit)
A
J
BC DE
FG HI
A
STANDBY/ON (¤) button
Press this button to turn the unit on and put it in
standby. When the unit is ON, the ring around the
button lights blue.
o When this unit is in standby mode, it consumes
standby power. For this reason, we use the term
“standby” rather than “off ”.
B
C
D
E
Disc slot
Insert a disc here. After a disc is inserted partway, the
unit will automatically draw it in.
Skip (.//) buttons
When the playback source is CD, use to skip to the
previous or next track. During playback, press and hold
to search backward/forward.
Play/pause (7/9) button
When paused, press to resume playback.
Press during playback to pause.
Press again to resume playback.
Stop/eject (8/-) button
Press during playback to stop playback.
When stopped, press to partially eject the disc. Hold
the disc by its edges and pull it out.
16
F
PHONES jack
Connect headphones (3.5mm stereo mini plug) here.
o When headphones are connected to the unit,
audio will not be output from the SPEAKERS terminals on its back.
G
SOURCE knob
Turn to select the playback source.
H
Remote control signal receiver
Receives signals from the remote control. When operating the remote control, point it at this sensor.
I
Display
This shows a variety of information.
J
VOLUME knob
Use this knob to adjust the volume. To increase the
volume, turn the knob clockwise. To decrease the volume, turn the knob counterclockwise.
o When the volume is adjusted with the remote
control, the main unit volume knob will not turn
in response.
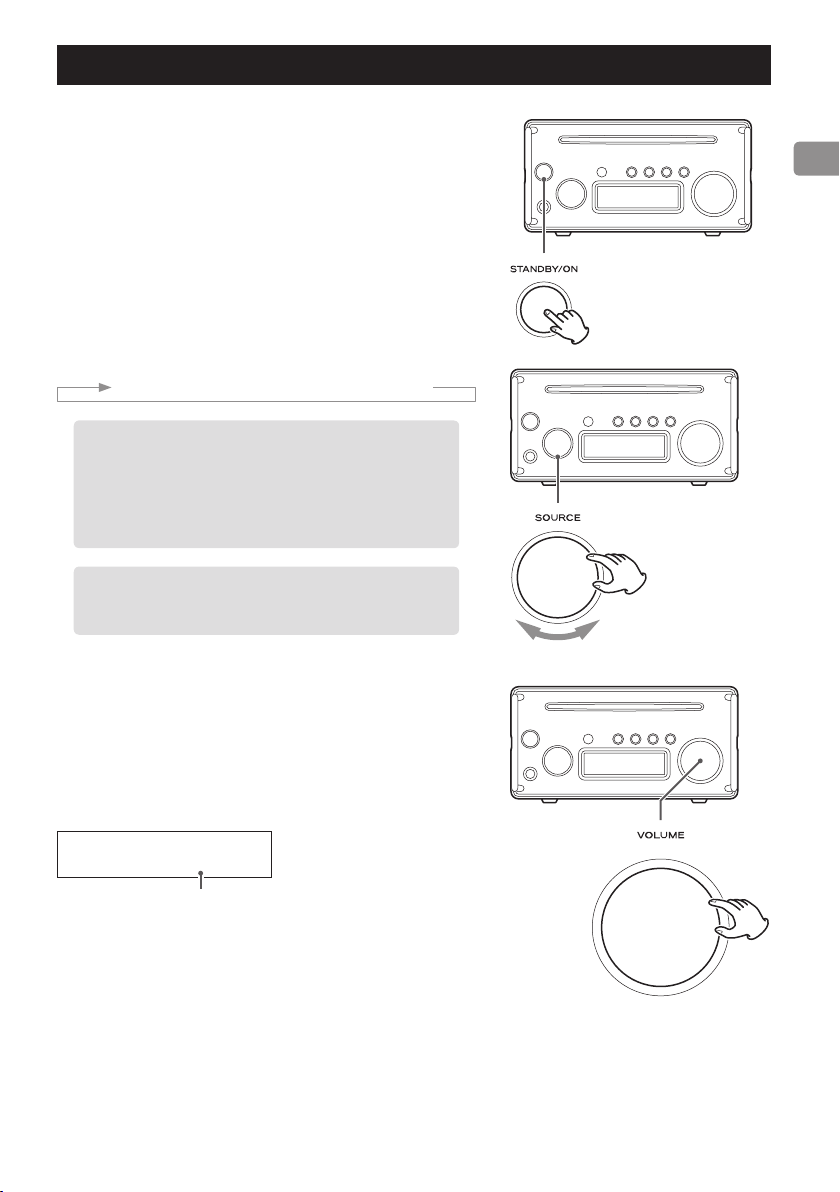
Basic operation
Turning the unit on/off (standby)
Press the STANDBY/ON (¤) button to turn the unit on. The indicator
lights blue when on.
Press the button again to put the unit in standby. The indicator becomes
unlit.
Changing the playback source
Turn the SOURCE knob to select the playback source.
The name of the selected playback source is shown.
Turn the SOURCE knob clockwise to change the playback source in the
following order.
USB w Bluetooth w LINE w CD w FM w OPTICAL
o If a digital audio format other than PCM is input, “No Signal”
will be shown and no sound will be output.
If this is the case, the connected digital audio output device
might have a “PCM” digital output format setting that would
enable playback. Refer to the operation manual for that device
to make this setting.
o To use this unit with a Windows computer, you must install
the dedicated driver on that computer before setting this unit
to USB and playing audio files on the computer (page 25).
Adjusting the volume
Turn the VOLUME knob or use the VOLUME buttons on the remote control
to adjust the volume to the appropriate level.
o The volume setting will be shown when you turn the VOLUME knob.
As the value increases, the volume becomes louder.
Display example
CD
VOLUME 15
Volume
MIN: Minimum volume
MAX: Maximum volume
17
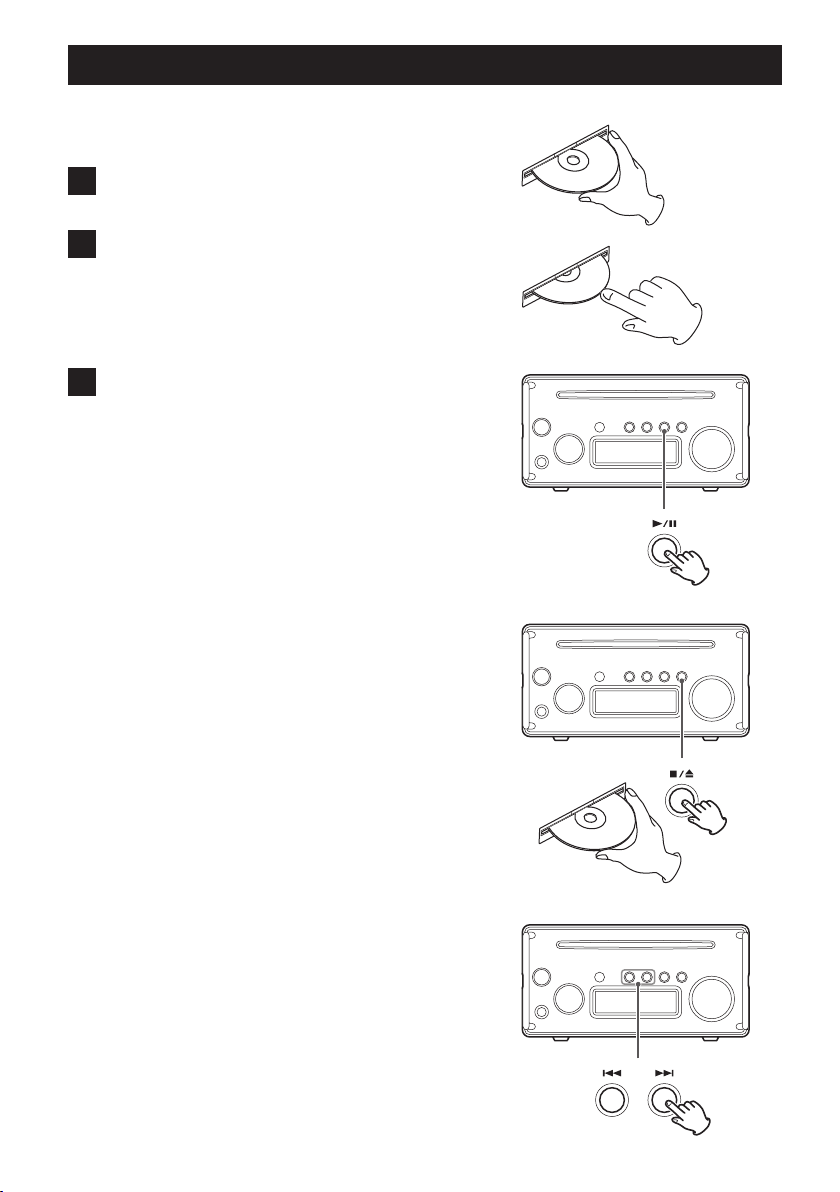
Listening to CDs
Playing a CD
1 Hold the disc by its edges with the labeled side up and
insert it partway.
2 Push the disc in further until just before it disappears.
It will automatically be drawn in to the slot.
If a disc becomes caught or is otherwise difficult to insert, do not
push it in forcefully. Press the eject (-) button and remove the
disc once before trying to reinsert it. (Pushing a disc forcefully could
damage the unit.)
3 Press the play/pause (7/9) button.
During playback, PLAY appears at the top of the display.
o If CD Auto Start is ON when a CD is loaded, the playback source
will be set to CD and playback will start automatically (page
24).
Pausing playback
Press the play/pause (y/9) button to pause playback.
To resume playback from the position where it was paused, press the play/
pause (y/9) button again.
When paused, PAUSE appears at the top of the display.
Stopping playback
Press the stop/eject (8/-) button to stop playback.
Ejecting a disc
When CD playback is stopped, press the stop/eject (8/-) button.
Press to partially eject the disc. Hold the disc by its edges and pull it out.
o Pressing the stop/eject (8/-) button will eject the disc regardless of
the selected playback source.
Skipping to search for a track
Press a skip (.//) button to skip to the previous or next track. Keep
pressing until you reach the track you want.
o During playback, press the . button once to return to the begin-
ning of the current track. When you want to play an earlier track, press
the . button repeatedly until you reach that track.
o During program playback, tracks from earlier or later in the program
will be played back.
18
Listening to FM radio
FM mode
Press the MODE button to switch between stereo and mono reception.
Display
example
FM STEREO
107.90MHz
STEREO
Receive stereo FM broadcasts in stereo.
o “STEREO” will be shown when receiving in stereo.
MONO
Receive FM broadcasts in mono. When the reception of an FM stereo
broadcast is poor, select this mode. The sound becomes mono, but noise is
also reduced, making it sound better.
Changing the received frequency
Increasing the received frequency
Press the direction (;) button to increase the received frequency one step.
Press and hold the direction (;) button to search for a station in the
higher-frequency direction.
Decreasing the received frequency
Press the direction (l) button to decrease the received frequency one step.
Press and hold the direction (l) button to search for a station in the
lower-frequency direction.
FM mode
Frequency range
Setting presets automatically
The unit can automatically search for stations that it can receive and assign
them to preset numbers.
Press and hold the PROGRAM button.
The unit will search for stations from the lowest receivable frequency to the
highest and assign them to preset numbers.
o After 20 presets have been assigned, “Full” will blink on the display and
automatic preset assignment will stop.
Selecting presets
Use the direction (k/j) buttons to change the preset number.
Display
FM
example
P03 87.5MHz
Preset number
19
RDS (European model only)
The Radio Data System (RDS) is a broadcasting service that allows stations
to send additional information along with the regular radio program signal.
o RDS works on the FM frequency band in Europe only.
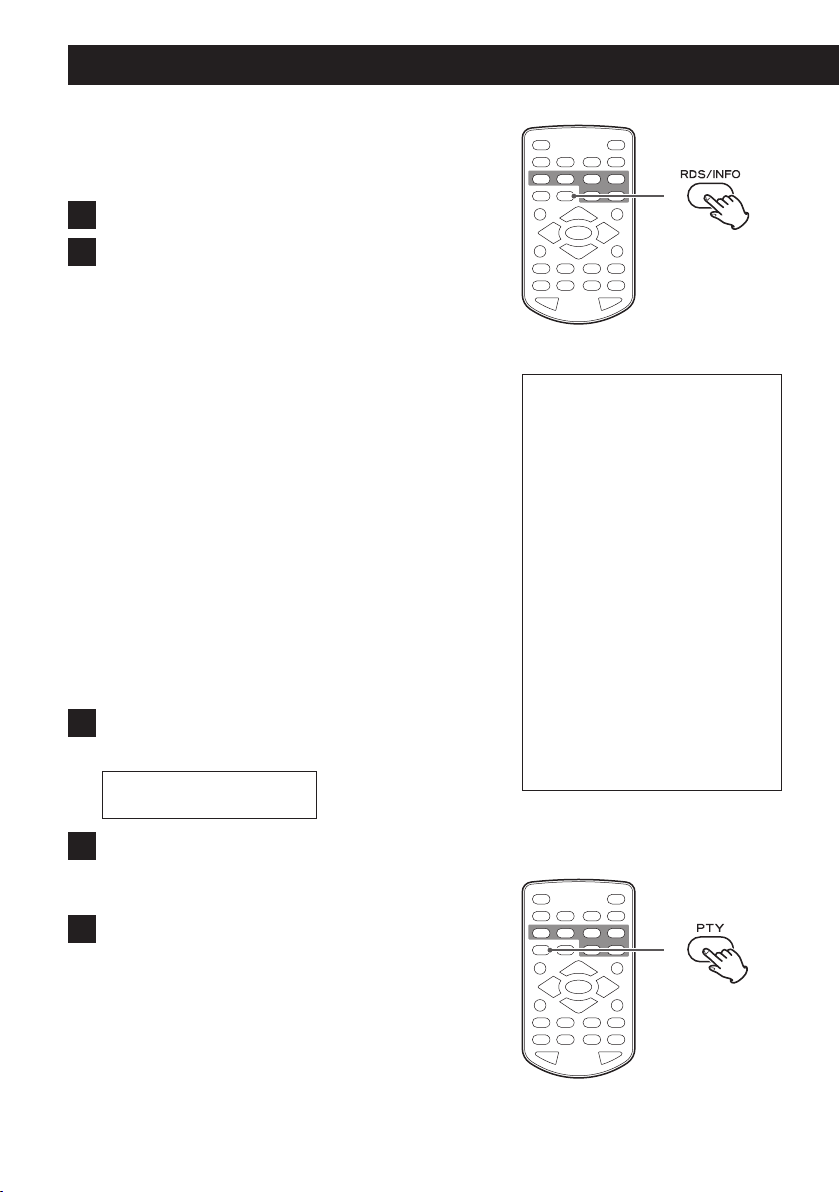
1 Tune in to an FM RDS station (page 17).
2 Press the remote control RDS button.
Pressing the RDS button cycles through RDS modes as follows:
Program service (PS)
When you select Program service, “PS” will appear to the right of
“FM” and then the program service name or station's name will be
displayed. If there is no program service data, the frequency will be
displayed.
RDS Program type (PTY)
When you select RDS Program type, “PTY” will appear to the right of
“FM” and then the program type will be displayed.
RDS Radio text (RT)
When you select RDS Radio text, “RT” will appear to the right of “FM”
and then information from the station consisting of up to 64 characters will be displayed.
RDS Clock time (CT)
Displays time information provided by the station.
PTY search
You can search for stations by program type. This function is available only
through the RDS services of FM frequency stations in Europe.
1 Press the PTY button.
“PTY SEARCH“ appears on the display.
FM PTY SEARCH
< NEWS >
The clock setting of this unit is automatically
adjusted according to the RDS Clock time
(CT) data it receives.
To turn on automatic clock adjustment,
hold down the RDS button for more
than 8 seconds.
o When automatic clock adjustment is
enabled, the unit adjusts its clock in
response to received CT data no matter
which RDS mode is selected.
If you tune in an RDS station that is broadcasting incorrect CT data, the clock might
be incorrectly adjusted. This could eventually affect timer operation.
If you do not want the clock of this unit to
be set according to received CT data, turn
off automatic clock adjustment.
To turn off automatic clock adjustment,
hold down the RDS button for more
than 8 seconds.
2 Use the direction (k/j) buttons to select the desired
program.
You can select from 31 program types (PTY).
3 Press the ENTER button.
The unit starts searching.
o When the program type that you have selected is found, search-
ing stops and the program type will be displayed.
o If a matching program type is not found during PTY Search, it
will stop at the frequency set before searching started.
o If you want to stop searching, press the PTY button.
20

NEWS:
Brief announcements, events, public opinion, reports and
real situations.
AFFAIRS:
Suggestions, including practical announcements other than
news, documents, discussion and analysis.
INFO:
Useful and reference information, such as weather forecasts,
consumer guides and medical advice.
SPORT:
Sports-related programs.
EDUCATE:
Educational and cultural information.
DRAMA:
All kinds of radio concerts and serial dramas.
CULTURE:
All aspects of national or local culture, including religious
events, philosophy, social science, language and theatre.
SCIENCE:
Programs on natural science and technology.
VARIED:
Popular programs such as quizzes, entertainment news,
interviews, comedy and satire.
POP M:
Programs of commercial and popular songs, including music
sales volumes, etc.
ROCK M:
Modern music generally composed and played by young
musicians.
EASY M:
Popular music usually lasting for less than 5 minutes.
LIGHT M:
Classical music, instrumental music, chorus, and light music
favored by general audiences.
CLASSICS:
Orchestral music including great operas and symphonies,
chamber music and so on.
OTHER M:
Other music styles, including rhythm & blues and reggae.
WEATHER:
Weather reports and forecasts.
FINANCE:
Financial reports, commerce and trading.
CHILDREN:
Children’s programs.
SOCIAL:
Social affairs.
RELIGION:
Religious programs.
PHONE IN:
Programs in which the public expresses its views by phone.
TRAVEL:
Travel reports.
LEISURE:
Programs concerning recreational activities.
JAZZ:
Jazz music.
COUNTRY:
Country music.
NATION M:
National music.
OLDIES:
Music from the so-called golden age of popular music.
FOLK M:
Folk music.
DOCUMENT:
Documentaries.
TEST:
Broadcast when testing emergency broadcast equipment or
receivers. Not intended for searching or dynamic switching
for consumer receivers.
ALARM:
A program with notifications about emergencies and natural
disasters.
21
Bluetooth® function
Bluetooth notes
When using this unit with a mobile phone or other Bluetooth
devices, they should be no more than about 10 m (33 ft)
apart. Depending on the circumstances of use, however, the
effective transmission distance might be shorter.
Wireless communication with every device that supports
Bluetooth wireless technology is not guaranteed.
To determine the compatibility between this unit and
another device that supports Bluetooth wireless technology,
refer to that device’s operation manual or contact the shop
where you purchased it.
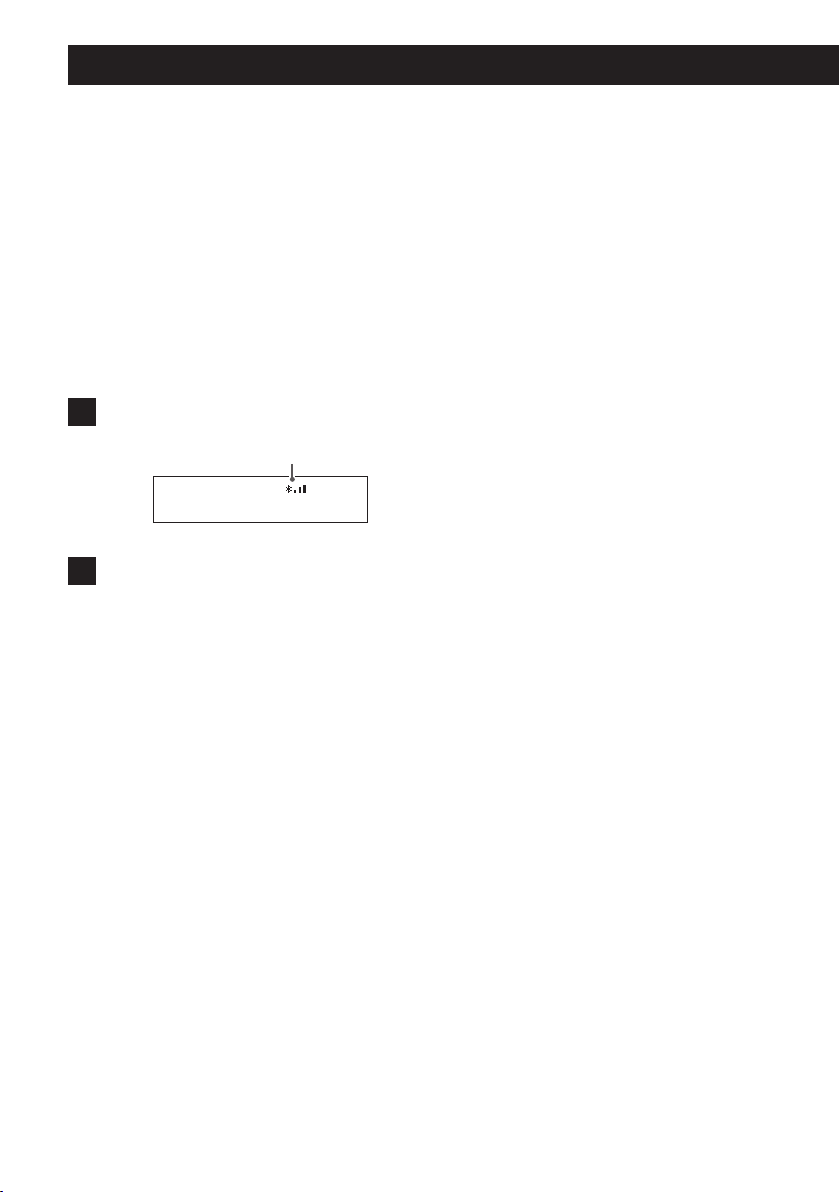
1 Turn the SOURCE knob to select Bluetooth.
Display
example
Bluetooth indicator
Bluetooth
PM 07:28
2 Pair or connect with another Bluetooth
device.
Pairing with another Bluetooth device
Pairing this unit with another Bluetooth device is necessary the first time you connect with that Bluetooth
device.
If no paired Bluetooth device is found, this unit will
become ready to pair with another device. When this
unit is ready to pair, its Bluetooth indicator blinks.
When this unit's Bluetooth indicator is blinking, conduct pairing using the other Bluetooth device.
For details, refer to the operation manual of that
Bluetooth device.
When pairing with a Bluetooth device that supports
aptX® or AAC, it will automatically connect using aptX
or AAC.
Connecting with an already paired Bluetooth
device
When the playback source of this unit is set to
Bluetooth and the other Bluetooth device is on, the
Bluetooth function will be enabled and they should
connect automatically.
If they do not connect automatically, connect them
manually.
o If a request for a passcode appears on the screen
of the Bluetooth device, enter “0000” (four zeros).
o When this unit and the other Bluetooth device are
connected, the Bluetooth indicator stops blinking
and stays lit.
o When pairing or connecting with another Bluetooth
device, they should be within a few meters of each
other. If they are too far apart, pairing and connection afterwards might become impossible.
o When Bluetooth is selected as the playback source
for this unit, the Bluetooth device that was last
connected to it will automatically be connected
again. If you want to connect with a different
Bluetooth device, conduct pairing with that
device.
o This unit will store information for up to eight
pairable devices. If more than eight devices are
paired, the oldest pairing information will be deleted
and the new pairing information will be added.
V
ATTENTION
Even when this unit or the other Bluetooth device is
ready to connect, if the Bluetooth indicator on this unit
continues to blink for 10 minutes, it will automatically
enter standby mode. To use this unit, you must turn
it on again.
If the indicator continues blinking for a long time,
restart both this unit and the other Bluetooth device
and then reconnect them.
22
Settings
3 Start playback on the other Bluetooth
device.
o Confirm that the volume is turned up on the other
Bluetooth device. If you do not turn up the volume on the playback device, no sound might be
output from this unit.
o Depending on the connected Bluetooth device,
you might not be able to adjust the volume. For
details, refer to the operation manual of that
Bluetooth device.
Warning about Bluetooth device
operation
You can use the following buttons on the main unit or the
remote control to control a connected Bluetooth device.
Play/pause (7/9) button
Skip (.//) buttons
o Depending on the Bluetooth device being used, it might
not respond to remote control operations and actual
operations could differ.
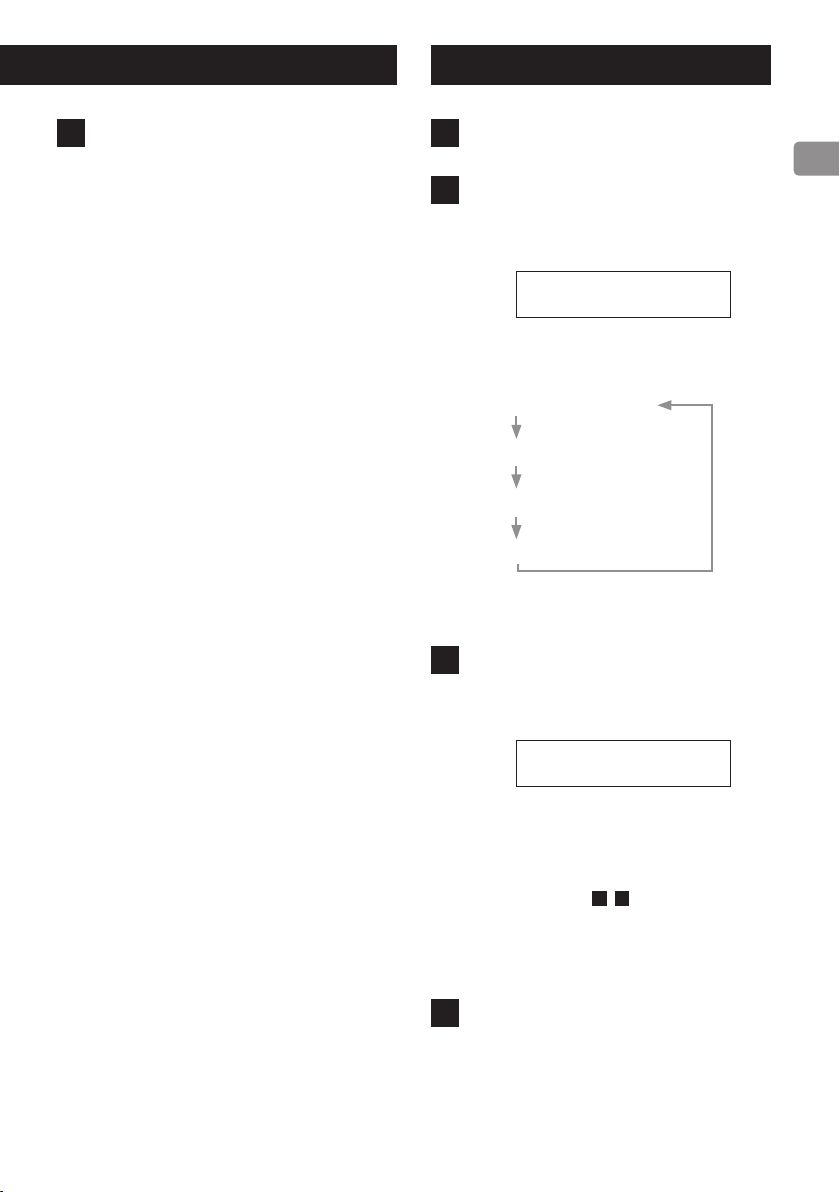
1 Press the MENU button.
2 Use the direction (l/;) buttons to change
the setting item and press the SELECT
button.
Display
Menu
example
< 1.Set clock >
Press the ; button to cycle through the following
items.
1.Set clock
2.CD setting
3.APS setting
4.FA. Reset
Press the l button to cycle through these items in
reverse order.
3 Use the direction (k / j) buttons to
change the setting, and press the SELECT
button to conrm the change.
Display
Current Time
example
12H/24H
The selected item blinks.
o When there are multiple settings, press the SELECT
button to show the next setting.
Repeat procedures 2–3 to set other items as
necessary.
o Press the MENU button instead to cancel the set-
ting change.
4 Press the MENU button to complete mak-
ing settings.
23
Settings (continued)
Set clock (time settings)
Set the clock in the following manner.
Current Time (time display)
Select 12-hour or 24-hour display.
Display
Current Time
example
12H/24H
Current Time (time shown)
Set the current time in order of hours and minutes.
Display
Current Time
example
PM 11:45
CD setting
CD Auto Start
o This is set to OFF when shipped new from the factory.
OFF: CD will not automatically play when loaded.
ON: CD will automatically play when loaded.
Display
CD Auto Start
example
OFF
APS (automatic power saving)
setting
Display
Menu
example
APS OFF
o This is set to ON when shipped new from the factory.
OFF: The automatic power saving function is disabled.
ON: The automatic power saving function is enabled.
FA. Reset (restoring default settings)
Display
Factory Reset
example
OK?
24
When “OK?” appears, press the SELECT button to restore settings to their factory default values.
The unit will enter standby after settings are restored.

Playing back music on a computer
Installing the driver on a computer
This unit can be connected by USB and used with a computer running one of the following operating systems.
Operation is not guaranteed with operating systems other
than the following (As of September 2015).
Mac OS
The unit works with the following versions.
OS X Lion 10.7
OS X Mountain Lion 10.8
OS X Mavericks 10.9
OS X Yosemite 10.10
This unit can be operated with the standard OS driver, so
there is no need to install a driver.
Windows OS
The unit works with the following versions.
Windows 7 (32/64-bit)
Windows 8 (32/64-bit)
Windows 8.1 (32/64-bit)
Windows 10 (32/64-bit)
Installing the driver on the computer
Before you can use this unit to play files on a Windows computer, you must first download the dedicated driver from the
TEAC Global Site and install it on the computer.
TEAC Global Site
http://teac-global.com/
About the transmission mode
This unit connects using high-speed asynchronous mode.
Transmittable sampling frequencies are 44.1kHz, 48 kHz,
88.2kHz, 96kHz, 176.4kHz and 192kHz.
When properly connected, you will be able to select “TEAC
USB AUDIO DEVICE” as an audio output from the computer.
o In asynchronous mode, the audio data sent from the
computer is processed using this unit's clock, reducing
data transmission jitter.
Downloading the TEAC HR Audio
Player application
Our TEAC HR Audio Player application (Mac and Windows
versions available) supports playback of high-resolution
audio files. You can download it from TEAC Global Site.
TEAC Global Site
http://teac-global.com/
ATTENTION
Install the dedicated driver software on the computer
before connecting the unit by USB.
If a computer is connected to this unit before the driver is
installed, proper operation will not be possible.
o For instructions about driver installation procedures,
please access the Downloads page from the TEAC Global
site (http://teac-global.com/).
o Depending on the combination of hardware and soft-
ware, proper operation might not be possible even with
the above operating systems.
25

Troubleshooting
General
The unit does not turn on.
(The power switch LED does not light.)
e Check that the power cord is completely plugged into
the power outlet. If the outlet is switched, confirm that
the switch is in the ON position.
e Connect a different electrical device to the outlet to
confirm that it is supplying power.
Remote control does not work.
e Point the remote control at the front panel of the unit
from a distance of less than about 5 m (16 ft).
e The remote control will not work if there is an obstruc-
tion between it and the main unit. In this case, try
changing the position.
e If the batteries are exhausted, replace both of them
with new ones.
A television set or another device operates in error.
e Some televisions that are able to receive signals from
wireless remote controls might be operated in error by
this unit's remote control. If this should occur, use the
main unit's buttons.
No sound is output or very little sound is output.
e Confirm connections with the amplifier and speakers.
e Confirm connections with other devices.
There is noise.
e Place the unit as far away as possible from TVs, micro-
wave ovens and other devices that have strong
magnetism.
Radio
A station cannot be received. The reception is poor.
e Select a broadcast station.
e If reception is poor, try repositioning the antenna.
e If a TV is near the unit, turn the TV off.
Stereo broadcasts become mono.
e Press the remote control FM MODE button to select
stereo.
CD Player
Playback is not possible.
e If the disc is upside down, reload it with the labeled
side up.
e If the disc is dirty, wipe it clean.
e Depending on the quality and recording conditions
of the disc, some CD-R/CD-RW discs cannot be played
back.
e CD-R/CD-RW discs that have not been finalized cannot
be played back.
The sound skips.
e Vibrations can cause the sound to skip. Install this unit
in a stable location.
e If the disc is dirty, wipe it clean.
e Do not use discs that are scratched or cracked.
MP3 and WMA files
Playback is not possible.
e Check the file extension. Files are recognized by their
extensions: “.mp3” for MP3 files and “.wma” for WMA
files.
e The MP3/WMA file might be damaged.
e Check the file format. This unit can play MP3 and WAV
files (page 27)
The names of tracks, artists and albums are not shown.
e There is no ID3 tag information for the music file. Use a
computer, for example, to prepare MP3/WMA files with
corrected ID3 tag information.
ID3 tags cannot be used with WAV files.
Some characters are not shown correctly.
e If the file information uses Japanese, Chinese or other
double-byte characters, playback is possible but the
name will not be shown correctly.
26
Since this unit uses a microcontroller, external noise and
other interference can cause the unit to malfunction. If
this occurs, unplug the power cord, wait for a while, and
then turn the power back on to restart operations.

Specifications
CD Player
Playback media ............................ CD-DA, CD-R/RW
Only 12cm discs can be used
Format ........................... ISO9660 LEVEL 1/2/JOLIET
Maximum number of files ............250 (including folders)
Maximum number of folders. . . . . . . . . . . . . . . . . . . . . . . . . . . . . . 99
Playable audio formats
MP3
Extension ..............................“.mp3”, “.MP3”
Bit rate ................... 32 kbps – 320 kbps or VBR
Sampling frequency
16 kHz, 22.05 kHz, 24 kHz, 32 kHz, 44.1 kHz, 48 kHz
Supported standards .......MPEG-1/2 Audio Layer-3
WMA
Extension .............................“.wma”, “.WMA”
Bit rate ................... 32 kbps – 320 kbps or VBR
Sampling frequency
8kHz, 11.025kHz, 16kHz, 22.05kHz, 32kHz,
44.1kHz, 48kHz
Supported standard ......................WMA ver.9
Digital audio input
Supported sampling frequencies (PCM)
44.1 kHz, 48 kHz, 88.2 kHz, 96 kHz, 176.4 kHz, 192 kHz
Supported bit depths ..................................16/24
Bluetooth
Bluetooth version .........................................3.0
Output ............................................... Class 2
Supported profile ......................................A2DP
Codecs .......................................SBC, AAC, aptX
Amplifier Section
Maximum output ........26 W + 26 W (JEITA 10%, 1 kHz, 4 Ω)
Rated output ............. 20 W + 20 W (JEITA 1%, 1 kHz, 4 Ω)
Total harmonic distortion ............ 0.08% (1 kHz, 4 Ω, 1 W)
Signal-to-noise ratio
LINE IN ............................................90 dB
(IHF-A/LPF 20kHz/1kHz, 2V input)
Frequency Response ............. 20 Hz – 45 kHz (−5 dB)
General
Power supply
Model for Europe ............AC 220–240 V (50 Hz, 60 Hz)
Model for USA/Canada ...........AC 120 V (50 Hz, 60 Hz)
Power consumption ....................................21 W
External dimensions
182 × 93 × 221 mm (7 1/4" × 3 3/4" × 8 3/4")
(W × H × D, including protrusions)
Weight .......................................2.2kg (4 7/8 lb)
Operating temperature ....................... +5°C to +35°C
Operating humidity .......... 5% to 85% (no condensation)
Storage temperature ........................ −20°C to +55°C
Included accessories
Power cord × 1
Remote control (RC-1324) × 1
Batteries for remote control (AAA) × 2
Basic FM antenna × 1
Owner’s manual (this document) × 1
Headphones output
Rated output .................. 80 mW + 80mW (32 Ω, 1 kHz)
Total harmonic distortion ............................. 0.03%
Tuner
Frequency range
FM ...............................87.5 MHz to 108.0 MHz
o In order to improve the product, specifications and appear-
ance could be changed at any time without warning.
o Weight and dimensions are approximate.
o Illustrations in this manual might differ in part from the
actual product.
27

INSTRUCTIONS DE SÉCURITÉ IMPORTANTES
ATTENTION: POUR RÉDUIRE LE RISQUE D’ÉLECTROCUTION,
NE RETIREZ PAS LE CAPOT (OU L’ARRIÈRE). AUCUNE PIÈCE
INTERNE N’EST RÉPARABLE PAR L’UTILISATEUR. CONFIEZ
TOUTE RÉPARATION À UN SERVICE APRÈS-VENTE QUALIFIÉ.
Le symbole d’éclair à tête de flèche dans
<
B
AVERTISSEMENT : POUR PRÉVENIR LES
RISQUES D’INCENDIE ET D’ÉLECTROCUTION,
N’EXPOSEZ PAS CET APPAREIL À LA PLUIE NI
À L’HUMIDITÉ.
un triangle équilatéral sert à prévenir l’utilisateur de la présence dans l’enceinte
du produit d’une «tension dangereuse»
non isolée d’une grandeur suffisante pour
constituer un risque d’électrocution pour
les personnes.
Le point d’exclamation dans un triangle
équilatéral sert à prévenir l’utilisateur de
la présence d’instructions importantes de
fonctionnement et de maintenance (entretien) dans les documents accompagnant
l’appareil.
ATTENTION
o NE RETIREZ PAS LES CAPOTS EXTERNES OU BOÎTIERS
POUR EXPOSER L’ÉLECTRONIQUE. AUCUNE PIÈCE
INTERNE N’EST RÉPARABLE PAR L’UTILISATEUR.
o SI VOUS RENCONTREZ DES PROBLÈMES AVEC CE
PRODUIT, CONTACTEZ LE MAGASIN OÙ VOUS AVEZ
ACHETÉ L’UNITÉ. N’UTILISEZ PAS LE PRODUIT TANT QU’IL
N’A PAS ÉTÉ RÉPARÉ.
o L’UTILISATION DE COMMANDES, DE RÉGLAGES OU
LE SUIVI DE PROCÉDURES AUTRES QUE CE QUI EST
DÉCRIT DANS CE DOCUMENT PEUT PROVOQUER UNE
EXPOSITION À UN RAYONNEMENT DANGEREUX.
La plaque signalétique se trouve sous l’unité comme représenté ci-dessous.
Façade
Plaque signalétique
The Bluetooth® word mark and logos are registered trademarks owned by Bluetooth SIG, Inc. and any use of such marks by TEAC
CORPORATION is under license.
© 2013 CSR plc and its group companies. The aptX® mark and the aptX logo are trade marks of CSR plc or one of its group companies and may be registered in one or more jurisdictions.
This product is protected by certain intellectual property rights of Microsoft. Use or distribution of such technology outside of
this product is prohibited without a license from Microsoft.
Windows is a registered trademark of Microsoft Corporation in the United States and/or other countries.
Mac, Mac OS and OS X are trademarks of Apple Inc., registered in the U.S. and other countries.
Les autres noms de société, noms de produit et logos présents dans ce document sont des marques commerciales ou déposées
de leurs détenteurs respectifs.
28
1) Lisez ces instructions.
2) Conservez ces instructions.
3) Tenez compte de tous les avertissements.
4) Suivez toutes les instructions.
5) N’utilisez pas cet appareil avec de l’eau à proximité.
6) Ne nettoyez l’appareil qu’avec un chiffon sec.
7) Ne bloquez aucune ouverture de ventilation. Installez-le
conformément aux instructions du fabricant.
8) N’installez pas l’appareil près de sources de chaleur telles
que des radiateurs, bouches de chauffage, poêles ou
autres appareils (y compris des amplificateurs) dégageant de la chaleur.
9) Ne neutralisez pas la fonction de sécurité de la fiche
polarisée ou de terre. Une fiche polarisée a deux broches, l’une plus large que l’autre. Une fiche de terre a
deux broches identiques et une troisième broche pour
la mise à la terre. La broche plus large ou la troisième
broche servent à votre sécurité. Si la fiche fournie n’entre
pas dans votre prise, consultez un électricien pour le
remplacement de la prise obsolète.
10) Évitez de marcher sur le cordon d’alimentation et de
le pincer, en particulier au niveau des fiches, des prises
secteur, et du point de sortie de l’appareil.
11) N’utilisez que des fixations/accessoires spécifiés par le
fabricant.
12) Utilisez-le uniquement avec
des chariots, socles, trépieds,
supports ou tables spécifiés
par le fabricant ou vendus
avec l’appareil. Si un chariot
est utilisé, faites attention
à ne pas être blessé par un
renversement lors du déplacement de l’ensemble chariot/appareil.
13) Débranchez cet appareil en cas d’orage ou de non utilisation prolongée.
14) Confiez toute réparation à des techniciens de maintenance qualifiés. Une réparation est nécessaire si l’appareil
a été endommagé d’une quelconque façon, par exemple
si le cordon ou la fiche d’alimentation est endommagé,
si du liquide a été renversé sur l’appareil ou si des objets
sont tombés dedans, si l’appareil a été exposé à la pluie
ou à l’humidité, s’il ne fonctionne pas normalement, ou
s’il est tombé.
o L’appareil tire un courant nominal de veille de la prise
secteur quand son interrupteur POWER ou STANDBY/ON
n’est pas en position ON.
o La fiche secteur est utilisée comme dispositif de décon-
nexion et doit donc toujours rester disponible.
o Des précautions doivent être prises en cas d’utilisation
d’écouteurs ou d’un casque avec le produit car une
pression sonore excessive (volume trop fort) dans les
écouteurs ou dans le casque peut causer une perte
auditive.
ATTENTION
o N’exposez pas cet appareil aux gouttes ni aux
éclaboussures.
o Ne placez pas d’objet rempli de liquide sur l’appareil,
comme par exemple un vase.
o N’installez pas cet appareil dans un espace confiné
comme une bibliothèque ou un meuble similaire.
o L’appareil doit être placé suffisamment près de la
prise de courant pour que vous puissiez à tout
moment attraper facilement la fiche du cordon
d’alimentation.
o Si le produit utilise des piles/batteries (y compris un
pack de batteries ou des piles installées), elles ne
doivent pas être exposées au soleil, au feu ou à une
chaleur excessive.
o PRÉCAUTION pour les produits qui utilisent des
batteries remplaçables au lithium: remplacer une
batterie par un modèle incorrect entraîne un risque
d’explosion. Remplacez-les uniquement par un type
identique ou équivalent.
V
Précautions concernant les piles
Un mauvais emploi des piles peut entraîner leur rupture ou
leur fuite, avec pour conséquence un incendie, des blessures
ou la salissure des objets proches. Veuillez lire et suivre attentivement les précautions suivantes.
o Veillez à insérer les piles avec leurs pôles positif (¥) et
négatif (^) correctement orientés.
o Utilisez des piles du même type. N’utilisez jamais des
types de pile différents ensemble.
o Si la télécommande doit rester inutilisée durant une
période prolongée (plus d’un mois), retirez ses piles pour
éviter qu’elles ne coulent.
o Si les piles coulent, essuyez le liquide dans le compar-
timent des piles et remplacez les piles par des neuves.
o N’utilisez pas de piles d’un type autre que celui spécifié.
Ne mélangez pas des piles neuves avec des anciennes et
n’utilisez pas ensemble des types de pile différents.
o Ne chauffez pas et ne démontez pas les piles. Ne jetez
jamais les piles dans un feu ou dans de l’eau.
o Ne conservez et ne transportez pas les piles avec
d’autres objets métalliques. Les piles pourraient entrer
en court-circuit, couler ou exploser.
o Ne rechargez jamais une batterie sans avoir vérifié qu’elle
peut l’être.
29
INSTRUCTIONS DE SÉCURITÉ IMPORTANTES (suite)
Pb, Hg, Cd
Informations sur le laser
Ce produit contient un système laser à semi-conducteur
dans son boîtier et est répertorié comme « PRODUIT LASER
DE CLASSE 1 ».
Pour éviter d’être exposé au faisceau laser, n’essayez pas
d’ouvrir le boîtier.
Laser :
Type : EP-HD870PB
Fabricant : GUANGDONG EVER BRIGHT GROUP CO.,LTD
Puissance laser : moins de 1 mW sur la lentille de l’objectif
Longueur d’onde : 792±25 nm
DÉCLARATION DE CONFORMITÉ
Nous, TEAC AUDIO EUROPE, Gutenbergstr. 3,
82178 Puchheim, Allemagne, déclarons sous
notre propre responsabilité que le produit
TEAC décrit dans ce mode d’emploi est
conforme aux normes techniques lui correspondant.
Pour les consommateurs européens
Mise au rebut des équipements électriques
et électroniques et des piles et/ou accumulateurs
(a) Tout équipement électrique/électronique et pile/
accumulateur hors d’usage doit être traité séparément de la collecte municipale d’ordures ménagères
dans des points de collecte désignés par le gouvernement ou les autorités locales.
(b) En vous débarrassant correctement des équipements
électriques/électroniques et piles/accumulateurs
hors d’usage, vous contribuerez à la sauvegarde de
précieuses ressources et à la prévention de potentiels
effets négatifs sur la santé humaine et l’environnement.
(c) Le traitement incorrect des équipements élec-
triques/électroniques et piles/accumulateurs hors
d’usage peut avoir des effets graves sur l’environnement et la santé humaine en raison de la présence
de substances dangereuses dans les équipements.
(d) Le symbole de déchets d’équipements
électriques et électroniques (DEEE), qui
représente une poubelle à roulettes barrée
d’une croix, indique que les équipements
électriques/électroniques et piles/accumulateurs doivent être collectés et traités
séparément des déchets ménagers.
Si une pile ou un accumulateur contient
plus que les valeurs de plomb (Pb), mercure (Hg) et/ou cadmium (Cd) spécifiées
dans la directive sur les piles et accumulateurs (2006/66/CE), alors les symboles
chimiques de ces éléments seront indiqués sous le
symbole DEEE.
(e) Des systèmes de retour et de collecte sont dispo-
nibles pour l’utilisateur final. Pour des informations
plus détaillées sur la mise au rebut des vieux
équipements électriques/électroniques et piles/
accumulateurs hors d’usage, veuillez contacter
votre mairie, le service d’ordures ménagères ou le
magasin dans lequel vous avez acquis l’équipement.
30

Précautions pour les équipements sans fil
Conformité de l’émetteur radio et
brouillage
Modèle pour l’EEE (Espace Économique Européen)
Cet équipement est conforme aux normes harmonisées de
la Directive 1999/5/CE (R&TTE).
Étiquetage de conformité
Marquage CE:
ATTENTION
Les changements ou modifications non expressément
approuvés par la partie responsable de la conformité
peuvent invalider le droit de l’utilisateur à faire fonctionner
l’équipement.
ATTENTION
L’autorisation des dispositifs sans fil varie avec les pays ou
régions. Veuillez n’utiliser cet appareil que dans le pays où il
a été acheté.
o Selon le pays, des restrictions d’usage de la technologie
sans fil Bluetooth peuvent exister.
Exigences pour l’exposition aux rayonnements
Cet équipement est conforme à la réglementation reconnue
internationalement en matière d’exposition humaine aux
ondes radio générées par l’émetteur.
Déclaration de conformité
Modèle pour l’EEE (Espace Économique Européen)
Cet équipement est conforme à la norme EN.62311 :
Évaluation des équipements électroniques et électriques
en relation avec les restrictions d’exposition humaine aux
champs électromagnétiques; la norme harmonisée de la
Directive 1999/5/CE.
31

Accessoires fournisTable des matières
Nous vous remercions d’avoir choisi un produit TEAC.
Lisez ce mode d’emploi avec attention pour tirer les meilleures performances de cette unité.
Après l’avoir lu, gardez-le en lieu sûr pour vous y référer
ultérieurement.
Ce mode d’emploi explique les fonctions principales de cette
unité.
Veuillez consulter le manuel de référence pour des informations sur la totalité des fonctions de l’unité.
Le mode d’emploi et le manuel de référence peuvent être
téléchargés depuis le site mondial TEAC (http://www.
teac-global.com/).
INSTRUCTIONS DE SÉCURITÉ IMPORTANTES ............... 28
Précautions pour les équipements sans fil ................. 31
Accessoires fournis ....................................... 32
Utilisation du site mondial TEAC .......................... 32
Avant l’utilisation ......................................... 33
Réglage de l’horloge ...................................... 33
Notes sur les disques ..................................... 34
Branchements ............................................ 36
Branchement des enceintes .............................. 38
Emploi de la télécommande .............................. 39
Nomenclature et fonctions des parties (télécommande) .. 40
Nomenclature et fonctions des parties (unité principale) .. 42
Fonctionnement de base ................................. 43
Écoute de CD ............................................. 44
Écoute de la radio FM ..................................... 45
RDS (modèle européen uniquement) ..................... 46
Technologie sans fil Bluetooth® ...........................48
Réglages ................................................. 49
Lecture de musique sur un ordinateur .................... 51
Guide de dépannage ..................................... 52
Caractéristiques techniques. . . . . . . . . . . . . . . . . . . . . . . . . . . . . . . 53
Vérifiez que vous disposez bien de tous les accessoires représentés ci-dessous.
Veuillez contacter le magasin dans lequel vous avez acheté
cette unité si l’un de ces accessoires manque ou a été
endommagé durant le transport.
Cordon d’alimentation × 1
Télécommande (RC-1324) × 1
Piles pour télécommande (AAA) × 2
Antenne FM de base × 1
Mode d’emploi (ce document) × 1
o Conservez ce mode d’emploi dans un endroit sûr pour
vous y référer ultérieurement.
o Voir page 184 pour des informations sur la garantie.
Utilisation du site mondial TEAC
Vous pouvez télécharger des mises à jour pour cette unité
depuis le site mondial TEAC: http://teac-global.com/
1) Allez sur le site mondial TEAC.
2) Dans la section TEAC Downloads (téléchargements
TEAC), cliquez sur la langue souhaitée afin d’ouvrir la
page de téléchargement du site web pour cette langue.
NOTE
Si la langue désirée n’apparaît pas, cliquez sur Other
Languages (autres langues).
3) Cliquez sur le nom du produit dans la section «Products»
(produits).
4) Sélectionnez et téléchargez les mises à jour nécessaires.
32

Réglage de l’horlogeAvant l’utilisation
V
Emplacement de l’unité
o Évitez de la placer dans des environnements soumis à
de hautes températures comme en exposition directe
aux rayons solaires ou près d’une source de chaleur. Ne
placez pas non plus l’unité sur un amplificateur ou tout
autre dispositif dégageant de la chaleur. Cela pourrait
causer une décoloration, une déformation ou un mauvais fonctionnement.
o Ne placez rien sur l’unité. Ne posez pas de tissu sur
l’unité et ne placez pas celle-ci sur du linge de maison
ou sur une épaisse moquette.
Entretien
Essuyez les saletés du capot supérieur et des autres surfaces
au moyen d’un chiffon doux légèrement humidifié avec un
nettoyant neutre dilué.
N’utilisez pas de lingettes de nettoyage imbibées de produits chimiques, de diluant ou de substances similaires car
cela pourrait endommager la surface de l’unité.
V
Par sécurité, débranchez le cordon d’alimentation de la prise secteur avant tout
nettoyage.
Cette unité dispose d’une horloge intégrée.
Après avoir effectué les branchements, réglez l’heure.
L’heure apparaît sur l’écran lorsque l’unité est par exemple
en veille.
o Voir «Set clock (réglage de l’heure)» en page 50 pour
la façon de régler l’horloge.
Exemple d’affichage en veille
T AM 09:18
Heure actuelle
Apparaît lorsque le réveil est en service
o L’horloge sera réinitialisée si le cordon d’alimentation
de l’unité est débranché de la prise de courant. Réglez à
nouveau l’heure lorsque vous utilisez l’unité.
o L’horloge n’est pas d’une précision absolue. Nous vous
recommandons donc de re-régler l’heure de temps à
autre.
33

Notes sur les disques
Types de disque lisibles par cette unité
Les CD (12cm) qui portent le logo Compact Disc
Digital Audio.
o Ce logo apparaît sur le disque et sur son emballage.
o Cette unité ne peut pas lire les CD de 8cm.
Les CD-R et CD-RW correctement enregistrés et
finalisés au format CD audio.
Les CD-R et CD-RW sur lesquels ont été gravés des
fichiers MP3 ou WMA et qui ont été correctement
finalisés.
o Les disques à multiples sessions ne sont pas pris en
charge.
Cette unité ne peut pas lire de disques de type autre que
ceux ci-dessus.
Si vous essayez de lire tout autre type de disque
V
avec cette unité, des bruits forts risquant d’endommager les haut-parleurs et d’altérer votre
audition peuvent être produits. N’essayez jamais
de lire un type de disque autre que ceux indiqués
ci-dessus.
o Fichiers WMA
Les formats Windows Media Audio professionnel (WMA
Pro) et Windows Media Audio Lossless (WMA Lossless)
ne sont pas pris en charge.
o Selon la qualité du disque et les conditions de l’enregis-
trement, la lecture peut ne pas être possible.
o Cette unité ne peut pas lire les types de disque suivants.
CD-ROM
CD vidéo
Super Audio CD
DVD vidéo
DVD audio
DVD-ROM
Si vous chargez un DVD vidéo, DVD audio, DVD-
V
ROM ou disque similaire dans cette unité, l’unité
essaiera de le lire et tournera à haute vitesse. Si
vous chargez par erreur un tel disque, le disque
peut être endommagé, aussi n’essayez pas de le
retirer avant qu’il ait cessé de tourner.
o Cette unité peut être dans l’incapacité de correctement
lire des CD à dispositif anti-copie, des disques doubles
(DualDisc) ou d’autres CD spéciaux qui ne se conforment pas à la norme CD Red Book. Le fonctionnement
et la qualité sonore ne peuvent pas être garantis si des
disques spéciaux sont utilisés dans cette unité. Si la lecture d’un disque spécial cause des problèmes, contactez
le vendeur du disque.
CD-R/CD-RW
Cette unité peut lire des CD-R/CD-RW au format CD audio
(CD-DA) ou contenant des fichiers au format MP3 ou WMA.
o Pour lire un disque créé par un enregistreur de CD, veil-
lez bien à le finaliser.
o Selon la qualité du disque et les conditions de l’enregis-
trement, la lecture peut ne pas être possible. Pour des
détails, voir le mode d’emploi de l’appareil que vous
utilisez.
o Si vous avez des questions quant à la gestion d’un CD-R
ou CD-RW, contactez directement son vendeur.
Précautions d’emploi
o N’utilisez pas de disques fendus car ils pourraient
endommager l’unité.
o Ne posez pas d’étiquette ou d’autres matériaux sur les
disques. N’utilisez pas de disques desquels ont été retirés
de l’adhésif, des auto-collants ou matériaux similaires
car leur surface peut conserver des résidus collants.
Les disques dont par exemple les auto-collants laissent
échapper de la colle sur leurs bords sont aussi à éviter.
L’emploi de tels disques dans l’unité peut entraîner le
blocage du disque ou des dommages pour l’unité.
o Pour écrire sur le côté inscriptible du disque, employez
un marqueur permanent à pointe feutre. L’emploi d’un
stylo à bille ou autre à pointe dure peut endommager le
disque, le rendant illisible.
o N’utilisez jamais de stabilisateurs de CD du commerce.
Cela pourrait rendre le disque illisible ou endommager
l’unité.
o N’employez jamais de disques ayant une forme
irrégulière, dont des disques en forme de cœur ou octogonaux, car ils peuvent endommager l’unité.
34

o Pour sortir un disque de son boîtier, saisissez le disque
par sa tranche, tout en pressant sur le centre du boîtier.
Ne touchez pas la face du disque où sont encodées les
données (côté sans inscription).
Si un disque ne se charge pas
correctement
Si un disque est coincé ou difficile à insérer, ne forcez pas
sur le disque. Appuyez sur la touche d’éjection (-) et retirez
le disque avant de le réinsérer (forcer sur un disque peut
endommager l’unité).
Rangement des disques
o Les disques doivent être rangés dans leurs boîtiers
quand ils ne sont pas utilisés. Ne pas le faire peut entraîner des déformations et des rayures.
o Ne laissez pas les disques dans des lieux exposés direc-
tement à la lumière du soleil ou qui sont très humides
ou très chauds. Cela risquerait de provoquer une déformation ou une dégradation des disques, les rendant
inutilisables.
o Les CD-R et CD-RW sont plus sensibles aux effets de la
chaleur et des rayons ultraviolets que les CD ordinaires.
Pour cette raison, ne les laissez pas de façon prolongée
dans des endroits exposés directement à la lumière du
soleil ou par exemple près d’appareils dégageant de la
chaleur.
o Nettoyez toujours les disques avant de les ranger. Ne pas
nettoyer un disque sale risque d’entraîner des sauts de
lecture ou une dégradation de la qualité sonore.
Entretien
o Si la face du disque où sont encodées les données (face
sans inscription) est salie par des empreintes de doigt ou
de la poussière, utilisez un chiffon doux pour essuyer la
surface d’un mouvement allant du centre vers le bord
extérieur.
o N’employez jamais de nettoyants pour disque, traite-
ments antistatiques, diluants ou produits chimiques
similaires pour nettoyer les disques. De tels produits
chimiques pourraient abîmer la surface du disque.
35

Branchements
V
Une fois tous les branchements faits, raccordez la fiche du cordon d’alimentation à une prise secteur.
o Lisez les modes d’emploi de tous les appareils que vous comptez employer avec cette unité.
o Ne regroupez pas les câbles de connexion avec des cordons d’alimentation. Cela pourrait entraîner des bruits.
o Assurez-vous que chaque fiche est bien enfoncée.
Antenne FM de base
A
Câble RCA
Câble USB
B
DC
Installez le pilote dédié
sur l’ordinateur avant de
lui brancher cette unité
(page 51).
Câble numérique optique
E F
Câble RCA
Cordon d’alimentation secteur fourni
Sortie audio
(LINE OUT, etc.)
Platine cassette,
lecteur de MD, etc.
36
Sortie
numérique
(optique)
Appareil à sortie audio
numérique
Prise d’entrée
ligne
Caisson de
graves
c
Prise secteur

A
Antenne FM
Pour recevoir une émission FM, déployez cette
antenne et positionnez-la pour la meilleure réception.
Après avoir déplacé cette unité, réajustez la position
de l’antenne.
B
Port USB
Sert à recevoir l’audio numérique d’un ordinateur.
Raccordez-le au port USB d’un ordinateur pour recevoir de l’audio numérique de ce dernier.
Utilisez un câble USB du commerce.
ATTENTION
Installez le pilote logiciel TEAC dédié sur l’ordinateur
avant de brancher l’unité (page 51).
C
Prises d’entrée audio analogique (LINE IN)
Servent à recevoir l’audio analogique.
À l’aide de câbles RCA du commerce, branchez-y un
appareil à sortie audio tel qu’un lecteur de cassette
ou de MD.
Utilisez des câbles du commerce pour les branchements.
Reliez la prise R de cette unité à la prise de sortie droite
(R) de la source audio et la prise L de cette unité à la
prise de sortie gauche (L) de la source audio.
F
Entrée d’alimentation (~IN)
Branchez ici le cordon d’alimentation fourni.
Une fois tous les autres branchements terminés, raccordez la fiche du cordon d’alimentation à une prise
secteur.
V
N’utilisez aucun cordon d’alimentation
autre que celui fourni avec cette unité.
L’utilisation d’autres cordons d’alimentation peut entraîner un incendie ou un
choc électrique. Débranchez le cordon de
la prise secteur en cas de non-utilisation
prolongée de l’unité.
D
Prise d’entrée audio numérique (OPTICAL)
Reçoit l’audio numérique. Raccordez-y la prise de sortie audio numérique d’un appareil audio numérique.
Utilisez un câble numérique optique (TOS) du
commerce pour faire le branchement.
o Des fréquences d’échantillonnage allant jusqu’à
192kHz sont prises en charge.
E
Prise de sortie pour caisson de graves
(SUBWOOFER OUT)
Si vous souhaitez utiliser un caisson de graves, branchez-le à cette prise.
o Le niveau de sortie est lié aux commandes
VOLUME de la face avant de l’unité et de la télécommande.
37

Branchement des enceintes
V
Précautions lors des branchements
o Une fois tous les branchements faits, raccordez la fiche
du cordon d’alimentation à une prise secteur.
o Lisez les modes d’emploi de tous les appareils que vous
comptez employer avec cette unité.
ATTENTION
o Si vous ne branchez pas les enceintes LS-101HR, uti-
lisez des modèles ayant une impédance nominale
comprise entre 4 et 8Ω. Si des enceintes ayant une autre
impédance sont utilisées, le circuit de protection peut
intervenir, entraînant l’arrêt du son.
o Les borniers d’enceinte rouges sont les borniers + (plus)
et les noirs les borniers − (moins). Généralement, le
conducteur + du câble d’enceinte est marqué pour le
distinguer du conducteur −. Branchez le conducteur
marqué au bornier rouge +, et le conducteur non marqué au bornier noir −.
o Les parties métalliques des deux conducteurs ne doivent
pas se toucher. Si elles se touchent, un court-circuit électrique peut se produire. Des fils en court-circuit peuvent
créer un risque d’incendie ou entraîner une panne de
votre équipement.
Ne laissez jamais les câbles d’enceinte causer un
court-circuit.
o Assurez-vous que chaque fiche est bien enfoncée. Pour
éviter tout ronflement ou bruit parasite, ne regroupez
pas les câbles avec le cordon d’alimentation secteur ou
d’autres câbles.
Enceintes LS-101HR ou enceintes ayant une
impédance comprise entre 4 et 8Ω
Comment brancher les enceintes
1 Dévissez le capuchon du bornier en le tour-
nant dans le sens anti-horaire. Il n’est pas
possible de retirer complètement les capuchons de bornier.
2 Insérez le fil dans le bornier et revissez le
capuchon en le tournant dans le sens horaire
an que le l soit bien tenu.
o Assurez-vous qu’aucune partie de l’isolant n’est insé-
rée dans le bornier, et que seul le fil dénudé touche
le bornier.
3 Vériez que le câble est solidement xé en
tirant doucement sur le câble.
38

Emploi de la télécommande
Connexion par fiches bananes
Vous pouvez également faire des connexions au moyen
de fiches bananes disponibles dans le commerce. D’abord,
montez les fiches bananes sur les câbles d’enceinte, puis
connectez les fiches aux borniers.
o Maintenez les capuchons vissés pendant l’utilisation.
o Lisez attentivement les instructions concernant les fiches
bananes que vous utilisez.
Remarque concernant le modèle européen
Conformément aux réglementations de sécurité européennes, le branchement de fiches bananes à des
borniers d’enceinte n’est pas autorisé sur les modèles
européens. Les orifices dans lesquels pourraient s’insérer
les fiches bananes ont été occultés par des capuchons
noirs. Branchez les enceintes à l’aide de câbles nus ou
portant des cosses à fourche. Si un capuchon noir sort
de son bornier, remettez-le en place.
Précautions d’emploi
V
Un mauvais emploi des piles peut entraîner leur rupture ou leur fuite, avec pour
conséquence un incendie, des blessures
ou la salissure des objets proches. Veuillez
attentivement lire et respecter les précautions en page 29.
o Pour utiliser la télécommande, pointez-la vers le capteur
de télécommande de l’unité principale dans un rayon
maximal de 5m. Ne placez pas d’obstacles entre l’unité
principale et la télécommande.
o La télécommande peut ne pas fonctionner si le cap-
teur de signal de télécommande de l’unité principale
est exposé à la lumière du soleil ou à une forte source
lumineuse. Dans ce cas, essayez de déplacer l’unité
principale.
o Sachez que l’emploi de cette télécommande peut entraî-
ner le déclenchement involontaire d’opérations sur
d’autres appareils contrôlables par rayons infrarouges.
Installation des piles
Ouvrez l’arrière de la télécommande et insérez deux piles
AAA dans le compartiment avec leurs pôles ¥ et ^ orientés selon les indications. Replacez le couvercle.
Remplacement des piles
Si la portée de fonctionnement de la télécommande se
réduit, c’est que les piles sont déchargées. Dans ce cas, remplacez-les par des neuves.
Jetez les piles usagées conformément à leurs instructions ou
aux directives établies par votre municipalité.
39

Nomenclature et fonctions des parties (télécommande)
l
a
b
c
d
e
f
g
h
i
j
k
Quand l’unité principale et la télécommande ont toutes
les deux des touches ayant les mêmes fonctions, les
instructions de ce mode d’emploi se réfèrent à une
seule d’entre elles, mais l’autre peut être utilisée de la
même façon.
a
Touche Standby/On (¤)
Appuyez sur cette touche pour mettre l’unité en
marche (On) ou en veille (Standby). Quand l’unité est
allumée, le pourtour de la touche STANDBY/ON (¤)
de l’unité principale est allumé en bleu.
m
o
q
s
u
w
e
Touche RDS/INFO
n
p
r
t
v
Quand la source du son est réglée sur «FM», appuyez
sur cette touche pour choisir un mode RDS. Veuillez
ignorer «INFO » sur la télécommande (la fonction
INFO ne concerne pas cette unité).
f
Touche DISPLAY
Appuyez sur cette touche pour changer ce que l’écran
affiche.
x
g
Touche SELECT
Sert à changer les réglages.
h
Touche CLOCK
Appuyez à plusieurs reprises sur la touche pour
afficher l’heure et le réglage d’activation du réveil,
puis revenir à l’affichage de la page d’informations
précédente.
i
Touches de saut (.//)
Quand la source du son est réglée sur CD, elles servent
à sauter à la piste précédente ou suivante.
Quand la source du son est réglée sur FM, elles servent
à changer de preset (préréglage).
j
Touche MUTE
b
Touche TIMER
Sert à régler le réveil.
c
Touche SLEEP
Sert à régler la minuterie d’extinction.
d
Touche PTY
Utilisez-la pour rechercher des stations par type de
programme (PTY).
Appuyez sur cette touche pour couper temporairement le son. Pour rétablir le son, appuyez à nouveau.
k
Touche LOUDNESS
Appuyez pour activer ou désactiver l’accentuation des
basses fréquences. Quand elle est activée, l’icône
s’affiche à l’écran.
l
Touches VOLUME (−/+)
Servent à régler le volume.
40
m
Touche d’éjection (-)
Appuyez sur cette touche pour partiellement éjecter
le disque. Prenez le disque par la tranche et sortez-le.
n
Touche UPCONVERT
Appuyez sur cette touche pour activer ou désactiver la
conversion ascendante.
o
Touche DIMMER
Appuyez sur cette touche pour régler la luminosité
de l’écran.
p
Touches de source
Utilisez ces touches pour sélectionner la source lue.
q
Touche MENU
Appuyez sur cette touche pour passer en mode de
réglage.
r
Touches de direction (k/j)
Quand la source du son est réglée sur CD, utilisez-les pour sélectionner des dossiers (MP3/WMA
uniquement).
Quand la source du son est réglée sur FM, elles servent
à changer de preset (préréglage de station).
s
Touches de direction (l/;)
Touches de recherche (m/,)
Quand la source du son est réglée sur CD, appuyez
durant la lecture pour une recherche vers l’arrière/
l’avant.
Quand la source du son est réglée sur FM, utilisez
ces touches pour abaisser/augmenter la fréquence
de réception. Maintenez pressée une de ces touches
durant au moins deux secondes pour lancer la sélection automatique de stations.
t
Touche MODE
Quand la source du son est réglée sur CD, utilisez-la
pour alterner entre lecture en boucle et lecture
aléatoire.
Quand la source du son est réglée sur FM, utilisez-la
pour alterner entre stéréo et mono.
u
Touche Stop (8)
Appuyez sur cette touche en cours de lecture pour
arrêter celle-ci.
v
Touche Lecture/Pause (7/9)
Quand la source du son est réglée sur CD et l’unité
à l’arrêt ou en pause, appuyez sur cette touche pour
lancer la lecture du disque.
Utilisez cette touche pour interrompre la lecture et la
mettre en pause.
Quand la source du son est réglée sur FM, utilisez-la
pour changer de preset et de fréquence.
w
Touche CLEAR
Sert à effacer les pistes programmées.
x
Touche PROGRAM
Quand la source du son est réglée sur CD, elle sert à la
lecture du programme.
Quand la source du son est réglée sur FM, elle sert
avec les stations de radio préréglées (presets).
41

Nomenclature et fonctions des parties (unité principale)
A
J
BC DE
FG HI
A
Touche STANDBY/ON (¤)
Appuyez sur cette touche pour mettre l’unité en
marche (On) ou en veille (Standby). Quand l’unité est
allumée, le pourtour de la touche est allumé en bleu.
o Quand cette unité est en veille, elle consomme un
courant de veille. Pour cette raison, nous utilisons
le terme «en veille» plutôt que «éteinte».
B
C
D
E
Fente pour disque
Insérez-y un disque. Après insertion partielle d’un
disque, l’unité tire celui-ci automatiquement à l’intérieur.
Touches de saut (.//)
Quand la source du son est réglée sur CD, elles servent
à sauter à la piste précédente ou suivante. En cours de
lecture, maintenez une de ces touches pressée pour
une recherche en arrière/avant.
Touche Lecture/Pause (7/9)
En pause, appuyez sur cette touche pour reprendre
la lecture.
Appuyez durant la lecture pour la mettre en pause.
Appuyez à nouveau pour reprendre la lecture.
Touche Stop/éjection (8/-)
Appuyez sur cette touche en cours de lecture pour
arrêter celle-ci. À l’arrêt, appuyez sur cette touche pour
42
partiellement éjecter le disque. Prenez le disque par la
tranche et sortez-le.
F
Prise casque (PHONES)
Branchez-y un casque (fiche mini-jack stéréo 3,5mm).
o Quand un casque est branché à l’unité, le son ne
sort plus par les prises SPEAKERS de la face arrière.
G
Bouton SOURCE
Sert à sélectionner la source de son.
H
Capteur de signal de télécommande
Reçoit les signaux de la télécommande. Pour utiliser la
télécommande, pointez-la vers ce capteur.
I
Écran
Affiche diverses informations.
J
Bouton VOLUME
Utilisez ce bouton pour régler le volume. Pour augmenter le volume, tournez le bouton dans le sens
horaire. Pour baisser le volume, tournez le bouton dans
le sens anti-horaire.
o Lorsque vous réglez le volume avec la télécom-
mande, le bouton de volume de l’unité principale
ne tourne pas en réponse à cette action.

Fonctionnement de base
Allumage/extinction (veille) de l’unité
Appuyez sur la touche STANDBY/ON (¤) pour allumer l’unité. Le voyant
s’allume en bleu quand elle est en service.
Appuyez à nouveau sur la touche pour mettre l’unité en veille. Le voyant
s’éteint.
Changement de la source de son
Tournez le bouton SOURCE pour choisir la source de son.
Le nom de la source de son sélectionnée s’affiche.
Tournez le bouton SOURCE vers la droite pour changer la source de son
dans l’ordre suivant.
USB w Bluetooth w LINE w CD w FM w OPTICAL
o Si un format audio numérique autre que PCM est reçu, «No
Signal» (aucun signal) s’affiche et aucun son n’est produit.
Dans ce cas, voyez si l’appareil source connecté a un réglage
de format de sortie numérique «PCM» permettant la lecture.
Reportez-vous au mode d’emploi de cet appareil pour effectuer ce réglage.
o Pour utiliser cette unité avec un ordinateur Windows, vous
devez installer le pilote dédié sur ce dernier avant de configurer l’unité en mode USB et de lire des fichiers audio sur
l’ordinateur (page 51).
Réglage du volume
Tournez le bouton VOLUME ou utilisez les touches VOLUME de la télécommande pour régler le volume au niveau approprié.
o Le réglage du volume s’affiche lorsque vous tournez le bouton
VOLUME.
Plus la valeur augmente, plus le volume devient fort.
Exemple d’affichage
CD
VOLUME 15
Volume
MIN: volume minimal
MAX: volume maximal
43

Écoute de CD
Lecture d’un CD
1 Tenez le disque par sa tranche avec sa face imprimée
vers le haut et insérez-le partiellement.
2 Poussez le disque sans pour autant l’enfoncer complè-
tement. Il sera automatiquement avalé par la fente.
Si un disque est coincé ou difficile à insérer, ne forcez pas sur le
disque. Pressez la touche d’éjection (-) et retirez le disque avant
d’essayer de le réinsérer (forcer sur un disque peut endommager
l’unité).
3 Appuyez sur la touche Lecture/Pause (7/9).
Durant la lecture, PLAY s’affiche en haut de l’écran.
o Si CD Auto Start est activé (ON), lorsqu’un CD est chargé, il
devient automatiquement la source de son et sa lecture démarre
(page 50).
Mise en pause de la lecture
Appuyez sur la touche Lecture/Pause (y/9) pour mettre la lecture en
pause.
Pour reprendre la lecture depuis l’endroit où elle a été mise en pause,
appuyez à nouveau sur la touche Lecture/Pause (y/9).
En pause, PAUSE s’affiche en haut de l’écran.
Arrêt de la lecture
Appuyez sur la touche Stop/éjection (8/-) pour arrêter la lecture.
Éjection d’un disque
Avec la lecture de CD à l’arrêt, appuyez sur la touche Stop/éjection (8/-).
Appuyez sur cette touche pour partiellement éjecter le disque. Prenez le
disque par la tranche et sortez-le.
o Appuyer sur la touche Stop/éjection (8/-) éjecte le disque quelle
que soit la source de son actuellement sélectionnée.
Saut de recherche d’une piste
Appuyez sur une touche de saut (.//) pour sauter à la piste précédente ou suivante. Continuez d’appuyer jusqu’à ce que vous ayez atteint la
piste voulue.
o Durant la lecture, appuyez une fois sur la touche . pour revenir
au début de la piste actuelle. Lorsque vous désirez lire une piste antérieure, appuyez plusieurs fois sur la touche . jusqu’à ce que vous
ayez atteint cette piste.
o Durant la lecture programmée, ce sont les pistes antérieures ou ulté-
rieures du programme qui seront lues.
44

Écoute de la radio FM
Mode FM
Appuyez sur la touche MODE pour faire alterner la réception entre stéréo
et mono.
Exemple
d’affichage
FM STEREO
107.90MHz
STÉRÉO
Les émissions FM stéréo sont reçues en stéréo.
o «STEREO» s’affiche en cas de réception en stéréo.
MONO
Les émissions FM sont reçues en mono. Lorsque la réception d’une émission FM stéréo est médiocre, sélectionnez ce mode. Le son devient mono,
mais le bruit est également réduit, ce qui améliore le son.
Changement de la fréquence de réception
Augmentation de la fréquence de réception
Appuyez sur la touche de direction (;) pour augmenter d’un palier la fréquence de réception.
Maintenez la touche de direction (;) pressée pour rechercher une station
en direction des fréquences plus élevées.
Diminution de la fréquence de réception
Appuyez sur la touche de direction (l) pour diminuer d’un palier la fréquence de réception.
Maintenez la touche de direction (l) pressée pour rechercher une station
en direction des fréquences plus basses.
Mode FM
Fréquence de syntonisation
Réglage automatique des presets
L’unité peut rechercher automatiquement les stations qu’elle arrive à capter
et les affecter à des mémoires de préréglage (presets).
Maintenez pressée la touche PROGRAM.
L’unité va rechercher de la plus basse à la plus haute des fréquences des
stations pouvant être reçues et les affecter à des numéros de preset.
o Après mémorisation de 20 presets, « Full» (mémoire pleine) clignote
dans l’écran et l’affectation automatique des presets s’arrête.
Sélection de presets
Utilisez les touches de direction (k/j ) pour changer de numéro de
preset.
Exemple
d’affichage
FM
P03 87.5MHz
Numéro de preset
45

RDS (modèle européen uniquement)
Le système RDS (Radio Data System) est un service de diffusion qui permet
aux stations d’envoyer des informations supplémentaires en même temps
que le programme radio normal.
o Le RDS ne fonctionne sur la bande de fréquences FM qu’en
Europe.
1 Réglez la réception sur une station FM RDS (page 43).
2 Appuyez sur la touche RDS de la télécommande.
Appuyer sur la touche RDS passe en revue les modes RDS comme suit:
Affichage du nom de la station (Program service ou PS)
Lorsque vous sélectionnez l’affichage du nom de la station, «PS »
apparaît à droite de «FM » puis le nom du service de programme
ou de la station s’affiche. S’il n’y a pas de données de service de programme, c’est la fréquence qui s’affiche.
Affichage du type de programme RDS (PTY)
Lorsque vous sélectionnez l’affichage du type de programme RDS,
«PTY» apparaît à droite de «FM» puis le type de programme s’affiche.
Affichage du texte radio RDS (RT)
Lorsque vous sélectionnez l’affichage du texte radio RDS, «RT» apparaît à droite de «FM» puis les informations de station composées au
maximum de 64caractères s’affichent.
Horloge RDS (CT)
Affiche l’heure fournie par la station.
Recherche d’un type de programme (PTY)
Vous pouvez rechercher des stations par type de programme. Cette fonction n’est disponible que sur les services RDS des stations FM en Europe.
1 Appuyez sur la touche PTY.
«PTY SEARCH» s’affiche.
FM PTY SEARCH
< NEWS >
L’horloge de cette unité est automatiquement réglée par les données d’horloge RDS
(CT) qu’elle reçoit.
Pour activer le réglage automatique
d’horloge, maintenez la touche RDS
enfoncée plus de 8 secondes.
o Lorsque le réglage automatique d’hor-
loge est activé, l’unité règle son horloge
en réponse aux données CT reçues quel
que soit le mode RDS sélectionné.
Si vous captez une station RDS diffusant des
données CT incorrectes, l’horloge peut être
mal réglée. Cela risque d’affecter le fonctionnement du réveil.
Si vous ne voulez pas que l’horloge de
cette unité soit réglée par les données CT
reçues, désactivez le réglage automatique
d’horloge.
Pour désactiver le réglage automatique
d’horloge, maintenez la touche RDS
enfoncée plus de 8 secondes.
2 Utilisez les touches de direction (k/j) pour sélec-
tionner le type de programme désiré.
Vous pouvez choisir parmi 31 types de programme (PTY).
3 Appuyez sur la touche ENTER.
L’appareil lance la recherche.
o Quand le type de programme que vous avez sélectionné est
trouvé, la recherche s’arrête et le type de programme est affiché.
o Si aucun programme du type sélectionné n’est trouvé durant la
recherche PTY, cette dernière s’arrête à la fréquence de laquelle a
démarré la recherche.
o Si vous voulez arrêter la recherche, appuyez sur la touche PTY.
46

NEWS (nouvelles):
Communiqués, événements, sondages, reportages, situations vécues.
AFFAIRS (informations générales):
Suggestions incluant des annonces pratiques autres qu’actualités, documents, débats, analyses, etc.
INFO (informations pratiques):
Informations utiles et de référence telles que prévisions
météo, guides du consommateur et conseils médicaux.
SPORT:
Émissions sportives.
EDUCATE (éducation):
Informations culturelles et éducatives.
DRAMA (théâtre):
Tous types de concerts et séries dramatiques radiodiffusés.
CULTURE:
Tous les aspects de la culture locale ou nationale, y compris les événements religieux, la philosophie, les sciences
humaines, les langues et le théâtre.
SCIENCE:
Émissions sur les sciences de la nature et la technologie.
VARIED (variétés):
Émissions grand public telles que jeux, variétés, interviews,
émissions comiques et satiriques.
POP M (musique de variétés):
Émissions de musique, de variétés, ou hit-parade, etc.
ROCK M (musique rock):
Musique moderne, généralement composée et interprétée
par de jeunes musiciens.
EASY M (musique facile) :
Musique grand public durant généralement moins de 5
minutes.
LIGHT M (musique légère):
Musique classique, instrumentale, chorale, et musique légère
s’adressant au grand public.
CLASSICS (musique classique):
Musique orchestrale incluant opéras, symphonies, musique
de chambre, etc.
OTHER M (autres styles musicaux):
Autres styles musicaux dont Rhythm & Blues et reggae.
WEATHER (météo):
Informations et prévisions météorologiques.
FINANCE:
Informations financières, commerciales, boursières.
CHILDREN (enfants):
Émissions pour enfants.
SOCIAL:
Vie collective et sociale.
RELIGION:
Émissions à caractère religieux.
PHONE IN (débats publics):
Émissions au cours desquelles les auditeurs s’expriment en
direct.
TRAVEL (voyages):
Émissions à caractère touristique.
LEISURE (loisirs):
Émissions sur les activités de loisirs.
JAZZ:
Musique de jazz.
COUNTRY:
Musique country.
NATION M:
Musique militaire et patriotique.
OLDIES (âge d’or):
Tubes de ce que l’on appelle l’âge d’or de la musique pop.
FOLK M:
Musique folk.
DOCUMENT:
Documentaires.
TEST:
Émission pour tester les équipements de diffusion ou
récepteurs de secours. Non destinée à la recherche ou la
commutation dynamique sur des récepteurs grand public.
ALARM:
Programme avec avis d’alerte ou de catastrophe naturelle.
47

Technologie sans fil Bluetooth®
Notes pour la technologie sans fil
Bluetooth
Si vous utilisez cette unité avec un téléphone mobile ou
d’autres dispositifs à technologie sans fil Bluetooth, ils ne
doivent pas être éloignés l’un de l’autre de plus de 10m.
Toutefois, selon les conditions d’utilisation, la distance effective de transmission peut être réduite.
La communication sans fil ne peut pas être garantie pour
tous les appareils à technologie sans fil Bluetooth.
Pour déterminer la compatibilité entre cette unité et un
autre appareil à technologie sans fil Bluetooth, reportez-vous
au mode d’emploi de cet appareil ou contactez le magasin
dans lequel vous l’avez acheté.
1 Tournez le bouton SOURCE pour choisir
Bluetooth.
Exemple
d’affichage
Indicateur Bluetooth
Bluetooth
PM 07:28
2 Appairez ou connectez un autre appareil
Bluetooth.
Appairage avec un autre appareil Bluetooth
Appairer cette unité avec un autre appareil Bluetooth
est nécessaire la première fois que vous vous connectez à cet appareil Bluetooth.
Si aucun appareil Bluetooth appairé n’est trouvé, l’unité
se tient prête à l’appairage avec un autre appareil.
Quand cette unité est prête à l’appairage, son indicateur Bluetooth clignote.
Quand l’indicateur Bluetooth de cette unité clignote,
effectuez l’appairage avec l’autre appareil Bluetooth.
Pour des détails, référez-vous au mode d’emploi de cet
appareil Bluetooth.
Lors d’un appairage avec un appareil Bluetooth prenant en charge l’aptX® ou l’AAC, la connexion se fait
automatiquement avec l’aptX ou l’AAC.
Connexion avec un appareil Bluetooth déjà
appairé
Quand la source de son de cette unité est réglée
sur Bluetooth et que l’autre appareil Bluetooth est
en service, la fonction Bluetooth est activée et ils se
connectent automatiquement.
S’ils ne se connectent pas automatiquement, connectez-les manuellement.
o Si une demande de mot de passe apparaît sur
l’écran de l’appareil Bluetooth, saisissez «0000 »
(quatre zéros).
o Quand cette unité et l’autre appareil Bluetooth
sont connectés, le voyant Bluetooth cesse de clignoter et reste allumé.
o Lors de l’appairage ou de la connexion avec un
autre appareil Bluetooth, ceux-ci doivent être à
quelques mètres l’un de l’autre. S’ils sont trop éloignés, l’appairage et la connexion peuvent devenir
impossibles.
o Si Bluetooth est sélectionné comme source de son
pour cette unité, le dernier appareil Bluetooth qui
lui était connecté sera automatiquement reconnecté. Si vous souhaitez vous connecter à un autre
appareil Bluetooth, effectuez l’appairage avec cet
appareil.
o Cette unité conservera les informations de huit
périphériques pouvant être appairés. Si plus de
huit appareils sont appairés, les informations d’appairage les plus anciennes sont supprimées et
remplacées par les nouvelles.
V
ATTENTION
Même quand cette unité ou l’autre appareil Bluetooth
sont prêts à se connecter, l’unité entre automatiquement en veille après 10minutes de clignotement de
son indicateur Bluetooth. Pour utiliser cette unité, vous
devez la rallumer.
Si le voyant continue de clignoter pendant longtemps,
faites redémarrer l’unité et l’autre appareil Bluetooth,
puis reconnectez-les.
48

Réglages
3 Lancez la lecture sur l’autre appareil
Bluetooth.
o Vérifiez que le volume est monté sur l’autre appa-
reil Bluetooth. Si vous ne montez pas le volume sur
l’appareil de lecture, aucun son ne pourra sortir de
cette unité.
o Selon l’appareil Bluetooth connecté, vous pouvez
ne pas être en mesure de régler le volume. Pour
des détails, référez-vous au mode d’emploi de cet
appareil Bluetooth.
Avertissement au sujet du fonctionnement d’un appareil à technologie
Bluetooth
Vous pouvez utiliser les touches suivantes sur l’unité principale ou sur la télécommande pour contrôler un appareil
Bluetooth connecté.
Touche Lecture/Pause (7/9)
Touches de saut (.//)
o Selon l’appareil Bluetooth utilisé, il peut ne pas répondre
aux actions de télécommande et le fonctionnement
obtenu peut être différent.
1 Appuyez sur la touche MENU.
2 Avec les touches de direction (l/;), chan-
gez de paramètre de réglage et appuyez
sur la touche SELECT.
Exemple
d’affichage
Appuyez sur la touche ; pour passer en revue les
paramètres suivants.
Appuyez sur la touche l pour passer en revue ces
paramètres dans l’ordre inverse.
Menu
< 1.Set clock >
1.Set clock
2.CD setting
3.APS setting
4.FA. Reset
3 Avec les touches de direction (k/j), chan-
gez le réglage, et appuyez sur la touche
SELECT pour conrmer le changement.
Exemple
d’affichage
Current Time
12H/24H
L’élément sélectionné clignote.
o S’il y a plusieurs réglages, appuyez sur la touche
SELECT pour afficher le réglage suivant.
Répétez les procédures 2–3 pour régler si nécessaire
d’autres paramètres.
o Appuyez à la place sur la touche MENU pour
annuler le changement de réglage.
4 Appuyez sur la touche MENU pour mettre
n aux réglages.
49

Réglages (suite)
Set clock (réglage de l’heure)
Réglez l’horloge de la manière suivante.
Current Time (mode d’affichage de l’heure)
Sélectionnez l’affichage sur 12 ou 24heures.
Exemple
d’affichage
Current Time (heure indiquée)
Réglez les heures et les minutes.
Exemple
d’affichage
Current Time
12H/24H
Current Time
PM 11:45
CD setting (réglage pour CD)
CD Auto Start (lecture automatique de CD)
o Ce paramètre est réglé sur OFF en sortie d’usine.
OFF: charger un CD ne lance pas automatiquement sa
lecture.
ON: charger un CD lance automatiquement sa lecture.
Exemple
d’affichage
CD Auto Start
OFF
APS setting (réglage d’économie
automatique d’énergie)
Exemple
d’affichage
o Ce paramètre est réglé sur ON en sortie d’usine.
OFF: la fonction d’économie automatique d’énergie est
ON: la fonction d’économie automatique d’énergie est
Menu
APS OFF
désactivée.
activée.
FA. Reset (restauration des réglages
par défaut)
Exemple
d’affichage
Factory Reset
OK?
50
Lorsque «OK?» apparaît, appuyez sur la touche SELECT pour
ramener les paramètres à leur valeur par défaut définie en
usine.
Après restauration des réglages d’usine, l’unité passe en
veille.

Lecture de musique sur un ordinateur
Installation du pilote sur un
ordinateur
Cette unité peut être connectée par USB et utilisée avec un
ordinateur fonctionnant sous un des systèmes d’exploitation suivants. Le fonctionnement n’est pas garanti avec les
systèmes d’exploitation autres que les suivants (à date de
septembre2015).
Mac OS
L’unité fonctionne avec les versions suivantes.
OS X Lion 10.7
OS X Mountain Lion 10.8
OS X Mavericks 10.9
OS X Yosemite 10.10
Cette unité peut fonctionner avec le pilote standard du système d’exploitation (OS), donc il n’y a pas besoin d’installer
de pilote.
Windows
L’unité fonctionne avec les versions suivantes.
Windows 7 (32/64bits)
Windows 8 (32/64bits)
Windows 8.1 (32/64bits)
Windows 10 (32/64bits)
Installation du pilote sur l’ordinateur
Avant de pouvoir utiliser cette unité pour lire des fichiers
sur un ordinateur avec Windows, vous devez télécharger le
pilote dédié depuis le site mondial de TEAC et l’installer sur
l’ordinateur.
Site mondial TEAC
http://teac-global.com/
À propos du mode de transmission
Cette unité se connecte en mode asynchrone haute vitesse.
Les fréquences d’échantillonnage transmissibles sont
44,1kHz, 48kHz, 88,2kHz, 96kHz, 176,4kHz et 192kHz.
Quand la connexion est correcte, vous pouvez sélectionner «TEAC USB AUDIO DEVICE » comme sortie audio sur
l’ordinateur.
o En mode asynchrone, les données audio envoyées
depuis l’ordinateur sont traitées au moyen de l’horloge
de cette unité, ce qui réduit la gigue de transmission des
données.
Téléchargement de l’application
TEAC HR Audio Player
Notre application TEAC HR Audio Player (pour Mac OS et
Windows) prend en charge la lecture des fichiers audio à
haute résolution. Vous pouvez la télécharger depuis le site
mondial TEAC.
Site mondial TEAC
http://teac-global.com/
ATTENTION
Installez le pilote logiciel dédié sur l’ordinateur avant
de brancher l’unité par USB.
Si un ordinateur est connecté à cette unité avant que le
pilote ne soit installé, le bon fonctionnement ne sera pas
possible.
o Pour des instructions sur les procédures d’installation
des pilotes, veuillez accéder à la page Downloads (téléchargements) du site mondial TEAC (http://teac-global.
com/).
o Selon la combinaison ordinateur et logiciel, un bon fonc-
tionnement peut ne pas être possible même avec les
systèmes d’exploitation ci-dessus.
51

Guide de dépannage
Générales
L’unité ne s’allume pas.
(Le voyant de l’interrupteur d’alimentation ne s’allume
pas.)
e Vérifiez que le cordon d’alimentation est enfoncé à
fond dans la prise secteur. Si la prise a un commutateur, vérifiez que celui-ci est en position ON.
e Branchez un autre appareil électrique à la prise pour
vérifier qu’elle fournit bien du courant.
La télécommande ne fonctionne pas.
e Pointez la télécommande vers la face avant de l’unité à
une distance de moins de 5m environ.
e La télécommande ne fonctionnera pas s’il y a un
obstacle entre elle et l’unité principale. Dans ce cas,
essayez de changer de position.
e Si les piles sont déchargées, remplacez les deux par
des neuves.
Un téléviseur ou un autre appareil réagit par erreur.
e La télécommande de cette unité peut déclencher par
erreur certains téléviseurs capables de recevoir des
signaux de télécommandes sans fil. Si cela se produit,
utilisez les touches de l’unité principale.
Aucun son ne sort ou alors très faiblement.
e Vérifiez les branchements de l’amplificateur et des
enceintes.
e Vérifiez les branchements des autres appareils.
Il y a du bruit.
e Éloignez autant que possible l’unité des téléviseurs,
fours à micro-ondes et autres appareils à fort champ
magnétique.
Radio
Une station ne peut pas être captée. La réception est
mauvaise.
e Sélectionnez une station de radio.
e Si la réception est mauvaise, essayez de déplacer
l’antenne.
e S’il y a un téléviseur près de l’unité, éteignez-le.
Les émissions stéréo deviennent mono.
e Appuyez sur la touche FM MODE de la télécommande
pour sélectionner stéréo.
Lecteur de CD
La lecture n’est pas possible.
e Si le disque est à l’envers, rechargez-le avec sa face
sérigraphiée vers le haut.
e Si le disque est sale, nettoyez-le.
e Selon la qualité et les conditions d’enregistrement du
disque, certains CD-R/CD-RW peuvent ne pas être
lisibles.
e Les CD-R/CD-RW non finalisés ne peuvent pas être lus.
Le son saute.
e Des vibrations peuvent faire sauter le son. Installez
cette unité dans un endroit stable.
e Si le disque est sale, nettoyez-le.
e N’utilisez pas de disques rayés ou fissurés.
Fichiers MP3 et WMA
La lecture n’est pas possible.
e Vérifiez l’extension du fichier. Les fichiers sont identifiés
par leur extension: «.mp3» pour les fichiers MP3 et
«.wma» pour les fichiers WMA.
e Le fichier MP3/WMA peut être endommagé.
e Vérifiez le format du fichier. Cette unité peut lire les
fichiers MP3 et WAV (page 53).
Les noms de piste, d’artiste et d’album ne s’affichent
pas.
e Le fichier musical ne contient pas de balise ID3 d’in-
formation. Utilisez par exemple un ordinateur pour
préparer des fichiers MP3/WMA avec des informations
de balise ID3 correctes.
Les balises ID3 ne peuvent pas être utilisées avec des
fichiers WAV.
Certains caractères ne s’affichent pas correctement.
e Si des informations de fichier utilisent des carac-
tères japonais, chinois ou autres à double octet, la
lecture est possible mais le nom ne sera pas affiché
correctement.
52
Comme cette unité utilise un microcontrôleur, du bruit
ou d’autres interférences externes peuvent entraîner son
mauvais fonctionnement. Si cela se produit, débranchez
le cordon d’alimentation, attendez un instant puis rallumez pour relancer les opérations.

Caractéristiques techniques
Lecteur de CD
Support de lecture ........................ CD-DA, CD-R/RW
Seuls des disques de 12cm peuvent être employés
Format ........................... ISO9660 LEVEL 1/2/JOLIET
Nombre maximal de fichiers .......... 250 (dossiers compris)
Nombre maximal de dossiers .............................99
Formats audio lisibles
MP3
Extension ..........................«.mp3», «.MP3»
Débit binaire ...................32kbit/s – 320kbit/s
ou débit variable (VBR)
Fréquence d’échantillonnage
16 kHz, 22,05 kHz, 24 kHz, 32 kHz, 44,1 kHz, 48 kHz
Norme prise en charge .....MPEG-1/2 Audio Layer-3
WMA
Extension ........................«.wma», «.WMA»
Débit binaire ...................32kbit/s – 320kbit/s
ou débit variable (VBR)
Fréquence d’échantillonnage
8kHz, 11,025kHz, 16kHz, 22,05kHz,
32kHz, 44,1kHz, 48kHz
Norme prise en charge ................... WMA ver.9
Entrée audio numérique
Fréquences d’échantillonnage prises en charge (PCM)
44,1 kHz, 48 kHz, 88,2 kHz, 96 kHz, 176,4 kHz, 192 kHz
Résolutions prises en charge .......................16/24 bits
Bluetooth
Version Bluetooth. . . . . . . . . . . . . . . . . . . . . . . . . . . . . . . . . . . . . . . . . 3.0
Sortie ............................................... Classe 2
Profil pris en charge .................................... A2DP
Codecs .......................................SBC, AAC, aptX
Sortie casque
Sortie nominale ...............80 mW + 80mW (32Ω, 1kHz)
Distorsion harmonique totale .........................0,03 %
Section amplificateur
Sortie maximale .........26 W + 26 W (JEITA 10%, 1kHz, 4Ω)
Sortie nominale ..........20 W + 20 W (JEITA 1%, 1kHz, 4Ω)
Distorsion harmonique totale ........0,08% (1kHz, 4Ω, 1W)
Rapport signal/bruit
LINE IN ............................................90dB
(IHF-A/Passe-bas 20kHz/1kHz, 2V en entrée)
Réponse en fréquence ............20 Hz – 45 kHz (−5dB)
Générales
Alimentation électrique
Modèle Europe ..............CA 220–240 V (50 Hz, 60 Hz)
Modèle USA/Canada .............CA 120 V (50 Hz, 60 Hz)
Consommation électrique ..............................21 W
Dimensions externes ....................182 × 93 × 221mm
(L × H × P, avec saillies)
Poids ..................................................2,2kg
Température de fonctionnement .............+5°C à +35°C
Hygrométrie de fonctionnement .................5% à 85%
(sans condensation)
Température de stockage ....................−20°C à +55°C
Accessoires fournis
Cordon d’alimentation × 1
Télécommande (RC-1324) × 1
Piles pour télécommande (AAA) × 2
Antenne FM de base × 1
Mode d’emploi (ce document) × 1
o En vue d’améliorer le produit, ses caractéristiques et son
apparence peuvent être modifiées sans préavis.
o Le poids et les dimensions sont des valeurs approchées.
o Les illustrations de ce mode d’emploi peuvent différer
par certains aspects du modèle réel.
Tuner (syntoniseur)
Plage de fréquences
FM ................................87,5 MHz à 108,0 MHz
53
INSTRUCCIONES IMPORTANTES DE SEGURIDAD
PRECAUCIÓN: PARA REDUCIR EL RIESGO DE DESCARGA
ELÉCTRICA, NO QUITE LA CUBIERTA (NI EL PANEL
POSTERIOR). NO HAY PIEZAS INTERNAS QUE EL USUARIO
PUEDA REPARAR. PARA REPARACIONES, REMÍTASE A UN
SERVICIO TÉCNICO CUALIFICADO.
El símbolo del rayo acabado en flecha
<
B
AVISO: PARA EVITAR RIESGO DE
INCENDIO O DESCARGAS ELÉCTRICAS,
NO EXPONGA ESTE APARATO A LA
LLUVIA NI A LA HUMEDAD.
dentro de un triángulo equilátero alerta
al usuario de la presencia de un “voltaje
peligroso” sin aislar dentro de la carcasa
del producto que puede ser de magnitud
suficiente como para constituir riesgo de
descarga eléctrica para las personas.
El signo de exclamación dentro de un
triángulo equilátero alerta al usuario de
la presencia de importantes instrucciones
de funcionamiento y mantenimiento en la
literatura que acompaña al aparato.
PRECAUCIÓN
o NO QUITE LAS CARCASAS EXTERNAS NI DEJE AL AIRE LA
ELECTRÓNICA. ¡EN EL INTERIOR NO HAY PIEZAS QUE EL
USUARIO PUEDA MANIPULAR!
o SI EXPERIMENTA PROBLEMAS CON ESTE PRODUCTO,
PÓNGASE EN CONTACTO CON EL ESTABLECIMIENTO
DONDE ADQUIRIÓ LA UNIDAD PARA SOLICITAR SERVICIO
TÉCNICO. NO UTILICE EL APARATO HASTA QUE HAYA
SIDO REPARADO.
o EL USO DE CONTROLES, AJUSTES O PROCEDIMIENTOS
QUE NO SEAN LOS ESPECIFICADOS EN ESTE MANUAL
PUEDE CAUSAR EXPOSICIÓN A RADIACIONES
PELIGROSAS.
La placa de identificación está situada en la parte inferior de
la unidad como muestra la ilustración.
Frontal
Placa de identificación
The Bluetooth® word mark and logos are registered trademarks owned by Bluetooth SIG, Inc. and any use of such marks by TEAC
CORPORATION is under license.
© 2013 CSR plc and its group companies. The aptX® mark and the aptX logo are trade marks of CSR plc or one of its group companies and may be registered in one or more jurisdictions.
This product is protected by certain intellectual property rights of Microsoft. Use or distribution of such technology outside of
this product is prohibited without a license from Microsoft.
Windows is a registered trademark of Microsoft Corporation in the United States and/or other countries.
Mac, Mac OS and OS X are trademarks of Apple Inc., registered in the U.S. and other countries.
Los nombres de otras compañías, nombres de productos y logos que aparecen en este documento son marcas comerciales o
registradas de sus respectivos propietarios.
54

1) Lea estas instrucciones.
2) Conserve estas instrucciones.
3) Cumpla con lo indicado en los avisos.
4) Siga todas las instrucciones.
5) No utilice este aparato cerca del agua.
6) Límpielo solo con un trapo seco.
7) No bloquee ninguna de las ranuras de ventilación.
Instale este aparato de acuerdo con las instrucciones del
fabricante.
8) No instale este aparato cerca de fuentes de calor como
radiadores, calentadores, hornos u otros aparatos (incluyendo amplificadores) que produzcan calor.
9) No elimine el sistema de seguridad que supone el
enchufe polarizado o con toma de tierra. Un enchufe
polarizado tiene dos bornes, uno más ancho que el otro.
Uno con toma de tierra tiene dos bornes iguales y una
tercera lámina para la conexión a tierra. El borne ancho o
la lámina se incluyen para su seguridad. Si el enchufe que
venga con la unidad no encaja en su salida de corriente,
haga que un electricista cambie su salida anticuada.
10) Evite que el cable de corriente quede de forma que
pueda ser pisado o quedar retorcido o aplastado, especialmente en los enchufes, receptáculos o en el punto
en el que salen del aparato.
11) Use solo accesorios / complementos especificados por
el fabricante.
12) Utilice este aparato solo con
un soporte, trípode o bastidor
especificado por el fabricante
o que se venda con el propio aparato. Cuando utilice
un bastidor con ruedas, tenga
cuidado al mover la combinación de aparato/bastidor para
evitar que vuelque y puedan producirse daños.
13) Desconecte este aparato de la corriente durante las tormentas eléctricas o cuando no lo vaya a usar durante un
periodo de tiempo largo.
14) Dirija cualquier posible reparación solo al servicio técnico oficial. Este aparato deberá ser reparado si se ha
dañado de alguna forma, como por ejemplo si el cable
de corriente o el enchufe están rotos, si ha sido derramado algún líquido sobre la unidad o algún objeto ha
sido introducido en ella, si ha quedado expuesto a la
lluvia o la humedad, si no funciona normalmente o si ha
caído al suelo en algún momento.
o Este aparato libera corriente nominal no válida para el
funcionamiento a través de la toma de corriente, aún
cuando el interruptor de encendido y activación (POWER
o STANDBY/ON) no esté en la posición de encendido (ON).
o El enchufe que se conecta a la red es el dispositivo de
desconexión, por lo que deberá permanecer siempre en
prefecto estado de uso.
o Deberá llevar cuidado si utiliza auriculares con este
producto, ya que una excesiva presión sonora (volumen)
procedente de los mismos puede causar perdidas de
audición.
PRECAUCIÓN
o No exponga este aparato a salpicaduras ni goteras.
o No coloque objetos que contengan líquidos, como
por ejemplo jarrones, sobre el aparato.
o No instale este aparato en lugares cerrados tales
como estanterías o similares.
o Este aparato debe situarse lo suficientemente cerca
de una toma de electricidad como para poder
alcanzar fácilmente el cable de corriente en cualquier momento.
o Si el producto utiliza pilas (esto incluye las pilas
instaladas y los “packs” de pilas), se evitará su exposición directa al sol, al fuego o a cualquier otra fuente
de calor excesivo.
o PRECAUCIÓN con los productos que emplean bate-
rías de litio reemplazables: existe peligro de explosión
si la batería se reemplaza por otra de tipo incorrecto.
Reemplácela sólo por otra igual o de tipo equivalente.
V
Precauciones con respecto a las pilas
Un mal uso de las pilas puede hacer que se rompan o que
tengan fugas y ello causar fuego, lesiones u oxidación en
los objetos cercanos. Por favor, lea y observe las siguientes
precauciones cuidadosamente.
o Asegúrese de introducir las pilas siempre con la correcta
orientación de los polos positivo (¥) y negativo (^).
o Use pilas del mismo tipo. Nunca utilice juntas pilas de
tipos diferentes.
o Si no va a utilizar el mando a distancia durante mucho
tiempo (más de un mes), quite las pilas para evitar que
se sulfaten y tengan fugas.
o Si las pilas presentan fugas, limpie el líquido que haya
caído en el compartimento y sustituya las pilas por otras
nuevas.
o No utilice pilas que no sean del tipo especificado. No
mezcle pilas nuevas con viejas ni utilice juntas pilas de
tipos distintos.
o No caliente ni desarme las pilas. Nunca tire pilas al fuego
ni al agua.
o No transporte ni almacene pilas con otros objetos metá-
licos. Las pilas podrían producir cortocircuitos, perder
líquido o explotar.
o Nunca recargue una pila si no está completamente
seguro de que es una pila recargable.
55

INSTRUCCIONES IMPORTANTES DE SEGURIDAD (continuación)
Pb, Hg, Cd
Información sobre el láser
Este producto contiene en el interior de su carcasa un
sistema de láser semiconductor y está clasificado como
“PRODUCTO LÁSER DE CLASE 1”.
Para evitar quedar expuesto al haz del rayo láser, no intente
abrir la carcasa.
Láser:
Tipo: EP-HD870PB
Fabricante: GUANGDONG EVER BRIGHT GROUP CO.,LTD
Potencia láser: Inferior a 1 mW en la lente del objetivo
Longitud de onda: 792±25 nm
DECLARACIÓN DE CONFORMIDAD
TEAC AUDIO EUROPE, Gutenbergstr. 3,
82178 Puchheim, Alemania, declara bajo
su plena responsabilidad que el producto TEAC descrito en este manual
cumple con las normas técnicas correspondientes.
Para consumidores europeos
Deshacerse de aparatos eléctricos, electrónicos, pilas/baterías y acumuladores
(a) Todos los aparatos eléctricos y electrónicos, y pilas/
baterías y acumuladores gastados, deben ser eliminados separados del resto de basura común
y únicamente en los “puntos limpios” o bajo los
procedimientos especificados por el gobierno o
autoridades municipales locales.
(b) Con la eliminación correcta de los equipos eléctricos
y electrónicos, y de pilas/baterías y acumuladores
gastados, estará ayudando a conservar recursos muy
valiosos y a evitar los posibles efectos negativos en la
salud humana y en el medio ambiente.
(c) La eliminación incorrecta de los equipos eléctricos y
electrónicos, y pilas/baterías y acumuladores, puede
producir efectos muy dañinos en el medio ambiente
y en la salud humana a causa de las sustancias peligrosas que pueden encontrarse en estos equipos.
(d) El símbolo de Eliminación de Aparatos
Eléctricos y Electrónicos (WEEE en
inglés), identificado por cubos de basura
con ruedas tachados, indican que los
equipos eléctricos y electrónicos, y las
pilas/baterías y acumuladores, deben ser
eliminados de forma totalmente independiente con
respecto a la basura doméstica.
Si una pila/batería o un acumulador
contienen más cantidad de los valores
especificados de plomo (Pb), mercurio
(Hg), y/o cadmio (Cd) según está definido
en la Directiva relativa a las pilas (2006/66/
EC), entonces los símbolos químicos correspondientes a estos elementos estarán indicados debajo del
símbolo WEEE.
(e) Existen sistemas para la eliminación y recogida a
disposición del usuario final. Si necesita más información sobre cómo deshacerse de aparatos eléctricos
y electrónicos antiguos, así como de pilas/baterías y
acumuladores, póngase en contacto con su ayuntamiento, con la correspondiente empresa del servicio
de recogida de residuos o con el establecimiento
donde adquirió ese aparato.
56

Precauciones con los equipos inalámbricos
Cumplimiento de las normas de
interferencias y transmisión de radio
Modelo para el Espacio Económico Europeo (EEE)
Este equipo cumple con el estándar armonizado de la
DIRECTIVA 1999/5/EC ( R&TTE ).
Etiquetado de conformidad con la
indicación CE:
PRECAUCIÓN
Cualquier cambio o modificación efectuada en este equipo
que no haya sido expresamente aprobada por la parte responsable del cumplimiento de los requisitos exigidos podría
invalidar el derecho del usuario a utilizar el equipo.
PRECAUCIÓN
La autorización de dispositivos inalámbricos son diferentes
según los países o regiones. Por favor, utilice el producto
solamente en el país donde lo adquirió.
o Dependiendo del país, podrían existir restricciones para
el uso de la tecnología inalámbrica Bluetooth.
Requerimientos acerca de la exposición a
radiaciones
Este equipo cumple con la regulación internacionalmente
reconocida para los casos de exposición humana a ondas de
radio generadas por un transmisor.
Declaración de cumplimiento
Modelo para el Espacio Económico Europeo (EEE)
Este equipo cumple con la valoración EN.62311 de equipos
electrónicos y eléctricos relativa a las restricciones de exposición humana a campos electromagnéticos, el estándar
armonizado de la DIRECTIVA 1999/5/EC.
57

Accesorios incluidosÍndice
Gracias por elegir un producto TEAC.
Lea detenidamente este manual para obtener el mejor rendimiento posible de esta unidad.
Después de leerlo, guárdelo en un lugar seguro para futuras
consultas.
Este Manual del usuario explica las funciones principales de
esta unidad.
Consulte el Manual de referencia si desea obtener más información sobre todas las funciones de esta unidad.
Tanto el Manual del usuario como el Manual de referencia
pueden descargarse desde el sitio web global de TEAC
(http://www.teac-global.com/).
INSTRUCCIONES IMPORTANTES DE SEGURIDAD ...........54
Precauciones con los equipos inalámbricos ............... 57
Accesorios incluidos ...................................... 58
Web global de TEAC ......................................58
Antes de su utilización .................................... 59
Ajuste del reloj. . . . . . . . . . . . . . . . . . . . . . . . . . . . . . . . . . . . . . . . . . . . 59
Notas sobre los discos .................................... 60
Conexiones ............................................... 62
Conexión de los altavoces ................................ 64
Uso del mando a distancia ................................ 65
Nombres y funciones de las partes (mando a distancia) ... 66
Nombres y funciones de las partes (unidad principal) ..... 68
Funcionamiento básico ...................................69
Escuchar un CD ...........................................70
Escuchar la radio de FM ................................... 71
RDS (solo modelo para Europa) ...........................72
Función Bluetooth® .......................................74
Ajustes de configuración .................................75
Reproducir música en un ordenador ...................... 77
Solución de posibles fallos ................................ 78
Especificaciones .......................................... 79
Compruebe que todos los accesorios enumerados a continuación están incluidos en la caja.
Por favor, póngase en contacto con el establecimiento
donde adquirió esta unidad en caso de que alguno de
estos accesorios falte o haya sufrido desperfectos durante
el transporte.
Cable de corriente × 1
Mando a distancia (RC-1324) × 1
Pilas para el mando a distancia (AAA) × 2
Antena básica de FM × 1
Manual del usuario (este documento) × 1
o Guarde este manual en un lugar seguro para futuras
consultas.
o Consulte la página 184 para obtener información sobre
la garantía.
Web global de TEAC
Las actualizaciones para esta unidad pueden descargarse
desde la web global de TEAC: http://teac-global.com/
1) Entre en la web global de TEAC.
2) En la sección de descargas (downloads) de TEAC, haga
clic en el idioma que desee para abrir la página web de
descargas correspondiente a ese idioma.
NO TA
Si no aparece el idioma que desea, haga clic en “Other
Languages” (otros idiomas).
3) Haga clic en el nombre del producto en la sección
“Products” (productos).
4) Seleccione y descargue las actualizaciones que necesite.
58
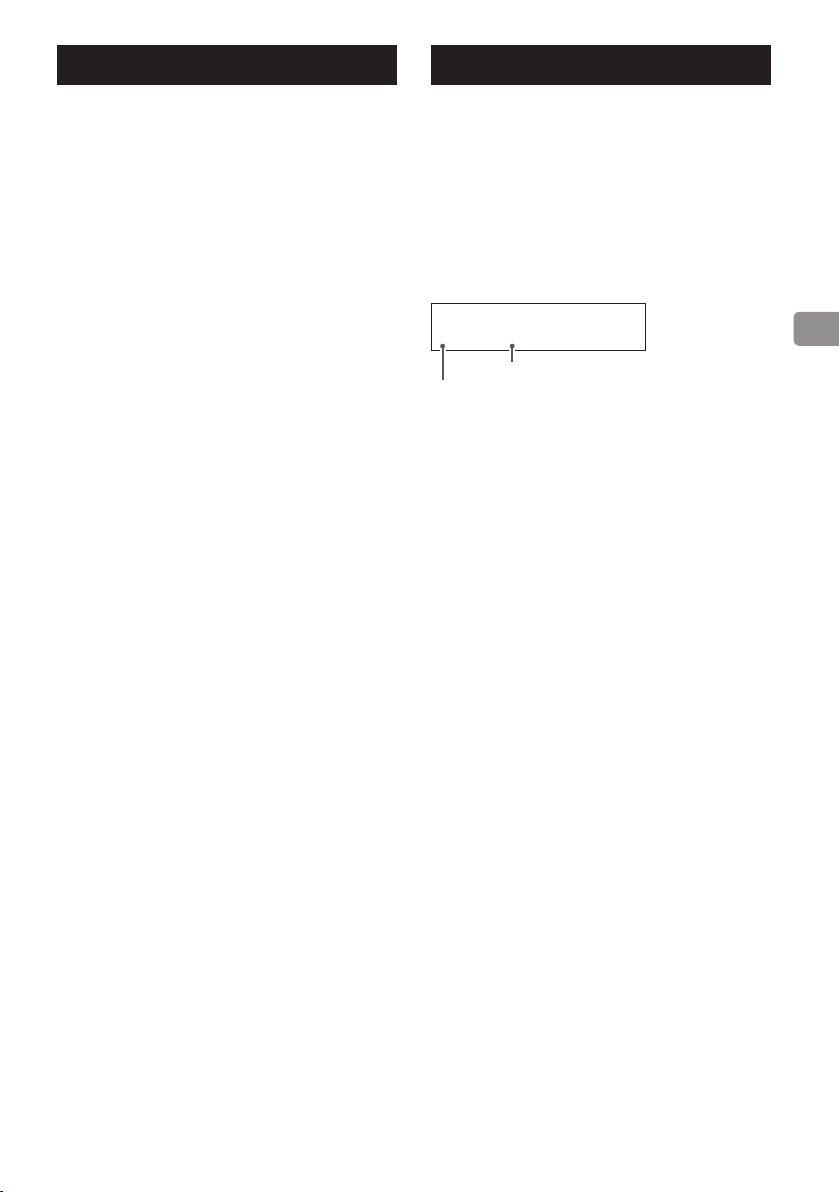
Ajuste del relojAntes de su utilización
V
Emplazamiento de la unidad
o No coloque la unidad en entornos donde la tempera-
tura sea alta, como por ejemplo donde reciba luz solar
directa o cerca de una fuente de calor, ni tampoco
sobre un amplificador o cualquier otro dispositivo que
genere calor. Si lo hace, puede causar que se decolore,
se deforme o se estropee.
o No coloque nada encima de la unidad. No ponga nin-
gún paño o tela encima de la unidad ni ponga la unidad
sobre una cama, ropa de cama, alfombra o moqueta
gruesa.
Mantenimiento
Limpie la suciedad de la cubierta superior y del resto de
paneles con un paño suave que haya sido ligeramente
humedecido con un líquido limpiador neutro diluido.
No utilice toallitas con tratamientos químicos, disolvente o
sustancias similares porque pueden dañar la superficie de
esta unidad.
V
Por seguridad, desconecte el cable de
corriente de la toma de electricidad antes
de proceder a la limpieza.
Esta unidad tiene un reloj incorporado.
Una vez completadas las conexiones, ajuste la hora.
La hora aparece en la pantalla cuando, por ejemplo, la unidad está en modo de reposo (standby).
o Consulte “Set clock (ajustes horarios)” en la página 76
para ver cómo se ajusta el reloj.
Ejemplo de pantalla con la unidad en reposo (standby):
T AM 09:18
Hora actual
Aparece solo cuando está activado el temporizador de
encendido/apagado
o El reloj se pondrá a cero si el cable de corriente de la
unidad se desconecta de la toma de electricidad. Vuelva
a ajustar la hora cuando utilice la unidad.
o El reloj no es perfectamente preciso, por lo que es acon-
sejable reajustar la hora de vez en cuando.
59

Notas sobre los discos
Tipos de discos que pueden reproducirse en esta unidad
Discos CD (12 cm) con el logo “Compact Disc Digital
Audio”
o Este logo aparece en las etiquetas y cajas de los discos.
o Esta unidad no puede reproducir discos CD de 8 cm.
Discos CD-R y CD-RW correctamente grabados y
finalizados en formato de CD Audio.
Discos CD-R y CD-RW grabados con archivos MP3 o
WMA y finalizados.
o Esta unidad no admite discos multisesión.
Esta unidad no puede reproducir discos que no sean los
mencionados anteriormente.
Si intenta reproducir otros tipos de discos con
V
esta unidad, pueden producirse ruidos a alto
volumen capaces de dañar los altavoces o afectar
a sus oídos. Nunca intente reproducir otros tipos
de discos distintos a los mencionados más arriba.
o Archivos WMA
Esta unidad no es compatible con los formatos Windows
Media Audio Professional (WMA Pro) y Windows Media
Audio Lossless (WMA Lossless).
o Dependiendo de la calidad del disco y las condiciones
de la grabación, podría no ser posible la reproducción.
o Esta unidad no puede leer ni reproducir los siguientes
tipos de discos:
Discos CD-ROM
Discos Vídeo CD
Discos Super Audio CD
Discos DVD Vídeo
Discos DVD Audio
Discos DVD-ROM
Si carga un disco DVD Vídeo, DVD Audio, DV-DROM
V
o similar en esta unidad, la unidad intentará
reproducirlo y girará a alta velocidad. Si carga accidentalmente un disco de este tipo, el disco podría
dañarse, por lo que no intente quitarlo hasta que
deje de girar.
otros discos CD especiales que no cumplan el estándar
del Libro Rojo del CD. No se puede garantizar ni el funcionamiento ni la calidad del sonido si se utilizan discos
especiales en esta unidad. En caso de que la reproducción de un disco especial cause problemas, póngase en
contacto con quien le vendió el disco.
Discos CD-R/CD-RW
Esta unidad puede reproducir discos CD-R/CD-RW que estén
en formato CD Audio (CD-DA) o que contengan archivos en
formato MP3 o WMA.
o Para poder reproducir un disco creado en una grabadora
de CD, primero asegúrese de que está finalizado.
o Dependiendo de la calidad del disco y de las condicio-
nes de grabación, podría no ser posible la reproducción.
Para más información, consulte el manual de instrucciones del dispositivo que esté utilizando.
o Si tiene dudas sobre el manejo de un disco CD-R o CD-RW,
póngase en contacto con el fabricante o vendedor del
disco directamente.
Precauciones de uso
o No utilice discos rotos o agrietados porque pueden
dañar la unidad.
o No coloque etiquetas ni otros materiales en los discos.
No utilice discos que hayan tenido pegada cinta adhesiva, pegatinas o materiales similares aunque se hayan
quitado, ya que pueden quedar restos pegajosos en la
superficie del disco. También deberá evitar los discos
que tengan pegatinas con restos de pegamento en sus
bordes, por ejemplo. Si utiliza tales discos en esta unidad,
podrían quedarse pegados o dañar la unidad.
o Cuando escriba algo en el lado de la etiqueta de un
disco, utilice un rotulador de tinta permanente con punta
de fieltro. Si utiliza un bolígrafo, lápiz o pluma con punta
dura, puede dañar el disco y hacerlo irreproducible.
o Nunca utilice estabilizadores de CD de los que se pueden
comprar en establecimientos comerciales, ya que pueden
hacer que el disco sea irreproducible o dañar la unidad.
o Nunca utilice discos con formas irregulares, incluyendo
los de forma de corazón y los octogonales, ya que pueden dañar la unidad.
o Esta unidad podría no ser capaz de reproducir correcta-
mente discos CD con control de copia, discos duales u
60

o Para sacar un disco de su caja, sujételo por los bordes a
la vez que presiona hacia abajo sobre el centro de la caja.
No toque la cara del disco que tiene los datos grabados
(el lado sin rotular).
Si un disco no se carga correctamente
Si un disco se queda atrapado o tiene problemas para
introducirlo, no lo empuje ni lo fuerce. Pulse el botón de
expulsión (-) y saque el disco antes de intentar volver
a meterlo. Empujar un disco forzándolo puede dañar la
unidad.
Cómo guardar los discos
o Los discos deben guardarse en su caja cuando no se
estén utilizando, ya que de otro modo pueden deformarse o rayarse.
o No deje los discos en sitios donde estén expuestos direc-
tamente a la luz solar o muy húmedos o calurosos, ya
que pueden deformarse o estropearse, convirtiéndose
en irreproducibles.
o Los discos CD-R y CD-RW son más sensibles a los efectos
del calor y de los rayos ultravioleta que los discos CD
normales. Por ello, no debe dejarlos durante mucho
tiempo en sitios donde estén expuestos directamente
a la luz solar ni cerca de aparatos que generen calor, por
ejemplo.
o Limpie siembre los discos antes de guardarlos. Si guarda
un disco sin limpiar, en su próxima reproducción puede
saltar o perder calidad de sonido.
Mantenimiento
o Si la cara del disco que contiene los datos codificados (el
lado sin rotular) se ensucia con huellas de dedos o polvo,
utilice un paño suave para limpiar su superficie desde el
centro hacia los bordes.
o Nunca utilice productos limpiadores de discos, trata-
mientos antiestáticos, disolventes o sustancias químicas
similares para limpiar los discos, ya que dichas sustancias
pueden estropear su superficie.
61

Conexiones
V
Una vez completadas todas las conexiones, enchufe el cable de corriente a la toma de electricidad.
o Lea las instrucciones de cada dispositivo que vaya a utilizar con esta unidad.
o No mezcle ni agrupe los cables de las conexiones con cables de corriente porque puede originarse ruido.
o Asegúrese de que todos los conectores están insertados correctamente.
Antena básica de FM
Cable USB
Instale el controlador
(driver) específico en
el ordenador antes de
conectar a él esta unidad
(página 77).
A
Cable RCA
Salida de audio
(SALIDA DE LÍNEA,
etc.)
B
DC
SALIDA DIGITAL
Cable digital óptico
(ÓPTICA)
E F
Cable RCA
Entrada de
línea
Toma de electricidad
Cable de corriente incluido
c
Platina de casete,
reproductor de MD, etc.
62
audio digital
SubwooferDispositivo de salida de

A
Antena de FM
Para recibir emisiones de FM, extienda esta antena y
colóquela de modo que se obtenga la mejor recepción.
Si mueve la unidad, vuelva a reajustar la posición de
la antena.
B
Puerto USB
Se utiliza para introducir audio digital desde un ordenador. Conéctelo al puerto USB de un ordenador para
introducir en esta unidad audio digital procedente de
dicho ordenador.
Utilice un cable USB de los que se pueden adquirir en establecimientos comerciales.
ATENCIÓN
Instale el controlador (driver) específico en el ordenador antes de conectar a él esta unidad (página 77).
C
Terminal de entrada de audio analógico
(LINE IN)
Se utilizan para introducir audio analógico.
Conecte en estos terminales un dispositivo de salida de
audio como, por ejemplo, un pletina de cassette o un
reproductor de MD utilizando cables RCA de los que se
pueden adquirir en establecimientos comerciales.
Para las conexiones, utilice cables de los que se
pueden adquirir en establecimientos comerciales.
Conecte el terminal R de esta unidad al terminal derecho (R) del dispositivo de salida de audio y el terminal
L de esta unidad al terminal izquierdo (L) del dispositivo de salida de audio.
E
Terminal SUBWOOFER OUT
Si desea utilizar un subwoofer, conéctelo a este
terminal.
o El nivel de salida está enlazado con los controles
de volumen (VOLUME) de la parte frontal de la
unidad y del mando a distancia.
F
Entrada de corriente (~IN)
Inserte aquí el cable de corriente.
Una vez que haya realizado el resto de conexiones, conecte el cable de corriente a una toma de
electricidad.
V
No utilice ningún otro cable de corriente
que no sea el incluido con esta unidad. El
uso de otros cables de corriente pueden
provocar fuego o una descarga eléctrica.
Desenchufe el cable de corriente de la
toma de electricidad cuando no vaya a utilizar la unidad durante un largo periodo de
tiempo.
D
Terminal de entrada de audio digital
(OPTICAL)
Por él se introduce audio digital. Conecte aquí el terminal de salida de audio digital de un dispositivo de
audio digital.
Para la conexión, utilice un cable óptico digital
(TOS) de los que se pueden adquirir en establecimientos comerciales.
o Esta unidad admite frecuencias de muestreo de
hasta 192 kHz.
63

Conexión de los altavoces
V
Precauciones al hacer las conexiones
o Una vez que haya realizado el resto de conexiones,
conecte el cable de corriente a una toma de electricidad.
o Lea las instrucciones de cada dispositivo que vaya a utili-
zar con esta unidad.
PRECAUCIÓN
o Si no conecta unos altavoces LS-101HR, utilice altavoces
con una impedancia nominal de 4–8 Ω. Si se utilizan
altavoces con otras impedancias, puede activarse el circuito de protección y detenerse la salida de sonido.
o Los terminales de altavoz rojos son los positivos (+) y
los terminales de altavoz negros son los negativos (−).
Normalmente, el conductor + del cable de altavoz está
marcado para poder distinguirlo del conductor negativo
− del cable. Conecte el conductor marcado al terminal
rojo (+) y el conductor sin marcar al terminal negro (−).
o Las partes metálicas de los dos conductores separados
no deben tocarse. Si se tocan, puede producirse un cortocircuito. Los cables cortocircuitados pueden provocar
peligro de incendio o averías en el equipo.
Nunca permita que un cable entre en cortocircuito.
o Asegúrese de insertar correctamente todos los conecto-
res en los terminales. Para evitar ruidos y zumbidos, no
mezcle ni agrupe los cables de altavoces con el cable de
corriente u otros cables.
Altavoces LS-101HR o altavoces con
una impedancia nominal de 4–8 Ω
Cómo conectar los altavoces
1 Gire la cubierta del terminal hacia la
izquierda para aflojarla. Las cubiertas de
los terminales de altavoces de esta unidad
no se pueden sacar del todo.
2 Inserte la parte metálica del conductor en el
terminal y gire la cubierta hacia la derecha
para aanzar la conexión.
o Asegúrese de que en el terminal solo entra la parte
metálica del conductor y no el recubrimiento aislante, y que por tanto lo único que toca el terminal
es la parte metálica del cable.
3 Confirme que el cable está firmemente
sujeto tirando de él suavemente.
64

Uso del mando a distancia
Conexión con conectores de tipo
banana
Para hacer las conexiones también es posible utilizar conectores de tipo banana de los que se pueden adquirir en
establecimientos comerciales.
o Mantenga las cubiertas apretadas durante el uso.
o Lea atentamente las instrucciones de los conectores de
tipo banana que vaya a utilizar.
Aviso sobre el modelo para Europa
De acuerdo con las normativas de seguridad europeas,
en los modelos para Europa no está permitida la conexión de conectores de tipo banana en los terminales
de altavoces. Los orificios donde podrían conectarse
dichos conectores han sido tapados con unas cubiertas
negras. Conecte los altavoces utilizando cables con la
parte metálica al aire (quitado el recubrimiento aislante)
o conectores de horquilla. En caso de que una de dichas
cubiertas negras se salga del terminal, vuelva a colocarla
en su posición original.
Precauciones de uso
V
Un mal uso de las pilas podría provocar
que se rompan o que tengan fugas, y ello
causar un incendio, lesiones u oxidación
de materiales cercanos. Por favor, lea atentamente y observe las precauciones que
encontrará en la página 55.
o Cuando utilice el mando a distancia, apunte con él hacia
el receptor de la señal del mando a distancia que hay en
la unidad principal, a una distancia de 5 m o menos. No
coloque obstáculos entre la unidad principal y el mando
a distancia.
o El mando a distancia puede no funcionar si el receptor
de la señal del mando a distancia que hay en la unidad
principal está expuesto a la luz solar directamente o a
una luz intensa. En ese caso, intente mover de sitio la
unidad principal.
o Lleve cuidado porque el uso de este mando a distan-
cia podría causar el funcionamiento involuntario de
otros dispositivos que pueden ser controlados por rayos
infrarrojos.
Instalación de las pilas
Quite la tapa de la parte posterior del mando a distancia e
inserte dos pilas AAA en el compartimento orientándolas
según las indicaciones ¥ y ^. Vuelva a colocar la tapa.
Cambio de las pilas
Si la distancia de funcionamiento del mando a distancia
disminuye, las pilas están gastadas. En ese caso, reemplácelas
por unas nuevas.
Deshágase de las pilas usadas de acuerdo con las instrucciones que aparezcan en ellas, o según los requisitos
establecidos por las normas locales.
65

Nombres y funciones de las partes (mando a distancia)
l
a
b
c
d
e
f
g
h
i
j
k
Cuando tanto la unidad principal como el mando a
distancia tienen botones con las mismas funciones, la
instrucciones de este manual se refieren solo a uno de
ellos, pero el otro se puede utilizar de la misma manera.
a
Botón de reposo/encendido (¤)
Pulse este botón para encender la unidad y para
ponerla en reposo. Cuando la unidad está encendida,
el anillo que rodea el botón STANDBY/ON (¤) de la
unidad principal se ilumina en azul.
b
Botón TIMER
Se utiliza para configurar el ajuste del temporizador de
encendido/apagado.
c
Botón SLEEP
Se utiliza para configurar el ajuste del temporizador
de apagado.
m
o
q
s
u
w
e
Botón RDS/INFO
n
p
r
t
Cuando la fuente de reproducción es FM, este botón
se utiliza para seleccionar un modo de RDS. Ignore la
función INFO, ya que no funciona con esta unidad.
f
Botón DISPLAY
Púlselo para cambiar la información que se muestra
en la pantalla.
v
x
g
Botón SELECT
Se utiliza para cambiar los ajustes.
h
Botón CLOCK
Púlselo repetidamente para mostrar la hora y el ajuste
de configuración del temporizador de encendido/
apagado, y a continuación volver a ver en pantalla la
información que había antes.
i
Botones de salto (.//)
Cuando la fuente de reproducción es CD, estos botones se utilizan para saltar a la pista anterior o siguiente.
Cuando la fuente de reproducción es FM, se utilizan
para cambiar las presintonías.
j
Botón MUTE
Pulse este botón para silenciar temporalmente el
sonido. Para restablecer el sonido, vuelva a pulsarlo
de nuevo.
k
Botón LOUDNESS
Púlselo para activar y desactivar el realce de las bajas
frecuencias. Cuando está activado, el icono aparece
en la pantalla.
l
d
Botón PTY
Se utiliza para buscar emisoras por el tipo de programa
(PTY).
Botones VOLUME (−/+)
Se utilizan para ajustar el volumen.
66

m
tón de expulsión (-)
Bo
Púlselo para expulsar el disco parcialmente. Sujete el
disco por los bordes y tire de él hacia afuera.
n
Botón UPCONVERT
Pulse este botón para activar y desactivar la
sobreconversión.
o
Botón DIMMER
Púlselo para cambiar el brillo de la pantalla.
p
Botones de fuente
Estos botones se utilizan para seleccionar la fuente de
reproducción.
q
Botón MENU
Púlselo para entrar en el modo de ajustes de
configuración.
r
Botones de dirección (k/j)
Cuando la fuente de reproducción es CD, se utilizan
para seleccionar carpetas (solo MP3/WMA).
Cuando la fuente de reproducción es FM, se utilizan
para cambiar las presintonías.
s
Botones de dirección (l/;)
Botones de búsqueda (m/,)
Cuando la fuente de reproducción es CD, pulsándolos
durante la reproducción se busca hacia atrás/hacia
delante.
Cuando la fuente de reproducción es FM, se utilizan
para disminuir/incrementar la frecuencia recibida.
Púlselos y manténgalos pulsados durante al menos
dos segundos para empezar la selección automática
de emisoras.
t
Botón MODE
Cuando la fuente de reproducción es CD, se utiliza para
cambiar entre reproducción repetida y reproducción
aleatoria.
Cuando la fuente de reproducción es FM, se utiliza para
cambiar entre estéreo y mono.
u
Botón de parada (8)
Púlselo durante la reproducción para pararla.
v
Botón de reproducción/pausa (7/9)
Cuando la fuente de reproducción es CD y la unidad
está parada o en pausa, pulsándolo se comienza la
reproducción de un disco.
Este botón se utiliza durante la reproducción para
ponerla en pausa.
Cuando la fuente de reproducción es FM, se utiliza
para seleccionar presintonías y frecuencias.
w
Botón CLEAR
Se utiliza para borrar pistas programadas.
x
Botón PROGRAM
Cuando la fuente de reproducción es CD, se utiliza con
la reproducción programada.
Cuando la fuente de reproducción es FM, se utiliza con
las presintonías de emisoras de radio.
67
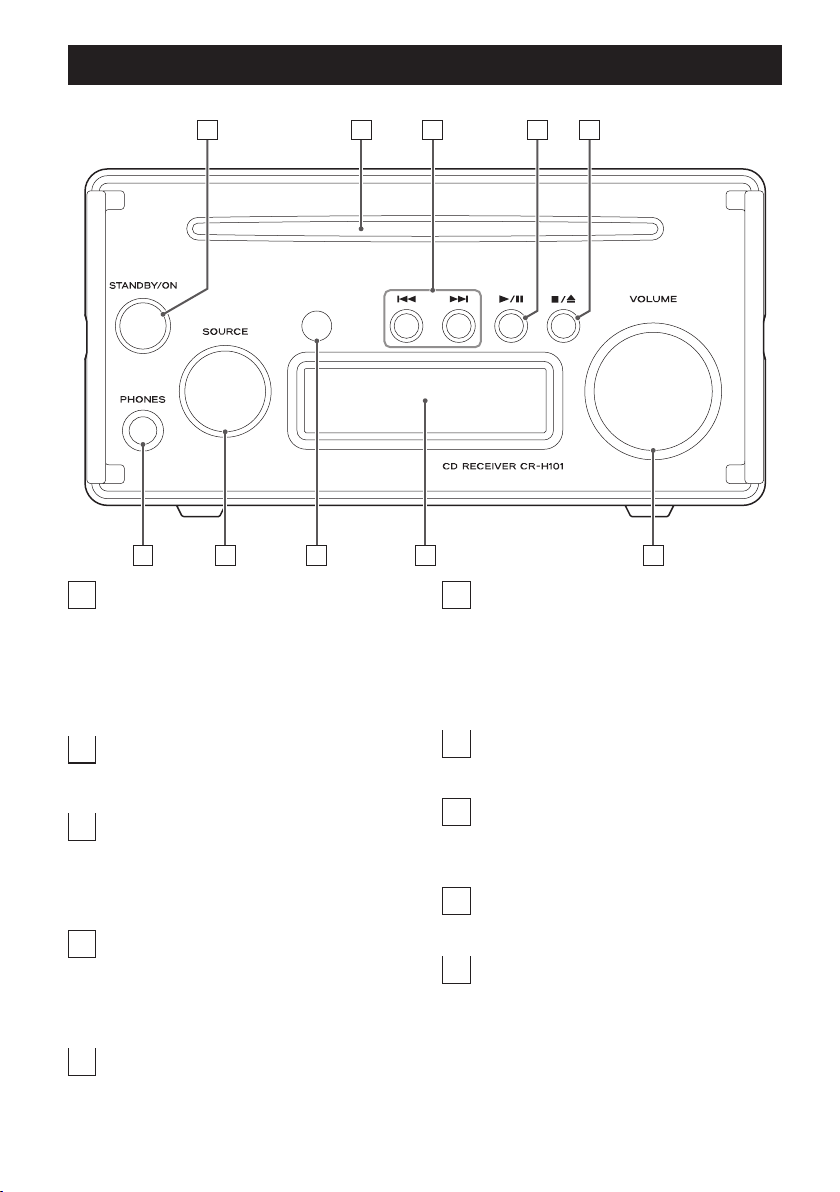
Nombres y funciones de las partes (unidad principal)
A
J
BC DE
FG HI
A
Botón STANDBY/ON (¤)
Púlselo para encender la unidad (ON) y para ponerla
en reposo (STANDBY). Cuando la unidad está encendida, el anillo que rodea el botón se ilumina en azul.
o Cuando la unidad está en modo de reposo,
consume corriente de reposo. Por este motivo
utilizamos el término “en reposo” y no “apagada”.
B
Ranura de disco
Inserte aquí un disco. Una vez insertado parcialmente,
la unidad lo arrastrará automáticamente hacia dentro.
C
Botones de salto (.//)
Cuando la fuente de reproducción es CD, se utilizan
para saltar a la pista anterior o siguiente. Durante la
reproducción, púlselos y manténgalos pulsados para
buscar hacia atrás/hacia delante.
D
Botón de reproducción/pausa (7/9)
Cuando esté en pausa, púlselo para reanudar la
reproducción.
Pulse durante la reproducción para ponerla en pausa.
Púlselo de nuevo para reanudar la reproducción.
E
Botón de parada/expulsión (8/-)
Púlselo durante la reproducción para pararla.
Con ella parada, pulse para expulsar parcialmente el
disco. Sujete el disco por los bordes y tire hacia afuera.
68
F
Salida de auriculares PHONES
Conecte aquí unos auriculares (minijack estéreo de
3,5 mm).
o Cuando se conectan unos auriculares a la unidad,
por los terminales de altavoces (SPEAKERS) del
panel posterior deja de salir audio.
G
Mando giratorio SOURCE
Gírelo para seleccionar la fuente de reproducción.
H
Receptor de señal del mando a distancia
Recibe las señales del mando a distancia. Cuando
utilice el mando a distancia, apunte hacia este sensor.
I
Pantalla
En ella se muestra diversa información.
J
Mando giratorio VOLUME
Este mando giratorio se utiliza para ajustar el volumen.
Para subirlo, gírelo hacia la derecha. Para bajarlo, gírelo
hacia la izquierda.
o Cuando se ajusta el volumen con el mando a dis-
tancia, este mando de la unidad principal no gira
en respuesta a dicho ajuste.

Funcionamiento básico
Encendido/apagado (reposo) de la unidad
Pulse el botón STANDBY/ON (¤) para encender la unidad. El indicador se
ilumina en azul cuando la unidad está encendida.
Vuelva a pulsar el botón otra vez para poner la unidad en reposo (standby).
El indicador se apagará.
Cambio de la fuente de reproducción
Gire el mando SOURCE para seleccionar la fuente de reproducción.
El nombre de la fuente de reproducción seleccionada se mostrará en la
pantalla.
Gire el mando SOURCE hacia la derecha para cambiar la fuente de reproducción según el siguiente orden:
USB w Bluetooth w LINE w CD w FM w OPTICAL
o Si se introduce audio digital en otro formato que no sea PCM,
en la pantalla se mostrará “No Signal” (sin señal) y no escuchará sonido.
Si este es el caso, es posible que el dispositivo de salida de
audio digital conectado a esta unidad tenga un ajuste de
formato de salida digital que sea “PCM” y que permitiría la
reproducción. Remítase al manual de instrucciones de dicho
dispositivo para hacer dicho ajuste.
o Para utilizar esta unidad con un ordenador Windows, es
necesario instalar el controlador (driver) específico en dicho
ordenador antes de poner esta unidad en USB y reproducir
archivos de audio del ordenador (página 77).
Ajuste del volumen
Gire el mando VOLUME o utilice los botones VOLUME del mando a distancia para ajustar el volumen al nivel apropiado.
o El ajuste de volumen se mostrará en la pantalla cuando gire el mando
VOLUME.
A medida que aumenta el valor, el volumen sube.
Pantalla de ejemplo
CD
VOLUME 15
Volumen
MIN: volumen mínimo
MAX: volumen máximo
69

Escuchar un CD
Reproducción de un CD
1 Sujete el disco por los bordes con el lado rotulado
hacia arriba e insértelo parcialmente.
2 Empuje el disco hacia adentro hasta justo antes de
que desaparezca. Será arrastrado automáticamente
hacia dentro de la ranura.
Si un disco se queda atrapado o tiene dificultades para introducirlo,
no lo empuje ni lo fuerce. Pulse el botón de expulsión (-) y saque
el disco antes de intentar volver a meterlo. Empujar un disco forzándolo puede dañar la unidad.
3 Pulse el botón de reproducción/pausa (7/9).
Durante la reproducción, en la parte superior de la pantalla aparece
PLAY.
o Si la función CD Auto Start (comienzo automático de CD) está acti-
vada (ON) al cargar un CD, la fuente de reproducción cambiará a
CD y la reproducción comenzará automáticamente (página 76).
Poner en pausa la reproducción
Pulse el botón de reproducción/pausa (y/9) para poner en pausa la
reproducción.
Para reanudar la reproducción desde la posición en la que se puso en
pausa, pulse otra vez el botón de reproducción/pausa (y/9).
Cuando la reproducción está en pausa, en la parte superior de la pantalla
aparece PAUSE.
Parar la reproducción
Pulse el botón de parada/expulsión (8/-) para parar la reproducción.
Expulsión de un disco
Con la reproducción de CD parada, pulse el botón de parada/expulsión
(8/-).
Púlselo para expulsar parcialmente el disco. Sujételo por los bordes y tire
de él hacia afuera.
o Al pulsar el botón de parada/expulsión (8/-), el disco será expulsado
independientemente de la fuente de reproducción seleccionada.
Saltar para buscar una pista
Pulse uno de los botones de salto (.//) para saltar a la pista anterior
o siguiente. Siga pulsando hasta que llegue a la pista que desee.
o Durante la reproducción, pulse el botón . una vez para volver al
principio de la pista actual. Si desea ir a una pista anterior, pulse el
botón . repetidamente hasta llegar a dicha pista.
o Durante la reproducción programada, se reproducirán las pistas situa-
das antes o después en el programa.
70
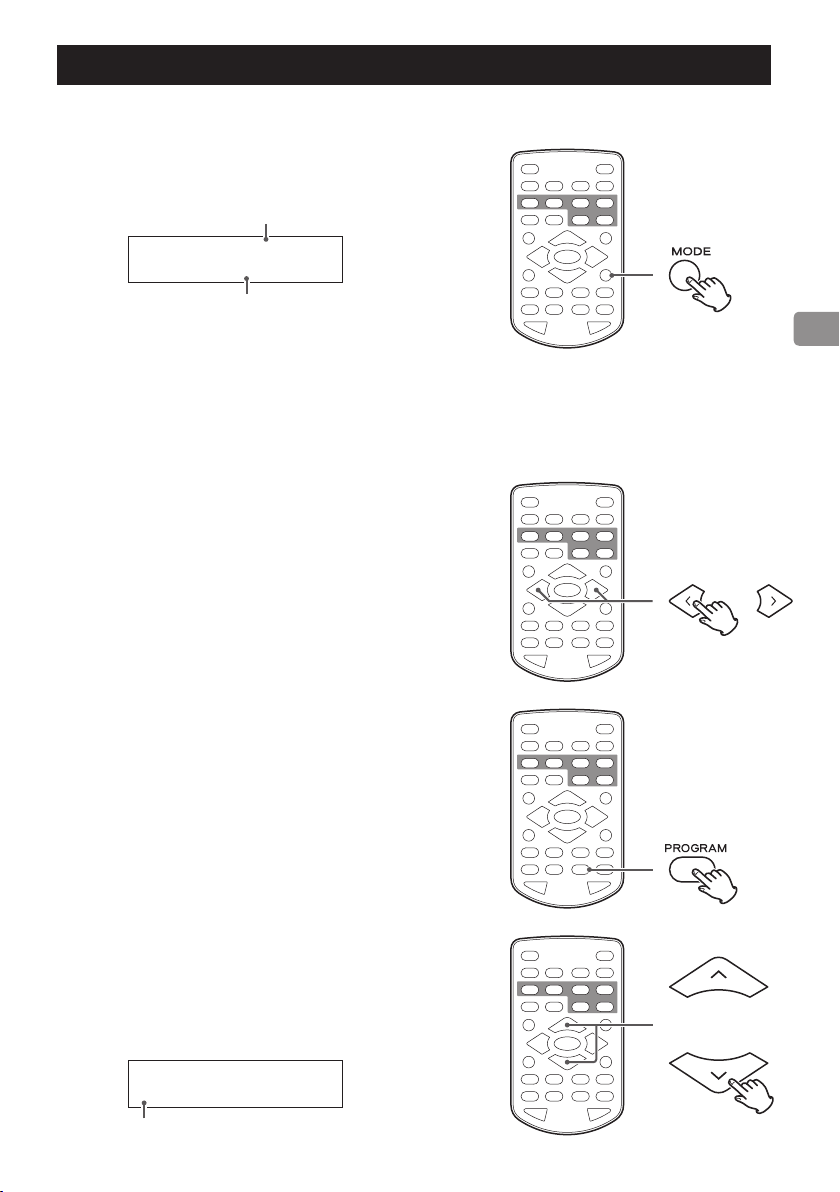
Escuchar la radio de FM
Modo de FM
Pulse el botón MODE para cambiar entre modo de recepción en estéreo y
en mono.
Pantalla de
ejemplo
FM STEREO
107.90MHz
STEREO (ESTÉREO)
Se reciben en estéreo las emisiones de FM estéreo.
o En la pantalla aparecerá “STEREO” cuando se reciba en estéreo.
MONO
Se reciben las emisiones de FM en mono. Cuando la recepción de emisiones de FM estéreo no sea buena, seleccione este modo. El sonido se hará
monoaural, pero también se reducirá el ruido y mejorará el sonido.
Cambiar la frecuencia recibida
Aumentar la frecuencia recibida
Pulse el botón de dirección (;) para incrementar en un paso la frecuencia
recibida.
Pulse y mantenga pulsado (;) el botón para buscar una emisora en dirección ascendente (frecuencias más altas).
Disminuir la frecuencia recibida
Pulse el botón de dirección (l) para disminuir en un paso la frecuencia
recibida.
Pulse y mantenga pulsado (l) el botón para buscar una emisora en dirección descendente (frecuencias más bajas).
Modo de FM
Rango de frecuencia
Ajuste automático de presintonías
La unidad puede buscar emisoras automáticamente, recibirlas y asignarles
números de presintonías.
Pulse y mantenga pulsado el botón PROGRAM.
La unidad buscará emisoras desde la frecuencia más baja que se pueda
recibir hasta la más alta y les asignará números de presintonías.
o Una vez que se hayan asignado 20 presintonías, “Full” (llena) parpa-
deará en la pantalla y dejará de asignar presintonías automáticas.
Selección de presintonías
Utilice los botones de dirección (k/j ) para cambiar el número de
presintonía.
Pantalla de
ejemplo
FM
P03 87.5MHz
Número de presintonía
71

RDS (solo modelo para Europa)
El Sistema de Datos por Radio (RDS) es un servicio de radiodifusión que
permite a las emisoras enviar información adicional junto con las señales
de la programación de radio convencional.
o El sistema RDS solo funciona en la banda de frecuencias de FM
de Europa.
1 Sintonice una emisora de FM con RDS (página 69).
2 Pulse el botón RDS del mando a distancia.
Pulsando el botón RDS se recorren cíclicamente los modos RDS
como sigue:
Servicio de programa (PS)
Cuando se selecciona “Servicio de programa”, “PS” aparece en la pantalla a la derecha de “FM”, y después aparece el nombre del servicio
de programa o el nombre de la emisora. Si no hay datos de servicio
de programa, aparece la frecuencia.
Tipo de programa RDS (PTY)
Cuando se selecciona “Tipo de programa RDS”, “PTY” aparece en la
pantalla a la derecha de “FM”, y después aparece el tipo de programa.
Texto por radio RDS (RT)
Cuando se selecciona “Texto por radio RDS”, “RT” aparece en la pantalla a la derecha de “FM”, y después aparece información de la emisora
hasta un máximo de 64 caracteres.
Servicio horario RDS (CT)
Muestra la información horaria suministrada por la emisora.
Búsqueda PTY
Se pueden buscar emisoras por el tipo de programa. Esta función está disponible solo a través de los servicios RDS de las emisoras de FM de Europa.
1 Pulse el botón PTY.
“PTY SEARCH“ (búsqueda PTY ) aparecerá en la pantalla.
FM PTY SEARCH
< NEWS >
El reloj de esta unidad se ajusta automáticamente de acuerdo a los datos horarios (CT)
RDS que recibe.
Para activar el ajuste automático del
reloj, mantenga pulsado el botón RDS
durante más de ocho segundos.
o Cuando se activa el ajuste automático
del reloj, la unidad ajusta su reloj en respuesta a los datos horarios CT recibidos,
independientemente de qué modo RDS
esté seleccionado.
Si sintoniza una emisora RDS que esté emitiendo datos horarios CT incorrectos, puede
que el reloj se ajuste incorrectamente. Y
esto podría afectar en definitiva al funcionamiento del temporizador.
Si no desea que el reloj de esta unidad se
ajuste de acuerdo a los datos horarios CT
recibidos, desactive el ajuste automático
del reloj.
Para desactivar el ajuste automático del
reloj, mantenga pulsado el botón RDS
durante más de ocho segundos.
2 Utilice los botones de
dirección
(k/j) para seleccio-
nar el programa deseado.
Puede elegir entre 31 tipos de programas (PTY).
3 Pulse el botón ENTER.
La unidad comenzará la búsqueda.
o Una vez encontrado el tipo de programa que haya seleccionado,
finalizará la búsqueda y aparecerá en la pantalla el tipo de programa.
o Si durante la búsqueda PTY no se encuentra ningún tipo de pro-
grama que coincida con el tipo seleccionado, se detendrá en la
frecuencia desde la que empezó la búsqueda.
o Si desea detener la búsqueda, pulse el botón PTY.
72

NEWS:
Noticias breves, convocatorias, opinión pública, informes,
situaciones reales.
AFFAIRS:
Sugerencias, incluyendo mensajes prácticos al margen de las
noticias, documentos de actualidad, debates y análisis.
INFO:
Información útil o de referencia, tales como previsión meteorológica, guías de consumo y consejos médicos.
SPORT:
Programas relacionados con el deporte.
EDUCATE:
Información educativa y cultural.
DRAMA:
Todo tipo de series dramáticas y conciertos.
CULTURE:
Todos los aspectos de la cultura nacional o local, incluyendo
actos religiosos, filosofía, ciencias sociales, lenguaje y teatro.
SCIENCE:
Programas sobre ciencias naturales y tecnología.
VARIED:
Programas populares como concursos, noticias de entretenimiento, entrevistas, comedias y sátiras.
POP M:
Programas sobre música comercial, popular, incluyendo listas de éxitos y superventas de discos, etc.
ROCK M:
Música moderna generalmente compuesta e interpretada
por jóvenes.
EASY M:
Canciones populares que normalmente duran menos de
cinco minutos.
LIGHT M:
Música clásica, instrumental, coral y ligera, dirigida a un
público generalista.
CLASSICS:
Música orquestal, grandes óperas y sin¬fonías, música de
cámara, etc.
OTHER M:
Otros estilos musicales, incluyendo rhythm & blues y reggae.
WEATHER:
Información y previsión meteorológica.
FINANCE:
Información financiera, comercial y bursátil.
CHILDREN:
Programas infantiles.
SOCIAL:
Temas y acontecimientos sociales.
RELIGION:
Programas religiosos.
PHONE IN:
Programas en los que los oyentes participan y expresan sus
opiniones por teléfono.
TRAVEL:
Información sobre viajes.
LEISURE:
Programas sobre actividades recreativas.
JAZZ:
Música de jazz.
COUNTRY:
Música country.
NATION M:
Música nacional.
OLDIES:
Música de la llamada época dorada de la música popular.
FOLK M:
Música folk.
DOCUMENT:
Documentales.
TEST:
Se emiten cuando se prueban señales de emergencia de
equipos emisores y receptores. No tienen como función la
búsqueda ni la sintonización dinámica en los receptores de
los consumidores.
ALARM:
Programas que notifican mensajes sobre emergencias e
información sobre desastres naturales.
73
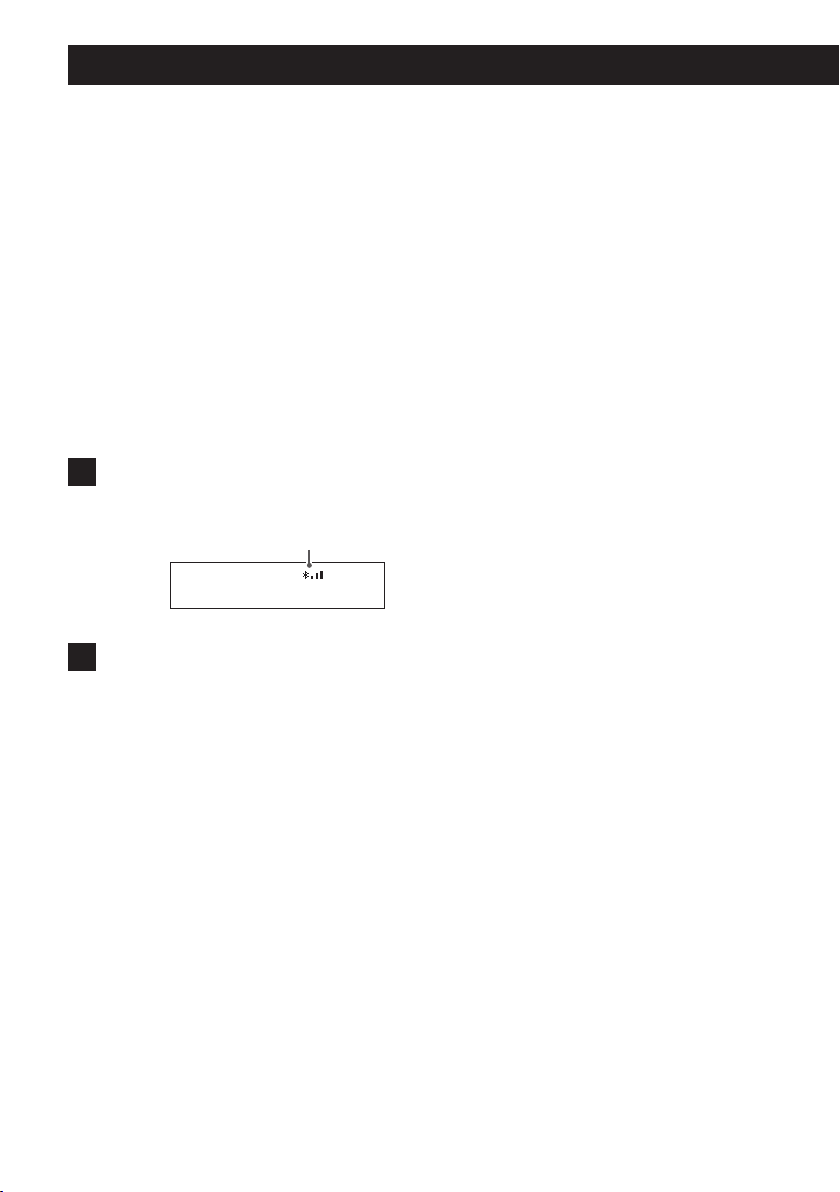
Función Bluetooth®
Notas sobre Bluetooth
Cuando utilice esta unidad con un teléfono móvil u otros
dispositivos Bluetooth, la distancia no deberá ser superior
a 10 m. Dependiendo de las circunstancias de utilización,
sin embargo, la distancia de transmisión efectiva podría ser
inferior.
No está garantizada la comunicación inalámbrica con
todos los dispositivos que soportan tecnología inalámbrica
Bluetooth.
Para determinar la compatibilidad entre esta unidad y otro
dispositivo que admita tecnología inalámbrica Bluetooth,
remítase al manual de instrucciones de dicho dispositivo
o póngase en contacto con el establecimiento donde lo
adquirió.
1 Gire el mando SOURCE para seleccionar
Bluetooth.
Pantalla de
ejemplo
Indicador de Bluetooth
Bluetooth
PM 07:28
2 Empareje o conecte esta unidad con otro
dispositivo Bluetooth.
Emparejamiento con otro dispositivo Bluetooth
Es necesario emparejar esta unidad con otro dispositivo Bluetooth la primera vez que se vaya a conectar
con dicho dispositivo.
Si no encuentra ningún dispositivo Bluetooth emparejado, esta unidad se preparará para emparejarse con
otro dispositivo. Cuando esté preparada, parpadeará el
indicador Bluetooth.
Cuando el indicador Bluetooth de esta unidad parpadee, proceda al emparejamiento utilizando el otro
dispositivo Bluetooth.
Cuando empareje esta unidad con un dispositivo
Bluetooth compatible con aptX® o AAC, se conectará
automáticamente utilizando aptX o AAC.
Conexión con un dispositivo Bluetooth ya
emparejado
Cuando la fuente de reproducción de esta unidad esté puesta en Bluetooth y el otro dispositivo
Bluetooth esté encendido, se habilitará la función
Bluetooth y ambos dispositivos deberán conectarse
automáticamente.
Si no se conectan automáticamente, conéctelos
manualmente.
o Si en la pantalla del dispositivo Bluetooth aparece
una petición de clave de acceso, introduzca “0000”
(cuatro ceros).
o Cuando esta unidad y el otro dispositivo Bluetooth
estén conectados, el indicador de Bluetooth dejará
de parpadear y se quedará iluminado fijo.
o Cuando proceda a emparejar o conectar esta
unidad con otro dispositivo Bluetooth, ambos
deberán estar a pocos metros el uno del otro. Si
están demasiado alejados, podría resultar imposible tanto el emparejamiento como la posterior
conexión.
o Cuando seleccione Bluetooth como fuente de
reproducción en esta unidad, volverá a conectarse
automáticamente otra vez el dispositivo Bluetooth
que se conectó por última vez. Si desea conectar un dispositivo Bluetooth diferente, proceda al
emparejamiento con dicho dispositivo.
o Esta unidad almacenará información para emparejar
hasta un total de ocho dispositivos. Si se emparejan
más de ocho dispositivos, se borrará la información
de emparejamiento más antigua y se añadirá la
nueva.
V
ATENCIÓN
Incluso aunque esta unidad o el otro dispositivo
Bluetooth estén preparados para conectar, si el
indicador de Bluetooth de esta unidad continúa parpadeando durante 10 minutos, esta unidad entrará
automáticamente en modo de reposo (standby).
Si el indicador continúa parpadeando durante mucho
tiempo, reinicie tanto esta unidad como el otro dispositivo Bluetooth y después vuelva a conectarlos.
74

Ajustes de configuración
3 Comience la reproducción en el otro dispo-
sitivo Bluetooth.
o Compruebe que está subido el volumen en el otro
dispositivo Bluetooth. Si no sube el volumen en el
dispositivo de reproducción, podría no escucharse
sonido procedente de esta unidad.
o Dependiendo del dispositivo Bluetooth, podría no
ser posible ajustar el volumen. Para más detalles,
remítase al manual de instrucciones de dicho dispositivo Bluetooth.
Aviso sobre el funcionamiento del
dispositivo Bluetooth
Se pueden utilizar los siguientes botones de la unidad principal o del mando a distancia para controlar un dispositivo
Bluetooth conectado a esta unidad.
Botón de reproducción/pausa (7/9)
Botones de salto (.//)
o Dependiendo del dispositivo Bluetooth que se esté
utilizando, este podría no responder a las órdenes del
mando a distancia o las respuestas de funcionamiento
podrían ser diferentes a lo esperado.
1 Pulse el botón MENU.
2 Utilice los botones de dirección (l/;) para
cambiar el apartado de ajuste y pulse el
botón SELECT.
Pantalla de
ejemplo
Pulse el botón ; para recorrer cíclicamente los siguientes apartados.
Pulse el botón l para recorrer cíclicamente estos apartados en orden inverso.
Menu
< 1.Set clock >
1. Set clock
2. CD setting
3. APS setting
4. FA. Reset
3 Use los botones de dirección (k/j) para
cambiar el ajuste y pulse el botón SELECT
para conrmar el cambio.
Pantalla de
ejemplo
Current Time
12H/24H
El apartado seleccionado parpadeará.
o Cuando haya varios ajustes posibles, pulse el
botón SELECT para que se muestre en pantalla el
siguiente ajuste.
Repita los procedimientos 2–3 para configurar otros
apartados según sea necesario.
o Por el contrario, para cancelar el cambio del ajuste,
pulse el botón MENU.
4 Pulse el botón MENU para dar por comple-
tados los ajustes.
75

Ajustes de configuración (continuación)
Set clock (ajustes horarios)
El reloj se ajusta de la manera indicada a continuación.
Current Time (formato horario)
Selecciona el formato de 12 horas o 24 horas.
Pantalla de
ejemplo
Current Time (hora actual mostrada en pantalla)
Ajusta la hora actual, primero la hora y luego los minutos.
Pantalla de
ejemplo
Current Time
12H/24H
Current Time
PM 11:45
CD setting (ajuste de CD)
CD Auto Start (comienzo automático de CD)
o El ajuste de fábrica es OFF.
OFF: el CD no se reproducirá automáticamente al cargarse.
ON: el CD se reproducirá automáticamente al cargarse.
Pantalla de
ejemplo
CD Auto Start
OFF
APS setting (ajuste de la función de
ahorro de energía automático)
Pantalla de
ejemplo
o El ajuste de fábrica es ON.
OFF: la función de ahorro de energía automático está
ON: la función de ahorro de energía automático está activada.
Menu
APS OFF
desactivada.
FA. Reset (restaurar los ajustes predeterminados de fábrica)
Pantalla de
ejemplo
Factory Reset
OK?
76
Cuando aparezca “OK?” (¿aceptar?), pulse el botón SELECT
para restaurar los ajustes a sus valores predeterminados de
fábrica.
La unidad entrará en reposo (standby) después de que sean
restablecidos.

Reproducir música en un ordenador
Instalación del controlador (driver)
en un ordenador
Esta unidad se puede conectar mediante USB con un ordenador cuyo sistema operativo sea uno de los indicados a
continuación. No está garantizado el funcionamiento con
otros sistemas operativos que no sean los indicados (a septiembre de 2015).
Mac OS
La unidad funciona con las siguientes versiones:
OS X Lion 10.7
OS X Mountain Lion 10.8
OS X Mavericks 10.9
OS X Yosemite 10.10
Esta unidad puede funcionar con el controlador estándar del
OS, por lo que no hace falta instalar ningún controlador.
Windows OS
La unidad funciona con las siguientes versiones:
Windows 7 (32/64 bits)
Windows 8 (32/64 bits)
Windows 8.1 (32/64 bits)
Windows 10 (32/64 bits)
Instalación del controlador (driver) en el ordenador
Antes de utilizar esta unidad para reproducir archivos de
un ordenador Windows, es necesario descargar primero el
controlador específico desde el sitio web global de TEAC e
instalarlo en el ordenador.
Sitio web global de TEAC:
http://teac-global.com/
Acerca del modo de transmisión
Esta unidad se conecta en modo asíncrono de alta velocidad.
Las frecuencias de muestreo que se pueden transmitir son
44.1 kHz, 48 kHz, 88.2 kHz, 96 kHz, 176.4 kHz y 192 kHz.
Cuando se haya realizado la conexión correctamente, se
podrá seleccionar “TEAC USB AUDIO DEVICE” como salida de
audio en el ordenador.
o En modo asíncrono, los datos de audio enviados desde
el ordenador se procesarán utilizando el reloj de esta
unidad, reduciéndose así las fluctuaciones que se producen durante la transmisión de datos.
Descarga de la aplicación de reproducción de audio TEAC HR Audio
Player
Nuestra aplicación “TEAC HR Audio Player” (disponible en
versiones para Mac y Windows) es compatible con la reproducción de archivos de audio de alta resolución. Se puede
descargar desde el sitio web global de TEAC.
Sitio web global de TEAC:
http://teac-global.com/
ATENCIÓN
Instale el software controlador específico en el ordenador antes de conectar la unidad mediante USB.
Si conecta un ordenador a esta unidad antes de haber instalado el controlador, no funcionará correctamente.
o Para obtener instrucciones acerca del procedimiento de
instalación del controlador (driver), acceda a la página de
descargas (Downloads) de la web global de TEAC (http://
teac-global.com/).
o Dependiendo de la combinación de hardware y sof-
tware, podría darse el caso de que el funcionamiento
no sea posible incluso con los sistemas operativos antes
mencionados.
77

Solución de posibles fallos
General
La unidad no se enciende
(El LED del interruptor de encendido no se ilumina).
e Compruebe que el cable de corriente está comple-
tamente enchufado en la toma de electricidad. Si la
toma de electricidad tiene un interruptor de encendido/apagado, confirme que el interruptor está en la
posición de encendido.
e Conecte otro dispositivo eléctrico a la toma de elec-
tricidad para confirmar que esta suministra corriente.
El mando a distancia no funciona.
e Apunte con el mando a distancia hacia el panel fron-
tal de la unidad desde una distancia inferior a 5 m
aproximadamente.
e El mando a distancia no funcionará si hay algún obstá-
culo entre él y la unidad principal. En ese caso, pruebe
a cambiar de posición.
e Si las pilas están gastadas, cámbielas por unas nuevas.
Errores de funcionamiento en una TV u otro dispositivo.
e Algunas televisiones capaces de recibir señales de
mandos a distancia inalámbricos pueden presentar
errores de funcionamiento causados por el mando
a distancia de esta unidad. Si se da el caso, utilice los
botones de la unidad principal.
No se escucha sonido o se escucha muy bajo.
e Compruebe las conexiones del amplificador y los
altavoces.
e Compruebe las conexiones con otros dispositivos.
Hay ruido.
e Coloque la unidad lo más alejada posible de televi-
siones, hornos microondas y otros dispositivos que
emitan ondas electromagnéticas.
Radio
No se recibe una emisora. La recepción no es buena.
e Seleccione una emisora.
e Si la recepción no es buena, intente reubicar la antena.
e Si hay una TV cerca de la unidad, apague la TV.
Las emisiones en estéreo se convierten en mono.
e Pulse el botón FM MODE del mando a distancia para
seleccionar el modo estéreo.
Reproductor de CD
La reproducción no es posible.
e Si el disco está al revés, vuelva a cargarlo con el lado
de la etiqueta (rotulado) hacia arriba.
e Si el disco está sucio, límpielo.
e Dependiendo de la calidad del disco y de las condicio-
nes de grabación, es posible que algunos discos CD-R/
CD-RW no puedan reproducirse.
e Los discos CD-R/CD-RW que no hayan sido finalizados
no pueden reproducirse.
El sonido salta.
e Las vibraciones pueden hacer que el sonido salte.
Instale esta unidad en un lugar estable.
e Si el disco está sucio, límpielo.
e No utilice discos rayados o rotos.
Archivos MP3 y WMA
La reproducción no es posible.
e Compruebe la extensión del archivo. Los archivos se
reconocen por su extensión: “.mp3” para los archivos
MP3 y “.wma” para los archivos WMA.
e El archivo MP3/WMA podría estar dañado.
e Compruebe el formato del archivo. Esta unidad repro-
duce archivos MP3 y WAV (página 79)
Los nombres de las pistas, artistas y álbumes no aparecen en la pantalla.
e No hay información de etiqueta ID3 para ese archivo
de música. Utilice un ordenador, por ejemplo, para
preparar los archivos MP3/WMA con su información de
etiqueta ID3 corregida.
Las etiquetas ID3 no pueden usarse con archivos WAV.
Algunos caracteres no se muestran bien en la pantalla.
e Si la información del archivo utiliza caracteres japone-
ses, chinos u otros caracteres de doble byte, puede
reproducirse el archivo, pero su nombre no se mos-
trará correctamente.
78
Dado que esta unidad utiliza un microcontrolador, ruidos externos y otras interferencias pueden hacer que la
unidad no funcione bien. Si esto ocurre, desenchufe el
cable de corriente, espere un rato y vuelva a encender la
unidad para restablecer el funcionamiento.

Especificaciones
CD Player
Soportes de reproducción ................. CD-DA, CD-R/RW
Solo se pueden utilizar discos de 12 cm
Formato ...........................ISO9660 NIVEL 1/2/JOLIET
Número máximo de archivos ........250 (incluidas carpetas)
Número máximo de carpetas ............................. 99
Formatos de audio reproducibles
MP3
Extensión ..............................“.mp3”, “.MP3”
Velocidad de bits ..........32 kbps – 320 kbps o VBR
Frecuencia de muestreo
16 kHz, 22.05 kHz, 24 kHz, 32 kHz, 44.1 kHz, 48 kHz
Estándares admitidos .....MPEG-1/2 de audio capa-3
WMA
Extensión .............................“.wma”, “.WMA”
Velocidad de bits ..........32 kbps – 320 kbps o VBR
Frecuencia de muestreo
8kHz, 11.025kHz, 16kHz, 22.05kHz, 32kHz,
44.1kHz, 48kHz
Estándar admitido ........................WMA ver. 9
Entrada de audio digital
Frecuencias de muestreo admitidas (PCM)
44.1 kHz, 48 kHz, 88.2 kHz, 96 kHz, 176.4 kHz, 192 kHz
Profundidades de bits admitidas .......................16/24
Bluetooth
Versión de Bluetooth .....................................3.0
Salida ................................................ Clase 2
Perfil compatible ......................................A2DP
Codecs .......................................SBC, AAC, aptX
Sección de amplificador
Potencia máxima ........26 W + 26 W (JEITA 10%, 1 kHz, 4 Ω)
Potencia nominal ......... 20 W + 20 W (JEITA 1%, 1 kHz, 4 Ω)
Distorsión armónica total ............ 0,08% (1 kHz, 4 Ω, 1 W)
Relación señal/ruido
LINE IN (entrada de línea) ..........................90 dB
(entrada IHF-A/LPF 20kHz/1kHz, 2V)
Respuesta de frecuencias ......... 20 Hz – 45 kHz (−5 dB)
General
Alimentación
Modelo para Europa .........CA 220–240 V (50 Hz, 60 Hz)
Modelo para EE. UU./Canadá .....CA 120 V (50 Hz, 60 Hz)
Consumo de corriente ..................................21 W
Dimensiones externas ...................182 × 93 × 221 mm
(ancho × alto × profundo, incluidos salientes)
Peso ...................................................2,2 kg
Temperatura de funcionamiento ...........de +5 °C a +35 °C
Humedad de funcionamiento ................ de 5 % a 85 %
(sin condensación)
Temperatura de almacenamiento ........ de −20 °C a +55 °C
Accesorios incluidos
Cable de corriente × 1
Mando a distancia (RC-1324) × 1
Pilas para el mando a distancia (AAA) × 2
Antena básica de FM × 1
Manual del usuario (este documento) × 1
Salida de auriculares
Potencia nominal ............. 80 mW + 80 mW (32 Ω, 1 kHz)
Distorsión armónica total ............................. 0,03%
Sintonizador
Rango de frecuencias
FM ............................ de 87.5 MHz a 108.0 MHz
o Con objeto de mejorar el producto, las especificaciones
y el diseño puede sufrir cambios sin previo aviso.
o El peso y las dimensiones son aproximados.
o Las ilustraciones de este manual pueden diferir en parte
del producto real.
79

WICHTIGE SICHERHEITSHINWEISE
VORSICHT: VERMEIDEN SIE DAS RISIKO EINES
STROMSCHLAGS. ENTFERNEN SIE NICHT DIE ABDECKUNG
(ODER RÜCKSEITE). DIE BAUTEILE IM GERÄTEINNEREN
BEDÜRFEN NICHT DER WARTUNG DURCH DEN NUTZER.
WENDEN SIE SICH IM WARTUNGS-/REPARATURFALL AN
DEN QUALIFIZIERTEN SERVICE.
Das Blitzsymbol mit Pfeilspitze in einem
<
B
WARNUNG: ZUR VERMEIDUNG VON
BRAND ODER STROMSCHLAG DARF
DIESES GERÄT NICHT REGEN ODER
FEUCHTIGKEIT AUSGESETZT WERDEN.
gleichseitigen Dreieck weist den Benutzer
auf das Vorhandensein ei ner nicht isolierten „gefährlichen elektrischen Spannung“ im Geräteinneren hin, deren Stärke
ausreichen kann, um für Personen ein
Stromschlagrisiko darzustellen.
Das Ausrufezeichen in einem gleichseitigen Dreieck weist den Benutzer auf wichtige Bedienungs- und Wartungs- (Reparatur-)
Anweisungen in den Dokumen tationen
hin, die dem Produkt beiliegen.
WARNUNG
o ENTFERNEN SIE NICHT DAS GEHÄUSE, UM DIE INTERNE
ELEKTRONIK FREIZULEGEN. IM GERÄTEINNEREN
BEFINDEN SICH KEINE BAUTEILE, DEREN WARTUNG VOM
NUTZER VORZUNEHMEN IST.
o SOLLTEN FUNKTIONSSTÖRUNGEN AUFTRETEN,
KONTAKTIEREN SIE DEN HÄNDLER, BEI DEM SIE DAS
GERÄT ERWORBEN HABEN UND BITTEN SIE UM EINEN
SERVICETERMIN. VERWENDEN SIE DAS PRODUKT ERST
WIEDER, WENN DIE REPARATUR DURCHGEFÜHRT
WURDE.
o DIE VERWENDUNG VON BEDIENELEMENTEN, EINSTELLUN-
GEN SOWIE DAS ABWEICHEN VON DEN IN DIESEM
HANDBUCH BESCHRIEBENEN VERFAHRENSWEISEN
KANN ZU GESUNDHEITS-GEFÄHRDENDER STRAHLENBELASTUNG FÜHREN.
Das Typenschild befindet sich auf der Geräteunterseite (siehe Abbildung).
Vorderseite
Typenschild
The Bluetooth® word mark and logos are registered trademarks owned by Bluetooth SIG, Inc. and any use of such marks by TEAC
CORPORATION is under license.
© 2013 CSR plc and its group companies. The aptX® mark and the aptX logo are trade marks of CSR plc or one of its group companies and may be registered in one or more jurisdictions.
This product is protected by certain intellectual property rights of Microsoft. Use or distribution of such technology outside of
this product is prohibited without a license from Microsoft.
Windows is a registered trademark of Microsoft Corporation in the United States and/or other countries.
Mac, Mac OS and OS X are trademarks of Apple Inc., registered in the U.S. and other countries.
Alle anderen Firmen- und Produktnamen sowie Logos in diesem Dokument sind Warenzeichen oder eingetragene Warenzeichen
ihres jeweiligen Eigentümers.
80

1) Lesen Sie diese Hinweise.
2) Bewahren Sie diese Anweisungen auf.
3) Beachten Sie alle Warnungen.
4) Befolgen Sie alle Anweisungen.
5) Elektrische Geräte sollten nie in der Nähe von Wasser betrieben werden.
6) Verwenden Sie zum Reinigen stets ein trockenes Tuch.
7) Achten Sie darauf, dass Belüftungsöffnungen nicht verdeckt sind. Beachten Sie bei der Installation die entsprechenden Anwei sun gen des Herstellers.
8) Vermeiden Sie Aufstellungsorte in der Nähe von Wärmequel len, wie Heizkörpern, Wärmespeichern, Öfen,
Herden oder anderen Geräten (inklusive Verstärkern), die
Wärme abstrahlen.
9) Umgehen Sie nie die Sicherheitsfunktionen eines verpolungssicheren oder geerdeten Steckers.
Verpolungssichere Stecker besit zen zwei Stromkontakte,
von denen einer breiter ist als der andere. Geerdete
Stecker (Schutzkontaktstecker) besitzen zwei Strom kontakte sowie einen dritten Erdungskontakt. Beide Steckeraus füh run gen dienen der Sicherheit. Falls der vorhandene Stecker nicht in die verwendete Steckdose passt, lassen Sie den Stecker durch einen Elektriker austauschen.
10) Achten Sie insbesondere im Bereich von Steckern,
Steckdosen sowie dem Netzkabelauslass/-anschluss darauf, dass nicht auf das Netz kabel getreten oder das Kabel
eingeklemmt werden kann.
11) Verwenden Sie nur vom Hersteller zugelassene Zubehörartikel.
12) Verwenden Sie ausschließlich vom Herstel ler empfohlene oder beim Gerätekauf
erworbene Rollwagen, Halterungen, Stative, Tische usw.
Achten Sie bei Verwendung
eines Rollwagens darauf,
dass Wagen und Gerät nicht
umfallen und Sie verletzen.
13) Trennen Sie Ihr Audiosystem während eines Gewitters
oder längerer Nichtverwendung vom Spannungsnetz.
14) Überlassen Sie alle Reparaturen/Wartungsarbeiten qualifiziertem Fachpersonal. Reparatur oder Wartung sind
erforderlich, wenn eine Beschädigung jeglicher Art
vorliegt. Beispielsweise, wenn das Netzkabel oder der
Netzstecker beschädigt sind, Flüssigkeit oder Gegenstände ins Geräteinnere gelangt sind, das Gerät Regen
oder Feuchtigkeit ausgesetzt war, nicht mehr ordnungsgemäß funktioniert oder fallen gelassen wurde.
o Es wird auch dann ein geringer Ruhe strom aus dem Netz
bezogen, wenn sich der POWER- oder STANDBY/ONSchalter nicht in der ON-Position befindet.
o Der Netzstecker dient als Verbindungs-/Trennglied zur
Span nungs versorgung. Ach ten Sie darauf, dass er stets in
einwandfreiem Zustand ist.
o Achten Sie bei der Verwendung von Kopfhörern auf Ihr
Gehör. Zu hoher Schalldruck von Ohr- oder Kopfhö rern
kann Hör schäden oder Hörverlust verursachen.
WARNUNG
o Vermeiden Sie die Einwirkung von Tropf- oder Spritz-
wasser.
o Stellen Sie niemals Vasen oder andere mit Flüssig-
keiten gefüllte Gefäße auf das Gehäuse.
o Eine Installation in geschlossenen Regalsystemen
oder ähnlichen Möbelstücken ist nicht zulässig.
o Wählen Sie einen Betriebsort in der Nähe der Wand-
steck dose, so dass der Netzstecker jederzeit zugänglich ist.
o Falls Batterien (inklusive Akkupack oder aus-
tauschbare Trocken batterien) zum Einsatz kommen,
setzen Sie diese nicht direkter Sonne, Feuer oder großer Hitze aus.
o ACHTUNG bei Verwendung von Lithium-Batterien:
bei inkorrekt vorgenommenem Batteriewechsel besteht Explosions gefahr. Ersetzen Sie verbrauchte
Batterien ausschließlich durch frische des glei chen
oder gleichwertigen Typs.
81

WICHTIGE SICHERHEITSHINWEISE (Fortsetzung)
Pb, Hg, Cd
V
Sicherheitshinweise zum Umgang mit
Batterien
Bei missbräuchlicher Verwendung können Batte rien bersten
oder auslaufen, wodurch Brände, Ver letzun gen oder Flecken
auf Gegen ständen in unmittelbarer Nähe verursacht werden können. Bitte lesen und beachten Sie die folgenden
Sicherheits hinweise sorgfältig.
o Achten Sie beim Einsetzen der Batterien auf deren kor-
rekte Pola rität: (¥) kennzeichnet den Pluspol und (^)
den Minuspol.
o Verwenden Sie ausschließlich Batterien des gleichen
Typs. Ver wenden Sie niemals unterschiedliche Batterietypen zusammen.
o Falls die Fernbedienung über einen längeren Zeitraum
(länger als einen Monat) nicht verwendet wird, entfernen Sie die Batterien aus dem Batterie fach, um Schäden
durch auslaufende Batterie flüssigkeit zu vermeiden.
o Falls Batterien ausgelaufen sein sollten, reinigen Sie das
Batterie fach sorgfältig, und ersetzen Sie defekte Batterien
durch frische.
o Verwenden Sie stets den zulässigen Batterietyp.
Verwenden Sie niemals verbrauchte Batterien zusammen mit neuen oder Batteri en unterschiedlichen Typs.
o Erhitzen oder zerlegen Sie Batterien nicht und entsorgen
Sie alte Batterien nicht, indem Sie sie verbrennen oder in
ein Gewässer werfen.
o Um Auslaufen oder Bersten zu vermeiden, transportieren
und la gern Sie Batterien stets so, dass sie keinen Kontakt
mit anderen me tallischen Gegen ständen haben, die einen Kurzschluss verursachen könnten.
o Versuchen Sie niemals Batterien aufzuladen, die nicht
ausdrücklich als wiederaufladbar gekennzeichnet sind.
Informationen zur Lasertechnik
Dieses Gerät verfügt im Gehäuseinneren über einen HalbleiterLaser und ist als „LASERPRODUKT DER KLASSE 1“ klassifiziert.
Zum Schutz vor Laserstrahlen sollten Sie nicht versuchen das
Gehäuse zu öffnen.
Laser:
Typ: EP-HD870PB
Hersteller: GUANGDONG EVER BRIGHT GROUP CO.,LTD
Laserleistung: weniger als 1 mW an der Objektivlinse
Wellenlänge: 792±25 nm
Für Kunden in Europa
Entsorgung von elektrischen sowie elektronischen Altgeräten und Batterien
(a) Sofern ein Produkt, die Verpackung und/oder die
begleitende Dokumentation durch das Symbol einer durchgestrichenen Abfalltonne gekennzeichnet ist, unterliegt dieses Pro dukt den europäischen
Richtlinien 2002/96/EC und/oder 2006/66/EC sowie nationalen Gesetzen zur Umsetzung dieser
Richtlinien.
(b) Diese Richtlinien und Gesetze schreiben vor, dass
Elektro- und Elektronik-Altgeräte sowie Batterien
und Akkus nicht in den Hausmüll (Restmüll) gelangen dürfen. Um die fachgerechte Entsorgung,
Aufbereitung und Wiederverwertung sicherzustellen, sind Sie verpflichtet, Altgeräte und entladene
Batterien/Akkus an den dafür vorgesehenen Orten
zu entsorgen.
(c) Durch die ordnungsgemäße Entsorgung solcher
Geräte, Bat terien und Akkus leisten Sie einen Beitrag
zur Einsparung wertvoller Rohstoffe und verhindern
potenziell schädliche Aus wirkungen auf die
Gesundheit der Allgemeinheit und die Um welt, die
durch falsche Abfallentsorgung entstehen können.
Die Entsorgung ist für Sie kostenlos.
(d) Falls der Gehalt an Blei (Pb), Quecksilber
(Hg) und/oder Cadmium (Cd) in
Batterien/Akkus die in der Richtlinie zur
Batterieentsorgung (2006/66/EC) angegebenen, zulässigen Höchstwerte übersteigen, wird die Bezeich nung des entsprechenden chemischen Ele ments oder der
Elemente unterhalb der durchgestrichenen Abfalltonne angegeben.
(e) Weitere Informationen zur Wert stoffsamm-
lung und Wieder verwertung von Altgeräten,
Batterien und Akkus erhalten Sie bei Ihrer
Stadtverwaltung, dem für Sie zuständigen
Abfall entsorgungsunternehmen oder der
Verkaufsstelle, bei der Sie das Produkt erworben haben.
KONFORMITÄTSERKLÄRUNG
TEAC AUDIO EUROPE, Gutenbergstr. 3,
82178 Puchheim, Deutschland, erklärt
in eigener Verant wortung, dass das in
dieser Anleitung beschriebene TEACProdukt geltenden technischen Normen entspricht.
82

Hinweise für Geräte mit Funkübertragung
Konformität des Funksenders und
Interferenzen
EU-Modell (Europäische Union)
Dieses Gerät entspricht der harmonisierten Norm der
DIRECTIVE 1999/5/EC ( R&TTE ).
Konformitätslabel
CE-Label:
WICHTIGER HINWEIS
Änderungen oder Modifikationen, die nicht ausdrücklich von
der die Konformität zertifizierenden Stelle genehmigt sind,
können zum Erlöschen der Betriebserlaubnis führen.
ACHTUNG
Die Betriebserlaubnis für Geräte mit Funkübertragung unterliegt landesspezifischen Regelungen. Verwenden Sie das
Gerät bitte nur in dem Land, in dem Sie es erworben haben.
o Die Verwendung der Bluetooth-Funktechnologie unter-
liegt möglicherweise landesspezifischen Einschränkungen.
Vorschrift zur Strahlungsbelastung
Dieses Gerät entspricht den international anerkannten
Regularien zur Verträglichkeit von Funkstrahlung beim
Menschen.
Konformitätserklärung
EU-Modell (Europäische Union)
Dieses Gerät entspricht EN.62311 – Bewertung von elektrischen und elektronischen Einrichtungen in Bezug auf
Begrenzungen der Exposition von Personen in elektromagnetischen Feldern – harmonisierte Norm der DIRECTIVE
1999/5/EC.
83

Zubehör im LieferumfangInhaltsverzeichnis
Vielen Dank, dass Sie sich für ein Produkt von TEAC entschieden haben.
Bitte lesen Sie dieses Handbuch sorgfältig durch, damit Sie
Ihr Gerät optimal verwenden können. Bewahren Sie das
Handbuch an einem sicheren Ort auf, damit Sie zu einem
späteren Zeitpunkt darauf zurückgreifen können.
In dieser Bedienungsanleitung werden die Hauptfunktionen
des Geräts erklärt.
Für umfassende Informationen zu allen Funktionen des
Geräts lesen Sie bitte das zugehörige Referenzhandbuch.
Die Bedienungsanleitung und das Referenzhandbuch stehen
auf der Webseite TEAC Global (http://www.teac-global.com/)
zum Download zur Verfügung.
WICHTIGE SICHERHEITSHINWEISE ......................... 80
Hinweise für Geräte mit Funkübertragung ................ 83
Zubehör im Lieferumfang ................................84
Die weltweite Webseite von TEAC ......................... 84
Vorbereitung ............................................. 85
Einstellen der Uhrzeit ..................................... 85
Hinweise zu Disk-Formaten ...............................86
Anschlüsse ............................................... 88
Anschluss von Lautsprechern ............................. 90
Steuerung mit der Fernbedienung ........................ 91
Geräteübersicht (Fernbedienung) ......................... 92
Geräteübersicht (Hauptgerät) ............................. 94
Grundlegende Bedienung ................................ 95
Hören von CDs ........................................... 96
Hören von FM-Radio ...................................... 97
RDS (nur Modelle für den europäischen Markt) ............ 98
Bluetooth®-Funktion .....................................100
Einstellungen ............................................101
Musikwiedergabe von einem Computer .................103
Fehlerbehebung .........................................104
Spezifikationen ..........................................105
Überprüfen Sie, ob die Verpackung alle im Folgenden aufgeführten Zubehörteile enthält.
Sofern etwas fehlt oder auf dem Transportweg beschädigt wurde, setzten Sie sich bitte mit Ihrem Händler in
Verbindung.
Netzkabel × 1
Fernbedienung (RC-1324) × 1
Batterien für Fernbedienung (Typ AAA) × 2
Einfache FM-Antenne × 1
Bedienungsanleitung (dieses Dokument) × 1
o Bewahren Sie diese Anleitung für Referenzzwecke auf.
o Informationen zur Garantie finden Sie auf Seite 184.
Die weltweite Webseite von TEAC
Updates für das Gerät stehen auf der weltweiten Webseite
von TEAC zum Download bereit: http://teac-global.com/
1) Öffnen Sie die weltweite Webseite von TEAC.
2) Klicken Sie im Bereich „Downloads“ auf die gewünschte
Sprache, um die Download-Seite für diese Sprache zu
öffnen.
ANMERKUNG
Sollte die gewünschte Sprache nicht angezeigt werden, klicken Sie auf „Other Languages“.
3) Wählen Sie im Produkt-Bereich den Produktnamen aus.
4) Wählen Sie die benötigten Updates aus, um sie her unter zu laden.
84

Einstellen der UhrzeitVorbereitung
V
Aufstellen des Geräts
o Vermeiden Sie die Aufstellung in direktem Sonnenlicht,
in der Nähe von Wärmequellen und an anderen, extrem
warmen Orten. Stellen Sie das Gerät insbesondere nicht
auf einen Verstärker oder andere Geräte, die Wärme
erzeugen, da dies zu Verfärbungen und Verformungen
des Gehäuses sowie zu Fehlfunktionen führen kann.
o Stellen Sie nichts auf das Gerät. Decken Sie das Gerät
nicht mit Textilien ab und stellen Sie es nicht auf eine
Decke oder einen dicken Teppich.
Wartung
Verwenden Sie zur Reinigung der Vorderseite und der anderen Geräteoberflächen ein mit einer milden Seifenlösung
leicht angefeuchtetes, weiches Tuch.
Verwenden Sie keine chemischen Reinigungstücher,
Verdünner oder ähnliche Substanzen, da diese die Gehäuseober fläche angreifen könnten.
V
Ziehen Sie zur Sicherheit das Netzkabel,
bevor Sie das Gerät reinigen.
Dieses Gerät verfügt über eine interne Uhr.
Stellen Sie nach Abschluss der Verkabelung die aktuelle
Uhrzeit ein.
Die Uhrzeit wird im Display angezeigt, wenn sich das Gerät
beispielsweise im Standby-Modus befindet.
o Im Abschnitt „Set clock (Einstellen der Uhrzeit)“ auf Seite
102 erfahren Sie, wie Sie die Uhrzeit einstellen.
Beispielhafte Display-Anzeige im Standby-Modus
T AM 09:18
Aktuelle Uhrzeit
Wird eingeblendet, wenn die Zeitschaltfunktion
zum Ein-/Ausschalten aktiv ist
o Wenn Sie das Stromkabel aus der Steckdose ziehen, wird
die Uhrzeit zurückgesetzt. Stellen Sie die Uhr erneut,
wenn Sie das Gerät wieder in Betrieb nehmen.
o Da die interne Uhr nicht absolut präzise läuft, empfehlen
wir Ihnen, die Uhrzeit gelegentlich nachzustellen.
85

Hinweise zu Disk-Formaten
Disk-Typen, die mit diesem Gerät
wieder gegeben werden können
CDs (12cm) mit dem Compact Disk Digital Audio Logo
o Dieses Logo befindet sich auf der Beschriftungsseite
und der Hülle der Disk.
o Die Wiedergabe von Mini-CDs mit 8cm Durchmesser ist
mit diesem Gerät nicht möglich.
CD-Rs und CD-RWs, die im CD-Audio-Format erstellt und korrekt formatiert wurden.
Finalisierte CD-R- und CD-RW-Disks mit Audiodateien im MP3- oder WMA-Format.
o Multi-Session-Disks werden nicht unterstützt.
Dieses Gerät ist ausschließlich für die oben genannten DiskFormate ausgelegt.
Wenn Sie versuchen, Disks mit einem anderen
V
Format wiederzugeben, werden eventuell sehr
laute Geräusche ausgegeben, die zu Schäden
an Lautsprechern und zu Hörschäden führen
können. Versuchen Sie daher niemals, Disks
mit einem anderen als den oben angegebenen
Formaten abzuspielen.
o WMA-Dateien
Die Formate WMA Pro (Windows Media Audio Professional)
und WMA Lossless (Windows Media Audio Lossless)
werden nicht unterstützt.
o Je nach Qualität der Disk und Aufnahme ist eine Wieder-
gabe eventuell nicht möglich.
o Die folgenden Disk-Formate können mit diesem Gerät
nicht wiedergegeben werden.
CD-ROM
Video CD
Super Audio CD
DVD Video
DVD Audio
DVD-ROM
o Copy Control CDs, Dual-Disks und andere spezielle,
nicht Red-Book-konforme CDs werden mit diesem Gerät
möglicherweise nicht korrekt wiedergegeben. Eine
korrekte Funktion und Klangqualität kann bei diesen
Sonderformaten nicht garantiert werden. Bei Problemen
mit Disks in Sonderformaten wenden Sie sich bitte an
den jeweiligen Händler.
CD-Rs/CD-RWs
Das Gerät unterstützt die Wiedergabe von CD-Rs und
CD-RWs im Format Audio-CD (CD-DA) oder mit Daten in den
Formaten MP3 oder WMA.
o Wenn Sie CDs mit einem CD-Brenner herstellen, verges-
sen Sie nicht, diese zu finalisieren.
o Je nach Qualität der Disk und Aufnahme ist eine Wieder-
gabe eventuell nicht möglich. Details entnehmen Sie
bitte der Bedienungsanleitung des jeweiligen Geräts.
o Wenn Sie Fragen zur Verwendung von CD-Rs oder CD-RWs
haben, wenden Sie sich bitte direkt an Ihren Händler.
Hinweise zur Betrieb
o Verwenden Sie keine angebrochenen Disks, da diese das
Gerät beschädigen können.
o Bringen Sie keine Aufkleber oder andere Materialen auf den
Disks an. Verwenden Sie keine Disks, die mit Klebeband,
Aufklebern oder ähnlichen Materialien beklebt waren, da
sich noch Kleberreste auf der Oberfläche befinden können. Verwenden Sie zudem keine Disks, bei denen um die
Aufkleber herum Klebstoff ausgetreten ist. Eine solche Disk
kann im Gerät steckenbleiben und es beschädigen.
o Zur Beschriftung der Label-Seite einer Disk verwenden Sie
einen wasserfesten Filzstift. Kugelschreiber oder andere
Stifte mit harter Spitze können die Disk beschädigen,
sodass sie nicht mehr wiedergegeben werden kann.
o Verwenden Sie keine CD-Stabilizer. CD-Stabilizer können zu
Schäden an den Disks und dem Gerät führen.
o Verwenden Sie keine ungewöhnlich geformten Disks wie
z.B. herzförmige oder achteckige CDs, da diese das Gerät
beschädigen können.
Video- oder Audio-DVDs, eine DVD-ROM oder
V
eine ähnliche Disk werden beim Versuch der
Wiedergabe auf eine hohe Drehzahl beschleunigt.
Durch das versehentliche Laden kann eine solche
Disk beschädigt werden. Entnehmen Sie sie also
erst, wenn sie sich nicht mehr dreht.
86
o Wenn Sie eine Disk aus dem Case nehmen, drücken Sie
auf die mittlere Halterung und fassen die Disk nur am
äußeren Rand an. Berühren Sie nicht die Datenseite der
Disk (die nicht beschriftete Seite).

Wenn eine Disk nicht korrekt geladen
wird
Wenn eine Disk im Gerät stecken bleibt oder sich nicht richtig einlegen lässt, üben Sie keine übermäßige Kraft auf sie
aus. Drücken Sie die Auswurftaste (-) und entnehmen Sie
die Disk komplett, bevor Sie sie erneut einlegen. (Wenn Sie
beim Einführen der Disk zu viel Kraft aufwenden, kann das
Gerät beschädigt werden.)
Wartung
o Wenn die Datenseite einer Disk (die unbeschriftete
Seite) durch Fingerabdrücke oder Staub verschmutzt
ist, wischen Sie mit einem weichen Tuch von innen nach
außen über die Oberfläche.
Lagerung von Disks
o Bewahren Sie nicht verwendete Disks immer in ihren
Hüllen auf. Andernfalls könnte es zu Verformungen und
Kratzern kommen.
o Lassen Sie Disks nicht in direktem Sonnenlicht oder an
sehr feuchten oder heißen Orten liegen. Unter diesen
Bedingungen können die Disks verformt und beschädigt
werden, sodass sie sich nicht mehr abspielen lassen.
o CD-Rs und CD-RWs reagieren empfindlicher auf Hitze
und UV-Strahlung als herkömmliche CDs. Lassen Sie sie
daher nicht längere Zeit in direktem Sonnenlicht oder in
der Nähe von Wärme erzeugenden Geräten liegen.
o Reinigen Sie die Disks immer, bevor Sie sie einlagern.
Verschmutzungen können bei der Wiedergabe zu
Sprüngen und einer reduzierten Klangqualität führen.
o Verwenden Sie zur Reinigung niemals Schallplatten-
Reiniger, Antistatik-Sprays, Verdünner oder ähnliche
chemische Reinigungsmittel. Chemikalien können die
Oberfläche der Disk beschädigen.
87

Anschlüsse
V
Nachdem Sie das Gerät verkabelt haben, verbinden Sie das Netzkabel mit einer Steckdose.
o Lesen Sie die Bedienungsanleitungen aller Geräte, die Sie mit diesem Gerät verwenden möchten.
o Fassen Sie die Anschlusskabel nicht mit Stromkabeln zusammen. Andernfalls können Einstreuungen auftreten.
o Sorgen Sie dafür, dass alle Kabel fest eingesteckt sind.
Einfache FM-Antenne
USB-Kabel
Bevor Sie das Gerät
anschließen, installieren
Sie auf dem Computer die
zugehörige Treibersoftware
(Seite 103).
A
Cinch-Kabel
Audio-Ausgang
(LINE OUT etc.)
B
DC
Optisches Digitalkabel
DIGITALAUSGANG
(OPTISCH)
E F
Cinch-Kabel
Line-Ein gangs-
buchse
Netzkabel (im Lieferumfang)
c
Steckdose
Kassettendeck,
MD-Player etc.
88
digitalem Audioausgang
SubwooferAudiogerät mit

A
FM-Antenne
Stellen Sie einen Sender ein und richten Sie die Antenne
für einen optimalen Empfang aus. Wenn Sie das Gerät
bewegen, führen Sie die Ausrichtung erneut durch.
B
USB-Port
Dient zur Einspeisung digitaler Audio-Dateien von einem
Computer. Verbinden Sie diesen Anschluss mit dem
USB-Port eines Computers, um digitale Audiodaten zu
empfangen.
Verwenden Sie dazu ein handelsübliches USB-Kabel.
ACHTUNG
Bevor Sie das Gerät anschließen, installieren Sie auf
dem Computer die zugehörige Treibersoftware von
TEAC (Seite 103).
C
Analoge Audio-Eingänge (LINE IN)
Dienen zum Anschluss analoger Audioquellen.
Schließen Sie hier Audiogeräte wie z.B. Kassettendecks
oder MD-Player mit herkömmlichen Cinch-Kabeln an.
Verwenden Sie zum Anschluss handelsübliche
Audiokabel mit Cinch-Steckern.
Verbinden Sie die Gerätebuchse R mit der rechten
(R) und die Gerätebuchse L mit der linken Ein gangsbuchse (L) des Audiowiedergabegeräts.
V
Verwenden Sie ausschließlich das mitgelieferte Netz kabel. Bei Verwendung eines
anderen Kabels kann es zu einem Brand
oder Stromschlägen kommen. Ziehen Sie
das Netzkabel aus der Steckdose, wenn Sie
das Gerät längere Zeit nicht verwenden.
D
Digitaler Audio-Eingang (OPTICAL)
Dient zum Anschluss digitaler Audioquellen. Verbinden Sie diesen Anschluss mit dem Digitalausgang
eines digitalen Audiogeräts.
Verwenden Sie zum Anschluss ein handelsübliches optisches Digitalkabel (TOS).
o Der Anschluss unterstützt Samplingfrequenzen bis
zu 192kHz.
E
SUBWOOFER OUT Subwoofer-Anschluss
An dieser Buchse können Sie bei Bedarf einen Subwoofer anschließen.
o Der Ausgangspegel wird über den VOLUME-Regler
auf der Vorderseite und die VOLUME-Tasten der
Fernbedienung gesteuert.
F
Netzbuchse (~IN)
Dient zum Anschluss des beiliegenden Netzkabels.
Nachdem Sie das Gerät vollständig verkabelt haben,
verbinden Sie das Netzkabel mit einer Steckdose.
89

Anschluss von Lautsprechern
V
Vorsichtsmaßnahmen bei der Verkabelung
o Nachdem Sie das Gerät verkabelt haben, verbinden Sie
das Netzkabel mit einer Steckdose.
o Lesen Sie die Bedienungsanleitungen aller Geräte, die
Sie mit diesem Gerät verwenden möchten.
VORSICHT
o Sofern Sie keine LS-101HR Lautsprecher anschließen,
achten Sie auf eine Nennimpedanz von 4 bis 8Ω. Wenn
Sie Lautsprecher mit anderen Impedanz-Werten verwenden, könnte die Schutzschaltung ausgelöst und die
Wiedergabe unterbrochen werden.
o Die positiven Lautsprecheranschlüsse (+) sind rot, die
negativen (−) schwarz. In der Regel ist die positive
(+) Ader des Lautsprecherkabels markiert, damit sie
sich einfacher von der negativen (−) unterscheiden
lässt. Verbinden Sie die markierte Ader mit der roten
Polklemme (+) und die nicht-markierte Ader mit der
schwarzen (−).
o Die Metallteile der Kabel dürfen sich nicht berühren.
Andernfalls kann es zu einem Kurzschluss kommen.
Kurzschlüsse können zu Bränden und Schäden an den
Geräten führen.
Achten Sie darauf, dass es nicht zu einem Kurzschluss
der Lautsprecherkabel kommt.
o Sorgen Sie dafür, dass alle Kabel fest angeschlossen sind.
Um Brumm- und andere Störgeräusche zu verhindern,
fassen Sie die Lautsprecherkabel möglichst nicht mit
Strom- oder anderen Kabeln zusammen.
Lautsprecher mit einer Nennimpedanz
von 4 – 8Ω (z.B. LS-101HR)
Anschluss von Lautsprechern
1 Drehen Sie die Polklemme gegen den Uhr-
zeigersinn auf. Die Polklemmen lassen sich
nicht vollständig abschrauben.
2 Führen Sie das Kabel ein und drehen Sie die
Polklemme im Uhrzeigersinn fest.
o Achten Sie dabei unbedingt darauf, dass nur der
blanke, abisolierte Teil des Kabels Kontakt mit der
Polklemme hat.
3 Prüfen Sie das Kabel durch leichten Zug
auf festen Sitz.
90

Steuerung mit der Fernbedienung
Anschluss mit Bananensteckern
Sie können zum Anschluss auch herkömmliche Bana nenstecker verwenden. Verbinden Sie zuerst die Laut sprecherkabel mit den Bananensteckern und stecken Sie dann die
Stecker in die Anschlussbuchsen.
o Betreiben Sie das Gerät nur mit festgedrehten Pol klem men.
o Lesen Sie sorgfältig die Anleitung der verwendeten
Bananenstecker.
Hinweis zum europäischen Modell
Gemäß den europäischen Sicherheitsvorschriften ist
bei der europäischen Variante des Geräts der Anschluss
über Bananenstecker nicht gestattet. Die Öffnungen,
die zum Anschluss von Bananensteckern verwendet
werden können, sind daher mit schwarzen Kappen
verschlossen. Verwenden Sie zum Anschluss abisolierte
Kabel oder Kabelschuhe. Sofern sich eine schwarze
Kappe löst, bringen Sie sie wieder an.
Hinweise zum Betrieb
V
Bei einer missbräuchlichen Verwendung
können Batterien undicht werden, was zu
Bränden, Verletzungen und der Ver schmutzung anderer Gegenstände führen kann.
Bitte lesen und befolgen Sie dazu die Sicherheits hin weise auf Seite 82.
o Wenn Sie die Fernbedienung verwenden, richten Sie
sie aus einer Entfernung von maximal 5m auf den
Empfänger am Hauptgerät. Achten Sie darauf, dass sich
keine Hindernisse zwischen dem Hauptgerät und der
Fernbedienung befinden.
o Falls der Empfänger am Hauptgerät direktem Sonnen-
licht oder einer anderen starken Lichtquelle ausgesetzt
ist, funktioniert die Fernbedienung möglicherweise
nicht. Stellen Sie in diesem Fall das Hauptgerät an einer
anderen Stelle auf.
o Beachten Sie, dass bei Einsatz der Fernbedienung verse-
hentlich auch andere Geräte auf die Infrarot-Steuerung
reagieren können.
Einsetzen der Batterien
Entfernen Sie die Abdeckung auf der Rückseite der
Fernbedienung und setzen Sie zwei AAA Batterien ein. Achten
Sie dabei auf die Markierungen für ¥ und ^. Schließen Sie
die Abdeckung.
Batteriewechsel
Wenn die Reichweite der Fernbedienung nachlässt, sind die
Batterien entladen. Ersetzen Sie die Batterien in diesem Fall
durch neue.
Entsorgen Sie die leeren Batterien entsprechend den aufgedruckten Hinweisen bzw. den lokalen Vorschriften.
91

Geräteübersicht (Fernbedienung)
l
a
b
c
d
e
f
g
h
i
j
k
Sofern eine Funktion sowohl über das Hauptgerät als
auch über die Fernbedienung aufgerufen werden kann,
wird sie in dieser Bedienungsanleitung nur einmal
beschrieben. Die Funktionsweise ist für beide Tasten
identisch.
a
STANDBY-/Einschalttaste (¤)
Mit dieser Taste schalten Sie das Gerät ein oder
aktivieren den Standby-Modus. Wenn das Gerät eingeschaltet ist, leuchtet der Leuchtring der STANDBY-/
Einschalttaste (¤) blau.
m
o
q
s
u
w
e
RDS/INFO-Taste
n
p
r
t
Wenn FM als Wiedergabequelle ausgewählt ist, dient
sie zur Auswahl des RDS-Modus. Die Bezeichnung
„INFO“ kann ignoriert werden. (Die INFO-Funktion ist
bei diesem Gerät nicht belegt.)
f
DISPLAY-Taste
Drücken Sie die Taste, um zwischen den Anzeigemodi
des Displays umzuschalten.
v
x
g
SELECT-Taste
Dient zur Einstellung der Parameter.
h
CLOCK-Taste
Drücken Sie diese Taste wiederholt, um das Display
zwischen der Uhrzeit, der Einstellung der Zeitschaltfunktion und den ursprünglichen Infor ma tionen
umzuschalten.
i
Sprungtasten (.//)
Wenn CD als Wiedergabequelle ausgewählt ist,
springen Sie mit diesen Tasten zum vorherigen oder
nächsten Track.
Wenn FM als Wiedergabequelle ausgewählt ist, schalten Sie damit durch die Presets.
b
TIMER-Taste
Dient zur Einstellung der Zeitschaltfunktion.
c
SLEEP-Taste
Dient zur Einstellung der zeitgesteuerten StandbyFunk tion.
d
PTY-Taste
Mit dieser Taste durchsuchen Sie die Sender nach dem
Programm-Typ.
j
MUTE-Taste
Drücken Sie diese Taste, um das Gerät vorübergehend
stummzuschalten. Drücken Sie die Taste erneut, um
die Stummschaltung aufzuheben.
k
LOUDNESS-Taste
Dient zum De-/Aktivieren der Loudness-Funktion
zur Bass-Anhebung. Bei aktivierter Funktion wird im
Display das Symbol eingeblendet.
l
VOLUME-Tasten (−/+)
Dienen zur Einstellung der Lautstärke.
92

m
Auswurftaste (-)
Drücken Sie diese Taste, um die Disk teilweise auszuwerfen. Fassen Sie die Disk am Rand an und ziehen Sie
sie dann ganz heraus.
n
UPCONVERT-Taste
Drücken Sie diese Taste, um die Upsampling-Funktion
zu de-/aktivieren.
o
DIMMER-Taste
Mit dieser Taste ändern Sie die Display-Helligkeit.
p
Quellauswahltasten
Drücken Sie diese Tasten, um die Wiedergabequelle
auszuwählen.
q
MENU-Taste
Drücken Sie diese Taste, um in den Einstellungsmodus
zu wechseln.
r
Richtungstasten (k/j)
Wenn CD als Wiedergabequelle ausgewählt ist, dient
die Taste zur Auswahl von Ordnern. (nur MP3/WMA)
Wenn FM als Wiedergabequelle ausgewählt ist, schalten Sie damit durch die Presets.
s
Richtungstasten (l/;)
Suchtasten (m/,)
Wenn CD als Wiedergabequelle ausgewählt ist, können
Sie den Track während der Wiedergabe rück-/vorwärts
durchsuchen.
Wenn FM als Wiedergabequelle ausgewählt ist, senken Sie mit diesen Tasten die Empfangsfrequenz ab
bzw. heben sie an. Halten Sie die Tasten mindestens
zwei Sekunden lang gedrückt, um den automatischen
Sendersuchlauf zu starten.
t
MODE-Taste
Wenn CD als Wiedergabequelle ausgewählt ist,
schalten Sie mit dieser Taste zwischen den WiedergabeModi Repeat und Shuffle um.
Wenn FM als Wiedergabequelle ausgewählt ist,
schalten Sie mit dieser Taste zwischen Stereo- und
Monobetrieb um.
u
Stopp-Taste (8)
Drücken Sie diese Taste, um die Wiedergabe zu
beenden.
v
Wiedergabe/Pause-Taste (7/9)
Wenn CD als Wiedergabequelle gewählt ist und die
Wiedergabe angehalten oder pausiert ist, können Sie
mit dieser Taste die Wiedergabe starten.
Während der Wiedergabe können Sie die Wiedergabe
mit dieser Taste pausieren.
Wenn FM als Wiedergabequelle ausgewählt ist, dient
sie zur Auswahl von Presets und Frequenzen.
w
CLEAR-Taste
Mit dieser Taste löschen Sie programmierte Tracks.
x
PROGRAM-Taste
Wenn CD als Wiedergabequelle ausgewählt ist, ist diese
Taste der programmierten Wiedergabe zugeordnet.
Wenn FM als Wiedergabequelle ausgewählt ist, dient
sie zur Auswahl von Sender-Presets.
93

Geräteübersicht (Hauptgerät)
J
FG HI
A
A
STANDBY-/Einschalttaste (¤)
Mit dieser Taste schalten Sie das Gerät ein oder in den
Standby-Modus. Wenn das Gerät eingeschaltet ist,
leuchtet der Ring um die Taste blau.
o Im Standby-Modus verbraucht das Gerät weniger
Energie. Das Gerät wird also nicht ausgeschaltet,
sondern in den Standby-Modus versetzt.
B
Disk-Einschub
Legen Sie hier eine Disk ein. Sobald Sie sie teilweise hineingeschoben haben, wird sie automatisch eingezogen.
BC DE
um die Disk teilweise auszuwerfen. Fassen Sie die Disk
am Rand an und ziehen Sie sie dann ganz heraus.
F
PHONES-Buchse
Dient zum Anschluss eines Kopfhörers mit 3,5mm
Stereo-Mini-Klinkenstecker.
o Bei angeschlossenem Kopfhörer erfolgt keine Wieder-
gabe über die rückseitigen SPEAKER-Anschlüsse.
G
SOURCE-Regler
Dient zur Auswahl der Wiedergabequelle.
C
Sprungtasten (.//)
Wenn CD als Wiedergabequelle dient, springen Sie mit
den Tasten zum vorherigen oder nächsten Track. Für
den schnellen Suchlauf (vorwärts oder rückwärts) halten Sie sie während der Wiedergabe gedrückt.
D
Wiedergabe/Pause-Taste (7/9)
Drücken Sie diese Taste, um die Wiedergabe zu pausieren oder durch erneutes Drücken fortzusetzen.
E
Stopp-/Auswurftaste (8/-)
Mit dieser Taste beenden Sie die Wiedergabe. Wenn die
Wiedergabe angehalten wurde, drücken Sie die Taste,
94
H
Empfänger für Fernbedienung
Empfängt das Signal der Fernbedienung. Richten Sie die
Fernbedienung im Betrieb auf diesen Sensor.
I
Display
Blendet verschiedene Informationen ein.
J
VOLUME-Regler
Dient zum Einstellen der Lautstärke. Drehen Sie den
Regler im Uhrzeigersinn, um die Lautstärke anzuheben. Drehen Sie den Regler gegen den Uhrzeigersinn,
um die Lautstärke abzusenken.
o Wenn Sie die Lautstärke über die Fernbedienung
einstellen, wird der Volume-Regler nicht mitbewegt.
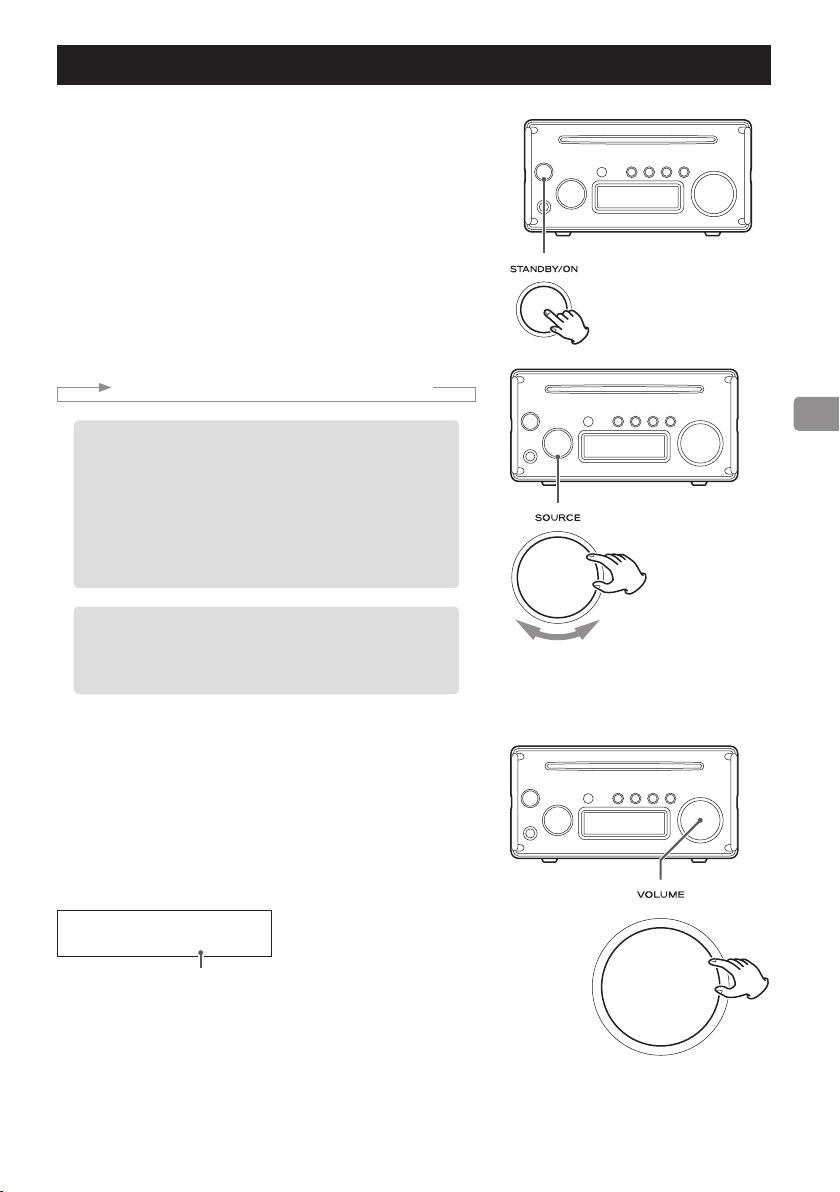
Grundlegende Bedienung
Ein- und Ausschalten (Standby) des Geräts
Drücken Sie die STANDBY-/Einschalttaste (¤), um das Gerät einzuschalten. Im eingeschalteten Zustand leuchtet der LED-Ring blau.
Drücken Sie die Taste erneut, um das Gerät in den Standby-Modus zu versetzen. Die LED-Anzeige erlischt.
Auswahl der Wiedergabequelle
Bedienen Sie den SOURCE-Regler, um die Eingangsquelle auszuwählen.
Der Name der gewählten Wiedergabequelle wird eingeblendet.
Drehen Sie den SOURCE-Regler im Uhrzeigersinn, um in der folgenden
Reihenfolge durch die Wiedergabequellen zu blättern.
USB w Bluetooth w LINE w CD w FM w OPTICAL
o Digitale Audiodateien, die nicht im PCM-Format anliegen, wer-
den nicht wiedergegeben und im Display wird die Meldung
„No Signal“ eingeblendet.
Überprüfen Sie in diesem Fall, ob das angeschlossene
Wiedergabe gerät für die Ausgabe im PCM-Format konfiguriert werden kann, um eine Wiedergabe zu ermöglichen. Für
weitere Informationen lesen Sie die Bedienungs anleitung des
Wiedergabe geräts.
o Bevor Sie das Gerät mit einem Windows-PC nutzen können,
müssen Sie den zugehörigen Treiber installieren. Wählen Sie
anschließend die Wiedergabequelle USB, um Audiodateien
von Ihrem Computer wiederzugeben (Seite 103).
Einstellen der Lautstärke
Drehen Sie den VOLUME-Regler oder bedienen Sie die VOLUME-Tasten der
Fernbedienung, um die Lautstärke nach Bedarf anzupassen.
o Wenn Sie den VOLUME-Regler bedienen, wird der aktuelle Wert im
Display eingeblendet.
Je höher der eingestellte Wert ist, desto lauter ist die Wiedergabe.
Display-Beispiel
CD
VOLUME 15
Lautstärke
MIN: Minimale Lautstärke
MAX: Maximale Lautstärke
95

Hören von CDs
Wiedergabe einer CD
1 Halten Sie die Disk mit der bedruckten Seite nach
oben am Rand und schieben Sie sie teilweise ins Gerät.
2 Schieben Sie sie fast vollständig hinein. Die Disk wird
automatisch eingezogen.
Wenn eine Disk stecken bleibt oder sich nicht richtig einlegen lässt,
üben Sie keine übermäßige Kraft aus. Drücken Sie die Auswurftaste
(-), entnehmen Sie die Disk und legen Sie sie erneut ein. (Wenn Sie
zu viel Kraft aufwenden, kann das Gerät beschädigt werden.)
3 Drücken Sie die Wiedergabe/Pause-Taste (7/9).
Während der Wiedergabe wird oben im Display PLAY eingeblendet.
o WennCD Auto Start aktiv ist, wird automatisch die Wiedergabe-
quelle CD eingestellt und die CD-Wiedergabe gestartet (Seite 102).
Pausieren der Wiedergabe
Drücken Sie die Taste Wiedergabe/Pause (y/9), um die Wiedergabe
zu pausieren. Um die Wiedergabe ab der Pause-Position fortzusetzen,
drücken Sie die Taste Wiedergabe/Pause (y/9) erneut. Während Sie die
Wiedergabe pausieren, wird oben im Display PAUSE eingeblendet.
Anhalten der Wiedergabe
Drücken Sie die Stopp-/Auswurftaste (8/- ), um die Wiedergabe
anzuhalten.
Auswerfen einer Disk
Wenn die CD-Wiedergabe angehalten wurde, drücken Sie die Stopp-/
Auswerfen (8/-).
Drücken Sie diese Taste, um die Disk teilweise auszuwerfen. Fassen Sie die
Disk am Rand an und ziehen Sie sie dann ganz heraus.
o Durch Drücken der Stopp-/Auswurftaste (8/-) können Sie die Disk
unabhängig von der gewählten Wiedergabequelle jederzeit auswerfen.
Suchen eines Tracks über die Sprungfunktion
Mit den Sprungtasten (.//) springen Sie zum vorherigen oder nächsten
Track. Drücken Sie die Taste wiederholt, bis Sie den Track erreicht haben.
o Während der Wiedergabe drücken Sie die Taste . einmalig, um
zum Anfang des aktuellen Tracks zu springen. Um einen Track davor
wiederzugeben, drücken Sie die Taste . wiederholt, bis Sie den
Track erreicht haben.
o Während der programmierten Wiedergabe werden die Tracks wieder-
gegeben, die im Programm davor oder danach angelegt wurden.
96

Hören von FM-Radio
FM-Modus
Drücken Sie die Taste MODE, um zwischen Stereo- und Mono-Empfang
umzuschalten.
DisplayBeispiel
FM STEREO
107.90MHz
STEREO
Stereophone FM-Sendungen werden auch stereo empfangen.
o Sofern eine stereophone Sendung empfangen wird, wird im Display
„STEREO“ eingeblendet.
MONO
FM-Sendungen werden mono empfangen. Wenn der Empfang von stereophonen FM-Sendungen schlecht ist, wechseln Sie in diesen Modus.
Die Wiedergabe erfolgt dann mono, allerdings werden die Störgeräusche
reduziert und die Klangqualität verbessert.
Ändern der Empfangsfrequenz
Anheben der Empfangsfrequenz
Drücken Sie die Richtungstaste (;), um die Empfangsfrequenz um einen
Schritt anzuheben.
Halten Sie die Richtungstaste (;) gedrückt, um einen Sender oberhalb der
aktuellen Frequenz zu suchen.
Absenken der Empfangsfrequenz
Drücken Sie die Richtungstaste (l), um die Empfangsfrequenz um einen
Schritt abzusenken.
Halten Sie die Richtungstaste (l) gedrückt, um einen Sender unterhalb der
aktuellen Frequenz zu suchen.
FM-Modus
Frequenzbereich
Automatisches Einstellen der Presets
Das Gerät kann automatisch nach empfangbaren Sendern suchen und
diesen Speicherplätze zuweisen.
Drücken und halten Sie PROGRAM-Taste.
Das Gerät sucht im gesamten Frequenzbereich von unten nach oben nach
Sendern und weist sie den Preset-Speicherplätzen zu.
o Sobald 20 Presets zugewiesen wurden, blinkt im Display die Meldung
„Full“ und die automatische Zuordnung wird beendet.
Auswahl von Presets
Bedienen Sie die Richtungstasten (k/j), um die Preset-Nummer zu ändern.
Display-
FM
Beispiel
P03 87.5MHz
Preset-Nummer
97

RDS (nur Modelle für den europäischen Markt)
Das Radio Data System (RDS) ist ein Rundfunk-Service, der es den Sendestationen erlaubt, neben dem regulären Radioprogrammsignal zusätzliche
Informationen zu übertragen.
o RDS ist nur für das FM-Frequenzband in Europa ausgelegt.
1 Stellen Sie einen FM-RDS-Sender ein (Seite 95).
2 Drücken Sie die RDS-Taste auf der Fernbedienung.
Durch Drücken der RDS-Taste blättern Sie wie folgt durch die RDS-Modi:
Program service (PS)
Wenn Sie Program service auswählen, wird rechts neben „FM“ der
Eintrag „PS“ und anschließend der Name für den Programm-Service
oder den Radio-Sender eingeblendet. Wenn der Programm-Service
keine Daten bereitstellt, wird die Frequenz eingeblendet.
RDS Program type (PTY)
Wenn Sie RDS Program type auswählen, wird rechts neben „FM“ der
Eintrag „PT Y“ und anschließend der Programm-Typ eingeblendet.
RDS Radio text (RT)
Wenn Sie RDS Radio text auswählen, wird rechts neben „FM“ der
Eintrag „RT“ und anschließend die Sender-Information eingeblendet,
die aus bis zu 64 Zeichen bestehen kann.
RDS Clock time (CT)
Die vom jeweiligen Sender übermittelten Zeitinformationen werden
angezeigt.
PTY search
Sie können die Sender nach dem Programm-Typ durchsuchen. Diese
Funktion steht nur über die RDS-Dienste der FM-Sendestationen in Europa
zur Verfügung.
1 Drücken Sie die Taste PTY.
Im Display wird „PT Y SEARCH“ eingeblendet.
FM PTY SEARCH
< NEWS >
Das Gerät stellt seine Uhrzeit automatisch
auf die RDS-Clock-Time-Daten (CT) ein, die
es empfängt.
Um die automatische Einstellung der
Uhrzeit zu aktivieren, halten Sie die
RDS-Taste für mindestens 8 Sekunden
gedrückt.
o Wenn die automatische Einstellung
der Uhrzeit aktiv ist, gleicht das Gerät
seine Uhrzeit unabhängig vom gewählten RDS-Modus auf die empfangenen
CT-Daten ab.
Wenn Sie einen RDS-Sender einstellen,
der fehlerhafte CT-Daten ausgibt, wird die
Uhrzeit also eventuell falsch abgeglichen.
Und das kann sich entsprechend auch auf
die Timer-Funktionalität auswirken.
Um einen automatischen Abgleich der
Uhrzeit im Gerät auf die empfangenen
CT-Daten zu verhindern, müssen Sie die
automatische Einstellung der Uhrzeit
deaktivieren.
Dazu halten Sie die RDS-Taste für mindestens 8 Sekunden gedrückt.
2 Wählen Sie mit den Richtungstasten (k/j ) das
gewünschte Programm aus.
Sie können aus 31 Programm-Typen (PTY) wählen.
3 Drücken Sie die Taste ENTER.
Das Gerät beginnt mit der Suche.
o Wenn der gewählte Programm-Typ gefunden wurde, wird die
Suche angehalten und der Programm-Typ eingeblendet.
o Wenn der passende Programm-Typ während der PTY-Suche
nicht gefunden wurde, endet die Suche bei der Frequenz, die zu
Beginn der Suche eingestellt war.
o Wenn Sie die Suche selbst anhalten möchten, drücken Sie die
Taste PTY.
98

NEWS:
Kurze Durchsagen, Veranstaltungen, öffentliche Meinung,
Reportagen und aktuelle Ereignisse.
AFFAIRS:
Empfehlungen inklusive praxisbezogener Ankündi gungen,
die nicht den Charakter von Nachrichten, Dokumentationen,
Diskussionen oder Analysen haben.
INFO:
Praxis- und Referenzinformationen wie Wetter vor her sagen,
Verbraucherinformationen und medizinische Hin weise.
SPORT:
Sport-Programme.
EDUCATE:
Informationen aus dem Kultur- und Bildungsbereich.
DRAMA:
Hörspielserien und alle Arten von Radio-Konzerten.
CULTURE:
Nationale oder lokale Kulturnachrichten jeder Art einschließlich
religiöser Veranstaltungen, Philosophie, Sozialwissenschaften,
Sprachen und Theater.
SCIENCE:
Programme über Naturwissenschaften und Technik.
VARIED:
Unterhaltungsprogramme wie Quiz-Sendungen, Neuig keiten aus der Unterhaltungsbranche, Interviews, Comedy und
Satire.
POP M:
Programme mit kommerziellen und populären Songs,
Hitparaden einschließlich der Verkaufsumsätze etc.
ROCK M:
Moderne, in der Regel von jungen Künstlern komponierte
und eingespielte Musiktitel.
EASY M:
Pop-Musik mit einer durchschnittlichen Spieldauer unter 5
Minuten.
LIGHT M:
Klassische und Instrumentalmusik, Chorwerke und leichte
Unter haltungsmusik.
CLASSICS:
Orchestermusik einschließlich großer Opern und Sym phonien, Kammermusik usw.
OTHER M:
Weitere Musikstile wie Rhythm & Blues, Reggae u. a.
WEATHER:
Wetterberichte und -vorhersagen.
FINANCE:
Berichte aus der Börsen- und Finanzwelt.
CHILDREN:
Kinder- und Jugendsendungen.
SOCIAL:
Soziale Belange.
RELIGION:
Programme mit religiösem Hintergrund.
PHONE IN:
Programme mit Zuhörer-Beteiligung per Telefon.
TRAVEL:
Reiseberichte.
LEISURE:
Sendungen zu Freizeitaktivitäten.
JAZZ:
Jazz-Musik.
COUNTRY:
Country-Musik.
NATION M:
Landestypische Musik.
OLDIES:
Musik aus den so genannten goldenen Zeiten der Pop-Musik.
FOLK M:
Folk-Musik.
DOCUMENT:
Dokumentationen.
TEST:
Testübertragungen für Notfall-Geräte oder -Empfänger. Nicht
zur Suche oder dynamischen Umschaltung für Ver braucherelektronik geeignet.
ALARM:
Programm mit Warnmeldungen bei Notfällen oder Natur katas trophen.
99

Bluetooth®-Funktion
Hinweise zu Bluetooth
Wenn Sie dieses Gerät mit einem Mobiltelefon oder anderen Bluetooth-Geräten benutzen, sollte der Abstand zwischen den Geräten nicht mehr als 10m betragen. Abhängig
von den aktuellen Bedingungen kann die tatsächliche
Reichweite gegebenenfalls geringer sein.
Eine drahtlose Übertragung kann nicht für alle BluetoothGeräte garantiert werden.
Für Angaben zur Kompatibilität dieses Geräts mit anderen
Bluetooth-Geräten lesen Sie die Bedienungsanleitung des
anderen Geräts oder wenden Sie sich an den Händler, bei
dem Sie das Gerät gekauft haben.
1 Bedienen Sie den SOURCE-Regler, um die Ein-
gangs quelle Bluetooth auszuwählen.
DisplayBeispiel
Bluetooth-Anzeige
Bluetooth
PM 07:28
2 Koppeln/verbinden Sie das Gerät mit einem
anderen Bluetooth-Gerät.
Koppeln mit einem anderen Bluetooth-Gerät
Um eine neue Verbindung zwischen diesem Gerät und
einem anderen Bluetooth-Gerät herzustellen, müssen
Sie die Geräte koppeln.
Sofern kein gekoppeltes Bluetooth-Gerät gefunden
wird, ist das Gerät zur Kopplung mit einem anderen
Gerät bereit. Die Bluetooth-Anzeige blinkt, um dies
anzuzeigen.
Wenn die Bluetooth-Anzeige blinkt, führen Sie an dem
anderen Bluetooth-Gerät die Kopplung durch.
Details dazu finden Sie in der Bedienungsanleitung
des Bluetooth-Geräts.
Sofern Sie das Gerät mit einem Bluetooth-Gerät
koppeln möchten, das aptX® oder AAC unterstützt,
wird die Kopplung automatisch über aptX bzw. AAC
durchgeführt.
Verbindung zu einem bereits gekoppelten
Bluetooth- Gerät herstellen
Wenn Sie an diesem Gerät als Wiedergabequelle
Bluetooth eingestellt haben und das andere BluetoothGerät eingeschaltet ist, wird Bluetooth aktiviert und die
Verbindung sollte automatisch hergestellt werden.
Sofern die Verbindung nicht automatisch hergestellt
wird, stellen Sie die Verbindung manuell her.
o Wenn Sie über das Display des Bluetooth-Geräts
zur Eingabe eines Zugangscodes aufgefordert
werden, geben Sie „0000“ (vier Nullen) ein.
o Sobald die Verbindung zwischen dem Gerät und
dem Bluetooth-Gerät hergestellt wurde, hört die
Bluetooth-Anzeige auf zu blinken und leuchtet
dauerhaft.
o Achten Sie beim Koppeln und Verbinden darauf,
dass die beiden Bluetooth-Geräte nur wenige
Meter voneinander entfernt sind. Ist der Abstand
zu groß, können die Geräte möglicherweise nicht
gekoppelt/verbunden werden.
o Wenn Sie am Gerät Bluetooth als Wiedergabe-
quelle gewählt haben, wird automatisch eine
Verbindung zu dem zuletzt verbundenen Gerät
hergestellt. Sofern Sie eine Verbindung zu einem
anderen Bluetooth-Gerät herstellen möchten, führen Sie die Kopplung mit diesem Gerät durch.
o Dieses Gerät speichert die Informationen von bis
zu acht gekoppelten Geräten. Wenn Sie bereits
acht Geräte gekoppelt haben, wird der älteste
Eintrag gelöscht, bevor ein neuer hinzugefügt
werden kann.
V
ACHTUNG
Auch wenn das Gerät und das andere Bluetooth-Gerät
zur Verbindung bereit sind, wird der Standby-Modus
aktiviert, wenn die Bluetooth-Anzeige an diesem Gerät
zehn Minuten lang blinkt. Um das Gerät zu benutzen,
müssen Sie es dann erneut einschalten.
Sollte die Anzeige weiterhin lange blinken, schalten
Sie beide Geräte aus und wieder ein und versuchen
Sie dann erneut, die Verbindung herzustellen.
100
 Loading...