

Content Server
User Manual
Software version S1
This document is not to be reproduced in whole or in part without permission in writing from:
D1389801

TANDBERG Content Server User Manual
Trademarks and Copyright
All rights reserved. This document contains information that is proprietary to TANDBERG. No part
of this publication may be reproduced, stored in a retrieval system, or transmitted, in any form, or
by any means, electronically, mechanically, by photocopying, or otherwise, without the prior
written permission of TANDBERG. Nationally and internationally recognized trademarks and
trade names are the property of their respective holders and are hereby acknowledged.
Contains iType™ from Agfa Monotype Corporation.
Disclaimer
The information in this document is furnished for informational purposes only, is subject to
change without prior notice, and should not be construed as a commitment by TANDBERG. The
information in this document is believed to be accurate and reliable; however TANDBERG
assumes no responsibility or liability for any errors or inaccuracies that may appear in this
document, nor for any infringements of patents or other rights of third parties resulting from its
use. No license is granted under any patents or patent rights of TANDBERG.
This document was written by the Research and Development Department of TANDBERG,
Norway. We are committed to maintain a high level of quality in all our documentation. Towards
this effort, we welcome you to Contact us
and structure of this document.
Copyright © 2006 TANDBERG. All rights reserved. TANDBERG is a registered trademark of
TANDBERG ASA and/or its subsidiaries in the United States and/or other countries.
This product includes software licensed from Agora Laboratories. Copyright (c) 2003 Agora
Laboratories, Inc. All Rights Reserved.
Portions utilize Microsoft Windows Media Technologies. Copyright (c) 1999-2002 Microsoft
Corporation. All rights reserved.
RealNetworks (r) technology is provided under license from RealNetworks, Inc., copyright (c)
1995-2003 RealNetworks, Inc. and/or its suppliers. P.O. Box 91123, Seattle Washington 981119223, U.S.A. Patents Pending. All rights reserved. RealNetworks is a registered trademark of
RealNetworks, Inc.
Contains software licensed from Spirit. Copyright (c) 1995-2004 SPIRIT
This product includes software developed by the OpenSSL Project for use in the OpenSSL
Toolkit. (http://www.openssl.org/). Copyright (c) 1998-2005 The OpenSSL Project. All rights
reserved.
THE OpenSSL SOFTWARE IS PROVIDED BY THE Open SSL PROJECT “AS IS” AND ANY
EXPRESSED OR IMPLIED WARRANTIES, INCLUDING, BUT NOT LIMITED TO, THE IMPLIED
with comments and suggestions regarding the content
ii

User Manual
WARRANTIES OF MERCHANTABILITY AND FITNESS FOR A PARTICULAR PURPOSE ARE
DISCLAIMED. IN NO EVENT SHALL THE OpenSSL PROJECT OR ITS CONTRIBUTORS BE
LIABLE FOR ANY DIRECT, INDIRECT, INCIDENTAL, SPECIAL, EXEMPLARY, OR
CONSEQUENTIAL DAMAGES (INCLUDING ,BUT NOT LIMITED TO, PROCUREMENT OF
SUBSTITUTE GOODS OR SERVICES; LOSS OF USE, DATA, OR PROFITS; OR BUSINESS
INTERRUPTION) HOWEVER CAUSED AND ON ANY THEORY OF LIABILITY, WHETHER IN
CONTRACT, STRICT LIABILITY, OR TORT( INCLUDING NEGLIGENCE OR OTHERWISE)
ARISING IN ANY WAY OUT OF THE USE OF THIS SOFTWARE, EVEN IF ADVISED OF THE
POSSIBILITY OF SUCH DAMAGE
COPYRIGHT © 2006, TANDBERG
iii

TANDBERG Content Server User Manual
Environmental Issues
Thank you for buying a product, which contributes to a reduction in pollution, and thereby helps
save the environment. Our products reduce the need for travel and transport and thereby reduce
pollution. Our products have either none or few consumable parts (chemicals, toner, gas, paper)
and low energy consuming products.
Waste handling
There is no need to send any products or material back to TANDBERG as there are no
consumables to take care of. Please contact your local dealer for information on local waste
handling and recycling of electronic products.
Production of products
Our factories employ the most efficient environmental methods for reducing waste and pollution
and ensuring the products are recyclable.
Digital User Manuals
TANDBERG is pleased to announce that it has replaced the printed versions of its User Manuals
with a digital CD version. The environmental benefits of this are significant. The CDs are
recyclable and the savings on paper are huge. A simple web-based search feature helps users
directly access the information they need. If desired, the user manuals on the CD can still be
printed locally.
iv
Operator Safety Summary
User Manual
For your protection, please read these safety instructions completely before operating the
equipment and keep this manual for future reference. The information in this summary is intended
for operators. Carefully observe all warnings, precautions and instructions both on the apparatus
and in the operating instructions.
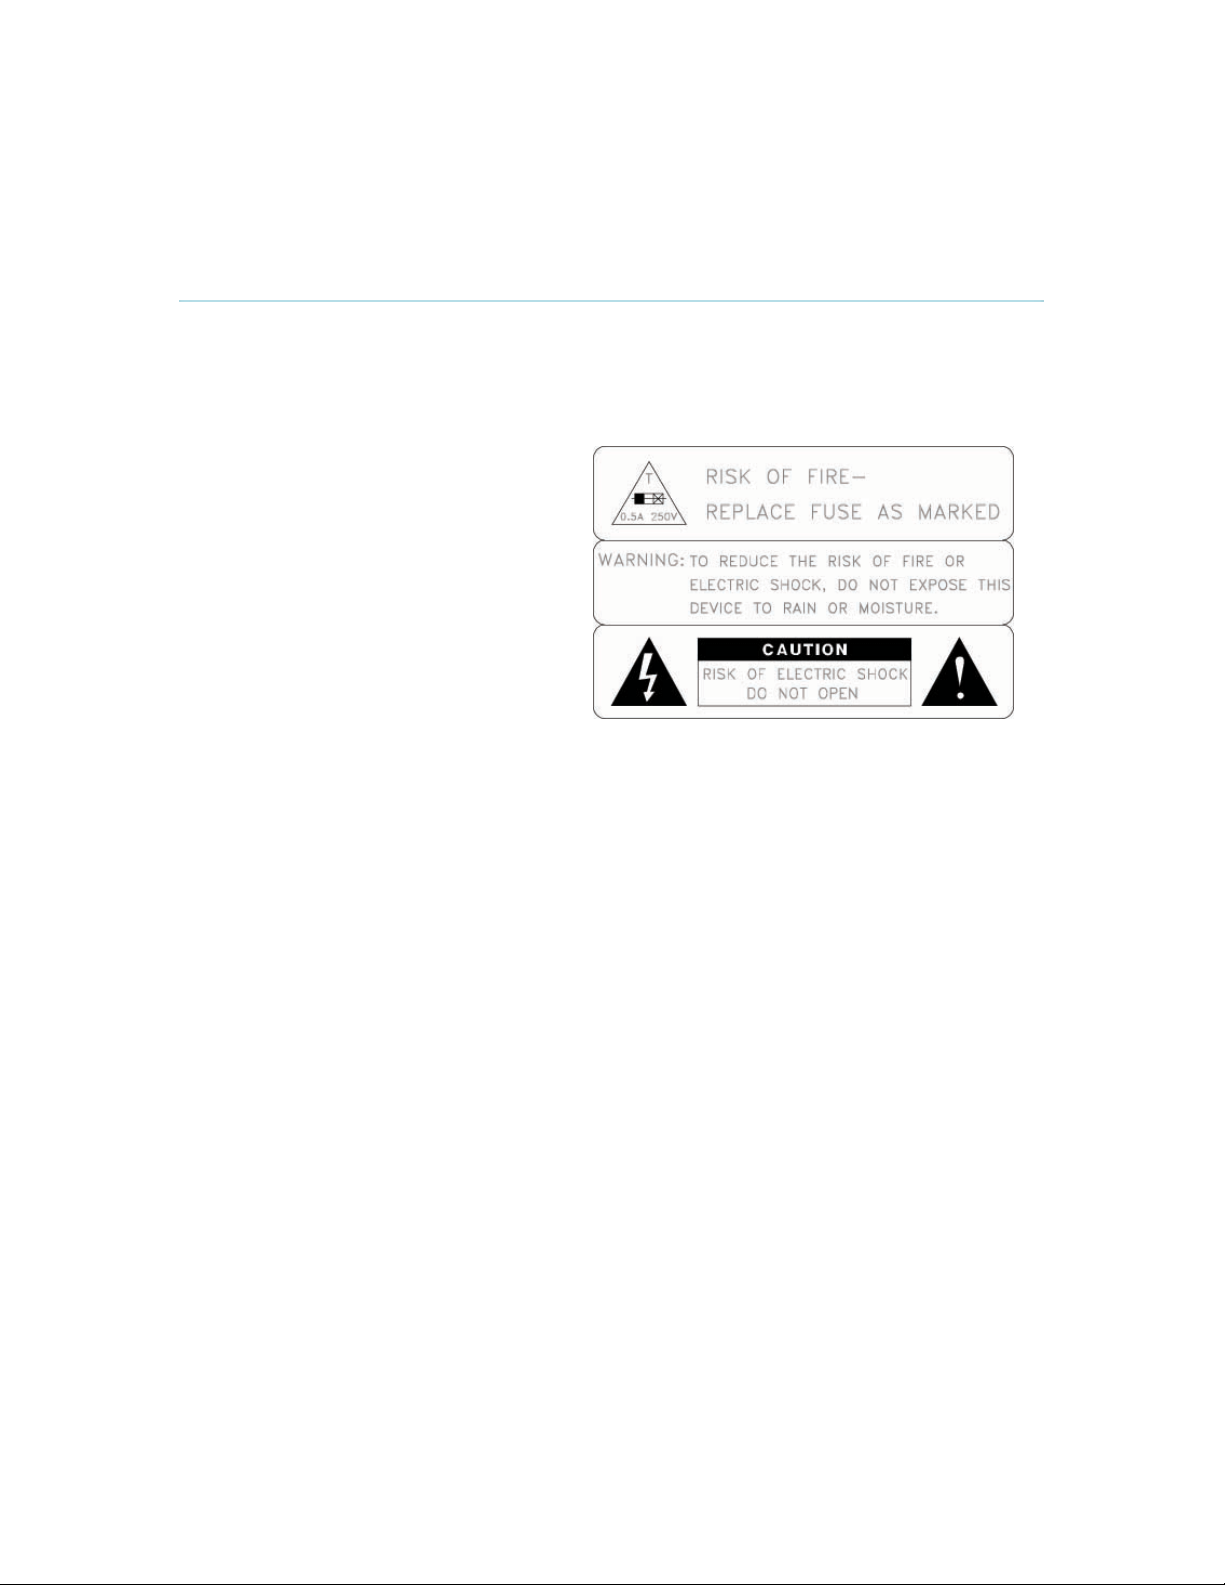
Equipment Markings
The lightning flash symbol within an
equilateral triangle is intended to alert the
user to the presence of uninsulated
“dangerous voltages” within the product’s
enclosure that may be of sufficient
magnitude to constitute a risk of electrical
shock.
The exclamation mark within an equilateral
triangle is intended to alert the user to the
presence of important operating and
maintenance (servicing) instructions
accompanying the equipment.
Warnings
Water and moisture - Do not operate the equipment under or near water - for example
near a bathtub, kitchen sink, or laundry tub, in a wet basement, or near a swimming pool
or in areas with high humidity.
Cleaning - Unplug the apparatus from the wall outlet before cleaning or polishing. Do not
use liquid cleaners or aerosol cleaners. Use a lint-free cloth lightly moistened with water
for cleaning the exterior of the apparatus.
Ventilation - Do not block any of the ventilation openings of the apparatus. Install in
accordance with the installation instructions. Never cover the slots and openings with a
cloth or other material. Never install the apparatus near heat sources such as radiators,
heat registers, stoves, or other apparatus (including amplifiers) that produce heat.
Grounding or Polarization - Do not defeat the safety purpose of the polarized or
grounding-type plug. A polarized plug has two blades with one wider than the other. A
grounding type plug has two blades and a third grounding prong. The wide blade or third
prong is provided for your safety. If the provided plug does not fit into your outlet, consult
an electrician.
Power-Cord Protection - Route the power cord so as to avoid it being walked on or
pinched by items placed upon or against it, paying particular attention to the plugs,
receptacles, and the point where the cord exits from the apparatus.
Attachments - Only use attachments as recommended by the manufacturer.
Accessories - Most systems should only be used with a cart, stand, tripod, bracket, or
table specified by the manufacturer, or sold with the apparatus. When a cart is used, use
caution when moving the cart/apparatus combination to avoid injury from tip-over.
Lightning - Unplug this apparatus during lightning storms or when unused for long periods
of time.
v

TANDBERG Content Server User Manual
Servicing - Do not attempt to service the apparatus yourself as opening or removing
covers may expose you to dangerous voltages or other hazards, and will void the
warranty. Refer all servicing to qualified service personnel.
Damaged Equipment - Unplug the apparatus from the outlet and refer servicing to
qualified personnel under the following conditions:
When the power cord or plug is damaged or frayed
If liquid has been spilled or objects have fallen into the apparatus
If the apparatus has been exposed to rain or moisture
If the apparatus has been subjected to excessive shock by being dropped, or the
cabinet has been damaged
If the apparatus fails to operate in accordance with the operating instructions
vi

Contact us
User Manual
If you have any questions, comments or suggestions, please see the Online Support
www.tandberg.net
It is also possible to send a fax or mail to the attention of:
Product and Sales Support
TANDBERG
P.O. Box 92
1325 Lysaker
Norway
Tel: +47 67 125 125
Fax: +47 67 125 234
service at
vii

TANDBERG Content Server User Manual
End-User License Information
IMPORTANT: THE USER MANUAL CD FOR THIS PRODUCT CONTAINS IMPORTANT
TERMS AND CONDITIONS INCLUDING END USER LICENSE AGREEMENTS. THE LICENSE
AGREEMENTS SHOULD BE READ PRIOR TO USE. USE OF THIS PRODUCT CONSTITUTES
ACCEPTANCE OF THE TERMS OF THE LICENSES.
viii

User Manual
Table of Contents
End-User License Information ....................................................................................................... viii
1 Introduction............................................................................................................................... 1
2 Installation ................................................................................................................................ 2
2.1 Unpacking .............................................................................................................................. 3
2.2 Connecting cables ................................................................................................................. 4
2.3 IP Address Setting Configuration........................................................................................... 5
2.3.1 IP setting configuration: ............................................................................................. 5
2.3.2 Static IP configuration:............................................................................................... 6
2.3.3 Content Server configuration ..................................................................................... 6
2.3.4 User configuration...................................................................................................... 7
2.3.5 QuickTime installation................................................................................................ 8
3 General Use ........................................................................................................................... 10
3.1 Restart and shutdown .......................................................................................................... 10
3.1.1 How to restart the Content Server ........................................................................... 11
3.1.2 How to shutdown the Content Server ...................................................................... 11
3.2 Restoring the Content Server to factory settings ................................................................. 11
3.2.1 How to restore the Content Server to factory settings............................................. 12
4 Administrator Settings ............................................................................................................ 13
4.1 Site Settings......................................................................................................................... 14
4.1.1 Content Server Properties ....................................................................................... 15
4.1.2 Gatekeeper .............................................................................................................. 18
4.1.3 H.323 ports .............................................................................................................. 19
4.1.4 Site Codec Support.................................................................................................. 20
4.2 Line settings......................................................................................................................... 21
4.2.1 Transcoding Line ..................................................................................................... 22
4.2.2 Transcoding Line Properties:................................................................................... 23
4.2.3 H.239 Capabilities:................................................................................................... 24
4.2.4 Call options .............................................................................................................. 25
4.2.5 Advertised Codecs................................................................................................... 26
4.2.6 Transcoding Codec Support .................................................................................... 27
4.2.7 Transcoding Templates ........................................................................................... 28
4.2.8 Archiving Line Properties......................................................................................... 30
4.3 User Management ............................................................................................................... 32
4.3.1 Adding Users ........................................................................................................... 33
4.4.2 Managing Users ............................................................................................................ 34
4.4 Template Editor.................................................................................................................... 35
4.4.1 Template List ........................................................................................................... 36
4.4.2 Existing Template .................................................................................................... 37
4.4.3 Editing an Existing Template ................................................................................... 37
4.4.4 Editing a New Template Screen .............................................................................. 38
4.4.5 Serverpush Output Screen ...................................................................................... 39
4.4.6 File Output Information ............................................................................................ 40
4.4.7 Creating a New Template ........................................................................................ 41
4.4.8 Template creation tips.............................................................................................. 50
4.4.9 Using the Multicast Templates................................................................................. 50
4.5 Software Upgrade ................................................................................................................ 58
5 Creating and Editing Content ................................................................................................. 59
5.1 Creating Conferences .......................................................................................................... 61
5.1.1 Live View.................................................................................................................. 64
ix

TANDBERG Content Server User Manual
5.2 Editing Conferences............................................................................................................. 68
5.2.1 Slide List .................................................................................................................. 70
5.2.2 Media URL List ........................................................................................................ 71
5.2.3 Content Editor .......................................................................................................... 72
5.2.4 Uploading Slides ...................................................................................................... 73
5.2.5 Deleting Slides ......................................................................................................... 75
5.2.6 Adding Markers........................................................................................................ 75
5.2.7 Removing Markers................................................................................................... 76
6 Dialing in to the Content Server ............................................................................................. 77
6.1 Scheduling a Call with TMS................................................................................................. 79
7 Viewing Content ..................................................................................................................... 80
7.1.1 Conference Test Page ............................................................................................. 81
7.1.2 The Content Viewer ................................................................................................. 82
7.1.3 The Video Display.................................................................................................... 83
7.1.4 The Video Controls .................................................................................................. 84
7.1.5 Conference Views.................................................................................................... 89
8 Appendices............................................................................................................................. 95
Appendix 1 – LED panel menu structure ................................................................................... 96
Appendix 2 – Compatibility ........................................................................................................ 97
Appendix 3 – Troubleshooting guide ......................................................................................... 99
Appendix 4 - Example XML File............................................................................................... 101
Appendix 5 – TANDBERG Content Server port assignment................................................... 103
x

1 Introduction
The TANDBERG Content Server is the latest addition to the TANDBERG product range which
provides users with a quick and easy way to record video meetings and view them live or ondemand from their computers.
Features at a glance:
Large scale content creation from multiple concurrent video meetings
Live streaming of video meetings in multiple formats and data rates
Multicast and unicast streaming
In-built Windows Media™ streaming server
Integration with external streaming servers for publishing Windows Media™,
RealNetworks
content
Searchable content library for quick retrieval and streaming on-demand
No client installation required for the web-based content viewer
Interactive tools for users to view and explore recorded video meetings
Integration with Active Directory for authenticating administrative users and
owners
User-friendly web-based interface for administrative system configuration
Integration with TANDBERG Management Suite (TMS)
®
Real Media (RealAudio® and RealVideo®) and QuickTime®

TANDBERG Content Server User Manual
2 Installation
Precautions:
Never install communication wiring during a lightning storm.
Never install jacks for communication cables in wet locations unless the jack is
specifically designed for wet locations.
Never touch uninstalled communication wires or terminals unless the communication line
has been disconnected at the network interface.
Use caution when installing or modifying communication lines.
Avoid using communication equipment (other than a cordless type) during an electrical
storm. There may be a remote risk of electrical shock from lightning.
Do not use the communication equipment to report a gas leak in the vicinity of the leak.
Always connect the product to an earthed socket outlet.
The socket outlet shall be installed near to the equipment and shall be easily accessible.
Never install cables without first switching the power OFF.
This product complies with the following directives:
LVD 73/23/EC, EMC 89/366/EEC, R&TTE 99/5/EEC,
Directive 73/23/EEC (Low Voltage Directive)
Standard EN 60950-1
Directive 89/336/EEC (EMC Directive)
Standard EN 55022, Class A
Standard EN 55024
Standard EN 61000-3-2/-3-3
Approved according to UL 60950-1 and CAN/CSA C22.2 No. 60950-1-03
Complies with FCC15B Class A
2
2.1 Unpacking
To avoid damage to the unit during transportation, the Content Server is delivered in a special
shipping box, which should contain the following components:
User Manual and other documentation on CD.
Rack-ears, screws and screwdriver.
Cables:
o Power cable
o Ethernet cable
TANDBERG Content Server
Installation site preparations
Make sure that the Content Server is accessible and that all cables can be easily
connected.
For ventilation: Leave a space of at least 10cm (4 inches) behind the Content Server’s
rear panel and 10cm (4 inches) in front of the front panel.
The room in which you install the Content Server should have an ambient temperature
between 0
relative humidity.
Do not place heavy objects directly on top of the Content Server.
Do not place hot objects directly on top, or directly beneath the Content Server.
Use a grounded AC power outlet for the Content Server.
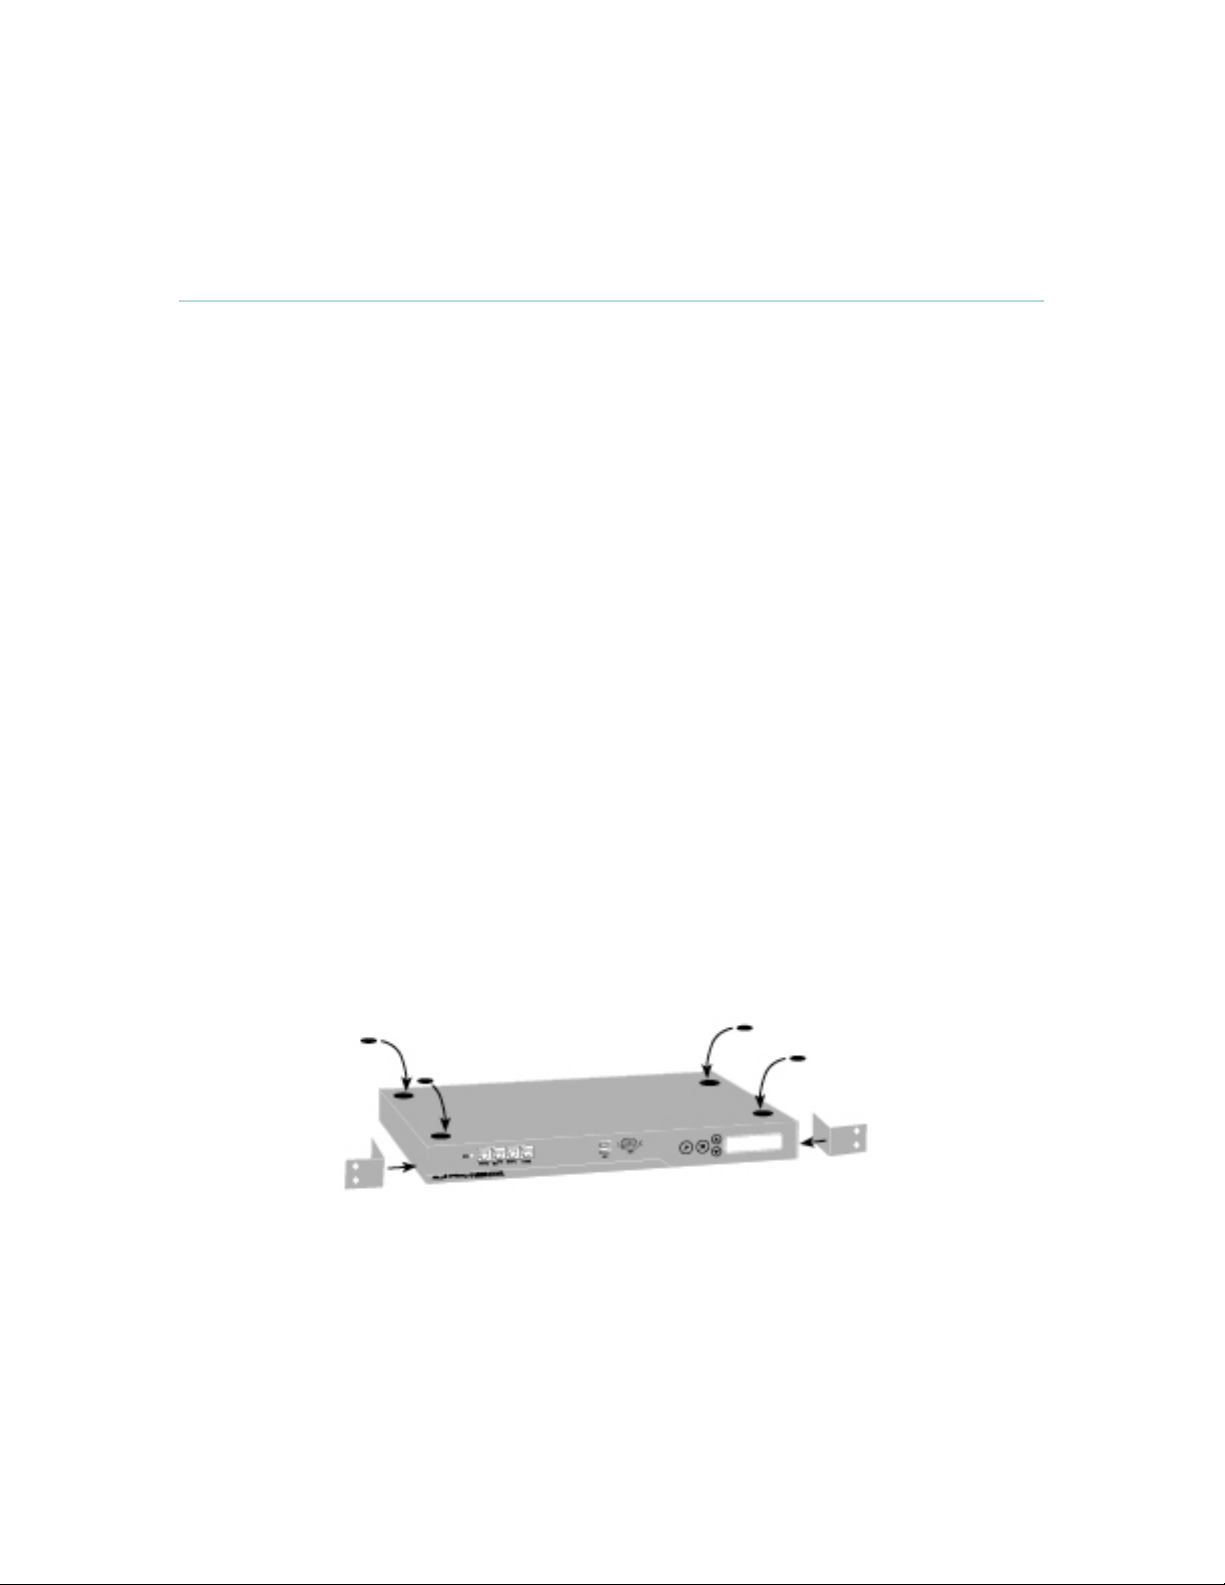
Rack Mounting (optional)
The Content Server comes with rubber feet for standalone installation and brackets for mounting
in standard 19” racks.
º
C and 35ºC (32ºF and 95ºF) and between 10% and 90% non-condensing
Before starting the rack mounting please make sure the TANDBERG Content Server is placed
securely on a hard flat surface.
1. Disconnect the AC power cable.
2. Make sure that the mounting space is prepared according to the ‘Installation site
preparations’ above.
3. Attach the brackets to the Content Server on both sides of the unit.
3
TANDBERG Content Server User Manual
4. Insert the Content Server into a 19” rack, and secure with screws in the front (four
screws).
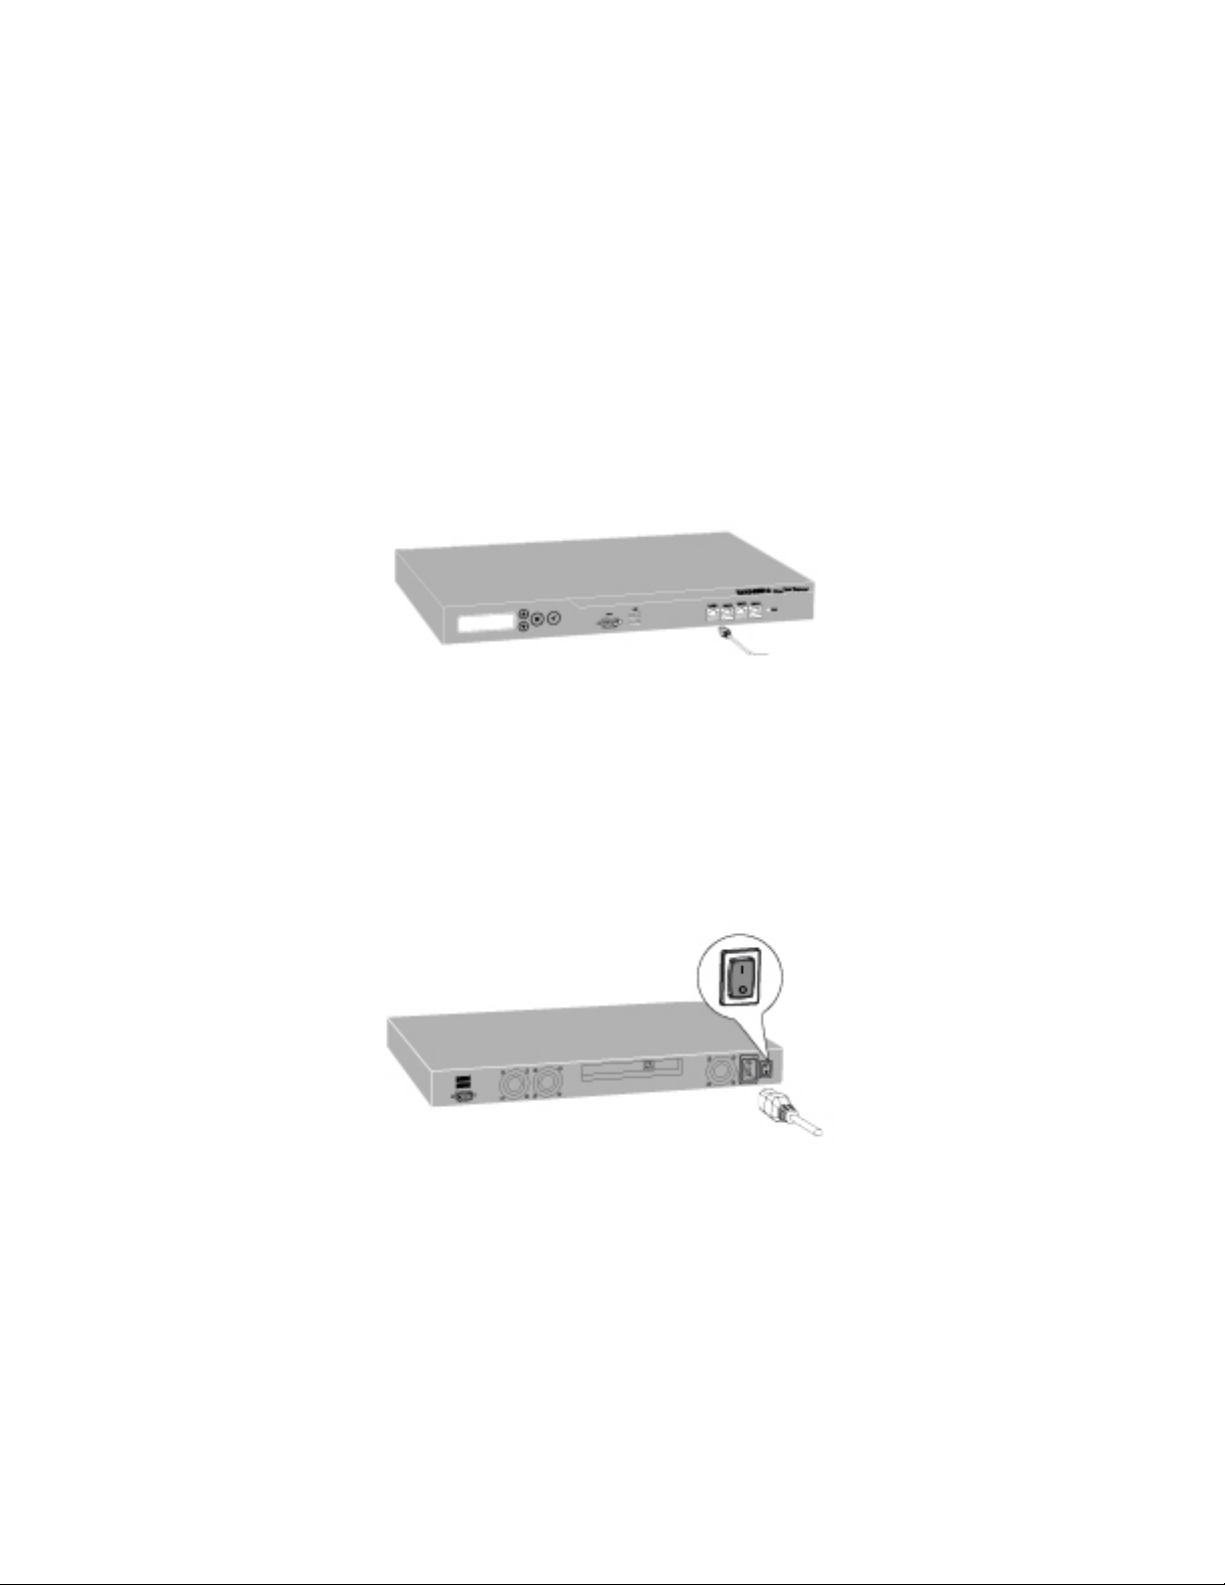
2.2 Connecting cables
LAN cable
Connect a LAN cable from the ‘LAN 1’ connector on the Content Server to your network. The
LAN 2, 3 and 4’ connectors are not used and should be left open.
Power cable
Connect the system power cable to an electrical distribution socket. Press the power switch
button at the back side to ‘1’ to turn on the Content Server. On the front panel of the system the
power indicator LED, marked ‘Pwr’, will light up.
4
2.3 IP Address Setting Configuration
The Content Server requires the IP Address Settings to be configured before it can be used. IP
Address Configuration can be made using the LCD Panel.
The default IP Address configuration is DHCP. It is recommended that administrators change the
configuration to a Static IP address once the server is in production.
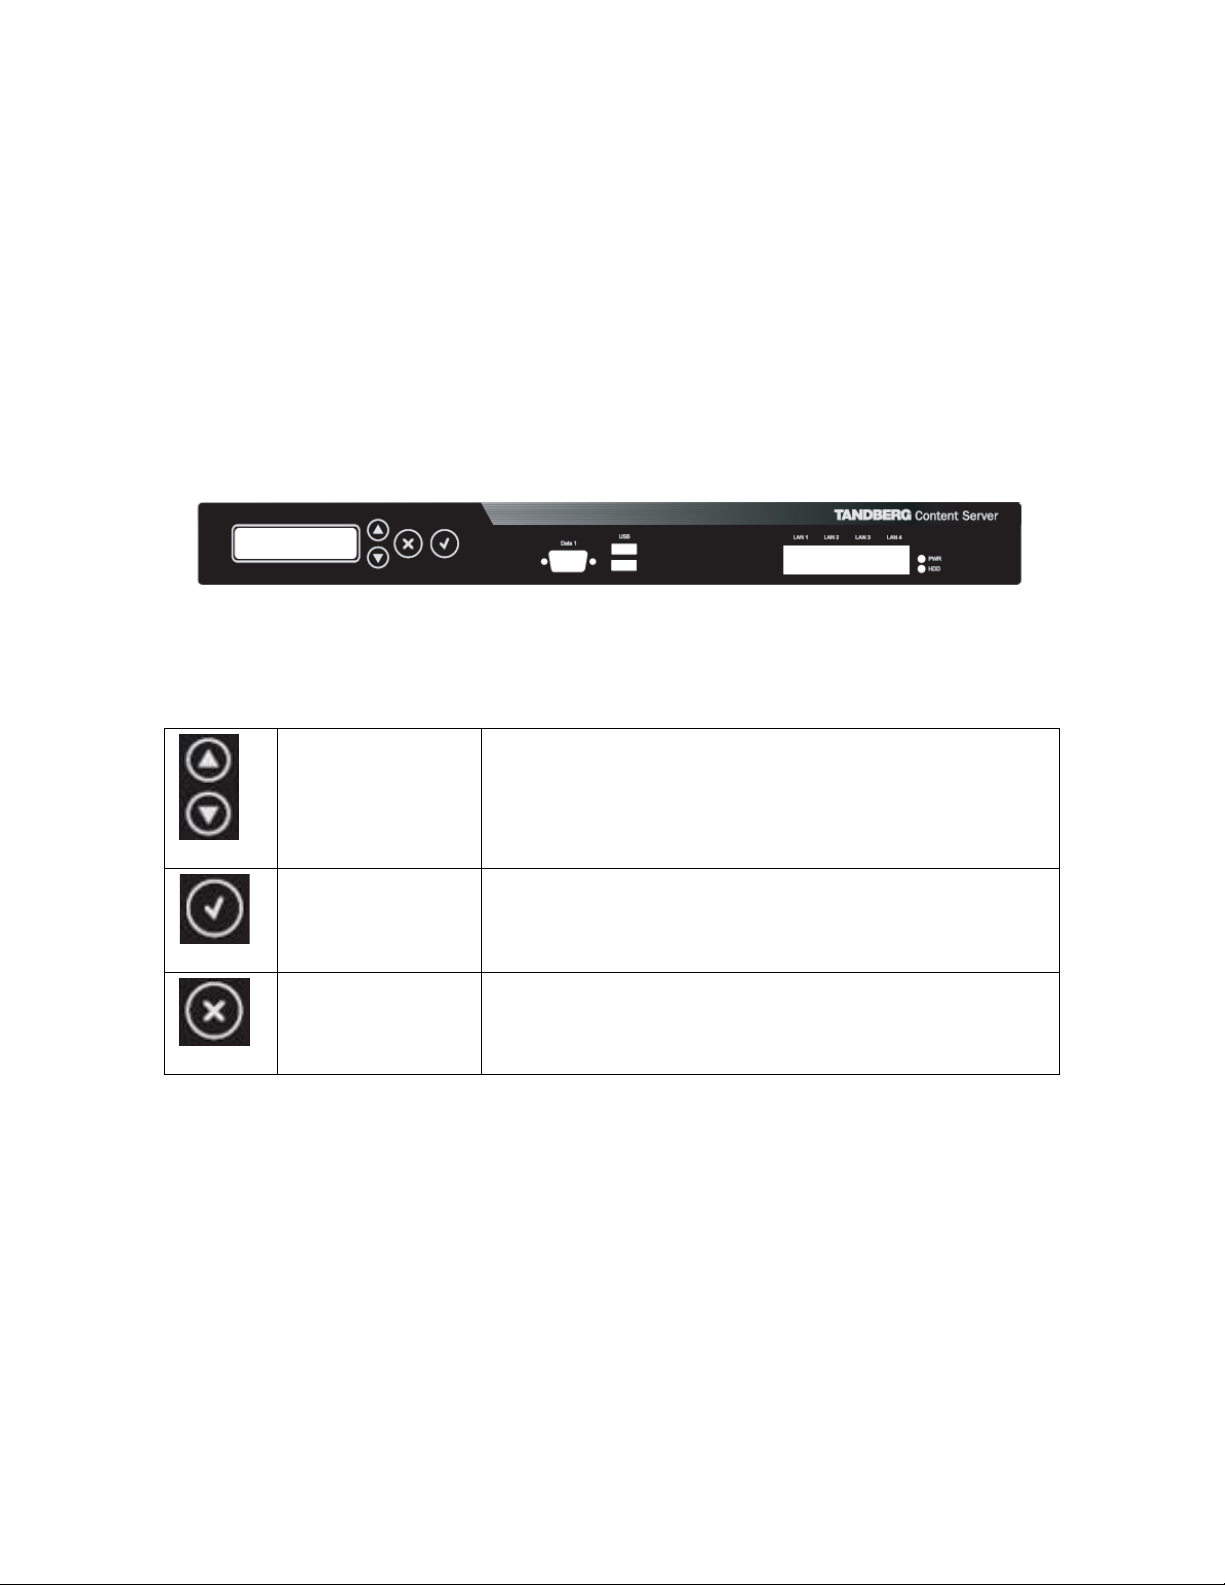
Front view of the Content Server with the LCD panel:
LCD Panel buttons and their functions:
Up and Down
arrows
Enter
Return
Used to select items in the menu, move between values in
a numerical address and modify numerical values.
Used to enter the edit mode and confirm selection or
entry.
Used to return to the previous menu screen or exit the edit
mode without saving the latest entry.
2.3.1 IP setting configuration:
The LCD panel allows you choose either a Dynamic or a Static IP address configuration.
1. Press Enter to display the Main Menu screen.
2. From the Main Menu screen, use the Up or Down arrow to select IP Settings.
3. Press Enter to confirm your selection.
4. From the IP Settings menu, use the Up or Down arrow to select IP Assignment and
press Enter.
5

TANDBERG Content Server User Manual
5. Press Enter again at the Address Type screen and select the required configuration
(DHCP or Static) by using the Up or Down arrows.
6. Press Enter to confirm.
7. If you have selected Static configuration, go to Section 2.3.2 Static IP configuration.
If you have selected DHCP configuration, go to Section 2.3.3 Content Server
configuration.
2.3.2 Static IP configuration:
The LCD panel allows you enter the IP address of the server, Subnet Mask and Default Gateway
addresses.
1. If you have selected Static configuration, press Return to go back to the IP Settings
menu.
2. Use the Up or Down arrow to select IP Address and press Enter twice to start the
edit mode.
3. Move between characters by using the Up and Down arrows. Edit values by pressing
Enter and using the Up or Down arrow to modify. Press Enter again to confirm the
value, or press Return to restore the value to its previous state.
4. When finished editing the address, press Return. You will be asked to confirm your
address entry on the following screen. At the Save Changes? Prompt, use the Up or
Down arrow to select Yes and press Enter to confirm.
5. Press Return to go back to the IP Settings menu.
6. Use the Up or Down arrow to select Subnet Mask and press Enter twice.
7. Repeat steps 3-4 to enter the Subnet Mask address.
8. Press Return to go back to the IP Settings menu.
9. Use the Up or Down arrow to select Default Gateway and press Enter twice.
10. Repeat steps 3-4 to enter the Default Gateway address.
The LCD panel menu structure is available in Appendix 1.
2.3.3 Content Server configuration
You can access the Content Server to register to a gatekeeper and enter H.323 services.
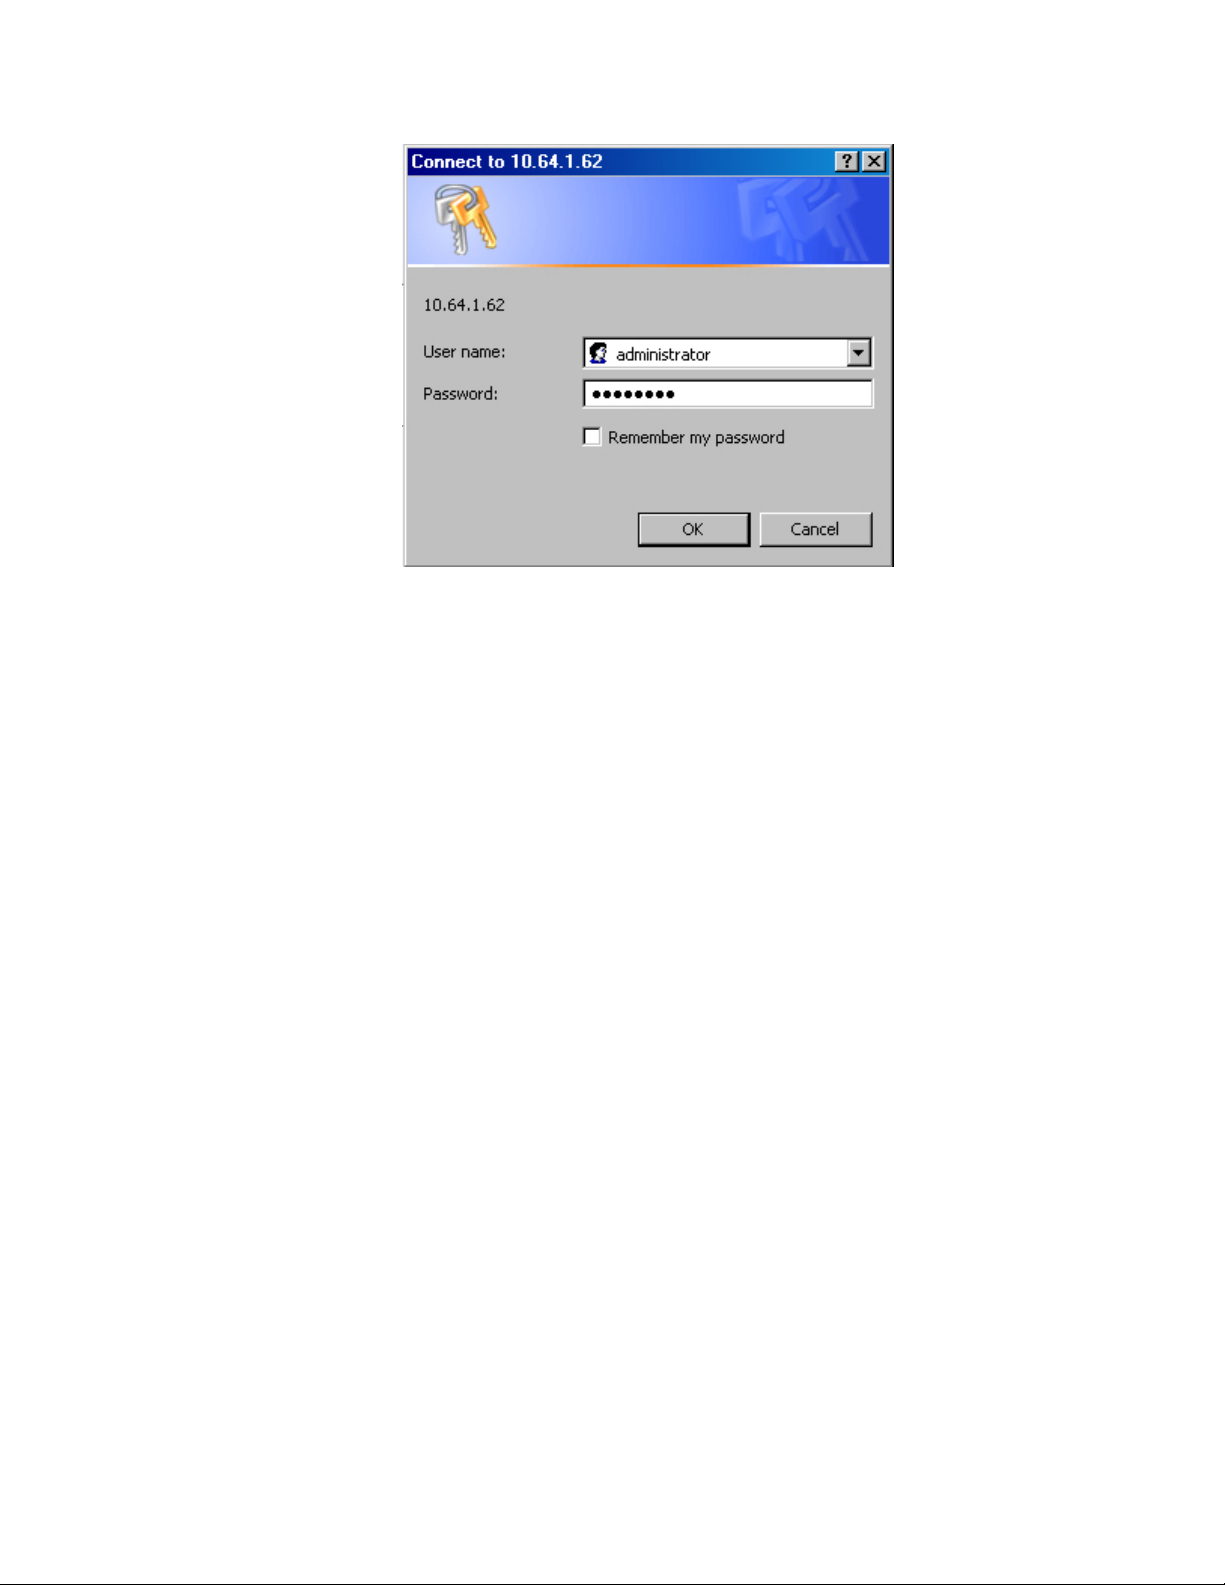
1. Start a Web browser and enter the IP-address of the Content Server.
2. When prompted for login, enter the username administrator and password
TANDBERG.
6
3. To configure the Content Server, go to the Administrator Settings to set the H.323
system alias and E.164 aliases for each line. For details, see the Administrator
Setings chapter of this manual.
4. Once the initial setup has been completed, log in to
https://<ContentServerIPaddress>:8098/ and use the Set Administrative
Password tool to change your administrative password.
2.3.4 User configuration
The TANDBERG Content Server can be added to an existing domain to take advantage of Active
Directory integration.
If you add the Content Server to an existing domain, you need to define a separate security policy
for the server, otherwise the existing security policies may prevent the server from functioning
correctly.
Please contact your authorised TANDBERG reseller or partner for details of the recommended
security policy settings.
7
TANDBERG Content Server User Manual
2.3.5 QuickTime installation
NOTE:
NOTE:
Installing QuickTime:
Read this section only if you require calls to be recorded and streamed in the
QuickTime
If you will be recording calls in two formats only - Windows Media and Real
Media, you do NOT need to install QuickTime on the server.
QuickTime can be installed and enabled on the Content Server at any time,
so you can defer this installation until (and if) it is required.
The Content Server ships with QuickTime support turned off by default. Do
not enable the QuickTime codec in the Codec Support settings unless
QuickTime has been manually installed on the Content Server.
1. Remote desktop to the IP address of the CONTENT SERVER
®
format.
2. Log in as an administrator
3. Use a Web Browser to navigate to the Apple QuickTime download site
4. Click on the link QuickTime standalone installer
of QuickTime. At the time of writing this manual, the link to download the standalone
version of QuickTime was :
http://www.apple.com/quicktime/download/standalone.html
5. Run the QuickTimeInstaller.exe file
6. Follow the installation prompts
7. Click on Finish when the installation has been completed
8. Log off to terminate the remote desktop connection
9. Log in to the Content Server as an administrator
10. In Administrator Tools: Site Settings, enable QuickTime in the Site Codec
Support.
11. Click Save.
. Do not install the iTunes version
8
12. Enable QuickTime in Line Settings for all lines where QuickTime recording is
required. You can do this from Trancoding Codec Support section for Transcoding

Line 1 or Codec Support section for Archiving Lines 2-5). Remember to click the
Save button to confirm the changes.
13. Attach Recording and Streaming Templates with QuickTime outputs to Lines 1-5 to
take advantage of the QuickTime output functionality and record your content for on
demand QuickTime playback.
Example:
select QuickTime 6 Default Template - QT6-Default.xml* from the drop-
down menu in the Template Options section of Line Settings for
Transcoding Line 1. Click Save.
select QuickTime MOV H323 Default Output - H323-MOV-Default.xml*
from the drop-down menu in Template Options section of Line settings for
Archiving Lines 2- 5. Click Save.
9
TANDBERG Content Server User Manual
3 General Use
TANDBERG Content Server
The Content Server will always be turned on and be available to record conference calls.
The unit itself should not be available to users at anytime.
If the system does not respond:
Check the LCD panel to determine if the unit is switched on and ‘live’.
Make sure that the Content Server is switched on by using the On/Off switch located at
the rear of the unit.
Restart the Content Server using the LCD panel. For details, see section 3.1, Restart and
shutdown.
or,
Restart the H.323 service on the Content Server (this will only affect the calls which are
live at the time of the restart, but will not affect any users accessing recorded content on
the server). For details on how to restart the H.323 service without restarting the Content
Server, see the Administrator Settings chapter.
3.1 Restart and shutdown
The server can be restarted and shutdown via the LCD panel.
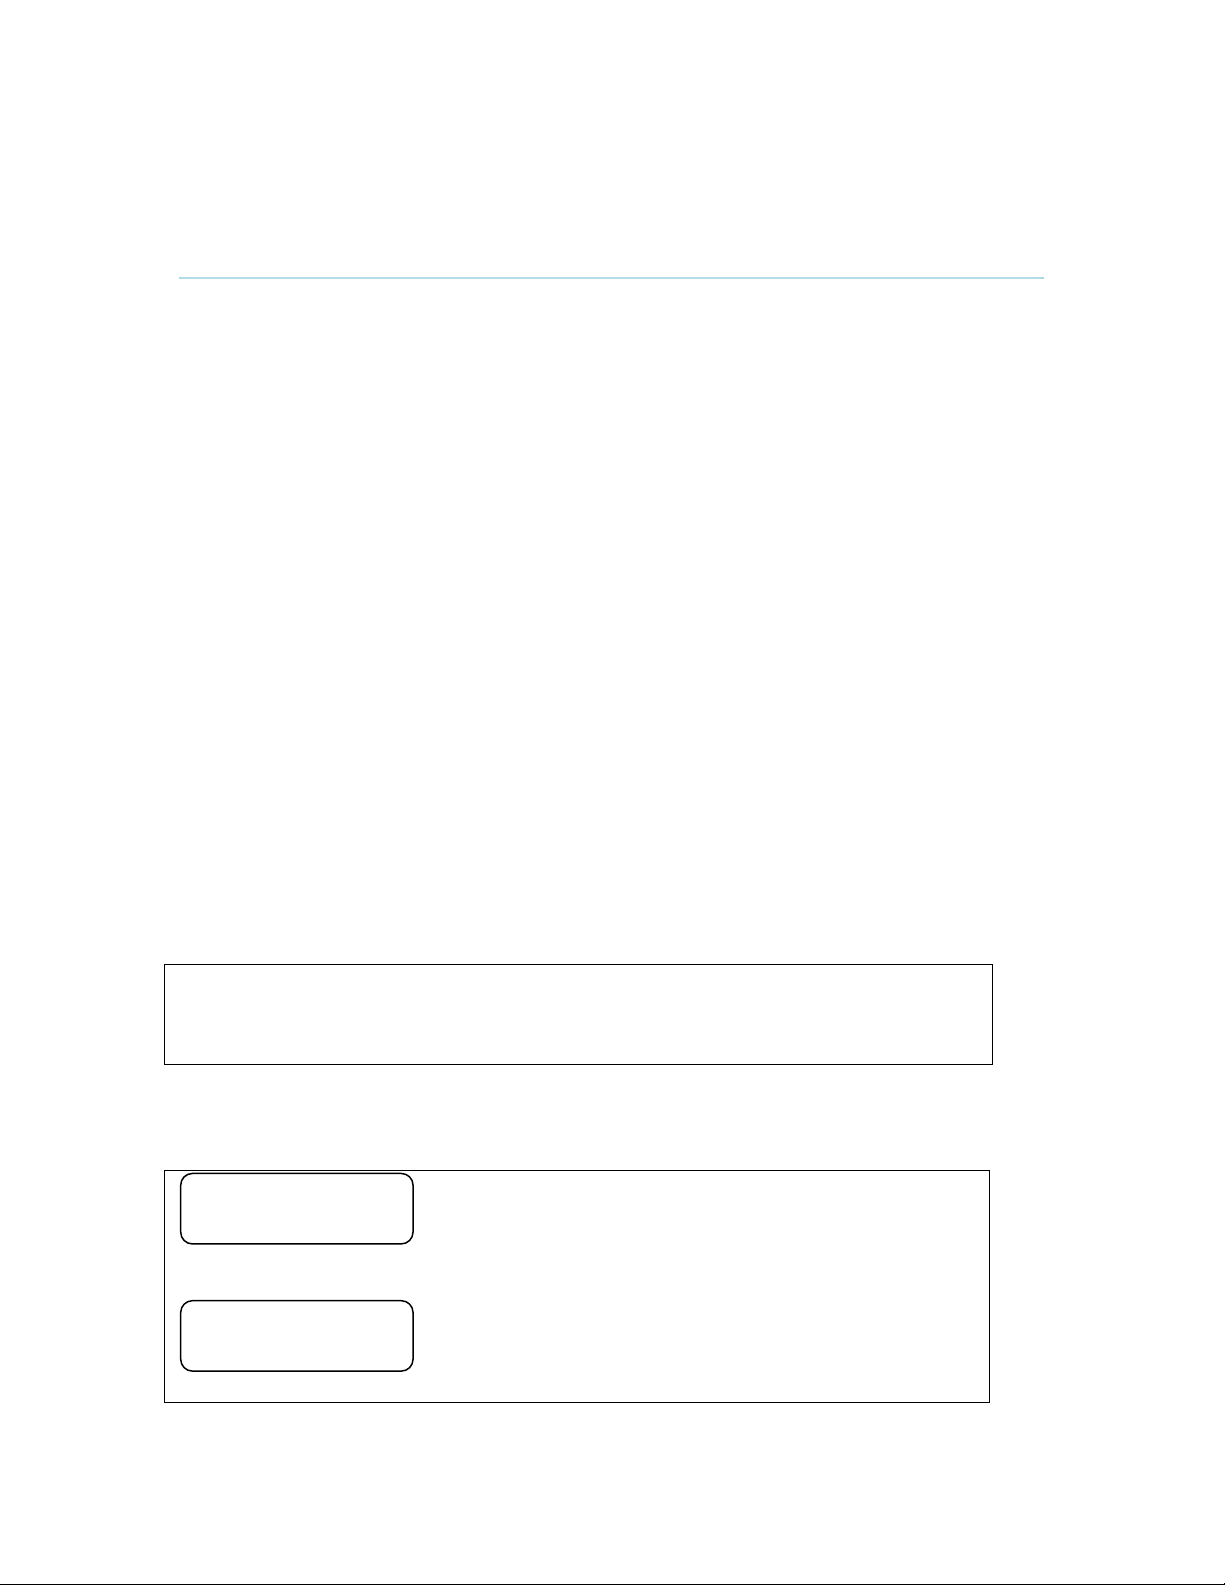
NOTE:
The LCD panel display indicates the current status of the Content Server.
<IP Address>
IN CALL
It is not recommended to shutdown or restart the Content Server while calls
are in progress. If THE CONTENT SERVER is in a call and the server is
restarted or shutdown, calls in progress will fail and will not be recorded.
LCD panel display when a call is currently in progress.
<IP Address>
NOT IN CALL
LCD panel display when no calls are currently in progress.
10

3.1.1 How to restart the Content Server
1. Press Enter to display the Main Menu screen.
2. From the Main Menu screen, use the Up or Down arrow to select Commands.
3. Press Enter to confirm your selection.
4. From the Commands menu, use the Up or Down arrow to select Restart and press
Enter.
5. You will be asked to confirm this action on the following screen. At the Restart? prompt,
use the Up or Down arrow to select Yes and press Enter to confirm.
3.1.2 How to shutdown the Content Server
1. Press Enter to display the Main Menu screen.
2. From the Main Menu screen, use the Up or Down arrow to select Commands.
3. Press Enter to confirm your selection.
4. From the Commands menu, use the Up or Down arrow to select Shutdown and press
Enter.
5. You will be asked to confirm this action on the following screen. At the Shutdown?
prompt, use the Up or Down arrow to select Yes and press Enter to confirm.
NOTE:
Please note that there is currently no indication on the LCD panel to tell the
administrator that the machine has shut down and that it is safe to turn off
the server.
Typically server is in a state that it is safe to shutdown within a few minutes.
3.2 Restoring the Content Server to factory settings
The administrator can restore the Content Server to factory settings partially or fully via the LCD
panel. A partial restore to factory settings – Config Restore - restores the factory configuration
files and templates, but does not affect the content stored on the server. A full restore to factory
settings – Full Restore – removes content and deletes all media files in addition to restoring the
factory configuration files and templates.
11

TANDBERG Content Server User Manual
3.2.1 How to restore the Content Server to factory settings
1. Press Enter to display the Main Menu screen.
2. From the Main Menu screen, use the Up or Down arrow to select Commands.
3. Press Enter to confirm your selection.
4. From the Commands menu, use the Up or Down arrow to select Restore Factory and
press Enter.
5. From the Restore Factory menu, use the Up or Down arrow to select Full Restore or
Config Restore and press Enter.
a. If you are performing a full restore, you will be asked to confirm this action on the
following screen. At the Full Restore? prompt, use the Up or Down arrow to
select Yes and press Enter to confirm.
b. If you are performing a partial restore, you will be asked to confirm this action on
the following screen. At the Config Restore? prompt, use the Up or Down arrow
to select Yes and press Enter to confirm.
NOTE:
Use the Restore to factory settings function with caution and remember that
the Full Restore function will result in the loss of all your recorded content.
12
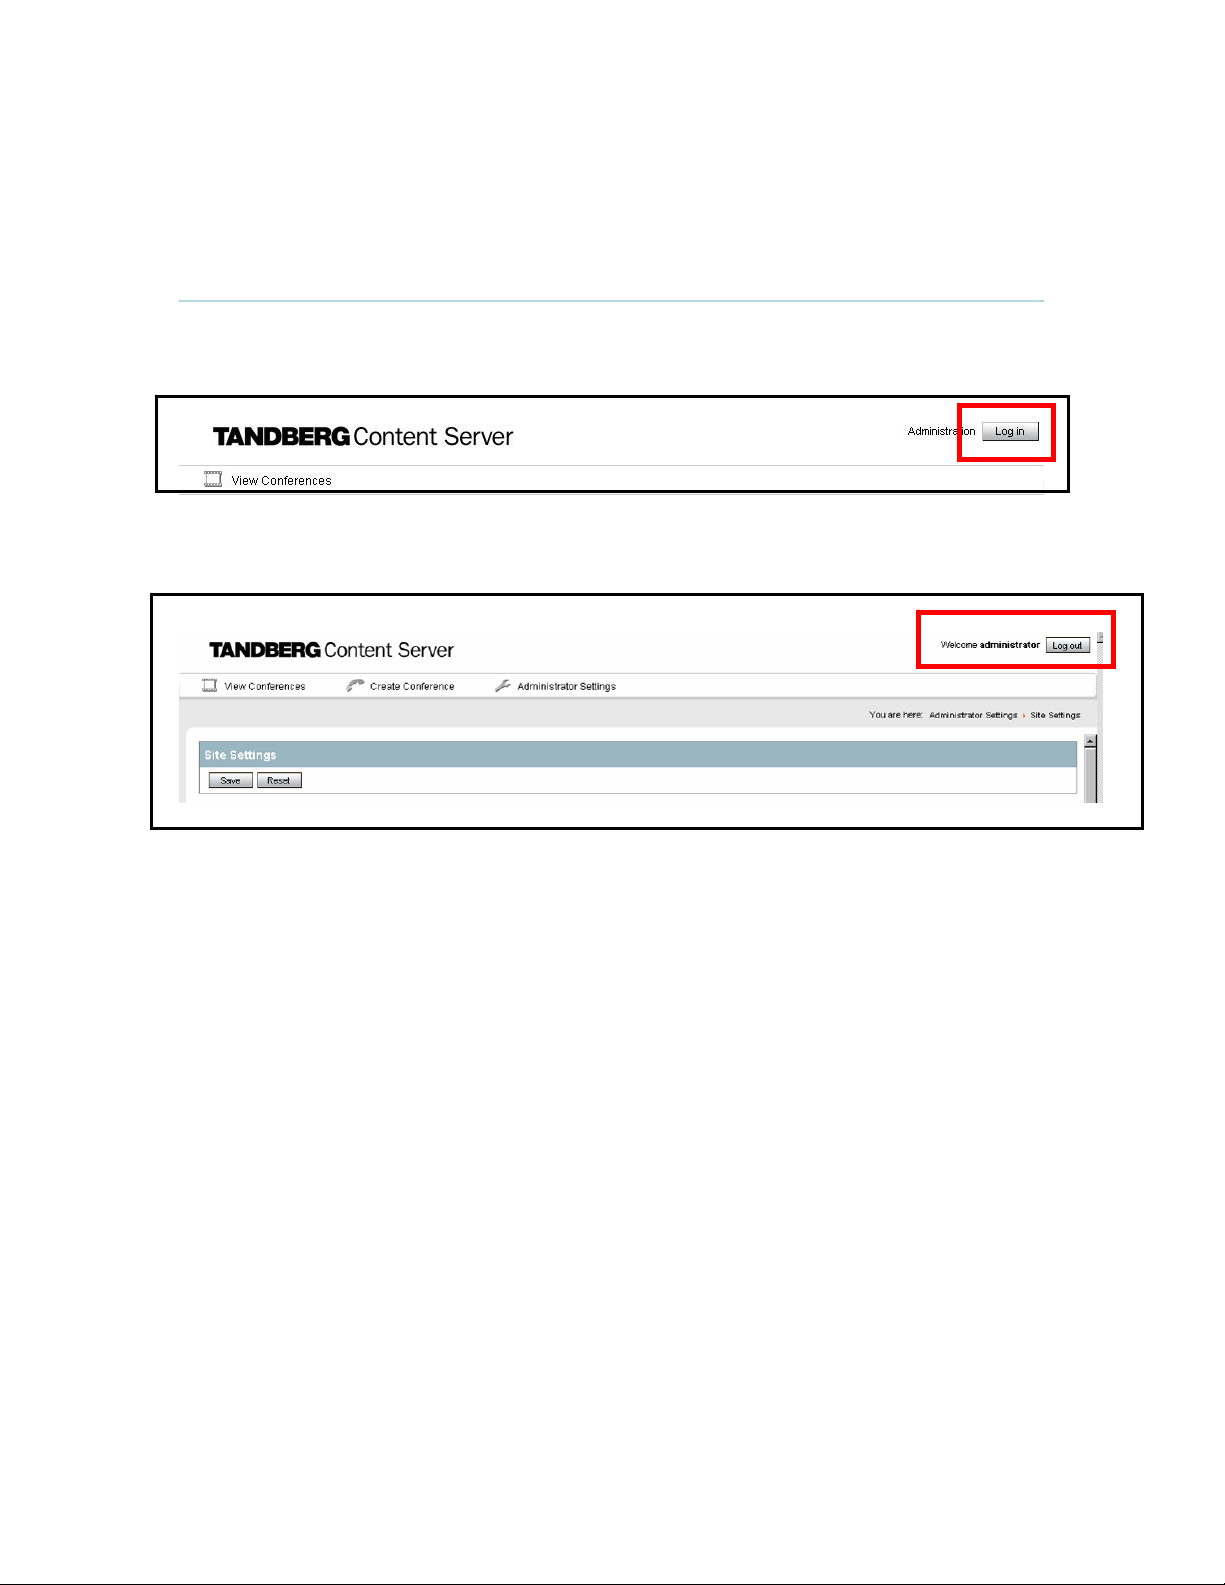
4 Administrator Settings
To view the Administrator Settings, click the Log in button then enter your administration
username and password.
When you are successfully logged in, the screen will display the Welcome <username>
message as displayed below, with menu items now available according to your login privileges.
The administrator needs to review the Administrator Settings and configure the settings based on
the requirements of the installation site.
Configuration settings can be made via the Administrator Settings menu.
The Administrator Settings dropdown Menu contains:
Site Settings
Line Settings
User Management
Template Editor
Software Upgrade
13

TANDBERG Content Server User Manual
4.1 Site Settings
Administrators need to review configuration information in the Site Settings menu to ensure that
the system is configured properly for their installation site.
All changes made in the Site Settings page need to be confirmed by clicking the Save button at
the top or bottom of the page. Clicking the Reset button restores the values on the screen to the
last saved values. Use Reset if the field values on the screen have been changed but not yet
saved.
Site Settings contain:
Content Server Properties
Gatekeeper
H.323 ports
Site Codec Support
14
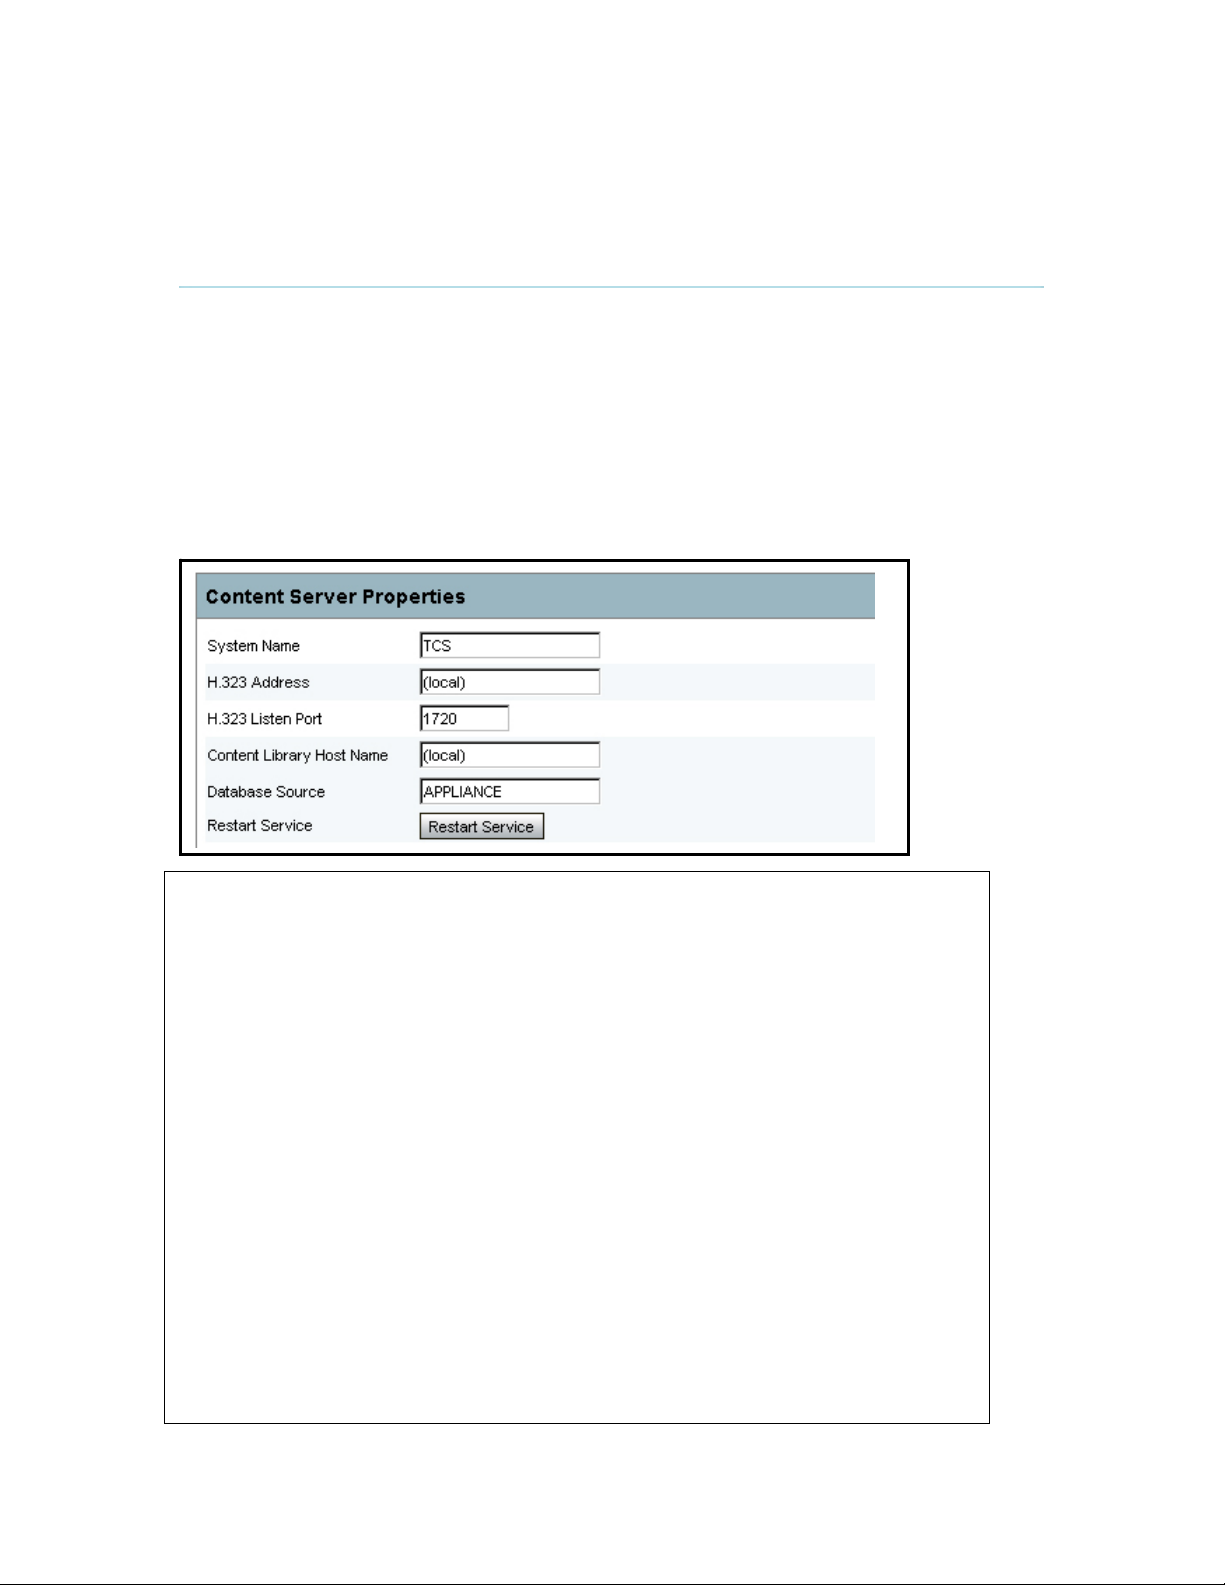
4.1.1 Content Server Properties
This menu item contains the following settings:
System Name
H.323 Address
H.323 Listen Port
Content Library Host Name
Database Source
Restart Service
System Name
Other systems can call in using this name instead of IPnumber/IP-address. System Name is also used for registering
with a gatekeeper.
H.323 Address
H.323 Listen
Port
Content Library
Host Name
Database
Source
Restart Service
The default for the Content Server installation is (local). It is
recommended to leave the H.323 address in the Site Settings as
(local), unless instructed otherwise by TANDBERG support.
Standard videoconferencing port. Users only need to change this
setting if the local videoconferencing port at customer site is set
to a different port.
The default for the Content Server installation is (local). It is
recommended to leave the Content Library Host Name in the Site
Settings as (local), unless instructed otherwise by TANDBERG
support.
By default, the Database Source is set to (local). To optimize the
performance of the Content Server, it is strongly recommended
that the administrator changes the Database Source to the
<Machine name> (which can be set up from the Windows SAK
at the time of installation).
If the TANDBERG Content Server is not responding, restart the
Service here. This will only affect calls that are currently live (that
is, the calls will be ended and conferences will not be available
15

TANDBERG Content Server User Manual
for on demand playback).
Before restarting the Endpoint, check if there are live conferences
in progress in the Live Conferences page or check the call status
on the LCD panel of the unit. The Site Settings page will also
display a warning if lines are in a call. If you click on the Restart
Service button and lines are in a call, you will be asked to confirm
if you want to go ahead with the Restart.
NOTE:
Remember to restart the service after making changes to the Content
Server Properties. Changes in the Content Server Properties menu will
not take effect until the service is restarted.
16
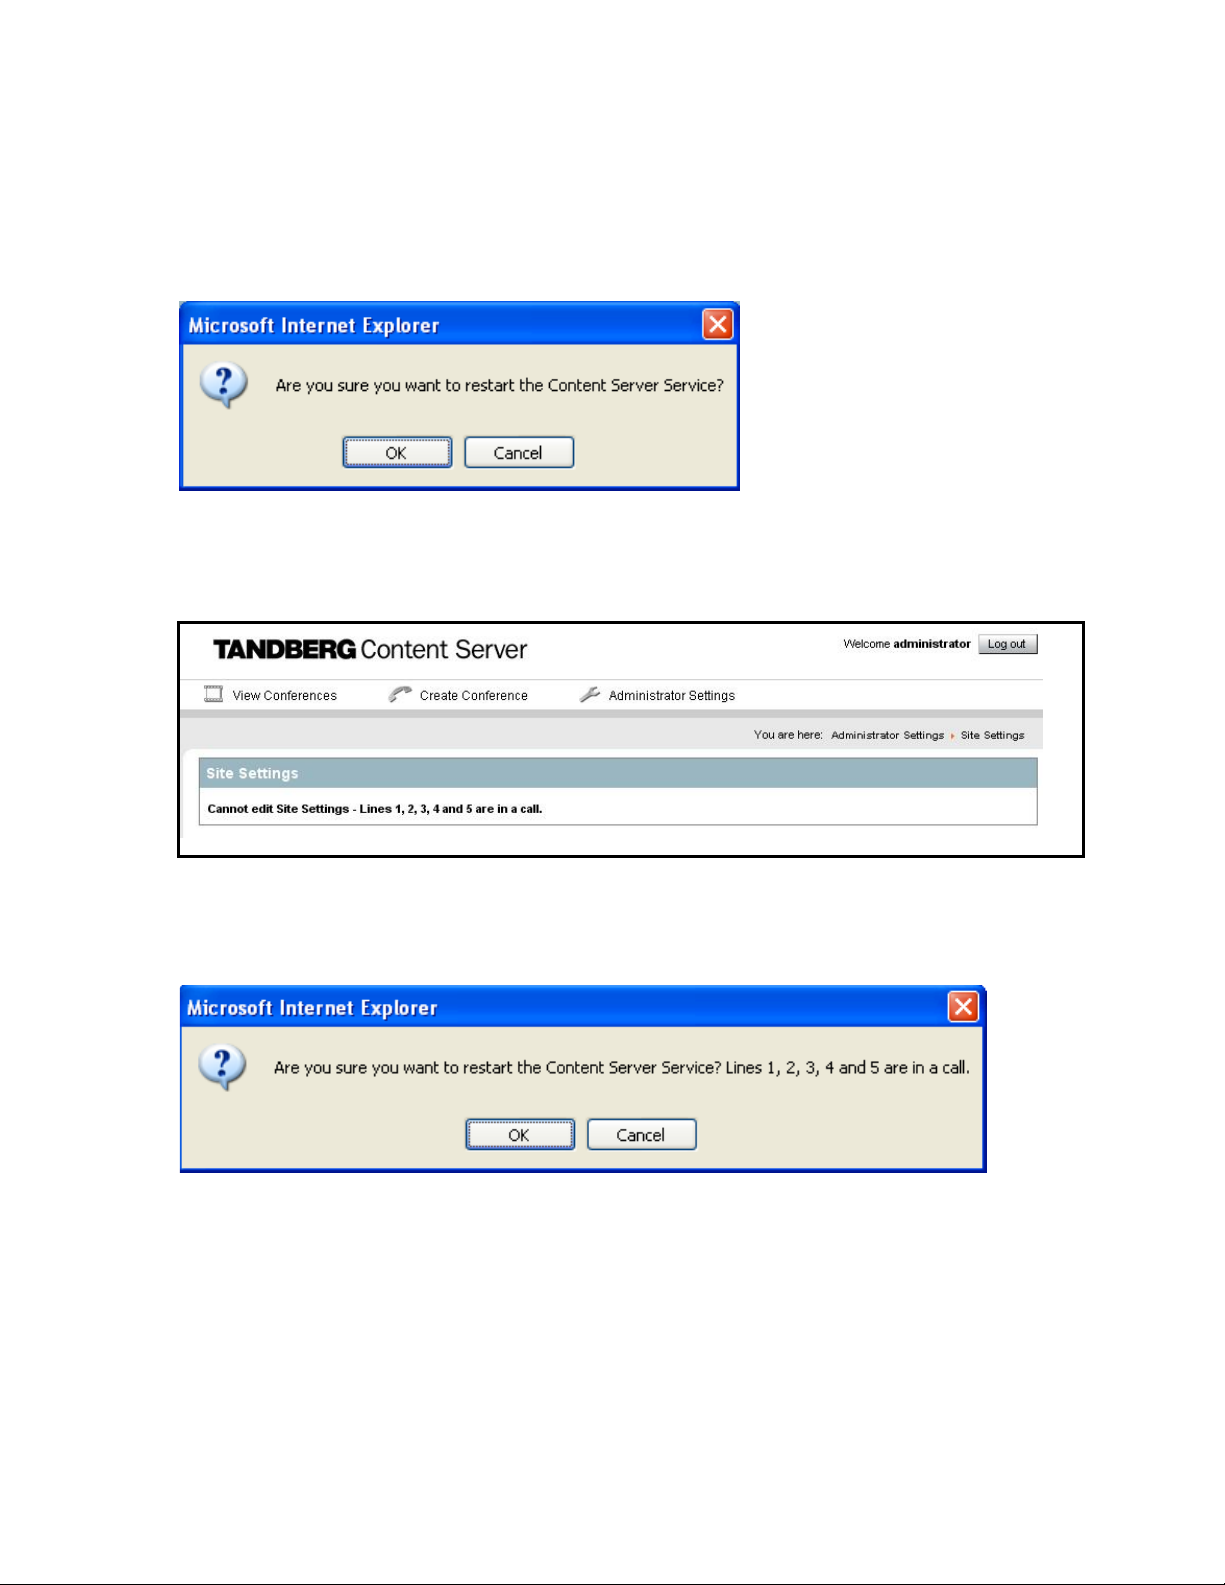
4.1.1.1 Restart Service
If there are no live calls on the TANDBERG Content Server, clicking the Restart Service button
will result in the following message being displayed.
If the TANDBERG Content Service is recording calls at the time, the Site Setting interface will
indicate this and all Site Settings will be disabled except for the Restart Service button.
If you click on the Restart Service button while lines are in calls, the following message will be
displayed.
By clicking OK, the calls will be ended and the Content Server service will restart.
17
TANDBERG Content Server User Manual
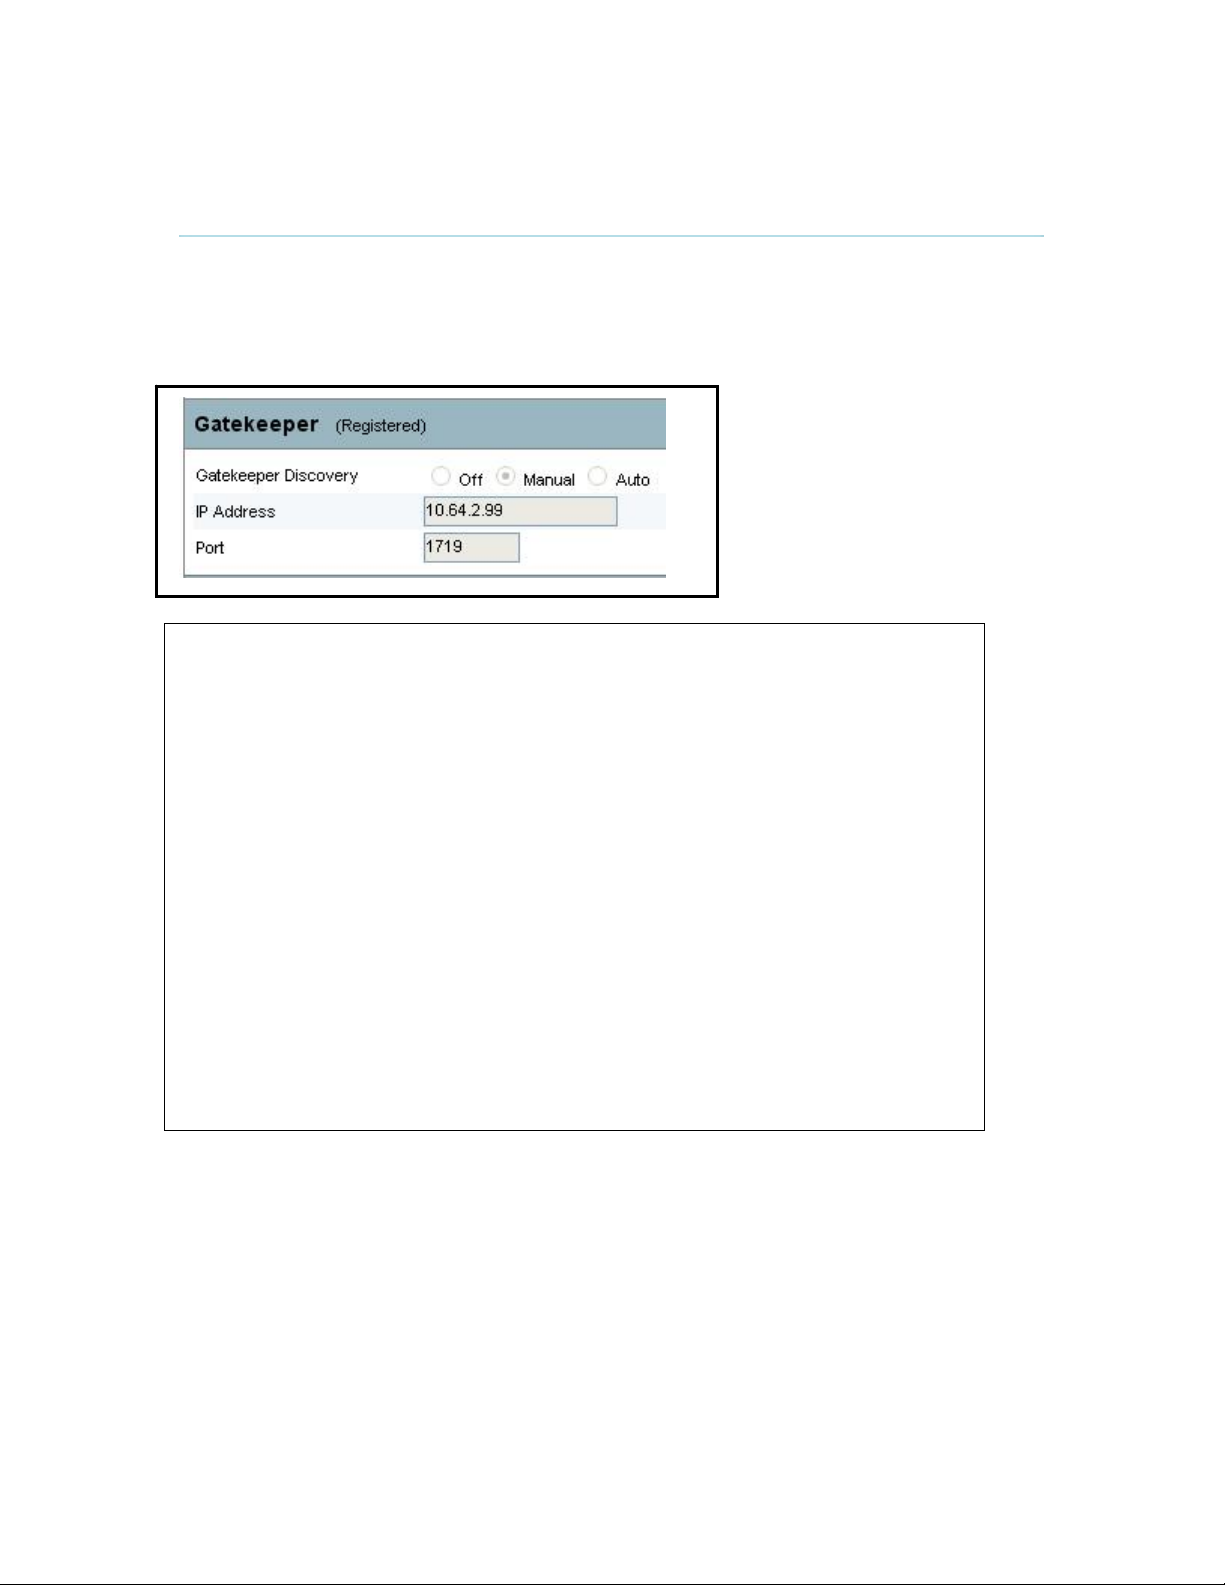
4.1.2 Gatekeeper
The Gatekeeper configuration menu contains the following settings:
Gatekeeper Discovery
IP Address
Port
Gatekeeper
Discovery
Gatekeeper Discovery configuration can be set to OFF,
MANUAL or AUTO.
OFF - The system will not use a gatekeeper for calls.
MANUAL - The system will use a specific gatekeeper identified
by Gatekeeper IP-address.
IP Address
Port
AUTO - The system will automatically try to register on any
available gatekeeper. If a gatekeeper responds to the request
sent from the codec within 30 seconds this specific gatekeeper
will be used. This requires auto discovery on the gatekeeper as
well. If no gatekeeper responds, the system will not use a
gatekeeper for making H.323 calls and hence an IP-address
must be specified manually.
This gatekeeper IP-address will be used if you specify
Gatekeeper Discovery: Manual.
This port setting should not be changed unless the local network
configuration specifies a different port.
18
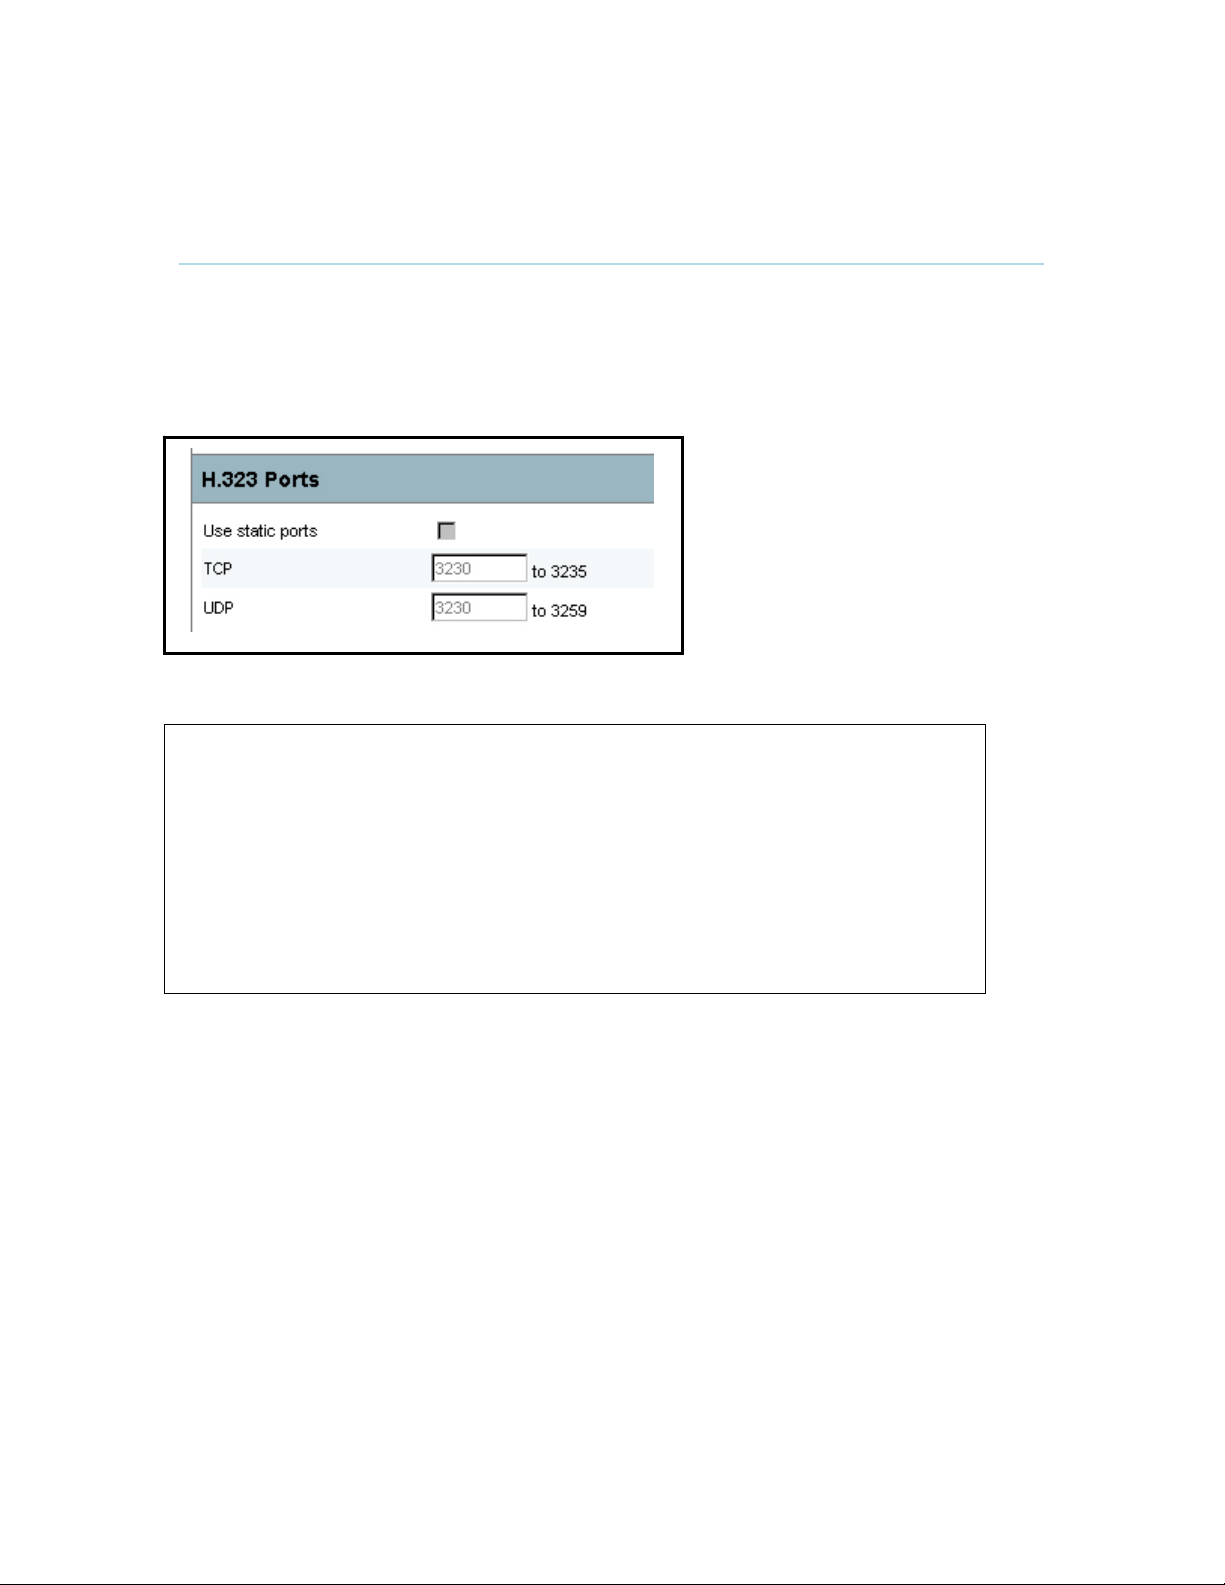
4.1.3 H.323 ports
The H.323 ports configuration menu contains the following settings:
Use static ports
TCP
UDP
.
Use static ports
‘Use static ports’ is disabled by default. This means that the system
will dynamically allocate which ports to use when opening a
TCP/UDP connection. The reason for doing this is to avoid using the
same ports for subsequent calls as some firewalls consider this as a
sign of attack.
Static ports can be enabled by selecting the checkbox and
specifying the required range of ports.
TCP
UDP
Standard firewall port range.
Standard firewall port range.
19
TANDBERG Content Server User Manual
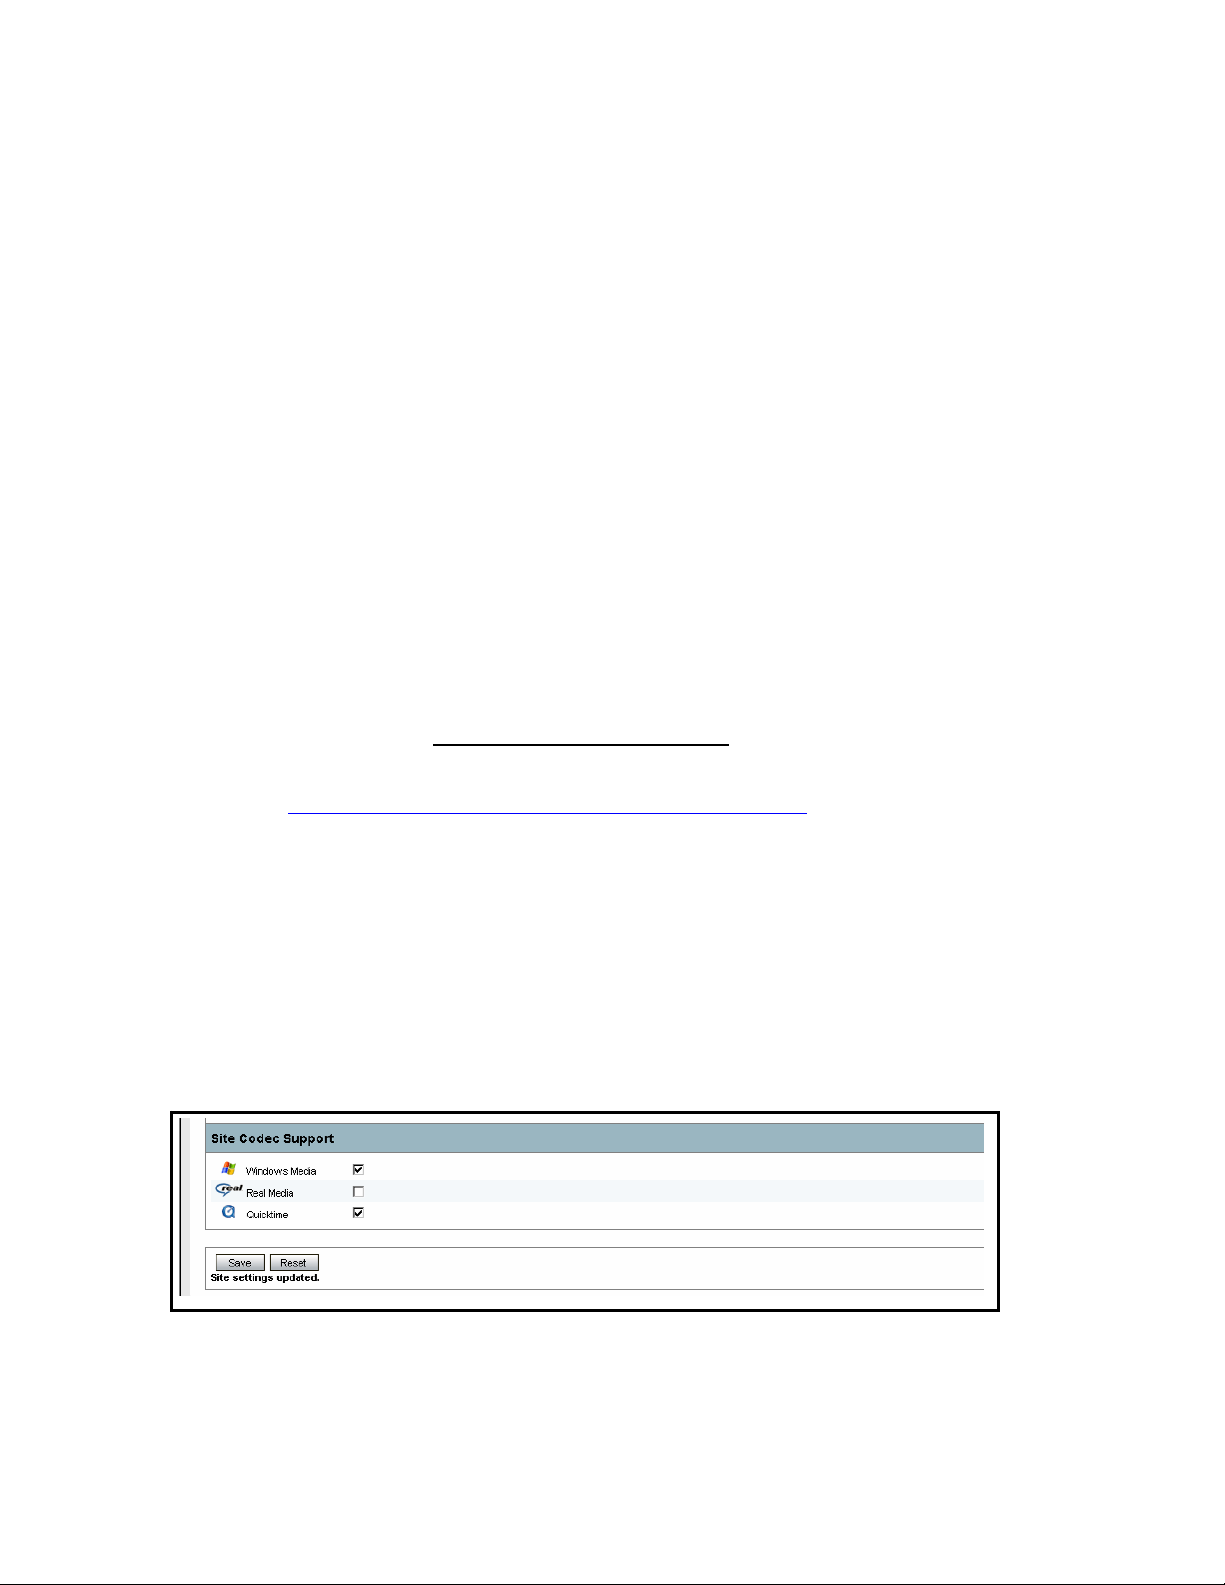
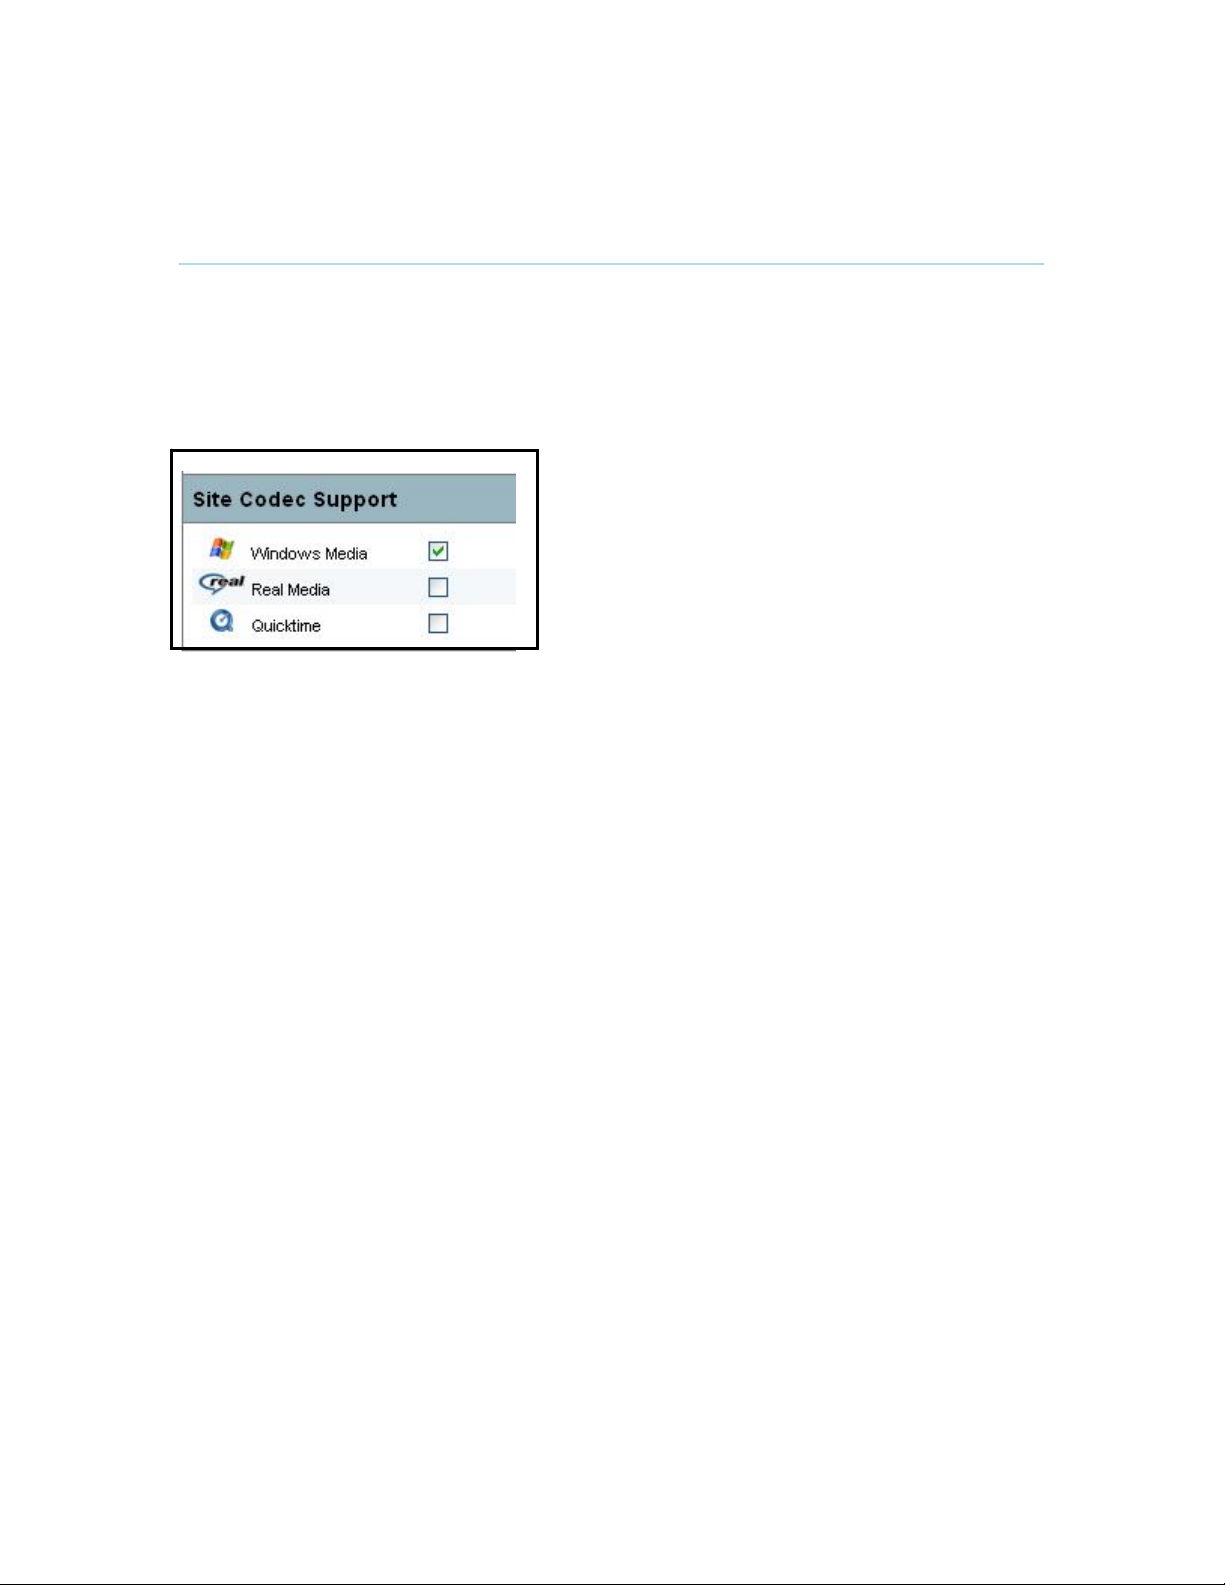
4.1.4 Site Codec Support
The Site Codec Support configuration menu contains the following settings:
Windows Media
Real Media
QuickTime
Windows Media and Real Media codecs are enabled by default. Administrators can disable
individual codecs to suit their installation requirements. Disabling site codecs in this menu will
affect all line settings.
Please note that QuickTime is disabled by default. You should only enable QuickTime after
manually installing the latest version of QuickTime on the Content Server.
20

4.2 Line settings
The Line Settings menu allows the administrator to select default settings which apply to each
available line on the TANDBERG Content Server.
The number of lines is equal to the number of concurrent video meetings which can be recorded
by the TANDBERG Content Server and may differ between systems. Please refer to your
purchase agreement for information on the number of lines that your system supports.
In a system with five concurrent videoconference inputs, line 1 is always designated as
Transcoding Line, while lines 2-5 are always designated as Archiving lines.
The Transcoding Line records videoconferences in up to three formats and two bit rates each.
The formats include native Microsoft Windows Media™ (WMV) format, native Apple QuickTime
(MOV) format and native RealNetworks
®
Real Media (RM) format. Streaming bit rates range from
®1
suitable for 56K modems up to very fast LAN. The selection of formats and bit rates can be made
by administrators and saved as templates for the line.
The Archiving Line records videoconferences at their original format and bit-rate. The original
videoconference codecs are wrapped into either a Microsoft Windows Media™ (ASF) or Apple
QuickTime
®1
(MOV) format and can be played back with those players.
1
Support for Apple QuickTime enabled if installed on the appliance by site administrator
21

TANDBERG Content Server User Manual
4.2.1 Transcoding Line
The following Line Settings are available for the Transcoding Line:
Transcoding Line Properties
H.239 Capabilities
Call Options
Advertised Codecs
Transcoding Codec Support
Transcoding Templates
22

4.2.2 Transcoding Line Properties:
H.323 ID
E.164 Alias
Password
Protection
NOTE:
The identity of the line number that can be used from an endpoint to
dial the line.
The gatekeeper alias that can be used from an endpoint to dial the
line. If a gatekeeper is present, it is possible to place IP-calls using
“telephone-style” numbers, eg. an E.164 alias, according to the
numbering plan implemented in the gatekeeper
Select this option to password-protect streaming access to any
incoming ad-hoc calls. A randomly generated password will be
created for the conference at the time of the call.
Changing the password for live conferences: The Administrator
can retrieve the existing password by going to the View Status page
for the live conference. The administrator can change the password
or delete it. Any password change needs to be confirmed by clicking
on the Set Password button.
Changing the password for recorded conferences: The
Administrator can retrieve the existing password by going to the Edit
page for the live conference. The administrator can change the
password or delete it. Any password change needs to be confirmed
by clicking on the Save button at the bottom of the page.
Remember to save your changes and then restart the service from Site
Settings after making changes to the H.323 ID and E.164 Alias. Changes to
the H.323 ID and E.164 Alias in Line Settings will not take effect until the
service is restarted.
23

TANDBERG Content Server User Manual
4.2.3 H.239 Capabilities:
The Transcoding Line H.239 Capabilities are enabled by default. If H.239 Dual Video output is not
required, this capability can be disabled.
Administrators can set the minimum and maximum resolutions for acceptable H.239 video input.
For optimal performance, it is recommended that the maximum resolution be set to 800x600 or
640x480.
24

4.2.4 Call options
The supported call speeds and maximum time in call can be set for each line.
Supported call
speeds
Maximum time
in call
The administrator can select the supported call speeds for each
line from a range of options from 128 to 2048 Kbps. This
determines the range of available conference bandwidths when a
user dials out from the TANDBERG Content Server.
This feature will automatically end both incoming and outgoing
calls when the call time exceeds the length of time specified in
minutes. The default setting is ‘0’, which means that the call will
never be automatically ended.
Note: You need to save your changes and restart the service
from Site Settings for changes to the Maximum time in call value
to take effect.
25

TANDBERG Content Server User Manual
4.2.5 Advertised Codecs
The TANDBERG Content Server supports advertising of video and audio codecs as part of the
capability set negotiation.
The advertised video and audio codecs can be set for each line.
Advertise video
codecs
Advertise audio
codecs
The administrator can enable advertising of video codecs for
each line by selecting the checkbox. Supported advertised
codecs include H.261 and H.263.
The administrator can enable advertising of audio codecs for
each line by selecting the checkbox. Supported advertised
codecs include G.711, G.722 and G.722.1.
26

4.2.6 Transcoding Codec Support
The Transcoding Codec Support configuration menu contains the following options:
Windows Media
QuickTime
Real Media
Administrators can disable or enable individual codecs for each line to suit their installation
requirements.
NOTE:
Do not enable QuickTime in the Codec Support settings unless the latest
The Content Server will ship with QuickTime support turned off by default.
version of QuickTime has been manually installed on the Content Server.
27

TANDBERG Content Server User Manual
4.2.7 Transcoding Templates
The Template Options drop-down menu allows users to select a recording/streaming template to
be used for the transcoding line. Only templates appropriate for the Line are displayed in the
drop-down menu for that line. For example:
NOTE:
NOTE:
NOTE:
TIP:
Live streaming is only enabled for Real Media content if external streaming
servers are used (Helix or G2).
If QuickTime is not enabled, templates that only have QuickTime will not be
available in the drop down list. Templates that include QuickTime and other
Codecs will be displayed and can be used but the QuickTime outputs will not
work. E.g. Triple-Default.xml
QuickTime content recorded with the Transcoding Line cannot be streamed
live at all. Live streaming is only enabled for QuickTime content if external
streaming servers are used and content has been recorded on one of the
Archiving lines (Lines 2-5).
For best performance, it is recommended that templates with the Windows
Media Codec 8 are used in preference to Windows Media Codec 9.
28

The following factory recording/streaming templates for the Transcoding Line are shipped with the
TANDBERG Content Server:
Template name Output type
QuickTime 6 Default Template – QT6-Default.xml
QuickTime 6: 56K and 384K on
demand
QuickTime 6 Low Bitrate Template – QT6-Low.xml
QuickTime 6: 56K and 128K on
demand
Real Media 10 Default Template – RM10-Default.xml
Real Media 10: 56K and 384K on
demand
Real Media 10 High Bitrate Audio Streams - RM10-
AudioHigh.xml
Real Media 10 Low Bitrate Audio Streams - RM10AudioLow.xml
Real Media 10 Low Bitrate Streams - RM10-low.xml
TCS three format triple play – Triple-Default.xml
TCS three format triple play low bitrate streams – TripleLow.xml
Windows Media 8 Default Template – wmV8Default.xml
Windows Media 8 Dual VGA Template - WMV8DualVGA.xml
Windows Media 8 Low Bitrate Streams - WMV8-Low.xml
Real Media 10: 28K stream audio
with VGA images
Real Media 10: 12K stream audio
with VGA images
Real Media10: 56K and 128K on
demand
Windows Media 8: 56K and 384K(15
frames per second) live and on
demand
Real Media 10: 56K and 384K on
demand
QuickTime 6: 56K and 384K on
demand
Windows Media 8: 56K and 128K
live and on demand
Real Media 10: 56K and 128K on
demand
QuickTime 6: 56K and 128K on
demand
Windows Media 8: 56K and 384K(15
frames per second) live and on
demand
Windows Media 8: DualVideo
Streaming and on demand 56K and
384K with VGA images
Windows Media 8: 56K and 128K
live and on demand
Windows Media 8 Multicast Default Base Template WMV8-MulticastDefault.xml
Windows Media 8 Default Template – WMV8-PIPVGA.xlm
Windows Media 9 High Bitrate Audio Only Streams WMV9-AudioHigh.xml
Windows Media 9 Low Bitrate Audio Only Streams WMV9-AudioLow.xml
Windows Media 8: 56K and 384K(15
frames per second) multicast and on
demand
Windows Media 8: Extended Video
Picture in Picture.
Windows Media 9: 40K live and on
demand audio with VGA images
Windows Media 9: 14K live and on
demand audio with VGA images
29

TANDBERG Content Server User Manual
4.2.8 Archiving Line Properties
See Chapter 4.2.1: Transcoding Line Properties, for a detailed description of the line settings
screen.
4.2.8.1 Codec Support
Codec Support for Archiving Lines is limited to Windows Media and QuickTime formats only.
Administrators can disable or enable individual codecs for each line to suit their installation
requirements.
NOTE:
Do not enable QuickTime in the Codec Support settings unless the latest
30
The Content Server will ship with QuickTime support turned off by default.
version of QuickTime has been manually installed on the Content server.

4.2.8.2 Archiving Templates
The Template Options drop-down menu allows users to select a recording/streaming template to
be used for the Archiving Lines. Only templates appropriate for the line are displayed in the dropdown menu for that line.
NOTE:
The following factory recording/streaming templates for the Archiving Lines are shipped with the
TANDBERG Content Server:
Template name Output type
QuickTime MOV H323 Output – H323-MOV-default.xml
QuickTime MOV H323 Dual Output (Still Image) – H323MOV-Dual.xml
Windows Media ASF H323 Output - H323-ASF-default.xml
Windows Media ASF H323 Dual Output (Still Image) –
H323-ASF-Dual.xml
Live streaming is only enabled for QuickTime content if external streaming
servers are used and content has been recorded on one of the Archiving
lines (Lines 2-5). QuickTime content recorded with the Transcoding Line
cannot be streamed live at all.
QuickTime MOV at incoming
conference bitrate
QuickTime MOV at incoming
conference bitrate
Dual Video with snapshots every 15
seconds
Windows Media ASF at incoming
conference bitrate
Windows Media ASF at incoming
conference bitrate
Dual Video with snapshots every 15
seconds
Windows Media ASF H323 Multicast Base Output H323-ASF-Multicast.xml
Windows Media multicast and on
demand
31

TANDBERG Content Server User Manual
4.3 User Management
The User Management menu is used to authorize user privileges. The TANDBERG Content
Server does not store user passwords.
Administrators can add new users, change user privileges and delete users. Usernames added
by the administrator through this menu must belong to valid existing users in the Active Directory
domain that the Server has been added to (for details, see the User Configuration chapter of this
manual).
A user has either Owner or Administrator privileges.
32

4.3.1 Adding Users
Enter one user per line or leave a space between each valid username then click the “Add Users”
button to add them to the database.
If the users are to have Administrator Privileges, select the checkbox to the right of the field
before clicking the Add Users button and they will be added as Administrators.
33

TANDBERG Content Server User Manual
4.4.2 Managing Users
An Administrator can add or remove Administrator Privileges or delete users from the database.
4.3.1.1 Deleting users
To delete one or more users or administrators, select the check box to the left of their username
and click the “Delete Selected” button. They will be removed from the database.
Click the “All” text link to select all users and click “None” do deselect the users that are currently
selected.
4.3.1.2 Changing Privileges
Administrators have a tick in the “Administrator Privileges” check box to the right of their
username.
To give an owner administrator privileges, click in the check box so a tick appears and click on
the “Update Users” button.
To remove administrator privileges, click the check box to the right of the user to remove the tick,
then click on the “Update Users” button.
NOTE:
Administrative rights in the Content Server are not related to administrative
rights in the Windows domain. A Windows administrative account may not
have any special privileges in the Content Server environment and a normal
Windows user account can be set up as a Content Server administrator.
34

4.4 Template Editor
The contents of a template determine how output from a videoconference is handled by the
TANDBERG Content Server to produce the desired outputs.
Options to think about for creating templates to produce the output required:
Is a transcoding or archiving line used?
What codecs or combinations of codecs are needed? Windows Media, Real
Media or Quicktime?
Is the conference needed to be streamed live or on-demand or both?
What streaming rates are needed for the outputs: 56K, 256K, 384K, etc?
Are the outputs video, audio or both?
With or without still images?
Does the presentation contain Dual Stream Video and slides?
Is this a Picture in Picture presentation layout?
According to what answers are given to the above options, a recording/streaming template can
be created starting from a blank document or using one of the system templates as a guide.
The recording and streaming options for each line can be selected from predefined system
templates, which are displayed with an asterisk (*) after the filename. The system templates
cannot be deleted.
Existing editable templates can be modified and new templates can be created by editing an
existing system template using the Template Editor and saving it with a new name.
Click on the New Template button to create one or select from the list of pre-defined templates
by clicking on its description and name.
35

TANDBERG Content Server User Manual
4.4.1 Template List
36

4.4.2 Existing Template
By clicking an existing template, the screen will look like this:
Clicking on any of the Writers or Outputs on the left hand side of the screen will display the
related information on the right hand side of the screen.
4.4.3 Editing an Existing Template
Click the Edit button to make changes to the existing template.
37

TANDBERG Content Server User Manual
4.4.4 Editing a New Template Screen
When an existing template is edited, the right hand side of the screen will display the Information
for the writer highlighted in orange on the left hand side of the screen.
Click the title bar of another writer to display its information on the right hand side of the screen.
To order the writers or the outputs within a writer, click on the grip (handle) at the end of the
Writer or Output title and move it to the new position. This way, templates have a consistent look
to them with writers and outputs in the same order.
Editing a protected system template enables an administrator to use this as a starting point for
creating other templates. Enter a new filename and change Job Description to reflect the newly
created template.
The titles of the writers are editable, so administrators can add meaningful descriptions of each
output.
To change writer title, click on ‘Edit title’ next to the title.
38

4.4.5 Serverpush Output Screen
If you click on the writer (left hand side of screen) you will see the information on the right hand
side of screen in Output and Writer Information
The Server name is set to (local) and will be interpreted as IP that the Content Server is using.
The Filename base must be the same as the last part of the Streaming path above.
39

TANDBERG Content Server User Manual
4.4.6 File Output Information
Enter the Directory and Filename base for the live conferences in the Output Information part of
the screen.
For Windows Media, the Directory for files is E:/data/media
For QuickTime and Real Media, the Directory for files is E:/data/www
Append other folders to the Directory to store files created using this template in their own
subdirectory.
40

4.4.7 Creating a New Template
When you click on the “New Template” button from the Template Editor screen you will see a
screen like this:
Filename: Enter the name of this template. (e.g. WMV8-Default.xml)
Job Description: Enter a meaningful description for this job.
Templates are sorted in the interface by Job description.
4.4.7.1 Template types
If you would like to add outputs for the transcoding line, add Windows Media, Real Media or
QuickTime.
If you would like to create a template for the archiving line, add H.323. If the H.323 writer is
chosen, the other options become unavailable.
Still image can be chosen for both types of lines (see Still Image writer section for details).
41

TANDBERG Content Server User Manual
4.4.7.2 Windows Media
Up to three writers are permitted for a Windows Media template (this means that three outputs
can be generated for this format).
Each writer will have the following Information:
Profile filename
Audio only
Streaming path
On demand
path
Select the right profile for the required type of output. Profiles
determine the type of codec used for recording, the streaming bit
rate, video framerate and video resolution.
Examples:
WM8_384K(15fps).prx – this profile will encode to a
Windows Media file using Windows Media codec 8, at 15
frames per second and a bitrate suitable for a 384K
Internet connection.
WM8_128K(dual).prx – this profile will encode to a
Windows Media file using Windows Media codec 8 and a
bitrate suitable for a 128K Internet connection.
Check this box if you require an audio only output.
Enter the path here if you would like the conference to be streamed
live. If you leave this field blank, the movie will not be streamed live.
The streaming path in writer information should be in the format:
mms:// <servername>/<publishing point>
Enter the path here if you would like the conference to be available
on demand. If you leave this field blank, the movie will still be written
to the server but will not be displayed in the interface.
The on-demand path in writer information should be in the format:
mms:// <server name>
On demand
output
Source
42
Choose File output if you want to stream content on demand from
the Content Server. Choose Server Push Output if you want to
stream on demand content from an external server.
Choose Source: Normal video for video or video with
snapshots/slides.

Choose Source: Extended (H.239) video if you want a video with
an extended video stream from a H.239 presentation
Picture in
picture
PIP location
Check this box if you require a picture in picture layout for your
output (otherwise the default layout is Picture out of Picture)
Select the location of the Picture in Picture from the drop down
menu.
For each Writer you can specify File, Network and/or streaming outputs (Server Push).
43

TANDBERG Content Server User Manual
4.4.7.3 File Output
File Output information specifies where the file will be saved for on demand viewing.
Directory
Filename base
FTP
E:/data/media is the default path if streamed off the Content Server
Windows Media streaming server.
Enter characters that will become the base of the filename. Spaces
are allowed but no special characters are allowed.
Filename format: <base> L <line number><timestamp>.ext
The file will include the filename base and will have the additional
information added as per example above.
Select the FTP option if you would like to upload files for on-demand
streaming from an external server. If this option is selected, you also
need to specify a valid Directory path to the external server.
44

4.4.7.4 Server Push
The Serverpush method, or pushing the live stream to the Windows Media streaming server is
the default streaming option on the Content Server.
For streaming, enter the following information:
The server name of your external Windows Media streaming server or (local) if you are
using the Content Server Windows Media streaming server.
Add the port which will be 8080 if you are using the Content Server
Add filename base. The filename base should be an alphanumeric entry with no spaces
and no special characters. Underscores are allowed. The streaming path under Writer
Information should be: mms:\\<server name>\<filename_base>
If you have set up a publishing point on the Windows Media streaming server, you can copy the
parameters for your new publishing point by specifying the Publishing point copy.
If your publishing point on the Windows Media streaming server is called “my_publishing_point”,
enter my_publishing_point in the Publishing point copy field.
45

TANDBERG Content Server User Manual
4.4.7.5 Network
Network is used to add the network sink or server pull functionality to the Content Server. It can
only be used for Windows Media in situations where you want the external server to request the
stream.
A network publishing point has to be created on the external Windows Media server to take
advantage of this functionality.
Enter the Content Server name and port for Server Pull of the data
Server name
Port
The streaming path will be mms:\\<server name>\<publishing point>, where:
server name is the external Windows Media server name
publishing point is the publishing point you have created on the external Windows Media
server.
Enter the IP address of the Content Server or (local) will be
interpreted as IP that the Content Server is using
Select a port that is NOT being used on the Content Server (see
Appendix 5 for a list of ports used by the Content Server)
46

4.4.7.6 QuickTime
Up to three writers are permitted for a QuickTime template (this means that three outputs are
allowed to be generated for this format). The QuickTime format does not allow live streaming.
File Output
File Output information specifies where the file will be saved for on demand viewing.
E:\data\www - the default directory for QuickTime content if streamed on-demand off the Content
Server Windows Media streaming server.
The on demand path in QuickTime writer information should be in this format:
• http://<servername>/tcs/data if the Content Server is used for streaming
• rtsp://<servername>/filename if external Darwin streaming server is used
47

TANDBERG Content Server User Manual
• Real Media
Up to three writers are permitted for a Real Media template (this means that three outputs are
allowed to be generated for this format). The Real Media format does not allow for live streaming
direct from the TANDBERG Content Server.
File Output
File Output information specifies where the file will be saved for on demand viewing.
If Real Media content is streamed on-demand from the Content Server, then the Directory should
be E:\data\www
The on demand path should be http://<servername>/tcs/data
Real Media content can be streamed off external streaming servers (Helix or G2) both live and
on-demand.
On a Helix server, the live streaming path should be rtsp://<servername>/encoder and the ondemand path should be rtsp://<servername>/<archivefoldername>.
For on demand streaming, check Archive Enabled on the external server.
On a G2 server, the live streaming path should be rtsp://<servername>/broadcast foldername and
the on-demand path should be rtsp://<servername>/<archivefoldername>.
For on demand streaming, check Archive Enabled on the external server.
In Writer Information on the TANDBERG Content Server you need to select Server Push Output
as on-demand output.
48

4.4.7.7 H.323 Writer
The H.323 Writer allows the creation of templates for Archiving lines, by wrapping H.261 and
H.263+ codecs in either QuickTime or Windows Media format
The H.323 Writer does not require a profile, but users have to choose the file type – Windows
Media or QuickTime.
Windows Media
Only one file output is supported for this format in a H.323 writer
Serverpush
The publishing point format should be http://<servername>: port/<publishing point>
The streaming path point format should be mms://servername/publishing point
QuickTime
Only one file output is supported for this format in a H.323 writer
TIP:
Serverpush
Live streaming off external Darwin streaming server
Session name
Unlike the transcoding QuickTime format, archiving format content wrapped
in QuickTime format CAN be streamed live off an external streaming server.
User selected name you choose to identify the session
Server name
Audio port
Video port
Sdp location
The path for on demand streaming off an external Darwin streaming server should be
rtsp://<servername>/filename
On demand streaming from the TANDBERG Content Server
The directory for on demand streaming off the TANDBERG Content Server should be
E:\data\www
The path for on demand streaming off the TANDBERG Content Server should be:
http:// servername/tcs/data
IP of external streaming server
Specify a port that is not already being used
Specify a port that is not already being used
Identify the movies folder that streaming media are streamed from
49

TANDBERG Content Server User Manual
4.4.7.8 Still Image
Use this writer if you want to extract still images from the extended video (H.239) stream for lowbandwidth streaming. This writer can only be used in a template which specifies dual video.
One writer only is supported.
Still images of extended H.239 video are extracted at a specified interval:
Specified interval recommended minimum 10sec
Specified interval recommended maximum 60sec
4.4.8 Template creation tips
4.4.8.1 PIP
For a Picture in Picture layout choose the following in the Writer Information:
Profile filename – choose profile with (with SVGA, VGA or XGA, with PIP)
Source = Extended (H.239) video
Select PIP checkbox
To specify PIP location, select the required location from the dropdown menu
4.4.8.2 H.239 or Dual Stream
For H.239 (Dual Stream) video output choose the following in the Writer Information:
Normal video: writer with source normal
Extended video: writer with source extended
Profile with SVGA, VGA or XGA in the profile name, but not PIP
If still images required from extended video (for bandwidth under 384K), add Still image
writer
4.4.9 Using the Multicast Templates
If you intend to deliver your live streaming content as a multicast stream you will need to modify
one of the system Multicast templates and then use the Windows Media Services Multicast
Announcement Wizard to create an announcement. The announcement is a Windows Media
metafile that provides the player with the information required to receive the streaming content.
50

To setup up a multicast stream from the TANDBERG Content Server first edit the relevant
Template (WMV8-MulticastDefault.xml for the Transcoding line or H323-ASF-Multicast.xml for the
archiving lines) with the Template Editor.
Make a note of the Port used for the Network Output Information as this will be used later in the
creation of the new Publishing Point. If you create multiple Templates for Multicast Publishing
Points then you must choose different Ports for each.
NOTE: When selecting a port for the Network sink you should choose a number greater than
9000 as this will ensure you do not conflict with other port numbers used by the TANDBERG
Content Server.
Also note the name Streaming Path as you will use this in the creation of the Announcement.
Once you have completed the new Template give it a new name and save it.
Remember, you must set this template as the active template for a line before you can begin
using it.
51

TANDBERG Content Server User Manual
The next steps are to create the multicast publishing point and the multicast announcement file.
At this point the administrator should use the Remote Desktop Connection application to connect
to the Content Server and the administrative pages of the Windows Media Services.
Within the Windows Media Service administrative pages, create a new Publishing Point using the
Wizard and choose to create a “Broadcast publishing point”.
Choose to have the content delivery via “Multicast”. You can decide whether to enable Unicast
rollover.
52

The Encoder URL is the IP address of the Content Server followed by the port you selected in the
template. E.g. http://127.0.0.1:9990
On completion of the Wizard choose to create a .nsc file.
53

TANDBERG Content Server User Manual
In the Multicast Announcement Wizard choose to create the “Multicast information file (.nsc) and
announcement file (.asx)”
If the call is already in progress when you run the announcement wizard you can choose to
automatically retrieve the stream formats. If you are setting this up before the call starts then you
will need to select existing stream format files to allow the wizard to correctly identify the formats
54

to be used in the multicast (note: you can use previously recorded conference movie files for
this).
Choose whether you want to enable logging or not for the multicast.
Set the location of where the (.nsc) and (.asx) files will be created. This should be within the
E:\data\www path.
55

TANDBERG Content Server User Manual
Specify the URL to the Multicast Information File. This should be of the form http://<Content
Server IP>/data/Multicast.nsc where <Content Server IP> is the address of your Content Server.
After choosing whether you want to add further meta-data and archive you have completed the
announcement wizard. If you are running this wizard while the call is in progress, then you can
choose to Start the publishing point when the wizard finishes.
56

When you have done this setup once you do not need to repeat it for further calls unless you
change any of the streaming parameters (such as bitrate or codecs etc). If you have to create
further announcement files then retain your previous ones for use in other calls.
NOTE: It is possible to create a .nsc file with multiple stream formats within it. This is very useful
for handling the multiple bitrates available on the archiving lines. See the Windows Media
Services documentation for further information.
57

TANDBERG Content Server User Manual
4.5 Software Upgrade
The ‘Software Upgrade’ page allows administrators to view the software version, device serial
number, and option keys installed on the TANDBERG Content Server.
The Content Server software can easily be upgraded by adding option keys and installing release
keys provided by authorized TANDBERG resellers or partners. After putting in the option or
release key click on the Restart Service button to restart the Content Server for the software
upgrade to take effect.
58

5 Creating and Editing Content
The TANDBERG Content Server enables users with ‘Owner’ and ‘Administrator’ privileges to
record video calls by dialing out from the web interface and to edit their recorded content.
Owners and Administrators need to log in to the Content Server to create and edit their
conferences.
Click the Log In button at the top right of the screen
Enter your username and password that has been given to you by your administrator, or a valid
username and password for your domain.
59

TANDBERG Content Server User Manual
You will see a screen similar to this if you are a Conference Owner and have the ability to record
calls and edit your recorded content.
You will see a screen similar to this if you have administrative privileges.
60

5.1 Creating Conferences
Click on the Create Conference text link in the menu bar.
Enter the following details about the Conference:
Title
Description
Keywords
Copyright
Password
Owner
The name of the conference that participants will see
Details about the conference to be displayed beneath the Title in the
Conference list
Enter any keywords that can be used when searching for the
conference.
Enter any copyright information about the conference
Enter a password to restrict streaming access to this conference. If
no password is entered, then there is no restriction on who has
access to the conference if they can view the conference list.
Select the Owner of the Conference from the pull down list. Only the
owner and administrators can edit the conference.
61

TANDBERG Content Server User Manual
Make a call
Recording Type
Address
Speed
NOTE:
After you have entered the required information press the “Make Call” button to start the call.
The Recording Type determines the output of your recorded call. The
Record/Stream Type is associated with the Transcoding line 1. The Archive
Type is associated with Archiving Lines 2 to 5.
Please note that all lines are enabled to record and stream calls live by
default, but it is templates attached to lines which determine which live and
on-demand streaming options are turned on. Depending on the kind of
template which is attached by an administrator to the line, choosing the
Record/Stream type may result in a call which is available on-demand only,
and choosing the Archive line may result in content which is streamed live!
There are two recording types available - Record / Stream or
Archive
Record / Stream – If you select the Record/Stream radio button,
your conference will be recorded on the Transcoding Line
Archive – If you select the Archive radio button, your conference will
be recorded on an Archiving Line. You may choose which line you
would like to use to record your call.
Enter the Address of the endpoint you are calling. The address can
be in the format of an IP Address, H.323 alias or E.164 alias.
Choose the call rate from the drop-down menu. You will only be able
to see the allowed call rates for the line you have chosen.
62

Call State Information
The display will be updated with the following call information:
Click the “End Call” button to finish the call. Calls can also be terminated from the remote end.
63

TANDBERG Content Server User Manual
5.1.1 Live View
Once the call has been made, the following screen will be displayed to the Owner of the
conference.
NOTE:
The Conference URL will be displayed with the two links also available, Watch and Email.
64
To view the path to your recorded content, you can click on the Show URL
List button to display the movie and slide URLs.
When finished, click on the Hide URL List button.

5.1.1.1 Watch
Click to view the live conference.
Click on the displayed bit rate to watch the live stream. Depending on the template used for the
call, there may be one or multiple bit rates available, or none if the conference is not being
streamed.
Note: The start up time of the stream is affected by internal buffering so if the video does not play
after clicking on the link, click on the play button to watch the presentation.
65

TANDBERG Content Server User Manual
5.1.1.2 Email
Click to send an email with the URL for users to view the Conference.
66

5.1.1.3 Conference Views
While the call is live, the conference details will be displayed in the list of Live Conferences and
users will be able to click on a link to view the live presentation.
When the conference has completed, it will be listed with the recorded conferences
67

TANDBERG Content Server User Manual
5.2 Editing Conferences
Click on the Edit link to the right of the Conference name to edit its contents.
Only Owners and Administrators can edit conferences.
Owners can edit their own conferences.
Administrators can edit all conferences.
68

The following conference details can be edited:
Title:
The name of the conference that participants will see
Description:
Details about the conference to be displayed beneath the Title in the
Conference list
Keywords:
Enter any keywords that can be used when searching for the
conference
Copyright:
Enter any copyright information about the conference
Password:
Enter a password to restrict access to this conference. If no
password is entered, then there is no restriction on who has access
to the conference if they can view the conference list.
Owner:
Select the Owner of the Conference from the pull down list. Only the
owner and administrators can edit the conference.
Click the Save button if you have made changes to any fields on the screen.
Click Return to go back to the Conference List.
69

TANDBERG Content Server User Manual
5.2.1 Slide List
Conference owners can click on the Show Slide List button to display and edit the titles of the
slides.
This will display the slides for the conference.
Change the names of the Slide Titles and click Save when they are correct.
Return takes you back to same page you came from in the Recorded Conferences list.
70

5.2.2 Media URL List
Administrators can click on the Show URL List button to display the URLs of the movies and the
URL path to the presentation slides.
This will display the URLs of any on demand movies and the slide path for graphics associated
with this conference.
71

TANDBERG Content Server User Manual
5.2.3 Content Editor
Click the Content Editor button to add slides, modify slides and position the slide index points in
the presentation.
You will see the following screen if you are editing a conference which does not have any slides.
72

5.2.4 Uploading Slides
Click the Upload Slide button to add a graphic to your presentation.
Formats
You can upload graphics in the following formats: .JPEG, .GIF and
.PNG
Filesize
Dimensions
The graphics will appear in the Slides window.
The filesize of the graphic must not exceed 150 K.
The Content Editor will resize your graphic proportionally for display
in the Content Viewer. If you would prefer to resize your graphics
manually in a third party application, the maximum width of your
graphic should not exceed 630 pixels and the height should not
exceed 520 pixels.
73

TANDBERG Content Server User Manual
To reorder the slide list, click and drag the slide you wish to change. The number to the left of the
slide will change dynamically as you move it.
not set means that the slide is yet not associated with a marker in the conference presentation.
74

5.2.5 Deleting Slides
Click the DELETE button on the slide if you wish to remove it from the slide list.
5.2.6 Adding Markers
Adding markers into the timeline is done by clicking above the video slider bar. This will enter a
small inverted triangle to indicate a marker has been added.
The first marker entered will correspond with the first slide in the list as above.
Entering in a name of the slide will create this marker in the movie as a clickable index point for a
user watching the movie.
If a slide is associated with a marker but is not named, it will not contain an index point but the
slide will be in the slide list and also display when the movie is playing.
75

TANDBERG Content Server User Manual
5.2.7 Removing Markers
Click, drag and drop the markers into the white space above to remove the marker from the
timeline.
This will not change the order of the slides but may drop the last slide off the list if the number of
markers is less than the number of slides uploaded.
76

6 Dialing in to the Content Server
Users can record their calls by dialing in to the Content Server from H.323 devices. Depending on
the options of the Content Server, up to 5 lines can be used to record calls. Each of these lines
will have its own unique H.323 ID or E.164 alias that users can dial (this feature requires a
gatekeeper).
Once connection to the Content Server has been established, a “Recording in progress” logo will
be displayed to the endpoint. Calls made from endpoints to the Content Server are recorded from
the moment that a connection to the Server has been established.
All incoming ad hoc calls can be password-protected by default. To enable this function, the
administrator needs to select Password protection (for incoming ad-hoc calls) in the Line
Settings menu for each line that password protection is required.
77

TANDBERG Content Server User Manual
If password protection is enabled, users will need to enter a password to view incoming calls live
and on-demand.
Administrators (and conference owners) can copy and paste the password for the conference
from the Conference Edit page and email it to the users with the conference URL. The password
is not automatically included in the email for security reasons.
78

6.1 Scheduling a Call with TMS
To schedule a call, go to the Book Meeting Room screen in TMS.
Fill in the fields for the meeting room booking with:
Conference Title
Date of the booking
Room to be used
Start and End time of the meeting.
To Record and Stream the Conference, select the ‘Record and Stream Conference’ checkbox
and then CONFIRM the details on the screen.
You will be prompted with a message if the date and time for the conference in the room you
specify conflicts with another meeting.
If so, please choose a different location/date/time combination.
79

TANDBERG Content Server User Manual
7 Viewing Content
Users can access a list of available conferences and access the public conferences. They can
also access password protected conferences if the administrator or owner has emailed them the
password for the conference.
A user’s view may look similar to this:
80

7.1.1 Conference Test Page
Click on the Conference Test Page at the bottom right of the screen to check the ability of your
screen, browser and plug in settings to view conferences.
Example screen display
To check the streaming movie in your browser, click View next to the Player you have installed.
81

TANDBERG Content Server User Manual
7.1.2 The Content Viewer
To access the content viewer, click on one of the displayed bit rates for the conference.
The Content Window has three parts
1) The video display in the top left hand corner of the window
2) The public and private indexing underneath the video display
3) The presentation of slides or graphics, in the right hand side of the window.
82

7.1.3 The Video Display
>> >>
Bit-Rate: 384Kbytes 128Kbytes 56Kbytes
Size: 320X240 240X180 160X120
The video can be displayed in a number of different sizes.
The example shows three different bit-rates with their recommended sizes for the videos.
83

TANDBERG Content Server User Manual
7.1.4 The Video Controls
7.1.4.1 The Slide Bar
The Slide Bar shows:
• the progress of the video downloading,
• the position where the video is playing and
• a controller you can move to any position in the video.
There are two ways that the videos can be viewed.
1. The whole video is downloaded to your computer (pseudo-streaming)
The yellow line in the Slide Bar shows you the download progress. When the video has
completely downloaded, it is ready for you to play by moving the slider or clicking on any item
in the Table of Contents.
You can still start playing the video before it is completely downloaded but you can only move
the slide bar to any position on the yellow line.
2) The video is streamed (true streaming)
The yellow line will not be displayed in this case.
You can move the controller to any part of the video to view it. The video will stop, load the
requested part of the video to your browser (called ‘buffering’) and then begin playing.
You can also click on an item in the Index to view the video from that location.
84

7.1.4.2 Play and Pause
&
Click the play button and the presentation will play from the current position of the slider.
If the video is playing, click the pause button to halt the video at its current position.
7.1.4.3 Audio
The sound level controller is for muting and adjusting the volume of the video.
Click on the MUTE button to toggle the volume on and off.
To increase the volume click
Note: Please check your computer’s audio level if no sound can be heard.
+ and click - to decrease the volume.
7.1.4.4 Time Display
The yellow numbers on the time indicator display:
• Left: the time elapsed from the start of the video
• Right: the total length of the video.
The format of the time display is hours: minutes: seconds.
85

TANDBERG Content Server User Manual
7.1.4.5 Bit rate:
The number displayed beneath the Bit-rate e.g. 384K is the current download speed of the video
that is displayed on the screen.
To choose another speed, click the speed displayed and choose another one.
The video will select the new format and start playing from the position you were at with the
previous video.
Note: The higher the number, the better the quality but the file size is bigger and the video may
also take longer to display, due to data buffering on the server.
86

7.1.4.6 Image size
If you have selected a video download option that is not the largest size of 320 X 240 pixels, the
video will be displayed inside the player and not fill up the window.
>> >>
320X240 240X180 160X120
To increase the display size, click on
Click
Note: The image quality will be reduced if you increase the display size.
Example shows a 56KByte video at size 160 X 120 increased to 320 X 240
Note the decrease in picture quality when the video is enlarged.
to restore to the original size of the video.
as displayed.
>>
87

TANDBERG Content Server User Manual
7.1.4.7 Index
The Content Viewer contains two indexes. The Index are the shared indexes for the presentation being played and the Bookmarks are the individual indexes for any user.
Index: The items in the index can only be changed by the owner of the conference.
By clicking an item in the Index, the video will move and start playing at that reference and
display the corresponding slide.
Bookmarks: To access your own bookmarks for a conference, click the Bookmarks tab at the
top. Click on any of your bookmarks and the video will begin playing from this point and the
corresponding slide in the presentation will be displayed.
To create your own Bookmark, click on the Add Bookmark button.
Replace the time displayed with an appropriate name for your personal bookmark.
Bookmarks are stored as cookies in you web browser, so using bookmarks requires that cookies are allowed (enabled) in your web browser. This also means that your bookmarks will only be available from the computer you created them with.
88

7.1.5 Conference Views
Users of the system will see a view of the recorded conferences when they first enter the
conference screen.
They will be initially sorted by the Conference Date with the most recent conferences first.
As the number of conferences increase, the screens will be displayed in groups of 10 with links to
view the previous and next group as below.
Click on the Prev 10 and Next 10 links to move between the conferences in groups of 10.
89

TANDBERG Content Server User Manual
7.1.5.1 Sorting Conferences
To sort all the conferences in a different order, click the arrow of the pull-down menu as shown to
display other sort options. Choose from the list.
90
 Loading...