siemens 880 User Manual

SINUMERIK 840/840C
SINUMERIK 850
SINUMERIK 880/880 GA2
Measuring Cycles Version 20 and higher
Start-up Guide 08.96 Edition
Service Documentation

SINUMERIK 840/840C
SINUMERIK
850
SINUMERIK
880/880 GA2
Measuring Cycles
Version 20 and higher
Start-up Guide
Service Documentation
Valid for:
Control Software Version
SINUMERIK 840 from SW 01
SINUMERIK 840C from SW 01
SINUMERIK 850 from SW 04
SINUMERIK 880 from SW 04
SINUMERIK 880 GA2 from SW 01
08.96 Edition

SINUMERIK® documentation
Printing history
Brief details of this edition and previous editions are listed below.
The status of each edition is shown by the code in the "Remarks" column.
Status code in ”Remarks” column:
A . . . New documentation
B . . . Unrevised reprint with new Order No.
C . . . Revised edition with new status.
If factual changes have been made on a page since the last edition, this is indicated by
a new edition coding in the header on that page.
Edition Order No. Remarks
07.90 6ZB5 410-0EM02-0AA0 A
10.91 6ZB5 410-0EM02-0AA1 C
01.93 6FC5 197-0AB60-0BP0 C
08.96 6FC5 197-0AB60-0BP1 C
Siemens quality for software and training
to DIN ISO 9001, Reg. No. 2160-01
Other functions not described in this documentation might be
executable in the control. This does not, however, represent an
obligation to supply such functions with a new control or when
servicing.
This publication was produced on the Siemens 5800 Office
System.
The reproduction, transmission or use of this document or its
contents is not permitted without express written authority.
Offenders will be liable for damages. All rights, including rights
created by patent grant or registration of a utility model or
design, are reserved.
We have checked that the contents of this publication agree with the
hardware and software described herein. The information given in this
publication is reviewed at regular intervals and any corrections that might
be necessary are made in the subsequent printings. Suggestions for
improvement are welcome at all times.
Subject to change without prior notice.
© Siemens AG 1990, 1991, 1993,1996 All Rights Reserved
Order No. 6FC5 197-0AB60-0BP1
Printed in the Federal Republic of Germany
Preliminary Remarks
aaaaa
a
aaaaa
a
aaaaa
a
aaaaa
a
aaaaa
a
aaaaa
a
aaaaa
a
aaaaa
a
aaaaa
a
aaaaa
a
aaaaa
a
aaaaa
a
aaaaa
a
aaaaa
a
aaaaa
a
aaaaa
a
aaaaa
a
aaaaa
a
aaaaa
a
aaaaa
a
aaaaa
a
aaaaa
a
aaaaa
a
aaaaa
a
aaaaa
a
aaaaa
a
aaaaa
a
aaaaa
a
aaaaa
a
aaaaa
a
aaaaa
a
aaaaa
a
aaaaa
a
aaa
a
a
a
a
a
a
a
a
a
a
a
a
a
a
a
a
a
a
a
a
a
a
a
a
a
a
a
a
a
a
a
a
a
aaaaa
a
aaaaa
a
aaaaa
a
aaaaa
a
aaaaa
a
aaaaa
a
aaaaa
a
aaaaa
a
aaaaa
a
aaaaa
a
aaaaa
a
aaaaa
a
aaaaa
a
aaaaa
a
aaaaa
a
aaaaa
a
aaaaa
a
aaaaa
a
aaaaa
a
aaaaa
a
aaaaa
a
aaaaa
a
aaaaa
a
aaaaa
a
aaaaa
a
aaaaa
a
aaaaa
a
aaaaa
a
aaaaa
a
aaaaa
a
aaaaa
a
aaaaa
a
aaaaa
a
aaa
aaa
aaa
aaa
aaa
aaa
aaa
aaa
aaa
aaa
aaa
aaa
aaa
aaa
aaa
aaa
aaa
Technical Comments
Other functions not described in this documentation might be executable in the control. This
does not, however, represent an obligation to supply such functions with a new control or
when servicing.
The symbol shown on the left appears in this
documentation whenever the machine tool manufacturer
has the possibility of influencing/modifying the functional
behaviour described by changing a cycle machine data
(MDC).
Since the cycle machine data range and the cycle setting data range can be set up in different
ways, the relevant data in the examples are explained on the basis of the standard settings.
a
a
a
a
a
a
a
a
a
a
a
a
a
a
a
a
a
a
a
a
a
a
a
a
a
a
a
a
a
a
a
a
SINUMERIK 850/880 control as from Software Version 4,
SINUMERIK 880 GA2 as from Software Version 1,
SINUMERIK 840 as from Software Version 1,
SINUMERIK 840C as from Software Version 1,
This User's Guide applies to:
measuring cycles as from version 20!

General Preconditions 1
Hardware 2
Functional Test 3
Machine Data for Measuring Cycles 4
Setting Data for Measuring Cycles 5
Auxiliary Cycles for Start-up 6
Start-up Flowchart 7
User Memory Submodule (UMS) 8
Tool and Workpiece Measurement in
JOG Mode (SINUMERIK 880)
Workpiece Measurement in JOG Mode
(SINUMERIK 840 SW2)
Lists 11
Alarms 12
9
10
Abbreviations 13

Contents
Page
1 General Preconditions . . . . . . . . . . . . . . . . . . . . . . . . . . . . . . . . . . 1–1
1.1 Notes to ensure smooth running of the measuring cycles . . . . . . . . . . . 1–2
2 Hardware . . . . . . . . . . . . . . . . . . . . . . . . . . . . . . . . . . . . . . . . . . . . 2–1
2.1 Probe . . . . . . . . . . . . . . . . . . . . . . . . . . . . . . . . . . . . . . . . . . . . . 2–1
2.1.1 Multidirectional probe (3D) . . . . . . . . . . . . . . . . . . . . . . . . . . . . . . . . 2–2
2.1.2 Bidirectional probe . . . . . . . . . . . . . . . . . . . . . . . . . . . . . . . . . . . . . . 2–2
2.1.3 Monodirectional probe . . . . . . . . . . . . . . . . . . . . . . . . . . . . . . . . . . . . 2–2
2.2 Jumpering/connection . . . . . . . . . . . . . . . . . . . . . . . . . . . . . . . . . . . . 2–3
3 Functional Test . . . . . . . . . . . . . . . . . . . . . . . . . . . . . . . . . . . . . . . 3–1
3.1 Service display . . . . . . . . . . . . . . . . . . . . . . . . . . . . . . . . . . . . . . . . . 3–1
3.2 Test program . . . . . . . . . . . . . . . . . . . . . . . . . . . . . . . . . . . . . . . . . . 3–1
4 Machine Data for Measuring Cycles . . . . . . . . . . . . . . . . . . . . . . . . 4–1
4.1 Cycle machine data memory (MDC) . . . . . . . . . . . . . . . . . . . . . . . . . . 4–1
4.1.1 Channel-oriented values, overview . . . . . . . . . . . . . . . . . . . . . . . . . . . 4–1
4.1.2 Channel-oriented bits, overview . . . . . . . . . . . . . . . . . . . . . . . . . . . . . 4–1
4.1.3 Central values, overview . . . . . . . . . . . . . . . . . . . . . . . . . . . . . . . . . . 4–2
4.1.4 Central bits, overview . . . . . . . . . . . . . . . . . . . . . . . . . . . . . . . . . . . . 4–2
4.2 NC machine data . . . . . . . . . . . . . . . . . . . . . . . . . . . . . . . . . . . . . . . 4–3
4.2.1 MD 18 Zero offset group . . . . . . . . . . . . . . . . . . . . . . . . . . . . . . . . . . 4–3
4.2.2 MD 19 P number (SINUMERIK 850 only) . . . . . . . . . . . . . . . . . . . . . . 4–3
4.2.3 MD 157 Type/software version . . . . . . . . . . . . . . . . . . . . . . . . . . . . . 4–4
4.2.4 MD 208/209 Max. tool wear (parameters P5/P6/P7) . . . . . . . . . . . . . . . 4–4
4.2.5 NC transverse axis bits MD 5011 and MD 572* . . . . . . . . . . . . . . . . . . 4–5
4.2.6 PLC machine data 6026 bit 2 . . . . . . . . . . . . . . . . . . . . . . . . . . . . . . 4–6
4.3 Channel-oriented values, description . . . . . . . . . . . . . . . . . . . . . . . . . 4–6
4.4 Channel-oriented bits, description . . . . . . . . . . . . . . . . . . . . . . . . . . . 4–14
4.5 Central values, description . . . . . . . . . . . . . . . . . . . . . . . . . . . . . . . . 4–17
4.5.1 Tool probe (m1) . . . . . . . . . . . . . . . . . . . . . . . . . . . . . . . . . . . . . . . . 4–22
4.5.2 Workpiece probe (m2) . . . . . . . . . . . . . . . . . . . . . . . . . . . . . . . . . . . 4–24
4.5.3 Calibration element (m3) . . . . . . . . . . . . . . . . . . . . . . . . . . . . . . . . . . 4–26
4.5.4 Tool change position (m4) . . . . . . . . . . . . . . . . . . . . . . . . . . . . . . . . . 4–31
4.5.5 Reversal dimension (m5) . . . . . . . . . . . . . . . . . . . . . . . . . . . . . . . . . 4–33
4.6 Central bits, description . . . . . . . . . . . . . . . . . . . . . . . . . . . . . . . . . . 4–34

5 Setting Data for Measuring Cycles . . . . . . . . . . . . . . . . . . . . . . . . . 5–1
5.1 Cycle setting data memory (SDZ) . . . . . . . . . . . . . . . . . . . . . . . . . . . 5–1
5.1.1 Channel-oriented values, overview . . . . . . . . . . . . . . . . . . . . . . . . . . . 5–1
5.1.2 Channel-oriented bits, overview . . . . . . . . . . . . . . . . . . . . . . . . . . . . . 5–1
5.2 Channel-oriented values, description . . . . . . . . . . . . . . . . . . . . . . . . . . 5–2
5.3 Channel-oriented bits, description . . . . . . . . . . . . . . . . . . . . . . . . . . . . 5–2
6 Auxiliary Cycles for Start-up . . . . . . . . . . . . . . . . . . . . . . . . . . . . . . 6–1
6.1 Auxiliary cycle L898 . . . . . . . . . . . . . . . . . . . . . . . . . . . . . . . . . . . . . 6–1
7 Start-up Flowchart . . . . . . . . . . . . . . . . . . . . . . . . . . . . . . . . . . . . . 7–1
8 User Memory Submodule (UMS) . . . . . . . . . . . . . . . . . . . . . . . . . . . 8–1
8.1 Measuring cycle overview . . . . . . . . . . . . . . . . . . . . . . . . . . . . . . . . . 8–1
8.2 Result displays, alarm texts . . . . . . . . . . . . . . . . . . . . . . . . . . . . . . . . 8–4
8.2.1 Result displays . . . . . . . . . . . . . . . . . . . . . . . . . . . . . . . . . . . . . . . . . 8–4
8.2.2 Include result displays and alarm list in UMS . . . . . . . . . . . . . . . . . . . . 8–6
8.3 Input displays for measuring cycles . . . . . . . . . . . . . . . . . . . . . . . . . . 8–7
8.3.1 Input displays for cycle package 3 (measuring cycles for turning machines) 8–7
8.3.1.1 General . . . . . . . . . . . . . . . . . . . . . . . . . . . . . . . . . . . . . . . . . . . . . 8–7
8.3.1.2 Diskette . . . . . . . . . . . . . . . . . . . . . . . . . . . . . . . . . . . . . . . . . . . . . 8–7
8.3.1.3 Outline and branching displays package 3 . . . . . . . . . . . . . . . . . . . . . . 8–8
8.3.2 Input displays for cycle package 4
(measuring cycles for milling machines and machining centres) . . . . . . 8–9
8.3.2.1 General . . . . . . . . . . . . . . . . . . . . . . . . . . . . . . . . . . . . . . . . . . . . . 8–9
8.3.2.2 Diskette . . . . . . . . . . . . . . . . . . . . . . . . . . . . . . . . . . . . . . . . . . . . . 8–9
8.3.2.3 Outline and branching package 4 . . . . . . . . . . . . . . . . . . . . . . . . . . . . 8–10
9 Tool and Workpiece Measurement in JOG Mode (SINUMERIK 880) 9–1
9.1 General conditions . . . . . . . . . . . . . . . . . . . . . . . . . . . . . . . . . . . . . . 9–1
9.2 Necessary machine data . . . . . . . . . . . . . . . . . . . . . . . . . . . . . . . . . . 9–1
10 Workpiece Measurement in JOG Mode (SINUMERIK 840 SW2) . . . . 10–1
10.1 General conditions . . . . . . . . . . . . . . . . . . . . . . . . . . . . . . . . . . . . . . 10–1
10.2 User Memory Submodule (UMS) . . . . . . . . . . . . . . . . . . . . . . . . . . . . 10–2
10.2.1 Diskette . . . . . . . . . . . . . . . . . . . . . . . . . . . . . . . . . . . . . . . . . . . . . 10–2
10.2.2 Link lists . . . . . . . . . . . . . . . . . . . . . . . . . . . . . . . . . . . . . . . . . . . . . 10–2
10.3 FX 34: Measuring for SINUMERIK 840M . . . . . . . . . . . . . . . . . . . . . . . 10–3
10.3.1 Description . . . . . . . . . . . . . . . . . . . . . . . . . . . . . . . . . . . . . . . . . . . 10–3
10.3.2 Additional information . . . . . . . . . . . . . . . . . . . . . . . . . . . . . . . . . . . . 10–3
10.3.3 Block call . . . . . . . . . . . . . . . . . . . . . . . . . . . . . . . . . . . . . . . . . . . . . 10–4
10.3.4 Signal description . . . . . . . . . . . . . . . . . . . . . . . . . . . . . . . . . . . . . . . 10–4
10.3.5 Programming example . . . . . . . . . . . . . . . . . . . . . . . . . . . . . . . . . . . . 10–5
10.3.6 Block data list . . . . . . . . . . . . . . . . . . . . . . . . . . . . . . . . . . . . . . . . . . 10–5

11 Lists . . . . . . . . . . . . . . . . . . . . . . . . . . . . . . . . . . . . . . . . . . . . . 11–1
11.1 Cycle machine data . . . . . . . . . . . . . . . . . . . . . . . . . . . . . . . . . . . . . 11–1
11.1.1 Channel-oriented values . . . . . . . . . . . . . . . . . . . . . . . . . . . . . . . . . . 11–1
11.1.2 Channel-oriented bits . . . . . . . . . . . . . . . . . . . . . . . . . . . . . . . . . . . . 11–2
11.1.3 Central values . . . . . . . . . . . . . . . . . . . . . . . . . . . . . . . . . . . . . . . . . 11–3
11.1.4 Central bits . . . . . . . . . . . . . . . . . . . . . . . . . . . . . . . . . . . . . . . . . . . 11–6
11.2 Cycle setting data . . . . . . . . . . . . . . . . . . . . . . . . . . . . . . . . . . . . . . . 11–7
11.2.1 Channel-oriented values . . . . . . . . . . . . . . . . . . . . . . . . . . . . . . . . . . 11–7
11.2.2 Channel-oriented bits . . . . . . . . . . . . . . . . . . . . . . . . . . . . . . . . . . . . 11–7
12 Alarms . . . . . . . . . . . . . . . . . . . . . . . . . . . . . . . . . . . . . . . . . . . . . 12–1
12.1 Alarm overview . . . . . . . . . . . . . . . . . . . . . . . . . . . . . . . . . . . . . . . . 12–1
12.2 Measuring cycle alarms . . . . . . . . . . . . . . . . . . . . . . . . . . . . . . . . . . 12–4
13 Abbreviations . . . . . . . . . . . . . . . . . . . . . . . . . . . . . . . . . . . . . . . . . 13–1

01.93 1 General Preconditions
1 General Preconditions
Option: B78
Software versions: For measuring cycles Version 20 and higher, the following software
versions are required:
SINUMERIK 840 software version 1 and higher
SINUMERIK 840C software version 1 and higher
SINUMERIK 850 software version 4 and higher
SINUMERIK 880 software version 4 and higher
SINUMERIK 880 GA2 software version 1 and higher
PLC program: No PLC program is required for the measuring cycle function. The
measuring function is activated in the cycles by means of command
@720....
FB 116 (850) or FB 121 (840/880) is required when using the function
package "Tool management".
Axis arrangement: For proper operation of measuring cycles it is necessary for the machine
axes to be arranged in accordance with DIN 66217.
Siemens AG 1990 All Rights Reserved 6FC5197- AB60 1–1
©
SINUMERIK 840/850/880 (IA)

1 General Preconditions 08.96
1.1 Notes to ensure smooth running of the measuring cycles
1.1 Notes to ensure smooth running of the measuring cycles
1. To ensure that the measuring cycles operate correctly it is imperative that the machine
axes are set up according to DIN 66217.
2. Reference point approach must already have been performed.
3. GRC/CRC, (coordinate rotation) and scale modification must be deselected before a
measuring cycle is called.
4. Inch/metric switchover.
Measurements must be performed in the input system defined in MD 5002 bit 4, i.e.
switchover with G70/G71 is not permitted.
5. Before the cycles are called, the axes must be positioned in such a way that they do not
change direction when they move from the current position to approach the set position.
Nor must the tool collide with the sensor or the workpiece probe collide with other machine
parts when approaching the starting position with linear interpolation.
6. The parameters of the individual cycles must be defined before the cycles are called.
7. The cycles are automatically skipped in operating modes "Block search", "Dry run" and
simulation.
8. All cycles can be exited with the following initial settings:
T version G01, G90, G95
M version G01, G90, G94
9. The cycle must be called no later than the 1st nesting depth.
10. Call cycle L965. This cycle must be started at least once after start-up and it must always
be programmed when the measuring plane is changed.
1st nesting depth 2nd nesting depth
3rd nesting depth
%MPF 1234
L01
Measuring cycle call L973
L01
M17
L973
L9xx
L9xx
Measuring cycle
auxiliary programs
M17
Nesting depth when calling measuring cycles
END OF SECTION
1–2 ©
M17
Siemens AG 1990 All Rights Reserved 6FC5197- AB60
SINUMERIK 840/850/880 (IA)
07.90 2 Hardware
2.1 Probe
2 Hardware
2.1 Probe
For determining tool and workpiece dimensions, a touch trigger probe is required which
supplies a constant signal (no pulse) when deflected.
The probe must switch with almost no bounce. This is generally achieved by adjusting the
probe mechanically. In addition, "Software debouncing" is carried out in the NC.
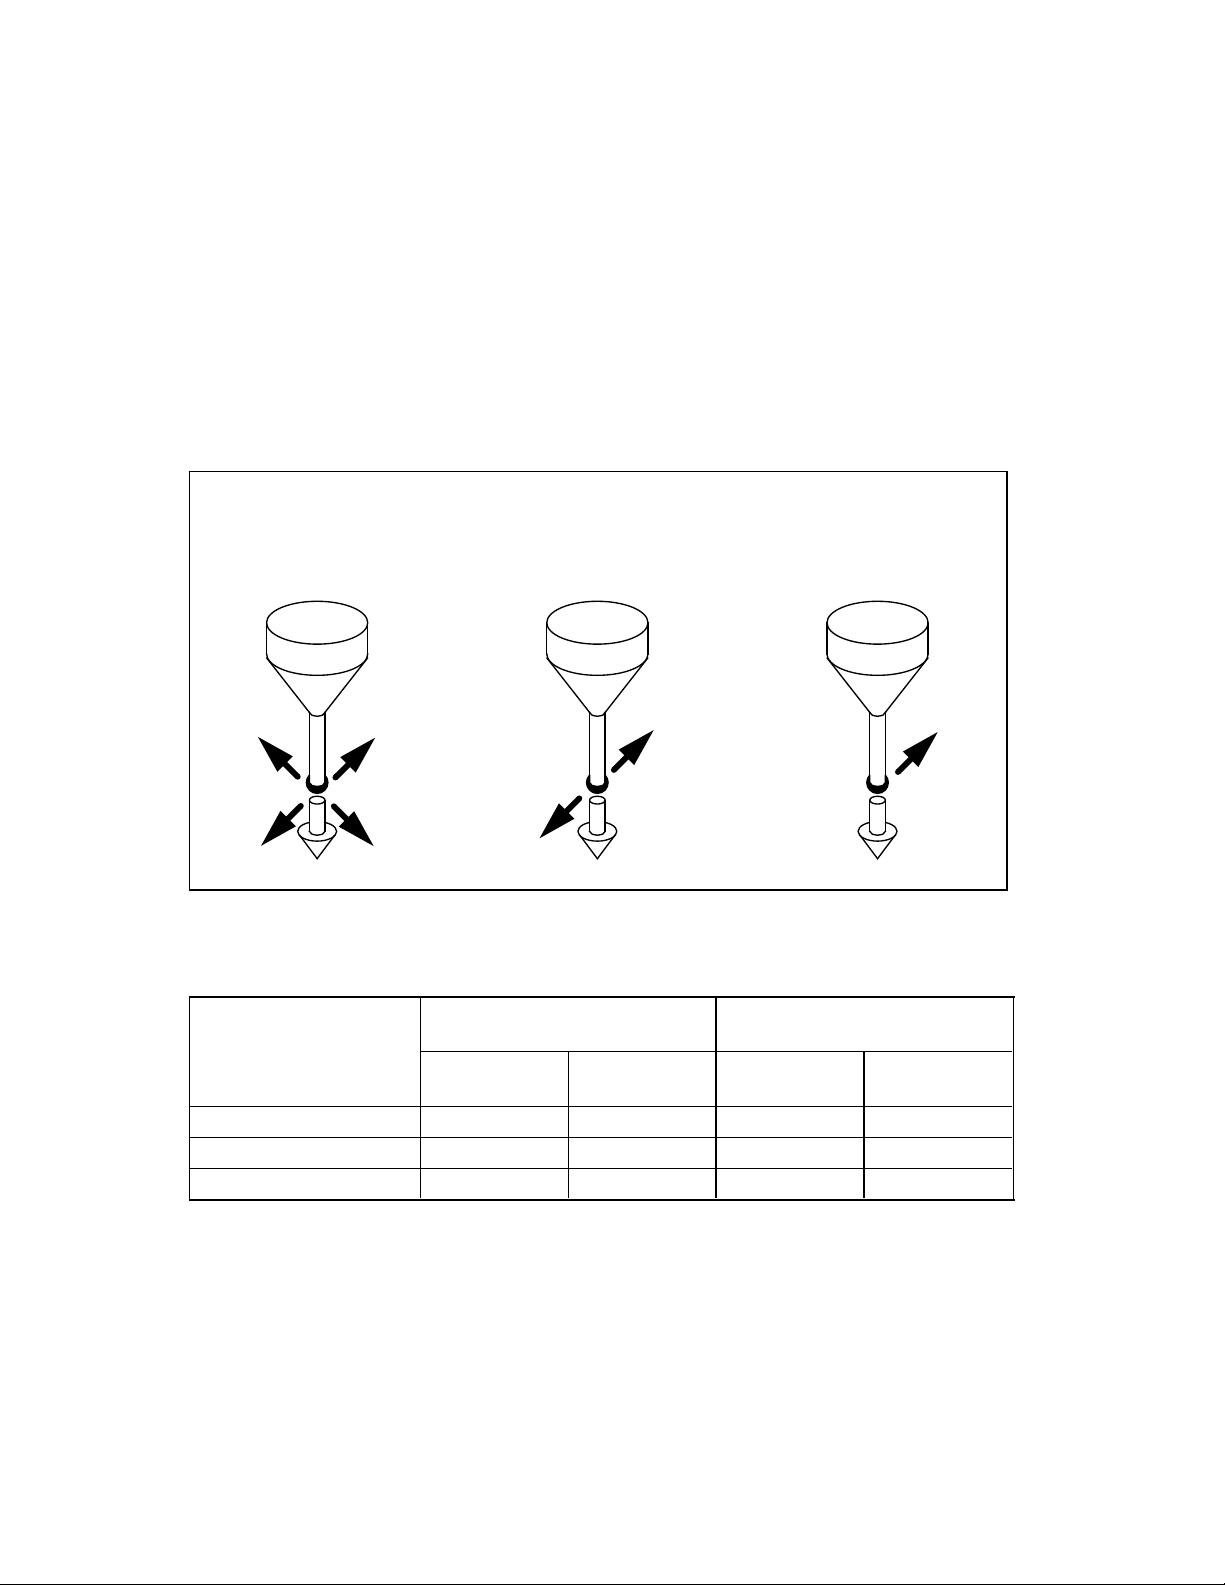
Various types of probe of different make are available on the market. Probes are therefore
classified in three groups according to the number of directions in which the probe can be
deflected (see Fig. below).
Multidirectional
probe
Types of probe
Turning machines
Tool measure-
ment
Multidirectional probe yes yes yes yes
Bidirectional probe
Monodirectional probe
—
Bidirectional
probe
Workpiece
measurement
yes
Tool
measurement
Monodirectional
probe
Milling machines and
machining centres
Workpiece
measurement
—
———
yes
yes
While on turning machines a bidirectional probe can be used, milling machines and machining
centres also permit the use of a monodirectional probe for workpiece measurement. In the
cycles for milling machines and machining centres, the probe type is to be specified by an R
parameter.
Siemens AG 1990 All Rights Reserved 6FC5197- AB60 2–1
©
SINUMERIK 840/850/880 (IA)

2 Hardware 07.90
2.1.1 Multidirectional probe (3D)
2.1.1 Multidirectional probe (3D)
With this type of probe, tool and workpiece measuring cycles can be used without restriction.
2.1.2 Bidirectional probe
This type of probe can be used on turning machines for workpiece measurement. When
performing workpiece measurement on milling machines and machining centres, this probe
type is treated as a monodirectional probe.
2.1.3 Monodirectional probe
This type cannot be used on turning machines. It can be used for workpiece measurement on
milling machines and machining centres with some few restrictions (more information is given
in the respective cycles).
It must be possible to position the spindle with the NC function "M19" and to transmit the
probe switching signal through 360° to the receiving station (on the machine column).
The probe must be mechanically aligned in the spindle in such a way that measurements can
be performed in the following directions with the spindle being positioned to 0 degrees.
Measurement with 0 degr. spindle position
X-Y plane (G17) Positive X direction
Z-X plane (G18) Positive Z direction
Y-Z plane (G19) Positive Y direction
Measurement takes longer with a monodirectional probe because the spindle must be
positioned in the cycle several times with M19.
2–2 ©
Siemens AG 1990 All Rights Reserved 6FC5197- AB60
SINUMERIK 840/850/880 (IA)
01.93 2 Hardware
aaaaaaaaaaaaaaaaaaaaaaaaaaaaaaaaaaaaaaaaaaaaaaaaaaaaaaaaaaaaaaaaaaaaaaaaaaaaaaaaaaaaaaaaaaaaaaaaaaaaaaaaaaaaaaaaaaaaaaa
a
aaaaaaaaaaaaaaaaaaaaaaaaaaaaaaaaaaaaaaaaaaaaaaaaaaaaaaaaaaaaaaaaaaaaaaaaaaaaaaaaaaaaaaaaaaaaaaaaaaaaaaaaaaaaaaaaaaaaaaa
a
aaaaaaaaaaaaaaaaaaaaaaaaaaaaaaaaaaaaaaaaaaaaaaaaaaaaaaaaaaaaaaaaaaaaaaaaaaaaaaaaaaaaaaaaaaaaaaaaaaaaaaaaaaaaaaaaaaaaaaa
a
aaaaaaaaaaaaaaaaaaaaaaaaaaaaaaaaaaaaaaaaaaaaaaaaaaaaaaaaaaaaaaaaaaaaaaaaaaaaaaaaaaaaaaaaaaaaaaaaaaaaaaaaaaaaaaaaaaaaaaa
a
aaaaaaaaaaaaaaaaaaaaaaaaaaaaaaaaaaaaaaaaaaaaaaaaaaaaaaaaaaaaaaaaaaaaaaaaaaaaaaaaaaaaaaaaaaaaaaaaaaaaaaaaaaaaaaaaaaaaaaa
a
2.2 Jumpering/connection
2.2 Jumpering/connection
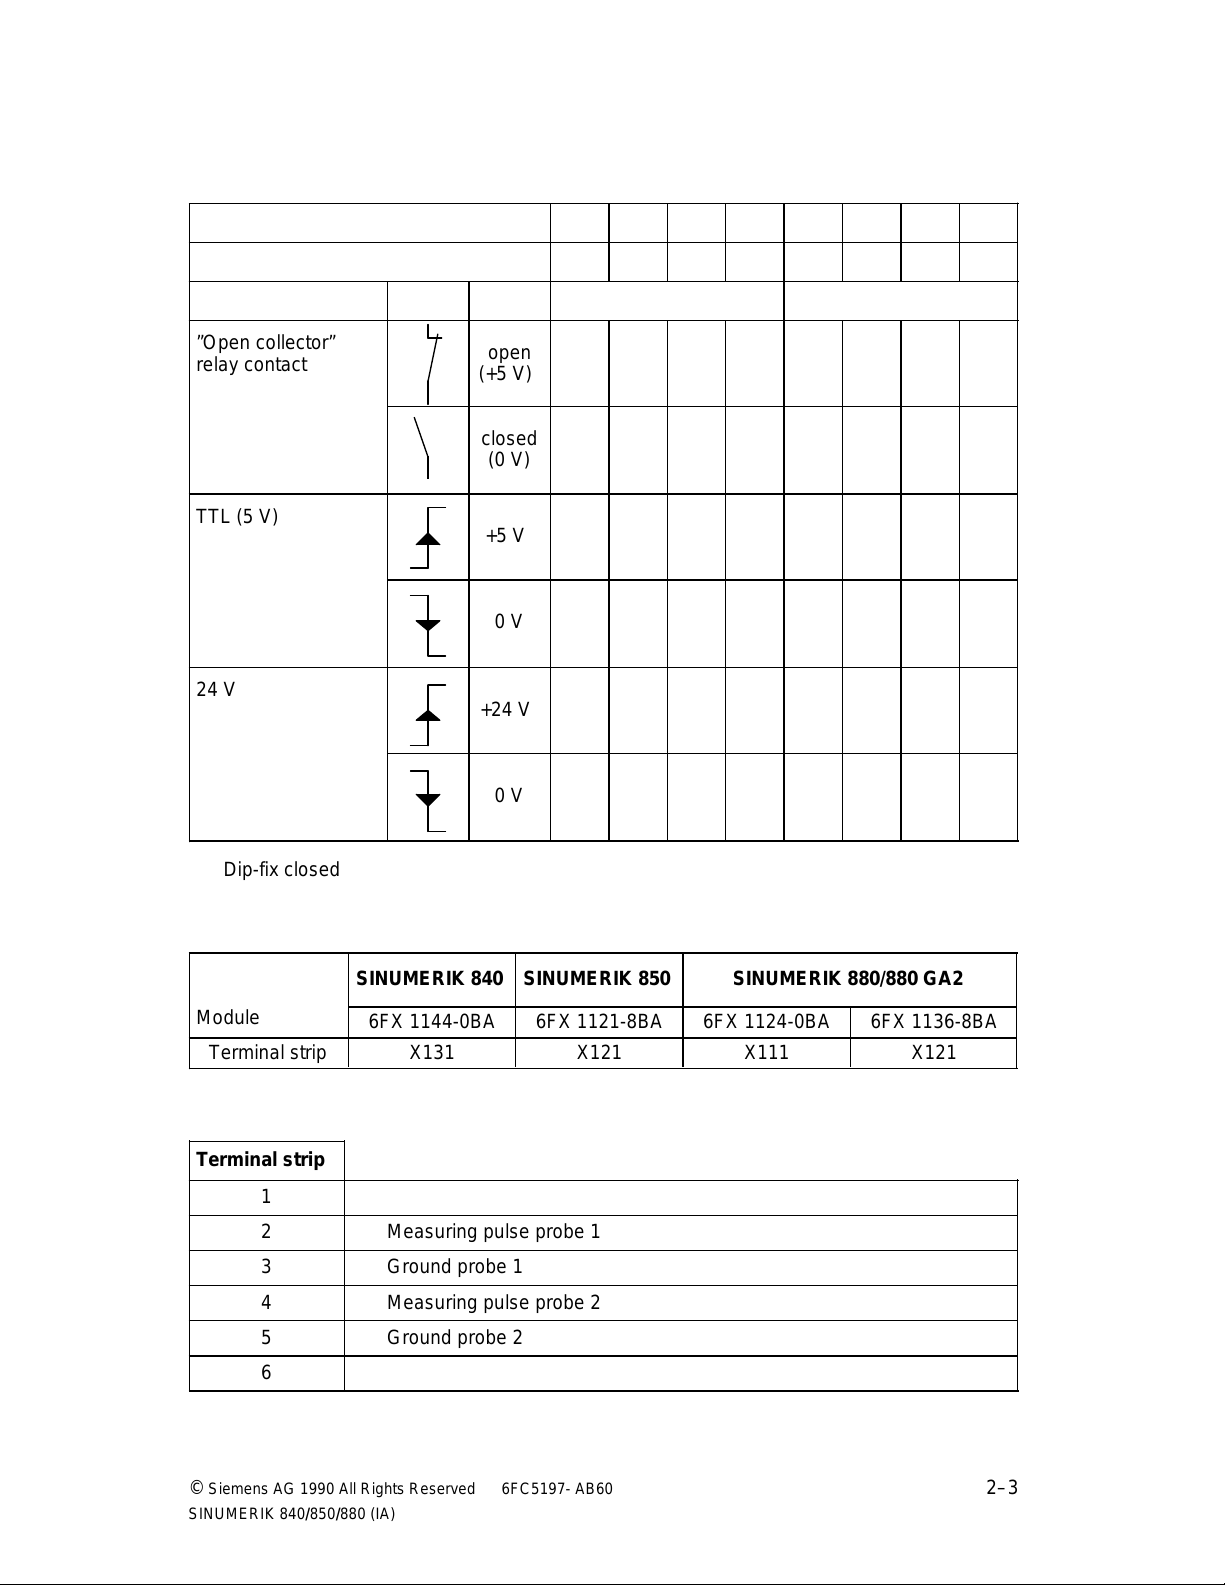
Jumpering on the interface module depends on the probe/probe interface used.
SINUMERIK 850/880/880 GA2 S1.1 S1.2 S2.1 S2.2 S1.3 S1.4 S3.1 S3.2
SINUMERIK 840 S3.1-3 S3.1-4 S1-1 S1-2 S3.3-1 S3.3-2 S2-1 S2-2
Type of operation Edge Level Probe 1 Probe 2
”Open collector”
relay contact
TTL (5 V)
24 V
Dip-fix closed
open
(+5 V)
closed
(0 V)
+5 V
0 V
+24 V
0 V
Module
SINUMERIK 840
6FX 1144-0BA
SINUMERIK 850
6FX 1121-8BA
SINUMERIK 880/880 GA2
6FX 1124-0BA 6FX 1136-8BA
Terminal strip X131 X121 X111 X121
Terminal strip
1
2 Measuring pulse probe 1
3 Ground probe 1
4 Measuring pulse probe 2
5 Ground probe 2
6
© Siemens AG 1990 All Rights Reserved 6FC5197- AB60 2–3
SINUMERIK 840/850/880 (IA)
2 Hardware 01.93
aaa
aaa
aaa
aaa
aaa
aaa
aaa
aaa
aaa
aaa
aaa
aaa
aaa
aaa
aaa
aaa
aaa
aaa
aaa
aaa
aaa
aaa
aaa
aaa
aaa
aaa
aaa
aaa
aaa
aaa
aaa
aaa
aaa
aaa
aaa
aaa
aaa
aaa
2.2 Jumpering/connection
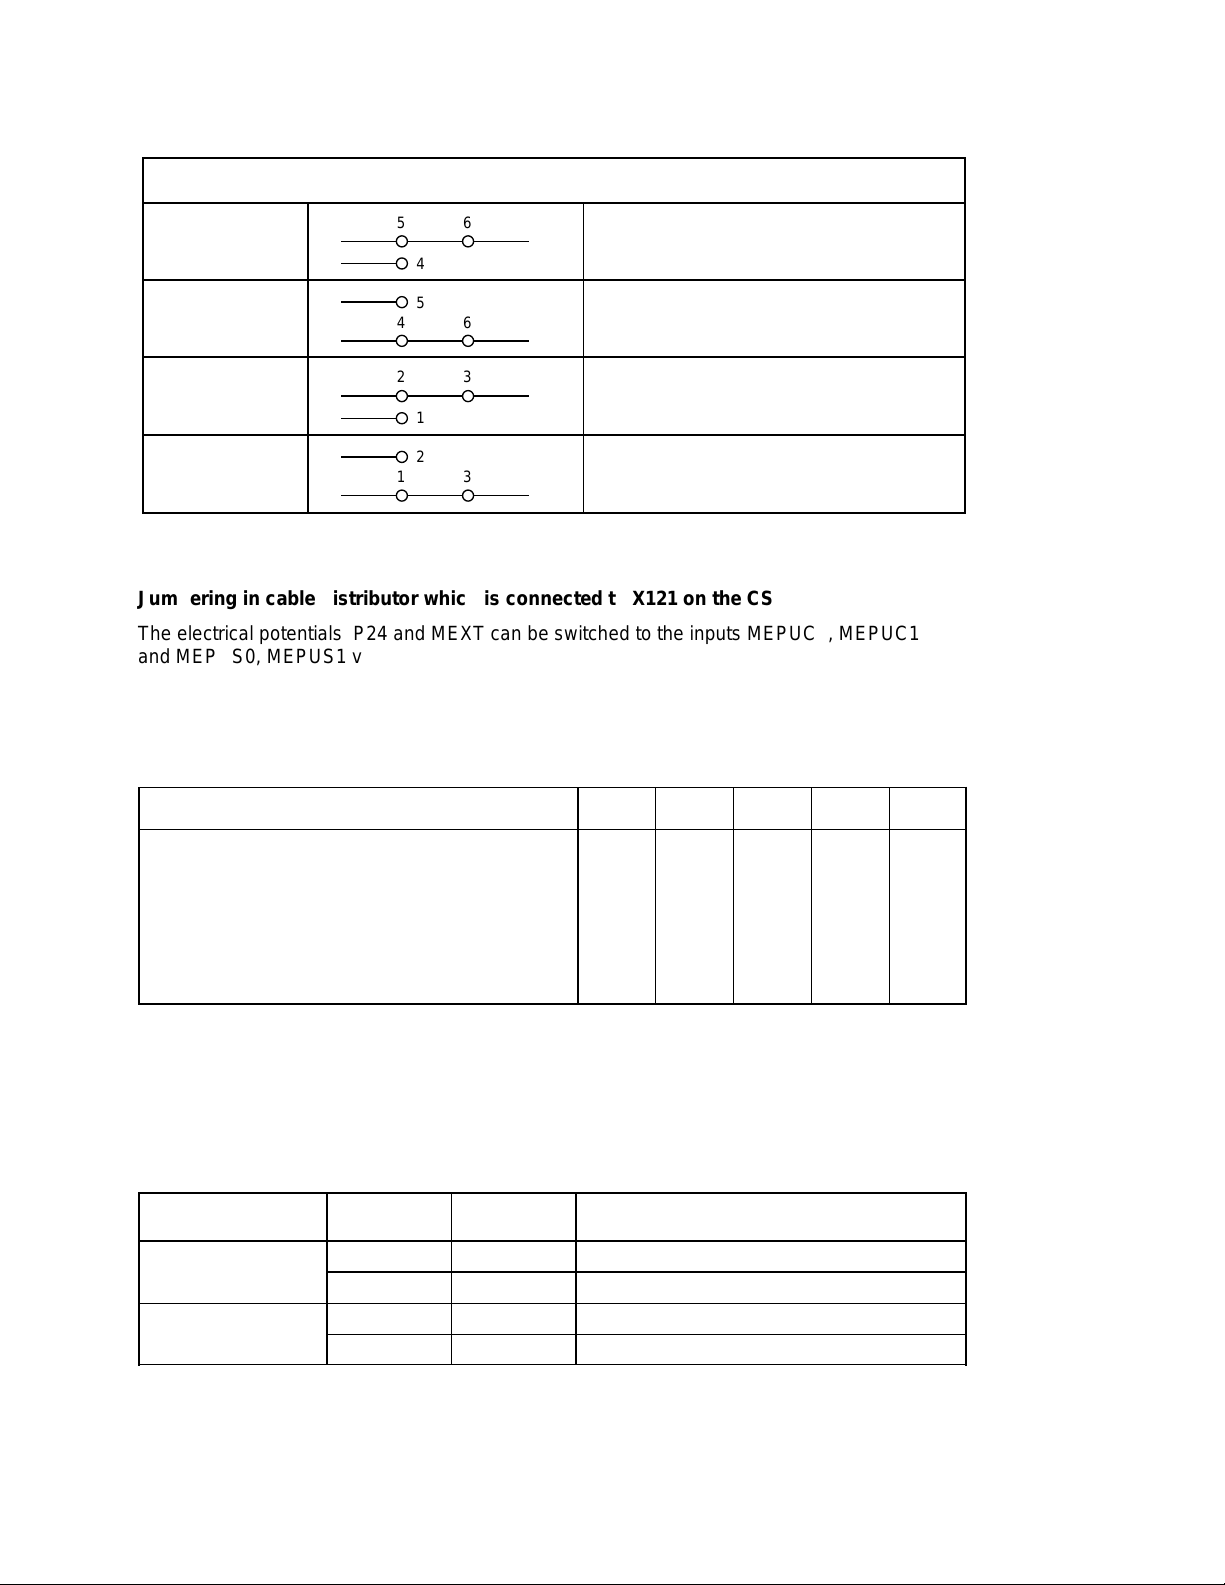
Jumpering on module CSB 6FC5 114-0AA02
SINUMERIK 840C
SENS 0 active at 24 V input signal
or active o. c. transistor
sensor 1
SENS 0 active at 0 V input signal
or passive o. c. transistor
sensor 1
SENS 1 active at 24 V input signal
or active o. c. transistor
sensor 2
SENS 0 active at 0 V input signal
or passive o. c. transistor
sensor 2
S4
S4
S4
S4
5
6
a
a
4
5
4
2
6
a
a
a
3
a
1
2
1
3
a
a
Jumpering in cable distributor which is connected to X121 on the CSB
The electrical potentials P24 and MEXT can be switched to the inputs MEPUC0, MEPUC1
and MEPUS0, MEPUS1 via switches S1 ... S5 (dip fix) and can thus be used as a ”sensor
connection” or ”rapid NC input”.
Table showing state of switches S1 ... S5
Measuring pulse inputs as NC inputs S1 S2 S3 S4 S5
Measuring pulse inputs 00111
Level (24 V) 00000
Open collector 11000
Relay to earth 11000
Relay to P24 00110
0: open
1: closed
Sensor connection to cable distributor 6FC5147-0AA01
Cable connector Pin Switch
X4
X1
1
3
1
3
S1
S3
S2
S4
Measuring pulse sensor 1 (MEPUS0)
Earth sensor 1 (MEPUC0)
Measuring pulse sensor 2 (MEPUS1)
Earth sensor 2 (MEPUC1)
END OF SECTION
2–4 ©
Siemens AG 1990 All Rights Reserved 6FC5197- AB60
SINUMERIK 840/850/880 (IA)

08.96 3 Functional Test
3.1 Service display
3 Functional Test
3.1 Service display
The measuring signal can be checked via the diagnostics menu "PLC status".
Status display
Probe 1 deflected F 24.7
Probe 2 deflected F 24.6
3.2 Test program
With the following example of a test program, the measuring function (repeatability of the
machine and the probe) can be checked without using the measuring cycle subroutines.
Example:
% 1
N5 G00 G94 Z... F150 Pre-positioning approx. 1 mm in front of measuring point
N10 G01 @720 R1 K1 Z... Move onto probe;
set value approx. 1 mm behind measuring point
N15 @714 Stop decoding
N20 R0=R1 Reload actual value of measuring point in parameter R0
N25 G04 F2 Note value of parameter R0
N30 @100 K-5 Return to N5
N35 M30
In addition, the program can be used to determine the scattering of measured values (repeat
accuracy) for the entire measuring system (machine-probe-signal transmission to NC). In other
words, the random dimensional deviations can be determined that follow no trend.
END OF SECTION
Siemens AG 1990 All Rights Reserved 6FC5197- AB60 3–1
©
SINUMERIK 840/850/880 (IA)

07.90 4 Machine Data for Measuring Cycles
4.1 Cycle machine data memory (MDC)
4 Machine Data for Measuring Cycles
4.1 Cycle machine data memory (MDC)
The machine data for measuring cycles are stored in the cycle machine data
memory (MDC).
The MDC memory is subdivided in the following areas:
4.1.1 Channel-oriented values, overview
MDC
No.
D e s i g n a t i o n
Standard
value
0
.
.
Siemens (Measuring Cycles)
——— —
.
49
400
.
.
User
——— —
.
449
4.1.2 Channel-oriented bits, overview
MDC
No.
800
819
76543210
.
.
Siemens (Measuring Cycles)
.
Bit No.
Input
limits
Ref.
system
Input
unit
820
.
.
Siemens
.
849
900
.
.
User
.
949
Siemens AG 1990 All Rights Reserved 6FC5197- AB60 4–1
©
SINUMERIK 840/850/880 (IA)

4 Machine Data for Measuring Cycles 07.90
4.1.3 Central values, overview
4.1.3 Central values, overview
MDC
No.
D e s i g n a t i o n
1000
.
.
Siemens (Measuring Cycles)
.
1149
4000
.
.
User
.
4149
4.1.4 Central bits, overview
SDC
No.
7000
7009
76543210
.
.
.
Standard
value
——— —
——— —
Input
limits
Bit No.
Siemens (Measuring Cycles)
Ref.
system
Input
unit
7010
7049
8000
8049
.
.
Siemens
.
.
.
User
.
4–2 ©
Siemens AG 1990 All Rights Reserved 6FC5197- AB60
SINUMERIK 840/850/880 (IA)

01.93 4 Machine Data for Measuring Cycles
4.2 NC machine data
4.2 NC machine data
4.2.1 MD 18 Zero offset group
Considering the fact that the 800 systems have just one ZO group while several users require
more than just one group, this need has been met by the use of a cycle "ZO groups L960".
When starting up the measuring cycles, MD 18 must be preset with "1", otherwise an alarm
would be issued on ZO determination.
Cycle L960 stores the current ZO group number in DB 18 to enable the ZO memory to be
transferred to the ZO group memory (R240 - R299 or MIB 200 - MIB 399) on completion of
ZO determination (by the measuring cycles).
MD 18 is a "System cell" and must not be modified manually after completion of start-up.
4.2.2 MD 19 P number (SINUMERIK 850 only)
The NC machine data 19 (MD 19) is only significant when the PLC function package "Tool
management" is used and if the tools are to be compensated by workpiece measuring cycles.
In MD 19 the P number (5-32) is to be stated under which the G number of the next cutting
edge is to be found.
Minimum number of P memories settable with NC MD 13
Fixed allocation by
NC software
T No.P0TypeP1Geometry
MD211 D1
TOA area 1
Dn
MD212 D1
MD216 D1
TOA area m
Dn
TOA areas are determined via NC MD210 (max. 16)
Start address of TOA areas in NC MD211-216
1) Addition to geometry values with
NC MD5007.6="0"(with standard machine data "0")
2) Addition to geometry values with
NC MD5007.3="1"
3) Depending on NC MD
P2 P3 P4
Determination by
NC MD 5007.6
Wear
P5 P6 P7
Quantity is determined with
NC MD 13
Determination by
1
)
NC MD 5007.32)
Add. TO
P8 P9
Formula for TOA memory
W
= INT
NUMB
= Number of single-edged tools
W
NUMB
k1 = Total capacity of TOA memory 8192 bytes
K2 = Width of one P memory 4 bytes
P
= Number of desired P memories
NUMB
Reference to next
cutting edge
P10
k1
· K2
P
NUMB
User-assignable
P11-P32
3)
© Siemens AG 1990 All Rights Reserved 6FC5197- AB60 4–3
SINUMERIK 840/850/880 (IA)

4 Machine Data for Measuring Cycles 01.93
4.2.3 MD 157 Type/software version
4.2.3 MD 157 Type/software version
NC MD 157 is always evaluated in the measuring cycles.
The type of control and the NC software version are stored in MD 157.
MD 157= XXXXX
NC software version
1 = T version
2 = M version
04 = SINUMERIK 840
05 = SINUMERIK 850
06 = SINUMERIK 840C
08 = SINUMERIK 880
09 = SINUMERIK 880 GA2
4.2.4 MD 208/209 Max. tool wear (parameters P5/P6/P7)
These measuring cycles are used to check the maximum wear when performing tool offset.
When the maximum wear is exceeded, no offset is made but an alarm is output.
MD 208: Wear L1/L2
MD 209: Wear radius
Max. input value: 99999 ˆ= 9.99999
Type
4–4 ©
Siemens AG 1990 All Rights Reserved 6FC5197- AB60
SINUMERIK 840/850/880 (IA)

07.90 4 Machine Data for Measuring Cycles
4.2.5 NC transverse axis bits MD 5011 and MD 572*
4.2.5 NC transverse axis bits MD 5011 and MD 572*
The NC transverse axis bits are taken into account in all measuring cycles with the following
combinations.
5011
Bit No.
7 6 5 4 3 2 1
0
572*
Bit No.
1
0000000-0
0000000-1
- -01000-1
- -01001-1
- -01010-1
- -01011-1
- -01100-1
- -01101-1
- -01110-1
- -01111-1
- -11000-1
- -11001-1
- -11010-1
- -11011-1
- -11100-1
- -11101-1
- -11110-1
- -11111-1
01-1----1
1--1----1
11-1----1
* - means: 0 for 1st axis
1 for 2nd axis
2 for 3rd axis
3 for 4th axis
.
.
.
etc.
©
Siemens AG 1990 All Rights Reserved 6FC5197- AB60 4–5
SINUMERIK 840/850/880 (IA)

4 Machine Data for Measuring Cycles 10.91
4.2.6 PLC machine data 6026 bit 2
4.2.6 PLC machine data 6026 bit 2
When the measuring cycle functions
• result display selection
• tool management (840/880)
are used the above-mentioned bit must be ”0”.
FB 89 must be available.
4.3 Channel-oriented values, description
Standard values can be loaded from the measuring cycle diskette.
MDC
No.
D e s i g n a t i o n
0 Start address of empirical values
Standard
value
Input
limits
Ref.
system
1 1 to 99 — —
Input
unit
in the setting data (SDC).
Start address of empirical values in the area of the channel-specific cycle setting data (SDC).
Here, the value "0" is to be input when no empirical values are required.
The input value must not overlap with the MDC 2 and MDC 3.
MDC
No.
D e s i g n a t i o n
1 Number of empirical values 49 0 to 99 — —
Standard
value
Input
limits
Ref.
system
Input
unit
Here, the number of memories for empirical values in the area of the channel-specific SDC is
to be stated. Value "0" is to be input if empirical values are not required.
The input value must not overlap with the MDC 2 and MDC 3.
MDC
No.
D e s i g n a t i o n
Standard
value
Input
limits
Ref.
system
Input
unit
2 Start address of empirical values
51 1 to 99 — —
in the setting data (SDC).
Start address of the average values in the area of the channel-specific cycle setting data.
Value "0" is to be input when average values are not required.
The input value must not overlap with the MDC 0 and MDC 1.
4–6 ©
Siemens AG 1990 All Rights Reserved 6FC5197- AB60
SINUMERIK 840/850/880 (IA)

08.96 4 Machine Data for Measuring Cycles
4.3 Channel-oriented values, description
MDC
No.
D e s i g n a t i o n
Standard
value
Input
limits
Ref.
system
Input
unit
3 Number of average values 49 0 to 99 — —
Here, the number of memories for average values is to be stated in the area of the channelspecific SDC. Value "0" must be input when no average values are required.
The input value must not overlap with the MDC 0 and 1.
MDC
No.
4 Rapid traverse rate
Intermediate positioning
D e s i g n a t i o n
Standard
value
Input
limits
Ref.
system
100 1 to 100 — %
Input
unit
The intermediate positions calculated by the measuring cycles are approached at maximum
axis speed (NC MD 280*) in percent.
The machine data is only effective with the collision monitor (MDC 800 Bit 0 = 0) switched
off.
Example:
MDC 4 80
MDC 800 bit 0 0
NC MD 2800 10000 (X axis)
NC MD 2801 8000 (Y axis)
NC MD 2802 10000 (Z axis)
Intermediate positions are approached at a rate of 6400 mm/min (80 % of 8000) when
measuring in the X/Y plane.
Intermediate positions are approached at a rate of 8000 mm/min (80 % of 10000) when
measuring in the Z/X plane.
Siemens AG 1990 All Rights Reserved 6FC5197- AB60 4–7
©
SINUMERIK 840/850/880 (IA)

4 Machine Data for Measuring Cycles 10.91
4.3 Channel-oriented values, description
MDC
No.
D e s i g n a t i o n
5 Positioning speed with collision
Standard
value
Input
limits
Ref.
system
0 1 to 15.000 — mm/min
Input
unit
monitor active
Intermediate positions calculated by measuring cycles are approached at the input speed rate.
The machine data is only effective with activated collision monitoring (MDC 800 bit = 1) and
must be > 0; otherwise alarm message 4008 is issued.
MDC
No.
6
Reserve — —
D e s i g n a t i o n
.
.
13
MDC
No.
D e s i g n a t i o n
Standard
value
Standard
value
Input
limits
Input
limits
Ref.
system
Ref.
system
Input
unit
Input
unit
14 PLC number for logging 1 1 to 4 — —
Here, the number of the PLC must be stated in which the function blocks for the logging
function (with CP 315) are called.
MDC
No.
D e s i g n a t i o n
15 PLC number for MDC 16-19 1 1 to 4 — —
Standard
value
Input
limits
Ref.
system
Input
unit
Here, the number of the PLC must be stated in which the measurement abort signal (MDC 16
and MDC 17) or selection of a result display (MDC 18 and MDC 19) is processed.
4–8 ©
Siemens AG 1990 All Rights Reserved 6FC5197- AB60
SINUMERIK 840/850/880 (IA)
07.90 4 Machine Data for Measuring Cycles
4.3 Channel-oriented values, description
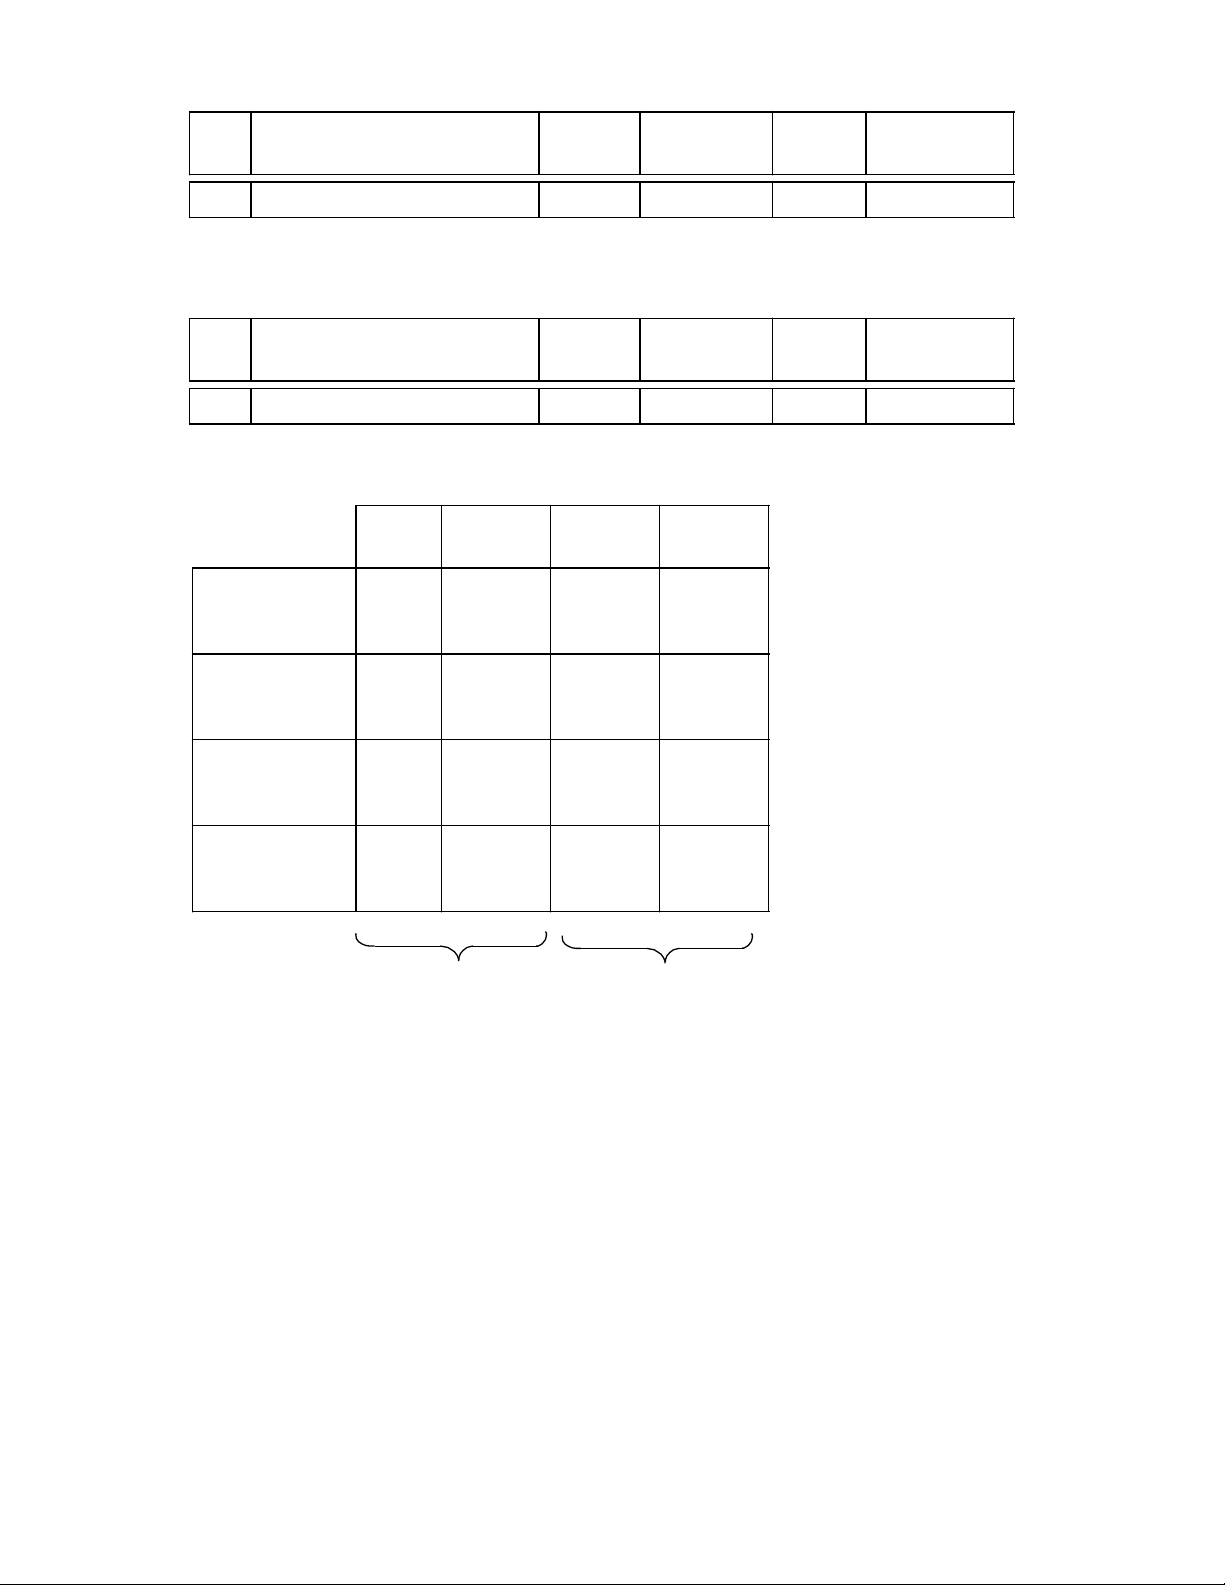
MDC
No.
16 Meas. abort signal ident. coarse 0 see table — —
D e s i g n a t i o n
Standard
value
Input
limits
Ref.
system
See MDC 17 for description.
MDC
No.
17 Meas. abort signal ident. fine 0 see below — —
D e s i g n a t i o n
Type Bit
DB No.
DX No.
Input
Flag
82
84
0000
0000
Standard
value
Byte
DW
:
127
:
255
Input
limits
0
.0
Ref.
system
:
.7
0
.0
:
.7
Input
unit
Input
unit
DB
DX
87
87
88
88
0001
:
:
0255
1000
:
:
1255
0
:
2048
0
:
2048
MDC 16 MDC 17
.00
:
.15
.00
:
.15
© Siemens AG 1990 All Rights Reserved 6FC5197- AB60 4–9
SINUMERIK 840/850/880 (IA)

4 Machine Data for Measuring Cycles 07.90
4.3 Channel-oriented values, description
Use without measurement abort signal
The machining program cannot be continued when a cycle reset alarm (alarm numbers 4000-
4039) occurs. It can only be stopped by program abort (reset). Following program abort,
further measuring points or measuring or machining operations programmed in the part
program can no longer be executed.
To enable these measuring points or machining operations to be likewise executed, first of all,
the cause that has led to the reset alarm must be eliminated. Re-entry in the machining
program is then possible with block search.
Use with measurement abort signal
The function "Measurement abort signal" provides the possibility of continuing the machining
program when cycle reset alarms (4011, 4019, 4020, 4026, 4027, 4030, 4031, 4032, 4033)
have occured.
The measurement abort signal is generally released by the operator by pressing a key
arranged on the machine control panel.
The signal can be read out by the measuring cycles directly from the PLC input from a flag or
a data word.
Example:
a) Measurement abort signal on input: I 15.4
MDC 16 = 820000
MDC 17 = 15.4
b) Measurement abort signal from flag: F 200.2
MDC 16 = 840000
MDC 17 = 200.2
c) Measurement abort signal from data block: DB 200 D 10.9
MDC 16 = 870200
MDC 17 = 10.09
d) Measurement abort signal from DX data block: DX 200 D 10.9
MDC 16 = 881200
MDC 17 = 10.09
The function "Measurement abort signal" is activated as soon as MDC 16 > 0.
4–10 ©
Siemens AG 1990 All Rights Reserved 6FC5197- AB60
SINUMERIK 840/850/880 (IA)

07.90 4 Machine Data for Measuring Cycles
4.3 Channel-oriented values, description
MDC
No.
18 Selection result display
identifier coarse
D e s i g n a t i o n
See MDC 19 for description.
MDC
No.
19 Selection result display
identifier fine
D e s i g n a t i o n
Type
Flag
DB
84
87
87
:
DB No.
DX No.
0000
0001
:
0255
Standard
value
0 see table — —
Standard
value
0 see below — —
Input
limits
Input
limits
Ref.
system
Ref.
system
Byte
DW
0
:
255
0
:
2048
Input
unit
Input
unit
DX
88
:
88
1000
:
1255
MDC 18 MDC 19
0
:
2048
© Siemens AG 1990 All Rights Reserved 6FC5197- AB60 4–11
SINUMERIK 840/850/880 (IA)

4 Machine Data for Measuring Cycles 08.96
4.3 Channel-oriented values, description
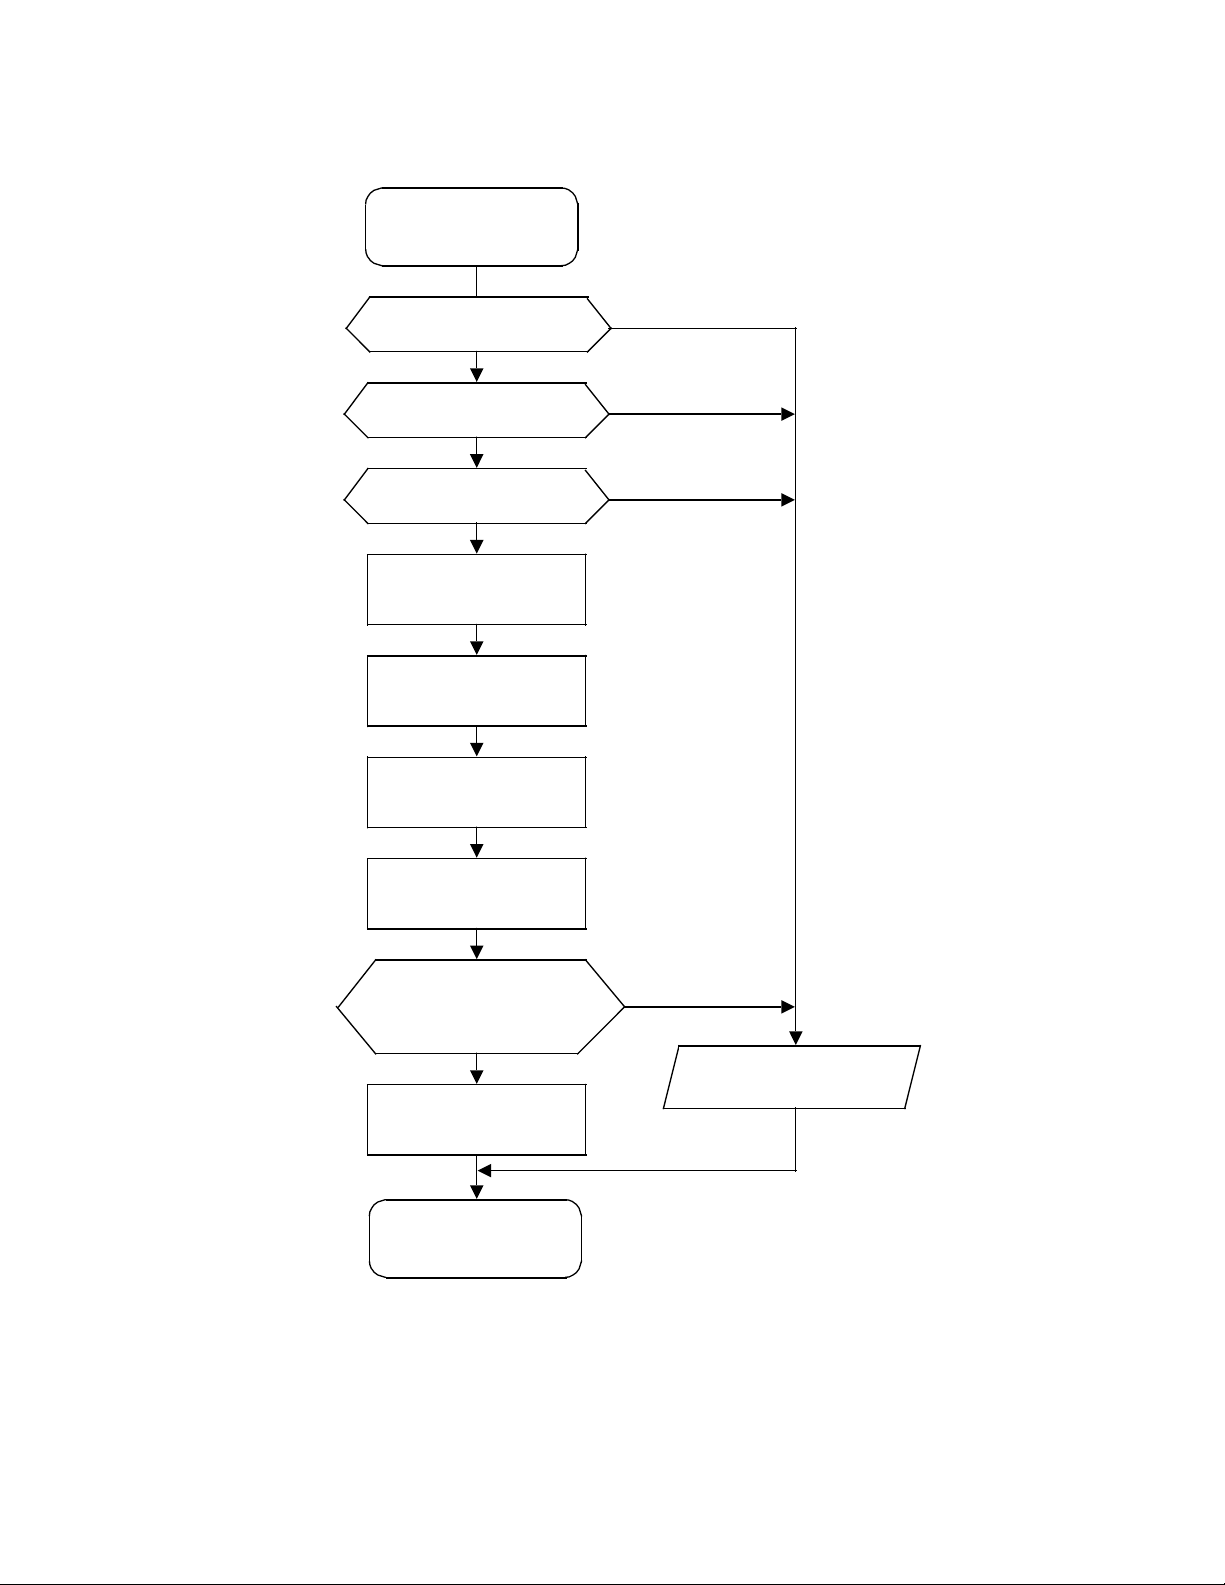
The cycle can perform a menu selection (insertion of a result display) on completion of a
measuring operation (see MDC 7001 bit 2).
The function "Menu selection" is performed via the PLC, i.e. the cycle enters the relevant
menu number directly in the PLC and also triggers menu selection.
The interface area must be determined via MDC 18 and 19 to avoid collision with other "Menu
selectors", otherwise alarm 4049, Display cannot be selected, is called.
The following definitions are possible:
a) Measuring Cycles use DB 40 directly
b) " use another DB (image of DB 40)
c) " use a flag area (image of DB 40)
In cases b and c, the PLC user program must take care of data transfer
(interface DB 40
assigned interface).
Special case:
If MDC 18=0, the menu selection is performed through DB 40.
Interface for display selection
Byte
DB 40 DL51
(DBm DLn)
DB 40 DR51
(DBm DRn)
DB40 DL52
(DBm DLn+1)
DB40 DR52
(DBm DRn+1)
DB40 DL53
(DBm DLn+2)
DB40 DR53
(DBm DRn+2)
Bit
(M n)
(M n+1)
(M n+2)
(M n+3)
(M n+4)
(M n+5)
15 14 13 12 11 10 9 8
76 54321 0
Triggered
by user
Insertion
from other
PLC act.
Insertion
own PLC
active
Function ident No. 1 - 15
1System area
2User area
Menu number
Acknowledgements
Insertion
already
active
Error
H
L
H
L
Insertion
carried
out
DB40 DL54
(DBm DLn+3)
(M n+6)
DB40 DR54
(DBm DRn+3)
(M n+7)
Mode group number 1 - 8
Channel number 1 - 8
4–12 © Siemens AG 1990 All Rights Reserved 6FC5197- AB60
SINUMERIK 840/850/880 (IA)
07.90 4 Machine Data for Measuring Cycles
4.3 Channel-oriented values, description
Outline flowchart of insertion by means of measuring cycles via user interface DB40, DW51 DW54, for example.
Display selection
D 51.1=0
Yes
D 51.2=0
Yes
D 51.7=0
Yes
Enter function ident.
number in DW 52
Enter menu number
in DW 53
Enter mode group
number and channel
number in DW 54
Trigger
D 51.8=1
No
No
No
Insertion was carried out
D 51.0
Reset trigger
D 51.8=0
Yes
No
Alarm 4049
Display selection not poss.
End
© Siemens AG 1990 All Rights Reserved 6FC5197- AB60 4–13
SINUMERIK 840/850/880 (IA)
 Loading...