


Register your product and get support at
4900 series
www.philips.com/welcome
User Manual

Contents
10.2 Pause TV |
36 |
1 TV Tour |
3 |
1.1 Ultra HD TV |
3 |
11 Sources |
37 |
1.2 Pause TV and recordings |
|
3 |
11.1 Switch to a device |
37 |
|
|
||||||
1.3 EasyLink |
3 |
|
|
|
|
11.2 From standby |
|
37 |
|
|
|
|
2 Setting up |
4 |
|
|
|
|
11.3 EasyLink |
37 |
|
|
|
|
|
|
|
|
|
12 Timers and clock |
38 |
|
||||||
2.1 Read safety |
4 |
|
|
|
|
|
||||||
|
|
|
|
|
|
|
|
|
|
|
||
2.2 TV stand and wall mounting |
4 |
12.1 Sleep timer |
|
38 |
|
|
|
|||||
2.3 Tips on placement |
|
4 |
|
|
12.2 Clock |
38 |
|
|
|
|
|
|
2.4 Power cable |
4 |
|
|
|
|
12.3 Switch off timer |
38 |
|
|
|||
2.5 Antenna cable |
|
4 |
|
|
13 Videos, Photos and Music |
39 |
||||||
2.6 Satellite dish |
5 |
|
|
|
||||||||
|
|
|
13.1 From a USB connection |
39 |
|
|||||||
3 Connect devices |
6 |
|
|
|
||||||||
|
|
13.2 Play your videos |
39 |
|
|
|||||||
|
|
|
|
|
|
|
|
|||||
3.1 About connections |
|
6 |
|
|
13.3 View your photos |
39 |
|
|
||||
3.2 Common interface - CAM |
|
8 |
13.4 Play your music |
40 |
|
|
||||||
3.3 Set-top box - STB |
|
8 |
|
|
14 Settings |
41 |
|
|
|
|||
3.4 Satellite receiver |
|
9 |
|
|
|
|
|
|||||
|
|
|
14.1 Picture |
|
|
|
|
|
|
|||
3.5 Home Theatre System - HTS |
9 |
41 |
|
|
|
|
|
|||||
3.6 Blu-ray Disc player |
11 |
|
|
14.2 Sound |
44 |
|
|
|
|
|
||
3.7 DVD player |
11 |
|
|
|
|
14.3 General settings |
46 |
|
|
|||
3.8 Game console |
|
11 |
|
|
15 Specifications |
48 |
|
|
||||
3.9 USB Hard Drive |
|
11 |
|
|
|
|
||||||
|
|
|
15.1 Environmental |
|
|
|
|
|
||||
3.10 USB flash drive |
|
12 |
|
|
|
48 |
|
|
||||
3.11 Camcorder |
13 |
|
|
|
|
15.2 Reception for PxH / PxT models |
49 |
|||||
3.12 Computer |
13 |
|
|
|
|
15.3 Reception for PxK models |
49 |
|
||||
3.13 Headphones |
13 |
|
|
15.4 Display |
49 |
|
|
|
|
|
||
4 Switch on |
15 |
|
|
|
15.5 Power |
50 |
|
|
|
|
|
|
|
|
|
15.6 Dimensions and weights |
50 |
|
|||||||
|
|
|
|
|
|
|
||||||
4.1 On, Standby or Off |
|
15 |
|
|
15.7 Connectivity |
|
50 |
|
|
|
||
4.2 Keys on TV |
15 |
|
|
|
|
15.8 Sound |
50 |
|
|
|
|
|
4.3 Sleep timer |
15 |
|
|
|
|
15.9 Multimedia |
|
50 |
|
|
|
|
4.4 Switch Off Timer |
|
15 |
|
|
16 Software |
52 |
|
|
|
|||
5 Remote control |
|
16 |
|
|
|
|
|
|||||
|
|
|
16.1 Software update |
52 |
|
|
||||||
|
|
|
|
|
|
|
|
|||||
5.1 Key overview |
16 |
|
|
16.2 Software version |
52 |
|
|
|||||
5.2 IR sensor |
16 |
|
|
|
|
16.3 Open source software |
52 |
|
||||
5.3 Batteries |
17 |
|
|
|
|
16.4 Open source license |
52 |
|
||||
5.4 Cleaning |
17 |
|
|
|
|
17 Troubleshooting and support |
55 |
|||||
6 TV channels |
|
18 |
|
|
||||||||
|
|
|
17.1 Troubleshooting |
55 |
|
|
||||||
|
|
|
|
|
|
|
|
|||||
6.1 Channel Lists |
18 |
|
|
17.2 Register |
56 |
|
|
|
|
|
||
6.2 Watching TV channels |
18 |
|
17.3 Help |
56 |
|
|
|
|
|
|||
6.3 Channel list copy |
|
22 |
|
|
17.4 Online help |
|
56 |
|
|
|
||
7 Channel installation - Antenna, Cable |
17.5 Consumer Care / Repair |
57 |
|
|||||||||
|
|
|
|
|
|
|
||||||
24 |
|
|
|
|
|
18 Safety and care |
58 |
|
|
|||
7.1 Update channels |
|
24 |
|
|
18.1 Safety |
58 |
|
|
|
|
|
|
7.2 Reinstall channels |
|
24 |
|
|
18.2 Screen care |
|
59 |
|
|
|
||
7.3 DVB-T or DVB-C |
|
24 |
|
|
|
|
|
|
|
|
|
|
7.4 Manual Installation |
25 |
19 Terms of use, copyrights and licenses
60
8 Channel installation - Satellite (For PxK models) 27
8.1 Watching satellite channels |
27 |
||
8.2 |
Satellite channel list |
27 |
|
8.3 |
Favourite satellite channels |
27 |
|
8.4 |
Lock satellite channels |
|
28 |
8.5 |
Satellite installation |
28 |
|
8.6 Problems with satellites |
|
32 |
|
19.1 Terms of use |
60 |
|
19.2 Copyrights and licenses |
60 |
|
Index 62
9 TV guide |
33 |
|
|
9.1 What you need |
|
33 |
|
9.2 Using the TV guide |
33 |
|
|
10 Recording and pause TV |
35 |
||
10.1 Recording |
35 |
|
|
2
1
TV Tour
1.1
Ultra HD TV
This TV has an Ultra HD display. Its resolution is four times as much as normal HD displays. Ultra HD means 8 million pixels for the most refined and lifelike picture on TV.
You can watch native Ultra HD videos through an HDMI connection. Ultra HD offers TV viewing that is crisp and sharp even on a big screen.
1.2
Pause TV and recordings
If you connect a USB Hard Drive, you can pause and record a broadcast from a digital TV channel.
Pause your TV and answer that urgent phone call or simply take a break during a sports match, while the TV stores the broadcast on the USB Hard Drive. You can start watching again later.
With a USB Hard Drive connected, you can also record digital broadcasts. You can record while you are watching a programme or schedule a recording of an upcoming programme.
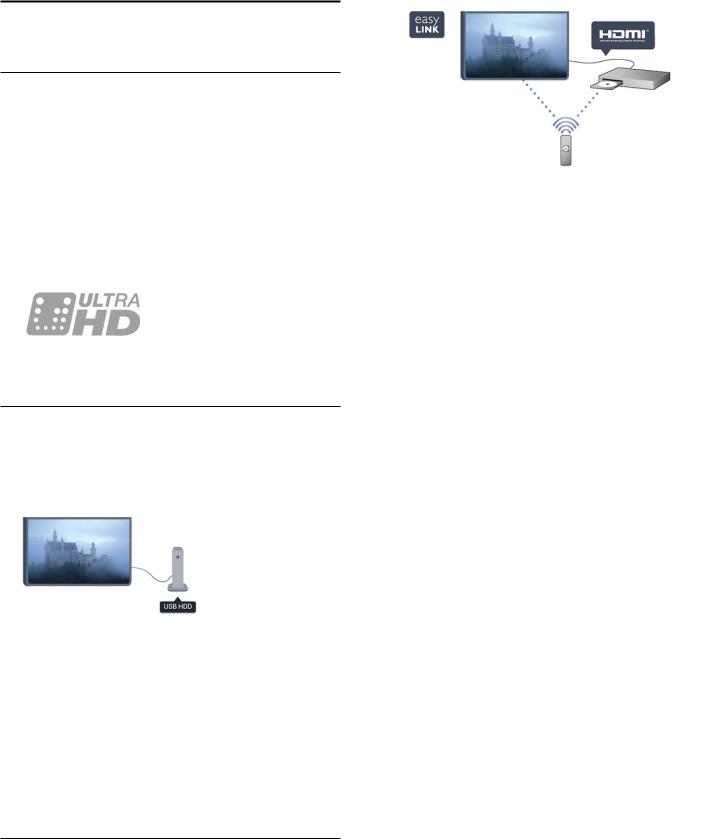
1.3
EasyLink
With EasyLink you can operate a connected device, like a Bluray Disc player, with the remote control of the TV.
EasyLink uses HDMI CEC to communicate with the connected devices.
3
2
Setting up
2.1
Read safety
Read the safety instructions first before you use the TV.
In Help, go to Safety and care > Safety.
2.2
TV stand and wall mounting
TV stand
You can find the instructions for mounting the TV stand in the Quick Start Guide that came with the TV. In case you lost this guide, you can download it from www.philips.com.
Use the product type number of the TV to look for the Quick Start Guide to download.
Wall mounting
Your TV is also prepared for a VESA-compliant wall mount bracket (sold separately).
Use the following VESA code when purchasing the wall mount . . .
To fix the bracket securely, use screws with a length indicated in the drawing.
-43PUx4900 - VESA MIS-F 200x200, M6 (Minimum 10 mm, Maximum 15 mm)
-49PUx4900 - VESA MIS-F 400x200,
M6 (Minimum 10 mm, Maximum 15 mm)
- 55PUx4900 - VESA MIS-F 400x200, M6 (Minimum 10 mm, Maximum 15 mm)
Caution
Wall mounting the TV requires special skills and should only be performed by qualified personnel. The TV wall mounting should meet safety standards according to the TV's weight. Also read the safety precautions before positioning the TV.
TP Vision Europe B.V. bears no responsibility for improper mounting or any mounting that results in
accident or injury.
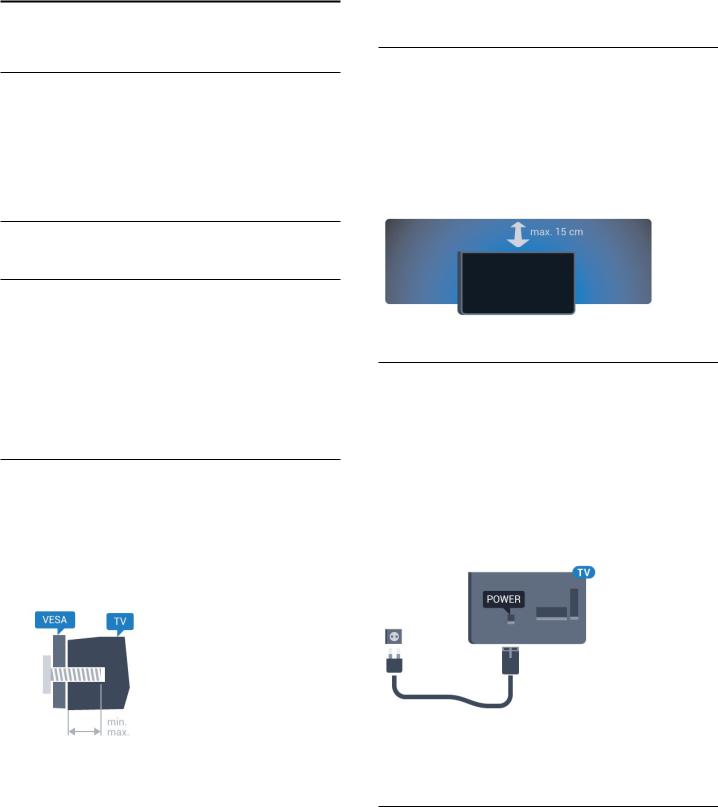
2.3
Tips on placement
-Position the TV where light does not shine directly on the screen.
-Position the TV up to 15 cm away from the wall.
-The ideal distance to watch TV is 3 times its diagonal screen size. When seated, your eyes should be level with the centre of the screen.
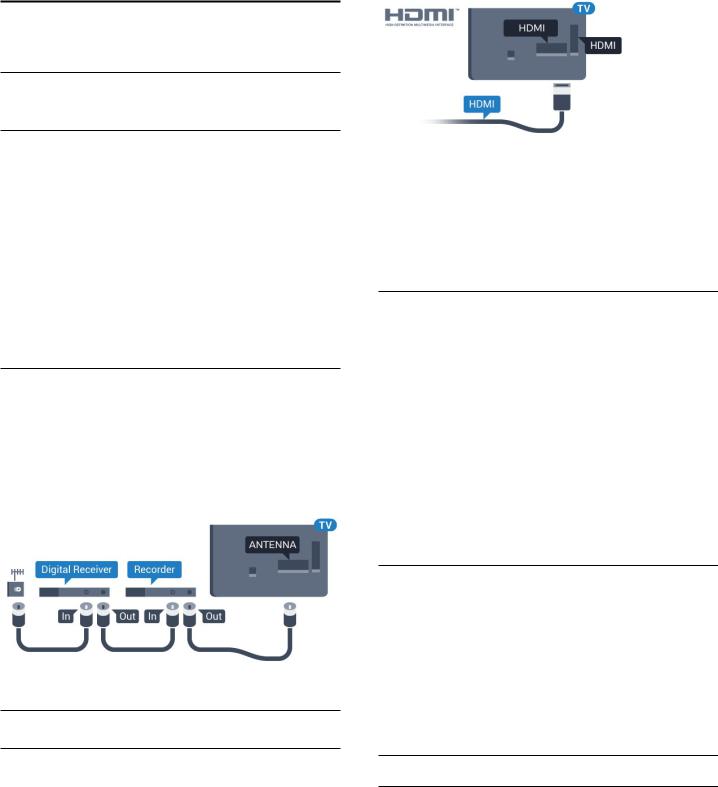
2.4
Power cable
-Insert the power cable into the POWER connector on the back of the TV.
-Make sure the power cable is securely inserted in the connector.
-Make sure that the power plug, in the wall socket, is accessible at all times.
-When you unplug the power cable, always pull the plug, never pull the cable.
Although this TV has a very low standby power consumption, unplug the power cable to save energy if you do not use the TV for a long period of time.
2.5
Antenna cable
Insert the antenna plug firmly into the ANTENNA socket at the back of the TV.
You can connect your own antenna or an antenna signal from an antenna distribution system. Use an IEC Coax 75 Ohm RF antenna connector.
Use this antenna connection for DVB-T and DVB-C input signals.
4

2.6
Satellite dish
- For PUK models
Attach the satellite F-type connector to the satellite connection SAT at the back of the TV.
5
3
Connect devices
3.1
About connections
Connectivity guide
Always connect a device to the TV with the highest quality connection available. Also, use good quality cables to ensure a
good transfer of picture and sound.
If you need help to connect several devices to the TV, you can visit the Philips TV connectivity guide. The guide offers information on how to connect and which cables to use.
Go to www.connectivityguide.philips.com
Antenna port
If you have a Set-top box (a digital receiver) or Recorder, connect the antenna cables to run the antenna signal through the Set-top box and/or Recorder first before it enters the TV. In this way, the antenna and the Set-top box can send possible additional channels to the Recorder to record.
HDMI ports
HDMI quality
An HDMI connection has the best picture and sound quality. Use an HDMI cable for TV signal.
For best signal quality transfer, use a High speed HDMI cable and do not use an HDMI cable longer than 5 m.
Copy protection
HDMI cables support HDCP (High-bandwidth Digital Content Protection). HDCP is a copy protection signal that prevents copying content from a DVD disc or Bluray Disc. Also referred to as DRM (Digital Rights Management).
HDMI ARC
HDMI 1 connection on the TV have HDMI ARC (Audio Return Channel). If the device, typically a Home Theatre System (HTS), also has the HDMI ARC connection, connect it to HDMI 1 on this TV. With the HDMI ARC connection, you do not need to connect the extra audio cable that sends the sound of the TV picture to the HTS. The HDMI ARC connection combines both signals.
In case you prefer to switch off ARC on the HDMI
connections, press and select |
Setup and |
press OK. Select TV |
|
settings > Sound > Advanced > |
HDMI 1 - ARC. |
HDMI Ultra HD
You can watch videos filmed or made in 'native' Ultra HD resolution - 3840x2160 pixels - on this TV.
Connect a Blu-ray Disc player, game console or computer that plays Ultra HD videos to one of HDMI connections. Use a High speed HDMI cable to connect. The HDMI UHD connections have ARC (Audio Return Channel).
HDMI CEC - EasyLink
EasyLink
With EasyLink you can operate a connected device with the TV remote control. EasyLink uses HDMI CEC (Consumer Electronics Control) to communicate with the connected devices. Devices must support HDMI CEC and must be connected with an HDMI connection.
6

EasyLink setup
The TV comes with EasyLink switched on. Make sure that all HDMI CEC settings are properly set up on the connected EasyLink devices. EasyLink might not work with devices from other brands.
HDMI CEC on other brands
The HDMI CEC functionality has different names on different brands. Some examples are: Anynet, Aquos Link, Bravia Theatre Sync, Kuro Link, Simplink and Viera Link. Not all brands are fully compatible with EasyLink.
Example HDMI CEC branding names are property of their respective owners.
Operate devices
To operate a device connected to HDMI and set up with EasyLink, select the device - or its activity - in the list of TV connections. Press SOURCES , select a device connected to an HDMI connection and press OK.
Once the device is selected, the TV remote control can control the device.
However and OPTIONS keys and some other TV keys are not forwarded to the device.
If the key you need is not on the TV remote control, you can select the key in the Options menu.
Press OPTIONS and select Controls in the menu bar. On the screen, select the device key you need and press OK.
Some very specific device keys might not be available in the Controls menu.
Note: Only devices that support EasyLink Remote Control function will respond to the TV remote control.
EasyLink On or Off
The TV comes with all EasyLink settings switched on. You can switch off any EasyLink setting independently.
To switch off EasyLink completely . . .
1. Press |
and select |
Setup and press OK. |
2. Select |
TV settings > |
General |
settings > EasyLink. |
|
|
3. Select |
EasyLink. |
|
4. Select |
Off and press |
OK. |
5. Press |
, repeatedly if necessary, to close the |
|
menu. |
|
|
EasyLink Remote Control
EasyLink Remote Control
If you want devices to communicate but you don't want to operate them with the TV remote control, you can switch off EasyLink remote control separately. You can control multiple HDMI-CEC compliant devices with your TV remote control.
In the EasyLink settings menu, select EasyLink Remote Control and select Off.
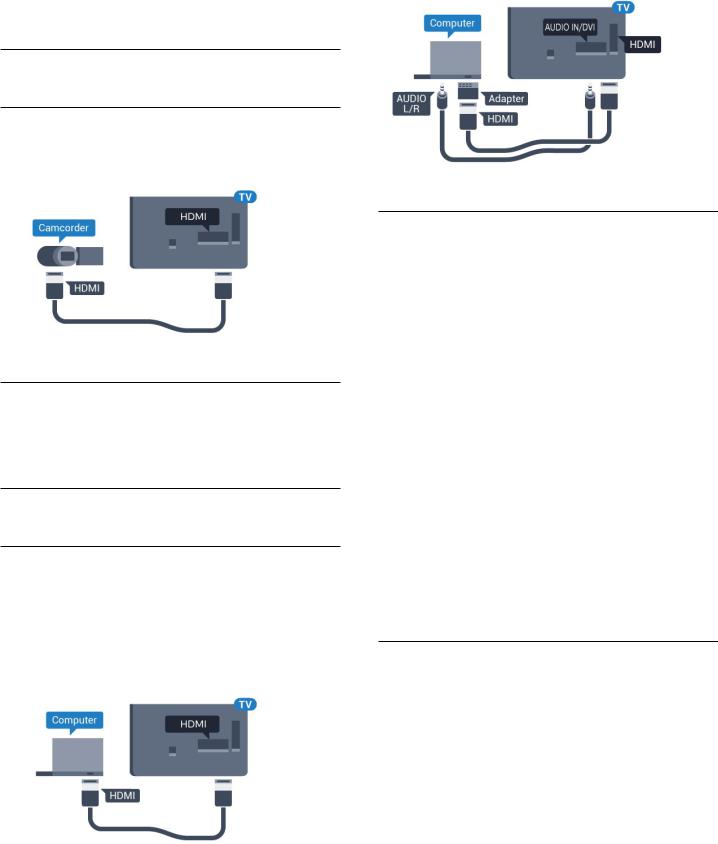
DVI to HDMI
If you still own a device that only has a DVI connection, you can connect the device to any of the HDMI connection with a DVI to HDMI adapter.
Use a DVI to HDMI adapter if your device only has a DVI connection. Use one of the HDMI connections and add an Audio L/R cable (mini-jack 3.5mm) to Audio In for sound, on the back of the TV.
Copy protection
DVI and HDMI cables support HDCP (High-bandwidth Digital Content Protection). HDCP is a copy protection signal that prevents copying content from a DVD disc or Blu-ray Disc. Also referred to as DRM (Digital Rights Management).
7

Y Pb Pr - Audio L R
Y Pb Pr - Component Video is a high quality connection.
The YPbPr connection can be used for High Definition (HD) TV signals. Next to the Y, Pb and Pr signals add the Audio Left and Right signals for sound.
Match the YPbPr (green, blue, red) connector colours with the cable plugs when you connect.
Use an Audio L/R cinch cable if your device also has sound.
3.2
Common interface - CAM
CI+
This TV is ready for the CI+ Conditional Access.
With CI+ you can watch premium HD programmes, like movies and sports, offered by digital TV broadcasters in your region. These programmes are scrambled by the TV broadcaster and descrambled with a prepaid CI+ module.
Digital TV broadcasters provide this CI+ module (Conditional Access Module - CAM) when you subscribe to their premium programmes. These programmes have a high level of copy protection.
Contact a digital TV broadcaster for more information on terms and conditions.
CVBS - Audio L R
CVBS - Composite Video is a high quality connection. Next to the CVBS signal adds the Audio Left and Right signals for sound.
Audio Out - Optical
Audio Out - Optical is a high quality sound connection. This optical connection can carry 5.1 audio channels. If your device, typically a Home Theatre System (HTS), has no HDMI ARC connection, you can use this connection with the Audio In - Optical connection on the HTS. The Audio Out - Optical connection sends the sound from the TV to the HTS.
You can set the type of the audio out signal to fit the audio capabilities of your Home Theatre System.
If the sound does not match the video on screen, you can adjust the audio to video synchronization.
CAM
Insert a CAM module
Switch off the TV before inserting a CAM.
Look on the CAM for the correct method of insertion. Incorrect insertion can damage the CAM and TV.
Use the Common Interface slot on the TV to insert the CAM card.
With the front of the card facing to you, gently insert the CAM as far as it will go.
Leave the card in the slot permanently.
It may take a few minutes before the CAM is activated. Removing the CAM will deactivate the broadcast service on TV.
If a CAM is inserted and subscription fees are paid, (connection methods can differ), you can watch the TV broadcast. The inserted CAM is exclusively for your TV.
8

3.3
Set-top box - STB
Use 2 antenna cables to connect the antenna to the Set-top box (a digital receiver) and the TV.
Next to the antenna connections, add an HDMI cable to connect the Set-top box to the TV.
Auto switch off
Switch off this automatic timer, if you only use the remote control of the Set-top box. Do this to prevent the TV from switching off automatically after a 4 hour period without a key press on the remote control of the TV.
To switch off the Switch off timer, press and select Setup and press OK.
Select TV settings > General settings > Switch off timer and set the slider bar to Off.
3.4
Satellite receiver
Connect the dish antenna cable to the Satellite receiver.
Next to the antenna connection, add an HDMI cable to connect the device to the TV.
Auto switch off
Switch off this automatic timer, if you only use the remote control of the Set-top box. Do this to prevent the TV from switching off automatically after a 4 hour period without a key press on the remote control of the TV.
To switch off the Switch off timer, press and
select |
Setup and press OK. |
Select |
TV settings > General settings > Switch off |
timer and set the slider bar to Off.
3.5
Home Theatre System - HTS
Connect with HDMI ARC
Use an HDMI cable to connect a Home Theatre System (HTS) to the TV. You can connect a Philips Soundbar or an HTS with a built-in disc player.
HDMI ARC
HDMI 1 connection on the TV have HDMI ARC (Audio Return Channel). If the device, typically a Home Theatre System (HTS), also has the HDMI ARC connection, connect it to HDMI 1 on this TV. With the HDMI ARC connection, you do not need to connect the extra audio cable that sends the sound of the TV picture to the HTS. The HDMI ARC connection combines both signals.
Audio to video synchronisation (sync)
If the sound does not match the video on screen, you can set a delay on most Home Theatre Systems with a disc player to match the sound with the video.
Connect with HDMI
Use an HDMI cable to connect a Home Theatre System (HTS) to the TV. You can connect a Philips Soundbar or an HTS with a built-in disc player.
If the Home Theatre System has no HDMI ARC connection, add an optical audio cable (Toslink) to send the sound of the TV picture to the Home Theatre System.
9

Audio to video synchronisation (sync)
If the sound does not match the video on screen, you can set a delay on most Home Theatre Systems with a disc player to match the sound with the video.
Audio Out settings
Audio Out delay
With a Home Theatre System (HTS) connected to the TV, the picture on TV and the sound from the HTS should be synchronised.
Automatic audio to video sync
With recent Philips Home Theatre Systems, the audio to video sync is automatically synchronised and always correct.
Audio sync delay
For some Home Theatre Systems you might need to adjust the audio sync delay to synchronise the audio to video. On the HTS, increase the delay value until there is a match between picture and sound. A delay value of 180ms may be required. Read the user manual of the HTS. With a delay value set up on the HTS, you need to switch off Audio Out delay on the TV.
To switch off the Audio Out delay . . .
1.Press and select Setup and press OK.
2.Select TV settings > Sound > Advanced > Audio out delay.
3.Select Off and press OK.
4.Press , repeatedly if necessary, to close the menu.
Audio Out offset
If you cannot set a delay on the Home Theatre System, you can set the TV to sync the sound. You can set an offset that compensates the time necessary for the Home Theatre System to process the sound of the TV picture. You can set the value in steps of 1ms. Maximum setting is 12ms. The Audio out delay setting should be switched on.
To synchronise the sound on the TV . . .
1. Press and select |
Setup and press OK. |
|
2. Select |
TV |
|
settings > |
Sound > |
Advanced > Audio out offset. |
3.Use the slider bar to set the sound offset and press OK.
4.Press , repeatedly if necessary, to close the menu.
Audio Out format
If you have a Home Theatre System (HTS)
with multichannel sound processing capabilities like Dolby Digital, DTS® or similar, set the Audio out format to Multichannel. With Multichannel, the TV can send the compressed multichannel sound signal from a TV channel or connected player to the Home Theatre System. If you have a Home Theatre System without multichannel sound processing, select Stereo.
To set the Audio Out format . . .
1. Press |
and select |
Setup and press OK. |
2. Select |
TV |
|
settings > Sound > |
Advanced > Audio out format. |
|
3. Select |
Multichannel or Stereo. |
|
4. Press |
, repeatedly if necessary, to close the |
|
menu. |
|
|
Audio Out levelling
Use the Audio Out leveling setting to level the volume (loudness) of the TV and the Home Theatre System when you switch over from one to another. Volume differences can be caused by differences in sound processing.
To level the difference in volume . . .
1. Press and select |
Setup and press |
OK. |
||
2. Select |
TV |
|
|
|
settings > |
Sound > |
Advanced > |
Audio out |
|
leveling. |
|
|
|
|
3. If the volume difference is large, select |
More. If the |
|||
volume difference is small, select |
Less. |
|
||
Press , repeatedly if necessary, to close the menu.
Audio Out leveling affects both the Audio Out - Optical and HDMI ARC sound signals.
Problems with HTS sound
Sound with loud noise
If you watch a video from a plugged in USB flash drive or connected computer, the sound from your Home Theatre System might be distorted.
1. Press and select |
Setup and press OK. |
|
2. Select |
TV |
|
settings > |
Sound > |
Advanced > Audio out format. |
10
No sound
If you cannot hear the sound from the TV on your Home Theatre System, check the following . . .
-Check if you connected the HDMI cable to a HDMI 1 connection on the Home Theatre System.
-Check if the HDMI ARC setting on the TV is
switched On.
Go to > Setup > TV
settings > Sound > Advanced > HDMI 1 -ARC.
3.6
Blu-ray Disc player
Use a High speed HDMI cable to connect the Blu-ray Disc player to the TV.
If the Blu-ray Disc player has EasyLink HDMI CEC, you can operate the player with the TV remote control.
3.7
DVD player
Use an HDMI cable to connect the DVD player to the TV.
If the DVD player is connected with HDMI and has EasyLink CEC, you can operate the player with the TV remote control.
3.8
Game console
HDMI
For best quality, connect the game console with an High speed HDMI cable to the TV
Y Pb Pr - Audio L R
Connect the game console with a component video cable (Y Pb Pr) and an audio L/R cable to the TV.
CVBS - Audio L R
Connect the game console to the TV with a composite cable (CVBS) and an audio L/R cable to the TV.
Best Setting
Before you start playing a game from a connected game console, we advice you to set the TV in the ideal setting Game.
To set the TV to the ideal setting…
1. Press and select |
Setup and press OK. |
|
2. Select |
TV |
|
settings > |
Picture > |
Advanced > Activity style. |
3.Select Game, Computer or TV. The setting TV returns to the picture settings for watching TV.
4.Press , repeatedly if necessary, to close the menu.
11

3.9
USB Hard Drive
What you need
If you connect a USB Hard Drive, you can pause or record a TV broadcast. The TV broadcast must be a digital broadcast (DVB broadcast or similar).
To pause
To pause a broadcast, you need a USB 2.0 compatible Hard Drive with a minimum of 32GB disc space.
To record
To pause and record a broadcast, you need a minimum of 250GB disc space.
TV guide
Before you decide to buy a USB Hard Drive to record, you can check if you can record digital TV channels in your country.
Press TV GUIDE on the remote control. If there is a Record button on the TV guide page, you can record.
Installation
Before you can pause or record a broadcast, you must connect and format a USB Hard Drive.
1. Connect the USB Hard Drive to one of the USB connections on the TV. Do not connect another USB device to the other USB ports when formatting.
2.Switch on the USB Hard Drive and the TV.
3.When the TV is tuned to a digital TV channel, press
(Pause). Trying to pause will start the formatting.
Follow the instructions on screen.
When the USB Hard Drive is formatted, leave it connected permanently.
Warning
The USB Hard Drive is formatted exclusively for this TV, you cannot use the stored recordings on another TV or PC. Do not copy or change recording files on the USB Hard Drive with any PC application. This will
corrupt your recordings. When you format another USB Hard Drive, the content on the former will be lost. A USB Hard Drive installed on your TV will need reformatting for use with a computer.
Formatting
Before you can pause or record a broadcast, you must connect and format a USB Hard Drive. Formatting removes all files from the USB Hard Drive.
Warning
The USB Hard Drive is formatted exclusively for this TV, you cannot use the stored recordings on another TV or PC. Do not copy or change recording files on the USB Hard Drive with any PC application. This will corrupt your recordings. When you format another USB Hard Drive, the content on the former will be lost. A USB Hard Drive installed on your TV will need reformatting for use with a computer.
To format a USB Hard Drive…
1. Connect the USB Hard Drive to one of
the USB connections on the TV. Do not connect another USB device to the other USB ports when formatting.
2.Switch on the USB Hard Drive and the TV.
3.When the TV is tuned to a digital TV channel, press (Pause). Trying to pause will start the
formatting. Follow the instructions on screen.
When the USB Hard Drive is formatted, leave it connected permanently.
3.10
USB flash drive
You can view photos or play your music and videos from a connected USB flash drive.
Insert a USB flash drive in one of the USB connections on the TV while the TV is switched on.
The TV detects the flash drive and opens a list showing its content.
If the contents list does not appear automatically, press SOURCES , select USB and press OK.
To stop watching the USB flash drive content, press
EXIT or select another activity.
To disconnect the USB flash drive, you can pull out the flash drive anytime.
12
3.11
Camcorder
HDMI
For best quality, use an HDMI cable to connect the camcorder to the TV.
CVBS - Audio L R
Use a Video Audio L/R cable to connect the camcorder to the TV.
3.12
Computer
Connect
You can connect your computer to the TV and use the TV as a PC monitor.
With HDMI
Use an HDMI cable to connect the computer to the TV.
With DVI to HDMI
Alternatively, you can use a DVI to HDMI adapter to connect the PC to HDMI and an audio L/R cable (minijack 3.5mm) to AUDIO IN L/R on the back of the TV.
Best Setting
Ideal monitor setting
If your computer is added as a Computer type of device in the Source menu (the list of connections), the TV is set to the ideal Computer setting automatically.
If you use your computer to watch movies or use it to play games, you might want to set the TV back to the ideal TV watching or gaming setting.
To set the TV to the ideal setting manually . . .
1. Press and select |
Setup and press OK. |
|
2. Select |
TV |
|
settings > |
Picture > |
Advanced > Activity style. |
3.Select Game, Computer or TV. The setting TV returns to the picture settings for watching TV.
4.Press , repeatedly if necessary, to close the menu.
Remember to set the Game or computer setting back to Computer when you stop playing the game.
3.13
Headphones
You can connect a set of headphones to connection on the TV. The connection is a mini-jack 3.5mm. You can adjust the volume of the headphones separately.
To adjust the volume . . .
1. Press and select Setup and press OK.
2.Select TV settings > Sound > Headphone volume and press OK.
3.Press (up) or (down) to adjust the volume.
4.Press , repeatedly if necessay, to close the menu.
13

14

4
Switch on
4.1
On, Standby or Off
Before you switch on the TV, make sure you plugged in the mains power in the POWER connector on the back of the TV.
To put the TV in Standby when the indicator light is off, press the small joystick key on the back of the TV. The indicator will light up.
With the TV in standby, press on the remote control to switch the TV on.
Switch to standby
To switch the TV to Standby, press on the remote control.
Switch Off
To switch the TV Off, press the joystick key. The indicator light goes off.
The TV is still connected to the mains power but consumes very little energy.
To switch off the TV completely, disconnect the power plug.
When disconnecting the power plug, always pull the power plug, never the cord. Ensure that you have full access to the power plug, power cord and outlet socket at all times.
4.2
Keys on TV
If you lost the remote control or its batteries are empty, you can still do some basic TV operations.
To open the basic menu…
1.With the TV switched on, press the joystick key on the back of the TV to bring up the basic menu.
2.Press left or right to
select Volume, Channel or Sources.
3.Press up or down to adjust the volume or tune to the next or previous channel. Press up or down to go through the list of sources, including the tuner selection.
4.The menu will disappear automatically.
To switch the TV off, select and press the joystick
key.
4.3
Sleep timer
With the sleep timer, you can set the TV to switch to standby automatically after a preset time.
To set the sleep timer . |
. . |
1. Press and select |
Setup and press OK. |
2. Select TV settings > |
General settings > Sleep |
timer. |
|
With the slider bar you can set the time to up to 180 minutes in increments of 5 minutes. If set to 0 minutes, the sleep timer is switched off.You can always switch off your TV earlier or reset the time during the countdown.
3. Press , repeatedly if necessary, to close the menu.
4.4
Switch Off Timer
If the TV receives a TV signal but you don't press a key on the remote control during a 4 hour period, the TV switches off automatically to save energy. Also, if the TV does not receive a TV signal nor a remote control command for 10 minutes, the TV switches off automatically.
If you use the TV as a monitor or use a digital receiver to watch TV (a Set-Top Box - STB) and you do not use the remote control of the TV, you should deactivate this automatic switch off.
To deactivate the Switch Off Timer …
1. Press |
and select |
Setup and press OK. |
|
2. Select |
TV settings > |
General settings > Switch |
|
off timer. |
|
|
|
3. Press |
(up) or |
(down) to adjust the |
|
value. The value 0 deactivates the automatic switch off.
4. Press menu.
15

5
Remote control
5.1
Key overview
Top
1. Standby / On
To switch the TV on or back to Standby.
2. Playback keys
-Play , to playback
-Pause , to pause playback
-Stop , to stop playback
-Rewind , to rewind
-Fast forward , to go fast forward
-Record , to record now
3.TV GUIDE
To open or close the TV Guide.
4.SETUP
To open the Settings menu.
5.FORMAT
To open or close the Picture format menu.
Middle
1.SOURCES
To open or close the Sources menu - the list of
connected devices.
2.Colour keys
The buttons function follow the on-screen instructions.
3.INFO
To open or close programme infomation.
4.BACK
To switch back to the previous channel you selected. To close a menu without changing a setting.
5.HOME
To open or close the home menu.
6.EXIT
To switch back to watching TV.
7.OPTIONS
To open or close the Options menu.
8.OK key
To confirm a selection or setting.
9.Arrow / navigation keys
To navigate up, down, left or right.
10.LIST
To open or close the channel list.
Bottom
1. Volume
To adjust the volume level.
2. Number keys and text keypad
To select a TV channel directly or to enter text.
3. SUBTITLE
To switch subtitles on, off or Automatic.
4. Channel
To switch to the next or previous channel in the channel list. To open the next or previous page in Text/Teletext. To start the next or previous chapter on a disc.
5. Mute
To mute the sound or to restore it.
6. TEXT
To open or close Text / Teletext.
16

5.2
IR sensor
The TV can receive commands from a remote control that uses IR (infrared) to send commands. If you use such a remote control, always make sure you point the remote control at the infrared sensor on the front of the TV.
5.3
Batteries
1.Slide the battery door in the direction shown by the arrow.
2.Replace the old batteries with 2
type AAA-LR03-1.5V batteries. Make sure the + and the - ends of the batteries line up correctly.
3.Reposition the battery door.
4.Slide it back until it clicks.
Remove the batteries if you are not using the remote control for a long time.
Safely dispose of your old batteries according to the end of use directions.
5.4
Cleaning
Your remote control is treated with a scratch-resistant coating.
To clean the remote control, use a soft damp cloth. Never use substances such as alcohol, chemicals or household cleaners on the remote control.
17

6
TV channels
6.1
Channel Lists
About channel lists
After a channel installation, all channels appear on the channel list. Channels are shown with their name and logo if this information is available.
There is a channel list with all installed channels. You can only filter this list to show TV or only Radio channels.
With a channel list selected, press the
arrows (up) or (down) to select a channel, then press OK to watch the selected channel. You only tune to the channels in that list when
using or keys.
Channel icons
After an Automatic Channel Update of the channel list, newly found channels are marked with
a (star).
If you lock a channel, it will be marked with a (lock).
The 3 most popular channels being watched by others at this moment are marked with a 1, 2 or 3.
Radio stations
If digital broadcasting is available, digital radio stations are installed during installation. Switch to a radio channel just like you switch to a TV channel. A Cable (DVB-C) channel installation usually places radio stations from channel number 1001 onwards.
Open a channel list
To open the current channel list…
1.Press , to switch to TV.
2.Press LIST to open the current channel list.
3.Press LIST again to close the channel list.
Filter a channel list
You can filter a list with all channels. You can set the channel list to show only TV channels or only Radio stations.
To set a filter on a list with all channels…
1.While watching a TV channel, press LIST to open the channel list.
2.Press OPTIONS to open Option menu.
3. Select List, then you can
select All, Favourites, Radio, and New channels.
6.2
Watching TV channels
Watching channels
Tune to a channel
To watch TV channels, press . The TV tunes to the TV channel you last watched.
Switch channels |
|
- To switch channels, press or |
. |
- If you know the channel number, type in the |
|
number with the number keys. Press |
OK after you |
entered the number to switch immediately.
Previous channel
- To switch back to the previously tuned channel, press .
Channel list
While watching a TV channel, press LIST to open the channel lists.
The channel list can have several pages with channels. To view the next or previous page, press + or .
To close the channel lists without switching channel, press LIST again.
Radio channels
If digital broadcasting is available, digital radio station are installed during installation. Switch to a radio channel just like you switch to a TV channel.
Lock a channel
Lock and unlock a channel
To prevent children from watching a channel or a programme, you can lock channels or lock age rated programmes.
You can lock a channel to prevent children from watching it. To watch a locked channel you need to enter the Child lock code. You cannot lock programmes from connected devices.
To lock a channel . . .
1.While watching a TV channel, press LIST to open the Channel list.
2.In any list, select the channel you want to lock.
3. Press OPTIONS and select Lock channel. In a channel list, a locked channel is marked with a
lock .
18

To unlock a channel, select the locked channel in the channel list, press OPTIONS , then
select Unlock channel. You will need to enter the Child lock code.
Parental rating
To prevent children from watching a programme not suitable for their age, you can use an age rating.
Some digital broadcasters have age rated their programmes. When the age rating of a programme is equal to or higher than the age you have set as age rating for your child, the programme will be locked. To watch a locked programme you must enter the child lock code. The parental age rating is set for all channels.
To set an age rating . . .
1. Press |
and select Setup and press OK. |
2. Select |
Channel settings > Child lock > Parental |
rating and press OK.
3.Enter a 4-digit Child lock code. Enter a 4-digit Child lock code and confirm. Now you can set an age rating.
4.Set the age and press OK.
5.Press , repeatedly if necessary, to close the menu.
6.To switch off the parental age rating,
select None as age setting.
The TV will ask for the code to unlock the programme. For some broadcasters / operators, the TV only locks programmes with a higher rating.
Set or change the lock code
To set the lock code or to change the current code . . .
1. Press |
and select |
Setup and press OK. |
2. Select |
Channel settings > Child lock > Change |
|
code and press OK. |
|
|
3. If a code is set already, enter the current Child lock code and then enter the new code twice.
The new code is set.
Forgotten your code?
To override and enter a new child lock code in case you forget it, enter 8888.
Channel options
Open options
While watching a channel, you can set some options.
Depending on the type of channel you are watching (analogue or digital) or depending on the TV settings you made, some options are available.
To open the options menu…
1.While watching a channel, press OPTIONS.
2.Press OPTIONS again to close.
Subtitles and subtitle language
Switch On
To switch on Subtitles, press SUBTITLE.
You can set subtitles to Subtitles off, Subtitles on, or Automatic.
Automatic
If language information is part of the digital broadcast and the broadcasted programme is not in your language (the language set on TV), the TV can show subtitles automatically in one of your preferred subtitle languages. One of these subtitle languages must also be part of the broadcast.
You can select your preferred subtitle languages in Subtitle Language.
Preferred subtitle languages
Subtitles for digital channels
There is no need to set subtitles in Text for digital channels.
Digital channels can offer several subtitle languages for a programme. You can set a preferred primary and secondary subtitle language. If subtitles in one of these languages are available, the TV will show them. If none of the preferred subtitle languages are available, you can select another subtitle language which is available.
To set the primary and secondary subtitle language . .
.
1. Press and select Setup and press |
OK. |
2. Select Channel settings and select |
Languages. |
3. Select Primary subtitle language or |
Secondary |
subtitle language and press OK. |
|
4.Select a language and press OK.
5.Press , repeatedly if necessary, to close the menu.
Select a subtitle language
If none of the preferred subtitle languages are available, you can select another subtitle language if available. If no subtitle languages are available, you cannot select this option.
To select a subtitle language when none of your preferred languages are available…
1.Press OPTIONS.
2.Select Subtitle language and select one of the languages as subtitles temporarily.
19
 Loading...