


Operating Instructions
Bedienungsanleitung Istruzioni per l’uso Mode d’emploi
Instrucciones de funcionamiento Gebruiksaanwijzing Betjeningsvejledning
IC Recorder
Digitales Diktiergerät
Registratore IC
Magnétophone à puce
Grabadora IC
IC-recorder
IC-optager
ENGLISH
DEUTSCH
ITALIANO
FRANÇAIS
ESPAÑOL
NEDERLANDS
DANSK
Model No. Nº de modelo
|
Modell Nr. |
Model Nr. |
|
Modello numero |
Modelnr. |
|
Modèle n° |
|
|
|
|
E
RR-XS410
RR-XS400
VQT3T14

Dear customer
Thank you for purchasing this product.
For optimum performance and safety, please read these instructions carefully.
Before connecting, operating or adjusting this product, please read the instructions completely. Please keep this manual for future reference.
Supplied accessories
Please check and identify the supplied accessories.
Use numbers indicated in parentheses when asking for replacement parts. (Product numbers correct as of June 2011. These may be subject to change.)
1 AAA rechargeable Ni-MH battery½ [HHR-4AGE] *Indicated as rechargeable battery in the text.
1 Battery Case [RFA3332]
1 USB extension cable [K2ZZ04Y00005]
½ Make sure to buy [HHR-4MVE] for Europe or [HHR-
VQT3T14 |
4MRT] for Asia and Latin America and use one of the |
|
pair when replacing the rechargeable battery. |
||
|
2
g For the United Kingdom and Republic of
Ireland customers
(Sales and Support Information)
Customer Care Centre
•For customers within the UK: 0844 844 3852
•For customers within the Ireland: 01 289 8333
•Visit our website for product information www.panasonic.co.uk
•E-mail: customer.care@panasonic.co.uk Direct Sales at Panasonic UK
•For customers: 0844 844 3856
•Order accessory and consumable items for your product with ease and confidence by phoning our Customer Care Centre
Monday-Thursday 9:00 a.m.-5:30 p.m., Friday 9:30 a.m.- 5:30 p.m. (Excluding public holidays)
•Or go on line through our Internet Accessory ordering application at www.pas-europe.com.
•Most major credit and debit cards accepted.
•All enquiries transactions and distribution facilities are provided directly by Panasonic UK.
•It couldn’t be simpler!
•Also available through our Internet is direct shopping for a wide range of finished products, take a browse on our website for further details.
2
Features
Recording
This unit supports the Linear PCM (hereinafter referred to as “PCM”) recording. Data is not compressed in PCM recording. Therefore, highquality recording is enabled, comparable to the sound quality of CD.
Playing back to listen
•Recorded file
•WMA/MP3 music file
Connecting this unit to a computer
•Recharge/Use USB power
•Move and organize recording/music/data files
Recording/Playback using the Timer
You can record at a specified time. You can also set an alarm to sound or file to play back at a specified time.
Table of contents |
|
|
ENGLISH |
Preparation |
|
Supplied accessories........................................................ |
2 |
Part names ....................................................................... |
5 |
Screen display .................................................................. |
6 |
Inserting the battery/Charging.......................................... |
7 |
Turning the Power ON/OFF/Hold function............................. |
9 |
Setting the clock ............................................................. |
10 |
File and Folder................................................................ |
11 |
Selecting the folder......................................................... |
11 |
Selecting the folder or file in the list screen .................... |
12 |
Basic Operations |
|
Recording ....................................................................... |
13 |
Playing............................................................................ |
15 |
Listening to the audio using earphones.......................... |
16 |
Deleting files................................................................... |
17 |
VQT3T14
3
3
|
Table of contents |
|
|
Advanced Operations |
|
|
Selecting the recording scene ........................................ |
18 |
|
Selecting recording mode............................................... |
20 |
|
Switching microphone sensitivity.................................... |
21 |
|
Reducing noise (LOW CUT FILTER).............................. |
21 |
|
Setting the recording level manually............................... |
22 |
|
Setting the recording EQ ................................................ |
24 |
|
Self timer ........................................................................ |
25 |
|
Preventing unnecessary recording (VAS)....................... |
26 |
|
Past recording function (PRE-RECORD) ....................... |
27 |
|
Recording by connecting an external microphone ......... |
28 |
|
Copying to other devices ................................................ |
29 |
|
Recording from other devices......................................... |
30 |
|
Index function ................................................................. |
33 |
|
Changing the playback speed ........................................ |
34 |
|
A-B Repeat play ............................................................. |
34 |
|
Playback from a specified position (TIME SEARCH) ..... |
35 |
|
Slight return playback ..................................................... |
35 |
|
Repeat play (REPEAT) ................................................... |
36 |
|
Skip at regular intervals (TIME SKIP)............................. |
37 |
|
Setting the playback EQ (SOUND EQ)........................... |
38 |
|
Using an SD Card........................................................... |
39 |
|
Using the file search function ......................................... |
40 |
|
Listening to music on this unit (WMA/MP3 music files)..... |
41 |
VQT3T14 |
|
|
|
Using the playlist function............................................... |
42 |
|
Editing: Dividing files....................................................... |
44 |
|
Editing: Combining files .................................................. |
45 |
4 |
Editing: Copying or moving files...................................... |
46 |
|
Recycle bin function ....................................................... |
47 |
Using the timer ............................................................... |
48 |
Common menu ............................................................... |
51 |
Using with a computer |
|
System requirements...................................................... |
55 |
Connecting this unit to a computer................................. |
56 |
Using USB power ........................................................... |
58 |
Opening folders of this unit............................................. |
59 |
Importing files to a computer/Organizing files ................ |
60 |
File name........................................................................ |
61 |
Folder structure on this unit ............................................ |
63 |
Transferring music files to this unit.................................. |
65 |
Other |
|
Q & A (Frequently Asked Questions)................................... |
66 |
Error messages .............................................................. |
66 |
Troubleshooting guide .................................................... |
71 |
Specifications ................................................................. |
78 |
Care and use.................................................................. |
80 |
Maintenance................................................................... |
82 |
Useful Information .......................................................... |
85 |
4

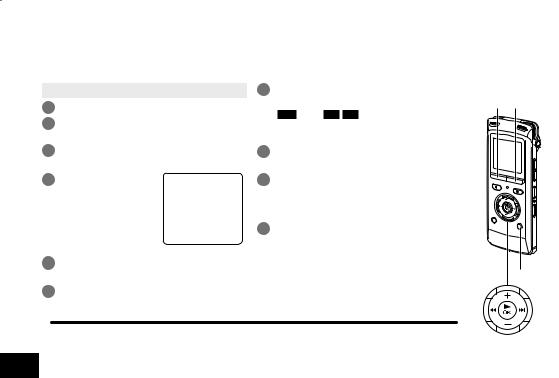
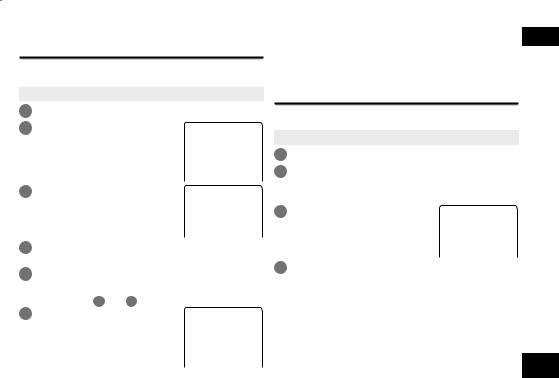
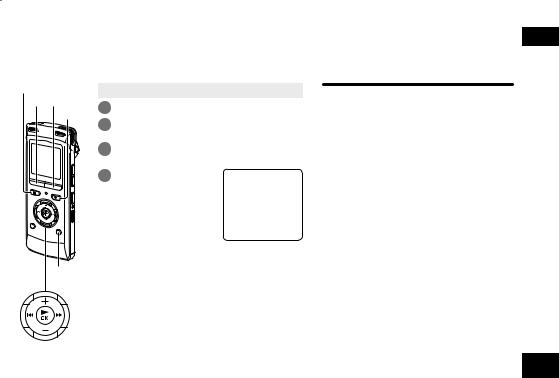
Part names
1
2

 bo
bo
3 |
|
bp |
5 |
4 |
brbq |
7 |
6 |
bs |
9 |
8 |
bt |
|
||
|
|
bk
bl
bm
bn
 cr
cr
 cs
cs
ck
cl cm
cn co

 cp
cp
cq
ct
dk
1Built-in microphone |
5g STOP/RETURN |
2LCD display |
6* REC |
3F1 |
7+ (Volume up) |
4F2 |
8u (Fast backward) |
The F1 and F2 buttons |
9q OK |
operate the function |
bkLIST |
shown in the display. |
bl– (Volume down) |
ENGLISH
bmi (Fast forward) bnMENU
boExternal microphone/Line-in jack ( ) bpFAST (Fast playback)
bqSLOW (Slow playback)
brRecording indicator (Status indicator) bsA-B &
btERASE ckStrap eyelet clBuilt-in speaker
cmOPR/HOLD switch (OPR: Operation) cnLine/Mic switch
coUSB plug lever cpHeadphone/earphone jack ( ) cqBattery cover
crUSB plug cover csUSB plug
ctSD card slot cover dkSD card slot
VQT3T14
5
5
VQT3T14
6
Screen display
• The following screen examples explain each item. Some items may not be displayed simultaneously.
Screen display during recording:
Index ( page 33) File number ( page 14)
Status indication ( page 14) SD card ( page 11)
Folder name ( page 14) Level meter ( page 14)
Recording elapsed time
Recording mode ( page 20) Recording Scene ( page 18)
Screen display during playback:
Repeat indication ( pages 34, 36) Sound EQ ( page 38)
Status indication ( page 34)
File name ( page 61)
Playback elapsed time
Playback status bar
Skip setting ( page 37)
Timer indication ( page 50) Battery indicator ( page 9)
Battery setting (BATT. SETTING) ( page 52) OVER indication ( page 14)
Low cut filter ( page 21)
“ ” Synchro recording ( page 32) Remaining recording time
Input: Built-in microphone
“ ”: External microphone ( page 28)
“ ”: Line-in ( page 30) Microphone sensitivity ( page 21) Recording level ( page 22)
“ ”: VAS ( page 26)
Time skip ( page 37)
Total playback time ( page 16)
Playback speed ( page 34)
Index setting ( page 33)
6

Inserting the battery/Charging |
ENGLISH |
Upon purchasing, charge once before initial use. 2 Insert the unit’s USB plug into the computer.
Use your computer for charging. If the battery has |
|
|
completely run out, it takes approx. 2 hours for a full |
|
|
recharge. |
Insert the USB plug |
|
Inserting the rechargeable battery (supplied) |
||
straight in the same |
||
|
||
|
direction as that of |
|
1 AAA rechargeable Ni-MH battery |
the terminal. |
|
|
||
Make sure the battery faces the |
If the unit cannot be connected to the computer |
|
right direction. |
directly, use the USB extension cable (supplied). |
|
1 |
3 |
|
|
|
5 |
|
2 |
|
|
4 |
Charging the battery
• Start the computer beforehand.
• Turn the unit off beforehand. ( page 9)
1 Take out the USB plug.
Push and slide |
Storing the USB plug: |
|
until a “click” |
||
|
||
sound is heard. |
|
The first time you connect the unit to your PC
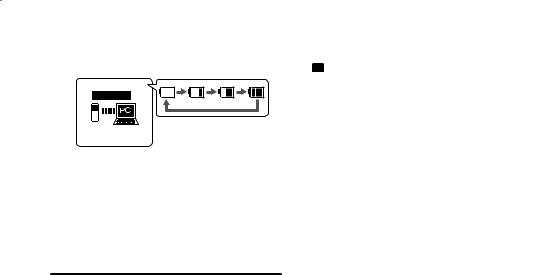
Because multiple “Found New Hardware” messages will appear, do not disconnect the unit from your PC until all messages disappear.
*Never disconnect the unit or remove the SD card while “ACCESS…” is displayed, otherwise this unit may be damaged.
3Slide the OPR/HOLD switch to the [HOLD] side.
HOLD |
|
|
OPR |
|
|
ON / OFF |
|
VQT3T14 |
OPR/HOLD |
|
|
switch |
Status indicator |
7 |
|
||
|
|
7
Inserting the battery/Charging
The status indicator lights and recharging starts. Also, “CHARGING” is shown in the unit’s display and the battery indicator changes as shown below.
CHARGING
* While charging, sliding the OPR/HOLD switch to the original position can cancel charging halfway.
* When the status indicator goes out, charging is complete.
g Disconnecting the unit
Double-click the icon (Windows XP: [ ], Windows Vista/ Windows 7: [
 ]) on the task tray at the bottom of the computer screen and follow the on-screen instructions to remove the unit. (The icon may not be displayed depending on the OS settings.)
After the unit is removed, this unit turns off.
* If BATT. SETTING in the common menu is set to “ALKALINE”, the battery cannot be charged.
* When using a rechargeable battery, use the supplied
VQT3T14 |
rechargeable battery or the optional rechargeable |
||
battery ( page 2). If commercially sold batteries other |
|||
|
|
||
|
|
than the above are used, operation is not guaranteed. |
|
|
|
Do not charge a dry cell battery. |
|
8 |
|
* If charging does not start, switch Hold off once and |
|
|
|
switch Hold on again. |
|
*If the temperature of this unit has risen or an
undesignated rechargeable battery has been inserted, “
 ” is displayed. ( page 71)
*When the computer is in sleep mode or is restarted, recharging may be impossible.
*Charging is possible even during data transfer.
*The rechargeable battery does not need to be fully depleted before recharging.
*The rechargeable battery or this unit may become hot while charging, but this is not a malfunction.
*If the usage time becomes remarkably short even though the battery is fully recharged, the battery has reached the end of its lifespan. Purchase a new rechargeable battery ( page 2).
*An AAA, LR03 alkaline battery (not supplied) can also be used.
*If you use an alkaline battery, set the BATT. SETTING in the common menu to “ALKALINE”. ( page 52)
*Remove the battery from the unit if you will not use it for a long period of time.
*Make sure to turn the power off before removing the battery.
• If the battery is removed while the unit is on, data may be lost or this unit may be damaged.
8
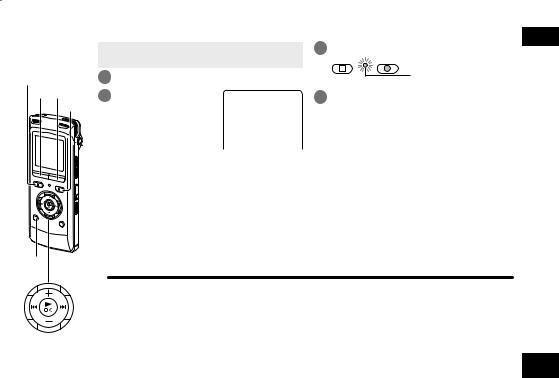
Turning the Power ON/OFF/Hold function
 ON / OFF OPR HOLD
OPR/HOLD switch
Turning the power ON:
Slide the OPR/HOLD switch to [ON/OFF] side to turn the power on. Then, the display lights on.
Set the current date and time when turning this unit on for the first time. ( page 10)
Turning the power OFF:
Slide and hold the OPR/HOLD switch to [ON/OFF] side for 1 second or more.
g About the battery indicator
The remaining battery level is displayed as below while this unit is operating.


 Blinking
*If the battery runs out, “  ” blinks. Replace the battery or charge the rechargeable battery as soon as possible.
*Please replace battery within approx. 1 minute for preservation of the clock data.
*Depending on the battery status or the operation content to use, even if the power turns off due to the battery exhaustion, this unit may be used for a while if turned on again. However, the unit may suddenly turn off during operation due to the low level of battery.
*Some level of battery is required when recording, or performing Deleting files ( page 17), Dividing files ( page 44), Deleting index ( page 33), FORMAT
( page 53). If the battery indicator shows “  ” (blinking) and these operations are performed, the power turns OFF due to the battery exhaustion.
g Auto power off
The power automatically turns off after a preset time (the factory setting is 15 minutes) elapses while recording is paused or stopped. ( page 52)
g Using the Hold function
Button operations are ignored when you set Hold on. Slide the OPR/HOLD switch to [HOLD] side during recording or playback.
*When the Hold function is on, button operation is ignored even if the unit is on (“HOLD ON” is displayed). Accordingly, operation mistakes (i.e. Recording or playback stopping midway) can be prevented.
ENGLISH
VQT3T14
9
9
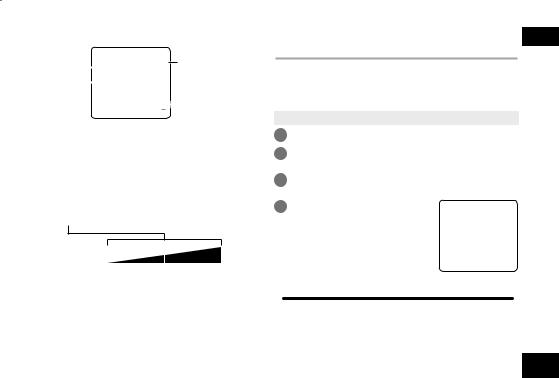
Setting the clock
The clock has not been set at the time of purchase.
The clock is used as a file name ( page 61) or to preserve recording date and time information. Set the correct date and time.
• Turn the power on. ( page 9)
1Press [MENU].
2Press +, – to select “COMMON MENU” and press [q OK] to enter.
3Press +, – to select “DATE & TIME” and press [q OK] to enter.
4Press +, – to set the year and press i.
The above illustration is a display example.
5Press +, – to set the month and press i.
6Press +, – to set the date and press i.
7Press +, – to set the clock indication method and press i.
“ 24H ” and “ AM / PM ” are displayed for the 24-hour display and the 12-hour display respectively.
8Press +, – to set the hour and press i.
9Press +, – to set the minute.
To change the setting, press u, i to move between the items, and then press +, – again to make the setting.
10Press [q OK] to enter.
The date and time are set and the clock starts to operate.
To exit the setting screen, press [F2 (CLOSE)].
VQT3T14 |
* The clock operates with the monthly loss/gain of approx. 60 seconds at normal temperature. |
|
|
|
* The clock setting will be lost if the battery is removed or completely exhausted. |
10
F1 F2
MENU
10
File and Folder
File
Recorded audio data from the starting point to the ending point is saved as a file.
The saved data is called a file.
Folder
This is where files are stored. This unit has the following folders.
•“A”, “B”, “C” and “D” folders for microphone recording ( page 13).
•“L” folder for files recorded from other devices connected to this unit ( page 30).
•” folder (Recycle) where deleted files are placed
( page 47).
• “M” folder for music ( page 41).
Using each folder according to the purposes of recording enables you to search files easily later. Up to 199 files can be recorded in each folder.
Folders are created in the internal memory. When an SD card ( page 39) is inserted, folders are created in the same way on the SD card.
In this manual, microSD/microSDHC card is written as “SD card”.
Selecting the folder
• Press [g STOP/RETURN] to stop the unit.
1Press [F2 (FOLDER)].
2Press +, –, u, i to select the folder and press [q OK] to enter.
“P1 to P5” present playlist files ( page 42).
If the SD card is inserted, the items for SD card are displayed on the screen in step 2 . Press [F1 (MEMORY)] to select the memory.
When the internal memory |
When the SD card is |
|
is selected |
selected |
|
When the SD card is selected, |
|
|
|
|
|
“ ” is displayed on the screen. |
|
|
ENGLISH
VQT3T14
11
11
VQT3T14
12
Selecting the folder or file in the list screen
You can select recorded files by displaying them on the list.
• Press [g STOP/RETURN] to stop the unit.
1Press [LIST  ].
].
2Press +, – to select “FLDR SEARCH” and press [q OK] to enter.
3Press +, – to select “INT. MEMORY” (internal memory ) and press [q OK] to enter.
When the SD card is inserted, “microSD CARD” is displayed. Either one can be selected.
4 |
Press +, – to select the |
|
|
: Folder |
|
|
|
folder and press [q OK] to enter.
If folders have been created in the MUSIC folder, repeat step 4 to select the target folder.
5Press +, – to select the file and press [q OK] to enter.
File playback starts.
When “MUSIC” is selected in step 4 , folders or files transferred from the PLAYLIST folder or computer are displayed (For details of PLAYLIST, see page 42.) If a folder exists (on the second hierarchy) under the folder
(e.g. Artist A), select “Artist A” and press [q OK]. Then, the folder under “Artist A” is displayed. (For details of folder hierarchy, see page 63.)
Pressing u several times on the screen in step 5 will switch the screen to screens in steps 3 or 4 . Also, it is possible to move among folder hierarchies to select folders and files.
*When there is no file in the selected folder, “No File” is displayed.
*The “A”, “B”, “C”, “D”, “L”, “M”, and “ (recycle bin)” folders are displayed as “MIC_A (MIC_A_SD), MIC_B (MIC_B_SD), MIC_C (MIC_C_SD), MIC_D
(MIC_D_SD), LINE (LINE_SD), MUSIC and RECYCLE” respectively on the list screen. (The indications in the brackets are displayed when using the SD card.)
*Press [F1 (TAB)] on the screen in step 3 to switch between “FLDR SEARCH” and “R. FILE SRCH”. ( page 40)
* Pressing [LIST ] for approx. 1 second or more while the unit is stopped or during playback will directly display the screen shown in step 5 at left.
12
Recording
gSTOP/RETURN F1 F2
*REC
LIST
•Turn the power on. ( page 9)
•Press [g STOP/RETURN] to stop the unit.
1Press [F2 (FOLDER)].
2Press u, i to select the recording
destination folder and press [q OK] to enter.
For microphone recording, select a folder among folders “A”, “B”, “C” and “D”. (The factory setting is “A”)
When you select a folder except for “A”, “B”, “C” or “D”, recording is automatically saved in “A”.
3 Press [* REC] (Recording starts).
STOP REC
RETURN |
The recording indicator |
|
lights on. |
4Press [g STOP/RETURN] to stop recording.
To pause recording:
1Press [* REC] during recording.
Recording indicator blinks.
2Press [* REC] again to resume recording.
*You can select preset recording settings registered in advance according to the recording target. ( page 18)
*Change the recording mode or microphone sensitivity as necessary. ( pages 20, 21)
*If the file size exceeds 2 GB during recording, the recording stops tentatively at the point when the data reaches 2 GB. Then, the recording resumes with a new file. Recording is not available during the interval (approx. 2 seconds) from when the recording stops to when the recording resumes.
*Note if your finger or an object touches this unit during recording, the noise will be recorded through the microphone.
ENGLISH
VQT3T14
13
13
Recording
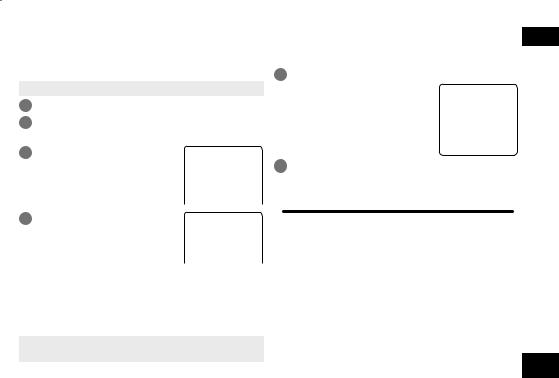
Screen display during recording:
1 |
|
2 |
5 |
3 |
|
|
6 |
47
1Status indication
*: During recording
h : During recording pause, recording standby, past recording standby
2Folder name ( page 11), File number
3Level meter
Displays the volume input into this unit. (Stereo (L/R))
L and R volumes are displayed respectively during monaural recording ( page 20) as well. Note that the monaural recording
data are synthesized from L and R. 4Recording mode ( page 20)
5OVER indication
If the input volume is excessive and the level meter swings, “ ”
”
is displayed.
6Possible remaining recording time
Displays the remaining recording time (possible recording time) in the selected recording mode.
VQT3T14 |
7Microphone sensitivity ( page 21) |
|
See page 6 for other screen displays. |
||
|
14
Note when recording
This unit is equipped with a high-sensitivity microphone. Accordingly, if a breath or wind directly hits the microphone during recording, the wind-cutting sound may be recorded or voice may be difficult to hear.
1. This can be
prevented by blocking the
wind with your body so that
the wind does not directly hit the unit.
2. During dictation recording, slightly
move this unit from front of your
mouth or keep distance.
Turning the “LOW CUT FILTER” ( page 21) to “ON” reduces the sound of low frequency range. This may help the reduction of the wind-cutting sound.
14
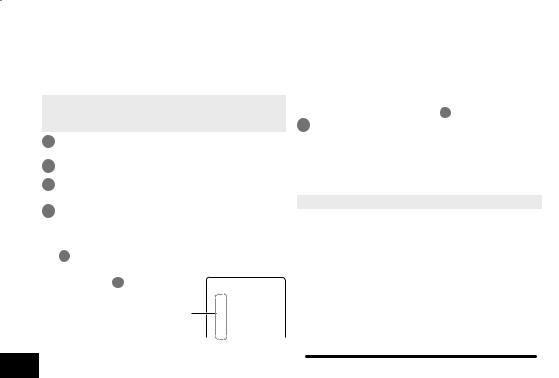
Playing
•Press [g STOP/RETURN] to stop the unit.
•Select a folder. ( page 11)
•Select a file. ( right)
1 Press [q OK] (Playback starts).
g STOP/RETURN
Adjusting the volume
Turn up the volume: Press +. Turn down the volume: Press –.
Volume range is 0 to 20. (The factory setting is “10”.)
If you turn the unit off with the volume set to 17 or more, the volume will be set to 16 next time the unit is turned on.
Operations during playback
Jump (Skip): Press u, i.
Press u midway while playing a file and the playback jumps to the beginning of the file. To return to the previous file, press u within approx. 1 second from the beginning of the file.
Fast backward/Fast forward (Search): Press and hold u, i.
To stop: Press [g STOP/RETURN].
ENGLISH
Select a file
Press u, i to select.
Each time you press, the file number changes.
File number/Total number of files in the folder
Folder name
|
Remaining |
Memory |
recording time |
usage |
|
indication |
FOLDER |
|
( page 11) |
Screen display example while stopped
You can also select the file on the list screen ( page 12)
VQT3T14
15
15
Playing
Checking information.
You can check the file information or current time.
•Press [g STOP/RETURN] to stop the unit.
1Press [g STOP/RETURN].
The information screen appears.
2Move the information screen up or down using + or –.
The following contents can be confirmed on the information screen.
|
Remaining recording time : Possible remaining |
||
|
(Possible recording time) |
recording time in the |
|
|
|
recording mode currently |
|
|
|
being set |
|
|
Recording date and time |
: Date and time when the |
|
|
|
selected file was recorded |
|
|
Total playback time |
: Length of the selected file |
|
|
File format |
: Format of the selected file |
|
VQT3T14 |
Current time |
: Current time |
|
This is not displayed for the M (MUSIC) folder. |
|||
|
|||
To exit the information screen: 16 Press [g STOP/RETURN].
Listening to the audio using earphones
Connect stereo earphones (not supplied). Plug type: ø 3.5 mm stereo mini plug Recommended additional earphones: Panasonic RP-HV154, RP-HJE120
(the product number is correct as of June 2011.)
Monitoring the recording in progress
Adjusting the volume:
You can adjust the volume by
Built-in speaker pressing +, –, but the recording level ( page 22) is not affected.
|
Listening to the audio |
|
during playback |
Insert |
The audio during playback |
comes from the speaker. |
|
securely. |
Listening may be difficult |
|
|
|
in noisy places due to the |
|
speaker output. In that case, |
|
connect stereo earphones (not |
|
supplied). |
*The built-in speaker is turned off when earphones are connected.
16
Deleting files
g STOP/RETURN
F2
ERASE
•Select a file to delete beforehand. ( page 15)
•Press [g STOP/RETURN] to stop the unit.
1Press [ERASE].
2Press +, – to select “FILE” and press [q OK] to enter.
3Press +, – to select “YES” and press [q OK] to enter.
While deleting, the status indicator blinks and “ERASING” is displayed. It may take several minutes until the deletion is complete.
When “FILE WAS MOVED TO RECYCLE
BIN  ” is displayed, press [q OK]. Selecting “FOLDER” in step 2 will move to the screen to delete all files in the selected folder.
ENGLISH
To exit the deletion screen, press [F2 (CLOSE)].
Deleting files from the list screen.
Select files on the list screen ( page 12) and press [ERASE]. Then, the screen to delete the file appears. Select the folder and press [ERASE]. Then, the screen to delete all files in the folder appears.
* When the recycle bin function is ON, files are moved to the recycle bin ) folder. When the recycle bin function is OFF, files are deleted immediately without being moved to the recycle bin
) folder. ( page 47)
*Files in the MUSIC (M) folder are deleted immediately irrespective of the recycle bin settings.
*The file numbers displayed on this unit are moved forward after deleting files. ( page 61)
*Read-only MP3 music files transferred from the computer or subfolders ( pages 63, 65)
in the MUSIC folder created on the computer cannot be deleted using this unit. Delete them on the computer. ( page 60)
VQT3T14
17
17

VQT3T14
18
Selecting the recording scene
This unit offers recommended recording settings for each recording scene. Selecting the recording scene enables easy recording with the most appropriate settings.
• Press [g STOP/RETURN] to stop the unit.
1Press [F1 (SCENE)].
2Press u, i to select the scene and press [q OK] to enter.
g The factory setting of recording scenes
3Press +, – to select “LOAD” and press [q OK] to enter.
The selected recording 
 scene is displayed.
When [* REC] is pressed, recording is performed with the selected recording scene setting
Recording Scene |
LANG. |
KARAOKE |
MUSIC |
CONVERSATION |
MEETING |
LECTURE |
FAVORITE |
|
Application |
STUDY |
PERF. |
||||||
|
|
|
|
|
||||
|
Recording |
Loud volume |
High quality |
Recording other |
Records a |
Records sounds |
You can |
|
|
your own |
recording such |
recording |
people’s voices |
broad sound |
from a specific |
register your |
|
|
voice for |
as karaoke |
such as |
for interviews or |
band. For |
direction, such |
own settings |
|
Setting Item (page) |
pronunciation |
|
musical |
meetings etc. |
recording |
as in classroom |
|
|
practice etc. |
|
performances |
|
meetings etc. |
lectures etc. |
|
||
Recording mode (20) |
MP3: 192 kbps |
MP3: 320 kbps |
PCM: 48 kHz |
MP3: 64 kbps |
MP3: 192 kbps |
MP3: 192 kbps |
MP3: 192 kbps |
|
Microphone sensitivity (21) |
HIGH |
HIGH |
HIGH |
HIGH |
HIGH |
HIGH |
HIGH |
|
Recording level (22) |
AUTO |
MANUAL |
MANUAL |
AUTO |
AUTO |
AUTO |
AUTO |
|
Low cut filter (21) |
ON |
OFF |
OFF |
ON |
ON |
ON |
OFF |
|
Recording peak limiter (23) |
OFF |
ON |
OFF |
OFF |
OFF |
OFF |
OFF |
|
Self timer recording (25) |
OFF |
OFF |
OFF |
OFF |
OFF |
OFF |
OFF |
|
VAS setting (26) |
OFF |
OFF |
OFF |
OFF |
OFF |
OFF |
OFF |
|
Past Recording Settings (27) |
OFF |
OFF |
OFF |
OFF |
OFF |
OFF |
OFF |
18
Changing recording scene settings
The setting details of each recording scene can be changed according to preference.
• Press [g STOP/RETURN] to stop the unit.
1Press [F1 (SCENE)].
2Press u, i to select the recording scene and press [q OK] to enter.
3Press +, – to select “CHANGE SETTING” and press [q OK] to enter.
4Press +, – to select the item you want to change and press [q OK] to enter.
5Press +, – to select the setting and press
[q OK] to enter.
Repeat steps 4 and 5 to change other items.
6When you have completed the settings, press +, – to select “OK” and press
[q OK] to enter.
ENGLISH
To select the changed recording scene, select “LOAD” ( page 18).
To exit the setting screen, press [F2 (CLOSE)].
Initializing recording scene settings
Returns individual recording scenes whose settings have been changed to the factory settings.
• Press [g STOP/RETURN] to stop the unit.
1 |
Press [F1 (SCENE)]. |
|
2 |
Press u, i to select the recording scene |
|
|
you want to initialize and press [q OK] to |
|
3 |
enter. |
|
Press +, – to select |
|
|
|
“INITIALIZE” and press |
|
|
[q OK] to enter. |
|
4 |
Press +, – to select “YES” and press [q OK] |
|
|
to enter. |
|
|
The selected recording scene setting is returned to the |
|
|
factory setting. |
|
|
To select the initialized recording scene, select “LOAD” |
VQT3T14 |
|
( page 18) |
|
|
|
To exit the setting screen, press [F2 (CLOSE)].
19
19
Selecting recording mode
You can change the sound quality. This allows you to provide the best sound quality for the particular purpose.
• Press [g STOP/RETURN] to stop the unit.
1Press [MENU].
2Press +, – to select “MIC REC MENU” and press [q OK] to enter.
3Press +, – to select “MIC REC MODE” and press [q OK] to enter.
4Press +, – to select the setting (PCM sampling frequency/MP3 bitrate) and press [q OK] to enter.
(The factory setting is “MP3 192kbps”.)
To exit the setting screen, press [F2 (CLOSE)].
g STOP/RETURN
F2
VQT3T14
20
The selected recording mode

 is displayed.
MENU
* Depending on the recording mode setting, the sound quality and remaining recording time ( page 79) will differ.
High quality
recording Long recording
Recording |
PCM |
PCM |
MP3 |
MP3 |
MP3 |
MP3 |
MP3 |
format |
48 kHz |
44.1 kHz |
320 kbps |
192 kbps |
128 kbps |
64 kbps |
32 kbps |
* When the recording mode is set to “MP3 32kbps”, the recording becomes monaural.
20
Switching microphone sensitivity
Switch the microphone sensitivity according to the volume of the sound source. When the sound source volume is loud, set the sensitivity to “LOW”. When it is low, set the sensitivity to “HIGH”.
• Press [g STOP/RETURN] to stop the unit.
1Press [MENU].
2Press +, – to select “MIC REC MENU” and press [q OK] to enter.
3Press +, – to select “MIC SENS.” and press [q OK] to enter.
4Press +, – to select “HIGH” or “LOW” and press [q OK] to enter.
(The factory setting is “HIGH”.)
To exit the setting screen, press [F2 (CLOSE)].
Reducing noise (LOW CUT FILTER) ENGLISH
Sound of low frequency range is reduced during microphone recording. This is effective when reducing noise of air conditioning equipment, etc. while recording at a meeting, etc.
• Press [g STOP/RETURN] to stop the unit.
1Press [MENU].
2Press +, – to select “MIC REC MENU” and press [q OK] to enter.
3Press +, – to select “LOW CUT FILTER” and press [q OK] to enter.
4Press +, – to select “ON” and press [q OK] to enter.
(The factory setting is “OFF”.)
To exit the setting screen, press [F2 (CLOSE)].
When the microphone sensitivity is 

 High or Low, “
  ” or “
  ” is displayed
respectively.
“ ” is displayed.
VQT3T14
21
21

Setting the recording level manually
The recording level can be adjusted automatically or manually on this unit. When the recording level adjustment is AUTO, the sound distortion is reduced by adjusting the recording level automatically. To record the original sound volume level faithfully such as an instrument playing and nature sound, set the recording level adjustment to MANUAL. (The factory setting is “AUTO”.)
Setting the recording level adjustment to MANUAL
• Press [g STOP/RETURN] to stop the unit.
1Press [MENU].
2Press +, – to select “MIC REC MENU” and press [q OK] to enter.
3Press +, – to select “REC LEVEL ADJ.” and press [q OK] to enter.
4Press +, – to select “MANUAL” and press [q OK] to enter.
To exit the setting screen, press [F2 (CLOSE)].
VQT3T14 |
displayed. |
|
The recording level is |
22
Adjusting the recording level manually
•Set the recording level adjustment to MANUAL beforehand. (When the recording level adjustment is AUTO, the unit does not enter the recording standby.)
1Press and hold [* REC] for 1 second or more.
The unit enters the recording standby.
2Aim the microphone at the sound source to record.
3Press u, i to adjust the recording level ( page 23).
Adjustment range is 0 to 30. (The factory setting is “15”.)
Pressing [* REC] starts recording.
g STOP/RETURN
F2
* REC
MENU
22
OVER indication
Level meter 
 Recording level
*If the level meter swings and “ ” is displayed, this means the recording level is too high. Adjust the level
within the “ ” range even if the recording sound reaches the highest level.
*The input level (volume input to this unit) for recording is combination of the recording level and microphone sensitivity.
The input level image is as below.
ENGLISH
Setting the recording peak limiter to ON
Even if the recording level adjustment is MANUAL, when the excessive volume is input, the recording level is automatically adjusted and the sound distortion is reduced.
• Press [g STOP/RETURN] to stop the unit.
1Press [MENU].
2Press +, – to select “MIC REC MENU” and press [q OK] to enter.
3Press +, – to select “PEAK LIMITER” and press [q OK] to enter.
4Press +, – to select “ON” and press [q OK] to enter.
(The factory setting is “OFF”.)
Recording |
1 |
30 1 |
30 |
||
level |
|||||
|
|
|
|
|
|
MIC SENS. |
|
LOW |
|
HIGH |
|
*No sound is recorded at the recording level 0.
*The recording level can also be adjusted during recording or while recording is paused.
*When [MENU] is pressed during recording standby, the microphone sensitivity ( page 21), “LOW CUT FILTER” ( page 21) and recording EQ ( page 24) can be set.
To exit the setting screen, press [F2 (CLOSE)].
*When the recording level adjustment is AUTO, the recording peak limiter function will be activated regardless of the above setting.
*If the level meter swings, “ ” is displayed regardless of the recording peak limiter setting.
VQT3T14
23
23
Setting the recording EQ
Using the recording EQ enables you to set bass, middle and treble range of recording level according to your preferred settings for recording.
The recording EQ includes 7 types of fixed mode and the “USER” mode with which you can set the recording level according to each frequency band.
VQT3T14
24
•Set the recording level adjustment to MANUAL beforehand. ( page 22) (When the recording level adjustment is AUTO, the unit does not enter the recording standby.)
1Press and hold [* REC] for 1 second or more.
The unit enters the recording standby.
2Press [MENU].
3Press +, – to select “REC EQ” and press [q OK] to enter.
4Press +, – to select the recording EQ mode.
Press [F1 (CONFIRM)] to confirm the details. Press [F1] again to return to the previous screen.
When you select modes other than “USER”, go to step
5 .
Setting when selecting “USER”:
1After step 4 , press [F1 (EDIT)]
150 Hz band is selected.
2Press u, i to select the frequency band to change, and press +, – to adjust the recording level (±12 dB).
3When the settings for the frequency band to change are all complete, go to step 5 .
5 Press [q OK] to enter.
To exit the setting screen, press [F2 (CLOSE)].
The EQ mode name is not displayed after exiting the setting screen.
Pressing [* REC] starts recording.
EQ mode |
Effect and application |
|
FLAT |
This (basic) mode does not emphasise a |
|
specific sound range. |
||
|
||
EXTRA BASS |
Emphasise the bass range strongly. |
|
|
|
|
BASS |
Emphasise the bass range slightly. |
|
MIDDLE |
Emphasise the middle range. |
|
BASS&TREBLE |
Emphasise the bass and treble ranges slightly. |
|
TREBLE |
Emphasise the treble range slightly. |
|
EXTRA TREBLE |
Emphasise the treble range strongly. |
|
|
This mode enables adjustment of |
|
USER |
frequency bands of 150 Hz, 500 Hz, |
|
|
1 kHz, 4 kHz and 12 kHz. |
(The factory setting is “FLAT”.)
*When the recording level adjustment is AUTO, the recording EQ does not function.
24
gSTOP/RETURN F1 F2
*REC
MENU
Self timer
You can select your preferred time period from when [* REC] is pressed until when the recording starts. This function is very useful where you need time for preparation before recording should start – for example in musical instrument practice.
• Press [g STOP/RETURN] to stop the unit.
1Press [MENU].
2Press +, – to select “MIC REC MENU” and press [q OK] to enter.
3Press +, – to select “SELF TIMER” and press [q OK] to enter.
4Press +, – to select the time and press [q OK] to enter.
(The factory setting is “OFF”.)
To exit the setting screen, press [F2 (CLOSE)].
*When [* REC] is pressed, countdown starts. Then, recording starts after the set time. The recording indicator blinks during countdown.
*Once the self timer is set, the setting is preserved until the self timer setting is set to OFF or the settings of this unit are initialized. ( page 54)
*Pressing [* REC] during countdown starts recording immediately.
*If you press [g STOP/RETURN] during countdown, the self timer recording can be stopped.
ENGLISH
VQT3T14
25
25
Preventing unnecessary recording (VAS)
When VAS (Voice Activated System) is set, if silence continues for approx. 2 seconds during microphone recording, the recording is paused automatically. If the unit detects sound, the recording resumes.
•Set the recording level adjustment to AUTO beforehand. ( page 22)
•Press [g STOP/RETURN] to stop the unit.
1Press [MENU].
2Press +, – to select “MIC REC MENU” and press [q OK] to enter.
3Press +, – to select “VAS” and press [q OK] to enter.
4Press +, – to select “ON” and press [q OK] to enter.
(The factory setting is “OFF”.)
To exit the setting screen, press [F2 (CLOSE)].
“ ” is displayed.
To start VAS recording, press [* REC].
Adjusting the VAS operation level:
Press u, i during VAS recording.
(The factory setting is “3”.)
*You can adjust the sound detection level from 1 to 5.
*If the audio to record is low, increase the VAS value (sensitivity level). If the sound is loud, decrease the VAS value.
|
|
* When the recording level adjustment is MANUAL ( page 22), even if the VAS setting is set to ON, |
|||
|
|
the setting does not change to the VAS recording. |
|
|
|
VQT3T14 |
* For important recording, set the VAS setting to OFF. |
” blinks. When [* REC] is pressed from this |
|||
* If the recording is paused with no sound state, “ |
|||||
|
|
* If the “LOW CUT FILTER” setting is “ON”, low frequency sound may be cut out and VAS recording |
|||
|
|
may not activate. In this case, change the “LOW CUT FILTER” setting to “OFF”. ( page 21) |
|||
|
|
recording pause state, the status is changed to normal recording pause state and “ |
” lights up. |
||
26 |
|
||||
|
While “ |
” is blinking, the “AUTO POWER OFF” ( page 52) function does not operate. |
|||
|
|
|
|
|
|
g STOP/RETURN
F2
* REC
MENU
26
Past recording function (PRE-RECORD)
If you start recording from the standby state of the past recording function, recording can be started with the audio approx. 5 seconds before the recording operation.
To set the past recording to ON:
• Press [g STOP/RETURN] to stop the unit.
1 Press [MENU].
2 Press +, – to select “MIC REC MENU” and press [q OK] to enter.
3 Press +, – to select “PRE-RECORD” and press [q OK] to enter.
4 Press +, – to select “ON” and press [q OK] to enter.
(The factory setting is “OFF”.)
To exit the setting screen, press [F2 (CLOSE)].
To record using the past recording function:
When recording mode is PCM, the past recording function does not operate.
• Set the recording mode to MP3. ( page 20)
• Press [g STOP/RETURN] to stop the unit.
ENGLISH
VQT3T14
27
27
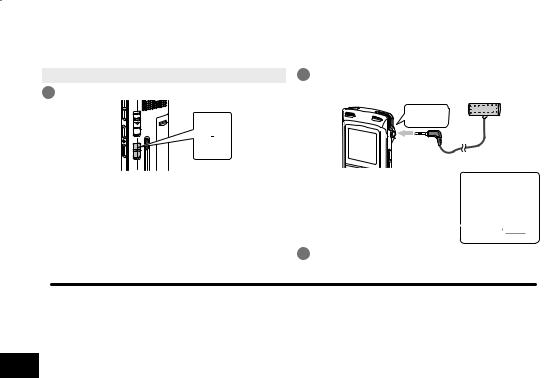
Recording by connecting an external microphone
Use this setting when recording by connecting an external microphone to the external microphone/Line-in jack of this unit.
• Press [g STOP/RETURN] to stop the unit.
1 Slide the Line/Mic switch to [MIC].
 LINE MIC
2 Connect the external microphone.
External microphone (not supplied) 
Insert securely.
Plug type:
 ø 3.5 mm stereo mini plug
“ ” is displayed.


VQT3T14
28
3 Press [* REC] to start recording.
See page 13 for recording operations.
*Read the operating instructions for the connected device.
*If the recording level is too low or high, adjust the microphone sensitivity. ( page 21)
*The built-in microphone of this unit does not work if another device is connected to the external microphone/Line-in jack.
*If the connected external microphone is monaural, the sound for one channel may only be recorded.
28
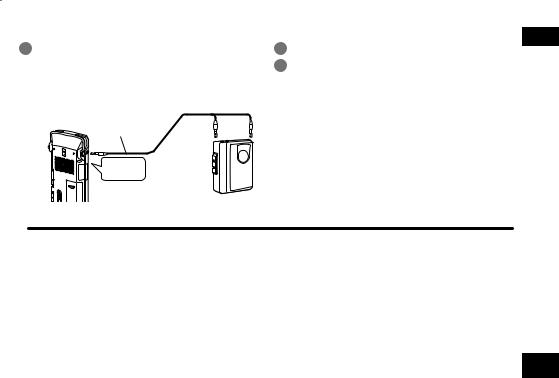
Copying to other devices
1Connect the headphone/earphone jack
( ) of this unit with the audio input (mic) terminal of the external device with an audio cable.
Audio Cable with resistor  (not supplied)
Insert securely.
Plug type:
ø 3.5 mm stereo mini plug
Stereo Monaural mini plug mini plug
To audio input (mic) terminal
External device
ENGLISH
2Start recording on the external device.
3Play the file that you want to copy on this unit.
*Read the operating instructions for the connected device.
*Use the connection cable that matches monaural/stereo of the connected device. Wrong connection may cause recording trouble (i.e. Only 1 channel is copied.).
*The copied sound quality may differ from the sound quality of this unit.
*Adjust the volume on this unit to copy with a proper volume.
VQT3T14
29
29

VQT3T14
30
Recording from other devices
This is the method to record to the “L” folder by connecting an external device to the external microphone/ Line-in jack of this unit.
• Press [g STOP/RETURN] to stop the unit. |
7 Connect the external device |
|
||
1 |
Slide the Line/Mic switch |
Audio Cable without resistor |
|
Audio device |
(not supplied) |
|
|||
|
to [LINE]. |
|
|
|
|
MIC |
|
To audio output |
To LINE OUT |
|
LINE |
Insert |
||
|
(headphone) |
(audio out) |
||
|
securely. |
|||
|
|
terminal |
terminal |
|
|
|
|
||
|
|
Plug type: |
|
L R |
2 |
Press [MENU]. |
|
|
|
ø 3.5 mm stereo |
|
|
||
3 |
Press +, – to select “LINE REC” and press |
mini plug |
|
|
|
|
|
||
4 |
[q OK] to enter. |
|
|
|
Press +, – to select “LINE INPUT” and press |
Connect with the external device and slide the Line/ |
|||
|
[q OK] to enter. |
Mic switch to “LINE”. Then, the selected line input |
||
5 |
Press +, – to select the |
setting and the line recording mode will appear. |
||
( page 32) |
|
|
||
|
setting and press [q OK] |
|
|
|
|
|
|
|
|
to enter. |
Line input setting |
|
: HIGH |
||
|
When connecting to the headphone terminal of external device, the line output terminal of portable device or the line output terminal of component stereo, select “HIGH”, “MEDIUM” or “LOW” respectively.
(The factory setting is “HIGH”.)
6 Press [F2 (CLOSE)].


 : MEDIUM


 : LOW
: LOW
30
 Loading...