


Operating and Installation Instructions Freezer with Ice Maker
To prevent accidents and appliance damage read these instructions before installation or use.
en - US, CA |
M.-Nr. 09 920 590 |

Contents
IMPORTANT SAFETY INSTRUCTIONS. . . . . . . . . . . . . . . . . . . . . . . . . . . . . . . . . 4
Guide to the freezer . . . . . . . . . . . . . . . . . . . . . . . . . . . . . . . . . . . . . . . . . . . . . . . . 8
Before use . . . . . . . . . . . . . . . . . . . . . . . . . . . . . . . . . . . . . . . . . . . . . . . . . . . . . . 10 Turning the appliance On/Off . . . . . . . . . . . . . . . . . . . . . . . . . . . . . . . . . . . . . . . . 10
Settings. . . . . . . . . . . . . . . . . . . . . . . . . . . . . . . . . . . . . . . . . . . . . . . . . . . . . . . . . 11 Using the settings . . . . . . . . . . . . . . . . . . . . . . . . . . . . . . . . . . . . . . . . . . . . . . . . . 11 Additional settings . . . . . . . . . . . . . . . . . . . . . . . . . . . . . . . . . . . . . . . . . . . . . . . . . 11 Turning the button sound On/Off . . . . . . . . . . . . . . . . . . . . . . . . . . . . . . . . . . . . . . 12 Turning off for longer periods of time . . . . . . . . . . . . . . . . . . . . . . . . . . . . . . . . . . 13
Temperature and door alarm . . . . . . . . . . . . . . . . . . . . . . . . . . . . . . . . . . . . . . . 14 Temperature alarm . . . . . . . . . . . . . . . . . . . . . . . . . . . . . . . . . . . . . . . . . . . . . . . . 14 Door alarm . . . . . . . . . . . . . . . . . . . . . . . . . . . . . . . . . . . . . . . . . . . . . . . . . . . . . . . 14
Setting the temperature. . . . . . . . . . . . . . . . . . . . . . . . . . . . . . . . . . . . . . . . . . . . 15
Using the freezer efficiently . . . . . . . . . . . . . . . . . . . . . . . . . . . . . . . . . . . . . . . . 17 Freezing food . . . . . . . . . . . . . . . . . . . . . . . . . . . . . . . . . . . . . . . . . . . . . . . . . . . . . 17 Defrosting . . . . . . . . . . . . . . . . . . . . . . . . . . . . . . . . . . . . . . . . . . . . . . . . . . . . . . . 18 Cooling drinks quickly . . . . . . . . . . . . . . . . . . . . . . . . . . . . . . . . . . . . . . . . . . . . . . 18
SuperCool. . . . . . . . . . . . . . . . . . . . . . . . . . . . . . . . . . . . . . . . . . . . . . . . . . . . . . . 20
Ice cube maker . . . . . . . . . . . . . . . . . . . . . . . . . . . . . . . . . . . . . . . . . . . . . . . . . . . 21
Automatic defrost . . . . . . . . . . . . . . . . . . . . . . . . . . . . . . . . . . . . . . . . . . . . . . . . 22
Adjusting the interior fittings . . . . . . . . . . . . . . . . . . . . . . . . . . . . . . . . . . . . . . . 23 Moving the shelves . . . . . . . . . . . . . . . . . . . . . . . . . . . . . . . . . . . . . . . . . . . . . . . . 23 Freezer baskets . . . . . . . . . . . . . . . . . . . . . . . . . . . . . . . . . . . . . . . . . . . . . . . . . . . 23 Ice cube container. . . . . . . . . . . . . . . . . . . . . . . . . . . . . . . . . . . . . . . . . . . . . . . . . 24
Cleaning and care . . . . . . . . . . . . . . . . . . . . . . . . . . . . . . . . . . . . . . . . . . . . . . . . 25 Cleaning the interior and accessories . . . . . . . . . . . . . . . . . . . . . . . . . . . . . . . . . . 26 Ventilation slits . . . . . . . . . . . . . . . . . . . . . . . . . . . . . . . . . . . . . . . . . . . . . . . . . . . . 27 Door seals . . . . . . . . . . . . . . . . . . . . . . . . . . . . . . . . . . . . . . . . . . . . . . . . . . . . . . . 27 Changing the light bulb . . . . . . . . . . . . . . . . . . . . . . . . . . . . . . . . . . . . . . . . . . . . . 28
Water filter . . . . . . . . . . . . . . . . . . . . . . . . . . . . . . . . . . . . . . . . . . . . . . . . . . . . . . 30 Water filter change indicator . . . . . . . . . . . . . . . . . . . . . . . . . . . . . . . . . . . . . . . . . 30 Exchanging the water filter . . . . . . . . . . . . . . . . . . . . . . . . . . . . . . . . . . . . . . . . . . 31 Confirming the filter change . . . . . . . . . . . . . . . . . . . . . . . . . . . . . . . . . . . . . . . . . 32 Using an external water filter . . . . . . . . . . . . . . . . . . . . . . . . . . . . . . . . . . . . . . . . . 32
Lead free certificate . . . . . . . . . . . . . . . . . . . . . . . . . . . . . . . . . . . . . . . . . . . . . . . 35
Frequently asked questions . . . . . . . . . . . . . . . . . . . . . . . . . . . . . . . . . . . . . . . . 36
After sales service . . . . . . . . . . . . . . . . . . . . . . . . . . . . . . . . . . . . . . . . . . . . . . . . 42
2

Contents
Caring for the environment . . . . . . . . . . . . . . . . . . . . . . . . . . . . . . . . . . . . . . . . . 44
Installation . . . . . . . . . . . . . . . . . . . . . . . . . . . . . . . . . . . . . . . . . . . . . . . . . . . . . . 45 Climate Range . . . . . . . . . . . . . . . . . . . . . . . . . . . . . . . . . . . . . . . . . . . . . . . . . . . . 45 Installation site . . . . . . . . . . . . . . . . . . . . . . . . . . . . . . . . . . . . . . . . . . . . . . . . . . . . 45 Stainless steel panels . . . . . . . . . . . . . . . . . . . . . . . . . . . . . . . . . . . . . . . . . . . . . . 48 Custom door panels . . . . . . . . . . . . . . . . . . . . . . . . . . . . . . . . . . . . . . . . . . . . . . . 48 Installation options . . . . . . . . . . . . . . . . . . . . . . . . . . . . . . . . . . . . . . . . . . . . . . . . . 48
Dimensions. . . . . . . . . . . . . . . . . . . . . . . . . . . . . . . . . . . . . . . . . . . . . . . . . . . . . . 50
Installing the appliance . . . . . . . . . . . . . . . . . . . . . . . . . . . . . . . . . . . . . . . . . . . . 54 Before you begin . . . . . . . . . . . . . . . . . . . . . . . . . . . . . . . . . . . . . . . . . . . . . . . . . . 54 RemoteVision module installation . . . . . . . . . . . . . . . . . . . . . . . . . . . . . . . . . . . . . 56 Preparing the installation niche . . . . . . . . . . . . . . . . . . . . . . . . . . . . . . . . . . . . . . . 57 Sliding the appliance into the niche . . . . . . . . . . . . . . . . . . . . . . . . . . . . . . . . . . . 61 Aligning the appliance . . . . . . . . . . . . . . . . . . . . . . . . . . . . . . . . . . . . . . . . . . . . . . 62 Attaching the appliance to the installation niche . . . . . . . . . . . . . . . . . . . . . . . . . . 63 Preparing the custom door . . . . . . . . . . . . . . . . . . . . . . . . . . . . . . . . . . . . . . . . . . 65 Attaching and aligning the custom door front . . . . . . . . . . . . . . . . . . . . . . . . . . . . 67
Plumbing. . . . . . . . . . . . . . . . . . . . . . . . . . . . . . . . . . . . . . . . . . . . . . . . . . . . . . . . 71
Electrical connection . . . . . . . . . . . . . . . . . . . . . . . . . . . . . . . . . . . . . . . . . . . . . . 74
RemoteVision (optional accessory) . . . . . . . . . . . . . . . . . . . . . . . . . . . . . . . . . . 75
Contact details . . . . . . . . . . . . . . . . . . . . . . . . . . . . . . . . . . . . . . . . . . . . . . . . . . 79
3
IMPORTANT SAFETY INSTRUCTIONS
When using the appliance, follow basic safety precautions, including the following:
Read all instructions before installation and use to prevent accidents and machine damage.
This appliance is intended for residential use only. Use only as described in this Operating manual.
Only use the appliance for its intended purpose.
This appliance complies with current safety requirements. Improper use of the appliance can lead to personal injury and material damage.
Keep these operating instructions in a safe place and pass them on to any future user.
Electrical Safety
Before installation, make sure that the voltage and frequency listed on the data plate correspond with the household electrical supply. This data must correspond to prevent injury and machine damage. Consult a qualified electrician if in doubt.
Before installation or service, disconnect the power supply to the work area by unplugging the unit, "tripping" the circuit breaker or removing the fuse.
Do not use an extension cord to connect this appliance to electricity. Extension cords do not guarantee the required safety of the appliance (e.g., danger of overheating).
Be certain your appliance is properly installed and grounded by a qualified technician. To guarantee the electrical safety of this appliance continuity must exist between the appliance and an effective grounding system. It is imperative that this basic safety requirement be met. If there is any doubt, have the electrical system of the house checked by a qualified electrician.
Only connect power to the appliance when all installation and plumbing work is complete.
4

IMPORTANT SAFETY INSTRUCTIONS
Installation
This appliance is top-heavy and must be secured to prevent the possibility of tipping forward.
Keep the door closed until the appliance is completely installed and secured per installation instructions.
This appliance must be installed and connected in compliance with the installation instructions.
Installation and repair work should be performed by a Miele authorized service technician. Work by unqualified persons could be dangerous and may void the warranty.
Installation must comply with local plumbing regulations and state laws.
Do not operate any appliance with a damaged cord or plug, or if the appliance has been damaged in any manner. Contact Miele’s Technical Service Department.
This appliance must not be used in a non-stationary location (e.g. on a ship).
Do not install the freezer in a room with too low an ambient temperature, e.g., a garage, as this may lead to the appliance switching off for longer periods so that it cannot maintain the required temperature.
In appliances with an automatic ice maker, avoid contact with the moving parts of the ejector mechanism, or with the heating element located on the bottom of the ice maker. Do not place fingers or hands on the automatic ice making mechanism while the freezer is plugged in.
The ice cube maker is not suitable for connection to a hot water supply.
Do not use water that is microbiologically or chemically unsafe or of unknown quality without adequate disinfection or other treatment before or after the filter is used; the filter alone is not an adequate safeguard.
Use
This appliance is not designed for commercial use. It is intended for use in domestic households and in similar working and residential environments such as:
–shops, offices and similar work environments
–by customers in hotels, motels, Bed & Breakfasts or similar residential environments.
This appliance is not intended for outdoor use.
The appliance is only intended for residential use to store frozen foods, freeze fresh foods and prepare ice.
All other uses are prohibited and may be dangerous.
5

IMPORTANT SAFETY INSTRUCTIONS
Persons who lack physical, sensory or mental abilities, or experience with the machine should not use it without supervision or instruction by a responsible person.
To reduce the risk of injury, do not allow children to play in, on or near the appliance, especially in the door hinge area.
After your freezer is in operation, do not touch the cold surfaces in the freezer compartment, particularly when hands are damp or wet. Skin may adhere to these extremely cold surfaces.
Do not refreeze frozen foods which have thawed completely.
Do not store or use gasoline or other flammable vapors and liquids in the vicinity of this or any other appliance.
Do not deactivate the water filter display.
Do not use sharp-edged objects to remove frost and ice, or separate frozen foods and remove ice trays. They will damage the evaporator, causing irreversible damage to the appliance.
Do not use defrosting sprays or de-icers, as they might contain substances which could damage the plastic parts or which could cause a build-up of gases and pose a danger to health.
Do not use any oils or grease on the door seal, as these will cause the seal to deteriorate and become porous with time.
Do not block the ventilation gaps in the plinth or the top of the appliance housing unit, as this can impair the efficiency of the appliance, increase the electricity consumption and cause damage to the appliance.
Never use a steam cleaner to clean the appliance. Pressurized steam could damage electrical components and cause a short circuit.
The following applies to stainless steel appliances:
Do not use sticky notes, transparent adhesive tape, masking tape or other types of adhesive on the coated surface of the appliance door. These will damage the surface, causing it to lose its soil resistant protective coating.
The high-quality surface coating of the appliance door is susceptible to scratches. Even a magnet can cause damage.
6

IMPORTANT SAFETY INSTRUCTIONS
Disposal of your old appliance
Before disposing of an old appliance, first make the door latch or lock unusable.
Take off the door.
Leave the shelves in place so that children may not easily climb inside.
Consult with your municipal policy on recycling.
Be careful not to damage any part of the pipework while awaiting disposal by:
- puncturing the refrigerant channels in the evaporator.
- bending any pipework.
- scratching the surface coating. Splashes of refrigerant can damage the eyes.
Your old freezer may have a cooling system that used CFCs (chlorofluorocarbons). CFCs are believed to harm stratospheric ozone.
If you intentionally release this CFC refrigerant, you can be subject to fines and imprisonment under provisions of environmental legislation. Make sure the CFC refrigerant is removed and disposed of by a qualified technician.
SAVE THESE
INSTRUCTIONS
7

Guide to the freezer
Door shelves (height adjustable)
Shelves (height adjustable)
Ice cube maker
Ice cube container
Control panel
Main switch to turn the appliance On/Off
Freezer baskets
Water filter
8
Guide to the freezer
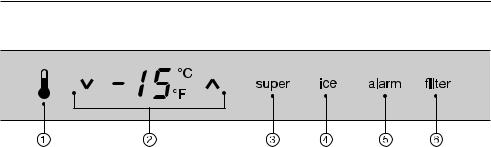
Control panel
Access button " "
Temperature displaycolder; warmer
Allows you to set the desired temperature in the freezer
On/Off sensor button for the SuperCool function
On/Off sensor button for the ice cube maker
Sensor button for the temperature and door alarm*
Water filter change indicator*
*Only visible when the relevant function is activated
9
Before use
Before using for the first time
Clean the inside of the appliance and the accessories with a mild solution of warm water and liquid dish soap. Dry with a soft cloth.
If the appliance was transported to the installation site horizontally, leave the appliance standing upright for approx. 8 hours before connecting it to the electrical supply. This is very important to ensure correct functioning.
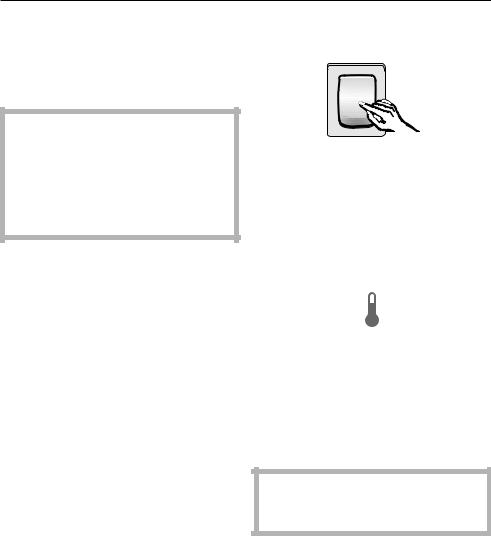
Turning the appliance On/Off
Open the appliance door.
Turn the appliance On/Off with the main switch.
The main switch is located on the right-side underneath the control panel.
Once on, the appliance begins cooling. When the door is open, the interior lights come on.
The access button will light in the control panel.
The preset temperatures (factory default settings) are reached after a few hours. Do not put any food in the appliance until the preset temperatures are reached.
Turning off the appliance with the main switch does not safely isolate it from the power supply.
10
Settings
Using the settings
This appliance is operated with the use of touch keys activated by a finger.
–An available button will appear white.
–A selected button will appear yellow.
Touch the access button " " so it turns yellow.
On the control panel you will see additional sensor buttons to operate the appliance.
These buttons allow you to:
–adjust the temperature,
–select the SuperCool function, or
–turn the ice maker On/Off.
For additional information, see the corresponding sections in this manual.
To leave the settings menu, touch the access button " " so it turns white. The last settings entered are stored. If the access button is not pressed the display will go out after approx. 30 secs.
The other sensor buttons now disappear from the control panel.
Additional settings
In the settings mode you can select and change functions.
In settings mode, certain settings can be changed. The function possibilities are described in the respective chapters of this manual.
Overview of the selectable function settings:
Function |
Display text |
|
|
To enter and exit the |
c |
Settings mode |
|
|
|
Temperature unit |
† |
°C - °F |
|
(see "Setting the |
|
temperature") |
|
|
|
RemoteVision |
|
Module settings |
|
(optional accessory) |
|
|
|
Button sound on/off |
|
(see "Settings") |
|
|
|
No function |
^ |
|
|
11
Settings
Turning the button sound On/Off
If you prefer the buttons to be silent when touched the button sound can be turned off.
Touch the access button " " so it turns yellow.
Note the position of the button, but do not touch.
Touch the access button " " again so it turns white.
Only the access button " " is visible.
Place one finger on the position of the button and hold (the button will not be visible).
While holding down the button, press the access button " " once. Keep holding the button down until the following appears in the display (approx. 5 seconds).
Tap the button until appears in the display.
Touch the access button " " to confirm.
By touching the button, you can choose between:
0 : Button sound is off
1 : Button sound is on
– : Return to menu.
Touch the access button " " to confirm the setting.
Tap the button until you see in the display.
Touch the access button " ".
You have now left the Custom settings mode.
When you are in the Custom settings mode the door alarm is turned off automatically. Once the door is closed it is reactivated.
12

Settings
Turning off for longer periods of time
If the appliance is not going to be used for an extended time (for example, during a vacation) some precautions need to be taken:
Shut off the water supply line, (several hours before switching off the appliance)
Take all food out of the appliance
Turn the appliance off
Unplug the appliance
Empty the ice cube container
Clean the interior
Remove and discard the water filter (secure the filter cap)
Leave the door open to prevent odors
13
Temperature and door alarm
The appliance is equipped with an alarm system, to ensure that the temperature does not rise unnoticed because of energy loss or an open door.
The alarm system is always operational, it does not need to be switched on.
Turning the temperature alarm Off
As soon as the alarm condition is corrected, the alarm signal turns off and the affected zone stops flashing in the display. The "alarm" indicator goes out.
Temperature alarm
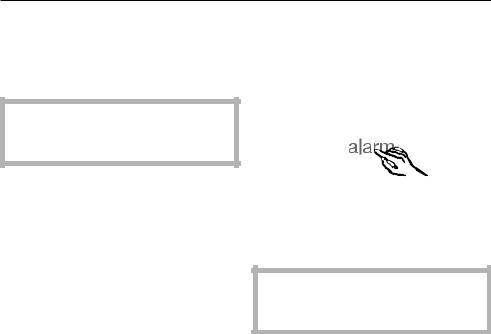
If the temperature becomes too warm, an alarm sounds and the "alarm" indicator turns red and flashes and the temperature flashes in the control panel.
The temperature display shows the highest temperature reached during the alarm.
The alarm will sound and the display will flash if:
–too much warm air flows into the appliance, for example when food is being loaded, re-arranged, or taken out.
–large amounts of food are being frozen at once.
–the power fails.
As soon as the alarm condition is corrected the alarm with turn off and the sensor button for alarm will go out.
To turn the alarm off early, press the "alarm" sensor button.
The alarm signal turns off. The "alarm" indicator remains on until the alarm condition is corrected.
If the temperature in the freezer zone reaches 0°F (-18°C) or higher, check that food has not defrosted.
Door alarm
If the appliance door is left open, an alarm signal will sound and the "alarm" indicator will turn red after five minutes.
Once the door is closed the alarm will turn off and the "alarm" indicator will go out.
Turning the door alarm Off
To turn the alarm off early:
The "alarm" indicator and signal will turn off.
The alarm will turn off and the "alarm" indicator will go out.
14
Setting the temperature
Setting the temperature
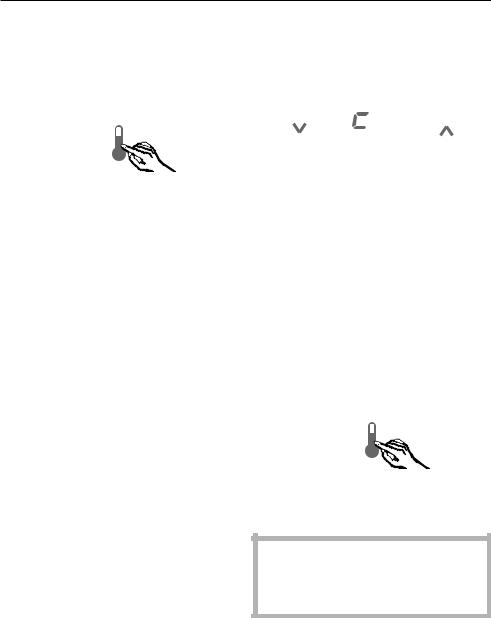
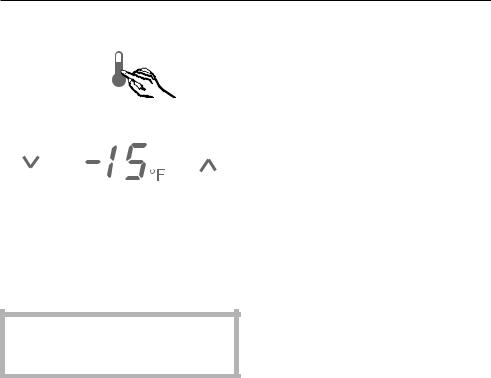
Touch the access button " " so it turns yellow.
Use the and buttons next to the temperature display to set the temperature warmer or colder.
Tap the and sensor buttons to raise/lower the temperature 1°, or hold it down to move through the temperature range more quickly.
The temperature display on the control panel always shows the desired temperature.
Temperature range
The temperature can be set within the following range:
7°F to -11°F (-14°C to -24°C).
To freeze fresh food and store frozen food for an extended period of time, a temperature of 0°F (-18°C) is suggested.
The room temperature and the installation location can affect the time it takes for the appliance to drop to the coldest temperature. If the room temperature is too high, it may not be possible for the appliance to reach the lowest temperature.
15
Setting the temperature
Temperature unit (Fahrenheit/Celsius)
The temperature can be displayed in degrees Fahrenheit (°F) or Celsius (°C).
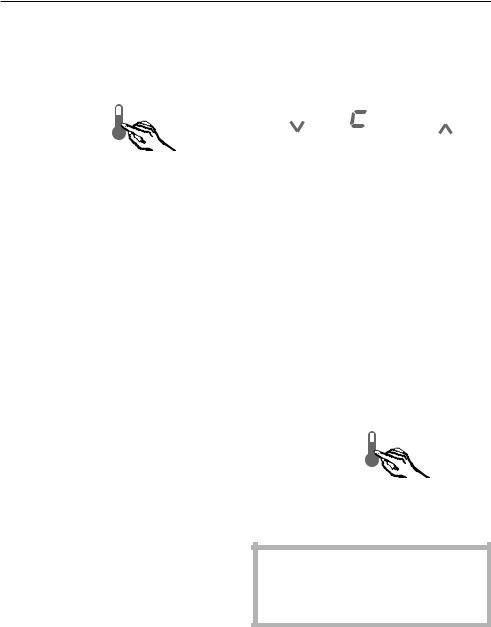
Touch the access button " " so it turns yellow.
Note the position of the button, but do not touch.
Touch the access button " " again so it turns white.
Only the access button " " is visible.
Place one finger on the position of the button and hold (the button will not be visible).
While holding down the button, press the access button " " once. Keep holding the button down until the following appears in the display (approx. 5 seconds).
Tap the button until † appears in the display.
Touch the access button " " to confirm.
By touching the button you can select either Fahrenheit or Celsius for the temperature display.
†0: Fahrenheit
†1: Celsius
†–: return to menu.
Touch the access button " " to confirm the setting.
Tap the button until a appears in the display.
Touch the access button " ".
You have left the Custom settings mode.
When you are in the Custom settings mode the door alarm is turned off automatically. Once the door is closed it is reactivated.
16

Using the freezer efficiently
Freezing food
Fresh food should be frozen as quickly as possible. This helps maintain the nutritional value, vitamin content, appearance and taste of the food.
Never refreeze partially or fully defrosted food. Consume defrosted food as soon as possible, it will lose its nutritional value and spoil if left for too long. Do not refreeze defrosted food unless it has been cooked.
Before placing food in the freezer
When you are planning to freeze large amounts of food (more than 4 ½ lbs [2 kg]), switch on the SuperCool function ahead of time (see "SuperCool").
This will provide the food already in the freezer with a protective boost of cold air.
Placing food in the freezer
Food to be frozen can be placed anywhere in the freezer.
The freezer baskets can hold a maximum of 35 lbs (16 kg) of frozen food.
Spread the food to be frozen across the bottom of the freezer basket or across the shelves, so that it will freeze through to the core as quickly as possible.
When placing items in the freezer, make sure the packaging and containers are dry, to keep them from sticking together when frozen.
When freezing, try not to let frozen food come into contact with unfrozen food, this could cause the frozen food to defrost.
17

Using the freezer efficiently
Defrosting
Frozen food can be defrosted in different ways:
–in a microwave oven,
–at room temperature,
–in the refrigerator (the cold given off by the frozen food helps to keep the other food cold),
–in a steam oven.
Poultry It is especially important to observe proper hygiene when defrosting poultry. Never save the liquid from defrosted poultry. Drain it away and promptly wash the container, the sink and your hands. Danger of salmonella poisoning.
Fruit should be defrosted at room temperature in its packaging, or in a covered bowl.
Most vegetables can be cooked while still frozen. Simply place directly into boiling water or hot oil.
Cooling drinks quickly
To cool drinks quickly, switch on the SuperCool function. See "SuperCool" for more information.
Do not leave bottles in the freezer for more than 1 hour, closed containers could burst.
18

Using the freezer efficiently
Freezing tips
–The following are examples of foods suitable for freezing:
Fresh meat, poultry, game, fish, vegetables, herbs, fresh fruit, pastry/dough, leftovers, and a range of pre-cooked meals.
–The following examples of foods not suitable for freezing:
Lettuce, radishes, sour cream, mayonnaise, eggs in their shells, onions, whole raw apples and pears.
–To retain color, taste and vitamin C, vegetables should be trimmed, washed, and blanched.
To blanch: bring a large saucepan of water to a boil, then submerge the vegetables in rapidly boiling water for 2-3 minutes, depending on type. Remove, and plunge into ice-cold water to cool quickly. Drain and pack for freezing.
–Lean meat freezes better than fatty meat, and can be stored for considerably longer.
–To prevent chops, steaks, cutlets or rolled meats from freezing together in solid blocks when packed, separate with a sheet of plastic freezer wrap.
–Do not season fresh foods or blanched vegetables before freezing. Cooked food can be lightly seasoned before freezing, but care should be taken as the taste of some spices alters when frozen.
–Do not place hot foods or drinks in the freezer. This causes already frozen food to thaw, and increases the energy consumption considerably. Allow hot foods and drinks to cool down before placing them in the freezer.
Packing tips
Unsuitable packing material
-wrapping paper
-greaseproof paper
-cellophane
-garbage bags
-plastic shopping bags
Suitable packing material
-plastic freezer bags/wrap
-aluminum foil
-freezer containers
To help prevent freezer burn, expel as much air as possible from bags, etc., before sealing them.
Close the packaging tightly with
-plastic clips
-twist ties
-rubber bands
Mark the package to indicate the contents and the date of freezing.
19

SuperCool
When the SuperCool function is activated, the appliance is cooled as cold as possible (to a factory-preset temperature).
SuperCool
The SuperCool function is ideal for freezing large quantities of unfrozen food. Ideally the function should be switched on 4 - 6 hours before the food is placed in the freezer.
If the max. freezing capacity is used, 24 hours are recommended.
This helps food to freeze quickly and retain its nutrients, vitamins, flavor and appearance.
Switching on SuperCool
Touch the SuperCool sensor so that it turns yellow.
The temperature now begins to fall, with maximum cooling performance.
The new temperature setting appears in the display -22°F (-30°C).
Switching off SuperCool
The SuperCool function automatically switches off after approx. 52 hours. The sensor button turns white, and the appliance continues running at normal power.
To save energy, you can switch off the SuperCool function once the food is sufficiently chilled.
Touch the SuperCool sensor so that it turns white.
The temperature display returns to the original temperature setting.
The appliance now continues running at normal power.
20
Ice cube maker
For the automatic ice cube maker to operate, it must be connected to the household water supply. See "Plumbing".
Turning on the ice cube maker
Make sure that the ice cube container is under the ice cube maker, as far as possible.
Ice cubes will not be produced unless the container is completely closed.
Touch the sensor button for the ice cube maker so that it turns yellow.
As soon as the freezer has cooled to a freezing temperature, the ice cube container fills with water. Cold air is blown directly over the container.
As soon as the ice cubes are frozen, they fall into the ice cube container.
The ice cube maker can produce approx. 120 ice cubes within 24 hours. Note: Ice production will vary due to your water supply temperature, pressure and hardness.
The production volume of the ice depends on the temperature in the freezer. The lower the temperature the more ice cubes produced.
After the appliance is turned on for the very first time, it can take up to 10 hours for the first ice cubes to drop out of the ice cube maker and collect in the container.
Once the ice cube container is full, the ice cube maker switches off automatically.
Do not use the ice cube container for rapid cooling of food or drinks. The ice cube maker may become blocked and be damaged.
Do not use the first three containers of ice cubes from the ice cube maker.
Discard the ice produced in the first 24 hours after switching on the ice cube maker.
This applies for the very first use, and whenever the appliance has been out of service for an extended period of time.
The amount of ice cubes produced depends on the temperature in the freezer section. The lower the temperature, the more ice cubes will be produced in a given period of time.
Turning off the ice cube maker
The water supply line must be shut off several hours before the appliance or ice cube maker is switched off.
Touch the sensor button for the ice cube maker so that it turns white.
21

Automatic defrost
The freezer defrosts automatically.
The moisture generated in the appliance collects in the evaporator. It is automatically defrosted and dissipated by the condenser periodically.
This automatic defrosting system enables the freezer to remain permanently ice-free, while ensuring that the food stored in the freezer stays frozen.
22
Adjusting the interior fittings
Moving the shelves
The shelves can be adjusted according to the height of the food.
Using both hands, grasp the shelf from underneath and lift slightly so that the rear of the shelf is slightly above the mountings.
Pull the shelf forward.
Move the shelf to the desired height, then insert the (rear) hooks into place.
Make sure the shelf is level.
Top shelf
Lift the shelf up and out.
When replacing the shelf, make sure that the latches on the corners at the back are correctly engaged.
Adjusting the door shelves
For easier loading, unloading, and cleaning, the door shelves can be shifted or completely removed.
Using both hands, grasp the door shelf by the frame and tip it slightly forward.
Slide the tipped shelf up or down along the slide-rails, and click it into place with the lower hooks.
Make sure the shelf is level.
Removing a door shelf
Slide it upward all the way to the top of the slide-rails, until it can be removed.
Replacing a door shelf
Start at the top of the slide-rails and slide the shelf down into the desired position.
Freezer baskets
For easier loading, unloading, and cleaning, the freezer baskets can be shifted or completely removed.
Pull the basket forward until resistance is felt.
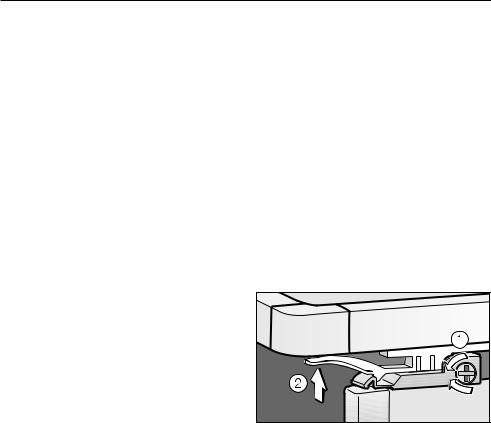
On the hinged-side of the door is a safety lock, which must be turned to a horizontal position before the drawer can be removed.
Using a suitable object, e.g., coin, turn the safety lock to a horizontal position .
On both sides of the basket, pull the latches upward and lift the basket out of the freezer.
Replacing the freezer basket
Fully extend the telescopic tracks.
Lay the basket onto the tracks so that it connects in the front and back.
Turn the safety lock back to the vertical position.
Slide the freezer basket in.
23

Adjusting the interior fittings
Ice cube container
The ice cube container is set on telescopic tracks, and can be removed for loading, unloading and cleaning.
Slide the container forward until resistance is felt.
On both sides of the container, pull the latches (see arrow) upward and lift the container out of the freezer.
Push the tracks back into the freezer to avoid injury.
Replacing the ice cube container
Completely extend the telescopic tracks.
Lay the container onto the tracks so that it connects in the front and back.
Slide the ice cube container completely in.
24
 Loading...