


LB652082S
LG LB652082S, LB652088S, LB642058S, LB642022S, LB642052S Installation Instructions Manual
...
www.lg.com
INSTALLATION INSTRUCTIONS
BUILT IN OVEN
Please read the instructions before installing this product.
LB672098S
LB652088S
LB652082S
LB642058S
LB642052S
LB642022S
LB632020S
LB632120S
EM790SP
EM780SP
EM780S
EM550SP
EM550S
EM530S
EM430S
EA790SP
EA780SP
EA550SP
EA530S
EA430S
EA330S
EZ790SP
EZ780SP
EZ550SP
EZ530S
EZ430S
EZ330S
LB633009N
LB633029N
LB644029N
MFL06218406
ENGLISH
1
Caution for safety
Any electrical installation work must be carried out by a qualified electrician or competent person.
This electric appliance must be installed according to the instructions in order to avoid a damage.
This oven should be disconnected from the power supply before installation or maintenance. This
oven should always be earthed.
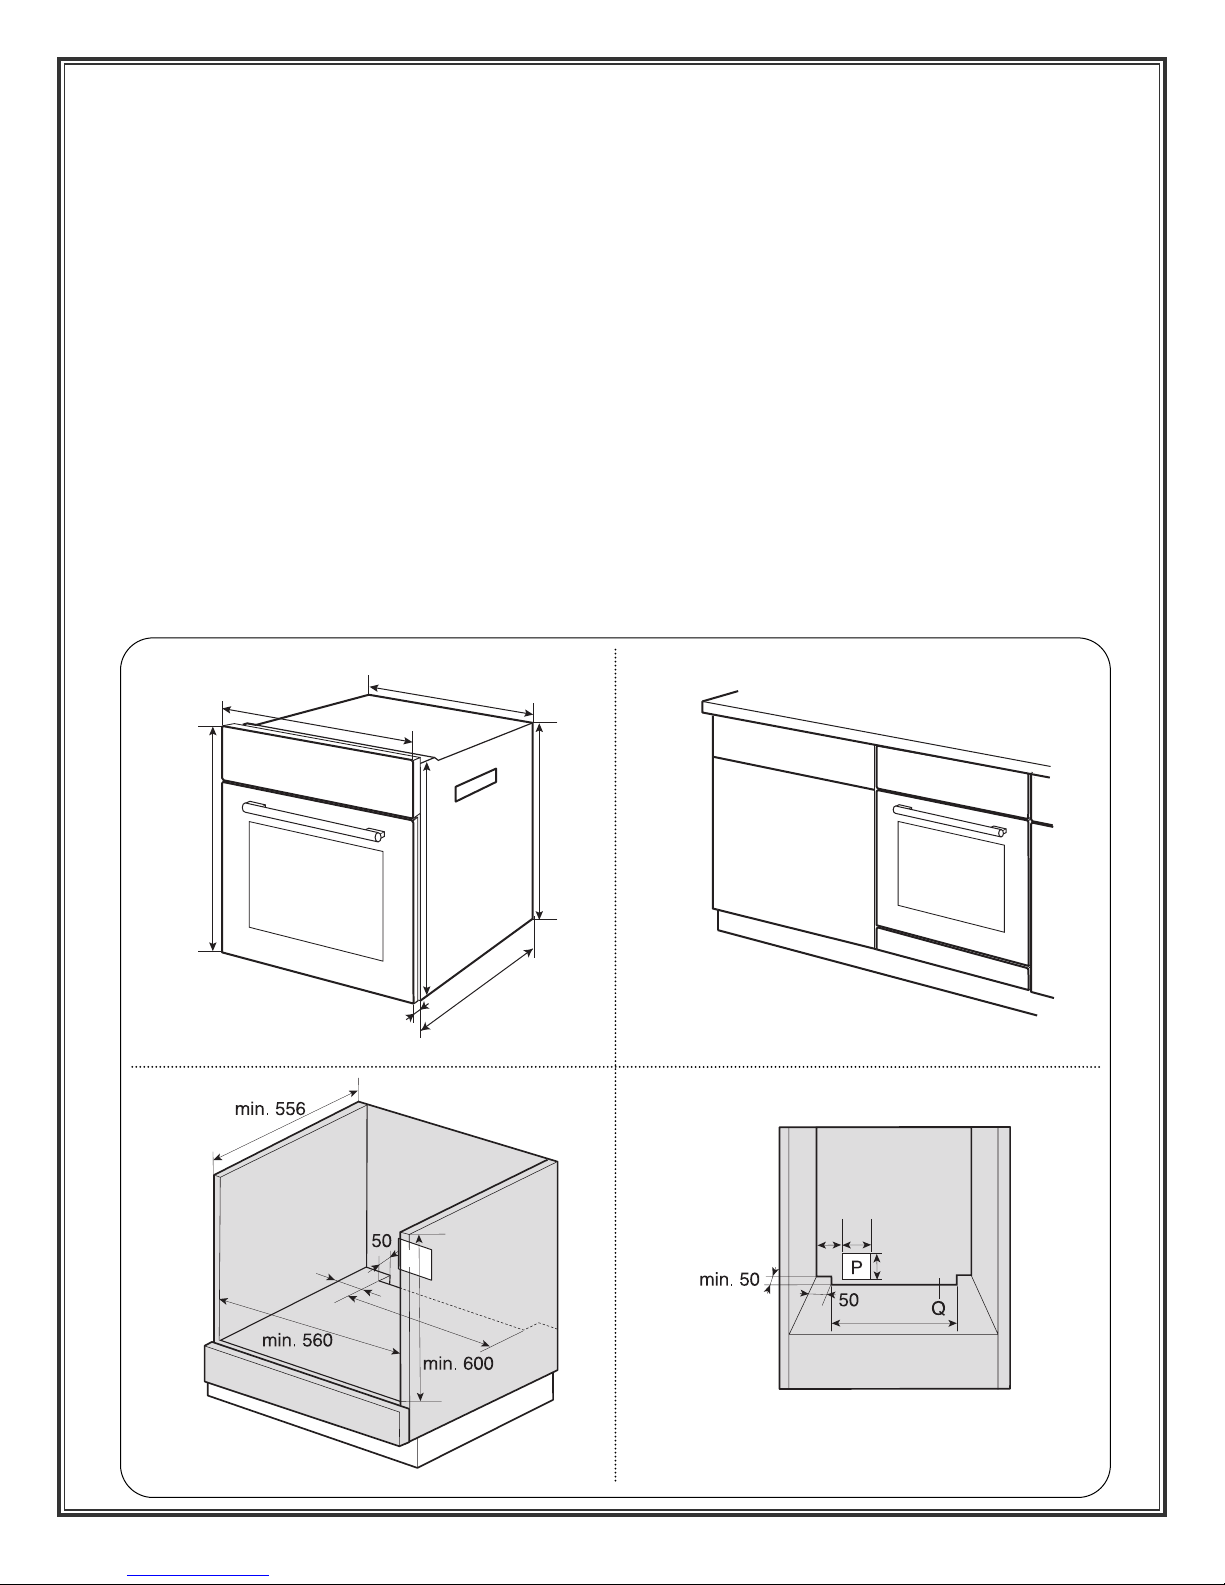
The work in the low cabinet
Oven dimensions and kichen cabinet dimensions are shown in the fig-1A, 1C, 1D.
The oven power supply must be located in the back area (P) of kitchen cabinet or outside the
installation space (cupboard).
In accordance with the position of power supply, make a hole “P ” in the back wall to pass the
connection lead.
Lift the oven and slide into the cabinet by using side holes. But do not try to lift the oven by door
handle on the front.
Take care not to kink the wires of the electrical supply cable.
If installing with hobs, follow the hob installation instruction.
575
583
20
553
556
593
595
460
50
70
460
70
70
P
[fig-1A] [fig-1B]
[fig-1D][fig-1C]

2
ENGLISH
The work in the high cabinet
Oven dimensions and kichen cabinet dimensions are shown in the fig-2A, 2B.
A gap must be minimum 10mm between the rear of the installed oven and the connecting wall.
To Lift oven, use side holes of the oven (refer to arrow, Fig-2A).
Kitchen cabinet in contact with the oven must be heat resistant up to 90 °C, and close units fronts
up to at least 70 °C.
[fig-2A]
[fig-2B]
[fig-2C]
460
P
70
70
590 (min. 586)
70
50
575
583
20
553
556
593
595
Transport
opening
3
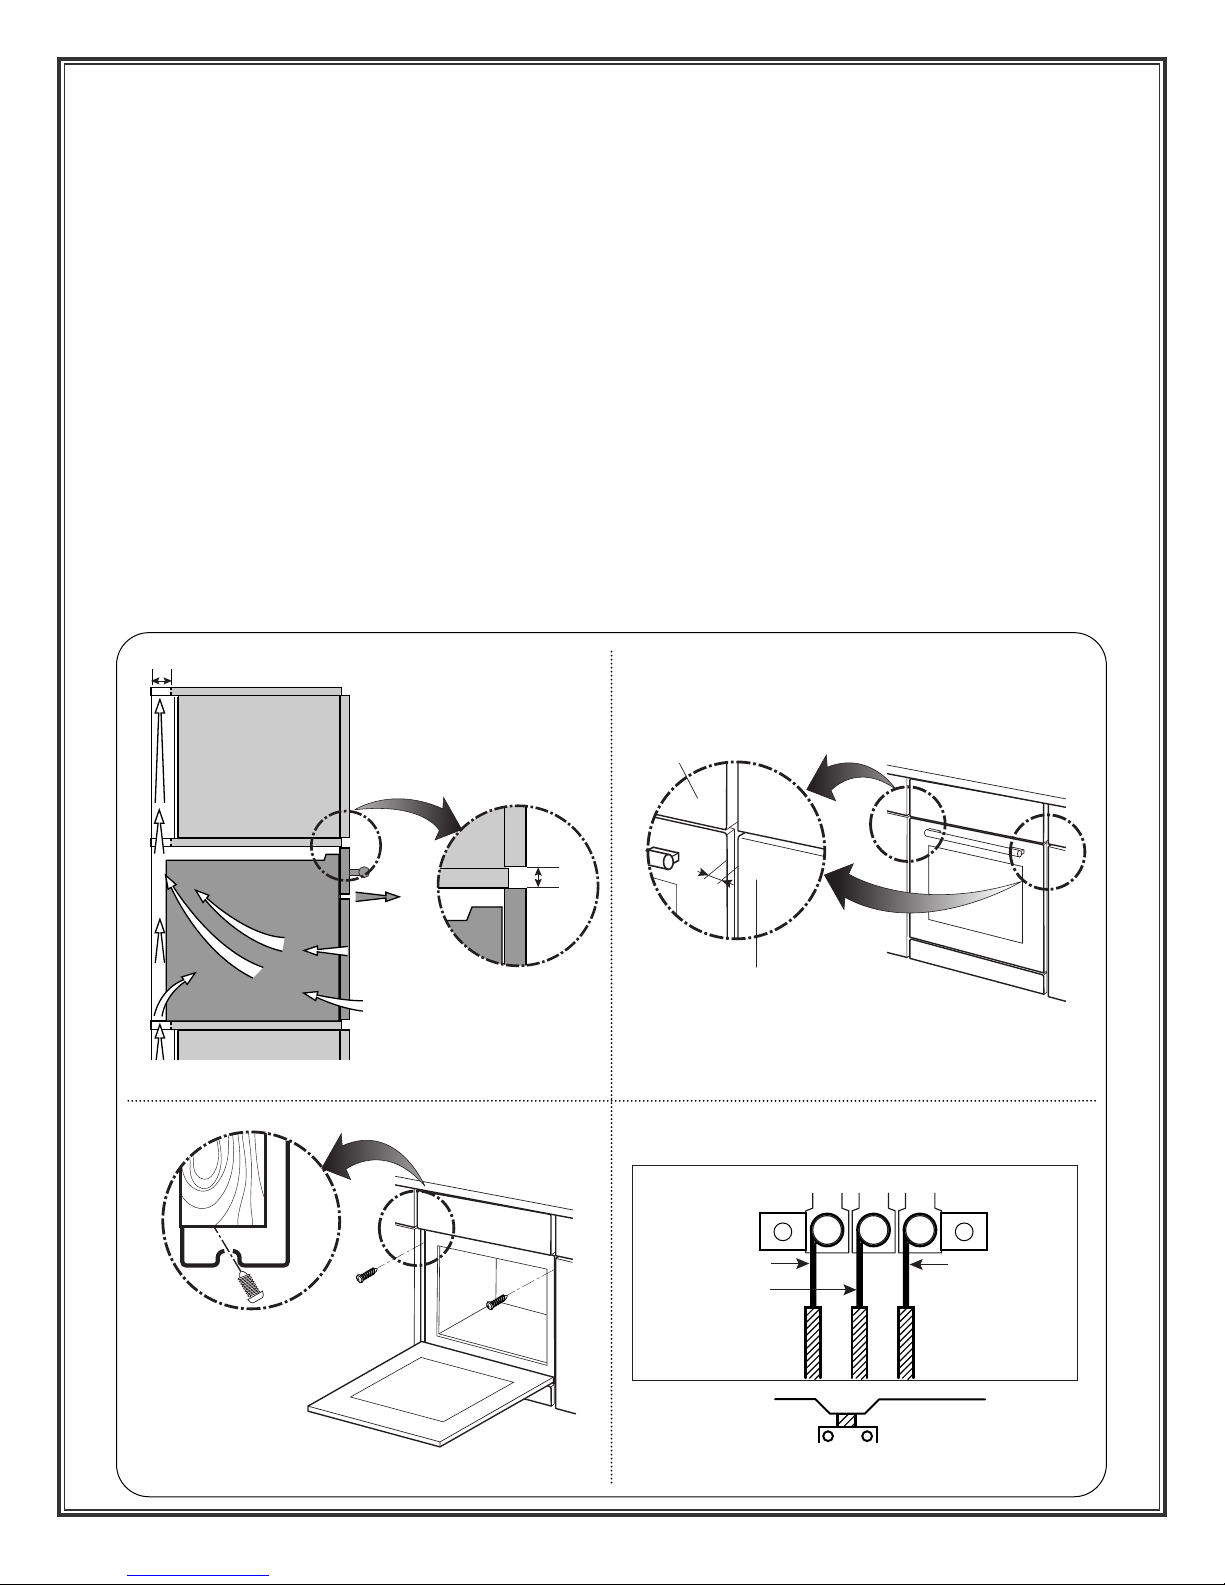
For Ventilation
For correct ventilation, the ventilation opening of 50mm should be required between the
back wall and the floor of the installation cabinet (See “Q ” fig--1D, 2B & 3A), the ventilation gap
of 5mm is required between the oven top rim and the cooktop lower rim, and between the oven
both sides rim and the cabinet (fig-3B, 3C), these openings must not be closed by any way. So
ensure that the sides are not touching the front edges of the housing.
Connect the oven to the power supply. Secure the oven to the kitchen unit with screws (Fig-3D).
Conneting the oven to the power supply
The oven must be connected by a licensed specialist in accordance with this instructions and in
compliance with local regulations. Make sure the voltage shown on the rating plate is the same
as the power supply voltage in your home.
Use a type H05 VV-F power cord. The oven must be connected to the power supply by means of
an all-pole disconnect switch with a minimum contact gap of 3mm and must be connected to
earthed socket by law. The supply plug shall be accessible after the installation.
The oven's componets operate at 220-240V. Identify the phase and neutral conductor in the
socket. Incorrect connection may damage the oven (Fig-3E).
[fig-3A]
[fig-3C]
[fig-3E][fig-3D]
min. 5
min. 50
min.5
oven
close kitchen cabinet
or appliance.
Neutral
Earth
Live
[fig-3B]
 Loading...