


B250R
Table of contents
 Loading...
Karcher B250R User Manual
QUICKSTART
BR/BD 100/250
Warning
These are only brief instructions! Please read and comply with these instructions prior to using or servicing your appliance.
The non-compliance of the operating and safety instructions may lead to damages of the appliance and to dangers for the operator and other persons.
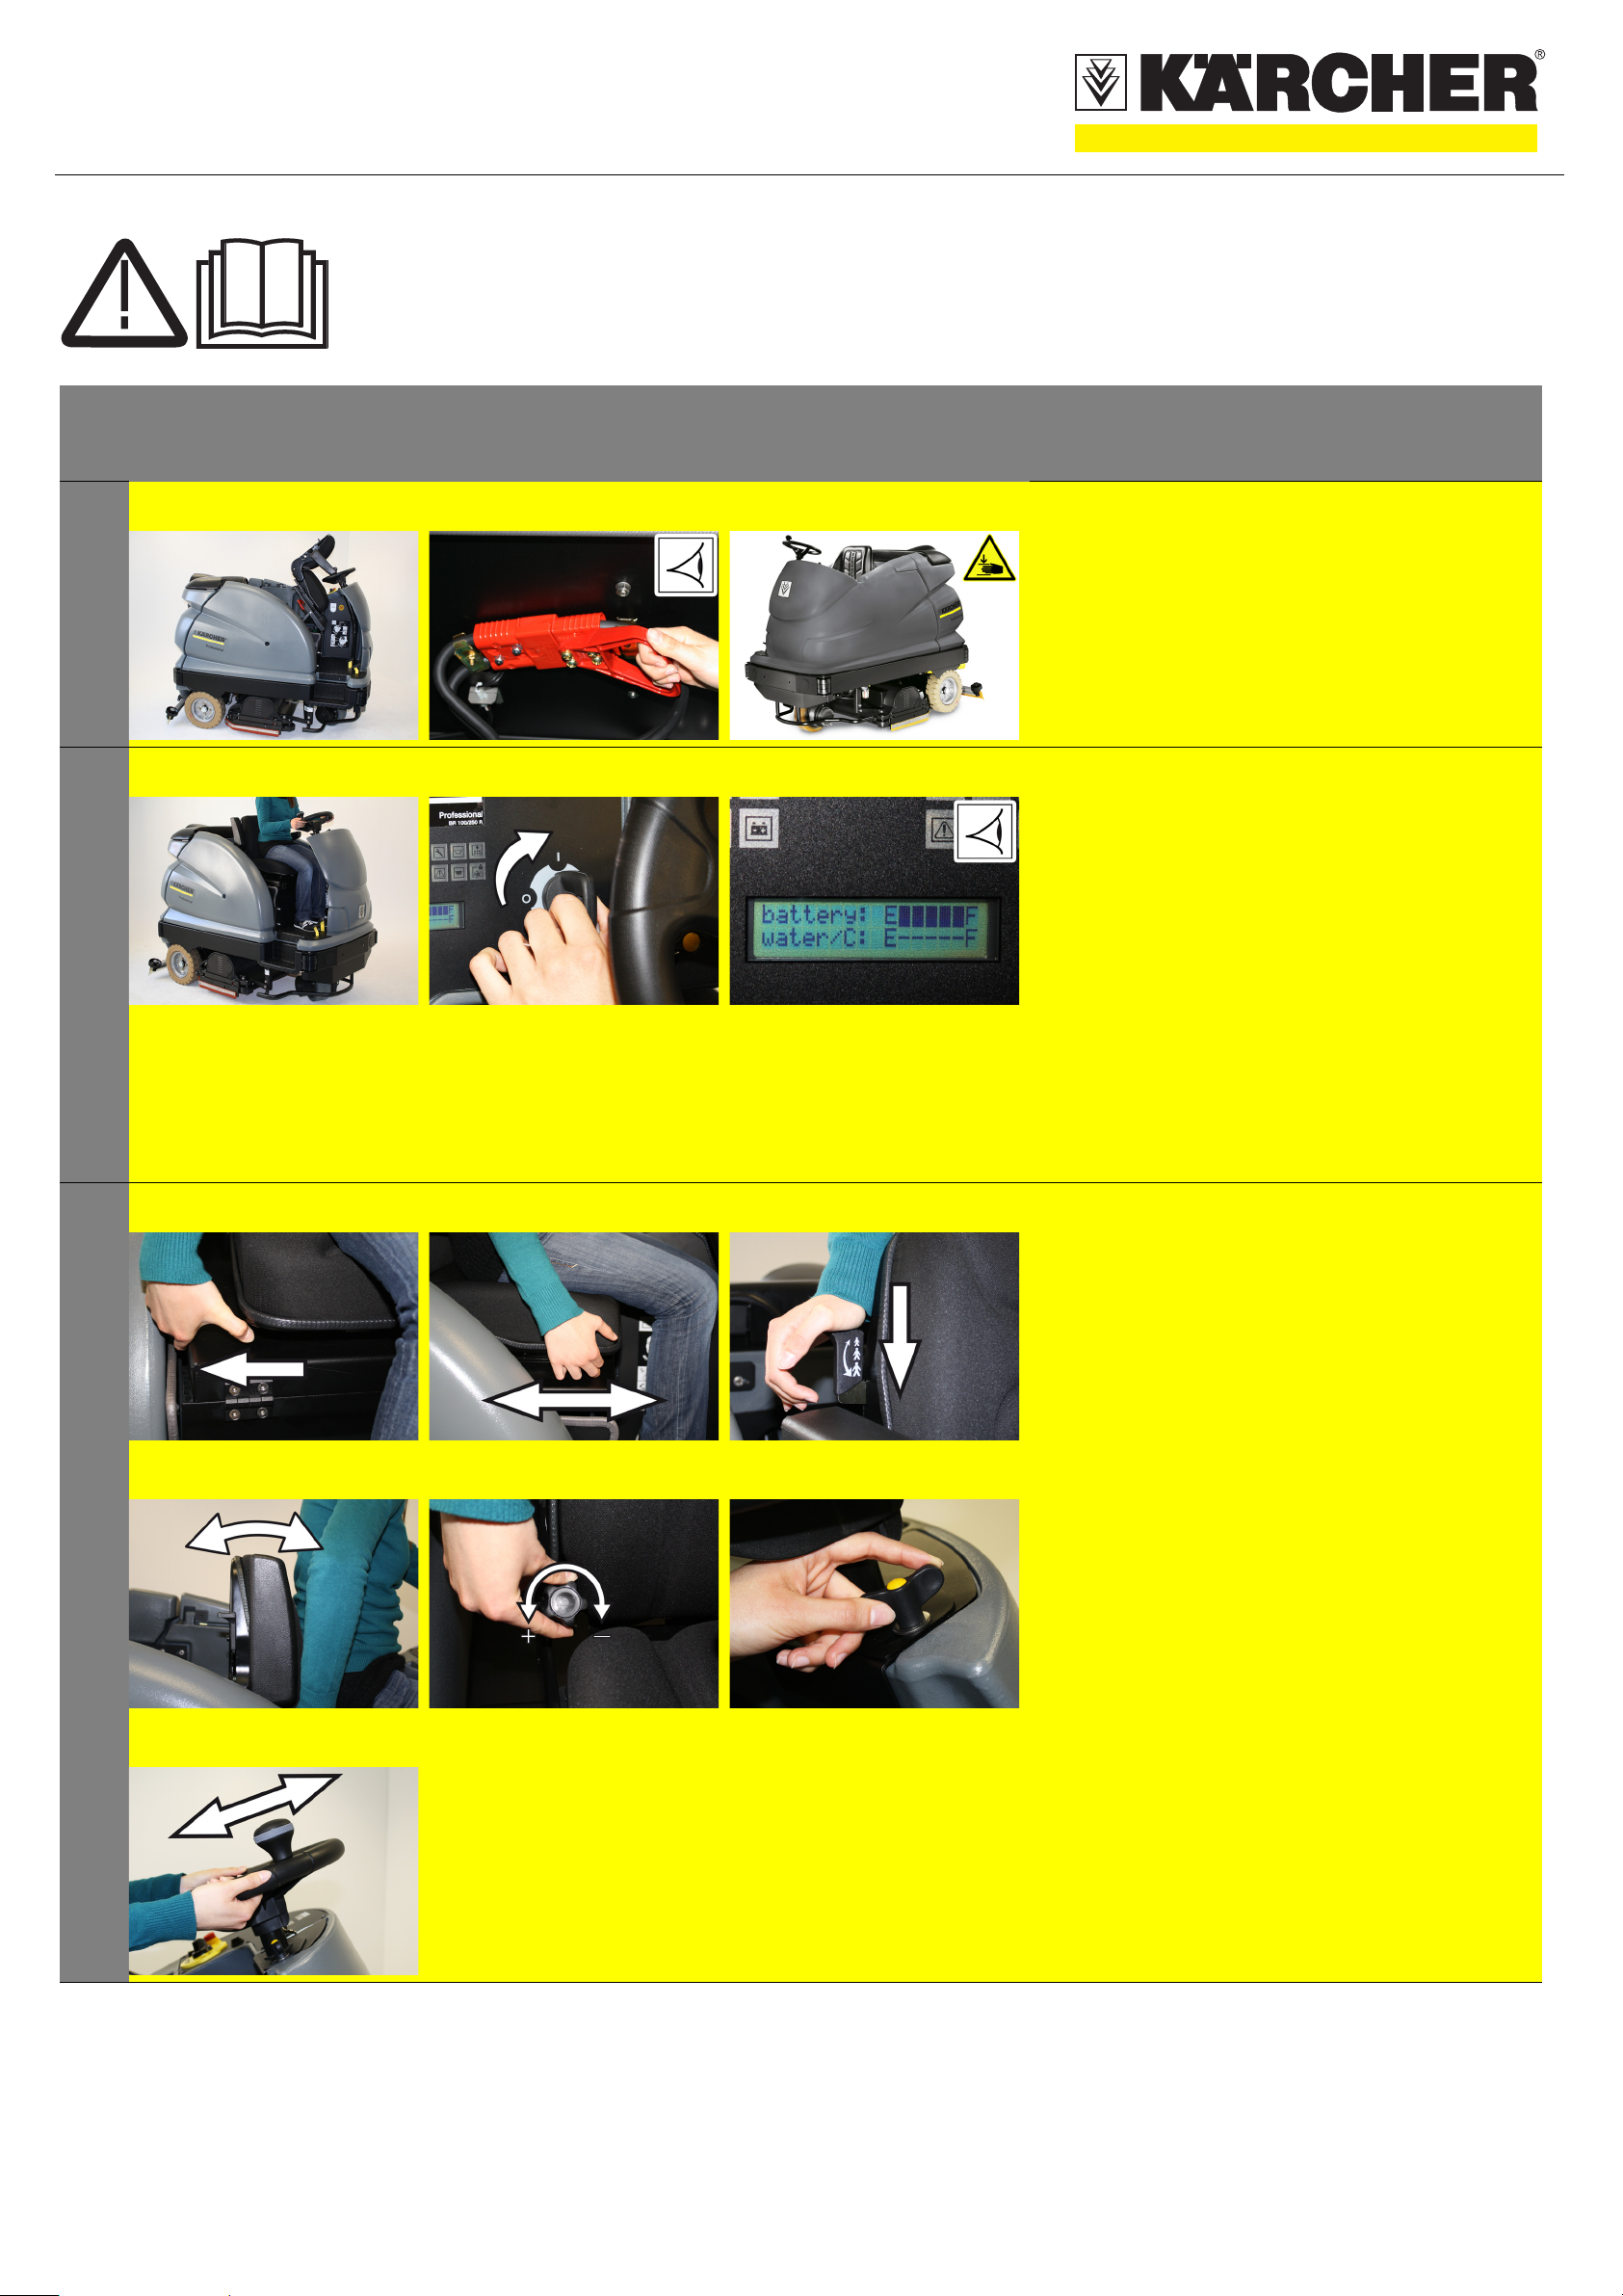
Start up
A B C A Tilt the seat towards the front.
1
B Check if the battery plug is connected to the
appliance.
C Fold the seat backwards.
2
3
A B C A Sit on the driver's seat.
B Set main switch to “1”.
C Check battery status.
Note
The device is equipped with a safety mechanism
to prevent total discharge, i.e. when the permissible minimum capacity is reached, then the
machine can only be driven and existing lamps
can be switched on. In such a case, the battery
monitoring symbol on the control console glows
red.
Drive the machine directly to the charging
station; avoid any steep gradients in the process.
A
B
C
A Pull seat adjustment lever outwards.
B Slide seat, release lever and lock in place.
C Adjust the seat springs.
D Adjust the seat back.
E Set up the lumbar support.
F Loosen the wing nut to adjust the steering
wheel.
Position the steering wheel.
Tighten the wing nuts.
D
E
F
5.964-044.0 01/11
QUICKSTART
Start up
4
A B
Note
Fill up the fresh water tank completely before starting up the machine to ventilate the water supply system.
몇 Warning
Risk of damage. Only use the recommended
detergents. With respect to different detergents
the operator bears the increased risk regarding
the operational safety and danger of accident.
Only use detergents that are free from solvents,
hydrochloric acid and hydrofluoric acid.
Follow the safety instructions for using detergents.
A Open the cover of the fresh water reservoir.
Fill fresh water (max. 60 °C) until 15 cm below the upper edge of the tank.
B Pour in detergent.
Close the cover of the fresh water reservoir.
1
2
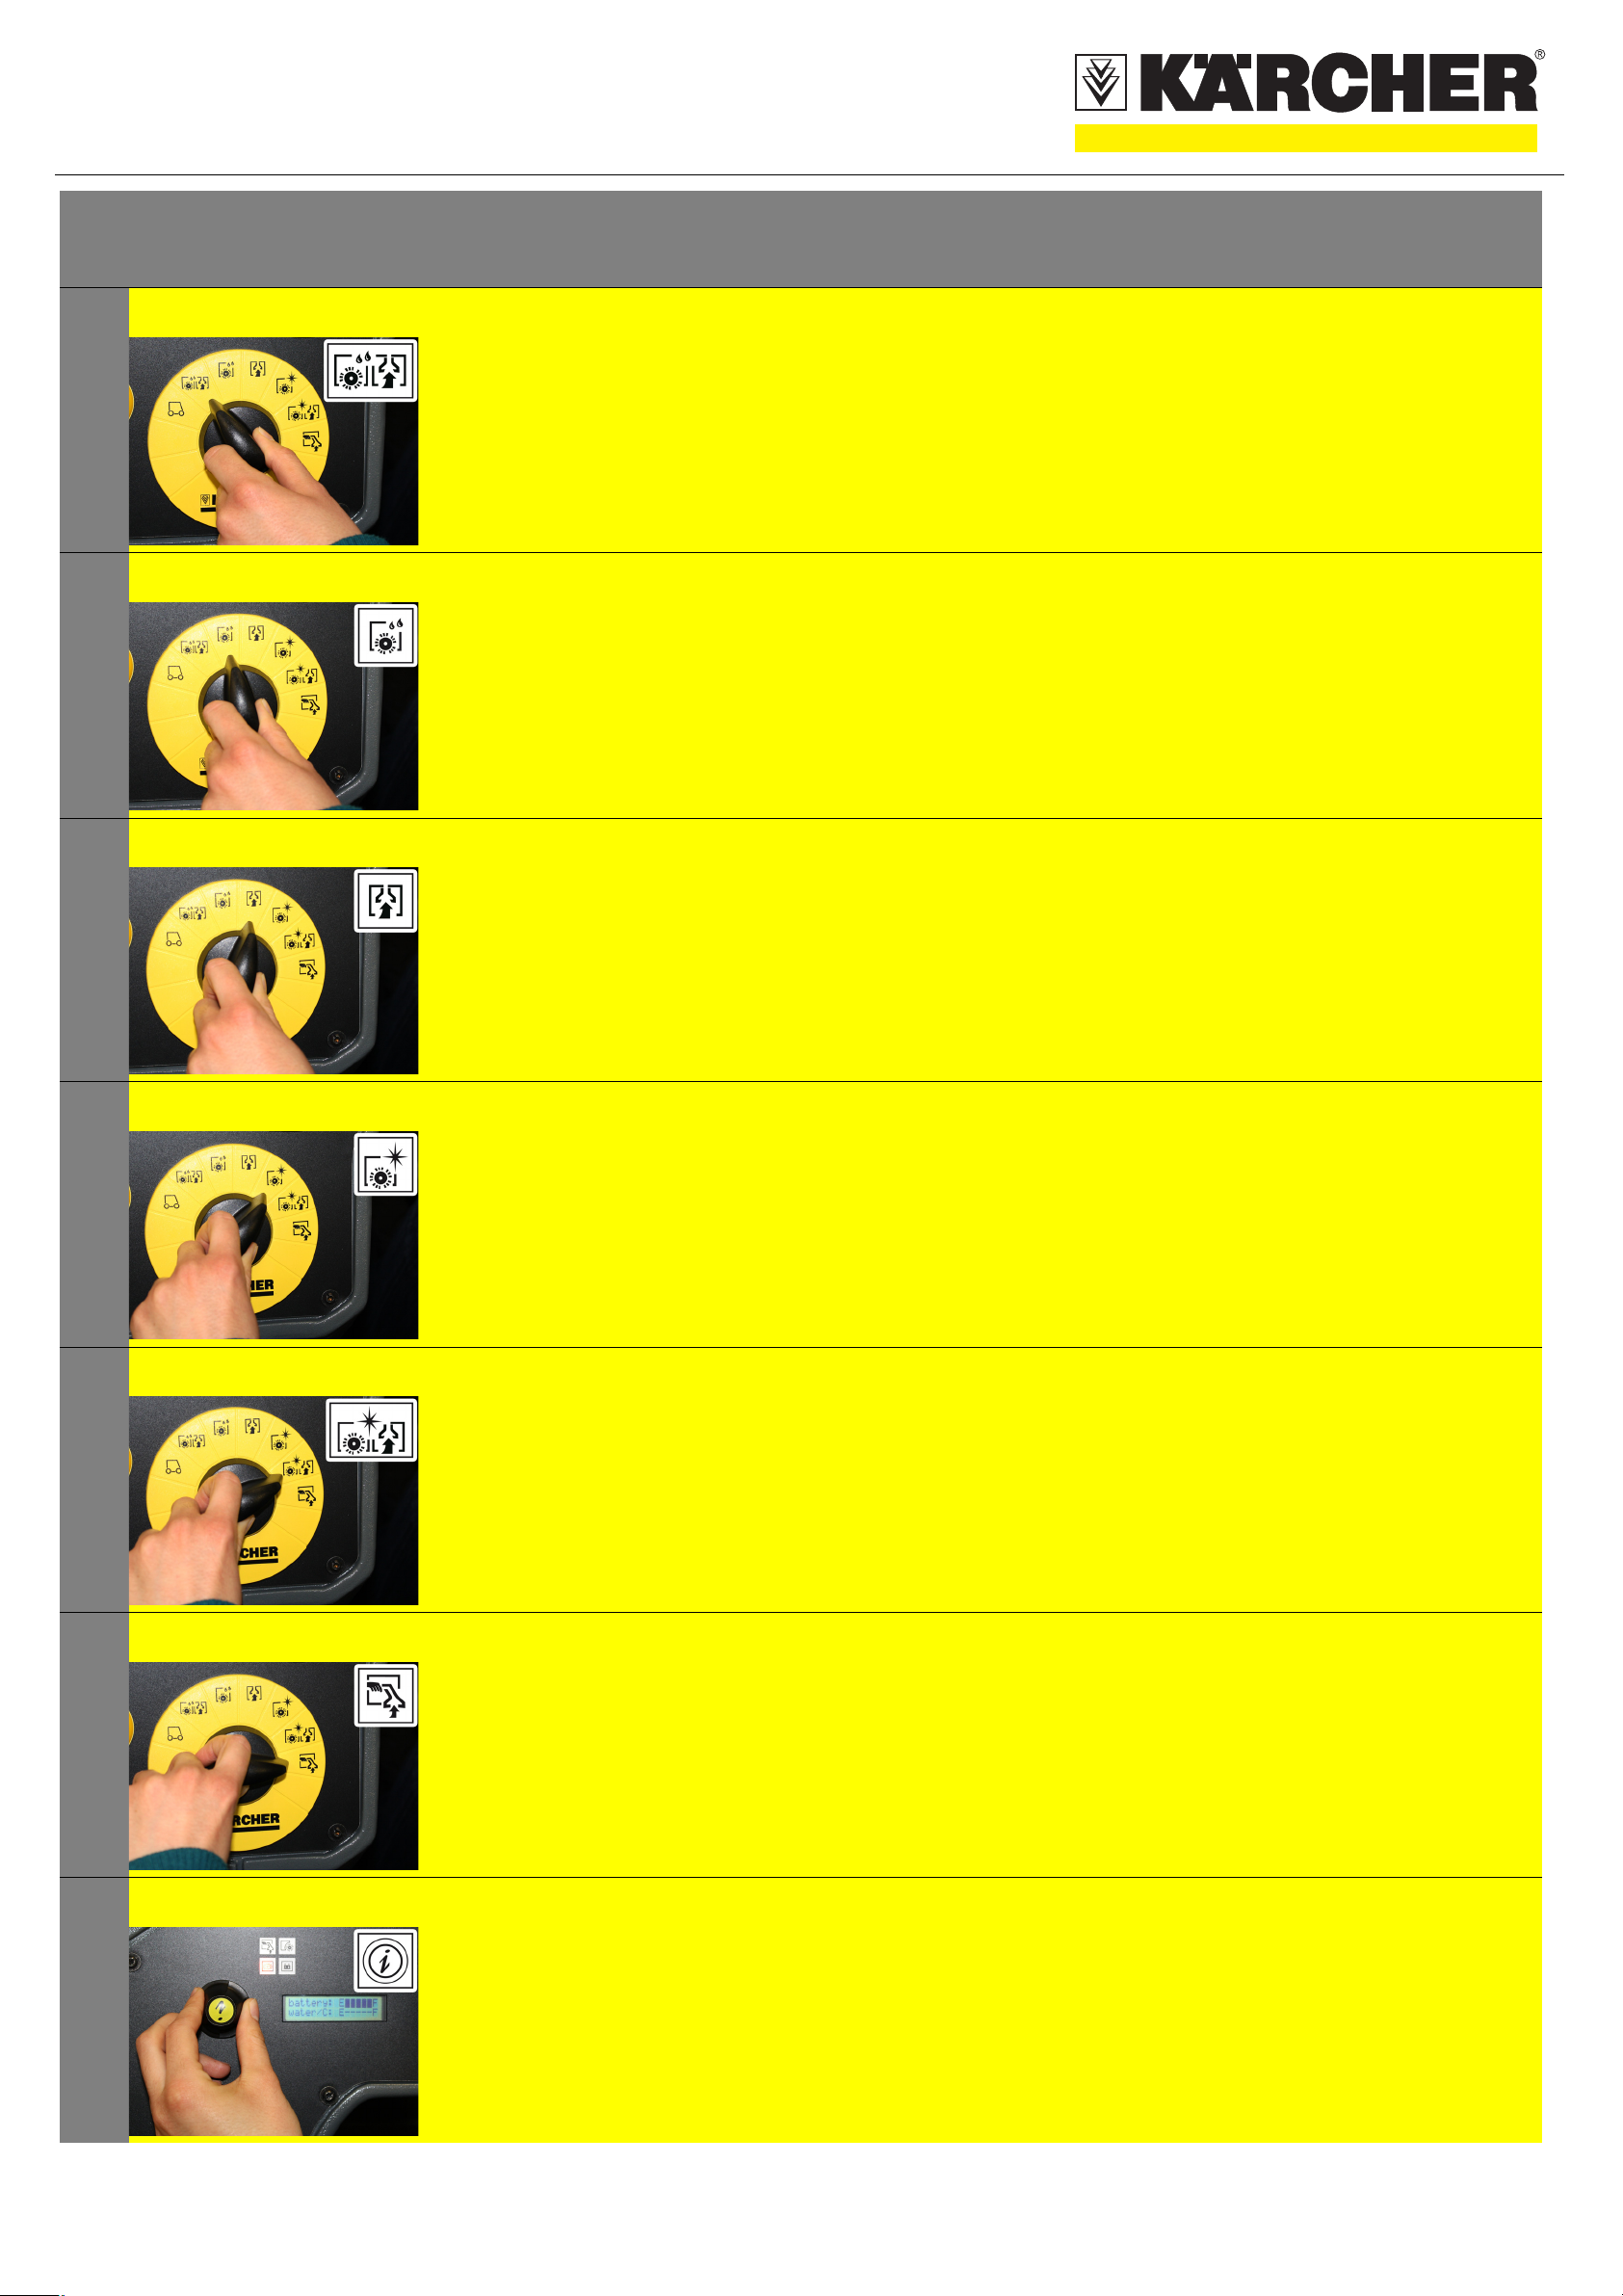
Operation
A B Turning on the Appliance
Danger
Danger of accident. The immobilizing brake must always be checked first on an even surface before starting the machine.
A Sit on the driver's seat.
B Set main switch to “1”.
A
B
C D
Drive the machine
A Set programme switch to step 1 (driving).
B Drive forward
Set the drive direction using the drive direction button at the operator console.
C Reverse drive
Set the drive direction using the drive direction button at the operator console.
D Determine the driving speed by pressing the
drive pedal.
E Stop the machine: Release driving pedal;
press brake, if necessary.
E
5.964-044.0 01/11
QUICKSTART
Operation
3
4
5
A
A
A Vacuuming
Scrubbing suction
A Wet clean the floor and vacuum up dirt water.
Wet scrubbing
A Wet clean the floor and allow the detergent to
react.
A Suck in the dirt fleet.
6
7
8
A Polishing
A Polishing the floor without the application of
liquid.
A Scrub the floor without applying water
(vacuum polishing)
A Polish the floor without applying any fluid and
suck in the polishing dust.
A Manual cleaning
A Apply liquid detergent using the wall-ceiling-
floor nozzle (optional) and vacuum it again.
A Info button
9
Use the Info button to select the menu items and
do the settings.
A Turning the button to the right/left scrolls
through the menus forward/ backward.
The selected setting gets accepted by
pressing the button.
5.964-044.0 01/11
Loading...