


 Loading...
Operation Guide
FS-1020MFP/FS-1220MFP
This Operation Guide is for models FS-1020MFP and FS-1220MFP.
This Operation Guide is intended to help you operate the machine correctly, perform routine maintenance and take a simple troubleshooting action as necessary, so that you can always use the machine in good condition.
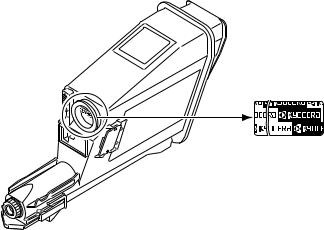
We recommend the use of our own brand supplies. We will not be liable for any damage caused by the use of third party supplies in this machine.
A label shown in the illustration assures that the supplies are our own brand.
Included Guides
The following guides are supplied with the machine. Refer to them as necessary.
Quick Installation Guide |
Describes the procedures for installation of the machine. |
|
|
Safety Guide |
Provides safety and cautionary information for the installation and use of |
|
the machine. Be sure to read this guide before using the machine. |
|
|
Safety Guide |
Describes the machine installation space, cautionary space, and other |
(FS-1020MFP/FS-1025MFP/FS-1120MFP/ |
information. Be sure to read this guide before using the machine. |
FS-1125MFP/FS-1220MFP/FS-1320MFP/ |
|
FS-1325MFP) |
|
Product Library disc |
|
|
|
Operation Guide (This Guide) |
Describes how to load paper, basic copy, print and scan operations, and |
|
troubleshooting. |
|
|
KYOCERA Client Tool User Guide |
Describes how to use KYOCERA Client Tool. KYOCERA Client Tool is a |
|
software program that is installed on your computer to enable you to |
|
configure machine settings. |
|
|
Printer Driver User Guide |
Describes how to install the printer driver and use printer functionality. |
|
|
KYOCERA Net Viewer User Guide |
Describes how to monitor the network printing system with KYOCERA |
|
Net Viewer. |
|
|

Contents
1 |
Machine Parts ................................................................................................................................................ |
1-1 |
|
Front Machine Components ......................................................................................................................... |
1-2 |
|
Rear Machine Components .......................................................................................................................... |
1-3 |
|
Operation Panel ............................................................................................................................................. |
1-4 |
2 |
Preparation ..................................................................................................................................................... |
2-1 |
|
Connections ................................................................................................................................................... |
2-2 |
|
Loading Paper ................................................................................................................................................ |
2-4 |
|
Loading Originals ........................................................................................................................................ |
2-16 |
|
Installing and Uninstalling Drivers and Utilities ....................................................................................... |
2-17 |
|
Machine Settings ......................................................................................................................................... |
2-22 |
|
Configuration ............................................................................................................................................... |
2-36 |
|
Printing the Status Page ............................................................................................................................. |
2-42 |
3 |
Copying .......................................................................................................................................................... |
3-1 |
|
Basic Operation ............................................................................................................................................. |
3-2 |
|
Manual Duplex ............................................................................................................................................... |
3-3 |
|
Using Programs ............................................................................................................................................. |
3-5 |
|
Copying Functions ........................................................................................................................................ |
3-5 |
|
ID Card Copy .................................................................................................................................................. |
3-6 |
4 |
Printing ........................................................................................................................................................... |
4-1 |
|
Printing from Application Software ............................................................................................................. |
4-2 |
|
About GX Driver ............................................................................................................................................. |
4-2 |
|
Manual Duplex ............................................................................................................................................... |
4-3 |
|
Print Box ......................................................................................................................................................... |
4-5 |
|
Changing the Default Printer Driver Settings (Windows 7 for example) .................................................. |
4-6 |
5 |
Scanning ........................................................................................................................................................ |
5-1 |
|
Push Scan ...................................................................................................................................................... |
5-2 |
|
Using Programs ............................................................................................................................................. |
5-3 |
|
Quick Scan (Scan to PDF/Scan to Email/Scan to Folder) .......................................................................... |
5-4 |
|
Scanning using TWAIN/WIA ......................................................................................................................... |
5-5 |
6 |
Maintenance ................................................................................................................................................... |
6-1 |
|
General Information ...................................................................................................................................... |
6-2 |
|
Toner Container Replacement ..................................................................................................................... |
6-2 |
|
Maintenance Kit Replacement ...................................................................................................................... |
6-5 |
|
Cleaning the Machine .................................................................................................................................... |
6-5 |
|
Maintenance Menu ........................................................................................................................................ |
6-7 |
|
Prolonged Non-Use and Moving of the Machine ........................................................................................ |
6-8 |
7 |
Troubleshooting ............................................................................................................................................ |
7-1 |
|
Solving Malfunctions .................................................................................................................................... |
7-2 |
|
Error Messages .............................................................................................................................................. |
7-7 |
|
Clearing Paper Jams ..................................................................................................................................... |
7-9 |
8 |
Appendix ........................................................................................................................................................ |
8-1 |
|
Specifications ................................................................................................................................................ |
8-2 |
Index .............................................................................................................................................................. |
Index-1 |
|
i

ii

Legal and Safety Information
CAUTION NO LIABILITY IS ASSUMED FOR ANY DAMAGE CAUSED BY IMPROPER INSTALLATION.
Notice
The information in this guide is subject to change without notification. Additional pages may be inserted in future editions. The user is asked to excuse any technical inaccuracies or typographical errors in the present edition.
No responsibility is assumed if accidents occur while the user is following the instructions in this guide. No responsibility is assumed for defects in the machine's firmware (contents of its read-only memory).
This guide, and any copyrightable subject matter sold or provided with or in connection with the sale of the machine, are protected by copyright. All rights are reserved. Copying or other reproduction of all or part of this guide, or any copyrightable subject matter without the prior written consent of KYOCERA Document Solutions Inc. is prohibited. Any copies made of all or part of this guide, or any copyrightable subject must contain the same copyright notice as the material from which the copying is done.
Regarding Tradenames
Adobe Acrobat, and Flash are registered trademarks of Adobe Systems Incorporated. Macintosh and Mac OS are trademarks of Apple Inc., registered in the U.S. and other countries.
Microsoft, MS-DOS, and Windows are registered trademarks of Microsoft Corporation in the U.S.A. and/or other countries. ENERGY STAR is a U.S. registered mark.
All other brand and product names are registered trademarks or trademarks of their respective companies.
iii

Compliance and Conformity
This equipment has been tested and found to comply with the limits for a Class B digital device, pursuant to Part 15 of the FCC Rules. These limits are designed to provide reasonable protection against harmful interference in a residential installation. This equipment generates, uses and can radiate radio frequency energy and, if not installed and used in accordance with the instructions, may cause harmful interference to radio communications. However, there is no guarantee that interference will not occur in a particular installation. If this equipment does cause harmful interference to radio or television reception, which can be determined by turning the equipment off and on, the user is encouraged to try to correct the interference by one or more of the following measures:
•Reorient or relocate the receiving antenna.
•Increase the separation between the equipment and receiver.
•Connect the equipment into an outlet on a circuit different from that to which the receiver is connected.
•Consult the dealer or an experienced radio/TV technician for help.
•The use of a non-shielded interface cable with the referenced device is prohibited.
CAUTION — The changes or modifications not expressly approved by the party responsible for compliance could void the user’s authority to operate the equipment.
This device complies with Part 15 of FCC Rules.
Operation is subject to the following two conditions; (1) this device may not cause interference, and (2) this device must accept any interference, including interference that may cause undesired operation of the device.
* The above warning is valid only in the United States of America.
Interface connectors
IMPORTANT Be sure to power off the machine before connecting or disconnecting an interface cable. For protection against static electricity discharge to the machine's internal electronics through the interface connector(s), cover any interface connector that is not in use with the protective cap supplied.
 Note Use shielded interface cables.
CDRH Regulations
The Center for Devices and Radiological Health (CDRH) of the U.S. Food and Drug Administration implemented regulations for laser products on August 2, 1976. These regulations apply to laser products manufactured after August 1, 1976. Compliance is mandatory for products marketed in the United States. A label indicating compliance with the CDRH regulations must be attached to laser products marketed in the United States.
Canadian Department of Communications Compliance Statement
This Class B digital apparatus complies with Canadian ICES-003.
Avis de conformité aux normes du ministère des Communications du Canada
Cet appareil numérique de la classe B est conforme à la norme NMB-003 du Canada.
iv

Safety Instructions Regarding the Disconnection of Power
Caution: The power plug is the main isolation device! Other switches on the equipment are only functional switches and are not suitable for isolating the equipment from the power source.
VORSICHT: Der Netzstecker ist die Hauptisoliervorrichtung! Die anderen Schalter auf dem Gerät sind nur Funktionsschalter und können nicht verwendet werden, um den Stromfluß im Gerät zu unterbrechen.
Energy Saving Control Function
To reduce energy consumption while in a waiting state, the device comes equipped with an energy saving control function for switching to Sleep Mode as well as Power Off Mode where power consumption is automatically reduced to a minimum after a certain amount of time elapses since the device was last used.
Sleep Mode
The device automatically enters Sleep Mode when approximately 1 minute has passed since the device was last used. The amount of time of no activity that must pass before Sleep Mode is activated may be lengthened by changing the Auto sleep setting. For details, refer to Device Defaults Tab on page 2-38.
Power Off Mode
The device automatically turns its power off when 1 hour has passed since the device was last used. The amount of time of no activity that must pass before Power Off Mode is activated may be lengthened by changing the Power Off Timer setting. For details, refer to Device Defaults Tab on page 2-38.
In case of not using the machine for an extended period of time
CAUTION If this machine will be left unused for an extended period (e.g. overnight), turn it off at the power switch. If the machine will not be used for an even longer period of time (e.g. vacation), remove the power plug from the outlet as a safety precaution.
CAUTION Remove paper from the cassettes and seal it in the paper storage bag to protect it from humidity.
Duplex Printing
This machine includes duplex printing as a standard function. For example, by printing two single-sided originals onto a single sheet of paper as a duplex printing, it is possible to lower the amount of paper used.
Printing in duplex mode reduces paper consumption and contributes to the conservation of forest resources. Duplex mode also reduces the amount of paper that must be purchased, and thereby reduces cost. It is recommended that machines capable of duplex printing be set to use duplex mode by default.
Resource Saving - Paper
For the preservation and sustainable use of forest resources, it is recommended that recycled as well as virgin paper certified under environmental stewardship initiatives or carrying recognised ecolabels, which meet EN 12281:2002*1 or an equivalent quality standard, be used.
This machine also supports printing on 64 g/m² paper. Using such paper containing less raw materials can lead to further saving of forest resources.
*1: EN12281:2002 "Printing and business paper - Requirements for copy paper for dry toner imaging processes" Your sales or service representative can provide information about recommended paper types.
v

Environmental benefits of "Power Management"
To reduce power consumption when idle, this machine is equipped with a power management function that automatically activates energy-saving mode when the machine is idle for a certain period of time. Although it takes the machine a slight amount of time to return to READY mode when in energy-saving mode, a significant reduction in energy consumption is possible.
It is recommended that the machine be used with the activation time for energy-saving mode set to the default setting.
Energy Star (ENERGY STAR®)
We have determined as a company participating in ENERGY STAR® that this product has earned the ENERGY STAR®.
ENERGY STAR® is a voluntary energy efficiency program with the goal of developing and promoting the use of products with high energy efficiency in order to help prevent global warming. By purchasing ENERGY STAR® qualified products, customers can help reduce emissions of greenhouse gases during product use and cut energy-related costs.
Legal Restriction on Copying/Scanning
It may be prohibited to copy/scan copyrighted material without permission of the copyright owner.
Copying/Scanning the following items is prohibited and may be penalized by law. It may not be limited to these items. Do not knowingly copy/scan the items that are not to be copied/scanned.
•Paper money
•Bank note
•Securities
•Stamp
•Passport
•Certificate
Local laws and regulations may prohibit or restrict copying/scanning of other items not mentioned above.
vi
Safety Conventions in This Guide
The sections of this guide and parts of the machine marked with symbols are safety warnings meant to protect the user, other individuals and surrounding objects, and ensure correct and safe usage of the machine. The symbols and their meanings are indicated below.
WARNING: Indicates that serious injury or even death may result from insufficient attention to or incorrect compliance with the related points.
CAUTION: Indicates that personal injury or mechanical damage may result from insufficient attention to or incorrect compliance with the related points.
The following symbols indicate that the related section includes safety warnings. Specific points of attention are indicated inside the symbol.
.... [General warning]
.... [Warning of high temperature]
The following symbols indicate that the related section includes information on prohibited actions. Specifics of the prohibited action are indicated inside the symbol.
.... [Warning of prohibited action]
.... [Disassembly prohibited]
The following symbols indicate that the related section includes information on actions which must be performed. Specifics of the required action are indicated inside the symbol.
.... [Alert of required action]
.... [Remove the power plug from the outlet]
.... [Always connect the machine to an outlet with a ground connection]
Please contact your service representative to order a replacement if the safety warnings in this Operation Guide are illegible or if the guide itself is missing. (fee required)
Note An original which resembles a bank note closely may not be copied properly in some rare cases because this machine is equipped with a counterfeiting prevention function.
vii

Environment
The service environmental conditions are as follows:
•Temperature: 50 to 90.5 °F (10 to 32.5 °C)
•Humidity: 15 to 80 %
However, adverse environmental conditions may affect the image quality. Avoid the following locations when selecting a site for the machine.
•Avoid locations near a window or with exposure to direct sunlight.
•Avoid locations with vibrations.
•Avoid locations with drastic temperature fluctuations.
•Avoid locations with direct exposure to hot or cold air.
•Avoid poorly ventilated locations.
If the floor is delicate against casters, when this machine is moved after installation, the floor material may be damaged.
During printing, some ozone is released, but the amount does not cause any ill effect to one’s health. If, however, the machine is used over a long period of time in a poorly ventilated room or when printing an extremely large number of copies, the smell may become unpleasant. To maintain the appropriate environment for print work, it is suggested that the room be properly ventilated.
Cautions when Handling Consumables
Do not attempt to incinerate parts which contain toner. Dangerous sparks may cause burns.
Keep parts which contain toner out of the reach of children.
If toner happens to spill from parts which contain toner, avoid inhalation and ingestion, as well as contact with your eyes and skin.
•If you do happen to inhale toner, move to a place with fresh air and gargle thoroughly with a large amount of water. If coughing develops, contact a physician.
•If you do happen to ingest toner, rinse your mouth out with water and drink 1 or 2 cups of water to dilute the contents of your stomach. If necessary, contact a physician.
•If you do happen to get toner in your eyes, flush them thoroughly with water. If there is any remaining tenderness, contact a physician.
•If toner does happen to get on your skin, wash with soap and water.
Do not attempt to force open or destroy parts which contain toner.
Other precautions
After use, always dispose of the Toner Container in accordance with Federal, State and Local rules and regulations. Store all consumables in a cool, dark location.
If the machine will not be used for an extended period of time, remove the paper from the cassette, return it to its original package and reseal it.
viii
About the Operation Guide
This Operation Guide contains the following chapters:
1 Machine Parts
This chapter lists the names of different machine parts.
2 Preparation
This chapter explains how to start up the machine, load paper and originals, and use the application software included in the Product Library disc.
3 Copying
This chapter explains the functions you can use when copying.
4 Printing
This chapter explains the printing procedure from an application software.
5 Scanning
This chapter explains the functions you can use when scanning originals.
6 Maintenance
This chapter explains how to replace the toner container and how to care for your machine.
7 Troubleshooting
This chapter explains how to handle machine problems that may occur, such as paper jams.
8 Appendix
This chapter lists the machine specifications.
Conventions in This Guide
This manual uses the following conventions.
Convention |
Description |
Example |
||
|
|
|
||
Italic Typeface |
Used to emphasize a key word, phrase |
Refer to Connections on page 2-2. |
||
|
or reference to additional information. |
|
|
|
Bold |
Used to denote buttons on the |
To start printing, click OK. |
||
|
software. |
|
|
|
Bracket Bold |
Used to denote operation panel keys. |
Press [Start] to start copying. |
||
Courier |
Indicates characters entered in the |
1- appears in the display on the operation panel. |
||
|
display on the operation panel. |
|
|
|
Note |
Used to provide additional or useful |
|
|
Note Do not remove the toner container from the |
|
information about a function or feature. |
|
|
carton until you are ready to install it in the machine. |
|
|
|
||
Important |
Used to provide important information. |
IMPORTANT Take care not to touch the drum and |
||
|
|
transfer roller (black) during cleaning. |
||
Caution |
Used to suggest mechanical damage |
CAUTION When removing a paper jam, pull the paper |
||
|
as a result of an action. |
gently so as not to tear it. Torn pieces of paper are difficult |
||
|
|
to remove and may be easily overlooked, deterring the |
||
|
|
paper jam recovery. |
||
Warning |
Used to alert users to the possibility of |
WARNING If you are shipping the machine, remove and |
||
|
personal injury. |
pack the developer unit and drum unit in a plastic bag and |
||
|
|
ship them separately from the machine. |
||
ix

x

1 Machine Parts
This chapter explains the following topics: |
|
Front Machine Components.................................................................................................................................. |
1-2 |
Rear Machine Components................................................................................................................................... |
1-3 |
Operation Panel...................................................................................................................................................... |
1-4 |
1-1

Front Machine Components
1
2
3
4
5
6


 7
7
8
1Original Cover
2Original Size Indicator Plates
3Platen
4Inner Tray
5Paper Stopper
6Front Cover
7Cassette Cover
8Cassette
9Operation Panel
10Power Switch
Machine Parts
9
10
1-2

Machine Parts
Rear Machine Components
13
11
12
11Rear Cover
12Power Cord Connector
13USB Interface Connector
1-3

Machine Parts
Operation Panel
[ID Card Copy] key |
Displays the ID Card Copy |
|||
|
|
|
screen. |
|
[Copy] key |
Displays the Copy screen. |
|||
|
|
|
|
|
[Scan] key |
Displays the Scan screen. |
|||
|
|
|
|
|
[Print Box] key |
Displays the Print Box screen. |
|||
|
|
|
|
|
|
|
|
|
|
Mode Select key |
• Set the mode to Copies, |
||||
|
|
|
Density, or Program. |
||
|
|
|
• Press and hold for 5 seconds to |
||
|
|
|
print the status page. Refer to |
||
|
|
|
Printing the Status Page on |
||
|
|
|
page 2-42. |
||
|
|
||||
Copies indicator |
Lights up when Copies is selected. |
||||
|
|
|
Enter the number of copies. |
||
Density indicator |
Lights up when Density is selected. |
||||
|
|
|
Adjust the copy density. |
||
Program indicator |
Lights up when Program is |
||||
|
|
|
selected. Select the program |
||
|
|
|
number. |
||
|
|
|
|
|
|
|
|
|
|
|
|
|
|
|
|
|
|
|
|
|
|
|
|
|
|
|
|
|
|
|
|
|
|
|
|
|
|
|
|
|
|
|
|
|
Display |
• Displays numerical values and |
|
|
|
|
|
||||
|
settings such as the number of copies, |
|
|
|
|
|
||||
|
and error codes. |
|
|
|
|
|
||||
|
• When the machine is in sleep mode, |
|
|
|
|
|
||||
|
-- is displayed. |
|
|
|
|
|
||||
[] key / [] key |
Increments/decrements numbers in the |
|
|
|
|
|
||||
|
display. |
|
|
|
|
|
|
|
|
|
|
|
|
|
|
|
|
|
|
|
|
[Stop/Reset] key |
|
• Cancels the printing job in progress. |
||||||||
|
|
• Returns settings to their default states. |
||||||||
|
|
• Hold down two seconds to pause printing. Hold down two seconds again to |
||||||||
|
|
resume printing. |
||||||||
|
|
|
|
|
|
|
|
|
|
|
[Start] key |
|
Starts copying and scanning operations. |
||||||||
|
|
|
|
|
|
|
|
|
|
|
Processing Indicator (Green) |
Flashes when the machine is processing data. |
|||||||||
Attention Indicator (Amber) |
Lights or flashes when an error occurs. |
[Quiet Mode] key |
Turns on Quiet Mode. |
|
Quiet Mode |
|
If you prefer quiet operation, press [Quiet Mode] to turn on Quiet Mode. When Quiet |
|
Mode is on, the print speed is slower. |
1-4

2 |
Preparation |
|
|
|
|
This chapter explains the following topics: |
|
|
Connections ........................................................................................................................................................... |
2-2 |
|
Loading Paper ........................................................................................................................................................ |
2-4 |
|
Loading Originals................................................................................................................................................. |
2-16 |
|
Installing and Uninstalling Drivers and Utilities................................................................................................ |
2-17 |
|
Machine Settings.................................................................................................................................................. |
2-22 |
|
Configuration........................................................................................................................................................ |
2-36 |
|
Printing the Status Page...................................................................................................................................... |
2-42 |
|
2-1

Preparation
Connections
This section explains how to start up the machine.
Connecting the USB Cable
Follow the steps as below for connecting the USB cable.
1 Connect the USB cable to the machine’s USB interface connector.
Note Use a USB cable with a rectangular Type A plug and a square Type B plug. The USB cable should be shielded and no longer than 5 meters (16 feet) long.
2 Connect the other end of the USB cable to the computer's USB interface connector.
Connecting the Power Cord
Install the machine close to an AC wall outlet. If an extension cord is used, the total length of the power cord plus extension should be 5 meters (16 feet) or less.
 Note Only use the power cord supplied with the machine.
1 Connect the power cord to the power cord connector at the rear of the machine.
2 Connect the other end of the power cord to a power outlet.
2-2

Preparation
3 Press the power switch to On. The machine begins to warm up.
IMPORTANT If you install the toner container and switch on the power, a screen with two bars ( ) rotating is shown on the display on the operation panel. When the machine is first switched on after toner installation, there will be a delay of approximately 7 minutes before the machine gets ready to use. Once 01 appears in the display on the operation panel, machine installation is complete.
Starter Toner Container
The toner container packed with the new machine is a starter toner container. The starter toner container lasts an average of 700 pages.
2-3

Preparation
Loading Paper
General Guidelines
The machine is designed to print on standard copier paper, but it can also accept a variety of other types of paper within the limits specified below.
Note The manufacturer assumes no liability for problems that occur when paper not satisfying these requirements is used.
Selection of the right paper is important. Using the wrong paper can result in paper jams, curling, poor print quality, and paper waste, and in extreme cases can damage the machine. The guidelines given below will increase the productivity of your office by ensuring efficient, trouble-free printing and reducing wear and tear on the machine.
Paper Availability
Most types of paper are compatible with a variety of machines. Paper intended for xerographic copiers can also be used with the machine.
There are three general grades of paper: economy, standard, and premium. The most significant difference between grades is the ease with which they pass through the machine. This is affected by the smoothness, size, and moisture content of the paper, and the way in which the paper is cut. The higher the grade of paper you use, the less risk there will be of paper jams and other problems, and the higher the level of quality your printed output will reflect.
Differences between paper from different suppliers can also affect the machine's performance. A high-quality machine cannot produce high-quality results when the wrong paper is used. Low-priced paper is not economical in the long run if it causes printing problems.
Paper in each grade is available in a range of basis weights (defined later). The traditional standard weights are 60 to 120 g/m² (16 to 31.9b).
Paper Specifications
The following table summarizes the basic paper specifications. Details are given on the following pages:
Item |
Specifications |
|
|
Weight |
60 to 220 g/m² (16 to 58.5 lb/ream) |
|
|
Thickness |
0.086 to 0.110 mm (3.4 to 4.3 mils) |
|
|
Dimensional Accuracy |
±0.7 mm (±0.0276 inches) |
|
|
Squareness of Corners |
90 ±0.2° |
|
|
Moisture Content |
4 to 6% |
|
|
Pulp Content |
80% or more |
|
|
2-4
Preparation
Minimum and Maximum Paper Sizes
The minimum and maximum paper sizes are as follows.
356 mm (14 inches)
inches) |
|
|
|
Minimum |
|
||
|
|
|
|||||
|
|
|
|
|
|
||
148 mm (5-13/16 |
|
|
|
Paper Size |
|
||
|
|
|
|
|
|
|
|
|
|
|
|
|
|
|
|
|
|
|
|
|
|
|
|
|
|
|
|
|
|
|
|
|
|
|
|
|
|
|
|
70 mm (2-3/4 inches)
Maximum
Paper Size
216 mm (8-1/2 inches)
Selecting the Right Paper
This section describes the guidelines for selecting paper.
Condition
Avoid using paper that is bent at the edges, curled, dirty, torn, embossed, or contaminated with lint, clay, or paper shreds.
Use of paper in these conditions can lead to illegible printing and paper jams, and can shorten the life of the machine. In particular, avoid using paper with a surface coating or other surface treatment. Paper should have as smooth and even a surface as possible.
Composition
Do not use paper that has been coated or surface-treated and contains plastic or carbon. The heat of fusing can cause such paper to give off harmful fumes.
Bond paper should contain at least 80% pulp. Not more than 20% of the total paper content should consist of cotton or other fibers.
Paper Sizes
Cassette is available for the paper sizes shown below. The dimensional tolerances are ±0.7 mm for the length and width. The angle at the corners must be 90° ±0.2°.
•A4 (210 × 297 mm)
•A5 (148 × 210 mm)
•A6 (105 × 148 mm)
•Folio (210 × 330 mm)
•JIS B5 (182 × 257 mm)
•ISO B5 (176 × 250 mm)
•Letter (8-1/2 × 11 inches)
•Legal (8-1/2 × 14 inches)
•Statement (5-1/2 × 8-1/2 inches)
•Executive (7-1/4 × 10-1/2 inches)
2-5

Preparation
•Envelope Monarch (3-7/8 × 7-1/2 inches)
•Envelope #10 (4-1/8 × 9-1/2 inches)
•Envelope #9 (3-7/8 × 8-7/8 inches)
•Envelope #6-3/4 (3-5/8 × 6-1/2 inches)
•Envelope C5 (162 × 229 mm)
•Envelope DL (110 × 220 mm)
•Oficio II (216 × 340 mm, 8-1/2 × 13 inches)
•216 × 340 mm
•16 K (197 × 273 mm)
•Custom*
70 × 148 to 216 × 356 mm, 2-3/4 × 5-13/16 to 8-1/2 × 14 inches
*If the length of custom paper is larger than 297 mm (11-11/16 inches), the machine can be substituted A4, Folio, Legal, and Oficio II as the standard paper size.
Smoothness
The paper should have a smooth, uncoated surface. Paper with a rough or sandy surface can cause blank spaces in the printed output. Paper that is too smooth can cause multiple feeding and fogging problems. (Fogging is a gray background effect.)
Basis weight
Basis weight is the weight of paper expressed in grams per square meter (g/m²). Paper that is too heavy or too light may cause feed errors or paper jams as well as premature wear of the product. Uneven weight of paper, namely uneven paper thickness may cause multiple-sheet feeding or print quality problems such as blurring because of poor toner fusing.
The recommended basis weight is between 60 and 220 g/m² (16 to 58.5 lib/ream).
Paper Weight Equivalence Table
The paper weight is listed in pounds (lb) and metric grams per square meter (g/m²). The shaded part indicates the standard weight.
Europe Metric Weight |
U. S. Bond Weight (lb) |
Europe Metric Weight |
U. S. Bond Weight (lb) |
|
(g/m²) |
(g/m²) |
|||
|
|
|||
|
|
|
|
|
60 |
16 |
128 |
34 |
|
64 |
17 |
135 |
36 |
|
75 |
20 |
148 |
39 |
|
80 |
21 |
157 |
42 |
|
81 |
22 |
163 |
43 |
|
|
|
|
|
|
90 |
24 |
176 |
47 |
|
100 |
27 |
199 |
53 |
|
105 |
28 |
220 |
58.5 |
|
120 |
32 |
|
|
|
|
|
|
|
Thickness
The paper used with the machine should be neither extremely thick nor extremely thin. If you are having problems with paper jams, multiple feeds, and faint printing, the paper you are using may be too thin. If you are having problems with paper jams and blurred printing the paper may be too thick. The correct thickness is 0.086 to 0.110 mm (3.4 to 4.3 mils).
Moisture Content
Moisture content is defined as the percent ratio of moisture to the dry mass of the paper. Moisture can affect the paper’s appearance, feed ability, curl, electrostatic properties, and toner fusing characteristics.
2-6

Preparation
The moisture content of the paper varies with the relative humidity in the room. When the relative humidity is high and the paper absorbs moisture, the paper edges expand, becoming wavy in appearance. When the relative humidity is low and the paper loses moisture, the edges shrink and tighten, and print contrast may suffer.
Wavy or tight edges can cause jams and alignment anomalies. The moisture content of the paper should be 4 to 6%.
To ensure correct moisture content, it is important to store the paper in a controlled environment. Some tips on moisture control are:
•Store paper in a cool, dry location.
•Keep the paper in its wrapping as long as possible. Re-wrap paper that is not in use.
•Store paper in its original carton. Place a pallet etc. under the carton to separate it from the floor.
•After removing paper from storage, let it stand in the same room as the machine for 48 hours before use.
•Avoid leaving paper where it is exposed to heat, sunlight, or damp.
Other Paper Properties
Porosity: Indicates the density of paper fiber.
Stiffness: Limp paper may buckle in the machine, resulting in paper jams.
Curl: Most paper naturally tends to curl one way if left unpacked. When paper passes through the fixing unit, it curls upward a little. To produce flat printouts, load the paper so that the upward pressure from the machine can correct their curling.
Electrostatic discharge: During the printing process the paper is electrostatically charged to attract the toner. The paper must be able to release this charge so that printed sheets do not cling together in the Output Tray.
Whiteness: The contrast of the printed page depends on the whiteness of the paper. Whiter paper provides a sharper, brighter appearance.
Quality control: Uneven sheet size, corners that are not square, ragged edges, welded (uncut) sheets, and crushed edges and corners can cause the machine to malfunction in various ways. A quality paper supplier should take considerable care to ensure that these problems do not occur.
Packaging: Paper should be packed in a sturdy carton to protect it from damage during transport. Quality paper obtained from a reputable supplier is usually correctly packaged.
Specially treated paper: We do not recommend printing onto the following types of paper, even if it conforms to the basic specifications. When you use these kinds of paper, purchase a small amount first as a sample to test.
•Glossy paper
•Watermarked paper
•Paper with an uneven surface
•Perforated paper
2-7

Preparation
Special Paper
The following types of special paper can be used:
•Preprinted paper
•Labels*
•Bond paper
•Recycled paper
•Thin paper* (60 to 64 g/m²)
•Rough paper
•Letterhead
•Colored paper
•Prepunched paper
•Envelopes*
•Cardstocks (Postcards)*
•Thick paper (90 to 220 g/m²)
•High-quality paper
*Only one sheet can be loaded at a time in the cassette.
Use paper that is sold specifically for use with copiers or printers (heat-fusing type).
Since the composition and quality of special paper vary considerably, special paper is more likely than white bond paper to give trouble during printing. No liability will be assumed if moisture and so forth given off during printing on special paper causes harm to the machine or operator.
Note Before purchasing any type of special paper, test a sample on the machine and check that printing quality is satisfactory.
Labels
One label sheet can be loaded at a time.
The basic rule for printing on adhesive labels is that the adhesive must never come into contact with any part of the machine. Adhesive paper sticking to the drum or rollers will damage the machine.
Top sheet (white bond paper)
Adhesive
 Carrier sheet
Label paper has a structure comprising of three layers, as shown in the diagram. The top sheet is printed on. The adhesive layer consists of pressure-sensitive adhesives. The carrier sheet (also called the linear or backing sheet) holds the labels until used. Due to the complexity of its composition, adhesive-backed label paper is particularly likely to give printing problems.
Adhesive label paper must be entirely covered by its top sheet, with no spaces between the individual labels. Labels with spaces in between are liable to peel off, causing serious paper jam problems.
2-8

Preparation
Some label paper is manufactured with an extra margin of top sheet around the edge. Do not remove the extra top sheet from the carrier sheet until after printing is finished.
Acceptable |
Unacceptable |
 Top sheet

Carrier sheet 
The table below lists the specifications for adhesive label paper.
Item |
Specification |
|
|
Weight of top sheet |
44 to 74 g/m² (12 to 20 lb/ream) |
|
|
Composite weight |
104 to 151 g/m² (28 to 40 lb/ream) |
|
|
Thickness of top sheet |
0.086 to 0.107 mm (3.9 to 4.2 mils) |
|
|
Composite thickness |
0.115 to 0.145 mm (4.5 to 5.7 mils) |
|
|
Moisture content |
4 to 6% (composite) |
|
|
Postcards
One postcard can be loaded at a time. Make sure the postcards you are going to set are not curled. Feeding curled postcards may cause paper jams.
Some postcards have rough edges on the back (those are created when the paper is cut). In this case, put the postcard on a flat place and rub the edges with, for example, a ruler to smooth them.
Envelopes
One envelope can be loaded at a time. Envelopes should be fed in the face-up position, right edge first.
Since the composition of an envelope is more complex than that of ordinary paper, it is not always possible to ensure consistent printing quality over the entire envelope surface.
Normally, envelopes have a diagonal grain direction. This direction can easily cause wrinkles and creases when envelopes pass through the machine. Before purchasing envelopes, make a test print to check whether the machine accepts the envelope.
•Do not use envelopes that have an encapsulated liquid adhesive.
•Avoid a long printing session for envelopes only. Extended envelope printing can cause premature machine wear.
2-9

Preparation
Thick Paper
If an excessive amount of thick paper is loaded in the cassette, it may not be fed. In that case, reduce the number of sheets to be loaded.
Fan the stack of paper and align the edges before loading them in the paper source. Some types of paper have rough edges on the back (those are created when the paper is cut). In this case, put the paper on a flat place and rub the edges once or twice with, for example, a ruler to smooth them. Feeding rough edged paper may cause paper jams.

 Burrs
Burrs
Burrs 
Note If paper is not fed even after its rough edges have been removed, warp the paper at the leading edge upward for a few millimeters as shown in the figure, and then load the paper.
Colored Paper
Colored paper should satisfy the same conditions as white bond paper. Refer to Paper Specifications on page 2-4. In addition, the pigments used in the paper must be able to withstand the heat of fusing during the printing process (up to 200°C or 392°F).
Preprinted Paper
Preprinted paper should satisfy the same conditions as white bond paper. Refer to Paper Specifications on page 2-4. The preprinted ink must be able to withstand the heat of fusing during the printing process, and must not be affected by silicone oil.
Do not use paper with any kind of surface treatment, such as the type of paper commonly used for calendars.
Recycled Paper
Select recycled paper that meets the same specifications as the white bond paper except for whiteness. Refer to Paper Specifications on page 2-4.
Note Before purchasing recycled paper, test a sample on the machine and check that the printing quality is satisfactory.
2-10

Preparation
Paper Type
The machine is capable of printing under the optimum setting for the type of paper being used.
Not only can preset paper types be selected, but it is also possible for you to define and select customized paper types. Paper type can be changed using the printer driver and KYOCERA Client Tool. The following types of paper can be used.
Paper Type |
Paper Weight Displayed in |
Paper Type |
Paper Weight Displayed in |
|
KYOCERA Client Tool |
KYOCERA Client Tool |
|||
|
|
|||
|
|
|
|
|
Plain |
Normal 2 |
Color |
Normal 2 |
|
|
|
|
|
|
Preprinted |
Normal 2 |
Prepunched |
Normal 2 |
|
|
|
|
|
|
Labels* |
Heavy 1 |
Envelope* |
Heavy 2 |
|
|
|
|
|
|
Bond |
Heavy 1 |
Cardstock* |
Heavy 2 |
|
|
|
|
|
|
Recycled |
Normal 2 |
Thick |
Heavy 2 |
|
|
|
|
|
|
Vellum* |
Light |
High quality |
Normal 2 |
|
|
|
|
|
|
Rough |
Heavy 1 |
Custom 1 (to 8)** |
Normal 2 |
|
|
|
|
|
|
Letterhead |
Normal 2 |
|
|
|
|
|
|
|
*One sheet must be loaded at a time.
**This is a paper type defined and registered by the user. Up to eight types of user settings may be defined. For more information, refer to KYOCERA Client Tool User Guide.
Preparing the Paper
After removing paper from the packaging, fan through the sheets to separate them prior to loading.
If using paper that has been folded or is curled, straighten it prior to loading. Failure to do so may result in a paper jam.
IMPORTANT Ensure paper is not stapled and clips are removed.
You should not use inkjet printer paper or any paper with a special surface coating. (Such papers may cause paper jams or other faults.)
2-11
Preparation
Loading Paper into Cassette
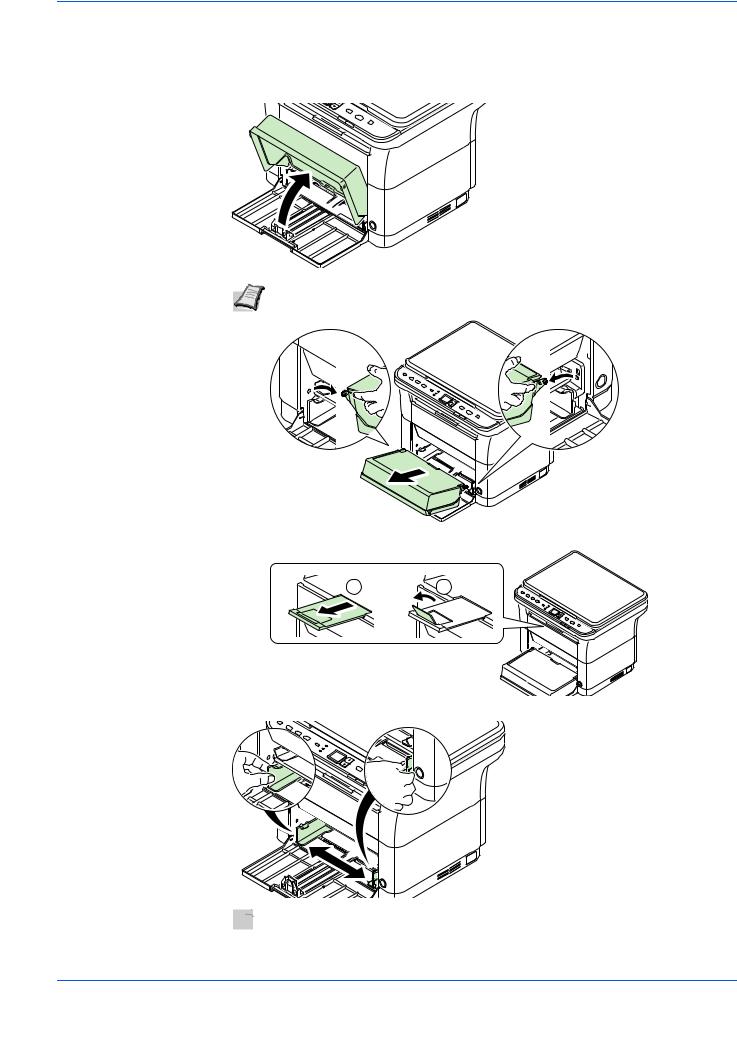
250 sheets of A4 or Letter paper (80 g/m²) may be loaded into the cassette. 1 Open the cassette cover.
Note When using paper that is larger than A4/Letter, remove the cassette cover.
Gently press on both the left and right sides of the cassette cover and pull.
If necessary, open the paper stopper shown in the figure.
1 |
2 |
2 Adjust the position of the width guides located on the left and right sides of the cassette.
 Note Paper sizes are marked on the cassette.
2-12

Preparation
3 Adjust the paper length guide to the paper size required.
 Note When using paper larger than A4/Letter, pull out the paper length guide.
When using A6 paper, attach the stopper.
Move the stopper to the A6 position.
2-13

Preparation
4Load the paper all the way in the cassette until the paper touches the far inner side. Ensure the side to be printed is facing up and the paper is not folded, curled, or damaged.
IMPORTANT Adjust so that there is no gap between the paper length guide and the paper.
Note Load an amount of paper that fits under (does not contact) the tabs on the width guides.
When using A6 paper, load the paper as shown in the illustration.
When loading an envelope, load as shown in the illustration.
Close the flap. 

Correct Incorrect
Load envelope with the print side facing up.
2-14
Loading...