


JMW9330DAW
Jenn-Air JMW9330DAW, JMW9330DAS, JMW9330DAB, JMW8330DAW, JMW8330DAS Owner’s Manual
...
JENN-AI
_JENN-AIR
Form No. A,/04/03 Part No. 8112P216-60
_2003 Maytag Appliances Sales Co,
Litho U,S,A.
installer: Please leave this manual with this appliance,
Consumer: Please read and keep thb manual for future
reference. Keepsales receipt and/or canceled checkas proof
of purchase,
Model Number
Serial Number
Date of Purchase
If you have questions, caik
Jenn-Air Customer Assistance
1-800-JEN NAIR 'J -800-536-6247)
1-800-688-2080 { U.S.Try for hearing or speech impaired}
(Mon.-Fd., 8 am-8 pm EasternTime}
Internet: http:i/www.jen nair.com
In our continuing effort to improve the quality and pertor-
mance of our cooking products, itmay be necessary to make
changes to the appliance without revising this guide.
Fer service J#fePmade_t,see page 27.
To ensure proper and safe operation: Appliance
must be properly installed and grounded by a qualified
technician. Do not attempt to adjust, repair, service, or
replace any part of your appliance unless it is specifi-
cally recommended in this guide. All other servicing
should be referred to a qualified servicer.
Always disconnect power to appliance before servicing.
To Prevent Fire or Smoke
Be sure all packing materials are removed from the
appliance before operating it.
Keep area around appliance clear and free from
combustible materials. Flammabb materials should not
be stored in an oven.
Many plastics are vulnerable to heat. Keep plastics
away from parts of the appliance that may become
warm or hot.
To prevent grease fires, do not let cooking grease or
other flammable materials accumulate in or near the
appliance.
IM PORTANT SAFETY
iNSTRUCTiONS
Warning and Important Safety Instructions appearing in
this guide are not meant to cover all possible conditions
and situations that may occur. Common sense, caution,
and care must be exercised when installing, maintain-
ing, or operating the appliance.
Always contact your dealer, distributor, service agent, or
manufacturer about problems or conditions you do not
understand.
Recognize Safety Symbols, Words, Labds
WARNING. Hazards or unsafe practices which
COULD reSUlt in severe persona! injury or death,
COULD result in minor personal injury.
Read and follow ail instrections before using this
appmiance to prevent the potential risk of fire, electric
shock, personal injury or damage to the appliance as a
result of improper usage of the appliance. Use appliance
only for its intended purpose as described in this guide.
In Case of Fire
• Use dry chemical or foam-type extinguisher or baking
soda to smother fire or flame. Never use water on a
grease fire.
1°Turn off appliance to avoid spreading the flame.
2. NEVER pick up or move a flaming pan.
3. Smother fire or flame by closing the oven door.
Child Safety
above an app!iance. Chi!dren c!irnb!ng on the appli-
ance or on the appliance door to reach items could be
NEVER leave children alone or unsupervised near the
appliance when it is in use or is still hot. Children
should never be allowed to sit or stand on any part of
the appliance as they could be injured or burned.
Children must be taught that the appliance and
utensils in it can be hot. Let hot utensils cool in a safe
place, out of reach of small children. Children should
be taught that an appliance is not a toy. Children
should not be allowed to play with controls or other
parts of the unit.
About Your Appliance
NEVER use an appliance as a step tO reach gabinets
above. Misuse of appliance doers, such as stepping,
serious injuries,
To prevent potential hazard to the user and damage to
the appliance, do not use appliance as a space heater
to heat or warm a room. ,Also, do not use the oven as a
storage area for food or cooking utensil&
Do not obstruct the flow of air by blocking the oven
venL
• DO NOT TOUCH HEATING ELEMENTS OR INTERIOR
SURFACES OF OVEN. Heating elements may be hot
even though they are dark in color. Interior surfaces of
any oven become hot enough to cause burns. During
and after use, do not touch, or let clothing or other
flammable materials contact heating elements or
interior surfaces of oven until they have had sufficient
time to cool. Other surfaces of the appliance may
become hot enough to cause burns - among these
surfaces are: oven vent openings and surfaces near
these openings, oven doors, windows of oven door&
Do not touch a hot oven light bulb with a damp cloth
as the bulb could break. Should the bulb break,
disconnect power to the appliance before removing
bulb to avoid electrical shock.
A fan should be heard during some bake, convect
bake, convect roast, and all broil and cleaning opera-
tions. If you do not hear the fan, call an authorized
servicer.
NEVER use aluminum foil to cover an oven rack or
oven bottom. Misuse could result in risk of electric
shock, fire, or damage to the appliance. Use foil only
as directed in this guide.
Cooking Safety
Never heat an unopened food container in the oven.
Pressure build-up may cause container to burst
resulting in serious personal injury or damage to the
appliance.
Use dry, sturdy potholders. Damp potholders may
cause burns from steam. Dish towels or other substi-
tutes should never be used as potholders because they
can trail across hot elements and ignite or get caught
on appliance part&
• Wear proper apparel. Loose fitting or long hanging-
sleeved apparel should not be worn while cooking.
Clothing may ignite and cause burns if garment comes
in contact with heating elements.
Always place oven racks in the desired positions while
oven is cool Slide oven rack out to add or remove
food, using dry, sturdy potholders. Always avoid
reaching into the oven to add or remove food. If a rack
must be moved while hot, use a dry potholder. Do not
let potholder contact hot element in oven.
Use care when opening the oven door. Let hot air or
steam escape before removing or replacing food.
• PREPARE[} FO0[} WARNUNG: Follow food
manufacturer's instructions. If a plastic frozen food
container and!or its cover distorts, warps, or is other-
wise damaged during cooking, immediately discard
the food and its container. The food could be contami-
nated.
Do not allow aluminum foil or meat probe to contact
heating element.
Always turn off all controls when cooking is com-
pleted.
Utensim Safety
Follow the manufacturer's directions when using oven
cooking bags.
This appliance has been tested for safe performance
using conventional cookware. Do not use any devices
or accessories that are not specifically recommended
in this manual. Do not use add-on oven convection
systems. The use of devices or accessories that are not
expressly recommended in this guide can create
serious safety hazards, result in performance problems,
and reduce the life of the components of the appli-
ance.
Only certain types of glass, glass/ceramic, ceramic,
earthenware, or other glazed utensils are suitable for
oven service without breaking due to the sudden
change in temperature. Follow utensil manufacturer's
instructions when using glass.
Cleaning Safety
• Turn off all controls and wait for appliance parts to
cool before touching or cleaning. Clean with caution.
Use care to avoid steam burns if a wet sponge or cloth
is used to wipe spills on a hot surface. Some cleaners
can produce noxious fumes if applied to a hot surface.
Clean only parts listed in this guide.
Se f-C ean Oven
Do not leave food or co0king utensils, etc. in the oven
dur!ng the se!f_c!ean cycle,
Do not clean door gasket. The door gasket is essential
for a good seal Care should be taken not to rub,
damage, or move the gaskeL
Do not use oven cleaners or oven liners of any kind in
or around any part of the seif-cban oven.
Before seif-cbaning the oven, remove broiler pan,
oven racks and other utensils, and wipe off excessive
spfllovers to prevent excessive smoke or flare ups.
important Safety Notice and
The California Safe Drinking Water and Toxic Enforce-
ment Act of 1986 (Proposition 65} requires the Governor
of California to publish a list of substances known to the
State of California to cause cancer or reproductive harm,
and requires businesses to warn customers of potential
exposures to such substances.
Users of this appliance are hereby warned that when
the oven is engaged in the seJf-cban cycle, there may
be some Jow-bveJ exposure to some of the listed
substances, including carbon monoxide. Exposure to
these substances can be minimized by properly venting
the oven to the outdoors by opening the windows and/
or door in the room where the appliance is located
during the self-dean cycle.
UMPORTANT NOTUCE REGARDUNG PET BURDS:
Never keep pet birds in the kitchen or in rooms where
the fumes from the kitchen could reach. Birds have a
very sensitive respiratory system. Fumes released during
an oven self-charting cycle may be harmful or fatal to
birds. Fumes released due to overheated cooking off, fat,
margarine and overheated non-stick cookware may be
equally harmful.
Note: For microwave oven operation (select models}
refer to the use and care guide packed in the micro-
wave oven.
Save These instructions for Future Reference
3
O00KING
Control Panel
A B C
Keep UF_IEROVENWarm
CANCEL Clean Broil Bake
CANCEL Clean Broil Bake
Keep TIMER TIMER Clock 0
Warm LOWER OVEN 1 2
D EF
Convect
Bake
I I
Cook & Delay
Hold
1
1 3
4 5 6
Favorite
l
G
8 9
Autoset
H
_Pvper
Light
Lower
Oven
Light
I
J K L M 0
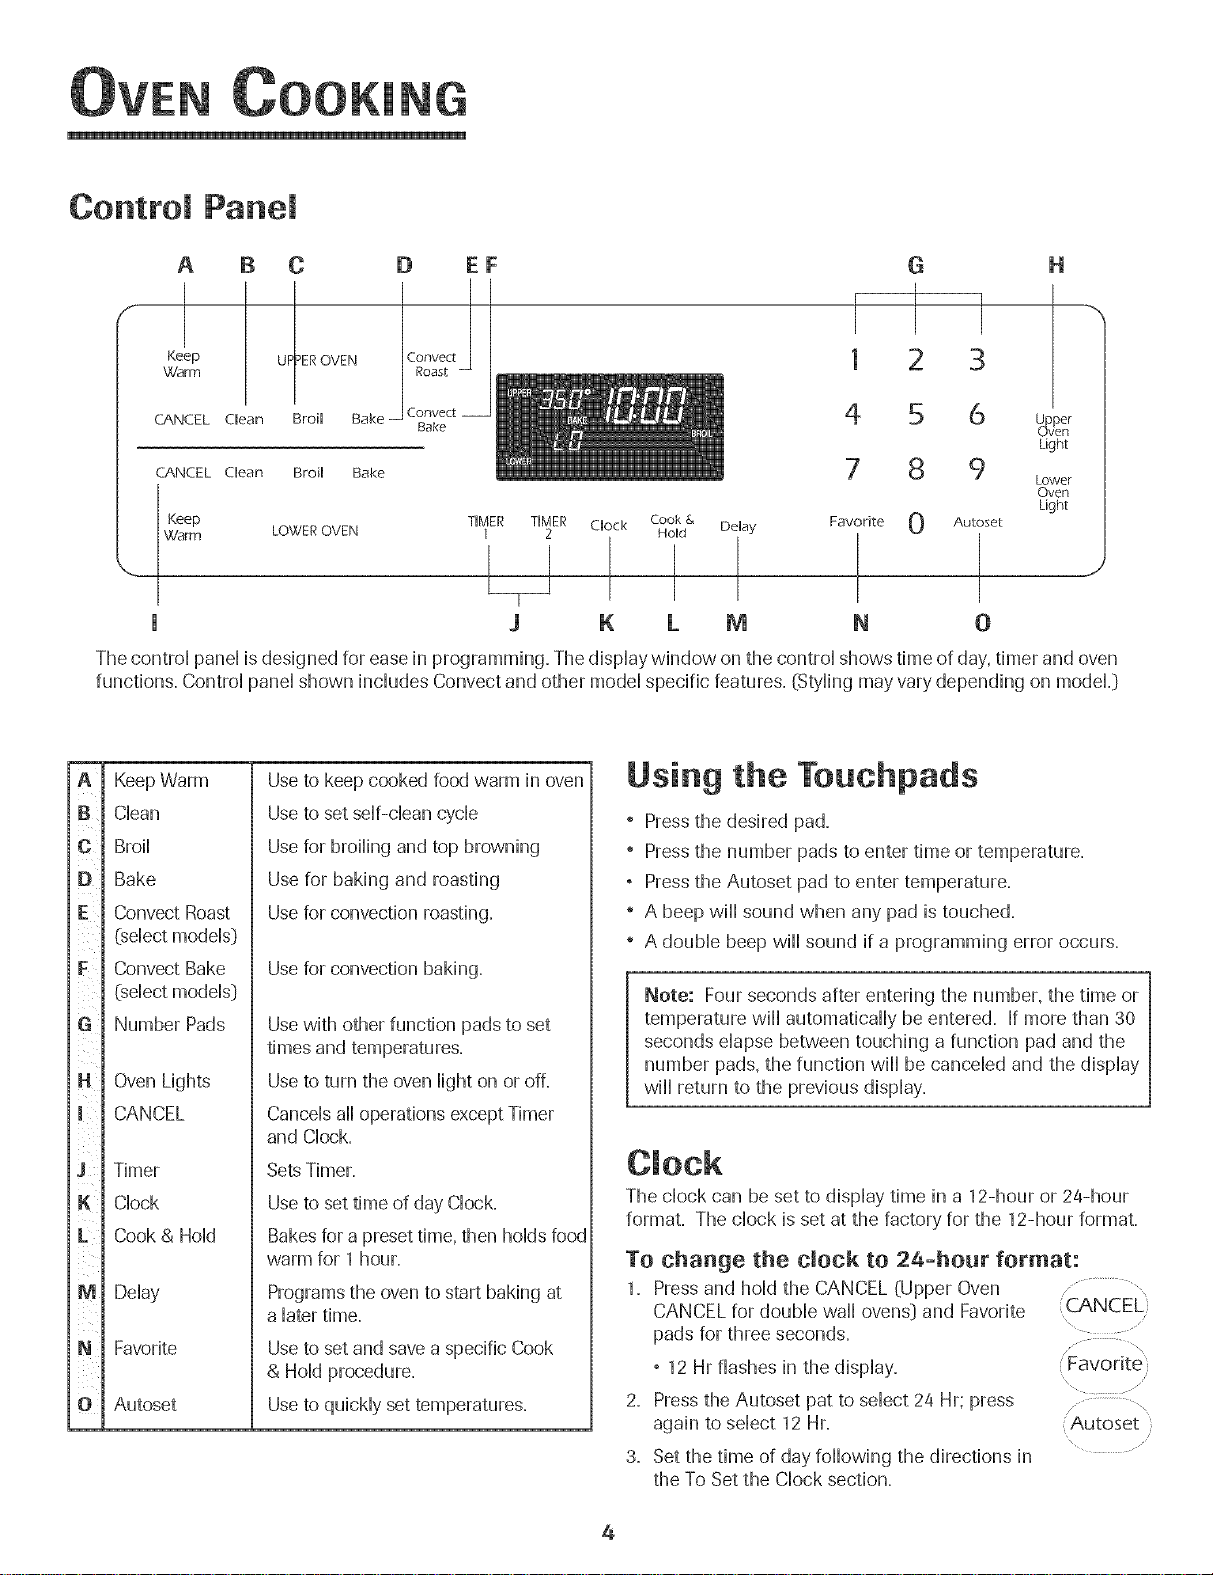
The control panel is designed for ease in programming. The display window on the control shows time of day, timer and oven
functions. Control panel shown includes Convect and other model specific features. (Styling may vary depending on modeL}
ia
Keep Warm
i l
Clean
l
1¢
Broil
Bake
iD
Convect Roast
(select models}
Convect Bake
iF
(select models}
ii!i
Number Pads
J l i
[
iN
Oven Lights
i l
CANCEL
J i i
Timer
l
Clock
iK
[
L
Cook & Hold
im
Delay
ii
ii
IN
Favorite
ii
i i
Autoset
Useto keep cooked food warm in oven
Useto set self-clean cycle
Usefor broiling and top browning
Use for baking and roasting
Usefor convection roasting.
Use for convection baking.
Usewith other function pads to set
times and temperatures.
Useto turn the oven light on or off.
Cancels ailoperations except Timer
and Clock.
SetsTimer.
Useto set time of day Clock.
Bakesfor a preset time, then holds food
warm for 1 hour.
Programs the oven to start baking at
a later time.
Useto set and savea specific Cook
& Hold procedure.
Useto quickly set temperatures.
Using the Touchpads
" Press the desired pad.
" Press the number pads to enter time or temperature.
, Press the Autoset pad to enter temperature.
" A beep will sound when any pad is touched.
" A double beep will sound if a programming error occurs.
Note: Four seconds after entering the number, the time or
temperature will automatically beentered. If more than 30
seconds elapse between touching a function pad and the
number pads, the function will be canceled and the display
will return to the previous display.
The clock can be set to display time in a 12-hour or 24-hour
format, The chockis set at the factory for the 12-hour format,
To change the clock to 2a-hour format:
1. Pressand hold the CANCEL (Upper Oven
CANCEL for double wail ovens} and Favorite
pads for three seconds.
, 12 Hr flashes in the display.
2. Pressthe Autoset pat to select 24 Hr; press
again to select 12Hr.
3. Set the time of day following the directions in
the To Set the Clock section.
N
eft
_J
,:CANCEL'}
...... \
'Autoset
\ .........
4
OOKING
To set the Clock:
1. Pressthe Clock pad. Clock
, The time of day flashes in the display.
2. Pressthe appropriate number pads to set the time of day.
, Colon flashes in the display.
3. Pressthe Clock pad again or wait four seconds.
, The colon will remain on.
When electrical power is supplied or after a power interrup-
tion, the last clock time before power was interrupted will
flash.
To recall the time of day when another time function is
showing, press the Clock pad.
Clock time cannot be changed when the oven has been
programmed for Delay cook or clean or Cook & Hold.
To cancel the Clock display:
If you do not want the time of day to display:
Press and hold the CANCEL and Clock pads for
three seconds. The time of day will disappear .....
from the display. ...............,
When the clock display is canceled, press the , Clock }
Clock pad to briefly display the time of day. ............
When the clock display is canceled, after 15minutes, the oven
control will go into Standby Mode to saveenergy. The display
will be blank and the oven light will not operate. To "wake up"
the control from Standby Mode, press any touchpad. A double
beep will sound.
CANCEL
To restore the Clock display:
Press and hold the CANCEL and Clock pads for three sec-
onds. The time of day will reappear in the display.
The timer can be set from one minute @0:01}up to 99 hours
and 59 seconds _99:59}.
The timer can be used independently of any other oven
activity'. It can also be set while another oven function is
operating.
The Timer does not control the oven. It only controls a
beeper.
TO set the Timer:
1. Pressthe Timer pad.
, 00:00and TIMER icon flash in the display.
2. Pressthe appropriate number pads until the correct time
appears in the display.
, The colon and TIMER icon will continue to flash.
3. PressTimer pad again or wait four seconds.
, The colon stops flashing and the time begins counting
down.
, The last minute of the timer countdown wiii be displayed
in seconds.
4. At the end of the set time, one long beep wiii sound and
"End" will be displayed.
5. Pressthe Timer pad to clear the display. ..............,
TIMER
To cancel theTimer: , ! ...........
1. Pressand hold the Timer pad for three seconds ..........i 0
OR
2. Pressthe Timer pad and press '0' using the number pads.
Locking the Control
and Oven Door
The touchpad and oven door call be locked for safety,
cleaning, or to prevent unwanted use. The touchpads will not
function when locked.
If the oven is currently in use, the touchpads and door cannot
be locked.
The current time of day wiii remain in the display when the
touchpads and door are locked.
To lock:
1. Pressand hold the CANCEL and Cook & Hold .........
pads for three seconds .............
° OFFappears in the display
° The LOCK icon flashes while the door is locking.
To unlock:
Press and hold the CANCEL and Cook & Hold pads for three
seconds. OFFdisappears from the display.
Note: The touchpads and oven door cannot be locked if
the oven temperature is 400° For above.
Fault Codes
The BAKE or LOCK icon may flash rapidly in the display to
alert you if there is an error or a problem. If the BAKE or
LOCK icon flashes in the display, press CANCEL pad. If the
BAKE or LOCK icon continues to flash, disconnect power to
the appliance. Wait a few minutes, and then reconnect
power. If the icon flashing still continues, disconnect power to
the appliance and call an authorized servicer.
(CANCEL}
Cook &
5

OOKING
To set Bake:
1. Pressthe Bake pad.
, The BAKE icon will flash+
, 000 will flash in the display. ......
2. Select the oven temperature. Press the Autoset pad for
350° For the appropriate number pads.
+ Eachadditional press of the Autoset pad will increase
the temperature by 25°.
+ The oven temperature can be set from 170° to 550°.
3. Press Bake pad again or wait four seconds.
+ The BAKE icon will stop fiasMng and light in the display.
+ The PREHEATicon wiHHHightin the dispHay.
+ 100° or the actual oven temperature if over 100° Fwill
display. It will rise in 5° increments until the preset
temperature is reached.
4. Allow the oven to preheat for 8-15 minutes.
+ When the set oven temperature is reached, one long
beep will sound.
+ The set temperature will display.
+ The PREHEATicon will turn off.
Bake
:Autoset '
Bak+ng Differences Between Your Old
and New Oven
It is normal to notice some baking time differences between a
new ovenand anold one. See"Adjusting the OvenTemperature"
on page 12.
Baking with Convection
(:select models)
When convection baking, enter your normal baking tempera-
ture. The control will automatically reduce the set oven
temperature by 25°.
TO set Conveet Bake:
1. Pressthe Convect, or Convect Bake pad.
+ The BAKE and FAN icons will flash
, 000 will flash in the display.
2. Select the oven temperature. Press the Autoset pad for
350° For the appropriate number pads.
, Eachadditional press of the Autoset pad will increase
the temperature by 25 degrees. The oven temperature
can be set from 170° to 550°.
3.
Press Convect Bake pad again or wait four seconds.
, The BAKE icon will stop flashing.
, The PREHEATicon will light in the display.
+ 100°or the actual oven temperature if over 100° Fwill
display. It will rise in 5° increments until the preset
temperature is reached.
, The FAN icon will start to rotate.
Convect
Bake
Autoset
]
+ To recall set temperature during preheat, press Bake pad.
5. Placefood in the oven.
8. Check cooking progress at the minimum cooking time.
Cook longer if needed.
7. When cooking is finished, press CANCEL pad.
8. Remove food from the oven. "...........
Baking Notes:
+ To change the oven temperature during cooking+press
Bake,then press the Autoset or appropriate number pads
until the desired temperature is displayed.
To change the oven temperature during preheat, press the
Bake padtwice, then pressthe Autoset pad or appropriate
number pads until the desired temperature is displayed.
If you forget to turn off the oven, it will automatically turn
off at the end of 12 hours. If you wish to deactivate this
feature, see page 11.
Foradditional baking and roasting tips, see "Cooking Made
Simple" booklet.
4. Allow the oven to preheat for 8-15 minutes.
, When the set oven temperature is reached, one long
beep will sound.
, The PREHEATicon will turn off.
+ The set temperature will display.
, To recall the set temperature during preheat, press the
Convect Bake pad.
5. Placefood in the oven.
6. Check cooking progress at the minimum cooking time.
Cook longer if needed.
7. When cooking is finished, press CANCEL pad.
8. Removefood from the oven.
\
O00KING
Roasting With Convection
(select models)
When convection roasting, enter your normai roasting time
and temperature. The controi wiii automaticaHHyprompt you to
check the food for aloneness at 75% of the set time.
° When convection roasting, the cooking time must be set
before setting the temperature.
° If your recipe requires a preheated oven, add 15 minutes
to the cooking time programmed.
° Roasting times can vary with different cuts of meat.
° Refer to "Cooking Made Simpie" bookiet for suggested
roasting temperatures and times.
To set Convect Roast:
1. Pressthe Convect Roast pad.
° The ROASTand FAN icons wiii flash
° 00:00wiii flash in the dispiay.
, 000 iights in the dispiay.
2. Enter the roasting time using the number pads.
, Time can be set from 10 minutes (00:10} to 11 hours,
59 minutes (11:59}.
, Press Convect Roastagain or wait 4seconds.
, 'Roast' flashes in the dispiay.
3. Seiect the oven temperature. Press the " ..........................
Autoset pad for 350° F or the appropriate , ....
number pads.
° Eachadditionai pressof the Autoset pad wiii uncrease
the temperature by 25°.
° The oven temperature can be set from 170° to 550°.
Convect"
Roast
Autoset
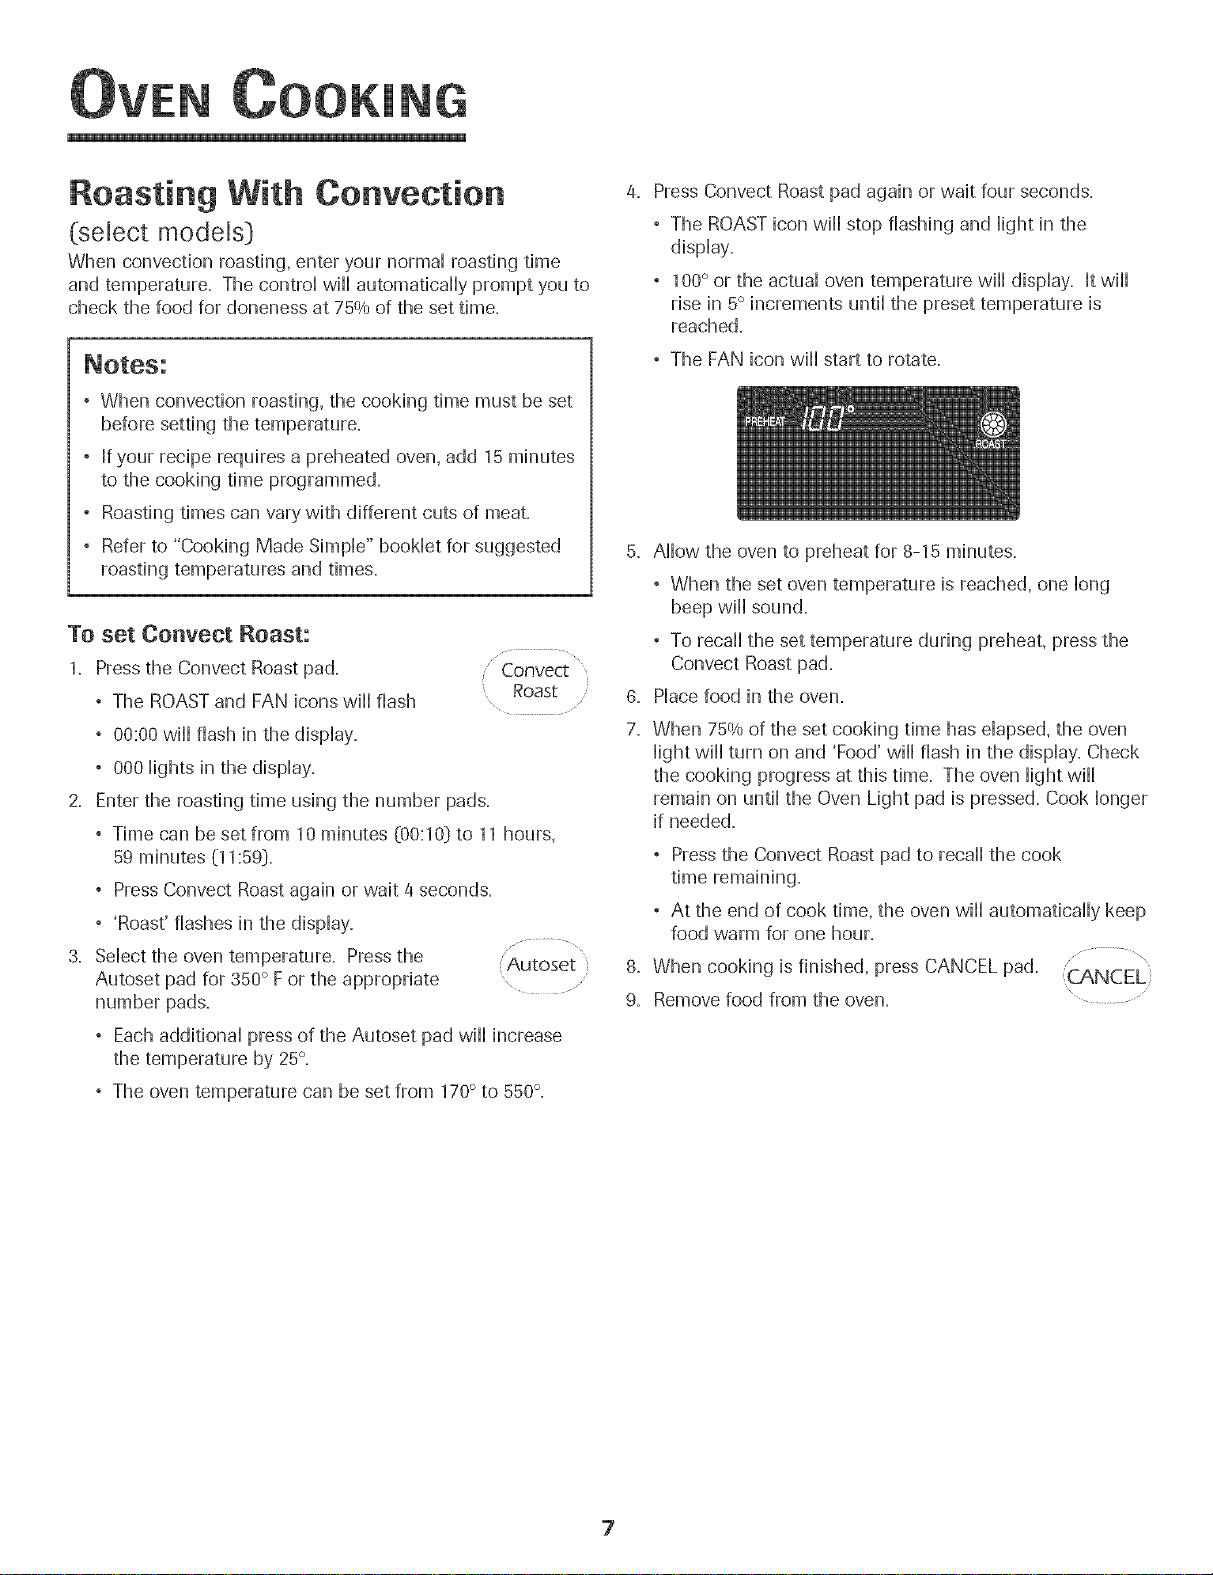
Press Convect Roast pad again or wait four seconds.
° The ROASTicon wiii stop flashing and Hightin the
dispiay.
, 1O0° or the actuaHoven temperature wiHHdispHay.It wiHH
rise in 5° increments untii the preset temperature is
reached.
, The FAN icon wiHHstart to rotate.
5. Allow the oven to preheat for 8-15 minutes.
° When the set oven temperature is reached, one long
beep wiii sound.
, To recall the set temperature during preheat, press the
Convect Roast pad.
6. Placefood in the oven.
7. When 75% of the set cooking time has elapsed, the oven
light will turn on and 'Food' will flash in the display. Check
the cooking progress at this time. The oven light will
remain on until the Oven Light pad is pressed. Cook longer
if needed.
° Pressthe Convect Roast pad to recall the cook
° At the end of cook time, the oven wiii automatically keep
food warm for one hour.
8. When cooking is finished, press CANCEL pad.
9. Removefood from the oven.
7
OOK[NG
Cook & Hold
When using the Cook & Hold option, the oven begins to heat
immediately after the control has been set. Then, the oven
cooks for a specified length of time. When that time has
elapsed, the oven wii[ keep the food warm for up to an hour
then automatbafly turn off.
TO set Cook & Hold: Cook &
1. Pressthe Cook & Hold pad. \ Homd
° The HOLD icon wii[ flash to indicate that you are in Cook&
Hold programming.
° 00:00wiii flash in the display.
2. Select the amount of time you want to cook by using the
number pads.
° The HOLD icon continues to flash.
° The time wiii iight in the display.
, Time can be set from 00:10to 11:59.
3. Press Bake,Convect Bake or Convect Roast {select models}
and select the oven temperature. Pressthe Autoset pad for
350° For the appropriate number pads.
Bake
° The desired cycle icon will flash. ....
, The oven temperature can be set from 170° Fto 550° F.
a. Pressthe desired cycle pad again ORwait four seconds.
° The desired cycle icon wiii remain iiL
° The cooking time wiii show in the display.
° The PREHEATicon will show in the display.
° The actual oven temperature wiii be displayed
during preheat.
° The set temperature wiii display when the oven is
preheated.
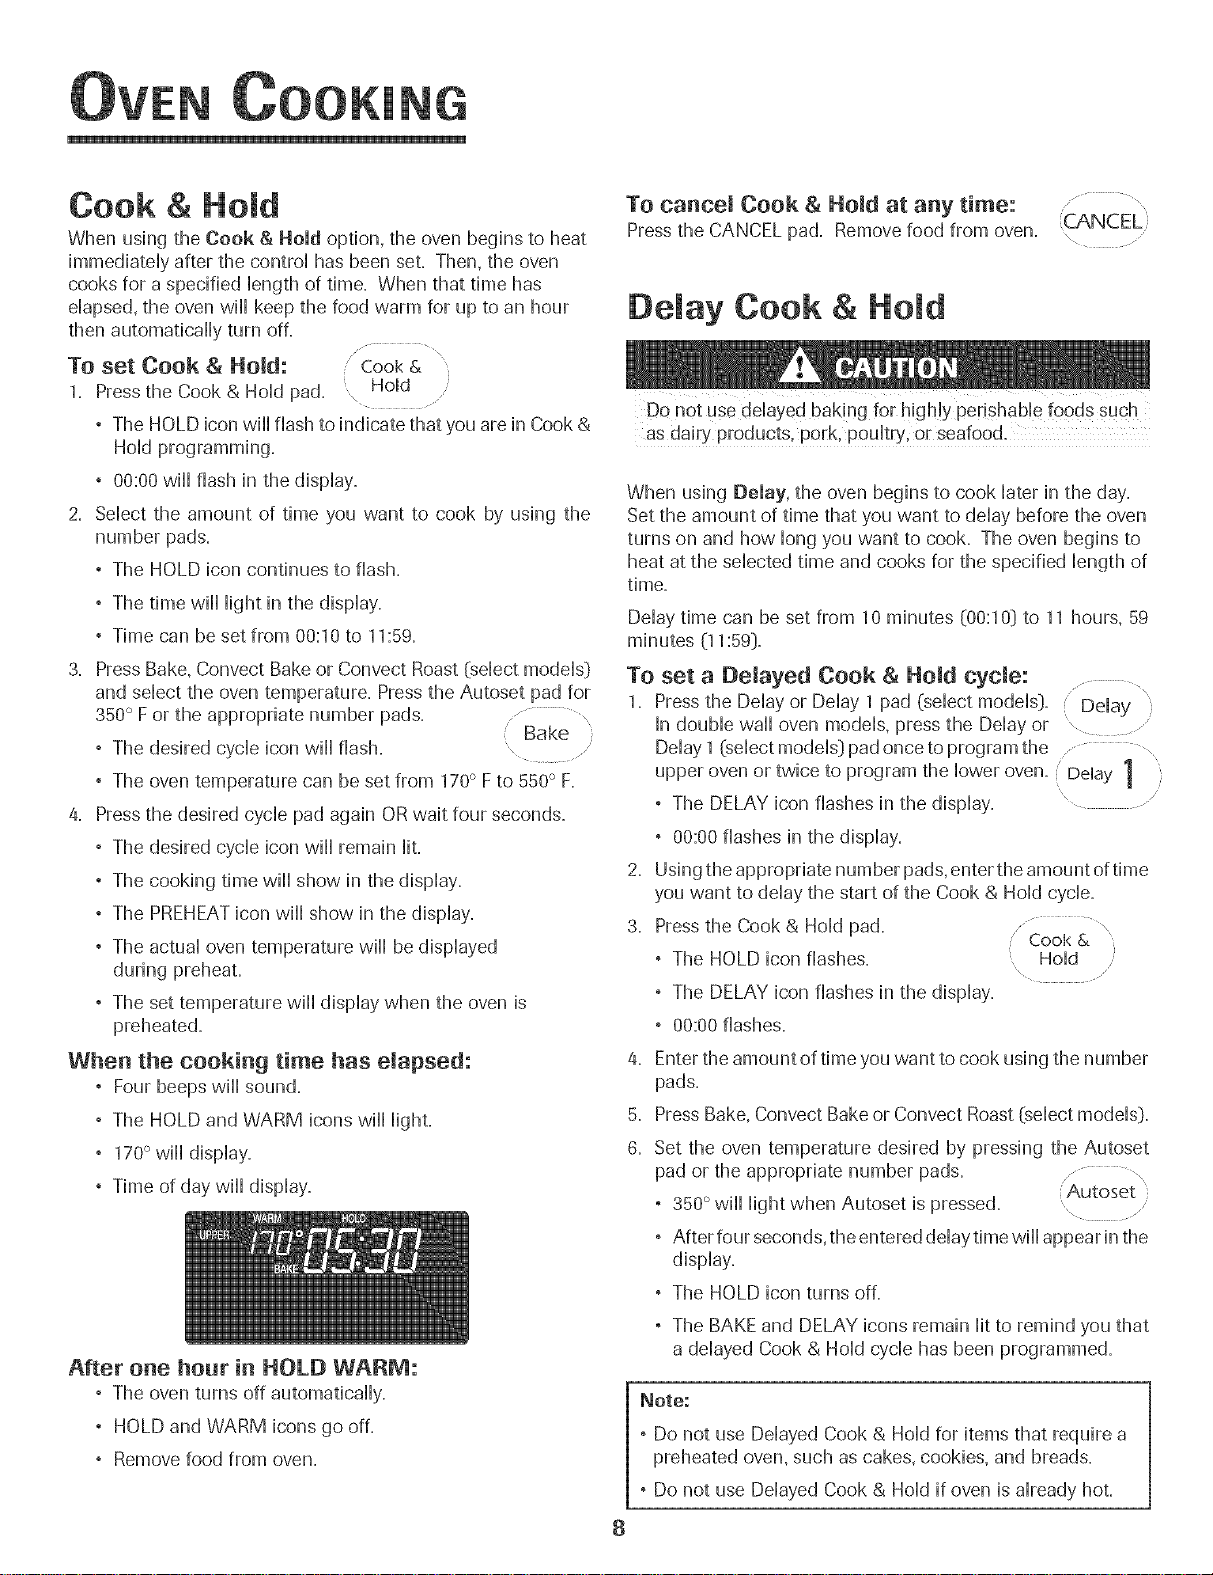
When the cooking time has elapsed:
° Four beeps wii] sound.
° The HOLD and WARM icons wii] light.
° 170°will display.
° Time of day wii] display.
To cancer Cook & Hold at any time:
Press the CANCEL pad. Remove food from oven.
/,
Delay Cook & Hold
as dairy products, pork, poultry, or seafood.
When using Delay, the oven begins to cook later in the day.
Set the amount of time that you want to delay before the oven
turns on and how long you want to cook. The oven begins to
heat at the selected time and cooks for the specified length of
time.
Delay time can be set from 10 minutes (00:10} to 11 hours, 59
minutes (11:59}.
To set a Delayed Cook & Held cycle: .......... ,
1. Press the Delay or Delay 1 pad (select models}. Delay }
[n double wall oven models, press the Delay or .
Delay 1 (select models} pad once to program the .......... ,
upper oven or twice to program the lower oven. Delay 1
° The DELAY icon flashes in the display. ............
° 00:00 flashes in the display.
2,
Using the appropriate number pads, enter the amount of time
you want to delay the start of the Cook & Hold cycle.
3.
Pressthe Cook & Hold pad............... \
, The HOLD icon flashes. Hold
" The DELAY icon flashes in the display.
, 00:00 flashes.
4,
Enter the amount of time you want to cook using the number
pads.
5.
Press Bake, Convect Bake or Convect Roast (select models}.
6.
Set the oven temperature desired by pressing the Autoset
pad or the appropriate number pads. ...........,
, 350° wiii light when Autoset is pressed. .......
° After four seconds, the entered delay time wiii appear in the
display.
° The HOLD icon turns off.
,' Cool<&
Autoset }
After one hour in HOLD WARM:
, The oven turns off automatically.
, HOLD and WARM icons go off.
, Remove food from oven.
° The BAKE and DELAY icons remain lit to remind you that
a delayed Cook & Hold cycle has been programmed.
Note:
, Do not use Delayed Cook & Hold for items that require a
preheated oven, such as cakes, cookies, and breads.
° Do not use Delayed Cook & Hold if oven is already hot.
8
OOOKING
To set Btoih
1. Press the Broil pad.
, The BROIL icon flashes.
, 000 flashes.
, SETflashes.
Press the Autoset pad once to set HI broil or Autoset
twice to set LO broik " .................
, HI or LO wiiI be displayed.
Sebct HI broil for normal broiling. Sebct LObroil for
low-temperature broiling of longer cooking foods such
as poultry.
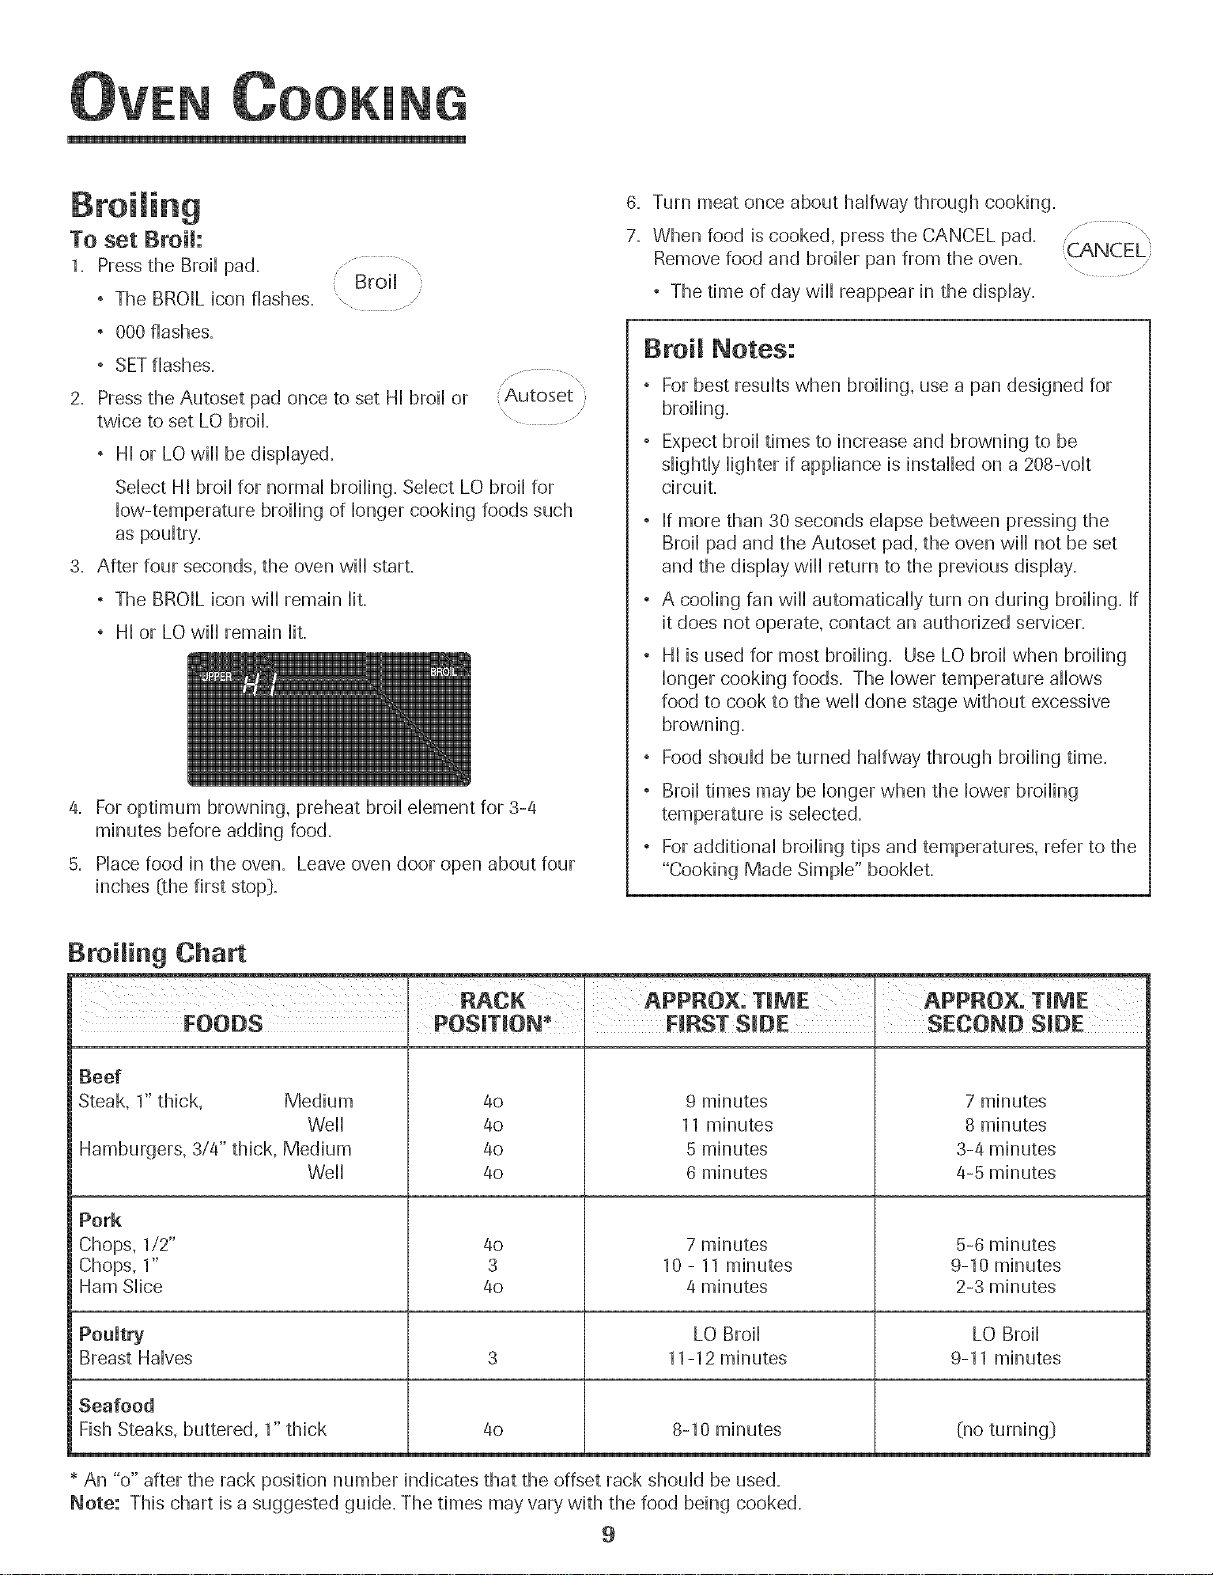
After four seconds, the oven wiiI start.
, The BROIL icon wiiI remain lit.
, HI or LO wiiI remain lit.
4. Foroptimum browning, preheat broil dement for 3-4
minutes before adding food.
5. Placefood in the oven. Leave oven door open about four
inches (the first stop}.
6. Turn meat once about halfway through cooking.
7. When food is cooked, press the CANCEL pad.
Removefood and broiler pan from the oven.
, The time of day will reappear in the display.
Broil Notes:
\
, For best results when broiling, use a pan designed for
broiling.
, Expect broil times to increase and browning to be
slightly lighter if appliance is installed on a 208-volt
circuit.
° If more than 30 seconds elapse between pressing the
Broil pad and the Autoset pad, the oven will not be set
and the display will return to the previous display.
° A cooling fan will automatically turn on during broiling. If
it does not operate, contact an authorized servicer.
° HI is used for most broiling. Use LO broil when broiling
longer cooking foods. The lower temperature allows
food to cook to the well done stage without excessive
browning.
° Food should be turned halfway through broiling time.
° Broil times may be longer when tile lower broiling
temperature is selected.
° Foradditional broiling tips and temperatures, refer to the
"Cooking Made Simple" bookleL
CANCEL
Broiling Chart
RACK APPROX: TmME APPROX. TmME
FOODS FmRSTS_DE SECOND S_DE
Beef
Steak, 1"thick, Medium 4o 9 minutes 7 minutes
Well 40 11 minutes 8 minutes
Hamburgers, 3/4" thick, Medium 4o 5 minutes 3-4 minutes
Well 4o 6 minutes 4-5 minutes
Pork
Chops, 1/2" 4o 7 minutes 5-6 minutes
Chops, 1" 3 10 - 11minutes 9-10 minutes
Ham Slice 4o 4 minutes 2-3 minutes
Poultry LO Broil LO Broil
Breast Halves 3 11-12 minutes 9-11 minutes
Seafood
Fish Steaks, buttered, 1" thick 4o 8-10 minutes (no turning[}
* An "o" after the rack position number indicates that the offset rack should be used.
Note: This chart is a suggested guide. The times may vary with the food being cooked.
9
OOKING
Keep War
For safeHykeephg hot foods warm or for warmhg breads and
pHates.
To set Keep Warm:
1. Pressthe Keep Warm pad.
° The WARM icon flashes.
° 000 flashes in the dispHay.
2. SeHectthe Keep Warm temperature. Pressthe Autoset pad
or the appropriate number pads.
° 170°wiHHHightwhen the Autoset pad is pressed.
° Each press of the Autoset pad wiHHincrease the
temperature by 5°.
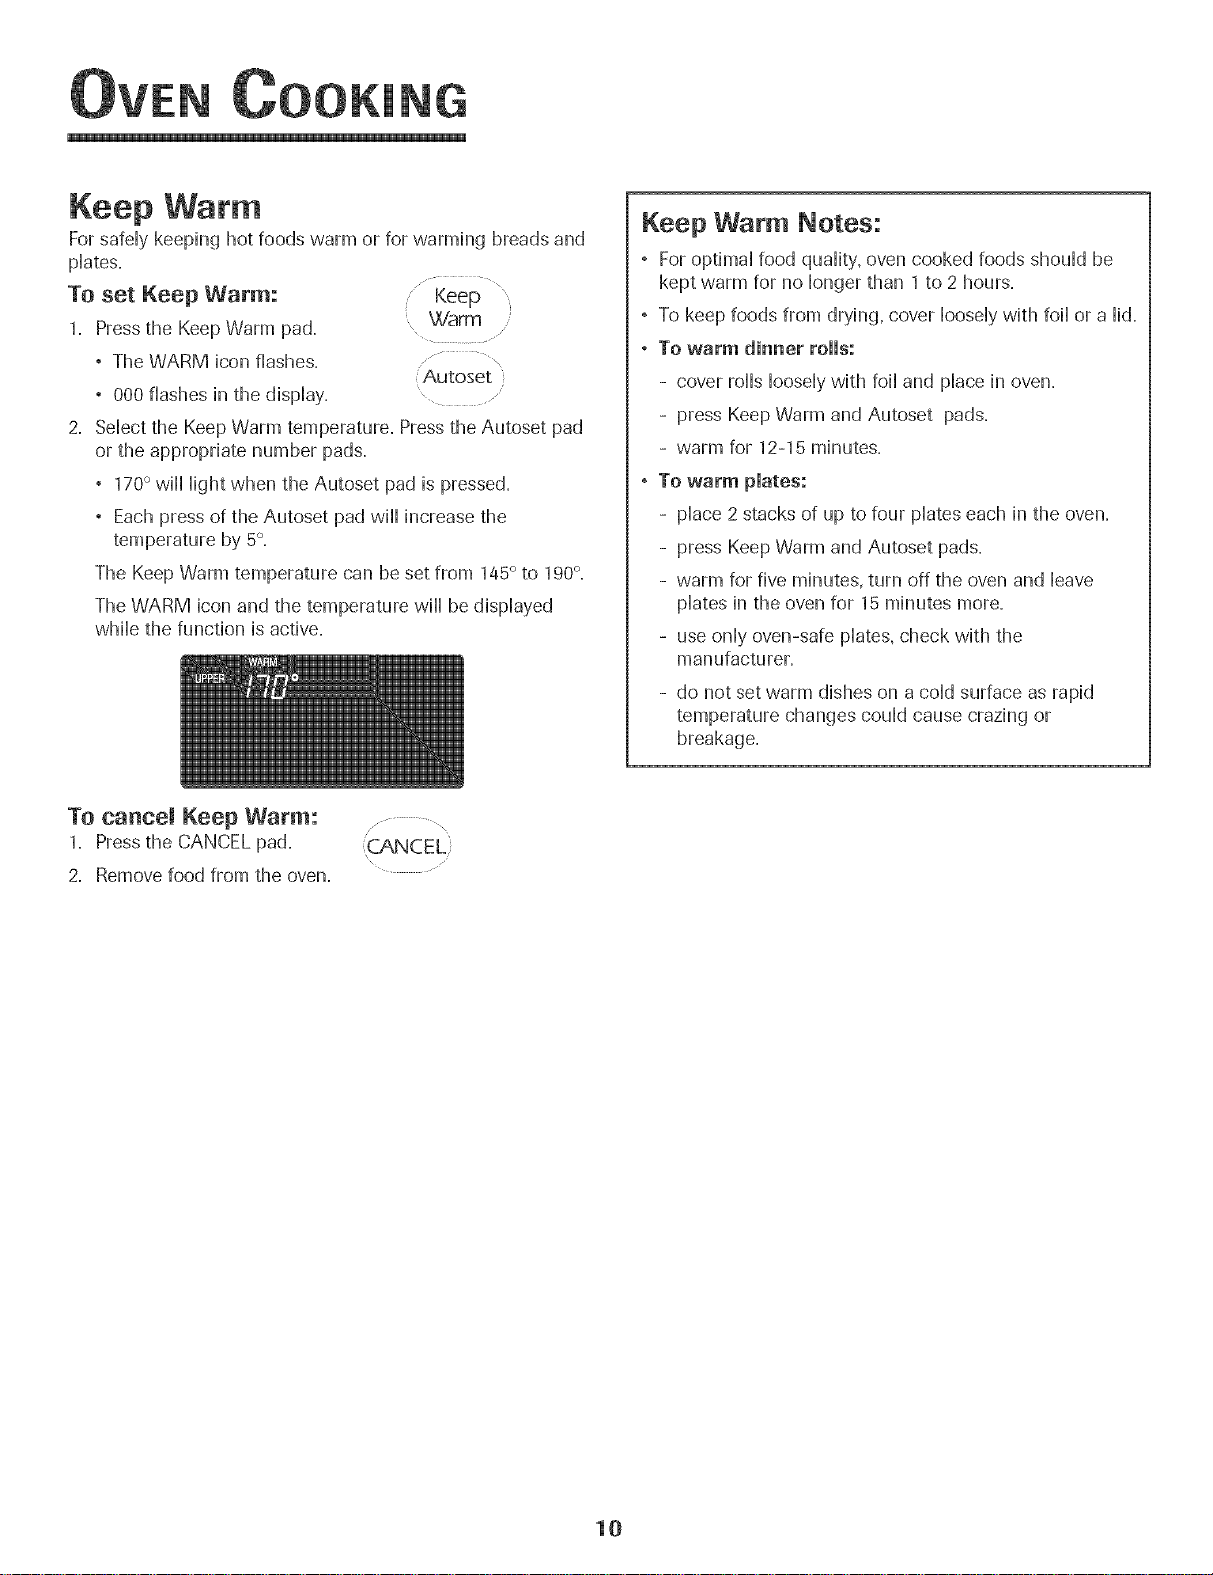
The Keep Warm temperature can be set from 145° to 190°.
The WARM icon and the temperature wiHHbe dispHayed
wMHethe function is active.
Warm
\
:Autoset
Keep Warm Notes:
° ForoptimaHfood quaHity,oven cooked foods shouHdbe
kept warm for no Hongerthan 1 to 2 hours.
° To keep foods from drying, cover HooseHywith foiHor a Hid.
° To warm dinner rolls:
- cover roHHsHooseHywith foiHand pHacein oven.
- press Keep Warm and Autoset pads.
- warm for 12-15 minutes.
° To warm pmates:
- pHace2stacks of up to four pHateseach in the oven.
- press Keep Warm and Autoset pads.
- warm for five minutes, turn off the oven and Heave
pHatesin the oven for 15 minutes more.
- use onHyoven-safe pHates,check with the
manufacturer.
- do not set warm dishes on a coHdsurface as rapid
temperature changes couHdcause crazing or
breakage.
To cancel Keep Warm: ..........
1. Pressthe CANCEL pad.
2. Remove food from the oven.
\
10
OOKING
Automatic Shut-Off/Sabbath
Mode
The oven wi[[ automatically turn off after 12 hours if you
accidentaHHyHeaveit on. This safety feature can be turned off.
To cancel the 12=hour shut=off and run the oven con=
tinuously for 72 hours:
1= Pressand hoM the CHockpad for three seconds Clod<
° "SAb" will be dispHayedand flash for five seconds.
° "SAb" will then be dispHayedcontinuousHyuntiHturned
off or untiHthe 72-hour time Himitis reached.
° The BAKE icon will also be displayed if a bake cycle is in
use while the oven is in Sabbath Mode.
° All keys are inactive except CANCEL and Clock. All other
functions EXCEPTBAKE (Timer, Keep Warm, Clean, etc.)
are locked out during the Sabbath Mode.
° A Cook & Hold can be programmed during the Sabbath
Mode, however a Delay Cook & Hold is not allowed.
TO cancem the Sabbath Mode:
1= Pressthe CLOCK pad for three seconds. ........
OR
2= After 72 hours, the Sabbath Mode will end=
, "SAb" will flash for five seconds.
" Clock
\ ....
Sabbath Mode Notes:
, Sabbath Mode can be turned on at any time with or
without the oven on=
, Sabbath Mode cannot be turned on if the keypads are
locked out or when the door is locked.
, Most prompts and messages and all beeps are
deactivated when Sabbath Mode is active.
, If the oven is baking when Sabbath Mode is set, the
BAKE icon will go out at the end of the baking cycle.
There will be no audible beeps.
, If the oven light is desired while in Sabbath Mode, it
must be turned on before the Sabbath Mode is started.
, When the Sabbath Mode is started, the temperature
display will immediately show the set temperature, rather
than the actual oven cavity temperature. No preheat
beep will sound.
, The self-clean cycle and automatic door lock do not
operate during the Sabbath Mode.
, Pressing CANCEL pad will cancel a Bake cycle, however
the control will stay in the Sabbath Mode.
, If power fails, the oven will power up in Sabbath Mode
with 72 hours remaining and no cycle active.
, The time of day will return to the display.
11
OOKING
Adjusting the Oven Temperature
Oven temperatures are carefully tested for accuracy at the
factory. It is normaHto notice some baking or browning
differences between a new oven and an oHdone. As ovens
get oHder,the oven temperature can shift.
You may adjust the oven temperature if you think the oven is
not baking or browning correctHy. To decide how much to
change the temperature, set the temperature 25 degrees
higher or Howerthan your recipe recommends, then bake.
The resuHtsof the first bake shouHdgive you an idea of how
much to adjust the temperature.
TO adjust the oven temperature: Bake
1. Pressthe Bake pad. .....
2. Enter 550° by pressing the appropriate number pads.
3. Pressand hoHdthe Bake pad for severaHseconds or untiH
O0° appears in the dispHay.
If the oven temperature was previousHyadjusted, the
change wiHHbe dispHayed. For exampHe,if the oven tem-
perature was reduced by 15° the dispHaywiHHshow "-15°",
4. Pressthe Autoset pad to adjust the temperature.
Eachtime the Autoset pad is pressed, the temperature
changes by 5°, The oven temperature can be increased or
decreased by 5° to 35°,
5. The time of day wiHHautomatically reappear in the dispHay.
You do not need to readjust the oven temperature if there is a
power faiHureor interruption. Temperature adjustment appHies
to Bake, Convect Bake and Convect Roast (seHectmodeHs_)
onHy.
The Favorite pad aHHowsyou to save the time and temperature
from a Cook & HoHdBake, Convect Bake or Convect Roast
_seHectmodeHs_)cycHe.
To set a Favorite cycHe,a Cook & HoHdfunction must be either
active or just programmed.
To set a new Favorite cycle or to save a cur-
rentJy running Cook & Hold as a Favorite:
1. Program a Cook & Hold cycle as described in the Cook &
HoHdsection on page 8. .................,
2. Pressand hoHdthe Favorite pad for three Favorite'
seconds. ......
° The newHyset or currentHyrunning Cook & HoHdcycHe
wiHHbe saved.
, A beep wiHHsound to indicate that the controHhas
accepted the Favorite setting.
To start a cycle programmed into Favorite:
1. Pressthe Favorite pad.
° Time and temperature for the set Cook & HoHdcycHewiHH
be dispHayed.(If no Cook & HoHdcycHehas been pro-
grammed, "nonE" is dispHayed._)
2. Pressthe Bake, Convect Bake or Convect Roast _seHect
modeHs_)pad.
° The Favorite cycHewiHHbegin immediateHy.
° The seHectedcycHeicon wiHHHightin the dispHay
° The cooking time wiHHHightin the dispHay
When the cooking time has elapsed:
° The seHectedcycHeicon wiHHturn off.
° The HOLD WARM icon wiHHHight.
° 170° wiHHdispHay.
To cance! a Favorite cycle in progress: ..................,
1. Pressthe CANCEL pad.
° The stored Favorite cycle will not be affected. .....
2. Removefood from the oven.
12
OOKING
Oven Light
The Oven Light automaticaHHycomes on whenever the oven
door is opened. When the door is dosed, press the Oven Light
pad to turn the Oven Light on or off. A beep wiHHsound
every'time the Oven Light pad is pressed.
uven
Light ......
Oven Vent ....
The oven vent is Hocatedbellowthe controHpaneHon your waHH
oven,
When the oven is in use, the area near the oven vent may
become hot enough to cause burns. Do not Mock the vent
opening for best baking resuHts.
Oven Fans
The cooling fan wiHHautomaticaHHyturn on during cHeaning,
broiHingand some baking operations. Itis used to heHpkeep
intemaHparts on the controHpaneHcool The fan wiHHautomati-
caHHyturn off when parts have cooHed.The fan may continue
to operate after the oven has been turned off. This is normal
A convection fan _seHectmodeHsDis used to circuHatehot air
in the oven when the convection feature is seHected.It
automaticaHHyturns on whenever a Ceuvect pad is pressed
and wiHHturn off when Ceuvect is cancelled.
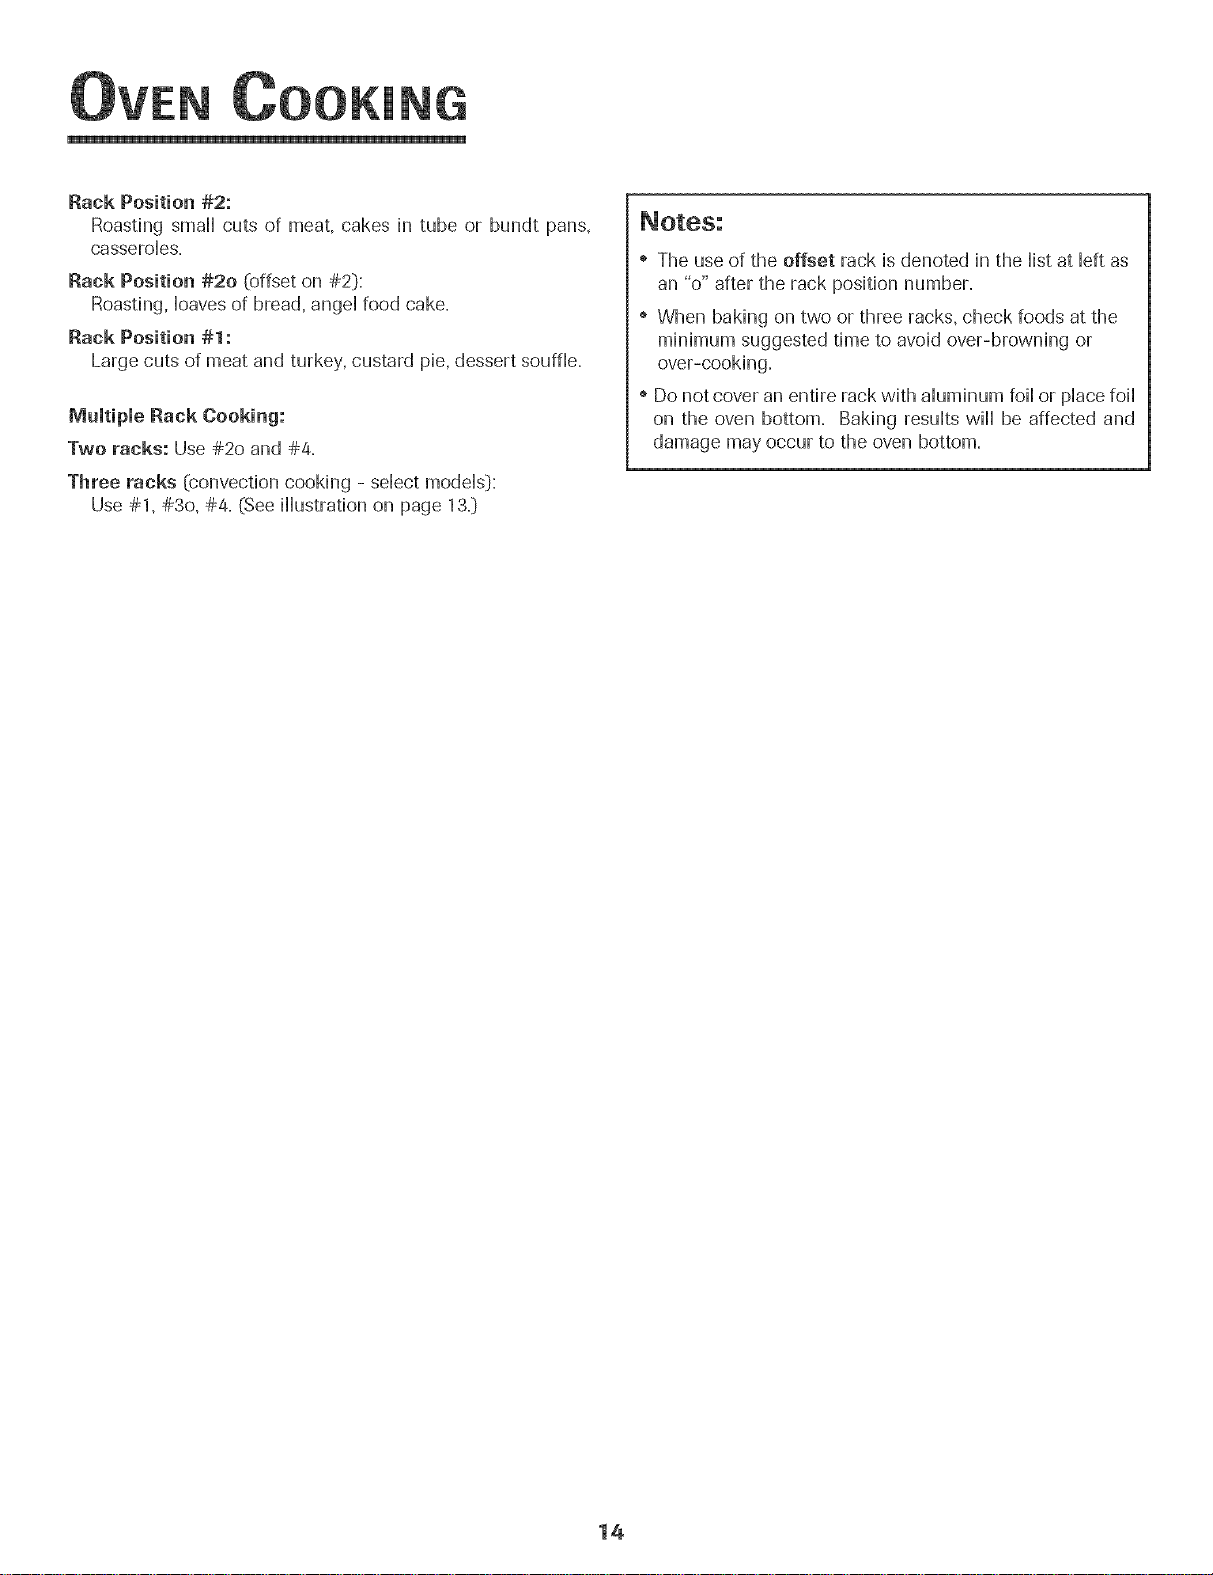
Oven Racks
Do not attempt t° change the rack position when the aven
is hot.
Do not use the oven for storing food Orcookware.
Single and Doable Cenvect Ovens - two fiat and one
offset rack were packaged for each oven.
Single and Doable Nou-Couvect Ovens - one fiat and one
offset rack were packaged for each oven.
To remove:
1. PuHHforward to the "stop"
position.
2. Lift up on the front of the
rack and puHHout.
To replace:
1. PHacerack on the rack
support in the oven.
2. TiHtthe front end up sHightHy;sHiderack back untiHit dears
the Hock-stopposition.
3. Lower front and sHideinto the oven.
the oven door is opened.
i Note: The convection fan wiHHautomaticaHHystop whenever
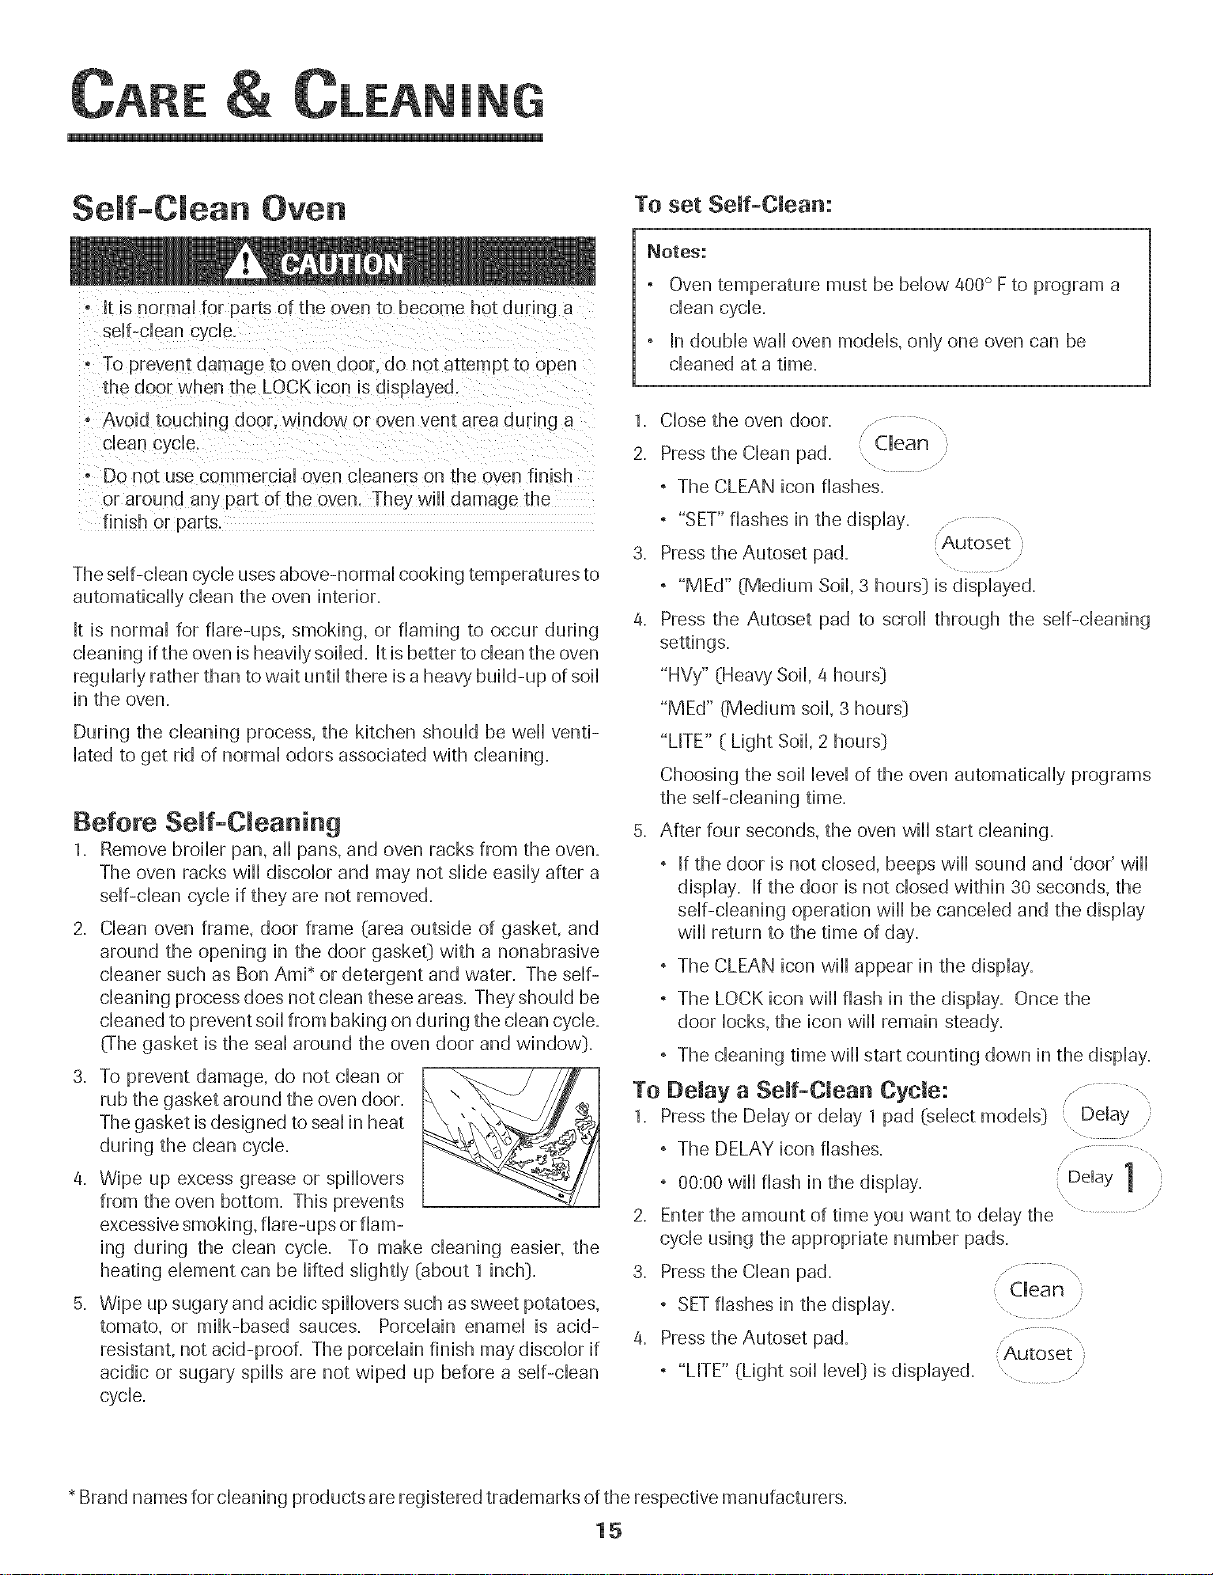
Rack Positions
-- 1 (fiat u'ack}
Three=rack Convection Baking
(select models}
Rack Position #4:
Three-rack baking (modeHswith convection onHy).
Rack Position #4o (offset rack on #41):
Most broiHing.
Rack Position #3:
Most baked goods on a cookie sheet or jeHHyroHHpan.
Rack Position #30 [offset rack on #3[):
Most baked goods, pies, Hayercakes.
13
OOKING
Rock Position #2:
Roasting small cuts of meat, cakes in tube or bundt pans,
casseroHes,
Rock Position #2o (offset on #2[):
Roasting, Hoavesof bread, angd food cake,
Rock Position #1:
Large cuts of meat and turkey, custard pie, dessert souffle,
Multiple Rock Cooking:
Two rocks: Use #2o and #4=
Three rocks (convection cooking - sdect modds_):
Use #1, #30, #4= (See illustration on page 13=_)
e The use of the offset rack is denoted in the Histat Heftas
an "o" after the rack position number=
When baking on two or three racks, check foods at the
minimum suggested time to avoid over=browning or
over=cooking,
Do not cover an entire rack with aHuminumfoiHor pHacefoiH
on the oven bottom, Baking resuHtswill be affected and
damage may occur to the oven bottom=
14
Se f-C ean Oven
• tt is normal for parts of the oven to become hot during a
self-cJean cycle.
- To prevent damage to oven door. do not attenlpt to open
the door when the LOCK icon is displayed
, A\oid touching door. window or oven vent area during a
clean cycle.
- Do not use commercial oven cleaners on the oven finish
or around any part of the oven. They wiii damage the
finish or parts.
Theself-clean cycle usesabove-normal cooking temperatures to
automatically clean the oven interior.
It is normal for flare-ups, smoking, or flaming to occur during
cleaning ifthe oven is heavilysoiled. Itisbetter to clean the oven
regularly rather than to wait until there is a heavy build-up of soil
in the oven.
During the cleaning process, the kitchen should be well venti-
lated to get rid of normal odors associated with cleaning.
Before Seff-Cmeaning
1. Remove broiler pan, all pans, and oven racks from the oven.
The oven racks will discolor and may not slide easily after a
self-clean cycle if they are not removed.
2. Clean oven frame, door frame (area outside of gasket, and
around the opening in the door gasket} with a nonabrasive
cleaner such as Bon AmF or detergent and water. The self-
cleaning process does not clean these areas. They should be
cleaned to preventsoil from baking on during the clean cycle.
(The gasket is the seal around the oven door and window}.
3. To prevent damage, do not clean or
rub the gasket around the oven door.
The gasket isdesigned to seal in heat
during the clean cycle.
4. Wipe up excess grease or spiiiovers
from the oven bottom. This prevents
excessivesmoking, flare-ups or fiam-
ing during the clean cycle. To make cleaning easier, the
heating element can be lifted slightly (about 1 inch}. 3.
5. Wipe up sugary and acidic spiiiovers such as sweet potatoes,
tomato, or milk-based sauces. Porcelain enamel is acid-
resistant, not acid-proof. The porcelain finish maydiscolor if
acidic or sugary spills are not wiped up before a self-clean
cycle.
To set Self-Clean:
_otes:
, Oven temperature must be below 400° Fto program a
clean cycle.
, In double wall oven models, only one oven can be
cleaned at a time.
1. Close the oven door. ..... ,
2. Press the Clean pad. Clean }
, The CLEAN icon flashes.
, "SET"flashes in the display.
3. Press the Autoset pad. Autoset )
\
, "MEd" (Medium Soil, 3 hours} is displayed.
4. Press the Autoset pad to scroll through the self-cleaning
settings.
"HVy" (Heavy Soil, 4 hours}
"MEd" (Medium soil, 3 hours}
"L[TE" ( Light Soil, 2 hours}
Choosing the soil level of the oven automatically programs
the self-cleaning time.
5. After four seconds, the oven wiil start cleaning.
, [f the door is not closed, beeps wiil sound and 'door' wiil
display. [f the door is not closed within 30 seconds, the
self-cleaning operation wiil be canceled and the display
wiil return to the time of day.
, The CLEAN icon wiil appear in the display.
, The LOCK icon wiil flash in the display. Once the
door locks, the icon wiil remain steady.
, The cleaning time wiil start counting down in the display.
To Delay a Self-Clean Cycle: ........... \
1. Press the Delay or delay 1 pad (select models} ( Delay ,
° The DELAY icon flashes.
° 00:00will flash in the display. Delay 1
2.
Enter the amount of time you want to delay the
cycle using the appropriate number pads.
Press the Clean pad................
° SETflashes in the display.
4.
Press the Autoset pad. ..............\
, "LITE" (Light soil level} is displayed.
Clean
(Autoset
* Brandnames for cleaning products are registered trademarks ofthe respective manufacturers,
15

IN
5. PresstheAutoset pad to scroll through the sdf- ...........
cleaning settings. Autoset
"HVy" (Heavy SoiH,4 hours:)
"MEd" (Medium Soil 3 hours:)
"LITE" (Light Soil 2 hours:)
Choosing the soiHHeveHof the oven automatically programs
the sdf-cHeaning time.
6. After four seconds, the CLEAN and DELAY icons will Hight
and the LOCK icon will flash in the dispHay. When the
oven door Hatches,the LOCK icon will stop flashing and
HightcontinuousHyto show that the oven is set for a
ddayed dean operation. The dday time will display.
During the Seff-C ean Cycle
When LOCK shows in the display, the door cannot be opened.
To prevent damage to the door, do not force the door open
when LOCK is displayed.
Smoke and Smells
You may see some smoke and smell an odor the first few
times the oven is cleaned. This is normal and will lessen in
time.
Smoke may also occur if the oven is heavily soiled or if a
broiler pan was left in the oven.
Sounds
As the oven heats, you may hear sounds of metal parts
expanding and contracting. This is normal and will not
damage the oven.
After Serf-Cleaning
/
About one hour after the end of the self-clean cycle, the
LOCK icon will turn off. The door can then be opened.
Some soil may leave a light gray, powdery ash. Remove
it with a damp cloth. If soil remains after wiping, that means
the clean cycle was not long enough. The soil will be re-
moved during the next clean cycle.
mfoven racks were left in the oven and do net slide
smoothly after a clean cycle, wipe racks and rack supports
with a small amount of vegetable oil to make them easier to
move.
Fine lines may appear in the porcelain becaase it went
throagh heating and cooling= This is normal and will not
affect performance.
A white discoloration may appear after cleaning if acidic
or sugary foods were not wiped up before the self-clean
cycle. This discoloration is normal and will not affect perfor-
mance.
If the oven door is left open, "door" will flash in the
display and a signal will beep until the door is closed
and the Clean pad is pressed again.
If more than five seconds elapse between pressing the
Clean pad and the Autoset pad, the program will
automatically return to the previous display.
A cooling fan will turn on during the self-clean cycle and
will automatically turn off after the clean cycle when the
oven has cooled. If it does not operate, contact an
authorized servicer.
The oven door will be damaged if the oven door is
forced to open when the LOCK icon is still displayed.
16

Cleaning Procedures
o Be sure appliance is elf and aH pa_s are ceel before handl!ng
or cleaningo This is to avoid damage and possible burns.
TOprevent staining or d!scobratJon, clean appliance after each use,
AINTENAN
Oven Light
OVEN,
: Be sure buHbisCooH.
• DO not touch a hot buHbwith a damp cHothasthe buHb
may break
To repmace oven light:
1= Use a dry pothoHderand very carefuHHyunscrew buHbcover
and buHb,
2, RepHacewith a 40 watt, oven-rated appHiancebuHb.BuHb
with a brass base is recommended to prevent fush)g of
buHbhto socket.
3. RepHacebuHbcover and reconnect power to oven.
4, Reset chock,
Oven Window
To protect the oven door window:
1. Do not use abrasive cHeaningagents such as steeHwooH
scouring pads or powdered cHeansersasthey may scratch
the gHass.
2. Do not hit the gHasswith pots, pans,furniture, toys, or
other objects.
3. Do not chosethe oven door untiHthe oven racks are in
pHace.
Scratching, hitting, jarring or stressing the gHassmay weaken
its structure causing an increased risk of breakage at a Hater
date.
18
NG
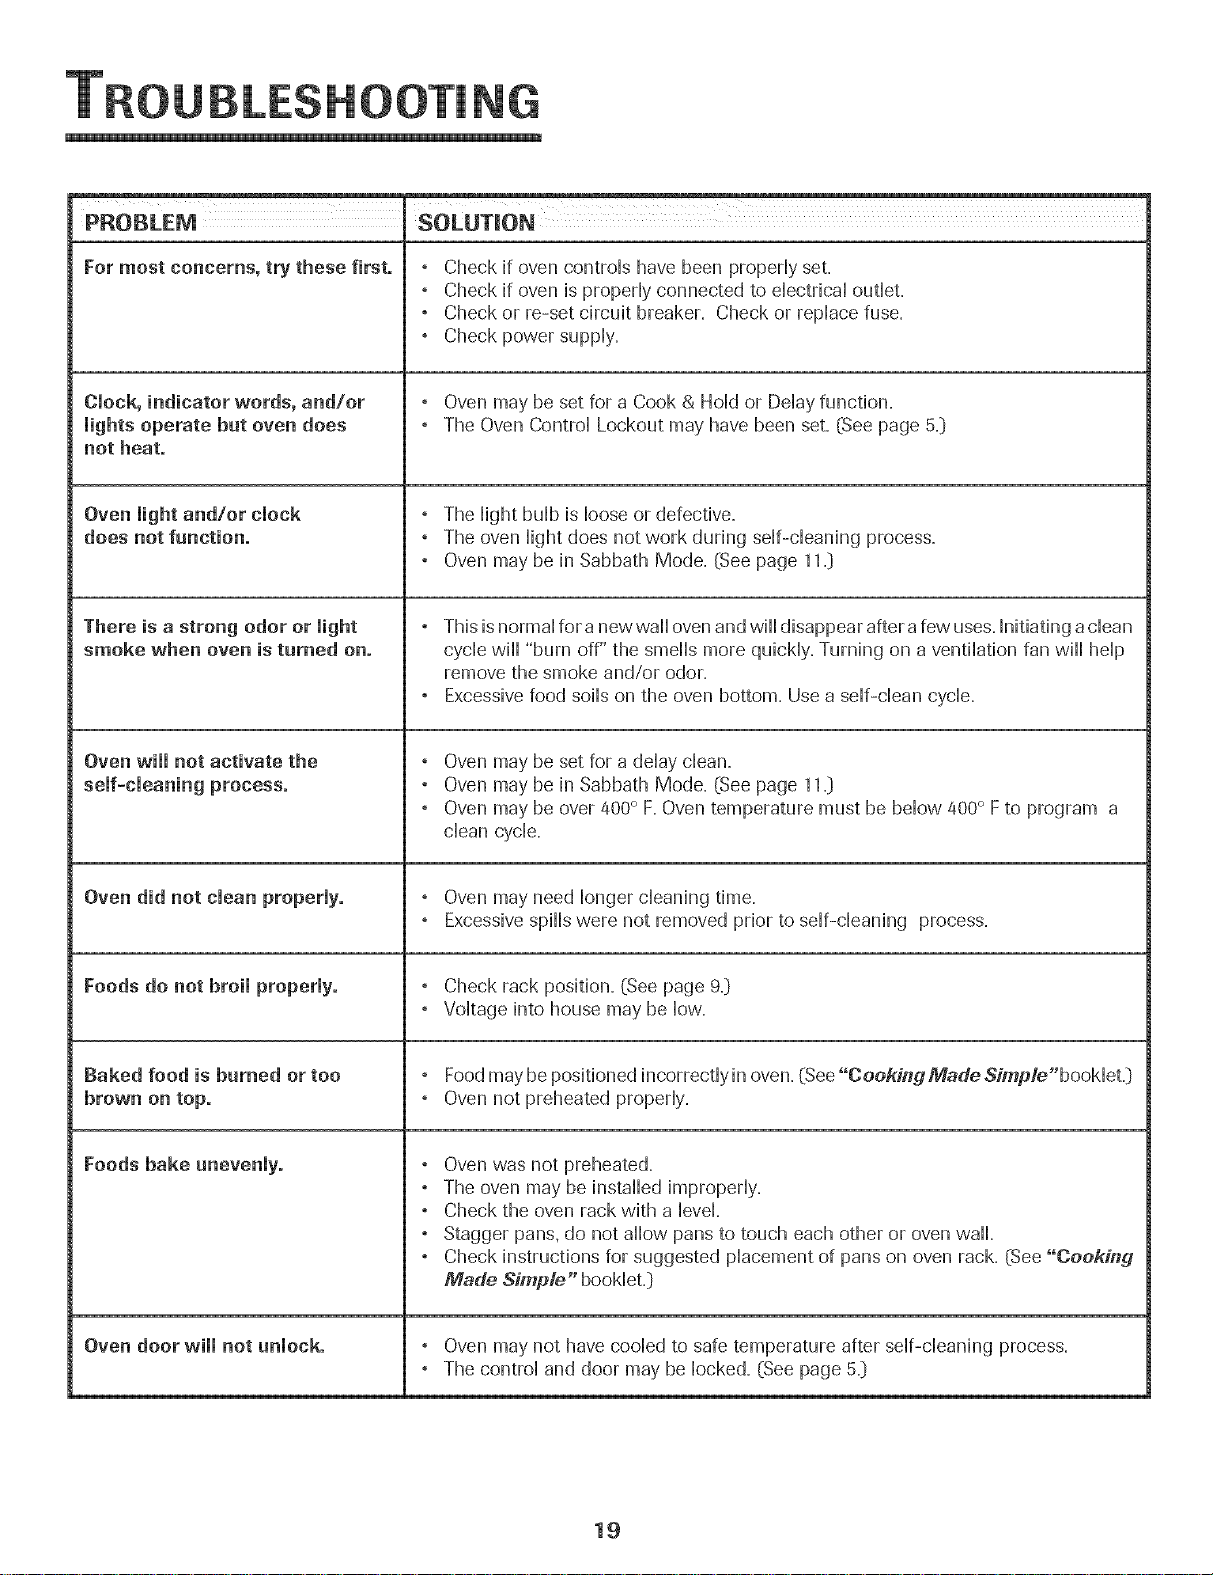
PROBLEM SOLUTION
For most concerns, try these first. , Check if oven controHshave been propedy set.
, Check if oven is propedy connected to dectricaU outHet.
, Check or re-set circuit breaker. Check or repHacefuse.
, Check power suppHy.
Clock, indicator words, and/or , Oven may be set for a Cook & HoHdor DeHayfunction.
lights operate but oven does , The Oven ControHLockout may have been set. (See page 5._)
not heat.
, The HightbuHbis Hooseor defective.
does not function. , The oven Hightdoes not work during stir-cleaning process.
, Oven may be in Sabbath Mode. (See page 11._)
There is a strong odor or light ° This isnormal for a newwaH oven and will disappear aftera few uses.Initiating adean
smoke when oven is turned on. cycle will "burn off" the smells more quickly. Turning on a ventilation fan will help
remove the smoke and/or odor.
, Excessive food soils on the oven bottom. Use a self-clean cycle.
Oven will not activate the , Oven may be set for a delay clean.
, Oven may be in Sabbath Mode. (See page 11._)
, Oven may be over 400° F. Oven temperature must be below 400° Fto program a
clean cycle.
Oven did not clean properly. , Oven may need longer cleaning time.
, Excessive spills were not removed prior to self-cleaning process.
Foods do not broil properly. , Check rack position. (See page 9._)
, Voltage into house may be low.
Baked food is burned or too , Foodmay be positioned incorrectly in oven. (See"Cooking Made Simp/e"booMet.)
brown on top. , Oven not preheated properly.
Foods bake unevenly. , Oven was not preheated.
, The oven may be installed improperly.
, Check the oven rack with a level.
, Stagger pans. do not allow pans to touch each other or oven wall.
, Check instructions for suggested placement of pans on oven rack. (See "Cooking
Made Simp/e" booklet.]
Oven door will not unlock. , Oven may not have cooled to safe temperature after self-cleaning process.
, The control and door may be locked. (See page 5._)
19
 Loading...