

Page 1
®
IvoBase
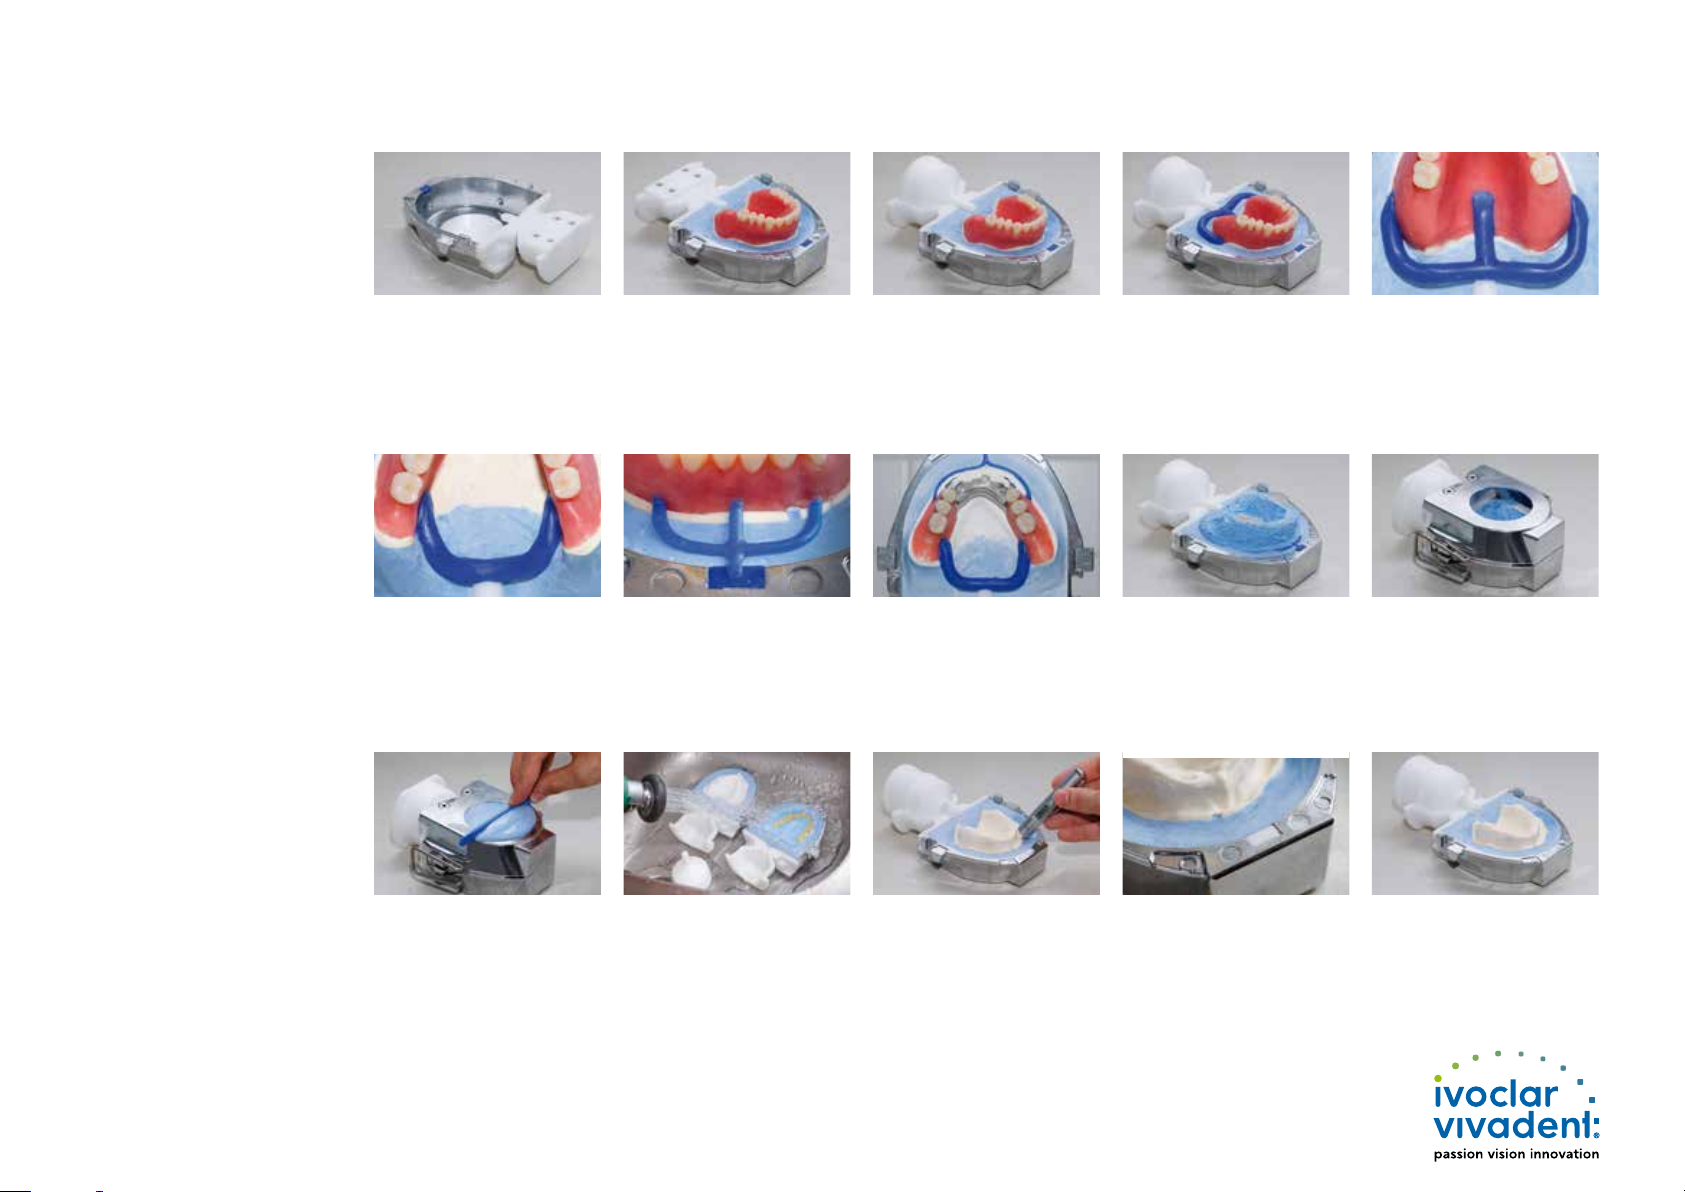
Investing the model
Placing the injection
channels
1
Placing the aeration
channels
Investment in silicone
2
Casting the counter model
System Short Instructions
– Isolate the inner surfaces with
a thin layer of petroleum jelly
– Place access former "half"
and flask lid in the flask half
– Position the filter wax
component
Mandibular complete dentures
– Place injection channels to the
lingual area of the retromolar
triangle
– Separate the center channel
– Soak model in water, isolate,
and invest in dental stone
(Class III)
– Access former "half" must be
invested flush in the stone
– Press the aeration wax
component anterior to the
contouring and to the center
of the filter wax component
– Allow the stone to set
thoroughly
– Remove access former "half"
and place access former
"full"
Partial dentures
– Place an injection channel at
the dorsal end of each
denture saddle
– Place an aeration channel
anterior to the denture saddle
– Position the injection wax
component on the
contouring, stone surface and
access former and press on
– Coat the surfaces of the
contoured dentures with
A-silicone
– Do not cover access formers,
occlusal surfaces and incisal
edges
– Provide the silicone with
retentive patterns
Maxillary complete dentures
– Press one injection channel
against the center of the
palatal roof
– Place one channel each
vestibular to the two maxillary
tubers and press on
– Isolate stone-to-stone contact
surfaces with Separating Fluid
– Position the upper flask half
and lock using the locking
clasps
Boil out the model
Preparing for injection
3
– Mix conventional dental stone
(Class III) and have it flow into
the flask without any bubbles
– Skim off excess stone
– Allow the stone to set
thoroughly
– Heat in a water bath at 90 °C
for 5-8 min
– Open the flask, remove access
former "full" and roughly
remove wax using a wax knife
– Boil out the inner surfaces
with clean, boiling water
– Use pure water without any
additives
– Roughen basal and cervical
surfaces of the resin teeth
– Allow flask halves to cool to
below 30 °C and check
temperature with an IR
thermometer
– Isolate stone surface with
Separating Fluid
– Apply a second coat after
5 minutes
– Insert the aeration filter
flush into the corresponding
recess in the flask
– Push the IvoBase funnel into
the centering insert until it
stops and position it
– Assemble the two flask halves
and lock
Page 2
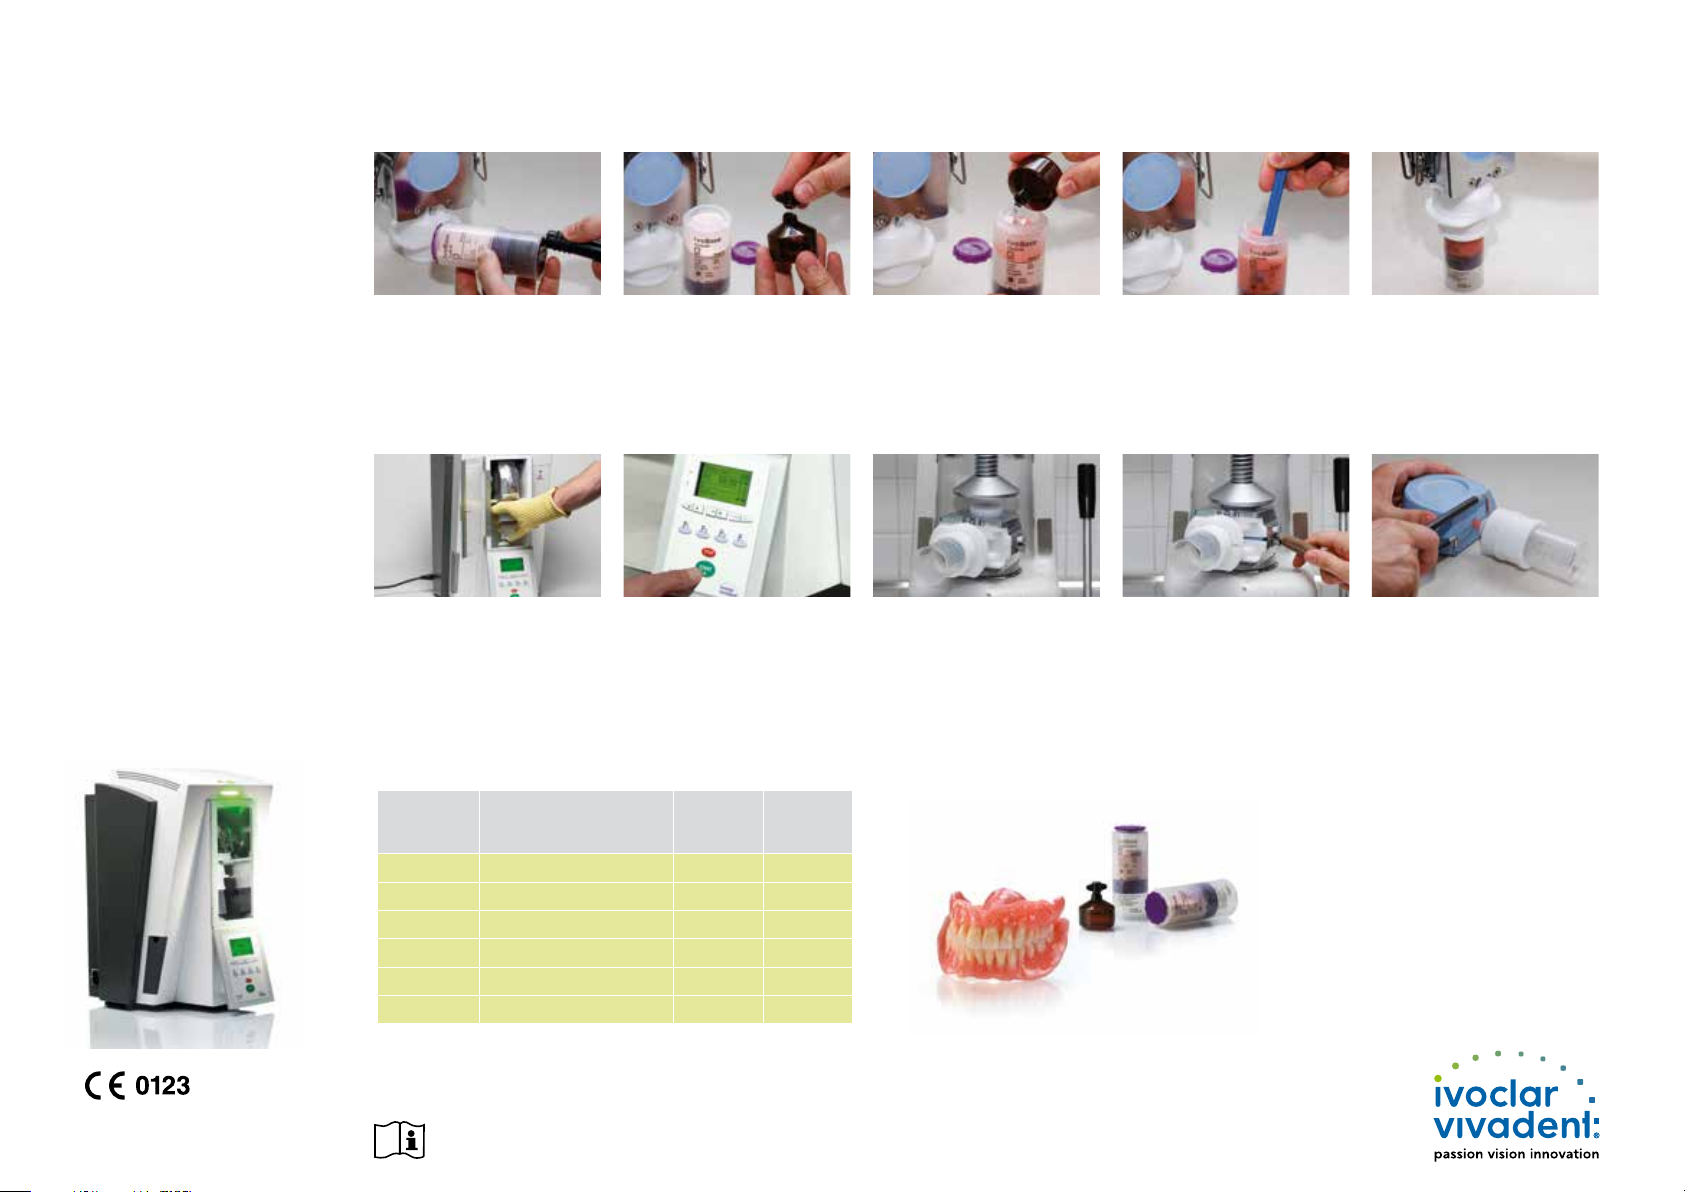
®
IvoBase
Mixing the material
4
Loading the injector
Injection and
polymerization
5
Divesting
System Short Instructions
– Remove the monomer
container from the capsule
– Remove the capsule seal
– Insert the flask into the
polymerization chamber until
it stops
– Close the door of the Injector
– Twist off the sealing cap of
the monomer container
– Select the program
– Activate "RMR" key, if desired
– Start
– Start of the program with the
expansion phase
– Pour the monomer into the
open capsule
– Remove the flask at the end
of the program
– Cool in cold water for
15 min.
– Remove the locking clasps
– Secure the flask in the dental
press with the divesting aid
– Use the spatula to mix the
monomer and polymer in the
capsule to a homogeneous
mixture for approx. 20–30 s
– Lift the upper flask half by
levering it on both sides in the
gap between the flask halves
– Turn over the flask
– Repeat the procedure
– Place capsule on an even
surface
– Place flask with the centering
insert on the capsule
– Remove the stone core and
separate capsule
– Divest the dentures from the
stone core using stone tongs
– Finish and polish dentures as
usual
Ivoclar Vivadent AG
9494 Schaan/Liechtenstein
639389/e/2012-12-06/Rev. 0
Program
No.
1 IvoBase Hybrid 35 min 45 min
2 IvoBase High Impact 50 min 60 min
3 SR Ivocap High Impact 55 min 65 min
4 SR Ivocap Clear 55 min 65 min
5 SR Ivocap Elastomer 65 min –
6-20 Ivoclar Vivadent – spare
* With the RMR function (residual monomer reduction) the residual monomer content is reduced to below 1%.
Material Duration Duration
with
RMR*
Please refer to the Instructions for Use for more detailed information
 Loading...