

Page 1

Cucina
Installazione e uso
Cooker
Installation and use
Êóõoííaя плита
Установка и пользование
K6 E11/R
Page 2

Cucina con forno e piano elettrico
Istruzioni per l'installazione e l'uso 3
Cooker with electric oven and electric hob
Instructions for installation and use 11
Электрическая плита
Инструкции по установке и использованию 18
Page 3

Avvertenze
Per garantire l’efficienza e la sicurezza di questo elettrodomestico:
• rivolgetevi esclusiv amente a centri di assistenza tecnica autorizzati
• richiedete sempre l’utilizzo di parti di ricambio originali
1 Questo apparecchio è stato concepito per un uso di
tipo non professionale all’interno di abitazione.
2 Prima di utilizzare l’apparecchio, leggere attentamente
le avvertenze contenute nel presente libretto in quanto
forniscono importanti indicazioni riguardanti la sicurezza di installazione, d’uso e di manutenzione. Conservare con cura questo libretto per ogni ulteriore consultazione.
3 Dopo aver tolto l’imballaggio assicurarsi dell’integrità dell’ap-
parecchio. In caso di dubbio non utilizzare l’apparecchio e
rivolgersi a personale professionalmente qualificato. Gli elementi dell’imballaggio (sacchetti in plastica, polistirolo espanso, chiodi, ecc.) non dev ono essere lasciati alla portata dei
bambini in quanto potenziali fonti di pericolo.
4 L’installazione deve essere effettuata secondo le istruzioni
del costruttore da personale professionalmente qualificato.
Una errata installazione può causare danni a persone, animali o cose, nei confronti dei quali il costruttore non può
essere considerato responsabile.
5 La sicurezza elettrica di questo apparecchio è assicurata
soltanto quando lo stesso è correttamente collegato ad un
efficiente impianto di messa a terra come previsto dalle vigenti norme di sicurezza elettrica. E’ necessario verificare
questo fondamentale requisito di sicurezza e, in caso di dubbio, richiedere un controllo accurato dell’impianto da parte di
personale professionalmente qualificato. Il costruttore non
può essere considerato responsabile per eventuali danni
causati dalla mancanza di messa a terra dell’impianto.
6 Prima di collegare l’apparecchio accertarsi che i dati di targa
siano rispondenti a quelli della rete di distribuzione elettrica.
7 V erificare che la portata elettrica dell’impianto e delle prese
di corrente siano adeguate alla potenza massima dell’apparecchio indicata in targa. In caso di dubbio rivolgersi ad una
persona professionalmente qualificata.
8 All’installazione occorre prevedere un interruttore omnipolare
con distanza di apertura dei contatti uguale o superiore a 3
mm.
9 In caso di incompatibilità tra la presa e la spina dell’apparec-
chio fare sostituire la presa con altra di tipo adatto da personale professionalmente qualificato. Quest’ultimo , in particolare, dovrà anche accertare che la sezione dei cavi della
presa sia idonea alla potenza assorbita dall’apparecchio. In
generale è sconsigliabile l’uso di adattatori, prese multiple e/
o prolunghe. Qualora il loro uso si rendesse indispensabile è
necessario utilizzare solamente adattatori semplici o multipli
e prolunghe conformi alle vigenti norme di sicurezza, facendo però attenzione a non superare il limite di portata in valore di corrente, marcato sull’adattatore semplice e sulle prolunghe, e quello di massima potenza marcato sull’adattatore multiplo.
10 Non lasciare l’apparecchio inutilmente inserito. Spegnere l’in-
terruttore generale dell’apparecchio quando lo stesso non è
utilizzato.
11 Non ostruire le aperture o fessure di ventilazione o di
smaltimento calore.
12 Il cavo di alimentazione di questo apparecchio non deve
essere sostituito dall’utente. In caso di danneggiamento del
cavo , o per la sua sostituzione, rivolgersi esclusivamente ad
un centro di assistenza tecnica autorizzato dal costruttore.
13 Questo apparecchio dovrà essere destinato solo all’uso per
il quale è stato espressamente concepito. Ogni altro uso (ad
esempio: riscaldamento di ambienti) è da considerarsi improprio e quindi pericoloso. Il costruttore non può essere
considerato responsabile per eventuali danni derivanti da
usi impropri, erronei ed irragionevoli.
14 L ’uso di un qualsiasi apparecchio elettrico comporta l’osser-
vanza di alcune regole fondamentali. In particolare:
• non toccare l’apparecchio con mani o piedi bagnati o
umidi
• non usare l’apparecchio a piedi nudi
• non usare, se non con particolare cautela, prolunghe
• non tirare il cavo di alimentazione, o l’apparecchio stesso, per staccare la spina dalla presa di corrente.
• non lasciare esposto l’apparecchio ad agenti atmosferici
(pioggia, sole, ecc.)
• non permettere che l’apparecchio sia usato dai bambini
o da incapaci, senza sorveglianza
15 Prima di effettuare qualsiasi operazione di pulizia o di manu-
tenzione, disinserire l’apparecchio dalla rete di alimentazione elettrica, o staccando la spina, o spegnendo l’interruttore
dell’impianto.
16 Allorchè si decida di non utilizzare più l’apparecchio, si rac-
comanda di renderlo inoperante tagliandone il cavo di alimentazione, dopo aver staccato la spina dalla presa di corrente. Si raccomanda inoltre di rendere innocue quelle parti
dell’apparecchio suscettibili di costituire un pericolo, specialmente per i bambini che potrebbero servirsi dell’apparecchio fuori uso per i propri giochi.
17 Non dimenticate che la zona di cottura rimane calda per
almeno mezz’ora dopo lo spegnimento. Fate attenzione a
non appoggiare inavvertitamente recipienti o oggetti sulla
zona ancora calda.
18 Non accendete le zone di cottura se ci sono fogli di alluminio
o materiali plastici sul piano
19 Non avvicinatevi alle zone di cottura calde
20 Usando piccoli elettrodomestici nelle vicinanze del piano fate
attenzione che il cavo di alimentazione non finisca su parti
calde
21 Fate attenzione che i manici delle casseruole siano orientati
verso l’interno, del piano per evitare di urtarli accidentalmente.
22 Non lasciare mai una zona di cottura accesa senza che vi
sia una pentola sopra, perchè in tal caso il riscaldamento
sarà massimo in brevissimo tempo , con possibili danni per
gli elementi riscaldanti.
23 Quando il grill o il forno sono in funzione, le parti acces-
sibili possono diventare molto calde. É opportuno tenere i bambini a distanza.
24 Controllare sempre che le manopole siano nella posizione “·”/
”
o” quando l’apparecchio non è utilizzato.
25 Se la cucina viene posta su di un piedistallo, prendere
adeguati accorgimenti affinchè l'apparecchio non scivoli dal piedistallo stesso .
3
Page 4
Installazione
Le istruzioni che seguono sono rivolte all’installatore qualificato affinché compia le operazioni di installazione,
regolazione e manutenzione tecnica nel modo più corretto e secondo le norme in vigore.
Importante: qualsiasi intervento di regolazione, manutenzione etc. deve essere eseguito con l’elettrodomestico elettricamente disinserito.
Posizionamento
La cucina è predisposta con grado di protezione contro i
riscaldamenti eccessivi di tipo X, è pertanto possibile l’installazione a fianco di mobili la cui altezza non superi quella
del piano di lavoro .
Livellamento (presente solo su alcuni modelli)
Nella parte inferiore dell’apparecchio si trovano 4 piedini
di sostegno regolabili con viti che permettono di migliorare il livellamento dell’apparecchio, se necessario. E’ indispensabile che l’apparecchio sia posizionato in modo
uniforme.
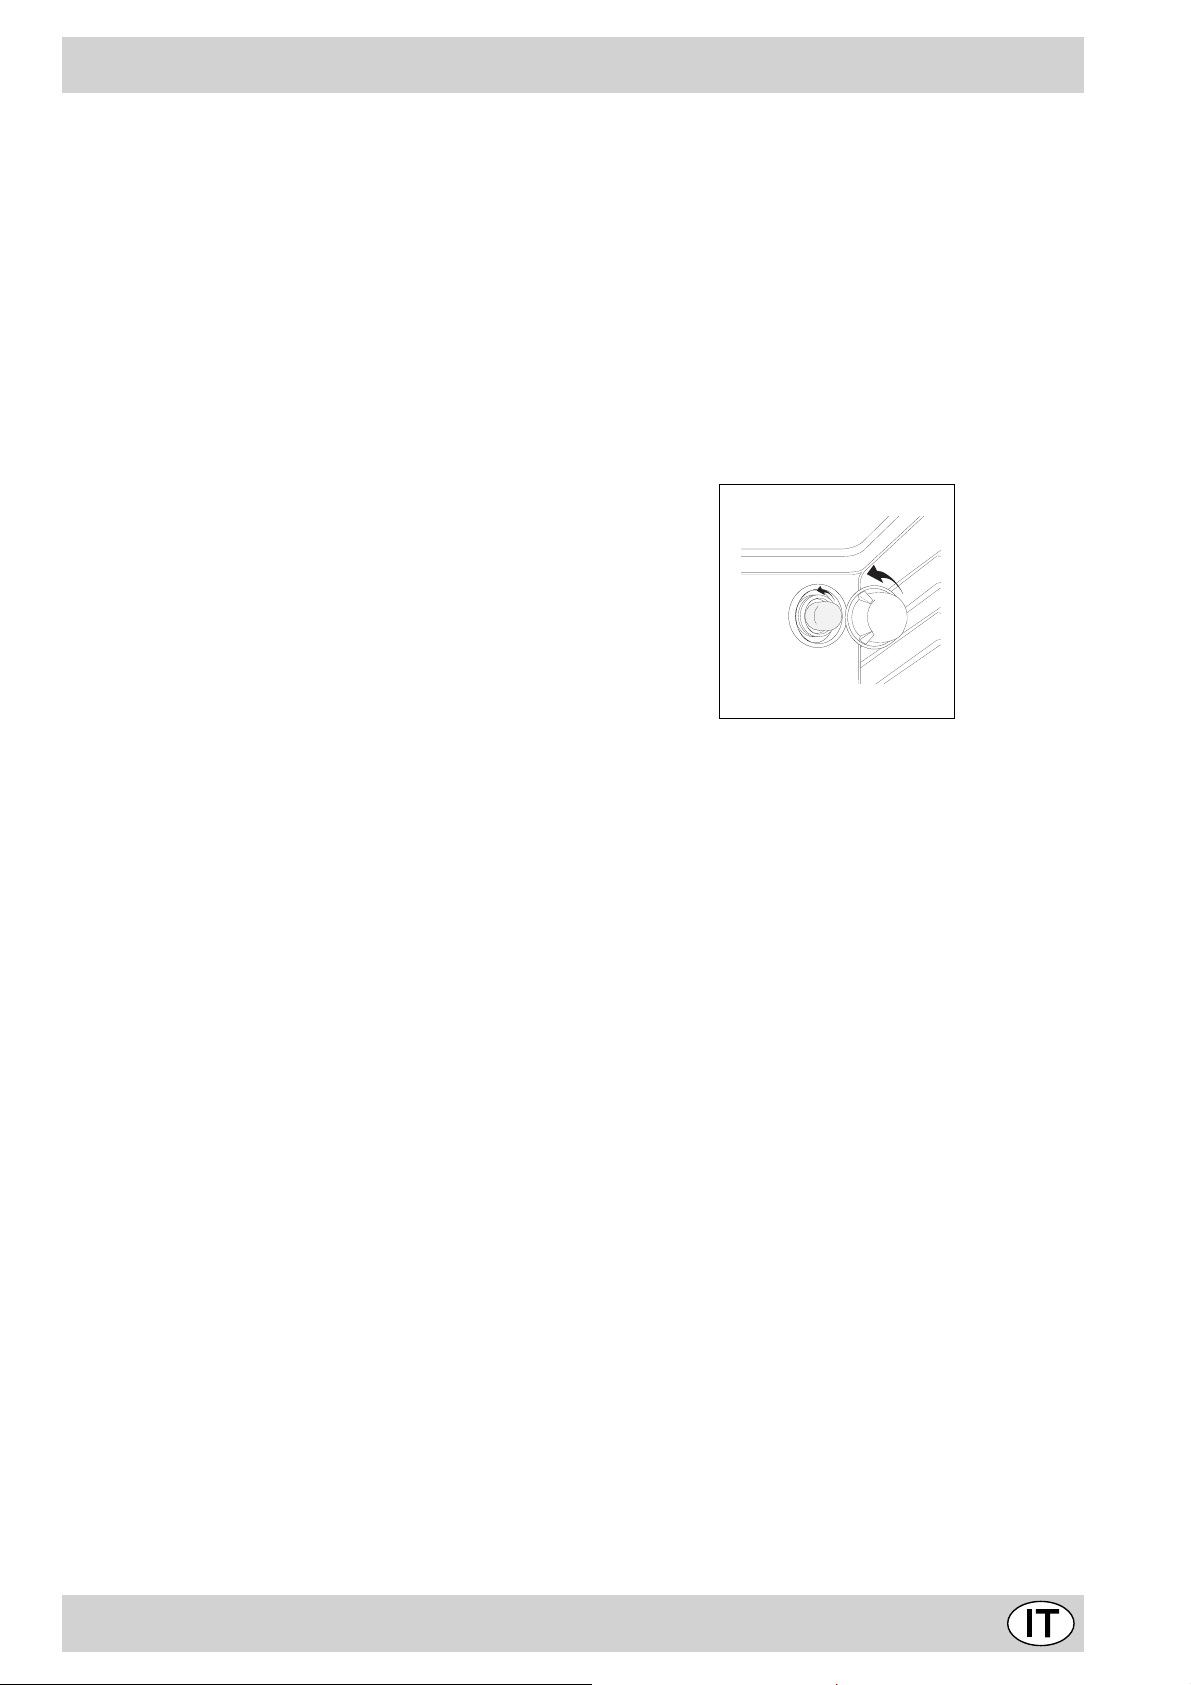
Per la messa in opera del cav o eseguire le seguenti operazioni:
• svitare la vite del serracav o e le viti dei contatti
Nota: i ponticelli vengono predisposti dalla Fabbrica
per il collegamento a 230V monofase (fig. A).
• per effettuare i collegamenti elettrici delle fig. C e fig.
D , utilizzare i due ponticelli alloggiati dentro la scatola
(fig. B - riferimento "P")
• fissare il cavo di alimentazione nell’apposito f ermacavo
e chiudere il coperchio.
220-230V 1N~
H07RR-F 3x6 CEI-UNEL 35363
N L
5
3
4
Fig. A
1
2
P
NL2L1
Montaggio gambe (presente solo su alcuni modelli)
V engono fornite delle gambe da montare ad incastro sotto la base della cucina.
Montaggio cavo di alimentazione
Apertura morsettiera:
• Servendosi di un cacciavite, fare leva sulle linguette
laterali del coperchio della morsettiera;
• Tirare ed aprire il coperchio della morsettiera.
L3
Fig. B
380-400V 2N~
H05RR-F 4x4 CEI-UNEL 35363
N L1 L2
5
3
4
Fig. C
1
2
380-400V 3N~
H05RR-F 5x2.5 CEI-UNEL 35363
N L1 L3L2
5
3
4
Fig. D
Collegamento del cavo di alimentazione alla rete
Montare sul cavo una spina normalizzata per il carico indicato sulla targhetta caratteristiche, nel caso di collegamento diretto alla rete è necessario interporre tra l’apparecchio e la rete un interruttore omnipolare con apertura
minima fra i contatti di 3 mm. dimensionato al carico e
rispondente alle norme in vigore (il filo di terra, di colore
giallo-verde, non de ve essere interrotto dall’interruttore).
Il cavo di alimentazione de ve essere posizionato in modo
1
2
4
Page 5

che non raggiunga in nessun punto una temperatura superiore di 50°C a quella ambiente.
Prima di effettuare l’allacciamento accertarsi che:
• la valvola limitatrice e l’impianto domestico possano
sopportare il carico dell’apparecchiatura (vedi targhetta
caratteristiche);
• l’impianto di alimentazione sia munito di efficace col-
legamento a terra secondo le norme e le disposizioni
di legge;
• la presa o l’interruttore omnipolare siano facilmente
raggiungibili con l’apparecchio installato.
5
Page 6
Caratteristiche tecniche
Forno
Dimensioni (HxLxP): 32x40,5x39,5 cm
V olume: 52 Litri
Assorbimento Max Forno: 2300 W
Dimensioni utili del cassetto scaldavivande:
larghezza cm. 46
profondità cm. 42
altezza cm. 8.5
Piano Elettrico
Rapida Ø 180 mm: 2000 W
Normale Ø 145 mm: 1000 W
Normale Ø 220 mm: 2000 W
Assorbimento Max Piano Elettrico: 7000 W
Voltaggio e Frequenza
220-230V / 380-400V 3N AC 50/60 Hz
ENERGY LABEL
Direttiva 2002/40/CE sull'etichetta dei forni elettrici
Norma EN 50304
Consumo energia dichiarazione Classe convezione Natur ale
funzione di riscaldamento: Statico
7
Questa apparecchiatura è conforme alle seguenti
Direttive Comunitarie:
- 73/23/CEE del 19/02/73 (Bassa Tensione) e successive modificazioni;
- 89/336/CEE del 03/05/89 (Compatibilità Elettromagnetica) e successive modificazioni;
- 93/68/CEE del 22/07/93 e successive modificazioni.
La cucina con forno elettrico
A Piano di contenimento eventuali trabocchi
B Piastre elettriche
C Cruscotto
D Griglia ripiano del forno
E Leccarda o piatto di cottura
F Piedini regolabili
H La spia di funzionamento delle piastre elettriche
L Manopola di selezione forno
M Manopola termostato
N Manopole di comando delle piastre elettriche
O La spia termostato forno
S Contaminuti
O
H
A
B
C
F
B
D
E
F
L M S
N
6
Page 7
Istruzioni per l’uso
La selezione delle varie funzioni presenti nella cucina avviene agendo sui dispositivi ed organi di comando posti sul
cruscotto dello stesso.
Attenzione: Alla prima accensione consigliamo di far funzionare il forno a vuoto per circa mezz’ora con il termostato al massimo e a porta chiusa. Quindi trascorso tale
tempo spegnerlo, aprite la porta ed areare il locale. L’odore che talvolta si avverte durante questa operazione è
dovuto all’evaporazione delle sostanze usate per proteggere il forno durante l’intervallo di tempo che intercorre
tra la produzione e l’installazione del prodotto.
Attenzione: Utilizzare il primo ripiano dal basso, posizionandoci la leccarda in dotazione per raccogliere sughi e/
o grassi, solamente nel caso di cotture al grill o con girarrosto (presente solo su alcuni modelli). Per le altre cotture
non utilizzate mai il primo ripiano dal basso e non appoggiate mai oggetti sul fondo del f orno mentre state cuocendo perchè potreste causare danni allo smalto. P onete sempre i Vostri recipienti di cottura (pirofile, pellicole di alluminio, ecc. ecc.) sulla griglia in dotazione con l’apparecchio,
appositamente inserita nelle guide del forno.
Forno Statico
Posizione manopola termostato “ M ”: Tra 60°C e Max.
In questa posizione si accendono i due elementi riscaldanti
inferiore e superiore. E’ il classico f orno della nonna che è
stato però portato ad un eccezionale livello di distribuzione
della temperatura e di contenimento dei consumi. Il f orno
statico resta insuperato nei casi in cui si debbano cucinare
piatti i cui ingredienti risultano composti da due o più
elementi che concorrono a formare un piatto unico come
ad esempio: cavoli con costine di maiale, baccalà alla
spagnola, stoccafisso all’anconetana, teneroni di vitello
con riso etc... Ottimi risultati si ottengono nella
preparazione di piatti a base di carni di manzo o vitello
quali: brasati, spezzatini, gulasch, carni di selvaggina,
cosciotto e lombo di maiale etc... che necessitano di
cottura lenta con costante aggiunta di liquidi. Resta
comunque il miglior sistema di cottura per i dolci, per la
frutta e per le cotture con recipienti coperti specifici per le
cotture al forno. Nella cottura al forno statico utilizzate un
solo ripiano, in quanto su più ripiani si avrebbe una cattiv a
distribuzione della temperatura. Usando i diversi ripiani a
disposizione potrete bilanciare la quantità di calore tra la
parte superiore ed inferiore. Se la cottura necessita di
maggior calore dal basso o dall’alto, utilizzate
rispettivamente i ripiani inferiori o superiori.
Forno Dolce
Posizione manopola termostato “M”: T r a 60°C e Max.
Si accende l’elemento riscaldante inferiore.
Questa funzione è indicata per la cottura di cibi delicati, in
particolare i dolci che necessitano di lievitazione, in quanto
viene facilitata dal calore proveniente dal basso.
Viene fatto notare che le temperature più elevate vengono raggiunte in tempi piuttosto lunghi, pertanto in questi
casi è consigliabile utilizzare la funzione “Forno Statico”.
Forno “sopra”
Posizione manopola termostato “M”: Tra 60°C e Max.
Si accende l’elemento riscaldante superiore.
Questa funzione può essere utilizzata per ritocchi di cottura.
Grill
Posizione manopola termostato “M”: Max.
Si accende l’elemento riscaldante superiore centrale.
La temperatura assai elevata e diretta del grill consente
la immediata rosolatura superficiale dei cibi che,
ostacolando la fuoriuscita dei liquidi, li mantiene più teneri
internamente. La cottura al grill è particolarmente
consigliata per quei piatti che necessitano di elevata
temperatura superficiale: bistecche di vitello e manzo,
entrecôte, filetto, hamburger etc...
Alcuni esempi di utilizzo sono riportati al paragrafo “Consigli
pratici per la cottura”.
La luce forno
Si accende ruotando la manopola “L” sul simbolo
mina il forno e resta accesa quando sia messo in funzio-
ne un qualsivoglia elemento elettrico riscaldante del forno.
Il contaminuti
Per utilizzare il contaminuti occorre caricare la suoneria
ruotando la manopola “S”di un giro quasi completo in sen-
so orario
po desiderato facendo coincidere con il riferimento fisso
del frontalino il numero corrispondente ai minuti prefissati.
Le manopole di comando delle piastre elettriche del
piano di cottura (N)
Le cucine possono essere dotate di piastre elettriche normali e rapide in varie combinazioni (le piastre rapide si distinguono dalle altre per la presenza di un bollo rosso al
centro). P er e vitare dispersioni di calore e danni alle piastre
è bene usare recipienti con fondo piano e di diametro non
inferiore a quello della piastra. Nella tabella sono riportate le
corrispondenze fra la posizioni indicate sulle manopole e
l’uso per il quale le piastre sono consigliate.
Pos. Piastra normale o rapida
Prima di utilizzarle per la prima volta, è necessario riscaldare le piastre di cottura alla massima temperatura
per circa 4 minuti, senza pentola. Durante questa fase
iniziale, il rivestimento protettiv o si indurisce e raggiun-
4; quindi, tornando indietro 5, impostare il tem-
0 Spento
1
Cottura di verdure, pesci
Cottura di patate (a vapore) minestre, ceci,
2
fagioli
Proseguimento di cottura di grandi quantità di
3
cibi, minestroni
4 Arrostire (medio)
5 Arrostire (forte)
6
Rosolare o raggiungere bollitura in poco tempo
. Illu-
7
Page 8
ge la massima resistenza.
La spia di funzionamento delle piastre elettriche (H)
Risulta accesa quando sia messo in funzione un qualsivoglia
elemento elettrico riscaldante del piano di cottura eventualmente provvisto di piastre elettriche.
Consigli pratici per la cottura
La spia termostato forno (O)
Indica la fase di riscaldamento dello stesso, il suo spegnimento segnala il raggiungimento all’interno del forno della
temperatura impostata con la manopola. A questo punto l’alternativo accendersi e spegnersi di questa spia indica che il
termostato sta lavorando correttamente per mantenere costante la temperatura del forno .
Nella cottura al forno utilizzate una sola leccarda o griglia
alla volta. Questa va posizionata sulle guide inferiori o
superiori a seconda che la cottura necessiti di maggior
calore dal basso o dall’alto.
Preriscaldamento
Nel caso in cui sia necessario preriscaldare il forno, in
linea di massima tutte le volte in cui si cuociono cibi lievitati, è consigliabile utilizzare la funzione “forno statico” che
consente di raggiungere la temperatura in breve tempo.
Alla fine del preriscaldamento, indicata dallo spegnimento della spia rossa “E”, selezionate la funzione di cottura
più indicata.
Cottura del pesce e della carne
Per le carni bianche, i volatili ed il pesce utilizzate temperature da 180 °C a 200 °C.
Per le carni rosse che si vuole siano ben cotte all’esterno
conservando all’interno il sugo, è bene utilizzare una temperatura iniziale alta (200°C-220°C) per brev e tempo, per
poi diminuirla successivamente .
In generale, più grosso è l’arrosto , più bassa do vrà essere la temperatura e più lungo il tempo di cottura. Ponete la
carne da cuocere al centro della griglia ed inserite sotto
la griglia la leccarda per raccogliere i grassi.
Inserite la griglia in modo che il cibo si trovi al centro del
forno. Se volete più calore da sotto, utilizzate i ripiani più
bassi. Per ottenere arrosti saporiti (in particolare anatra e
selvaggina) bardate la carne con lardo o pancetta e posizionatela in modo che sia nella parte superiore.
Cottura dei dolci
Nella cottura dei dolci preriscaldate sempre il forno e, per
evitare un abbassamento del dolce, non aprite la porta
durante la cottura. In generale:
Buona cottura e sterna, m a i nterno c ol lo so
Usate meno liquido, riducete la temperatura,
aumentate il tempo di cottura.
Dolce non si stacca dallo stampo
Ungete bene lo stampo e cospargetelo anche con un
pò di farina.
Utilizzo del grill
Utilizzate la funzione
centro della griglia (posta al 3° o 4° ripiano partendo dal
basso), dato che risulta accesa solamente la parte centrale della resistenza superiore.
Utilizzare il primo ripiano dal basso, posizionandoci la
leccarda in dotazione per raccogliere sughi e/o grassi.
Quando si utilizza tale funzione, si raccomanda di impostare il termostato al massimo. Questo, però, non significa che non si possano utilizzare temperature inferiori, semplicemente regolando la manopola del termostato sulla
temperatura desiderata.
Importante: effettuare la cottura al grill con porta del
forno chiusa, ciò per ottenere migliori risultati ed un sen-
sibile risparmio di energia (10% circa).
Pertanto i migliori risultati nell’utilizzo delle funzioni
grill si ottengono disponendo la griglia sugli ultimi
ripiani partendo dal basso (vedi tabella cottura)
dopodiché, per raccogliere i grassi ed evitare la formazione di fumo, disponete la leccarda in dotazione
nel primo ripiano dal basso.
“grill” posizionando il cibo al
Dolce troppo secco
La prossima volta impostate una temperatura di10°C
superiore e riducete il tempo di cottura.
Dolce si abbassa
Usate meno liquido o abbassate la temperatura di
10°C.
Dolce scuro superiormente
Inseritelo ad altezza inferiore, impostate una
temperatura più bassa e prolungate la cottura.
8
Page 9
Manutenzione or dinaria e pulizia della cucina
Prima di ogni operazione disinserire elettricamente
la cucina. Per una lunga durata della cucina è indispen-
sabile eseguire frequentemente una accurata pulizia generale, tenendo presente che:
· per la pulizia non utilizzare apparecchi a vapore
• le par ti smaltate e i pannelli autopulenti, se presenti,
vanno lavate con acqua tiepida senza usare polver i
abrasive e sostanze corrosive che potrebbero ro vinarle;
• l’interno del forno va pulito, con una certa frequenza,
quando è ancora tiepido usando acqua calda e detersivo, risciacquando ed asciugando poi accuratamente;
· le piastre elettr iche si puliscono con uno strofinaccio
umido e si ungono con un pò d’olio quando sono ancora tiepide;
• l’acciaio inox può rimanere macchiato se rimane a con-
tatto per lungo tempo con acqua fortemente calcarea
o con detergenti aggressivi (contenenti fosforo). Si consiglia di sciacquare abbondantemente ed asciugare
dopo la pulizia. E’ inoltre opportuno asciugare eventuali trabocchi d’acqua.
N.B.: evitare di chiudere il coperchio fino a c he le piastre elettriche sono ancora calde. Eliminare eventuali
liquidi presenti sul coperchio prima di aprirlo.
Sostituzione della lampada nel vano forno
• Togliere l’alimentazione al forno tramite l’interruttore
omnipolare utilizzato per il collegamento del forno all’impianto elettrico, o scollegare la spina, se accessibile;
• Svitare il coperchio in vetro del portalampada;
• Svitare la lampada e sostituirla con una resistente ad
alta temperatura (300°C) con queste caratteristiche:
- Tensione 230V
- Potenza 25W
- Attacco E14
• Rimontare il coperchio in vetro e ridate alimentazione
al forno.
9
Page 10

Consigli pratici per la cottura
Posizione
manopola
selezione
1 Statico
2 Forno Dolce
3 Forno
Sopra
Cibo da cucinare Peso
(Kg)
Anatra
Arrosto di vitello o
manzo
Arrosto di maiale
Biscotti (di f ro lla)
Crostate
Lasagne
Agnello
Sgombro
Plum-cake
Bignè
Pan di spagna
Torte salate
Torte lievitate
Crostate
Torte di frutta
Brioches
Ritocchi di cottura - 3/4 15 220 -
0.3
0.5
1.5
0,5
0,5
Posizione di
cottura ripiani
dal basso
1
1
1
1
1
1
1
1
1
1
Tempo di pre riscaldamento
(minuti)
3
3
3
3
3
3
2
2
2
3
3
3
3
3
3
3
15
15
15
15
15
10
10
10
10
10
10
15
15
15
15
15
Posizione
manopola
termostato
200
200
200
180
180
190
180
180
170
180
170
200
160
180
180
160
Tempo di
cottura
(minuti)
65-75
70-75
70-80
15-20
30-35
35-40
50-60
30-35
40-50
30-35
20-25
30-35
30-40
35-40
50-60
25-30
4 Grill
NB: i tempi di cottura sono indicativi e possono essere modificati in base ai propri gusti personali. Nelle cotture al
grill la leccarda va posta sempre al 1° ripiano a partire dal basso.
Sogliole e seppie
Spiedini di calamari e
gamberi
Filetto di merluzzo
Verdure alla griglia
Bistecca di vitello
Cotolette
Hamburger
Sgombri
Toast
1
1
1
1
1
1
1
1
n.° 4
4
4
4
3/4
4
4
4
4
4
5
5
5
5
5
5
5
5
5
Max
Max
Max
Max
Max
Max
Max
Max
Max
8-10
6-8
10
10-15
15-20
15-20
7-10
15-20
2-3
10
Page 11

Important
To maintain the EFFICIENCY and SAFETY of this appliance, we recommend:
• call only the Service Centers authorized by the manufacturer
• always use original Spare Parts
1 This appliance is intended for non-professional use
within the home.
2 Before using your appliance, read the instructions
in this owner’s manual carefull y since you will find
all the instructions you require to ensure safe
installation, use and maintenance. Alwa ys keep this
owner’s manual c lose to hand since you may need
to refer to it in the future.
3 When you have removed the packing, check that the
appliance is not damaged. If you ha v e an y doubts, do
not use the appliance, contact your nearest Ariston
Service Centre. Nev er lea v e the packing components
(plastic bags, foamed polystyrene, nails, etc.) within
the reach of children since they are a source of potential
danger.
4 The appliance must be installed only by a qualified
person in compliance with the instructions provided.
The manufacturer declines all responsibility for
improper installation which may harm persons and
animals and damage property.
5 The electr ical safety of this appliance can only be
guaranteed if the cooker is correctly and efficiently
earthed, in compliance with regulations on electrical
safety. Always ensure that the earthing is efficient; if
you have any doubts call in a qualified technician to
check the system. The manufacturer declines all
responsibility for damage resulting from a system which
has not been earthed.
6 Before plugging the appliance into the mains, check
that the specifications indicated on the date plate
correspond to those of the electrical mains of your
home.
7 Check that the electr ical capacity of the system and
sockets will support the maximum power of the
appliance, as indicated on the data plate. If you have
any doubts, call in a qualified technician.
8 An omnipolar switch with a contact opening of at least
3 mm or more, is required for the installation.
9 If the socket and appliance plug are not compatible,
have the socket replaced with a suitable model by a
qualified technician. The latter, in particular, will also
have to ensure that the cross section of the socket
cables are suitable for the power absorbed by the
appliance. The use of adapters, multiple sockets and/
or extensions, is not recommended. If their use cannot
be avoided, remember to use only single or multiple
adapters and extensions which comply with current
safety regulations. In these cases, never exceed the
maximum current capacity indicated on the single
adapter or extension and the maximum power indicated
on the multiple adapter.
10 Do not leav e the appliance plugged in if it is not in use.
Switch off the main switch when you are not using the
appliance.
11 The openings and slots used for ventilation and
dispersion of heat on the rear and below the control
panel must never be covered.
12 The user must not replace the supply cable of this
appliance. Always call an after-sales service centre
authorised by the manufacturer in the event of cable
damage or replacement.
13 This appliance must be used for the purpose for which
it was expressly designed. Any other use (e.g. heating
rooms) is considered to be improper and consequently
dangerous. The manuf acturer declines all responsibility
for damage resulting from improper and irresponsib le
use.
14 A number of fundamental rules must be follo wed when
using electrical appliances. The following are of
particular importance:
• do not touch the appliance when your hands or f eet
are wet
• do not use the appliance baref oot
• do not use extensions, but if these are necessary
caution must be exercised.
• ne v er pull the power supply cable or the appliance
to unplug the appliance plug from the mains.
• ne ver leav e the appliance exposed to atmospheric
agents (rain, sun etc.)
• do not allow children or persons who are not f amiliar
with the appliance to use it, without supervision.
15 Always unplug the hob from the mains or s witch off the
main switch before cleaning or carrying out
maintenance operations.
16 If you are no longer using an appliance of this type,
remember to make it unserviceable by unplugging the
appliance from the mains and cutting the supply cable.
Also make all potentially dangerous parts of the
appliance safe, abov e all for children who could mistake
it for a toy.
17 Do not forget that the cooking zone stays hot for at
least half an hour after it has been turned off. Take
care not to inadvertently place pans or items on the
hot zone.
18 Do not turn the cooking zones on if there is any
aluminium foil or plastic material on the hob.
19 Do not get too close to the hot hob.
20 When using small electric appliances near the hob,
keep the power supply cab le a w a y from the hot parts.
21 Make sure you turn the handles of pots and pans
inwards to avoid knoc king them ov er accidentally.
22 Nev er leav e a cooking zone on without a pan on it, as
the zone would heat up almost immediately, causing
damage to the heating elements.
23 Remember to keep children away from the
appliance when you use the grill or oven, since
these parts become very hot. Keep children well
away.
24 Make sure the knobs are in the ”•”/”o” position when the
appliance is not in use.
25 If the cooker is placed on a pedestal, take the
necessary precautions to prevent the same from sliding
off the pedestal itself.
11
Page 12

Installation Instructions
The following instructions should be read by a qualified
technician to ensure that the appliance is installed,
regulated and technically serviced correctly in compliance
with current regulations.
Important: The power supply to the appliance must be
cut off before any adjustments or maintenance work is
done on it.
Positioning
The cooker is manufactured with type X deg ree protection
against overheating.
Levelling Y our Appliance (only on certain models)
4 support feet which are adjusted using screws are located
in the lower part of the cooker. These level off the oven
when necessary . It is essential that the cooker be standing
lev el.
To install the cable, proceed as follo ws:
• unscre w the wire clamp screw and the contact screws
Note: the jumpers are factory-set for a single-phase
230V connection (Fig. A).
• to make the electrical connections illustrated in fig. C
and fig. D, use the two jumpers housed in the box (fig.
B - reference “P”)
• fasten the supply cable in place with the clamp and
close the cover of the terminal board.
220-230V 1N~
H07RR-F 3x6 CEI-UNEL 35363
N L
5
3
4
Fig. A
1
2
P
NL2L1
Mounting the legs (only on certain models)
Press-fit legs are supplied which fit under the base of your
cooker.
Fitting on a Power Supply Cable
Opening the terminal board:
• Using a screwdriver, prise on the side tabs of the
terminal board cover;
• Pull open the co v er of the terminal board.
L3
Fig. B
380-400V 2N~
H05RR-F 4x4 CEI-UNEL 35363
N L1 L2
5
3
4
Fig. C
1
2
380-400V 3N~
H05RR-F 5x2.5 CEI-UNEL 35363
N L1 L3L2
5
3
4
Fig. D
1
2
Connecting the supply cable to the mains
Install a standardised plug corresponding to the load
indicated on the data plate. When connecting the cable
directly to the mains, install an omnipolar circuit-breaker
with a minimum contact opening of 3 mm between the
appliance and the mains. The omnipolar circuit breaker
should be sized according to the load and should comply
with current regulations (the green-yellow earth wire should
not be interrupted by the circuit breaker). The supply cab le
should be positioned so that it does not reach a tempera-
12
Page 13

ture of more than 50°C with respect to the room temperature, anywhere along its length.
Before making the connection, check that:
• the limiter valve and the home system can support the
appliance load (see data plate);
Technical Characteristics
• the mains are properly earthed in compliance with
current directives and regulations;
• there is easy access to the socket and omnipolar circuit
breaker , once the hob has been installed.
Oven
Dimensions (HxWxD): 32x40.5x39.5 cm
V olume: 52 Litres
Max. Ov en Power Absorption: 2300 W
Innder dimensions of the plate plate warmer:
Width: 46 cm
Depth: 42 cm
Height: 8.5 cm
Electric Hob
Rapid Ø 180 mm: 2000 W
Normal Ø 145 mm: 1000 W
Normal Ø 220 mm: 2000 W
Max. Electric Hob P ower Absorption: 7000 W
Cooker with electric oven
V oltage and Frequency
220-230/380-400V~ 3N 50/60Hz
ENERGY LABEL
Directive 2002/40/EC on the label of electric ovens
Norm EN 50304
Declared energy consumption for Natural con vection Class
heating mode: Convection
This appliance conforms with the following Eur opean
Economic Community directives:
- 73/23/EEC of 19/02/73 (Low V oltage) and subsequent
modifications;
- 89/336/EEC of 03/05/89 (Electromagnetic
Compatibility) and subsequent modifications;
- 93/68/EEC of 22/07/93 and subsequent modifications.
A Hob surface
B Electric hotplate
C Control Panel
D Oven Rack
A
B
B
E Dripping Pan or Baking Sheet
F Adjustable Feet
H Electric hotplate indicator light
L Selector Knob
M Thermostat Knob
N Electric hotplate control knobs
O Thermostat Light
S Timer Knob
C
D
O
H
E
F
F
L M S
N
13
Page 14

How T o Use Y our Appliance
The various functions featured with the ov en are controlled
using the knobs and buttons on the control panel.
Notice: The first time you use your appliance, we recommend that you set the thermostat to the highest setting and
leave the oven on for about half an hour with nothing in it,
with the oven door shut. Then, open the oven door and let
the room air. The odour that is often detected during this
initial use is due to the evaporation of substances used to
protect the oven during storage and until it is installed.
Attention: Only use the bottom shelf of the oven when using
the rotisserie to cook (where present). F or all other types of
cooking, never use the bottom shelf and ne ver place anything
on the bottom of the oven when it is in operation because
this could damage the enamel. Alw ays place your cookw are
(dishes, aluminium foil, etc. etc.) on the grate provided with
the appliance inserted especially along the oven guides.
Convection Mode
P osition of thermostat knob “M”: betw een 60°C and Max.
On this setting, the top and bottom heating elements come
on. This is the classic, traditional type of oven which has
been perfected, with exceptional heat distribution and reduced energy consumption. The con vection o ven is still unequalled when it comes to cooking dishes made up of several ingredients, e.g. cabbage with ribs, Spanish style cod,
Ancona style stockfish, tender veal strips with rice, etc. Excellent results are achieved when preparing veal or beefbased dishes as well (braised meats, stew, goulash, wild
game, ham etc.) which need to cook slowly and require basting or the addition of liquid. It nonetheless remains the best
system for baking cakes as well as fruit and cooking using
covered casserole dishes f or oven baking. When cooking in
convection mode , only use one dripping pan or cooking rack
at a time, otherwise the heat distribution will be une ven. Using the different rac k heights availab le, you can balance the
amount of heat between the top and the bottom of the oven.
Select from among the various rack heights based on whether
the dish needs more or less heat from the top.
Pastry Mode
P osition of thermostat knob “M”: Between 60°C and Max.
The bottom heating element comes on.
This mode is ideal for baking and cooking delicate foods especially cakes that need to rise because the heat coming
from the bottom helps the leavening process.
Please note that it takes a considerable amount of time for
the higher temperatures to be reached, therefore we recommend you use the “Con vection Mode” in these cases .
“Top” Oven
P osition of thermostat knob “M”: Between 60°C and Max.
The top heating element comes on.
This mode can be used to brown food at the end of cooking.
Grill
P osition of thermostat knob “M”: Max
The top central heating element comes on.
The extremely high and direct temperature of the grill makes
it possible to brown the surface of meats and roasts while
locking in the juices to keep them tender. The grill is also
highly recommended for dishes that require a high temperature on the surface: beef steaks, v eal, rib steak, filets, hamburgers etc...
Some grilling examples are included in the “Practical Cooking Advice” paragr aph.
The oven light
Set knob “L” to the
and stays on when any of the electrical heating elements in
the oven come on.
Thermostat Light (O)
This light indicates that the oven is heating. When it turns off,
the temperature inside the oven has reached the setting made
with the thermostat knob. At this point, the light will turn on
and off as the oven maintains the temperature at a constant
level.
Timer Knob (S)
In order to use the timer, it must be w ound by turning the "S"
knob almost one complete turn in the clockwise direction
. Then, turning it back , set the desired time by lining
up the number for the minutes with the mark on the control
panel.
The control knobs for the hob electric hotplates (N)
The cookers can be fitted with normal and rapid electric
hotplates in a variety of combinations (the rapid hotplates
can be distinguished from the rest by the red boss in the
centre of the same). T o avoid any heat loss and damage to
the hotplates, we advise you to use pans with a flat bottom,
with a diameter which matches that of the hotplate itself. The
table contains the different settings indicated on the knobs
and the use for which the hotplates are recommended.
Setting Normal or Fast P l ate
0
1 Cooking vegetables, fish
2
3
4 For roasting (average)
5 For roasting (above average)
6
Before using the hotplates for the first time, you should
heat them at maximum temperature for appr oximately 4
minutes, without any pans. During this initial stage, their
protective coating hardens and reaches its maximum
resistance.
Electric hotplate indicator light (H)
This light comes on when any of the electrical hotplates on a
hob which features electric hotplates have been turned on.
Off
Cooking potatoes (using steam) soups,
chickpeas, beans.
Continuing the cooking of large quantities
of food, minestrone
For browning and reaching a boil in a
short time.
symbol to turn it on. It lights the ov en
14
Page 15

Practical Cooking Advice
When cooking in the oven, use only one dripping pan or
rack at a time. Select from among the top or bottom rack
heights based on whether the dish needs more or less
heat from the top.
Preheating
If the oven must be preheated (this is generally the case
when cooking leavened foods), w e recommend y ou use
the “convection mode” to reach the desired temperature
as quickly as possible . When preheating is over , which is
indicated by the red light “E” going out, select the
required cooking mode.
Cooked well on the inside but sticky on the
outside
Use less liquid, lower the temperature, and increase
the cooking time.
The pastry sticks to the pan
Grease the pan well and sprinkle it with a dusting of
flour.
Cooking Fish and Meat
When cooking white meat, fowl and fish, use temperature
settings from 180 °C to 200 °C.
For red meat that should be well done on the outside while
tender and juicy in the inside, it is a good idea to start with
a high temperature setting (200°C-220°C) for a short time,
then turn the oven down afterwards.
In general, the larger the roast, the lower the temperature
setting. Place the meat on the centre of the g rid and place
the dripping pan beneath it to catch the fat.
Make sure that the grid is inserted so that it is in the centre
of the oven. If you would like to increase the amount of
heat from below, use the low ra ck heights. For savoury
roasts (especially duck and wild game), dress the meat
with lard or bacon on the top.
Baking Cakes
When baking cakes, always preheat the oven and do not
open the oven door during baking to prevent the cak e
from dropping. In gener al:
Pastry dropped
Use less liquid or lower the temperature by 10°C.
Pastry is too dark on top
Place it on a lower rack, lower the temperature, and
increase the cooking time.
I used more than one level and they are not all at
the same cooki ng point
Use a lower temperature setting. It is not necessary to
remove the food from all the racks at the same time.
Using the Grill
Use the
tre of the grill (situated on the 3rd or 4th rack form the
bottom) because only the central part of the top heating
element is turned on.
Use the bottom rack (1st from the bottom), placing the
dripping pan provided to collect any sauce and/or grease
and prevent the same from dripping onto the oven bottom.
When using this mode, we recommend you set the thermostat to the highest setting. How ever , this does not mean
you cannot use lower temperatures, simply by adjusting
the thermostat knob to the desired temperature.
Important: always use the grill with the oven door shut.
This will allow you both to obtain excellent results and to
save on energy (appro ximately 10%).
Therefore the best results when using the grill modes
are obtained by placing the grid on the lower racks
(see cooking table) then, to prevent fat and grease
from dripping onto the bottom of the oven and smoke
from forming, place a dripping-pan on the 1st oven
rack from the bottom.
“grill” mode, placing the food under the cen-
15
Page 16

Selector knob
setting
Food to be c ooked Weight
(in kg)
Cooking rack
position from
bottom
Preheat ing time
(minutes)
Thermostat
knob
setting
Cooking
time
(minutes)
1 Convection
2 Pastry
Mode
3 Top Oven
4 Grill
NB: cooking times are approximate and may vary according to personal taste. When cooking using the grill, the
dripping pan must always be placed on the 1st oven rack from the bottom.
Duck
Roast veal or beef
Pork roast
Biscuits (short pastry)
Tarts
Lasagne
Lamb
Mackerel
Plum-cake
Cream puffs
Sponge-cake
Savoury pies
Raised Cakes
Tarts
Fruit cakes
Brioches
Browning food to
perfect cooking
Soles and cuttlefish
Squid and prawn
kebabs
Cod filet
Grilled vegetables
Veal steak
Cutlets
Hamburgers
Mackerels
Toasted sandwiches
1
1
1
1
1
1
1
1
0.3
0.5
1.5
0,5
1
1
0,5
- 3/4 15 220 -
1
1
1
1
1
1
1
1
n.° 4
3
3
3
3
3
3
2
2
2
3
3
3
3
3
3
3
4
4
4
3/4
4
4
4
4
4
15
15
15
15
15
10
10
10
10
10
10
15
15
15
15
15
5
5
5
5
5
5
5
5
5
200
200
200
180
180
190
180
180
170
180
170
200
160
180
180
160
Max
Max
Max
Max
Max
Max
Max
Max
Max
65-75
70-75
70-80
15-20
30-35
35-40
50-60
30-35
40-50
30-35
20-25
30-35
30-40
35-40
50-60
25-30
8-10
6-8
10
10-15
15-20
15-20
7-10
15-20
2-3
16
Page 17

Routine Maintenance and Cleaning
Before each operation, disconnect the appliance fr om
the electrical power supply. To ensure that the appli-
ance lasts a long time, it must be thoroughly cleaned frequently, keeping in mind that:
· do not use steam equipment to clean the appliance
• the enamelled parts and the self-cleaning panels,
where present, are washed with warm water without
using any abrasive powders or corrosive substances
which could ruin them;
• the inside of the oven should be cleaned fairly often
while it is still warm, using warm water and detergent
followed b y careful rinsing and drying;
· the electric hotplates should be cleaned with a damp
cloth and lubricated with a little oil while still warm;
• stainless steel may become marked if it comes into
contact with very hard water or harsh detergents
(containing phosphorous) for long periods of time. After
cleaning, it is advisable to rinse thoroughly and dry. It
is also recommended that drops of water be dried;
N.B.: A void closing the co ver while the electric plates
are still warm. Remove any liquid from the lid before
opening it.
Replacing the Oven Lamp
• Disconnect the oven from the power supply by means
of the omnipolar switch used to connect the appliance
to the electrical mains; or disconnect the plug if it is
accessible.
• Remove the glass cov er of the lamp-holder .
• Remove the lamp and replace it with a lamp resistant
to high temperatures (300°C) with the follo wing specifications:
- V oltage: 230V
- Wattage: 25W
- Socket: E14
• Replace the glass cover and connect the oven to the
mains.
17
Page 18

Предупреждения
Для обеспечения эффективности и безопасности данного изделия:
• обращайтесь только в уполномоченные центры технического обслуживания
• всегде требуйте установку оригинальных запасных частей
1 Данное изделие предназначается для
непрофессионального использования в домашних
условиях.
2 Перед началом эксплуатации данного изделия
рекомендуется внимательно прочитать инструкции,
содержащиеся в данном руководстве,
предоставляющие важные рекомендации по
безопасному осуществлению монтажа, эксплуатации
и технического обслуживания. Бережно сохраните
данное руководство для его консультации в
будущем.
3 После того, как Вы освободите машину от упаковки,
убедитесь в том, что машина не повреждена. В случае
сомнений не пользуйтесь изделием и обратитесь к
квалифицированному технику. Части упаковки
(пластмассовые мешки, вспененный полистирол, гвозди и
т.д.) не должны попадать в руки детей, так как эти материалы
представляют собой потенциальную опасность.
4 Установка должна быть выполнена квалифицированным
персоналом в соответствии с инструкциями
производителя. Неправильная установка может
причинить ущерб людям, животным или имуществу, за
который производитель не несет никакой
ответственности.
5 Электрическая безопасность данного изделия
гарантируется только, если оно правильно
подсоединено к надежной системе заземления в
соответствии с действующими правилами
электрической безопасности. Необходимо проверить
соблюдение этого важного требования по безопасности
и в случае сомнений поручить тщательную проверку
системы квалифицированному персоналу.
Производитель не несет ответственности за возможный
ущерб, вызванный отсутствием заземления
электрического изделия.
6 Перед подсоединением электрического изделия
проверьте, чтобы данные, указанные на заводской
табличке, соответствовали характеристиками сети
электропитания.
7 Проверить, чтобы потребление электроэнергии
электрического изделия и электрических розеток
соответствовало максимальной мощности изделия,
указанной на заводской табличке. В случае сомнений
обратитесь к квалифицированному специалисту.
8 При монтаже изделия необходимо установить
многополярный разъединитель с расстоянием между
контактами равным или больше 3 мм.
9 В случае несовместимости электророзетки и
электровилки изделия поручить замену розетки на
другую, пригодную, квалифицированному персоналу. В
частности электрик должен проверить, чтобы сечение
проводов электророзетки соответствовало
поглощаемой мощности электрического изделия. Как
правило не рекомендуется использовать переходники,
тройники и/или удлинители. При необходимости в
использовании вышеуказанных устройств следует
использовать только простые или множественные
переходники и удлинители, соответствующие
действующим нормативам по безопасности. При этом
важно не превышать предел расхода по значению тока,
указанный на простом переходнике или удлинителе, и
максимальную мощность, указанную на множественном
переходнике.
10 В период простоя изделия отсоедините его от сети
электропитания. Выключите главный разъединитель
электрического изделия, когда оно не используется.
11 Не закрывайте вентиляционные отверстия или
решетки рассеивания тепла;
12 Пользователь не должен самостоятельно заменять провод
электропитания данного изделия. В случае повреждения
провода электропитания или для его замены обращайтесь
только в центр технического обслуживания,
уполномоченный производителем изделия.
13 Данное изделие должно использоваться исключительно
в целях, для которых оно было спроектировано. Любое
другое его использование (например, отопление
помещения) считается ненадлежащим и следовательно
опасным. Производитель не несет ответственности за
возможный ущерб, вызванный ненадлежащим,
неправильным и неразумным использованием изделия.
14 При использовании любого электроприбора необходимо
соблюдать некоторые основные правила. В частности:
• не прикасайтесь к электроприбору мокрыми или
влажными руками или с мокрыми ногами.
• не пользуйтесь электроприбором с босыми ногами
• используйте удинители только в случае крайней
необходимости
• не тяните за провод электропитания электроприбора
или за сам электроприбор для его отсоединения от
электророзетки.
• не подвергайте электроприбор воздействию
атмосферных осадков (дождь, солнце и т.д.)
• не разрешайте детям или недееспособным лицам
пользоваться электроприбором без присмотра
15 Перед осуществлением чистки или технического
обслуживания электроприбора отсоедините его от сети
электропитания, вынув вилку из розетки или при помощи
общего выключателя.
16 По завершении срока службы данного изделия
рекомендуется вывести его из строя, обрезав провод
электропитания, вынув перед этим вилку из розетки.
Кроме того рекомендуется обезвредить потенциально
опасные части изделия в особенности для детей,
которые могут использовать выведенный из строя
электроприбор для игры.
17 Не забудьте, что зона приготовления остается горячей
примерно в течение получаса после ее выключения.
Следует быть внимательными, чтобы случайно не
поместить на неостывшую конфорку посуду или другие
предметы.
18 Не включайте электрические конфорки, если на
варочной панели лежат листы фольги или
пластмассовые материалы.
19 Держитесь на безопасном расстоянии от горячих
конфорок.
20 При использовании мелких бытовых электроприборов
рядом с кухонной плитой обращайте внимание, чтобы
их провод не касался горячих частей плиты.
21 Следите, чтобы ручки кастрюль и сковород были
повернуты таким образом, чтобы вы не могли случайно
их задеть.
22 Никогда не оставлять электрическую конфорку
включенной, не поставив на нее кастрюлю, так как в
противном случае конфорка достигает максимального
нагрева за короткое время с возможным повреждением
нагревательных элементов.
23 В процессе функционирования гриля или духовки
доступные детали духового шкафа могут сильно
нагреться. Не разрешайте детям приближаться к
духовому шкафу.
24 Всегда проверяйте, чтобы рукоятки находились в
положении •/o, когда изделие не используется;
25 Если кухонная плита устанавливается на возвышение,
необходимо зафиксировать ее надлежащим образом.
18
Page 19

Установка
Приведенные ниже инструкции предназначены для
квалифицированного установщика для осуществления
установки, наладки и технического обслуживания
плиты надлежащим образом с соблюдением
действующих нормативов.
Важно: любая операция по регуляции, техническому
обслуживанию и т.д. должна производиться только
после отсоединения электроприбора от сети
электропитания.
Расположение
Кухонная плита оснащена системой защиты от
чрезмерного перегрева класса Х, поэтому рядом с
кухонной плитой можно ставить мебельные элементы,
высота которых не превышает уровень варочной
панели.
Нивелировка (имеется только в некоторых
моделях)
В нижней части кухонной плиты расположены 4
опорные ножки с регулируемыми винтами, которые при
необходимости позволяют оптимизировать
выравнивание кухонной плиты. Очень важно, чтобы
кухонная плита была установлена ровно.
Для подсоединения кабеля электропитания выполнить
следующие операции:
отвинтить винт кабельного зажима и винты
контактов
Примечание: фабричная установка перемычек
соответствует монофазному соединению 230 В (рис.
А).
для осуществления электрических соединений,
показанных на рис. C и D, использовать две
перемычки, расположенные внутри
соединительной коробки (рис. B ссылка P)
зафиксировать кабель электропитания в
специальном кабельном зажиме и закрыть крышку.
230V 1N~
H07RN-F 3x4 CEI-UNEL 35364
NL
Установка ножек (имеется только в некоторых
моделях)
К кухонной плите прилагаются ножки, вставляемые в
основание кухонной плиты.
Подсоединение кабеля электропитания
Порядок открывания зажимной коробки:
При помощи отвертки приподнять боковые шпонки
крышки зажимной коробки;
Потянуть и открыть крышку зажимной коробки.
5
3
4
1
2
Ðèñ. À
P
NL2L3
L1
Ðèñ. B
400V 2N~
H05RR-F 4x2.5 CEI-UNEL 35363
NL2L1
5
3
4
Ðèñ. C
1
2
19
Page 20

400V 3N~
H05RR-F 5x2.5 CEI-UNEL 35363
NL3L1L2
5
3
4
Ðèñ. D
Подсоединение провода электроприбора к сети
электропитания
Подсоедините к проводу стандартную электрическую
вилку, расчитанную на нагрузку, указанную на
заводской табличке с данными. В случае прямого
подсоединения к сети электропитания необходимо
установить между электроприбором и сетью
многополюсный выключатель с минимальным
расстоянием между контактами 3 мм, расчитанный на
нагрузку и соответствующий действующим нормативам
(желто-зеленый провод заземления не должен
прерываться выключателем). Провод электропитания
должен располагаться таким образом, чтобы ни в какой
точке он не подвергался нагреванию, превышающему
температуру помещения на 50°C.
1
2
Перед осуществлением электрического
подсоединения необходимо проверить следующее:
ограничительный клапан и домашняя система
должны быть расчитаны на нагрузку плиты
(смотреть заводскую табличку с техническими
данными);
Сеть электропитания должна быть оснащена
надежным заземлением согласно нормативам и
указаниям законодательства;
электрическая розетка или многополюсный
выключатель должны быть легкодоступны без
необходимости разбирать электроприбор.
20
Page 21

Технические характеристики
Духовой шкаф
Габаритные размеры (В x Ш x Г) 32x40,5x39,5 cm
Рабочая: 52 литров
Макс. поглощаемая мощность духового шкафа: 2300 Вт
Рабочие размеры ящика для разогревания пищи:
ширина см. 46
глубина см. 42
высота см. 8.5
Электрическая варочная панель
Быстрая конфорка Ø 180 ìì: 2000 Âò
Нормальная Ш 145 мм: 1000 Вт
Нормальная Ш 225 мм: 2000 Вт
Макс. поглощаемая мощность электрической
варочной панели: 7000 Вт
Напряжение и частота
220-230 В / 380-400 В 3 Н перем. ток 50/60 Гц
ENERGY LABEL
Директива 2002/40/CE касательно этикеток на
электрических духовках
Норматив EN 50304
Заявление о расходах электроэнергии для класса
натуральной конвекции
функция нагревания: Статическое
7
Данное изделие соответствует следующим
Директивам Европейского Сообщества:
- 73/23/CEE от 19/02/73 (Низкое напряжение) и
последующим изменениям;
- 89/336/CEE от 03.05.89 (Электромагнитная
совместимость) и последующим изменениям;
- 93/68/CEE от 22.07.93 и последующим изменениям.
Плита с электрической духовкой (описание)
A Варочная панель с бортиками для сбора возможных
утечек
B Электрические конфорки
C Панель управления
D Решетка духовки
E Противень или жарочный лист
F Регулируемые ножки
H Световой индикатор функционирования
электрических конфорок
L Рукоятка выбора функций духового шкафа
M Рукоятка выбора температуры
N Рукоятки электрических конфорок
O Световой индикатор термостата духового шкафа
S Таймер
O
H
A
B
C
F
B
D
E
F
L M S
N
21
Page 22

Руководство по эксплуатации
Выбор различных функций кухонной плиты производится
при помощи рукояток и регуляторов, расположенных на
панели управления кухонной плиты .
Внимание: При первом включении духового шкафа
рекомендуем прокалить его примерно в течение 30 минут
при максимальной температуре и с закрытой дверцей.
По истечении 30 минут выключите духовку, откройте
дверцу и проветрите помещение. Запах, который может
появиться в процессе этой операции, образуется в
результате испарения веществ, использованных для
предохранения духовки в период от ее производства до
установки.
Внимание: Установите прилагающийся противень для
сбора сока и/или жира на самый нижний уровень только
в случае использования функции гриль или вертела
(имеющихся только в некоторых моделях). Для других
функций никогда не используйте самый нижний уровень
и никогда не помещайте никаких предметов на дно
духового шкафа в процессе приготовления, так как это
может повредить его эмалированное покрытие. Всегда
ставьте Вашу посуду для приготовления блюд (жаровни,
алюминиевые листы и т.д.) на прилагающуюся решетку,
установленную на опорные направляющие духовки.
Статическая духовка
Положение рукоятки термостата M: Между 60°C è
Ìàêñ.
В этом положении включаются два нагревательных
элемента: нижний и верхний. Это
типичная«бабушкина» духовка, которая, однако, была
оснащена отличной системой термораспределения и
позволяет сократить расход электроэнергии.
Статическая духовка остается непревзойденной для
приготовление блюд с двумя и более ингредиентами,
составляющими единое блюдо, таких, например, как:
капуста со свиными ребрами, треса по-испански,
треска по-анконетански, кусочки телятины с рисом и
т.д. Отличный результат получается при приготовлении
мясных блюд из телятины или говядины, таких как:
тушеное мясо, мясное рагу, гуляш, блюда из дичи,
свиной окорок и филейная часть свинины и т.д.,
требующих медленного тушения с постоянной
поливкой соком от жарки. Такая система остается
оптимальной для кондитерской выпечки, для
приготовления фруктов и для тушения в специальных
закрытых емостях для духовки. В процессе
приготовления блюд в статической духовке используйте
только один уровень, так как при одновременном
использовании нескольких уровней получается плохое
термораспределение. Используя разные имеющиеся
уровни, можно распределить жар между верхней и
нижней частью духового шкафа. Если для
приготовления какого-либо блюда требуется больший
жар снизу или сверху, следует использовать
соответственно нижние или верхние уровни.
Кондитерская выпечка
Положение рукоятки термостата M: Между 60°C è
Ìàêñ.
Включается нижний нагревательный элемент.
Данная функция предназначена для приготовления
деликатных блюд, таких как кондитерская выпечка,
требующая подъема теста, чему способствует
выделение тепла снизу.
Хотим обратить ваше внимание на то, что для
достижения более высоких температур требуется
больше времени, следовательно в этих случаях
следует использовать режим «Статическая духовка».
Нагрев сверху
Положение рукоятки термостата M: Между 60°C è
Ìàêñ.
Включается верхний нагревательный элемент.
Эта функция может быть использована для доводки
готовых блюд.
Гриль
Положение рукоятки термостата M: Ìàêñ.
Включается центральный верхний нагревательный
элемент.
Значительная температура прямого действия гриля
позволяет получить быстрое образование корочки на
поверхности продукта, которая препятствует выходу
соков и сохраняет продукт нежным и сочным.
Использование функции гриль в особенности
рекомендуется для блюд, для приготовления которых
требуется высокая поверхностная температура:
телячьих и говяжьих бифштексов, антрекотов, вырезки,
гамбургеров и т.д.
В параграфе «Практические советы по приготовлению»
приводятся некоторые примеры использования духового
шкафа.
Освещение духового шкафа
Включается, повернув рукоятку L на символ
Освещает духовой шкаф и остается включенным,
когда включается какой-либо нагревательный
электрический элемент духовки.
Таймер
Для использования таймера необходимо завести
звонок, повернув рукоятку S почти на один полный
оборот по часовой стрелке
4. Затем повернуть назад
5 и установить напротив фиксированной отметки на
панели управления значение, соответствующее
значению нужного времени.
РУКОЯТКИ УПРАВЛЕНИЯ ЭЛЕКТРИЧЕСКИМИ
КОНФОРКАМИ (N)
Плиты могут быть оборудованы обычными, быстронагревающимися и автоматическими электрическими конфорками
в различных комбинациях (быстронагревающиеся конфорки можно отличить по красному кружку в центре, автоматические по алюминиевому диску в центре).
Чтобы избежать потерь тепла и порчи посуды, рекомендуем
использовать посуду с плоским дном, диаметр которого не
превышает диаметр конфорки.
Таблица показывает соответствие между позицией рукоятки и целью, для которой она используется.
.
22
Page 23

Позиция Обычная или быстрая конфорка
0 Выключено
1 Приготовление овощей, рыбы
2
3
4 Жаренье (среднее)
5 Жаренье (усиленное)
6 Жаренье до корочки, кипячение
Приготовление картофеля на пару,
супов, фасоли
Приготовление и выдерживание
больших количеств пищи
Практические советы по приготовлению блюд
Перед первым использованием прогрейте пустые электрические конфороки при максимальной температуре в
течение приблизительно 4 минут. Это необходимо для
укрепления защитного покрытия конфорок.
Зеленый индикатор электрических конфорок (H)
Индикатор горит, когда включена хотя бы одна электрическая конфорка.
Световой индикатор термостата духового шкафа (O)
Показывает фазу нагревания, когда индикатор
термостата гаснет, это означает, что внутри духового
шкафа была достигнута температура, заданная
рукояткой термостат. На данном этапе мигание этого
индикатора означает, что термостат функционирует
исправно для поддержания неизменного значения
температуры в духовке.
При приготовлении блюд в духовом шкафу используйте
только один противень или решетку. Противень или
решетка устанавливаются на нижние или верхние
направляющие в зависимости от интенсивности тепла,
необходимого для приготовления данного блюда.
Предварительный нагрев
При необходимости в предварительном нагреве
духового шкафа, что обычно всегда требуется для
выпечки всех дрожжевых изделий, можно использовать
функцию статическая духовка, которая позволяет
достичь нужной температуры за короткий срок. По
завершении нагрева красный световой индикатор E
гаснет, и вы можете выбрать нужный режим
приготовления.
Приготовление рыбы и мяса
Белое мясо, птицу и рыбу следует запекать при
температуре от 180°C до 200°C.
Для приготовления красного мяса, хорошо
прожаренного снаружи и сочного внутри, следует в
начале установить высокую температуру (200°С
220°C) в течение короткого времени, затем понизить
температуру.
Обычно, чем крупнее кусок запекаемого мяса, тем
дольше будет его приготовление при низкой
температуре. Поместите кусок мяса в центр решетки
и установите под решетку противень для сбора жира.
Установите решетку таким образом, чтобы мясо
находилось в центре духовки. Если требуется получить
больший нагрев снизу, установите решетку на нижние
направляющие. Для приготовления ароматного
запеченого мяса (в особенности утки и дичи) следует
обложить кусок мяса кусочками сала или корейки и
расположить его на верхнем уровне духовки.
Кондитерская выпечка
Для кондитерской выпечки необходимо всегда
производить предварительный нагрев духовки, а так
же не следует открывать дверцу духового шкафа в
процессе выпечки во избежание оседания теста.
Общие рекомендации:
Если пирог слишком сухой
В следующий раз повысьте температуру на
10°C и сократите время приготовления.
Если пирог слишком сырой
В следующий раз повысьте температуру на
10°C или сократите количество жидкости при
замешивании теста.
Если поверхность пирога слишком темная
Поместите форму с пирогом на более низкий
уровень, уменьшите температуру и увеличьте
время приготовления.
Если пирог хорошо пропечен снаружи, а
внутри сырой
Сократите количество жидкости при
замешивании теста, уменьшите температуру и
увеличьте время приготовления.
Если пирог пригорает к форме
Хорошо смажьте и посыпьте мукой форму.
Функция гриль
Используйте функцию
«гриль», поместив продукт
в центр решетки (установленной на 3-ий или на 4-ый
уровень снизу), так как включена только центральная
часть верхнего электрического сопротивления.
Установите на первый уровень снизу прилагающийся
противень для сбора соков и/или жира.
При использовании этой функции рекомендуется
установить на термостате максимальную температуру.
Это, однако, не исключает возможность использования
23
Page 24

более низких температур, устанавливая рукоятку
термостата на требуемую температуру.
Важно: используйте функцию гриль с закрытой
дверцей духовки для получения оптимальных
результатов и для значительной экономии энергии
(примерно 10%).
Оптимальный результат при использовании
функции гриль получается, когда решетка
устанавливается на верхних уровнях (смотрите
таблицу приготовления), после чего для сбора
жира и во избежание образования дыма
установите прилагающийся противень на самый
нижний уровень.
Регулярное техническое обслуживание и чистка кухонной плиты
Перед чисткой или любыми операциями по уходу
за плитой отсоедините ее от электрической сети.
Для продления срока службы оборудования необходимо тщательно и регулярно его чистить, имея в виду,
что:
· Для чистки не использовать паровые агрегаты.
· Эмалированные части и самоочищающиеся повер-
хности мойте теплой водой без применения абразивных и разъедающих средств, которые могут испортить их.
· Изнутри духовку промывайте пока она еще не
остыла теплой водой с моющим средством, затем
тщательно ополосните и вытрите.
· Электрические конфорки нужно очищать влажной
тканью, а затем протереть с небольшим
количеством масла, пока они еще теплые.
· Нержавеющая сталь может потерять свои свойства
при длительном контакте с жесткой водой или агрессивными чистящими средствами (содержащими фосфор). Рекомендуется компоненты из нержавеющей стали промывать водой и вытирать насухо,
не оставляя подтеков.
· Гриль рекомендуется чистить пока он еще горячий.
Решетка гриля должна промываться неабразивным
моющим средством.
Внимание: не закрывайте крышку, пока конфорки
не остыли. Удалите всю жидкость перед тем, как
открыть крышку.
Замена лампочки освещения духовки
• Отключить электропитание духовки при помощи
многополярного выключателя, используемого для
подсоединения духовки к сети электропитания, или
вынуть вилку из розетки, если это возможно.
• Отвинтите стеклянную крышку плафона лампочки;
• Вывинтите лампочку и замените ее на новую,
устойчивую к высоким температурам (300°C),
имеющую следующие характеристики:
- Напряжение 230 В
- Мощность 25 Вт
- Подсоединение Е14
• Восстановите стеклянную крышку на место и
подключите напряжение.
24
Page 25

Положение
рукоятки
регуляции
Приготавливаемый
продукт
Вес (кг) Расположение
на уровнях
духовки снизу
вверх
Время
предварительного
нагрева (минуты)
Положение
рукоятки
термостата
Время
приготов-
ления
(минуты)
1 Статическое Óòêà
Жаркое из телятины
или говядины
Жаркое из свинины
Печенье (песочное)
Песочный торт
Лазанья
Баранина
Скумбрия
екс
Эклеры
Бисквит
Несладкие пироги
2 ондитерская
выпечка
3 Forno Sopra
(Нагрев сверху)
4 Гриль амбала и каракатицы
ПРИМЕЧАНИЕ: указанна я продолжительность приготовления служит только в качестве примера и может быть
изменена в соответствии с личными вкусами. При использовании гриля противень всегда устанавливается на
самый нижний уровень духовки.
Дрожжевая выпечка
Песочный торт
Фруктовый торт
Слоеные булочки
Доведение
доготовности
альмары и креветки
на шампурах
Филе трески
Овощи-гриль
Телячий бифштекс
Отбивные
Гамбургер
Скумбрия
Горячие бутерброды
1
1
1
1
1
1
1
1
0.3
0.5
1.5
0,5
1
1
0,5
- 3/4 15 220 -
1
1
1
1
1
1
1
1
Номер 4
3
3
3
3
3
3
2
2
2
3
3
3
3
3
3
3
4
4
4
3/4
4
4
4
4
4
15
15
15
15
15
10
10
10
10
10
10
15
15
15
15
15
5
5
5
5
5
5
5
5
5
200
200
200
180
180
190
180
180
170
180
170
200
160
180
180
160
Ìàêñ.
Ìàêñ.
Ìàêñ.
Ìàêñ.
Ìàêñ.
Ìàêñ.
Ìàêñ.
Ìàêñ.
Ìàêñ.
65-75
70-75
70-80
15-20
30-35
35-40
50-60
30-35
40-50
30-35
20-25
30-35
30-40
35-40
50-60
25-30
8-10
10-15
15-20
15-20
7-10
15-20
6-8
10
2-3
25
Page 26

26
Page 27

27
Page 28

Merloni Elettrodomestici
Viale Aristide Merloni 47
60044 Fabriano
Italy
Tel +39 0732 6611
Fax +39 0732 662501
www.merloni.com
Cucina con forno e piano elettrico (Russia)
04/04 - 195043549.00
 Loading...