


HP M1705B, M1772A, M1771A, M1770A, PageWriter 300 Service Manual
...PageWriter 100, 200 and 300 Series Cardiographs
M1770A, M1771A, and M1772A
Mobile Cart M1705B
Service Manual
+
+3 3DUW 1R 0 |
&RS\ULJKW ‹ |
3ULQWHG LQ 86$ 2FWREHU |
+HZOHWW 3DFNDUG &RPSDQ\ |
|
3ULQWHG LQ 8 6 $ |
(GLWLRQ |
|
October 22, 1998 3:00 pm DRAFT

Notice
Notice
The information in this document is subject to change without notice.
Hewlett-Packard makes no warranty of any kind with regard to this material, including, but not limited to, the implied warranties of merchantability and fitness for a particular purpose. Hewlett-Packard shall not be liable for errors contained herein or for incidental or consequential damages in connection with the furnishing, performance, or use of this material.
This document contains or refers to proprietary information which is protected by copyright. All rights are reserved. No part of this document may be photocopied, reproduced, or translated to another language without the prior written consent of HewlettPackard Company.
|
Responsibility of the Manufacturer |
|
|
Hewlett-Packard only considers itself responsible for any effects on safety, reliability and |
|
|
performance of the equipment if all the following are true: |
|
|
• Assembly operations, extensions, re-adjustments, modifications or repairs are done by |
|
|
persons authorized by Hewlett-Packard. |
|
|
• The electrical installation of the relevant room complies with the IEC or national require- |
|
|
ments. |
|
|
• The instrument is used according to the instructions for use presented in this manual. |
|
|
|
|
|
As with all electronic |
equipment, radio frequency interference between this |
WARNING |
||
|
cardiograph and any existing RF transmitting or receiving equipment at the |
|
|
||
|
installation site, including electrosurgical equipment, should be evaluated |
|
|
carefully and any limitations noted before the equipment is placed in service. |
|
|
Monitoring during electrosurgery should not be attempted and monitoring |
|
|
electrodes should be removed from the patient to preclude the possibility of |
|
|
burns. Radio frequency generation from electrosurgical equipment and close |
|
|
proximity transmitters may seriously degrade cardiograph performance. Hewlett- |
|
|
Packard assumes no liability for failures resulting from RF interference between |
|
|
HP medical electronics and any radio frequency generating equipment at levels |
|
|
exceeding those established by applicable standards. |
|
|
|
|
ii

CAUTION
CAUTION
Notice
Like all electronic devices, this cardiograph is susceptible to electrostatic discharge (ESD). Electrostatic discharge typically occurs when electrostatic energy is transferred to the patient, the electrodes, or the cardiograph. ESD may result in ECG artifact that may appear as narrow spikes on the cardiograph display or on the printed report. When ESD occurs, the cardiograph’s ECG interpretation may be inconsistent with the physician’s interpretation.
ESD discharges to exposed metal on the rear of the cardiograph can occasionally cause an error message to appear on the cardiograph display. The cardiograph returns to normal operation after turning the power off, then on again.
The data transmission cable must have a suppression device attached to assure the cardiograph’s compliance with the European Radiated Emissions Standard found in CISPR 11. If your data transmission cable does not include a suppression device, compliance can be achieved by attaching one of the following suppression devices to the cable, near the cardiograph:
part number 0443164251 |
Fair-Rite Products Corporation |
|
|
|
P. O. Box J |
|
|
One Commercial Row |
|
|
Wallkill, New York 12589 |
|
|
telephone: (914) 895-2055 |
|
|
FAX: (914)895-2629 |
|
|
or |
|
|
Euro-Schaffner, S. A. |
|
|
1 B Avenue de Suisse - BP 16 |
|
|
68311 Illzach Cedex, France |
|
|
telephone: 33-8-931-0400 |
|
|
FAX: 33-8-931-0401 |
part number 28B2025-0A0 |
Steward |
|
|
|
East 36th Street |
|
|
P. O. Box 510 |
|
|
Chattanooga, TN 37401 |
|
|
telephone: (615) 867-4100 |
|
|
FAX: (615) 867-4102 |
|
|
or |
|
|
Steward EMC, S.A. |
|
|
Rue Fritz-Couvoisier 40 |
|
|
Ch-2300 La Chaux-de-Fonds |
|
|
Switzerland |
|
|
telephone: 41-39-282-387 |
|
|
Fax: 41-39-280-277 |
|
|
|
This is to certify that this equipment is in accordance with the Radio Interference Requirements of the EMC Directive.
iii

Notice
Warranty
Hewlett-Packard warrants this medical product against defects in materials and workmanship for a period of three years in certain geographics, or one year with onsite support.
If Hewlett-Packard receives notice of such defects during the warranty period, HewlettPackard shall, at its option, either repair or replace hardware products which prove to be defective.
Hewlett-Packard software and firmware products that are designated by Hewlett-Packard for use with a hardware product, when properly installed on that hardware product, are warranted not to fail to execute their programming instructions due to defects during the warranty period. Hewlett-Packard shall repair or replace software media and firmware that do not execute their programming instructions due to such defects. Hewlett-Packard does not warrant that the operation of the software, firmware, or hardware shall be uninterrupted or error free.
If Hewlett-Packard is unable, within a reasonable time, to repair or replace any product to a condition as warranted, Buyer shall be entitled to a refund of the purchase upon return of the product to Hewlett-Packard.
Limitation of Warranty
The foregoing warranty shall not apply to defects resulting from any of the following:
1.Improper or inadequate maintenance by Buyer.
2.Buyer-supplied software or interfacing.
3.Unauthorized modification or misuse.
4.Operation outside of the environmental specifications for the product.
5.Improper site preparation and maintenance.
THE WARRANTY SET FORTH ABOVE IS EXCLUSIVE AND NO OTHER WARRANTY, WHETHER WRITTEN OR ORAL, IS EXPRESSED OR IMPLIED. HEWLETT-PACKARD SPECIFICALLY DISCLAIMS THE IMPLIED WARRANTIES OF MERCHANTABILITY AND FITNESS FOR A PARTICULAR PURPOSE.
iv

Notice
Printing History
October 1994 |
Edition 1 |
May 1996 |
Edition 2 |
October 1998 |
Edition 3 |
v
Safety Summary
Safety Summary
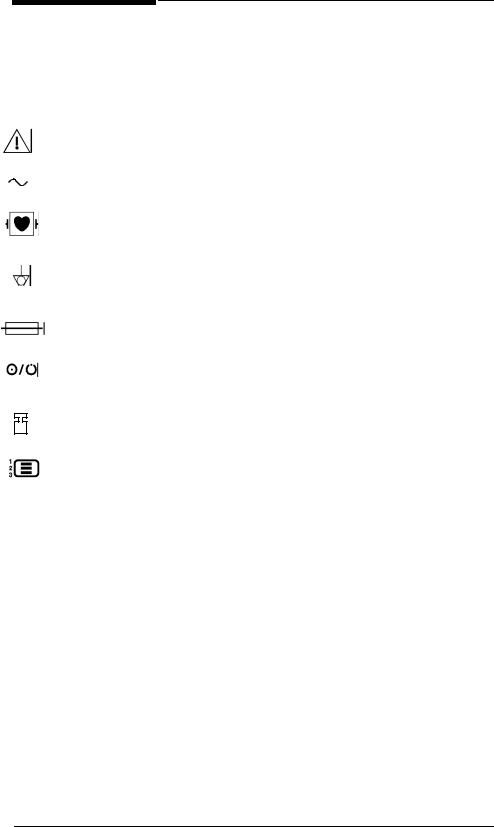
Safety Symbols Marked on the Cardiograph
The following symbols are used on the cardiograph or the cart:
Caution - See operating instructions
Alternating current.
Meets IEC type CF leakage current requirements and is defibrillator protected. (Isolated ECG input.)
Equipotential (identifies independent protective earth conductor to the cardiograph).
Fuse.
Indicates power control for cardiograph.
Hz Indicates operating frequency in cycles per second.
The maximum weight that the cart can hold
Displays the configuration menu on the PageWriter 200/200/300pi.
Please see Chapter 2, “Performance Verification and Maintenance,” for safety requirements that apply to the cardiograph.
vi
WARNING
CAUTION
NOTE
Conventions Used in This Manual
Conventions Used in This Manual
Warning statements describe conditions or actions that can result in personal injury or loss of life.
Caution statements describe conditions or actions that can result in damage to the equipment or software.
Notes contain additional information on cardiograph usage.
TEXT |
represents the labels that appear on the display. |
.H\ |
represents keys on the key panel. |
|
represents the temporary key labels that appear on the display. |
Softkey |
|
|
|
vii

Preface
Preface
This manual contains service information for the Hewlett-Packard M1770A pageWriter 300pi, PageWriter 200i, M1771A PageWriter 200, and M1772A PageWriter 100 cardiographs. The information and procedures in this manual apply to all models unless otherwise specified.
This manual is organized as follows:
•Chapter 1 — Introduction. Contains a general description of the cardiographs, lists of technical specifications, and lists of accessories and options.
•Chapter 2 — Performance Verification and Maintenance. Explains how to check the cardiograph’s performance using built-in self-tests, and lists maintenance procedures and safety requirements that apply to the cardiograph.
•Chapter 3 — Theory of Operation. Provides an overview of how the cardiograph works and describes the operation of the major subassemblies.
•Chapter 4 — Troubleshooting. Contains procedures and error codes to aid the service person in localizing faults to a replaceable subassembly.
•Chapter 5 — Removal and Replacement. Contains procedures for removing and replacing each of the cardiograph’s major subassemblies.
•Chapter 6 — Parts List. Lists part numbers for the cardiograph’s replaceable parts, and provides assembly drawings.
•Appendix A — Connector Pin Assignments. Identifies and defines the signals assigned to the subassembly interconnections.
•Index.
viii

Contents
Notice. . . . . . . . . . . . . . . . . . . . . . . . . . . . . . . . . . . . . . . . . . . . . . . . . . . . . . . . . . . . . . . . . . . . . . . . . . . |
. . .ii |
Responsibility of the Manufacturer . . . . . . . . . . . . . . . . . . . . . . . . . . . . . . . . . . . . . . . . . . . . . . . |
. . .ii |
Warranty . . . . . . . . . . . . . . . . . . . . . . . . . . . . . . . . . . . . . . . . . . . . . . . . . . . . . . . . . . . . . . . . . . . |
. . iv |
Limitation of Warranty . . . . . . . . . . . . . . . . . . . . . . . . . . . . . . . . . . . . . . . . . . . . . . . . . . . . . . . . |
. . iv |
Safety Summary . . . . . . . . . . . . . . . . . . . . . . . . . . . . . . . . . . . . . . . . . . . . . . . . . . . . . . . . . . . . . . . . . |
. . vi |
Safety Symbols Marked on the Cardiograph . . . . . . . . . . . . . . . . . . . . . . . . . . . . . . . . . . . . . . . . |
. . vi |
Conventions Used in This Manual . . . . . . . . . . . . . . . . . . . . . . . . . . . . . . . . . . . . . . . . . . . . . . . . . . |
. .vii |
Preface . . . . . . . . . . . . . . . . . . . . . . . . . . . . . . . . . . . . . . . . . . . . . . . . . . . . . . . . . . . . . . . . . . . . . . . . |
. viii |
1. Introduction |
|
PageWriter 100, 200, 200i, and 300pi Series Cardiographs . . . . . . . . . . . . . . . . . . . . . . . . . . . . . . . |
. 1-1 |
M1705B Cart . . . . . . . . . . . . . . . . . . . . . . . . . . . . . . . . . . . . . . . . . . . . . . . . . . . . . . . . . . . . . . . . |
. 1-3 |
Transmission and Storage, Option #A05 . . . . . . . . . . . . . . . . . . . . . . . . . . . . . . . . . . . . . . . . . . |
. 1-3 |
Inquiries . . . . . . . . . . . . . . . . . . . . . . . . . . . . . . . . . . . . . . . . . . . . . . . . . . . . . . . . . . . . . . . . . . . . . . . |
. 1-3 |
Specification Data . . . . . . . . . . . . . . . . . . . . . . . . . . . . . . . . . . . . . . . . . . . . . . . . . . . . . . . . . . . . . . . |
. 1-3 |
Sampling Characteristics of Cardiograph . . . . . . . . . . . . . . . . . . . . . . . . . . . . . . . . . . . . . . . . . . |
1-4 |
Options and Accessories . . . . . . . . . . . . . . . . . . . . . . . . . . . . . . . . . . . . . . . . . . . . . . . . . . . . . . . . . . |
. 1-8 |
PageWriter 100, 200, 200i, and 300pi Cardiographs . . . . . . . . . . . . . . . . . . . . . . . . . . . . . . . . . . |
1-8 |
Country/Region Options . . . . . . . . . . . . . . . . . . . . . . . . . . . . . . . . . . . . . . . . . . . . . . . . . . |
. 1-8 |
Standard Accessories . . . . . . . . . . . . . . . . . . . . . . . . . . . . . . . . . . . . . . . . . . . . . . . . . . . . . |
1-12 |
2. Performance Verification and Maintenance |
|
Introduction . . . . . . . . . . . . . . . . . . . . . . . . . . . . . . . . . . . . . . . . . . . . . . . . . . . . . . . . . . . . . . . . . . . . |
. 2-1 |
Performance Verification . . . . . . . . . . . . . . . . . . . . . . . . . . . . . . . . . . . . . . . . . . . . . . . . . . . . . . . . . . |
. 2-1 |
Visual Inspection and Power On Self Test . . . . . . . . . . . . . . . . . . . . . . . . . . . . . . . . . . . . . . . . . |
2-2 |
Extended Self-test . . . . . . . . . . . . . . . . . . . . . . . . . . . . . . . . . . . . . . . . . . . . . . . . . . . . . . . . . . . . |
. 2-2 |
Internal Circuitry Testing of PageWriter 100 . . . . . . . . . . . . . . . . . . . . . . . . . . . . . . . . . . |
. 2-2 |
Internal Circuitry Testing of PageWriter 200/200i/300pi . . . . . . . . . . . . . . . . . . . . . . . . . |
. 2-4 |
Memory Test . . . . . . . . . . . . . . . . . . . . . . . . . . . . . . . . . . . . . . . . . . . . . . . . . . . . . . . . . . . |
. 2-5 |
How to Read the Extended Self-Test Report . . . . . . . . . . . . . . . . . . . . . . . . . . . . . . . . . . |
2-11 |
Display Test (PageWriter 200/200i/300pi only) . . . . . . . . . . . . . . . . . . . . . . . . . . . . . . . . . . . . . |
2-12 |
Indicator Light Test (PageWriter 100 only). . . . . . . . . . . . . . . . . . . . . . . . . . . . . . . . . . . . . . . . . |
2-12 |
Printer Test . . . . . . . . . . . . . . . . . . . . . . . . . . . . . . . . . . . . . . . . . . . . . . . . . . . . . . . . . . . . . . . . . |
2-12 |
Keyboard Tests . . . . . . . . . . . . . . . . . . . . . . . . . . . . . . . . . . . . . . . . . . . . . . . . . . . . . . . . . . . . . . |
2-13 |
PageWriter 200/200i/300pi Keyboard Test . . . . . . . . . . . . . . . . . . . . . . . . . . . . . . . . . . . . |
2-13 |
PageWriter 100 Keyboard Test . . . . . . . . . . . . . . . . . . . . . . . . . . . . . . . . . . . . . . . . . . . . . |
2-13 |
ECG Simulation . . . . . . . . . . . . . . . . . . . . . . . . . . . . . . . . . . . . . . . . . . . . . . . . . . . . . . . . . . . . . |
2-14 |
Changing the Default Operating Language (200/200i/300pi Only) . . . . . . . . . . . . . . . . . . . . . . . . . |
2-16 |
Resetting the Cardiograph to the Factory Default State . . . . . . . . . . . . . . . . . . . . . . . . . . . . . . . . . . |
2-17 |
Resetting the PageWriter 200/200i/300pi . . . . . . . . . . . . . . . . . . . . . . . . . . . . . . . . . . . . . . . . . . |
2-17 |
Resetting the PageWriter 100 . . . . . . . . . . . . . . . . . . . . . . . . . . . . . . . . . . . . . . . . . . . . . . . . . . . |
2-17 |
Preventive Maintenance . . . . . . . . . . . . . . . . . . . . . . . . . . . . . . . . . . . . . . . . . . . . . . . . . . . . . . . . . . . |
2-18 |
Care and Cleaning . . . . . . . . . . . . . . . . . . . . . . . . . . . . . . . . . . . . . . . . . . . . . . . . . . . . . . . . . . . |
2-18 |
Cleaning the Cardiograph . . . . . . . . . . . . . . . . . . . . . . . . . . . . . . . . . . . . . . . . . . . . . . . . . |
2-18 |
Cleaning the Keyboard Overlay . . . . . . . . . . . . . . . . . . . . . . . . . . . . . . . . . . . . . . . . . . . . |
2-19 |
Cleaning the Digital Array Printhead and Paper Sensor . . . . . . . . . . . . . . . . . . . . . . . . . . |
2-20 |
ix

Cleaning the Electrodes and Cables . . . . . . . . . . . . . . . . . . . . . . . . . . . . . . . . . . . . . . . . . |
2-21 |
Caring for the Battery . . . . . . . . . . . . . . . . . . . . . . . . . . . . . . . . . . . . . . . . . . . . . . . . . . . . . . . . . . . . |
2-22 |
Storing the Battery . . . . . . . . . . . . . . . . . . . . . . . . . . . . . . . . . . . . . . . . . . . . . . . . . . . . . . . . . . . |
2-22 |
Safety Tests . . . . . . . . . . . . . . . . . . . . . . . . . . . . . . . . . . . . . . . . . . . . . . . . . . . . . . . . . . . . . . . . . |
2-23 |
PageWriter 100, 200/200i, and 300pi Series Performance Verification Matrix . . . . . . . . . . . . . . . . |
2-24 |
3. Theory of Operation |
|
Operational Overview . . . . . . . . . . . . . . . . . . . . . . . . . . . . . . . . . . . . . . . . . . . . . . . . . . . . . . . . . . . . |
. 3-1 |
ECG Data Path. . . . . . . . . . . . . . . . . . . . . . . . . . . . . . . . . . . . . . . . . . . . . . . . . . . . . . . . . . . . . . . . |
3-1 |
Power-on and Power-off Sequences . . . . . . . . . . . . . . . . . . . . . . . . . . . . . . . . . . . . . . . . . . . . . . . |
3-1 |
Power-on . . . . . . . . . . . . . . . . . . . . . . . . . . . . . . . . . . . . . . . . . . . . . . . . . . . . . . . . . . . . . . . |
3-1 |
Power-off . . . . . . . . . . . . . . . . . . . . . . . . . . . . . . . . . . . . . . . . . . . . . . . . . . . . . . . . . . . . . . . |
3-2 |
Circuit Descriptions . . . . . . . . . . . . . . . . . . . . . . . . . . . . . . . . . . . . . . . . . . . . . . . . . . . . . . . . . . . . . . . |
3-2 |
The Patient Cable . . . . . . . . . . . . . . . . . . . . . . . . . . . . . . . . . . . . . . . . . . . . . . . . . . . . . . . . . . . . . . . . |
3-3 |
CPU Assembly . . . . . . . . . . . . . . . . . . . . . . . . . . . . . . . . . . . . . . . . . . . . . . . . . . . . . . . . . . . . . . . . . . |
3-4 |
CPU/System Oscillator . . . . . . . . . . . . . . . . . . . . . . . . . . . . . . . . . . . . . . . . . . . . . . . . . . . . . . . . . |
3-5 |
System Gate Array/Real-Time Crystal . . . . . . . . . . . . . . . . . . . . . . . . . . . . . . . . . . . . . . . . . . . . . |
3-5 |
ECG Front End Control . . . . . . . . . . . . . . . . . . . . . . . . . . . . . . . . . . . . . . . . . . . . . . . . . . . |
3-5 |
Interrupt Control . . . . . . . . . . . . . . . . . . . . . . . . . . . . . . . . . . . . . . . . . . . . . . . . . . . . . . . . . |
3-5 |
DMA for ECG Data . . . . . . . . . . . . . . . . . . . . . . . . . . . . . . . . . . . . . . . . . . . . . . . . . . . . . . |
3-6 |
DMA for LCD Data . . . . . . . . . . . . . . . . . . . . . . . . . . . . . . . . . . . . . . . . . . . . . . . . . . . . . . |
3-6 |
System Reset Circuitry . . . . . . . . . . . . . . . . . . . . . . . . . . . . . . . . . . . . . . . . . . . . . . . . . . . . |
3-6 |
Watch-dog Circuitry . . . . . . . . . . . . . . . . . . . . . . . . . . . . . . . . . . . . . . . . . . . . . . . . . . . . . . |
3-6 |
Real-Time Clock . . . . . . . . . . . . . . . . . . . . . . . . . . . . . . . . . . . . . . . . . . . . . . . . . . . . . . . . . |
3-6 |
DRAM RAS and CAS Generation and Refresh . . . . . . . . . . . . . . . . . . . . . . . . . . . . . . . . . |
3-6 |
NVRAM Interface . . . . . . . . . . . . . . . . . . . . . . . . . . . . . . . . . . . . . . . . . . . . . . . . . . . . . . . . |
3-7 |
Keyboard Interface. . . . . . . . . . . . . . . . . . . . . . . . . . . . . . . . . . . . . . . . . . . . . . . . . . . . . . . . |
3-7 |
Display Control for PageWriter 20 and 300 Series . . . . . . . . . . . . . . . . . . . . . . . . . . . . . . . |
3-7 |
NVRAM . . . . . . . . . . . . . . . . . . . . . . . . . . . . . . . . . . . . . . . . . . . . . . . . . . . . . . . . . . . . . . . . . . . . |
3-7 |
ECG Front End . . . . . . . . . . . . . . . . . . . . . . . . . . . . . . . . . . . . . . . . . . . . . . . . . . . . . . . . . . . . . . . |
3-7 |
DRAM . . . . . . . . . . . . . . . . . . . . . . . . . . . . . . . . . . . . . . . . . . . . . . . . . . . . . . . . . . . . . . . . . . . . . |
3-7 |
ROM-1 and ROM-2 Address Space . . . . . . . . . . . . . . . . . . . . . . . . . . . . . . . . . . . . . . . . . . . . . . . |
3-7 |
Printer Gate Array/SRAM . . . . . . . . . . . . . . . . . . . . . . . . . . . . . . . . . . . . . . . . . . . . . . . . . . . . . . |
3-7 |
Motor Driver . . . . . . . . . . . . . . . . . . . . . . . . . . . . . . . . . . . . . . . . . . . . . . . . . . . . . . . . . . . . . . . . . |
3-8 |
Analog/Digital Converter . . . . . . . . . . . . . . . . . . . . . . . . . . . . . . . . . . . . . . . . . . . . . . . . . . . . . . . |
3-8 |
Thermal Printhead . . . . . . . . . . . . . . . . . . . . . . . . . . . . . . . . . . . . . . . . . . . . . . . . . . . . . . . . . . . . |
3-8 |
System Expansion Connector . . . . . . . . . . . . . . . . . . . . . . . . . . . . . . . . . . . . . . . . . . . . . . . . . . . . |
3-8 |
Power Supply . . . . . . . . . . . . . . . . . . . . . . . . . . . . . . . . . . . . . . . . . . . . . . . . . . . . . . . . . . . . . . . . . . . |
3-9 |
Voltage Selector . . . . . . . . . . . . . . . . . . . . . . . . . . . . . . . . . . . . . . . . . . . . . . . . . . . . . . . . . . . . . . |
3-9 |
Primary Line Fuses . . . . . . . . . . . . . . . . . . . . . . . . . . . . . . . . . . . . . . . . . . . . . . . . . . . . . . . . . . . . |
3-9 |
Power Transformer . . . . . . . . . . . . . . . . . . . . . . . . . . . . . . . . . . . . . . . . . . . . . . . . . . . . . . . . . . . . |
3-9 |
Rectifier/Filter . . . . . . . . . . . . . . . . . . . . . . . . . . . . . . . . . . . . . . . . . . . . . . . . . . . . . . . . . . . . . . . |
3-10 |
Switch-Mode Battery Charger . . . . . . . . . . . . . . . . . . . . . . . . . . . . . . . . . . . . . . . . . . . . . . . . . . |
3-10 |
Battery . . . . . . . . . . . . . . . . . . . . . . . . . . . . . . . . . . . . . . . . . . . . . . . . . . . . . . . . . . . . . . . . . . . . . |
3-10 |
VPRINT Boost Regulator . . . . . . . . . . . . . . . . . . . . . . . . . . . . . . . . . . . . . . . . . . . . . . . . . . . . . . |
3-10 |
Switched +6V Boost Regulator . . . . . . . . . . . . . . . . . . . . . . . . . . . . . . . . . . . . . . . . . . . . . . . . . |
3-10 |
5V Linear Regulators . . . . . . . . . . . . . . . . . . . . . . . . . . . . . . . . . . . . . . . . . . . . . . . . . . . . . . . . . |
3-10 |
ECG Front End . . . . . . . . . . . . . . . . . . . . . . . . . . . . . . . . . . . . . . . . . . . . . . . . . . . . . . . . . . . . . . . . . |
3-11 |
Isolation Power Transformer . . . . . . . . . . . . . . . . . . . . . . . . . . . . . . . . . . . . . . . . . . . . . . . . . . . |
3-11 |
Front End Power Supply . . . . . . . . . . . . . . . . . . . . . . . . . . . . . . . . . . . . . . . . . . . . . . . . . . . . . . . |
3-11 |
Opto-Isolators . . . . . . . . . . . . . . . . . . . . . . . . . . . . . . . . . . . . . . . . . . . . . . . . . . . . . . . . . . . . . . . |
3-12 |
x
Integrated Front End Circuits/Oscillator . . . . . . . . . . . . . . . . . . . . . . . . . . . . . . . . . . . . . . . . . . 3-12 Calibration . . . . . . . . . . . . . . . . . . . . . . . . . . . . . . . . . . . . . . . . . . . . . . . . . . . . . . . . . . . . . . . . . . 3-12 Defibrillator Protection . . . . . . . . . . . . . . . . . . . . . . . . . . . . . . . . . . . . . . . . . . . . . . . . . . . . . . . . 3-12 Storage and Transmission (Option #A05 0nly) . . . . . . . . . . . . . . . . . . . . . . . . . . . . . . . . . . . . . . . . . 3-13 M177XA Expansion Connector . . . . . . . . . . . . . . . . . . . . . . . . . . . . . . . . . . . . . . . . . . . . . . . . . 3-14 Gate Array . . . . . . . . . . . . . . . . . . . . . . . . . . . . . . . . . . . . . . . . . . . . . . . . . . . . . . . . . . . . . . . . . . 3-14 ROM-X1, ROM-X2 . . . . . . . . . . . . . . . . . . . . . . . . . . . . . . . . . . . . . . . . . . . . . . . . . . . . . . . . . . 3-14 Flash1, Flash2 . . . . . . . . . . . . . . . . . . . . . . . . . . . . . . . . . . . . . . . . . . . . . . . . . . . . . . . . . . . . . . . 3-15 VPROG Power Supply . . . . . . . . . . . . . . . . . . . . . . . . . . . . . . . . . . . . . . . . . . . . . . . . . . . . . . . . 3-15 Dual UART . . . . . . . . . . . . . . . . . . . . . . . . . . . . . . . . . . . . . . . . . . . . . . . . . . . . . . . . . . . . . . . . 3-15 18.432 MHz Oscillator . . . . . . . . . . . . . . . . . . . . . . . . . . . . . . . . . . . . . . . . . . . . . . . . . . . . . . . . 3-15 RS232 Drivers . . . . . . . . . . . . . . . . . . . . . . . . . . . . . . . . . . . . . . . . . . . . . . . . . . . . . . . . . . . . . . . 3-15 Serial Port Connectors 1 and 2. . . . . . . . . . . . . . . . . . . . . . . . . . . . . . . . . . . . . . . . . . . . . . . . . . 3-15
4. Troubleshooting |
|
Introduction . . . . . . . . . . . . . . . . . . . . . . . . . . . . . . . . . . . . . . . . . . . . . . . . . . . . . . . . . . . . . . . . . . . . |
. 4-1 |
Maintenance Philosophy . . . . . . . . . . . . . . . . . . . . . . . . . . . . . . . . . . . . . . . . . . . . . . . . . . . . . . . . . . |
. 4-1 |
Test Equipment . . . . . . . . . . . . . . . . . . . . . . . . . . . . . . . . . . . . . . . . . . . . . . . . . . . . . . . . . . . . . . . . . |
. 4-1 |
Test Tools . . . . . . . . . . . . . . . . . . . . . . . . . . . . . . . . . . . . . . . . . . . . . . . . . . . . . . . . . . . . . . . . . . . . . |
. 4-2 |
Patient Cable Test Tool (M1770-87908) . . . . . . . . . . . . . . . . . . . . . . . . . . . . . . . . . . . . . . . . . . |
. 4-2 |
Front End and RS-232 Port Test Tool (M1770-87909, Rev. B) . . . . . . . . . . . . . . . . . . . . . . . . . . |
4-2 |
Testing the Instrument Signal Path . . . . . . . . . . . . . . . . . . . . . . . . . . . . . . . . . . . . . . . . . . . |
4-2 |
Testing the Cardiograph’s RS-232 Port . . . . . . . . . . . . . . . . . . . . . . . . . . . . . . . . . . . . . . . |
4-2 |
The Error and Event Logging . . . . . . . . . . . . . . . . . . . . . . . . . . . . . . . . . . . . . . . . . . . . . . . . . . . . . . . |
4-3 |
Using Extended Self-test in Troubleshooting . . . . . . . . . . . . . . . . . . . . . . . . . . . . . . . . . . . . . . . . . . . |
4-3 |
How the PageWriter 100 Communicates Error Codes and Messages . . . . . . . . . . . . . . . . . . . . . . . . . |
4-3 |
PageWriter 100 Error Code Communication . . . . . . . . . . . . . . . . . . . . . . . . . . . . . . . . . . . . . . . . |
4-3 |
PageWriter 100 Error Message Communication . . . . . . . . . . . . . . . . . . . . . . . . . . . . . . . . . . . . . |
4-4 |
Troubleshooting Tables . . . . . . . . . . . . . . . . . . . . . . . . . . . . . . . . . . . . . . . . . . . . . . . . . . . . . . . . . . . . |
4-4 |
Testing the Power Supply . . . . . . . . . . . . . . . . . . . . . . . . . . . . . . . . . . . . . . . . . . . . . . . . . . . . . . . . . |
4-19 |
5. Removal and Replacement |
|
Introduction . . . . . . . . . . . . . . . . . . . . . . . . . . . . . . . . . . . . . . . . . . . . . . . . . . . . . . . . . . . . . . . . . . . . . |
5-1 |
Tool Requirements . . . . . . . . . . . . . . . . . . . . . . . . . . . . . . . . . . . . . . . . . . . . . . . . . . . . . . . . . . . . . |
5-1 |
The Battery . . . . . . . . . . . . . . . . . . . . . . . . . . . . . . . . . . . . . . . . . . . . . . . . . . . . . . . . . . . . . . . . . . . . . |
5-2 |
Removing the Battery . . . . . . . . . . . . . . . . . . . . . . . . . . . . . . . . . . . . . . . . . . . . . . . . . . . . . . . . . . |
5-2 |
The Keyboard Assembly . . . . . . . . . . . . . . . . . . . . . . . . . . . . . . . . . . . . . . . . . . . . . . . . . . . . . . . . . . . |
5-4 |
Removing the Keyboard . . . . . . . . . . . . . . . . . . . . . . . . . . . . . . . . . . . . . . . . . . . . . . . . . . . . . . . . |
5-4 |
Removing the Keyboard Assembly . . . . . . . . . . . . . . . . . . . . . . . . . . . . . . . . . . . . . . . . . . . |
5-4 |
Removing the Keyboard Flexible Circuit . . . . . . . . . . . . . . . . . . . . . . . . . . . . . . . . . . . . . . . . . . . |
5-6 |
Removing the Keyboard Display . . . . . . . . . . . . . . . . . . . . . . . . . . . . . . . . . . . . . . . . . . . . . . . . . |
5-6 |
Replacing the Keyboard . . . . . . . . . . . . . . . . . . . . . . . . . . . . . . . . . . . . . . . . . . . . . . . . . . . . . . . . |
5-7 |
The Top Cover Assembly . . . . . . . . . . . . . . . . . . . . . . . . . . . . . . . . . . . . . . . . . . . . . . . . . . . . . . . . . . |
5-8 |
Opening and Removing the Top Cover Assembly . . . . . . . . . . . . . . . . . . . . . . . . . . . . . . . . . . . . |
5-8 |
Replacing the Top Cover Assembly . . . . . . . . . . . . . . . . . . . . . . . . . . . . . . . . . . . . . . . . . . . . . . . |
5-9 |
The Printer Door Assembly . . . . . . . . . . . . . . . . . . . . . . . . . . . . . . . . . . . . . . . . . . . . . . . . . . . . . . . . |
5-10 |
Removing the Printer Door Assembly . . . . . . . . . . . . . . . . . . . . . . . . . . . . . . . . . . . . . . . . . . . . |
5-10 |
Replacing the Printer Door . . . . . . . . . . . . . . . . . . . . . . . . . . . . . . . . . . . . . . . . . . . . . . . . . . . . . |
5-11 |
The Printer Drive Assembly . . . . . . . . . . . . . . . . . . . . . . . . . . . . . . . . . . . . . . . . . . . . . . . . . . . . . . . |
5-11 |
Removing the Printer Drive Assembly . . . . . . . . . . . . . . . . . . . . . . . . . . . . . . . . . . . . . . . . . . . . |
5-11 |
Replacing the Printer Drive Assembly . . . . . . . . . . . . . . . . . . . . . . . . . . . . . . . . . . . . . . . . . . . . |
5-12 |
xi

The Printhead Assembly . . . . . . . . . . . . . . . . . . . . . . . . . . . . . . . . . . . . . . . . . . . . . . . . . . . . . . . . . . |
5-13 |
Removing the Printhead Assembly . . . . . . . . . . . . . . . . . . . . . . . . . . . . . . . . . . . . . . . . . . . . . . |
5-13 |
Removing the Optical Paper Sensor . . . . . . . . . . . . . . . . . . . . . . . . . . . . . . . . . . . . . . . . . |
5-14 |
Replacing the Printhead Assembly . . . . . . . . . . . . . . . . . . . . . . . . . . . . . . . . . . . . . . . . . . . . . . . |
5-15 |
The Control Board Assembly . . . . . . . . . . . . . . . . . . . . . . . . . . . . . . . . . . . . . . . . . . . . . . . . . . . . . . |
5-17 |
Removing the Control Board Assembly . . . . . . . . . . . . . . . . . . . . . . . . . . . . . . . . . . . . . . . . . . . |
5-17 |
Replacing the Control Board Assembly . . . . . . . . . . . . . . . . . . . . . . . . . . . . . . . . . . . . . . . . . . . |
5-17 |
The Power Supply . . . . . . . . . . . . . . . . . . . . . . . . . . . . . . . . . . . . . . . . . . . . . . . . . . . . . . . . . . . . . . . |
5-18 |
Removing the Power Supply . . . . . . . . . . . . . . . . . . . . . . . . . . . . . . . . . . . . . . . . . . . . . . . . . . . |
5-18 |
Replacing the Power Supply Assembly . . . . . . . . . . . . . . . . . . . . . . . . . . . . . . . . . . . . . . . . . . . |
5-19 |
The Fuses . . . . . . . . . . . . . . . . . . . . . . . . . . . . . . . . . . . . . . . . . . . . . . . . . . . . . . . . . . . . . . . . . . . . . . |
5-20 |
The Internal Cables . . . . . . . . . . . . . . . . . . . . . . . . . . . . . . . . . . . . . . . . . . . . . . . . . . . . . . . . . . . . . . |
5-21 |
Replacing the Power Supply Cables . . . . . . . . . . . . . . . . . . . . . . . . . . . . . . . . . . . . . . . . . . . . . . |
5-21 |
Replacing the Capacitor Board Cable . . . . . . . . . . . . . . . . . . . . . . . . . . . . . . . . . . . . . . . . . . . . . |
5-22 |
Replacing the Printer Cables . . . . . . . . . . . . . . . . . . . . . . . . . . . . . . . . . . . . . . . . . . . . . . . . . . . |
5-23 |
The Storage and Transmission Board Assembly . . . . . . . . . . . . . . . . . . . . . . . . . . . . . . . . . . . . . . . |
5-23 |
Removing the Storage and Transmission Board Assembly . . . . . . . . . . . . . . . . . . . . . . . . . . . . |
5-23 |
6. Parts Lists |
|
Introduction . . . . . . . . . . . . . . . . . . . . . . . . . . . . . . . . . . . . . . . . . . . . . . . . . . . . . . . . . . . . . . . . . . . . |
. 6-1 |
Ordering Information . . . . . . . . . . . . . . . . . . . . . . . . . . . . . . . . . . . . . . . . . . . . . . . . . . . . . . . . . . . . |
. 6-1 |
Calling for Service . . . . . . . . . . . . . . . . . . . . . . . . . . . . . . . . . . . . . . . . . . . . . . . . . . . . . . . . . . . . . . . |
6-2 |
Parts List . . . . . . . . . . . . . . . . . . . . . . . . . . . . . . . . . . . . . . . . . . . . . . . . . . . . . . . . . . . . . . . . . . . . . . . |
6-3 |
7. Connector Pin Assignments |
|
CPU Assembly Connectors . . . . . . . . . . . . . . . . . . . . . . . . . . . . . . . . . . . . . . . . . . . . . . . . . . . . . . . . . |
A-1 |
xii

WARNING
NOTE
Introduction
This chapter introduces you to the M1770A PageWriter 200i/300pi, M1771A PageWriter 200, and M1772A PageWriter 100 cardiographs and lists their technical specifications.
These cardiographs are only to be serviced by HP qualified personnel.
Safe and effective use of medical instrumentation requires periodic inspection and preventive maintenance. Perform the preventive maintenance procedures in Chapter 2 of this manual at required intervals to ensure satisfactory instrument performance.
The cardiographs use a thermal printhead to record waveforms and label the ECG report. The paper supplied with the cardiographs is a thermal paper designed to work with this printhead and with the photo detector used to advancing the paper.
Hewlett-Packard guarantees the performance of the cardiographs only when used with Hewlett-Packard supplies, accessories, and paper that meet or exceed Hewlett-Packard specifications.
PageWriter 100, 200, 200i, and 300pi Series Cardiographs
The M1770A PageWriter 200i/300pi is Hewlett-Packard’s economical, interpretive cardiograph. The M1771A PageWriter 200 is the economical, non-interpretive cardiograph. The M1772A PageWriter 100 is the most economical, non-interpretive cardiograph. The cardiograph contains the user controls, the printer, and all the processing circuitry. All models use the same enclosure. The M1705B cart is designed for these cardiographs. Figure 1-1 shows the M1770A mounted on the cart. Option #A05 provides transmission and storage capability for the M1770A and M1771A. The StressWriter option provides capability for communication between a PageWriter 100/200/200i/300pi cardiograph and a StressWriter system.
1-1

PageWriter 100, 200, 200i, and 300pi Series Cardiographs
Figure 1-1 |
M1770A/M1771A PageWriter 300pi/200i/200 Cardiograph. |
The PageWriter 100, 200, and 300 family of cardiographs print ECGs in Auto and Manual formats. All PageWriter cardiographs use a continuous feed, high-resolution, thermal array printer. This produces electrocardiograms on standardsize paper that can be included in patient records without cutting or mounting. ECG reports clearly show the ECG waveforms. The PageWriter 200 and 300 series cardiographs also annotate records with patient information and ECG measurements. The PageWriter 200i and 300pi also includes ECG interpretation for both adult and pediatric patients.
From a service standpoint, the PageWriter 100, 200, and 300 family of cardiographs are similar except for two major hardware differences:
•The M1770A has additional firmware for ECG measurements and interpretation.
•The M1771A has additional firmware for ECG measurements.
•The M1772A keypanel does not have an LCD preview display and uses operational keys instead of alphanumeric keys for user input.
All other model differences are found in the cardiograph’s software.
The PageWriter 100, 200, and 300 family of cardiographs is designed for low-cost, longterm reliability. The modular design makes extensive use of VLSI and gate array technology, resulting in a minimum number of subassemblies. The modular approach means less down-time for the user, since replacing subassemblies allows faster field repairs. The internal self-test efficiently identifies faulty subassemblies, further speeding the repair process.
1-2

Inquiries
M1705B Cart
The optional M1705B Cart provides mobility for the PageWriter 100, 200, and 300 family of cardiographs. The large wheels make the cart easy to move, yet steady. Slots in the cardiograph’s feet and a thumbscrew secure the cardiograph to the cart rails. The tray directly below the cardiograph provides storage for the user’s guide. Storage for the power cable is built in. Other built-in cable retainers hold the patient data cable out of the way. Two compartmented trays provide storage for spare patient electrodes and patient cables, additional thermal paper, and consumable supplies.
Transmission and Storage, Option #A05
Transmission and storage features are available for the M1770A and M1771A with purchase of Option #A05. Up to thirty Auto ECGs can be stored in the cardiograph’s internal flash memory. Stored ECGs can be recalled later for editing, re-analyzing, printing, or transmission to another PageWriter 200/200i/300pi equipped with Option #A05, a PageWriter XLi cardiograph, a TraceMaster ECG Management System, or facsimile machine. Manual ECGs cannot be transmitted or stored.
Inquiries
|
Refer any questions or comments regarding these instruments to the nearest Hewlett- |
|||
|
Packard Sales/Service Office or to one of Hewlett-Packard’s Service Dispatch Centers. |
|||
|
Always identify the instrument by model number and serial number in all correspondence. |
|||
|
Telephone numbers for Service Dispatch Centers and Sales/Service Offices are listed in |
|||
|
Chapter 6, “Parts List.” |
|||
|
|
|
|
|
|
|
|
|
|
|
Specification Data |
|||
|
The following tables list the technical specifications for the cardiographs and the mobile |
|||
|
cart. Specifications are the same for all models except as noted |
|||
Table 1-1 |
Physical Specifications |
|||
|
|
|
||
Parameter |
|
Specification |
||
|
|
|
|
|
Dimensions (h × w × l) |
|
4 in × 15 in × 17 in (11.5 cm × 39.2 cm × 43.7 cm) |
||
cardiograph |
|
|||
cart |
|
36 in × 17 in × 33 in (91.4 cm × 43.5 cm × 84.8 cm) |
||
|
|
|
|
|
Weight |
|
|
|
|
cardiograph |
|
18.7 lbs. (8.5 kg) or less (includes battery, 200 sheets of paper, patient cable, and power cord) |
||
cart |
|
38 lbs. (17.24 kg) |
||
|
|
|
||
Chemical resistance, |
|
Withstands the following: isopropyl alcohol (except patient cable), mild soap and water, chlorine |
||
cleaners |
|
bleach and water (30 ml/l of water). |
||
|
|
|
|
|
1-3

|
Specification Data |
|
Table 1-2 |
Electrical Specifications |
|
|
|
|
Parameter |
|
Specification |
|
|
|
Resolution |
|
5 μV |
ECG (internal) |
|
|
display |
|
128 row pixels by 240 column pixels |
|
|
|
display sweep speed |
|
23.1 mm/sec ± 1% |
|
|
|
Input impedance |
|
greater than 2.5 MΩ@ 10 Hz, typically greater than 100MΩ @ DC1 |
|
|
|
Gain accuracy |
|
±5% of input signal or ±40 μV, whichever is greater2 |
|
|
|
Input bias |
|
less than 40 nA for input leadwire, less than 500 nA for Right Leg output |
|
|
leadwire1 |
|
|
|
Common mode rejection |
|
110 dB or greater with AAMI test circuit1 |
|
|
|
Defibrillator recovery |
|
System recovery 8 seconds after 360 joule discharge, no damage1 |
|
|
|
Crosstalk rejection |
|
Less than 2% channel crosstalk1 |
|
|
|
Sample rate |
|
4.096M samples per second per input leadwire (unfiltered) |
|
|
|
DC offset tolerance |
|
³ ±300 mVdc with less than 5% gain change1 |
|
|
|
Noise |
|
£ 30 μV peak-to-peak RTI1 |
|
|
|
Standardizing voltage |
|
1 mV ± 5% for 100 mSec ± 5 mSec1 |
|
|
|
50/60 Hz notch filter |
|
50/60 Hz AC line rejection filters are always active. |
|
|
|
Pacemaker pulse display |
|
> 0.2 mV indication for pace pulses between 0.5 and 2 ms duration at amplitude |
|
|
2 to 250 mV1 |
|
|
|
1Meets or exceeds AAMI EC11-1991 standard for Diagnostic Electrocardiographic Devices.
2Meets or exceeds AAMI EC11-1991 standard for Diagnostic Electrocardiographic Devices. Tested according to AAMI EC11-1991 test method 4.2.7.1.
Sampling Characteristics of Cardiograph
Physiological factors such as breathing can cause variation in amplitudes of heart beats, independent of the heart rate. In addition, sampled systems (as opposed to continuous systems) may show changes in the apparent height of the R-wave when sampling of the R- wave occurs slightly off-peak. Because the sampling rate and the heart rate are asynchronous, the time between the peak and an adjacent sample can vary from one QRS complex to the next. This results in a slight variation of displayed QRS amplitude. This effect is more pronounced with narrower signals, more commonly found in some pediatric electrocardiograms and in pacemaker pulses. The M177XA family of cardiographs minimizes this effect by:
•using an integrating-type A/D converter
•sampling all leadwires simultaneously
•oversampling the signals
•processing the oversampled signals with appropriate digital signal processing techniques
1-4

Specification Data
Table 1-3 ECG to Paper Specifications
Parameter |
Specification |
|
|
|
|
Frequency response of PageWriter |
High Pass |
Low Pass |
200/200i/300pi |
|
|
(-3dB bandwidth) |
|
|
|
|
|
Auto ECG |
0.05 Hz1 |
150 Hz1 |
0.15 Hz1 |
100 Hz2 |
|
|
0.5 Hz |
40 Hz |
Manual ECG |
0.05 Hz3 |
150 Hz3 |
0.15 Hz |
100 Hz2 |
|
|
0.5 Hz |
40 Hz |
|
|
|
|
|
|
Frequency response of PageWriter 100 |
|
|
Auto ECG1 |
<3 dB down at (user selectable): |
0.15-150 Hz or 0.15-40 Hz |
Manual ECG3 |
<3 dB down at (user selectable): |
0.05-150 Hz or 0.05-40 Hz |
|
|
|
ECG resolution on paper |
|
|
voltage axis |
Approximately 8 dots/mm (200 dots/in) |
|
time axis |
Approximately 20 dots/mm (500 dots/in) at 25mm/sec and slower |
|
|
Approximately 10 dots/mm (250 dots/in) at 50mm/sec |
|
|
|
|
Recorder speed |
5, 10, 25, and 50 mm/sec + 1.5%4 |
|
|
|
|
ECG visibility with pace pulse |
Meets or exceed AMMI EC11-1991 standard for Diagnostic Electrocardio- |
|
|
graphic Devices |
|
|
|
|
1Bold entries mean meets or exceeds AAMI EC11-1991 standard for Diagnostic Electrocardiographic Devices. Meets frequency response standard 3.2.7.2 using methods A, D, and E with auto report filter settings at 0.05-150 Hz or 0.15-150 Hz.
2-4 dB @ 100 Hz
3Bold entries mean meets or exceeds AAMI EC11-1991 standard for Diagnostic Electrocardiographic Devices. Meets frequency response standard 3.2.7.2 using methods A, D, and E with manual report filter settings at 0.05-150 Hz.
4Bold entries mean meets or exceeds AAMI EC11-1991 standard for Diagnostic Electrocardiographic Devices.
1-5

Specification Data
Table 1-4 |
Power Supply and Battery Specifications |
|
|
|
|
Parameter |
|
Specification |
|
|
|
AC line frequency |
|
50 and 60 Hz (nominal) |
115 V setting |
|
90–132 Vac |
230 V setting |
|
198–264 Vac |
AC input power rating |
|
50 VA |
|
|
|
Battery voltage |
|
6 V DC, 6.5 Ah |
|
|
|
Battery recharge time with unit off |
|
|
(battery fully discharged) |
|
|
to 90% capacity |
|
7 hours typical |
to full capacity |
|
16 hours typical |
|
|
|
Battery capacity |
|
|
Auto |
|
40 ECGs |
continuous rhythm (Manual mode) |
40 minutes |
|
|
|
|
Battery life |
|
|
AC and battery operation |
|
Typically 24 months |
battery only operation |
|
Typically 14–16 months |
|
|
|
Low battery warning |
|
At least 2 Auto ECGs or at least 2 minutes of Man- |
|
|
ual ECG is allowed after the Low Battery indica- |
|
|
tion is given. |
|
|
|
Table 1-5 |
Safety Specifications |
|
|
|
|
|
Parameter |
Specification |
|
|
|
|
ECG leads source current to ground |
Less than 10 μA RMS1 |
|
|
|
|
ECG leads sink current |
|
|
120 Vac, 60 Hz1 |
Less than 20 μA RMS with patient cable |
|
240 Vac, 50 Hz2 |
Less than 50 μA RMS with patient cable |
|
|
|
|
Ground wire integrity |
Less than 100 mΩ @ 25 A AC1 |
|
|
|
|
Shunting of defibrillator energy |
< 10%1 |
|
|
|
|
Operator safety during defibrillation |
< 100 μC1 |
|
|
|
1Meets or exceeds AAMI EC11-1991 standard for Diagnostic Electrocardiographic Devices.
2Meets or exceeds IEC 601-2-25 International Standard for Medical Electrical Equipment, Part 2 for Electrocardiographs.
1-6

Specification Data
Table 1-6 |
Environmental Specifications |
|
|
|
|
|
Parameter |
Specification |
|
|
|
|
Temperature |
50° to 104° F (10° to 40° C) |
|
operating |
|
|
storage |
32° to 122° F (0° to 50° C) |
|
|
|
|
Humidity |
|
|
operating |
15 to 80% RH, non-condensing |
|
storage |
15 to 90% RH, non-condensing |
|
|
|
|
Pressure (altitude) |
|
|
operating |
15,000 ft. (4600 m) for 2 hours |
|
storage |
15,000 ft. (4600 m) |
|
|
|
Table 1-7 |
Miscellaneous Specifications |
|
|
|
|
|
Parameter |
Specification |
|
|
|
|
Real time clock accuracy |
|
|
10 to 40° C |
Less than 3 minutes deviation per month. |
|
|
|
|
Printhead life |
Typically 100,000 pages |
|
|
|
Table 1-8 |
Storage and Transmission Specifications (Option #A05 only) |
|
|
|
|
|
Parameter |
Specification |
|
|
|
|
Auto ECG storage capacity |
30 ECGs |
|
|
|
|
Transmission Protocols |
|
|
DT |
Data transmission standard used between HP PageWriter cardio- |
|
|
graphs and HP TraceMaster ECG Management Systems |
|
SCP |
Standard Communications Protocol1 |
|
|
|
|
Modem command interfaces |
|
|
Data modem |
Hayes standard AT command set |
|
FAX modem |
EIA/TIA-578 Service Class 1 |
|
|
|
|
Modem protocols |
|
|
Modulation |
V.34 |
|
Error correction |
V.42 |
|
Compression |
V.42 bis |
|
FAX modulation |
V.17 |
|
|
|
1Described in the European Committee for Standardization, Standard Communications Protocol - Computer - Assisted Electrocardiography. (CEN/TC 251).
1-7

Options and Accessories
Options and Accessories
PageWriter 100, 200, 200i, and 300pi Cardiographs
These tables list the options and accessories available for the PageWriter 100, 200, and 300 family of cardiographs.
Country/Region Options
Each country/region option includes the appropriate power cord, voltage, printer, patient cable, and language. See Table 1-9, which shows the configuration of each country/region option.
1-8
Options and Accessories
Table 1-9 |
|
Country/Region Option Configurations |
|
|
|
|
|||
|
|
|
|
|
|
|
|
|
|
|
Country/ |
|
|
User |
Printer1 |
AHA/ |
|
Power Cord2 |
|
Option |
Region |
|
Labels |
Manuals |
IEC |
Volts |
Electrodes |
||
|
|
|
|
|
|
|
|
|
|
ABA |
North America |
|
English |
English |
A |
AHA |
120 |
903–US |
Disposable |
|
|
|
|
|
|
|
|
|
|
ABB |
Europe English |
|
English |
English |
A4 |
IEC |
220 |
902–Europe |
None |
|
|
|
|
|
|
|
|
|
|
ABC |
French Canada |
|
French |
French |
A |
AHA |
120 |
903–US |
Disposable |
|
|
|
|
|
|
|
|
|
|
ABD |
Germany |
|
German |
German |
A4 |
IEC |
220 |
902–Europe |
None |
|
|
|
|
|
|
|
|
|
|
ABE |
Spain |
|
Spanish |
Spanish |
A4 |
IEC |
220 |
902–Europe |
None |
|
|
|
|
|
|
|
|
|
|
ABF |
France |
|
French |
French |
A4 |
IEC |
220 |
902–Europe |
None |
|
|
|
|
|
|
|
|
|
|
ABG |
Australia |
|
English |
English |
A4 |
AHA |
240 |
901–Australia |
Welsh |
|
|
|
|
|
|
|
|
|
|
ABH |
Netherlands |
|
Dutch |
Dutch |
A4 |
IEC |
220 |
902–Europe |
None |
|
|
|
|
|
|
|
|
|
|
ABK |
Intercon |
|
English |
English |
A |
AHA |
120 |
903–US |
Welsh |
|
English, Taiwan |
|
|
|
|
|
|
|
|
|
|
|
|
|
|
|
|
|
|
ABM |
Latin America |
|
Spanish |
Spanish |
A |
AHA |
120 |
903–US |
Welsh |
|
|
|
|
|
|
|
|
|
|
ABN |
Norwegian |
|
Norwe- |
Norwe- |
A4 |
IEC |
230 |
902-Europe |
None |
|
|
|
gian |
gian |
|
|
|
|
|
|
|
|
|
|
|
|
|
|
|
ABS |
Sweden |
|
Swedish |
Swedish |
A4 |
IEC |
220 |
902-Europe |
None |
|
|
|
|
|
|
|
|
|
|
ABU |
United Kingdom |
|
English |
English |
A4 |
IEC |
240 |
900–UK |
None |
|
|
|
|
|
|
|
|
|
|
ABX |
Finland |
|
Finnish |
Finnish |
A4 |
IEC |
220 |
902-Europe |
None |
|
|
|
|
|
|
|
|
|
|
ABZ |
Italy |
|
Italian |
Italian |
A4 |
IEC |
220 |
902–Europe |
None |
|
|
|
|
|
|
|
|
|
|
AB2 |
China |
|
Chinese |
Chinese |
A4 |
IEC |
220 |
922–China |
Welsh |
|
|
|
|
|
|
|
|
|
|
AB4 |
Singapore |
|
English |
English |
A4 |
AHA |
240 |
900–UK |
Welsh |
|
|
|
|
|
|
|
|
|
|
AC6 |
S. Korea |
|
English |
English |
A |
AHA |
220 |
902-Europe |
Welsh |
|
|
|
|
|
|
|
|
|
|
ACJ |
India |
|
English |
English |
A4 |
IEC |
240 |
917-SA |
Welsh |
|
|
|
|
|
|
|
|
|
|
AKM |
China |
|
Chinese |
English |
A4 |
IEC |
220 |
922-China |
Welsh |
|
|
|
|
|
|
|
|
|
|
ACQ |
South Africa |
|
English |
English |
A4 |
IEC |
220 |
917–SA |
None |
|
|
|
|
|
|
|
|
|
|
AKV |
South America |
|
Spanish |
Spanish |
A |
AHA |
220 |
902–Europe |
Welsh |
|
|
|
|
|
|
|
|
|
|
1In Table 1-9 an “A” in the Printer column refers to 8.5 x 11-in. paper; “A4” refers to 210 x 297-mm paper
2See Table 1-11 for HP part numbers
NOTE |
Switzerland should order the desired language (German, French, Italian, or English) and |
|
the Swiss power cord (HP 8120-2296). |
||
|
1-9

Options and Accessories
Table 1-10 |
PageWriter 300pi, 200/200i and 100 Series Documentation Part Numbers |
||
|
|
|
|
|
Document Title |
Language |
Part Number |
|
|
|
|
|
PageWriter 100 Cardiograph User’s Guide |
English |
M1772-91900 |
|
(M1772A) |
|
|
|
|
|
|
|
|
French |
M1772-91901 |
|
|
|
|
|
|
German |
M1772-91902 |
|
|
|
|
|
|
Dutch |
M1772-91903 |
|
|
|
|
|
|
Spanish |
M1772-91904 |
|
|
|
|
|
|
Italian |
M1772-91905 |
|
|
|
|
|
|
Finnish |
M1772-91910 |
|
|
|
|
|
|
Chinese |
M1772-91908 |
|
|
|
|
|
PageWriter 200/200i Cardiograph Users’s |
English |
M1772-91900 |
|
Guide (M1770A, M1771A with Serial # Prefix |
|
|
|
CNA, CNB, CNC, 3807A or earlier version) |
|
|
|
|
|
|
|
|
French |
M1770-91901 |
|
|
|
|
|
|
German |
M1770-91902 |
|
|
|
|
|
|
Dutch |
M1770-91903 |
|
|
|
|
|
|
Spanish |
M1770-91904 |
|
|
|
|
|
|
Italian |
M1770-91905 |
|
|
|
|
|
|
Swedish |
M1770-91906 |
|
|
|
|
|
|
Finnish |
M1770-91910 |
|
|
|
|
|
PageWriter 300pi Cardiograph Users’s Guide |
English |
M1770-91930 |
|
(M1770A with Serial # Prefix CND) |
|
|
|
|
|
|
|
|
French |
M1770-91931 |
|
|
|
|
|
|
German |
M1770-91932 |
|
|
|
|
|
|
Dutch |
M1770-91933 |
|
|
|
|
|
|
Spanish |
M1770-91934 |
|
|
|
|
|
|
Italian |
M1770-91935 |
|
|
|
|
|
|
Swedish |
M1770-91936 |
|
|
|
|
|
|
Norwegian |
M1770-91938 |
|
|
|
|
|
|
Finnish |
M1770-91939 |
|
|
|
|
1-10

Options and Accessories
Table 1-10 |
PageWriter 300pi, 200/200i and 100 Series Documentation Part Numbers |
||
|
|
|
|
|
PageWriter 300pi Predictive Instruments Quick |
English |
M1770-92800 |
|
Reference Guide (M1770A with Serial # Prefix |
|
|
|
CND) |
|
|
|
|
|
|
|
|
French |
M1770-92801 |
|
|
|
|
|
|
German |
M1770-92802 |
|
|
|
|
|
|
Dutch |
M1770-92803 |
|
|
|
|
|
|
Spanish |
M1770-92804 |
|
|
|
|
|
|
Italian |
M1770-92805 |
|
|
|
|
|
|
Swedish |
M1770-92806 |
|
|
|
|
|
|
Norwegian |
M1770-92808 |
|
|
|
|
|
|
Finnish |
M1770-92809 |
|
|
|
|
|
Interpretive Physician’s Guide (M1770A) |
English |
M1700-92908 |
|
|
|
|
|
|
French |
M1700-92918 |
|
|
|
|
|
|
German |
M1700-92928 |
|
|
|
|
|
|
Dutch |
M1700-92938 |
|
|
|
|
|
|
Spanish |
M1700-92948 |
|
|
|
|
|
|
Italian |
M1700-92958 |
|
|
|
|
|
Interpretive Physician’s Guide - Addendum |
English |
M1700-90700 |
|
(M1770A) |
|
|
|
|
|
|
|
|
French |
M1700-90701 |
|
|
|
|
|
|
German |
M1700-90702 |
|
|
|
|
|
|
Dutch |
M1700-90703 |
|
|
|
|
|
|
Spanish |
M1700-90704 |
|
|
|
|
|
|
Italian |
M1700-90705 |
|
|
|
|
|
Predictive Instruments Physician’s Guide |
English |
M1792-93900 |
|
(M1770A with Serial # Prefix CND) |
|
|
|
|
|
|
|
|
French |
M1792-93901 |
|
|
|
|
|
|
German |
M1792-93902 |
|
|
|
|
|
|
Dutch |
M1792-93903 |
|
|
|
|
|
|
Spanish |
M1792-93904 |
|
|
|
|
|
|
Italian |
M1792-93905 |
|
|
|
|
1-11

Options and Accessories
Table 1-11 |
Power Cord Part Numbers |
|
|
|
|
|
|
|
Power Cord Key |
|
HP Part Number |
|
|
|
|
|
900 |
|
8120-1703 |
|
|
|
|
|
901 |
|
8120-4464 |
|
|
|
|
|
902 |
|
8120-1692 |
|
|
|
|
|
903 |
|
8120-5213 |
|
|
|
|
|
917 |
|
8120-4600 |
|
|
|
|
|
922 |
|
8120-8377 |
|
|
|
|
Table 1-12 |
Options |
|
|
|
|
|
Option |
Description |
|
|
|
|
A05 |
Adds storage and transmission capability |
|
|
|
|
M2488A-#A70, A71, A72 |
StressWriter system includes PageWriter cardiograph |
|
|
|
|
M2488A-#C70 |
StressWriter system includes interface card for PageWriter |
|
|
cardiograph |
|
|
|
Standard Accessories
Accessories included are based on model number and localization.
• 200 sheets of z-fold paper -English paper p/n M2481A -Metric paper p/n M2483A
• PageWriter 300pi HP M1770A Cardiograph User’s Guide (PageWriter 300pi)
• PageWriter 200/200i HP M1771A/M1770A Cardiograph User’s Guide (PageWriter
200/200i)
• Hewlett Packard Interpretive Cardiograph Physician’s Guide (PageWriter 200i/300pi only)
• PageWriter 100 HP M1772A Cardiograph User’s Guide (PageWriter 100 only)
• Using the HP PageWriter 200/200i Cardiograph Operator Training Video (PageWriter 200/200i, also for use with PageWriter 300pi)
• Using the HP PageWriter 100 Cardiograph Operator Training Video (PageWriter 100 only)
1-12

Performance Verification and Maintenance
Introduction
This chapter describes how to verify the cardiograph’s performance, explains preventive maintenance, presents patient safety information, and provides a performance verification checklist.
Performance Verification
Several procedures make up performance verification: visual inspection of the cardiograph exterior, execution of Extended Self-test, visual examination of an ECG recorded from an ECG patient simulator, and system safety tests using a safety analyzer.
A Performance Verification matrix which appears at the end of this section specifies the tests and inspections which must be performed following servicing of the PageWriter cardiographs. The Performance Verification test results must be recorded on
Customer Service order records
Make copies of the matrix. Fill out a copy each time the cardiograph is tested. Attach the printer test output, and simulator ECG trace to the completed matrix and file with the cardiograph’s permanent maintenance record.
NOTE |
If any of the performance verification tests fail, refer to Chapter 4, Troubleshooting. |
|
2-1

Performance Verification
Visual Inspection and Power On Self Test
Before beginning the inspection, press the  key to put the cardiograph in Standby mode, and unplug the power cord from the wall outlet. Inspect the cardiograph for the following:
•Worn or damaged power cord
•Loose or missing hardware
•Mechanical damage
•Evidence of liquid spill
•Worn printer drive gear
•Worn printer roller
•Corroded or damaged reusable electrodes, if present
•Damaged patient cable
•Dirt/paper residue on the thermal printhead
•Frayed or damaged wiring
Replace any damaged or missing items, and clean the printhead and patient electrodes as necessary. Cleaning instructions are listed under “Preventive Maintenance” later in this chapter. Connect the cardiograph to AC power. Be sure that the AC indicator comes on. Turn the cardiograph On and observe that the display turns on (PageWriter 200/200i/300pi) or that the LED’s flash on (PageWriter 100).
Extended Self-test
The cardiograph’s extended self-test checks each major subassembly. The extended selftest consists of two sections: the testing of internal circuitry and the testing of printer, display, keyboard, and modem capabilities.
To begin the extended self-test, press and hold both the $XWR |
and 0DQXDO keys while |
turning on the cardiograph with the 2Q 6WDQGE\ key. |
|
To stop or exit extended self-test, you must press 2Q 6WDQGE\ |
to place the cardiograph |
in Standby. |
|
Internal Circuitry Testing of PageWriter 100 |
|
These tests are performed on the internal circuitry: |
|
• Memory |
|
• Gate Array |
|
• Front-End Interface |
|
• Serial Interface |
|
Each of these tests is described in detail later in this chapter. |
|
When the internal circuitry test of the PageWriter 100 is performed, the LEDs show which test is being performed. The following table shows which LED is associated with each test.
2-2

Performance Verification
Table 2-1 |
PageWriter 100 Test LED’s |
|
|||
|
|
|
|
|
|
|
Test Number |
|
Test Name |
LED(s) lit on Page- |
Comments/Expected Results |
|
|
|
|
Writer 100 |
|
|
|
|
|
|
|
|
1 |
|
ROM-1 |
5 mm/mV |
OK |
|
|
|
|
|
|
|
2 |
|
ROM-2 |
10 mm/mV |
Normally fails for 100. |
|
|
|
|
|
|
|
3 |
|
ROM-X1 |
20 mm/mV |
OK for A#10. |
|
|
|
|
|
|
|
4 |
|
ROM-X2 |
V Leads |
OK for A#10. |
|
|
|
|
|
|
|
5 |
|
RAM |
Filter |
OK |
|
|
|
|
|
|
|
6 |
|
NVRAM |
Auto |
OK |
|
|
|
|
|
|
|
7 |
|
GA |
I II III Lead Group |
Will also flash all LEDs. OK |
|
|
|
|
|
|
|
8 |
|
ECG FE |
aVR aVL aVF Lead Group |
OK |
|
|
|
|
|
|
|
9 |
|
SIO |
II aVF V2 Lead Group |
OK for A#10. |
|
|
|
|
|
|
|
A |
|
REMOTE |
V Leads |
For future use - normally fails. |
|
|
|
|
|
|
|
B |
|
MODEM |
5 mm/sec |
OK for A#10, with modem or test tool |
|
|
|
|
|
attached |
|
|
|
|
|
|
|
C |
|
FLASH1 |
10 mm/sec |
OK for A#10. |
|
|
|
|
|
|
|
D |
|
FLASH2 |
25 mm/sec |
OK for A#10. |
|
|
|
|
|
|
When the tests are completed, the results are also printed out in a pass/fail format on the left-hand side of the first page of the test report.
Table 2-2 |
Test Results Format |
|
Test Passes |
Test Fails |
|
|
|
Printed Result |
OK |
** |
|
|
|
In some cases, a test failure halts the test/test printout and an error code indicating the failure is flashed on the LED’s. See Chapter 4, “Troubleshooting,” for a list of self-test failure codes and failure symptoms. The section “How the PageWriter 100 Communicates Error Codes and Messages” in Chapter 4 describes how to read the LED’s.
2-3

Performance Verification
Internal Circuitry Testing of PageWriter 200/200i/300pi
These tests are performed on the internal circuitry:
•Memory
•Gate Array
•Front-End Interface
•Serial Interface
Each test is described detail later in this chapter.
When testing the internal circuitry of the PageWriter 200/200i/300pi, the numbers 1 through 9 and the characters A through D are displayed one at a time beginning with number 1. Each number represents a particular test. If the test fails, the character X is placed after the test number, for example, 3X. The test descriptions below are listed in the order the tests are performed.
Table 2-3 |
PageWriter 200/200i/300pi Test Numbers |
|
|||
|
|
|
|
|
|
|
Test Number |
|
Test Name |
Character Displayed on Page- |
Comments |
|
|
|
|
Writer 200/200i/300pi |
|
|
|
|
|
|
|
|
1 |
|
ROM-1 |
1 |
OK |
|
|
|
|
|
|
|
2 |
|
ROM-2 |
2 |
Passes for 300pi, 200i, and 200 with |
|
|
|
|
|
software revision A.05.06 or later. |
|
|
|
|
|
|
|
3 |
|
ROM-X1 |
3 |
Passes for Options #A05 and #A10 |
|
|
|
|
|
only. |
|
|
|
|
|
|
|
4 |
|
ROM-X2 |
4 |
Passes for Options #A05 and #A10 |
|
|
|
|
|
only. |
|
|
|
|
|
|
|
5 |
|
RAM |
5 |
OK |
|
|
|
|
|
|
|
6 |
|
NVRAM |
6 |
OK |
|
|
|
|
|
|
|
7 |
|
GA |
7 |
OK |
|
|
|
|
|
|
|
8 |
|
ECG FE |
8 |
OK |
|
|
|
|
|
|
|
9 |
|
SIO |
9 |
Passes for Options #A05 and #A10 |
|
|
|
|
|
only. |
|
|
|
|
|
|
|
A |
|
REMOTE |
A |
For future use - normally fails |
|
|
|
|
|
|
|
B |
|
MODEM |
B |
Passes for Options #A05 and #A10 |
|
|
|
|
|
only, with modem or test tool |
|
|
|
|
|
attached |
|
|
|
|
|
|
|
C |
|
FLASH1 |
C |
Passes for Options #A05 and #A10 |
|
|
|
|
|
only |
|
|
|
|
|
|
|
D |
|
FLASH2 |
D |
For future use - normally fails |
|
|
|
|
|
|
2-4

CAUTION
Table 2-4
Performance Verification
If your cardiograph is equipped with Options #A05 or #A10, do not turn it off during Test C or D. If you turn off the cardiograph while Test C or D are in process, you could lose stored ECGs, the Log of ECGs Stored, or the Log of ECGs Taken.
When the tests are completed, the results are printed out in a pass/fail format on the lefthand side of the first page of the test report.
Test Results Format
|
Test Passes |
Test Fails |
|
|
|
Printed Result |
OK |
** |
|
|
|
In some cases, a test failure halts the test/test printout and an error code indicating the failure appears on the display. See Chapter 4, “Troubleshooting,” for a list of self-test failure codes and failure symptoms.
Memory Test
This test looks for failures in the following memory subsystems:
•Read-Only Memory (ROM)
•Random Access Memory (RAM)
•Non-Volatile Random Access Memory (NVRAM)
Read-Only Memory (tests 1-4) . The cardiograph is designed to have up to four ROMs installed, two on the main control board and two on an option board. The Read-Only Memory test reads the contents and performs a 32-bit cyclic redundancy check (CRC) of each of the four ROM address spaces. The test of a ROM address space will fail if the ROM module is faulty or is not present. The four ROM address spaces are identified on the report as
•ROM-1
•ROM-2
•ROM-X1
•ROM-X2
Depending on the serial number and model of the unit you are servicing, the corresponding ROM part numbers vary. Refer to tables 2-5, 2-6, 2-7, and 2-8 for the correct ROM replacement part numbers.
2-5

Performance Verification
Table 2-5 |
ROM Replacement Part Numbers for PageWriter Cardiographs M1770, M1771A Serial Number |
|||
|
Prefix CNA, CNB, or CNC,3807A or earlier |
|
||
|
|
|
|
|
Test |
|
ROM Part Number |
Language |
|
|
|
|
|
|
ROM 1 |
U205 - Main CPU Board |
|
M1770-89505 |
|
|
|
|
|
|
ROM 2 |
U206 - Main CPU Board |
|
M1770-89521 |
English |
|
|
|
M1770-89521 |
French |
|
|
|
M1770-89522 |
German |
|
|
|
M1770-89523 |
Dutch |
|
|
|
M1770-89524 |
Spanish |
|
|
|
M1770-89525 |
Italian |
|
|
|
|
|
ROM X1 |
U9 - Interface Board |
|
M2488-17901 |
|
|
|
|
|
|
ROM X2 |
U10 - Interface Board |
|
M2488-17902 |
|
|
|
|
|
|
Table 2-6 |
ROM Replacement Part Numbers for PageWriter Cardiographs M1770, M1771A Serial Number |
|||
|
Prefix CND |
|
|
|
|
|
|
|
|
Test |
|
ROM Part Number |
Language |
|
|
|
|
|
|
ROM 1 |
U205 - Main CPU Board |
|
M1770-89550 |
English |
ROM 2 |
|
|
M1770-89551 |
French |
|
|
|
M1770-89552 |
German |
|
|
|
M1770-89553 |
Dutch |
|
|
|
M1770-89554 |
Spanish |
|
|
|
M1770-89555 |
Italian |
|
|
|
M1770-89556 |
|
|
|
|
Swedish |
|
|
|
|
M1770-89558 |
|
|
|
|
Norwegian |
|
|
|
|
M1770-89559 |
|
|
|
|
Finnish |
|
|
|
|
|
|
|
|
|
|
|
ROM X1 |
U9 - Interface Board |
|
M2488-17901 |
|
|
|
|
|
|
ROM X2 |
U10 - Interface Board |
|
M2488-17902 |
|
|
|
|
|
|
2-6
 Loading...