


 Loading...
Notebook User Guide
© Copyright 2011 Hewlett-Packard
Development Company, L.P.
Bluetooth is a trademark owned by its proprietor and used by Hewlett-Packard Company under license. SD Logo is a trademark of its proprietor.
The information contained herein is subject to change without notice. The only warranties for HP products and services are set forth in the express warranty statements accompanying such products and services. Nothing herein should be construed as constituting an additional warranty. HP shall not be liable for technical or editorial errors or omissions contained herein.
First Edition: April 2011
Document Part Number: 647230-001
Product notice
This guide describes features that are common to most models. Some features may not be available on your computer.
To obtain the latest information in this guide, go to the HP Web site at http://www.hp.com/support.
Software terms
By installing, copying, downloading, or otherwise using any software product preinstalled on this computer, you agree to be bound by the terms of the HP End User License Agreement (EULA). If you do not accept these license terms, your sole remedy is to return the entire unused product (hardware and software) within 14 days for a refund subject to the refund policy of your place of purchase.
For any further information or for requesting a full refund of the computer, please contact your local point of sale (the seller).

Safety warning notice
 WARNING! To reduce the possibility of heat-related injuries or of overheating the computer, do not place the computer directly on your lap or obstruct the computer air vents. Use the computer only on a hard, flat surface. Do not allow another hard surface, such as an adjoining optional printer, or a soft surface, such as pillows or rugs or clothing, to block airflow. Also, do not allow the AC adapter to come into contact with the skin or a soft surface, such as pillows or rugs or clothing, during operation. The computer and the AC adapter comply with the user-accessible surface temperature limits defined by the International Standard for Safety of Information Technology Equipment (IEC 60950).
iii
iv Safety warning notice

Table of contents
1 Welcome .......................................................................................................................................................... |
1 |
Finding information ............................................................................................................................... |
2 |
2 Getting to know your computer ..................................................................................................................... |
3 |
Top ....................................................................................................................................................... |
3 |
TouchPad ............................................................................................................................ |
3 |
Lights ................................................................................................................................... |
4 |
Buttons ................................................................................................................................. |
5 |
Keys ..................................................................................................................................... |
6 |
Right ..................................................................................................................................................... |
7 |
Left ....................................................................................................................................................... |
8 |
Display ................................................................................................................................................ |
10 |
Bottom ................................................................................................................................................ |
11 |
3 Networking .................................................................................................................................................... |
12 |
Using an Internet service provider (ISP) ............................................................................................ |
13 |
Identifying wireless and network status icons .................................................................................... |
14 |
Creating a wireless connection .......................................................................................................... |
14 |
Turning wireless devices on and off .................................................................................. |
14 |
Using the wireless key ...................................................................................... |
14 |
Using the operating system controls ................................................................. |
14 |
Using a WLAN .................................................................................................................................... |
14 |
Connecting to an existing WLAN ....................................................................................... |
15 |
Setting up a new WLAN ..................................................................................................... |
15 |
Protecting your WLAN ....................................................................................................... |
16 |
Roaming to another network .............................................................................................. |
16 |
Using Bluetooth wireless devices (select models only) ...................................................................... |
17 |
Connecting to a wired network ........................................................................................................... |
17 |
Connecting to a local area network (LAN) (select models only) ........................................ |
17 |
4 Keyboard and pointing devices ................................................................................................................... |
19 |
Using the keyboard ............................................................................................................................ |
19 |
Using the action keys ......................................................................................................... |
19 |
v
Using keypads ................................................................................................................... |
20 |
Using an optional external numeric keypad ...................................................... |
20 |
Using the TouchPad ........................................................................................................................... |
21 |
Setting pointing device preferences ................................................................................... |
21 |
Turning the TouchPad off and on ...................................................................................... |
21 |
Navigating .......................................................................................................................... |
22 |
Selecting ............................................................................................................................ |
22 |
Using TouchPad gestures (select models only) ................................................................ |
23 |
Scrolling ............................................................................................................ |
24 |
Pinching/Zooming ............................................................................................. |
24 |
5 Multimedia ..................................................................................................................................................... |
25 |
Using the media activity keys ............................................................................................................. |
25 |
Using the audio features .................................................................................................................... |
26 |
Adjusting the volume ......................................................................................................... |
27 |
Checking your audio functions ........................................................................................... |
27 |
Using the webcam (select models only) ............................................................................................. |
27 |
Using video devices ........................................................................................................................... |
28 |
VGA ................................................................................................................................... |
28 |
Connecting an HDMI device (select models only) ............................................................. |
29 |
Configuring audio for HDMI (select models only) .............................................. |
30 |
6 Power management ...................................................................................................................................... |
31 |
Shutting down the computer ............................................................................................................... |
31 |
Setting power options ......................................................................................................................... |
32 |
Using power-saving states ................................................................................................. |
32 |
Initiating and exiting Suspend ........................................................................... |
32 |
Initiating and exiting Hibernation ....................................................................... |
32 |
Using the Power icon ......................................................................................................... |
33 |
Using power management ................................................................................................. |
33 |
Viewing the current power management settings ............................................. |
33 |
Changing the current power management settings .......................................... |
33 |
Using battery power ........................................................................................................................... |
34 |
Displaying the remaining battery charge ........................................................................... |
34 |
Inserting or removing the battery ....................................................................................... |
35 |
Charging a battery ............................................................................................................. |
36 |
Maximizing battery life ....................................................................................................... |
37 |
Managing low battery levels .............................................................................................. |
37 |
Identifying low battery levels ............................................................................. |
37 |
Resolving a low battery level ............................................................................. |
38 |
Resolving a low battery level when external power is available ....... |
38 |
Resolving a low battery level when a charged battery is available ... |
38 |
Resolving a low battery level when no power source is available .... |
38 |
vi
Resolving a low battery level when the computer cannot exit |
|
Hibernation ....................................................................................... |
38 |
Conserving battery power .................................................................................................. |
38 |
Storing a battery ................................................................................................................ |
38 |
Disposing of a used battery ............................................................................................... |
39 |
Replacing the battery ......................................................................................................... |
39 |
Using external AC power .................................................................................................................... |
39 |
Testing an AC adapter ....................................................................................................... |
40 |
7 Drives ............................................................................................................................................................. |
41 |
Handling drives ................................................................................................................................... |
41 |
Replacing or upgrading the hard drive ............................................................................................... |
42 |
Removing the hard drive .................................................................................................... |
42 |
Installing a hard drive ......................................................................................................... |
44 |
Using optical drives (select models only) ........................................................................................... |
46 |
Identifying the installed optical drive .................................................................................. |
46 |
Inserting an optical disc ..................................................................................................... |
46 |
Removing an optical disc ................................................................................................... |
47 |
8 External cards and devices .......................................................................................................................... |
48 |
Using Digital Media Slot cards (select models only) .......................................................................... |
48 |
Inserting a digital card ........................................................................................................ |
48 |
Removing a digital card ..................................................................................................... |
49 |
Using a USB device ........................................................................................................................... |
49 |
Connecting a USB device .................................................................................................. |
50 |
Removing a USB device .................................................................................................... |
50 |
Using optional external devices .......................................................................................................... |
51 |
Using optional external drives ............................................................................................ |
51 |
9 Memory modules .......................................................................................................................................... |
52 |
10 Security ........................................................................................................................................................ |
57 |
Protecting the computer ..................................................................................................................... |
57 |
Using passwords ................................................................................................................................ |
58 |
Setting passwords in the operating system ....................................................................... |
58 |
Setting passwords in Setup Utility ..................................................................................... |
58 |
Managing an administrator password ............................................................... |
59 |
Entering an administrator password .................................................................. |
59 |
Managing a power-on password ....................................................................... |
60 |
Entering a power-on password ......................................................................... |
60 |
Using firewall software ....................................................................................................................... |
61 |
Installing an optional security cable .................................................................................................... |
62 |
vii
11 Backup and recovery .................................................................................................................................. |
63 |
Performing a system recovery ............................................................................................................ |
64 |
Backing up your information ............................................................................................................... |
65 |
12 Setup Utility (BIOS) ..................................................................................................................................... |
66 |
Starting Setup Utility ........................................................................................................................... |
66 |
Using Setup Utility .............................................................................................................................. |
66 |
Changing the language of Setup Utility ............................................................................. |
66 |
Navigating and selecting in Setup Utility ............................................................................ |
67 |
Displaying system information ........................................................................................... |
67 |
Restoring factory default settings in Setup Utility .............................................................. |
67 |
Exiting Setup Utility ............................................................................................................ |
67 |
Updating the BIOS ............................................................................................................................. |
68 |
Determining the BIOS version ........................................................................................... |
68 |
Downloading a BIOS update ............................................................................................. |
69 |
Appendix A Troubleshooting and support .................................................................................................... |
70 |
Troubleshooting .................................................................................................................................. |
70 |
The computer is unable to start up .................................................................................... |
70 |
The computer screen is blank ............................................................................................ |
70 |
Software is functioning abnormally .................................................................................... |
71 |
The computer is on but not responding ............................................................................. |
71 |
The computer is unusually warm ....................................................................................... |
71 |
An external device is not working ...................................................................................... |
71 |
The wireless network connection is not working ................................................................ |
72 |
The optical disc tray does not open for removal of a CD or DVD ...................................... |
72 |
The computer does not detect the optical drive ................................................................. |
73 |
A disc does not play ........................................................................................................... |
73 |
A movie is not visible on an external display ..................................................................... |
73 |
The process of burning a disc does not begin, or it stops before completion .................... |
74 |
Contacting customer support ............................................................................................................. |
74 |
Labels ................................................................................................................................................. |
75 |
Appendix B Cleaning your computer ............................................................................................................. |
76 |
Cleaning products .............................................................................................................................. |
76 |
Appendix C Specifications .............................................................................................................................. |
77 |
Input power ......................................................................................................................................... |
77 |
Operating environment ....................................................................................................................... |
78 |
Appendix D Electrostatic discharge .............................................................................................................. |
79 |
viii
Index ................................................................................................................................................................... |
80 |
ix
x
1 Welcome
The following section is included in this chapter:
●Finding information
After you set up and register the computer, take the following steps:
●Connect to the Internet—Set up your wired or wireless network so that you can connect to the Internet. For more information, refer to Networking on page 12.
●Get to know your computer—Learn about your computer features. Refer to Getting to know your computer on page 3 and Keyboard and pointing devices on page 19 for additional information.
●Find installed software—Access a list of the software preinstalled on the computer. Select Computer > More Applications. The list of preinstalled software is displayed.
 NOTE: For details about using the software included with the computer, select Computer > Help. You can also refer to the software manufacturer's instructions, which may be provided with the software or on the manufacturer's Web site.
●Update programs and drivers—Update your programs and drivers with the latest versions on a regular basis. When your computer is registered, it will automatically be updated with the latest versions. When you register, you can choose to receive automatic notifications when updates become available. The automatic notifications for operating system updates are available for 90 days. You can also go to http://www.hp.com/support to download updates from HP.
1

Finding information
The computer comes with several resources to help you perform various tasks.
Resources |
For information about |
|
|
|
|
Quick Setup poster |
● Setting up the computer |
|
|
● |
Identifying computer components |
|
|
|
Linux Help |
● |
Computer software |
To access the Linux Help, select Computer > Help. |
● |
Computer settings |
|
● Connecting to the Internet |
|
|
● |
Computer utilities |
|
|
|
Regulatory, Safety and Environmental Notices |
● Regulatory and safety information |
|
To access the notices, click the HP Documents icon |
● |
Battery disposal information |
located on the desktop. |
|
|
|
|
|
Safety & Comfort Guide |
● Proper workstation setup, posture, health, and work habits |
|
To access this guide: |
● Electrical and mechanical safety information |
|
Click the HP Documents icon located on the desktop. |
|
|
– or – |
|
|
Go to http://www.hp.com/ergo. |
|
|
|
|
|
Worldwide Telephone Numbers booklet |
HP support telephone numbers |
|
This booklet is provided with your computer. |
|
|
|
|
|
HP Web site |
● |
Support information |
To access this Web site, go to http://www.hp.com/ |
● Ordering parts and finding additional help |
|
support. |
● Software, driver, and BIOS updates |
|
|
||
|
● Accessories available for the device |
|
|
|
|
Limited Warranty* |
Warranty information |
|
To access the warranty: |
|
|
Click the HP Documents icon located on the desktop.
– or –
Go to http://www.hp.com/go/orderdocuments.
*You may find the expressly provided HP Limited Warranty applicable to your product located with the electronic guides on your computer and/or on the CD/DVD provided in the box. Some countries/regions may provide a printed HP Limited Warranty in the box. In countries/regions where the warranty is not provided in printed format, you may request a printed copy at http://www.hp.com/go/orderdocuments or write to:
●North America: Hewlett-Packard, MS POD, 11311 Chinden Blvd, Boise, ID 83714, USA
●Europe, Middle East, Africa: Hewlett-Packard, POD, Via G. Di Vittorio, 9, 20063, Cernusco s/Naviglio (MI), Italy
●Asia Pacific: Hewlett-Packard, POD, P.O. Box 200, Alexandra Post Office, Singapore 911507
Please include your product number, warranty period (found on your serial number label), name and postal address.
2 Chapter 1 Welcome

2 Getting to know your computer
The following sections are included in this chapter:
●Top
●Right
●Left
●Display
●Bottom
Top
TouchPad
Component |
|
Description |
|
|
|
|
|
(1) |
TouchPad light |
● |
Off: The TouchPad is on. |
|
|
● |
Amber: The TouchPad is off. |
|
|
|
|
(2) |
TouchPad on/off button |
Turns the TouchPad on and off. |
|
|
|
|
|
Top 3

Component |
|
Description |
|
|
|
(3) |
TouchPad zone |
Moves the pointer and selects or activates items on the |
|
|
screen. |
|
|
|
(4) |
Left TouchPad button |
Functions like the left button on an external mouse. |
|
|
|
(5) |
Right TouchPad button |
Functions like the right button on an external mouse. |
|
|
|
Lights
Component |
|
Description |
|
|
|
(1) |
TouchPad light |
● Off: The TouchPad is on. |
|
|
● Amber: The TouchPad is off. |
|
|
|
(2) |
Caps lock light |
On: Caps lock is on. |
|
|
|
(3) |
Power light |
● On: The computer is on. |
|
|
● Blinking: The computer is in the Suspend state. |
|
|
● Off: The computer is off or in Hibernation. |
|
|
|
(4) |
Wireless light |
● White: An integrated wireless device, such as a |
wireless local area network (WLAN) device and/or a Bluetooth® device, is on.
● Amber: All wireless devices are off.
4 |
Chapter 2 Getting to know your computer |
Buttons
Component |
Description |
|
|
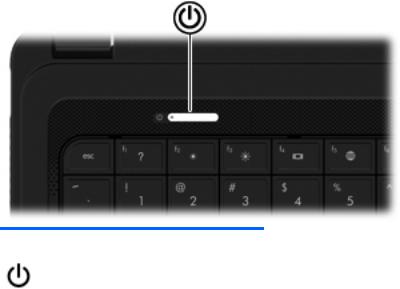
Power button |
● When the computer is off, press the button to turn on the |
|
computer. |
|
● When the computer is on, press the button briefly to initiate |
|
Suspend. |
|
● When the computer is in the Suspend state, press the button |
|
briefly to exit Suspend. |
|
● When the computer is in Hibernation, press the button briefly to |
|
exit Hibernation. |
|
If the computer has stopped responding and operating system |
|
shutdown procedures are ineffective, press and hold the power |
|
button for at least 5 seconds to turn off the computer. |
|
To learn more about your power settings, select Computer > |
|
Control Center > Power Management. |
|
|
Top 5

Keys
Component |
|
Description |
|
|
|
(1) |
esc key |
Displays system information when pressed in combination |
|
|
with the fn key. |
|
|
|
(2) |
fn key |
Displays system information when pressed in combination |
|
|
with the esc key. |
|
|
|
(3) |
Operating system logo key |
Displays the operating system menu. |
|
|
|
(4) |
Operating system applications key |
Displays a shortcut menu for items beneath the pointer. |
|
|
|
(5) |
Action keys |
Execute frequently used system functions. |
|
|
|
6 |
Chapter 2 Getting to know your computer |

Right
Component |
|
Description |
|
|
|
(1) |
Optical drive |
Reads and writes (select models only) to an optical disc. |
|
|
|
(2) |
Optical drive light |
● Green: The optical drive is being accessed. |
|
|
● Off: The optical drive is idle. |
|
|
|
(3) |
USB ports (2) |
Connect optional USB devices. |
|
|
|
(4) |
Power connector |
Connects an AC adapter. |
|
|
|
(5) |
Battery/AC adapter light |
● White: The computer is connected to external power |
|
|
and the battery is fully charged. |
|
|
● Amber: A battery is charging. |
|
|
● Blinking amber: The battery has reached a low battery |
|
|
level, or there is a battery error. When a battery |
|
|
reaches a critical battery level, the battery light begins |
|
|
blinking rapidly. |
|
|
|
(6) |
Security cable slot |
Attaches an optional security cable to the computer. |
|
|
NOTE: The security cable is designed to act as a |
|
|
deterrent, but it may not prevent the computer from being |
|
|
mishandled or stolen. |
|
|
|
Right 7

Left
Component |
|
Description |
|
|
|
(1) |
External monitor port |
Connects an external VGA monitor or projector. |
|
|
|
(2) |
Vents (2) |
Enable airflow to cool internal components. |
|
|
NOTE: The computer fan starts up automatically to cool |
|
|
internal components and prevent overheating. It is normal |
|
|
for the internal fan to cycle on and off during routine |
|
|
operation. |
|
|
|
(3) |
RJ-45 (network) jack |
Connects a network cable. |
(4) |
HDMI port (select models only) |
Connects an optional video or audio device, such as a high-definition television, or any compatible digital or audio component.
(5) |
USB port |
Connects an optional USB device. |
|
|
|
|
|
(6) |
Audio-in (microphone) jack |
Connects an optional computer headset microphone, |
|
|
|
stereo array microphone, or monaural microphone. |
|
|
|
|
|
(7) |
Audio-out (headphone) jack |
Produces sound when connected to optional powered |
|
|
|
stereo speakers, headphones, ear buds, a headset, or |
|
|
|
television audio. |
|
|
|
WARNING! To reduce the risk of personal injury, adjust |
|
|
|
the volume before putting on headphones, earbuds, or a |
|
|
|
headset. For additional safety information, refer to the |
|
|
|
Regulatory, Safety and Environmental Notices. |
|
|
|
NOTE: When a device is connected to the headphone |
|
|
|
jack, the computer speakers are disabled. |
|
|
|
|
|
(8) |
Digital Media Slot |
Supports the following digital card formats: |
|
|
|
● |
Secure Digital (SD) Memory Card |
● Secure Digital Extended Capacity (SDxC) Memory
Card
● Secure Digital High Capacity (SDHC) Memory Card
● MultiMediaCard (MMC)
8 |
Chapter 2 Getting to know your computer |

Component |
|
Description |
|
|
|
(9) |
Hard drive light |
● Blinking white: The hard drive is being accessed. |
|
|
● Off: The hard drive is idle. |
|
|
|
(10) |
Power light |
● White: The computer is on. |
|
|
● Blinking white: The computer is in the Suspend state. |
|
|
● Off: The computer is off or in Hibernation. |
|
|
|
Left 9

Display
Component |
Description |
|
|
|
|
(1) |
Speakers (2) |
Produce sound. |
|
|
|
(2) |
Internal display switch |
Turns off the display or initiates Suspend if the display is closed |
|
|
while the power is on. |
|
|
NOTE: The display switch is not visible from the outside of the |
|
|
computer. |
|
|
|
(3) |
WLAN antennas (2)* (select models only) |
Send and receive wireless signals to communicate with wireless |
|
|
local area networks (WLAN). |
|
|
|
(4) |
Webcam light |
On: The webcam is in use. |
|
|
|
(5) |
Webcam |
Records video and captures still photographs. |
|
|
|
(6) |
Internal microphone |
Records sound. |
*The antennas are not visible from the outside of the computer. For optimal transmission, keep the areas immediately around the antennas free from obstructions. To see wireless regulatory notices, refer to the section of the Regulatory, Safety and Environmental Notices that applies to your country or region.
10 Chapter 2 Getting to know your computer

Bottom
Component |
|
Description |
|
|
|
(1) |
Battery bay |
Holds the battery. |
|
|
|
(2) |
Battery release latch |
Releases the battery from the battery bay. |
|
|
|
(3) |
Vents (5) |
Enable airflow to cool internal components. |
|
|
NOTE: The computer fan starts up automatically to cool |
|
|
internal components and prevent overheating. It is normal |
|
|
for the internal fan to cycle on and off during routine |
|
|
operation. |
|
|
|
(4) |
Hard drive bay |
Holds the hard drive. |
|
|
|
(5) |
Memory module compartment |
Contains the wireless LAN (WLAN) device and the |
|
|
memory module slots. |
CAUTION: To prevent an unresponsive system, replace the wireless module only with a wireless module authorized for use in the computer by the governmental agency that regulates wireless devices in your country or region. If you replace the module and then receive a warning message, remove the module to restore computer functionality.
Bottom 11

3 Networking
The following sections are included in this chapter:
●Using an Internet service provider (ISP)
●Identifying wireless and network status icons
●Creating a wireless connection
●Using a WLAN
●Using Bluetooth wireless devices (select models only)
●Connecting to a wired network
Your computer may support one or both of the following types of Internet access:
●Wireless—For mobile Internet access, you can use a wireless connection. Refer to Connecting to an existing WLAN on page 15 or Setting up a new WLAN on page 15.
●Wired—You can access the Internet by connecting to a wired network. For information on connecting to a wired network, refer to Connecting to a wired network on page 17.
 NOTE: Internet hardware and software features vary depending on computer model and your location.
12 Chapter 3 Networking

Using an Internet service provider (ISP)
Before you can connect to the Internet, you must establish an ISP account. Contact a local ISP to purchase Internet service and a modem. The ISP will help set up the modem, install a network cable to connect your wireless computer to the modem, and test the Internet service.
 NOTE: Your ISP will give you a user ID and password to access the Internet. Record this information and store it in a safe place.
Using an Internet service provider (ISP) 13

Identifying wireless and network status icons
Icon |
Name |
Description |
|
|
|
|
Wireless (connected) |
Indicates that one or more wireless devices are on. |
|
|
|
|
Network Connection |
Indicates that the wired network is connected and active. If both |
|
(connected) |
wired and wireless connections are active, the operating system |
|
|
uses the wired connection because it is faster. |
|
|
|
|
Network Connection |
Indicates that wired and wireless networks are not connected. |
|
(disconnected) |
|
|
|
|
Creating a wireless connection
Your computer may be equipped with one or more of the following wireless devices:
●Wireless local-area network (WLAN) device
●Bluetooth® device
Turning wireless devices on and off
Using the wireless key
Use the wireless key to turn both the wireless network controller and the Bluetooth controller off or on simultaneously. They can be controlled individually through Control Center or Setup Utility.
 NOTE: Refer to Using the action keys on page 19 for information on identifying the location of the wireless key on your computer.
Using the operating system controls
To enable or disable a wireless or wired network device:
1.Right-click the Network Connection icon in the notification area, at the far right of the taskbar.
2.To enable or disable one of the following devices, select or clear one of the following options:
●Enable Networking (all network devices)
●Enable Wireless
Using a WLAN
A wireless connection connects the computer to Wi-Fi networks, or WLANs. A WLAN is composed of other computers and accessories that are linked by a wireless router or a wireless access point.
14 Chapter 3 Networking
Connecting to an existing WLAN
1.Turn on the computer.
2.Be sure that the WLAN device is on.
 NOTE: Refer to Using the action keys on page 19 for information on identifying the location of the wireless key on your computer.
3.Click the Network Connection icon in the notification area, at the far right of the taskbar. Available wireless networks are listed under Wireless Networks.
4.Click the desired wireless network.
If the network is a security-enabled WLAN, you are prompted to enter a network security code. Type the code, and then click OK to complete the connection.
 NOTE: To connect to a network that is not automatically detected, click the Network Connection icon and select Connect to Hidden Wireless Network. Enter the ESSID information, and set encryption parameters.
NOTE: If no WLANs are listed, and your network is not hidden, you are out of range of a wireless router or access point.
If you do not see the network you want to connect to, right-click the Network Connection icon in the notification area, at the far right of the taskbar, and click Edit Connections.
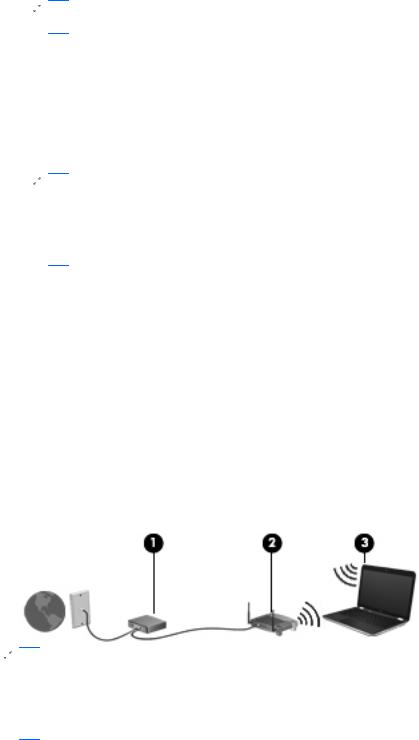
Setting up a new WLAN
Required equipment:
●A broadband modem (either DSL or cable) (1) and high-speed Internet service purchased from an Internet service provider (ISP)
●A wireless router (purchased separately) (2)
●The wireless computer (3)
The illustration below shows an example of a wireless network installation that is connected to the Internet.
 NOTE: Some cable modems include a built-in router. Check with your ISP to see if you need a separate router.
NOTE: When setting up a wireless connection, be sure that your computer and wireless router are synchronized. To synchronize your computer and wireless router, turn your computer and wireless router off and then back on.
As your network grows, additional wireless and wired computers can be connected to the network to access the Internet.
Using a WLAN 15
For help in setting up your WLAN, refer to the information provided by your router manufacturer or your ISP.
Protecting your WLAN
When you set up a WLAN or access an existing WLAN, always enable security features to protect your network from unauthorized access. WLANs in public areas (hotspots) like coffee shops and airports may not provide any security. If you are concerned about the security of your computer in a hotspot, limit your network activities to e-mail that is not confidential and basic Internet surfing.
Wireless radio signals travel outside the network, so other WLAN devices can pick up unprotected signals. You can use the following precautions to protect your WLAN:
●Use a firewall—Checks both data and requests for data that are sent to your network, and discards any suspicious items. Firewalls are available in both software and hardware. Some networks use a combination of both types.
●Encrypt your data—Wi-Fi Protected Access (WPA and WPA2) encrypts and decrypts data transmitted over the network. WPA uses Temporal Key Integrity Protocol (TKIP) to dynamically generate a new key for every packet. It also generates different sets of keys for each computer on the network. Wired Equivalent Privacy (WEP) encrypts data before it is transmitted using a WEP key. Without the correct key, others will not be able to use the WLAN.
Roaming to another network
When you move your computer within range of another WLAN, the operating system attempts to connect to that network. If the attempt is successful, your computer is automatically connected to the new network. If the operating system does not recognize the new network, follow the same procedure you used initially to connect to your WLAN.
16 Chapter 3 Networking

Using Bluetooth wireless devices (select models only)
A Bluetooth device provides short-range wireless communications that replace the physical cable connections that traditionally link electronic devices such as the following:
●Computers
●Phones
●Audio devices
The strength of Bluetooth is in synchronizing information transfers between your computer and wireless devices. The inability to consistently connect two or more computers to share the Internet through Bluetooth is a limitation of Bluetooth and the operating system.
Bluetooth devices provide peer-to-peer capability that allows you to set up a personal area network (PAN) of Bluetooth devices. For information on configuring and using Bluetooth devices, refer to the Bluetooth software Help.
Connecting to a wired network
Connecting to a local area network (LAN) (select models only)
Connecting to a local area network (LAN) requires an 8-pin, RJ-45 network cable (purchased separately). If the network cable contains noise suppression circuitry (1), which prevents interference from TV and radio reception, orient the circuitry end of the cable (2) toward the computer.
To connect the network cable:
1.Plug the network cable into the network jack (1) on the computer.
Using Bluetooth wireless devices (select models only) 17

2.Plug the other end of the cable into a network wall jack (2).
 WARNING! To reduce the risk of electric shock, fire, or damage to the equipment, do not plug a modem or telephone cable into the RJ-45 (network) jack.
18 Chapter 3 Networking
Loading...