


User’s Guide
CRT Color Monitor Series
FS7600, vx74
Manuel de l’utilisateur
Moniteurs à écran cathodique couleur FS7600, vx74
— LEA ESTO —
Guía del usuario
Serie de monitores en color de tubo de rayos catódicos FS7600, vx74


English
User’s Guide
CRT Color Monitor Series
FS7600, vx74

The information in this document is subject to change without notice.
Hewlett-Packard® Company makes no warranty of any kind with regard to this material, including, but not limited to, the implied warranties of merchantability and fitness for a particular purpose.
HP shall not be liable for errors contained herein or for incidental or consequential damages in connection with the furnishing, performance, or use of this material.
THE WARRANTY TERMS CONTAINED IN THIS STATEMENT, EXCEPT TO THE EXTENT LAWFULLY PERMITTED, DO NOT EXCLUDE, RESTRICT OR MODIFY AND ARE IN ADDITION TO ANY MANDATORY STATUTORY RIGHTS APPLICABLE TO THE SALE OF THIS PRODUCT OR SERVICE TO YOU.
HP assumes no responsibility for the use or reliability of its software on equipment that is not furnished by HP.
This document contains proprietary information that is protected by copyright. All rights are reserved. No part of this document may be photocopied, reproduced, or translated to another language without the prior written consent of HP.
Hewlett-Packard Company
P.O. Box 4010
Cupertino, CA 95015-4010
USA
© 2004 Hewlett-Packard Development Company, L.P. All rights reserved.
Hewlett-Packard is a registered trademark of Hewlett-Packard Company in the United States of America and other countries/regions.
This product incorporates copyright protection technology that is protected by method claims of certain U.S. patents and other intellectual property rights owned by Macrovision Corporation and other rights owners. Use of this copyright protection technology must be authorized by Macrovision Corporation, and is intended for home and other limited viewing uses only unless otherwise authorized by Macrovision Corporation. Reverse engineering or disassembly is prohibited. Apparatus Claims of U.S. Patent Nos. 4,631,603, 4,577,216, 4,819,098, and 4,907,093 licensed for limited viewing
uses only.
Other brand or product names are trademarks of their respective holders.
HP supports lawful use of technology and does not endorse or encourage the use of our products for purposes other than those permitted by copyright law.

Contents |
|
Packing Contents .......................................... |
1 |
Repacking..................................................... |
1 |
Introduction .................................................. |
1 |
Power Saving ............................................... |
2 |
Install the Monitor......................................... |
2 |
User Controls and Indicators ......................... |
3 |
Using the On-Screen Menu ............................ |
4 |
Individual Adjustment ................................... |
6 |
Troubleshooting ............................................ |
9 |
Servicing ..................................................... |
10 |
Technical Specifications............................... |
11 |
Preset Modes.............................................. |
12 |
Agency Regulatory Notices......................... |
12 |
Federal Communications Commission Notice ........... |
12 |
Declaration of Conformity for Products Marked |
|
with FCC Logo, United States Only ......................... |
13 |
Canadian Notice.................................................. |
14 |
European Notice .................................................. |
14 |
Japanese Notice................................................... |
14 |
Korean Notice...................................................... |
14 |
EPA Energy Star Compliance.................................. |
15 |
Power Cord Set Requirements ................................ |
15 |
English
User’s Guide |
iii |

iv User’s Guide

Packing Contents
The package contains:
•CRT monitor
•AC power cord
•Monitor base
•Documentation packet
Repacking
Save the original box and all packing material for future shipping needs.
NOTE: Packing materials and product are recyclable.
Introduction
This 17" CRT color monitor is a high performance and easy to use product.
It employs the latest on-screen-menu technology. The microprocessor capability offers 9 most commonly used VESA timing modes preset in the factory, and 10 modes for user to adjust to the special timings that user might have.
We hope that you will find this manual is helpful in obtaining the fullest use of your monitor, and in ensuring your personal safety during operation.
English
User’s Guide |
1 |

Power Saving
The monitor will be driven into “Power Saving” mode by the control signal from the display controller, as indicated by the amber-color power LED.
State |
Power Consumption |
LED Light |
|
|
|
ON |
Normal |
Green |
|
|
|
OFF |
< 4 W |
Amber |
|
|
|
The power saving states will be kept until a control signal has been detected, or the keyboard or mouse is activated. The recovery time from Active OFF state back to ON state is around 10 seconds.
Install the Monitor
•To connect the tilt/swivel base to the monitor, align hooks with the sockets on bottom side of the monitor, and gently push the base towards the front of the monitor.
•The 15-pin D-shell signal connector on the signal cable will connect easily to the video adapter output on your personal computer. Lock both screws on the connector to ensure a firm connection.
•Turn the PC power switch ON. Then turn the monitor power switch ON by pressing the switch inward. The green power indicator will light up.
•Allow about 30 seconds for the CRT tube to warm up. Data will be displayed on the screen.
•If your display fails to function properly, please first refer to the section “Troubleshooting” in this manual.
2 User’s Guide

User Controls and Indicators
A |
B |
C |
1 2 |
A Displays menu & exits menu |
|
1 |
Power LED |
B Scrolls through menu to choose an icon for adjustment / |
2 |
Power ON/OFF switch |
|
Adjusts level of selected icon |
|
|
|
C Confirms menu selection |
|
|
|
English
User’s Guide |
3 |

Using the On-Screen Menu
1 Menu screen — press the 

 /menu button to display the menu below and exit menus
Select mark
Press the – + button to move the selection mark to the desired location.
Adjustment icons
The item presently being adjusted |
|
|
|
1 : |
CONTRAST |
: 2 |
|
|
When the /select button is pressed, |
|||
|
|
|
|
|||||||||
is shown. |
|
|
|
|
|
|
|
|
the selected adjustment screen |
|||
|
|
|
|
|
|
|
|
|
|
appears. |
||
|
|
|
|
|
|
|
||||||
|
CONTRAST |
BRIGHTNESS |
H.SIZE |
H. POSITION |
V. SIZE |
|
||||||
|
V. POSITION |
ZOOM |
PINCUSHION |
TRAPEZOID |
ROTATION |
|
||||||
|
COLOR |
LANGUAGE |
DISP. FREQ. |
DEGAUSS |
RECALL |
|
||||||
|
H. MOIRE |
V. MOIRE |
|
|
|
|
|
|
|
|||
|
|
|
|
|
|
|
|
|
|
|
|
|
|
: |
|
|
|
|
CONTRAST |
|
|
|
|
: |
|
|
|
|
|
|
|
|
|
|
|
|
|
|
4 User’s Guide
2 Adjustment screen (example: horizontal position adjustment)
Adjustment icon
End Button When the 

 /menu button is pressed, the adjustment level is stored, the adjustment screen is ended, and the menu screen returns.
Name of adjustment screen
H.POSITION |
The adjustment level is shown by both a number
and a bar. It can be varied with the front – + buttons.
 When the

 /select button is pressed,
the horizontal size adjustment screen appears.
On the adjustment screen where these two adjustment icons appear, it is possible to switch between the two screens by pressing the 

 /select button.
NOTE: The amount of adjustment depends upon how long you depress the adjustment button. You may have to tap the button to obtain the desired results.
English
User’s Guide |
5 |
Individual Adjustment
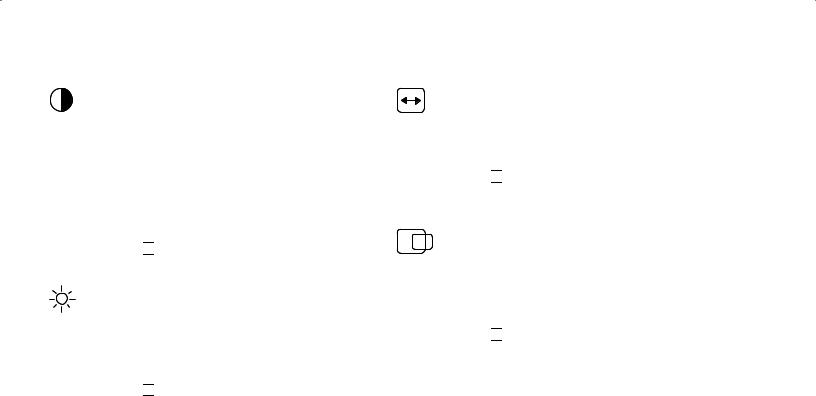
CONTRAST adjustment
Adjust the screen contrast to match your personal preference.
Press the – button to decrease contrast and press the + button to increase it.
Direct operation: You can access the CONTRAST adjustment screen by pressing the – or + before entering the menu screen.
Press the 

 /select key toggles between CONTRAST and BRIGHTNESS.
BRIGHTNESS adjustment
Adjusts the brightness to get the desired background level.
Press the + button to make the background lighter, the – button to make it darker.
Press the 

 /select key toggles between CONTRAST and BRIGHTNESS.
HORIZONTAL SIZE adjustment
Fills the viewable area horizontally.
Press the – button to make the image narrower, or press + the button to make it wider.
Press the 

 /select key toggles between HORIZONTAL SIZE and HORIZONTAL POSITION.
HORIZONTAL POSITION adjustment
Shifts the image on the screen horizontally.
Press the – button to move the screen image to the left, or press the + button to move it to the right.
Press the 

 /select key toggles between HORIZONTAL SIZE and HORIZONTAL POSITION.
6 User’s Guide

VERTICAL SIZE adjustment
Fills the viewable area vertically.
Press the – button to make the image smaller, or press the + button to make it larger.
Press the 

 /select key toggles between VERTICAL SIZE and VERTICAL POSITION.
VERTICAL POSITION adjustment
Shifts the image on the screen vertically.
Press the – button to move it downward, or press the + button to move it upward.
Press the 

 /select key toggles between VERTICAL SIZE and VERTICAL POSITION
Zoom adjustment
The picture can be expanded with the zoom control.
PINCUSHION adjustment
The image can be corrected for barrel distortion.
Press the – button or the + button to eliminate curved vertical lines.
Press the 

 /select key toggles between PINCUSHION and TRAPEZOID correction.
TRAPEZOID adjustment
The image can be corrected for the trapezoidal distortion.
Press the – button to narrow the top edge, or press the + button to make the top edge wider.
Press the 

 /select key toggles between PINCUSHION and TRAPEZOID correction.
ROTATION adjustment
The image can be corrected for tilted picture.
Press the – button to tilt the image to the left, or press the + button to tilt the image to the right.
User’s Guide |
7 |
English

COLOR selection
The white of the image can be adjusted.
1Use the – + button to select: (1) 9300°K,
(2) 6500°K or (3) User color.
2If the (3):the user’s color is selected, “2” appears in the lower right of the On-Screen Menu.
Press the 

 /select button to display the
USER COLOR adjustment screen.
User Color
The white of the video image can be adjusted to the user’s preferred color.
1Use the 

 /select button to select R (red), G (green) or B (blue).
2Use the – + button to adjust the color as desired.
IMPORTANT: Memory recall of the user’s color is not possible, so take note of the initial setting before adjusting.
When the monitor is turned OFF, user color keeps the last adjustment.
8 User’s Guide
LANGUAGE selection
The language of the On-Screen Menu can be selected among English, French, German, Italian, Spanish, and Simplified Chinese. Select with the – + buttons.
DISP. FREQ (Input frequency display)
This displays the input synchronization signal frequency.
It identifies the horizontal and vertical frequency sent to the monitor from the video card currently in use.
Manual Degaussing
After moving the selector to the degauss icon, press the 

 /select button. The degaussing action takes place a few seconds later.
NOTE: A sharp snap noise may be heard when degaussing occurs. This is normal.

Memory Recall
It is possible to restore adjustments to the original factory settings. If the monitor is operating in a user defined mode, this control has no effect.
Horizontal Moiré
Reduce the dark wavy line Moiré pattern on the screen.
Press the – or + button to minimize the horizontal moiré image on the screen.
Vertical Moiré
Reduce the dark wavy line Moiré pattern on the screen.
Press the – or + button to minimize the vertical moiré image on the screen.
Troubleshooting |
English |
||
checks as follows: |
|
|
|
If your monitor fails to operate functionally, it may be |
|
||
possible to correct the problem by making simple |
|
||
|
|
|
|
Problem |
Check & Adjust |
|
|
|
|||
|
|
|
|
Blank screen |
• Monitor power switch, power |
|
|
(see NOTE) |
cord, signal cable, or connector |
|
|
|
• PC power switch |
|
|
|
• Brightness & contrast controls |
|
|
|
|
|
|
Display position |
• Vertical centering & horizontal |
|
|
off-center |
phase controls |
|
|
Display too small |
• Vertical & horizontal size controls |
|
|
or too large |
|
|
|
|
|
|
|
Display too bright |
• Brightness & contrast controls |
|
|
or too dim |
|
|
|
|
|
|
|
Refer to the operation instructions for your computer/ video adapter to ensure that you have the correct signal output source for the monitor. Ensure that the switches on the video adapter are set correctly for operation with this monitor.
If the above steps fail to correct the problem contact your dealer for servicing by qualified service personnel.
User’s Guide |
9 |

Please remember that the monitor should be returned for servicing together with the power cord.
NOTE: You can easily distinguish if the problem is on the monitor or on the computer by using the monitor’s built-in self-test function.
With the monitor power ON, disconnect the signal cable from monitor. If you see a “NO SIGNAL” image on the screen, the monitor is functioning properly, and the problem is with the PC side or signal cable.
Servicing
Refer all servicing to qualified service personnel.
Serious shock hazards exist within the covers of this monitor.
Do not open the covers under any circumstances — there are no user serviceable parts inside.
10 User’s Guide

Technical Specifications
Screen Size |
17" (43 cm) visual diagonal |
|
Viewable size 16" (40.6 cm) |
|
Anti-Glare Coating |
Dot Pitch |
0.25 to 0.27mm (variable) |
Display Area |
234 x 312 mm (typical) |
Default |
|
Display Colors |
Infinite |
Max. Resolution |
1280 Dots x 1024 Lines |
Compatibility |
All graphic modes with horizontal |
|
frequencies between 30 KHz to |
|
70 KHz |
Synchronization |
|
Horizontal: |
30 to 70 KHz |
Vertical: |
50 to 160Hz |
Bandwidth |
110 MHz |
Input Signal |
Video RGB Analog Sync. |
|
TTL Separate |
Signal Cable |
15-pin D-sub connector |
Power Input |
|
Voltage/ |
100 to 240V |
Frequency |
50–60 Hz |
Current Rating |
1.5 A |
|
|
|
English |
Power |
75 W (MAX.) |
|
|
|
|
||
Consumption |
|
|
|
Dimension |
15.9 x 16.0 x 16.7 inches |
|
|
(W x H x D) |
(maximum) |
|
|
|
404 x 406 x 423 mm (maximum) |
|
|
Weight |
37.5 lbs. (maximum) |
|
|
|
17 kg (maximum) |
|
|
Operating |
50°F to 95°F |
|
|
Temperature |
10°C to 35°C |
|
|
Storage |
–22°F to 140°F |
|
|
Temperature |
–30°C to 60°C |
|
|
Humidity |
20% to 80% (non-condensing) |
|
|
Altitude |
Up to 10,000 ft / 3,048 meters |
|
|
TCO’03 |
Some models meet TCO’03 |
|
|
MPRII |
Some models meet MPRII |
|
|
Plug and Play |
Yes |
|
|
*All performance specifications are provided by the component manufacturers. Performance specifications represent the highest specification of all HP’s component manufacturers’ typical level specifications for performance and actual performance may vary either higher or lower.
**TCO version has a different surface treatment.
***This product is ERGONOMICS APPROVED.
User’s Guide 11

Preset Modes
Display |
|
|
Resolutions |
Refresh Rates |
|
|
|
|
640 x 480 |
60 |
Hz |
|
|
|
640 x 480 |
75 |
Hz |
|
|
|
640 x 480 |
85 |
Hz |
|
|
|
720 x 400 |
70 |
Hz |
|
|
|
800 x 600 |
75 |
Hz |
|
|
|
800 x 600 |
85 |
Hz |
|
|
|
1024 x 768 |
75 |
Hz |
|
|
|
1024 x 768 |
85 |
Hz (preferred user resolution) |
|
|
|
1280 x 1024 |
60 |
Hz (maximum resolution) |
|
|
|
Agency Regulatory Notices
Federal Communications
Commission Notice
This equipment has been tested and found to comply with the limits for a Class B digital device, pursuant to Part 15 of the FCC Rules. These limits are designed to provide reasonable protection against harmful interference in a residential installation. This equipment generates, uses, and can radiate radio frequency energy and, if not installed and used in accordance with the instructions, may cause harmful interference to radio communications. However, there is no guarantee that interference will not occur in a particular installation. If this equipment does cause harmful interference to radio or television reception, which can be determined by turning the equipment off and on, the user is encouraged to try to correct the interference by one or more of the following measures:
•Reorient or relocate the receiving antenna.
•Increase the separation between the equipment and the receiver.
12 User’s Guide

•Connect the equipment into an outlet on a circuit different from that to which the receiver is connected.
•Consult the dealer or an experienced radio or television technician for help.
Modifications
The FCC requires the user to be notified that any changes or modifications made to this device that are not expressly approved by Hewlett-Packard Company may void the user’s authority to operate the equipment.
Cables
Connections to this device must be made with shielded cables with metallic RFI/EMI connector hoods to maintain compliance with FCC Rules and Regulations.
Declaration of Conformity for Products Marked with FCC Logo, United States Only
This device complies with Part 15 of the FCC Rules. Operation is subject to the following two conditions:
(1)this device may not cause harmful interference, and
(2)this device must accept any interference received, including interference that may cause undesired operation.
For questions regarding your product, contact:
Hewlett-Packard Company
P. O. Box 692000, Mail Stop 530113 Houston, Texas 77269-2000
Or, call 1-800-652-6672
For questions regarding this FCC declaration, contact:
Hewlett-Packard Company
P. O. Box 692000, Mail Stop 510101 Houston, Texas 77269-2000
Or, call
(281) 514-3333
To identify this product, refer to the Part, Series, or Model number found on the product.
User’s Guide 13
English

Canadian Notice
This Class B digital apparatus meets all requirements of the Canadian Interference-Causing Equipment Regulations.
•EN61000-3-2 (IEC61000-3-2) — Power Line Harmonics
•EN61000-3-3 (IEC61000-3-3) — Power Line Flicker
•EN60950 (IEC950) — Product Safety
Avis Canadien
Cet appareil numérique de la classe B respecte toutes les exigences du Règlement sur le matériel brouilleur du Canada.
European Notice
Products with the CE Marking comply with both the EMC Directive (89/336/EEC) and the Low Voltage Directive (73/23/EEC) issued by the Commission of the European Community.
Compliance with these directives implies conformity to the following European Norms (in brackets are the equivalent international standards):
•EN55022 (CISPR 22) — Electromagnetic Interference
•EN55024 (IEC61000-4-2,3,4,5,6,8,11) — Electromagnetic Immunity
Japanese Notice
Korean Notice
14 User’s Guide
 Loading...