

Page 1

In this user manual we have tried to describe the matters
concerning the operation of this CNC system to the greatest extent.
However, it is impossible to give particular descriptions for all
unnecessary or unallowable operations due to length limitation and
products application conditions;Therefore, the items not presented
herein should be regarded as "impossible" or "unallowable".
Copyright is reserved to GSK CNC Equipment Co., Ltd. It
is illegal for any organization or individual to publish or reprint this
manual. GSK CNC Equipment Co., Ltd. reserves the right to ascertain
their legal liability.
Page 2
GSK983Ta-H/ GSK983Ta-V Turning CNC System Connection Manual
II
Preface
Your Excellency,
We are honored by your purchase of this GSK 983Ma Milling CNC System made by
GSK CNC Equipment Co., Ltd.
Warning
Accident may occur by improper connection and operation!This system can
only be operated by authorized and qualified personnel.
Please read this manual and a manual from machine tool builder carefully before
installation, programming and operation, and strictly observe the requirements.
Otherwise, products and machine may be damaged, workpiece be scrapped or the user
be injured.
Safety Responsibility
Manufacturer’s Responsibility
——Be responsible for the danger which should be eliminated and/or controlled on
design and configuration of the provided CNC systems and accessories.
——Be responsible for the safety of the provided CNC systems and accessories.
——Be responsible for the provided information and advice for the users.
User’s Responsibility
——Be trained with the safety operation of CNC system and familiar with the safety
operation procedures.
——Be responsible for the dangers caused by adding, changing or altering to the
original CNC systems and the accessories.
——Be responsible for the failure to observe the provisions for operation, adjustment,
maintenance, installation and storage in the manual.
This manual is reserved by end user.
We are full of heartfelt gratitude to you for supporting us in the use of GSK’s
products.
Page 3

GSK983Ta-H/ GSK983Ta-V Turning CNC System Connection Manual
III
Contents
Precautions ................................................................................................................................... 1
1. NC Unit Interfaces ...................................................................................................................... 3
2.Interconnect Block Diagram ........................................................................................................ 4
3.Connection between NC Unit and GS2000T-CA1 Drive Unit ..................................................... 5
(without brake) ............................................................................................................................... 5
4. Connection between NC Unit and GS2000T-CA1 Drive Unit .................................................... 6
(with brake) .................................................................................................................................. 6
5. Full closed-loop connection with Grating Ruler ......................................................................... 7
6. Connection between NC Unit and DAP03 Spindle Servo Drive Unit ........................................ 8
7. Connection between NC Unit and GS3000Y-NP2 Spindle Servo Drive Unit............................ 9
8. Connection between NC Unit and Spindle Inverter ................................................................. 10
9. Machine Tool Operation Panel ................................................................................................ 11
10. Connection between NC Unit and Operation Panel .............................................................. 12
11. Connection between external MPG and Operation Panel ..................................................... 13
12. Connection between NC Unit and PC ................................................................................... 14
13. Connection Method for Brake and System Power-on Control .............................................. 15
14. Connection between NC Unit and I/O Unit ............................................................................ 16
15. General of External I/O Unit (X1) Interfaces .......................................................................... 17
16. Connectivity Diagrams for I/O Unit (X1) Input/Output Signals .............................................. 18
17. I/O Points Definition (X1) ....................................................................................................... 19
Appendix 1 Installation Dimension Drawings ............................................................................ 23
Appendix 2 Connection between NC Unit and DA98D Drive Unit(obsolete product) .......... 28
GSK983Ta-H/ GSK983Ta- V Turning CNC System Connection Manual .................................... 30
Version Upgrading Records ......................................................................................................... 30
Page 4

GSK983Ta-H/ GSK983Ta-V Turning CNC System Connection Manual
IV
Page 5
GSK983Ta-H/ GSK983Ta-V Turning CNC System Connection Manual
1
Electrical
Cabinet
Grounding Strip
S
M
P
S
NC
Unit
Opera
tion
Panel
I/O
Unit
X
Axis
Drive
Unit
Z
Axis
Drive
Unit
Spindle
Drive
Unit
Precautions
1、The system-matched power supply box is exclusive for GSK 983Ma.Do not
supply this power to other devices(such as bake and magnetic
valve);otherwise, serious danger may occur!
2、Requirements for electrical cabinet
The electrical cabinet adopts full-enclosed structure and dustproof design. The temperature
difference between outside and inside of the cabinet should be less than 10℃; or, a heat-exchange
system should be installed. The ambient temperature should not exceed 45℃. Prevent the entry of
dust, coolant and organic solution.
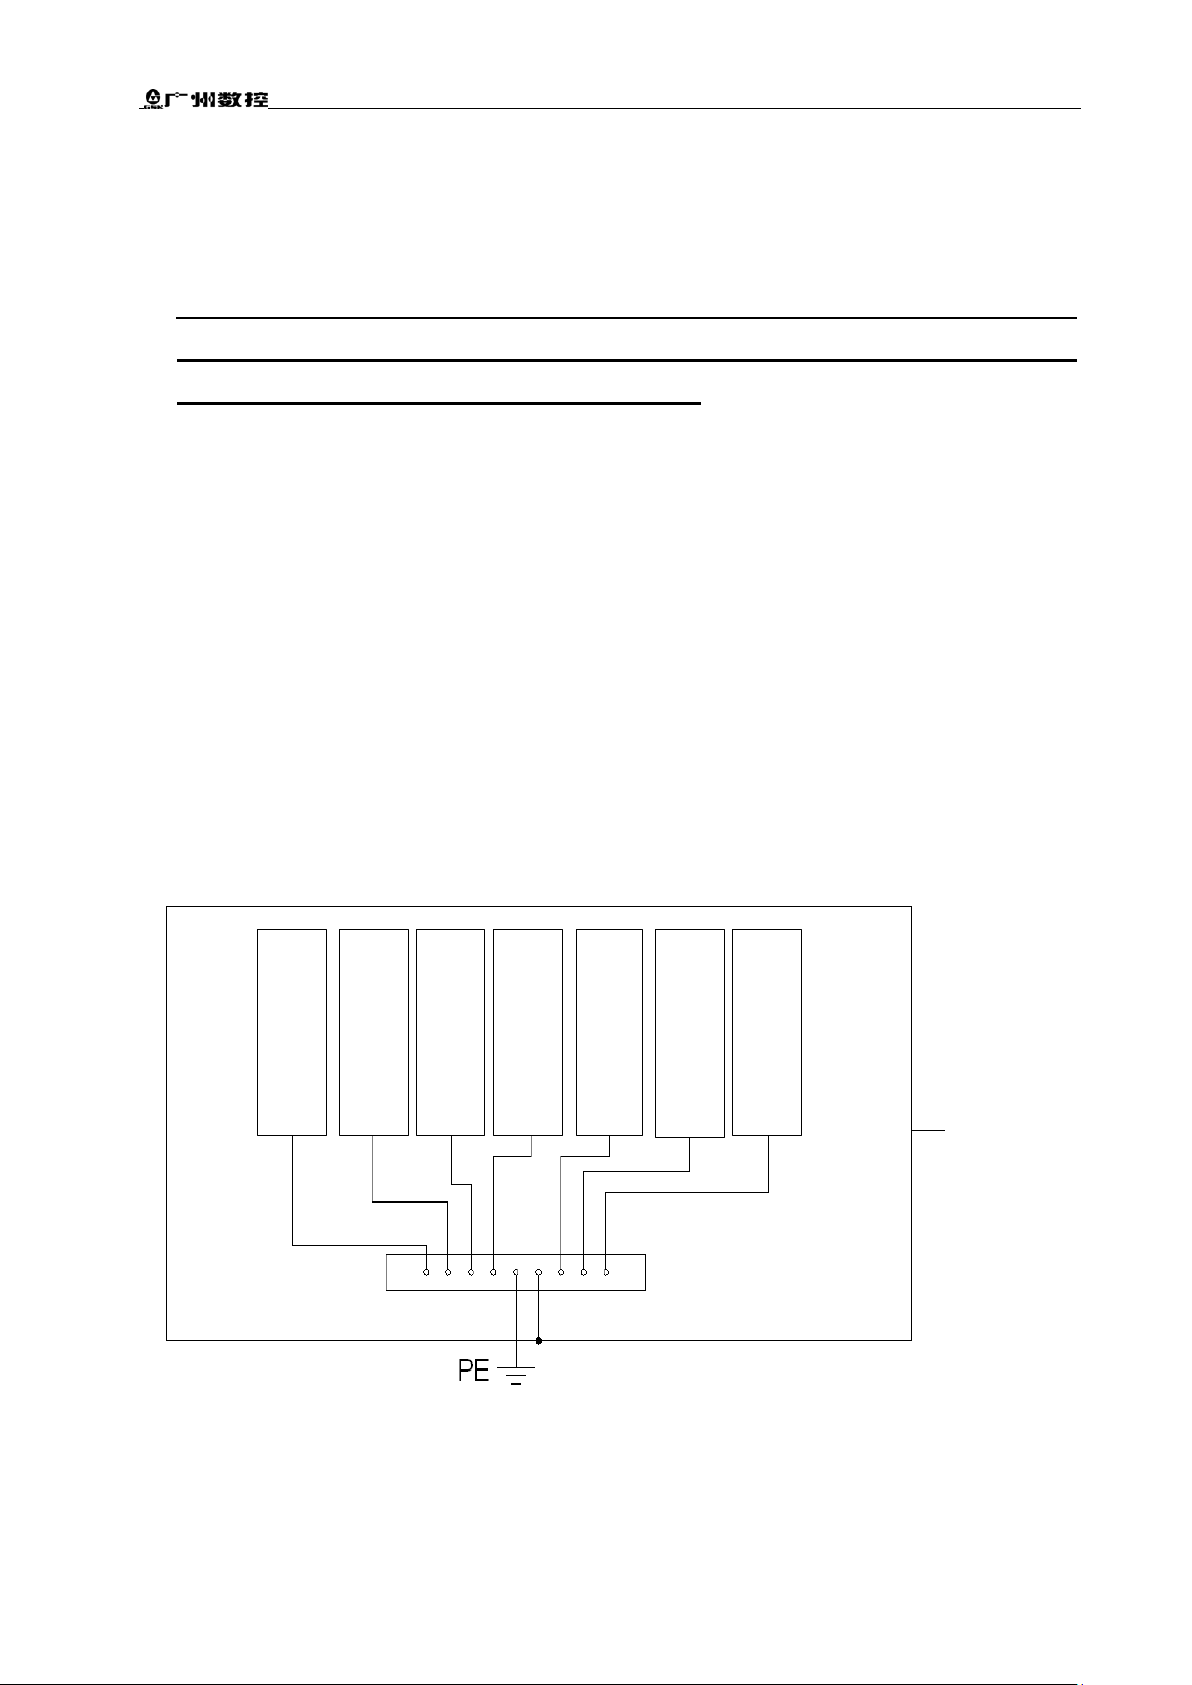
3、Grounding
The cabinet should be protectively grounded, and the continuity should meet the requirement
GB5226.1-2002. Well grounding is the essential condition for a stable operation. The grounding
wires of different parts cannot be connected with each other in series. The grounding strip whose
thickness not less than 3mm should be installed in the cabinet, the protective grounding terminals
should be connected to grounding strip with yellow-green wires independently, and when the
grounding strip is connected with the ground, its grounding resistance should be less than 4Ω.
4、The system power should be supplied through isolation transformer
5、Wiring
Page 6
GSK983Ta-H/ GSK983Ta-V Turning CNC System Connection Manual
2
AC220V
+24V
0V
M
3~
surge absorber
KM
The joints between wires and the system or drive unit should be tight and firm. The low-current
type wires such as signal wires and control wires should be laid far away from heavy current and
electromagnetic interference, and be arranged in an uncurled manner as far as possible, because
winding annularly could easily cause the acquisition of interference signal..
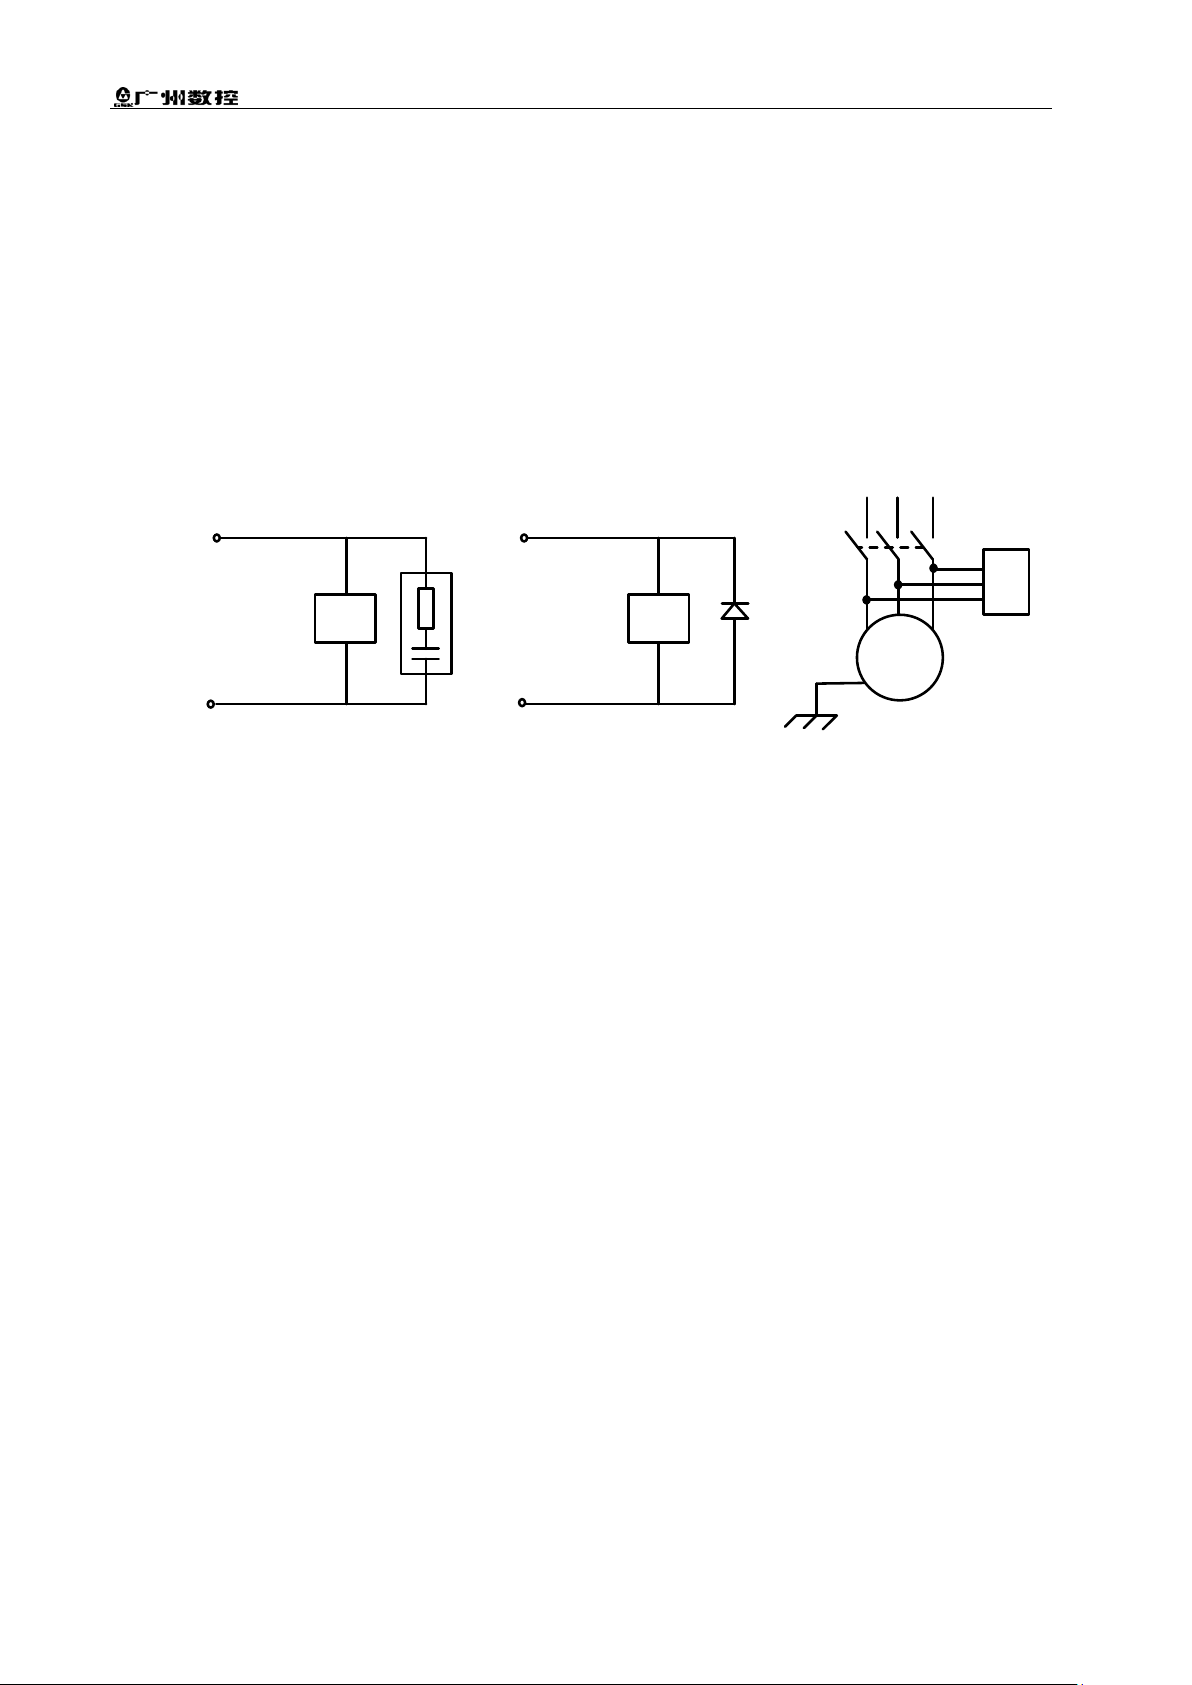
6、Interference suppression
Connect the RC circuits at the two ends of AC coil in parallel. The RC circuits should be closed to
inductive load as far as possible. Connect FWD at the ends of DC coil reversely in parallel. Connect
the surge absorber at the winding head of AC motor.
Page 7

GSK983Ta-H/ GSK983Ta-V Turning CNC System Connection Manual
3
a
T
SVZ(M)
SVY(M)
+24V
PR
PR
+3.3V
GND
+5V
GND
SP(T)
SV5
SV4
SVZ(T)
SVX
OP
I
O
USB
C232
Front View
Back View
Communication interface to PC
U disk read/write interface
Not used
Not used
Not used
Interface parallel to
+24V power
+24v Power
Spindle
Z axis
X axis
Operation panel
I/O unit
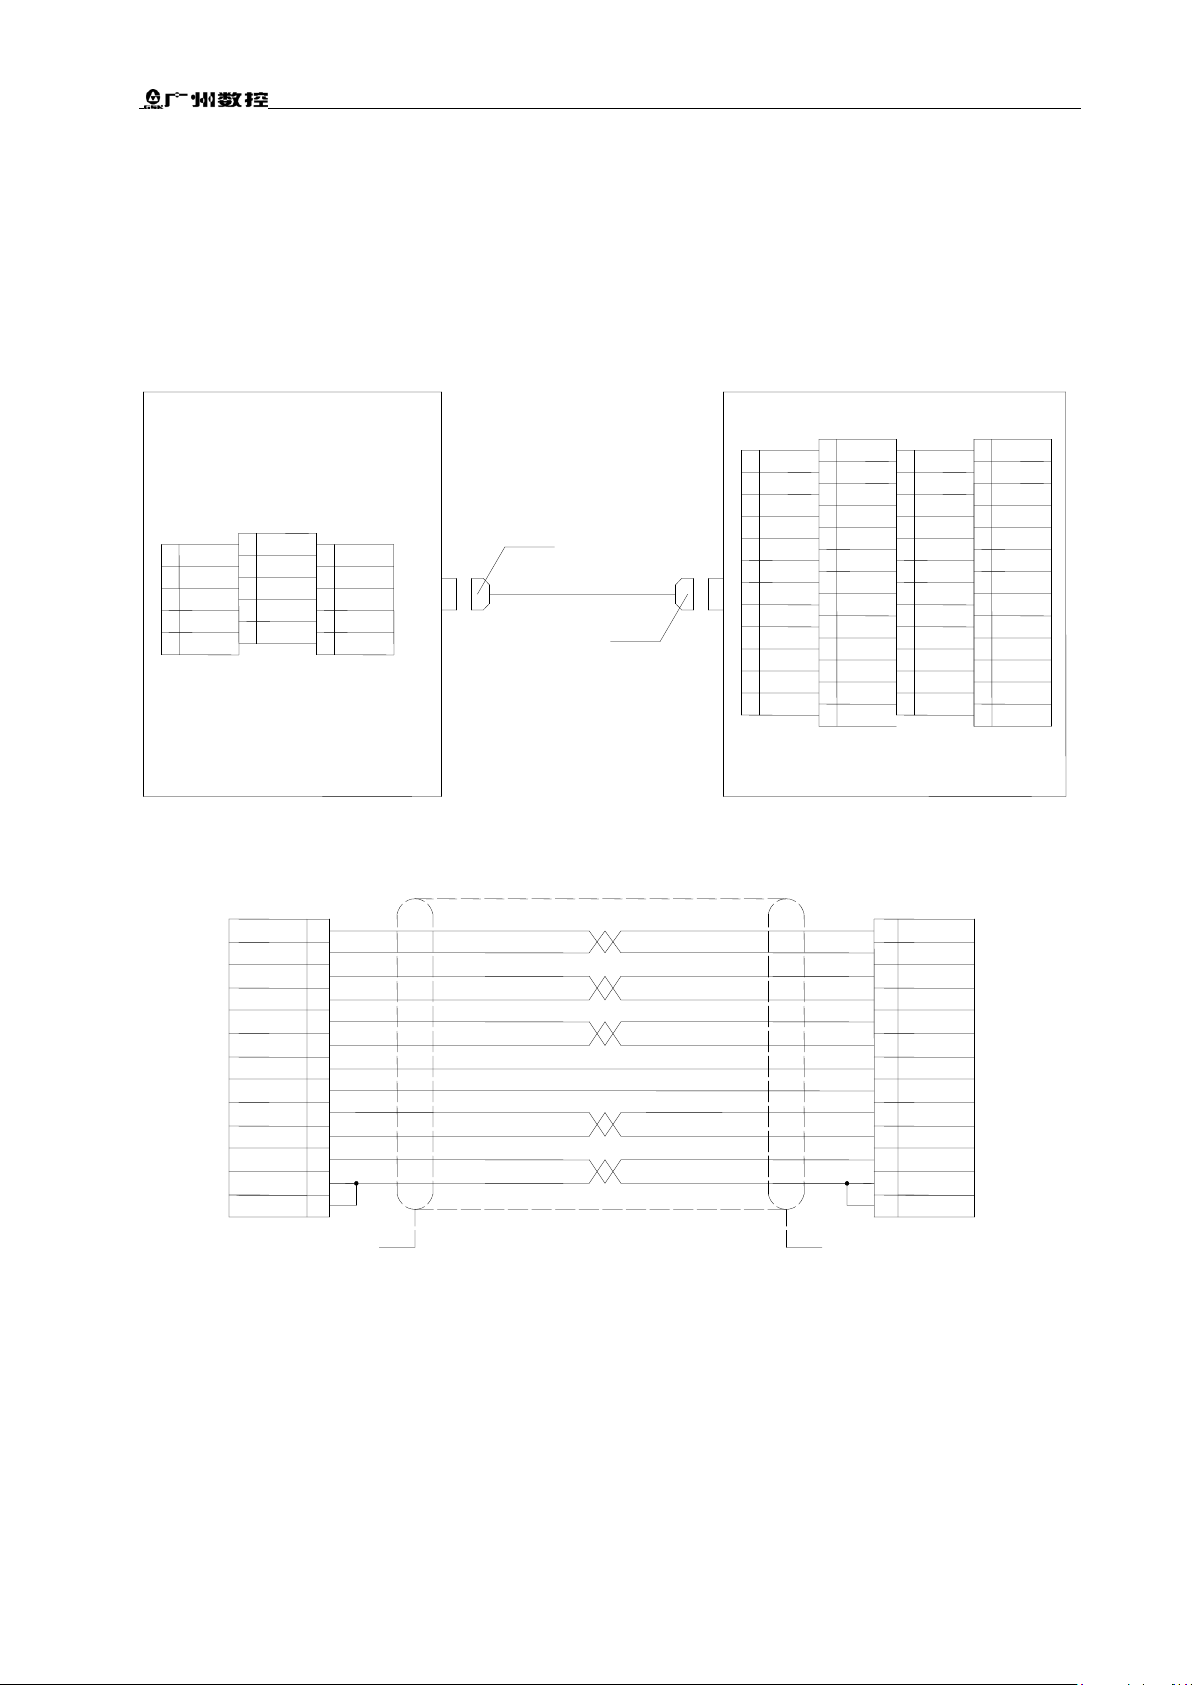
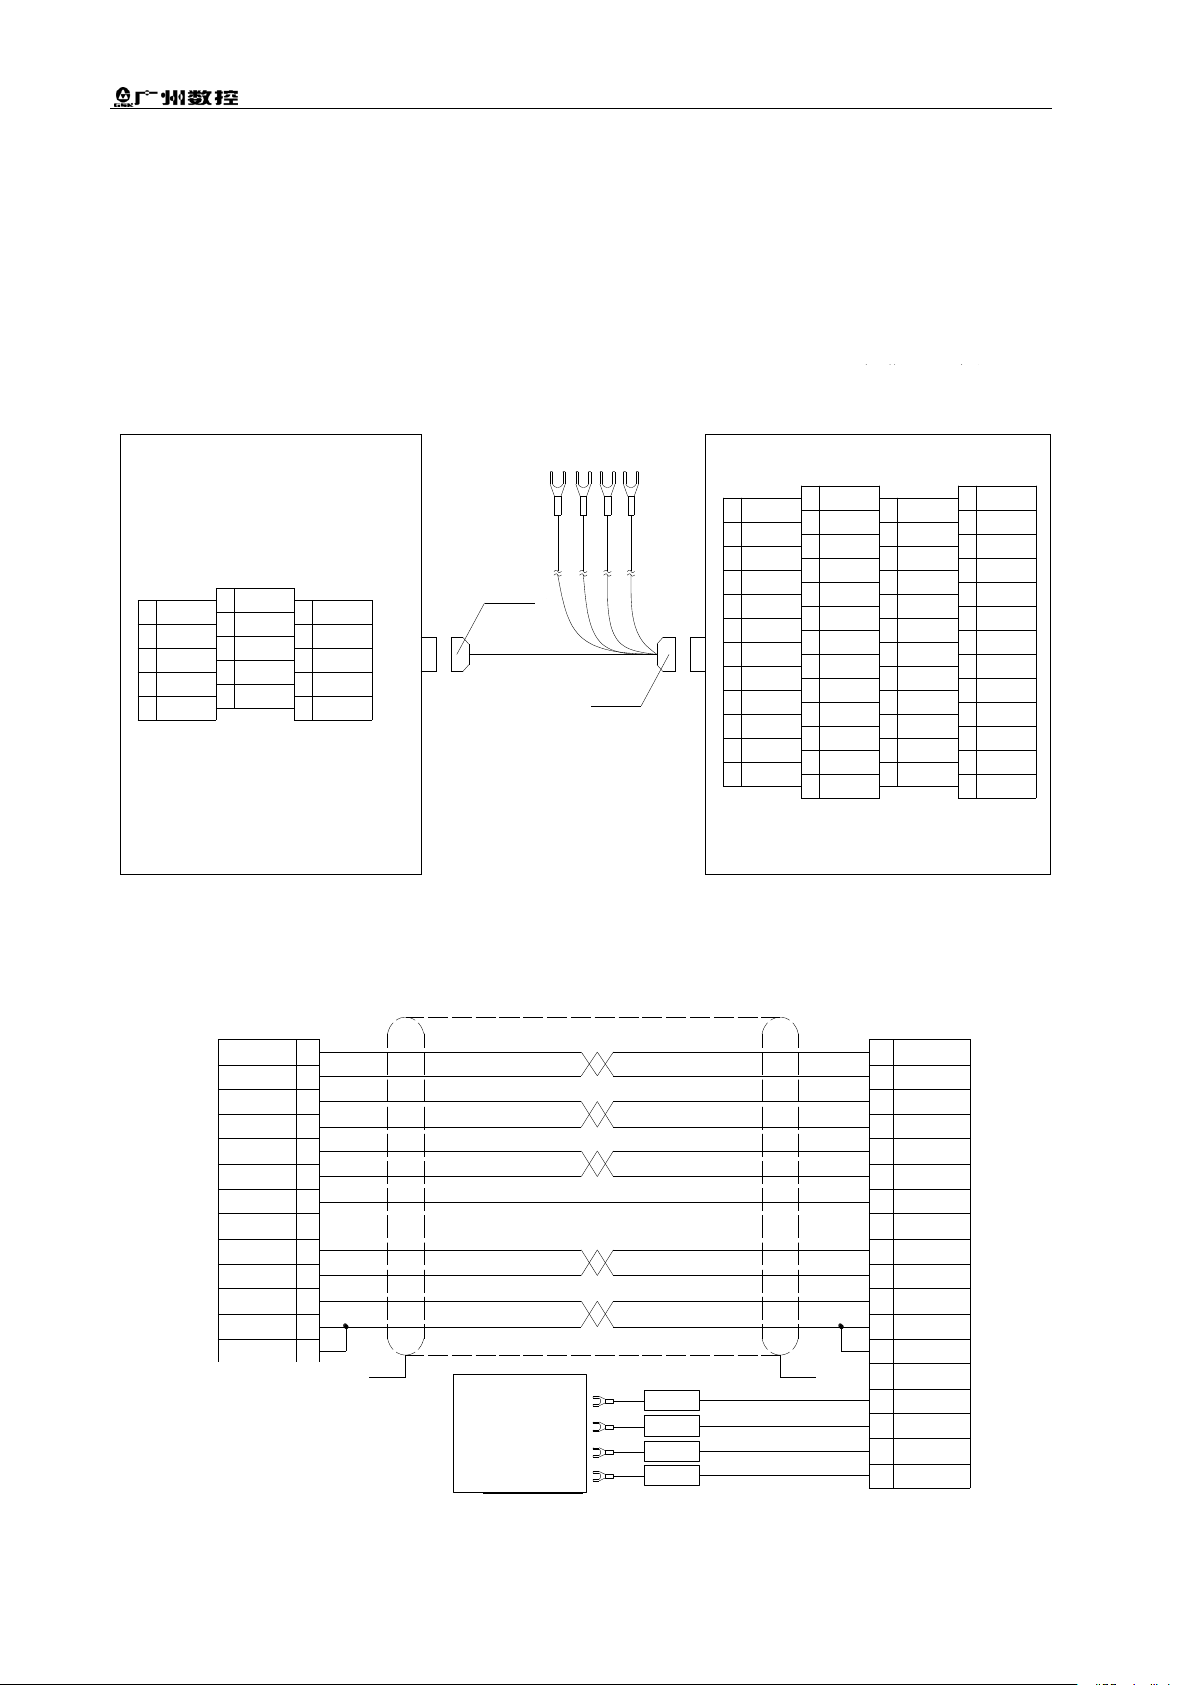
1. NC Unit Interfaces
Page 8
GSK983Ta-H/ GSK983Ta-V Turning CNC System Connection Manual
4
983T a - 0 0-7 8 5 G
983Ta-00-782
983Ta-00-777A
外置手脉
开 关 机 和 急 停 信 号
(急 停 输 出 点 请 看 机 床 操 作 面 板
接口说明)
+24V
PR
PR
+3.3V
GND
+5V
GND
SV5 SV4 SVX OP IO
SP(T)
SVZ(T)
SVZ(M)
SVY(M)
CN 3
外置主轴编码器
(当主轴电机与主轴
传 动 比 不 是 1 ∶ 1时 ,
建议使用)
I/ O 单 元 控 制 信 号
通信
电源
MDI
手脉
PON
ESPA
ESPC
ESPB
POFF
PCOM
CM1
(MPG)
(MD I)
CN3
(POW ER)
CC2
PC1
0V
+24V
(COM MUN I CAT ION)
38.0
38.1
38.2
38.3
38.4
38.5
38.6
38.7
40.0
40.1
40.2
48.5
48.4
48.3
48.2
48.1
48.0
40.7
40.6
40.5
40.4
40.3
48.6
48.7
43.0
43.1
43.2
43.3
43.4
43.5
43.6
43.7
35.7
35.6
35.5
35.4
35.3
35.2
35.1
35.0
34.7
34.6
33.3
33.4
33.5
33.6
33.7
34.0
34.1
34.2
34.3
34.4
34.5
33.2
33.1
33.0
32.7
32.6
32.5
32.4
32.3
32.2
32.1
32.0
0V
Y2.3
Y2.2
Y0.7
Y0.6
Y0.5
Y0.4
Y0.3
Y0.2
Y0.1
Y0.0
Y1.0
Y1.1
Y1.2
Y1.3
Y1.4
Y1.5
Y1.6
Y1.7
Y2.0
Y2.1
+24V
Y6.7
Y6.6
Y6.5
Y6.4
Y6.3
Y6.2
Y6.1
Y6.0
Y2.7
Y2.6
+24V
0V
Y2.4
Y2.5
Y3.0
Y3.1
Y3.2
Y3.3
Y3.4
Y3.5
Y3.6
Y3.7
CC1
X轴 伺 服 电 机
X轴 伺 服 驱 动 单 元
r,t
CN 2
CN 1
R,S,T
PE
U,V,W
PE
Z轴 伺 服 电 机
Z轴 伺 服 驱 动 单 元
r,t
CN 2
CN 1
R,S,T
PE
U,V,W
PE
主轴伺服电机
主轴伺服驱动单元
r,t
CN 2
CN 1
R,S,T
PE
U,V,W
PE
开关电源盒
+2 4V 电 源
机床至数控系统的输入信号(开关量)
数控系统至机床的输出信号(开关量)
NC单 元
机床操作面板
I/O单 元
983T a - 0 0-7 7 6 G
983T a - 0 0-7 7 6 G
X axis servo drive unit
Spindle servo drive unit
X axis servo motor
Z axis servo motor
Z axis servo drive unit
External spindle encoder
(recommendly used when
the transmission ratio
between the spindle and
spindle motor is not 1:1 )
Spindle axis servo motor
I/O unit
control signal
NC unit
Operation panel
External MPG
ON/OFF and Emergency Stop Signal
(refer to the operation panel interfaces
instruction for the emergency stop
output)
I/O
unit
Output signal from CNC to machine
tool (switching value)
Iutput signal from CNC to machine
tool (switching value)
+24V
Power
Switching Power Box
2. Interconnect Block Diagram
Page 9
GSK983Ta-H/ GSK983Ta-V Turning CNC System Connection Manual
5
SVX
CN1
SRDY
04
SON-
VC
SON+
09
0V
0V
10
15
14
05
+24V
03
*PCB
PCB
*PCA
PCA
*PCZ
PCZ
06
11
08
13
12
07
ALM+
23
COM+
39
ALM-
22
SON
COM-
VCMD-
13
14
25
VCMD+
24
PZOUT+
27
PZOUT-
26
PBOUT+
02
PBOUT-
01
03
PAOUT-
PAOUT+
04
FG
FG
GS2000T suffixing with C(CAN bus)
MDR50
DB15pin(3-row)
Without brake 983Ta-00-776G
AC servo drive unit
46
48
50
47
49
28
38
40
42
32
34
36
30
44
26
27
29
41
39
31
35
37
33
43
45
NC
PBO+
PAO+
PULS+
SEC1/CLE
SRV
ALRS
COM-
SRDY-
NC
ZSP-
ALM-
VCMD+
SFR
SON
PSR+
SRDY+
NC
ZSP+
ALM+
VCMD-
PBO-
PAO-
PULS-
SEC2/INH
NC
PZO+
SIGN+
FSTP
NC
NC
COM+
COM+
HOLD+
NC
ZOUT+
NC
SIGN-
DGND
RSTP
ZSL
NC
COM-
PSR-
HOLD-
NC
ZOUT-
AGND
NC
PZO-
21
SVX
23
25
22
24
PCB
SON+
PCA
PCZ
NC unit
+5V
0V
SRDY
+24V
02
04
03
01
08
09
07
06
VC
05
10
0V
(MDR50)
(D-Sub 15- pin)
12
14
13
11
15
0V
*PCA
SON-
*PCB
(D-15 Female)
*PCZ
CN1
03
13
15
17
07
09
11
05
19
01
02
04
16
14
06
10
12
08
18
20
SVX
983Ta-00-776G
Note :when the X axis is connected without brake,the connection of X or Z axis is the same. The X axis connection with
brake is shown in the following page.
PCA *PCA:Encoder feedback A phase differential signal(pulse signal,drive unit→NC)
PCB *PCB:Encoder feedback B phase differential signal(pulse signal,drive unit→NC)
PCZ *PCZ:Encoder feedback Z phase differential signal(pulse signal,drive unit→NC)
SON+/-:Enable signal(binary signal,NC→ drive unit)
SRDY:Servo drive ready signal(binary signal,drive unit→NC)
VC:Speed control voltage(direct current,NC→drive unit)
3. Connection between NC Unit and GS2000T-CA1 Drive Unit
(without brake)
Page 10
GSK983Ta-H/ GSK983Ta-V Turning CNC System Connection Manual
6
SVX CN1
SRDY 04
SON-
VC
SON+ 09
0V
0V
10
15
14
05
+24V 03
*PCB
PCB
*PCA
PCA
*PCZ
PCZ 06
11
08
13
12
07
ALM+23
COM+39
ALM-22
SON
COM-
VCMD13
14
25
VCMD+24
PZOUT+27
PZOUT-26
PBOUT+02
PBOUT-01
03 PAOUT-
PAOUT+04
FGFG
GS2000T
MDR50
DB15针(三排)
带抱闸 983Ta-00-776GX
HOLD+43
HOLD-42
HOLDHOLD+
21
SVX
23
25
22
24
PCB
SON+
PCA
PCZ
NC单元
+5V
0V
SRDY
+24V
02
04
03
01
08
09
07
06
VC05
10 0V
(MDR50)
(D-Sub 15针)
12
14
13
11
15 0V
*PCA
SON-
*PCB
(D-15孔)
*PCZ
CN1
03
13
15
17
07
09
11
05
19
01
02
04
16
14
06
10
12
08
18
20
SVX
983Ta-00-776GX
GS2000T后缀带C(CAN总线)
交流伺服驱动单元
46
48
50
47
49
28
38
40
42
32
34
36
30
44
26
27
29
41
39
31
35
37
33
43
45
NC
PBO+
PAO+
PULS+
SEC1/CLE
SRV
ALRS
COMSRDYNC
ZSPALMVCMD+
SFR
SON
PSR+
SRDY+
NC
ZSP+
ALM+
VCMD-
PBOPAOPULS-
SEC2/INH
NC
PZO+
SIGN+
FSTP
NC
NC
COM+
COM+
HOLD+
NC
ZOUT+
NC
SIGN-
DGND
RSTP
ZSL
NC
COMPSRHOLDNC
ZOUTAGND
NC
PZO-
机床配电柜
(详见第15页抱
闸连接方法)
COM+39
ZSL34
+24V
ZSL
+24V
HOLD+
ZSL
HOLD-
NC unit
GS5200T suffixing with C (CAN
bus) AC servo drive unit
SVX(D-15
Female)
D-Sub 15-Pin
With brake
Power
Distribution
Cabinet
DB15-Pin(3-row)
4. Connection between NC Unit and GS2000T-CA1 Drive Unit
(with brake)
Page 11
GSK983Ta-H/ GSK983Ta-V Turning CNC System Connection Manual
7
11*PCZX
07PCAX
12*PCAX
06
983Ta
SVX
PCZX
13*PCBX
08PCBX
光栅尺
01
02
0V
+5V
FG FG
SRDYX 04
SONX-
VCX
SONX+ 09
0V
0V
10
15
14
05
+24V 03
ALM+23
ALM-22
SON
COM-
VCMD13
14
25
VCMD+24
FGFG
MDR50
DB15针(三排)
HOLD+43
HOLD-42
HOLDHOLD+
机床配电柜
(详见第15页抱
闸连接方法)
COM+39
ZSL34
+24V
ZSL
CN1
GS2000T-CA1伺服驱动单元
DB15-Pin(3-row)
Power
Distribution
Cabinet
Servo Drive
Unit
Grating ruler
5. Full closed-loop connection with Grating Ruler
Page 12

GSK983Ta-H/ GSK983Ta-V Turning CNC System Connection Manual
8
Note:The corresponding positions of I/O
Unit are described in PLC User Manual of
Spindle Servo Drive Unit:
DAP01or DAP03
CN1
04 SRDY+
FG
Encoder A phase
differential signal
Encoder B phase
differential signal
Encoder Z phase
differential signal
Speed control voltage
5 VC
11 *PCZ
06 PCZ
13 *PCB
08 PCB
12 *PCA
07 PCA
NC Unit
SP
14 VCMD+
3 PZ-
18 PZ+
2 PB-
17 PB+
1 PA-
16 PA+
10 0V
15 VCMD-
Enable signal
Spindle arrival check signal
Spindle orientation
Spindle zero speed check
Spindle orientation completed
Spindle ready
15 0V
14 SON-
09 SON+
03 +24V
02 0V
SOR.M
*ZSP
M19.O
*SAR
*SRDY
24 SON
39 COM+
36 COM-
5 SPDAR
9 SFR
11 STAORT
20 ZSPD0
21 COIN
7 ALM
FG
983Ta-00-785
I/O Unit
the same version.
6. Connection between NC Unit and DAP03 Spindle Servo Drive
Unit
Page 13

GSK983Ta-H/ GSK983Ta-V Turning CNC System Connection Manual
9
Suffixing with N (no-bus)
GS
Spindle Servo Drive Unit
CN1
04 SRDY+
Encoder A phase
differential signal
Encoder B phase
differential signal
Encoder Z phase
differential signal
Speed control voltage
5 VC
11 *PCZ
06 PCZ
13 *PCB
08 PCB
12 *PCA
07 PCA
NC Unit
SP
44 VCMD+
32 PZ-
31 PZ+
3 PB-
18 PB+
4 PA-
19 PA+
10 0V
14 VCMD-
Enable signal
Spindle arrival check signal
Spindle orientation
Spindle zero speed check
Spindle orientation completed
Spindle ready
15 0V
14 SON-
09 SON+
03 +24V
02 0V
SOR.M
*ZSP
M19.O
*SAR
*SRDY
23 SON
39 COM+
24 COM-
41 PSR
08 OSTA
42 ZSP
12 COIN+
9 ALM+
983Ta-00-785G
I/O Unit
Note:The corresponding positions of I/O
Unit are described in PLC User Manual of
the same version.
28 COIN-
25 ALM-
20 SFR
FG
FG
DB44-Pin
DB15-Pin 3-row
7. Connection between NC Unit and GS3000Y-NP2 Spindle Servo
Drive Unit
Page 14

GSK983Ta-H/ GSK983Ta-V Turning CNC System Connection Manual
10
注1:M03、M04等I/O点在I/O单元的哪个位置请查看相应版本的PLC使用说明。
注2:主轴速度到达检测信号*SAR如果不用,应将其与0V短接(当输入点为低电平有效时)或者与24V短接(当输入点为高电平有效时)。
功能端子
图二:接主轴编码器时的连接
(983Ta-00-775)
编码器A相差分信号
编码器B相差分信号
编码器B相差分信号
编码器A相差分信号
0V~+10V
主轴变频器
FG
0V
编码器Z相差分信号
编码器Z相差分信号
主轴编码器
0V
+5V
主轴编码器
NC单元SP
07 PCA
FG
SON-14
0V15
*PCA
*PCB
12
13
0V10
PCB
0908SON+
VC05
04 SRDY
11
14
13
12
15
03 +24V
+5V01
0V02
*PCZ11
PCZ06
SP
SON+
PCA07
06 PCZ
0809PCB
+5V01
04
03
0V02
SRDY
+24V
VC05
10 0V
(D-Sub 15针)
(D-15孔)
0V
*PCZ
SON-
*PCB
*PCA
主轴零速检测*ZSP
主轴速度到达检测*SAR
主轴准备好检测*SRDY
NC单元、I/O单元
主轴正转 M03
主轴反转 M04
+24V
KA2
KA1
主轴变频器
压线端子排
(公共端)
(反转控制)
(正转控制)
主轴变频器
COM
REV
FWD
I/O单元
SP
NC unit, I/O unit
NC unit SP (D-15 Female)
Spindle Inverter
(Forward
)
(Reverse)
(Commo
n port)
Function port
Spindle
Inverter
Terminal
Strip
Spindle
encoder
Spindle encoder
Spindle Inverter
D-Sub 15-
Pin
I/O unit
Spindle CW
M03
Spindle CCW M04
Spindle zero speed
check
Spindle speed arrival
check
Spindle
ready
Note 1: The corresponding positions of I/O Unit such as M03 and M04 are described in PLC User
Manual of the same version.
Note 2: When the spindle speed arrival check signal *SAR is not used, it should be shorted to 0V (valid
when the input interface is at low level) or be shorted to 24V (valid when the input interface is at high
level).
Connection with spindle
encoder
+5V
0V
Encoder Z phase differential
signal
Encoder Z phase differential
signal
Encoder A phase differential
signal
Encoder A phase differential
signal
Encoder B phase differential
signal
Encoder B phase differential
signal
8. Connection between NC Unit and Spindle Inverter
Page 15

GSK983Ta-H/ GSK983Ta-V Turning CNC System Connection Manual
11
PON
ESPA
ESPC
ESPB
POFF
PCOM
Power OFF
Power ON
Emergency stop button
on operation panel
Operation Panel Side
I/O unit side
+24V
0V
Relay
X38.4
Note:when external MPG is used,emergency stop chain should
be formed by emergency sop buttons on operation panel and
external MPG
Note:External MPG and MPG on the operation panel cannot use at the same time.
ESPA
ESPC
ESPB
ESP1
06
ESP2
19
CM1
Emergency stop button
On operation panel
External MPG
Emergency stop
I/O side
When X38.COM is 24V, 0V here
When X38.COM is 0V, 24V here
X38.4
When X38.COM is 24V, 0V here
When X38.COM is 0V, 24V here
(Emergency stop chain leading-out terminal2)
-L、+L:2 poles of external MPG indicator
ESP1
-L(0V)
+L (24V)
PON
ESPA
ESPC
ESPB
POFF
PCOM
ESP2、ESP1:2 poles of external MPG
emergency stop button
0V
×100
×1
MPG
HX、HZ:External MPG axis select signal
×1 、×10、×100:External MPG override
Select signal
01
03
02
05
06
07
04
09
08
ESP2
HX
×10
HZ
14
15
17
19
18
20
21
16
11
13
12
24
23
25
10
22
(D-25male)
CM1
CN3(D-25 Female)is not used
+24V
PC1
RD+ RD-:RS422 differential receive terminal
TD+ TD-:RS422 differential sending terminal
06
02
03
08
07
CC2
01
RD+
RD-
TD-
(D-9 male)
0V
Communication
05
04
0V
TD+
09
( Emergency stop button on operation panel leading-out
terminal1;Emergency stop chain leading-out terminal 1)
(Emergency stop button on operation panel leading-out terminal2)
(Power on)
(Power off)
(Power switch common port)
HA+
HB+
HA-
HB-
HA+ HA-: MPG A phase pulse output
HA+ HA-: MPG B phase pulse output
HA+
HB+
0V
0V
+5V
+5V
HA-
HB-
HA+、HA-:External MPG A phase pulse input
HB+、HB-:External MPG B phase pulse input
MDI
MPG
PON
ESPA
ESPC
ESPB
POFF
PCOM
CM1
CN3
POWER
CC2
PC1
0V
+24V
COMMUNICATION
9. Machine Tool Operation Panel
Page 16

GSK983Ta-H/ GSK983Ta-V Turning CNC System Connection Manual
12
03
07
CC2
RD2+ RD2-:RS422差分接收端
TD2+ TD2-:RS422差分发送端
(D-Sub 9孔)
0V
05
04
FG
08
09
FG
OP
01
02
06
(D-9孔)
(D-Sub 9针)
机床操作面板
OP
983Ta-00-777A
06
02
03
08
07
CC2
01
(D-9针)
通信
05
04
0V
09
HA+ 06
0V 05
TD2- 02
HB- 09
RD2- 04
TD2+ 01
RD2+ 03
08HB+
07HA-
OP
04
HA+
01 0V
RD-07
09
HB-
06 TD-
RD+03
TD+02
05
HB+
HA-
08
CC2
HA+ HA- :手脉A相信号输入
HB+ HB- :手脉B相信号输入
NC单元
TD2+
TD2RD2+
RD2-
HA+
HAHB+
HB-
TD+
RD+
HA+
HB+
TDRD-
HAHB-
NC unit Operation Panel
D-Sub 9-Pin
(D-9 female)
(D-9 male)
Communication
RS422 differential receive terminal
RS422 differential sending terminal
MPG A phase pulse input
MPG B phase pulse input
10. Connection between NC Unit and Operation Panel
Page 17

GSK983Ta-H/ GSK983Ta-V Turning CNC System Connection Manual
13
FG
DB25孔
HB+09
HB-22
HA-21
+5V12
0V
10
HA+08
0V11
+5V
13
04* ×10
18
-L(0V)
ESP1
19
ESP206
17*
×100
05 +L(+24V)
×1
16*
02*
HZ
01*
HX
操作面板
CM1
FG
× 100
-L(0V)
+L(+24V)
ESP1
ESP2
× 1
× 10
HZ
HX
HA+
HAHB+
HB-
+5V
0V
983Ta-00-783
24V灯
急停开关
轴选开关
倍率开关
+5V
A相差分脉冲+
A相差分脉冲-
B相差分脉冲+
B相差分脉冲-
0V
使能
开关
外置手脉
无锡瑞普GSK-ZSSY1468-01G-100B-05L
*注:CM1中轴选信号HX、HZ和倍率信号×1、×10、×100的脚号由PLC定义,不同的PLC版本脚号可能会不相
同!连接时应先核对相应PLC版本的使用说明。
Operation
Panel
External MPG
Ruipu Wuxi
Axis select
switch
Override switch
Enabl
e
switch
24VLight
Emergency Stop
Switch
femal
e
B phase
differential pulse-
B phase
differential
pulse+
A phase
differential pulse-
A phase
differential
pulse+
*Note: axis select signals HX,HZ of CM1 and override signals ×1,×10,× 100 of pin No. are defined by PLC, and
pin No. can be different in different visions of PLC. So, check the operations of the corresponding PLC before
connecting.
11. Connection between external MPG and Operation Panel
Page 18

GSK983Ta-H/ GSK983Ta-V Turning CNC System Connection Manual
14
02
08
12
10
04
06
14
RS232
注:NC和电脑PC机外壳都要可靠接大地。
RXD
TXD
0V
串行数据发送
串行数据接收
(3M MDR14)
05
FG
07
03
04 DTR
FG
05060V
DSR
08 CTS
07 RTS
01 CD
(RS232)
09 RI
03 TXD
02 RXD
COM
09
0V
01
05
03
11
13
07
(D-Sub 9孔)
983Ta-00-772
3M MDR14插头
0V
CD
TXD
RXD
DTR
05
PC机
COM
01
03
02
04
COM
DSR
CTS
RTS
RI
06
08
07
09
(D-9针)
RXD
TXD
RS232
RS232
NC单元
NC unit
PC
Plug
(D-9 male)
(D-Sub 9-Pin Female)
Serial data receive
Serial data sending
Note: the shell of NC and PC should be grounded firmly.
12. Connection between NC Unit and PC
Page 19

GSK983Ta-H/ GSK983Ta-V Turning CNC System Connection Manual
15
N
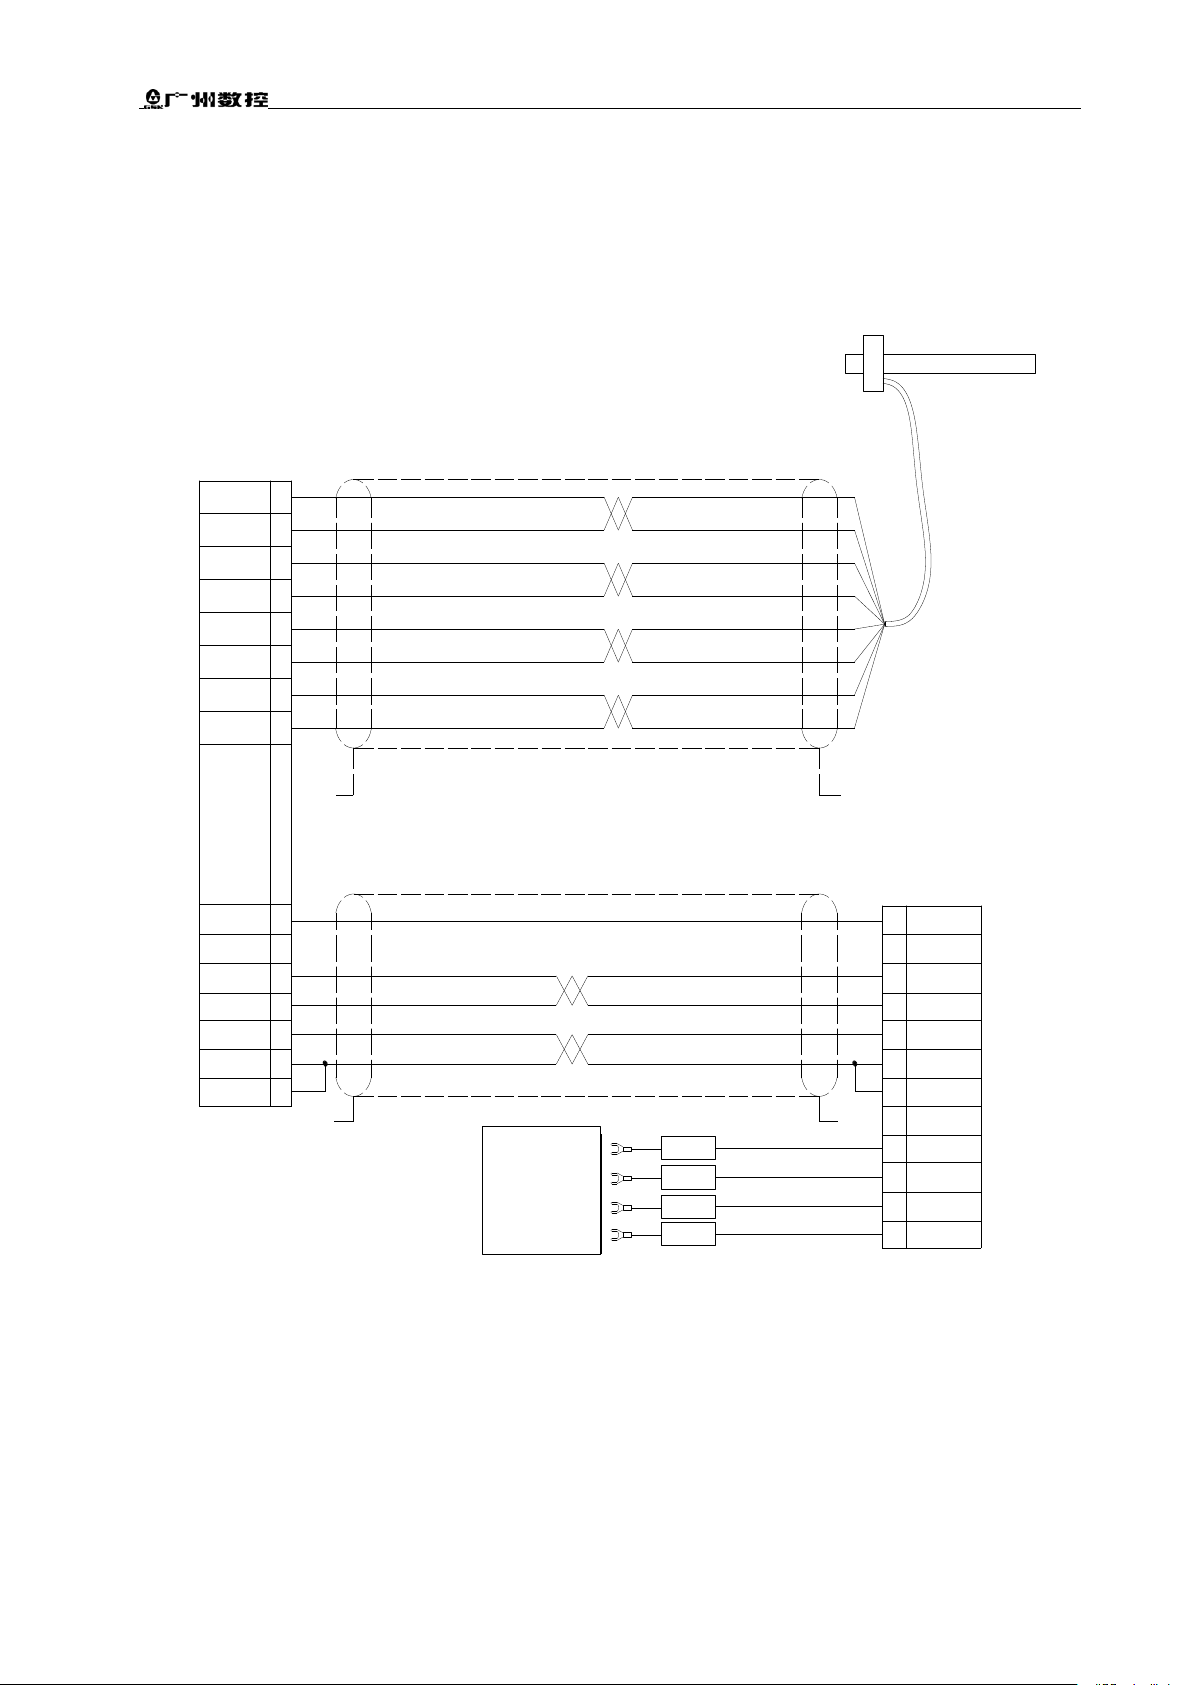
Emergency Stop Control
Z Axis Brake Control
+24V
0V
GS2000T-CA1 Servo CN1
Interface Connection
GSK983Ta-H/V
CNC system
KA0
L
DC24V
AC220V
GS2000T-CA1 Servo Drive Unit CN1 Plug Leading-out Signal Terminals
GS2000T-CA1
X Axis Servo Drive
Unit CN1 Plug
Servo Drive Unit brake output-
HOLD-
KA0
SB1
SB2
KA0
CN1-
42
HOLD
-
CN1-
34
ZSL
CN1-
43
HOLD+
CN1-39
COM+
System
Power
Box
+24
V
X Axis Brake
Control
X Axis Zero
Speed Clamping
Power-on Control
0V
KA1
KA0
Servo drive unit zero speed clamping input
Servo Drive Unit brake output +
Power supply +24V
ZSL
HOLD+
COM+
AC
24V
KA1
0V
+24V
1
2
GSK SJT Servo
Motor Brake Plug
KA
2
Emergency
Stop
Chain
KA 2 KA
2
To I/O unit
X38.4 Emergency stop input
Connect with 0V or 24V:
When X38.COM is24V,0V here;
When X38.COM is 0V,24V here。
E
System Power-on Control
13. Connection Method for Brake and System Power-on Control
Page 20

GSK983Ta-H/ GSK983Ta-V Turning CNC System Connection Manual
16
IO
(D-9male)
06
TD0+
0V
CC1
02
01
TD0-
External
I/O Unit
(D-Sub 9 male)
(D-9)
06
02
01
TX1-
TX1+
CC1
RD0+
TD1+
03
04
RD1+
05
09
04
TD1+
08
TD1-
RD1-
RD1+
05
TD1-
08
RD0-
07
RD1-
09
FG
0V
01
TD0+
02
09
08
IO
FG
TX1+
04
05
TX1-
RX1-
0V
02
04
01
05
RX1-
0V
(D-Sub 9-pin female)
CC1
RX1+
07
03
07
RD0+
03
TD0-
06
RX1+
03
RD0-
983
T
a-00-782
IO
NC Unit
TX1+、TX1-:RS422 differential signal sending
RX1+、RX1-:RS422 differential signal sending receive
14. Connection between NC Unit and I/O Unit
Page 21

GSK983Ta-H/ GSK983Ta-V Turning CNC System Connection Manual
17
Interface for power supply
to I/O unit
Interface for communication
with main cabinet
Signals from CNC to
Machine
Signals from Machine
to CNC
38.0
38.1
38.2
38.3
38.4
38.5
38.6
38.7
40.0
40.1
40.2
48.5
48.4
48.3
48.2
48.1
48.0
40.7
40.6
40.5
40.4
40.3
48.6
48.7
43.0
43.1
43.2
43.3
43.4
43.5
43.6
43.7
35.7
35.6
35.5
35.4
35.3
35.2
35.1
35.0
34.7
34.6
33.3
33.4
33.5
33.6
33.7
34.0
34.1
34.2
34.3
34.4
34.5
33.2
33.1
33.0
32.7
32.6
32.5
32.4
32.3
32.2
32.1
32.0
0V
Y2.3
Y2.2
Y0.7
Y0.6
Y0.5
Y0.4
Y0.3
Y0.2
Y0.1
Y0.0
Y1.0
Y1.1
Y1.2
Y1.3
Y1.4
Y1.5
Y1.6
Y1.7
Y2.0
Y2.1
+24V
Y6.7
Y6.6
Y6.5
Y6.4
Y6.3
Y6.2
Y6.1
Y6.0
Y2.7
Y2.6
+24V
0V
Y2.4
Y2.5
Y3.0
Y3.1
Y3.2
Y3.3
Y3.4
Y3.5
Y3.6
Y3.7
CC1
15. General of External I/O Unit (X1) Interfaces
Page 22

GSK983Ta-H/ GSK983Ta-V Turning CNC System Connection Manual
18
Power
Box
The COM ports of each address group determine whether the addresses are valid at high or low
level:
When COM port is connected to 24V,the input points are valid at low level(0V);
When COM port is connected to 0V,the input points are valid at low level(24V).
I/O unit (X1) Side
Machine Side
Connection when low level is valid
0V
+24V
X32.COM
2.8K
2.8K
2.8K
2.8K
2.8K
2.8K
2.8K
2.8K
2.8K
2.8K
2.8K
2.8K
2.8K
2.8K
2.8K
2.8K
X32.7
X32.6
X32.5
X32.4
X32.3
X32.2
X32.1
X32.0
1K
1K
1K
1K
1K
1K
1K
1K 1K
1K
1K
1K
1K
1K
1K
1K
X32.0
X32.1
X32.2
X32.3
X32.4
X32.5
X32.6
X32.7
2.8K
2.8K
2.8K
2.8K
2.8K
2.8K
2.8K
2.8K
2.8K
2.8K
2.8K
2.8K
2.8K
2.8K
2.8K
2.8K
X32.COM
+24V
0V
Connection when high level is valid
Machine Side
I/O unit (X1) Side
Relay
ULN2803
0V
Connectivity Diagram of Output Point
+24V
Machine Side
1. Input Signal
2. Output Signal
Note:There are 64 input points in 8 different groups. The figure above is taken X32.0-X32.7 for
example; other groups are alike.
There are 40 points for ULN2803 output. The maximum passing current of each point is 200mA.
983System
I/O unit Side
Detection
Switches
on
Machine
Tool
Detection
Switches
on
Machine
Tool
Power
Box
16. Connectivity Diagrams for I/O Unit (X1) Input/output Signals
Page 23

GSK983Ta-H/ GSK983Ta-V Turning CNC System Connection Manual
19
Terminal
No.
PLC
Address
Signal Name
Signal Function
I/O
X32.COM
X32 common port
High/low selection for groupX32
X32.0
X32.0
*+LX(fixed)
Xaxis"+"direction limit(short it to
0V when unused)
I
X32.1
X32.1
*-LX(fixed)
Xaxis"-"direction limit(short it to 0V
when unused)
I
X32.2
X32.2
I
X32.3
X32.3
I
X32.4
X32.4
I
X32.5
X32.5
*DECX(fixed)
Xaxis zero-point return deceleration
I
X32.6
X32.6
I
X32.7
X32.7
I
X33.COM
X33 common port
High/low selection for group X33
X33.0
X33.0
*+LZ(fixed)
Z axis"+"direction limit(short it to 0V
when unused)
I
X33.1
X33.1
*-LZ(fixed)
Xaxis"-"direction limit(short it to 0V
when unused)
I
X33.2
X33.2
I
X33.3
X33.3
I
X33.4
X33.4
I
X33.5
X33.5
*DECZ(fixed)
Z axis zero-point return deceleration
I
X33.6
X33.6
I
X33.7
X33.7
I
X34.COM
X34 common port
High/low selection for group X34
X34.0
X34.0
I
X34.1
X34.1
I
X34.2
X34.2
I
X34.3
X34.3
I
X34.4
X34.4
I
X34.5
X34.5
I
X34.6
X34.6
I
X34.7
X34.7
I
X38.COM
X38 common port
High/low selection for group X38
X38.0
X38.0
I
X38.1
X38.1
I
X38.2
X38.2
I
X38.3
X38.3
I
X38.4
X38.4
*ESP(fixed)
Emergency stop(input)
I
X38.5
X38.5
I
X38.6
X38.6
I
X38.7
X38.7
I
17. I/O Points Definition (X1)
Page 24

GSK983Ta-H/ GSK983Ta-V Turning CNC System Connection Manual
20
Terminal
No.
PLC
Address
Signal Name
Signal Function
I/O
X48.COM
X48 common port
High/low selection for group X48
X48.0
X48.0
I
X48.1
X48.1
I
X48.2
X48.2
I
X48.3
X48.3
I
X48.4
X48.4
I
X48.5
X48.5
I
X48.6
X48.6
I
X48.7
X48.7
I
X43.COM
X43 common port
High/low selection for group X43
X43.0
X43.0
I
X43.1
X43.1
I
X43.2
X43.2
I
X43.3
X43.3
I
X43.4
X43.4
I
X43.5
X43.5
I
X43.6
X43.6
SKIP.M
Block skip signal input
I
X43.7
X43.7
I
X35.COM
X35 common port
High/low selection for group X35
X35.0
X35.0
I
X35.1
X35.1
I
X35.2
X35.2
I
X35.3
X35.3
I
X35.4
X35.4
I
X35.5
X35.5
I
X35.6
X35.6
I
X35.7
X35.7
I
X40.COM
X40 common port
High/low selection for group X40
X40.0
X40.0
I
X40.1
X40.1
I
X40.2
X40.2
I
X40.3
X40.3
XAG.M
X axis auto tool compensation
I
X40.4
X40.4
ZAG.M
Z axis auto tool compensation
I
X40.5
X40.5
I
X40.6
X40.6
I
X40.7
X40.7
I
Page 25

GSK983Ta-H/ GSK983Ta-V Turning CNC System Connection Manual
21
Terminal
No.
PLC
Address
Signal Name
Signal Function
I/O
Y0.0
Y0.0
O
Y0.1
Y0.1
O
Y0.2
Y0.2
O
Y0.3
Y0.3
O
Y0.4
Y0.4
O
Y0.5
Y0.5
O
Y0.6
Y0.6
O
Y0.7
Y0.7
O
Y1.0
Y1.0
O
Y1.1
Y1.1
O
Y1.2
Y1.2
O
Y1.3
Y1.3
O
Y1.4
Y1.4
O
Y1.5
Y1.5
O
Y1.6
Y1.6
O
Y1.7
Y1.7
O
Y2.0
Y2.0
O
Y2.1
Y2.1
O
Y2.2
Y2.2
O
Y2.3
Y2.3
O
0V
24V power ground
+24V
24V power output
O
Terminal
No.
PLC
Address
Signal Name
Signal Function
I/O
Y3.0
Y3.0
O
Y3.1
Y3.1
O
Y3.2
Y3.2
O
Y3.3
Y3.3
O
Y3.4
Y3.4
O
Y3.5
Y3.5
O
Y3.6
Y3.6
O
Y3.7
Y3.7
O
Y6.0
Y6.0
O
Y6.1
Y6.1
O
Y6.2
Y6.2
O
Y6.3
Y6.3
O
Y6.4
Y6.4
O
Y6.5
Y6.5
O
Y6.6
Y6.6
O
Y6.7
Y6.7
O
Y2.4
Y2.4
O
Y2.5
Y2.5
O
Page 26

GSK983Ta-H/ GSK983Ta-V Turning CNC System Connection Manual
22
Y2.6
Y2.6
O
Y2.7
Y2.7
O
0V
24V power ground
+24V
24V power output
O
Note:Those points which have been defined functions are fixed in the system that cannot be changed
any more by users. And functions of other points can be programmed by PLC.
Page 27

GSK983Ta-H/ GSK983Ta-V Turning CNC System Connection Manual
23
382.5
400
130
±0.15
130
±0.15
5
8.75
190
USB
C232
53.5
183
8-
8-
130
±0.15
190
±0.15
200
5
71.2
45.5
>110
3
User Installation Drawing
-M
a
T
983Ta-H NC Unit Installation Dimension
Appendix 1 Installation Dimension Drawings
Page 28

GSK983Ta-H/ GSK983Ta-V Turning CNC System Connection Manual
24
983Ta-H Operation Panel Installation Dimension
Drill Pattern Installation Dimension (1:2)
Note: there are several versions concerning the panel rear cover
dimension and the "Drill Pattern and Installation Dimension" is
compatible with all versions; therefore, the drill pattern should be strictly
followed.
Page 29

GSK983Ta-H/ GSK983Ta-V Turning CNC System Connection Manual
25
C232
USB
Drill Pattern Installation Drawing
a
T
983Ta-V NC Unit Installation Dimension
Page 30

GSK983Ta-H/ GSK983Ta-V Turning CNC System Connection Manual
26
983Ta-V 机床操作面板安装尺寸
5
250±0.2
260
5
280±0.2
290
9.568
9.5 271
9 242
开孔及安装尺寸示意图
≥130
48.5
273
244
280±0.2
3.5
3
4-M4
250±0.2
注:面板后罩结构尺寸存在多个版本,但"开
孔及安装尺寸示意图"可以兼容,所以开孔必
须按照此图。
Drill Pattern Installation Dimension
Note: there are several versions concerning the panel rear cover
dimension and the "Drill Pattern and Installation Dimension" is
compatible with all versions; therefore, the drill pattern should be strictly
followed.
983Ta-V Operation Panel Installation Dimension
Page 31

GSK983Ta-H/ GSK983Ta-V Turning CNC System Connection Manual
27
4-
64.8
44.5
135.5
230
116
220
R
983 UNIT(X1)
38.0
38.1
38.2
38.3
38.4
38.5
38.6
38.7
40.0
40.1
40.2
48.5
48.4
48.3
48.2
48.1
48.0
40.7
40.6
40.5
40.4
40.3
48.6
48.7
43.0
43.1
43.2
43.3
43.4
43.5
43.6
43.7
35.7
35.6
35.5
35.4
35.3
35.2
35.1
35.0
34.7
34.6
33.3
33.4
33.5
33.6
33.7
34.0
34.1
34.2
34.3
34.4
34.5
33.2
33.1
33.0
32.7
32.6
32.5
32.4
32.3
32.2
32.1
32.0
0V
Y2.3
Y2.2
Y0.7
Y0.6
Y0.5
Y0.4
Y0.3
Y0.2
Y0.1
Y0.0
Y1.0
Y1.1
Y1.2
Y1.3
Y1.4
Y1.5
Y1.6
Y1.7
Y2.0
Y2.1
+24V
Y6.7
Y6.6
Y6.5
Y6.4
Y6.3
Y6.2
Y6.1
Y6.0
Y2.7
Y2.6
+24V
0V
Y2.4
Y2.5
Y3.0
Y3.1
Y3.2
Y3.3
Y3.4
Y3.5
Y3.6
Y3.7
CC1
Page 32

GSK983Ta-H/ GSK983Ta-V Turning CNC System Connection Manual
28
RSTP
09
SVX
CN1
SRDYX
04
SONX-
VCX
SONX+
09
0V
0V
10
15
14
05
+24V
03
*PCBX
PCBX
*PCAX
PCAX
*PCZX
PCZX
06
11
08
13
12
07
ALM
05
SON
23
FSTP
24
VCMD-
DG
VCMD+
01
32
17
COM+
38
PZOUT+
42
PZOUT-
43
PBOUT+
28
PBOUT-
13
12
PAOUT-
PAOUT+
27
20
SVX
16
19
18
17
04
02
01
03
VCMD-GND
34
DG
DG
32
31
VCMD+
33
PCBX
SONX+
PCAX
PCZX
983Ta NC Unit
+5V
0V
SRDYX
+24V
02
04
03
01
08
09
07
06
VCX
05
10
0V
(D-Sub 44 female)
(D-Sub 15-pin male)
12
14
13
11
15
0V
*PCAX
SONX-
*PCBX
(D-15female)
*PCZX
CN1
DA98D Drive Unit
29
24
23
22
27
26
25
28
21
30
14
13
07
08
12
10
09
11
06
15
05
PBOUT-
PAOUT-
RSTP
44
PZOUT-
COM+
PZOUT+
COM+
43
FSTP
37
38
SON
42
40
39
41
PAOUT+
PBOUT+
36
(D-44 male)
35
SVX
983Ta-00-776A
ALM
FG
FG
Note 1:When X axis is not with brake, the connection of X or Z axis is the same. Connection of X axis with brake, please see to the
following page.。
Note 2:According to this connection method,the rotation direction of the motor is consistent with Cartesian coordinate system, that
is ,seen from motor axle head, the feeding direction is positive direction. If the converse direction is needed, set PA46 parameter of
DA98D to 3(Default value is “0”.
PCAX *PCAX:Encoder feedback A phase differential signal(pulse signal, drive→NC)
PCBX *PCBX:Encoder feedback B phase differential signal(pulse signal, drive→NC)
PCZX *PCZX:Encoder feedback Z phase differential signal(pulse signal, drive→NC)
SONX+/-:Enable signal(switch signal,NC→drive)
ALMX:alarm signal(switch signal,drive→NC)
VCX:Speed control voltage(direct voltage,NC→drive)
983Ta
DA98D
Connection without brake
983Ta-00-776A
Appendix 2 Connection between NC Unit and DA98D Drive Unit
(obsolete product)
Page 33

GSK983Ta-H/ GSK983Ta-V Turning CNC System Connection Manual
29
Power
Distribution
Cabinet
26
ZSL
HOLD+
07
06
HOLD-
38
COM+
SRDYX
04
SONX-
VCX
SONX+
05
14
10
0V
09
03
+24V
15
0V
*PCBX
PCBX
*PCAX
PCAX
*PCZX
PCZX
11
07
12
06
08
13
SVX
CN1
05
ALM
17
32
01
VCMD+
DG
VCMD-
23
SON
24
FSTP
43
PZOUT-
27
PAOUT+
PAOUT-
12
42
PZOUT+
28
PBOUT+
13
PBOUT-
09
RSTP
+24V
HOLD-
ZSL
HOLD+
+24V
HOLD+
ZSL
HOLD-
ZSL
ALM
983Ta-00-776AX
20
16
19
18
17
04
02
01
03
VCMD-GND
34
DG
DG
32
31
VCMD+
33
PCBX
SONX+
PCAX
PCZX
+5V
0V
SRDYX
+24V
02
04
03
01
08
09
07
06
VCX
05
10
0V
(D-Sub 44female)
(D-Sub 15male)
12
14
13
11
15
0V
*PCAX
SONX-
*PCBX
(D-15 female)
*PCZX
CN1
29
24
23
22
27
26
25
28
21
30
14
13
07
08
12
10
09
11
06
15
05
PBOUT-
PAOUT-
RSTP
44
PZOUT-
COM+
PZOUT+
COM+
43
FSTP
37
38
SON
42
40
39
41
PAOUT+
PBOUT+
36
(D-44male)
35
SVX
SVZ
DA98D Drive Unit
FG
FG
983Ta NC Unit
983Ta
DA98D
Connection without brake
983Ta-00-776AX
Page 34

GSK983Ta-H/ GSK983Ta-V Turning CNC System Connection Manual
30
No.
Date
Version
Content
1
2012-6-19
First Version
GSK983Ta-H/ GSK983Ta- V Turning CNC System Connection
Manual
Version Upgrading Records
 Loading...