

Page 1

02506- 17
GRILLO FD900 4WD
OPERATOR’S MANUAL
MANUALE DELL’OPERATORE
MANUEL D’UTILISATION
BEDIENUNGSANLEITUNG
MANUAL DE INSTRUCCIONES
Page 2

INDEX
Safety rules
Instructions
Warnings Pag. 5
Identification and servicing Pag. 6
Technical specifications Pag. 7
Putting the machine into service Pag. 8
Instructions for use Pag. 8
Maintenance and lubrication Pag. 11
Implements Pag. 17
Pictures Pag. 72
EC Declaration of conformity
INDICE
Norme antinfortunistiche
Istruzioni
Avvertenze Pag. 18
Identificazione e assistenza Pag. 20
Caratteristiche tecniche Pag. 21
Messa in opera della macchina Pag. 22
Istruzioni d’uso Pag. 22
Manutenzione e lubrificazione Pag. 26
Accessori Pag. 32
Illustrazioni Pag. 72
Certificato di conformità CE
INDEX
Règles de sécurité
Instructions
Mises en garde Pag. 33
Identification et assistance Pag. 34
Caractéristiques techniques Pag. 35
Mise en service de la machine Pag. 36
Mode d’emploi Pag. 36
Maintenance et lubrification Pag. 39
Accessoires Pag. 45
Photos Pag. 72
Certificat de conformité CE
INDEX
Sicherheitsvorschriften
Anleitung
Sicherheitsrelevante Hinweise Pag. 46
Identifikation der Maschine und Kundendienst Pag. 47
Technische Daten Pag. 48
Inbetriebnahme der Maschine Pag. 49
Betriebsanleitung Pag. 49
Wartung und Schmierung Pag. 52
Zubehör Pag. 58
Abbildungen Pag. 72
EG-Konformitätserklärung
ÍNDICE
Normas de seguridad
Instrucciones
Advertencias Pag. 59
Identificación y asistencia Pag. 60
Características técnicas Pag. 61
Puesta en servicio de la máquina Pag. 62
Instrucciones de uso Pag. 62
Mantenimiento y lubricación Pag. 65
Accesorios Pag. 71
Fotos Pag. 72
Certificado de conformidad CE
Page 3
SAFETY SYMBOLS - SIMBOLOGIA PER LA SICUREZZA - SYMBOLOGIE POUR LA SECURITE –
SICHERHEITSSYMBOLE- SIMBOLOGÍA DE SEGURIDAD
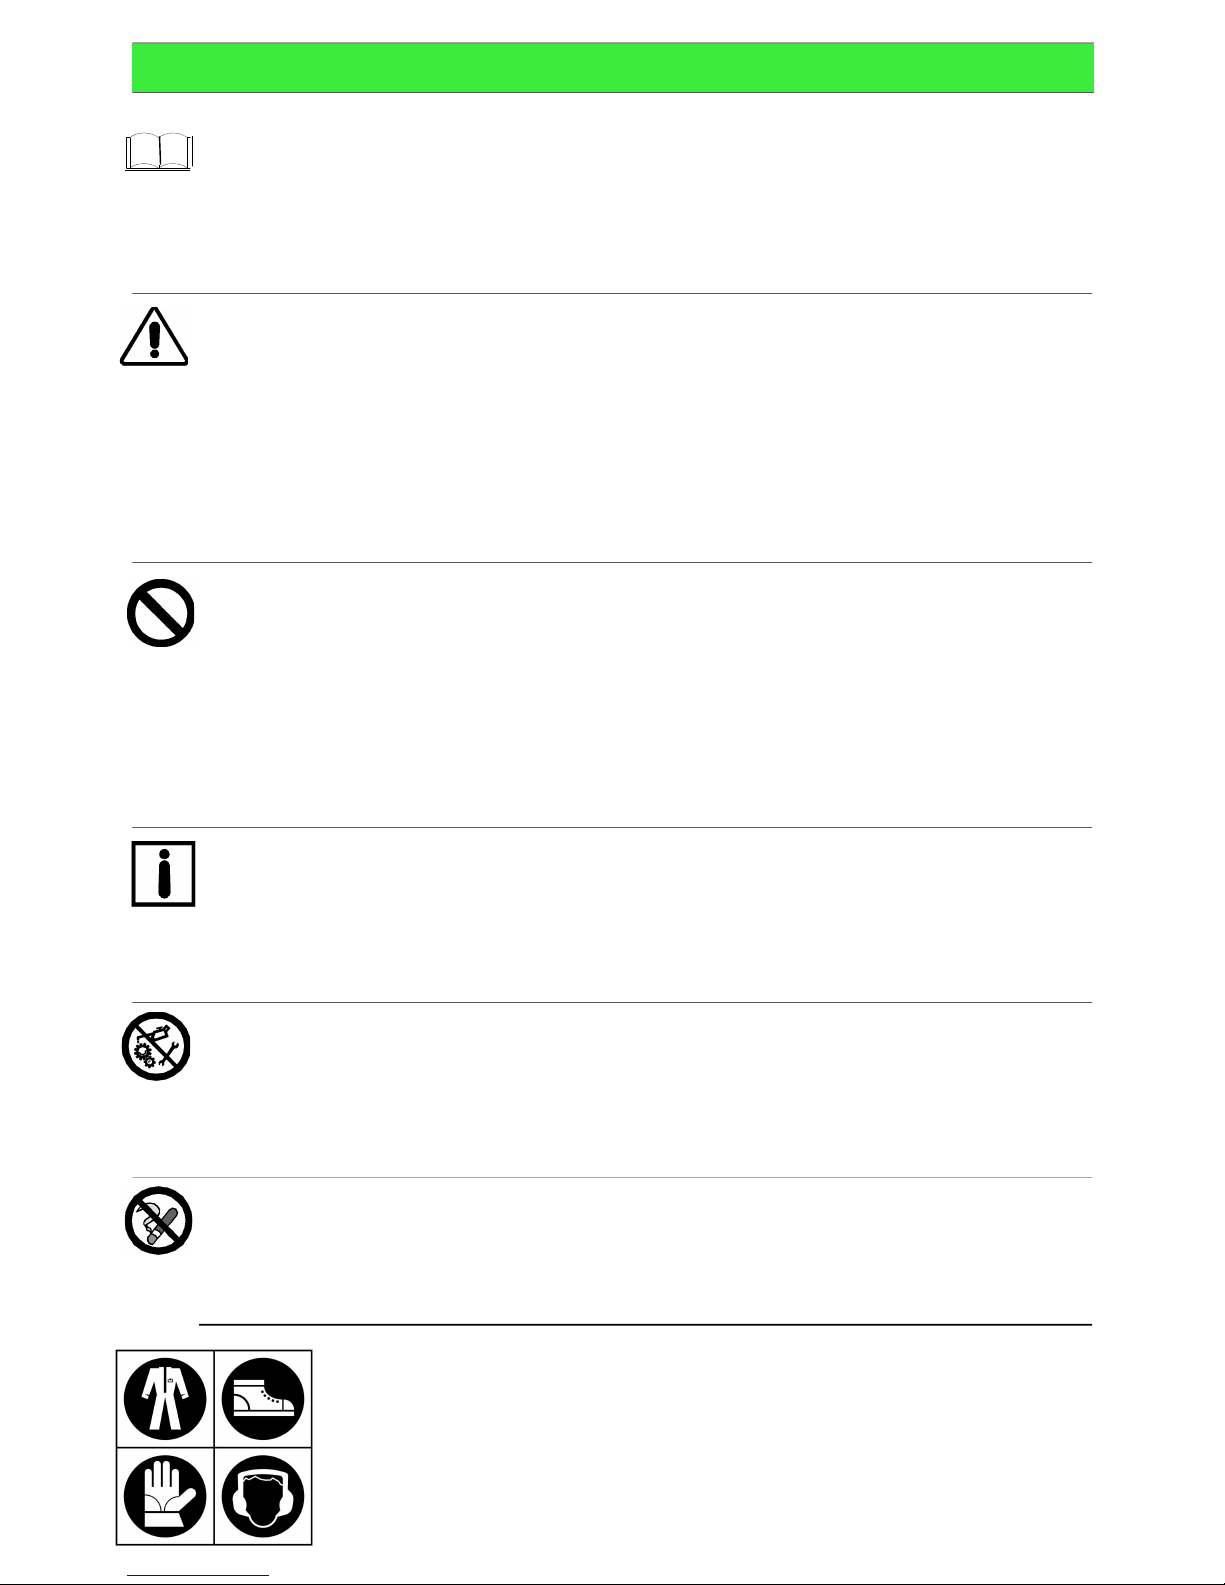
OPEN MANUAL- means that you must read the operator's manual very carefully.
MANUALE APERTO - significa che dovete leggere attentamente il manuale di uso e manutenzione.
MANUEL OUVERT – signifie qu'il faut lire avec attention le présent manuel.
OFFENES HANDBUCH – bedeutet, dass Sie die Gebrauchs- und Wartungsanleitung aufmerksam durchlesen müssen.
MANUAL ABIERTO – es decir que hay que leer muy atentamente el manual del operador.
CAUTION! - means that you have to pay particular attention to the operation you have to carry out, in particular if there is the
indication “DANGER”.
ATTENZIONE! - significa che dovete porre particolare attenzione all’operazione che dovete effettuare, in particolare se vi è anche
l’indicazione di “Pericolo”.
ATTENTION! - signifie qu'il faut faire particulière attention dans l'opération que vous allez faire, en particulier s'il y a aussi
l'indication “DANGER”.
VORSICHT! - bedeutet, dass Sie besondere Aufmerksamkeit beim Durchführen des Vorgangs haben müssen, insbesondere wenn
auch der Hinweis “GEFAHR” aufgeführt ist.
ATENCIÓN! - es decir que hay que poner mayor atención en la operación a ejecutar si, en particular cuando hay también la
indicación “Peligro”.
INTERDICTION, YOU MUST NOT DO THAT! - means that it is absolutely forbidden to carry out the operations reported under this
symbol because they could lead to mortal danger.
DIVIETO, NON FARE! - significa che non dovete assolutamente fare le operazioni riportate sotto questo simbolo, potrebbe
comportare un pericolo mortale.
INTERDICTION, NE PAS FAIRE! - signifie qu'il est absolument interdit d' effectuer les opérations reportées sous cette indication,
car elles pourraient conduire au danger de mort.
VERBOT, strengstens untersagt! - bedeutet, dass der Vorgang unter diesem Symbol absolut nicht durchgeführt werden darf, da er
zur einer lebensgefährlichen Situation führen könnte.
PROHIBICIÓN, NO LO HAGAN! - es decir que no hay que hacer absolutamente las operaciones bajo este símbolo, podría
comportar un peligro mortal.
NOTE, you have to pay particular attention to the note put next to this symbol
NOTA, dovete porre particolare attenzione alla nota posta accanto a questo simbolo.
NOTE, il faut faire attention particulière à la note mise à côté de ce symbole.
ANMERKUNG, besondere Aufmerksamkeit muss auf die Anmerkungen neben diesem Symbol gelenkt werden.
NOTA, hay que poner atención particular en la nota puesta a lado de este símbolo.
You must not repair nor lubricate the machine with moving parts or with the engine put on.
Non riparare o lubrificare la macchina con organi in movimento o motore acceso
Ne pas réparer ou lubrifier la machine avec des parties en mouvement ou à moteur en marche.
Niemals bei bewegenden Objekten oder bei laufendem Motor Reparationen oder Einschmierungen durchführen.
No reparar ni lubrificar la máquina con órganos en movimiento o motor en marcha.
You must not smoke, light matches or lift flames, trigger frames nor cause sparks.
Vietato fumare, accendere fiammiferi o fiamme, lasciare fiamme libere o creare scintille.
Il est interdit de fumer, allumer des allumettes ou du feu, laisser des flammes libres ou de causer des étincelles.
Es ist untersagt zu Rauchen, Streichhölzer oder Feuer anzuzünden, Flammen auslösen oder Funken verursachen.
Prohibido fumar, encender cerillas o fuego, dejar llamas o crear chispas.
Use personal protective equipement
Utilizzare mezzi di protezione individuali
Utilisez l'équipement de protection individuelle
Individuelle Schutzausrüstung benutzen
Utilizar dispositivo de proteccion individual
Page 4
GENERAL SECURITY RULES
NORME DI CARATTERE GENERALE SULLA SICUREZZA
SICHERHEITSHINWEISE
RÈGLES GÉNÉRALES DE SÉCURITÉ
NORMAS DE CARÁCTER GENERAL SOBRE LA SEGURIDAD
NORMAS DE CARÁCTER GENERAL ACERCA DA SEGURANÇA
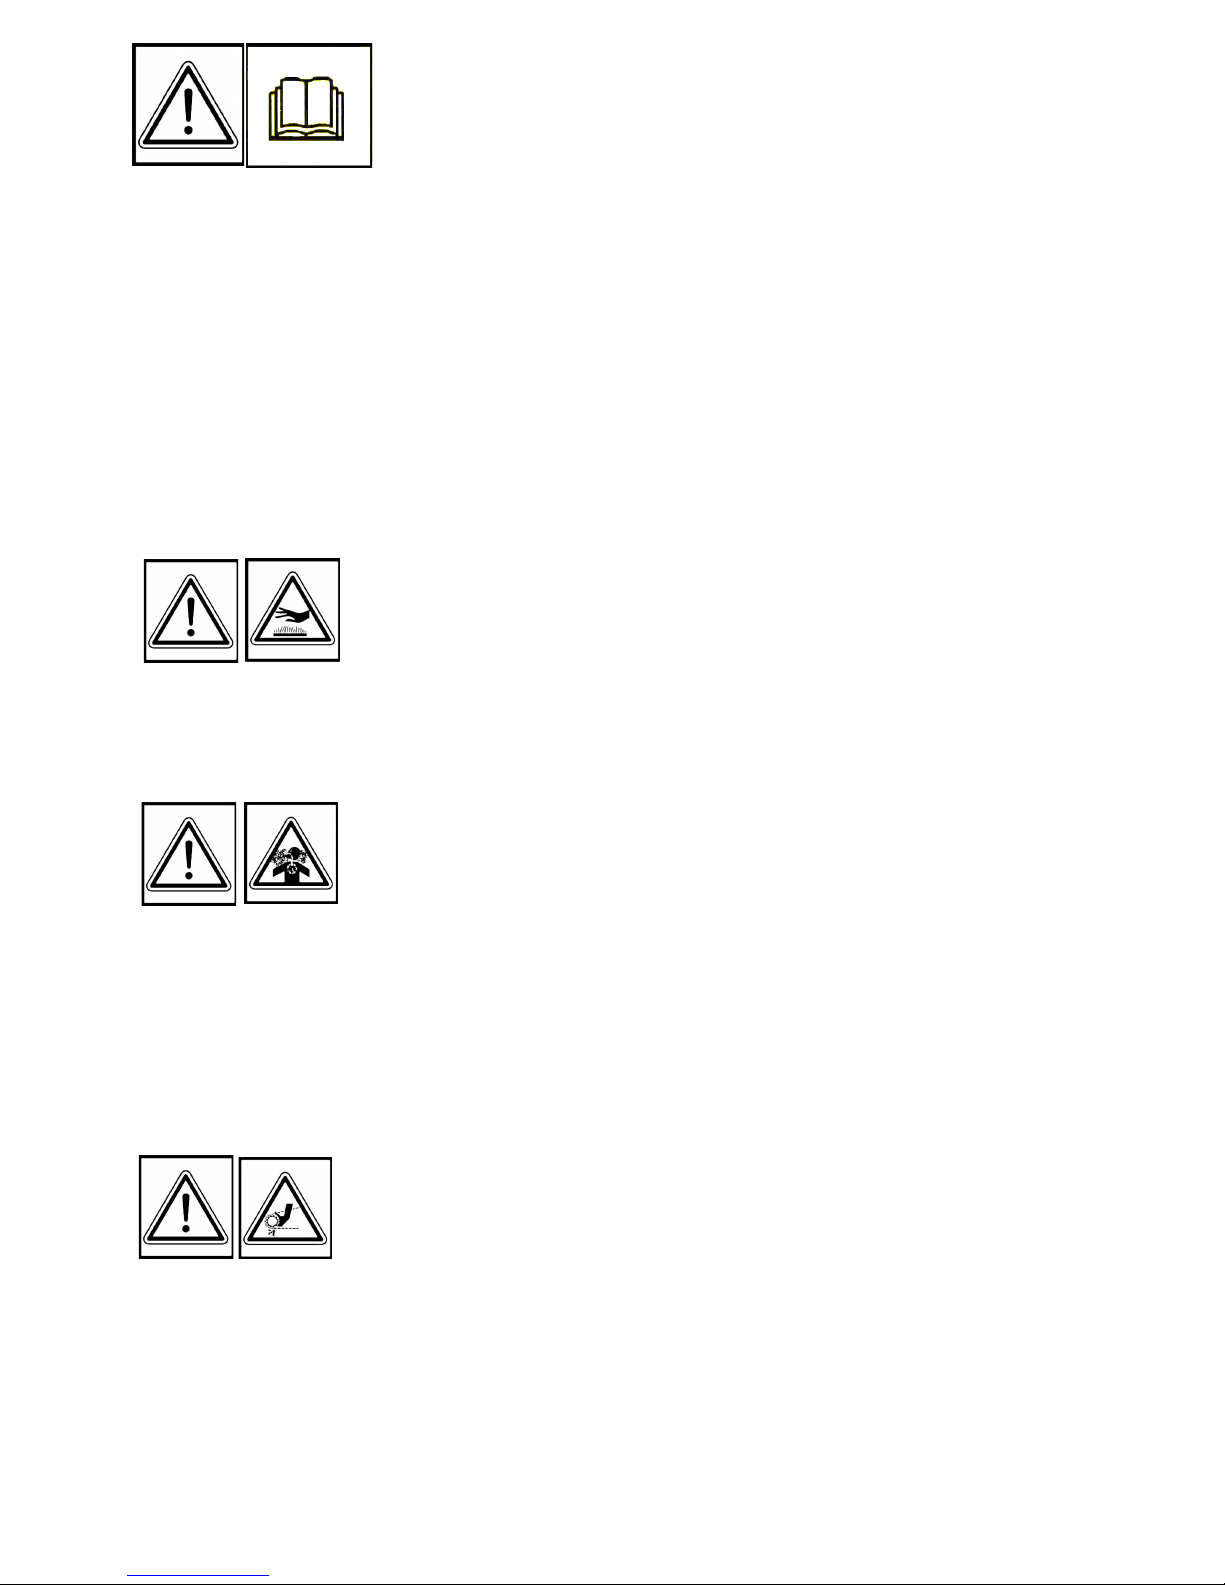
Pay attention to symbol DANGER! It points out all most dangerous operations according to the situation. All safety rules are important and therefore must be strictly
observed. Always keep this handbook within the reach, read it carefully and learn how to use the equipment in a safe way. Let nobody, not provided with necessary
information, work with the equipment.
Fare attenzione al simbolo PERICOLO! Esso indica la presenza delle principali situazioni di pericolo. Tutte le norme antinfortunistiche contente sono importanti e
vanno rispettate. Tenere sempre questo manuale a portata di mano, leggerlo attentamente ed imparare ad usare l’attrezzatura in modo sicuro. Non permettere che
qualcuno operi con questa attrezzatura senza aver ricevuto istruzioni esaurienti.
Attention au symbole DANGER! Il indique la présence des principales situations de danger. Toutes les normes contenues pour la prévention des accidents sont
importantes et doivent être respectées scrupuleusement. Garder toujours ce manuel à la portée de la main, le lire attentivement et apprendre à utiliser ce matériel
en toute sécurité. Ne pas permettre que d’autres personnes utilisent ce matériel sans avoir reçus des instructions exhaustives.
Achtung - die mit dem Symbol GEFAHR! gekennzeichneten Hinweise weisen auf potentielle Gefahrensituationen hin. Alle sicherheitsrelevanten Hinweise in diesem
Handbuch sind sehr wichtig und müssen unbedingt befolgt werden. Bewahren Sie dieses Handbuch stets griffbereit auf, lesen Sie es aufmerksam durch, und lernen
Sie, die Maschine und die gesamte Ausrüstung sicher zu benutzen. Die Maschine darf nur von Personen benutzt werden, die vorher entsprechend unterwiesen
wurden.
Preste atención al símbolo ¡PELIGRO! Indica la presencia de situaciones importantes de peligro. Todas las normas de prevención de accidentes detalladas son
importantes y deben respetarse estrictamente. Conserve este manual al alcance de la mano, léalo atentamente y aprenda a utilizar el equipamiento de modo
seguro. No permita que otras personas operen con este equipamiento sin haber recibido instrucciones exhaustivas.
Take special care not to touch hot parts of the engine.
Prestate particolare attenzione a non entrare in contatto con parti surriscaldate
del motore.
Veiller tout particulièrement à ne pas toucher des éléments surchauffés du
moteur.
Achtung – keine heißen Motorteile berühren!
No tocar partes recalentadas del motor.
Tome muito cuidado para não entrar em contacto com as partes aquecidas do
motor.
Engine exhaust fumes can cause sickness or death. If it is necessary to run an
engine in an enclosed area, use an exhaust pipe extension to remove the
fumes. Always try to work in a well ventilated area.
I gas di scarico possono causare malanni o morte. Se è necessario mettere in
moto un motore in uno spazio chiuso, usare una prolunga tubo di scarico per far
uscire il fumo. Lavorare in una zona ben ventilata.
L’exhalation des gaz d’échappement peut être cause d’intoxication ou de mort.
S’il est vraiment nécessaire d’allumer le moteur à l’intérieur, appliquer au tuyau
d’échappement un autre tuyau extensible pour permettre la sortie des gaz. Il est
toujours mieux de travailler en plein air.
Auspuffgase können Übelkeit oder Tod verursachen. Wenn es notwendig ist,
einen Motor in einem geschlossenen Raum laufen zu lassen, benützen Sie eine
Verlängerung, um das Auspuffgas abzuleiten. Versuchen Sie immer in einem
gut belüfteten Raum zu arbeiten.
Los gases de escape pueden provocar enfermedades o muerte. De tener que
poner en marcha un motor en un espacio cerrado, usar una prolongación del
tubo de escape para que salga el humo. Trabajar en una zona bien ventilada.
Os gases de escape podem causar danos ou morte. Caso seja necessário
fazer com que o motor funcione num espaço fechado, utilize uma extensão
para o tubo de escape que os fumos sejam expulso para o exterior. Trabalhe
numa área bem ventilada.
Caution! Never touch moving pulleys or belts. They can be very dangerous.
Never do maintenance with engine running.
Attenzione! Non toccare mai pulegge o cinghie in movimento, creano gravi
danni alla persona. Non fare manutenzione col motore in moto.
Attention! Ne jamais toucher ni poulies ni courroies en mouvement, elles
peuvent provoquer des accidents aux personnes. Ne pas faire l’entretien quand
le moteur est en marche.
Vorsicht! Nie laufende Riemenscheiben oder Treibriemen anfassen, da es
gefährlich ist. Nie bei laufendem Motor Instandhaltung machen.
¡Atención! No tocar jamás poleas o correas en movimiento, porque pueden
crear graves daños a la persona. No efectuar el mantenimiento con el motor en
marcha.
Atenção! Nunca toque nas polias ou correias em movimento devido ao alto
risco de ferimentos. Nunca faça a manutenção da máquina com o motor ligado.
Page 5
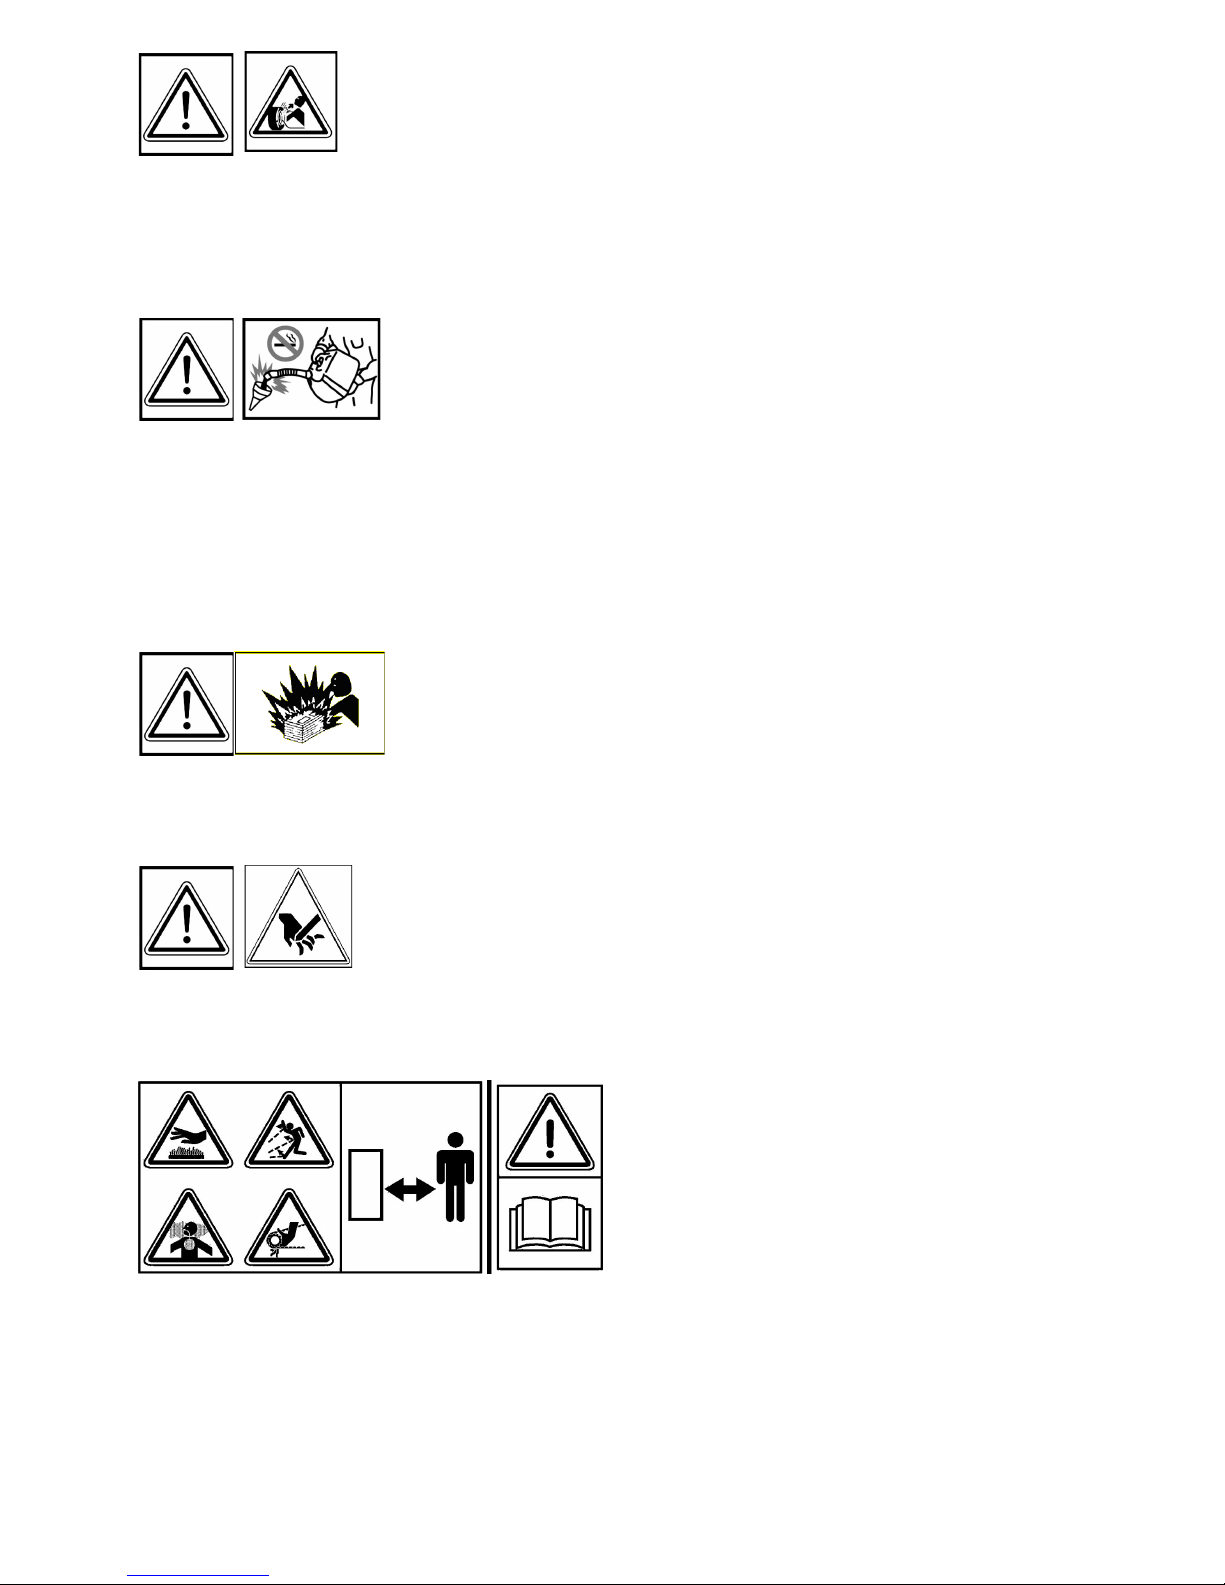
A burst which separates the tyre from the rim parts can cause serious injury or
death.
La separazione fra pneumatico e cerchione, causata dall’esplosione del
pneumatico, può provocare serie ferite o addirittura la morte.
La séparation entre le pneu et la jante, provoquée par l’explosion d’une roue
peut causer des dommages, blessures ou la mort.
Die Trennung der Räder von den Felgen durch Explosion kann schwere
Verletzungen oder den Tod verursachen.
La separación entre el neumático y la llanta producida por la explosión del
neumático puede provocar graves herida e incluso la muerte.
A separação entre o pneumático e o aro, provocada pela explosão do
pneumático, pode causar graves ferimentos ou até mesmo a morte.
Handle fuel with care, it is highly flammable: Do not refuel machine while
smoking, when machine is near an open flame or sparks, or when the engine is
running. Stop the engine.
Maneggiare il carburante con cura, è altamente infiammabile; non fate
rifornimento mentre fumate, o vicino a fiamme o scintille, o quando il motore è
acceso.
Manier avec soin le carburant car c’est très inflammable. Ne pas remplir le
réservoir si vous êtes en train de fumer ou pendant que la machine est près du
feu ou d’étincelles ou encore pendant que la machine travaille. Arrêter le
moteur.
Treibstoff vorsichtig handhaben, da er sehr entzündbar ist: beim Tanken nicht
rauchen. Nicht tanken, wenn die Maschine in der Nähe von Flammen oder
Funken ist oder wenn der Motor läuft. Immer den Motor abschalten.
Manejar el combustible con cuidado porque es sumamente inflamable; no
repostar mientras se fuma o cerca de llamas o chispas, o cuando el motor está
encendido.
Manuseie o carburante com cuidado, pois este è altamente inflamável; não
fume durante o abastecimento da máquina ou enquanto o motor estiver ligado,
não o aproximado de chama ou de faíscas.
Prevent battery explosions: keep sparks, lighted matches and open flames
away from the top of the battery. Battery gas can explode.
Per prevenire l’esplosione della batteria, tenete scintille, fiammiferi accesi e
fiamme lontani dalla stessa. Il gas della batteria può esplodere.
Prévenir l’explosion de la batterie: tenir les étincelles, les allumettes et le feu
loin de la batterie. Le gaz de la batterie peut exploser.
Vorbeugung der Batterie-Explosion. Entfernen Sie Funken, Zündhölzer und
Flammen von der Batterie. Das Batteriegas kann explodieren.
Para prevenir la explosión de la batería, mantener chispas, cerillas encendidas
y llamas lejos de la misma. El gas de la batería puede explotar.
Para prevenir explosão da bateria ter centelhas, fósforos acendido e chamas
longe da mesma. O gás da bateria poderia explodir.
Rotating blades are dangerous. Keep hands and feet away. Do not clean the
attachment when the engine is running.
Le lame in movimento sono pericolose. Tenere lontano mani e piedi. No pulire
l'attrezzo con il motore in moto.
Les lames en rotation sont dangereuses. Ne pas approcher mains et pieds. Ne
pas nettoyer l'outil quand le moteur est en marche.
Arbeitende Messer sind gefährlich. Hände und Füße fernhalten. Niemals bei
laufendem Motor reinigen.
Las cuchillas en movimiento son peligrosas . Mantener lejos los pies y las
manos. No limpiar la herramienta con el motor en marcha.
As facas em movimento são perigosas. Mantenha as maos e os pes afastados.
Nao limpe o equipamento com o motor em movimento.
DANGER! READ THE INSTRUCTION MANUAL. KEEP SAFETY DISTANCES.
PERICOLO! LEGGERE IL MANUALE D’ISTRUZIONE. TENERE LONTANO LE
PERSONE.
DANGER! LIRE LE MANUEL D’INSTRUCTIONS. RESPECTER LES
DISTANCES DE SÉCURITÉ
GEFAHR! DIE GEBRAUCHS ANLEITUNG DURCHLESEN. NICHT IN DER
NÄHE VON ANDEREN PERSONEN MÄHEN.
PELIGRO! LEER LAS INSTRUCCIONES. MANTENER ALEJADAS LAS
PERSONAS.
PERIGO! LER O MANUAL DE INSTRUÇÕES. MANTER AS PESSOAS
AFASTADAS.
Page 6
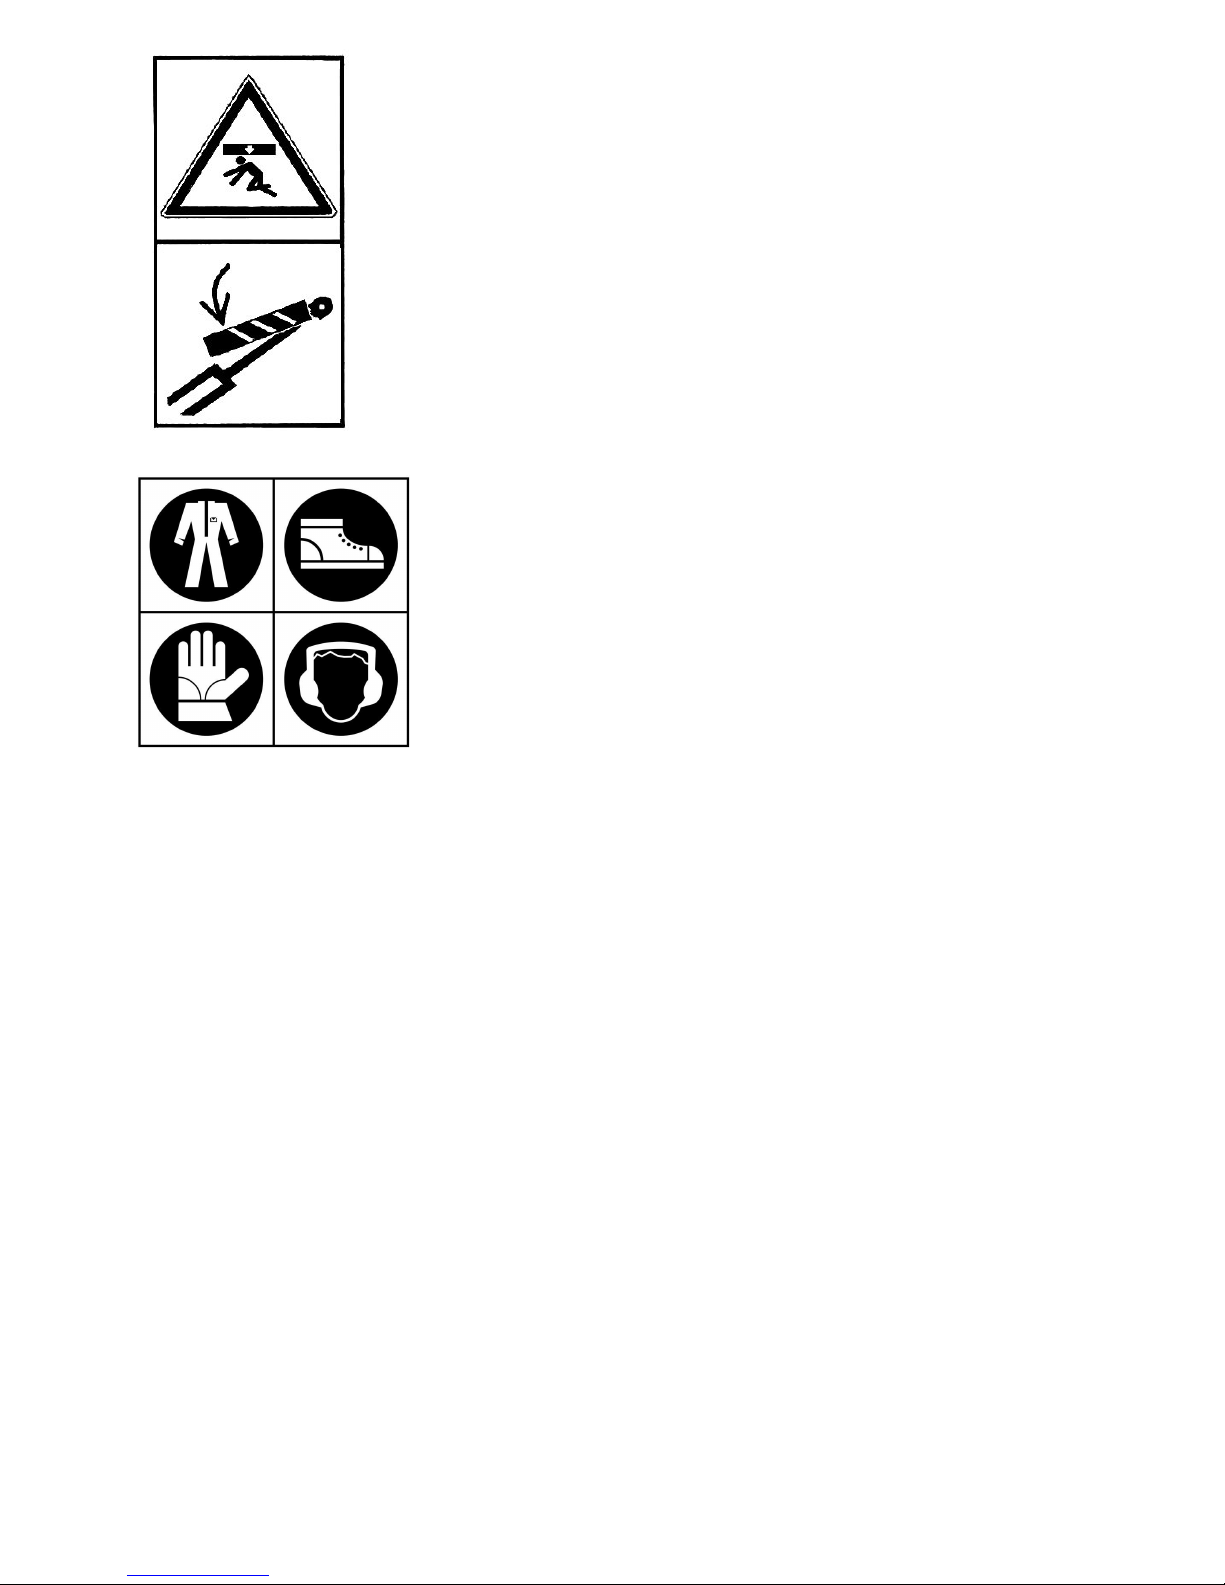
CAUTION! You must not stay for any reason under the lifted tipping
body without any support.
ATTENZIONE! Non sostare per nessun motivo sotto il cassone
ribaltabile sollevato e non puntellato.
ATTENTION! Ne pas rester pour aucune raison sous la benne
relevée sans aucun support.
ACHTUNG! Auf keinen Fall unter der angehobenen und ohne jegliche
Stütze versehenen Pritsche stehen
¡PELIGRO! En ningún caso estar por debajo de la plataforma
elevada y provista de ningún apoyo.
ATENÇÃO! Em nenhum caso, ser inferior a plataforma elevada e é
fornecida sem suporte
Before using the machine, it is mandatory to put on the appropriate individual
safety devices: body protection, protection gloves, security shoes, ear
protection.
Prima di utilizzare la macchina, è obbligatorio indossare gli appositi dispositivi di
sicurezza individuali: protezione del corpo, guanti di protezione, calzature di
sicurezza, protezione dell’udito.
Avant d’utiliser la machine, il est obligatoire de mettre les dispositifs individuels
de sécurité appropriés: protection du corps, gants de protection, chaussures de
sécurité, protection de l’ouïe.
Vor dem Gebrauch der Maschine ist es vorgeschrieben, die geeignete
persönlichen Schutzkleidung anzuziehen: Körperschutz, Schutzhandschuhe,
Sicherheitsschuhe, Gehörschutz.
Antes de utilizar la máquina es obligatorio ponerse los dispositivos individuales
de seguridad apropiados: protección del cuerpo, guantes de protección,
calzado de seguridad, protección del oído.
Page 7

Translation of the original instructions
FD900 4WD
HYDROSTATIC LAWNMOWER
Dear Customer,
Thank you for having purchased our Grillo FD900. We are confident that this machine will fully satisfy all your
requirements. To use and maintain the mower at its best, we urge you to read and observe carefully the directions
given in this handbook; this will ensure the best possible results and will also safeguard your investment. Please
keep this handbook in a safe place. It should accompany the machine throughout its working life.
GENERAL DESCRIPTION AND INTENDED USE
The Grillo machine FD900 is a lawnmower with operator on board, designed for the cut and the collection of grass
and for foliage collection.
ATTENTION! Read carefully before turning the engine on. The following
warnings are important for operator safety!
WARNINGS
Caution is the main safeguard in preventing accidents. We urge you to read the warnings that follow when using the
mower, before starting any work at all. Improper use of the mower and its equipment can be dangerous, observe
the precautions set out below:
1) Read the whole of this manual before turning on and using the mower for the first time.
2) Pay particular attention to the warnings and safety labels set out around the mower.
3) Before allowing others to use the machine, make sure they are aware of the safety precautions and how it is
used.
4) Before starting work, always change into suitable working clothes, gloves, boots and goggles.
5) Wear special acoustic protection (ear-caps) during work.
6) Before turning on the machine, make sure there are no people around it; especially children.
7) Before driving the machine in reverse, make sure there are no people or obstacles in the way.
8) Check the condition of the ground before mowing. Make sure there are no stones, sticks or other objects,
which could be run over and become a danger when projected.
9) If any impact with a foreign object occurs, disengage the blade, turn off the engine, remove the ignition key
and examine the lawnmower, if the machine vibrates have it repaired.
10) Before getting off the mower, turn off the engine, disengage the PTO, remove the ignition key and lower the
cutting deck to its lowest position.
11) Always drive slowly along uneven paths.
12) Keep the speed down when driving down slopes.
13) Always turn slowly when driving downhill.
14) The user is always liable for any damage caused to third parties.
15) Deformed or damaged blades must always be replaced, never just repaired.
16) Always use original Grillo spare parts and accessories.
17) Only work in sunlight or under effective artificial lighting.
18) Only store fuel in suitable containers designed for the purpose.
19) Be very careful when working close to a road.
20) Lift and empty the grass catcher only when the machine is motionless and on a flat ground.
21) Allow the engine to cool before putting the machine away in a closed environment.
IMPROPER USE TO BE AVOIDED
22) Do not allow passengers to ride on the machine.
23) The use of this machine is prohibited to children under 16 years old.
24) Do not operate the machine when tired or after drinking alcohol.
25) Do not operate the mower near to ditches or verges which could collapse under the weight of the machine,
especially when the surface is loose or wet.
26) Do not stop when working up or down slopes.
27) Do not allow any fuel spillage and after filling the tank wipe away any spilled fuel before starting the engine.
28) Do not tamper with the safety devices or disable them.
29) Do not change the engine settings, especially the maximum r.p.m.
30) Do not rest heavy loads on the seat, the starter safety device could become disengaged.
31) Never attempt any adjustments or cleaning with the engine running.
32) Never allow anyone to check the machine while you are seated at the controls with the engine running.
33) Do not move the machine without the deck, because it may turn over and be very dangerous.
5
Page 8

Translation of the original instructions
34) Do not lift the grass-catcher when the machine is moving.
35) Replace worn or damaged exhausts.
FURTHER SAFETY ADVICE
The above mentioned warnings could never cover all risks, if the operator does not use the mower correctly.
Therefore we recommend for your safety the following advice:
36) The mower blade is very dangerous when rotating, never put hands or feet underneath the mower deck.
37) Do not drive in reverse at high speed.
38) It is dangerous to operate the steering wheel abruptly with the motor at full power.
39) Fill the tank with fuel before starting the engine. Only refuel outdoors, always turn off the engine, keep
away from sparks or naked flames, do not smoke! Always replace the cap on the fuel tank and those on fuel
containers properly.
40) If the fuel tank has to be emptied, only do so outdoors.
41) Do not operate the mower over gravel which could be sucked up and drawn into the blade, becoming very
dangerous.
42) If you have children, hide the ignition key after using the machine.
43) CAUTION: to avoid the risk of fire, keep the engine compartment, exhaust, discharge outlets, battery, tank
area and fuel pipes free of grass, leaves, dirt, etc.
44) Do not store the machine inside any building where the engine fumes can reach naked flames, sparks or bare
electrical wires.
45) Always put in place the red safety hooks on the hydraulic cylinders for the lifting of the grass-catcher (fig. 16)
before accessing the engine.
Remove the implements and turn off the engine:
a) before cleaning obstructed points.
b) before checking or repairing the lawnmower.
c) when the machine hits a foreign body (check the mower deck to see if it is damaged and make repairs
before you operate).
d) if abnormal vibration occurs, stop and inspect the machine. Contact the nearest Grillo authorised service
centre if you need help.
IDENTIFICATION AND SERVICING
The Grillo FD900 is provided with an ID plate
showing the serial number, located on the side of the
chassis.
SERVICING
This manual provides the instructions for using the mower. For a correct basic maintenance contact an authorized
dealer.
SPARE PARTS
Original spares should always be used as these are the only ones which offer safety and interchangeability. Each
order should include the machine serial number and the code of the spare part needed. For engine spare parts,
refer to the information in the specific manual.
WARRANTY
The guarantee is given in compliance with the current law. The dealer will have to give the client a copy of the
registration card of the machine, which they will print up from the Grillo website. The engine guarantee is covered by
the relevant manufacturer.
RECOMMENDED SPARE PARTS TO BE KEPT ON STOCK
1 set of lawnmower blades
1 set of belts
1 engine air filter
1 engine oil filter
1 throttle cable
6
Page 9

Translation of the original instructions
A set of electrical equipment fuses
HOW TO ORDER SPARE PARTS
Always state the machine serial number and the code of the spare part needed. Contact our service centres. Our
address is:
GRILLO S.p.A.
Via Cervese 1701 – 47521 CESENA (FC) ITALY
Tel. 0039 – 0547 – 633.111 / Fax 0039 – 0547 – 632.011
Web site: www.grillospa.it / e-mail: grillo@grillospa.it
TECHNICAL SPECIFICATIONS
MODEL: hydrostatic lawnmower with front cutting deck.
ENGINE: YANMAR 3TNV76 Diesel 1116 cc (26 HP @ 3000 r.p.m.) 3 cylinders liquid-cooled with
electric valve, provided with manual and automatic device for radiator cleaning.
FUEL TANK: 31 litres.
HYDRAULIC OIL TANK: 6,3 litres.
STARTER: electric 12V.
TRACTION: hydraulic traction with 4 driving wheels (permanent integral traction also on tight turning
radius).
AUTOMATIC DIFFERENTIAL LOCK AND MANUAL WITH PUSH BUTTON.
GEARBOX: hydrostatic transmission with 4 hydraulic engines on the 4 wheels.
STEERING SYSTEM: hydraulic drive with steering wheel.
CLUTCH: electromagnetic for PTO, with magnetic blade brake.
SPEED: from 0 to 14,5 km/h continuously variable.
WHEELS front: 23x 10.50-12 TURF WHEELS; rear: 18×7.50-8 TURF WHEELS.
SEAT: Grammer super comfort and adjustable sprung seat. With side steel protections.
STEERING WHEEL: fixed on steering column and adjustable.
TURNING RADIUS: 370 mm.
AUTOMATIC FEATURES: automatic disengagement of blades when the grass catcher is full.
BRAKE: drum service and parking brakes.
GRASS CATCHER: 750 litres. Automatic opening with hydraulic discharge.
DISCHARGE HEIGHT: 1950 mm REAR PROJECTION: 300 mm
MOTORISED BAFFLE PROVIDING FULL AND EVEN GRASS CATCHER FILLING.
HYDRAULIC CUTTING DECK LIFTING AND GRASS CATCHER DISCHARGE
CUTTING DECK: with collection
CUTTING HEIGHT: from 20 to 100 mm, hydraulic and continuously adjustable from the driving
position.
CUTTING WIDTH: 126 cm.
HOURLY MOWING CAPACITY: 9.000 m²/h.
ROAD HOMOLOGATION LIGHTS: as a standard feature.
ATTACHMENTS: 126 cm (± 52 in) cutting deck with collection.
SIZE (with cutting deck): Length: 2910 mm - Width: 1330 mm - Height: 1660 mm
GROUND CLEARANCE: 150 mm
DISTANCE BETWEEN AXLES: 1190 mm
WEIGHT (without cutting deck): 795 kg - WEIGHT (with cutting deck): 970 kg
7
Page 10

Translation of the original instructions
PUTTING THE MACHINE INTO SERVICE
- Make sure the machine is complete and that it has not been damaged during transport.
- Check the levels of the engine oil (fig. 3) and hydrostatic transmission (fig. 4).
- Check the tyre pressures:
Front wheels 23×10.50 – 12 (1.4 bar)
Rear wheels 18×8.50 – 8 (1.4 bar)
- Check the battery voltage, it must not be inferior to 12.5 Volts; recharge if necessary. To get access to the
battery remove the knob of the throttle lever (fig. 5), loosen the dashboard fixing screws and remove the dashboard.
Do not start the machine if the battery is not properly connected or damages to the charge regulator and to the
electronic control modules may occur.
- If a dry battery has been supplied with separate acid, to put the machine into service proceed as follows:
1) pour in the acid and wait 2 hours;
2) charge the battery with a charger set to 12 Volts on a slow charge for 2 hours.
Caution: If this procedure is not followed, acid may leak out of the battery during work and damages to the
battery may occur.
BATTERY
Caution! The gases released by the battery are explosive, so keep it away from naked flames or sparks. Check the
level of the liquid at regular intervals and keep the terminals greased.
Important:
- Do not invert the battery poles.
- Do not run the lawnmower without the battery, as it is equipped with a charge regulator.
- Be careful not to cause any short circuits.
RUNNING IN – CAUTION!!
Change the engine oil and filter after the first 50 working hours. Check for oil leaks or loose screws, especially those
fixing the blades and the wheels. Adjust the tension on the PTO belts via the nuts placed on the spring: the spring
has to be adjusted at the length indicated by the red arrow (fig. 6). Adjust the cutting deck belt tension via the nut
placed on the spring: the spring has to be adjusted at the length indicated by the red arrow (fig. 7).
INSTRUCTIONS FOR USE
Before switching the engine on always check that:
- the radiator coolant liquid is up to the level (fig. 8);
- the engine cooling intake grid is clear (fig. 9);
- the engine oil is up to the level (fig. 3);
- the hydraulic oil is up to the level (fig. 4);
- both the forward and reverse pedals (fig. 1 n° 1 e n°2) are in the “stop” position;
- the PTO button is in the neutral position (fig. 1 n°26);
- the air filter is clean (fig. 10);
- the grid inside the grass catcher is clean (fig. 11); to remove it, insert the grass catcher door safety lock pin (fig.
12) and use the lever (fig. 11);
- the cutting deck and the load chutes are thoroughly cleaned and properly mounted.
Fill the fuel tank with diesel using a funnel fitted with a very fine mesh filter (fig. 1, n°13).
STARTING THE ENGINE
Insert the ignition key (fig. 1 n° 4) and turn it to warm-up the glow plugs. When the plug light goes out (after
approximately 15 seconds), turn the key again and release it as soon as the engine starts. To switch off the engine
turn the key to the “0” position.
SEAT ADJUSTMENT
The seat moves forward and backwards. Position the seat where you have the best control of the machine and are
most comfortable. To adjust the seat pull the lever upward and move the seat forward or rearward. To adjust the
seat suspension pull the seat suspension lever out. While sitting in the seat, adjust the seat suspension as follows
(fig.1, n°17) :
- for firmer suspension, pull the seat-suspension lever up as many times as necessary.
- for softer suspension, push the seat-suspension lever down as many times as necessary.
Once the seat-suspension has been adjusted, push the lever back in.
To tilt the back of the seat, pull the lever upward.
8
Page 11

Translation of the original instructions
STARTING WORK
1) Lift the deck from the ground.
2) Adjust the cutting height using the button (fig.1 n° 12).
3) Adjust the seat (fig. 1 n° 15, 16, 17).
4) Lower the cutting deck (fig. 1 n° 7).
5) Speed up the engine half way (fig. 1 n° 6). Do not engage the blades with the engine at maximum r.p.m, but
bring it to half speed and then engage the PTO (fig. 1 n° 26). Attention: While mowing the button has to be kept
in floating position (that is pushed forward). Always engage the blades outside the area to cut, to clean both the
cutting deck and the load chutes and to avoid putting too much strain on the clutch.
6) Gently press the forward pedal (fig. 1 n° 1) and start work. Use the pedal next to it (fig. 1 n° 2) to engage the
reverse gear.
7) The emergency brake pedal (fig. 1 n° 3) must be used only if there is a real emergency. To stop during normal
use of the machine just release the forward and/or reverse pedals (fig. 1 n° 1 e n° 2).
8) When the grass catcher is full, a sensor automatically disengages the blades rotation to avoid locking up the
load chutes; to lift and empty the grass-catcher use the lever on the hydraulic distributor (fig. 1, n° 8).
9) To start work again, disengage the PTO by pushing the switch off and then switch it on again (fig. 1 n°26).
FINISHING WORK
Once mowing has been completed, disengage the blades. To stop:
1) Release the forward pedal (fig. 1 n° 1 or n° 2).
2) Set the throttle lever to the minimum.
3) Lower the cutting deck to the ground
4) Stop the engine by turning the key in the “0” position and engage the parking brake (fig. 1 n° 3 and 5).
GUIDELINES FOR EFFECTIVE USE
The machine can also be used under harsh conditions without any risk of jamming up. Certain measures must be
taken and all devices must be adjusted properly.
1) Before starting work check that the deck and the load chute are perfectly clean without any dried grass or soil.
Check that the load chute has been mounted properly and fixed through the two red safety locks (fig. 13).
2) Check the ground before mowing, that there are no stones, sticks or foreign objects.
3) While mowing keep the engine at maximum rpm, adjust the speed to suit the height of the grass. Be careful
when coming across tall thick clumps of grass, slow down.
4) Regularly sharpen the lawnmower blades; the cut will be better and the engine will not be strained too much.
5) After having emptied the grass from the catcher, always engage the blades some metres before getting into
the grass to cut, so both the cutting deck and grass load chute are cleaned and the clutch is protected.
6) Keep the grid in front of the radiator clean (fig. 9).
7) Keep the grid at the inside of the grass catcher clean: to remove it, insert the grass catcher door safety lock pin
(fig. 12) and use the lever (fig. 11);
8) If the grass is wet or very high, do not cut in the lowest position, but at a mid-way height.
9) Check the tension on the belts activating the PTO; using the adjusting screw if necessary (fig. 6).
10) Check that the blades are not worn, especially the wing that push the grass into the load chute.
11) Under normal cutting conditions, the full grass-catcher micro-switch must be adjusted into horizontal position. It
is recommended to adjust this micro-switch inclined towards the bottom of the grass-catcher in case of wet and/or
very high grass, while it should be inclined towards the upper part of the grass-catcher in case of short and/or dry
grass.
12) Check that no foreign objects have clogged the load chute.
13) Check the rotation of the duct inside the grass catcher.
14) Check that the blades disengage automatically when the grass catcher is full; to do this, turn the ignition key,
turn on the panel without starting the engine, engage the PTO switch (fig. 1 no. 26) and touch the lever fitted on the
duct sensor (fig. 10, ref. A) by hand. The PTO should now disengage.
15) Check the engine revs. (max. 3200 rpm empty).
16) Always mow with the engine at maximum rpm; if the engine rpm drop, reduce the forward speed for a while, to
allow the engine to reach the right level again.
17) Check that the blades are properly mounted.
18) Check that the entry duct fits correctly and that it is aligned inside the load chute.
19) The mower FD900 is a hydrostatic machine and consequently it will absorb more power when cold, but after a
few minutes its efficiency will be at optimal. We inform you that the variable displacement pump and the hydrostatic
motors are of high quality and efficiency.
20) CAUTION! Do not travel with the cutting deck raised. Only raise it to get over obstacles, mount on pavements
or on kerbs. It is compulsory to travel on public highways with a type-approved machine, fitted with a lighting
system, a nameplate and with the cutting deck raised.
9
Page 12

Translation of the original instructions
MOWING POSITIONS
Use the button (fig. 1 n° 12) to adjust the cutting height. When working on irregular ground, with bumps or humps, it
is best to use the deck in the highest cutting position to avoid impact with the blade. Important: During work the deck
lifting button has to be in the «floating» position and the anti-scalp wheels aligned with the mower deck board.
SLOPES
Steep ground should be tackled in an up-and-down movement, being very careful at direction changes that the
wheels uphill do not meet any obstacles (stones, branches, roots, etc.) which could cause loss of control over the
machine. If the drive wheels tend to slip when driving uphill, use the hydraulic control to slightly raise the deck so
that more weight is exerted on the drive wheels, therefore giving more traction. Evaluate the various conditions and
be careful in the presence of damp ground and wet grass because this could cause the mower to slide. When going
downhill, start off at a slow speed and avoid driving over dry or cut grass because the wheels could lose their grip.
The differential lock (fig. 1 n° 25) is automatically engaged, for example: if during a strong descent you want to
reverse the direction of travel, to avoid the rear wheels skidding or when loading onto a vehicle in reverse using
ramps. Normally do not engage the differential lock button (fig. 1 n° 25). Do not run any risk, check the ground
carefully and if you do not feel safe, avoid strong slopes and do not exceed the speed-limits, which are imposed by
your country laws and written also in this manual (max. 14° or 25%).
SAFETY DEVICES
Always remember that the engine stops each time when:
- the operator gets up from the seat, if the parking brake has not been engaged and the blades have not been
disengaged before.
In addition, the engine will not start if:
- the PTO switch is engaged;
- if there is no one seated on the driving seat, unless the parking brake has been engaged and the blades have
been disengaged before;
- the forward and reverse pedals are not in the “stop” position;
- the grass catcher is not completely lowered.
Attention! When the parking brake is engaged, it is possible to leave the driving seat with the engine on, if the
blades are disengaged.
ROLL-BAR
CAUTION: To avoid injury or death from roll-over keep the roll-bar in the raised lock position and use the
seat belt.
Ensure that the seat is secured with the seat latch.
There is no roll-over protection when the roll bar is in the down position.
- Do not operate the machine on uneven ground or on a hill side with the roll-bar in the down position.
- Lower the roll-bar only when absolutely necessary.
- Do not wear the seat belt when the roll-bar is in the down position.
- Drive slowly and carefully.
- Raise the roll-bar as soon as clearance permits.
- Check carefully for overhead clearances (i.e. branches, doorways, electrical wires) before driving under any
objects and do not contact them.
To lower the roll-bar follow the procedure described below:
- Park the machine on a level surface.
- Disengage the PTO, lower the mower deck, and engage the parking brake.
- Shut off the engine and remove the key.
- Tilt the seat forward (fig. 14C).
- Remove the knob pins from the roll-bar (fig.14A).
- Lower the roll-bar and secure it in place with the knob pins (fig. 14D/E).
- Tilt the seat back.
Important: Lower the roll-bar only when absolutely necessary.
To raise the roll-bar follow the procedure described below:
- Park the machine on a level surface.
- Disengage the PTO, lower the mower deck, and engage the parking brake.
- Shut off the engine and remove the key.
- Tilt the seat forward (fig. 15C).
- Remove the knob pins from the roll-bar (fig.15A).
- Raise the roll-bar and secure it in place with the knob pins (fig. 15E).
- Tilt the seat back (fig. 15F).
10
Page 13

Translation of the original instructions
MAINTENANCE AND LUBRICATION
CAUTION!
- Before performing any cleaning, maintenance or repair operation always wear suitable clothing and
working gloves.
- When the machine or part of it is lifted to carry out maintenance operations, always remember to use
suitable fixing tools such as holders and safety locks.
- When carrying out maintenance operations and/or when the machine is tilted without safety locks or
supports, never leave it unguarded in places where inexperienced people and children could have easy
access to it.
If you do the maintenance on the engine, keeping the grass-catcher raised engage the two red safety locks on the
hydraulic cylinders (fig. 16). Never work on the engine if you have not engaged the safety locks.
ACCESSING THE ENGINE BASEMENT
Should the engine not start, to get access to it pull the lever of the hydraulic distributor for the tilting of the grasscatcher and then push the grass-catcher manually rearwards.
LUBRICATION
Never dispose of used oil, petrol or any other type of pollutant in the environment! Proper maintenance and correct
lubrication help to keep the machine fully efficient.
LUBRICATION CHART
Engine oil 15W40 3 kg Replace after the first 50 working hours and then
every 250 hours.
Coolant liquid / 6 kg Empty and wash the tank then add the coolant
every 1000 working hours or once a year.
Hydraulic oil OSO 46 9,5 kg Replace after the first 500 working hours then every
1000 working hours.
Cutting deck gearboxes LSX 75W90 0,1 kg
0,112 lt
Replace every 300 working hours.
ENGINE
For the lubrication intervals follow the directions given in the engine manual . It is in any case necessary to change
the oil and the filter after the first 50 working hours and then every 250 hours. For the diesel engine use SAE
15W40 oil quantity 3 litres. When you change the engine oil, it is necessary to change also the oil filter (fig. 3). To
remove the engine oil, unscrew the lid on the right side of the oil cup (fig. 17). Pour in the oil through the lid (fig. 18).
The first precaution to be taken is that the engine is maintained correctly with a clean air filter and the engine oil up
to the level. Keep the engine compartment, the muffler area and the collectors clean. Use a vacuum cleaner if
possible. Check the air filter (fig. 10) and the prefilter every 8 hours. In order not to reduce the air needed to cool the
radiator, the grid must always be kept clear. Make sure the radiator is always clean. The radiator fan is driven by an
electric engine. If the radiator protection grids are clogged and the cooling fluid and the hydraulic oil temperature
gets over 87° C, a sensor automatically reverses the rotation of the fan for a few minutes in order to clean the grids.
To check and clean the radiator fan use the lever (fig. 9).
RADIATOR REFILLING AND PURGE
Caution! Danger: hot liquid under pressure. In order to let the engine cool down correctly, there should be no air in
the cooling circuit. Make sure that the clamps on the water muffs are well tight and that no air can get into the circuit
from the outside. Carry out the purge as follows:
Caution: For this operation always wear suitable working gloves.
1) Pour coolant liquid into the expansion tank (fig. 8).
2) Start the engine and bring it to working temperature (to make sure the engine thermostatic valve is open).
3) Re-establish the liquid level in the expansion tank.
HYDRAULIC DISTRIBUTOR for SERVICES
The hydraulic distributor is controlled via levers (fig. 20). Working pressure: 120 BAR.
11
Page 14

Translation of the original instructions
WHEEL HYDRAULIC MOTORS
Check the level in the reservoir with the motors cold (fig. 4). If more oil is needed, add hydraulic oil OSO 46 (total
quantity: 9,5 litres). Carry out this control frequently. Caution! Replace both the hydraulic oil and the hydraulic filter
of the hydraulic motors after the first 500 working hours and then every 1000 working hours.
The oil has to be changed before the first 500 working hours ONLY if:
- the oil is black;
- the oil has a whitish colour (it is contaminated with water);
- there is black coloured residue (partial oil deterioration).
To drain the oil loosen the pipe on the gear pump (fig. 22). To fill the hydraulic engine again in with fresh oil,
unscrew the upper lid of the tank (fig. 4). Pay attention to impurities, which may obstruct the circuit and damage the
machine. When you change the hydraulic oil, the oil filter must be replaced too (fig. 21). Pay attention to the filtering
grade. Do not increase the pressure of the wheel transmission hydraulic system over 280 bar because this could
damage the hydraulic pump and the hydrostatic motors.
MOWER DECK GEARBOX
Use synthetic oil LSX 75 W 90 (API GL4 + GL5; API MT1 and PG2) quantity 0,112 lt. Replace every 300 working
hours. The gearbox is equipped with a cap on the right side (fig. 23). To remove oil from the gearbox, you must
disconnect the cutter deck from the machine, remove plastic cover, put the cutter deck in vertical position and
unscrew the lid. Make sure that oil will not get on the belt. (For this kind of operation contact our service centres.) If
the operator notices oil losses, check and replace the seals to avoid damages to the whole gearbox.
HYDRAULIC PRESSURES: summary table
Wheel closed circuit (variable displacement pump) 280 BAR
Hydraulic steering 120 BAR
Distributor 120 BAR. Free, hydraulic steering is
overriding.
Charge pump 7 BAR
LUBRICATION POINTS WITH GREASE
Find the lubrication points following the scheme (fig. 2A, n°4, n°3). Lubricate with grease every 50 hours the rear
axle pivots, the pedals, the PTO transmission belt guide pulley, the pivot connected to 2 points of the cutting deck,
the grass-catcher lifting arms.
EMERGENCY AND PARKING BRAKE
The FD900 moves forward via hydraulic motors. To brake it is therefore sufficient to release the forward and reverse
gear pedals (fig. 1 n° 1 and 2). The brake pedal (fig. 1, n° 3) has to be used only in case of emergency. To engage
the parking brake, press the emergency brake (fig. 1 n° 3) and then engage the locking via the appropriate pedal
(fig. 1 n° 5). To disengage the parking brake just press again the emergency brake (fig. 1 n° 3).
Remember to always engage the parking brake, even though the machine is self-braking when the engine is off.
The engine remains on when the operator gets off the machine if the parking brake is engaged.
ADJUSTMENT OF THE PARKING BRAKE AND EMERGENCY BRAKE PEDAL
The brake adjusting screws are located under the platform (fig. 24). The drum brakes are on the front wheels, make
sure the wire does not touch the wheel.
12
Page 15

Translation of the original instructions
SHARPENING THE BLADES
To sharpen the blades follow the procedure below:
1) set the cutting deck at the lowest cutting position
2) raise the grass-catcher and remove the load chute between cutting deck and grass-catcher.
3) raise the cutting deck and remove the side pivots (fig. 1, n. 10).
4) Hold the bar on the cutting deck, lean the feet against the bracket and hook the cutting deck (fig. 25). There is
no need to dismount the cardan joint. However before starting the machine, make sure that the cardan joint is well
connected and that the stop push button is protruding.
IMPORTANT: the central screw fixing the right blade disc has a left-hand thread. The tightening torque of the
central screw of the blade hub is 53 Nm (assembling scheme – fig. 26) while the screws fixing the blades have a
tightening torque of 50 Nm. To make replacement of the blades easier, remove the whole disc.
A blunt blade pulls at the grass giving it an unsightly appearance, the cutting edges of the blades must therefore be
kept sharp at all times. As the blades wear they lose their cutting efficiency and tend to become unbalanced,
causing the mower to vibrate; sharpen both blades uniformly. Caution: Always replace damaged or crooked
blades, never try to repair them!
CUTTING DECK ADJUSTMENT
An even deck is essential for achieving a uniform cut over the whole lawn. With the mower on a flat surface, check
the tyre pressures, check the distance of the cutting deck edge from the ground and act on the tie rods (fig. 27, A)
and on the adjusting screw (fig. 27, B) to put it parallel to the ground. If a satisfactory parallel set up cannot be
achieved, contact an authorized dealer.
To dismount the cutting deck follow the procedure below:
1) Raise the grass-catcher and remove the load chute.
2) Unscrew the locking screw of the cardan joint cover and unhook the cardan joint pushing on the lock button.
3) Remove the pins from the lifting arm pivots and remove these pivots.
4) Detach the four hydraulic pipes.
5) Pull the cutting deck forward to remove it from the machine.
To mount the cutting deck again follow the same procedure from the last point to the first. Should it be complicated
to connect the hydraulic pipes again, move the lever for the tilting of the grass-catcher, while to connect the cutting
height hydraulic pipes push the cutting height adjustment button with the key inserted in the dashboard.
PTO BELTS
Attention: These belts are special, USE ORIGINAL BELTS.
To replace them, loosen the tie rod (fig. 6) and remove the arm fixed through two screws to the right bracket of the
engine (fig. 28). Unhook the anti-vibration spring of the clutch and the clutch electric wire. To adjust the tension use
a no. 13 spanner on the tensioning spring (fig. 5. n° A). The spring must be compressed at the length indicated by
the red arrow (fig. 6).
ADJUSTMENT OF THE GRASS CATCHER - LOAD CHUTE ALIGNMENT
To achieve best results it is important to have a perfect alignment between the grass catcher and the load chute
when the grass catcher is closed. Follow the points below:
1) Put the grass-catcher in closed position.
2) Shorten or lengthen the rod of the side hydraulic cylinders (fig. 29) for the tilting of the grass-catcher. This
operation can be carried out by unscrewing or screwing the screw set at the bottom of the cylinders rod.
3) This adjustment can also be carried out via the screws fixing the grass-catcher in the rear part (fig. 30).
GRASS CATCHER LOCKING HOOK
The grass catcher locking hook is adjusted via the appropriate screw (fig. 31). Please leave a 2 mm clearance to
make the hooking easier when closing.
13
Page 16

Translation of the original instructions
FD900 – TROUBLESHOOTING GUIDE
PROBLEM CAUSE SOLUTION
The key is ON but the
dashboard does not turn on
No current from the battery
- Check the connecting eires
- Check the electrolyte level
- Recharge the battery
- Replace the fuse
The dashboard switches on but
with the key ON the starter
motor does not turn
Not enough current coming from
the battery
- Recharge the battery
No consent given to start
- Forward pedals in neutral position
- Operator seated
- Disengage the PTO
Difficult starting or engine
running irregularly
Carburettor problems
- Clean or replace the air filter
- Check there is no air in the fuel ducts
- Purge the fuel supply system
Sediment or dirt in the fuel - Check and replace the fuel filter if necessary
The starter motor turns but the
engine does not start
No diesel flow
- Check fuel level in the tank
- Check and replace the fuel filter if necessary
- Check that the vent hole on the fuel cap is not
blocked
Plugs not warmed up enough
with cold engine
- Wait for the plug warning light to switch off
No consent coming form the timer
- Check all connections
- Replace the timer
The electro-stop does not
complete its stroke
- Check the stroke of the electro-stop
- Replace the electro-stop
Drop in engine performance
while cutting
Speed too high for the grass
height
- Slow down
- Put the cutting deck into a higher cutting position
Engine stops when blades are
engaged
No consent given to blade
engagement
- Check the blades engagement button
- Operator seated
- Close the grass-catcher
Uneven cutting and insufficient
collection
Mower deck not parallel to the
ground
- Check the tyre pressure
- Adjust the mower deck parallel to the ground
Poor blade performance
- Check that the blades are mounted correctly
- Sharpen or replace the blades
- Adjust the PTO belt tension
Speed to high for the grass height
and condition
- Slow down
Load chute blocked
- Remove the mower deck and clean the load chute
- Check the max. engine rev. (3000 r.p.m.)
- Clean the grass-catcher grid
Vibrations while working Unbalanced blades - Balance the blades or replace them if damaged
Loose blade screws
- Check and fasten the blade screws, the engine
screws and the frame screws
- Check the blades of the load accelerator
Engine oil warning light goes
on
Insufficient pressure
- Check the engine oil level and refill if necessary
- Replace the engine oil filter
The engine does not start
- Faulty micro-switch of the
forward pedal
- Faulty seat micro-switch
- Faulty parking brake microswitch
- Connect the purple/black wire with the red/white
wire
- Detach the connection behind the seat and
connect the red/white wire with the purple wire
- Connect the red/white wire with the grey wire
14
Page 17

Translation of the original instructions
Blades do not engage
- Faulty PTO button
- Faulty clutch
- Faulty full grass-catcher microswitch
-Faulty closed grass-catcher
micro-switch
- Check the button to engage the blade
- Supply the clutch with direct power
- Check the fuses
- Detach the connection under the grass-catcher on
the right side. Connect the white/red wire with the
blue/red wire.
- Connect the white/red wire with the red wire to
check the functioning of the closed grass-catcher
micro-switch
CAUTION: If problems continue after having carried out the operations described in this manual, contact an
authorized dealer. Never attempt to make difficult reparations without the necessary means and technical
knowledge.
IMPACT WITH A STONE OR SOME OTHER FOREIGN OBJECT
1) Turn off the blades
2) Raise the cutting deck
3) Turn off the engine and pull the parking brake
4) Check the blade fixing screws and the deck state
5) Please check that the foreign body has not got into the accelerator or the pipe
ELECTRICAL SYSTEM
The electrical system is protected by fuses which, if blown, cause the whole electrical system to cut out. There are
two main fuses, both of 40 A/h: one protects the whole wiring system, while the other protects the fan on the
radiator. The fuses protecting the other electrical components of the machine and the lights are located on the left
mudguard. In case of failure, once the faulty component has been located and repaired, replace the blown
fuse with one of the same rating. Never replace a fuse with another of a different rating. If the electrical
problems still persist even after having changed the fuses, contact the Authorised Service Centre. Never attempt to
carry out complex repairs without having the necessary means and technical knowledge available.
FUNCTIONING OF THE MAIN ELECTRICAL DEVICES
- A safety sensor detects if the grass catcher is in working position (fig. 32), otherwise the cutting deck does not
engage.
- A sensor is mounted on the thermostatic valve of the engine (fig. 33). It detects the coolant liquid temperature.
When the coolant liquid temperature goes over 87°C, the sensor sends a signal to the electronic control unit (fig. 34)
which starts the automatic cleaning cycle, inverting for some seconds the radiator fan rotating sense. It is possible
to carry out the cleaning cycle also manually by pushing the button on the dashboard (fig. 1 n° 24). There are four
radiator fan inversion relays (fig. 36).
- In addition, this sensor on the thermostatic valve sends a warning alarm and switches off the engine if its
temperature goes over 107°C.
- A micro-switch is located on the forward pedal detecting if the pedal is in the stop position, allowing therefore
the starting of the machine (fig. 35, ref. A).
- A sensor is placed on the parking brake locking pedal (fig. 35, ref. C) that detects when the parking brake is
engaged, allowing the engine to keep on running even if the operator has get off the machine.
- A micro-switch is placed on the rod of the reverse gear pedal that activates the reverse gear warning buzzer
(fig. 35, ref. B).
- The differential lock electric valve (fig. 37) is placed under the load chute: when it activates, a red led goes on.
- The full grass catcher micro-switch is mounted on a moving deflector inside the grass catcher and sends the
signal to disengage the blades when the grass catcher is full (fig. 38). It is important to adjust the position of the full
grass-catcher micro-switch according to the type of the grass to be cut, to ensure an even filling of the grass-catcher
(fig. 2B).
AIR FILTER
Check and clean the air filter (fig. 10) and the pre-filter every 8 hours. The air filter is equipped with a depression
sensor that signals on the dashboard that the filter is clogged. For its replacement and the exact maintenance
intervals please follow the instructions and warnings in the engine manual. If working in a very dusty environment, it
is recommended to clean the air filter every 4 hours. Inside the air filter there is a safety cartridge to prevent
residues or impurities from getting inside the suction duct during the cleaning of the air filter. If the air filter looks
deteriorated or damage, it has to be replaced.
DIESEL FILTER
Replace the diesel filter cartridge (fig. 39) every 250 hours. For its replacement and the exact maintenance intervals
please follow the instructions and advices in the engine manual.
15
Page 18

Translation of the original instructions
DIESEL DECANTING DEVICE
The decanting device (fig. 40) prevents liquid impurities in the diesel or water from depositing on the bottom and
therefore from getting in contact with engine parts. Clean the decanting device every 250 hours and wash the inside
with clean diesel too. Check the decanting device at every use. For the cleaning and the exact maintenance
intervals please follow the instructions and advice in the engine manual. Attention! When you fill up the diesel tank,
always use a very fine filter.
CLEANING
Clean the deck, the entry ducts and the grass catcher. Do not wash the engine compartment with water under
pressure, use compressed air or a vacuum cleaner.
TOW HITCH
The tow hitch is located at the rear of the mower. The max. towing weight is 200 kg on flat ground.
TOWING THE MACHINE WITH SWITCHED OFF ENGINE
Importamt: To tow the machine in case of engine failure unscrew by three turns the screw on the hydrostatic pump
(fig. 41) by using a 17 mm key; pay greater attention because doing so the efficiency of the self-braking device is
cancelled. Tow the machine at very low speed and only on small distances, maximum 100 metres, to avoid
seizing the hydraulic pump or engine.
STORAGE AND LACK OF USE FOR LONG PERIODS
Store the machine in a dry environment, sheltered from bad weather conditions and, if possible, covered up. Clean
the machine from grass and/or ground residues. If the machine is to be out of use for more than 30 days, detach the
red cable from the battery and follow the engine manual instructions. Remember to lubricate all the joints. Regularly
check that the battery voltage does not go under 12,5 Volts. If it is below, recharge the battery.
MAINTENANCE SUMMARY TABLE
PROCEDURE EVERY
8 HOURS
AFTER THE
FIRST
20 HOURS
EVERY
50 HOURS
EVERY
100 HOURS
EVERY 250
HOURS
Engine oil Check the level
Change
(first change)
Air filter Check
Replace *
Hydraulic oil Check the level
Replace
(first change
after 500
hours, then
every 1000
hours)
Check that the cooler intake grid is
clean
Check that blades are well
sharpened and well-fixed
Lubricate with grease
Diesel filter Check
Replace *
Deck gearbox Replace
(every 300
hours)
Diesel decanting device Check
recommended procedure
* procedure to be carried out if necessary
16
Page 19

Translation of the original instructions
IMPLEMENTS
LIFTING HOOKS AND TRANSPORT
The lifting hooks (fig. 42) allows the machine with its cutting deck to be perfectly balanced. Check the machine
weight on the label and only lift it using suitable equipment such as crane etc. When transporting the machine on a
truck, lower the cutting deck, engage the parking brake and secure the machine through ropes or chains.
17
Page 20

Original instructions – Istruzioni originali – Instructions originales – Original-Anleitungen - Instrucciones originales
FD900 4WD
RASAERBA IDROSTATICO
Gentile Cliente,
nel ringraziarla per la fiducia e la preferenza accordata al nostro Grillo FD900 confidiamo che l’uso di
questa sua nuova macchina risponda pienamente alle sue esigenze. Per l’impiego ottimale e per la sua
manutenzione nel tempo, la preghiamo di leggere attentamente e seguire scrupolosamente le indicazioni
di questo libretto; ciò le consentirà di ottenere i massimi risultati e salvaguardare la sua spesa. La
preghiamo di conservare questo libretto, che dovrà sempre accompagnare la macchina.
DESCRIZIONE GENERALE ED USO PREVISTO
La macchina Grillo FD900 è un tosaerba con operatore a bordo, progettato per il taglio e la raccolta
dell’erba e per la raccolta di fogliame.
ATTENZIONE! Leggere attentamente prima di avviare il motore. Le seguenti
avvertenze sono importanti per l’incolumità dell’operatore!
AVVERTENZE
La prudenza è l’arma principale nella prevenzione degli incidenti.
La preghiamo vivamente di leggere con attenzione le seguenti avvertenze nell’uso del rasaerba, prima
ancora di iniziare il lavoro. L’uso improprio del rasaerba e del suo equipaggiamento può risultare
pericoloso. Osservare le precauzioni di seguito riportate.
1) Leggere interamente questo manuale prima di accendere e mettere in movimento il rasaerba.
2) Dare particolare attenzione alle etichette di sicurezza attorno al rasaerba.
3) Prima di fare lavorare con la macchina altre persone bisogna metterle al corrente delle norme di
sicurezza e di come si usa il mezzo.
4) Prima di iniziare il lavoro, indossare indumenti appropriati da lavoro, guanti, scarponi, occhiali.
5) Durante il lavoro indossare adeguati mezzi di protezione acustica (cuffie).
6) Prima di accendere la macchina verificare che non ci siano persone intorno; specialmente bambini.
7) Prima di partire con la macchina in marcia indietro controllare che non ci siano persone od ostacoli.
8) Controllare il terreno prima di procedere alla rasatura, che non vi siano sassi, bastoni o corpi
estranei, che potrebbero essere scagliati lontano, e quindi molto pericolosi.
9) Se si urta un corpo estraneo disinnestare la lama, fermare il motore, togliere la chiave d’avviamento
e ispezionare il tosaerba; se la macchina vibra farla riparare.
10) Prima di scendere dal rasaerba, spegnere il motore, disinserire la PTO, rimuovere la chiave
d’avviamento e abbassare il piatto tosaerba nella posizione più bassa.
11) Sui viali sconnessi viaggiare a bassa velocità.
12) Sulle pendenze, in discesa moderare la velocità.
13) In discesa curvare sempre lentamente.
14) L’utilizzatore è sempre responsabile dei danni arrecati a terzi.
15) I coltelli deformati o danneggiati devono essere sempre sostituiti, mai riparati.
16) Usare sempre ricambi ed accessori originali Grillo.
17) Lavorare solo con la luce del sole o con buona luce artificiale.
18) Immagazzinare il carburante in contenitori specificatamente costruiti per questo scopo.
19) Fare attenzione quando si lavora vicino ad una strada.
20) Sollevare e svuotare il cesto solo a macchina ferma e su terreno pianeggiante.
21) Far raffreddare il motore prima di mettere la macchina in locali chiusi.
USI IMPROPRI DA EVITARE
22) Non permettere passeggeri sulla macchina.
23) Vietato l’uso ai minori di 16 anni.
24) Non usare la macchina quando si è affaticati e non bere alcolici.
25) Non operare col rasaerba vicino a fossati o banchine che si possono rompere sotto il peso della
macchina, specialmente quando la superficie è staccata o bagnata.
26) Non fermarsi quando si lavora in salita o in discesa.
18
Page 21

Original instructions – Istruzioni originali – Instructions originales – Original-Anleitungen - Instrucciones originales
27) Evitare fuoriuscite di combustibile e dopo aver riempito il serbatoio pulire ogni fuoriuscita sulla
macchina prima di avviare il motore.
28) Non manomettere o disattivare i dispositivi di sicurezza.
29) Non cambiare le regolazioni del motore in modo particolare il numero di giri max.
30) Non appoggiare pesi sul sedile, si potrebbe disattivare il dispositivo di sicurezza dell’avviamento.
31) Non fare nessun tipo di regolazione o pulizia col motore in moto.
32) Non fare controllare la macchina da nessuno mentre siete seduti alla guida col motore in moto.
33) Non spostare la macchina senza piatto tosaerba, si potrebbe impennare risultando molto pericolosa.
34) Non sollevare il cesto con la macchina in movimento.
35) Sostituire le marmitte usurate o danneggiate.
ULTERIORI ACCORGIMENTI PER LA SICUREZZA
Le avvertenze sopra riportate potrebbero non essere sufficienti ad evitare ogni rischio, nel caso in cui
l’operatore non si attenesse all’uso appropriato della presente macchina raserba. Pertanto, per maggiore
prudenza specifichiamo quanto segue.
36) La rotazione della lama del rasaerba è molto pericolosa, non mettere mai le mani o i piedi sotto al
piatto rasaerba.
37) Non fare retromarcia col motore accelerato.
38) È pericoloso azionare il volante di guida bruscamente, col motore a massimo regime.
39) Prima di avviare il motore riempire il serbatoio di carburante. Fare rifornimento di combustibile solo
all’aperto, spegnere sempre il motore, stare lontano da scintille o fiamme, non fumare! Riposizionare
in modo sicuro il tappo del serbatoio e dei contenitori di carburante.
40) Se dovete svuotare il serbatoio carburante eseguite l’operazione all’aperto.
41) Non lavorare col rasaerba sopra alla ghiaia che viene aspirata e centrifugata dalla lama, risultando
molto pericolosa.
42) Se avete dei bambini, quando non usate la macchina, nascondete le chiavi di avviamento.
43) ATTENZIONE: per ridurre il pericolo di incendio mantenere il vano motore, la marmitta, i collettori di
scarico, la batteria, la zona serbatoio e conduttura carburante liberi da erba, foglie, polvere, ecc..
44) Non immagazzinare la macchina dentro un edificio dove i vapori del carburante possono arrivare a
fiamme, scintille o fili elettrici scoperti.
45) Inserire sempre i fermi rossi di sicurezza sui martinetti idraulici di sollevamento del cesto (fig. 16)
prima di accedere al motore.
Disinnestare la trasmissione del piatto e spegnere il motore:
a) prima di pulire i punti ostruiti
b) prima di controllare o riparare il tosaerba
c) dopo aver urtato un corpo estraneo (ispezionare l'organo di taglio per verificare che non sia
danneggiato e ripararlo prima di rimetterlo in funzione).
d) se la macchina comincia a vibrare in modo anomalo, effettuare immediatamente un controllo generale
per individuare la ragione che provoca questa anomalia: se necessario richiedere l'intervento di una
officina autorizzata Grillo.
19
Page 22

Original instructions – Istruzioni originali – Instructions originales – Original-Anleitungen - Instrucciones originales
IDENTIFICAZIONE E ASSISTENZA
IDENTIFICAZIONE
Il Grillo FD900 è fornito di una targhetta con il
numero della macchina, posizionata lateralmente
sul telaio.
SERVIZIO ASSISTENZA
Questo manuale fornisce le indicazioni per l’uso del rasaerba. Per una corretta manutenzione interpellare
un rivenditore autorizzato Grillo.
RICAMBI
Si raccomanda di impiegare esclusivamente ricambi originali, gli unici che offrono caratteristiche di
sicurezza e intercambiabilità. Ogni richiesta deve essere corredata del numero di matricola della
macchina e il numero di codice del pezzo da sostituire. Per i ricambi del motore, attenersi a quanto
indicato nel libretto specifico.
GARANZIA
La garanzia è fornita nei modi e nei limiti indicati dalla legge vigente. Il rivenditore dovrà
obbligatoriamente consegnare il certificato di garanzia della macchina al cliente finale, stampando una
copia della registrazione dal sito Grillo. Per quanto riguarda il motore, valgono le condizioni previste dai
rispettivi Produttori.
RICAMBI DI SCORTA CONSIGLIATI
N. 1 serie lame rasaerba
N. 1 serie cinghie
N. 1 filtro aria motore
N. 1 filtro olio motore
N. 1 filo acceleratore
Una serie di fusibili impianto elettrico
COME ORDINARE I RICAMBI
Indicare sempre il numero di matricola della macchina e il codice del pezzo da sostituire. Rivolgersi ai
nostri centri autorizzati. Il nostro indirizzo è:
GRILLO S.p.A.
Via Cervese 1701 – 47521 CESENA (FC)
Tel. 0547 – 633111 / Fax 0547 – 632011
Web site: www.grillospa.it / e-mail: grillo@grillospa.it
20
Page 23

Original instructions – Istruzioni originali – Instructions originales – Original-Anleitungen - Instrucciones originales
CARATTERISTICHE TECNICHE
MODELLO: rasaerba idrostatico con piatto frontale e carico diretto.
MOTORE: YANMAR 3TNV76 diesel, 1116 cc. (26 HP a 3000 giri), 3 cilindri, raffreddato a liquido, con
elettroventola , dotato di dispositivo manuale e automatico di pulizia radiatore.
CAPACITÀ SERBATOIO CARBURANTE: 31 litri.
CAPACITÀ SERBATOIO OLIO IDRAULICO: 6,3 litri
AVVIAMENTO: elettrico, 12V.
TRAZIONE: idraulica a 4 ruote motrici (integrale permanente anche su raggio di sterzata stretto).
BLOCCAGGIO DIFFERENZIALE AUTOMATICO E MANUALE A PULSANTE.
CAMBIO: trasmissione idrostatica con 4 motori idraulici sulle 4 ruote.
SISTEMA DI GUIDA: a volante con idroguida.
FRIZIONE: per PTO elettromagnetica, con freno lame magnetico.
VELOCITÀ: 0-14,5 km/h a variazione continua.
PNEUMATICI: anteriori 23 x 10.50-12 GARDEN; posteriori 18 x 7.50-8 GARDEN.
SEDILE: Grammer super comfort, molleggiato e registrabile. Braccioli metallici.
VOLANTE: montato su colonna di guida.
RAGGIO DI STERZATA: 370 mm.
AUTOMATISMI: disinnesto automatico delle lame a cesto pieno.
FRENO: a tamburo di servizio e di stazionamento.
CESTO RACCOGLI ERBA: 750 litri. Sistema di scarico cesto idraulico ad apertura automatica.
ALTEZZA DI SCARICO: 1950 mm
SBALZO POSTERIORE: 300 mm.
DEFLETTORE MOTORIZZATO CHE GARANTISCE UN COMPLETO ED UNIFORME RIEMPIMENTO
CESTO.
SOLLEVAMENTO PIATTO E SVUOTAMENTO CESTO IDRAULICI.
PIATTO DI TAGLIO : con raccolta.
ALTEZZA DI TAGLIO: da 20 a 100 mm con regolazione continua ed idraulica dal posto di guida.
LARGHEZZA DI TAGLIO: 126 cm.
CAPACITÀ ORARIA: 9.000 m²/h.
KIT LUCI PER OMOLOGAZIONE STRADALE: di serie
ACCESSORI: piatto di taglio con raccolta cm 126.
DIMENSIONI (con piatto):
Lunghezza: 2910 mm
Larghezza: 1.330 mm
Altezza: 1.660 mm
LUCE LIBERA DA TERRA: 150 mm
INTERASSE: 1.190 mm
PESO (senza piatto): 795 Kg
PESO (con piatto): 970 kg
21
Page 24

Original instructions – Istruzioni originali – Instructions originales – Original-Anleitungen - Instrucciones originales
MESSA IN OPERA DELLA MACCHINA
- Controllare l'integrità della macchina e accertare che non abbia subito danni durante il trasporto.
- Verificare i livelli olio motore (fig. 3) e trasmissione idrostatica (fig. 4).
- Verificare la pressione degli pneumatici:
Ruote anteriori 23 x 10.50 - 12 (1,4 bar)
Ruote posteriori 18 x 7.50 - 8 (1,4 bar)
- Controllare il voltaggio della batteria, non deve risultare inferiore al valore di 12,5 Volt, eventualmente
provvedere alla ricarica. Per accedere alla batteria rimuovere il pomello della leva acceleratore (fig.
5), svitare le viti di fissaggio del cruscotto e rimuoverlo. Non avviare la macchina se la batteria non è
correttamente collegata. Il regolatore di carica e le centraline potrebbero deteriorarsi.
- Se la batteria è stata fornita a secco con acido a parte, per la messa in opera procedere come segue:
1) inserire l'acido e attendere 2 ore;
2) caricare la batteria con un carica batteria regolato a 12 Volt su carica lenta per 2 ore.
Attenzione, non rispettando questa regola si può avere il deterioramento della batteria e la fuoriuscita
dell'acido durante il lavoro.
BATTERIA
Attenzione! I gas sprigionati dalla batteria sono esplosivi, tenetela lontano da fiamme o scintille.
Controllate periodicamente il livello del liquido e mantenete i morsetti lubrificati con grasso di vaselina.
Importante:
- Evitare di invertire la polarità della batteria.
- Non far funzionare il rasaerba senza la batteria, poiché esso è dotato di un regolatore di carica.
- Fare attenzione a non causare corto circuiti.
RODAGGIO - ATTENZIONE!
Sostituire l'olio motore dopo le prime 50 ore di funzionamento unitamente al filtro. Controllare che non vi
siano perdite d'olio o viti lente, in particolare quelle di fissaggio delle lame e delle ruote. Registrare la
tensione delle cinghie della presa di forza mediante i dadi posti sulla relativa molla: la molla va registrata
alla lunghezza indicata dalla freccia (fig. 6). Registrare la tensione della cinghia del piatto mediante il
dado posto sulla relativa molla: la molla va registrata alla lunghezza indicata dalla freccia rossa (fig. 7).
ISTRUZIONI D'USO
Prima di avviare il motore controllare sempre:
- che il liquido radiatore sia a livello (fig. 8);
- che la griglia di aspirazione per il raffreddamento del motore sia pulita (fig. 9)
- che l’olio del motore sia a livello (fig. 3);
- che l’olio idraulico sia a livello (fig. 4);
- che i pedali avanzamento e retromarcia (fig. 1 n° 1 e n°2) siano in posizione stop;
- che il pulsante inserimento PTO sia in posizione di folle (fig. 1 n. 26).
- che il filtro aria sia ben pulito (fig. 10);
- che la rete all’interno del cesto sia ben pulita (fig. 11); per estrarla, inserire il fermo di sicurezza del
coperchio (fig. 12) ed agire sulla levetta (fig. 11);
- che il piatto tosaerba e le condutture di carico siano ben pulite e correttamente montate.
Riempire il serbatoio di carburante (gasolio) servendosi di un imbuto munito di un filtro molto fine (fig. 1,
rif.13).
AVVIAMENTO DEL MOTORE
Inserire la chiave nel commutatore avviamento (fig. 1 n°4) e ruotarla per effettuare il preriscaldamento.
Quando la spia candeletta si spegne (dopo circa 15 sec.), ruotare ancora la chiave e, appena il motore
si sarà avviato, rilasciarla. Per spegnere il motore ruotare la chiave in posizione «0».
22
Page 25

Original instructions – Istruzioni originali – Instructions originales – Original-Anleitungen - Instrucciones originales
REGOLAZIONE SEDILE
Il sedile si muove in avanti e indietro. Posizionare il sedile nella posizione in cui si è più comodi e in cui si
ha il maggiore controllo della macchina. Per spostare il sedile in avanti e indietro tirare la leva in avanti e
muovere il sedile. Per regolare la sospensione del sedile tirare in avanti la leva della sospensione del
sedile posta in basso al centro della seduta. Con l'operatore seduto procedere alla regolazione come
segue (fig.1, n.17) :
- per ottenere una sospensione più dura, tirare la leva verso l'alto ripetutamente fino a raggiungere il
risultato desiderato.
- per ottenere una sospensione più morbida, spingere la leva verso il basso ripetutamente fino a
raggiungere il risultato desiderato.
Una volta regolata la sospensione spingere nuovamente indietro la leva della sospensione del sedile
posta in basso al centro della seduta.
Per ribaltare lo schienale del sedile tirare in alto la leva posta sul lato sinistro del sedile.
INIZIO DEL LAVORO
1) Sollevare il piatto da terra.
2) Regolare l’altezza di taglio utilizzando l’apposito pulsante (fig. 1 n°12).
3) Regolare le posizioni del sedile (fig. 1 n°15, 16, 17).
4) Abbassare il piatto tosaerba (fig. 1 n°7).
5) Accelerare il motore fino a metà della corsa (fig. 1 n°6). Non inserire le lame col motore a massimo
regime, ma portare il motore a metà regime ed innestare poi la PTO (fig. 1 n°26). Attenzione:
Durante il taglio la leva del distributore va mantenuta in posizione flottante (inclinata in avanti).
Innestare sempre le lame qualche metro prima di entrare nell’erba da tagliare, così facendo si
puliscono il piatto e la conduttura di carico e non si sollecita la frizione.
6) Premere dolcemente il pedale di avanzamento (fig. 1 n°1) ed iniziare il lavoro. Utilizzare il pedale a
fianco (fig. 1 n°2) per la retromarcia.
7) Il pedale freno di emergenza (fig. 1 n° 3) va utilizzato solo in caso di emergenza effettiva. Per
fermarsi normalmente è sufficiente rilasciare i pedali avanzamento e retromarcia (fig. 1 n° 1 – n° 2).
8) Quando il cesto è pieno un sensore disinnesta automaticamente la rotazione delle lame evitando
l’intasamento delle condutture; per sollevare verso l’alto il cesto, azionare la leva sul distributore
idraulico (fig. 1 n°8) e svuotare il cesto.
9) Per riprendere il lavoro disinserire la PTO portando in posizione di disinnesto il commutatore e
facendo poi l’inserimento (fig. 1 no. 26).
FINE LAVORO
Terminata la rasatura, disinnestare le lame. Per fermarsi:
1) Togliere il piede dal pedale avanzamento (fig. 1 n°1 o n°2).
2) Portare il manettino acceleratore al minimo.
3) Abbassare il piatto a terra.
4) Spegnere il motore ruotando la chiave nella posizione «0» e inserire il freno di stazionamento (fig. 1
n°3 e 5).
REGOLE UTILI PER IL BUON USO
La macchina può lavorare anche in condizioni gravose senza problemi di intasamento. Occorrono alcuni
accorgimenti e che tutti i dispositivi siano registrati in maniera corretta.
1) Prima di iniziare il lavoro controllare che il piatto e la conduttura di carico siano perfettamente puliti
senza incrostazioni di erba e terra. Controllare anche che il condotto di carico sia correttamente
posizionato e agganciato con i due fermi rossi (fig. 13).
2) Controllare il terreno prima di procedere alla rasatura che non vi siano sassi, bastoni o corpi estranei.
3) Durante la rasatura tenere il motore a massimo regime, regolare la velocità in base all’altezza
dell’erba. Prestare attenzione quando si incontrano cumuli di erba alta e fitta, rallentare.
4) Affilare frequentemente le lame del tosaerba; il taglio sarà migliore e il motore forzerà di meno.
5) Dopo aver scaricato l’erba dal cesto innestare sempre le lame qualche metro prima di entrare
nell’erba da tagliare, così facendo si puliscono il piatto e la conduttura di carico e si protegge la
frizione.
6) Mantenere pulita la griglia posta davanti al radiatore (fig. 9).
7) Mantenere pulita la griglia posta all’interno del cesto: per estrarla, inserire il fermo di sicurezza del
coperchio cesto (fig. 12) ed agire sulla levetta (fig. 11).
23
Page 26

Original instructions – Istruzioni originali – Instructions originales – Original-Anleitungen - Instrucciones originales
8) Se l’erba è bagnata o molto alta non tagliare nella posizione più bassa, ma in una posizione media.
9) Controllare la tensione delle cinghie che azionano la PTO; agire eventualmente sul registro (fig. 6).
10) Controllare che le lame non siano usurate, in modo particolare l’alettatura che imprime la spinta
dell’erba all’interno del canale di carico.
11) In condizioni di taglio normali, il micro del cesto pieno dev'essere regolato in posizione orizzontale. Si
consiglia di regolarlo inclinato verso il basso in caso di erba bagnata o molto alta, mentre inclinato
verso l'alto in caso di erba corta o asciutta.
12) Controllare che un corpo estraneo non blocchi il canale di carico.
13) Controllare la rotazione del camino all’interno del cesto.
14) Controllare che a cesto pieno le lame si disinnestino automaticamente: per fare questo, ruotare la
chiave di avviamento, accendere il motore a basso regime, inserire il commutatore PTO (fig. 1 n°26)
e toccare con la mano la levetta montata sul sensore camino. La presa di forza si deve così
disinserire.
15) Verificare i giri del motore (3200 max a vuoto).
16) Tagliare sempre con motore a massimo regime; se il motore cala di giri, rallentare la velocità di
avanzamento in modo da far riprendere al motore il giusto regime di giri.
17) Controllare il corretto montaggio delle lame.
18) Controllare l’allineamento e il corretto inserimento del canale di carico.
19) Essendo una macchina idrostatica, la FD900 a freddo assorbe più potenza, mentre dopo pochi minuti
di lavoro il rendimento sarà ottimale. Si tenga presente che la pompa a portata variabile e i motori
idrostatici sono di ottima qualità e ad alto rendimento.
20) ATTENZIONE! Durante i trasferimenti non viaggiare con il piatto di taglio alto. Utilizzare il sollevatore
idraulico del piatto solo per superare ostacoli, salire su marciapiedi o su cordoli. E’ invece obbligatorio
viaggiare su strade pubbliche con la macchina omologata completa di impianto luci e targa e il piatto
di taglio alzato.
POSIZIONI DI TAGLIO
Per regolare l’altezza di taglio utilizzare il pulsante (fig. 1 n°12). In presenza di terreno accidentato,
cunette o dossi, è conveniente operare con il piatto nella posizione di taglio più alta onde evitare urti da
parte delle lame. Attenzione! Durante il taglio la leva di sollevamento del piatto va mantenuto nella
posizione «flottante» e le ruotine antiscalpo a filo del bordo del piatto
TERRENI IN PENDENZA
I terreni ripidi devono essere percorsi possibilmente nel senso salita/discesa, facendo molta attenzione
nei cambi di direzione, che le ruote a monte non incontrino ostacoli (sassi, rami, radici, ecc.) i quali
potrebbero causare la perdita di controllo della macchina. Se le ruote motrici tendono a slittare in salita,
col comando idraulico sollevare leggermente il piatto in modo da caricare più peso sulle ruote motrici e
quindi avere più trazione. Valutare le varie situazioni e prestare attenzione in presenza di terreno umido
ed erba bagnata poiché la macchina potrebbe scivolare. In discesa partire a bassa velocità ed evitare di
calpestare erba secca o tagliata poiché le ruote perdono aderenza.
Il bloccaggio differenziale (fig. 1 n°25) si innesta automaticamente, ad esempio: se in forte discesa si
vuole invertire il senso di marcia, per evitare lo slittamento delle ruote posteriori, oppure per il carico su
automezzi in retromarcia con le rampe. Normalmente non inserire il bloccaggio differenziale (fig. 1 no.
25). Non rischiate, ispezionate bene il terreno e se non vi sentite troppo sicuri evitate i pendii troppo
ripidi; rispettate i limiti di sicurezza imposti dalla legge e riportati sul manuale (max. 14° - 25 %).
INTERVENTI DEI DISPOSITIVI DI SICUREZZA
Ricordare sempre che il motore si ferma ogni volta che:
- l’operatore si alza dal sedile, senza aver precedentemente inserito il freno di stazionamento.
Inoltre il motore non si avvia se:
- se il commutatore PTO è inserito;
- se non si è seduti al posto di guida, a meno che non sia stato inserito prima il freno di stazionamento
e disinnestate le lame;
- se i pedali avanzamento e retromarcia non sono in posizione di stop;
- se il cesto non è completamente abbassato.
Attenzione! Con il freno di parcheggio inserito, è possibile abbandonare il posto guida mantenendo il
motore acceso, purché le lame siano disinnestate.
24
Page 27

Original instructions – Istruzioni originali – Instructions originales – Original-Anleitungen - Instrucciones originales
ARCO DI SICUREZZA ROLL-BAR
ATTENZIONE: Per evitare gravi lesioni dovute al ribaltamento della macchina mantenere l'arco di
sicurezza sollevato e utilizzare la cintura di sicurezza.
Assicurarsi che il sedile sia ben fissato tramite apposito gancio.
La protezione dal ribaltamento non è assicurata se il roll-bar è in posizione abbassata.
- Non utilizzare la macchina su terreni sconnessi o su pendenze con il roll-bar in posizione abbassata.
- Abbassare l'arco di sicurezza roll-bar solo quando assolutamente necessario.
- Non indossare la cintura di sicurezza quando il roll-bar è abbassato.
- Guidare lentamente e con prudenza.
- Sollevare l'arco di sicurezza roll-bar non appena le condizioni lo permettono.
- Prestare attenzione al lavoro sottochioma, verificare che non vi siano cavi elettrici, rami bassi o altri
ostacoli che possano incastrarsi con l'arco di sicurezza roll-bar.
Per abbassare l'arco di sicurezza procedere come segue:
1) Parcheggiare la macchina su una superficie piana.
2) Disinserire la PTO, abbassare il piatto di taglio ed inserire il freno di parcheggio.
3) Spegnere il motore e togliere la chiave.
4) Ribaltare il sedile in avanti (fig. 14C).
5) Rimuovere i pomelli a vite dall'arco di sicurezza (fig. 14A).
6) Abbassare il roll-bar e fissarlo con gli stessi pomelli a vite (fig. 14D/E).
7) Riposizionare lo schienale.
Importante: abbassare l'arco di sicurezza roll-bar solo quando assolutamente necessario.
Per alzare l'arco di sicurezza procedere come segue:
1) Parcheggiare la macchina su una superficie piana.
2) Disinserire la PTO, abbassare il piatto di taglio ed inserire il freno di parcheggio.
3) Spegnere il motore e togliere la chiave.
4) Ribaltare il sedile in avanti (fig. 15C).
5) Rimuovere i pomelli a vite dall'arco di sicurezza (fig. 15A).
6) Alzare il roll-bar e fissarlo con gli stessi pomelli a vite. (fig. 15E)
7) Riposizionare lo schienale (fig. 15F).
25
Page 28

Original instructions – Istruzioni originali – Instructions originales – Original-Anleitungen - Instrucciones originales
MANUTENZIONE E LUBRIFICAZIONE
ATTENZIONE!
- Qualora si sollevi la macchina o parte di essa, usare sempre strumenti idonei quali supporti o fermi di
sicurezza.
- Prima di iniziare qualsiasi intervento di pulizia, manutenzione o riparazione indossare sempre indumenti
adeguati e guanti da lavoro.
- Non lasciare la macchina in manutenzione, priva di sicurezze o sollevata, in luoghi accessibili a persone
inesperte, specialmente bambini.
Se si esegue la manutenzione sul motore tenendo il cesto alzato, inserire i due blocchi di sicurezza
verniciati rossi sui cilindri oleodinamici (fig. 16). Non lavorare sul motore senza aver inserito i blocchi.
ACCESSO VANO MOTORE
Per accedere al motore in caso di avaria occorre tirare la leva del distributore idraulico che ribalta il cesto
e spingere manualmente il cesto verso il posteriore della macchina.
LUBRIFICAZIONE
Non disperdere mai nell’ambiente oli esausti, gasolio e ogni altro prodotto inquinante! Un’efficiente
manutenzione e una corretta lubrificazione contribuiscono a mantenere la macchina in perfetta efficienza.
TABELLA RIASSUNTIVA LUBRIFICAZIONE
Olio motore 15W40 3 kg Sostituire dopo le prime 50 ore di lavoro ed in
seguito ogni 250 ore.
Liquido di
raffreddamento
/ 6 kg Svuotare e lavare il serbatoio poi aggiungere il
liquido ogni 1000 ore oppure una volta all'anno.
Olio idraulico OSO 46 9,5 kg Sostituire dopo le prime 500 ore di lavoro ed in
seguito ogni 1000 ore.
Rinvio piatto LSX 75W90 0,1kg
0,112 Lt.
Sostituire ogni 300 ore.
MOTORE
Per gli intervalli e le modalità di lubrificazione seguire le norme contenute nel libretto del motore;
comunque è indispensabile sostituire l’olio e il filtro dopo le prime 50 ore di lavoro e
successivamente ogni 250 ore. Per il motore utilizzare olio SAE 15W40 quantità 3 litri. Quando si
sostituisce l’olio motore, è necessario sostituire anche il filtro olio (fig. 3). Per togliere l’olio dal motore,
svitare il tappo posto sul lato destro della coppa olio (fig. 17). Inserire l’olio dall’apposito tappo (fig. 18).
La prima precauzione è che il motore sia correttamente manutenzionato con filtro aria pulito e l’olio
motore a livello. Mantenere ben pulito il vano motore, la zona marmitta e collettori utilizzando, se
possibile, un aspiratore. Controllare il filtro aria (fig. 10) ed il prefiltro ogni 8 ore. Per non pregiudicare il
passaggio dell’aria che serve a raffreddare il radiatore. Controllare che il radiatore sia sempre ben pulito.
La ventola del radiatore è azionata da un motore elettrico. Se le griglie di protezione del radiatore si
intasano e la temperatura del liquido di raffreddamento e dell’olio idraulico sale al di sopra degli 87°C, un
sensore fa invertire automaticamente per qualche secondo il senso di rotazione della ventola per
effettuare la pulizia delle griglie stesse. Per ispezionare e pulire la ventola del radiatore agire sulla levetta
(fig. 19).
26
Page 29

Original instructions – Istruzioni originali – Instructions originales – Original-Anleitungen - Instrucciones originales
RABBOCCO DEL RADIATORE E RELATIVO SPURGO
Attenzione! Pericolo: liquido caldo e in pressione.
Al fine di agevolare un corretto raffreddamento del motore, è bene che non vi sia aria nel circuito di
raffreddamento. Assicurarsi quindi che le fascette sui manicotti dell’acqua siano ben strette e non possa
entrare aria nel circuito dall’esterno.
Effettuare lo spurgo come sotto indicato:
Attenzione! Per questa operazione, indossare sempre adeguati guanti da lavoro.
1) Inserire il liquido nella vaschetta di espansione (fig. 8)
2) Avviare il motore e portarlo alla temperatura di lavoro (per assicurarsi che la valvola termostatica del
motore sia aperta).
3) Rifare il livello della vaschetta.
DISTRIBUTORE IDRAULICO SERVIZI
Il distributore idraulico è a leve (fig. 20). La pressione di esercizio è 120 bar.
MOTORI IDRAULICI
Controllare il livello nel serbatoio con i motori freddi (fig. 4). Se occorre, aggiungere olio idraulico OSO 46
(quantità totale: 9,5 litri). Eseguire periodicamente questo controllo. Attenzione! Sostituire l’olio idraulico
e il relativo filtro dei motori idraulici la prima volta a 500 ore, successivamente ogni 1000 ore.
Occorre sostituire l’olio prima delle 500 ore se:
- l’olio è di colore nero;
- l’olio è di colore biancastro (l’olio è contaminato con acqua);
- sono presenti dei residui di colore nero (parziale deterioramento dell’olio).
Per togliere l’olio svitare il tubo sulla pompa ad ingranaggi (fig. 22). Per inserirlo, svitare il tappo superiore
del serbatoio (fig. 4). Prestare particolare attenzione ad eventuali impurità che possono finire nel circuito
causando gravi problemi alla macchina. Quando si sostituisce l’olio idraulico sostituire anche il filtro olio
(fig. 21); fare attenzione al grado di filtraggio. Non aumentare la pressione dell’impianto idraulico trazione
ruote oltre i 280 bar poiché si potrebbero danneggiare la pompa idraulica e i motori idrostatici sulle ruote.
RINVIO PIATTO TOSAERBA
Utilizzare olio sintetico LSX 75 W 90 (API GL4 + GL5; API MT1 e PG2) quantità 0,112 kg. Da sostituire
ogni 300 ore. Il tappo livello olio è posizionato a lato del rinvio (fig. 23). Per togliere l’olio dal rinvio,
occorre smontare il piatto dalla macchina, togliere la copertura in plastica, mettere il piatto in verticale e
svitare il tappo. Fare attenzione che l’olio non venga a contatto con la cinghia. (Per questa operazione
consigliamo di contattare il centro assistenza autorizzato). Se si notano delle perdite, controllare e
sostituire i paraoli per evitare il deterioramento dell’intero rinvio.
TABELLA RIASSUNTIVA PRESSIONI IDRAULICHE
Circuito chiuso ruote (pompa a portata variabile) 280 BAR
Idroguida 120 BAR
Distributore 120 BAR. E' libero, è prioritaria
l'idroguida.
Pompa di carico 7 BAR
PUNTI DI LUBRIFICAZIONE CON GRASSO
Consultare la collocazione dei punti di lubrificazione seguendo l’apposito schema (fig. 2A n.4 e n.3).
Lubrificare con grasso ogni 50 ore gli snodi dell’assale posteriore, i pedali, il galoppino cinghie PTO, lo
snodo attacco a due punti del piatto, i bracci del sollevatore del cesto.
FRENO DI EMERGENZA E STAZIONAMENTO
La macchina FD900 è dotata di un sistema di avanzamento tramite motori idraulici, perciò per frenare è
sufficiente rilasciare i pedali di avanzamento e retromarcia (fig.1 n°1 e 2). Il pedale del freno (fig. 1 n°3)
va utilizzato solo in caso di emergenza. Per inserire il freno di stazionamento, premere il freno di
emergenza (fig. 1 n°3) poi inserire il bloccaggio tramite l’apposito pedalino (fig. 1 n°5). Per sbloccare il
freno di stazionamento è sufficiente premere nuovamente il freno di emergenza (fig.1 n°3).
27
Page 30

Original instructions – Istruzioni originali – Instructions originales – Original-Anleitungen - Instrucciones originales
Utilizzare sempre il freno di stazionamento, anche se a motore spento la macchina è autofrenante. Il
motore rimane acceso anche quando l’operatore abbandona il posto guida, se il freno di stazionamento a
pedale è inserito.
REGOLAZIONE DEL FRENO DI STAZIONAMENTO E PEDALE FRENO DI EMERGENZA
I registri dei freni sono posizionati sotto la pedana (fig. 24). I freni a tamburo sono posizionati sulle ruote
anteriori, fare attenzione che il cavo non urti la ruota.
AFFILATURA DELLE LAME
Per affilare le lame procedere come segue:
1) posizionare il piatto nella posizione di taglio più bassa.
2) sollevare il cesto e rimuovere il canale di carico tra piatto e cesto
3) sollevare il piatto e sganciare i perni laterali (fig. 1, n. 10).
4) Afferrare la maniglia sul piatto, appoggiare il piede nella staffa dentata e agganciare il piatto (fig. 25).
Non occorre sganciare il cardano. Prima di avviare la macchina è comunque buona norma accertarsi che
il cardano sia ben collegato e il pulsante di fermo sporgente.
IMPORTANTE: la vite centrale che fissa il disco lama destro ha il filetto sinistro. La coppia di serraggio
della vite centrale del mozzo lama è di 53 Nm (schema di montaggio fig. 26), mentre le viti che fissano le
lame hanno una coppia di serraggio di 50 Nm. Per facilitare la sostituzione delle lame dai dischi,
rimuovere il disco completo.
Una lama non affilata strappa l’erba conferendole un brutto aspetto, è necessario che l’affilatura sia
sempre eseguita sui taglienti delle due lame. Le lame, usurandosi, perdono il taglio e tendono a
sbilanciarsi facendo vibrare il tosaerba; riaffilare entrambe le lame uniformemente.
ATTENZIONE: non tentare mai di riparare le lame danneggiate. Se danneggiate devono essere
sostituite.
REGOLAZIONE PIATTO DI TAGLIO
Una buona planarità del piatto è essenziale per ottenere un prato uniformemente rasato. Posto il
rasaerba su una superficie piana, verificare la corretta pressione degli pneumatici, controllare la distanza
del bordo del piatto dal suolo ed eventualmente agire sui tiranti (fig. 27, A) e sulla vite di registro (fig. 27,
B) per posizionarlo parallelamente al suolo. Nel caso non si riesca ad ottenere un buon parallelismo,
consultare un centro di assistenza autorizzato. Per lo smontaggio del piatto procedere come segue:
1) Sollevare il cesto e rimuovere il canale di carico.
2) Svitare la vite di fermo della protezione cardano e sganciare il cardano premendo il pulsante di blocco.
3) Togliere le copiglie dai perni dei bracci di sollevamento del piatto e sfilare i perni.
4) Scollegare i quattro tubi idraulici.
5) Tirare il piatto in avanti per sganciarlo dalla macchina.
Per rimontare il piatto seguire la procedura in senso inverso. Qualora risulti difficoltoso ricollegare i tubi
idraulici, muovere la leva di ribaltamento del cesto mentre per collegare i tubi della regolazione altezza di
taglio premere il pulsante regolazione altezza di taglio dal posto di guida a chiave inserita nel cruscotto.
CINGHIE PTO
Attenzione! Queste cinghie sono speciali, UTILIZZARE SOLO CINGHIE ORIGINALI.
Per la loro sostituzione, allentare il tirante (fig. 6) e togliere il braccio fissato al piedino destro del motore
tramite due viti (fig. 28). Sganciare la molla antivibrazioni della frizione e il cavo elettrico della frizione.
Per la regolazione della tensione, agire sul dado con chiave da 13 che agisce sulla molla di tensione. La
molla deve essere compressa alla lunghezza indicata dalla freccia rossa (fig. 6).
REGOLAZIONE ALLINEAMENTO CESTO E CANALE DI CARICO PIATTO
Per un buon lavoro è molto importante il perfetto accoppiamento fra cesto e condotto di carico in
posizione di cesto chiuso. A tal fine eseguire quanto segue:
1) Mettere il cesto in posizione tutta chiusa.
2) Accorciare o allungare lo stelo dei martinetti idraulici laterali (fig. 29) che operano il ribaltamento del
cesto. Tale operazione si effettua svitando o avvitando la vite posta in fondo allo stelo dei martinetti.
3) La regolazione può essere effettuata anche agendo sulle viti che fissano il cesto nella parte
posteriore (fig. 30).
28
Page 31

Original instructions – Istruzioni originali – Instructions originales – Original-Anleitungen - Instrucciones originales
GANCIO DI CHIUSURA CESTO
Il gancio di chiusura del cesto si regola tramite l’apposita vite (fig. 31). È necessario lasciare un leggero
gioco di 2 mm per facilitare l’aggancio nella chiusura.
FD900 - GUIDA ALL’IDENTIFICAZIONE DEGLI INCONVENIENTI
INCONVENIENTE CAUSA RIMEDIO
Con la chiave in pos. AVV. il
cruscotto rimane spento
La batteria non eroga corrente
alcuna
- Controllare i cavi di collegamento
- Controllare il livello dell’elettrolito
- Ricaricare la batteria
- Sostituire il fusibile
Il cruscotto si accende, ma
con la chiave in pos. AVV. il
motorino di avviamento non
gira
La batteria non eroga corrente
sufficiente
- Ricaricare la batteria
Manca il consenso
all’avviamento
- Pedali avanzamento in posizione STOP
- Sedersi al posto guida
- Disinserire la PTO
Avviamento difficoltoso o
funzionamento irregolare
del motore
Problemi di carburazione
- Pulire o sostituire il filtro dell’aria
- Controllare che non vi sia aspirazione d’aria
nelle condutture del carburante
- Spurgare il circuito di alimentazione
Depositi o impurità nel
carburante
- Controllare ed eventualmente sostituire il
filtro gasolio
Il motorino gira ma il motore
non si avvia
Mancanza del flusso di gasolio
- Verificare livello nel serbatoio
- Controllare (ed eventualmente sostituire) il
filtro gasolio
- Controllare che il foro di sfiato sul tappo del
serbatoio non sa otturato
Scarso preriscaldo delle
candelette a motore freddo
- Aspettare che la spia candelette sia spenta
Il timer non da il consenso
- Controllare i collegamenti
- Sostituire il timer
L’elettrostop non fa tutta la
corsa
- Controllare la corsa dell’elettrostop
- Sostituire l’elettrostop
Calo di rendimento del
motore durante il taglio
Velocità di avanzamento
elevata in rapporto all’altezza
di taglio
- Diminuire la velocità
- Collocare il piatto in una posizione di taglio
più alta
Inserendo le lame, il motore
si spegne
Manca il consenso
all’inserimento
- Controllare il pulsante inserimento lame
- Operatore seduto al posto guida
- Chiudere il cesto
Taglio irregolare e raccolta
insufficiente
Piatto di taglio non parallelo al
terreno
- Controllare la pressione degli pneumatici
- Ripristinare il parallelismo del piatto
Inefficienza delle lame
- Controllare il corretto montaggio delle lame
- Affilare o sostituire le lame
- Regolare la tensione delle cinghie PTO
Velocità di avanzamento
elevata in rapporto all’altezza
di taglio ed alle condizioni del
prato
- Ridurre la velocità di avanzamento
Intasamento del canale
- Togliere il piatto e svuotare il canale
- Controllare i giri del motore max 3000 G/1'
- Pulire la rete del cesto
29
Page 32

Original instructions – Istruzioni originali – Instructions originales – Original-Anleitungen - Instrucciones originales
Vibrazioni durante il
funzionamento
Lame squilibrate
- Equilibrare o sostituire le lame se
danneggiate
Fissaggi allentati
- Verificare e serrare le viti di fissaggio delle
lame, del motore e del telaio
Accensione della spia
dell’olio motore
Pressione insufficiente
- Controllare e ripristinare il livello dell’olio
motore
- Sostituire il filtro olio motore
I
i
l
Il motore non parte
- Micro pedale avanzamento
difettoso
- Micro sedile difettoso
- Micro freno di parcheggio
difettoso
- Fare il ponte tra il cavo viola/nero e
rosso/bianco
- Scollegare la connessione dietro al sedile e
collegare il cavo bianco/rosso con il cavo
viola.
- Collegare il cavo bianco/rosso con il cavo
grigio.
Le lame non si innestanno
- Interruttore difettoso
- Frizione difettosa
- Micro cesto pieno difettoso
- Micro cesto chiuso difettoso
- Controllare il pulsante inserimento lame
- Dare corrente diretta alla frizione
- Controllare i fusibili
- Scollegare la connessione posizionata sotto
al cesto sul lato destro. Collegare il cavo
bianco/rosso con il cavo blu/rosso.
- Collegare il cavo bianco/rosso con il cavo
rosso per verificare il funzionamento del
micro cesto chiuso.
ATTENZIONE: Se gli inconvenienti perdurano dopo aver eseguito le operazioni descritte nel
presente manuale, contattare il Centro Assistenza Autorizzato. Non tentare mai di effettuare
riparazioni impegnative senza avere i mezzi e le competenze tecniche necessarie.
SE SI URTA UNA PIETRA O UN ALTRO CORPO ESTRANEO
1) Disinnestare le lame
2) Sollevare il tosaerba
3) Spegnere il motore e tirare il freno a mano
4) Controllare le viti che fissano le lame e l’integrità del piatto.
5) Verificare che il corpo estraneo non si sia introdotto nel canale di carico.
IMPIANTO ELETTRICO
L’impianto elettrico è protetto da fusibili che, se interrotti, provocano la totale inefficacia dell’intero
impianto elettrico. I fusibili principali sono due da 40 A/h: uno protegge l'intero impianto elettrico mentre
l'altro protegge la ventola del radiatore. Sul parafango sinistro sono installati i fusibili a protezione delle
varie componenti dell'impianto elettrico e delle luci. In caso di avaria, una volta ricercato e riparato il
guasto, sostituire il fusibile avariato con uno di uguale portata. Non sostituire mai il fusibile con uno di
portata diversa. Se gli inconvenienti elettrici perdurano dopo aver sostituito i fusibili, contattare il Centro
Assistenza Autorizzato. Non tentare mai di effettuare riparazioni impegnative senza avere i mezzi e le
competenze tecniche necessarie.
FUNZIONAMENTO DEI PRINCIPALI DISPOSITIVI DELL’IMPIANTO ELETTRICO
- Un sensore di sicurezza rileva se il cesto è in posizione di lavoro (fig. 32), diversamente il piatto di
taglio non si aziona.
- Sulla valvola termostatica del motore è posizionato un sensore (fig. 33) che rileva la temperatura del
liquido di raffreddamento. Quando la temperatura del liquido di raffreddamento supera gli 87°C, il
sensore invia un segnale alla centralina (fig. 34) che fa innescare il ciclo di pulizia automatico,
invertendo per alcuni secondi il senso di rotazione della ventola del radiatore. È possibile eseguire il
ciclo di pulizia anche manualmente agendo sull’apposito pulsante posto sul quadro comandi (fig. 1 n°
30
Page 33

Original instructions – Istruzioni originali – Instructions originales – Original-Anleitungen - Instrucciones originales
24). I relé inversione ventola radiatore sono quattro (fig. 36).
- Il sensore sulla valvola termostatica invia inoltre il segnale di allarme e spegnimento del motore se la
temperatura sale sopra ai 107°C.
- Sul pedale avanzamento è posizionato un micro interruttore che rivela la posizione di stop per
l’avviamento (fig. 35, rif. A).
- Sul pedalino di blocco del freno di stazionamento è posizionato un sensore (fig. 35, rif. C) che rileva
quando il freno è inserito e permette al motore di rimanere in moto anche se l’operatore ha
abbandonato il posto guida.
- Sul tirante del pedale della retromarcia, è posizionato un micro interruttore che aziona il cicalino della
retromarcia (fig. 35, rif. B).
- L’elettrovalvola del bloccaggio differenziale (fig. 37) si trova sotto al canale di carico: quando essa è
attiva, si illumina un led rosso.
- Il micro del cesto pieno è montato sul deflettore mobile dentro al cesto e invia il segnale per
disinnestare le lame quando il cesto è pieno (fig. 38). E' importante regolare la posizione del micro
cesto pieno in base all’erba da tagliare, per garantire un riempimento totale del cesto (fig. 2B).
FILTRO ARIA
Controllare e pulire il filtro aria (fig. 10) ed il prefiltro ogni 8 ore. Il filtro aria è dotato di un sensore a
depressione che segnala sul cruscotto che il filtro è intasato. Per la sostituzione e gli intervalli esatti di
manutenzione, seguire le istruzioni e le avvertenze indicate nel manuale del motore. Se si lavora in
ambienti molto polverosi è consigliabile pulire il filtro dell'aria ogni 4 ore. All'interno del filtro è inoltre
presente una cartuccia di sicurezza per evitare che eventuali detriti entrino all'interno del condotto di
aspirazione durante la pulizia del filtro. Se il filtro risulta deteriorato va sostituito.
FILTRO GASOLIO
Sostituire la cartuccia del filtro gasolio (fig. 39) ogni 250 ore. Per la sostituzione e gli intervalli esatti di
manutenzione, seguire le istruzioni e le avvertenze indicate nel manuale del motore.
DECANTATORE GASOLIO
Il decantatore (fig. 40) serve per fare in modo che le eventuali impurità liquide del gasolio o parti di acqua
si depositino nel fondo e non entrino in contatto con le parti del motore. All'interno del decantatore è
presente un anello rosso che sale verso l'alto in base alla quantità di impurità presenti. Pulire il
decantatore avendo cura di lavare anche l’interno con gasolio pulito. Controllare il decantatore ad ogni
utilizzo. Attenzione! Quando si effettua il rifornimento di gasolio, utilizzare sempre un filtro molto fine.
PULIZIA
Lavare il piatto, le condutture ed il cesto. Non lavare il vano motore con l’idropulitrice, ma utilizzare l’aria
compressa oppure un aspiratore.
TIRO DI TRAINO
Il tiro di traino è situato nella parte posteriore della macchina. Si possono trainare rulli compattatori,
rimorchi fino a massimo 200 kg di peso in pianura.
TRAINO DELLA MACCHINA A MOTORE SPENTO
Attenzione! Per spostare la macchina a motore spento occorre svitare di tre giri la vite posta sulla pompa
idrostatica (fig. 41); utilizzare una chiave da mm 17. Prestare attenzione perché in questo modo si
annulla l’efficacia del dispositivo autofrenante. Trainare la macchina a bassissima velocità e per
piccoli tratti, 100 m massimo, per evitare il grippaggio della pompa idraulica, o dei motori.
RIMESSAGGIO E INATTIVITÀ PROLUNGATA
Riporre la macchina in un ambiente asciutto, al riparo dalle intemperie e pulire la macchina da residui di
terra ed erba e possibilmente, ricoprirla con un telo. Se si prevede un prolungato periodo di inattività
(superiore ad 1 mese), provvedere a scollegare il cavo rosso della batteria e seguire le indicazioni
contenute nel libretto di istruzioni del motore; lubrificare inoltre tutte le articolazioni. Controllare
periodicamente che il voltaggio della batteria non scenda sotto il valore di 12,5 Volt e in tal caso
provvedere alla ricarica.
31
Page 34

Original instructions – Istruzioni originali – Instructions originales – Original-Anleitungen - Instrucciones originales
TABELLA RIASSUNTIVA MANUTENZIONE
OPERAZIONE OGNI
8 ORE
PRIME
20 ORE
OGNI
50 ORE
OGNI
100 ORE
OGNI 250
ORE
Olio motore
controllare il
livello
●
cambiare
●
(primo
cambio)
●
Filtro aria
controllare
●
sostituire *
Olio idraulico
controllare ●
sostituire ●
(primo
cambio a
500 ore, poi
ogni 1000
ore)
Controllare che la griglia di
aspirazione del radiatore sia
pulita
●
Controllare affilatura e fissaggio
lame
● ●
Lubrificare con grasso ●
Filtro gasolio
controllare
●
sostituire *
Rinvio piatto sostituire ●
(ogni 300 ore)
Decantatore
gasolio
controllare ●
operazione raccomandata
* operazione da eseguire se necessario
ACCESSORI
GANCI DI SOLLEVAMENTO E TRASPORTO
I ganci di sollevamento (fig. 42) sono posizionati in modo che la macchina col piatto montato rimanga in
equilibrio se si deve sollevare con una gru. Controllare il peso della macchina sulla targhetta ed utilizzare
attrezzature idonee (rampe, gru, ecc.). Se la macchina viene trasportata a bordo di un camion o un
rimorchio, abbassare il piatto di taglio, inserire il freno di stazionamento ed assicurarla al mezzo di
trasporto mediante funi, cavi o catene.
32
Page 35

Traduction des instructions originales
FD900 4WD
TONDEUSE HYDROSTATIQUE
Cher Client,
Nous vous remercions de la préférence que vous avez bien voulu accorder à notre Grillo FD900. Nous sommes
certains que l’utilisation de votre nouvelle tondeuse à gazon répondra entièrement à vos exigences. Pour une
utilisation optimal et pour son entretien au fil du temps, nous vous demandons de lire attentivement et de suivre
scrupuleusement les indications de cette brochure, ce qui vous permettra d’obtenir d’excellents résultats et de
sauvegarder votre investissement. Nous vous demandons également de conserver ce manuel qui doit toujours
accompagner la machine.
DESCRIPTION GÉNÉRALE ET USAGE PRÉVU
La machine Grillo FD900 est une tondeuse auto-portée, conçue pour la coupe et le ramassage de l’herbe et pour le
ramassage du feuillage.
ATTENTION! Lire attentivement les instructions avant de démarrer le moteur. Les
suivantes précautions sont très importantes pour la sécurité de l'opérateur!
MISES EN GARDE
La prudence est la meilleure arme dans la prévention des accidents!
Nous vous indiquons ci-après les précautions à suivre lors de l’utilisation de la tondeuse à gazon et vous
demandons de les lire attentivement avant de commencer le travail.
L’utilisation impropre de la tondeuse et de son équipement peut entraîner des dangers; pour réduire ces
possibilités, veuillez respecter les indications suivantes.
1) Lire entièrement ce manuel avant l’activation et la mise en mouvement de la tondeuse.
2) Respecter avec une attention particulière les mises en garde et les étiquettes de sécurité placées sur la
tondeuse.
3) Avant de confier la tondeuse à d’autres personnes, il faut les mettre au courant des normes de sécurité, et du
mode d’emploi.
4) Avant de commencer le travail, mettre des vêtements de travail appropriés, gants, bottes et lunettes.
5) Pendant le travail mettre des instruments de protection acoustique appropriés (casques).
6) Avant de mettre la tondeuse en marche, vérifier que personne ne se trouve pas tout près de la machine,
spécialement des enfants.
7) Avant de faire marche arrière, contrôler qu’il n’y a personne et aucun obstacle.
8) Contrôler le terrain avant la tonte pour supprimer les cailloux, les morceaux de bois ou autres objets qui
pourraient être projetés et, donc, très dangereux.
9) Si l’on heurte un corps étranger déclencher la lame, éteindre le moteur, enlever la clé de démarrage et
examiner la tondeuse; si la machine vibre il faut l’amener chez un concessionnaire autorisé Grillo pour un
contrôle immédiat.
10) Avant de quitter la tondeuse, arrêter le moteur, désactiver la prise de force, enlever la clé de démarrage et
baisser le plateau de coupe de la tondeuse jusqu’à sa position la plus basse.
11) En cas de déplacement sur la voie publique, il faut impérativement respecter les règles du code de la route.
12) Sur de pentes, en descente, modérer la vitesse.
13) Dans les descentes tourner très lentement.
14) L’utilisateur est toujours responsable des dommages occasionnés aux tiers.
15) Les couteaux déformés ou endommagés doivent être toujours remplacés et jamais réparés.
16) Utiliser toujours des pièces détachées et des accessoires d’origine Grillo.
17) Travailler uniquement avec la lumière du soleil ou avec une bonne lumière artificielle.
18) Conserver le carburant dans des jerricans spécifiquement construits à cet effet.
19) Être vigilants lorsqu’on travaille près d’une route.
20) Soulever et vidanger le bac seulement si la machine est arrêtée sur le terrain plain.
21) Laisser refroidir le moteur avant de ranger la tondeuse dans des locaux fermés.
USAGES IMPROPRES A EVITER
22) Ne transporter aucun passager à bord.
23) Ne pas faire travailler des personnes trop jeunes: l’usage est interdit aux mineurs de 16 ans.
24) Ne pas utiliser la tondeuse quand l’on est fatigués ou l’on a bu des boissons alcoolisées.
25) Ne pas utiliser la tondeuse près des fossés ou sur les accotements qui peuvent s’écrouler sous le poids de la
machine, en particulier lorsque la surface est meuble ou mouillée.
26) Ne jamais s’arrêter lorsqu’on travaille en montée ou en descente.
27) Éviter les fuites de combustible; après avoir rempli le réservoir nettoyer soigneusement les fuites sur la
tondeuse avant d’activer le moteur.
33
Page 36

Traduction des instructions originales
28) Ne pas modifier ou désactiver les dispositifs de sécurité.
29) Ne pas modifier les réglages du moteur et plus spécialement le nombre de tours maximum.
30) Ne poser aucun poids sur le siège; le dispositif de sécurité du démarrage pourrait se désactiver.
31) N’effectuer aucun réglage ou nettoyage avec le moteur en marche.
32) Ne jamais faire contrôler la tondeuse lorsque le conducteur est au volant avec le moteur en marche.
33) Ne pas déplacer la machine sans plateau de coupe monté, car elle pourrait se soulever à l’avant et devenir
très dangereuse.
34) Ne pas soulever le bac si la machine est en mouvement.
35) Remplacer les pots d’échappement usés ou endommagés.
PRECAUTIONS DE SECURITE SUPPLEMENTAIRES
Les mises en garde décrites ci-dessus pourraient ne pas être suffisantes afin d’éviter tous les risques, au cas où
l’opérateur ne se tenait pas à l’usage approprié de la présente machine tondeuse. Pour cette raison et pour plus de
prudence nous ajoutons les précautions suivantes.
36) La rotation de la lame de la tondeuse est très dangereuse: ne jamais mettre les mains ou les pieds sous le
plateau.
37) Ne pas faire marche arrière si le moteur est accéléré.
38) Il est dangereux d’actionner le volant de direction brusquement, avec le moteur à plein régime.
39) Avant d’activer le moteur, remplir le réservoir de carburant. Le ravitaillement de combustible doit être fait en
plein air; désactiver le moteur, rester loin des étincelles ou des flammes et ne pas fumer. Remettre le bouchon
du réservoir et ranger les jerricans de carburant de manière fiable.
40) Effectuer la vidange du réservoir de carburant uniquement en plein air.
41) Ne jamais utiliser la tondeuse sur le gravier car il serait aspiré et centrifugé par la lame, ce qui est très
dangereux.
42) Si vous avez des enfants, cachez les clés de démarrage de la tondeuse.
43) ATTENTION! pour réduire le risque d’incendie faire en sorte que le logement du moteur, le pot d’échappement,
les collecteurs, la batterie, la zone réservoir et la tuyauterie du carburant ne soient pas obstrués par des
herbes, des feuilles, des poussières, etc.
44) Ne pas remiser la tondeuse dans un édifice où les vapeurs du carburant peuvent arriver jusqu’à des flammes,
des étincelles ou des fils électriques dénudés.
45) Insérer toujours les crochets rouge de sécurité sur les vérins hydrauliques de relevage du bac de ramassage
(fig. 16) avant d'accéder au moteur.
Déconnecter la transmission du plateau de coupe et arrêter le moteur:
a) avant de nettoyer les points obstrués.
b) avant toute contrôle ou réparation de la tondeuse.
c) après avoir heurté un objet étranger (vérifier que le plateau de coupe ne soit pas endommagé).
d) Si la machine vibrait de façon anormale, contrôler immédiatement l’ensemble de la machine de façon à
déterminer la raison qui provoque cette anomalie: si nécessaire contacter un centre d'assistance autorisé
Grillo.
IDENTIFICATION ET ASSISTANCE
La tondeuse Grillo FD900 est munie d’une plaquette
d’identification placée sur un côté du châssis avec le
numéro de série de la machine.
SERVICE ASSISTANCE
Ce manuel fournit toutes les indications utiles sur l’emploi de la tondeuse. Pour un entretien fiable contacter un
concessionnaire autorisé Grillo.
PIECES DETACHEES
Nous recommandons d’utiliser exclusivement des pièces détachées d’origine, les seules en mesure d’offrir des
caractéristiques de sécurité et d’interchangeabilité. Dans toute demande on doit indiquer le numéro de série de la
tondeuse et la référence de la pièce à remplacer. Pour les pièces détachées relatives au moteur, respecter les
indications contenues dans le manuel spécifique.
34
Page 37

Traduction des instructions originales
GARANTIE
La garantie est assurée selon les modes et les limites indiquées par la loi en vigueur. Le revendeur devra remettre
au client final une copie de la carte de garantie de la machine, qui pourra être téléchargée du site Grillo après avoir
enregistré la machine même. En ce qui concerne le moteur, seulement les conditions prévues par le fabricant
concerné sont valables.
PIECES DETACHEES QUE NOUS CONSEILLONS DE GARDER EN STOCK
N. 1 série lames de coupe
N. 1 série courroies
N. 1 filtre à air moteur
N. 1 filtre à huile moteur
N. 1 câble accélérateur
une série de fusibles de l'installation électrique
COMMANDE DES PIECES DETACHEES
Indiquer toujours le numéro de série de la tondeuse et la référence de la pièce à remplacer. S’adresser aux centres
d’assistance autorisés dans Votre département. Voici notre adresse:
GRILLO S.p.A.
Via Cervese 1701 – 47521 CESENA (FC) – ITALIE
Tél. 0039 – 0547 – 633111 / Fax 0039 – 0547 – 632011
Web site: www.grillospa.it / e-mail: grillo@grillospa.it
CARACTERISTIQUES TECHNIQUES
MODELE: tondeuse hydrostatique avec plateau de coupe frontal.
MOTEUR: YANMAR 3TNV76 diesel, 1116 cc (26 HP à 3000 tr/min) 3 cylindres, refroidissement à liquide avec
électroventilateur. Système automatique et manuel nettoyage radiateur.
RESERVOIR CARBURANT: 31 litres.
RESERVOIR HUILE HYDRAULIQUE: 6,3 litres.
DEMARRAGE: électrique 12V.
TRACTION: hydraulique à 4 roues motrices (intégrale et permanente même en cas de rayon de braquage serré).
BLOCAGE DU DIFFERENTIEL AUTOMATIQUE ET A COMMANDE MANUELLE PAR BOUTON.
BOITE DE VITESSES: hydrostatique avec 4 moteurs hydrauliques sur les 4 roues.
DIRECTION: hydraulique à volant.
EMBRAYAGE: par prise de force électromagnétique avec frein de lames magnétique.
VITESSE: de 0 à 14,5 km/h à variation continue.
PNEUS: avant 23 x 10.50-12 ROUES GAZON ; arrière 18 x 7.50-8 ROUES GAZON.
SIEGE: Grammer, super confort amorti et réglable. Protections latéraux en acier.
VOLANT: fixé sur colonne de direction.
RAYON DE BRAQUAGE: 37 cm.
AUTOMATISME: arrêt automatique des lames lorsque le bac est plein.
FREINS: à tambour de service et de stationnement.
BAC DE RAMASSAGE: 750 litres avec système de vidange hydraulique et ouverture automatique.
BENNAGE A HAUTEUR: 195 cm. ECART ARRIERE : 30 cm.
DEFLECTEUR BAC MOTORISE QUI PERMET UN REMPLISSAGE UNIFORME ET COMPLET DU BAC.
RELEVAGE HYDRAULIQUE DU PLATEAU ET VIDANGE HYDRAULIQUE DU BAC.
PLATEAU DE COUPE: avec ramassage.
HAUTEUR DE COUPE: de 2 à 10 cm avec réglage continu et hydraulique directement du poste de conduite.
LARGEUR DE COUPE: 126 cm.
RENDEMENT: 9.000 m²/h.
KIT ECLAIRAGE POUR HOMOLOGATION ROUTIERE: d’origine.
ACCESSOIRES: plateau de coupe de 126 cm avec ramassage.
DIMENSIONS (avec plateau):
Longueur : 2910 mm
Largeur : 1330 mm
Hauteur : 1660 mm
GARDE AU SOL: 150 mm
EMPATTEMENT : 1190 mm
POIDS (sans plateau) : 795 kg
POIDS (avec plateau) : 970 kg
35
Page 38

Traduction des instructions originales
MISE EN SERVICE DE LA TONDEUSE
- Contrôler que la machine soit en bon état et qu’elle n’a pas été endommagée pendant le transport.
- Vérifier les niveaux de l’huile moteur (fig. 3) et de la transmission hydrostatique (fig. 4).
- Vérifier la pression des pneus:
Roues AV 23 x 10.50 - 12 (1,4 bar)
Roues AR 18 x 7.50 - 8 (1,4 bar)
Roues du plateau (1,5 bar)
- Contrôler le voltage de la batterie qui ne doit pas être inférieur à la valeur de 12,5 V; effectuer éventuellement la
recharge. Pour accéder à la batterie enlever le pommeau du levier accélérateur (fig. 5), dévisser les vis de
fixation du tableau de bord et démonter le tableau de bord. Ne pas démarrer la tondeuse si la batterie n'est pas
bien connectée, car le régulateur de charge et les boîtiers électronique pourraient se détériorer.
- Si la batterie a été livrée à sec avec de l’acide à part, adopter la procédure suivante pour la mise en service:
1) introduire l’acide et attendre 2 heures;
2) charger la batterie avec un charge-batterie réglé à 12 V sur charge lente pendant 2 heures.
Attention: Si l’on ne respecte pas cette règle on peut détériorer la batterie et avoir une fuite d’acide pendant le
travail.
BATTERIE
Attention! Les gaz qui se dégagent de la batterie sont explosifs; garder la batterie éloignée des flammes ou des
étincelles. Contrôler périodiquement le niveau du liquide et lubrifier les bornes avec de la graisse de vaseline.
Important:
- Éviter d’inverser la polarité de la batterie.
- Ne pas faire fonctionner la tondeuse sans la batterie car elle est équipée d’un régulateur de charge.
- Veiller à ne pas provoquer des courts-circuits.
RODAGE - ATTENTION!
Remplacer soit l’huile moteur que le filtre après les 50 premières heures de travail. Contrôler qu’il n’y a aucune fuite
d’huile et aucune vis desserrée, spécialement les vis de fixation des lames et des roues. Régler la tension des
courroies de la prise de force par les écrous placés sur le ressort correspondant: le ressort doit être réglé à la
longueur indiquée par la flèche rouge (fig. 6). Régler la tension de la corroie du plateau par l’écrou qui se trouve sur
le ressort correspondant: le ressort doit être réglé à la longueur indiquée par la flèche rouge (fig. 7).
MODE D'EMPLOI
Avant de démarrer le moteur contrôler toujours que:
- le liquide du radiateur est au niveau (fig. 8)
- la grille d’aspiration pour le refroidissement du moteur est bien propres (fig. 9)
- l’huile du moteur est au niveau (fig. 3)
- l’huile hydraulique est au niveau (fig. 4)
- les pédales avancement et marche arrière (fig. 1 n° 1 e n°2) sont en position d’arrêt
- le bouton enclenchement PDF est au point mort (fig. 1 n° 26)
- le filtre à air est bien propre (fig. 10)
- la grille dans le bac est bien propre (fig. 11); pour la démonter, insérer le crochet de sécurité du couvercle (fig.
12) et actionner le levier (fig. 11)
- le plateau de coupe et les conduites de charge sont bien propres et montés de façon correcte.
Remplir le réservoir du gazole en utilisant un entonnoir muni d’un tamis très fin (fig. 1, n. 13).
DEMARRAGE DU MOTEUR
Introduire la clé dans le commutateur de démarrage (fig. 1 n° 4) et la tourner pour effectuer le pré-réchauffement.
Lorsque le voyant de la bougie d'allumage s’éteint (après environ 15 sec.), tourner encore la clé et la relâcher dès
que le moteur démarre. Pour éteindre le moteur tourner la clé sur la position «0».
REGLAGE DU SIEGE
Le siège peut être déplacé à l'avant et à l’arrière. Régler le siège dans la position la plus confortable et dans
laquelle on contrôle la machine au mieux. Pour déplacer le siège en avant ou en arrière, tirer le levier en avant et
déplacer le siège. Pour régler la suspension du siège tirer en avant le levier de la suspension du siège placé en bas
entre les jambes de l'opérateur. L'opérateur doit être assis et effectuer le réglage en suivant les indications cidessous (fig. 1, n. 17):
- pour durcir la suspension, tirer le levier vers le haut plusieurs fois jusqu’au réglage souhaité.
- pour assouplir la suspension, pousser le levier vers le bas plusieurs fois jusqu’au réglage souhaité.
Une fois avoir effectué ce réglage, pousser de nouveau à l’arrière le levier de la suspension placé en bas entre les
jambes de l'opérateur.
Pour rabattre le dossier du siège tirer vers le haut le levier placé sur le coté gauche du siège.
36
Page 39

Traduction des instructions originales
DEBUT DU TRAVAIL
1) Soulever le plateau de coupe du sol
2) Régler la hauteur de coupe en utilisant le bouton (fig. 1 n°12)
3) Régler la position du siège (fig. 1 n°15, 16, 17)
4) Baisser le plateau de coupe (fig. 1 n°7).
5) Accélérer le moteur à moitié-course (fig. 1 n°6). Ne pas enclencher les lames avec le moteur au régime
maximal, mais mettre le moteur à moitié régime et connecter ensuite la PDF (fig. 1 n°26). Attention: Pendant la
coupe le levier du distributeur doit être en position flottante (incliné en avant). Enclencher toujours les lames
quelque mètre avant d’entrer dans l’herbe à couper, afin de nettoyer le plateau et le canal de charge et afin de ne
pas forcer l'embrayage.
6) Appuyer doucement sur la pédale d'avancement (fig. 1 n°1) et commencer le travail. Pour enclencher la
marche arrière, utiliser la pédale à côté (fig. 1 n°2).
7) La pédale du frein d’urgence (fig. 1 n°3) ne doit être utilisée qu’en cas d’urgence effective. Pour s’arrêter dans
des conditions normales relâcher les pédale d'avancement ou de marche arrière (fig. 1 n°1 - n°2).
8) Lorsque le bac de ramassage de l’herbe est plein, un capteur désactive automatiquement la rotation des lames
en évitant l’obstruction du canal de charge; pour soulever le bac, actionner le levier sur le distributeur hydraulique
(fig. 1 n°8) et après vider le bac.
9) Pour continuer la tonte, déclencher la PTO, en mettant le commutateur en position de déclenchement; ensuite
enclencher la PTO (fig. 1, n°26).
FIN DU TRAVAIL
Quand la tonte est terminée, déclencher les lames. Pour s’arrêter:
1) Enlever le pied de la pédale avancement (fig. 1 n°1 ou n°2).
2) Porter la manette accélérateur au minimum.
3) Baisser le plateau.
4) Éteindre le moteur en tournant la clé dans la position «0» et enclencher le frein de stationnement (fig. 1 n°3 et
5).
REGLES UTILES POUR UN BON USAGE
La tondeuse peut travailler en présence de conditions difficiles sans aucun problème d’obstruction. Pour cela faire,
il faut prendre quelques précautions et tous les dispositifs doivent être correctement réglés.
1) Avant de commencer le travail, contrôler que le plateau de coupe et la conduite de charge sont parfaitement
propres, sans incrustations d’herbe et de terre. Contrôler aussi que le canal de charge soit correctement positionné
et bien connecté avec les deux crochets rouge (fig. 13).
2) Contrôler le terrain avant d’effecteur la tonte pour éliminer tout cailloux, morceaux de bois ou d’autres obs-
tacles.
3) Pendant la tonte le moteur doit tourner à plein régime, régler la vitesse en fonction de la hauteur de l’herbe. Ac -
corder une attention maximale aux cumuls d’herbe haute et touffue et ralentir.
4) Affûter fréquemment les lames de la tondeuse; la coupe sera meilleure et le moteur forcera beaucoup moins.
5) Après avoir vidangé l’herbe du bac, enclencher toujours les lames quelques mètres avant d’entrer dans l’herbe
à tondre; de cette façon, on nettoie le plateau et la conduite de charge et on protège l’embrayage.
6) Maintenir toujours bien nettoyé la grille du radiateur (fig. 9).
7) La grille à l’intérieur du bac doit être toujours bien propre: pour la démonter, insérer le dispositif de sécurité du
couvercle du bac (fig. 12) et actionner le petit levier (fig. 11).
8) Si l’herbe est mouillée ou très haute, ne pas couper dans la position la plus basse, mais dans une position
moyenne.
9) Contrôler la tension des courroies qui actionnent la PTO et si nécessaire la régler à travers l'écrou de réglage
(fig. 6).
10) Contrôler que les lames ne sont pas usées, plus spécialement le système d’ailettes qui pousse l’herbe dans la
conduite de chargement.
11) En conditions de coupe normales, le micro-interrupteur du bac plein doit être réglé en position horizontale. On
conseille de le régler incliné vers le bas en cas d'herbe mouillée ou très haute, et par contre incliné vers le haut en
cas d'herbe courte ou sèche.
12) Contrôler qu’aucun corps étranger ne bloque le canal de charge.
13) Contrôler la rotation de la cheminée à l’intérieur du bac.
14) Contrôler que, le bac étant plein, les lames se déclenchent automatiquement; à cet effet tourner la clé de dé-
marrage, activer le tableau sans démarrer le moteur, enclencher le commutateur PTO (fig. 1 n°26) et toucher avec
la main la palette montée sur le capteur de la conduite de charge. La prise de force doit se déclencher.
15) Vérifier les tours du moteur (3200 max. à vide).
16) Tondre toujours avec le moteur à plein régime; si le nombre des tours moteur diminue, réduire la vitesse
d'avancement pour que le moteur retrouve le régime de tours voulu.
17) Contrôler que le montage des lames soit correct.
18) Contrôler l’alignement et le correcte accouplement du plateau avec le canal de charge.
19) La tondeuse FD900 étant une machine hydrostatique, elle absorbe plus de puissance à froid, cependant le
rendement sera optimal après quelques minutes de travail. Nous vous informons que la pompe à portée variable et
37
Page 40

Traduction des instructions originales
les moteurs hydrostatiques sont de qualité optimale et de haut rendement.
20) ATTENTION: Pendant les déplacements, ne pas se déplacer avec le plateau de coupe relevé. Utiliser l’éléva -
teur hydraulique du plateau de coupe seulement pour franchir des obstacles, monter sur les trottoirs ou sur les bor dures. Par contre, sur les roues publiques il est obligatoire de voyager avec la machine homologuée, munie d’installation des feux, plaque et plateau de coupe relevé.
POSITIONS DE COUPE
Pour régler la hauteur de coupe utiliser le bouton (fig. 1 n°12). En cas de terrain accidenté, de cassis ou de dosd’âne, on conseille de travailler avec le plateau dans la position de coupe la plus haute pour éviter tout chocs aux
lames. Attention! Pendant la coupe, le levier de relevage du plateau doit se trouver dans la position «flottante» et
les roues anti-scalpes bien alignées avec le bord du plateau de coupe.
TERRAINS EN PENTE
Les terrains en pente doivent être parcourus, si possible, dans le sens montée/descente, en veillant, lors des
changements de direction, à ce que les roues en amont ne rencontrent aucun obstacle (cailloux, branches, racines,
etc.) susceptible d’entraîner la perte de contrôle de la tondeuse. Si les roues motrices ont tendance à glisser en
pente, soulever légèrement la tondeuse avec la commande hydraulique de manière à concentrer plus de poids sur
les roues motrices et obtenir ainsi une meilleure traction.
Évaluer les différentes situations et, si le terrain est humide et l’herbe mouillée, faire en sorte que la tondeuse ne
glisse pas. En descente démarrer avec une faible vitesse et éviter de piétiner l’herbe sèche ou coupée car les roues
perdraient leur adhérence.
Le blocage du différentiel (fig. 1 n°25) s'engage automatiquement (fig. 37) pour éviter le glissement des roues
arrières, ou lorsque l’on charge la machine sur des véhicules automobiles, en marche arrière sur les rampes. En
des conditions normales, ne pas insérer le blocage du différentiel (fig. 1, n° 25).
Ne pas prendre de risques: contrôler bien le terrain et si vous n’êtes pas sûrs, évitez les pentes très raides.
Respecter les limites de sécurité, imposées par les lois et indiquées dans ce manuel (max. 14° soit 25%).
INTERVENTIONS DES DISPOSITIFS DE SECURITE
Ne pas oublier que le moteur s’arrête chaque fois que:
- l’opérateur quitte son siège, sans avoir enclencher précédemment le frein de stationnement.
En outre, le moteur ne démarre pas si :
- le commutateur PTO est activé;
- l’opérateur n’est pas assis au poste de conduite, sauf si le frein de stationnement n’a été précédemment activé
et les lames declenchées.
- les pédales d’avancement et de marche arrière ne se trouvent pas sur la positon d’arrêt;
- le bac n’est pas complètement baissé.
Attention! Avec le frein de stationnement activé, il est possible d’abandonner le poste de conduite tout en
maintenant le moteur en marche, à condition que les lames soient déclenchées.
ARCEAU DE SECURITE ROLL-BAR
ATTENTION: Pour éviter des blessures graves causées par le renversement de la machine, maintenir
l'arceau de sécurité soulevé et utiliser les ceintures de sécurité.
S'assurer que le siège soit bien fixé au châssis de la machine à travers le crochet correspondant.
Si l'arceau de sécurité est baissé, l'opérateur n'est pas protégé en cas de renversement.
- Ne pas utiliser la tondeuse en terrains irrégulières ou en pentes si l'arceau de sécurité est baissé.
- Baisser l'arceau de sécurité uniquement si strictement nécessaire.
- Ne pas porter la ceinture de sécurité si l'arceau est baissé.
- Conduire lentement et en faisant attention.
- Soulever l'arceau de sécurité dès que possible.
- Faire attention en travaillant sous le feuillage, vérifier qu'il n'y a pas des câbles électriques, des branches trop bas
ou d'autres obstacles qui pourraient s'encastrer dans l'arceau de sécurité.
Pour baisser l'arceau de sécurité:
1) Garer la tondeuse sur un terrain en plain.
2) Déclencher la prise de force, baisser le plateau de coupe et enclencher le frein de parking.
3) Éteindre le moteur et enlever la clé.
4) Rabattre le siège en avant (fig. 14C)
5) Enlever les vis avec pommeaux (fig. 14A)
6) Baisser l'arceau et les fixer avec les mêmes vis à pommeaux (fig. 14D/E).
7) Remettre le siège en position.
IMPORTANT: Baisser l'arceau de sécurité uniquement si strictement nécessaire.
Pour soulever l'arceau de sécurité:
1) Garer la tondeuse sur un terrain en plain.
2) Déclencher la prise de force, baisser le plateau de coupe et enclencher le frein de parking.
38
Page 41

Traduction des instructions originales
3) Éteindre le moteur et enlever la clé.
4) Rabattre le siège en avant (fig. 15C)
5) Enlever les vis avec pommeaux (fig. 15A)
6) Soulever l'arceau et les fixer avec les mêmes vis à pommeaux (fig. 14D/E).
7) Remettre le siège en position (fig. 15F).
MAINTENANCE ET LUBRICATION
ATTENTION!
- Quand on relève la machine ou une partie de la machine, utiliser toujours des instruments appropriés
comme des support des sécurité.
- Avant de procéder à toute opération de nettoyage, de maintenance ou de réparation, mettre des vêtements
appropriés et des gants de travail.
- Ne pas laisser la machine relevée et sans supports de sécurité non gardée, surtout dans des lieux où
personnes inexpertes et enfants peuvent avoir accès à la machine.
Si vous faites l’entretien sur le moteur en gardant le bac soulevé, insérez les deux dispositifs de sécurité rouges qui
se trouvent sur les vérins hydrauliques (fig. 16). Ne pas faire l’entretien du moteur sans avoir activé ces
dispositifs de sécurité.
POUR ACCEDER AU MOTEUR
Pour avoir accès au moteur en cas de panne tirer le levier du distributeur hydraulique pour le basculement du bac
de ramassage et pousser manuellement le bac vers la parie arrière de la machine.
LUBRICATION
Ne pas disperser d'huiles usés, de gazole et de produits polluants dans l'environnement. Une maintenance fiable et
une lubrification correcte contribuent à maintenir la tondeuse en parfait état de marche.
TABLEAU RECAPITULATIF LUBRICATION
Huile moteur 15W40 3 kg Remplacer après les premières 50 heures de travail
et en suite toutes les 250 heures.
Liquide de
refroidissement
/ 6 kg Vidanger et laver soigneusement le réservoir, après
ajouter du liquide toutes les 1000 heures ou une
fois par an.
Huile hydraulique OSO 46 9,5 kg Remplacer après les premières 500 heures de
travail et en suite toutes les 1000 heures.
Renvoi du plateau LSX 75W90 0,1kg
0,112 Lt.
Remplacer toutes les 300 heures.
MOTEUR
Respecter les normes indiquées dans la notice du moteur en ce qui concerne les temps et les modalités de
lubrification. Il est toutefois indispensable de remplacer l’huile et le filtre après les 50 premières heures de
travail et après toutes les 250 heures. Pour le moteur diesel utiliser de l’huile SAE 15W40 quantité 3 litres. Quand
l’on remplace l’huile moteur il faut remplacer aussi le filtre à huile (fig. 3). Pour vidanger l’huile du moteur, dévisser
le bouchon sur le côté droit du bac à huile (fig. 17). Introduire l’huile dans le bouchon correspondant (fig. 18).
Première précaution à prendre: le moteur doit être correctement entretenu avec le filtre à air bien propre et l’huile
moteur au niveau désiré. Faire en sorte que le logement du moteur, le pot d’échappement et les collecteurs soient
toujours très propres en utilisant, si possible, un aspirateur. Contrôler le filtre à air (fig. 10) et le pré-filtre toutes les 8
heures. Pour ne pas empêcher le passage d’air qui sert à refroidir le radiateur contrôler que le radiateur soit
toujours très propre. Le ventilateur du radiateur est actionné par un moteur électrique. Si les grilles de protection du
radiateur se bouchent et la température du liquide de refroidissement et de l’huile hydraulique monte au dessus de
87°C, automatiquement un senseur fait inverser pour quelques secondes le sens de rotation du ventilateur pour
effectuer la nettoyage des grilles. Pour contrôler et nettoyer le ventilateur du radiateur, pousser le levier (fig. 19).
39
Page 42

Traduction des instructions originales
APPOINT DU RADIATEUR ET PURGE
Attention! Danger: liquide chaud et sous pression.
Afin de permettre un refroidissement correct du moteur, il est nécessaire que le circuit de refroidissement soit bien
purgé de l’air. Tout d’abord, s’assurer que les colliers sur les manchons de l’eau soient bien serrés et que l’air ne
puisse pas entrer de l’extérieur.
Ensuite effectuer la purge suivant les indications ci-dessous:
Attention! Pour cette opération porter toujours des gants de travail.
1) Introduire le liquide dans la cuvette d'expansion (fig. 8).
2) Démarrer le moteur et attendre qu’il atteigne la température d’exploitation (cela pour s’assurer que la vanne
thermostatique du moteur soit ouverte).
3) Remplir la cuvette jusqu’au niveau.
DISTRIBUTEUR ELECTROHYDRAULIQUE POUR SERVICES HYDRAULIQUES
Le distributeur électro-hydraulique par leviers (fig. 20) a une pression de service de 120 BAR.
MOTEURS HYDRAULIQUES
Contrôler le niveau dans le réservoir avec les moteurs froids (fig. 4). Si nécessaire, faire l’appoint d’huile OSO 46
(quantité totale: 9,5 litres). Faire ce contrôle périodiquement. Attention: Remplacer soit l’huile hydraulique que le
filtre des moteurs hydrauliques pour la première fois après 500 heures, ensuite toutes les 1000 heures.
Vidanger l’huile avant les 500 heures si:
- l’huile est noire;
- l’huile est blanchâtre (l’huile est contaminée avec de l’eau);
- il y a des résidus noirs (détérioration partielle de l’huile).
Pour vidanger l’huile dévisser le tuyau sur la pompe à engrenages (fig. 22). Pour insérer de l'huile fraîche, dévisser
le bouchon supérieur du réservoir (fig. 4). Faire attention aux impuretés qui peuvent entrer dans le circuit, en
causant de graves dommages à la machine. Quand on remplace l’huile hydraulique, remplacer aussi le filtre à huile
(fig. 21). Important: faire attention au degré de filtrage.
Ne pas augmenter la pression de l’installation hydraulique traction roues au-dessus des 280 bar car la pompe
hydraulique et les moteurs hydrostatiques des roues pourraient s’endommager.
RENVOI PLATEAU DE COUPE
Utiliser de l'huile synthétique LSX 75 W 90 (API GL4 + GL5; API MT1 et PG2) quantité 0,112 litres/ 0,1 kg à
vidanger toutes les 300 heures. Le bouchon niveau huile se trouve dans le coté du renvoi (fig. 23). Pour vidanger
l'huile, il faut démonter le plateau de la tondeuse, enlever la protection en plastique, positionner le plateau en
vertical et dévisser le bouchon. Faire attention à que l'huile ne coule pas sur la courroie. Pour cette opération on
conseille de contacter un concessionnaire agrée.S’il y a des fuites d’huile, contrôler et remplacer les bagues
d’étanchéité, afin d’éviter la détérioration du renvoi complet.
TABLEAU RECAPITULATIF PRESSIONS HYDRAULIQUES
Circuit fermé roues (pompe à débit variable) 280 BAR
Direction hydraulique 120 BAR
Distributeur hydraulique 120 BAR. Libre, la direction hydraulique est
prioritaire
Pompe de charge 7 BAR
POINTS DE LUBRIFICATION AVEC GRAISSE
Consulter le schéma des points de lubrification (fig. 2A n. 3 - 4). Lubrifier avec de la graisse toutes les 50 heures les
articulations de l’essieu arrière, les pédales, le galet tendeur des courroies PTO, l’articulation de l’attelage à deux
points du plateau de coupe, les bras de relevage du bac de ramassage.
FREINS DE SECOURS ET DE STATIONNEMENT
La tondeuse FD900 EST équipée d’un système d’avancement par moteurs hydrauliques, par conséquent pour
freiner il est suffisant de relâcher les pédales d’avancement et marche arrière (fig.1 n°1 et 2). La pédale du frein (fig.
1 n°3) ne doit être utilisé qu’en cas d’urgence.
Pour enclencher le frein de stationnement, appuyer sur la pédale du frein d'urgence (fig. 1 n°3) et ensuite insérer le
blocage par la petit pédale (fig. 1 n°5). Pour débloquer le frein de stationnement il est suffisant d’appuyer à nouveau
sur le frein de secours (fig. 1 n°3). Enclencher toujours le frein de parking même si la machine est auto-freinant à
moteur éteint. Le moteur reste allumé même si l'opérateur laisse le poste de conduite, si le frein de parking par
pédale est enclenché.
40
Page 43

Traduction des instructions originales
REGLAGE DU FREIN DE PARKING ET DE LA PEDALE FREIN D'URGENCE
Les écrous de réglage sont placés au-dessous de la plate-forme (fig. 24). Les freins à tambour sont placés sur les
roues avant, faire attention à que le câble ne touche pas la roue.
AFFUTAGE DES LAMES
Pour affûter les lames suivre les instructions ci-dessous:
1) Placer le plateau dans la position de coupe la plus basse.
2) Relever le bac de ramassage et enlever le conduit de charge entre le plateau et le bac.
3) Soulever le plateau et décrocher les pivots latéraux (fig. 1, n. 10).
4) Saisir la poignée sur le plateau, poser le pied sur l'étrier denté et crocher le plateau (fig. 25).
Il n’est pas nécessaire de décrocher le cardan. Cependant, avant de démarrer la machine il est conseillé de
contrôler que l’arbre à cardan soit bien inséré et le bouton de blocage en saillie.
IMPORTANT: La vis centrale qui fixe le moyeu de lame droit a le filet gauche. La couple de serrage de la vis
centrale du moyeu de lame est de 53 Nm (schéma de montage – fig. 26), tandis que les vis qui fixent ls lames ont
une couple de serrage de 50 Nm. Pour faciliter le remplacement des lames, démonter le moyeu complet.
Une lame non affûtée arrache mal le gazon et donne un mauvais aspect à votre pelouse. Il faut que l’affûtage des
lames soit toujours effectué sur les tranchants des deux lames. Les lames qui s’usent perdent leur capacité de
coupe et ont tendance à se déséquilibrer en faisant vibrer la tondeuse: aiguiser uniformément les deux lames.
ATTENTION:Remplacer toujours les couteaux abîmés ou tordus; ne jamais essayer de les réparer!
REGLAGE DU PLATEAU DE COUPE
Une bonne planéité du disque est essentielle afin d’obtenir un gazon uniformément tondu. Placer la tondeuse sur
une surface plane, vérifier que la pression des pneus est correcte, contrôler la distance du bord du plateau du sol et
éventuellement agir sur le tirant (fig. 27, A) et sur la vis de réglage (fig. 27, b) pour le positionner parallèlement au
sol. Si l’on n’arrive pas à obtenir un bon parallélisme, contacter un concessionnaire agrée. Pour démonter le plateau
suivre les instructions ci-dessous:
1) Soulever le plateau et enlever la conduite de charge
2) Dévisser la vis de blocage de la protection du cardan et décrocher le cardan en poussant sur le bouton de
blocage.
3) Enlever les goupilles des pivots des bras de relevage du plateau et enlever les pivots.
4) Déconnecter les quatre tuyaux hydrauliques
5) Tirer le plateau en avant pour le détacher de la machine
Pour remonter le plateau suivre la même procédure en sens inverse. Si on aura des difficultés à reconnecter les
tuyaux hydrauliques, bouger le levier de basculement du bac de ramassage. Pour connecter les tuyaux du reglage
hauteur de coupe pousser le bouton de réglage de la hauteur de coupe sur le tableau de bord avec contact inséré.
COURROIES PRISE DE FORCE
Attention! Il s’agit de courroies spéciales: N’UTILISER QUE DES COURROIES D’ORIGINE GRILLO.
Pour les remplacer dévisser la tige (fig. 6) et enlever le bras fixé au support droit du moteur à travers deux vis (fig.
28). Décrocher le ressort anti-vibrations de l'embrayage et le câble électrique de l'embrayage. Pour régler la
tension, agir sur l’écrou qui règle le ressort de tension en utilisant une clé 13. Le ressort doit être comprimé jusqu’à
la longueur indiquée par la flèche rouge (fig. 6).
ALIGNEMENT ENTRE BAC DE RAMASSAGE ET CONDUITE DE CHARGE DU PLATEAU
Pour faire un bon travail, il est important d’avoir le parfait couplage entre le bac de ramassage et le conduit de sortie
quand le bac est fermé. A cette fin, la machine possède des différents dispositifs de réglage qui doivent être utilisés
suivant la procédure ci-dessous:
1) Mettre le bac en position de fermeture.
2) Raccourcir ou allonger la tige des vérins hydrauliques latéraux (fig. 29) qui font basculer le bac. On effectue
cette opération en dévissant ou en serrant la vis placée au fond de la tige des vérins.
3) Ce réglage peut être effectuée aussi en utilisant les vis qui fixent le bac de ramassage dans la partie arrière
(fig. 30).
CROCHET DE FERMETURE DU BAC
Le crochet de fermeture du bac se règle avec la vis correspondante (fig. 31). Il est nécessaire de laisser un jeu de
2 mm pour faciliter le mécanisme de fermeture.
41
Page 44

Traduction des instructions originales
IDENTIFICATION DES INCONVENANTS
INCONVENIENT CAUSE REMEDE
Avec la clé sur la position de
AVV. (DEMARRAGE) le
tableau de bord reste éteint
La batterie ne distribue aucun
courant
- Contrôler les câbles de raccordement
- Contrôler le niveau de l’électrolyte
- Recharger la batterie
- Remplacer le fusible
Le tableau de bord s’allume,
mais avec la clé sur la pos.
AVV. (DEMARRAGE) le
démarreur ne tourne pas
La batterie ne distribue pas
suffisamment de courant
- Recharger la batterie
Absence des conditions pour le
démarrage
- Pédales d’avancement sur la position STOP
- S’asseoir au poste de conduite
- Déconnecter la PTO
Démarrage difficile ou
fonctionnement irrégulier du
moteur
Problèmes de carburation
- Nettoyer ou remplacer le filtre à air
- Contrôler qu’il n’y a aucune aspiration d’air
dans les conduites du carburant
- Purger le circuit d’alimentation
Dépôts ou impuretés dans le
carburant
- Contrôler et remplacer éventuellement le filtre
à gasoil
Le démarreur tourne, mais le
moteur ne démarre pas Le gazoile n’arrive pas
- Vérifier le niveau dans le réservoir
- Contrôler (et remplacer éventuellement) le filtre
à gasoil
- Contrôler que l’orifice de purge sur le bouchon
du réservoir n’est pas bouché
Préchauffage insuffisant des
bougies à moteur froid
- Attendre que le voyant des bougies soit éteint
Le temporisateur n’accorde pas
le démarrage
- Contrôler les connexions
- Remplacer le temporisateur
L’électro-stop ne fait pas toute
la course
- Contrôler la course de l’électro-stop
- Remplacer l’électro-stop
Baisse de rendement du
moteur pendant la coupe
Vitesse d’avancement élevée
par rapport à la hauteur de
coupe.
- Réduire la vitesse
- Régler le plateau de coupe dans une position
plus haute
Le moteur s’éteint lorsqu’on
enclenche les lames
Absence des conditions pour
l’enclenchement
- Contrôler le bouton d’enclenchement des
lames
-L’opérateur doit être assis au poste de conduite
- Fermer le bac
Coupe irrégulière et
ramassage insuffisant
Plateau de coupe non parallèle
au terrain
- Contrôler la pression des pneus
- Rétablir le parallélisme du plateau
Inefficacité des lames
- Contrôler que le montage des lames est
correct
- Affûter ou remplacer les lames
- Régler la tension des courroies prise de force
Vitesse d’avancement élevée
par rapport à la hauteur de
coupe et aux conditions du
gazon
- Réduire la vitesse d’avancement
Obstruction de la conduite de
chargement
- Enlever le plateau et vider la conduite
- Contrôler le tours du moteur max. 3000
tours/min.
- Nettoyer la grille du bac
Vibrations durant le
fonctionnement Lames déséquilibrées
- Équilibrer ou remplacer les lames si
endommagées
Fixations desserrées
- Vérifier et serrer les vis de fixation des lames,
du moteur et du châssis
- Vérifier les palettes de chargement
42
Page 45

Traduction des instructions originales
Allumage du témoin de l’huile
moteur
Pression insuffisante
- Contrôler le niveau et faire l’appoint d’huile
moteur
- Remplacer le filtre à huile
Le moteur ne tourne pas
- Micro-interrupteur pédale
avancement défectueux
- Micro-interrupteur siège
défectueux
- Micro-interrupteur frein de
parking défectueux
- Connecter le câble violet/noir avec le câble
rouge/blanc
- Déconnecter la connexion derrière le siège et
connecter le câble blanc/rouge avec le câble
violet.
- Connecter le câble blanc/rouge avec le câble
gris
Les lames ne s'enclenchent
pas
- Interrupteur défectueux
- Embrayage défectueuse
- Micro-interrupteur bac plein
défectueux
- Micro-interrupteur bac fermé
défectueux
- Connecter le bouton enclenchement de lames
- Donner courant directe à l'embrayage
- Contrôler les fusibles
- Déconnecter la connexion placé sous le bac
coté droit. Connecter le câble blanc/rouge avec
le câble bleu/rouge.
- Connecter le câble blanc/rouge avec le câble
rouge pour vérifier le fonctionnement du microinterrupteur du bac fermé
ATTENTION: Si les inconvénients persistent après avoir exécuté les opérations décrites dans ce manuel,
contacter le Centre Assistance Autorisé. Ne jamais essayer d’effectuer des réparations compliquées sans
avoir les moyens et les connaissances techniques nécessaires.
CHOC CONTRE UNE PIERRE OU UN AUTRE CORPS ETRANGER
1) Désactiver les lames
2) Soulever le plateau de coupe
3) Arrêter le moteur et activer le frein de parking.
4) Contrôler que les vis qui fixent les lames du plateau de coupe et le plateau n’ont pas été endommagés.
5) Contrôler que le corps étranger n’est pas dans la conduite de charge.
INSTALLATION ELECTRIQUE
L’installation électrique est protégée par des fusibles qui peuvent provoquer l’inefficacité totale de l’installation
électrique, si coupés. Il y a deux fusibles principaux de 40n A/h: un protège l'installation électrique complète tandis
que l'autre protège le ventilateur du radiateur. Sur le garde-boue coté gauche sont placés les fusibles qui protègent
les différentes composants de l'installation électrique et de l’éclairage. En cas de panne, après avoir détecté et
réparé la panne, remplacer le fusible grillé par un fusible de la même puissance. Ne jamais remplacer le
fusible par un fusible d’une puissance différente. Si, après avoir remplacé les fusibles, les inconvénients
persistent, contacter un centre d’assistance autorisé. Ne jamais essayer d’effectuer des réparations compliquées
sans disposer des moyens et des connaissances techniques nécessaires.
FONCTIONNEMENT DES PRINCIPAUX DISPOSITIFS DE L’INSTALLATION ELECTRIQUE
- Un capteur de sécurité détecte si le bac se trouve dans la position de travail (fig. 32), autrement le plateau de
coupe ne s’active pas.
- Une sonde est montée sur la soupape thermostatique du moteur (fig. 33) qui relève la température du liquide
de refroidissement. Quand la température du liquide de refroidissement monte au-dessus des 87°C, la sonde
envoie un signal au boîtier électronique (fig. 34) qui enclenche le cycle de nettoyage automatique, en inversant
pendant quelques secondes le sens de rotation du ventilateur du radiateur. Il est également possible d’effectuer
le cycle de nettoyage manuellement, en appuyant sur le bouton du tableau de bord (fig. 1 n° 24). Il y a quatre
relais pour l'inversion du ventilateur du radiateur (fig. 36).
- En outre la sonde placée sur la soupape thermostatique envoie le signal d’alarme et arrêt du moteur si la
température monte au-dessus de 107°C.
- Un interrupteur de sécurité est placé sur la pédale d’avancement afin de vérifier la position du neutre pour le
démarrage (fig. 35, A).
- Sur la pédale de blocage du frein de stationnement il y a un capteur (fig. 35, C) qui relève quand le frein est
activé et permet au moteur de rester allumé même si l’opérateur a quitté le siège.
- Un interrupteur de sécurité est placé sur la tige de la pédale de la marche arrière pour activer l’avertisseur
sonore de la marche arrière (fig. 35, B).
43
Page 46

Traduction des instructions originales
- L’électrovanne du blocage différentiel (fig. 37) se trouve au dessous la conduite de charge: quand elle s’active,
un LED rouge s’allume.
- Le micro-interrupteur du bac plein est monté sur le déflecteur mobile dans le bac et envoie le signal de
déclenchement des lames quand le bac est plein (fig. 38). On conseille de régler la position de ce microinterrupteur selon le type d'herbe à couper pour garantir un remplissage uniforme du bac (fig. 2B).
FILTRE A AIR
Contrôler et nettoyer le filtre à air (fig. 10) et le pré-filtre toutes les 8 heures. Le filtre à air est muni d’un capteur à
dépression qui signale le colmatage du filtre sur le tableau de bord. Pour le remplacement et les intervalles exactes
d’entretien, suivre les instructions et les avertissements indiqués dans la notice du moteur. Si on travaille dans des
environnement très poussiéreux on conseille de nettoyer le filtre toutes les 4 heures. A l’intérieur du filtre il y a une
cartouche de sécurité pour éviter que de débris entrent dans le collecteur d'aspiration pendant le nettoyage du filtre.
Si le filtre est détérioré il faut le remplacer.
FILTRE A GASOIL
Remplacer la cartouche du filtre à gasoil (fig. 39) toutes les 250 heures. Pour le remplacement et les intervalles
exactes d’entretien, suivre les instructions et les avertissements indiqués dans la notice du moteur.
DECANTEUR GASOIL
Le décanteur (fig. 40) sert à faire déposer dans le fond du conteneur les éventuelles impuretés liquides ou
particules d’eau contenues dans le gasoil afin qu’elles n’entrent pas en contact avec les composants du moteur. A
l'intérieur du décanteur il y a un anneau rouge qui monte vers le haut selon la quantité d'impuretés présentes dans
le carburant. Nettoyer le décanteur fréquemment, en faisant attention à laver aussi l’intérieur avec du gasoil propre.
Contrôler le décanteur lors de chaque utilisation. Lors de tout ravitaillement de gasoil, utiliser toujours un filtre très
fin.
NETTOYAGE
Laver le plateau, la conduite de charge et le bac de ramassage, Ne jamais laver le logement du moteur avec de
l'eau chaude à haute pression, utiliser de l'air comprimé ou un aspirateur.
ATTELAGE DE REMORQUE
L’attelage de remorque se trouve à l’arrière de la machine. On peut traîner des rouleaux compresseurs, et des
remorques jusqu’à un maximum de 200 kg de poids en plaine.
REMORQUAGE DE LA MACHINE A MOTEUR ETEINT
Attention! Pour déplacer la machine avec le moteur éteint il faut, préalablement, dévisser de trois tours la vis sur la
pompe hydrostatique en utilisant une clé de 17 mm (fig. 41). Porter un attention particulière car, ainsi faisant,
l’efficacité du dispositif auto-freinant (frein de service) est annulée. Remorquer la machine à vitesse très lente et
pendant de très courtes distances, 100 m maximum, afin d’éviter le blocage de la pompe hydraulique ou
des moteurs.
MISE EN DEPOT ET INACTIVITE PROLONGEE
Placer la tondeuse dans un local sec, à l’abri des intempéries et, si possible, la recouvrir d’une bâche. Nettoyer la
machine de l'herbe et résidus de terre. Si l’on prévoit une période prolongée d’inactivité (supérieure à 1 mois),
déconnecter le câble rouge de la batterie et respecter les indications contenues dans le manuel d’instructions du
moteur; graisser également toutes les articulations. Contrôler périodiquement que le voltage de la batterie ne
descende pas au dessous de la valeur de 12,5 Volt et, s’il en était ainsi, recharger.
44
Page 47

Traduction des instructions originales
TABLEAU RECAPITULATIF DE MAINTENANCE
OPERATION TOUTES
LES 8
HEURES
APRES LES
PREMIERES
20 HEURES
TOUTES
LES 50
HEURES
TOUTES
LES 100
HEURES
TOUTES LES
250
HEURES
Huile moteur Contrôler le niveau
Remplacer
(premier
change)
Filtre à air Contrôler
Remplacer
Huile Contrôler le
hydraulique niveau
Remplacer
*
(premier
change après
500 heures
puis toutes les
1000 heures)
Contrôler que la grille d'aspiration du
radiateur soit propre
Contrôler fixation et affûtage de la
lame
Lubrifier avec graisse
Filtre à gasoil Contrôler
Remplacer *
Huile renvoi
plateau Remplacer
(toutes les 300
heures)
Décanteur gasoil contrôler
opération recommandé
* à effectuer si nécessaire
ACCESSOIRES
CROCHETS POUR LE RELEVAGE ET LE TRANSPORT
Les crochets pour le soulèvement (fig. 42) sont placés de façon à permettre à la machine, avec le plateau de coupe
monté, de rester en équilibre lorsque l’on doit la soulever avec une grue. Contrôler le poids de la machine indiqué
dans la plaque et utiliser un équipement adéquat (rampes, grues, etc.). Si la machine est transportée à bord d’un
camion ou une remorque, porter le plateau de coupe dans la position la plus basse, activer le frein de
stationnement et l’assurer au moyen de transport par des cordes, câbles ou chaînes.
45
Page 48

Übersetzung der Original-Anleitungen
FD900 4WD
HYDROSTATISCHER RASENMÄHER
Sehr geehrter Kunde,
Wir danken Ihnen für Ihr Vertrauen und beglückwünschen Sie zu Ihrem neuen Grillo FD 900. In diesem Handbuch
finden Sie alles, was Sie wissen müssen, damit Ihr neuer Mäher perfekt funktioniert und lange hält. Lesen Sie es
daher genau durch, und befolgen Sie alle Hinweise und Anleitungen. Bewahren Sie das Handbuch sorgfältig auf.
Es ist ein wichtiger Bestandteil der Maschinenausstattung.
ALLGEMEINE BESCHREIBUNG UND VORGESEHENER GEBRAUCH
Die Grillo FD900 ist ein Aufsitz-Rasenmäher, der für das Mähen und Sammeln von Gras und für die
Laubsammlung entwickelt wurde.
ACHTUNG! Lesen Sie vor dem Anlassen des Motors die folgenden Hinweise zum
Schutz Ihrer persönlichen Sicherheit genau durch!
SICHERHEITSRELEVANTE HINWEISE
Vorsicht ist die wichtigste Maßnahme, um Unfälle zu vermeiden.
Die folgenden Hinweise zum Gebrauch des Mähers vor Beginn der Arbeit aufmerksam durchlesen, und stets
befolgen, da ein unsachgemäßer Gebrauch der Maschine und der dazugehörenden Ausrüstung gefährlich sein
kann.
1) Dieses Handbuch vor der ersten Benutzung des Mähers aufmerksam und ganz durchlesen.
2) Die auf dem Mäher angebrachten Plaketten und Hinweise zur Sicherheit besonders beachten.
3) Soll der Mäher von einer anderen Person benutzt werden, ist diese genau im Gebrauch der Maschine und
über die Unfallverhütungsmaßnahmen zu unterweisen.
4) Beim Arbeiten immer geeignete Arbeitskleidung, Handschuhe, Schuhe und Schutzbrillen tragen.
5) Während der Arbeit geeigneten Gehörschutz tragen.
6) Vergewissern Sie sich vor dem Einschalten der Maschine, dass sich keine anderen Personen und vor allem
keine Kinder in der Nähe aufhalten.
7) Vergewissern Sie sich vor dem Anfahren im Rückwärtsgang immer, dass sich keine anderen Personen oder
Hindernisse hinter der Maschine befinden.
8) Kontrollieren Sie den Boden vor dem Mähen auf Steine, Stöcke und andere Gegenstände, die die Maschine
beschädigen oder von dieser weggeschleudert werden und jemanden verletzen könnten.
9) Stößt man beim Mähen gegen einen Fremdkörper, muss das Messer ausgekuppelt, der Motor abgestellt, der
Zündschlüssel abgezogen und der Mäher kontrolliert werden; vibriert die Maschine, muss sie repariert
werden.
10) Vor dem Absteigen den Motor abstellen, die Zapfwelle ausschalten, den Zündschlüssel abziehen, und das
Mähwerk in die unterste Position stellen.
11) Auf holprigen Straßen langsam fahren.
12) Beim Abwärtsfahren auf Hängen langsam fahren.
13) Beim Abwärtsfahren sanft und langsam kurven.
14) Der Benutzer haftet immer für Personen- bzw. Sachschäden.
15) Verformte oder beschädigte Messer sofort auswechseln und nicht reparieren.
16) Ausschließlich Original – Grillo - Ersatzteile und –Zubehör verwenden.
17) Nur bei Tageslicht oder guter Beleuchtung arbeiten.
18) Den Treibstoff in speziell zu diesem Zweck hergestellten Behältern aufbewahren.
19) Beim Arbeiten in der Nähe einer Straße ist immer größte Vorsicht geboten.
20) Heben und leeren Sie den Grasfangkorb nur bei stehender Maschine und auf ebenem Untergrund.
21) Bevor die Maschine in einem geschlossenen Raum abgestellt wird, muss der Motor abgekühlt sein.
FOLGENDES IST ZU VERMEIDEN
22) Keine "Passagiere" befördern.
23) Das Mindestalter für die Benutzung dieser Maschine beträgt 16 (sechzehn) Jahre.
24) Den Mäher auf keinen Fall benutzen, wenn Sie müde sind und/oder unter Alkoholeinfluss stehen.
25) Nicht neben Gräben arbeiten, deren Rand unter dem Gewicht der Maschine nachgeben könnte, vor allem bei
nassem, lockerem oder bröckeligem Boden.
26) Beim Auf- bzw. Abwärtsfahren niemals stehenbleiben.
27) Keinen Treibstoff verschütten, und nach dem Tanken vor dem Anlassen des Motors alle Treibstoffreste
sorgfältig entfernen.
28) Die Sicherheitseinrichtungen dürfen nicht beschädigt oder außer Funktion gesetzt werden.
29) Die Einstellungen des Motors, im Besonderen die maximale Drehzahl, nicht verstellen.
46
Page 49

Übersetzung der Original-Anleitungen
30) Keine schweren Gegenstände auf dem Fahrersitz ablegen, da die Sicherheitseinrichtung ausgeschaltet
werden könnte.
31) Bei laufendem Motor keine Einstellungen oder Reinigungsarbeiten durchführen.
32) Die Maschine niemals von einer zweiten Person kontrollieren lassen, während Sie selbst auf der Maschine
sitzen und der Motor läuft.
33) Bewegen Sie die Maschine nicht ohne Mähwerk, sie kann sich aufbäumen und sehr gefährlich sein.
34) Heben Sie den Grasfangkorb nicht an, während die Maschine sich bewegt.
35) Abgenutzte oder beschädigte Auspufftöpfe auswechseln.
WEITERE SICHERHEITSRELEVANTE HINWEISE
Die oben aufgeführten Sicherheitshinweise könnten nicht ausreichen, um jedes Risiko zu vermeiden, falls sich der
Benutzer nicht an den vorgesehenen Gebrauch dieses Rasenmähers hält. Daher mahnen wir zur Vorsicht und
weisen auf Folgendes hin:
36) Die Drehung der Messer des Rasenmähers ist sehr gefährlich, Hände oder Füße vom Mähwerk fernhalten.
37) Im Rückwärtsgang nur langsam fahren.
38) Es ist gefährlich, bei hohen Motordrehzahlen das Lenkrad ruckartig zu betätigen.
39) Vor Beginn der Arbeit den Treibstofftank auffüllen. Nur im Freien tanken, vor dem Tanken immer den Motor
abstellen, nicht rauchen und nicht in der Nähe von offenen Flammen oder Funken tanken. Nach dem Tanken
Treibstofftank und Treibstoffbehälter wieder gut verschließen.
40) Den Treibstofftank bei Bedarf immer nur im Freien entleeren.
41) Nicht auf Schotter mähen, da der Schotter angesaugt und von den Messern herumgeschleudert wird, was
sehr gefährlich ist.
42) Den Zündschlüssel immer vor Kindern gesichert aufbewahren.
43) ACHTUNG: Um die Brandgefahr zu reduzieren, müssen der Motorraum, der Auspufftopf, die
Auspuffkrümmer, die Batterie, der Bereich um den Treibstofftank und die Treibstoffleitungen immer frei von
Gras, Blättern, Staub, usw. gehalten werden.
44) Die Maschine darf nicht in einem Gebäude abgestellt werden, in dem die Treibstoffdämpfe mit Flammen,
Funken oder freiliegenden Stromleitungen in Kontakt kommen könnten.
45) Vor Anlassen des Motors immer die roten Sicherheits-Sperren (Abb. 16) an den Grasfangkorb Hubzylindern
einhaken.
Den Mähantrieb auskuppeln und den Motor ausschalten:
a) bevor Sie verstopfte Punkte reinigen.
b) bevor Sie den Mäher überprüfen oder reparieren.
c) nachdem den Mäher gegen einen Fremdkörper gestoßen ist, prüfen Sie das Mähdeck auf Schäden hin.
d) wenn die Maschine anormal vibriert, halten Sie die Maschine an und suchen unverzüglich nach der
Ursache. Wenn notwendig, fragen Sie um Hilfe eines Grillo autorisierten Kundendienstzentrums.
IDENTIFIKATION DER MASCHINE UND KUNDENDIENST
Seitlich am Rahmen des Grillo FD900 befindet sich eine
Plakette mit der Seriennummer der Maschine.
KUNDENDIENST
In diesem Handbuch finden Sie die Anleitungen für den Gebrauch Ihrer Maschine. Für korrekte Wartungsarbeiten
wenden Sie sich bitte an Ihren Grillo-Händler.
ERSATZTEILE
Verwenden Sie ausschließlich Original-Ersatzteile, die unter sicherheitsrelevantem und montagetechnischem
Standpunkt keine Probleme bereiten können. Bei der Ersatzteilebestellung immer die Seriennummer der Maschine
und die Ersatzteil-Pos. angeben. Für die Ersatzteile des Motors die Hinweise im Handbuch des Motors beachten.
GARANTIE
Es gelten die gesetzlichen Garantiebedingungen. Der Händler muss eine Kopie der Garantie-Karte der Maschine
dem Kunden aushändigen. Die Kopie kann von der Grillo Webseite heruntergeladen werden. Für den Motor gelten
die vom jeweiligen Hersteller vorgesehenen Garantiebedingungen.
47
Page 50

Übersetzung der Original-Anleitungen
ERSATZTEILE, DIE SIE IMMER AUF LAGER HABEN SOLLTEN
1 Rasenmäher-Messersatz
1 Riemensatz
1 Luftfilter für den Motor
1 Ölfilter für den Motor
1 Gaszug
Ein Satz Sicherungen für die elektrische Anlage
ERSATZTEILEBESTELLUNG
Immer die Seriennummer der Maschine und die Ersatzteil-Pos. des auszuwechselnden Teils angeben. Wenden
Sie sich an ein Grillo-Center. Unsere Anschrift lautet:
GRILLO S.p.A.
Via Cervese 1701 – 47521 CESENA (FC)
Tel. 0039 – 0547 – 633.111 / Fax 0039 – 0547 – 632.011
Webseite: www.grillospa.it / E-Mail: grillo@grillospa.it
TECHNISCHE DATEN
MODELL: Hydrostatischer Frontaufsitzmäher mit Sammeln
MOTOR: YANMAR 3TNV76 Diesel 1116 cm³ (26 PS bei 3000 U.p.M.) Dreizylinder, Flüssigkeitskühlung mit
Elektrogebläse, mit manueller und automatischer Reinigung des Kühlers ausgestattet.
KRAFTSTOFFBEHÄLTER: 31 Liter.
HYDRAULIKÖLTANK: 6,3 Liter.
ANLASSER: elektrisch mit Batterie von 12 V.
ANTRIEB: hydraulisch mit Vierradantrieb (auch bei engem Wendekreis).
AUTOMATISCHE DIFFERENTIALSPERRE UND MANUELL MIT DRUCKKNOPF
GETRIEBE: hydrostatisches Getriebe mit vier Hydraulikmotoren auf den vier Rädern.
LENKUNG: mit Lenkrad und Servolenkung.
KUPPLUNG: elektromagnetisch für Zapfwelle, mit integrierter Messerbremse
GESCHWINDIGKEIT: 0 -14,5 km/h, stufenlos einstellbar.
REIFEN: vorne 23 x 10.50-12 GARTENRÄDER; hinten 18 x 7.50-8 GARTENRÄDER.
SITZ: super Komfort GRAMMER Sitz, gefedert und verstellbar und mit Armlehnen aus Metall ausgestattet.
LENKRAD: auf Lenksäule montiert und neigbar.
WENDEKREIS: 370 mm.
AUTOMATISMEN: automatisches Abschalten des Messers.
BREMSE: Betriebs- und Parkbremse.
GRASFANGKORB: 750 Liter. Hydraulische Korbentleerung mit automatischer Öffnung.
ABLADEHÖHE: 1950 mm.
HINTERER ÜBERHANG: 300 mm.
MOTORISIERTES GRASLEITBLECH, DAS EINE VOLLSTÄNDIGE UND GLEICHMÄßIGE BEFÜLLUNG DES
KORBES GEWÄHRLEISTET.
HYDRAULISCHE MÄHDECKSANHEBUNG UND KORBENTLEERUNG.
MÄHDECK : mit Sammlung
SCHNITTHÖHE: von 20 bis 100 mm mit stufenloser hydraulischer Einstellung vom Fahrersitz aus.
SCHNITTBREITE: 126 cm
LEISTUNG PRO STUNDE: 9.000 m²/h
BELEUCHTUNGSKIT FÜR STRASSENZULASSUNG: serienmäßig
ZUBEHÖR: Mähwerk von 126 cm
48
Page 51

Übersetzung der Original-Anleitungen
MASCHINENABMESSUNGEN (mit Mähdeck): Länge: 2910 mm - Breite: 1330 mm - Höhe: 1660 mm
ABSTAND VOM BODEN: 150 mm
ACHSSTAND: 1900 mm
GEWICHT (ohne Mähdeck): 795 kg
GEWICHT (mit Mähdeck):970 kg
INBETRIEBNAHME DER MASCHINE
- Die Maschine auf Transportschäden untersuchen.
- Ölstand des Motors (Abb. 3) und des hydrostatischem Getriebes (Abb. 4) kontrollieren.
- Reifendruck kontrollieren:
Vorderreifen 23 x 10.50 - 12 (1,4 bar)
Hinterreifen 18 x 7.50 - 8 (1,4 bar)
- Batterie kontrollieren; die Spannung darf nicht weniger als 12,5 V betragen; ggf. Batterie nachladen. Der
Zugang zur Batterie erfolgt, indem man den Knauf des Gashebels entfernt (Abb. 5), die
Befestigungsschrauben des Armaturenbretts herausschrauben und es entfernen. Die Maschine auf keinen Fall
anlassen wenn die Batterie nicht sachgemäß angeschlossen wurde. Der Laderegler und die Steuereinheiten
könnten hierdurch beschädigt werden.
- Wurde die Batterie trocken mit separater Säure geliefert, wie folgt vorgehen:
1) Säure einfüllen und 2 Stunden warten;
2) Batterie mit einem auf 12V und langsames Laden eingestelltem Ladegerät 2 Stunden lang aufladen.
Achtung - bei Nichtbeachtung dieses Hinweises kann die Batterie beschädigt werden und die Säure während
der Arbeit auslaufen.
BATTERIE
Achtung! Die aus der Batterie austretenden Gase sind explosiv. Die Batterie daher von Flammen oder Funken
fernhalten. Regelmäßig den Flüssigkeitsstand kontrollieren, und die Klemmen mit Vaseline geschmiert halten.
Wichtig:
- Die Pole der Batterie nicht umkehren.
- Der Mäher ist mit einem Laderegler ausgestattet, und sollte daher niemals ohne Batterie betrieben werden.
- Keine Kurzschlüsse verursachen.
EINFAHREN - ACHTUNG!!
Nach den ersten 50 Betriebsstunden das Motoröl und den Filter auswechseln. Vergewissern Sie sich, dass es
keine undichten Stellen gibt, und dass alle Schrauben, vor allem die Feststellschrauben der Messer und der
Räder, fest angezogen sind. Die Spannung der Zapfwellenriemen mit der Mutter auf der entsprechenden Feder
nachstellen: die Feder muss auf eine Länge von 65 mm von Buchse zur Buchse (siehe roten Pfeil) (Abb. 6)
nachgestellt werden. Die Spannung des Ladebeschleuniger-Riemens mit der Mutter auf der entsprechenden
Feder nachstellen: die Feder muss auf eine Länge von 70 mm (Abb.7) (siehe ebenfalls roten Pfeil) nachgestellt
werden.
BETRIEBSANLEITUNG
Vor dem Anlassen des Motors immer die folgenden Kontrollen vornehmen:
- Den Flüssigkeitsstand im Kühler kontrollieren (Abb. 8);
- Die Ansauggitter für die Motorkühlung müssen sauber sein (Abb. 9);
- Den Ölstand im Motor kontrollieren (Abb. 3);
- Den Hydraulikölstand kontrollieren (Abb. 4);
- Die Vorwärts- und Rückwärtsgangpedale (Abb. 1, Pos. 1 und 2) müssen auf Stopp stehen;
- Der Druckknopf zum Einkuppeln der Zapfwelle muss sich in Leerlaufstellung befinden (Abb. 1, Pos. 26);
- Der Luftfilter muss sauber sein (Abb. 10)
- Das Gitter im Fangkorb muss sauber sein (Abb. 11), um es herauszuziehen, die Sicherheitssperre des Deckels
einlegen (Abb. 12) und den Hebel betätigen (Abb. 11);
- Das Mähdeck und der Mähgutkanal müssen sauber sein.
Den Tank mit Treibstoff (Diesel) füllen, dazu einen Trichter mit einem sehr feinmaschigen Filter benutzen (Abb. 1,
Nr. 13).
ANLASSEN DES MOTORS
Den Zündschlüssel einstecken (Abb.1, Pos. 4) und zum Vorwärmen drehen; sobald das GlühkerzenWarnlämpchen erlischt (nach circa 15 Sekunden), den Zündschlüssel weiterdrehen, und sobald der Motor
angesprungen ist, loslassen. Zum Ausschalten des Motors den Zündschlüssel in Position << 0 >>drehen.
49
Page 52

Übersetzung der Original-Anleitungen
SITZEINSTELLUNG
Der Sitz lässt sich nach vorne und hinten bewegen. Den Sitz so einstellen, dass der Nutzer komfortabel sitzt und
eine bessere Überschaubarkeit über die Maschine hat. Um den Sitz nach vorne oder nach hinten zu schieben
muss man den Federungshebel des Sitzes unten in der Mitte des Sitzes nach vorne ziehen. Setzen Sie sich auf
den Sitz und gehen sie folgendermaßen für die Einstellung vor (Abb. 1, Nr. 17):
- um eine härtere Federung zu erzielen, muss der Hebel mehrmals bis zum gewünschten Resultat hochgezogen
werden.
- um eine weichere Federung zu erzielen, muss der Hebel mehrmals bis zum gewünschten Resultat nach unten
gedrückt werden.
Nach Einstellung der Federung muss der Hebel zur Einstellung der Federung wieder nach hinten gedrückt
werden.
Um die Rückenlehne zu klappen, muss der Hebel auf der linken Seite des Sitzes hochgezogen werden.
BEGINN DER ARBEIT
1) Das Mähdeck vom Boden anheben.
2) Mit vorgesehenem Druckknopf auf dem Mähdeck die Schnitthöhe einstellen (Abb. 1 Pos. 12).
3) Sitzpositionen (Abb. 1 Pos. 15,16 und Pos.17) einstellen.
4) Mähdeck senken (Abb. 1 Pos. 7).
5) Den Motor auf halbe Kraft beschleunigen (Abb. 1 Pos. 6). Bei Vollgas auf keinen Fall die Messer einschalten,
(der Motor darf nur halbe Drehzahl laufen), dann die Zapfwelle einschalten (Abb. 1 Pos. 26). Achtung: beim
Mähen muss der Hebel des Verteilers in „schwingender“ Position stehen (d.h. nach vorne geneigt). Die
Messer immer einige Meter vor der zu bearbeitenden Fläche einschalten, damit sich Mähwerk und Mähkanal
reinigen können und die Kupplung nicht überbeansprucht wird.
6) Sanft das Fahrpedal drücken (Abb. 1 Pos. 1) und mit der Arbeit beginnen. Das Pedal (Abb. 1 Pos. 2) seitlich
daneben ist das Pedal für den Rückwärtsgang.
7) Das Not-Bremspedal (Abb.1 – Pos. 3) soll nur in wirklichen Notfällen betätigt werden. Normalerweise werden
die Pedale für Vor-und-Rückwärtsgang (Abb. 1 – Pos. 1 und 2) zum Abbremsen benutzt.
8) Wenn der Grasfangkorb voll ist, werden durch einen Sensor automatisch die Messer ausgeschaltet und ein
Verstopfen des Kanals vermieden; durch Bedienung des Hebels am Hydraulikverteiler (Abb. 1 Pos. 8) kann man
den Fangkorb anheben und danach entleeren.
9) Um die Arbeit wieder aufzunehmen, zuerst die Schalter der Zapfwelle in „Aus“- Position stellen und dann
wieder einschalten (Abb. 1 Pos. 26).
NACH DEM MÄHEN
Nach dem Mähen die Messer auskuppeln. Zum Anhalten wie folgt vorgehen:
1) Das Fahrpedal loslassen (Abb. 1 Pos. 1 oder Pos. 2).
2) Den Gashebel auf Minimum stellen.
3) Das Mähdeck auf den Boden absenken.
4) Den Motor durch Drehen des Zündschlüssels auf Position „0“ ausschalten und Parkbremse einlegen (Abb. 1
Pos. 3 und Pos. 5).
NÜTZLICHE TIPPS ZUM GEBRAUCH DER MASCHINE
Der Mäher kann auch unter schwierigen Bedingungen ohne Verstopfungsgefahr arbeiten, wenn alle Vorrichtungen
korrekt eingestellt sind, und Sie die folgenden Punkte beachten:
1) Vergewissern Sie sich vor Beginn der Arbeit, dass das Mähwerk und die Mähgutleitungen sauber und frei von
Gras- und Erdresten sind. Vergewissern Sie sich weiterhin, dass der Ladekanal sachgemäß positioniert ist und dur
ch die zwei Haken (Abb. 13) eingehakt wurde.
2) Vor dem Mähen den Boden absuchen, und Steine, Stöcke oder andere Gegenstände entfernen.
3) Beim Mähen den Motor voll aufdrehen, und die Geschwindigkeit der Grashöhe anpassen. Bei besonders ho -
hem oder dichtem Gras langsamer fahren.
4) Häufiges Schleifen der Schneidmesser verbessert das Schnittbild und schont den Motor.
5) Nach dem Entleeren des Fangkorbes die Schneidmesser bereits einige Meter vor Beginn der zu bearbeiten -
den Fläche einkuppeln, damit der Rasenmäher und die Mähgutleitungen gereinigt werden und die Kupplung ge schont wird.
6) Das Gitter vor dem Kühler sauber halten (Abb.9).
7) Das Gitter im Fangkorb sauber halten: um es herauszunehmen, die Sicherheitssperre einlegen (Abb. 12) und
den Hebel betätigen (Abb. 11).
8) Bei nassem oder sehr hohem Gras das Mähwerk nicht ganz unten, sondern auf eine mittleren Position ein-
stellen.
9) Die Spannung der Mähdeck-Treibriemen kontrollieren und ggf. nachstellen (Abb. 6).
10) Regelmäßig kontrollieren, ob die Schneidmesser abgenutzt sind, im Besonderen die Schuaufeln, welche das
Mähgut in die Mähgutleitung drücken.
11) Unter normalen Arbeitsbedingungen muss sich der Mikroschalter im Grasfangkorb in waagerechter Stellung
befinden. Bei nassem oder hohem Gras muss er nach unten oder sehr hoch geregelt werden. Bei niedrigem
und trockenem Gras muss er nach oben geregelt werden.
50
Page 53

Übersetzung der Original-Anleitungen
12) Vergewissern Sie sich, dass kein Fremdkörper den Ladebeschleuniger verstopft.
13) Die Drehung der Mähgutleitung im Fangkorbinneren kontrollieren.
14) Vergewissern Sie sich, dass die Schneidemesser bei vollem Fangkorb automatisch ausgekuppelt werden;
dazu den Zündschlüssel so drehen, dass das Armaturenbrett funktioniert, der Motor bei niedriger Drehzahl läuft,
Zapfwellenschalter einlegen (Abb. 1 Pos. 26) und mit einer Hand den auf dem Sensor der Mähgutleitung montierte
Hebel berühren. Die Zapfwelle muss so ausgekuppelt werden.
15) Die Motorumdrehungen kontrollieren (max. 3200 Umdrehungen leer).
16) Immer mit voll aufgedrehtem Motor mähen; sinkt die Motorleistung, muss man kurz die Vorwärtsgeschwindig -
keit reduzieren mähen bis der Motor wieder die richtige Drehzahl erreicht hat.
17) Die Schneidmesser müssen richtig montiert sein.
18) Kontrollieren Sie die Ausrichtung und ob das Mähwerk richtig in den Ladebeschleuniger eingeführt wurde.
19) Da der Aufsitzrasenmäher FD900 eine hydrostatische Maschine ist, wird in kaltem Zustand mehr Leistung ab -
sorbiert. Schon nach wenigen Minuten entfaltet die Maschine ihre optimale Leistung. Berücksichtigen Sie, dass
Regelpumpe und die hydrostatischen Motoren von sehr guter Qualität und hochleistungsfähig sind.
20) ACHTUNG! Nicht mit angehobenem Mähdeck Wegstrecken zurücklegen. Die hydraulische Mähdeckanhe-
bung nur verwenden, um Hindernisse zu überwinden, auf Gehsteige oder feste Fahrbahnbegrenzungen zu fahren.
Es ist dagegen obligatorisch, auf öffentlichen Strassen mit homologierter Maschine einschließlich Lichtanlage,
Nummernschild und angehobenem Mähdeck zu fahren.
SCHNITTHÖHENEINSTELLUNG
Die Schnitthöhe wird durch einen Drückknopf (Abb. 1 Pos. 12) eingestellt. Auf unebenem Gelände, an Kuppen
oder Rinnen sollte das Mähwerk in der höchsten Stellung positioniert werden, damit die Messer keine
Bodenerhebungen berühren. Achtung! Während des Mähens muss sich der Hebel zum Anheben des Mähwerks in
Kipp-Position befinden und die Anti-Skalpräder perfekt mit dem Rand des Mähwerks angeglichen.
MÄHEN AN HÄNGEN
Wiesen in Hanglage vorzugsweise senkrecht zum Hang mähen (auf/ab) und niemals parallel zum Hang. Beim
Wenden besonders vorsichtig fahren, und darauf achten, dass die bergwärts gelegenen Räder nicht durch
Hindernisse (Steine, Äste, Wurzeln, usw.) ausgehoben werden, da dies den Verlust der Kontrolle über das
Fahrzeug zur Folge haben könnte. Sollten die Antriebsräder an Hängen durchrutschen, das Mähwerk mit der
hydraulischen Steuerung leicht anheben, so dass mehr Gewicht auf den Antriebsrädern ruht und folglich der
Antrieb erhöht wird. Die Lage muss also gut abgewägt werden. Bei feuchtem Boden und nassem Gras ist größte
Vorsicht angebracht, da die Maschine rutschen könnte. Beim Abwärtsfahren langsam anfahren, und bedenken,
dass die Räder auf geschnittenem oder trockenem Gras den Halt verlieren.
Die Differentialsperre (Abb. 1 Pos. 25) kuppelt sich automatisch ein z.B. wenn man bei starkem Gefälle die
Richtung ändert, um das Durchdrehen der Vorderräder zu vermeiden, oder auch zum Auffahren im
Rückwärtsgang auf Transportfahrzeuge mit Hilfe von Auffahrtrampen. Normalerweise wird die Differentialsperre
nicht eingeschaltet (Abb. 1, Pos. 25). Riskieren Sie nichts, inspizieren Sie das Gelände gut und wenn Sie sich
nicht sicher fühlen, vermeiden Sie zu steile Steigungen. Respektieren Sie die gesetzlich vorgeschriebenen
Sicherheitsgrenze, welche Sie im Handbuch finden (max. 14° - 25%).
SICHERHEITSVORRICHTUNGEN
Der Motor wird automatisch abgestellt, wenn:
- der Fahrer vom Sitz absteigt und zuvor die Parkbremse nicht eingelegt wurde.
Der Motor kann nicht eingeschaltet werden, wenn:
- der Zapfwellenschalter eingeschaltet ist;
- niemand auf dem Fahrersitz sitzt, außer wenn zuvor die Parkbremse eingelegt wurde und die Messer
ausgekuppelt wurden;
- die Pedale für Vor- und Rückwärtsgang nicht in der Stopp-Position stehen;
- der Grasfangkorb nicht vollständig abgesenkt wurde.
Achtung! Wenn die Parkbremse eingelegt ist, kann man den Fahrersitz verlassen, ohne dass der Motor sich abschaltet, solange die Messer ausgekuppelt sind.
ÜBERROLLBÜGEL
VORSICHT! Zur Vermeidung von schweren Verletzungen wegen Überschlagens der Maschine muss der
Überrollbügel hochgeklappt sein und Sicherheitsgurte verwendet werden.
Vergewissern Sie sich, dass der Sitz mit dem dafür vorgesehenen Haken sachgemäß befestigt wurde.
Der Schutz durch den Überrollbügel ist nicht gewährleistet wenn er heruntergeklappt wurde.
- Die Maschine auf keinen Fall mit heruntergeklapptem Überrollbügel einsetzen, wenn man auf unebenem
Gelände oder in Hanglage arbeitet.
- Den Überrollbügel nur dann senken, wenn es absolut erforderlich ist.
- Bei heruntergeklapptem Überrollbügel keine Sicherheitsgurte anschnallen.
- Langsam und mit Vorsicht fahren
- Den Überrollbügel wieder hochklappen, sobald die Bedingungen es erlauben.
- Besondere Vorsicht ist beim Arbeiten unter niedrigen Zweigen geboten! Stellen Sie sicher, dass keine
Elektrokabel, niedrige Zweige oder andere Hindernisse mit dem Überrollbügel in Verbindung kommen.
51
Page 54

Übersetzung der Original-Anleitungen
Zum Zurückklappen des Überrollbügels wie folgt vorgehen:
1. Die Maschine auf einem ebenem Gelände parken
2. Die Zapfwelle auskuppeln, das Mähdeck senken und die Parkbremse einlegen.
3. Den Motor abschalten und den Schlüssel abziehen.
4. Den Sitz nach vorne klappen (Abb. 14C).
5. Die Sternstellschrauben vom Überrollbügel entfernen (Abb. 14A)
6. Den Überrollbügel senken und ihn wieder mit den Sternstellschrauben befestigen (Abb. 14D).
7. Die Rückenlehne wieder hochklappen.
Wichtig: Den Überrollbügel nur dann senken, wenn es absolut erforderlich ist.
Zum Hochklappen des Überrollbügels wie folgt vorgehen:
1. Die Maschine auf einem ebenem Gelände parken
2. Die Zapfwelle auskuppeln, das Mähdeck senken und die Parkbremse einlegen.
3. Den Motor abschalten und den Schlüssel abziehen.
4. Den Sitz nach vorne klappen (Abb. 15C).
5. Die Sternstellschrauben vom Überrollbügel entfernen (Abb. 15A)
6. Den Überrollbügel heben und ihn wieder mit den Sternstellschrauben befestigen (Abb. 15E).
7. Die Rückenlehne wieder hochklappen(Abb. 15F).
WARTUNG UND SCHMIERUNG
VORSICHT!
- Wenn die Maschine oder ein Teil der Maschine angehoben wird, benutzen Sie immer geeignete
Arbeitsmittel wie z.B Hubtische oder Radkeile.
- Vor jedem Reinigungs-, Wartungs- oder Reparatureingriff, tragen Sie immer zweckmäßige
Arbeitskleidung und Arbeitshandschuhe.
- Wenn Sie Wartungsarbeiten an der Maschine durchführen, lassen Sie die angehobene
Maschine nie in ungesicherten Zustand (ohne Radkeile) und unbewacht, vor allem an einem Ort,
wo unerfahrene Personen oder Kinder leichten Zugang zur Maschine haben können.
Wenn bei der Wartung des Motors der Fangkorb hochgestellt wird, müssen die beiden roten Sicherheits-Sperren
über den Ölzylindern eingelegt werden (Abb. 16). Nicht am Motor arbeiten, ohne die Sicherheits-Sperren
eingelegt zu haben.
ZUGANG ZUM MOTORRAUM
Um Zugang zum Motorraum im Fall einer Panne des Motors, muss man den Hebel des hydraulischen Verteilers
zum Kippen des Grasfangkorbs ziehen und den Grasfangkorb manuell nach hinten verschieben.
SCHMIERUNG
Ablassöl und umweltschädliche Produkte richtig entsorgen. Eine gute Wartung und eine korrekte
Schmierung halten den Mäher stets funktionstüchtig und einsatzbereit.
SCHMIERBLATT
Motoröl 15W40 3kg Erster Wechsel nach 50 Betriebsstunden, dann alle 250
Stunden.
Kühlflüssigkeit / 6kg Den Behälter alle 1000 Betriebsstunden oder einmal jährlich
entleeren und reinigen, dann neue Kühlflüssigkeit nachfüllen
Hydrauliköl OSO 46 9,5kg Erster Wechsel nach 500 Betriebsstunden, danach alle 1000
Stunden
Mähwerk – Winkelgetriebe LSX 75W90 0,1 kg
0,112 lt
Alle 300 Betriebsstunden wechseln
MOTOR
Für die Abstände und die Vorgehensweise beim Schmieren die Hinweise im Handbuch des Motors beachten.
Nach den ersten 50 Betriebsstunden müssen das Öl und der Filter ausgewechselt werden. Danach
müssen sie alle 250 Stunden ausgewechselt werden. Für den Dieselmotor: SAE 15W40, Menge: 3 Liter. Wenn
man das Motoröl wechselt, muss auch der Ölfilter ausgewechselt werden (Abb. 3). Um das Öl aus dem Motor
abzulassen, den Deckel auf der rechten Seite des Ölbehälters abschrauben (Abb. 17). Das Öl durch den
vorgesehenen Deckel einfüllen (Abb. 18). Es ist besonders wichtig, dass der Motor sachgemäß gewartet wird: Der
52
Page 55

Übersetzung der Original-Anleitungen
Luftfilter muss sauber sein, der Motorölstand muss stimmen. Den Motorraum, den Bereich um den Auspufftopf und
die Auspuffkrümmer sauber halten, vorzugsweise ein Sauggerät benutzen. Den Luftfilter (Abb. 10) und den
Vorfilter alle 8 Stunden kontrollieren. Damit die Luft zum Kühlen des Kühlers ungehindert hineinströmen kann,
vergewissern Sie sich, dass der Kühler immer sauber ist. Das Gebläse des Kühlers wird von einem Elektromotor
angetrieben. Wenn die Schutzgitter des Kühlers verstopft sind und die Kühlflüssigkeit und das Hydrauliköl die
Temperatur von 87° C übersteigen, wird für einige Sekunden durch einen Sensor automatisch die
Rotationsrichtung des Ventilators umgedreht, um die Gitter zu reinigen. Dieser Vorgang kann auch von Hand
getätigt werden, indem man für einige Sekunden den Inversions-Schalter des Ventilators betätigt. Um den
Ventilator des Kühlers zu inspizieren und zu reinigen, muss der Hebel (Abb. 19) betätigt werden.
AUFTANKEN UND ENTLÜFTUNG DES KÜHLERS
Achtung! Gefahr: heiße Flüssigkeit unter Druck.
Damit der Motor richtig abkühlen kann, darf sich keine Luft im Kühlungszyklus befindet. Sicherstellen, dass die
Schellen der Wasser-Muffen fest angezogen sind und dass keine Luft von Außen in den Kreislauf eindringen kann.
Die Entlüftung wie folgt durchführen:
Vorsicht! Für diese Arbeit immer geeignete Handschuhe tragen.
1) Die Flüssigkeit in den Ausgleichsbehälter (Abb. 8) einfügen.
2) Den Motor anlassen und auf Arbeitstemperatur bringen (um sicherzustellen, dass das Thermostatventil des
Motors geöffnet ist).
3) Zum Schluss das Niveau des Behälters wiederherstellen und den Deckel schließen.
ELEKTRO-HYDRAULISCHER VERTEILER
Der elektro-hydraulische Verteiler (Abb. 20) wird durch Hebel betrieben. Der Betriebsdruck liegt bei 120 bar.
HYDROMOTOREN
Der Ölstand muss bei kalten Motor kontrolliert werden (Abb. 4). Wenn Hydrauliköl nachgefüllt werden muss, OSO
46 verwenden (Gesamtmenge: 9,5 Liter). Diese Kontrolle regelmäßig durchführen.
Achtung! Das Hydrauliköl in den Hydromotoren und den entsprechenden Filter nach 500 Stunden zum ersten Mal
wechseln, dann alle 1000 Stunden.
Das Öl muss vor Ablauf der 500 Stunden gewechselt werden, wenn:
- Es schwarz geworden ist;
- Es eine weißliche Farbe angenommen hat (weil es mit Wasser verschmutzt wurde);
- Schwarze Ablagerungen zu sehen sind (weil das Öl zum Teil schlecht geworden ist).
Zum Ablassen des Öls den unteren Tankverschluss (Abb. 22) aufschrauben. Zum Einfüllen den oberen
Verschluss abschrauben (Abb. 4). Besonders auf eventuelle Uhreinheiten achten, welche in den Kreislauf
gelangen und große Probleme an der Maschine verursachen können. Wenn man das Hydrauliköl wechselt, auch
den Ölfilter (Abb. 21) wechseln; auf den richtigen Filtrierung-Grad achten. Den Druck der hydraulischen Anlage
des Radantriebs nicht über 280 bar erhöhen; es könnten die Hydraulikpumpe und die hydrostatischen Motoren auf
den Rädern beschädigt werden.
WINKELGETRIEBE MÄHDECK
Synthetisches Öl LSX 75 W 90 (API GL4 + GL5; API MT1 und PG2) verwenden Menge 0,112 kg. Alle 300
Stunden wechseln. Der Deckel des Ölniveaus befindet seitlich auf dem Winkelgetriebe (Abb. 23). Um Öl vom
Winkelgetriebe zu entfernen, muss man das Mähwerk ausbauen, die Plastikabdeckung entfernen, das Mähdeck in
Wartungsstellung stellen und den Deckel herausschrauben. Achten Sie darauf, dass das Öl nicht auf dem Riemen
abgießt. (Für die Ausführung empfehlen wir, sich an eine autorisierte Fachwerkstatt zu wenden.) Bei Verlusten
Öldichtungen überprüfen und auswechseln, um Beschädigungen an der gesamten Übersetzung zu vermeiden.
Zusammenfassende Tabelle der DRÜCKANGABEN
Geschlossener Kreislauf an den Rädern
(Regelpumpe)
280 BAR
Servolenkung 120 BAR
Verteiler 120 BAR die Servolenkung ist vorrangig
Ladepumpe 7 BAR
SCHMIERPUNKTE
Die Lage der zu schmierenden Punkte mit dem entsprechenden Schema ermitteln (Abb. 2, Nr. 3 und Nr. 4). Alle
50 Stunden folgende Stellen mit Fett schmieren: die Gelenke der hinteren Achse, die Pedale, die Führungsrollen
der Zapfwellen-Keilriemen, das Verbindungsgelenk des Mähwerks an 2 Punkten, die Hebearme der
Fangkorbanhebung.
53
Page 56

Übersetzung der Original-Anleitungen
NOTBREMSE UND PARKBREMSE
Der FD900 ist mit einem Fahrsystem mit Hydromotoren ausgestattet, daher genügt es, die Fahr- und
Rückwärtspedale loszulassen, um zu bremsen (Abb. 1 Pos. 1 und 2). Das Bremspedal (Abb. 1 Pos. 3) darf nur im
Notfall benutzen werden. Die Bremse wird betätigt, indem man das Pedal drückt (Abb. 1 Pos. 3), und die Sperre
einlegt (Abb. 1 Pos. 5) . Um die Bremse zu lösen, einfach dasselbe Pedal (Abb. 1 Pos. 3) erneut drücken. Auch
wenn bei ausgeschaltetem Motor die Maschine selbst-bremsend ist, immer die Parkbremse verwenden. Der Motor
läuft weiter auch wenn der Fahrer den Sitz verlässt , wenn die Pedal-Parkbremse angezogen ist.
EINSTELLUNG DER PARKBREMSE UND DES NOTBREMSPEDALS
Die Einstellschrauben der Bremsen befinden unterhalb des Trittbretts (Abb. 24). Die Trommelbremsen sind an den
Vorderrädern angebracht, achten Sie darauf, dass das Trommelbremskabel nicht gegen das Rad stößt.
SCHLEIFEN DER MESSER
Zur Inspektion und Wartung des Mähdecks wie folgt vorgehen:
1) das Mähwerk in die niedriste Schnittposition bringen
2) den Grasfangkorb anheben und den zwischen Mähdeck und Korb angebrachten Ladekanal entfernen
3) die zwei seitlichen Bolzen aushängen (Abb. 1 Pos.10);
4) das Mähdeck von Hand weiter anheben und mit vorgesehenem Hebel einhaken (Abb. 25).
Der Kardan muss nicht ausgehängt werden, vor dem Anlassen der Maschine sollten Sie sich jedoch vergewissern,
dass der Kardan gut angeschlossen ist und die Haltetaste vorsteht.
WICHTIG: die mittlere Schraube, die die rechte Messerscheibe befestigt, ist linksgängig. Das Anzugsmoment der
mittleren Schraube der Messernabe ist 53 Nm (siehe Montageschema Abb. 26), wohingegen
Messerbefestigungsschrauben 50 Nm Anzugsmoment haben. Um den Wechsel der der Messer zu erleichtern,
muss die gesamte Trägerscheibe mit entfernt werden.
Da ein stumpfes Messer das Gras nicht glatt schneidet, sondern ausreißt, was das Schnittbild wesentlich
beeinträchtigt, müssen die beiden Messer regelmäßig auf beiden Schneiden geschliffen werden. Abgenutzte
Messer schneiden nicht mehr gut und werden unwuchtig, so dass der Mäher vibriert; beide Messer gleichmäßig
schleifen.
Achtung! Beschädigte oder verformte Messer nicht reparieren, sondern immer durch neue Messer
ersetzen!
EINSTELLEN DES MÄHDECKS
Ein einwandfreies Schnittbild kann nur dann erhalten werden, wenn das Mähwerk vollkommen plan liegt. Den
Mäher auf einen ebenen Boden stellen, den Reifendruck kontrollieren, die Entfernung des Mähwerkrandes vom
Boden kontrollieren, und eventuell die Spannvorrichtung (Abb. 27, A) und evtl. die Stellschraube nachstellen
(Abb. 27, B), um das Mähwerk parallel zum Boden zu stellen. Sollten Sie es nicht parallel stellen können,
wenden Sie sich an eine autorisierte Fachwerkstatt.
Zum Abnehmen des Mähwerks von der Maschine wie folgt vorgehen:
1) Den Grasfangkorb anheben und den Ladekanal entfernen
2) Die Sperrschraube des Kardanschutzes herausschrauben und den Kardan per Knopfdruck von der
Sperre aushängen
3) Die Splinte von den Bolzen der Hebearme herausnehmen und die Stifte entfernen
4) Die vier Hydraulikschläuche abtrennen
5) Das Mähdeck nach vorne ziehen, um es von der Maschine ausbauen.
Um das Mähwerk wieder anzuschließen, muss man in umgekehrter Reihenfolge vorgehen. Sollte sich der
Anschluss der Hydraulikschläuche schwierig erweisen, muss man den Hebel zur Entleerung des Grasfangkorbs
bewegen, wohingegen zum Anschluss der Schläuche für die Schnitthöheneinstellung der Druckknopf zur
Schnitthöheneinstellung bei eingestecktem Schlüssel vom Fahrersitz aus gedrückt werden muss.
ZAPFWELLENRIEMEN
Achtung! Es handelt sich um einen Spezialriemen, NUR ORIGINAL-RIEMEN VERWENDEN. Zum Auswechseln
wie folgt vorgehen: die Spannvorrichtung (Abb. 6) lösen und den Arm am rechten Fuß des Motors durch zwei
Schrauben entfernen (Abb. 28). Die Stoß-Dämpffeder der Kupplung und das Kupplungskabel aushaken. Um die
Spannung nachzustellen muss die Mutter, welche auf die Spannfeder wirkt mit einem 13-er Schlüssel eingestellt
werden. Die Feder muss auf die von dem roten Pfeil angezeigten Länge komprimiert werden (Abb.6)
EINSTELLUNG DER ANGLEICHUNG ZWISCHEN GRASFANGKORB UND LADEKANAL
Um ein gutes Ergebnis zu erzielen ist die sachgemäße Deckung zwischen Grasfangkorb und Ladekanal bei
geschlossenem Grasfangkorb sehr wichtig
Hierzu wie folgt vorgehen:
1) Den Grasfangkorb schließen.
2) Kürzen oder verlängern Sie den Stiel der hydraulischen Stellzylinder (Abb. 29), die das Kippen des
Grasfangkorbs bewirken. Dazu die Schraube unter dem Stiel der Stellzylinder fest- oder herausschrauben.
54
Page 57

Übersetzung der Original-Anleitungen
3) Die Nachstellung kann ebenfalls mit Hilfe der Befestigungsschrauben durchgeführt werden, die den
Grasfangkorb im hinteren Teil befestigen (Abb. 30).
HAKEN KORBVERSCHLUSS
Der Korbverschluss-Haken wird mit der entsprechenden Schraube eingestellt (Abb. 31). Es muss ein leichtes Spiel
von 2 mm bleiben, um das Einhaken beim Schließen zu erleichtern.
FD900 - STÖRUNGEN UND DEREN ABHILFE
STÖRUNG URSACHE ABHILFE
Der Zündschlüssel steht auf "AVV.", die
Armaturenbrettbeleuchtung schaltet sich
jedoch nicht ein
Batterie liefert keinen Strom
- Verbindungskabel kontrollieren
- Elektrolyt Stand kontrollieren
- Batterie aufladen
- Sicherung auswechseln
Das Armaturenbrett schaltet sich mit dem
Zündschlüssel in der Pos. "AVV." ein, der
Anlasser springt jedoch nicht an
Batterie liefert nicht genug
Strom
- Batterie aufladen
Zustimmung zum Start fehlt
- Fahrpedale in STOPP Stellung
bringen
- Sich auf Fahrersitz setzen
- Schalten Sie die Zapfwelle ab
Der Motor hat beim Starten Schwierigkeiten
oder läuft unregelmäßig. Versorgungsprobleme
- Luftfilter reinigen oder
auswechseln
- Kontrollieren, ob Luft in die
Treibstoffleitungen angesaugt
wird
- Treibstoffleitungen säubern
Verunreinigter Treibstoff
- Treibstofffilter kontrollieren und
ggf. auswechseln
Anlasser funktioniert, Motor springt jedoch
nicht an
Dieselölversorgung ist
unterbrochen
- Treibstoffstand kontrollieren
- Treibstofffilter kontrollieren und
ggf. auswechseln
- Kontrollieren, ob das
Entlüftungsloch auf dem
Tankdeckel verstopft ist
Bei Kaltstart werden die
Zündkerzen nicht
genügend
vorgewärmt
- Warten, bis das ZündkerzenWarnlämpchen erlischt
Timer gibt keine Zustimmung
- Verbindungen kontrollieren
- Timer auswechseln
Elektrostopp führt nicht den
ganzen Hub aus
- Elektrostopp-Hub kontrollieren
- Elektrostopp auswechseln
Motorleistung fällt beim Mähen ab Für die Schnitthöhe zu hohe
Geschwindigkeit
- Langsamer fahren
- Rasenmäher in eine etwas höhere
Schnittposition einstellen
Beim Einkuppeln der Messer stirbt der
Motor ab
Zustimmung zum Einkuppeln
fehlt
- Druckknopf zum Einschalten der
Messer
kontrollieren
- Auf Fahrersitz setzen
- Grasfangkorb schließen
Unregelmäßiges Schnittbild und schlechte
Mähgutsammlung
Mähwerk nicht parallel zum
Boden
- Reifendruck kontrollieren
- Mähwerk justieren
Messer funktionieren nicht
richtig
- Kontrollieren, ob sie korrekt
montiert sind
- Messer nachschleifen oder
auswechseln
- Spannung der Zapfwellenriemen
nachstellen
Für die Schnitthöhe und die
Beschaffenheit der Wiese zu
hohe Fahrtgeschwindigkeit
- Langsamer fahren
Verstopfung des Ladekanals - Das Mähwerk entfernen und den
55
Page 58

Übersetzung der Original-Anleitungen
Kanal leeren
- Die Umdrehungen des Motors
kontrollieren,
max. 3000 U.p.M.
- Das Gitter des Grasfangkorbs
reinigen
Vibrationen beim Arbeiten Messer sind schlecht
ausgewuchtet
- Messer auswuchten oder ggf.
beschädigte Messer auswechseln
Befestigungsschrauben locker
- Befestigungsschrauben der
Messer, des Motors und des
Rahmens kontrollieren und ggf.
nachziehen
Motoröl-Warnlämpchen leuchtet auf Druckabfall
- Ölstand kontrollieren und ggf. Öl
nachfüllen
- Motorölfilter auswechseln
Der Motor startet nicht
- Defekter Mikroschalter für
Vortrieb
- Defekter Mikroschalter im
Sitz
- Defekter Parkbremsen
Mikroschalter
- Brückenschaltung zwischen dem
lila - schwarzen und dem rot –
weißen Kabel vornehmen
- Die Verbindung hinter dem Sitz
abtrennen. Das weiß – rote Kabel
mit dem lilafarbenem Kabel
verbinden.
- Das weiß – rote Kabel mit dem
grauen Kabel verbinden.
Die Messer kuppeln sich nicht ein
- Defekter Schalter
- Defekte elektromagnetische
Kupplungen
- Mikroschalter für vollen
Grasfangkorb ist defekt
- Mikroschalter für
geschlossenen Grasfangkorb
ist defekt
- Den Druckkopf zum Einschalten
der Messer prüfen.
- Die Kupplung direkt mit Strom
versorgen
- Die Schmelzsicherungen prüfen
- Den Konnektor unter dem
Grasfangkorb auf der rechten Seite
abtrennen. Das weiß-rote Kabel mit
dem roten Kabel verbinden, um die
Funktionsweise zu prüfen.
ACHTUNG: Falls die Störungen anhalten, nachdem Sie die im vorliegenden Handbuch beschriebenen
Eingriffe durchgeführt haben, wenden Sie sich an eine autorisierte Fachwerkstatt. Versuchen Sie niemals,
größere Reparaturen ohne die notwendigen Mittel und technischen Kenntnisse durchzuführen.
WENN SIE GEGEN EINEN STEIN ODER EINEN ANDEREN FREMDKÖRPER GEFAHREN SIND
1) Die Messer ausschalten
2) Das Mähwerk anheben
3) Den Motor ausschalten und die Handbremse ziehen
4) Messerbefestigungsschrauben und Mähwerk kontrollieren.
5) Vergewissern Sie sich, dass sich der Fremdkörper nicht im Ladekanal befindet.
ELEKTRISCHE ANLAGE
Die elektrische Anlage ist durch Sicherungen geschützt; brennen diese durch, wird die gesamte elektrische Anlage
außer Betrieb gesetzt. Es gibt zwei Hauptsicherungen zu je 40 A/h: eine schützt die gesamte Anlage und die zwei te schützt das Kühlgebläse. Auf dem linken Schutzblech sind die Schmelzsicherungen montiert zum Schutz der
unterschiedlichen Komponenten der elektrischen Anlage und der Lichtanlage. Bei evtl. Schäden den Defekt su-
chen und beheben, und die Sicherung durch eine neue, gleiche Sicherung ersetzen. Niemals Sicherungen mit
anderer Leistung einsetzen! Falls die elektrischen Störungen auch nach dem Auswechseln der Sicherungen an -
dauern, setzen Sie sich bitte mit Ihrem Grillo-Servicecenter in Verbindung. Versuchen Sie niemals, kompliziertere
Reparaturen selber durchzuführen, wenn Sie nicht über die dafür erforderlichen technischen Kenntnisse und Ausrüstungen verfügen.
FUNKTIONSWEISE DER WICHTIGSTEN KOMPONENTEN DER ELEKTRISCHEN ANLAGE
- Ein Sicherheitssensor erkennt, ob sich der Grasfangkorb in der Arbeitsposition befindet (Abb. 32), ansonsten
schaltet sich das Mähwerk nicht ein.
- Am Thermostatventil des Motors ist ein Sensor montiert (Abb. 33), der die Temperatur der Kühlflüssigkeit
misst. Sobald die Temperatur der Kühlflüssigkeit 87°C übersteigt, leitet der Sensor ein Signal an die Steuereinheit
(Abb. 34), welche einen automatischen Reinigungszyklus auslöst, indem sie einige Sekunden lang die
Drehrichtung des Kühlergebläses umkehrt. Man kann den Reinigungszyklus auch von Hand ausführen, indem
man den dafür vorgesehenen Knopf drückt , der sich auf der Schalttafel befindet (Abb. 1 Pos. 24). Es gibt vier
Relais zur Umkehrung des Kühlergebläses (Abb. 36).
56
Page 59

Übersetzung der Original-Anleitungen
- Auf dem Gehäuse des thermostatischen Ventils ist außerdem ein Sensor montiert, der das Alarmsignal und
das Signal zum Ausschalten des Motors weiterleitet, sobald die Temperatur über 107°C steigt.
- Auf dem Fahrpedal befindet sich ein Mikroschalter, der die Stopp-Position für das Anfahren ermittelt (Abb. 35,
Pos. A).
- Auf dem Pedal zum Blockieren der Parkbremse befindet sich ein Sensor (Abb. 35, Pos. C), der erhebt, wann
die Bremse eingelegt ist und der erlaubt, dass der Motor weiterläuft, auch wenn der Fahrer den Sitz verlassen
hat.
- Auf der Spannvorrichtung des Rückwärtsgangspedals befindet sich ein Mikroschalter, der den Warnsummer
des Rückwärtsgangs aktiviert (Abb. 35, Pos. B).
- Das Elektroventil der Differenzialsperre (Abb. 37) befindet sich unter dem Ladekanal: Wenn es in Betrieb ist,
leuchtet ein rotes LED auf.
- Der Mikroschalter des vollen Grasfangkorbs ist auf dem beweglichen Grasleitblech im Korb montiert, und
wenn der Korb voll ist sendet er ein Signal zum Ausschalten der Messer (Abb. 38). Zur Gewährleistung einer
kompletten Befüllung des Grasfangkorbs ist es wichtig, je nach Beschaffenheit des Grases die Stellung des
Mikroschalters bei vollem Grasfangkorb einzustellen (Abb. 2B).
LUFTFILTER
Den Luftfilter (Abb. 10) und den Vorfilter alle 8 Stunden kontrollieren und reinigen. Der Luftfilter ist mit einem
Depressions-Sensor ausgestattet, welcher auf dem Armaturenbrett das Verstopfen des Filters anzeigt. Was den
Wechsel und die genauen Wartungsintervalle betrifft, halten Sie sich an die Anleitungen und Hinweise im
Motorhandbuch. Bei Arbeiten in besonders staubiger Umgebung wird die Reinigung des Luftfilters alle 4 Stunden
empfohlen. Des Weiteren ist im Innern des Filters ein Sicherheitseinsatz untergebracht; mit diesem wird
vermieden, dass evtl. Fremdkörper in die Ansaugleitung während der Reinigung des Filters eindringen. Der Filter
muss bei Verschleiß gewechselt werden.
DIESELFILTER
Der Einsatz des Dieselfilters (Abb. 39) alle 250 Stunden auswechseln. Was das Auswechseln und die genauen
Wartungsintervalle betrifft, halten Sie sich an die Anleitungen und Hinweise im Motorhandbuch.
DIESEL-ABKLÄRGEFÄß
Das Diesel-Abklärgefäß (Abb. 40) dient dazu, dass sich mögliche flüssige Verunreinigungen des Dieseltreibstoffs
oder Wasser auf dem Boden absetzen und nicht mit Teilen des Motors in Kontakt kommen. Im Innern des
Abklägefäßes befindet sich ein roter Ring. Je mehr Unreinheiten vorliegen, desto höher steigt er. Das Abklärgefäß
reinigen, dabei auch das Innere mit sauberem Diesel säubern. Das Abklärgefäß bei jedem Gebrauch überprüfen.
Was das Auswechseln und die genauen Abstände der Wartung betrifft, halten Sie sich an die Anleitungen und
Hinweise im Motorhandbuch. Achtung! Den Dieseltreibstoff immer mit Hilfe eines sehr feinmaschigen Filters
auffüllen.
REINIGUNG
Das Mähwerk, die Mähgutleitungen, den Ladebeschleuniger und den Grasfangkorb reinigen. Den Motorraum auf
keinen Fall mit einem Hochdruckreiniger waschen, sondern immer nur mit Pressluft oder einem Sauggerät.
ANHÄNGERKUPPLUNG
Die Anhängerkupplung befindet sich auf der Rückseite der Maschine. Es können in der Ebene Planierwalzen und
Anhänger bis zu einem Gewicht von maximal 200 kg gezogen werden.
ZIEHEN DER MASCHINE BEI ABGESCHALTETEM MOTOR
Achtung! Um die Maschine bei abgeschaltetem Motor zu bewegen, muss man die Schraube auf der
hydrostatischen Pumpe (Abb. 41) um drei Umdrehungen aufschrauben; hierzu einen 17 mm Schlüssel benutzen.
Vorsichtig vorgehen, denn auf diese Weise wird die Vorrichtung zum Selbstbremsen außer Kraft gesetzt. Die
Maschine sehr langsam und nur kurze Strecken ziehen, höchstens 100 m, um ein Festfressen der
hydraulischen Pumpe und der Motoren zu vermeiden.
WIRD DIE MASCHINE LÄNGERE ZEIT EINGELAGERT
Den Mäher an einem trockenen, vor Witterungseinflüssen geschützten Ort bringen, von Grasresten befreien und
mit einer Plane abdecken. Wird die Maschine voraussichtlich für mehr als einen Monat nicht gebraucht, das rote
Kabel der Batterie abtrennen, die im Handbuch des Motors angegebenen Hinweise befolgen und alle Gelenke
schmieren. Regelmäßig die Spannung der Batterie prüfen; sinkt sie unter 12,5 Volt, muss die Batterie sofort
aufgeladen werden.
57
Page 60

*
1000
*
58
Page 61

Traducción de las instrucciones originales
FD 900
CORTACÉSPED HIDROSTATICO
Estimado Cliente,
dándole las gracias por la confianza y la preferencia otorgada a nuestro Grillo FD900, confiamos en que el uso de
esta máquina se ajuste plenamente a sus necesidades. Para poderla utilizar de la mejor manera y para su
mantenimiento a través del tiempo, le rogamos que lea atentamente y siga escrupulosamente las indicaciones de
este manual. Esto le permitirá obtener los máximos resultados y proteger su inversión. Por eso le rogamos que
guarde siempre este manual junto con la máquina.
DESCRIPCIÓN GENERAL Y USO PREVISTO
La máquina Grillo FD900 es un cortacésped con asiento, construido para cortar y recoger el césped y para la
recogida del follaje.
¡ATENCIÓN! Antes de arrancar el motor, lea atentamente. ¡Las siguientes
advertencias son importantes para su incolumidad física!
ADVERTENCIAS
¡La prudencia es el arma principal en la prevención de los accidentes. Le rogamos que lea cuidadosamente estas
advertencias sobre el uso de la máquina, antes de empezar el trabajo. El uso incorrecto del cortacésped y de su
equipamiento puede ser perjudicial; para reducir estas posibilidades, adopte las precauciones necesarias que se
indican a continuación.
1) Leer este manual en su totalidad antes de encender el cortacésped y ponerlo en marcha.
2) Prestar una atención especial a las prohibiciones y a las etiquetas de seguridad.
3) Antes de permitir que otras personas trabajen, es preciso ponerlas al corriente de las normas de seguridad y
de cómo se usa el cortacésped.
4) Antes de empezar el trabajo, ponerse prendas apropiadas de seguridad, guantes, botas gafas.
5) Durante el trabajo, ponerse adecuados medios de protección acústica (cascos).
6) Antes de encender el motor, comprobar que no haya personas alrededor, especialmente niños.
7) Antes de arrancar en marcha atrás, comprobar que no haya personas y obstáculos.
8) Realizar una inspección del terreno antes de proceder con el corte, quitar las piedras, bastones o cuerpos
extraños que podrían ser arrojados a gran distancia y por esto causar graves peligros.
9) Si choca contra un cuerpo extraño, desembrague la cuchilla, apague el motor, retire la llave de contacto y
controle el cortacésped. Si la máquina vibra, llévela a reparación.
10) Antes de bajar de la máquina, apagar el motor, desconectar la toma de fuerza (PTO), retirar la llave de
contacto y posicionar el plato del cortacésped en la posición más baja.
11) En terrenos irregulares, reducir la velocidad.
12) Cuesta abajo, disminuir la velocidad.
13) Cuesta abajo, entrar siempre lentamente en las curvas.
14) El usuario siempre es responsable de los daños causados a terceras personas.
15) Las cuchillas deformadas o dañadas tienen que ser siempre cambiadas y nunca arregladas.
16) Utilizar siempre repuestos y accesorios originales Grillo.
17) Trabajar sólo con la luz natural o con luz artificial muy buena.
18) Guardar el carburante en contenedores especialmente fabricados para dicho uso.
19) Prestar atención cuando trabaje cerca de una carretera.
20) Levantar y vaciar el cesto sólo cuando la máquina esté parada y sobre superficie llana.
21) Dejar enfriar el motor antes de estacionar la máquina en lugares cerrados.
EVITAR LOS USOS INCORRECTOS
22) No deje subir a pasajeros.
23) Se prohíbe el uso a los menores de 16 años.
24) No utilice la máquina cuando esté cansado o haya tomado bebidas alcohólicas.
25) No trabaje con el cortacésped cerca de fosos o muelles que se pueden romper bajo el peso de la máquina,
especialmente cuando la superficie está desprendida o mojada.
26) No parar la máquina cuando se suba o se baje una pendiente. .
27) Evite derrames de combustible y, tras haber llenado el depósito, limpie cualquier derrame antes de arrancar el
motor.
28) No manipule o desactive los dispositivos de seguridad.
29) Se prohíbe cambiar las regulaciones del motor, en particular el número máximo de revoluciones.
30) No ponga pesos sobre el asiento, el dispositivo de seguridad del arranque podría desactivarse.
31) No haga ningún tipo de regulación o limpieza con el motor encendido.
32) No permita que terceros controlen la máquina cuando esté conduciendo o con el motor en marcha.
59
Page 62

Traducción de las instrucciones originales
33) No desplace la máquina sin el plato cortacésped. La máquina podría encabritarse y resultar peligrosa.
34) No levante el cesto mientras la máquina esté en marcha.
35) Cambie los escapes deteriorados o dañados.
MEDIDAS PREVENTIVAS COMPLEMENTARIAS
Las advertencias citadas arribas podrían no ser suficientes al fin de evitar cualquier riesgo, en el caso de que el
operador no respete el uso apropiado de la máquina cortacésped. Por eso, añadimos las medidas preventivas de
seguridad que se dan a continuación.
36) La rotación de la cuchilla del cortacésped es muy peligrosa: mantener los pies y las manos alejados del plato
de corte cuando el motor esté funcionando.
37) No retroceder con el motor acelerado.
38) Es peligroso accionar el volante bruscamente, con el motor en velocidad máxima.
39) Antes de arrancar, reposte de combustible el depósito. Haga el abastecimiento sólo al aire libre, apague
siempre el motor, manténgase alejado de chispas o llamas, ¡no fume! Cierre bien el tapón del depósito y de
los contenedores de carburante.
40) Si es necesario vaciar el depósito de carburante, haga la operación al aire libre.
41) No trabaje con el cortacésped sobre la grava, porque sería aspirada y centrifugada por la cuchilla y podría
causar graves peligros.
42) En presencia de niños, cuando la máquina no se utiliza, esconda las llaves de contacto.
43) ¡ATENCIÓN! Para reducir el peligro de incendio, mantenga el alojamiento del motor, el tubo de escape, los
colectores de escape, la batería, la zona del depósito y de los conductos del carburante libres de hierbas,
hojas, polvo, etc.
44) No almacene la máquina al interior de un edificio donde los vapores del carburante puedan llegar hasta
llamas, chispas o cables eléctricos descubiertos.
45) Insertar siempre los dispositivos rojos de seguridad sobre los cilindros hidráulicos de levantamiento del cesto
(fig.16) antes de acceder al motor.
Desactivar la transmisión del plato de corte y apagar el motor:
a) antes de limpiar los puntos obstruidos.
b) antes de controlar o reparar el cortacésped.
c) en caso de choque contra un cuerpo extraño (inspeccionar el órgano de corte para comprobar que no
haya daños y repararlo antes de volver a trabajar).
d) si la máquina empieza a vibrar de manera anómala, efectuar en seguida un control general para
individuar el origen de la anomalía: si necesario, contacte a un taller autorizado Grillo.
IDENTIFICACIÓN Y ASISTENCIA
El cortacésped Grillo FD900 está equipado de una placa
con el número de bastidor de la máquina, posicionada
sobre un lado del chasis.
SERVICIO Y ASISTENCIA
Este manual proporciona las instrucciones para el uso del cortacésped. Para un correcto mantenimiento, consulte
el distribuidor de su área.
REPUESTOS
Se aconseja utilizar exclusivamente recambios originales GRILLO, porque son los únicos que ofrecen las
características de seguridad e intercambiabilidad. Cuando se soliciten piezas de recambio, se citarán siempre el
número de serie de la máquina y el código de la pieza de recambio.
Para los recambios del motor, siga las indicaciones del manual específico.
GARANTÍA
La garantía es ofrecida en los modos y dentro de los límites previstos por la ley en vigor. El revendedor tiene que
entregar el certificado de garantía de la máquina al cliente final, imprimiendo una copia de la registración del portal
Internet Grillo. Por lo que respecta el motor, valen las condiciones previstas por los respectivos fabricantes.
REPUESTOS ACONSEJADOS
N. 1 juego de cuchillas cortacésped
N. 1 juegos de correas
60
Page 63

Traducción de las instrucciones originales
N. 1 filtro de aire motor
N. 1 filtro de aceite motor
N. 1 cable acelerador
Una serie de fusibles de la instalación eléctrica
PEDIR RECAMBIOS
Indique siempre el número de chasis de la máquina y el código del repuesto. Dirígase a nuestros centros
autorizados.
Nuestra dirección:
GRILLO S.p.A.
Via Cervese 1701 – 47521 CESENA (FC)
Tel. 0547 – 633111 / Fax 0547 – 632011
Web site: www.grillospa.it / e-mail: grillo@grillospa.it
CARACTERÍSTICAS TÉCNICAS
MOTOR: YANMAR 3TNV76, diésel, 1116 cc (26 HP – con 3.000 rpm), 3 cilindros, refrigeración
líquida con electroventilador, provisto de dispositivo manual y automático de limpieza del radiador.
CAPACIDAD DEPÓSITO DE COMBUSTIBLE: 31 litros.
CAPACIDAD DEPÓSITO DE ACEITE HIDRÁULICO: 6,3 litros.
ARRANQUE: eléctrico 12 V.
TRACCIÓN: hidráulica con 4 ruedas motrices (integral permanente, también bajo radio de giro mínimo).
BLOCAJE DIFERENCIAL: automático o manual mediante pulsador.
TRANSMISIÓN: mediante bomba hidráulica y con motores hidráulicos en las 4 ruedas.
SISTEMA DE DIRECCIÓN: dirección hidráulica con volante.
EMBRAGUE PLATO DE CORTE: eléctromagnético, con freno de cuchilla integrado.
VELOCIDAD: 0-14,5 km/h: variación continúa.
NEUMÁTICOS DELANTEROS: 23x10.50-12 Jardín; TRASEROS: 18x7.50-8 Jardín.
ASIENTO: Grammer, super-confort, amortiguado y ajustable con protecciones laterales.
VOLANTE: montado sobre columna de dirección.
RADIO DE GIRO: 37 cm.
AUTOMATISMOS: desembrague automático de las cuchillas al llenado del cesto recogedor.
FRENOS: de tambor, de servicio y de aparcamiento.
CESTO RECOGEDOR DE HIERBA: 750 litros de capacidad con sistema de descarga hidráulico. Puerta cesto con
apertura automática.
ALTURA DE VACIADO: 195 cm.
VOLADIZO DE VACIADO: 30 cm.
UN DEFLECTOR INTERNO MOTORIZADO, GARANTIZA UN LLENADO COMPLETO Y UNIFORME DEL
CESTO.
ELEVACIÓN DEL CORTE Y VACIADO HIDRÁULICO DEL CESTO.
PLATO DE CORTE: con recogida.
ALTURA DE CORTE: de 2 a 10 cm con regulación continua e hidráulica desde el puesto de conducción.
ANCHO DE CORTE: 126 cm.
CAPACIDAD HORARIA: 9.000 m2/h.
ACCESORIOS: plato de corte con recogida cm 126.
DIMENSIONES (con plato de corte): Longitud: 2910 mm - Anchura: 1330 mm - Altura: 1660 mm
ALTURA LIBRE DEL SUELO: 150 mm
DISTANCIA ENTRE EJES: 1190 mm
PESO (sin plato de corte): 795 kg - PESO (con plato de corte): 970 kg
61
Page 64

Traducción de las instrucciones originales
PUESTA EN SERVICIO DE LA MÁQUINA
- Compruebe que la máquina esté íntegra y que no haya sufrido daños durante el transporte.
- Verifique los niveles de aceite en el motor (fig. 3) y en la transmisión hidrostática (fig. 4).
- Verifique la presión de los neumáticos:
Ruedas delanteras 23 x 10.50 - 12 (1,4 bar)
Ruedas traseras 18 x 7.50 - 8 (1,4 bar)
- Controle que el voltaje de la batería no sea inferior a los 12,5 Voltios. Si necesario, haga la recarga. Para
acceder a la batería, quitar el pomo de la palanca del accelerador (fig. 5), aflojar los tornillos de fijación del
salpicadero y retirarlo. No arrancar la máquina si la batería no está correctamente conectada. El regulador de
carga y las unidades de control podrían dañarse.
- Si en su equipamiento la batería está en seco con ácido aparte, para ponerla en función siga las instrucciones
siguientes:
1) eche el ácido y espere durante 2 horas;
2) cargue la batería con una cargador tarado a 12 Voltios en carga lenta durante 2 horas.
Atención: si no sigue este procedimiento, la batería puede deteriorarse y derramar ácido durante el trabajo.
BATERÍA
¡Atención! Los gases emitidos por la batería son explosivos: guarde la batería lejos de llamas o chispas. Controle
periódicamente el nivel del líquido y mantenga los terminales lubricados con grasa de vaselina.
Importante:
- No invierta la polaridad de la batería.
- No ponga en marcha el cortacésped sin batería, ya que está dotado de un regulador de carga.
- Evite que se produzcan cortocircuitos.
RODAJE - ¡ATENCIÓN!
Cambie el filtro y el aceite motor la primera vez después de 50 horas de trabajo. Verifique que no se produzcan
derrames de aceite y que los tornillos no estén aflojados, especialmente los tornillos que aseguran las cuchillas y
las ruedas. Regule la tensión de las correas de la toma de fuerza mediante las tuercas que se encuentran en el
muelle correspondiente: el muelle tiene que ser regulado según la longitud indicada por la flecha roja (fig. 6).
Regule la tensión de la correa del plato de corte mediante la tuerca que se encuentra en el muelle correspondiente:
el muelle tiene que ser regulado según la longitud indicada por la flecha roja (fig. 7).
INSTRUCCIONES DE USO
Antes del arranque compruebe siempre:
- el nivel del líquido del radiador llegue (fig. 8);
- Que las rejillas de aspiración para la refrigeración del motor estén limpias (fig. 9);
- el nivel del aceite del motor (fig. 3);
- el nivel del aceite hidráulico (fig. 4);
- Que los pedales de avance y de marcha atrás (fig. 1 n° 1 y n°2) estén en la posición de parada;
- Que el pulsador de embrague PTO esté en punto muerto (fig. 1 n° 26);
- Que el filtro del aire esté limpio (fig. 10);
- Que la red del cesto esté limpia (fig. 11). Para desmontarla, activar el dispositivo de seguridad de la puerta
(fig. 12) y accionar la palanca (fig. 11);
- Que el plato cortacésped y los conductos de carga estén limpios y correctamente montados.
Llene el depósito de carburante (gasóleo) por medio de un embudo con filtro muy fino (fig. 1, n°13).
ARRANQUE DEL MOTOR
Inserte la llave de contacto en el conmutador de arranque (fig. 1 n°4) y gírela para el precalentamiento. Cuando el
testigo de la bujía se apaga (después de 15 segundos aprox.), gire otra vez la llave y suéltela en cuanto el motor
arranque. Para apagar el motor, gire la llave en la posición «0».
REGULACIÓN DEL ASIENTO
El asiento puede moverse hacia adelante y hacia atrás. Ajustar el asiento en la posición más cómoda y que
asegura el mejor control de la máquina. Para mover el asiento hacia adelante o hacia atrás empujar la palanca
hacia adelante y mover el asiento. Para ajustar la suspensión del asiento empujar hacia adelante la palanca de la
suspensión del asiento colocada en bajo, en el medio del asiento.
Sentarse y regular el asiento siguiendo los pasos que se dan a continuación (fig.1, n°17):
para una suspensión más dura, tirar de la palanca hacia arriba repetidamente hasta obtener el resultado
deseado.
para una suspensión más suave, empujar la palanca hacia abajo repetidamente hasta obtener el resultado
deseado.
62
Page 65

Traducción de las instrucciones originales
Una vez regulada la suspensión, tirar de nuevo hacia atrás la palanca de la suspensión del asiento colocada en
bajo, en el medio del asiento.
Para volcar el respaldo del asiento empujar hacia arriba la palanca colocada a mano izquierda del asiento.
EMPEZAR EL TRABAJO
1) Levantar el plato del suelo.
2) Regular la altura de corte por medio del pulsador (fig. 1, n°12).
3) Regular las posiciones del asiento (fig. 1 n°15, 16, 17).
4) Bajar el plato cortacésped (fig. 1 n°7).
5) Acelerar el motor hasta la mitad del recorrido (fig. 1 n°6). No conecte las cuchillas con el motor en régimen
máximo; es necesario llevar el motor a régimen medio antes de conectar la PTO (fig. 1 n°26). Atención:
durante el corte la palanca del distribuidor tiene que estar en posición “flotante” (inclinada hacia
adelante). Conecte siempre las cuchillas unos metros antes del césped a cortar: de esta manera se limpiarán el
plato y el conducto de carga, sin esforzar el embrague.
6) Apriete levemente el pedal de avance (fig. 1 n°1) y empiece el trabajo. El pedal al lado (fig. 1 n°2) acciona la
marcha atrás.
7) El pedal del freno de emergencia (fig. 1 n°3) se debe utilizar sólo en los casos de emergencia efectiva. En
condiciones normales, para detenerse, utilice los pedales de avance y de marcha atrás (fig. 1 n°1 y n°2).
8) En cuanto el cesto de recogida esté lleno, un detector desconecta automáticamente la rotación de las cuchillas
para evitar la obstrucción de los conductos; para levantar el cesto, accione la palanca sobre el distribuidor
hidráulico (fig. 1 n°8) y vacie el cesto.
9) Para reanudar el trabajo, desconecte la PTO por medio del pulsador y le conecte nuevamente.(fig. 1 n°26).
TERMINAR EL TRABAJO
Una vez terminado el trabajo, desembrague las cuchillas. Para detenerse:
1) Quite el pie del pedal de avance (fig. 1 n°1 o n°2).
2) Ponga la palanca de gases al mínimo.
3) Baje el plato hasta el suelo.
4) Apague el motor girando la llave en la posición «0» y active el freno de estacionamiento (fig. 1 n°3 y 5).
REGLAS PARA EL USO CORRECTO DEL CORTACÉSPED
La máquina puede trabajar en condiciones gravosas sin problemas de obstrucción, si todos los dispositivos están
regulados correctamente y si se respetan algunas indicaciones.
1) Antes de empezar el trabajo, verifique que el plato y el conducto de carga estén perfectamente limpios, sin
residuos de hierba y de tierra. Controlar que el conducto de carga de la hierba esté en la posición correcta y
enganchado con los dos ganchos rojos (fig.13).
2) Inspeccione el suelo antes de proceder con el corte, quite las piedras, bastones o cuerpos extraños.
3) Durante el corte mantenga el motor en régimen máximo, regule la velocidad según la altura del césped. Prestar
atención cuando encuentre cúmulos de hierba alta y espesa: reduzca la velocidad.
4) Afile frecuentemente las cuchillas del cortacésped; el corte será mejor y el motor hará un esfuerzo menor.
5) Después del vaciado del cesto, conecte siempre las cuchillas pocos metros antes de llegar al césped por
cortar. De esta manera se limpiarán el plato y el conducto de carga y se protege el embrague.
6) Mantenga limpia la rejilla que se encuentra delante del radiador (fig. 9).
7) Mantenga limpia la rejilla colocada en el interior del cesto: para desmontarla, active el soporte de seguridad
(fig. 12) y utilice la palanca (fig. 11).
8) Si el césped está mojado o es muy alto, no empiece a cortar en la posición más baja, sino en una mediana.
9) Controle la tensión de las correas que accionan el plato; si necesario modifique la regulación (fig. 6).
10) Controle que las cuchillas no estén desgastadas, especialmente las aletas que imprimen el empuje de la hierba
hacia el interior del conducto de carga.
11) En condiciones de corte normal, el sensor del cesto lleno tiene que ser regulado en posición horizontal. En
caso de hierba mojada o muy alta, regularlo hacia abajo; en caso de hierba seca o corta, regularlo hacia arriba.
12) Controle que ningún cuerpo extraño bloquee el conducto de carga.
13) Controle el movimiento del deflector dentro del cesto.
14) Controle la desconexión automática de las cuchillas al llenado del cesto; a tal fin, gire la llave de contacto,
encienda el tablero sin arrancar el motor, accione el pulsador PTO (fig. 1 n°26) y toque con la mano la palanca
montada sobre el sensor del deflector . De esta manera, la toma de fuerza tiene que desconectarse.
15) Verifique las revoluciones del motor (3200 máximo en vacío).
16) Corte el césped siempre con el motor en régimen máximo; si el motor baja de revoluciones, disminuya un
momento la velocidad de avance, para que recupere el normal régimen de revoluciones.
17) Compruebe que las cuchillas estén correctamente montadas.
18) Compruebe la correcta alineación y montaje del conducto de carga.
19) El cortacésped FD900 es una máquina hidrostática, por esta razón, en frío, necesita de más potencia, pero, a
los pocos minutos de trabajo, el rendimiento será perfecto. Le informamos que la bomba de caudal variable y
los motores hidrostáticos son de calidad muy buena y dan un rendimiento muy alto.
20) ¡ATENCIÓN! Durante los desplazamientos no viaje con el plato de corte alto. Utilice el elevador hidráulico sólo
para superar obstáculos, subirse en las aceras o en los bordillos. Por contrario, es obligatorio viajar por las
63
Page 66

Traducción de las instrucciones originales
carreteras públicas con la máquina homologada, equipada de la instalación de luces y placa de matrícula y con
el plato de corte alto.
POSICIONES DE CORTE
Para regular la altura de corte, utilice el botón (fig. 1 n°12). Sobre terrenos irregulares, con cunetas o lomas, se
aconseja trabajar con el plato en la posición de corte más alta, al fin de evitar que las cuchillas choquen contra el
suelo. ¡Atención! Durente el corte es necesario mantener el plato en la posición «flotante» y las ruedas antiscalp
en correspondencia del borde del plato.
TERRENOS EN PENDIENTE
Los terrenos pendientes se deben recorrer posiblemente en el sentido de subida/descenso, prestando mucha
atención en los cambios de dirección para que las ruedas cuesta arriba no encuentren obstáculos (piedras, ramas,
raíces, etc.) que podrían causar la pérdida de control de la máquina. Si las ruedas motrices corren el riesgo de
deslizar en subida, levante ligeramente el plato por medio del mando hidráulico, para cargar más peso sobre éstas
y obtener una tracción mayor. Evalúe las distintas situaciones y ponga atención en no deslizar sobre terreno
húmedo e hierba mojada. Cuesta abajo, póngase en movimiento con baja velocidad y evite pasar sobre hierba
seca o cortada, porque las ruedas pierden adherencia.
El bloqueo del diferencial (fig. 1 n°25) se embraga automáticamente, por ejemplo: en descensos fuertes si se
quiere invertir el sentido de la marcha para evitar el deslizamiento de las ruedas traseras, o para cargar la máquina
en otros vehículos, en marcha atrás con las rampas. En situaciones normales, no accione el pulsador (fig. 1, n°25).
¡No corra riesgos! Inspeccione bien el terreno y, si no está seguro, evite los descensos fuertes. Respete los límites
de seguridad que la ley impone, citados en el manual (max. 14° o 25%).
CÓMO INTERVIENEN LOS DISPOSITIVOS DE SEGURIDAD
Es importante recordar que el motor se para siempre cada vez que:
- el operador abandona el asiento, si el freno de estacionamiento no está activado.
Además, el motor no arranca cuando:
- el pulsador PTO está activado;
- el operador no está sentado en el puesto de conducción, si el freno de estacionamiento no está activado y las
cuchillas no han sido desembragadas;
- los pedales de avance y marcha atrás no están en posición de stop;
- el cesto no está completamente bajo.
¡Atención! Cuando el freno de estacionamiento está activado y las cuchillas desembragadas, es posible abandonar
el puesto de conducción manteniendo el motor en marcha.
ARCO DE SEGURIDAD ROLL BAR
¡ATENCIÓN! Para evitar graves lesiones consiguientes al vuelvo de la máquina, mantenir el arco antivuelco levantado y utilizar los cinturones de seguridad.
Asegurarse de que el asiento se encuentre bien fijado por medio de su enganche.
Si el arco anti-vuelco se encuentra en posición baja, la protección en caso de vuelco no está asegurada.
- Nunca utilizar la máquina en terrenos accidentados o en pendientes con el arco anti-vuelco bajo.
- Bajar el arco anti-vuelco sólo de ser absolutamente necesario.
- No llevar los cinturones de seguridad si el arco de seguridad está bajo.
- Conducir despacio y con cuidado.
- Levantar el arco de seguridad cuando las circunstancias lo permitan.
- Prestar atención a la hora de trabajar debajo de ramas bajas. Verificar que no haya cables eléctricos, ramas bajas
u otros obstáculos que puedan entrar en contacto con el arco de seguridad.
Para bajar el arco de seguridad seguir los pasos que se dan a continuación:
1. Aparcar la máquina sobre una superficie plana;
2. Desactivar la PTO, bajar el plato de corte y activar el freno de aparcamiento.
3. Apagar el motor y quitar la llave.
4. Volcar el asiento hacia adelante (fig. 14C).
5. Quitar los pomos con tornillo del arco anti-vuelco (fig. 14A).
6. Bajar el arco anti-vuelco y fijarlo con los pomos con tornillos (fig. 14D/E).
7. Volver a posicionar el respaldo del asiento en la posición correcta.
Importante: bajar el arco de seguridad sólo si estrictamente necesario.
Para levantar el arco de seguridad seguir los pasos que se dan a continuación:
1. Estacionar la máquina en una superficie plana.
2. Desconectar la PTO, bajar el plato de corte y activar el freno de aparcamiento.
3. Apagar el motor y retirar la llave de contacto.
4. Volcar el asiento hacia adelante (fig. 15C).
5. Quitar los pomos con tornillo del arco anti-vuelco (fig. 15A).
6. Levantar el arco anti-vuelco y asegurarlo con los mismos pomos con tornillo (fig. 15 E).
7. Volver a posicionar el respaldo del asiento en la posición correcta (fig. 15F).
64
Page 67

Traducción de las instrucciones originales
MANTENIMIENTO Y LUBRICACIÓN
¡ATENCIÓN!
- Si fuera necesario levantar la máquina o parte de esa, utilizar siempre herramienta adecuada como
soportes o ganchos de seguridad.
- Antes de iniciar cualquier operación de limpieza, mantenimiento o reparación, llevar indumentaria
apropiada y guantes de trabajo.
- No dejar la máquina en mantenimiento, sin dispositivos de seguridad o levantada en lugares accesibles a
personas inexpertas, especialmente niños.
Si se realiza el mantenimiento del motor con el cesto alto, es necesario activar los dos soportes rojos de seguridad
de los cilindros oleodinámicos (fig. 16). No llevar a cabo intervenciones sobre el motor antes de haber
asegurado los soportes.
ACCESO AL MOTOR
En caso de averia del motor, para acceder al compartimiento del motor, tirar hacia atrás la palanca del distribuidor
que sirve para volcar el cesto de recogida. Empujar manualmente el cesto hacia atrás.
LUBRICACIÓN
Nunca desechar en el medio ambiente el aceite usado, gasoleo o cualquier otro producto contaminante.
Un mantenimiento eficaz y una correcta lubricación contribuyen a mantener la máquina en perfectas condiciones.
TABLA RECAPITULATIVA LUBRICACIÓN
Aceite motor 15W40 3 kg
Sustituir después de la primeras 50 horas de trabajo y luego cada
250 horas.
Líquido de
refrigeración
/ 6 kg
Vaciar y lavar el vaso de llenado, añadir el líquido cada 1000 horas o
una vez al año.
Aceite hidráulico OSO 46 9,5 kg
Sustituir después de la primeras 500 horas de trabajo y luego cada
1000 horas.
Transmisión
plato
LSX75W90
0,1 kg
0,112Lt.
Sustituir cada 300 horas.
MOTOR
Para los intervalos y los modos de lubricación siga las indicaciones detalladas en el manual del motor; de todas
maneras, es indispensable cambiar el aceite y el filtro después de la primeras 50 horas de trabajo y luego
cada 250 horas. Para el motor utilice aceite SAE 15W40, cantidad 3 litros. Cuando se cambia el aceite motor es
necesario cambiar también el filtro del aceite (fig. 3). Para vaciar el aceite motor, desenroscar el tapón colocado en
el lado derecho de la cubeta de aceite (fig. 17). Introducir el aceite por el tapón correspondiente (fig. 18). La primera
precaución es que el motor esté correctamente mantenido con filtro de aire limpio y aceite del motor a nivel.
Mantenga bien limpio el alojamiento del motor, la zona del silenciador de escape y los colectores: posiblemente
utilice una aspiradora. Controle el filtro de aire (fig. 10) y el prefiltro cada 8 horas.
Para no obstruir el pasaje de aire que sirve para refrigerar el radiador, controle que el radiador esté siempre bien
limpio. El ventilador del radiador es accionado por un motor eléctrico. Si las rejillas de protección del radiador se
obstrúen y la temperatura del líquido de refrigeración y del aceite hidráulico supera los 87°C, un detector invierte
automáticamente durante algunos segundos el sentido de rotación del ventilador para limpiar la rejilla. Para
controlar y limpiar el ventilador del radiador, empujar la palanca (fig. 19).
PURGA Y NIVEL LÍQUIDO RADIADOR
¡Atención! Peligro: líquido caliente y bajo presión.
Al fin de permitir una correcta refrigeración del motor, es importante que no haya aire en el circuito de refrigeración.
Antes de todo, verifique que los collares de los manguitos del agua estén bien cerrados y que el aire externo no
pueda entrar en el circuito.
Luego efectúe la purga de la siguiente manera:
¡Atención! Para efectuar esta operación póngase siempre guantes de trabajo.
1) Llenar el depósito de compensación con el líquido (fig. 8).
2) Arrancar el motor y llevarlo hasta la temperatura de trabajo (para estar seguro de que la válvula termostática
del motor esté abierta).
3) Rellene de nuevo el depósito hasta el nivel.
DISTRIBUIDOR HIDRÁULICO PARA LOS SERVICIOS
Es un distribuidor hidráulico por palancas (fig. 20). La presión de trabajo es de 120 bares.
65
Page 68

Traducción de las instrucciones originales
MOTORES HIDRÁULICOS
Controlar el nivel en el tanque con los motores fríos (fig. 4). Si necesario, añadir aceite hidráulico OSO 46 (cantidad
total: 9,5 litros). Haga periódicamente este control.
¡Atención! Cambie el aceite hidráulico de los motores y el filtro después de las primeras 500 horas de trabajo y
luego cada 1000 horas. Es necesario cambiar el aceite antes de las primeras 500 horas si:
- el aceite es de color negro;
- el aceite es de color blanquecino (el aceite está contaminado con agua);
- hay residuos de color negro (deterioro parcial del aceite).
Para extraer el aceite, destornillar el tapón colocado en la bomba de engranajes (fig. 22). Para poner el aceite,
destornillar el tapón superior del depósito (fig. 4). Ponga una atención particular a los eventuales residuos que
pueden entrar en el circuito y causar graves problemas a la máquina.
Cuando se cambia el aceite hidráulico, es necesario cambiar también el filtro de aceite (fig. 21); prestar atención al
grado de filtración.
No aumente la presión de la instalación hidráulica tracción ruedas más allá de los 280 bar, porque la bomba
hidráulica y los motores hidrostáticos en las ruedas podrían dañarse.
TRANSMISIÓN PLATO DE CORTE
Utilice aceite sintético LSX 75 W 90 (API GL4 + GL5; API MT1 y PG2), cantidad 0,112 litros. Cambie el aceite cada
300 horas. El tapón con el nivel aceite se encuentra al lado de la transmisión (fig. 23). Para vaciar el aceite de la
transmisión, desmontar el plato de la máquina, quitar el capó de plástico, posicionar el plato en posición vertical y
destonillar el tapón. Prestar atención a que el aceite no contacte con la correa (para esta operación, dirígase a un
Centro de Asistencia Autorizado). Si nota derrames, controle y cambie los retenes, para evitar el deterioro de toda
la transmisión.
TABLA RECAPITULATIVA DE LAS PRESIONES HIDRÁULICAS
Circuito cerrado ruedas (bomba de caudal variable) 280 BAR
Dirección hidráulica 120 BAR
Distribuidor 120 BAR. Es libre, la dirección hidráulica
tiene la prioridad.
Bomba de carga 7 BAR
PUNTOS DE LUBRICACIÓN CON GRASA
Consulte los puntos de lubricación siguiendo el esquema (fig. 2A, n°3 y n°4). Lubrique con grasa cada 50 horas las
articulaciones del eje trasero, los pedales, la polea de las correas PTO, la articulación enganche en dos puntos del
plato, los brazos del elevador del cesto.
FRENO DE EMERGENCIA Y DE ESTACIONAMIENTO
El sistema de avance de la máquina FD900 es por motores hidráulicos, por eso, para frenar es suficiente dejar los
pedales de avance y retroceso (fig.1 n°1 y 2). El pedal del freno (fig. 1, n°3) debe ser utilizado sólo en caso de
emergencia. Para activar el freno de estacionamiento, apretar el freno de emergencia (fig. 1 n°3) luego activar el
bloqueo por medio del pedal correspondiente (fig. 1 n°5). Para quitar el freno de estacionamiento, es suficiente con
volver a apretar el freno de emergencia (fig.1 n°3).
Aunque la máquina sea autofrenante, activar siempre el freno de estacionamiento. Si el freno de estacionamiento
está activo, el motor queda en marcha también cuando el operador abandona el asiento.
REGULACIÓN DEL FRENO DE ESTACIONAMIENTO Y PEDAL FRENO DE EMERGENCIA
Los dispositivos de regulación de los frenos se encuentran debajo de la plata forma (fig. 24). Los frenos de tambor
son colocados sobre las ruedas delanteras. Prestar atención a que el cable no contacte con la rueda.
AFILADO DE LAS CUCHILLAS
Para afilar las cuchillas seguir los pasos que se dan a continuación:
1) Colocar el plato en la posición más baja.
2) Levantar el cesto de recogida y quitar el conducto de carga entre plato de corte y cesto de recogida.
3) Levantar el plato y desenganchar los dos pernos de fijación laterales (fig.1, n°10);
4) Agarrar la empuñadura sobre el plato de corte, apoyar el pie sobre el soporte metálico anti-deslizamiento y
enganchar el plato (fig.25).
No es necesario desenganchar el cardán. De todas maneras, antes de encender la máquina, se aconseja controlar
siempre que el cardán esté bien conectado y el pulsador sobresaliente.
IMPORTANTE: el tornillo central que asegura el disco de la cuchilla derecha tiene rosca izquierda. El par de
apriete del tornillo central del buje de la cuchilla es 53 Nm (esquema de montaje fig. 26), mientras que los tornillos
66
Page 69

Traducción de las instrucciones originales
que aseguran las cuchillas tienen par de apriete de 50 Nm. Para facilitar la sustitución de las cuchillas, desmontar
el disco completo.
Una cuchilla no afilada arranca la hierba dejándole un mal aspecto: es necesario hacer el afilado en los filos de las
dos cuchillas. Las cuchillas, con el tiempo se desgastan, pierden el corte, y tienden a desajustarse haciendo vibrar
el cortacésped; haga nuevamente el afilado de las dos cuchillas de manera uniforme.
¡Atención! Nunca tratar de reparar las cuchillas dañadas o torcidas. Si dañadas, siempre tienen
que ser sustituidas.
REGULACIÓN PLATO DE CORTE
Una buena colocación en plano del plato es esencial para obtener un césped cortado uniformemente. Poner el
cortacésped en una superficie plana y controlar que la presión de los neumáticos sea correcta. Controle también la
distancia del borde del plato al suelo y, al ser necesario, regule los tirantes (fig. 27 ref.A) y el tornillo (fig. 27 ref.B)
para que quede paralelo al suelo. Si no se consigue obtener un buen paralelismo, consultar un Centro de
Asistencia Autorizado. Para desarmar el plato de la máquina:
Levantar el cesto de recogida y retirar el canal de carga.
Aflojar el tornillo que bloquea la protección del cardán y desenganchar el cardán empujando el pulsador de
bloqueo.
Quitar los pasadores de los pernos de los brazos del plato. Quitar los pernos.
Desconectar las 4 mangueras hidráulicas.
Tirar el plato de corte hacia adelante para desengancharlo de la máquina.
Para volver a montar el plato de corte, seguir la misma procedura, pero al revés. En caso de dificultades en
conectar las mangueras, mover la palanca para el vuelco del cesto mientras para conectar las mangueras de la
regulación de la altura de corte presionar el pulsador de regulación de la altura de corte desde el puesto de
conducción. La llave de contacto tiene que estar insertada.
CORREAS PTO
¡Atención! Éstas son correas especiales: UTILICE SÓLO PIEZAS ORIGINALES. Para cambiar las correas, afloje
el tirante (fig. 6) y quitar el brazo fijado al soporte derecho del motor por medio de dos tornillos (fig. 28).
Desenganchar el muelle anti-vibraciones del embrague y el cable eléctrico del embrague. Regule la tensión
mediante la tuerca con llave 13 que actúa sobre el muelle de tensión. El muelle tiene que ser comprimido según la
longitud indicada por la flecha roja (fig. 6).
REGULACIÓN CIERRE DEL CESTO PARA QUE ENCAJE BIEN CON EL CONDUCTO DE CARGA
Para obtener óptimos resultados en la recogida, la alineación perfecta entre conducto de carga y cesto de recogida
(en posición cerrada) es fundamental. Con este objetivo, es necesario seguir los pasos siguientes:
1. Colocar el cesto en posición cerrada.
2. Acortar o alargar el vástago de los pistones hidráulicos laterales (fig. 29) que operan el vuelco del cesto.
Esta operación se efectúa enroscando o desenroscando el tornillo colocado en el fondo del vástago de los
pistones.
3. Esta regulación puede ser efectuada también por medio de los tornillos que aseguran la parte trasera del
cesto de recogida (fig. 30).
GANCHO DE CIERRE DEL CESTO DE RECOGIDA
El gancho de cierre del cesto se regula por medio de un tornillo (fig. 31). Es necesario dejar un juego de 2 mm para
facilitar el enganche en la fase de cierre.
67
Page 70

Traducción de las instrucciones originales
FD900 – IDENTIFICACIÓN DE LOS INCONVENIENTES
INCONVENIENTE CAUSA REMEDIO
Con la llave en posición
ARRANQUE [AVV.] el tablero
de mandos queda apagado
La batería no suministra corriente
alguna
Controle los cables de conexión
Controle el nivel del electrolito
Haga la recarga de la batería
Cambie el fusible
El tablero de mandos se
enciende, pero con la llave en
posición ARRANQUE [AVV.]
el motor de arranque no gira
La batería no suministra corriente
suficiente
Haga la recarga de la batería
Faltan las condiciones para la
puesta en marcha
Pedales de avance en posición “STOP”
Siéntese en el puesto de conducción
Desconecte la PTO
Arranque difícil o
funcionamiento irregular del
motor
Problemas de carburación
Limpie o cambie el filtro de aire
Controle que no haya aspiración de aire en los
conductos de combustibles
Purgue el circuito de alimentación
Depósitos o impurezas en el
carburante
Controle y si necesario cambie el filtro de gasóleo
El motor de arranque gira
pero el motor no arranca
Falta de flujo de gasóleo
Controle el nivel en el depósito
Controle (y de ser necesario cambie) el filtro de
gasóleo
Controle que el respiradero en el tapón del
depósito no esté obturado
Escaso precalentamiento de las
bujías con motor frío
Espere que el testigo de las bujías esté apagado
El temporizador impide el
arranque
Controle las conexiones
Cambie el temporizador
El electrostop no hace todo el
recorrido
Controle el recorrido del electrostop
Cambie el electrostop
Baja de rendimiento del motor
durante el corte
Velocidad de avance elevada con
respecto a la altura de corte
Disminuya la velocidad
Suba de unas muescas el plato de corte
Al activar las cuchillas, el
motor se apaga
Faltan las condiciones para la
activación
Controle el pulsador activación cuchillas
Siéntese en el puesto de conducción
Cierre el cesto
Corte irregular y recolección
insuficiente
Plato de corte no paralelo al suelo
Controle la presión de los neumáticos
Restablezca el paralelismo del plato
Ineficiencia de las cuchillas
Controle que las cuchillas estén montadas
correctamente
Afile o cambie las cuchillas
Regule la tensión de las correas PTO
Velocidad de avance elevada con
respecto a la altura de corte y las
condiciones del césped
Reduzca la velocidad de avance
Obstrucción del conducto
Quite el plato y haga el vaciado del conducto
Controle las revoluciones del motor max 3000
rpm
Limpie la rejilla del cesto
Vibraciones durante el trabajo
Cuchillas desequilibradas
Equilibre o cambie las cuchillas averiadas
Fijaciones flojas
Verifique y ajuste los tornillos de fijación de las
cuchillas, del motor y del bastidor
Verifique las palas del acelerador de carga
Encendido del testigo del
aceite
Presión insuficiente
Controle y restablezca el nivel del aceite
Cambie el filtro del aceite motor
El motor no arranca
Sensor pedal de avance
defectuoso
Hacer un puente entre el cable violeta/negro y
rojo/blanco
Sensor asiento defectuoso
Desconectar la conexión detrás del asiento y
conectar el cable blanco/rojo con el cable violeta.
Sensor freno de aparcamiento
defectuoso
Conectar el cable blanco/rojo con el cable gris
Las cuchillas no se activan Interruptor defectuoso
Embrague defectuoso
Sensor cesto lleno defectuoso
Sensor cesto cerrado defectuoso
Controlar el interruptor para la activación de las
cuchillas
Dar corriente directa al embrague.
Controlar los fusibles.
68
Page 71

Traducción de las instrucciones originales
Desconectar la conexión colocada bajo el cesto,
a mano derecha. Conectar el cable blanco/rojo con
el cable blu/rojo.
Conectar el cable blanco rojo con el cable rojo
para verificar el correcto funcionamiento del sensor
cesto cerrado.
ATENCIÓN: Si después de haber efectuado las operaciones descritas en el presente maual, los
inconvenientes no se resuelven, contacte un Centro de Asistencia Autorizado. No trate nunca de efectuar
reparaciones complicadas sin tener los medios y los conocimientos técnicos necesarios.
AL CHOCAR CONTRA UNA PIEDRA U OTRO CUERPO EXTRAÑO:
1) Desembragar las cuchillas.
2) Levantar el plato de corte
3) Apagar el motor, active el freno de estacionamiento.
4) Controlar los tornillos de fijación de las cuchillas y la integridad del plato de corte.
5) Verificar que el cuerpo extraño no se haya metido dentro del conducto de carga.
INSTALACIÓN ELÉCTRICA
La instalación eléctrica es protegida mediante fusibles que, una vez interrumpidos, provocan la ineficiencia total de
la instalación eléctrica. Los fusibles generales son dos de 40 A/h: el primero protege toda la instalación eléctrica, el
segundo protege el ventilador del radiador Sobre el guardabarros, se encuentran los fusibles que protegen los
distintos componentes de la instalación eléctrica y de las luces. Una vez buscada y detectada la avería, cambie el
fusible quemado con otro de igual capacidad. No cambie nunca el fusible con otro de capacidad diferente.
Si los inconvenientes persisten tras haber realizado las operaciones detalladas arriba, remítase al Centro de
Asistencia Autorizado. No trate nunca de efectuar reparaciones complicadas sin tener los medios y los
conocimientos técnicos necesarios.
FUNCIONAMIENTO DE LOS PRINCIPALES DISPOSITIVOS DE LA INSTALACIÓN ELÉCTRICA
- Un sensor de seguridad reconoce si el cesto está en posición de trabajo (fig. 32) e impide o permite el
embrague de las cuchillas.
- Sobre la válvula termostática del motor hay un sensor (fig. 33) que detecta la temperatura del líquido de
refrigeración. Cuando ésta supera los 87°C, el sensor envía un impulso a la unidad de control electrónico (fig.
34) que hace empezar el ciclo de limpieza automático, invertiendo durante algunos segundos el sentido de
rotación del ventilador del radiador. Es posible comandar el ciclo de limpieza también manualmente utilizando
el pulsador que se encuentra en el tablero de mandos (fig. 1 n°24). Los relés de inversión ventilador son cuatro
(fig. 36).
- El sensor en la válvula termostática envía además una signal de alarma y apaga el motor si la temperatura
supera los 107°C.
- En el pedal de avance se encuentra un interruptor de seguridad que controla la posición de parada durante el
arranque (fig. 35, ref.A).
- En el pedal de bloqueo del freno de estacionamiento se encuentra un sensor (fig. 35, ref.C) que detecta
cuando el freno está activo y permite al motor de mantenerse encendido aunque el operador haya abandonado
el puesto de conducción.
- En el tirante del pedal de la marcha atrás se encuentra un interruptor de seguridad que acciona el avisador
acústico de la marcha atrás (fig. 35, ref.B).
- La electroválvula del bloqueo del diferencial (fig. 37) se encuentra debajo del conducto de carga: cuando está
activa, se enciende un testigo rojo.
- El sensor del cesto lleno se encuentra sobre el deflector móvil, dentro del cesto de recogida y envía la signal
para desembragar las cuchillas al llenado del cesto (fig. 38). Una correcta regulación del cesto es muy
importante para asegurar un llenado uniforme y total del cesto de recogida (fig. 2B).
FILTRO DE AIRE
Controlar y limpiar el filtro del aire (fig. 10) y el pre-filtro, cada 8 horas. El filtro de aire está equipado de un sensor
de depresión que indica en el tablero de mandos cuando el filtro está obstruído. Para su sustitución y para conocer
los intervalos exactos de mantenimiento, siga las normas y las advertencias detalladas en el manual del motor.
En caso de entornos muy polvorientos recomendamos limpiar el filtro del aire cada 4 horas.
Dentro del filtro se encuentra un cartucho de seguridad para evitar que eventuales impurezas se metan dentro del
conducto de aspiración durante la limpieza del filtro. Si el filtro resultara deteriorado, hay que sustituirlo.
FILTRO DEL GASÓLEO
Cambie el cartucho del filtro del gasóleo (fig. 39) cada 250 horas. Para cambiarlo y consultar los intervalos exactos
de mantenimiento, siga las normas detalladas en el manual del motor.
69
Page 72

Traducción de las instrucciones originales
DECANTADOR GASÓLEO
El decantador (fig. 40) sirve para que las eventuales impurezas líquidas del gasóleo o partes de agua no entren en
contacto con las partes del motor sino que se depositen en el fondo del vaso. Dentro del decantador hay un anillo
rojo que sube hacia arriba según la cantidad de impurezas presentes. Lavar bien el decantador con gasoleo limpio
(no olvidar lavar también la parte interna). Controlar el decantador trás cada uso. ¡Atención! Cuando hace el
reabastecimiento de gasóleo, utilice siempre un filtro muy fino.
LIMPIEZA
Lave el plato, los conductos de carga y el cesto de recogida. No lave el alojamiento del motor con máquina de
chorro de agua a alta presión; utilice aire comprimido o una aspiradora.
TIRANTE DE TRACCIÓN
El tirante de tracción se encuentra en la parte trasera de la máquina. Se pueden remolcar rodillos compactadores y
remolques hasta un máximo de 200 kg de peso en llano.
REMOLQUE DE LA MÁQUINA CON EL MOTOR APAGADO
¡Atención! Para desplazar la máquina con el motor apagado, es necesario aflojar tres vueltas el tornillo de la bomba
hidrostática (fig. 41), utilizando una llave de 17 mm. Prestar atención porque de esta manera se desactiva el
dispositivo de auto freno. Remolque la máquina en velocidad muy baja y durante pequeños trayectos de 100
m como máximo, al fin de evitar que la bomba hidráulica o los motores se dañen.
ALMACENAMIENTO E INACTIVIDAD PROLONGADA
Guarde la máquina en un lugar seco, al reparo de intemperie, limpia y posiblemente cubierta con una lona. Si se
prevé un tiempo prolongado de inactividad (superior a un mes), proceda con la desconexión del cable rojo de la
batería y siga las indicaciones detalladas en el manual de instrucciones del motor; lubrique además todas las
articulaciones. Controle periódicamente que el voltaje de la batería no baje hasta menos de 12,5 Voltios y en este
caso proceda con la recarga.
TABLA RECAPITULATIVA DE MANTENIMIENTO
INTERVENTOS CADA
8 HORAS
PRIMERAS
20 HORAS
CADA
50 ORE
CADA
100 ORE
CADA 250
HORAS
Aceite motor - Controlar el nivel
- Sustituir
●
●
(primero
cambio)
●
Filtro de aire - Controlar
- Sustituir
●
*
Aceite hidráulico - Controlar
- Sustituir
●
●
(primero
cambio a 500
horas, luego
cada 1000
horas)
Controlen que la rejilla de aspiración
motor sea limpia
●
Controlar afilado y fijación cuchillas
● ●
Lubricar con grasa ●
Filtro diésel – Controlar
- Sustituir
●
*
Transmisión plato Sustituir ●
(cada 300
horas)
Decantador diésel Controlar
●
operación recomendada
* intervenir si necesario
70
Page 73

Traducción de las instrucciones originales
ACCESORIOS
GANCHOS DE ELEVACIÓN Y TRANSPORTE
La posición de los ganchos de elevación (fig. 42) permite a la máquina con el plato montado de quedar en equilibrio
si se debe elevar con una grúa. Controle el peso de la máquina en la placa y utilice un equipamiento adecuado
(rampas, grúas, etc.). Si la máquina es transportada con un camión o un remolque, baje el plato de corte, ponga el
freno de estacionamiento y amárrela al medio de transporte con cables o cadenas.
71
Page 74

13
21
23
4
15
17
16
19
27
14
24
25
26
7
9
8
12
6
11
3
5
2
1
18
20
10
22
Fig. 1
72
Page 75

FIG. 1 - LEGEND - COMMANDS
FIG. 1 - LEGENDA - COMANDI
FIG. 1 - LEGENDE - COMMANDES
FIG. 1 – LEYENDA - COMANDOS
ABB. 1 - LEGENDE - BEDIENUNGEN
ENGLISH ITALIANO FRANÇAIS
1. Feed pedal
2. Reverse gear pedal
3. Emergency brake pedal
4. Ignition key
5. Parking brake blocking pedal
6. Throttle lever
7. Grass catcher tilting lever
8. Grass catcher lifting lever
9. Cutting deck lifting lever
10. Cutting deck unhooking pivots for
maintenance
11. Knob for light bar disassembly
12. Cutting height adjustment button
13. Fuel tank cap
14. Emergency lights button
15. Back adjustment lever
16. Seat position adjustment lever
17. Seat shock absorber adjustment lever
18. Button for unhooking cylinders safety
devices
19. Dip switch and acoustic warning signal
20. Hydraulic oil level cap
21. Prefilter
22. Deck inspection coupling lever
23. Single front headlight turn-on button
24. Fan inversion button
25. Differential locking button
26. PTO engaging button
27. Flashing light button
1. Pedale avanzamento
2. Pedale retromarcia
3. Pedale freno di emergenza
4. Chiave avviamento
5. Pedale blocco freno di parcheggio
6. Leva acceleratore
7. Leva ribaltamento cesto
8. Leva sollevamento cesto
9. Leva sollevamento piatto
10. Levette sgancio per manutenzione piatto
11. Pomello smontaggio barra fanali
12. Pulsante regolazione altezza di taglio
13. Tappo carburante
14. Pulsante luci di emergenza
15. Leva regolazione schienale
16. Leva regolazione posizione sedile
17. Leva regolazione ammortizzatore sedile
18. Pulsante sgancio fermi di sicurezza
martinetti idraulici
19. Devio luci e avvisatore acustico
20. Tappo livello olio idraulico
21. Prefiltro
22. Leva aggancio ispezione piatto
23. Accensione faro singolo anteriore
24. Pulsante inversione ventola
25. Pulsante bloccaggio differenziale
26. Pulsante inserimento PTO
27. Pulsante luce lampeggiante
1. Pédale avancement
2. Pédale de marche arrière
3. Pédale frein d’urgence
4. Clé de démarrage
5. Pédale de blocage frein de
stationnement
6. Levier accélérateur
7. Levier bennage bac
8. Levier relevage bac
9. Levier relevage plateau
10. Pivots décrochage plateau pour
entretien
11. Pommeau démontage barre de feux
12. Bouton réglage hauteur de coupe
13. Bouchon carburant
14. Bouton feux de détresse
15. Levier réglage du dossier
16. Levier réglage position siège
17. Levier réglage amortisseur siège
18. Bouton déclenchement des dispositifs
de sécurité des cylindres hydrauliques
19. Commutateur des feux et avertisseur
acoustique
20. Bouchon niveau huile hydraulique
21. Pré-filtre
22. Levier accrochage inspection plateau
23. Bouton allumage phare unique avant
24. Bouton inversion ventilateur
25. Bouton blocage différentiel
26. Bouton enclenchement PTO
27. Bouton feu clignotant
DEUTSCH ESPAÑOL
1. Fahrpedal
2. Rückwärtsgangpedal
3. Notbremse Pedal
4. Zündschlüssel
5. Hebel zum Blockieren der Feststellbremse
6. Beschleunigungshebel
7. Hebel zum Kippen des Korbes
8. Hebel zum Anheben des Korbes
9. Hebel zum Anheben des Mähdecks
10. Stifte zur Aushängung d. Mähdecks f.
Wartungsarbeiten
11. Knopf. f. Ausbau der Lichter Stoßstange
12. Druckknopf zur Einstellung der
Schnitthöhe
13. Treibstoff-Deckel
14. Notlicht-Druckknopf
15. Hebel zur Einstellung der Rückenlehne
16. Hebel zur Einstellung der Position des
Sitzes
17. Hebel zur Einstellung der Stoßdämpfer
des Sitzes
18. Druckknopf zur Entsperrung der
Hydraulikzylinder Sicherheitsvorrichtungen
19. Schalter und Warnton
20. Hydraulik – Ölstandsdeckel
21. Vorfilter
22. Hebel zum Einhaken zur Kontrolle des
Mähwerks
23. Einschaltung vorderer Einzel-Scheinwerfer
24. Druckknopf zur Umkehrung des Gebläses
25. Druckknopf Differenzialsperre
26. Druckknopf Einschalten Zapfwelle
27. Blinklicht Druckknopf
1. Pedal avance
2. Pedal marcha atrás
3. Pedal freno de emergencia
4. Llave arranque
5. Pedal bloqueo freno estacionamiento
6. Palanca acelerador
7. Palanca vuelco cesto
8. Palanca elevador cesto
9. Palanca elevador plato de corte
10. Palanca regulación posición volante
11. Mango para desmontar la barra de las
luces
12. Pulsador regulación altura de corte
13. Tapón carburante
14. Pulsador seña de emergencia
15. Palanca regulación respaldo
16. Palanca regulación posición asiento
17. Palanca regulación amortiguador asiento
18. Pulsador desblocaje de los dispotivos de
seguridad de los cilíndros hidráulicos
19.
20. Conmutador lucesTapón nivel aceite
hidráulico
21. Pre-filtro
22. Palanca de enganche para inspección del
plato
23. Encendido faro síngulo anterior
24. Pulsador inversión ventilador
25. Pulsador bloqueo diferencial
26. Pulsador embrague PTO
27. Pulsador luz intermitente
73
Page 76

DASHBOARD LEGEND – FIG. 2
LEGENDA CRUSCOTTO – FIG. 2
LEGENDE TABLEAU DE BORD – FIG. 2
ZEICHENERKLÄRUNG ARMATURENBRETT – ABB. 2
LEYENDA TABLERO DE MANDOS – FIG. 2
Fuel emergency
supply
Riserva carburante Reserve carburant Treibstofftankreserve Reserva carburante
Pre-heating Preriscaldo Prechauffage Vorglühen Precalientamiento
Hand brake Freno a mano Frein à main Handrembre Freno de mano
Engile oil pressure Pressione olio motore
Pression huile
moteur
Motoröldruck
Presión aceite
motor
Battery Generatore Batterie Generator Batería
Engine water
temperature
Temperatura acqua
motore
Temperature eau
moteur
Motor
Wassertemperatur
Temperatura agua
motor
Engine air filter Filtro aria motore Filtre à air moteur Luftfilter Filtro aire motor
Differential lock
Bloccaggio del
differenziale
Blocage du
différentiel
Differentialsperre
Bloqueo del
diferencial
Fue level
Livello carburante
Niveau carburant
Krafstoffniveau
Nivel carburante
Hourmeter
Contaore
Compteur horaire
Stundenzähler
Contador de horas
RPM meter
Contagiri
Compteur tours mot.
UPM-Zähler
Contador de giros
Engine oil temp.
Temp. olio motore
Temp. huile moteur
Motorenöl-Temp.
Temperatura motor
74
Page 77

PTO on PTO attiva
Prise de force
enclenchée
Eingeschaltetete
Zapfwelle
PTO activa
Closed grasscatcher
Cesto chiuso
Bac de ramssage
fermé
Geschlossener
Grasfangkorb
Cesto cerrado
Seat Sedile Siège Sitz Asiento
Idle/neutral position Folle Point mort Leerlauf Punto muerto
Full beam headlight Luci abbaglianti Feux Fernlicht Luces de carretera
Low beam
headlight
Luci anabbaglianti Feux de route Abblendlicht Luces de cruce
Position light Luci di posizione Feux de croisement Standlicht Luces de posición
Blinkers Indicatori di direzione Feux de position Blinklicht
Indicadores de
dirección
75
Page 78

1
10
16
14
3
7
13
9
12
11
6
5
2
4
FIG.2A
8
15
76
Page 79

FIG. 2/A LEGEND
FIG. 2/A LEGENDA
FIG. 2/A LEGENDE
ABB. 2/A LEGENDE
FIG. 2/A LEYENDA
- INFORMATION AND WARNINGS
- ETICHETTE E AVVERTENZE
- ETIQUETTES ET MISES EN GARDE
- INFORMATIONEN UND WARNUNGEN
- ETIQUETAS Y ADVERTENCIAS
ENGLISH ITALIANO FRANÇAIS
1. ATTENTION! SHEAR DANGER. Keep people
away.
2. Cutting deck lifting lever; grass catcher lifting
lever, grass catcher tilting lever.
3. Belt assembly scheme / greasers.
4. Fat lubrication points.
5. ATTENTION, DANGER! Read the instructions
manual. Take off the key and read the instructions
before making any maintenance or reparation.
ATTENTION, DANGER! TURNING GEARS. Keep
your hands and feet away and make sure that there
are no moving parts, not even by force of inertia.
6. DANGER! MACHINE ROLL-OVER: do not use
this machine on slopes steeper than 14° (25%).
7. Emergency brake pedal.
8. Parking brake.
9. Cutting height adjustment.
10. ATTENTION! Do not touch pulleys or belts in
rotation: they can cause serious injury.
11. ATTENTION! Do not touch the rotating cardan
joint, it can severely hurt people. Do not make
maintenance with the engine on.
12. ATTENTION! CUTTING PART. Keep your
hands and feet away. Do not work with the lawn
mower on gravel or other foreign bodies that can be
sucked in and thrown away by the blades, being very
dangerous. Keep people away.
13. Noise level.
14. Accelerator min./max.
15. Serial number plate.
16. Fuses.
1. ATTENZIONE! PERICOLO CESOIAMENTO.
Mantenere a distanza le persone.
2. Leva sollevamento piatto; leva sollevamento
cesto; leva ribaltamento cesto.
3. Schema montaggio cinghia e ingrassatori
4. Punti di lubrificazione con grasso.
5. ATTENZIONE, PERICOLO! Leggere il
manuale di istruzioni. Togliere la chiave e leggere le
istruzioni prima di effettuare qualsiasi operazione di
manutenzione e riparazione.
ATTENZIONE, PERICOLO! ORGANO IN
ROTAZIONE. Tenere lontano le mani assicurandosi
che non ci siano parti in movimento, neanche per
inerzia.
6. PERICOLO! RIBALTAMENTO DELLA
MACCHINA: Non usare questa macchina su pendii
superiori a 14° (25%).
7. Pedale freno di emergenza.
8. Freno di stazionamento.
9. Regolazione altezza di taglio.
10. Attenzione! Non toccare mai pulegge o cinghie
in movimento: creano gravi danni alla persona.
11. ATTENZIONE! Non toccare il giunto cardanico
in rotazione, crea gravi danni alla persona. Non fare
manutenzione con il motore in moto.
12. ATTENZIONE! ORGANO TAGLIENTE. Tenere
lontano mani e piedi. Non lavorare col rasaerba
sopra la ghiaia o altri corpi estranei che possono
essere aspirati e centrifugati dalle lame risultando
molto pericolosi. Tenere lontano le persone.
13. Livello sonoro.
14. Acceleratore min/max.
15. Targhetta matricola.
16. Schema fusibili.
1. ATTENTION! RISQUE DE CISAILLEMENT.
Maintenir les personnes à distance.
2. Levier relevage plateau de coupe; Levier
relevage bac; Levier bennage bac.
3. Schéma montage courroie et graisseurs.
4. Points de lubrification avec graisse.
5. ATTENTION, DANGER! Lire la notice
d’utilisation. Enlever la clé de démarrage et lire les
instructions avant d’effectuer toute opération
d’entretien et de réparation.
ATTENTION, DANGER! ORGANE EN ROTATION.
Maintenir à distance les mains et veiller à ce que
qu’aucune partie n’est en mouvement, même pas par
inertie.
6. DANGER! RENVERSEMENT DE LA
MACHINE: Ne pas utiliser cette machine dans des
pentes supérieures à 14° (25%).
7. Pédale frein de secours.
8. Frein de stationnement.
9. Réglage hauteur de coupe.
10. ATTENTION! Ne pas toucher les poulies ou les
courroies en mouvement: elles peuvent entraîner
des blessures graves.
11. ATTENTION! Ne pas toucher le cardan en
rotation, il peut causer des graves dommages aux
personnes. N’effectuer aucune opération d’entretien
avec le moteur en marche.
12. ATTENTION! ORGANE TRANCHANT.
Maintenir à distance les mains et les pieds. Ne pas
travailler avec la tondeuse sur le gravier ou sur
d’autres objets pouvant être aspirés et centrifugés
par les lames et devenir très dangereux. Maintenir
les personnes à distance.
13. Niveau sonore.
14. Accélérateur min/max.
15. Plaque numéro de série.
16. Schéma fusibles.
DEUTSCH ESPAÑOL
1. ACHTUNG! SCHNITTGEFAHR. Personen fern
halten.
2. Hebel zum Anheben des Mähwerks; Hebel
zum Anheben des Grasfangkorbs; Hebel zum Kippen
des Grasfangkorbs.
3. Montageanleitung für Riemen und
Schmiernippel
4. Mit Fett zu schmierende Punkte.
5. ACHTUNG, GEFAHR! Gebrauchsanleitung
lesen. Den Schlüssel abziehen und die Anleitungen
lesen, bevor Sie jegliche Instandhaltungs- und
Reparatureingriffe durchführen.
6. ACHTUNG, GEFAHR! DREHENDES TEIL.
Hände und Füße fernhalten und sicherstellen, dass
sich keine Teile bewegen, auch nicht durch Trägheit.
GEFAHR! UMKIPPEN DER MASCHINE: Diese
Maschine nicht auf Hängen einsetzen, die steiler als
14° (25%) sind.
7. Notbremspedal.
8. Feststellbremse.
9. Einstellung der Schnitthöhe.
10. ACHTUNG! Die drehende Riemen und
Riemenscheibe nicht berühren, es kann schwere
Verletzungen verursachen.
11. ACHTUNG! Das drehende Kardangelenk nicht
berühren, es kann schwere Verletzungen
verursachen. Mit laufendem Motor keine
Instandhaltungen durchführen.
12. ACHTUNG! SCHNEIDENDES TEIL. Halten Sie
Hände und Füße fern. Nicht mit dem Rasenmäher
auf Kies oder anderen Fremdkörpern arbeiten, diese
könnten von den Messern angesaugt und
weggeschleudert werden und sehr gefährlich sein.
Personen fern halten.
13. Geräuschpegel.
14. Beschleuniger min./max.
15. Seriennummernschild.
16. Schema der Sicherungen
1. ¡ATENCIÓN! PELIGRO DE CORTE. Mantener
alejadas las personas.
2. Palanca elevación del plato; palanca elevación
del cesto; palanca vuelco del cesto.
3. Esquema montaje correa y engrasadores.
4. Puntos de lubricación con grasa.
5. ¡ATENCIÓN, PELIGRO! Leer el manual de
instrucciones. Quitar la llave y leer las instrucciones
antes de efectuar cualquier operación de
manutención y reparación. ¡ATENCIÓN, PELIGRO!
ÓRGANO EN ROTACIÓN. Mantener las manos
alejadas y verificar que ninguna parte está en
movimiento, ni siquiera por inercia.
6. ¡PELIGRO!VOLCADO DE LA MÁQUINA: No
Utilizar esta máquina en pendientes superiores a 14°
(25%).
7. Pedal freno de emergencia.
8. Freno de estacionamiento.
9. Ajuste altura de corte.
10. ¡ATENCIÓN! Nunca tocar las poleas o las
correas en movimiento: pueden crear lesiones
graves.
11. ¡ATENCIÓN! No tocar el cardan mientras está
en rotación; puede dañar gravemente a las
personas. No hacer operaciones de mantenimiento
con el motor en marcha.
12. ¡ATENCIÓN! ÓRGANO CORTANTE. Mantener
las manos y los pies alejados. No trabajar con el
cortacésped sobre la grava u otros objetos que
pueden ser aspirados y centrifugados por las
cuchillas y resultar muy peligrosos. Mantener
alejadas las personas.
13. Nivel de ruido.
14. Acelerador min/max.
15. Placa número de chasis.
16. Esquema fusibles.
77
Page 80

ADJUSTMENT OF THE FULL GRASS CATCHER
SENSOR
1. Dry grass: the sensor must be tilted upwards.
2. Normal mowing: the sensor must be positioned
horizontally
3. Wet and high grass, leaves: the sensor must be
tilted downward.
REGOLAZIONE MICRO CESTO PIENO
1. Erba asciutta: inclinato verso l’alto
2. Taglio normale: micro cesto in posizione
orizzontale
3. Erba bagnata o alta, foglie: micro inclinato verso il
basso.
REGLAGE MICRO BAC PLEIN
1. Herbe sèche: le micro doit être incliné vers le haut
2. Herbe normale: le micro doit être en position
horizontal
3. Herbe mouillée ou haute/feuilles: le micro doit
être incliné vers le bas.
REGULIERUNG DES MIKROSCHALTERS BEI VOLLEM
GRASFANGKORB
1. Trockenes Gras: den Mikroschalter nach oben
neigen
2. Mähen unter normalen Bedingungen: den
Mikroschalter in waagerechte Stellung
positionieren
3. Nasses oder hohes Gras, Laub: den
Mikroschalter nach unten neigen
REGULACIÓN MICRO CESTO LLENO
1. Hierba seca: inclinado hacia arriba.
2. Corte normal: micro cesto en posición horizontal.
3. Hierba mojada o alta, hojas: micro inclinado hacia abajo.
CUTTING DECK SERVICE – BLADES SHARPENING
To sharpen the blades proceed as follows:
1. position the cutting deck in the lowest position
2. lift the grass catcher and remove the grass chute
between the deck and the grass catcher
3. lift the cutting deck and unhook the side pivot
(fig.1, n.10)
4. hold the handle on the cutting deck, lean the foot
in the toothed stirrup and hook the cutting deck
(fig.25). No need to remove the cardan. Before
starting the machine, make sure the cardan is
properly connected and the locking button is ON.
MANUTENZIONE PIATTO - AFFILATURA LAME
Per affilare le lame procedere come segue:
1. posizionare il piatto nella posizione di taglio più
bassa:
2. sollevare il cesto e rimuovere il canale di carico
tra piatto e cesto
3. sollevare il piatto e sganciare i perni laterali (fig. 1,
n.10)
4. afferrare la maniglia sul piatto, appoggiare il piede
nella staffa dentata e agganciare il piatto (fig. 25).
Non occorre sganciare il cardano. Prima di
avviare la macchina è comunque buona norma
accertarsi che il cardano sia ben collegato e il
pulsante di fermo sporgente.
78
Page 81

ENTRETIEN PLATEAU DE COUPE – AFFUTAGE
COUTEAUX
Pour affûter les couteaux, suivre les indications suivantes:
1. Positionner le plateau dans la position la plus
basse
2. Soulever le bac de ramassage et enlever la
goulotte entre plateau et bac.
3. Soulever le plateau et décrocher les pivots
latéraux (fig. 1, n.10)
4. Saisir la poignée sur le plateau, placer le pied sur
l’étrier denté et tirer le plateau vers le haut jusqu’à
verrouillage (fig. 25). Ne pas démonter le cardan.
Avant de démarrer la machine on recommande
de toute façon de vérifier que le cardan soit bien
branché et que son bouton de blocage soit dans
la position correcte.
WARTUNGSARBEITEN AM MÄHDECK - SCHLEIFEN
DER MESSER
Zum Schleifen der Messer folgendermaßen vorgehen:
1. Das Mähdeck in die unterste Schnittstellung
positionieren
2. Den Grasfangkorb anheben und den Ladekanal
zwischen Mähdeck und Grasfangkorb entfernen
3. Das Mähdeck anheben und die zwei seitlichen
Bolzen (Abb. 1, Pos. 10) aushaken
4. Den Griff am Mähdeck ergreifen, den Fuß auf die
verzahnte Halterung stützen und das Mähdeck
einhaken (Abb. 25). Der Ausbau des Kardans ist
nicht erforderlich. Vor dem Anlassen der
Maschine ist es jedoch ratsam, den
sachgemäßen Anschluss des Kardans zu
kontrollieren und sich zu vergewissern, dass die
Sperrtaste in der richtigen Position steht.
MANTENIMIENTO PLATO DE CORTE - AFILADO
CUCHILLAS
Para afilar las cuchillas, seguir los pasos que se
dan a continuación:
1. Colocar el plato de corte en la posición más baja
2. Levantar el cesto de recogida y retirar el
conducto de carga entre plato de corte y cesto de
recogida.
3. Levantar el plato y desenganchar los pivotes
laterales (fig.1, n.10)
5. Agarrar la empuñadura sobre el plato de corte,
apoyar el pie sobre el soporte metálico antideslizamiento y enganchar el plato (fig. 25). No es
necesario desconectar el cardan. Antes de
arrancar la máquina es importante controlar que el
cardan está bien conectado y el pulsador
sobresaliente.
79
Page 82

Grass chute can be mounted only if the cutting deck is in
its lowest position.
Rimontare il canale di carico solo con il piatto abbassato.
La goulotte peut être remontée seulement si le plateau de
coupe se trouve dans la position la plus basse.
Den Ladekanal nur bei gesenktem Mähdeck wieder
anschließen.
Volver a montar el conducto de carga sólo con el plato en
posición baja.
FIG. 2/B
80
Page 83

Fig. 3
Fig. 4
Fig. 5
Fig. 6
Fig. 7
Fig. 8
81
Page 84

Fig. 9
Fig. 10
Fig. 11
Fig. 12
Fig. 13
Fig. 14
82
Page 85

Fig. 15
Fig. 16
Fig. 17
Fig. 18
Fig. 19
Fig. 20
83
Page 86

Fig. 21
Fig. 22
Fig. 23
Fig. 24
Fig. 25
Fig. 26
HYDRAULIC OIL
FILTER
84
Page 87

Fig. 27
Fig. 28
Fig. 29
Fig. 30
A
B
85
Page 88

Fig. 31
Fig. 32
Fig. 33
Fig. 34
Fig. 35
Fig. 36
86
Page 89

Fig. 37
Fig. 38
Fig. 39
Fig. 40
Fig. 41 Fig. 42
87
Page 90

Grillo S.p.A.
47521 CESENA (ITALY) – Via Cervese 1701
Tel: +39 0547 633111
Fax: +39 0547 632011
Website: www.grillospa.it
E-mail: grillo@grillospa.it
GRILLO DEUTSCHLAND GmbH
Pilsener Strasse, 9 - D-86199 Augsburg
Tel: + 49 082126879910
Faxnr.: + 49 01733132860
Webseite: www.grillodeutschland.de
E-Mail: grillo@grillodeutschland.de
Grillo Agrigarden LTD
Dove fields Uttoexeter - ST148HU Staffordshire
Tel: + 44 01889569149
Fax no.: + 44 01889592666
Website: www.grilloagrigarden.co.uk
E-mail: info@grilloagrigarden.co.uk
S.p.A.
 Loading...