

Page 1

CONTENTS
Introduction and Overview . . . . . . . . . . . . 2
It Is the Year 2003 . . . . . . . . . . . . . . . . . . . . . .2
About Stealth Action . . . . . . . . . . . . . . . . . . . . .2
Sam Fisher Profile . . . . . . . . . . . . . . . . . . . . . . .3
Third Echelon™Team . . . . . . . . . . . . . . . . . . . . .4
Terrorists . . . . . . . . . . . . . . . . . . . . . . . . . . . . .5
Getting Started . . . . . . . . . . . . . . . . . . . . 6
Installation . . . . . . . . . . . . . . . . . . . . . . . . . . .6
Uninstalling/Reinstalling the Game . . . . . . . . . . . .6
Main Menu. . . . . . . . . . . . . . . . . . . . . . . 7
Start Game . . . . . . . . . . . . . . . . . . . . . . . . . . .7
Settings . . . . . . . . . . . . . . . . . . . . . . . . . . . . .7
Play Intro . . . . . . . . . . . . . . . . . . . . . . . . . . . .7
Credits . . . . . . . . . . . . . . . . . . . . . . . . . . . . . .7
Splinter Cell™Website . . . . . . . . . . . . . . . . . . . .7
Start Game Menu . . . . . . . . . . . . . . . . . . 8
Create . . . . . . . . . . . . . . . . . . . . . . . . . . . . . .8
Load . . . . . . . . . . . . . . . . . . . . . . . . . . . . . . .8
Delete . . . . . . . . . . . . . . . . . . . . . . . . . . . . . .8
Settings Menu. . . . . . . . . . . . . . . . . . . . . 9
Controls . . . . . . . . . . . . . . . . . . . . . . . . . . . . .9
Graphics . . . . . . . . . . . . . . . . . . . . . . . . . . . . .9
Sounds . . . . . . . . . . . . . . . . . . . . . . . . . . . . . .9
Playing Splinter Cell . . . . . . . . . . . . . . . . 10
Game Screen . . . . . . . . . . . . . . . . . . . . . . . . .10
Sam’s Basic Movements . . . . . . . . . . . . . . . . . .11
Sam’s Advanced Movements . . . . . . . . . . . . . . .11
Control Map . . . . . . . . . . . . . . . . . . . . . . . . . .12
Actions . . . . . . . . . . . . . . . . . . . . . . . . . . . . .14
Attack . . . . . . . . . . . . . . . . . . . . . . . . . . . . . .15
Non-Playable Character-Linked Moves . . . . . . . . .15
Palm™OPSAT: Operational Satellite Uplink . . . . . .16
Quick Inventory: SC-20K, Gadgets, & Items . . . . . .17
SC-20K M.A.W.S.
(Modular Assault Weapon System) . . . . . . . . .17
Gadgets . . . . . . . . . . . . . . . . . . . . . . . . . .18
Items . . . . . . . . . . . . . . . . . . . . . . . . . . . .19
In-Game Elements . . . . . . . . . . . . . . . . . . .20
Hints and Tips . . . . . . . . . . . . . . . . . . . . 22
Credits . . . . . . . . . . . . . . . . . . . . . . . . . 23
Warranty . . . . . . . . . . . . . inside front cover
Technical Support . . . . . . . . inside back cover
1
Page 2
INTRODUCTION AND OVERVIEW
It Is the Year 2003
In response to the growing use of sophisticated digital encryption to conceal potential threats to the national security of
the United States, the NSA (National Security Agency) has ushered forth a new dawn of intelligence-gathering techniques. This top-secret initiative, dubbed Third Echelon, marks a return to classical methods of espionage, enhanced with
leading-edge surveillance and combat technology for the aggressive collection of stored data in hostile territories. When
intelligence deemed critical to national security cannot be obtained by traditional means, Third Echelon is granted clearance to conduct physical operations.
Its existence denied by the U.S. government, Third Echelon deploys units known as Splinter Cells™: elite intelligence-gathering forces consisting of a lone field operative supported by a remote team. Like a sliver of glass, a Splinter Cell is
small, sharp, and nearly invisible.
March 10, 2004: The CIA contacted NSA officials regarding the loss of contact with Agent Alison Madison, a CIA operative monitoring widespread communication shortages plaguing the former Soviet Republic of Georgia. A second operative, Agent Blaustein, was inserted into the Georgian capital T’bilisi to locate Agent Madison, only to drop from contact
seven days later. Fearing for the lives of American agents compromised at the hands of a suspected terrorist effort,
Third Echelon has activated Splinter Cell operative Sam Fisher to locate the missing agents and evaluate the situation.
You are Sam Fisher. You must leave no trace on the physical or political map. Remember: Although killing may compromise secrecy, the choice between leaving a witness or a corpse is no choice at all. You do not exist. You are a
Splinter Cell.
About Stealth Action
Sam’s ability to operate covertly is his most valuable asset against overwhelming enemy forces. The visibility meter on
Sam’s OPSAT is an important indicator of stealth. If it is completely to the left, Sam is invisible to enemy surveillance. If
it is completely to the right…Sam is in critical danger of being detected and/or intercepted. Remaining under the cover
of shadows is an important stealth technique, but crouching, moving slowly, and keeping your back to the wall also contribute to Sam’s invisibility.
A Splinter Cell operative must not only defy enemy eyes, but also enemy ears. Consider that while running and jumping
are sometimes necessary movements, they also generate sound – a golden invitation for an enemy patrol to investigate
your position. Moving slowly while crouched is much more likely to avoid enemy investigation.
Alarms: Note that if an enemy detects Sam, or even suspects the presence of an intruder, they have been specifically
trained to alert nearby comrades or trigger an alarm, rather than engage Sam by themselves. Because of the extremely
covert nature of Splinter Cell operations, indiscretion with alarms can lead Third Echelon to abort a mission.
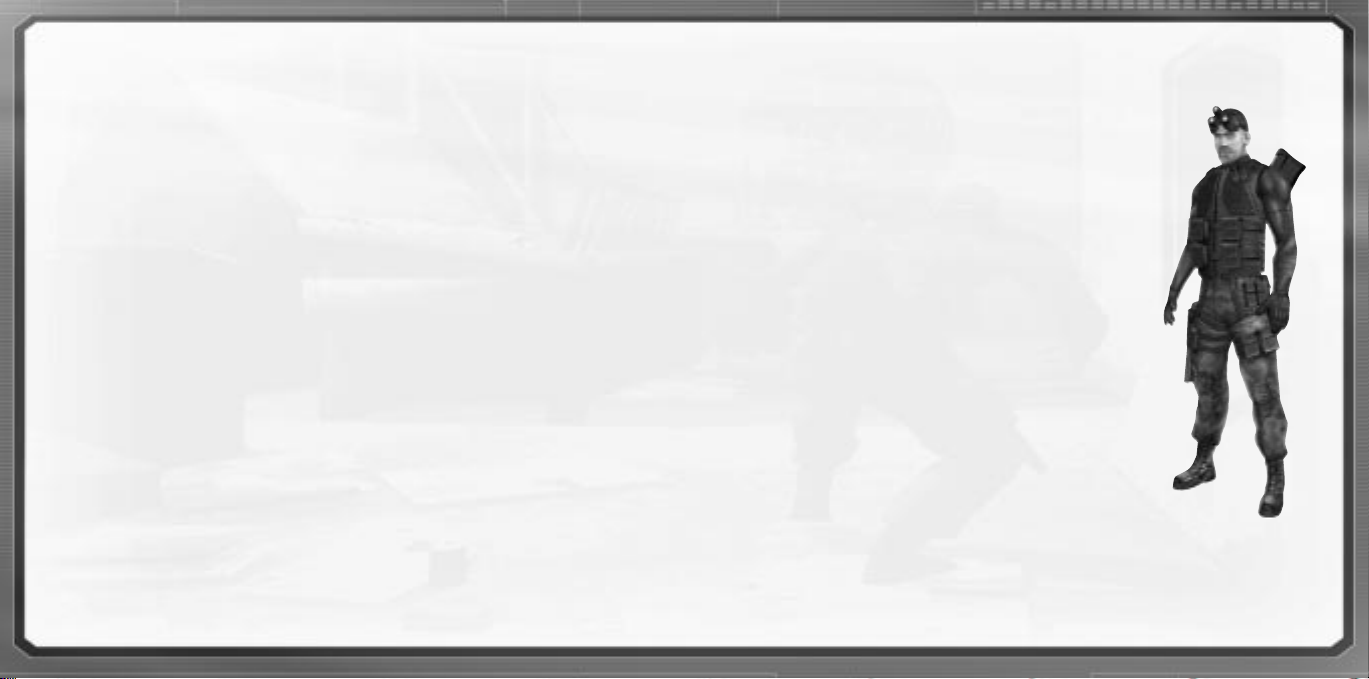
Sam Fisher Profile
Fisher has been on the front lines of espionage in several defining conflicts throughout the
past decades. He has not only survived, but also excelled in the field of covert operations
through hard work, insatiable curiosity, and brutal honesty. He has little time for polite
niceties and even less for lies.
Though fully aware and confident of his abilities, Fisher understands that his survival has
often been a gift of chance. He knows he is human and fallible and does not want to
die. He has a strange and slightly dark sense of humor.
He is quiet, instinctive, and observant: somebody who watches from the outside.
Combat, espionage, and constant training have defined his adult life; his tactical
experience has become part of his instinct. Now, even outside of work he is most
comfortable on the fringes of society, keenly observant but still removed.
Fisher has acquired an admirable collection of scars and secured his place in Valhalla; he
has little left to prove to the world. Now older and wiser, he has no interest in glory. If
he fights, it is because he believes the cause is necessary and he is capable.
2
3
Page 3
Third Echelon Team
Third Echelon’s specialists have been recruited from every
branch of intelligence and armed forces, some even culled
from civilian life. They are the elite of America’s strategists, hackers, and operatives. Each field operative works
with a remote support team of roughly a dozen members.
Sam Fisher’s Support Team is headed by Three
Primary Members:
COLONEL IRVING LAMBERT
Born: 19 61 in Batcave, NC
Height: 6' 2"
Weight: 270 lbs.
THIRD ECHELON
Operations Coordinator
Lambert is the link between the field
agent(s) and Third Echelon’s team of
researchers, hackers, strategists, and
commanders. While Fisher is in the
field, he is in constant contact with
Lambert via subdermal microchips
and a cochlear implant.
VERNON WILKES, Jr.
Born: 19 67 in Baltimore, MD
Height: 5' 10"
Weight: 145 lbs.
THIRD ECHELON Field Runner
Field Runners are mainly responsible
for coordinating the transportation
and equipment for field agents.
Transportation is usually procured
(stolen) from an area of operation
and abandoned afterwards. Wilkes
will debrief Fisher on any new
equipment or weaponry as it
becomes available.
ANNA GRÍMSDÓTTIR
Born: 1974, Boston, MA
Height: 5' 8"
Weight: 128 lbs.
THIRD ECHELON
Communications Lead
Grímsdóttir heads a small team of
programmers responsible for providing technological, cryptographic, and
data support for the Field Operative.
Grímsdóttir will assist Fisher in his
interface with the high-tech components of his missions.
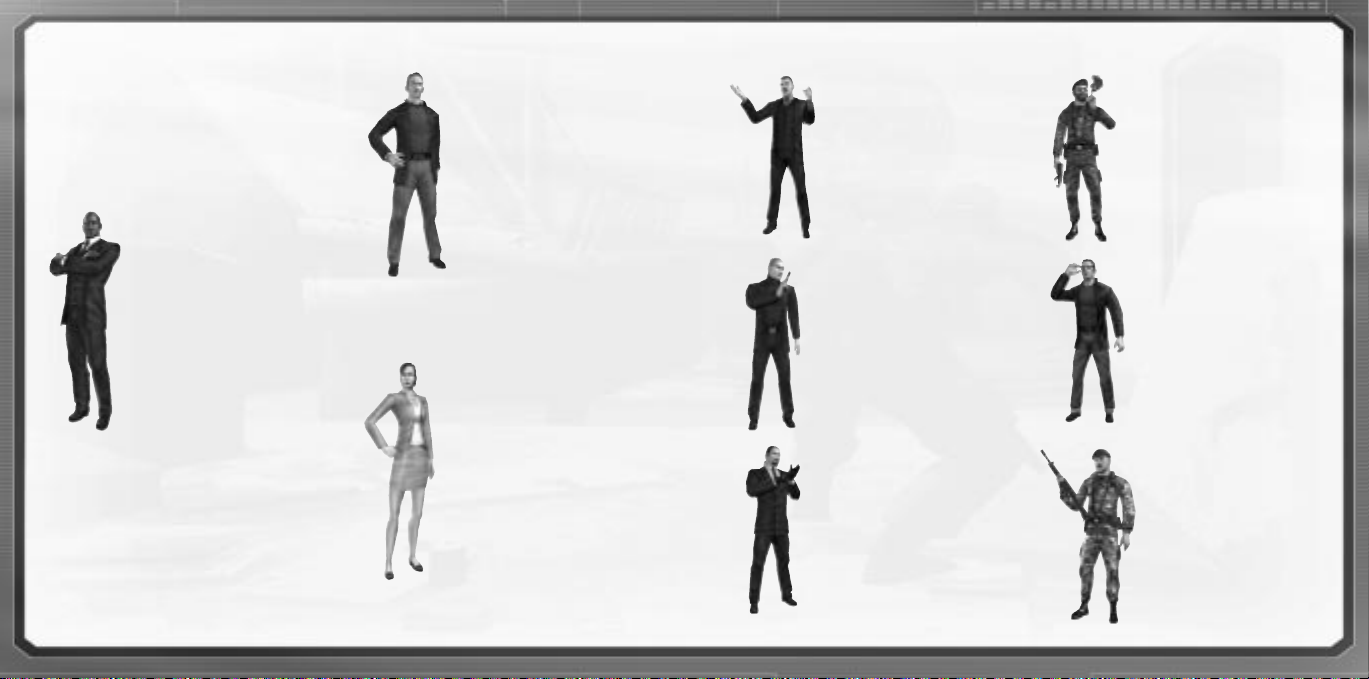
Terrorists
KOMBAYN NIKOLADZE
Profile: Using his political, technological, and financial influence,
Nikoladze has become the newly
elected President of Georgia. His
ambition is matched only by his
industriousness.
VYACHESLAV GRINKO
Profile: Ex-Spetsnaz (Russian
Special Forces), Grinko is now
Nikoladze’s “lieutenant” of the
Russian Mafia.
HAMLET
Profile: Grinko’s personal driver.
GEORGIAN COLONELS
Profile: The leadership for
Nikoladze’s worldwide military/mercenary forces. Several colonels can
be found in each cell of the
Georgian mercenary army. They
also have security clearance to certain areas that normal soldiers
don’t have.
PHILIP MASSE
Profile: Hired for his vast computer
knowledge, Philip Masse is
the man directly responsible for the
Georgian information crisis.
CHINESE OFFICERS
Profile: The leadership behind the
People’s Liberation Army of China.
These officers sometimes hold key
information that Sam can use to
accomplish his missions. Elimination
might not be the best option
when first encountering them.
4
5
Page 4

GETTING STARTED
Installation
To install Splinter Cell, follow these simple steps. If you experience trouble during installation, refer to the Technical
Support section of this manual.”
1. Start your computer.
2. Insert the Splinter Cell Installation CD into your CD-ROM drive. The Autorun Menu should appear.
Note: If the Autorun Menu does not automatically appear, double-click on the My Computer icon located on your desktop
and then double-click on the icon that corresponds to your computer’s CD-ROM drive. The Autorun Menu should now appear.
3. Click on the Install Splinter Cell button. The installation wizard now walks you through each step of the setup and
installation process for the game.
Once you have created a directory for Splinter Cell, the game is installed on your hard drive. The game automatically
asks you if you want to install DirectX v8.1. You cannot play Splinter Cell without v8.1 or higher on your computer. If you
already have a version of DirectX that is v8.1 or higher, simply check the No button, and it does not install DirectX. If
you are not sure, click Yes, and the DirectX installer performs its own verification.
4. After installing the game, select Ubi Soft Entertainment/ Splinter Cell/Play Splinter Cell from your computer’s Start
menu or double-click the Play Splinter Cell shortcut on your desktop. Doing either starts the game.
Note: The Splinter Cell Play CD must be in your CD-ROM drive to start the game.
Uninstalling/Reinstalling the Game
To uninstall Splinter Cell, follow these simple steps:
1. Start your computer.
2. Insert either Splinter Cell CD into your CD-ROM drive. The Autorun Menu should appear.
3. When it appears, click on the Uninstall Splinter Cell button. The uninstall wizard automatically asks if you really want
to uninstall the game. If you are sure you want to remove Splinter Cell from your hard drive, click the Yes button. If
you don’t want to uninstall the game, click No, which cancels the process.
If you uninstall Splinter Cell, all previously saved games remain on your hard drive, unless you answer Yes to the “Delete
all configuration and saved games files” question.
Note: You can also uninstall Splinter Cell by using the Add/Remove Programs control panel in Windows.
6
MAIN MENU
Start Game
Select this option to create a new game, resume a previous
game, or delete a profile.
Note: You can choose to create a player profile or use the
provided default player profile (Sam).
Settings
Select this option to adjust the controls, the video and the
sound settings.
Play Intro
Select this option to replay the Splinter Cell game intro.
Credits
Select this option to view the list of people who participated in this game’s creation.
Splinter Cell Website
Use this option to visit the official Splinter Cell website.
7
Page 5

START GAME MENU
This is the option to select to start playing. From this menu, you can choose to:
•Start a new game by first creating a player profile.
• Resume an existing game.
New Profile
To create your player profile:
1. Type in your player name.
2. Select a difficulty level.
3. Click on create to save your profile and launch the game.
Load Profile
To play an existing saved game:
1. Select a player.
2. Click on load game (the load saved games menu will
pop-up).
3. Select a saved game or a level from the lists.
4. Click on start game.
To delete a player profile:
1. Choose a player from the list.
2. Click on delete.
SETTINGS MENU
The settings menu allows you to customize Splinter Cell to perform best on your system and to your taste. You can change
the Controls, the Graphics, and the Sounds settings.
Controls
This is the option to choose to customize your mouse settings
and controls.
Graphics
This is the option to choose to customize your graphics settings:
Video resolution, shadow detail, shadow resolution, and the animated geometry.
Sounds
This is the option to choose to customize your sound settings: Ambient volume, voice volume, music volume, SFX volume,
and sound quality, as well as your advanced audio settings: Audio virtualization, 3D audio accelerated, and EAX.
8
9
Page 6

PLAYING SPLINTER CELL
Game Screen
1. Life Bar: This represents the status of Sam’s
health/life.
2. Stealth Meter: The meter moves from left
to right to represent the amount of light in
Sam’s area and the amount of sound he
makes while moving.
3. Interaction System: This system appears
when you can interact with an object or person
in the environment. Press the interaction key to
interact. If there is more than one interaction
available, press and hold the interaction key,
scroll down the list using your movement keys,
and release to activate your selection.
4. Objective: Displays the next goal to reach in
your mission.
5. Selected Weapon, Gadget, or Item: Displays the current selection.
6. Communication Box: Appears at the top of the screen when you receive a communication.
7. New Goal to Read in Your OPSAT: Press ESC to read it.
8. New Notes to Read in Your OPSAT: Press ESC to read it.
9. New Recon to Read in Your OPSAT: Press ESC to read it.
10. Rate of Fire
11. Total Ammo
12. Ammo in One Clip
13. Clips
6
4
Sam’s Basic Movements
Movement keys (W,S,A,D by default)
13
7
8
9
2
12
13
115
10
Accelerate (mouse wheel up by default)
Decelerate (mouse wheel down by default)
Jump (Shift by default)
Crouch (C by default)
Movement is slower, but quieter, and Sam
is less visible while crouched.
Sam’s Advanced Movements
Rolling
Press Crouch while moving to do a roll.
Back to Wall (Q by default)
Sam is less visible with his back to a wall.
Quiet Landing
To execute a quiet landing, quickly press
Crouch after you’ve hit the Jump button. If
you are already in a crouched position, you
will automatically land softly.
Mantling
Press Jump and push Forward into low
objects like crates or tables and Sam will
crawl, or “mantle” onto them.
Climbing
To climb a pipe, ladder, vertical cable, or
fence, simply walk into it. Press Jump to
jump off.
Shimmying
To shimmy, you must be hanging from a
ledge. To hang from a ledge, Sam must
either jump or slowly walk off the ledge.
Once in shimmying position, Sam can
move left and right as well as pull himself
Wall Jump
When standing near a wall, press Jump
and then quickly press it again to kick off
a nearby wall and gain extra height.
Split Jump
up if there is room. Move down or jump
again to let go of a ledge.
Hand-Over-Hand
To grab hold of a horizontal pipe, press
Jump. Bring Sam’s legs up to clear obstacles by pressing the Crouch key.
While at the top of a Wall Jump, if Sam is
in a corridor that is about as wide as he is
tall, pressing Jump a third time will allow
him to enter the Split Jump position.
10
11
Page 7

Control Map
PALM
OPSAT
TYPE
~
Tab
INVENTORY
QUICK
HOLD
1 2
JUMP
F1 F2 F3
TOGGLE
NIGHT
VISION
BACK TO
WALL
Q
A
OptionControl
MOVE
MOVE
W
MOVE
S
CHANGE
RATE OF
FIRE
Z
Cmd/Alt Space
TOGGLE
THERMAL
VISION
3
RESET
CAMERA
X
F4 F5
4 5 6 7 8 9 0
RELOAD
E R
MOVE
D
CROUCH
C
T Y U I O P
F G H J K L
V B N M
QUICK
SAVE
F6 F7 F8 F9 F10
INTERACTION
12
QUICK
LOAD
–
;
,
.
/
=
[ ]
’
ShiftShift
OptionCmd/Alt Control
F11 F12ESC
Delete
FIRE
\
ReturnCaps Lock
L Button
LOOK
Mouse
ALT.
FIRE
R Button
MOUSE WHEEL UP:
ACCELERATE
SNIPER MODE ZOOM IN
STICKY CAM ZOOM IN
MOUSE WHEEL DOWN:
DECELERATE
SNIPER MODE ZOOM OUT
STICKY CAM ZOOM OUT
MIDDLE MOUSE:
USE/ EQUIP
13
Page 8

Zip Line
Jump to grab hold of a sloped wire or zip
line. Sam will slide down automatically.
Press Crouch to raise Sam’s legs. Jump
again to let go.
Door Peek
To peek through a door before entering,
select the Peek Door interaction. Move
Forward to go through the door or move
Backward close it.
Rappelling
To Rappel from a small chimney, stand
near it and select the Rappel on wall interaction. Sam can move up and down the
rope. Press Jump to kick off the wall.
Actions
Interaction (Space Bar by default)
Interact with the environment, with NPCs and objects.
Use/Equip (middle mouse button by default)
Equip Sam with weapons, items or gadgets.
Reload (R by default)
Reload your weapon.
Change Rate of Fire (Z by default)
Change your SC-20K rate of fire.
Sniper Zoom In
(mouse wheel up by default)
Enter Sniper mode. Use the accelerate key.
Sniper Zoom Out
(mouse wheel down by default)
Exit Sniper mode. Use the decelerate key.
Sticky Cam Zoom In
(mouse wheel up by default)
Sticky Cam Zoom Out
(mouse wheel down by default)
Hold Breath
Hold breath to steady aim by the pressing Alt Fire (right
mouse button).
Toggle Night Vision (2 by default)
Night Vision goggles amplify very low existing light, especially lights at the lower end of the infrared spectrum.
Toggle Thermal Vision (3 by default)
Similar to Night Vision, Thermal vision is an essential tool
in low light situations. This technology differs from night
vision in that it captures the upper level of the infrared
light spectrum, which is emitted as heat rather than
reflected as light.
Note: Thermal vision is not available in the first few
missions.
Attack
Close Attack
With your weapon holstered, press the left
mouse button when very close to an
enemy to hit him with your elbow.
Drop Attack
If you can get above an enemy and
drop directly down on him, you will
knock him out.
Rappel Shooting
Sam can equip and fire his weapon while
rappelling. Press Use/Equip (middle mouse
button) and Fire (left mouse button).
Hanging Shooting
Sam can equip and fire his weapon while
hanging from a pipe, but only if his legs
are not tucked. Press Use/Equip to equip
the selected weapon.
Split Jump Shooting
Sam can equip and fire his weapon while in
the Split Jump position. Press Use/Equip to
equip the selected weapon.
Back to Wall Shooting
When Sam approaches a corner with his
back to the wall, he will automatically peek
around the corner. Press Use/Equip while
peeking to equip with the selected weapon
and allow him to shoot around the corner.
Non-Playable
Character-Linked Moves
Sam has several special moves that can be performed on
NPCs (Non Playable Characters). Being able to get close
to an enemy without being detected is necessary to execute these moves.
Grabbing
Sneak up close behind an enemy and select
the Grab Character interaction. Press Fire to
knock him out.
Human Shield
After grabbing an enemy, you can equip
your side arm and fire while using the
grabbed enemy as a human shield.
Interrogation
Some NPCs can be interrogated for useful
information. While holding an NPC, select
the Interrogate interaction to make him talk.
Forced Cooperation
Some objects in the world can’t be used
by Sam, but there may be NPCs who can
use the objects for him. To force an NPC
to cooperate, grab him, drag him to the
object you want him to use, and select the
Force Cooperate interaction.
14
15
Page 9

Move Body
Sam will need to hide dead or unconscious
bodies in order to prevent them from being
discovered. Select the Pick Up Body interaction to carry a body. Press the interaction
key to put him down quietly or simply equip
a weapon to drop the body in a hurry.
Conversations
Some friendly NPCs will talk to you.
Simply walk up to them and select the
Talk To interaction.
Palm OPSAT:
Operational Satellite Uplink
The Palm™ OPSAT is a compact, wrist-mounted version
of a standard civilian PDA designed for military use. It
enables Sam to receive mission objectives and updates
from Third Echelon headquarters. The OPSAT also displays
real-time images from Sticky Cameras. Press ESC (default
key) to access your OPSAT. Use this menu to customize
your settings while in-game or to save or load a saved
game at any time during the game.
Inventory
The inventory section provides information about your SC20K as well as the gadgets and the items you are carrying. A video demo and controls explanation of the
weapons and gadgets is also accessible and updated at
the beginning of every mission.
Mission Information
GOALS: This section gives the specific details of your
mission objectives.
NOTES: This section provides additional hints and clues
that may have been gathered during the mission.
DATA: Recon data provides intelligence about enemies,
locations, or other key elements pertinent to the operation. Pay special attention to the data sticks, as they
contain key information.
Settings: This section allows you to customize or
configure the Controls, Graphics, and Sound settings
while playing.
Saving/Loading: This section allows you to save
your game at any time or load a saved game.
Quick Inventory:
SC-20K, Gadgets, & Items
Hold CTRL (default key) to access the quick inventory. Use
the mouse to make your selection.
SC-20K M.A.W.S.
(Modular Assault Weapon System)
The bull pup configuration of this assault rifle makes it
light and compact without sacrificing firepower
(5.56x45mm ss109). Its modular configuration allows it to
be customized to fit any mission profile. Equipped with a
flash/sound suppressor and combined with a multipurpose
launcher, the SC-20K becomes the obvious choice of
weaponry for Sam when infiltrating enemy territory.
Note: Because of the more overt nature of the SC-20K, it
will only be acquired after a few missions – when the situation requires it.
Sniper Mode: Sniper mode is only available with the SC-20K:
• Equip SC-20K: Press Use/Equip.
• Enter Sniper Mode: Zoom in.
• Hold breath and steady aim (limited time):
Press Alt Fire.
• Fire: Press Fire.
• Exit Sniper Mode: Zoom out.
Manual Reload: Sam will automatically reload when out
of ammunition. Otherwise, pressing the Reload key with
the SC-20K or selected pistol will reload the weapon.
SC-20K’s Multipurpose Launcher: First, make sure you
select the desired device from your quick inventory. To use
the multipurpose launcher, press Alt Fire. The Launcher
cannot be fired in Sniper Mode.
Ring Airfoil Projectile: A
high-impact, zero penetration
projectile designed to incapacitate rather than kill.
Note: The Ring Airfoil is
much more effective if it hits
the head.
16
17
Page 10

Sticky Camera: A miniature camera with full pan and zoom functionality, plus Night and Thermal
Vision modes. The Sticky Camera
feeds its image directly to Sam’s
OPSAT. Ideal for advance scouting
and intelligence gathering. To pick
up your sticky camera, stand near it and select the Sticky
Camera interaction. Press Fire to exit.
Sticky Shocker: A high-voltage
discharge device coated in adhesive resin. The Sticky Shocker
will adhere to an enemy and
give him an incapacitating shock.
Hint: Fired into pools of water,
the Sticky Shocker can neutralize
multiple opponents.
Smoke Grenade: Standard CS
(0-chlorobenzalmalononitrile)
gas canister grenade can incapacitate groups of enemies.
Exposure to CS gas causes violent respiratory seizure.
Prolonged exposure causes
unconsciousness.
Diversion Camera: An
adaptation of the Sticky
Camera. The Diversion
Camera has had its pan and
zoom motors as well as its
vision-enhancement apparatus replaced with a noise-
maker and a CO2 gas canister. The device can be used to attract enemies with a
sound (press Interaction) and to dispense a cloud of incapacitating gas (press Alt Fire) once they are nearby.
Gadgets
To use a gadget: Select the gadget of your choice in the
quick inventory.
SC Pistol: The SC Pistol tactical model with single-action
trigger and a 20-round magazine comes equipped with a
silencer/flash suppressor. Its
5.7x28mm ss190 rounds offer good penetration against
modern body armor, while keeping the weapon’s weight,
dimensions, and recoil at reasonable levels. Select this
gadget from your Quick Inventory. Press Use/Equip. Once
equipped, press Fire to start using it.
Lock Pick: Standard set of
picks, wrenches, and probes for
bypassing standard cylinder
locks. First, select the lock pick
from the gadgets in your Quick
Inventory. Then press Fire to
start using it. To release a pin,
you must press the correct
movement key (W, S, A, or D). Once you hear and see
the pin begin to move, press the same key repeatedly
until it is released. Repeat until all pins are released.
Laser Microphone: T.A.K.
(Tactical Audio Kit): A laser-
operated microphone integrated
into the SC Pistol that enables
the user to read the vibration
off certain surfaces (mainly
glass windows). It is used to
listen to conversations. Select this gadget from your Quick
Inventory. Once selected, press Fire to start using it.
Camera Jammer:
The Camera Jammer emits
microwave pulses that disrupt
the characteristic signals used in
the microcircuitry of surveillance
cameras. The Camera Jammer
operates off of a capacitor that
must be allowed to recharge
from its battery after a short time. Select this gadget
from your Quick Inventory. Once selected, press Fire to
start using it.
Optic Cable: This flexible
cable/camera can easily be
slipped under doors to view the
other side. Complete with Night
Vision enhancement. Once in
use, move the mouse left or
right to move Optical Cable in
the desired direction. Select this
gadget from your Quick Inventory. Once selected, press
Fire to start using it.
Disposable Pick:
Unconventional lock picks,
these micro-explosive-shaped
charges deliver a quick
impact to any standard lock
cylinder that will shatter the
pins and unlock the door.
Select this gadget from your Quick Inventory. Once selected, press Fire to start using it.
Items
Some objects in the world or items from your inventory
can be thrown. Grenades, flares, and other items must
first be selected from the Quick Inventory. Miscellaneous
items from the environment can be picked up by selecting the Object interaction. Once the item or object is in
your possession, equip Sam by pressing Use/Equip. A
series of reticles on the screen will show your aiming
trajectory. Use the mouse to move the reticles on the
screen to aim. Press Fire to throw the object or
Use/Equip to abort the throw.
18
19
Page 11

Wall Mine: The Wall Mine is
a motion-sensitive explosive
device that can be attached
to almost any surface.
Chemical Flare: Chemical Flares
are lightweight plastic sticks
filled with a binary chemical
agent. When the inner contain-
ers are cracked, the chemical
agents mix, causing the stick to glow. Useful for attracting
and distracting enemies.
Emergency Flare: Similar to
the Chemical Flare, these
standard road flares also emit
a great deal of heat, making
them useful for distracting
heat sensors such as those
found on automated turrets.
Frag Grenade: The 14-oz. M67
fragmentation grenade consists
of a 2.5" steel sphere surround-
ing 6.5 ounces of high explo-
sive. Upon detonation, the steel
sphere shatters, emitting a burst
of high-velocity shrapnel.
Medical Kit:
Standard field first-aid kit.
Bullet Box:
Find it to retrieve some ammo.
In-Game Elements
Enemy static defenses present a wide range of potential
obstacles to overcome – from simple keypads that control
doors, to automated turrets that detect heat and movement and fire on intruders.
Alarm Panel: Standard
alarm switches that can be
triggered by enemies to alert
nearby comrades. Because of
the extremely covert nature
of Sam’s operations, indiscretion with alarms can lead
Third Echelon to abort a mission.
Automated Turret: Heat- and
motion-sensing turrets with an
Independent Friendly Fire (IFF)
recognition system. Turrets can
be hacked from their attached
control computer. Select the
Interact with Turret interaction.
Either deactivate a turret entirely, or disable its IFF system. With IFF disabled, it will still attack Sam, but it will
also attack enemies. Use your movement keys to navigate
in the attached control computer to make your selection.
Surveillance Camera:
Standard off-the-shelf surveillance cameras that detect
movement and have the ability to directly trigger alarms.
This type of camera is fragile
and can be destroyed.
Armored Camera: Except for
the bulletproof casing, these
cameras are identical to the
standard surveillance camera.
Key Pad Lock:
Standard push-button security pads linked to electromagnetic locking systems in a
door. Only the correct code
will allow a key pad-locked
door to be opened. Multiple
failed attempts to enter a code will sound an alarm. Use
your left mouse button to select the numbers.
IMPORTANT: Once you find a key pad code, it will automatically appear in your Inventory in the Notes section.
Retinal Scanner: A locking
device that reads the unique
imprint of a person’s retina
before unlocking a door. No one
without access can open a retinal scanner-locked door, but
those with the correct retinas
can sometimes be “convinced”
to open them for you. An incorrect retinal scan automatically
triggers an alarm.
20
21
Page 12

HINTS AND TIPS
•You can change your SC-20K rate of fire.
•When in Sniper Mode, hold your breath for a more precise shot.
• Head shots are a direct kill.
• Cameras detect you more quickly the faster you are moving.
•A rollover maneuver allows Sam to go through flames without damage.
• Shooting around corners with your back to the wall makes you harder to hit.
•Drop attacks are effective and silent.
•Frequently check your different vision modes; you might see something you couldn’t see before.
• Barrels containing explosive or flammable liquids can be very useful.
• Sam can use objects from the environment. To pick up an object, press the Interaction key when standing near it. To
use the object press Use/Equip. Use your mouse to move the reticles and press Fire to throw the object.
• Rolling is an effective way to reduce your profile when moving from cover to cover.
• Saving equipment is pointless as you are re-equipped between missions. Use what you have.
• Engaging multiple enemies is extremely dangerous. Tilt the odds in your favor with traps, explosives, and other gadgets.
• Enemies can notice lights or cameras that have been broken and can see objects thrown through the air.
• Dogs can smell you. Shadows won’t help against them. Use obstacles or water to delay or lose them.
•Thermal vision can allow you to see through some thin or lightweight materials.
• Knocking out an enemy is always quieter than killing him...and nearby enemies will hear the dying gasps of comrades.
• If an enemy finds an unconscious comrade, he will revive him. So hide those bodies!
• Enemies might hesitate if you are holding one of their friends as a human shield and are not pointing your weapon at them.
• Not all NPCs can be forced to cooperate. Only Colonels can open retinal scanners and only Technicians can oper-
ate computers.
•You can break lights to create your own shadow paths to hide and move in.
•Frequently check Updates to Goals, Notes, and Data on your OPSAT. Read those Data Sticks for clues and other
useful info.
22
CREDITS
Splinter Cell Port Team
Senior Producer
Mathieu Ferland
Associate Producer
Maxime Bélanger
Lead Programmer
Jean-François Prévost
Programmers
Dany Lepage
Feng Quan Wang
Cyrille Lauzon
Alexandre Dionne
with the collaboration
of Programmers
Yanick Mimee
Hugo Allaire
David Chabot
Alain Turcotte
Data Manager
Francis Tremblay
Chief Game Designer
Daniel Bérubé
with the collaboration of
Game Designer
Mathieu Bérubé
3D Artists
Marc Bouchard
Yves Allaire
Sébastien Hébert
Thierry Laberge
The Chinh Ngo
Marek Bogdan
François Pelland
Interface Designer
Véronique Guilbault
Sound Game Designer
Fabien Noel
Compatibility Lab Testers
Jason Alleyne
with the collaboration
of Integrator
Alexandre St-Louis
Quality Assurance
See in-game credits for complete list.
Splinter Cell
Original Team
Senior Producers
Mathieu Ferland
Reid Schneider
Associate Producer
Roxane Gosselin
Original Creation
François Coulon
Art Director
Hugo Dallaire
Lead Programmer
Antoine Dodens
Lead 3D Artist/
Lead Level Design
François C. Pelland
Animation Art & Technical
Director/Lead Animator
Steve Dupont
Lead Character Artist/
Character Concept Artist
Martin Caya
Scriptwriter
JT Petty
Lead Game Designer
Nathan Wolff
Sound Game Designer
Fabien Noel
Technical Directors 3D Art
Marc Bouchard
with the collaboration of
Associate Producer &
Creative Director
François Coulon
Production Assistant
Annemarie Gabriele
Programmers
Frédéric Blais
David Chabot
Mathieu Laforce
Alain Turcotte
Yannick Létourneau
Yanick Mimee
David Levesque
with the collaboration
of Programmers
Hugo Allaire
David Kalina
Chris Gripeos
Intern Programmers
François Chelling
Matthew Clarke
Animators (In Game)
Jonathan Abenhaim
James Humphreys
Bourbaki Joseph
Frédéric Poirier
Benoit Saumure
3D Artists
Marek Bogdan
John Bigorgne
The Chinh Ngo
Aline Desruisseaux
Mathieu Fecteau
Sébastien Hébert
Thierry Laberge
with the collaboration of
3D Artists
Sébastien Beaulieu
Christian Bédard
Carol Bertrand
Carl Lavoie
Texture Artist
Yves Allaire
SFX Artist
Dany Bergeron
Interface Designer
Véronique Guilbault
Character Artist
David Blazetich
David Giraud
with the collaboration of
Character Artist
Kenjo Aoki
Éric Belisle
Karine Fortin
Emile Ghorayeb
Game Designer/Scriptwriter
Clint Hocking
Level Designer
Neil Alphonso
Mathieu Bérubé
Ed Byrne
Clint Hocking
Hugo Potvin
Sébastien Galarneau
with the collaboration of
Level Designer
Chris Smith
Localization
Jean-Robert Michel
Sound Integrator
Jonathan Gosselin
with the collaboration of
Sound Integrator
Sylvain Côté
23
Page 13

Cinematics
Lead Modeler
François De Billy
Modelers
Daniel Bordeleau
Steve Fraser
Thierry Laberge
Martin Sabran
Simon Tremblay
Michael Yeomans
Animators
Stephen Greenberg
Patrick Pelletier
James Humphreys
with the collaboration
of Animators
François Royer
Jean-Thierry Roy
Prerendered
Cinematics Editor
Miguel Angel Martin
2D Artist
Patrick Sirois
Storyboarder
Wayne Murray
“NAME OF THE GAME” by Ken Jordan, Scott Kirkland and Tom Morello ©2001 EMI VIRGIN MUSIC, INC., HARDER FASTER MUSIC, EMI VIRGIN SONGS, INC.,
DRUG MONEY MUSIC and Sony Music Publishing. All Rights for HARDER FASTER MUSIC Controlled and Administered by EMI VIRGIN MUSIC, INC. (ASCAP); All
Rights for DRUG MONEY MUSIC Controlled and Administered by EMI VIRGIN SONGS, INC. (BMI) All Rights Reserved. International Copyright Secured and used
by permission. “The Name Of The Game” Performed by The Crystal Method Courtesy of Geffen Records under license from Universal Music Enterprises
©2000 South Beach Beverage Company, LLC ® Registered Trademarks of South Beach Beverage Company, LLC
©2002 Palm, Inc. All rights reserved. Palm, the Palm logo, Palm Powered, and the Palm trade dress are trademarks of Palm, Inc or its subsidiaries. All
other brands are trademarks or registered trademarks of their respective owners. Uses Bink Video. Copyright ©1997–2002 by RAD Game Tools, Inc.
“Splinter Cell” ©2002 Ubi Soft Entertainment. All Rights Reserved. Splinter Cell, Ubi Soft, and the Ubi Soft logo are trademarks of Ubi Soft Entertainment
in the US and/or other countries. All other trademarks are the property of their respective owners.
Unreal Engine is a trademark of Epic Games Inc. WARNING: It is a violation of Federal Copyright Law to copy, duplicate or reproduce this
Program or any portions of this Program without the express written permission of the copyright owner.
Planning Coordinator
François Ringuette
Marketing Research
Coordinator
Stéphane Cardin
Quality Assurance
Lead Tester
David Deschênes
Assistant
Pierre-Yves Savard
Testers
Martin Asnong
Raymond Brunette
Miguel Canepa
Stéphane Charbonneau
Patrick Charland
Alain Chénier
Jean-François Dessureault
Marc-André Dessureault
Philippe Dion
Patrick Dufort
Pascal Émard
Mathieu Fortin
Yannick Francoeur
Yan Gagnon
Félix Hardy
Ahmad Jamous
Mathieu Lachance
Eric Laperriere
Frédéric Ouellet
Luc Plante
Marc-André Proulx
François Quidoz
Jo-Ashley Robert
Daniel Sarrazin
Patrick Sauvageau
Bruno St-Laurent
Martin Tavernier
Allen Tremblay
Special thanks
Bruno Bellavance
Caroline Cantin
Derek Chan
Nicolas Davidts
Patrick Filion
Marc Fortier
Julie Lachance
Didier Lord
Caroline Martin
John Stafford
Jean-Francis Tétrault
Special thanks to the Xbox
Advanced Technology Group.
The complete credits list is available
in the credits section in the game.
24
 Loading...