


“The only thing that ever really frightened
me during the war was the U-boat peril.”
– W.S.Churchill, The Second World War
™
1
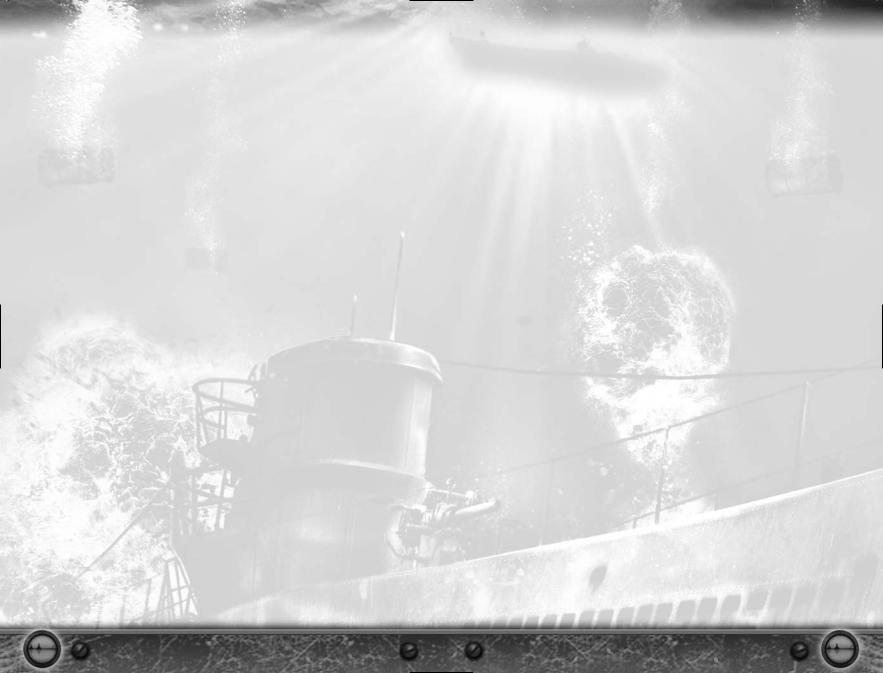
TABLE OF CONTENTS
INTRODUCTION . . . . . . . . . . . . . . . . . . . . . . . . . . . . . . . . 3
GETTING STARTED . . . . . . . . . . . . . . . . . . . . . . . . . . . . . . 4
System Requirements . . . . . . . . . . . . . . . . . . . . . . . . . . . . . . . . . . . . . . . . . . . . . . . . . . 4
Installing Silent Hunter® III . . . . . . . . . . . . . . . . . . . . . . . . . . . . . . . . . . . . . . . . . . . . . 4
Uninstalling Silent Hunter III . . . . . . . . . . . . . . . . . . . . . . . . . . . . . . . . . . . . . . . . . . . . 4
Running the Game . . . . . . . . . . . . . . . . . . . . . . . . . . . . . . . . . . . . . . . . . . . . . . . . . . . . . 4
GAME MODES . . . . . . . . . . . . . . . . . . . . . . . . . . . . . . . . 5
Naval Academy . . . . . . . . . . . . . . . . . . . . . . . . . . . . . . . . . . . . . . . . . . . . . . . . . . . . . . . 5
Single Missions . . . . . . . . . . . . . . . . . . . . . . . . . . . . . . . . . . . . . . . . . . . . . . . . . . . . . . . 6
The Mission Editor. . . . . . . . . . . . . . . . . . . . . . . . . . . . . . . . . . . . . . . . . . . . . . . . . . . . . 6
Career Mode . . . . . . . . . . . . . . . . . . . . . . . . . . . . . . . . . . . . . . . . . . . . . . . . . . . . . . . . . . 7
Multiplayer . . . . . . . . . . . . . . . . . . . . . . . . . . . . . . . . . . . . . . . . . . . . . . . . . . . . . . . . . . 11
Museum . . . . . . . . . . . . . . . . . . . . . . . . . . . . . . . . . . . . . . . . . . . . . . . . . . . . . . . . . . . . . 11
COMMANDING THE U-BOAT . . . . . . . . . . . . . . . . . . . . . . 12
The Main Player Interface . . . . . . . . . . . . . . . . . . . . . . . . . . . . . . . . . . . . . . . . . . . . . 12 Moving Around the U-Boat. . . . . . . . . . . . . . . . . . . . . . . . . . . . . . . . . . . . . . . . . . . . . 15 Station Descriptions . . . . . . . . . . . . . . . . . . . . . . . . . . . . . . . . . . . . . . . . . . . . . . . . . . 16 Officers Orders . . . . . . . . . . . . . . . . . . . . . . . . . . . . . . . . . . . . . . . . . . . . . . . . . . . . . . . 28 Conducting Torpedo attacks . . . . . . . . . . . . . . . . . . . . . . . . . . . . . . . . . . . . . . . . . . . 38
U-BOAT, VEHICLES, AND WEAPON DATA . . . . . . . . . . . . . 44
The Silent Hunter III U-Boats. . . . . . . . . . . . . . . . . . . . . . . . . . . . . . . . . . . . . . . . . . . 44
The Type II U-Boats . . . . . . . . . . . . . . . . . . . . . . . . . . . . . . . . . . . . . . . . . . . . . . . . . . . 44
The Type VII U-Boats . . . . . . . . . . . . . . . . . . . . . . . . . . . . . . . . . . . . . . . . . . . . . . . . . . 45
The Type IX U-Boats . . . . . . . . . . . . . . . . . . . . . . . . . . . . . . . . . . . . . . . . . . . . . . . . . . 47
The Type XXI U-Boat . . . . . . . . . . . . . . . . . . . . . . . . . . . . . . . . . . . . . . . . . . . . . . . . . . 50
Torpedo Armaments. . . . . . . . . . . . . . . . . . . . . . . . . . . . . . . . . . . . . . . . . . . . . . . . . . . 50
Deck Guns . . . . . . . . . . . . . . . . . . . . . . . . . . . . . . . . . . . . . . . . . . . . . . . . . . . . . . . . . . . 53
Machine Guns. . . . . . . . . . . . . . . . . . . . . . . . . . . . . . . . . . . . . . . . . . . . . . . . . . . . . . . . 53
U-BOAT THREATS . . . . . . . . . . . . . . . . . . . . . . . . . . . . . 55
Escorts . . . . . . . . . . . . . . . . . . . . . . . . . . . . . . . . . . . . . . . . . . . . . . . . . . . . . . . . . . . . . . 55
Aircraft . . . . . . . . . . . . . . . . . . . . . . . . . . . . . . . . . . . . . . . . . . . . . . . . . . . . . . . . . . . . . . 55
Warships . . . . . . . . . . . . . . . . . . . . . . . . . . . . . . . . . . . . . . . . . . . . . . . . . . . . . . . . . . . . 55
Merchants . . . . . . . . . . . . . . . . . . . . . . . . . . . . . . . . . . . . . . . . . . . . . . . . . . . . . . . . . . . 56
Enemy Sensors . . . . . . . . . . . . . . . . . . . . . . . . . . . . . . . . . . . . . . . . . . . . . . . . . . . . . . . 56
ASW Weapons . . . . . . . . . . . . . . . . . . . . . . . . . . . . . . . . . . . . . . . . . . . . . . . . . . . . . . . 57
TECHNICAL SUPPORT . . . . . . . . . . . . . . . . . . . . . . . . . . 59 WARRANTY . . . . . . . . . . . . . . . . . . . . . . . . . . . . . . . . . . 60
INTRODUCTION
August 1939. The Second World War is about to begin. The grey wolves, the U-boats of the German Kriegsmarine, take to the sea. There will be war in the Atlantic. The goal – to cut England’s lifelines.
Six years later, the war ends, and Germany lays in ruins. The U-boat fleet is all but wiped out, 30,000 of its 40,000 men having died at sea. Still, fighting hard but fair, they had accomplished success beyond all expectations and out of proportion to their strength. At some points during the war, they had come close to bringing the British Empire to its knees.
On the Allied side, the cost of victory has been even higher. More than 30,000 merchant seamen have been lost in this struggle, along with many thousands of servicemen from all branches of the military. About 20 million tons of merchant tonnage lie under the sea.
And the emotional cost of the war has been even greater.
Yet, this is also a time of explosive technological development. Allied antisubmarine defenses have discovered how to defend against the U-boat and submarine warfare in general.
But the real breakthrough is taking place in Germany. Having just entered operational service, yet never used in actual combat, the revolutionary Type XXI U-boat is a prototype for post-war submarine development in the world’s major naval fleets. This, alone, is testimony to the high level of professionalism and experience of the U-boat force and the engineers behind them.
This game pays homage to everyone – Allied or Axis – who served at sea during the crucial years of World War II.
2 |
3 |
GETTING STARTED
This section will help you get started playing Silent Hunter III. Even if you are an experienced sub simmer and a veteran of the previous Silent Hunter titles, we recommend reading this section.
SYSTEM REQUIREMENTS
Supported OS: Windows® XP/2000
Processor: Pentium® III 1.4 GHz or AMD Athlon™ 1.4 GHz or faster (Pentium IV 2.0 GHz or AMD Athlon 2.0GHz or faster recommended)
RAM: 512 MB (1 GB recommended)
Video Card: 64 MB DirectX® 9-compliant graphics card (128 MB DirectX 9- compliant card recommended) (see supported list*)
Sound Card: DirectX 9-compliant PCI card
DirectX Version: DirectX 9 or later (included on disc) DVD-ROM: 4x DVD-ROM drive or faster (DVD-ROM only)
Hard Drive Space: 2 GB
*Supported Cards at Time of Release
NVIDIA® GeForce™ 3/4/FX series with the exception of MX series cards ATI® Radeon™ 8500/9000 family cards or newer
These chipsets are the only ones that will run this game. Additional chipsets may be supported after release. For an up-to-date list of supported chipsets, please visit the FAQ for this game on our support website at: http://support.ubi.com.
NOTICE: This game contains technology intended to prevent copying that may conflict with some disc and virtual drives.
INSTALLING SILENT HUNTER III
Silent Hunter III must be installed before you can run the game. To install, insert the Silent Hunter III DVD and wait for the launch screen to appear. Click Install and follow the instructions as they appear.
If you have auto-run disabled, you may launch the installer manually. Choose Windows Explorer from the Programs submenu on your Windows Start menu. Choose the Silent Hunter III DVD icon to display the files located on the DVD. Look for Setup.exe among those files and double-click it to run the installer.
UNINSTALLING SILENT HUNTER III
To uninstall the game, select Uninstall from the Silent Hunter Start menu item. You can also choose Settings from the Windows Start menu and select Control
Panel, select Add/Remove Programs, left-click on Silent Hunter III, and click on the Add/Remove button. The game and all its components are then removed from your system, except for your saved games.
RUNNING THE GAME
From the Start menu, select: Programs: Silent Hunter III: Silent Hunter III.
The intro video will play, after which the Main Menu will appear. From the Main Menu you can access all of the game’s features. See the sections further into the manual for details.
GAME MODES
NAVAL ACADEMY
The Naval Academy menu gives you access to a set of five tutorials. Each tutorial focuses on a set of aspects of the game:
• Navigation Course:
U-boat direction control. U-boat speed control. U-boat dive controls.
•Naval Artillery Course:
-Deck gun aiming.
-Deck gun ammo management.
•Flak Artillery Course:
-Flak gun aiming.
•Torpedoes Course:
-Periscope use.
-Torpedo tubes management.
-Torpedo attacks.
•Convoy Attack Course:
-Positioning in submersion.
-Target priority.
-Detection avoidance.
Note that each tutorial is playable as a training or exam session. Each tutorial played as an exam session will grant you a result of pass or fail, with a quality evaluation. You can retry a tutorial even after failing it. Only the best results per tutorial are recorded.
NOTE: Graduating all the tutorials will give you bonus renown when you start the Career mode!
4 |
5 |

SINGLE MISSIONS
The Single Missions menu gives you access to individual missions and historical scenarios. From this screen, you will also launch new missions created with the game’s Mission Editor or downloaded from the Internet.
The menu consists of two main parts:
•The list in the upper right corner shows the available missions.
•The left side of the screen displays a short description of the currently selected mission.
If you want to play the mission with a different U-boat model than the one selected by the mission maker, use the scrolling list provided on the lower portion of the screen.
THE MISSION EDITOR
Should you want more than the single missions included with the game, the first solution is to use the mission generator. If something more complex is what you’re looking for, try the Mission Editor – included as a separate executable within the game.
You can use the Mission Editor either to create a new mission from scratch, or to edit the campaign data for the dynamic campaign. Make sure you back up anything you edit, though, or you may end up with an unusable install of the game.
Single missions also use the dynamic campaign engine; therefore you do not need to worry about filling the ocean with ships. The game engine will do that, and do it with historical accuracy.
Full documentation for the Mission Editor is available on the game DVD.
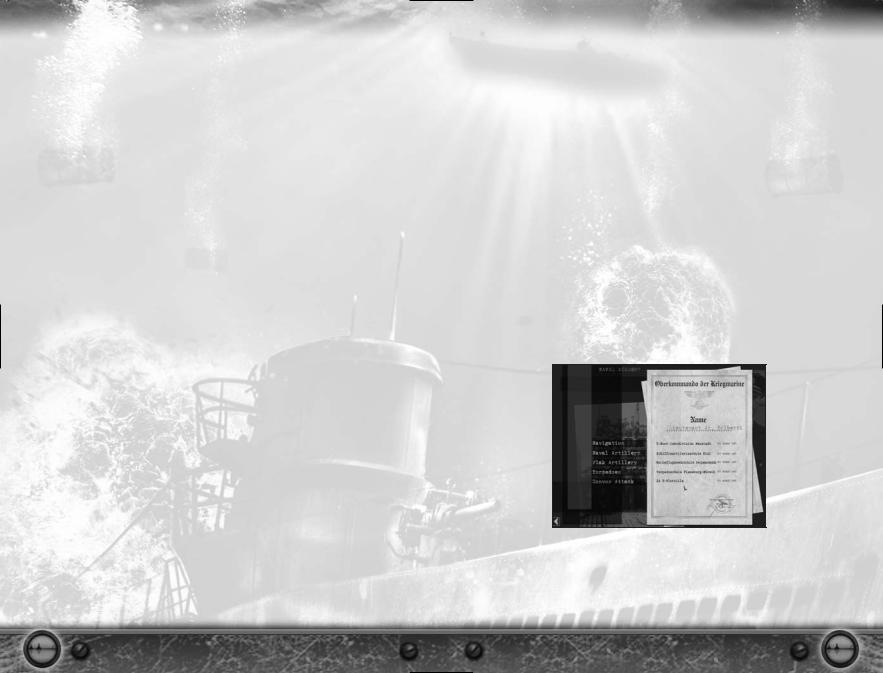
CAREER MODE
The core of Silent Hunter III is the Career mode. The game uses a dynamic, random campaign engine based on historical reality. Every time you play, you can have a unique career.
Career Renown
As a measure of your performance, after each patrol you will earn “renown” for achieving objectives and destroying enemy units. Your renown will accumulate as you play through Career mode. You can use your renown to gain access to better U-boat types, improved equipment, or new crew members.
NOTE: If your renown reaches negative values, your career may suddenly end!
Career Timeline
The career timeline will evolve from the moment you start your career. The time spent on patrol will add to the time you spend on base.
Between patrols, you will spend time performing a number of actions: repairing a damaged U-boat after a patrol, changing the type of U-boat, or upgrading a system. You will spend a minimum of two weeks (of game time) on base between patrols.
NOTE: No matter when you start your career, the war will always end in May of 1945!
Career Options
Starting a New Career
While the campaign has random elements, you can customize some things to your liking. By selecting a start year and initial flotilla assignment, you will change what type of U-boat you will start the campaign on, the theater of operation, and even the nature of the warfare you will conduct.
Starting Year
You can start the campaign at any time between 1939 and 1943. The later you start your campaign, the more challenging the enemy will be.
6 |
7 |
Starting Flotilla
This choice will determine the operational base and the type of U-boat you will be assigned.
•1st Flotilla
–1939: U-Boat Type IIA
–1940: U-Boat Type IID
–1941: U-Boat Type VIIB
–1942: U-Boat Type VIIC
•2nd Flotilla
–1940: U-Boat Type VIIB
–1941: U-Boat Type IXB
–1942: U-Boat Type IXC
•7th Flotilla
–1939: U-Boat Type IIA
–1940: U-Boat Type IID
–1941: U-Boat Type VIIB
–1942: U-Boat Type VIIC
–1943: U-Boat Type IXC
•10th Flotilla
–1942: U-Boat Type IXB
–1943: U-Boat Type IXC
•11th Flotilla
–1942: U-Boat Type VIIC
–1943: U-Boat Type VIIC/41
•29th Flotilla
–1941: U-Boat Type VIIB
–1942: U-Boat Type VIIB
–1943: U-Boat Type VIIC
Career On-Base Options
When you start your career, and every time you return from patrols, you will access the Main Career menu.
In this menu, you will have access to a number of options specific to Career mode.
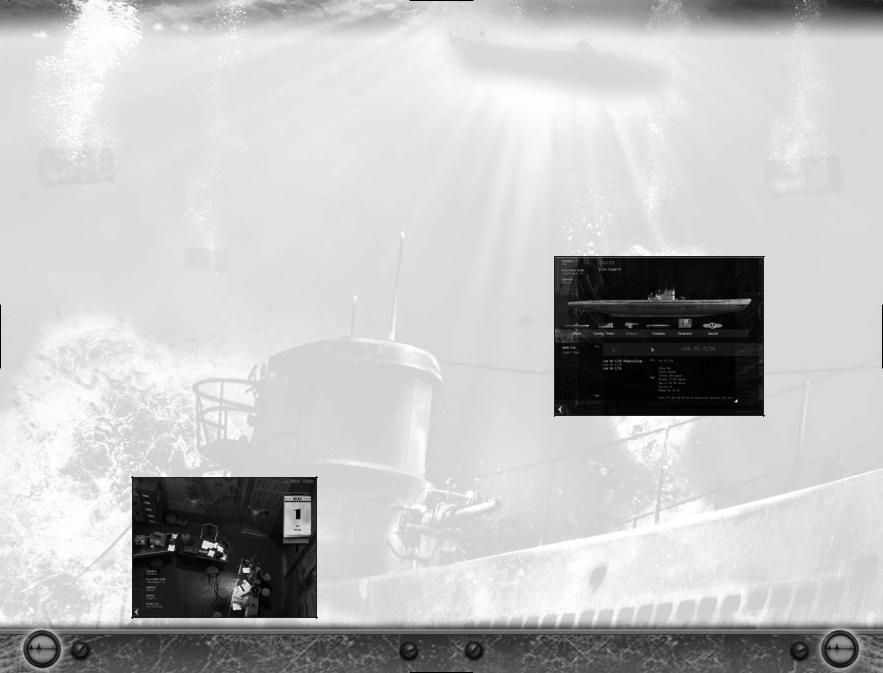
U-Boat Options
This menu will allow you access to:
•Newer types of U-boats.
•Upgraded versions of conning towers.
•Newer versions of flak guns.
•The torpedo armament of the U-boat before leaving in mission.
•Access to new or upgraded versions of U-boat systems.
–Engine upgrades.
–Snorkel.
–Batteries.
–Hydrophones.
–Sonar.
–Radar.
–Radar warning.
–Sonar decoys.
•Personalized U-boat emblems.
Switching to a new U-Boat or upgrading the conning tower will cost you renown. To have access to newer types of U-Boats early on, you will need high amounts of renown.
Although basic torpedo load will cost you nothing, adding advance torpedo types to your loadout will require renown.
Improving the systems or adding new ones to your U-Boat will also tax you renown. Gaining the right to wear an emblem and to personalize that depends entirely on your performance during the patrols.
8 |
9 |
Barracks Options
This menu will allow you to:
•Replace crew losses.
•Add extra crew to your starting crew.
•Pre-arrange the crew in any desired configuration.
•Recruit experienced crew.
Player Options
This menu will allow you to:
•Review your evolution for the current career.
•Review your evolution patrol by patrol.
•View your awards.
•Apply for transfer to a new flotilla.
•Promote your crew.
•Specialize your crew.
•Award your crew with decorations after each patrol.
You will be awarded with medals and ranks as you progress in your campaign, depending on specific conditions related to your combat service.
You can apply for transfer to a new flotilla at any time, but your request will be approved only if you proved yourself a valuable U-boat commander.
Between patrols, as your crew gains combat experience, you will be allowed to promote or qualify some crew members. This will make your crew both more resilient and more efficient.
At the end of a good patrol you may be rewarded with decorations for your crew. They are a welcome upgrade for your crew members and have various beneficial effects. You may end up with an elite crew that drastically improves your performance in patrols.
Career Options
This menu will allow you to:
•Set the game difficulty.
•Adjust the video settings.
•Adjust the audio settings.
Career Saving
For each career patrol, there will be two auto-saves, one before leaving in patrol and one after returning from patrol.
You can also save during patrols. All these saves will be available for a specific career profile.
Starting a new career with the same profile will cause you to lose any previous saves under that profile.
Career Loading
To load career saves, you must select a previously created career profile. When selecting a save, a panel will display relevant career details.
Because saves are stored in chronological order, loading an early save will delete all the following saves of that career.
MULTIPLAYER
Silent Hunter III supports LAN multiplayer games for up to eight players and online games for up to four players, on Ubi.com. Two modes are available: scripted missions and generated missions.
The scripted mission included in the game covers a series of famous convoy battles. You can add more scripted missions by using the Mission Editor. Generated missions are based on the campaign data. Using the mission generator, the host will select specific options like mission starting date, type and experience of enemies, U-boat starting positions, and more.
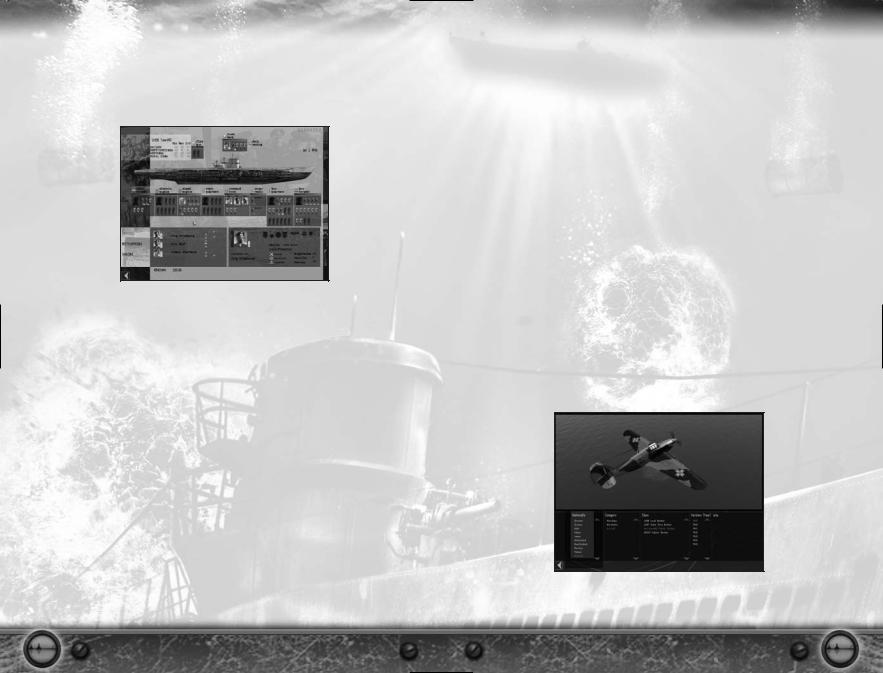
MUSEUM
Using the Museum interface you can familiarize yourself with the planes, ships, and submarines included in the game. It is important to know your enemy before encountering him on the field of battle, and this is the place to do it.
Units are sorted by nationality and type. For a given class or model, you can also check which armament versions are used throughout the war.
10 |
11 |
COMMANDING THE U-BOAT
As captain, you will be required to manage your U-boat in an efficient manner. You will need to move from station to station, keeping your boat’s running parameters, the tactical situation, and the crew’s state under observation.
THE MAIN PLAYER INTERFACE
The player interface is designed to keep all vital functions of the U-boat within your reach. For this reason, it is on-screen in almost every menu of the game. The main elements of the interface are:
•The Quick Controls Panel.
•The Messages Log.
•The Stations Panel.
•The Officers Panel.
•The Stealth Meter.
Each of these elements is explained below.
Quick Controls Panel
Here you will find the most common commands and instruments required to maneuver your U-boat: speed, direction, and depth. In each section, you can switch between displaying two instruments used for the same purpose by clicking the button in the lower left corner of the section in question.
Speed
The controls that set your U-boat’s speed are the Engines Telegraph, which requests a certain regime from the Engine Room, and the knotmeter, which allows you to set a particular speed to be met by the engines. Keep in mind, though, that circumstances
– such as running on electric engines, sustaining damage, or having an insufficient crew – may prevent the Engine Room team from meeting your request.
Direction
You can turn your U-boat in two ways: by clicking on the rudders indicator to set the rudders to the desired position, or by requesting a new direction relative to your current position – clicking on the compass and letting the Chief Engineer do the rest. The first method is useful when you want to start a turn of a certain rate – dependent on the position of the rudders – for an indefinite time. The latter method, on the other hand, should be used when a turn of precise magnitude and fixed turning rate – maximum for the current conditions – is desired.
In the same section you will see the magnetic compass, indicating the current direction, on the top of the panel.
HINT: Turning your boat demands a minimum speed; otherwise the rudders are not effective. The faster the boat goes, the faster it turns.
Depth Control
Depth changes are requested by clicking on the depth meter. Two versions of this instrument are available. The fine version, marked up to 25 m, is useful when requesting depth changes near the surface in order to run at periscope depth or snorkel depth or surface the boat. All these important depth settings are clearly marked on the instrument.
Should you need to go deeper than 25 m, use the gross scale version of the depth meter.
Both versions show the depth of the U-boat’s keel; for this reason, the minimum depth indicated will be about 4 m.
HINT: While changing depth works even at zero speed by using the ballast tanks and compressed air, it is best done when some speed is available to make use of the dive planes.
When ordering depth changes, keep in mind that each U-boat has a maximum operational depth, marked with green on the depth meters. Diving beyond that depth is a risky enterprise, but is sometimes useful to avoid detection or depth charge attacks. When the red section of the meter is reached, however, you are inviting disaster and pressure hull failure.
Time Compression and Clock
You can set the time compression level from x1 to x1024. Time compression is an absolute necessity when traveling long distances, as it makes time pass faster. Note however that:
•You will not be able to set time compression higher than 32x except in the Navigation Map station.
•Time acceleration will automatically drop down to lower levels in various situations, such as when you are in close proximity to other ships or land.
12 |
13 |

Messages Log
Reports received from your officers or crewmen are added to the message log. Each entry contains the following:
•The time of the report.
•The function of the person responsible for it.
•The actual report text.
Whenever an officer is selected in the Officers Panel, any reports received from him will be highlighted in the log.
Stations Panel
This panel provides a quick mouse driven way to travel directly to certain sections of the U-boat or game interfaces. Simply click on the desired icon to be transported to that station. From top to bottom, the shortcuts are:
•Command Room (shortcut: F2)
•Attack Periscope (shortcut: F3)
•Bridge (shortcut: F4)
•Navigation Map (shortcut: F5)
•Torpedo Data Computer (shortcut: F6)
•Crew and Damage Management (shortcut: F7)
•Mission Orders (shortcut: F8)
•Radio Room (shortcut: F9)
•Deck Gun (shortcut: F10)
•Flak Gun (shortcut: F11)
•Free Camera (shortcut: F12)
Officers Panel
The most important members of your crew can be contacted through the Officers Panel. From left to right, they are:
•Chief Engineer
•Navigator
•Weapon Officer
•Sonarman
•Radioman
•Watch Officer
NOTE: The officers and crewmen present on the panel are those assigned to the stations at the moment, through the Crew Management Interface. They are not necessarily those with the greatest expertise for that particular job.
The Officers Panel has twofold functionality. Left-clicking on an officer selects him, which in turn opens up his primary orders level and highlights messages received from that station in the messages log.
Right-clicking on the officer will instantly transport you to his station, allowing you to better supervise him and even manually take over some of the tasks.
Stealth Meter
This icon represents the overall stealth factor of your U-boat. It depends on the following factors:
•Speed: The faster you turn the propellers, the more noise you make. This means you will be detected more easily by hydrophone.
•Height: The higher the silhouette of your U-boat above water, the easier it will be to detect you by visual observation or radar.
•Weather: High waves will make your U-boat’s silhouette harder to notice.
•Light Level: When it’s dark and you can’t see a thing, neither can the enemy. Until someone lights a flare, that is.
The representation is color-coded. Green means you should be pretty safe, while Red is not good at all.
NOTE: the stealth meter only shows how detectable your submarine is at the moment. It will not tell you whether you have been actually detected by anyone.
MOVING AROUND THE U-BOAT
Silent Hunter III was designed to immerse the player in the experience of a U-boat commander, while allowing rapid access to the submarine stations vital to your job. Generally speaking, in every U-boat type you will be able to visit the following stations:
•Command Room
-Chief Engineer’s Station
-Attack Officer Station
-Navigator Station
-Observation Periscope
-Damage and Crew Management Interface
•Conning Tower
-Attack Periscope
•Radio Room
-Radio Station
-Sound Station
-Captain’s Log
•Bridge
-UZO
-Deck Gun
-Flak Cannons
There are several ways to move between these stations, and our preferred method is through the 3D medium. For this, the mouse is the primary controller:
•Click the left mouse button (LMB) on a door to enter it.
•Click the right mouse button (RMB) on an officer to move to his station.
•Click the LMB on an officer or instrument to interact with him or it.
•Click and hold down LMB to capture the mouse and rotate the view.
Should you find this method too slow, use either the interface buttons in the upper right corner or keyboard shortcuts to speed up your movements. We recommend a combination of all three methods for maximum effect.
14 |
15 |
STATIONS
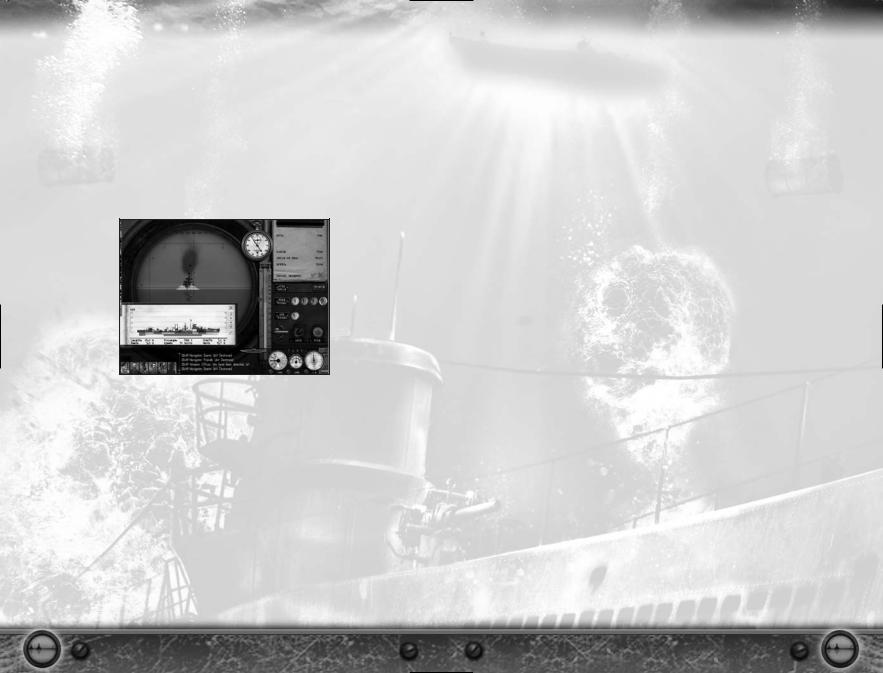
Periscope Station (Shortcut: F3)
The primary tool for submerged observation and attack is the periscope. Most U-boats carry two of them:
•Attack periscope:
–Smaller head, harder for the enemy to spot.
–Larger magnification, allowing a better observation of the targets.
•Observation periscope:
–Larger head, allowing better light transmission.
–Larger field of view for quicker spotting of targets.
–Able to tilt to a higher degree upwards; more useful to scan for aircraft.
Both periscope stations have identical functionality and share controls. In the interface, you will interact with the following areas:
Periscope View
Dominating the screen, the periscope gives you a view of the outside world. Clicking on it will capture the mouse and allow you to rotate the periscope.
Shortcuts:
•Arrows: Rotate the view.
•Shift + Arrows: Rotate the view fast.
•Ctrl + Arrows: Rotate the view slowly.
Periscope Up/Down Lever
When submerged, you need to raise the periscope above the surface to check your surroundings. This is done by clicking on the respective part of the control lever.
Shortcuts:
PgUp: Raise periscope incrementally. PgDn: Lower periscope incrementally.
Ctrl PgUp/PgDn: Completely raise/lower periscope.
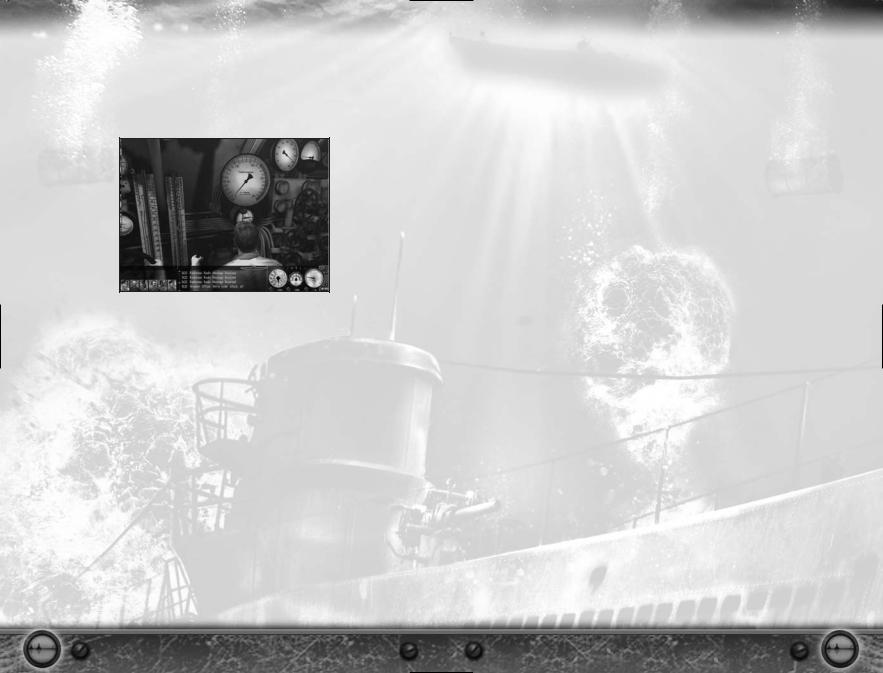
Papenberg Depth Meter
The higher the periscope stands above water, the easier it is to spot. You should keep it as low as possible, and the Papenberg – named after its inventor – is just the right tool to aid you.
In the middle of the meter, a moving liquid column shows the depth at which the submarine’s keel is located. The current level can be read on the scale to the right. On the left of the instrument, an index moving over a submarine silhouette shows the current height reached by the periscope head. When the index is level with the liquid column top, you are breaking the surface.
Tubes Status Panel
The panel displays the torpedo tubes of your submarine and their status. The color of the tube’s indicator lamp shows its status:
•Green: Tube is loaded and ready to fire.
•Red: Tube is loading.
•White: Tube is empty and no torpedoes are available for loading at this moment. To select a different tube than the current one, simply click on its indicator.
Shortcuts:
•Y: Cycle torpedo tubes selection.
•Q: Open selected tubes.
•W: Close selected tubes.
•I: Open weapons management screen to check torpedo loadout.
Target Notepad
The Target Notepad displays acquired data for the currently selected target. More information is available in the “Conducting Torpedo Attacks” section of this manual.
Recognition Manuals
When encountering ships, make sure you correctly identify the target before firing. Attacking friendly or neutral ships is not appreciated in the Kriegsmarine.
The Recognition Manuals are organized by nationality, so make sure to check all of them before committing to an identification.
To bring up a manual, click on its spine. Click on the brackets in the lower right corner of the cover to cycle to another manual, or on the cover to open it.
Shortcuts:
• N: Bring up/close the Recognition Manuals
Lock Button
To efficiently gather target information for an attack, it is best to lock the target. Place the crosshairs over the ship, and click the Lock Button.
Shortcuts:
• L: Lock/unlock target
16 |
17 |
Gyro Angle Indicator
The firing solution received from the Torpedo Data Computer is displayed here and will be used for subsequent attacks.
Fire Button
Press this button to launch torpedoes from the selected tubes on the current firing solution.
Shortcuts:
• Enter: Launch selected tubes.
Launched Torpedoes Status Panel
Once a torpedo has been launched, it appears in the torpedoes panel and stays there until it hits something or runs out of fuel. Clicking on a torpedo icon selects it and displays its timing information on the Chronometer.
Chronometer
The Chronometer comprises two displays. The main one, with the needle, shows the seconds elapsed since the last minute has been completed. The smaller display, inserted in the main one, shows the total time and is marked in minutes, up to 12 of them.
You can use the Chronometer to time events taking place in the game, such as submerging operations or depth charge attacks. To start the timer, click on it.
A second click will stop the timer, allowing you to view the end time. A third click will reset it to 0, ready for another use.
Additionally, the Chronometer will automatically time torpedo attacks. When a torpedo is selected in the Launched Torpedoes Status Panel (see above section), a red needle on the timer will show the time remaining to impact.
HINT: The torpedo’s time of impact is based on the range obtained from the periscope at the moment of firing. If the range is erroneous or the target starts maneuvering, the timer will be off.
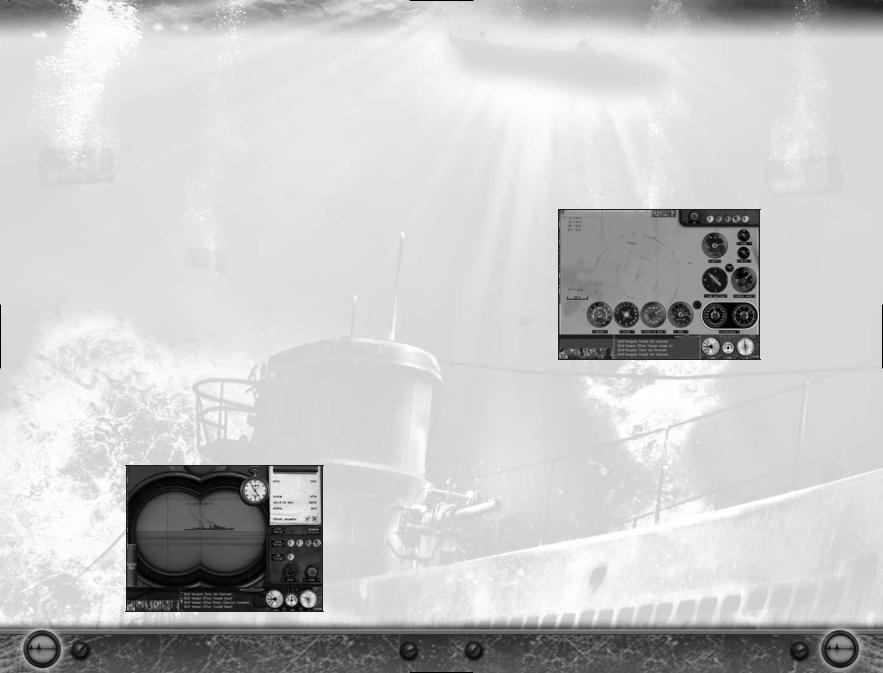
UZO Station (Shortcut: U)
Contrary to popular belief, the most common type of U-boat attack took place on the surface, during the night. The choice aiming device was the UZO (short for Uboot Zieloptik), which was placed on a rotating post on the bridge.
You can access the UZO in two modes: In 3D mode, go to the bridge (shortcut: F4) and left-click on the large, white binoculars that you see mounted in the center. Or, you can press the U key on the keyboard to be transported directly to it.
NOTE: The UZO station, like the bridge, is only accessible while surfaced.
Function-wise, this station is almost identical to the two periscopes, except that the Papenberg Depth Meter and Periscope Up/Down Lever are missing. Refer to the previous section for information on how to use the UZO.
Torpedo Data Computer (Shortcut: F6)
The Vorhaltrechner, or Torpedo Data Computer (TDC), is the brain of the U-boat’s attack system. Using data provided by the player and the currently used optic (periscope or UZO), it computes the gyro-angle – the angle at which the torpedo will need to turn in order to enter a collision course with the target.
Attack Map
This is the main element of this station. You can see on the map your submarine and any surrounding ships detected by your sensors. Clicking and dragging the map will move it to display a different area. The map will also show, with a red line, the current shooting solution for your torpedoes.
Shortcuts:
• Tab or mouse wheel: Map zoom level.
Map Tools
Sliding in from the upper part of the screen are the map tools. Click on them to zoom in or out on the map, or to display a map helper.
Target Data Section:
Input switch: Normally the TDC receives data from one of the attack stations. However, you can choose to adjust the data from here by clicking on the Input On/Off switch.
Bearing: Shows and sets the bearing received from the target.
Range: Shows and sets the range to target in hectometers (1 hm = 100 m) Angle on bow: Shows and sets the target’s angle on bow.
Speed: Shows and sets the target’s speed, and also shows in the inset dial the selected torpedo speed.
18 |
19 |
 Loading...