


CONTENTS
Introduction . . . . . . . . . . . . . . . . . . . . . . . . . . . . . . . . . . . . . 4
Installation . . . . . . . . . . . . . . . . . . . . . . . . . . . . . . . . . . . . . . 5
Enter CD Key . . . . . . . . . . . . . . . . . . . . . . . . . . . . . . . . . 5
Latest Information . . . . . . . . . . . . . . . . . . . . . . . . . . . . . . 6
The Single Player Game . . . . . . . . . . . . . . . . . . . . . . . . . . . . 6
Main Menu . . . . . . . . . . . . . . . . . . . . . . . . . . . . . . . . . . . . . 6
Playing the Game . . . . . . . . . . . . . . . . . . . . . . . . . . . . . . . . . 7
In-Game Display . . . . . . . . . . . . . . . . . . . . . . . . . . . . . . . 7
Movement Controls . . . . . . . . . . . . . . . . . . . . . . . . . . . . . . . 9
Crouching and Going Prone . . . . . . . . . . . . . . . . . . . . . .11
Leaning . . . . . . . . . . . . . . . . . . . . . . . . . . . . . . . . . . . . . .11
Sprinting . . . . . . . . . . . . . . . . . . . . . . . . . . . . . . . . . . . . .11
View Controls . . . . . . . . . . . . . . . . . . . . . . . . . . . . . . . . . . . .12
Weapons Controls . . . . . . . . . . . . . . . . . . . . . . . . . . . . . . . .13
Melee Attack . . . . . . . . . . . . . . . . . . . . . . . . . . . . . . . . . .14
Reloading Weapons . . . . . . . . . . . . . . . . . . . . . . . . . . . . .14
Aiming Down the Sight (ADS) . . . . . . . . . . . . . . . . . . . .14
Swapping Weapons and Picking Up Items . . . . . . . . . . . .15
“Cooking Off” Grenades . . . . . . . . . . . . . . . . . . . . . . . . .15
Binoculars and Artillery Strikes . . . . . . . . . . . . . . . . . . . .16
Other Controls . . . . . . . . . . . . . . . . . . . . . . . . . . . . . . . . . . .16
Show Objectives/Score . . . . . . . . . . . . . . . . . . . . . . . . . . .17
Quick Save/Quick Load . . . . . . . . . . . . . . . . . . . . . . . . . .17
Weapons of Call of Duty™: United Offensive™ . . . . . . . . . . . . .17
United States . . . . . . . . . . . . . . . . . . . . . . . . . . . . . . . . . .17
Browning .30 Caliber M1919A6
Deployable Light Machine Gun . . . . . . . . . . . . . . . . .17
2.36-in Rocket Launcher, M1A1 “Bazooka” . . . . . . . .18
Russia . . . . . . . . . . . . . . . . . . . . . . . . . . . . . . . . . . . . . . . .18
Tokarev SVT-40 . . . . . . . . . . . . . . . . . . . . . . . . . . . . .18
Degtyarev-Pekhotny 28 . . . . . . . . . . . . . . . . . . . . . . . .18
Tokarev TT-33 . . . . . . . . . . . . . . . . . . . . . . . . . . . . . .19
1

United Kingdom . . . . . . . . . . . . . . . . . . . . . . . . . . . . . . .19
Silenced Sten Mk IIs . . . . . . . . . . . . . . . . . . . . . . . . . .19
Webley Mk 4 . . . . . . . . . . . . . . . . . . . . . . . . . . . . . . .20
Germany . . . . . . . . . . . . . . . . . . . . . . . . . . . . . . . . . . . . .20
Gewehr 43 . . . . . . . . . . . . . . . . . . . . . . . . . . . . . . . . .20
Machinegewehr 34 General-Purpose Machine Gun . .21
Raketenpanzerbüchse “Panzerschrek” . . . . . . . . . . . . .21
Flammenwerfer 35 “Flamethrower” . . . . . . . . . . . . . .22
New Weapons . . . . . . . . . . . . . . . . . . . . . . . . . . . . . . . . .22
Deployable Light Machine Guns . . . . . . . . . . . . . . . .22
Flamethrowers . . . . . . . . . . . . . . . . . . . . . . . . . . . . . . .22
Satchel Charges . . . . . . . . . . . . . . . . . . . . . . . . . . . . . .23
Smoke Grenades . . . . . . . . . . . . . . . . . . . . . . . . . . . . .23
Stationary Weapons . . . . . . . . . . . . . . . . . . . . . . . . . . .23
Vehicles . . . . . . . . . . . . . . . . . . . . . . . . . . . . . . . . . . . . . . . . .24
Russia . . . . . . . . . . . . . . . . . . . . . . . . . . . . . . . . . . . . . . . .24
SU-152 Heavy Tank . . . . . . . . . . . . . . . . . . . . . . . . . .24
T-34/85 Medium Tank . . . . . . . . . . . . . . . . . . . . . . . .24
Gaz 67b Light Truck . . . . . . . . . . . . . . . . . . . . . . . . . .24
United Kingdom/United States . . . . . . . . . . . . . . . . . . . .25
Sherman M4A1 Medium Tank . . . . . . . . . . . . . . . . . .25
Willys Jeep . . . . . . . . . . . . . . . . . . . . . . . . . . . . . . . . .25
Germany . . . . . . . . . . . . . . . . . . . . . . . . . . . . . . . . . . . . .25
“Elefant” Heavy Tank . . . . . . . . . . . . . . . . . . . . . . . . .25
Panzer IV Medium Tank . . . . . . . . . . . . . . . . . . . . . . .26
Horch 1a Light Truck . . . . . . . . . . . . . . . . . . . . . . . . .26
Other Information . . . . . . . . . . . . . . . . . . . . . . . . . . . . . . . .26
Health Kits . . . . . . . . . . . . . . . . . . . . . . . . . . . . . . . . . . .26
Multiplayer . . . . . . . . . . . . . . . . . . . . . . . . . . . . . . . . . . . . . .27 Multiplayer Options . . . . . . . . . . . . . . . . . . . . . . . . . . . .28 Finding and Connecting to Multiplayer Servers . . . . . . . .29 Connecting to Your ISP . . . . . . . . . . . . . . . . . . . . . . .29 Setting Your Data Rate . . . . . . . . . . . . . . . . . . . . . . . .29 Server Listing . . . . . . . . . . . . . . . . . . . . . . . . . . . . . . .29
2

Server Filters . . . . . . . . . . . . . . . . . . . . . . . . . . . . . . . .30 Connecting to a Specific Server . . . . . . . . . . . . . . . . . .31 Adding to Favorites . . . . . . . . . . . . . . . . . . . . . . . . . . .32 Server Info . . . . . . . . . . . . . . . . . . . . . . . . . . . . . . . . .32 Creating a Server . . . . . . . . . . . . . . . . . . . . . . . . . . . . .32 General . . . . . . . . . . . . . . . . . . . . . . . . . . . . . . . . . . . .32 Advanced . . . . . . . . . . . . . . . . . . . . . . . . . . . . . . . . . .33 Settings . . . . . . . . . . . . . . . . . . . . . . . . . . . . . . . . . . . .34 Vehicles . . . . . . . . . . . . . . . . . . . . . . . . . . . . . . . . . . . .35 Weapons . . . . . . . . . . . . . . . . . . . . . . . . . . . . . . . . . . .36
Multiplayer Vehicle Controls . . . . . . . . . . . . . . . . . . . . . .36 Vehicle Weapons . . . . . . . . . . . . . . . . . . . . . . . . . . . . .36 Vehicle Views . . . . . . . . . . . . . . . . . . . . . . . . . . . . . . .37 Vehicle Positions . . . . . . . . . . . . . . . . . . . . . . . . . . . . .37 Multiplayer Battlefield Promotions . . . . . . . . . . . . . . . . .38 Multiplayer Maps . . . . . . . . . . . . . . . . . . . . . . . . . . . . . . .39 Multiplayer Game Types . . . . . . . . . . . . . . . . . . . . . . . . .40 Domination . . . . . . . . . . . . . . . . . . . . . . . . . . . . . . . .40 Capture the Flag . . . . . . . . . . . . . . . . . . . . . . . . . . . . .40 Base Assault . . . . . . . . . . . . . . . . . . . . . . . . . . . . . . . . .40
Important Tips . . . . . . . . . . . . . . . . . . . . . . . . . . . . . . . . . . .41
Credits . . . . . . . . . . . . . . . . . . . . . . . . . . . . . . . . . . . . . . . . .42
Customer Support . . . . . . . . . . . . . . . . . . . . . . . . . . . . . . . .47
Software License Agreement . . . . . . . . . . . . . . . . . . . . . . . . .49
3

INTRODUCTION
On air, land or sea, one thing has remained constant throughout history—in war, no one fights alone. From the skies over Western Europe to the rolling plains of Russia, the Allies stood together against their common enemy and prevailed. In Call of Duty™: United Offensive™ you will be immersed in some of the most decisive battles of World War II.
Become Corporal Scott Riley as you and your brothers in the besieged 101st airborne hold out in Bastogne during the Battle of the Bulge. Relive the career of S.O.E. operative James Doyle from your last bombing run as a gunner with the R.A.F. to the invasion of Sicily in 1943. Assume the role of Conscript Private Yuri Petrenko as you and your comrades take part in the events of the summer of 1943, from the Battle of Kursk to the final battle for the city of Kharkov.
Whether in a small unit sabotaging an enemy train in occupied Europe, or part of an entire tank division advancing across the Russian steppes, one truth rings through: success in battle cannot be realized by any one man. Adversity cannot be overcome without unity, and victory can only be achieved through a United Offensive.
4

INSTALLATION
A previous full installation of Call of Duty™ is required to play
Call of Duty:™ United Offensive.™
Insert disc one of Call of Duty™: United Offensive™ into your CD-ROM drive. After a few seconds, the splash screen will appear. Click Install to begin the installation process and then follow the on-screen instructions.
If the splash screen does not appear, you may have Autorun disabled. Double-click on the My Computer icon on your desktop. Open the CD-ROM drive with the Call of Duty™: United Offensive™ CD inserted. Double-click on Setup.exe to launch the Start screen. If you need more information, consult the help files.
Enter CD Key
The Installer will prompt you to enter a CD key. You must have a valid CD key to continue the installation process and play Call of Duty™: United Offensive.™ Your unique CD key is affixed to the jewel case your game CDs are contained in.
Note: Call of Duty™: United Offensive™ has its own CD key, separate from Call of Duty.™ Your Call of Duty™ key will not allow you to play
Call of Duty™: United Offensive.™
When prompted, enter the CD key as it appears on the jewel case. It’s important that you observe the following guidelines to ensure the privacy of your CD key:
•Keep your CD key in a safe, private place in case you need to reinstall your game at a later point.
•Players with invalid CD keys will not be permitted to join Multiplayer games, so be sure to enter it correctly, as it appears on the jewel case.
•No one from Activision or Gray Matter will ever ask you for your CD key (in game, on message boards or in chat rooms). Never give it out to anyone! If you lose your CD key, you will not be issued another one.
5

Latest Information
You’ll find the latest information about the game in the Readme file on the game disc. Select Readme from the Start screen to view this information. If you’re having problems installing or playing the game, you’ll also find help in the Help files section of the Start screen.
THE SINGLE PLAYER GAME
In the Single Player campaigns, you play as an Allied soldier deep in the thick of some of the fiercest combat of the Second World War. The success of your squad, the completion of your mission and even your very survival depends on how well you move, how well you shoot and, perhaps most importantly, how well you keep your wits about you.
To begin a Single Player game, select Play Call of Duty™:
United Offensive™ Single Player from the Call of Duty™:
United Offensive™ folder contained in the Programs section of the Windows® Start Menu.
MAIN MENU
After you view the introductory movies, the Main menu appears. From this menu you can launch new games, resume games in progress, switch to the Multiplayer portion of
Call of Duty™: United Offensive™ or access the configuration options.
Resume Game – Resume Game loads the last game you saved so you can continue your progress through the campaigns.
6

New Game – Launch a new Call of Duty™: United Offensive™ game from the beginning of the first campaign. After selecting
New Game, choose your difficulty level from one of the four options available.
Load Game – Load any games you’ve saved. When you reach the Load/Save menu, select the game name in the box on the left side of your screen and then click Load.
Multiplayer – Launch the Multiplayer component of Call of Duty™: United Offensive,™ where you can join or create Multiplayer servers via LAN or Internet.
Options – Configure your controls and adjust audio/video quality and performance settings. Click on the sub-sections on the right side of the screen for additional options. Click on those settings to change them. A list of default controls can be found on the following pages.
Quit – Exit the game and return to the desktop.
PLAYING THE GAME
Each mission loading screen provides crucial information about the setting, objectives, opportunities and potential obstacles you’ll encounter in the mission. This information comes as personal journal entries or communiqués from your superiors. Study them closely before entering the mission. The information they contain could save your life.
In-Game Display
Compass – The compass helps you navigate your surroundings and get your bearings. In addition to showing you which direction you’re facing, it shows you the location of Allies in your vicinity (green arrows) and the location of your current objective (a golden star).
7

Stance Indicator – The triangle-shaped icon shows your current stance. The icon changes from standing to crouching to prone, depending on the stance you choose. It also changes to a fast runner icon to indicate you’re sprinting. As your sprint energy depletes, the
icon drains from white to black. After you finish sprinting, the icon fills up again as your energy recharges.
Status Text – Throughout the game, updates appear here including changes in mission objectives, picking up health and other alerts.
Ammunition Counter – The box in the lower right-hand section of the screen is your ammunition counter. The first number indicates how many rounds are in your current weapon’s clip. The second number indicates your total number of rounds.
Health Bar – This bar indicates your current health status. A full green bar indicates full health. The bar reduces in size and changes color along the spectrum from green to red as you lose health.
Crosshair – Use your crosshair to aim your weapon. When you run or walk, your crosshair widens, indicating the lack of accuracy that comes from attempting to aim while moving. The wider the crosshair, the less accurate your shots. When you stop moving, you automatically steady your weapon and your crosshair narrows. It’s often wisest to fire when completely stopped to ensure accurate shots (and enable you to conserve ammo). Crouching or lying prone also keeps your crosshair focused, so use these positions whenever possible. Your crosshair
8

changes when you encounter interactive objects. If you move your crosshair over an ally who’s close to you, you’ll see your crosshair change to the image of a person. Press the Attack key (default: left mouse button) to ask individuals to move out of your line of sight.
Pickup/Interact Indicator – This indicator appears when there’s an item you can pick up, be it a health kit, secret documents or a new weapon. To pick up the desired item, press your Use key (default: F ). In the case of a new weapon (or ammunition for your current arsenal), press and hold the Use (default: F ) key. This icon also appears when you can interact with an object.
MOVEMENT CONTROLS
The default movement keys are as follows:
COMMAND DEFAULT KEY |
DESCRIPTION |
|
Forward |
W |
Walk forward. |
Backpedal |
S |
Walk backward. |
Move Left |
A |
Sidestep left. |
Move Right |
D |
Sidestep right. |
Lean Left |
Q |
Lean left around corners to minimize |
|
|
exposure. |
Lean Right |
E |
Lean right around corners to |
|
|
minimize exposure. |
Stand/Jump |
Spacebar |
Stand upright from either the |
|
|
crouching or prone position or jump |
|
|
when in the upright position. |
Go to Crouch |
C |
Crouch from either the standing |
|
|
or prone position. |
Go to Prone |
Ctrl |
Lie prone from either the standing or |
|
|
crouched position. |
9

Jump/ |
Unbound |
Jump (when already standing) or |
Stance Up |
|
move up to stand from either prone |
|
|
or crouch. |
Stance Down |
Unbound |
Move down one stance position |
|
|
(from standing to crouching or from |
|
|
crouching to prone). |
Stance Up |
Unbound |
Move up one stance position (from |
|
|
crouching to standing or from |
|
|
prone to crouching). |
Toggle Crouch |
Unbound |
Press once to move into crouch |
|
|
position. Press again to return to |
|
|
your previous stance. |
Toggle Prone |
Unbound |
Press once to move into prone |
|
|
position. Press again to return to |
|
|
your previous stance. |
Hold Down |
Unbound |
Hold to crouch. When released, you |
Crouch |
|
return to your previous stance. |
Hold Down |
Unbound |
Hold to lie prone. When released, |
Prone |
|
you return to your previous stance. |
Turn Left |
Unbound |
Rotate to the left while staying in |
|
|
one position. |
Turn Right |
Unbound |
Rotate to the right while staying in |
|
|
one position. |
Strafe |
Unbound |
Sidestep (control direction with |
|
|
the mouse). |
Sprint |
Alt |
Run fast for a short period of time. |
In addition to running forward, backward, left and right, you’ll need to master the other movement skills described on the following pages.
10
Crouching and Going Prone
As soon as you enter your first battle, you’ll find that a soldier who stands around often winds up dead. A shrewd player makes use of both the crouch and prone stance positions when in the thick of battle to keep cover, avoid enemy fire and move without exposing himself to danger. Keep in mind that while crouched or prone, you’ll be harder to hit, but won’t move as fast as when standing up. Additionally, when prone, you’ll crawl on your belly at a very slow pace and won’t be able to fire while moving.
Important Tip: Always use available cover! Crouching or lying behind trees and brush can keep the enemy from spotting you. Getting behind bulletproof objects can save you from gunfire.
Leaning
The ability to lean around corners and obstacles is essential to your survival. Leaning minimizes your exposure in potentially dangerous situations and allows you to look into rooms, around corners and otherwise peek from behind cover to survey the situation, check for hidden enemies and even fire at them. You can still be seen and even shot while leaning, so exercise caution. You activate the lean controls for as long as you hold down the key. Releasing either lean key (default: Q and E) returns you to a centered view position.
Sprinting
The ability to sprint for short distances is a new feature in Call of Duty™: United Offensive.™ Like leaning and crouching, sprint is most useful for minimizing your exposure to enemy fire. Use sprint to move rapidly from cover point to cover point. While sprinting, you will be unable to fire your weapon.
Important: Sprint only works when you’re standing up—it will not engage from the prone or crouching positions.
11

VIEW CONTROLS
The default view keys are as follows:
COMMAND DEFAULT KEY |
DESCRIPTION |
|
Look Up |
Unbound |
Shifts your view up to see above you. |
Look Down |
Unbound |
Shifts your view down to see |
|
|
below you. |
Mouse Look |
Unbound |
Toggles between mouse-controlled |
|
|
view and keyboard-controlled view. |
Center View |
Unbound |
Returns your view to front |
|
|
and center. |
Free Look |
Yes |
Enable mouse-controlled “free” |
|
|
viewing—move your mouse to |
|
|
view 360.° |
Invert Mouse |
No |
Invert the Y-axis of the mouse if |
|
|
you prefer. |
Smooth Mouse |
No |
Makes mouse movement less jittery. |
Mouse Sensitivity Slider |
Controls the responsiveness of |
|
|
|
the mouse. |
By default, looking around in the game is controlled by the mouse. Moving your mouse from side to side rotates your view left or right. Moving your mouse forward (away from you) causes you to look up, while moving your mouse backward (toward you) causes you to look down.
12

WEAPONS CONTROLS
The default weapons-related keys are as follows:
COMMAND |
DEFAULT KEY |
DESCRIPTION |
Attack |
Left Mouse |
Fire weapon. |
|
Button |
|
Toggle Aim |
Right Mouse |
Switch between “Aim Down |
Down the Sight |
Button |
the Sight” and “From the Hip” |
|
|
firing modes. |
Aim Down |
Unbound |
This command, when held |
the Sight |
|
down, allows you to aim down |
|
|
the sight of your gun. Release it |
|
|
to return to “From the Hip” |
|
|
firing mode. |
Melee Attack |
Shift |
Strike the enemy with the butt |
|
|
of your gun. |
Reload Weapon |
R |
Reload weapon. |
Change Rate |
M |
Switch between fully automatic |
of Fire |
|
and semiautomatic firing modes. |
|
|
(Note: Not all weapons have |
|
|
multiple firing modes) |
Select First Weapon 1 |
Switch your active weapon to the |
|
|
|
first weapon slot. |
Select Second |
2 |
Switch your active weapon to |
Weapon |
|
the second weapon slot. |
Select Pistol |
3 |
Switch your active weapon to |
|
|
your pistol. |
Select Grenade |
4 |
Switch your active weapon to |
|
|
grenades. |
Select Smoke |
5 |
Switch your active weapon to |
Grenade |
|
smoke grenades. |
|
|
(Multiplayer Only) |
13

Select Satchel |
6 |
Switch your active weapon to |
Charge |
|
satchel charges. |
|
|
(Multiplayer Only) |
Select Binoculars |
7 |
Switch your active weapon to |
|
|
binoculars. (Multiplayer Only) |
Next Weapon |
Mouse |
Switch to the next weapon in |
Wheel Down |
your inventory. |
|
Previous |
Mouse |
Switch to the previous weapon |
Weapon |
Wheel Up |
in your inventory. |
Melee Attack
Sometimes the proximity of your enemies makes it difficult to aim your weapon and defend yourself properly. Fortunately, you have a Melee Attack (default: shift) available that allows you to smack an enemy at close range with the butt end of your rifle or pistol.
Reloading Weapons
When your weapon’s clip runs out of ammunition, you will automatically reload. Monitor your ammunition carefully! Reloading (default: R) in the middle of a firefight takes time and leaves you unable to defend yourself. If you’re running low on ammunition, pick up the extra ammunition from a fallen comrade’s weapon of the same type. If all else fails, grab a weapon from a fallen enemy.
Aiming Down the Sight (ADS)
With every gun, you can enable the “aim down the sight” function, bringing the weapon up from your hip to your face so you can look down the sight (or look into the scope, in the case of scoped rifles). Aiming down the sight gives you a slight zoom effect, enabling you to be more accurate. However, when aiming down the sight, you move more slowly than normal.
14

The default toggle key for Aim Down the Sight is the right mouse button. You can also bind a key to “hold down” between ADS and normal modes.
Swapping Weapons and Picking Up Items
When you see a weapon on the ground, you can swap it with one of your two main weapons (slot 1 or slot 2). To swap weapons, move your crosshair over the weapon and hold down the Use key (default: F). You’ll automatically drop your current weapon and pick up the new weapon.
Picking up items is as simple as pointing your crosshair at the item and pressing the Use key (default: F), or, in the case of health and ammunition, walking over the item.
“Cooking Off” Grenades
You now have the ability to pull the pin and hold a grenade for as long as you want in order to “cook off” the charge. This is useful if you want to have more precision in your grenade throws. In the Single Player missions, it also reduces the ability for an enemy to pick up the grenade and throw it back to you.
To cook off grenades, press and hold the Fire button (default: left mouse button), then press and hold the Aim Down the Sight button (default: right mouse button) for as long as you want to hold the grenade in your hand. Your crosshair pulses for each second you hold it. When you want to throw the grenade, release both the fire and ADS mode buttons. The grenade will fly for as long as it has left on its fuse and explode.
Important Note: In Multiplayer, you can also cook off satchel charges in the same way you do grenades.
15

Binoculars and Artillery Strikes
When you’ve achieved the highest rank in a Multiplayer game, you acquire a set of binoculars (default: 7). Binoculars allow you to view aspects of the battlefield from an extremely long range. They also allow you to call in an artillery strike. To call in an artillery strike, use the binoculars by going into Aim Down the Sight mode, then press the Fire button (default: left mouse button) while aiming at your target. You’ll know the artillery strike has been called in when your ammo counter goes from
1 to 0.
OTHER CONTROLS
COMMAND |
DEFAULT KEY |
DESCRIPTION |
Show Objectives/ |
Tab |
Bring up a list of your |
Score |
|
mission objectives. |
Use |
F |
Use, pick up, drop off and |
|
|
otherwise interact with items |
|
|
and devices. |
Screenshot |
F12 |
Take an in-game screenshot. |
Quick Save |
F5 |
Quickly save your game in the |
|
|
middle of a mission. |
Quick Load |
F9 |
Load your Quick Save game. |
Enable Console |
No |
Set this to Yes if you want to |
|
|
enable the in-game console |
|
|
(accessible by pressing the |
|
|
tilde ~ key). Please be advised |
|
|
that the console is not |
|
|
supported. Please do not call |
|
|
Activision Customer Support |
|
|
with any questions regarding |
|
|
this feature. |
16
Show Objectives/Score
Throughout your campaign, mission objectives change. Press the Show Objectives/Score key (default: tab) to show your mission objectives and give you a status on each one.
•Incomplete or in-progress mission objectives appear in green text.
•Failed mission objectives appear in red text.
•Completed mission objectives appear in black text.
Quick Save/Quick Load
As you progress through the campaigns, it’s wise to save your progress. The Quick Save (default: F5) and Quick Load (default: F9) hotkeys allow you to avoid the save/load menus and stay in the action.
WEAPONS OF CALL OF DUTY :™
UNITED OFFENSIVE™
This section lists all weapons that have been added to the United Offensive™ expansion pack. Original Call of Duty™ weapon descriptions can be found in the original Call of Duty™ manual.
United States
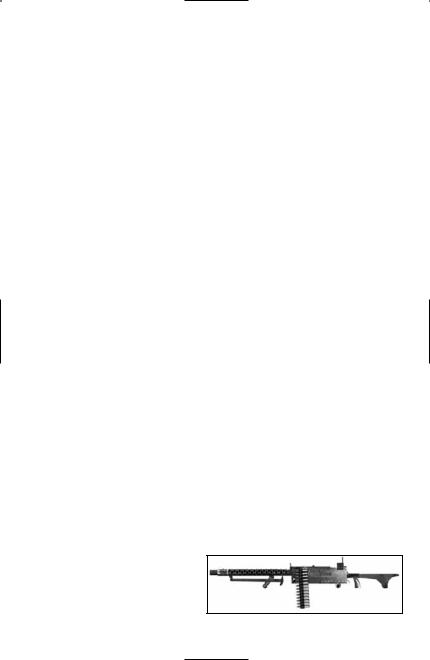
Browning .30 Caliber M1919A6 Deployable Light Machine Gun
The air-cooled M1919A6 was introduced as a lighter alternative to the monstrous, 93-pound water-cooled M1917. Weighing about 43 pounds with tripod, the M1919A6 was easier to transport with infantry units, as well as easier to mount on tanks. It was one of the most reliable weapons of the Second World War.
Range: |
Long |
Rate of Fire: |
Very Fast |
Damage: |
High |
Mobility: |
Fast |
17
 Loading...