


INTRODUCTION .............................................................. |
1 |
SYSTEM REQUIREMENTS .................................. |
1 |
Installing The Game.................................................... |
2 |
WHAT’S NEW .................................................................... |
2 |
Force Pool Management.......................................... |
2 |
New Map Features ...................................................... |
2 |
New Combat Dynamics .......................................... |
2 |
Starting The Game ...................................................... |
2 |
Uninstalling The Game ............................................ |
3 |
Saving Files ........................................................................ |
3 |
Electronic Documentation ...................................... |
3 |
TROUBLESHOOTING ................................................ |
4 |
Sound And Video Cards ........................................ |
4 |
DirectX 7 Setup .............................................................. |
4 |
Copy Protection .............................................................. |
4 |
CONTACTING TECHNICAL |
|
SUPPORT ................................................................................ |
5 |
Technical Support.......................................................... |
6 |
Online Technical Support........................................ |
6 |
Mailing Address.............................................................. |
6 |
GAMEPLAY............................................................................ |
7 |
QUICK START .................................................................... |
7 |
MAIN SCREEN .................................................................. |
9 |
Play A Game.................................................................... |
9 |
Boot Camp (Training)................................................ |
10 |
Create A Scenario........................................................ |
10 |
Multiplayer .......................................................................... |
10 |
BOOT CAMP ........................................................................ |
10 |
Quick Tour .......................................................................... |
10 |
Monitors/Toolbars.......................................................... |
10 |
Viewing The Terrain.................................................... |
11 |
Infantry Tactics ................................................................ |
11 |
Armour Tactics ................................................................ |
11 |
THE COMMAND SCREEN.................................... |
11 |
THE BATTLE GROUP SCREEN ...................... |
13 |
BATTLEFIELD CONTROLS .................................. |
15 |
Basic Unit Orders .......................................................... |
15 |
Hot Key Orders .............................................................. |
15 |
Movement Orders.......................................................... |
15 |
Vehicles.................................................................................. |
16 |
Indirect Paths/Waypoints ........................................ |
16 |
Fire ............................................................................................ |
17 |
Line Of Sight And Range ...................................... |
17 |
Smoke...................................................................................... |
18 |
Defend .................................................................................... |
18 |
Ambush.................................................................................. |
19 |
Group Orders .................................................................. |
19 |
OTHER CONTROLS .................................................... |
20 |
Naval Gun Fire, Mortar |
|
Barrages, And Air Strikes ...................................... |
20 |
Truce ........................................................................................ |
21 |
Combat Messages ........................................................ |
21 |
Options .................................................................................. |
21 |
Zoom Level.......................................................................... |
24 |
Unit Status............................................................................ |
24 |
COMMAND AND MORALE ................................ |
25 |
Rallying.................................................................................. |
25 |
Separation............................................................................ |
25 |
THE BATTLEFIELD........................................................ |
26 |
Hills .......................................................................................... |
26 |
Gullies, Trenches, and Gun Pits.......................... |
26 |
Forests .................................................................................... |
27 |
Buildings................................................................................ |
27 |
Rubble .................................................................................... |
28 |
Roads ...................................................................................... |
28 |
Scrub........................................................................................ |
28 |
Mine Fields.......................................................................... |
28 |
ENDING A BATTLE ...................................................... |
29 |
Victory Locations............................................................ |
29 |
Truce ........................................................................................ |
29 |
Time.......................................................................................... |
29 |
Morale Failure.................................................................. |
29 |
Debriefing Screen.......................................................... |
30 |
STRATEGIC LEVEL ...................................................... |
31 |
The Strategic Map ........................................................ |
31 |
Battle Groups .................................................................... |
32 |
Strategic Turns.................................................................. |
34 |
Weather.................................................................................. |
36 |
Air Strikes, Naval Gun Fire, |
|
And Mortar Support.................................................... |
37 |
Intelligence.......................................................................... |
38 |
Winning Campaigns And Operations.......... |
38 |
SCENARIO EDITOR .................................................... |
39 |
The Map................................................................................ |
39 |
MULTIPLAYER.................................................................... |
41 |
Using A TCP Connection........................................ |
41 |
Using A UDP Connection ...................................... |
42 |
Using A Serial Connection .................................... |
42 |
Using A Modem Connection................................ |
42 |
Using The MSN Gaming Zone .......................... |
42 |
Using Mplayer.................................................................. |
42 |
Communicating With Your Opponent .......... |
43 |
UNITS .......................................................................................... |
44 |
Infantry .................................................................................. |
44 |
Mortars .................................................................................. |
45 |
Machine Guns.................................................................. |
46 |
Flamethrowers.................................................................. |
46 |
Anti Tank Guns .............................................................. |
46 |
Crews ...................................................................................... |
47 |
Vehicles.................................................................................. |
47 |
Tanks........................................................................................ |
47 |
VEHICLES .............................................................................. |
49 |
M3 Half-Track .................................................................. |
49 |
M8 / M20 Armoured Cars .................................. |
49 |
M5A1 Stuart Light Tank ........................................ |
49 |
M8 Howitzer Motor Carriage .............................. |
49 |
M4 Sherman...................................................................... |
49 |
M10 and M18 Tank Destroyers........................ |
50 |
SD KFZ 250/251 Half Tracks .......................... |
50 |
Marder III ............................................................................ |
50 |
STUG III / STUH 42 .................................................. |
50 |
Panzer II ................................................................................ |
50 |
Panzer III .............................................................................. |
51 |
Panzer IVG ........................................................................ |
51 |
Panzer V Panther .......................................................... |
51 |
French Tanks .................................................................... |
51 |
Russian Tanks .................................................................. |
51 |
CREDITS .................................................................................. |
53 |
ATOMIC GAMES, INC............................................. |
53 |
SSI/Mattel ............................................................................ |
54 |
INTRODUCTION
On June 6th, 1944, the combined forces of the United States, Great Britain, Canada, and France launched the greatest amphibious invasion in the history of the world. The blow fell in Normandy, France, striking Adolph Hitler’s Atlantic Wall with nine divisions of assault troops plus support from naval gunfire and massive air strikes. The Atlantic Wall would crumble before the weight of this onslaught, and Europe would be free of the Third Reich less than a year later.
CLOSE COMBAT: INVASION
NORMANDY retells the story of this historic battle from the perspective of the men who fought for control of Europe. As the American Commander, you must fight your way off the beaches and take the important seaport of Cherbourg before the end of June. The German commander must delay the Americans at the beach and await reinforcements to throw the Allies back into the sea.
SYSTEM REQUIREMENTS
•Pentium 200 MHz IBM PC or compatible
•32 MB of RAM
•Windows® 95 or 98 — Note: This is a Windows game and was not designed to be played on Windows® NT systems. Multitasking is not recommended when playing
CLOSE COMBAT: INVASION NORMANDY
•An uncompressed hard drive with 250 MB free for the “Recommended” install
•4 X CD-ROM drive or faster
•An SVGA video adapter with 4 MB of memory and a Colour SVGA Monitor
•A Windows compatible mouse
•DirectX7 certified drivers required
In addition to the basic system requirements, the game requires that DirectX 7 or later be installed in your system. The option to install DirectX 7 appears during the game installation. For network play, you need a DirectPlay compatible network adapter.
Installing the Game
You must install CLOSE COMBAT: INVASION NORMANDY game files to your hard drive and have the CLOSE COMBAT: INVASION NORMANDY CD in your CD-ROM drive to play this game or use the Scenario Builder.
To install the game, insert the CD into the CD-ROM drive. When the pop-up window appears, click on the Install option. If you have disabled the Windows Autorun, or if it does not function, use WINDOWS EXPLORER to open the CD and double-click on the Setup icon. Follow all on-screen prompts to complete the installation.
WHAT’S NEW
Force Pool Management
Each Battle Group now has a Force Pool from which to draw units. You can configure your Battle Groups before heading into battle, replace units lost in battle, and if you play the American side, Reinforce your troops, restoring your Force Pool to full strength (see page 13, “The Battle Group Screen” for more information).
New Map Features
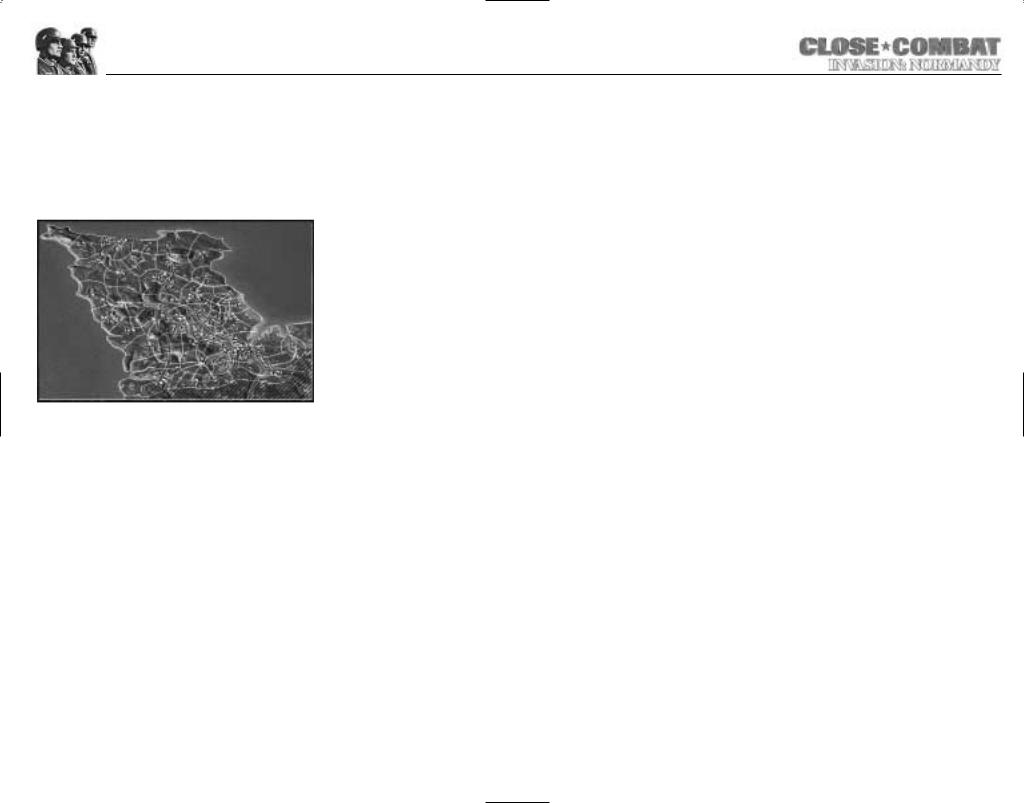
In addition to the new, historically accurate maps of the entire Cotentin peninsula, from Utah Beach to Cherbourg, CLOSE COMBAT: INVASION NORMANDY has new defensive terrain features such as complex trench systems, pillboxes, hardened emplacements, dragon’s teeth, barbed wire, and beach obstacles.
New Combat Dynamics
CLOSE COMBAT: INVASION NORMANDY adds a new support feature: naval bombardments. Allied ships off the coast can shell German positions to provide cover for the beach operations (see page 20, “Naval Gun Fire”). Also, airborne units now start the campaign game behind enemy lines; airborne units start with five days of supplies, from which they draw exclusively until exhaustion; after that, they must be connected to a supply depot by the road network in order to be in supply. Finally, units that were not historically present have been included in the Scenario Editor to allow you to create “what if” scenarios.
Starting the Game
Every time the CD-ROM drive is closed with the CD in place, the CLOSE COMBAT: INVASION NORMANDY Autorun program displays a menu with the options to run the game, run the Scenario Builder, install DirectX, uninstall the game, or view the README.TXT file. You can also start CLOSE COMBAT: INVASION NORMANDY by opening the Start menu, selecting Programs and choosing the folder where CLOSE COMBAT: INVASION NORMANDY was installed and left-clicking on the CLOSE COMBAT: INVASION NORMANDY program item.
1 |
2 |
For complete and specific “how to play” information, please refer to the rest of the manual. Some changes were made too late to include in this manual. Please read the README.TXT file in your game directory for more information.
Screen saver utilities should be turned off before starting to play CLOSE COMBAT: INVASION
NORMANDY.
Uninstalling the Game
To uninstall the game, select that option from the Autorun menu, or choose Settings from the Start menu, and select Control Panel; in the Control Panel, select Add/Remove Programs, left-click on CLOSE COMBAT: INVASION NORMANDY, and click on the Add/Remove button. The game and all of its components are then removed from your hard drive, except for your saved games and/or edited scenarios.
Saving Games
CLOSE COMBAT: INVASION NORMANDY requires space on your hard drive for saved games and temporary files. Each saved game can take up to 1.5 MB of hard drive space.
Electronic Documentation
If you do not already have the Adobe Acrobat Reader, you can install the software following these instructions. Insert the game CD in your CD-ROM drive. Use WINDOWS EXPLORER to open the CD, and double-click on the ACROWIN folder, located in the root directory. Double-click on the file entitled ACROREAD.EXE and follow the on-screen prompts.
Once Acrobat Reader is installed on your system, you can read README.PDF by opening the folder on your hard drive in which you installed the Adobe Acrobat reader, and double-clicking on the file ACROREAD.EXE. From the File menu of Adobe Acrobat, you may open the README.PDF located in the root directory of your game CD.
TROUBLESHOOTING
This section provides information that should help you solve some common problems.
Sound and Video Cards
This product requires Windows 95/98 and DirectX compliant sound and video cards. If you experience problems with sound or video while using this product please contact the manufacturer of your sound or video card for the latest DirectX certified drivers. If such drivers are not used, this product may not run properly on your system.
DirectX 7 Setup
This game requires DirectX 7 or later. If you do not have DirectX 7, then it can be installed or reinstalled from the CD. Installing DirectX 7 is an option when installing the game. You can also install it by using Windows Explorer to open the DIRECTX folder on the game CD. Double-click on DXSETUP.EXE to start the DirectX 7 install.
From within the installation program, you can also reinstall DirectX 7, test your driver’s certification, or reinstate your previous audio and video drivers.
DirectX Disclaimer
CLOSE COMBAT: INVASION NORMANDY utilises Microsoft’s DirectX sound and video drivers. DirectX is a programming tool created by Microsoft, and the installation of DirectX may cause video problems and system anomalies with computers using video drivers that are not DirectX certified. DirectX is a Microsoft product, and as such, this publisher cannot be responsible for changes that might occur to your computer system due to its installation. For DirectX related problems that cannot be fixed by updating to your video card’s latest Windows driver set, you must contact either Microsoft or the manufacturer of your video card for further technical support or service.
Microsoft retains all intellectual property rights to DirectX. The user has been granted a limited license to use DirectX with Microsoft operating system products.
Copy Protection
In order to play CLOSE COMBAT: INVASION NORMANDY, the game CD must be in the CD-ROM drive.
3 |
4 |
UBI SOFT UK TECHNICAL SUPPORT
Technical support: 0870 800 6160 (local rate call)
Hints and tips hotline service: 0960 466 5200 (premium rate call)
On-line Support Options
Ubi Soft offers several on-line support options for their software products. One of these is our website at: http://www.ubisoft.co.uk/support/
If you have a specific problem that is not addressed on our site, you can send your question to us via e-mail at: techsupport@ubisoft.co.uk
Please be as specific as you can be about the problem you are experiencing. Also include in the body of your e-mail: the name of the manufacturer of your computer system; the brand and speed of the processor; how much RAM you have, the version number of Windows you are using (if you aren't sure, right-click on the My Computer icon on your desktop and select 'Properties'), and the manufacturer name and model number of your video card, modem, and sound card.
Other Support Options
You can also contact Ubi Soft Customer Support by phone and fax. When you call, please have all of the above mentioned information ready.
UBI SOFT ENTERTAINMENT Ltd. Chantry Court
Minorca Road Weybridge Surrey KT13 8DU
Tel: +44 (0) 870 800 6160
Fax:+44 (0) 1932 838 274
In Nederland: Telefoonnummer: 0900 202 6766 (50 cpm.) Tijden: maandag tot en met vrijdag van 09:30 tot 18:00 uur
E-mail: techsupport@ubisoft.nl
In Belgie: Telefoonnummer:02 73.25.57.7 E-mail: hotmail@ubisoft.be
Scandinavia: Ubi Soft Nordic Support
Ubi Soft Nordic offers different possibilities to obtain support. On our website: http://www.ubisoft.dk
If you have a question, which is not described on our website, please e-mail us at: support@ubisoft.dk
Other ways of reaching us: By telephone or fax, please call: Telephone: (0045) 38 32 02 50
Fax: (0045) 38 33 34 49
Australia: Technical Support Hot Line: 1902 262 102 (calls are charged at $1.98 per minute including GST. Higher from mobile and public phones)
We regret that we cannot offer game hints and tips, as the service is provided for technical difficulties only.
GAMEPLAY
CLOSE COMBAT: INVASION NORMANDY is a real time strategy game that puts the emphasis on REAL. During a battle, you command up to 15 units ranging from squads of infantry to heavy tanks. The soldiers under your command act like real soldiers. If you order them to exert themselves, they get tired, if the enemy shoots at them, they keep their heads down, and when in danger they get scared. If a soldier becomes too scared, he may stop listening to orders; he may even surrender or desert.
Your units have the same strengths and weaknesses that they would in real life, so in planning your strategy you need to think about what would work in the real world. Historically, real world tanks had a hard time detecting enemy infantry, and enemy infantry could easily sneak up on a tank and use explosives to disable or destroy it. Real world tanks used infantry to scout ahead of them; you are well advised to do the same.
Your goal during each battle is to do more than just kill the enemy. The invasion of Normandy was a battle about ground, about taking it and about defending it. Each map has a number of important strategic spots called “Victory Locations”, and success or failure is determined by who holds them when a battle ends.
During Campaigns and Operations you have both strategic command of the battlefield and tactical control of every engagement. At the strategic level, you direct your Battle Groups along the network of roads that connects the towns and villages of the Cotentin region. You must deal with issues of supply, allocate sparse resources, and control your overall battle strategy.
QUICK START
Double-click on the CLOSE COMBAT: INVASION NORMANDY icon and start the game.
Once the game is started, go to the Main screen and select Play a Game. If this is your first time playing, you should consider playing the Boot Camp tutorial first.
5 |
6 |

Once on the Command screen, if you want to jump in quickly, choose a Battle listed in the window on the upper left hand side rather than a
Campaign or Operation. Once you have decided which Battle you want to play, double-click on it.
This brings you to the Battle Group screen where you can look at the units you will be fighting the Battle with. You can rename them if you want, using the button on the bottom of the screen. By clicking on units, you can also look at their Experience Level and Morale.
When you’re ready to fight, select Next from the lower right hand corner; this displays the Battle screen. When you first bring up the Battle screen, the action is frozen. This represents the pre-battle phase, during which you can place your troops. The darkened portion of the map represents where the enemy starts, the lightly shaded portion starts as no man’s land, and the unshaded portion is yours.
General Schlieben, commander of the Port of Cherbourg called Rommel asking permission to surrender the Port of Cherbourg and his men on 25 June, 1944:
"Loss of the city shortly is unavoidable…2,000 wounded [are] without a possibility of being moved. Is the destruction of the remaining troops necessary as part of the general picture in view of the failure of effective counterattacks? Directive urgently requested."…"In addition to superiority in material and artillery, air force and tanks, heavy fire from the sea has started, directed by spotter planes."…"I must state in the line of duty, that further sacrifices cannot alter anything.”
Place your troops to your best advantage; left-click on a unit and drag it to move it. You may also give orders to units during this stage. Right-click on a unit to give it an order. When placing Anti-Tank guns, which usually cannot move quickly, it is useful to check their fields of fire by giving them a Fire order and moving the cursor around. You can cancel the firing order by ordering the gun to Defend or Ambush. Infantry should usually start in cover, either in buildings,
woods, or ditches. Command teams improve the performance of other teams nearby. To see the area over which a command team has influence, press the Space bar. The coloured circles displayed represent the extent of the team leader’s command and control.
When you are satisfied with your troop placement, press the Begin button on the tool bar on the bottom of the screen.
While playing, keep in mind that the F5-F7 keys control your pop-up menus and that you can issue orders to a unit by right-clicking on it. Air Strikes, Naval Gun Fire, and Mortar Barrage can each be used only once per Battle if they are available at all.
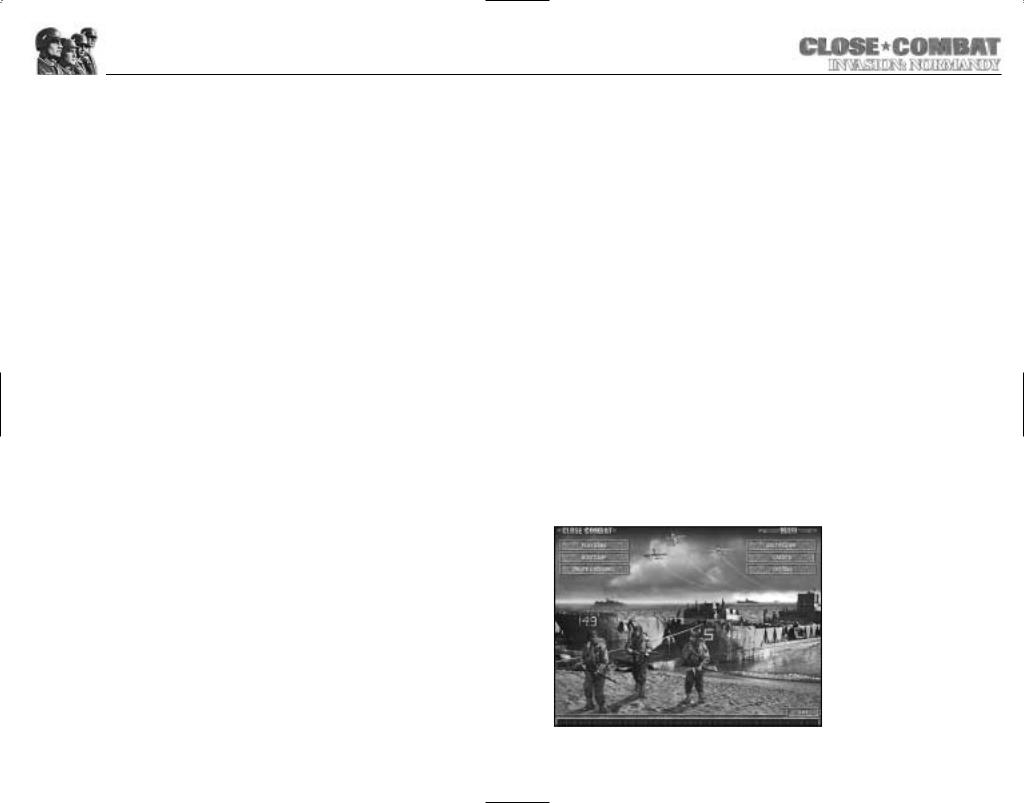
MAIN SCREEN
Play a Game
Left-clicking on the Play a Game option opens the Command screen. From the Command screen you may load a saved game or select any of the single player Battles, Operations, or Campaigns.
7 |
8 |
Boot Camp (Training)
The Boot Camp option opens the Boot Camp screen, where you may choose to play any of the five training scenarios. The tutorials include pop-up windows directing your actions and are designed to teach basic unit commands and tactics as well as strategic control. It is highly recommended that all novice players play through all five boot camps.
Create a Scenario
While CLOSE COMBAT: INVASION NORMANDY comes with a large number of pre-made Battles, Operations, and Campaigns, an easy-to-use tool has been provided for creating your own Battles, Operations, and Campaigns.
Multiplayer
While the AI computer opponent in the single player game does present a worthy opponent, there is something uniquely satisfying about outthinking a human being. CLOSE COMBAT: INVASION NORMANDY presents a number of options allowing two human players to square off.
BOOT CAMP
Boot Camp is an online tutorial that teaches basic unit commands and fundamental tactics. There are five boot camps; it is recommended that new players complete them in order from top to bottom. During the boot camps, you can always repeat the previous instruction by pressing Ctrl+H. You may exit boot camp at any time by pressing the ESC key.
Quick Tour
This explains how to give orders to a unit as well as basic targeting. Remember that rightclicking on a unit selects the unit and creates an order menu. Orders may be cancelled by right-clicking again, or by left-clicking off of the menu.
Monitors/Toolbars
This segment shows how to call in Air Strikes and Mortar Barrages, as well as monitoring team abilities and status. The prime things to remember from this boot camp are that the F5 key toggles the Team Monitor, F6 toggles the Inset Map, and F7 toggles the Soldier
Monitor.
Viewing the Terrain
This segment explains how to move your view around the map and the effects of terrain on units. The important things to remember are that you can left-click in the inset map to shift your view. You can zoom in and out with the Zoom buttons on the bottom of the screen. The properties of the various terrain types are also discussed.
Buildings provide great cover for infantry. Buildings with more than one story have a number on them. For purposes of determining line of sight, all units in a building are assumed to be on the top floor. A building’s roof becomes invisible when you have men inside so you can see what is going on.
Infantry Tactics
This is a demonstration of basic infantry strategy, including the use of two or more teams to lay down suppressive fire and how to use smoke to cover advancing infantry. Basic mortar use is also covered.
Armour Tactics
This segment is short, but it teaches a vital lesson. Tanks are extremely vulnerable to infantry at close range and bad at detecting them. To protect against these two failings, armour works best when supported by infantry.
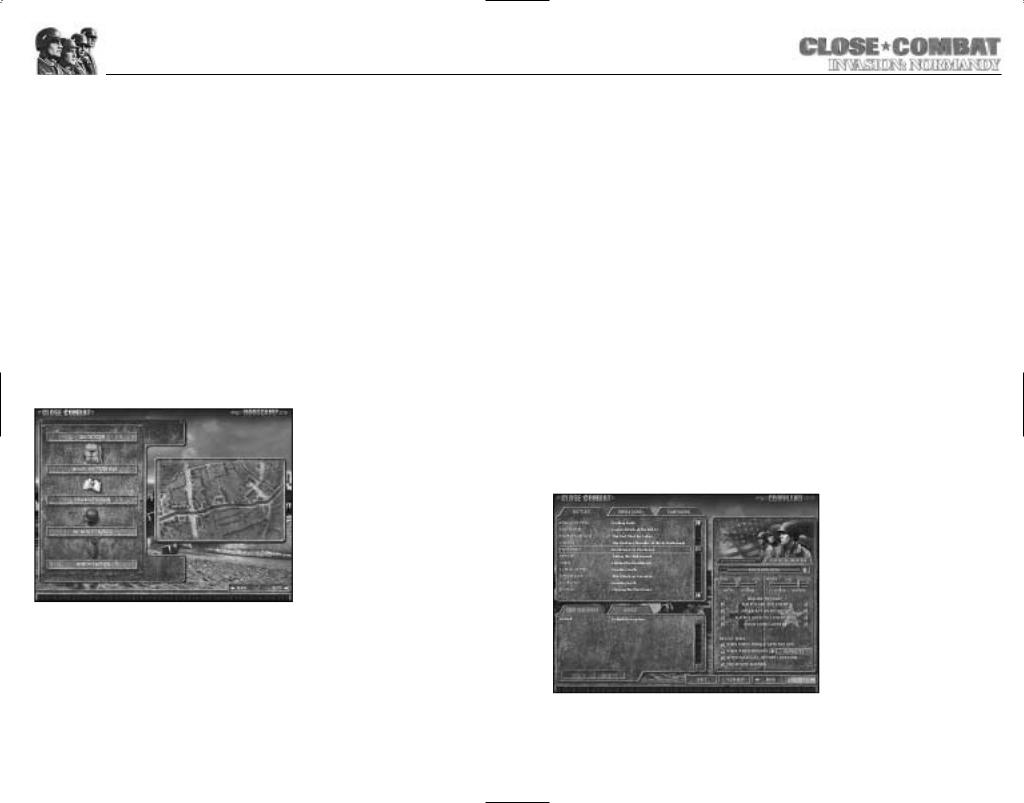
THE COMMAND SCREEN
The Command screen has three panels. The top left panel allows you to select from any of the pre-made Battles, Operations, and Campaigns. A Battle is a single engagement between German and American forces. It takes place on a single map, and the forces available to each side are fixed when the Battle begins. An Operation is a series of engagements between two Battle Groups on the strategic screen. Operations usually involve multiple engagements. A Campaign uses the strategic screen and has multiple Battle Groups on each side.
9 |
10 |
To load a saved game or to play a custom scenario, select it from the list in the lower left hand panel. Selecting them and clicking the Delete button deletes saved games and scenarios; deleting files is irreversible, so make sure you really want these files to be erased before you do this.
The right hand panel controls the parameters for new single and multiplayer games. At the top of the window you may select between playing either the Germans or the Americans.
Below that are two sliders indicating the Difficulty Level for each side. Recruit level difficulty provides better forces with higher morale. Line level plays at normal levels of force strength. At Elite level difficulty, that side starts with weakened forces. The Difficulty level also controls how quickly reinforcements pools regenerate over time.
Below the Difficulty sliders are the Realism Settings. You can change the indicators by clicking in the adjacent check boxes.
ALWAYS SEE ENEMY: Does exactly what it sounds like it should do. A side with this option chosen knows where the enemy is at all times. This can be an extremely useful option for new players as they learn the game.
NEVER ACT ON OWN INITIATIVE: Your soldiers never do anything unless they are specifically ordered to.
ALWAYS HAVE FULL ENEMY INFO: With this selected, the player always has access to the toolbar info of enemy units. This does not extend to Soldier Monitor information.
ALWAYS OBEY ORDERS: With this selected, your units always obey orders. This is for when you tire of your soldiers’ senses of self-preservation.
Below the Realism Settings is the Force Morale indicator. You can change the indicator by clicking in the adjacent check box. The default settings are Force Morale enabled for Operations and Campaigns and disabled for Battles. You may enable or disable this function by clicking on the check box. Designer’s Note: Be advised that disabling this option will severely alter play balance when playing Operations and Campaigns.
Below the Force Morale indicator are the Victory Condition settings. These determine what is required to win a battle and how much time you have to play a battle. The two-minute warning option allows a player who has no victory locations two minutes to capture one. Designer’s Note: It is recommended that you play with the timer set to 15 minutes for optimum play against the Artificial Player.
The View Map tab along the bottom of the screen allows you to view the map used in a particular battle.
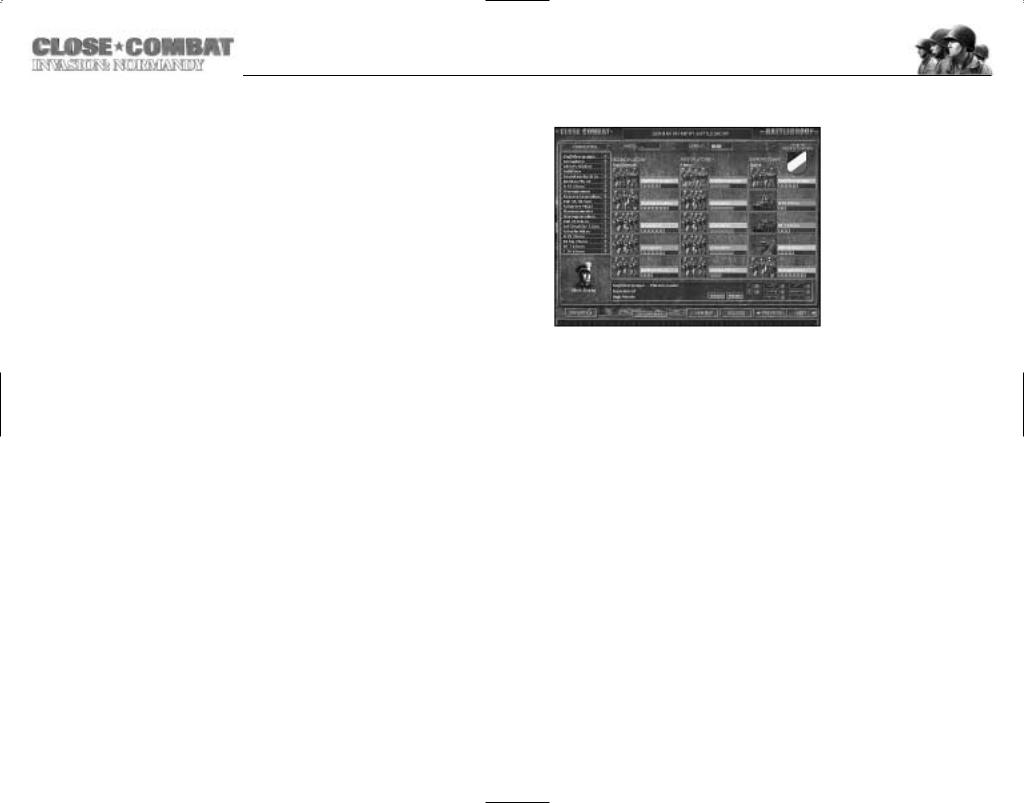
THE BATTLE GROUP SCREEN
Once you have selected your fight, you gain access to the Battle Group screen; this shows all the forces available for a particular battle. Left-clicking on any of the units listed selects the unit, showing its Experience Level, Morale, and armament in the bottom panel, as well as giving you a chance to rename the unit.
A new feature of the Battle Group Screen allows you to choose your forces from the Force Pool. To change your
forces, you must Double-click on a unit to remove it from the Battle Group and return it to the Force Pool. Next, you must select a new unit from the list of units in the Battle Group Force Pool on the left hand side of the screen by Double-clicking on the unit in the Force Pool list. Single-clicking on the unit in the force pool list will show the unit’s strength at the bottom of the screen. Note: removing a squad from your active roster will erase its history, including any experience bonuses or medals it has earned.
The button marked Reinforce is only present when you have chosen to play as the Americans and are playing an Operation or Campaign. This button refills the force pool for the Battle Group once it has been depleted. Reinforce can be selected only one time per Battle Group. Once it is used, it will not appear on the Battle Group Screen again. Note: the reinforce button will only work if the Battle Group is able to access a friendly major supply depot through the road net. If you try to Reinforce without such access, you will get a dialog box explaining that you are out of supply.
The button marked Rename allows you to rename the selected team.
The button marked Remove allows you to remove the selected team. When the selected team is removed, the next team in order of platoon precedence is selected. It may then be removed by clicking Remove again. This can be repeated until all teams are removed.
When a team is selected in the Force Pool and there is an open slot in the Battle Group screen the Add button appears in place of the Remove button. Clicking the Add button will fill an empty slot in the Battle Group with the selected team. To change the type of team to fill empty slots, simply select a different team by left-clicking on it in the Force Pool list.
The Revert button resets the Battle Group force to the computer-selected default force mix of the Battle Group.
11 |
12 |
The button marked Edit Opponent allows you to set the opposing side’s Battle Group’s team strength. It is only selectable when playing in single player mode.
The View Map button lets you preview the map with your area of deployment highlighted. The enemy deployment area is shown in a darker shade.
The button marked Soldier takes you to the Soldier Screen. The Soldier Screen shows the Health, Morale, Leadership, Intelligence, Strength, and Experience for each soldier in the unit as well as accumulated achievements such as kills, medals, acts of bravery, or acts of cowardice.
Health represents the physical status of the soldier.
Morale indicates the willingness of a soldier to fight on. Soldiers with high morale are braver and are more willing to face danger than men with poor morale.
Leadership represents the ability of a man to improve the morale of the men around him and to keep his team together. However, when a unit leader with a high leadership level dies, it can have a devastating effect on unit morale.
Intelligence reflects how likely the soldier is to go berserk or panic in a firefight. Intelligent
men are less likely to make such fatal errors.
Strength determines how quickly the soldier becomes fatigued when moving and affects how severe his wounds are if he is shot. The stronger the man, the longer he can keep going.
Experience is vital for a soldier and can affect a wide range of abilities, ranging from how good a shot he is, to how well he can hide himself in Ambush, to how well he conserves ammo. More experienced soldiers do just about everything better than green troops.
Each soldier also has his kills and achievements listed as a cumulative total in Operations and Campaigns.
The button marked Previous takes you back to the command Screen so you can select another Battle or exit the game.
The Next button takes you to the battlefield to begin fighting.
BATTLEFIELD CONTROLS
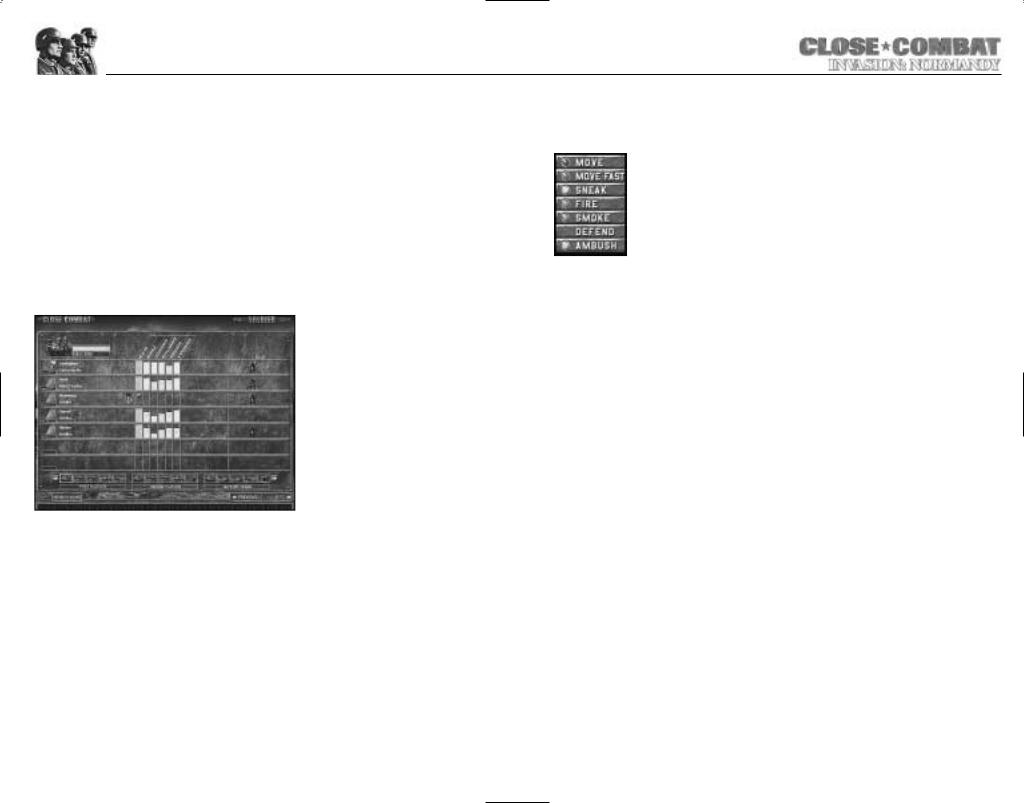
Basic Unit Orders
Right-clicking on any unit brings up a popup menu listing possible orders for that unit. These orders are: Move, Move Fast, Sneak, Fire, Smoke, Defend, and Ambush. Not all orders will be available at all times. For example, a tank that has thrown a tread can neither Move, Move Fast, nor Sneak. Once you bring up the popup menu, an order may then be selected by leftclicking on the order option. If you change your mind and do not wish to issue an order, either right or left-clicking on the map removes the popup menu. Order options that a unit cannot perform are shaded gray.
Hot Key Orders
All orders can also be given by hot key commands. To give an order by hot key, leftclick on the unit, then press the appropriate key.
Z.................. |
Move |
C.................. |
Sneak |
B ...................... |
Smoke |
M ...................... |
Ambush |
X ................ |
Move Fast |
V.................. |
Fire |
N ...................... |
Defend |
|
|
Movement Orders
Units have three movement commands: Sneak, Move, and Move Fast. After you select the menu order, place the cursor where you want the selected unit to go and left-click. If you wish to cancel the movement order during this phase hit Backspace on your keyboard. When you give a movement order, a coloured dot appears on the map, marking the unit’s destination. The unit attempts to reach its destination by whatever movement type you have selected. The colour of the dot corresponds with the type of movement order given.
Move...................... |
Blue |
Sneak .................. |
Yellow |
Move Fast .............. |
Purple |
Once placed, the destination dot can be moved to another location by left-clicking and dragging it.
Sneak
When sneaking, your men crawl forward cautiously and quietly. Sneak is the slowest of all movement types. In addition to being stealthy themselves, sneaking troops have an improved chance of finding concealed enemies. Sneaking troops never initiate combat; this makes sneaking undesirable in potential close combat situations. Using Sneak through a minefield is the best way for infantry to traverse this type of terrain. Engineers/Pioniere teams will clear minefields when they sneak though them. You may want to check the overview map to see if the minefields changed to green to verify the clearing of minefield elements on the map.
When a squad of men has moved to a location using Sneak movement, they then revert to Ambush mode.
13 |
14 |
Move
This orders infantry to cautiously advance. Infantry on the move are not quite as stealthy or as observant as men who are sneaking, but they are faster. Moving infantry initiates combat if the opportunity arises. Using Move through a minefield is dangerous.
When infantry reach a location they have Moved to, they then revert to Defend mode.
Move Fast
These orders cause infantry to move as quickly as they can. While running, soldiers focus on getting to their destination and do not try to use cover at all. They engage in hand to hand combat if the enemy gets in their way. Running men are not observant and tire quickly. Using Move Fast through a minefield is very dangerous for your troops.
Infantry that Move Fast will revert to Defend mode when they reach their destination.
Vehicles
Vehicles are not stealthy, particularly tanks. However, a sneaking tank is at maximum watchfulness and at its slowest speed. Vehicles, unlike infantry teams, will initiate combat in Sneak mode. A tank on the move is somewhat faster and slightly less observant. A tank that is sneaking or moving attempts to maintain its original armour arc as much as possible. For example, a tank that is facing the enemy could be ordered to back up using the Move command.
Tanks ordered to Move Fast turn to face their destination and then move there at maximum possible speed.
Tanks can fire while following any movement order, although their rate of fire and accuracy decrease.
Indirect Paths/Waypoints
Rather than having your units move in a straight line, it is possible to order infantry and vehicles to follow an indirect route. Routes are determined by setting waypoints. To set waypoints, right-click on a unit as normal and determine which type of movement you desire, then press and hold the shift key and plot the path you wish the unit to take by left-click- ing on the screen. Each number that appears represents a point the unit passes through on its way to its destination. When you have completed
your path, release the shift key and the unit proceeds as ordered. You can place a total of 20 waypoints. Set waypoints can also be selected and dragged to alter a unit’s path.
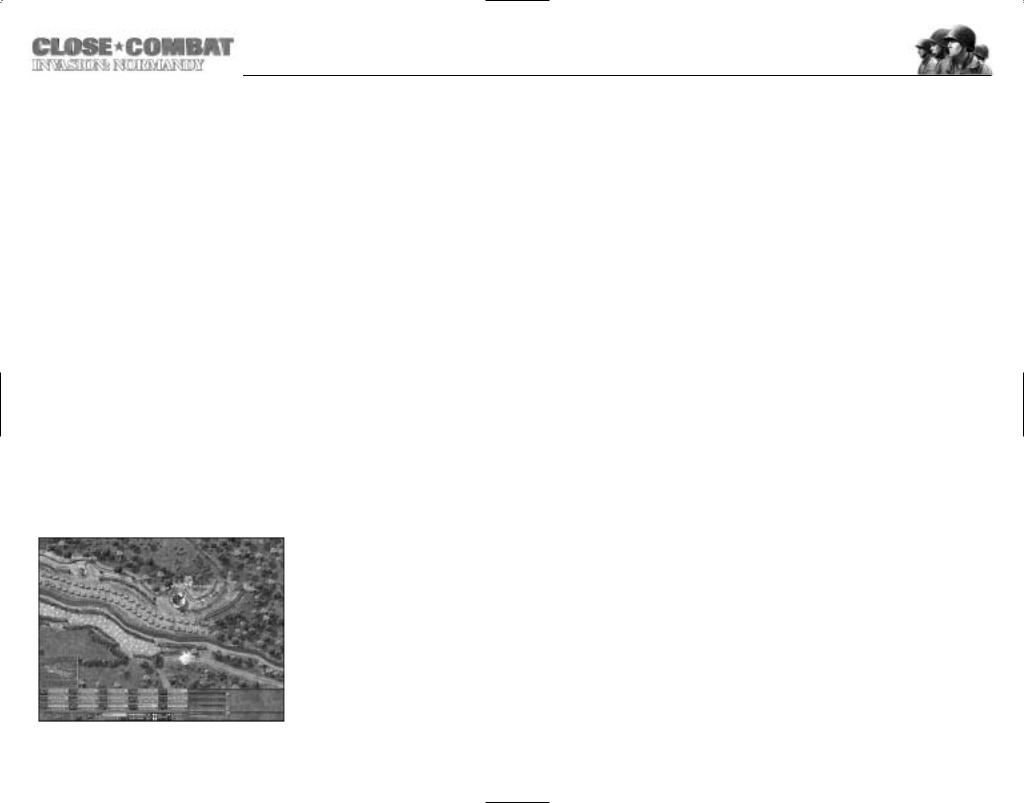
Fire
While your soldiers are capable of firing on their own initiative, it is often useful to direct their fire. The Fire option brings up a targeting circle. The targeting circle is connected to the firing unit by a coloured line.
When the circle is not sitting above an enemy unit, it appears as a thin, white circle. When placed on an enemy unit, the circle either turns green, yellow, red, or black. This colour corresponds with the chance that a shot will hit the enemy unit.
Green............ |
100-60% |
Red ................ |
29-10% |
Yellow.......... |
59-30% |
Black.............. |
9-0% |
When deciding whether or not to order a unit to Fire, it is important to consider the situation. If a unit is laying down suppression fire, it does not have to actually kill the enemy to have the desired effect. On the other hand, a small Bazooka team waiting in ambush while an armoured column approaches had better wait for a killing shot.
Line of Sight and Range
The colour of the line connecting the targeting circle to the firing unit indicates line of sight.
For direct fire weapons, the line is light green for clear lines of sight, dark green for lines of sight obscured by foliage or smoke, and red for lines of sight that are blocked. Infantry line of sight is determined for each soldier individually, so enemies visible to one soldier might not be seen by another. For indirect firing weapons, the connecting line is orange for targets in line of sight and brown for targets beyond line of sight. Teams that fire indirect weapons, such as mortar squads, do not need line of sight to hit their targets. However, having a clear line of sight greatly increases the accuracy of indirect fire.
The number by the targeting circle represents the distance from the firing unit. This distance is particularly important for infantry, whose anti-tank weapons and flamethrowers have short effective ranges. The distance number by the targeting circle also indicates range effects.
Green ............The unit is within effective range.
Yellow ..........The distance is too close or too far away; the weapon has reduced effectiveness.
Black ..............The distance is too close or too far away for the weapon to be effective at all.
If a line of sight is obstructed, a white number appears along the targeting line indicating the range to the obstruction. If a line of sight is partially obstructed by smoke or foliage and then completely blocked further along, both ranges are indicated.
Partial obstruction by smoke or foliage prevents the attacker from specifically targeting enemies, but the firing unit can lay down fire in the hopes of suppressing the enemy or getting lucky.
15 |
16 |
 Loading...